science of flight - royal air force museum london · introduction thank you for booking a visit to...
TRANSCRIPT
The
Science of Flight
This resource pack is a collaborative effort between the
Royal Air Force Museum, Cosford and St. Patrick’s Catholic Primary School,
Wellington. Supported by MLA West Midlands.
CATHOLIC PRIMARY SCHOOL

Introduction
Thank you for booking a visit to the Royal Air Force Museum Cosford.
During your visit to the Museum your school will take part in a ‘Science of Flight’ workshop which has
direct links to the National Curriculum. This workshop is aimed at children in Key Stage 2. It can be
used to help teach the science of forces and motion and the skills of scientific enquiry. There are
also links to the ICT and Numeracy curriculum. Children will benefit most from the session if they
have some existing knowledge of Physical processes.
Whilst at the Museum your group will build and test their own gliders and rockets. This pack has
been designed to complement your visit and builds upon the contents of our workshops. The
resources it contains can be used both before and after your visit to the Museum and there is
progression from one lesson to the next. We hope this pack is helpful to you and that you enjoy your
visit to the Royal Air Force Museum Cosford.
Forces
A Force is a push or a pull. It affects the way things move. Forces can make
objects speed up, slow down, stop or change direction. Forces can occur
naturally, such as gravity, or they can be produced by people or machines.
Friction is a force that appears whenever two things rub against each other.
Forces act in particular directions, and they always act in pairs. Whenever an
object pushes another, the object also pushes back. If these forces are
balanced, as in a floating object, then the object at rest will stay still. If the
forces are unbalanced, the object can speed up, slow down or change direction.
Air resistance, like friction, is a force which resists movement. Air resistance
can therefore affect the speed of a moving object. The example of a falling
parachute demonstrates the effects of air resistance. The reason a parachute
can protect a sky diver is that air resistance pushes up against the force of gravity. The bigger the
parachute, the greater the force of air resistance.

The science of flight
Hot Air Balloons and Airships:
In the late 18th
century the first hydrogen filled balloon was flown over
Paris. These balloons were able to float in the air because Hydrogen is
lighter than air so the balloon rose up into the sky. In the 19th
century,
large balloons were fitted with engines so they could be steered
wherever the pilots wanted to go. These airships were the first large
aircraft and from 1900 onwards were used as passenger vehicles .
However, during the 1930s there were several airship accidents, like
the Hindenburg disaster, and airships were abandoned. Today’s balloons use hot air to help them
rise into the sky thanks to the fact that hot air is less dense than cool air, providing lift.
Gliders:
The world’s first real glider was designed by a man called Sir George
Cayley. Cayley was able to work out how a wing works by carrying out
lots of experiments with kites. He produced the very first book on
aerodynamics, the science of how things move through the air.
Wings on all aircraft are lifted by the air flowing above and beneath
them. If you look at the wings of an aeroplane, or the rotor blades on a helicopter, you will see that
they are slightly curved on top and flat underneath. The air passing over the top of a wing travels
faster than the air travelling underneath. This creates low pressure above the wing and high
pressure underneath. This difference in pressure is what allows aircraft to fly.
Gliders were the first aircraft to fly using wings, but only for as long as they could remain moving
through the air! However, before aircraft could fly long distances they would need to be powered by
an engine.
Aeroplanes:
The first powered flight of an aircraft was made in December 1903, at Kitty
Hawk in the United States of America. The aeroplane had been designed by
two brothers, Orville and Wilbur Wright. The airplane flew for just 40
metres, but had been powered by a petrol engine.
Before the Wright brothers made their historic flight, people had tried many
different types of engines to keep aircraft in the air. Thomas Edison, the man
who invented the light bulb, tried using a gunpowder engine to power his design for a helicopter. He
was forced to stop his experiments when his factory was blown up! People had also tried steam
engines, like the ones used on trains.

Helicopters:
The first helicopter flight was made in 1907, but the idea of a flying
machine that spins had been around for a very long time.
The first person to design a helicopter was a famous Italian called
Leonardo da Vinci. Da Vinci was a genius and designed his helicopter
in the 15th century! Unfortunately, he never built or tested his
design.
Just like an aeroplane, helicopters need a lifting force to get them off the ground. On an aeroplane,
the wing has to travel through the air to create lift. On a helicopter the lift is created when the
rotor blades spin through the air. For this reason, helicopters are very different to other aircraft,
they can take off vertically, hover and fly very slowly in any direction.
The first really successful helicopter flew in 1936. It was made in Germany and was called the Focke
Achgelis. It could fly at heights of over 3, 000 meters and could travel up to 110 kph.
Rockets:
At the very beginning of the 16th century a Chinese man, called Wanhu, became
the first man to try and fly in a rocket ship. He tied forty-seven rockets to a
wooden chair in an attempt to reach the stars! He also had two kites on board
his ‘ship’ to help him glide gently back down to the ground. Unfortunately, we
don’t know if Wanhu’s experiment was a success. After the rockets had been lit
there was an enormous bang and he was never seen again!
It was not until the 20th century, 400 years after Wanhu’s original test flight, that scientists
developed the sorts of rockets that can carry people into space. Werner von Braun and Sergei
Korolev were both important scientists in the development of these rockets for the USA and the
USSR and in 1961 Yuri Gagarin became the first man to go into space.
Rockets are the perfect propulsion system for space travel, because unlike aeroplanes or helicopters
they don’t need air to work. There are two different types of rocket, liquid-fuelled and solid-fuelled.
Hot gases surge out from the tail end of these rockets, moving them forward at great speeds. To
stay in orbit around the earth, satellites must be travelling at 18, 000 miles per hour. To escape the
earth’s gravitational pull they need to reach speeds of 25, 000 miles per hour!

Pre – visit activities
In this section you will find lesson plans for two school based activities.
There is progression from one lesson to the next, with the children
completing the first investigation before planning and carrying out the
next one independently.

Falling: Lesson Plan Timescale: 1 hour
Location: School
Resources: A feather, a paperclip, a piece of A4 paper, a piece of folded A4 paper, a stopwatch.
Learning objectives: Sc1: Scientific enquiry
1b) To realise that it is important to test ideas using evidence from observation and measurement.
2d) Pupils should be taught to make a fair test or comparison by changing one factor and observing
or measuring the effect while keeping other factors the same.
2g) To check observations and measurements by repeating them where appropriate.
2h) To be able to use a wide range of methods, including tables, to communicate data in an
appropriate and systematic manner.
2j) To use observations, measurements or other data to draw conclusions.
2k) To decide whether these conclusions agree with any predictions made.
Sc4: Forces and Motion
2b) To know that objects are pulled downwards because of the gravitational attraction between
them and the earth.
2c) To understand that air resistance is a force that slows moving objects.
Ma4: Handling Data
2b) To construct and interpret tables for grouped discrete data.
Introduction / Teacher information: This activity should be used to introduce the children to the notions of gravity and air resistance.
Each of the objects falls towards the ground because of the gravitational pull of the Earth. Gravity
does not make heavier objects fall faster than lighter objects, but air resistance can make a big
difference to the speeds at which an object falls. This was demonstrated by the NASA astronaut
David Scott when he visited the moon in 1971. He dropped a hammer and a feather at the same time
and both fell at exactly the same speed because there is no air on the moon. A video of this
experiment can be found at http://www1.jsc.nasa.gov/er/seh/feather.html. On Earth, objects with
a larger surface area, like the feather and the piece of paper, fall more slowly because they create a
lot of air resistance as they fall. Therefore, the folded paper and the paperclip will fall more quickly
because they create less air resistance.
Main Activity: Using the partially completed investigation sheet, children should test how long it takes for the four
different objects to fall to the ground. They should also observe the way in which they fall. They
can then complete the results table and graph. Please ensure the children are in a safe environment
when completing their investigation.
Plenary:
• What have we learnt?
• Was it fair, reliable and accurate? (Evaluation)
• What else could we test? E.g. Test the effects of wind on the test, using a fan.

Falling investigation
The Question: Do different objects fall to the ground at different speeds? Compare the way in which they fall.
Prediction:
Equipment : A feather, a paperclip, a piece of A4 paper, a piece of folded A4 paper, a stopwatch.
Fair Testing: I can ensure that this test is fair by only changing one variable, which is the object we choose to drop. All other variables I shall keep the same, the stopwatch and the height from which
we drop the objects.
Method: Making sure that you drop your objects from exactly the same height, use the stopwatch to
time how long it takes each object to reach the ground. To ensure that the test is reliable we will
time each object 3 times.
Results:
Object Time 1
(seconds)
Time 2
(seconds)
Time 3
(seconds)
Average
(Add all 3 results and
divide by 3)
Feather
Paperclip
A4 paper
Folded A4 paper

Describe what happens when each of the objects is dropped:
Feather:
Paperclip:
A4 paper:
Folded A4 paper:
Graph: Complete the following graph to show how long it took for each object to fall to the ground.
A graph to show how long it took for different objects to fall to the ground.
0
1
2
3
4
5
Feather Paperclip A4 paper Folded A4 paper
Object
Tim
e i
n s
ec
on
ds
Conclusion: What have you discovered? Can you give a scientific reason for what you have observed?
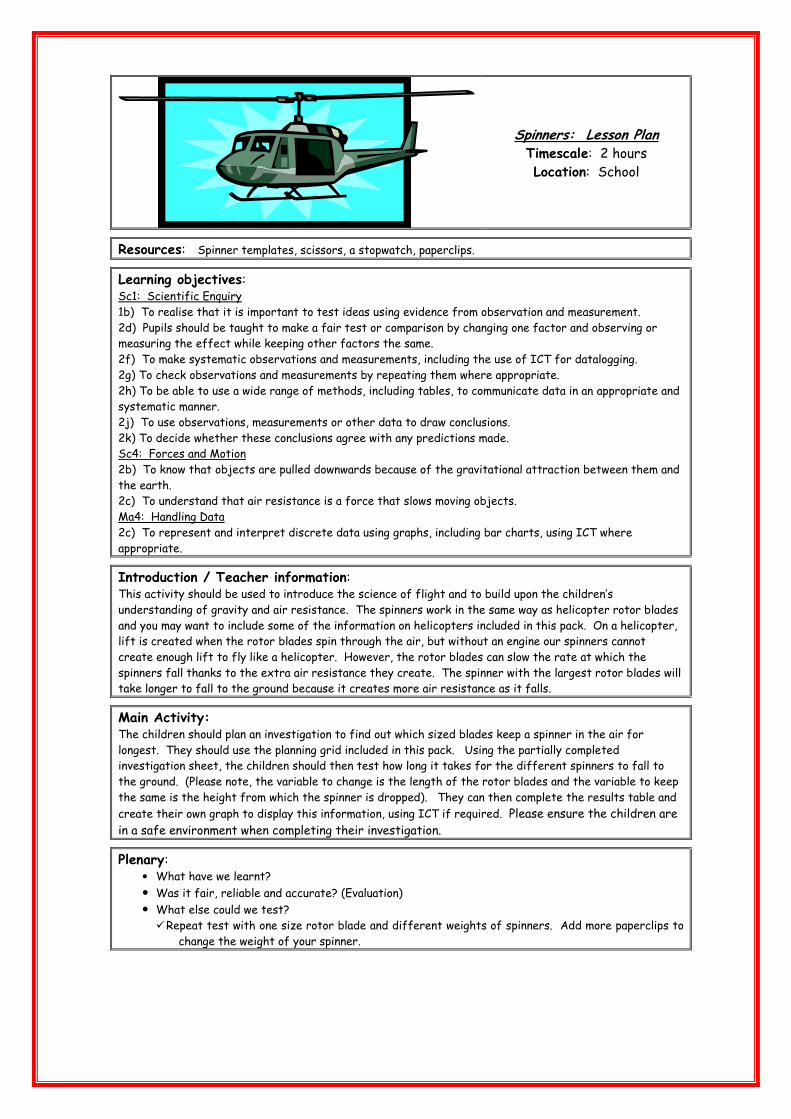
Spinners: Lesson Plan Timescale: 2 hours
Location: School
Resources: Spinner templates, scissors, a stopwatch, paperclips.
Learning objectives: Sc1: Scientific Enquiry
1b) To realise that it is important to test ideas using evidence from observation and measurement.
2d) Pupils should be taught to make a fair test or comparison by changing one factor and observing or
measuring the effect while keeping other factors the same.
2f) To make systematic observations and measurements, including the use of ICT for datalogging.
2g) To check observations and measurements by repeating them where appropriate.
2h) To be able to use a wide range of methods, including tables, to communicate data in an appropriate and
systematic manner.
2j) To use observations, measurements or other data to draw conclusions.
2k) To decide whether these conclusions agree with any predictions made.
Sc4: Forces and Motion
2b) To know that objects are pulled downwards because of the gravitational attraction between them and
the earth.
2c) To understand that air resistance is a force that slows moving objects.
Ma4: Handling Data
2c) To represent and interpret discrete data using graphs, including bar charts, using ICT where
appropriate.
Introduction / Teacher information: This activity should be used to introduce the science of flight and to build upon the children’s
understanding of gravity and air resistance. The spinners work in the same way as helicopter rotor blades
and you may want to include some of the information on helicopters included in this pack. On a helicopter,
lift is created when the rotor blades spin through the air, but without an engine our spinners cannot
create enough lift to fly like a helicopter. However, the rotor blades can slow the rate at which the
spinners fall thanks to the extra air resistance they create. The spinner with the largest rotor blades will
take longer to fall to the ground because it creates more air resistance as it falls.
Main Activity: The children should plan an investigation to find out which sized blades keep a spinner in the air for
longest. They should use the planning grid included in this pack. Using the partially completed
investigation sheet, the children should then test how long it takes for the different spinners to fall to
the ground. (Please note, the variable to change is the length of the rotor blades and the variable to keep
the same is the height from which the spinner is dropped). They can then complete the results table and
create their own graph to display this information, using ICT if required. Please ensure the children are
in a safe environment when completing their investigation.
Plenary:
• What have we learnt?
• Was it fair, reliable and accurate? (Evaluation) • What else could we test?
� Repeat test with one size rotor blade and different weights of spinners. Add more paperclips to
change the weight of your spinner.

Spinners: Planning Grid
Question to be investigated
What will we change? (variable)
What will we measure?
What will we keep the same?
What will we keep the same?
What will we keep the same?
What will we keep the same?

Spinners: Investigation
The Question: Does the length of the rotor blade affect the speed at which a spinner falls?
Prediction:
Equipment: Spinners template, a stopwatch, a paperclip.
Fair Testing: I can ensure that this test is fair by only changing one variable, which is the . All other variables I shall keep the same, the stopwatch, the paperclip, and the
.
Method: Making sure that you drop your spinners from exactly the same height, use the stopwatch
to time how long it takes each spinner to reach the ground. To ensure that the test is reliable we will
time each spinner 3 times.
Results: Complete the following results table and create a graph to display your results.
Length of rotor
blade
Time 1
(seconds)
Time 2
(seconds)
Time 3
(seconds)
Average
(Add all 3 results and
divide by 3)
Conclusion: What have you discovered? Can you give a scientific reason for what you have observed?
Evaluation: Do you think your test was fair? What would you change if you could do the test again?

Spinner templates: Instructions
Use your templates to make helicopters, following these instructions.
1. Cut round the four outside lines of your template.
2. Cut along the solid line dividing the two RAF Museum logos. These will make
your rotor blades.
3. Fold the two blades in opposite directions, along the dotted lines.
4. Cut along the two remaining solid lines on the template.
5. Fold along the dotted lines to make a T – shaped body for your helicopter.
6. Fasten the body at the bottom with a paper clip. This will help to weigh the
bottom end down so it flies properly.
7. Now test your helicopter to make sure it flies. You will need to launch your
helicopters from a safe height. Ask your teacher for a good place to launch
the helicopters from.

Spinner templates

Royal Air Force Museum
Cosford
In this section you will find details of the ‘Science of Flight’ workshops you will enjoy at
the Royal Air Force Museum Cosford.
Also included are details of our interactive Fun ’n’ Flight gallery, with a Key Stage 2 quiz,
where children can learn more about the Science of Flight.
Please note, this section includes a design sheet for children to design their rockets
before they visit the Museum. Children should bring their designs with them to the
Royal Air Force Museum Cosford.

Gliders: Lesson Plan Timescale: 45 minutes
Location: RAF Museum
Resources:
• Instruction sheets;
• Paper;
• Sticky tape;
• Launcher;
• Extension leads.
Learning objectives: Sc4: Forces and Motion
2b) To know that objects are pulled downwards because of the gravitational attraction
between them and the earth and to understand that this rate of fall can be slowed by the
introduction of wings;
2c) To understand that air resistance is a force that slows moving objects.
Introduction:
• Welcome the children;
• Briefly explain the science of flight in relation to gliders / forces and motion;
• Demonstrate how the glider launcher works;
• Instruct the children in the safe way of working and operating the launcher.
Main Activity:
• The children follow four glider designs or they can create their own design;
• Their goal is to find the glider that flies the furthest;
• At the end of the session we will have a ‘fly off’.
Plenary:
• What have we learnt.

Rockets: Lesson Plan Timescale: 45 minutes
Location: RAF Museum
Resources: Paper, card, scissors, glue, Sticky tape, rocket launchers, foot pump, stopwatch
Learning objectives: Sc4: Physical processes
2b) To know that objects are pulled downwards because of the gravitational attraction
between them and the earth.
2c) To understand that air resistance is a force that slows moving objects.
2d) To understand that when objects are pushed or pulled, an opposing push or pull is felt.
DT1: Developing, planning and communicating ideas
1a) Pupils should generate ideas for products after thinking about who will use them and what
they will be used for.
Ma2: Number
4c) To estimate answers by approximating and checking that their results are reasonable.
Introduction:
• Welcome the children;
• Briefly explain the science of flight in relation to rockets / forces and motion;
• Demonstrate to the children how to make the basic rocket.
Main Activity:
• The children make a rocket that launches from the rocket launcher;
• Demonstrate how the rocket launcher works;
• Instruct the children in the safe way of working and operating the launcher;
• The children fire the rocket from the launcher;
• Children observe the flight of the rockets and that they show ‘no glide’;
• Discuss how the rockets rate of fall can be slowed by the introduction of wings, making
the rockets glide on descent, referring to gliders session;
• Talk to children about their rocket designs and ask them to estimate how long it will
stay airborne;
• The children modify a rocket to add wings / tail / fins etc;
• At the end of the session we will have a ‘fly off’;
• Their goal is to find the rocket that glides the best.
Plenary: (Ideas for follow up lessons in school).
• What have we learnt.
• Was it fair, reliable and accurate? (Evaluation) • What else could we test?

Rockets: Design
During your visit to the Royal Air Force Museum Cosford you will have the chance to build and fire your own
rocket. Using what you have already learned about flight and air resistance, you should use this sheet to
design your own rocket. The fuselage of the rocket is shown already and cannot be changed.
At the Museum we will be looking at which type of rocket stays airborne the longest, so you will need to design
different elements, like wings and a tail, to help it glide slowly back to earth. You may also want to add fins, these
are used to help stabilise rockets, just like the feathers on a dart. You will have card, paper and correx available
to build your rocket on the day. Can you predict what type of rocket design will be the most effective? You
may want to think about what size wings will work best or whether the position they are in will make a
difference.
Nose Cone
Fuselage

Rockets: Result Sheet
Name Estimated time Actual time
Rockets: Result Sheet
Name Estimated time Actual time
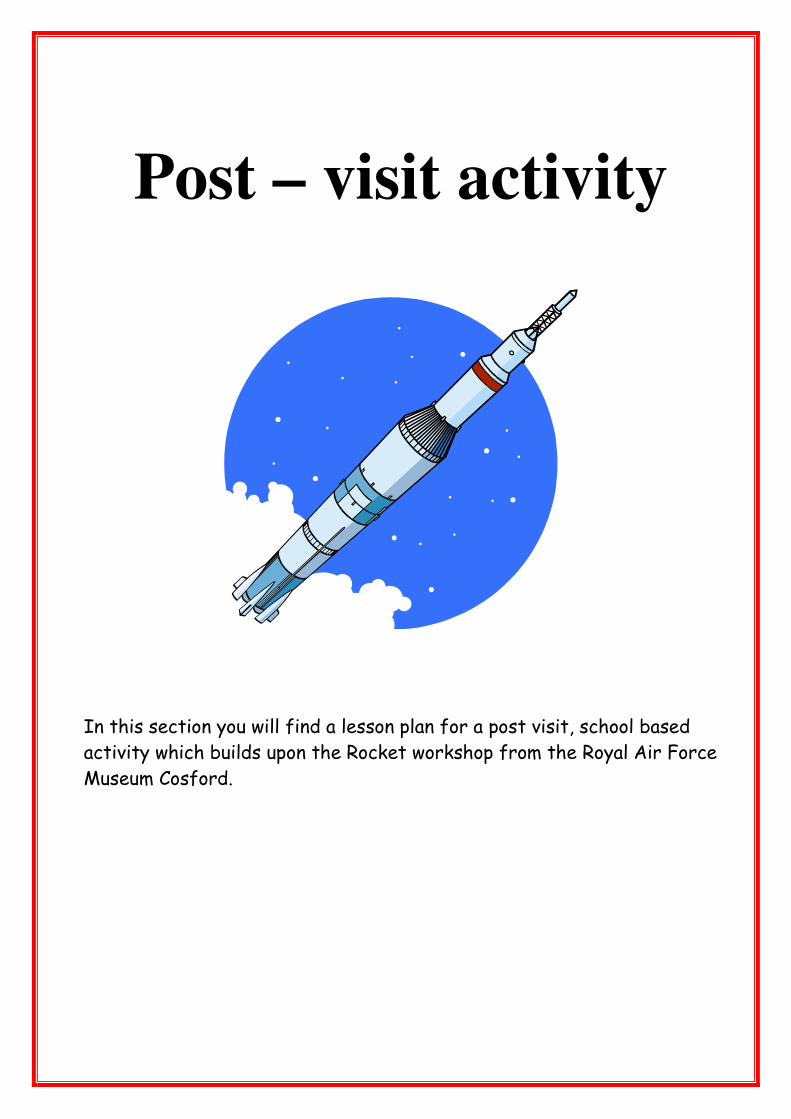
Post – visit activity
In this section you will find a lesson plan for a post visit, school based
activity which builds upon the Rocket workshop from the Royal Air Force
Museum Cosford.

Rockets: Lesson Plan (2) Timescale: 2 hours
Location: School
Resources: Paper, card, scissors, glue, stopwatch
Learning objectives: Sc1: Scientific enquiry
1b) To realise that it is important to test ideas using evidence from observation and
measurement.
2f) To make systematic observations and measurements, including the use of ICT for
datalogging.
2g) To check observations and measurements by repeating them where appropriate.
2h) To be able to use a wide range of methods, including tables, to communicate data in an
appropriate and systematic manner.
Sc4: Physical processes
2b) To know that objects are pulled downwards because of the gravitational attraction
between them and the earth.
2c) To understand that air resistance is a force that slows moving objects.
DT1: Developing, planning and communicating ideas
1a) Pupils should be taught to develop ideas
2a) Suggest alternative ways of making products if the first attempt fails
Introduction: Talk to the children about the rockets workshop at the Royal Air Force Museum Cosford.
Remind them of the most successful designs and remind them what they have previously learnt
about the science of flight, both in school and at the Museum. Explain that the children will be testing their rocket designs, making modifications in a systematic way to obtain better results.
Main Activity: Ask the children to re-launch their rockets by throwing them like gliders or by blowing them
off a piece of newspaper rolled into a tight tube and record how long it takes for their rockets
to glide to the ground. Ask the children to modify their own rockets, using a design sheet, to
try and make them stay airborne for longer. The children should then modify their rockets and
re-launch them. They can then complete the results table and graph provided. Please ensure
the children are in a safe environment when completing their investigation.
Plenary:
• What have we learnt.
• What else could we test?

Rockets: Modified Design
Using what you have already learned about flight and air resistance, you should use this sheet to
modify your rocket design. The fuselage of the rocket is shown already.
Nose Cone
Fuselage

Rockets: Recording Sheet
Results:
Rocket Time 1
(seconds)
Time 2
(seconds)
Time 3
(seconds)
Average
(Add all 3 results and
divide by 3)
Original Design
Modified Design
Graph: Complete the following graph to show the average time it took for each glider to reach the ground.
A graph to show how long it took for a glider to reach the ground.
0
0.5
1
1.5
2
2.5
3
3.5
4
4.5
5
Original Design Modified Design
Rocket type
Tim
e i
n s
ec
on
ds