samsung sch-u340 top casing replacement · introduction this guide will cover the removal of the...
TRANSCRIPT

Samsung SCH-U340 Top Casing ReplacementWritten By: Anish Sambamurthy
Samsung SCH-U340 Top Casing Replacement Draft: 2018-05-31Guide ID: 1995 -
This document was generated on 2019-09-20 06:23:04 AM (MST).
© iFixit — CC BY-NC-SA www.iFixit.com Page 1 of 7

INTRODUCTION
This guide will cover the removal of the Samsung SCH-U340 top casing.
TOOLS:Phillips #00 Screwdriver (1)
Samsung SCH-U340 Top Casing Replacement Draft: 2018-05-31Guide ID: 1995 -
This document was generated on 2019-09-20 06:23:04 AM (MST).
© iFixit — CC BY-NC-SA www.iFixit.com Page 2 of 7
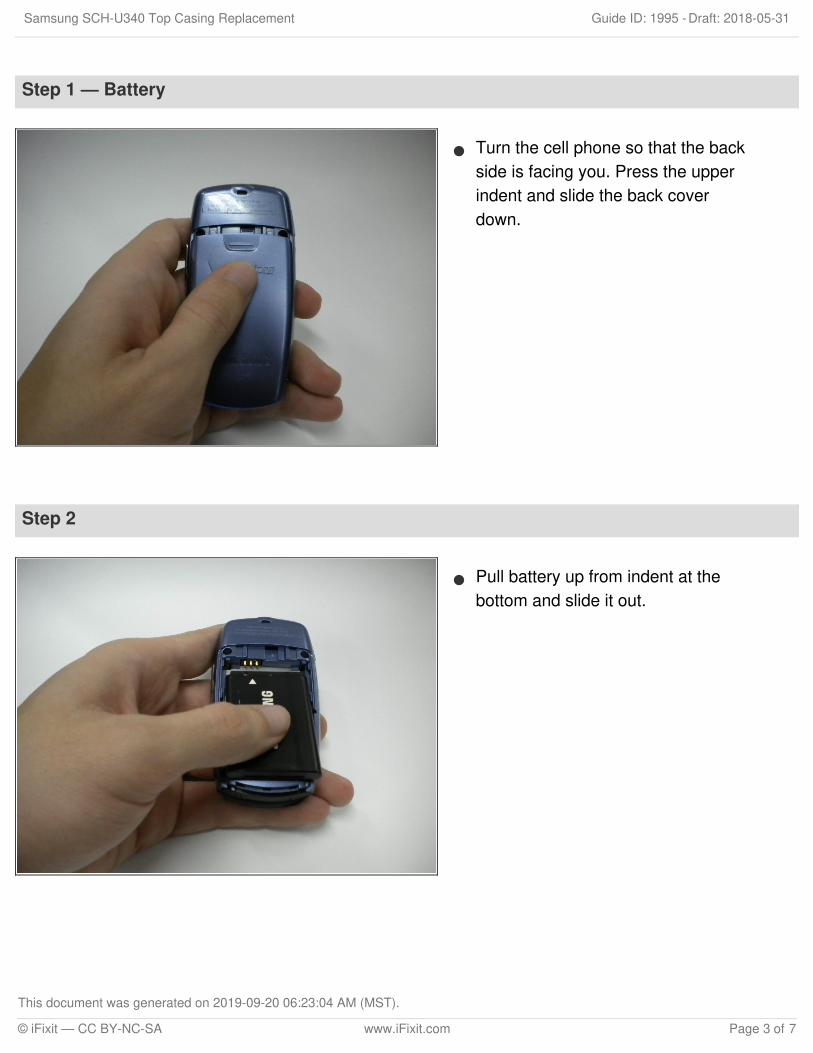
Step 1 — Battery
Turn the cell phone so that the backside is facing you. Press the upperindent and slide the back coverdown.
Step 2
Pull battery up from indent at thebottom and slide it out.
Samsung SCH-U340 Top Casing Replacement Draft: 2018-05-31Guide ID: 1995 -
This document was generated on 2019-09-20 06:23:04 AM (MST).
© iFixit — CC BY-NC-SA www.iFixit.com Page 3 of 7

Step 3
Set the battery aside.
Step 4 — Top Casing
The outer casing consists of twoseparate parts on the upper andlower halves of the device. Theupper outer casing is held onthrough a combination of screwsand tabs. First remove the plasticplugs covering the screws with aspudger.
Samsung SCH-U340 Top Casing Replacement Draft: 2018-05-31Guide ID: 1995 -
This document was generated on 2019-09-20 06:23:04 AM (MST).
© iFixit — CC BY-NC-SA www.iFixit.com Page 4 of 7

Step 5
Underneath the plugs are two smallscrews that can be removed with asmall Phillips screwdriver. They willneed to be pried out afterunscrewing them due to their size.Take care not to lose the screws asthey are small and have a tendencyto roll.
Step 6
The outer cover is now secured withseven tabs: one large tab (marked inred) and seven smaller tabs (markedin orange).
To begin removing the outercover start by prying the large tabup with a flat object.
Samsung SCH-U340 Top Casing Replacement Draft: 2018-05-31Guide ID: 1995 -
This document was generated on 2019-09-20 06:23:04 AM (MST).
© iFixit — CC BY-NC-SA www.iFixit.com Page 5 of 7

Step 7
Continue to pry each tab up, takingcare not to break the tabs.
If disaster strikes and a tab isbroken, the outer casing can still beput back on assuming the majorityof the tabs are still intact.
Samsung SCH-U340 Top Casing Replacement Draft: 2018-05-31Guide ID: 1995 -
This document was generated on 2019-09-20 06:23:04 AM (MST).
© iFixit — CC BY-NC-SA www.iFixit.com Page 6 of 7

To reassemble your device, follow these instructions in reverse order.
Step 8
After the last tab is removed, tuggently on the outer casing to removeit. Don't pull too hard, or you maydamage the wires connected to thespeaker.
Samsung SCH-U340 Top Casing Replacement Draft: 2018-05-31Guide ID: 1995 -
This document was generated on 2019-09-20 06:23:04 AM (MST).
© iFixit — CC BY-NC-SA www.iFixit.com Page 7 of 7