safety and health program manual
TRANSCRIPT

AMERICANTOWERCORPORATION
SafetyandHealthProgramManualGuidancetoPromotetheHealth,SafetyandWell‐BeingofAmericanTowerEmployees
Environmental Health & Safety 4/4/2012 REVISION 6

TableofContentsACCIDENT / INJURY INVESTIGATION ......................................................................................................... 1
ASBESTOS .................................................................................................................................................. 8
BLOODBORNE PATHOGENS .................................................................................................................... 11
CAPSTAN USAGE ..................................................................................................................................... 13
COMPRESSED GASES ............................................................................................................................... 15
CONFINED SPACES .................................................................................................................................. 18
CONTROLLED DESCENT OPERATIONS ..................................................................................................... 20
CRANES AND BOOM TRUCKS .................................................................................................................. 22
CRANE‐SUSPENDED PERSONNEL PLATFORMS ....................................................................................... 24
ELECTRICAL SAFETY ................................................................................................................................. 27
EXCAVATION AND TRENCHING ............................................................................................................... 32
FALL PROTECTION PROGRAM ................................................................................................................. 36
FIRE PROTECTION .................................................................................................................................... 49
FIRST AID/CPR ......................................................................................................................................... 53
FIXED LADDERS ....................................................................................................................................... 54
FORKLIFT SAFE OPERATIONS .................................................................................................................. 59
HAND AND POWER TOOLS ...................................................................................................................... 63
HAZARD COMMUNICATION .................................................................................................................... 68
HAZARDOUS LOCATIONS ........................................................................................................................ 70
HAZARDOUS MATERIALS HANDLING AND STORAGE ............................................................................. 71
HEAT ILLNESS PREVENTION .................................................................................................................... 73
LEAD PAINT ............................................................................................................................................. 74
LOCKOUT/TAGOUT ................................................................................................................................. 77
MOTOR VEHICLE SAFETY ......................................................................................................................... 78
MUSCULOSKELETAL DISORDERS AND BACK INJURIES ............................................................................ 90
OSHA INSPECTIONS ................................................................................................................................. 96
PERSONAL PROTECTIVE EQUIPMENT ..................................................................................................... 99
PORTABLE LADDERS .............................................................................................................................. 105
RADIOFREQUENCY RADIATION ............................................................................................................. 108
ROPE SAFETY ......................................................................................................................................... 114
SANITATION .......................................................................................................................................... 118

SCISSOR LIFTS ........................................................................................................................................ 121
TRANSPORTING HAZARDOUS MATERIALS ............................................................................................ 122
WELDING AND CUTTING SAFETY .......................................................................................................... 123

POLICY STATEMENT
American Tower Corporation will administer a comprehensive and continuous Safety and Health Program. Safety of employees takes precedence over all other concerns. ATC’s goal is to prevent accidents and comply with all Federal, State and Local safety and health standards. Safety is everyone’s responsibility. All managers and supervisors are expected to implement the procedures and address employee questions about work practices within ATC. No employee is expected to be in such a hurry that safety is neglected. The company will provide all safeguards required to protect personal safety and health. Employees who violate safety rules shall be subject to disciplinary action up to and including termination. Managers and Supervisors will address any employee concerns about guidelines not specifically covered in the Plan. More extensive safety information is available by contacting the Environmental, Health and Safety offices within the Compliance Department. The objective of this program is to maintain our excelling record in the industry with the full support of top management and to minimize the number of injuries through continuous training and promotion of a professional safety culture.

1
ACCIDENT/INJURYINVESTIGATION
1. GENERAL The procedure applies to all accident/incidents that meet the following criteria:
Work‐related accidents/injuries that result in personal injury to an American Tower employee over and above first aid (as defined by OSHA for injury and illness recordkeeping purposes).
Motor vehicle accidents that result in significant property damage (estimated damage over $1,000) or bodily injury to any person.
Any accident/injury that had the potential to result in serious personal injury or significant property damage (including falls arrested by personal fall arrest equipment).
2. RESPONSIBILITIES
2.1 The supervisor of the injured (or involved) Employee must perform the Accident/Incident investigation except as follows:
For severe Accidents/Injuries, as defined in 6.1 below, the supervisor will participate with an investigation team.
In low risk environments, such as offices, Accidents/Incidents may be investigated by someone other than the immediate supervisor. In these instances, the supervisor and HR Representative will jointly decide who performs the investigation.
2.2 Supervisors are required to use the services of the Safety Specialist to assist in
determining causes and in effecting remedies beyond their control. 2.3 In the Tower Group, the Operations Manager is responsible for:
Final review and sign‐off on Accident/Injury investigations.
Assuring a discussion is held with the injured Employee and his/her supervisor to assure accountability for safety is understood, especially for lost time injuries. Such discussions must be documented as to the date, persons in attendance, content and outcomes.
Leading a team to investigate severe Employee Accidents/Injuries, as defined in 6.1 below, in conjunction with the ATC Vice President ‐ Compliance and/or Director‐Environmental Health and Safety.
In other ATC units, a comparable operations manager is responsible for these activities.

2
2.4 All Employees must cooperate in the conduct of Accident/Injury investigations. Any Employee who fails to cooperate is subject to discipline, up to, and including, termination.
3. PROCEDURE 3.1 An Accident/Injury investigation must be conducted immediately following notification
that the Accident/Incident occurred. Specific procedures for conducting such investigation are provided in Appendix “A” attached hereto.
3.2 Accident/Injury investigations must be documented on the American Tower Corporation Accident/Incident Investigation Report and include concurrence by the:
Injured (or involved) Employee,
Operations Manager (or comparable position in non‐Tower units), and
Human Resources Representative and/or the Safety Specialist, as appropriate (see 4.3 above).
3.3 The ATC Employee Statement of Accident/Incident and Witness Statements must have
been completed when reporting the Accident/Incident and are integral parts of the
investigation process.
3.4 Timetables for implementation of corrective action must be developed. The Human Resources Representative or Safety Specialist, as appropriate, must monitor compliance with these timetables.
3.5 Copies of all Accident/Injury investigation reports must be provided to the ATC Director‐
Environmental Health and Safety within 7 days of the Accident/Incident. The Director will provide copies to corporate management as appropriate. Copies of Accident/Incident investigations for lost time injuries must also be provided to the senior executive of the operating unit.
4. SEVERE ACCIDENT INVESTIGATION PROCEDURE
4.1 Accidents that result in a severe injury to an ATC Employee must be thoroughly investigated by a team led by the most senior manager of the operation/location and/or the Director‐Environmental Health and Safety. The Vice President ‐ Compliance will determine who leads the Accident/Incident investigation team. Team members will include appropriate personnel who can lend expertise in identifying causes and implementing any necessary corrective action.
4.2 Severe Employee injuries include the following:
Death or life‐threatening injuries

3
Burns over 20% of the body
Dismemberment of hand, arm, foot or leg
Loss of sight in one eye
Internal injuries due to electrical contact
Fractures of an arm or leg, but not a finger or toe
Unconsciousness
Significant head trauma
Substantial blood loss
Any other permanent impairment of similar severity to the above
4.3 When a severe Employee injury occurs, local management must immediately:
Assure necessary first aid and medical help is provided.
Secure all systems, machinery and equipment to prevent further injury to persons or damage to property.
Preserve all evidence at the accident scene.
Obtain a complete photographic record of the Accident/Incident scene and related materials.
Identify all persons who may have knowledge about the Accident/Incident and start interviewing them.
Notify the Director – Environmental Health and Safety (mobile phone 602‐284‐0280), the Safety Specialists (248‐895‐4966) (480‐789‐0493), or the Vice President ‐ Compliance (mobile phone 919‐369‐7524).
4.4 The respective OSHA regional office must be notified within 8 hours if 3 or more Employees have been hospitalized or if an employee fatality has resulted. The Director – Environmental Health and Safety, or designee, will perform this notification. It is therefore imperative that the Director – Environmental Health and Safety or Vice President ‐ Compliance be immediately advised of any such severe injuries.
4.5 Upon completion of the investigation of a severe Employee injury, a full report must be prepared with accompanying exhibits including relevant photographs, diagrams, witness reports, training records, and written procedures. This report must include specific recommendations to assure that the incident does not recur.
4.6 Public Affairs and legal personnel must approve and release all information about serious accidents, or their investigation, to the public or press. In no case should information that speculates about the causes of a serious accident, or its investigation, be released.

4
5. FORMS
Forms required for this document:
Form Number Title
SFTY‐FRM‐001 Incident/Accident Investigation Report
Employee Statement of Incident/Accident
Witness Statement

5
APPENDIX A: ACCIDENT/INCIDENT INVESTIGATION PHASES
An Accident/Incident investigation has 4 phases: (1) Identify and collect facts; (2) Determine the basic
causes; (3) Determine the root causes; and (4) Recommend corrective action.
Phase 1: Identify and Collect Facts
The initial efforts of an Accident/Incident investigation should be directed towards identifying and
collecting facts. Facts are obtained by:
Observing the Accident/Incident scene including equipment, tools, machinery and/or vehicles. Photographs can be helpful in documenting the physical scene.
Interviewing involved people including employees, managers, engineers, contractors, and/or suppliers. Take notes to remember what has been said.
Reviewing records including administrative procedures, technical practices, training records, and equipment specifications.
The investigator should refrain from making any conclusions until all facts are collected.
Phase 2: Determine Basic Causes
Once all the facts have been collected, the basic causes of the Accident/Incident should be determined.
These include the obvious unsafe conditions and unsafe acts that led directly to the incident. There is
generally at least one basic unsafe condition and one basic unsafe act for each incident.
Basic unsafe conditions might include:
Defective tools or equipment,
Material failure
Improper storage
Housekeeping deficiencies
Lack of guarding.

6
Basic unsafe acts might include:
Failure to follow procedures,
Working at an unsafe speed,
Making safety devices inoperative,
Using unsafe equipment,
Failure to use personal protective equipment,
Taking unsafe positions or postures, or horseplay.
Phase 3: Determine Root Causes
Unfortunately, many Accident/Incident investigations stop once the basic causes have been identified
and corrected. For example, someone slips and falls on some oil and the oil is cleaned up. While this
may prevent the exact same Accident/Incident from happening again (i.e., another Employee will not
fall on the same spot of oil), it does not prevent recurrence of similar incidents. To truly prevent
recurrence, the root causes must be identified and corrected.
Root causes are the reasons the basic causes occurred. They are identified by asking the question WHY?
For example, why was oil on the floor? If it was from a leaking forklift, why was the forklift leaking?
Why wasn’t the forklift leak identified and repaired? Why wasn’t the oil on the floor observed before
someone got hurt? If it was observed, why wasn’t it cleaned up immediately?
The investigator should continue to ask WHY for a particular line of questioning until it is not practical or
useful to do so any further. Generally, root causes fall into the following categories:
Purchase of inadequate equipment
Inadequate maintenance
Inadequate design
Inadequate knowledge
Inadequate motivation
Inadequate procedures
Inadequate hazard identification processes.

7
Phase 4: Recommend Corrective Action
For every basic cause and root cause identified, corrective action must be recommended. Some
corrective action can be taken immediately, (e.g., basic causes can generally be corrected immediately).
However, correction of root causes will be most effective in preventing recurrence. Sometimes this
might require long‐term actions due to complexity, economics, state‐of‐the‐art or other practical
concerns. For example, purchase of new equipment, improved maintenance procedures, conduct of
training programs or implementation of inspection programs may require longer time frames. This
should not deter the investigator from making these types of recommendations.

8
ASBESTOS 1. GENERAL
1.1. Asbestos is a naturally occurring mineral mined from the earth that takes the form of
microscopic fibers which are nearly indestructible. It can be densely packed into a tough,
flexible and very useful material, which has been used for hundreds of years as an insulation,
fireproofing, and building material.
1.2. There are three major types of asbestos used in building and industry:
Chrysotile, or white asbestos ‐ used as insulation, fireproofing and soundproofing.
Amosite, or brown asbestos ‐ used in high friction applications like brake shoes and
clutches.
Crocidolite, or blue asbestos ‐ not as common as the other two, but the most toxic form.
About 95% of all asbestos used in the U.S. has been chrysotile, the least toxic form
of asbestos.
2. ASBESTOS‐CONTAINING MATERIALS
2.1. Building materials containing 1% or greater asbestos are designated as Asbestos‐Containing
Materials (ACM) by the Environmental Protection Agency.
2.2. Building materials found in buildings constructed prior to 1981 are Presumed Asbestos‐
Containing Materials (PACM) until proven otherwise by sampling and laboratory analysis.
2.3. In ATC, asbestos is most likely to be found in older buildings (built prior to 1981) in the
following applications:
Sprayed‐on insulation in locations such as various mechanical rooms, steel reinforcing
beams, and some ceilings
Ceiling tiles and mastic
Vinyl floor tiles and mastic
Plaster, drywall compound, and skim coat
Insulation around pipes and boilers
Asbestos cement wall panels
Only wood, glass, and steel are not considered suspect asbestos‐containing materials.

9
3. HEALTH HAZARDS
3.1. The most common way for asbestos fibers to enter the body is by breathing in fibers.
3.2. Asbestos fibers are released from the matrix of the building material when the material is
disturbed.
3.3. Friable ACM is material that can reduced to powder using hand pressure, which results in a
release of asbestos fibers into the air.
3.4. Non‐friable ACM is material that cannot be reduced to powder using hand pressure. Non‐
friable ACM that is damaged can release asbestos fibers in the air.
3.5. Asbestos fibers that are encapsulated within the matrix of the building material are not
hazardous to human health unless released to the air in concentrations exceeding the
Permissible Exposure Limit (PEL).
4. HEALTH EFFECTS FROM EXPOSURE TO ASBESTOS
4.1. Because it is so hard to destroy asbestos fibers, the body cannot break them down or remove
them once they are lodged in lung or body tissues. They remain in place where they can cause
disease. The following are the most common diseases associated with asbestos exposure:
Pleural disease ‐ plaque deposits or a thickening of the thin tissue that separates the
lungs from the other organs in the body.
Asbestosis ‐ a progressive, non‐cancerous and irreversible scarring of the lungs that
leads to breathing problems and heart failure. Typical latency period is over 20 years.
Lung cancer ‐ cancerous tumors that have a latency period of 20 to 30 years, usually
fatal.
Mesothelioma ‐ a cancer in the lining of the chest cavity or abdomen. Very rare but
always fatal.
Most asbestos related diseases have occurred in workers who historically have had high
exposures to asbestos over a prolonged period of time. Asbestos diseases have a latency
period ranging from 10 to 30 years after initial exposure. These exposures occurred in
occupations where asbestos was mined, milled, used in primary manufacturing, and in
insulation trades, such as shipbuilding.
5. LIMITING EXPOSURE TO ASBESTOS
5.1. ATC has surveyed many of its owned buildings for asbestos. Heed the warning signs posted as
follows:

10
DANGER – ASBESTOS – CANCER AND LUNG DISEASE HAZARD – AUTHORIZED
PERSONNEL ONLY – Entrance by ATC personnel is permitted if they have completed the
on‐line Asbestos Awareness training course.
DANGER – ASBESTOS – CANCER AND LUNG DISEASE HAZARD – AUTHORIZED
PERSONNEL ONLY – RESPIRATORS AND PROTECTIVE CLOTHING ARE REQUIRED IN THIS
AREA – Entrance by ATC personnel is prohibited.
5.2. When entering a building with suspect ACM, observe the condition of the suspect material.
Significantly damaged ceiling tiles, drywall, and/or floor tiles should be reported immediately to
the EH&S department. Do not enter this building until cleared by EH&S.
5.3. Do not disturb known or suspect ACM by any of the following methods:
Drilling
Sawing
Grinding
Abrading
Scraping
Hammering
Cutting
Breaking
5.4. Do not dry sweep the floor in any building constructed prior to 1981 without consulting the
EH&S department.
5.5. Do not disturb any building material other than wood, glass, or steel without consulting EH&S.
5.6. If an Operations and Maintenance Plan (O&M) is posted, read the O&M to determine what
materials are known to contain asbestos prior to conducting the work assigned. Only materials
that have been confirmed to not contain asbestos are permitted to be disturbed.
5.7. Do not attempt to avoid asbestos fibers by wearing a dust mask. Dust masks are not capable of
filtering out asbestos fibers.
5.8. Use of respirators is prohibited. Should the job require disturbing ACM, the ACM will either be
removed by the EH&S department, or the work will be contracted to qualified and trained
asbestos workers.

11
BLOODBORNEPATHOGENS
1. GENERAL 1.1. ATC Employees who can reasonably anticipate occupational exposure to bloodborne pathogens
shall be given all necessary protection to reduce the likelihood of exposure to, transmission of, and possible infection with HBV, HCV, HIV, or any other bloodborne diseases.
2. PROCEDURES 2.1. All ATC Employees who can reasonably anticipate a risk of occupational exposure to
bloodborne pathogens shall:
Participate in annual training on occupational risks and how to minimize exposures. Training will be provided to Employees within 10 days of employment or prior to starting any work assignment where a risk of occupational exposure might be anticipated. Training records must be kept for three years.
Use warning labels, signs and/or color coding to identify hazards
Use engineering and work practice controls to eliminate or minimize employee exposure
Observe all requirements for the use and safe handling of sharps, specimens, contaminated matter, etc.
Contact your manager immediately upon any exposure and complete the Employee Confidential Exposure Report attached hereto as Exhibit “A” as soon as possible.
2.2. If an Employee is exposed to any bloodborne pathogen, he/she will:
Seek immediate medical attention
Notify Employee’s supervisor as soon as possible
Supervisor is to contact EH&S immediately so that an investigation can be implemented.
Hands and other skin surfaces must be washed immediately, and thoroughly, if contaminated with blood or other body fluid.
Any spill of human blood or other body fluid must be cleaned up immediately. EH&S is to be notified immediately. If the appropriate PPE and spill cleanup materials are available, and the Employee has received the Bloodborne Pathogens training, he or she may clean up the spill if it will not jeopardize his or her health or those in close proximity. EH&S will coordinate all spill clean‐up procedures. Sharp material involved in the spill shall be carefully removed and placed in a sharps container. The spill area shall be washed with bleach of other appropriate disinfectant. Any equipment used in the clean up must be either decontaminated with the appropriate germicide or disposed of properly.
2.3. EH&S will coordinate the disposal of all regulated waste. EH&S will also make the determination as to whether or not a waste shall be classified as regulated waste. Disposal of all regulated waste will be in accordance with all applicable regulations of the United States and political subdivision of States.

12
2.4. All occupational bloodborne pathogens exposure incidents will be recorded on the OSHA 300 log if:
The incident involves the loss of consciousness, a transfer to another job, or restriction of work or motion
The incident results in a recommendation of medical treatment (e.g., Hepatitis B immune globulin, Hepatitis B vaccine, etc.)
The incident results in a diagnosis of seroconversion. It is recorded on the OSHA 300 log as an injury (e.g., “needle stick”).

13
CAPSTANUSAGE 1. GENERAL
1.1. Capstans, also known in the industry as “catheads,” are friction devices that provide mechanical
advantage when lifting heavy loads up onto a tower. The rope line leading from the capstan
drum to the load being lifted is referred to here as the load line. The line going from the
capstan drum to the operator on the ground is referred to as the fall line.
1.2. The risks of operating a capstan incorrectly include rope burns to the hands, dropped loads,
rigging equipment failures, and overloading the hoist.
1.3. ATC Tower Lighting crews are currently issued with the Hubbell Chance Model 90 Capstan.
1.4. Employees must take the time to determine the best location for the capstan and block as each
tower may be different.
1.5. Employees are never to leave a capstan unattended while a load is suspended.
1.6. Capstans are provided with a rope lock attachment. If this item is missing, please contact the
Warehouse for a replacement.
1.7. American Tower requires all capstan operators to wear protective gloves while operating a
capstan.
1.8. Capstans are to be mounted to the company vehicle using only the proper brackets, fasteners
and high‐strength bolts provided. No makeshift mountings are to be used.
1.9. Blocks (pulleys) must be checked before use to confirm they have a minimum rating suitable for
the load to be lifted.
2. TRAINING
2.1. Only qualified, designated operators are permitted to operate capstans on ATC sites.
Supervisors shall designate who may operate a capstan.
2.2. Training must consist of a combination of formal instruction (e.g., lecture and written material),
practical training (demonstrations performed by the trainer and practical exercises performed
by the trainee), and evaluation of the operator's performance at a worksite. An outline of the
training program is available in the EH&S section of the American Tower portal.

14
2.3. Employees must understand how to check the capstan for bent, broken or missing parts before
every use. If any parts are found to not be functioning properly, it must be tagged “DO NOT
USE” and returned for repair.
3. SAFE CAPSTAN OPERATIONS
3.1. The operator must keep constant tension on the fall line at all times to prevent the load from
slipping and falling.
3.2. If the rope overlaps, the operator must keep tension on the fall line while securing the load.
Keep fingers clear of the drum while untangling the rope.
3.3. The drum must never be allowed to turn without advancing the rope. This will cause the rope
to heat up and possibly melt.
3.4. Use extra caution in wet or snowy weather as a wet rope may slip on the drum.
3.5. Employees must never wrap the rope around their body or arm for extra pull and must keep
clothing and harnesses away from the drum to avoid being sucked in.
3.6. Do not allow anyone to stand under or near an elevated load.
3.7. Employees may contact the EH&S Department with any questions relating to capstan usage or
training.

15
COMPRESSEDGASES 1. GENERAL
1.1. The hazards of compressed gas cylinders include oxygen displacement, explosions, toxic effects
of some gases, and the physical hazard presented by a ruptured cylinder. Due to the severity of
these hazards, it is essential that cylinders are properly stored, transported, used and handled.
1.2. To ensure they are in safe condition, gas cylinders must be visually inspected upon receipt and
before use. If there is any doubt, the cylinder supplier should be contacted immediately.
1.3. Cylinders must be properly identified as to their contents.
2. STORAGE
2.1. Compressed gas cylinders must be stored in a well‐protected, well‐ventilated, dry location, at
least 20 feet from combustible materials.
2.2. Cylinders shall not be placed within 5 feet of an electrical outlet or where they may become
part of an electric circuit.
2.3. Compressed gas cylinders must always be stored:
in an upright position;
away from radiators and other sources of heat;
in assigned locations away from places where they may be knocked over or damaged by
passing or falling objects;
with a cylinder stand, straps or chains connected to a fixed surface so they cannot tip,
fall or roll. If chains are used, they should be chained one third from the top; and
with valve protection caps in place, hand‐tight.
2.4. When stored inside a building, fuel‐gas cylinders, except those in actual use or attached ready
for use, are limited to a total gas capacity of 2,000 cubic feet or 300 pounds of liquefied
petroleum gas.
2.5. Stored oxygen cylinders must be separated from fuel‐gas cylinders or combustible materials
either at a minimum distance of 20 feet or by a noncombustible barrier at least 5 feet high
having a fire‐resistance rating of at least one‐half hour.
2.6. Empty cylinders must always be stored with their valves closed. A cylinder’s status (full, empty
or in service) should always be identified.

16
3. HANDLING AND USE
3.1. Compressed gas cylinders must be handled carefully. Rough handling, knocks, or falls may
damage a cylinder, valve or safety devices and cause leakage. Dropping or striking may damage
the cylinder valve, which could turn the cylinder into a powerful projectile with the potential to
kill personnel. Never drag or slide cylinders, even for short distances.
3.2. Cylinders must be transported in a fully secured vertical position. Regulators should be
removed and valve‐protection caps put in place. Cylinder valves should be closed.
3.3. Cylinders should be moved by means of a cylinder truck or cart with a chain or belt securing
them. Regulators should be removed and valve protection caps put in place. Cylinder valves
should be closed. Cylinders may not be rolled or lifted by the valve or valve cap.
3.4. Installation, disconnection and replacement of compressed gas cylinders must only be done by
trained personnel.
3.5. Oxygen reacts with oil and grease in a manner that will easily result in fire or explosion. Do not
handle oxygen regulators, cylinders, or valves with greasy hands or gloves. Inspect oxygen
regulators, cylinders, and connections before installation. If there is evidence of oil, grease, or
other contaminants, remove them from service and contact the supplier.
3.6. Never remove the cylinder valve protective cap and cylinder valve outlet cap or plug until the
cylinder is ready to be used and has been properly secured.
3.7. No device or attachment for mixing air or oxygen with flammable gases is permitted unless it is
approved for such a purpose. Only approved apparatus such as torches, regulators or pressure‐
reducing valves may be used.
3.8. Regulator/gas compatibility should be checked prior to each installation. Connections should be
leak‐tested after hook‐up.
3.9. If cylinders are found to have leaky valves or fittings, the cylinders should be taken outdoors —
away from sources of ignition — and slowly emptied.
3.10. Cylinders must be kept far enough away from the actual welding or cutting operation so that
sparks, hot slag, or flame will not reach them. In the alternative, fire‐resistant shields must be
provided.
3.11. Cylinders not having fixed hand wheels shall have keys, handles, or nonadjustable wrenches on
valve stems while these cylinders are in service. Non‐sparking tools must be used on cylinders
which contain flammable materials.

17
3.12. Where a special wrench is required it must be left in position on the stem of the valve while the
cylinder is in use so that the fuel‐gas flow can be quickly turned off in case of emergency.
3.13. Unless connected to a manifold, oxygen from a cylinder shall not be used without first
attaching an oxygen regulator to the cylinder valve. Before connecting the regulator to the
cylinder valve, the valve shall be opened slightly for an instant and then closed. Always stand to
one side of the outlet when opening the cylinder valve. Oxygen valves must be opened fully to
prevent leakage around the valve stem.
3.14. Fuel‐gas must never be used from cylinders through torches or other devices equipped with
shutoff valves without reducing the pressure through a suitable regulator attached to the
cylinder valve or manifold. Never crack a fuel‐gas cylinder valve near other welding work or
near sparks, flame, or other possible sources of ignition.
3.15. Never lubricate, modify, force or tamper with a cylinder valve. A hammer or wrench shall not
be used to open a cylinder valve. If valves cannot be opened by hand or other trouble is
experienced, contact the supplier.
3.16. The cylinder valve must always be opened slowly. An acetylene cylinder valve shall not be
opened more than one‐and‐a‐half turns of the spindle, and preferably no more than three‐
fourths of a turn.
3.17. Nothing shall be placed on top of a cylinder that may damage the safety device or interfere
with the quick closing of the valve. Safety devices shall not be tampered with.
3.18. Do not use acetylene at operating pressures above 15 psig. Cylinders containing acetylene must
never be stored on their side.
3.19. Do not empty an oxygen cylinder below 25 to 50 psig. If the oxygen cylinder is allowed to
become completely empty, it will lose its positive pressure and fuel gas or other contaminants
may enter the cylinder, creating a hazardous situation.
3.20. Before a regulator is removed from a cylinder valve, the cylinder valve must be closed and the
gas released from the regulator.

18
CONFINEDSPACES
1. GENERAL
1.1. The objective of this Section is to protect employees who are required to enter confined spaces
and to prohibit work “permit‐required” confined spaces.
ATC employees are prohibited from performing work in permit‐required confined spaces.
1.2. A “confined space” is a space that:
Is large enough and so configured that an employee can bodily enter and perform
assigned work; and
Has limited or restricted means for entry or exit; and
Is not designed for continuous employee occupancy.
Examples of confined spaces include water towers, monopoles, and air conditioning ducts.
1.3. A "permit‐required confined space (permit space)" is a confined space that has one or more of
the following characteristics:
Contains or has a potential to contain a toxic, flammable or oxygen deficient
atmosphere;
Contains a material that has the potential for engulfing an entrant;
Has an internal configuration such that an entrant could be trapped or asphyxiated by
inwardly converging walls or by a floor which slopes downward and tapers to a smaller
cross‐section; or
Contains any other recognized serious safety or health hazard, such as moving machine
parts or electrical hazards.
Examples of permit‐required confined spaces include sewers, pipelines, septic tanks, chemical
storage vessels, bins, underground utility vaults and manholes.
(Note: A confined space can become a permit‐required confined space based
on work operations that may be performed inside them, such as welding, and
through natural activity like the decomposition of organic materials.)
2. WORKING IN A CONFINED SPACE
2.1. Before entering, make sure there are no hazards present that could make the space a permit‐
required confined space. Oxygen deficiency is particularly insidious and can be caused by
biologic activity like molds and/or decomposition of organic materials. Make sure there is air
movement in the space before entering. When in doubt, do not enter.

19
2.2. No work operations may be performed in a confined space that could make the space a permit‐
required space. This includes welding, torch‐cutting or the use of chemicals.
2.3. Provision must be made for prompt evacuation of an employee from the space in the event of
an injury or illness.
2.4. Employees must follow all required work procedures when inside a confined space.
2.5. Entrants should exit the confined space periodically for rest, particularly if the space is warm.
3. PERMIT‐REQUIRED CONFINED SPACES
3.1. Any required work in permit‐required confined spaces must be sub‐contracted to a firm which
specializes in this type of work. This includes welding inside water tanks. ATC employees may
never work in permit‐required confined spaces.
3.2. Note that the requirements for work in permit‐required spaces are extensive and include:
A written entry permit
Atmospheric testing for oxygen, flammables and toxic materials
Attendant(s) stationed outside the confined space(s) for monitoring the entrants and
providing rescue support.
Rescue and communications equipment
Isolation and lockout of energy sources
Mechanical ventilation
Personal protective equipment, including respirators.

20
CONTROLLEDDESCENTOPERATIONS 1. Purpose
This procedure describes the minimum requirements that must be followed when conducting
controlled descent operations.
2. Scope
This procedure must be utilized by American Tower Corporation personnel when working on an ATC
tower or other site where mechanical means are not feasible.
3. Definitions
3.1. Controlled Descent Descending from an elevated height to a lower work position by means
of a rope and a friction device that allows the worker to descend along the rope in a smooth,
controlled manner.
3.2 Qualified Person A worker who has been formally trained in controlled descent
procedure by an ATC‐approved training company.
4. Procedure
4.1. The use of mechanical means (i.e: man‐lift, crane or man‐basket) shall be evaluated and
considered before using controlled descent methods. When working at the top of a tower,
mechanical methods for reaching the work will generally be required.
4.2. Only persons qualified in controlled descent methods and in using controlled descent devices
are permitted to perform controlled descent operations. Controlled descent devices must meet
applicable standards and include use of a Petzl ID.
4.3. The descent line must be ½ kernmantle. The descent line must be secured to a 5,000 pound
anchor point using either an anchor strap or wire sling. The descent line must be protected if it
crosses over any steel members.
4.4. Controlled descent systems must include a secondary personal fall arrest system. Any person
not utilizing, or supervisor not requiring, a secondary personal fall arrest system is subject to
the same consequences as if free‐climbing.
4.5. Personal fall arrest will be provided by using a lifeline and a rope grab. Lifelines must be:
4.5.1. Three‐braid, ⅝ inches diameter, fixed at both ends, with snaphooks and factory knots
4.5.2. Tied off to a 5,000 pound anchor point, independent of the anchor point for the descent
line.
4.5.3. Used in conjunction with a 3‐foot (not 6‐foot) shock absorbing lanyard to restrict the
freefall distance to a total of 6 feet.
4.6. The descent and lifelines used in controlled descent operations shall be used for personnel only
and never used to hoist materials.
4.7. Only one person may be attached to a descent or lifeline at one time.
4.8. All equipment will be inspected prior to use.

21
5. Training
5.1. Only qualified ATC employees are permitted to use controlled descent procedures.
5.2. Employees shall qualify by completing formal training in controlled descent methods and
demonstrating competency. Formal training programs will be reviewed and pre‐approved by
ATC’s EH&S department.
6. Responsibilities
6.1. Qualified Person shall develop a specific plan outlining rigging, anchor points, hardware and
ropes before controlled descent operations are utilized. The plan must be site specific and
include provisions for rescue. The plan shall be approved by the Lighting Tech Supervisor in
advance of the work and will be retained on site during the course of the work.
6.2. Lighting Tech Supervisor shall assure that all requirements of this procedure, and the specific
controlled descent plan, are followed. The Supervisor must also assure that only persons
qualified in controlled descent methods and in using controlled descent devices perform
controlled descent operations.
6.3. Employees shall follow all the requirements of this Procedure and the specific controlled
descent plan.
7. Equipment
7.1. Descent and lifelines shall not be used for any other purpose than controlled descent.
7.2. Descent devices must have anti‐panic/anti‐lock capabilities.
7.3. Equipment dedicated solely for use in controlled descent operations will be stored
independently of other equipment in a container clearly marked for controlled descent
operations only.
7.4. Employees using controlled descent devices must inspect equipment and ropes before each
use. Damaged equipment is not permitted to be used and must be replaced prior to starting
any controlled descent procedure.
7.5. Rope service life shall be monitored by the qualified person and Lighting Tech Supervisor. Refer
to ATC’s Rope Safety Program for service life tracking procedure.

22
CRANESANDBOOMTRUCKS
Note: A boom truck is a crane. Whenever the term “crane” is used in this Part, it is meant to include
boom trucks. Occasionally the term “boom truck” is used by itself when referring to ATC‐owned or
operated equipment.
1. CRANE OPERATORS
1.1. All crane truck operators must be qualified for the type of equipment they are operating.
A National Commission for the Certification of Crane Operators (NCCCO) card for the
type of equipment being operated is evidence of being qualified. Other certifications,
such as labor union training, are also acceptable as evidence of qualification.
ATC employees who operate boom trucks must be fully trained by an outside expert in a
program that meets the requirements of ANSI B.30.5, Mobile and Locomotive Cranes.
Such training will typically require at least 2 days in the classroom and 1 day of hands‐on
practice.
Crane operators must meet all state and local jurisdictional requirements for the type of
crane being operated and maintain valid qualification documents.
Crane operators must fully understand and adhere to the requirements of ANSI B30.5 and OSHA
1926.550 including those covering safe operating procedures, crane equipment and operating
controls, inspection and maintenance, wire rope, use of load charts and personnel lifting.
2. INSPECTIONS
2.1. Cranes and crane equipment must be inspected before each use to make sure they are in
good working condition and do not require repair, adjustment, or lubrication prior to use. The
content of the inspection and any required documentation must meet the requirements of
ANSI B.30.5.
2.2. Upon satisfactory completion of the pre‐use inspection and before conducting the lift, the
crane operator shall perform a final check to ensure all applicable lift criteria are met.
2.3. Annually, cranes and crane equipment must be given a comprehensive inspection by a
certified outside entity pursuant to the requirements of ANSI B.30.5. A record of this
inspection must be retained.
2.4. In addition, boom trucks are required to have an annual DOT inspection by a qualified
inspector.
2.5. All maintenance and repair work performed on a crane must be documented and retained.

23
3. CRANE DANGER SIGNS
3.1. Cranes should be free of visible structural damage and cracks. There should be no fluid leaks.
3.2. There should be no modifications to add weight or hold down the rear of the crane.
3.3. Cranes must be set up within 1 degree of being level. Extra care must be taken to stabilize a
crane on soft ground.
3.4. If outriggers are used, tires must be off the ground and not supporting any part of the crane.
3.5. Cranes should not be operated near energized overhead power lines. If a line cannot be de‐
energized or otherwise fully insulated, safe distances must be maintained. All conductive
objects including cranes, booms, wire rope and loads must be at least 10 feet away from
energized overhead lines at all times. This distance increases by 4 inches for every 10,000 volts
over 50,000 volts. If employees on the ground are required to be in contact with the crane or
load, the required clearance distance is measured based on the maximum reach of the
equipment, not just on its location at the time.
3.6. Cranes should not be located near a trench or excavation. The weight of the crane could cause
the sidewalls to cave in and the crane to fall over.
3.7. The counterweight swing radius must be appropriately guarded to prevent personnel or other
equipment from being struck.
3.8. The area under the load must be appropriately guarded if work is conducted in a public area.
In all cases, the load should not be passed over the heads of workers or other persons.
3.9. A crane’s hoist line should be vertical at all times.
3.10. Cranes should operate smoothly. There should not be any sudden acceleration or deceleration
of a moving load.
3.11. A crane should not be left unattended with a suspended load.

24
CRANE‐SUSPENDEDPERSONNELPLATFORMS
1. GENERAL
1.1. Depending on the configuration of antennas on a tower structure, sometimes the only way to
access elevated work is from a crane‐suspended personnel platform. Requirements for types of
operations are covered in detail in OSHA Standard 1926.550(g) and ANSI A10.28‐1998, Safety
Requirements for Work Platforms Suspended from Cranes or Derricks. These operations are not
the same as riding the line which is not permissible in ATC.
1.2. A crane‐suspended work platform may only be used if no other feasible means of access exist.
The Project Manager must establish that there is no less hazardous way of performing the job
before choosing this method.
1.3. If a crane‐suspended personnel platform is to be used, the ATC Project Manager must partner
with the crane company and rigging supplier to assure they understand the OSHA and ANSI
requirements; the appropriate platform, crane and rigging gear are provided; and that the work
is performed in compliance with OSHA and ANSI.
2. PERSONNEL PLATFORM
2.1. The personnel platform must conform to OSHA and ANSI specifications. These include, but are
not limited to, a design factor or 5:1, a guardrail 42 inches off the floor, an inside grab rail, a
suspension system to minimize tipping, permanent indication of its rated capacity, and a
designated place to anchor fall protection.
2.2. The number of personnel occupying the suspended platform must be commensurate with the
rated capacity of the platform.
2.3. Roofs are required if overhead hazards are present. Hard hats, though required, are insufficient
by themselves.
3. CRANES
3.1. A crane used to hoist a suspended personnel platform must have certain features making it
appropriate for hoisting personnel. Among these is an anti‐two block device, load moment
device, boom angle indicator and load radius indicator.
3.2. The crane cannot be used to more than 50 percent of its rated capacity when lifting personnel.
It must be within 1% of level and located on firm footing. Outriggers must be fully extended.
4. RIGGING
4.1. Crane‐suspended personnel platforms must be rigged with a four‐point suspension capable of
supporting ten times the maximum intended load.

25
4.2. Rigging used for hoisting personnel must not be used for any other purpose.
4.3. The platform must be positively locked to the load block or hook in a manner to prevent
accidental engagement.
5. INSPECTIONS
5.1. The crane, its key components, rigging gear and personnel platform must be inspected by
competent persons immediately prior to using them and on a daily basis. These inspections
must be documented.
6. PROOF TEST AND TRIAL RUN
6.1. A proof test and trial run must be conducted by a competent person prior to each use. The
platform and rigging shall be proof‐tested to 150% of the platform’s rated capacity. This is done
by holding the platform in a suspended position for 5 minutes with a test load equally
distributed on it. The proof test must be documented.
6.2. Prior to placing personnel on the platform, a trial run must be made with the suspended
platform from the ground to the proposed work elevation.
6.3. The ATC Project Manager must coordinate with the crane company and rigging supplier on
obtaining the test load and designating the competent person to perform the proof test and
trial run.
6.4. A pre‐lift meeting must be held with all involved parties to discuss safety aspects associated
with the lift.
7. COMMUNICATION
7.1. An effective method of communicating and/or signaling with the crane operator must be
established. If visual contact cannot be maintained, then radios must be used.
8. PERSONAL FALL PROTECTION EQUIPMENT
8.1. Employees must wear full‐body safety harnesses and fall arrest lanyards, which must be tied off
to a designated point on the platform or above the headache ball/load block. You can also tie‐
off to the bull ring.
8.2. Tying‐off above the headache ball is preferred as long as the platform does not have a roof. A
safety shackle and choker can be placed just above the ball and below the becket. Never tie off
above the becket or to the rope on a multiple part block.
26
9. WORK OPERATIONS
9.1. Check the area for nearby electrical lines or other potential hazards in the area that could be
contacted by the crane or personnel platform.
9.2. Suspended platforms are not to be used during high winds, electrical storms or when other
adverse weather conditions exist.
9.3. Tag lines must be used where appropriate.
9.4. Personnel on the platform must keep all body parts inside the platform during hoisting
operations.
COMMENT ON WORKING FROM THE PLATFORM
OSHA and ANSI require that feet must be kept on the floor of the platform. However, this may be
difficult when antenna sections are close to each and the antenna above the one being worked on gets
in the way of the hoist line. Another difficulty is sometimes encountered when an antenna is excessively
long and the entire bracket system cannot be reached. In cases like these, some tower techs may find it
preferable to stand on the railing of the personnel platform to perform some work. Even though it
violates OSHA and ANSI standards, this method may present a lesser hazard than working from the
tower itself where the worker is subject to the hazards presented by navigating out to the antenna and a
potential swing fall. While not recommended, if you have to stand on the rail of the personnel platform
you must use either a self‐retracting lanyard or both a fall arrest and positioning lanyard. The anchor
point for the fall arrest lanyard will be the lower load block or headache ball, or the designated
structural member within the platform. The bull ring is a good place for anchoring the positioning
lanyard.

27
ELECTRICALSAFETY 1. GENERAL
1.1. Do not undertake any task involving work on or near electric power lines, generators or other
electrical equipment if you are not trained to do so. This includes the use of tools powered by a
portable or truck‐mounted generator.
1.2. Electrical equipment and lines must always be considered energized until known to be
disconnected and the absence of power is verified.
1.3. Only qualified personnel may work on or near energized electric circuits using safety procedure
outlined in NFPA 70E, Standard for Electrical Safety Requirements for Employee Workplaces.
2. UNDERSTANDING ELECTRICAL HAZARDS
2.1. The primary hazards of electricity are shock and possible electrocution, burns, arc‐blasts,
explosions, and fires.
2.2. A severe shock can cause considerably more damage to your body than is visible. You can suffer
internal bleeding and destruction of tissues, muscles, nerves, and internal organs. Burns
suffered in electrical accidents are of three types: electrical burns, arc burns, and thermal
contact burns. A startle reaction from receiving a small shock can cause a fall.
2.3. Extremely high‐energy arcs can cause “explosions” and damage equipment, causing
fragmented metal to fly in all directions. Even low‐energy arcs can cause violent explosions in
atmospheres that contain flammable gases, vapors, or combustible dusts.
2.4. The following table outlines the response of humans to electric current:
Response of Humans to Electric Current Threshold Current in Milliamps (mA)
Perception of shock 1mA ‐ 5mA
Pain, muscular contractions, grip paralysis 10mA ‐ 20mA
Respiratory paralysis 30mA
Ventricular fibrillation 50mA ‐ 200mA
Heart stops, tissues and organs burn 1500mA
When reviewing this table, consider that a 60 watt light bulb uses 500mA of current
How Shock Occurs
2.5. Electricity travels in closed circuits and its normal route is through a conductor and load. You
get a shock when your body becomes part of the circuit, i.e., when an electric current enters
28
your body at one point and exits at another. Remember that electricity follows every available
path, not just the path of least resistance.
2.6. Shock normally occurs when you touch:
both wires of an electric circuit, or
one wire of an energized circuit or “hot” part and the ground, or
one wire of an energized circuit or “hot” part while another part of your body is
touching a grounded object
2.7. The severity of a shock depends on 3 factors:
how much current flows through your body,
what path the electric current takes through your body, and
how long your body is part of the circuit.
The higher the voltage and the lower the resistance, the more current will flow through your
body. Water or moisture (from standing in puddles or sweaty hands) increases the shock
hazard by greatly reducing the resistance of the body to the flow of electricity.
3. TOOLS AND EQUIPMENT
3.1. You should always use tools and equipment that work properly. Tools must be designed and
constructed to withstand the voltages and stresses to which they are exposed. Products
intended for outdoor use must have heavily insulated cords.
3.2. You should inspect tools, cords, grounds, and accessories daily for insulation breakdown. Check
for broken or exposed wires and scuffed insulation on cords. Never use worn or frayed
extension cords. Damaged tools and extension cords must be removed from service and tagged
defective immediately and any repairs done by a qualified person.
3.3. Use safety features like three‐prong plugs, double‐insulated tools, and safety switches. Keep
machine guards in place and follow proper procedures. Dispose of any electrical items with
missing ground prongs.
3.4. Electrically operated equipment must be shut down and locked out before making repairs or
adjustments.
3.5. When working in the vicinity of electrical apparatus or lines, do not use tools, ropes, lines or
measuring tapes made of metal or other materials that conduct electricity.
3.6. The use of aluminum ladders is not permitted in ATC.

29
4. GROUND FAULT CIRCUIT INTERRUPTERS
4.1. At construction sites, the most common electrical hazard is the ground fault electrical shock.
OSHA electrical rules require either:
Ground fault circuit interrupters (GFCIs), or
An assured equipment grounding conductor program.
GFCIs are generally preferred because an assured equipment grounding program is difficult to
maintain from an administrative standpoint. A GFCI is a fast‐acting circuit breaker that senses
small imbalances in a circuit caused by current leakage to ground (for example, through you).
The GFCI shuts off the electricity in a fraction of a second.
4.2. GFCIs are necessary because while most portable electric tools have an equipment grounding
conductor or are double insulated, these methods are not foolproof. A grounding wire could
break, a cord could become defective, or water or moisture could cause double insulation in a
tool to become ineffective. A GFCI protects people from these insulation failures.
4.3. GFCIs must be provided for all outdoor power receptacle outlets and/or in all outdoor circuits
(e.g., temporary wiring during construction).
4.4. GFCIs must be inspected and checked periodically. This can be done by connecting them to a
lamp or radio, depressing the test switch, and ensuring that power goes off.
5. GUARDING
5.1. Live parts of electrical equipment operating at 50 volts or more must be guarded to avoid
accidental contact. Entrances to areas with live electrical parts must be marked with warning
signs. The signs should forbid entrance except by qualified persons.
5.2. You should never work near any part of an electric power circuit that you could contact in the
course of work unless protected against shock by de‐energizing and locking out the circuit or by
guarding it effectively by insulation or other means.
5.3. Only authorized, qualified personnel are permitted access to panel boxes. Electrical panels
must not be left open or unattended except while actively being worked on. Personnel working
on a panel should not leave the area for any reason while the panel is unattended. There
should be no exposed panel blanks.
6. OVERHEAD LINES
6.1. The locations of overhead power lines must be identified before starting work whenever
working out of doors in elevated positions, with long conductive objects, or with equipment
capable of elevating. All personnel should be advised of their locations, and warning signs
should be posted. Be aware that power lines may be obscured by nearby trees.

30
6.2. If work near overhead power lines is necessary, the utility company must be asked to safeguard
the lines. The best solution is to de‐energize and ground the lines. If that’s not possible, they
might be able to reduce the hazard by applying other protective measures such as insulated
blankets, guards, or barriers.
6.3. If a line cannot be de‐energized or otherwise fully insulated, safe distances must be maintained.
You are required to stay at least 10 feet away from energized overhead lines at all times. This
includes your body and any conductive objects you are holding. This distance increases by 4
inches for every 10,000 volts over 50,000 volts.
6.4. These same procedures and safe distances must also be maintained when using any vehicle or
mechanical equipment capable of having parts of its structure elevated near energized
overhead lines, such as a crane or boom truck. If employees on the ground are required to be in
contact with a vehicle or mechanical equipment, the required clearance distance is measured
based on the maximum reach of the equipment, not just on its location at the time.
6.5. Loads being moved near overhead power lines should never be guided by hand.
6.6. If a vehicle or piece of equipment contacts a power line, don’t think about touching it or going
near it — you could receive a lethal shock. In such cases, it is rarely the operator who is
electrocuted — it is generally workers on the ground touching the equipment because they
provide a ready path for the electricity to flow to ground.
7. UNDERGROUND LINES
7.1. If you dig with a conductive object and break through the insulation of an underground power
line, you can receive a serious shock that could kill or maim you.
7.2. Before any digging is done, all underground utility companies, including the power company,
must be contacted and asked to establish the estimated locations of their installations.
7.3. When you approach the estimated location of an electric power line or any other utility, use
caution and dig by hand if necessary.
7.4. If you are using a jackhammer, bar, or other hand tool in a work area where the exact location
of an underground electric power line is unknown and the tool could contact a line, you must
wear insulated protective gloves.
8. LOCKOUT/TAGOUT
8.1. “Lockout” is the process of turning off and locking out the flow of energy from a power source
to a piece of equipment or a circuit and is accomplished by installing a lock and a tag at the
power source.

31
8.2. “Tagout” refers to situations where it is unfeasible to perform lockout and only a tag is used. (It
is rare for lockout to be infeasible.)
8.3. Lockout procedures must be used whenever performing service or maintenance work on
machines, equipment or circuits where there is a risk of unexpected start‐up of machinery or
equipment or release of hazardous energy. Lockout is not required on cord and plug equipment
where the plug is under the exclusive control of the person performing the work.
8.4. Personnel who conduct lockout must be specifically trained in the necessary procedures and be
properly equipped. If lockout is necessary, contact the EH&S Department.
9. FIRST AID FOR ELECTRIC SHOCK
9.1. Never touch a victim of electric shock if he or she is still in contact with the source of electricity
because the current will flow from the victim through you. Turn off power at the main switch or
separate the electrical source from the victim using a non‐conducting item like a wooden
handle. If the accident involves power lines, call the power company.
9.2. Administer CPR and treat for shock only when it is safe to touch the victim.

32
EXCAVATIONANDTRENCHING 1. GENERAL
1.1. An excavation is defined as any man‐made cut, cavity, trench, or depression in an earth surface,
formed by earth removal. A trench is a narrow excavation (in relation to its length) made below
the surface of the ground. In general, the depth of a trench is greater than its width, and the
width (measured at the bottom) is not greater than 15 ft. When the term excavation is used, it
is meant to include trenches.
1.2. Excavation cave‐ins occur more often than most people would suspect and very often result in
death. Soil is very heavy; its weight varies by composition and moisture content, but it averages
about 100 pounds per cubic foot (i.e., a cubic yard = 2,700 pounds). When a person is covered
with soil they cannot breath and cannot move. A person can easily suffocate even if their head
is exposed because the weight of the soil prevents their chest muscles from moving.
1.3. There are many other hazards associated with excavation work. In addition to cave‐ins they
include:
Materials/equipment falling into hole
Underground utilities
Being struck by moving equipment
Asphyxiation
Explosions
Falls
Electrocutions
Drowning
2. COMPETENT PERSON
2.1. A competent person must be onsite at all times when personnel are working within or around
an excavation of 3 feet or greater. The competent person has many duties including:
Soil categorization;
Determination of the protective system to be used; and
Regular inspections and monitoring of excavation conditions.
2.2. A “competent person” is defined as one who is capable of identifying existing and predictable
hazards in the work environment and who has authorization to take prompt corrective
measures to eliminate them. He/she must be knowledgeable about soil types, required
protective systems and OSHA excavation and trenching requirements.

33
Inspections
2.3. The competent person must perform an inspection of the excavation prior to the start of work
each day and as needed throughout the day. An inspection must be made after every rainstorm
and other hazard‐increasing occurrence, such as heavy equipment coming close to the edge of
the excavation. Look for the condition of the excavation walls, water accumulation or seepage,
the adequacy of the protective system, and hazardous atmospheres.
3. SAFETY STARTS AT THE SURFACE
3.1. Personnel who operate excavating equipment and other heavy vehicles must be qualified to do
so.
3.2. Stay away from excavating equipment and other heavy vehicles. Many workers have been
killed on construction sites when struck by such vehicles. To avoid being struck by falling
material, never stand under loads handled by lifting or digging equipment.
3.3. Excavating equipment and other heavy vehicles must have back‐up alarms.
3.4. When excavations are exposed to vehicular traffic:
Each employee on the site must wear a vest made with reflective material or high
visibility material; and
Appropriate traffic control devices must be put in place. Adhere To procedures
specified in DOT Manual on Uniform Traffic Control Devices and/or local requirements.
3.5. The location of underground utility installations, such as sewer, telephone, fuel, electric, and
water lines must be determined prior to doing any digging.
3.6. Proceed with caution if the exact location of underground utilities cannot be identified. When
they are approached, dig by hand. Protect utilities from damage as may be required.
4. PROTECTIVE SYSTEMS
4.1. The use of a protective system is required for any excavation 5 feet deep or greater, except
when the excavation is in stable rock.
4.2. An excavation less than five (5') feet in depth may also require a protective system. A protective
system is not required only if the competent person determines there is no hazard to
personnel.

34
4.3. Protective systems must be designed/selected based on soil type:
Stable Rock: Vertical sides will remain intact while exposed.
Type A: Includes clay
Type B: Includes silt
Type C: Includes granular soils like gravel, sand
4.4. The soil type is determined by the competent person, using prescribed methods. Competent
persons must be familiar with the definitions of soil types and the manual and visual tests for
determining them found in OSHA 1926 Subpart P (1926.650 ‐ .652 and Appendices). All soils are
assumed to be Type C in the absence of any other specific determination by a competent
person.
4.5. Excavations must be protected from cave‐ins by one of the following:
Support (Shoring) Systems
Shoring systems are typically built or assembled on site to support the sides of an
excavation. They consist of sheeting, cross braces, wales, and uprights. Selection and
design involves using tabulated data and can be complex. They can be made from
timber or aluminum and can operate hydraulically or pneumatically.
Shield Systems
Shield Systems generally refer to prefabricated steel trench boxes that are placed inside
the excavation. The space between the side of excavation and outside of the box must
be backfilled. They can be combined with sloping such as in deep holes.
Sloping or Benching
Sloping means digging the excavation’s sides to a safe angle so a cave‐in cannot occur.
Benching systems excavate the sides to form a series of horizontal levels or steps. The
required angle is based upon the soil type:
Class A: ¾ (horizontal) to 1 (vertical); 53 degrees
Class B: 1 to 1; 45 degrees
Class C: 1 ½ to 1; 34 degrees
Stable Rock: Vertical; 90 degrees
4.6. A registered professional engineer must design protective systems for excavations deeper than
20 feet. An employee in a deep and confined footing excavation must wear a harness and a
retrieval line.

35
5. EGRESS FROM EXCAVATIONS
5.1. Excavations of 4 or more feet in depth require safe means of egress. This could be ladders,
ramps or stairways. Every worker must be within 25 feet of a means of egress. Ladders must
extend a minimum of 36 inches above the ground and ramps must be designed by a competent
person.
6. LOOSE ROCK AND SOIL
6.1. Excavated materials must be kept at least 2 feet from the edge of excavation sites. This serves
two purposes: it prevents loose rock/soil from falling onto employees and it minimizes the
weight on the edge of the excavation. Also, if excavated materials are kept on the edge, a 3 feet
trench which does not require a protective system can become a 5 or 6 feet one which does.
7. WATER ACCUMULATION
7.1. Water accumulation is a major cause of excavation collapses. Employees are prohibited from
entering an excavation with accumulated water unless adequate protection has been provided.
8. HAZARDOUS ATMOSPHERES
8.1. On occasion, operations in an excavation can introduce an explosive, flammable, toxic or
oxygen deficient atmosphere. Where there is concern that such conditions may exist, contact
the EH&S Department to determine the appropriate corrective action. No employee may enter
an excavation where a hazardous atmosphere may exist.

36
FALLPROTECTIONPROGRAM1. GENERAL
American Tower Corporation (ATC) has developed a fall protection program to help protect our
employees’ safety during tower construction, maintenance and equipment installation work.
This program focuses on:
Identification and control of fall hazards,
Establishment of safe climbing procedures,
Providing appropriate fall protection equipment, and
Providing information and training on fall hazards, proper procedures and correct use of
equipment.
2. BASIC REQUIREMENTS
2.1 Only employees who meet the following criteria are permitted to climb towers. Climbing
employees must:
Meet ATC’s performance and safety standards, and
Have successfully completed the ATC Fall Protection Training/Skill Qualification process
No other employees are authorized to climb towers for any purpose.
2.2 Each employee who is 6 feet or more above a lower level on a tower must be protected by a
personal fall arrest system (PFAS) or guardrail system. When climbing or working on a tower
above 6 feet, all employees must be properly tied off at all times; no free‐climbing is permitted –
there are no exceptions to this requirement.
2.3 Employees will not ascend or descend any towers or be elevated or lowered by way of a
mechanically driven cable (i.e., “ride the ball”, “riding the line”).
2.4 Walking/working surfaces on which employees work (including towers and tower members)
must have the strength and structural integrity to safely support them.
2.5 The act of rappelling to a lower elevation on towers or other structures is strictly prohibited.
Controlled descent is only permitted by employees competent to perform such techniques and
when all the requirements of the ATC Controlled Descent Procedure are adhered to.
Any employee who violates any aspect of the ATC Fall Protection Program is subject to discipline, up
to and including termination. Free‐climbing, rappelling or riding the line will result in immediate
termination.
3. PERSONAL FALL ARREST SYSTEMS

37
3.1 A personal fall arrest system will arrest an employee’s fall should one occur. It consists of a
body harness, lanyard, anchorage, and various connectors, and may include a deceleration
device, lifeline, or other suitable combinations. Personal fall arrest systems must meet the
following criteria:
Limit the maximum arresting force on an employee to 1,800 pounds when used with a body
harness;
Be rigged so that an employee can neither free fall more than 6 feet nor contact any lower
level;
Bring an employee to a complete stop and limit maximum deceleration distance an
employee travels to 3.5 feet; and
Have sufficient strength to withstand twice the potential impact energy of an employee
free‐falling a distance of 6 feet or the free fall distance permitted by the system, whichever
is less.
4. POSITIONING DEVICE SYSTEMS
4.1 A positioning device system allows an employee to be supported on an elevated vertical surface
(e.g., the side of a tower) and work with both hands free while leaning backwards. It generally
consists of a body harness, a short lanyard attached to both side D‐Rings, and an anchorage.
4.2 Positioning device systems must meet the following criteria:
They must be rigged so a worker can free fall no farther than 2 feet; and
They must be secured to an anchorage capable of supporting at least twice the potential
impact load of an employee’s fall or 3,000 pounds, whichever is greater.
4.3 Requirements for snaphooks, D‐Rings, and other connectors used with positioning device
systems must meet the same criteria as those for personal fall arrest systems.
4.4 When using a positioning device system, a personal fall arrest system must also be used.
4.5 Plan your fall protection system before starting your work. Take into consideration factors that
will affect your safety before, during and after a fall. The following are important points to
consider when planning your system.
Anchorage: Select an anchorage point that is rigid and capable of supporting required
loads. The anchorage point must be selected to reduce possible free fall and swing fall
hazards and to prevent the climber from striking an object during a fall.
Free Fall: Do not work above your anchorage point. Personal fall arrest systems must be
rigged such that the potential free fall distance is never greater than 6 feet. However, you
should always try to minimize your free fall distance to less than 6 feet. Avoid working
where your system may cross or tangle with that of another worker. Do not allow lanyards

38
or other connections to pass under arms or between legs. Never clamp, knot or otherwise
prevent the system from working properly.
Swing Falls: Swing falls occur when the anchorage point is not directly above the point
where a fall occurs. The force of striking an object while swinging can be great and cause
serious injury. Swing falls can be minimized by working directly below the anchorage.
Fall Clearance: Make certain enough clearance exists in your fall path to prevent striking an
object. The amount of clearance needed is dependent upon the type of connections used
and the anchorage location.
Sharp Edges: Avoid working where the fall arrest system will be in contact with or scrape
against unprotected sharp edges. If working near sharp edges is unavoidable, protection
against cutting must be provided by using a heavy pad or other means over the exposed
sharp edge.
Rescue: The user must have a rescue plan and the means at hand to implement it should a
fall occur.
After a Fall: Any lanyard that has been shock‐loaded must be removed from service and
destroyed. A harness or anchor strap that has been shock‐loaded must be fully inspected by
a competent person before being used again.
5. ANCHORAGE POINTS
5.1 Anchorage points must be selected and used very carefully. The maximum free fall distance is 6
feet, but you should always try to minimize it by keeping your anchorage point at chest level or
higher.
5.2 Anchorage points must meet the following criteria:
For fall arrest systems, anchorage points must be capable of supporting 5,000 pounds for
each person attached. If more than one system is connected to the same anchorage point,
that point must be capable of supporting a multiple of each person (i.e., 1 person = 5,000
pounds, 2 persons=10,000 pounds, etc.). If a professional engineer certifies both the system
and installation of an anchorage point, that point must be capable of supporting 3,600
pounds (or multiples thereof).
For positioning, anchorage points must be capable of supporting at least twice the potential
impact load of an employee’s fall or 3,000 pounds, whichever is greater.
5.3 A cable safety climb may not be used as an anchorage point for fall arrest or positioning
lanyards.
6. BASIC CLIMBING TECHNIQUES

39
6.1 Before climbing, assess the situation, look for hazards and try to find the least obstructed route
to the area you will be working or rigging from. Some hazards to look for are power lines, flying
insects, missing members, excessive corrosion and adverse weather conditions. Once the route
and hazards have been accounted for and/or corrected, the climber should inspect his gear and
suit up. Use the buddy system to verify that the harness, lanyards, rope grab and bolt bags are
worn correctly. Also, verify that lanyards, clothing and boot laces are properly secured to
prevent snagging.
6.2 Every employee will maintain a three‐point stance at all times when climbing. This is done by
constantly having any three from a combination of two hands and two feet always in firm
contact with the tower being climbed.
6.3 When climbing there are a few techniques you can use to help prevent rapid fatigue and ensure
safety. Make sure you have a good grasp and use your upper body to maintain balance but
avoid over‐squeezing with your hands. Try to use your legs as much as possible. When climbing
on diagonals, position your body weight to the outside of the slope or outside of your foot.
Avoid placing your body weight directly over your foot to prevent slippage.
6.4 As you are climbing, continually look for loose or missing members, missing bolts, or any other
hazards you may have missed from the ground.
6.5 When climbing monopoles, you will find that due to the greater vertical climb, your upper body
gets fatigued faster than when climbing freestanding towers. So, while climbing monopoles, it is
especially important to observe the basics, meaning you should not over grip and should use
your legs as much as possible. Avoid fatigue by using your upper back for the first half of the
pull and your arms for the second half.
7. FALL PROTECTION EQUIPMENT
7.1 Only fall protection equipment supplied by ATC may be used by employees. Employees may not
use their own gear or gear from a previous employer. ATC maintains a Fall Protection Gear
Standard Equipment List.
7.2 All equipment must meet or exceed all requirements of ANSI Z359.1 and OSHA 1926 (Subpart
M). All items of fall protection equipment must be properly labeled, stating compliance with
these standards, date of manufacture, and date of purchase.
7.3 All employees must have separate fall arrest systems. At no time will two employees be
connected to any fall protection devices or equipment at the same time (except for certain
anchorage points and cable safety climbs as explained further in this program).
7.4 Ropes and straps (webbing) used as lanyards, lifelines, and strength components of body
harnesses shall be made of synthetic fibers. Knots are not allowed to be tied in strength‐bearing
portions of ropes and straps, as they can reduce the strength by as much as 50%.
7.5 Any lanyard that has been shock‐loaded must be removed from service and destroyed. A
harness or anchor strap that has been shock‐loaded must be fully inspected by a competent
person before being used again. An Environmental Health and Safety (EH&S) Department
representative must be notified immediately of any incident that involves a fall.

40
8. EQUIPMENT INSPECTIONS
8.1 Fall protection equipment must be inspected prior to each use for wear, damage and other
deterioration. Look for:
Abrasions
Cuts
Untwisted 3‐strand rope
Burns
Chemical damage
UV Damage
Shock load
Deformed hooks
Faulty snap hooks
8.2 Employees shall use the buddy system to check the condition and connections of each other’s
harness, lanyards, safety climbs, rope grabs, and other fall protection equipment before
climbing.
8.3 Each month, a formal, documented fall protection equipment inspection must be conducted.
Defective fall protection equipment must be immediately removed from service and replaced.
9. EQUIPMENT CARE AND MAINTENANCE
9.1 You must treat your fall protection equipment as if your life depends on it – it does! Do not just
throw your equipment around.
9.2 Keep your fall protection equipment clean. The excessive build‐up of dirt, contaminants and/or
chemicals can damage soft goods, springs and other operating mechanisms.
9.3 To clean nylon or polyester gear, remove surface dirt with a sponge dampened in plain water.
Dip the sponge in a mild solution of water and commercial soap or detergent. Work up a thick
lather with a vigorous back and forth motion and wipe with a clean cloth. Hang freely to dry,
but away from excessive heat.
9.4 Proper storage and maintenance after use are as important as cleansing the equipment of dirt,
corrosives, or contaminants. Storage areas should be clean, dry, out of direct sunlight and free
of exposure to fumes or corrosive elements.
9.5 Carabiners, snaphooks and other metallic fall protection equipment dropped from elevations
must be removed from service and discarded.

41
10. FULL BODY HARNESS
10.1 A full body harness must be used by each ATC employee when climbing. Use of a body belt is
not permitted.
10.2 All full body harnesses must be capable of supporting 5,000 pounds and will have 2 side D‐Rings
for work positioning, a front center D‐Ring for ladder climbing, and a dorsal (back) center D‐Ring
for a fall arrest lanyard. Only specified Miller E65089FD, Elk River Eagle Tower LE Saddle, or
DBI/Sala Exofit harnesses may be used. Refer to the ATC Fall Protection Gear Standard
Equipment List.
10.3 Magic marker, paint, and other marking devices can deteriorate the webbing and may not be
used on harnesses. Harnesses that have excess amounts of paint or other chemicals on the
fabric must be replaced. The defective equipment must be returned to local management for
destruction and replacement.
10.4 All straps and buckles are required to be properly connected, fitted, and used when wearing the
harness. Be sure the dorsal D‐Ring is located between the shoulder blades. Chest, waist, leg
and sub‐pelvic straps must be adjusted to fit snuggly.
11. SHOCK ABSORBING LANYARD
11.1 Shock absorbing lanyards are provided to each employee and must be used as an integral part
of the fall protection system. The primary function of the shock‐absorber is to dissipate energy
and limit deceleration forces which are imposed on the body during fall arrest.
11.2 Different styles and lengths of lanyards are available for various applications as specified in the
ATC Fall Protection Gear Standard Equipment List. At no time should any person be subjected to
a free fall in excess of 6 feet or a shock load in excess of 1800 pounds.
11.3 Shock absorbing lanyards must be connected at the back center D‐Ring with the fabric pack
facing towards the body. Knots are not allowed to be tied in lanyards as doing so can reduce the
strength of the lanyard by as much as 50%. Lanyards must have a minimum breaking strength
of 5,000 pounds.
11.4 All lanyards must be equipped with self‐closing, self‐locking snap hooks for attachment to the
harness and with various self‐closing, self‐locking devices at opposite ends for attachment to
anchorages or connectors. When placing a hook (such as a “pelican” hook) directly over an
anchorage point, make certain you do not “cross‐load” your hook. That is, make sure any force
applied in the event of a fall will be borne by the inside top of the hook (the strong portion), not
the keeper or the side of the hook (the weak portion).
11.5 Never tie a lanyard back to itself unless it is a “tie‐back” type.
12. CALCULATING FALL CLEARANCE
12.1 Shock‐absorbing lanyards extend deceleration distance during a fall, significantly reducing fall
arrest forces by 65 to 80 percent below the threshold of injury, which ensures greater safety.

42
However, when using a shock‐absorbing lanyard, it is important to understand how to calculate
potential fall distance to avoid contact with a lower level.
12.2 When using a 6‐foot shock‐absorbing lanyard and a full‐body harness, the minimum fall
clearance distance from the anchorage point to the lower level is calculated as follows:
1. First consider the length of the shock‐absorbing lanyard [6 ft.]
2. Then add the maximum elongation of the shock absorber during deceleration [3‐1/2 ft.]
3. Now add the average height of a worker [6 ft.].
4. Then add a safety factor of 3 feet to allow for the possibility of an improperly fitted harness,
a taller than average worker and/or a miscalculation of distance.
12.3 The total, 18‐1/2 ft., is the suggested safe fall clearance distance. This is the height above a
lower level at which you must attach to an anchorage to avoid contact with a lower level.
13. POSITIONING LANYARDS
13.1 Positioning lanyards must limit free fall distance to 2 feet or less. They must be capable of
sustaining a minimum tensile load of 3,000 pounds applied in the fully extended position.
13.2 All lanyards, including positioning lanyards, must be equipped with self‐closing, self‐locking snap
hooks for attachment to the harness and with various self‐closing, self‐locking devices at
opposite ends for attachment to anchorages or connectors.
13.3 When tying off a positioning lanyard, look at the D‐Rings and lanyard snaphook connections to
make sure they are secure before leaning into the belt. Test the lanyard under load before
letting go of the tower steel. Positioning lanyard snaphooks must face outward from the body
for a safe connection. Always connect your personal fall arrest system before connecting your
positioning lanyard.
14. ANCHORAGE STRAPS
14.1 Anchorage straps with compatible D‐Rings are for direct connection of shock absorbing
lanyards, lifelines, or other fall protection equipment. Anchorage straps must be capable of
supporting 5,000 pounds.
14.2 To minimize the potential for slipping, an anchorage strap must always be used in the choker
configuration and never in the basket configuration. An anchorage strap must not be attached
in such a manner as to pass over sharp edges.
43
15. SNAPHOOKS AND D‐RINGS
15.1 Snaphooks and D‐Rings must have minimum tensile strength of 5,000 pounds and must be
proof‐tested to a minimum tensile load of 3,600 pounds without cracking, breaking, or suffering
permanent deformation.
15.2 Snap hooks must be self‐closing and self locking.
15.3 Unless a snaphook is specifically designed to do so, it shall not be engaged directly to:
webbing, rope or wire rope;
another snaphook;
a D‐Ring to which another snaphook or other connector is attached;
a horizontal lifeline;
a carabiner; or
any object incompatible in shape or dimension relative to the snaphook
15.4 Engaging a snaphook directly to any of the above listed items can potentially cause the
connected object to depress the snaphook keeper and release unintentionally (roll out). Roll
out may occur when a hook is snapped into an undersized ring, such as an eye bolt or other non‐
compatible shaped connector.
Note: A hook is compatible when the diameter of the D‐Ring to which the snaphook is attached is greater than the
inside length of the snaphook when measured from the bottom (hinged end) of the snaphook keeper to the inside
curve of the top of the snaphook. Thus, no matter how the D‐Ring is positioned or moved (rolls) with the snaphook
attached, the D‐Ring cannot touch the outside of the keeper, thus depressing it open.
16. CARABINERS
16.1 Only self‐closing, self‐locking steel carabiners may be used. Twist‐lock or aluminum carabiners
are not permitted. Two carabiners may not be attached together.
16.2 Do not connect snap hooks to carabiners. Carabiners, snaphooks and other metallic fall
protection equipment dropped from elevations must be removed from service and discarded.
17. SELF‐RETRACTING LIFELINES (SRLs)
17.1 Self–retracting lifelines are provided as part of crew fall protection. SRLs allow an individual to
move up and down from a central point. SRLs will be capable of supporting 5,000 pounds and
have a built in internal deceleration device that limits shock exposures to 900 pounds or less
(1/2 of the OSHA requirement for full body harnesses).
17.2 A SRL should be positioned directly above the worker in an upright manner. To support the unit,
an anchor tie‐off adapter and/or steel auto‐locking carabiner can be used to connect directly to
the anchorage above. SRLs must not be used in horizontal positions, as they may not properly
lock in the event of a fall. An SRL must always be positioned to avoid a swing fall.

44
17.3 Careful evaluation of the job site is required to insure an employee using a cable type SRL is not
exposed to an electrical energy hazard.
17.4 Retraction of the lifeline back into the housing must be controlled to ensure proper winding
onto the drum. Releasing the line from a long distance can render the unit inoperable for future
use.
17.5 When in use, the lifeline must be protected against any sharp edges.
17.6 A nylon web SRL must be serviced at least once a year.
17.7 If an SRL is shock loaded, it must be removed from service and be returned to the manufacturer
for inspection.
18. LIFELINES AND ROPE GRABS
18.1 Rope grabs are provided to each employee and are to be used with complimentary, approved
lifelines. Their use is dictated when a shock‐absorbing lanyard cannot be attached to a point
directly above. A vertical lifeline system is designed to allow a worker to move in a vertical and
slightly horizontal work area, letting the user work in intervals without detaching from the
lifeline. Lifelines and rope grabs are also used to provide personal fall arrest in controlled
descent operations.
18.2 Lifelines may not be used for any purpose other than fall arrest or controlled descent
operations. When taking a lifeline out of service, it must be destroyed so that no length is
greater than 10 feet.
18.3 Rope grabs must be the correct type and size to match the type and size of lifeline being used.
18.4 Rope grabs must always be positioned properly (upright) on the rope to ensure proper
operation in the event of a fall.
18.5 Check your rope grab before each use to ensure proper operation.
18.6 Lifelines must be capable of supporting 5,000 pounds and will have no knots tied anywhere on
the line. A small counterweight may be fabricated and tied to the line (with an attaching cord) to
keep it taut.
18.7 Anchorage straps or other certified anchorage devices are the only means permitted to anchor a
lifeline. Lifelines may not be hooked back to themselves.
18.8 Lifelines shall be protected against being cut or scraped.
19. CABLE GRABS AND SAFETY CLIMBS
19.1 Cable grabs are issued for use on tower safety climb lifelines. The connection between the
safety climb and the point of attachment to the harness (the front center D‐Ring) must not
exceed 9 inches in length. At no time may a shock‐absorbing lanyard be used on a cable grab for
fall arrest.
19.2 Cable grabs must activate within 2 feet after a fall occurs. Make sure you check your cable grab
for proper operation before using it to climb.
19.3 No more than 2 people may be attached to a cable safety climb at the same time.

45
20. AERIAL LIFTS
20.1 When work is conducted from a vehicle mounted aerial lift, a body harness and fall arrest
lanyard must be worn and anchored to the point on the lift designated by the manufacturer.
Note: An aerial device, or aerial lift, is any vehicle‐mounted device, telescoping or articulating, or both, which is used
to position personnel.
20.2 Attempt to perform work from within the basket at all times. If it becomes necessary to exit the
basket at elevated heights, 100% fall protection methods must be used at all times.
20.3 Employees must otherwise always stand firmly on the floor of the basket, and shall not sit or
climb on the edge of the basket or use planks, ladders, or other devices for a work position.
21. TRAINING
21.1 Training is an integral part of a fall protection program. To maintain a safe and productive work
environment, it is essential that employees working at heights:
Recognize fall hazards,
Evaluate the risk posed by each hazard, and
Control the hazard through preventative or protective measures.
21.2 All climbers must be trained in the proper use of fall protection equipment. Climbers must be
able to identify potential fall hazards, determine what equipment to use in specific work
environments, and demonstrate proper anchoring procedures. Employees must also learn
inspection and maintenance procedures and the proper wearing of fall protection equipment.
21.3 Each employee must read and fully understand the instructions in the User Manual that is
shipped with any piece of fall protection equipment.
21.4 ATC has a Fall Protection Training/Skill Qualification Process to train and/or qualify new hires.
ATC personnel receive further fall protection training in required OSHA 10 Hour training and
Tower Rescue training.
22. TOWER RESCUE
22.1 ATC crews will be equipped with rescue kits designed to rescue an injured or ill employee from a
tower or other structure.
22.2 All climbing employees will be trained on the use of the rescue kit.
22.3 A tower rescue kit must be readily accessible and two rescue‐trained employees must be
present at any job site that involves climbing towers.

46
23. FIXED AND PORTABLE LADDERS
23.1 Fixed and portable ladders are covered in separate sections of the ATC Safety and Health
Program Manual.
24. GUARDRAIL SYSTEMS
24.1 A personal fall arrest system is not required when a properly designed guardrail system is
present (except for aerial lifts as previously discussed, and any guardrail system on a tower).
Requirements for guardrail systems include the following:
The top edge height must be 39 – 45 inches above and completely surround the
walking/working level.
The guardrail system must be capable of withstanding a force of at least 200 pounds
applied within 2 inches of the top edge in any outward or downward direction. When
the 200‐pound test is applied in a downward direction, the top edge of the guardrail
must not deflect to a height less than 39 inches (1 meter) above the walking/working
level.
Screens, midrails, mesh, intermediate vertical members, or equivalent intermediate
structure members must be installed between the top edge of the guardrail system and
the walking/working surface when there are no walls or parapet walls at least 21 inches
high.
Midrails, screens, mesh, intermediate vertical members, solid panels, and equivalent
structural members shall be capable of withstanding a force of at least 150 pounds
applied in any downward or outward direction at any point along the midrail or other
member.
When guardrail systems are used at hoisting areas, a chain, gate, or removable guardrail
section must be placed across the access opening between guardrail sections when
hoisting operations are not taking place.
Guardrail systems must be set up on the unprotected sides or edges of any holes. When
holes are used for the passage of materials, the hole shall have not more than two sides
with removable guardrail sections. When the hole is not in use, it must be covered or
provided with guardrails along all unprotected sides and edges. If guardrail systems are
used around holes that are used as access points (such as ladder ways), gates must be
used or the point of access must be offset to prevent accidental walking into the hole.

47
GLOSSARY OF FALL PROTECTION TERMS
Anchorage: A secure point of attachment for lifelines, lanyards or deceleration devices.
Body Harness: Straps that may be secured about the person in a manner that distributes the fall‐arrest
forces over at least the thighs, pelvis, waist, chest, and shoulders with a means for attaching the harness
to other components of a personal fall arrest system.
Connector: A device that is used to couple (connect) parts of a personal fall arrest system or positioning
device system together.
Deceleration Device: Any mechanism(e.g., a rope grab, rip stitch lanyard, specially woven lanyard,
tearing or deforming lanyards, automatic self‐retracting lifelines/lanyards) that serves to dissipate a
substantial amount of energy during a fall arrest or otherwise limits the energy imposed on an employee
during fall arrest.
Deceleration Distance: The additional vertical distance a falling person travels before stopping,
excluding lifeline elongation and free fall distance, from the point at which a deceleration device begins
to operate.
Guardrail System: A barrier erected to prevent employees from falling to lower levels.
Lanyard: A flexible line of rope, wire rope, or strap that generally has a connector at each end for
connecting the body harness to a deceleration device, lifeline, or anchorage.
Low‐Slope Roof: A roof having a slope less than or equal to 4 in 12 (vertical to horizontal).
Openings: A gap or void 30 inches or more high and 18 inches or more wide, in a wall or partition,
through which employees can fall to a lower level.
Personal Fall Arrest System: A system that includes but is not limited to an anchorage, connectors, and
a body harness used to arrest an employee in a fall from a working level.
Positioning Device System: A full body harness system rigged to allow an employee to be supported on
an elevated vertical surface, such as a wall, and work with both hands free while leaning backwards.
Rope Grab: A deceleration device that travels on a lifeline and automatically engages the lifeline and
locks to arrest a fall.
Safety‐Monitoring System: A safety system in which a competent person is responsible for recognizing
and warning employees of fall hazards.
Self‐Retracting Lifeline/Lanyard: A deceleration device containing a drum‐wound line, which can be
slowly extracted from, or retracted onto, the drum under minimal tension during normal employee
movement and which, after onset of a fall, automatically locks the drum and stops the fall.

48
Snaphook: A connector consisting of a hook‐shaped member with a normally closed keeper, or similar
arrangement, which may be opened to permit the hook to receive an object and, when released
automatically, closes to retain the object.
Toe board: A low protective barrier that prevents material and equipment from falling to lower levels
and which protects personnel from falling.
Unprotected Sides and Edges: Any side or edge (except at entrances to points of access) of a
walking/working surface (e.g., floor, roof, ramp, or runway) where there is no wall or guardrail system at
least 39 inches high.
Walking/Working Surface: Any surface, whether horizontal or vertical, on which an employee walks or
works, including but not limited to floors, roofs, ramps, bridges, runways, formwork, and concrete
reinforcing steel. Does not include ladders, vehicles, or trailers on which employees must be located to
perform their work duties.
Warning Line System A barrier erected on a roof to warn employees that they are approaching an
unprotected roof side or edge and which designates an area in which roofing work may take place
without the use of guardrail, body belt, or safety net systems to protect employees in the area.

49
FIREPROTECTION 1. HOUSEKEEPING
1.1. Warehouses and offices must be kept orderly and free of excessive accumulations of
combustible materials.
1.2. Oily rags should be stored in metal containers with self‐closing lids. They should be discarded
outside the building.
1.3. Building and tower sites should be kept clear of excessive quantities of combustible weeds and
grass.
2. FLAMMABLE AND COMBUSTIBLE LIQUIDS
2.1. Flammable liquids, including gasoline, may only be handled in UL/FM approved, metal safety
cans. Among other features, these cans have self‐closing lids to control vapors and spills.
Combustible liquids must be handled in closed metal containers.
2.2. Gasoline and other flammable liquids may never be used for cleaning tools, equipment or your
hands. Use solvents and/or hand cleaners designed for this purpose.
2.3. Flammable and combustible liquids may never be stored in areas used for exits or stairways or
areas normally used for the safe passage of people.
2.4. Before refilling a fuel‐powered tool tank, shut down the engine and allow it to cool down. The
auto ignition temperature of gasoline is 495° F, which can be exceeded on the surface of a hot
engine or tool.
2.5. Never smoke or use open flames when near flammable or combustible liquids.
3. FIRE EXTINGUISHERS
3.1. Fires strike suddenly and without warning. Even a small fire can get out of hand quickly, so your
first jobs are to make sure: (1) you have a clear escape route, (2) other people are clear of the
fire and/or notified to evacuate, and (3) the fire department has been notified.
3.2. Portable fire extinguishers are the first line of defense when a fire starts. A well‐trained person,
operating the proper type and a properly functioning fire extinguisher, can quickly put out a
small fire. However, there is no expectation that ATC employees will fight fires. Fire
extinguishers are provided for employee protection and voluntary use.

50
Types of Fire Extinguishers
3.3. The three most common classes of fires are A, B, and C:
Class A fires involve ordinary combustible materials like wood, cloth, paper, rubber and
many plastics.
Class B fires involve flammable and combustible liquids, petroleum greases, tars, oils,
oil‐based paints, solvents, lacquers, alcohols and flammable gases.
Class C fires involve anything that is electrically energized like fuse boxes, wiring,
machinery, electric motors and appliances. They are essentially Class A or B fires that
require a non‐conductive extinguishing agent.
3.4. Some fire extinguishers can only be used on one type of fire, such as a pressurized water fire
extinguisher. These are listed for use on class A fires, and should not be used on class B or C
fires. Carbon dioxide fire extinguishers can be used on class B and C fires. Halon 1211 and 1301
fire extinguishers are effective on class A, B and C fires, especially in cabinets and enclosed
areas, and leave no residue. At American Tower we almost exclusively use multi‐purpose dry
chemical extinguishers which can be used on class A, B and C fires.
ATC Fire Extinguisher Requirements
3.5. A sufficient supply of ABC extinguishers must be conspicuously located and readily accessible
for immediate use throughout office and warehouse spaces. Extinguishers must be installed on
hangers, brackets, in cabinets, or on shelves. Wall recesses and/or flush‐mounted cabinets
should be used whenever possible. In locations where visual obstruction cannot be completely
avoided, directional arrows must be provided to indicate the location of extinguishers.
3.6. One 5‐pound ABC extinguisher must be on every crew truck.
3.7. Two 20‐pound ABC extinguishers must be on every boom truck.
3.8. Placement of fire extinguishers in communications buildings will generally be the responsibility
of the customer except where local or state fire codes specify otherwise (e.g. California).
3.9. All extinguishers must be maintained in a fully charged and operable condition. The following
inspection, maintenance and testing requirements apply to all ATC fire extinguishers:
A monthly visual inspection to assure the fire extinguisher is properly mounted,
accessible, shows no signs of damage or abuse and appears to be operational.

51
An annual, documented maintenance check. This involves disassembly and inspection of
each part and replacement where necessary. Each ATC office must maintain a contract
with a local fire extinguisher company to perform annual maintenance. Periodic
hydrostatic tests must be performed at intervals specified in NFPA codes based on the
type of extinguisher.
When extinguishers are removed for maintenance or testing, fully charged and operable
replacement units must be provided.
Using a Fire Extinguisher
3.10. Before deciding whether to use a fire extinguisher or not, it’s crucial to consider a number of
factors including:
The type and size of fire extinguisher (Note: a 5 pound dry chemical extinguisher will
discharge its contents in about 10‐15 seconds)
The size of the fire
The types of materials burning
If there are hazardous materials nearby
The amount of smoke
Available ventilation so you can breathe
Your escape route if the fire escalated rapidly
3.11. To operate a fire extinguisher, remember PASS: Pull, Aim, Squeeze, Sweep.
Pull Pull the locking pin.
Aim Aim the stream of agent at the base of the fire at its front edge.
Squeeze Squeeze the trigger to release the agent
Sweep Apply the agent in a sweeping motion from side to side.
3.12. If used on a class A fire, stay about 6 feet away and coat all the materials that are burning. The
dry chemical agent does not penetrate below the surface, and has little cooling effect, so
burning material should be broken apart and continued to be covered.
3.13. If a flammable liquid is burning, you need to stay about 15 feet away. The force from the
stream of dry chemical can cause a burning liquid to splash and the fire to spread.
3.14. For a fire in electrical equipment, the discharge should be directed at the source of the flames.
If possible, shut down the power to the equipment to eliminate this as a source of ignition.

52
3.15. Make sure that when using a fire extinguisher outdoors you stay upwind to minimize your
exposure to smoke and facilitate delivery of the agent, especially the lighter dry chemical type.

53
FIRSTAID/CPR
1. FIRST AID/CPR
1.1. When two or more ATC field employees are performing work at a tower site, at least two of the
people present must be First Aid/CPR trained. “Work” is defined as climbing, installation,
lighting repair or other maintenance to the tower or compound and does not include an
inspection visit. Certification of training must be up‐to‐date.
1.2. ATC field employees shall complete initial First Aid/CPR classes through the American Red
Cross, the American Heart Association, the National Safety Council, or other nationally
recognized training organization. This training must include “hands‐on” skills practice.
1.3. Refresher First Aid/CPR classes shall be completed every two years. Every second refresher
class may be completed by enrolling in and completing an on‐line course. Refresher classes
must include hands‐on skill practice in intervals not exceeding four years.
1.4. Each ATC vehicle must contain an appropriately stocked first aid kit.
1.5. If emergency medical facilities are not in close proximity to an office, at least two individuals
who spend most of their time in the office must have up‐to‐date First Aid/CPR training.
1.6. Each office and company vehicle must have an appropriately stocked first aid kit.
1.7. The following information must be obtained and recorded on the ATC Pre‐Construction Safety
Survey for every jobsite:
Local emergency services (medical, fire, police), their phone number(s), and the route
from the jobsite to closest medical facility;
The address of the worksite, including the nearest cross street or other landmark, so
ATC personnel will be able to quickly direct emergency services to the site.
Refer to the ATC policy and procedure on Bloodborne Pathogens in this program for further guidance.

54
FIXEDLADDERS
1. FIXED LADDERS
1.1. A fixed ladder is a vertical ladder mounted permanently to a structure. These ladders are
primarily used to access roofs or other structures for industrial purposes.
1.2. ATC personnel that are required to climb fixed ladders to access a work zone shall comply with
the applicable safety requirements in this section.
2. FIXED LADDERS ‐ SPECIFIC FEATURES
2.1. Rungs and Cleats
2.1.1. Rungs shall have a minimum diameter of three‐fourths inch for metal ladders and a
minimum of one and one‐eighth inches for wood ladders
2.1.2. The distance between rungs, cleats and steps shall not exceed 12 inches and shall be
uniform throughout the length of the ladder
2.1.3. The minimum clear length of rungs or cleats shall be 16 inches
2.1.4. Rungs, cleats and steps shall be free of splinters, sharp edges, burrs, or projections which
may be a hazard
2.1.5. The rungs of an individual –rung ladder shall be so designed that the foot cannot slide off
the end
2.2. Side Rails
2.2.1. Side rails which might be used as a climbing aid shall be of such cross sections as to afford
adequate gripping surface without sharp edges, splinters, or burrs
2.3. Fastenings
2.3.1. Fastenings shall be an integral part of fixed ladder design
2.4. Splices
2.4.1. All splices and connections shall have smooth transition with original members and with
no sharp or extensive projections
3. CLEARANCE
3.1. Climbing Side
3.1.1. On fixed ladders, the perpendicular distance from the centerline of the rungs to the
nearest permanent object on the climbing side of the ladder shall be 36 inches for a pitch
of 76 degrees, and 30 inches for a pitch of 90 degrees, with minimum clearances for
intermediate pitches varying between these two limits in proportion to the slope
3.2. Ladders Without Cages or Wells
3.2.1. A clear width of at least 15 inches shall be provided each way from the centerline of the
ladder in the climbing space, except when cages or wells are necessary
3.3. Ladders With Cages or Baskets
3.3.1. Ladders equipped with cage or basket are excepted from the provisions of 3.1.1 and 3.2.1

55
3.4. Clearance In Back of Ladder
3.4.1. The distance from the centerline of rungs, cleats, or steps to the nearest permanent object
in back of the ladder shall not be less than 7 inches, except that when unavoidable
obstructions are encountered, minimum clearances as shown in §1910.27 Figure D‐3 shall
be provided
3.5. Clearance In Back of Grab Bar
3.5.1. The distance from the centerline of the grab bar to the nearest permanent object in back
of the grab bars shall be not less than 4 inches. Grab bars shall not protrude on the
climbing side beyond the rungs of the ladder which they serve.
3.6. Step‐Across Distance
3.6.1. The step‐across distance from the nearest edge of the ladder to the nearest edge of
equipment or structure shall be not more than 12 inches, or less than 2 ½ inches
3.7. Hatch Cover
3.7.1. Counterweighted hatch covers shall open a minimum of 60 degrees from the horizontal.
The distance from the centerline of rungs or cleats to the edge of the hatch opening on the
climbing side shall be not less than 24 inches for offset wells or 30 inches for straight wells.
There shall not be protruding potential hazards within 24 inches of the centerline of rungs
or cleats; any such hazards within 30 inches of the centerline of the rungs or cleats shall be
fitted with deflector plates placed at an angle of 60 degrees from the horizontal.
4. SPECIAL REQUIREMENTS
4.1. Cages or Wells
4.1.1. Cages or wells (except on chimney ladders) shall be built, as shown on the applicable
drawings, covered in detail in §1910.27 Figures D‐7, D‐8, and D‐9, or of equivalent
construction
4.1.2. Cages or wells (except as provided in 4.5.1.) conforming to the dimensions shown in
Figures D‐7, D‐8, and D‐9 shall be provided on ladders of more than 20 feet to a maximum
unbroken length of 30 feet.
4.1.3. Cages shall extend a minimum of 42 inches above the top of landing, unless other
acceptable protection is provided
4.1.4. Cages shall extend down the ladder to a point not less than 7 feet nor more than 8 feet
above the base of the ladder, with bottom flared not less than 4 inches, or portion of cage
opposite ladder shall be carried to the base
4.1.5. Cages shall not extend less than 27 nor more than 28 inches from the centerline of the
rungs of the ladder. Cage shall not be less than 27 inches in width. The inside shall be
clear of projections. Vertical bars shall be located at a maximum spacing of 40 degrees
around the circumference of the cage; this will give a maximum spacing of approximately 9
½ inches, center to center.
4.1.6. Ladder wells shall have a clear width of at least 15 inches measured each way from the
centerline of the ladder. Smooth‐walled wells shall be a minimum of 27 inches from the
centerline of rungs to the well wall on the climbing side of the ladder. Where other

56
obstructions on the climbing side of the ladder exist, there shall be a minimum of 30
inches from the centerline of the rungs.
4.2. Landing Platforms
4.2.1. When ladders are used to ascend to heights exceeding 20 feet (except on chimneys),
landing platforms shall be provided for each 30 feet of height or fraction thereof, except
that, where no cage, well, or ladder safety device is provided, landing platforms shall be
provided for each 20 feet of height or fraction thereof. Each ladder section shall be offset
from adjacent sections. Where installation conditions (even for a short, unbroken length)
require that adjacent sections be offset, landing platforms shall be provided at each offset.
4.2.2. Where a man has to step s distance greater than 12 inches from the centerline of the rung
of a ladder to the nearest edge of structure or equipment, a landing platform shall be
provided. The minimum step‐across distance shall be 2 ½ inches
4.2.3. All landing platforms shall be equipped with standard railings and toeboards, so arranged
as to give safe access to the ladder. Platforms shall not be less than 24 inches in width and
30 inches in length.
4.2.4. One rung of any section of ladder shall be located at the level of the landing laterally
served by the ladder. Where access to the landing is through the ladder, the same rung
spacing as used on the ladder shall be used from the landing platform to the first rung
below the landing,
4.3. Ladder Extensions
4.3.1. The side rails of through or side‐step ladder extensions shall extend 3 ½ feet above
parapets and landings. For through ladder extensions, the rungs shall be omitted from the
extension and shall have not less than 18 nor more than 24 inches clearance between rails.
For side‐step or offset fixed ladder sections, at landings, the side rails and rungs shall be
carried to the next regular rung beyond or above the 3 ½ feet minimum.
4.4. Grab Bars
4.4.1. Grab bars shall be spaced by a continuation of the rung spacing when they are located in
the horizontal position. Vertical grab bars shall have the same spacing as the ladder side
rails. Grab‐bar diameters shall be the equivalent of the round‐rung diameters.
4.5. Ladder Safety Devices
4.5.1. Ladder safety devices may be used on tower, water tank, and chimney ladders over 20 feet
in unbroken length in lieu of cage protection. No landing platform is required in these
cases. All ladder safety devices such as those that incorporate lifebelts, friction brakes,
and sliding attachments shall meet the design requirements of the ladders which they
serve.

57
5. PITCH
5.1. Preferred Pitch
5.1.1. The preferred pitch of fixed ladders shall be considered to come in the range of 75 degrees
and 90 degrees with the horizontal
5.2. Substandard Pitch
5.2.1. Fixed ladders shall be considered as substandard if they are installed within the
substandard pitch range of 60 and 75 degrees with the horizontal. Substandard fixed
ladders are permitted only where it is found necessary to meet conditions of installation.
This substandard pitch range shall be considered as a critical range to be avoided, if
possible.
5.3. Scope of Coverage in This Section
5.3.1. This section covers only fixed ladders within the pitch range of 60 and 90 degrees with the
horizontal
5.4. Pitch Greater Than 90 Degrees
5.4.1. Ladders having a pitch in excess of 90 degrees with the horizontal are prohibited.
6. USE
6.1. Pre‐Climb Inspection
6.1.1. Fixed ladders shall be inspected prior to ascending or descending
6.1.1.1. Rungs, rails, welds and bolts shall be observed for missing/damaged
components
6.1.1.2. Ladder rungs, cleats, and steps shall be parallel, level and uniformly spaced
6.1.1.3. The rungs and steps of fixed metal ladders manufactured after March 15, 1991
shall be corrugated, knurled, dimpled, coated with skid resistant material, or
otherwise treated to minimize slipping
6.1.1.4. The ladder should not rock, sway, or otherwise move from its attachment points
6.1.1.5. The ladder shall be free of oil, grease, and other slipping hazards
6.1.1.6. The area around the top and bottom of the ladder should be clear of
obstructions
6.1.2. Ladders that fail the pre‐climb inspection will not be used
6.1.3. Supervisors shall be notified immediately of ladders failing the pre‐climb inspection
6.2. Fall Protection
6.2.1. Fall protection is required when ascending or descending fixed ladders greater than 20
feet in length
6.2.2. Where the total length of a climb exceeds 20 feet, fixed ladders shall be equipped with one
of the following:
Ladder safety devices
Self‐retracting lifelines, and rest platforms at intervals not to exceed 150 feet
A cage or well
6.2.3. Cages and wells for fixed ladders shall conform to all of the requirements in Section 4,
Special Requirements, of this policy

58
6.2.4. Ladder safety devices, and related support systems, for fixed ladders shall conform to all of
the following:
6.2.4.1. They shall be capable of withstanding without failure a drop test consisting of an
18‐inch drop of a 500‐pound weight
6.2.4.2. They shall permit the employee using the device to ascend or descend without
continually having to hold, push or pull any part of the device, leaving both
hands free for climbing
6.2.4.3. They shall be activated within 2 feet after a fall occurs, and limit the descending
velocity of an employee to 7 feet per second or less
6.2.4.4. The connection between the carrier or lifeline and the point of attachment to
the body belt or harness shall not exceed 9 inches in length
6.2.5. Where the total length of a climb exceeds 20 feet and there are no cages, wells, self‐
retracting lifelines, or other safety devices installed, the employee will not attempt to
climb the ladder
6.2.6. The employee shall immediately notify his/her supervisor
6.2.7. Supervisors will correct the deficiencies by having at least one safety device listed in 6.2.2.
of this section installed on the fixed ladder system, or
6.2.8. The supervisor will work with the building/ladder owner to install one of the safety devices
listed in 6.2.2. of this section
6.2.9. Personal fall arrest systems (PFAS) may be used by the employee in lieu of the safety
devices listed provided the PFAS and employee’s training meets ATC’s Fall Protection
Program

59
FORKLIFTSAFEOPERATIONS 1. OPERATOR TRAINING
1.1. Powered Industrial Trucks (forklifts) may only be operated by employees who are trained
pursuant to the OSHA requirements in 29 CFR 1910.178(l).
1.2. Training must consist of a combination of formal instruction (e.g., lecture, discussion,
interactive computer learning, video tape, written material), practical training (demonstrations
performed by the trainer and practical exercises performed by the trainee), and evaluation of
the operator's performance in the workplace. An outline of the training program must be
submitted to the EH&S Department for approval prior to the conduct of training.
1.3. Forklift operators must possess written certification (such as a wallet card) that he/she has
been trained and evaluated. The certification must include the name of the operator, the date
of the training, the date of the evaluation, and the identity of the person(s) who performed the
training or evaluation.
1.4. If an operator has previously received required training, possesses written certification, and
such training is appropriate to the truck and working conditions encountered, additional
training is not required if the operator has been evaluated and found competent to operate the
truck safely.
1.5. Refresher training in relevant topics shall be provided to the operator when:
The operator has been observed operating the vehicle in an unsafe manner;
The operator has been involved in an accident or near‐miss incident;
The operator has received an evaluation that reveals the operator is not operating the
truck safely;
The operator is assigned to drive a different type of truck; or
A condition in the workplace changes in a manner that could affect safe operation of
the truck
1.6. An evaluation of each powered industrial truck operator's performance shall be conducted at
least once every three years.
2. SAFE FORKLIFT OPERATIONS
2.1. Aisles and passageways shall be kept clear and in good repair, with no obstructions that could
create a hazard.
2.2. In order to prevent the build‐up of carbon monoxide gas, which has no odor, LP Gas powered
forklifts must not be operated in closed areas for extended periods of time.

60
2.3. An overhead guard must be present to provide protection against falling objects.
2.4. If a powered industrial truck is used to raise employees to a higher elevation:
The employee must be supported on a sturdy platform which can support his/her
weight, and
Appropriate fall protection must be utilized. This includes the use of either handrails
that extend fully around the platform or a personal fall protection system. If a personal
fall protection system is used, use either a self‐retracting lanyard or keep the lanyard as
short as possible to prevent contact with the ground below.
2.5. If the forklift is equipped with a seat belt, the operator must wear it.
2.6. Use a three‐point stance when getting on and off a forklift. Two hands and one foot should be
in contact with the floor or unit at all times. Do not jump on or off a forklift.
Traveling
2.6. Forklifts must be operated at a slow rate of speed and kept under control at all times. Under all
travel conditions the truck shall be operated at a speed that will permit it to be brought to a
stop in a safe manner. There must never be any stunt driving or horseplay.
2.7. When traveling, forks should be raised only high enough to clear the road surface. The load
should be stable with the mast tilted back. When parked, forks should be fully lowered. Never
raise or lower a load while travelling.
2.8. Always look in the direction of travel, and keep a clear view. If the load being carried obstructs
forward view, travel in reverse with the load trailing.
2.9. While negotiating turns, speed must be reduced. Forklifts have a high center of gravity and can
easily tip over, resulting in death or serious injury to the operator.
2.10. Slow down and sound the horn at cross aisles and other locations where vision is obstructed.
2.11. Grades shall be ascended or descended slowly.
When ascending or descending grades in excess of 10%, loaded trucks shall be driven
with the load upgrade.
On all grades, the load and load engaging means shall be tilted back if applicable, and
raised only as far as necessary to clear the road surface.

61
2.12. Avoid running over loose objects on the roadway surface. This can easily upset the center of
gravity and cause the vehicle to tip over. This is particularly true for unloaded forklifts.
2.13. Forklifts shall not be driven up to anyone standing in front of a bench or other fixed object.
2.14. No person shall be allowed to stand or pass under the elevated portion of any truck, whether
loaded or empty.
2.15. Unauthorized personnel are not permitted to ride on powered industrial trucks. Never attempt
to ride by standing on the forks of a moving truck. A slip could result in serious injury or death.
2.16. Arms or legs must not be placed between the uprights of the mast or outside the running lines
of the truck. Keep arms and legs inside the vehicle while moving.
2.17. When a powered industrial truck is left unattended, load‐engaging means shall be fully
lowered, controls shall be neutralized, power shall be shut off, and brakes set. Wheels shall be
blocked if the truck is parked on an incline.
Note: A powered industrial truck is considered to be unattended when the operator is 25 ft. or
more away from a vehicle that remains in his view, or whenever the operator leaves the
vehicle and it is not in his view.
2.18. A safe distance shall be maintained from the edge of ramps or platforms while on any elevated
dock, platform or freight car. Trucks shall not be used for opening or closing freight doors.
Loading and Unloading
2.19. Only loads within the rated capacity of the truck shall be handled. This information can be
found on the vehicle’s nameplate.
2.20. A load engaging means shall be placed under the load as far as possible and the mast shall be
carefully tilted backward to stabilize the load.
2.21. A load backrest extension shall be used whenever necessary to minimize the possibility of any
part of the load from falling rearward.
2.22. Brakes shall be set and wheel blocks shall be in place to prevent movement of trucks, trailers,
or railroad cars while loading or unloading. Fixed jacks may be necessary to support a
semitrailer during loading or unloading when the trailer is not coupled to a tractor. The flooring
of trucks, trailers, and railroad cars shall be checked for breaks and weakness before they are
driven onto.

62
2.23. Dockboards must be used and properly secured when entering trucks and trailers, must be
strong enough to carry the load imposed on them, and must be driven over slowly.
Maintenance
2.24. Forklift operators must inspect their trucks each day. The inspection should include brakes,
steering, forks, tires, horn, fuel and fluid levels.
2.25. If at any time a powered industrial truck is found to be in need of repair, defective, or in any
way unsafe, the truck shall be taken out of service until it has been restored to safe operating
conditions.
2.26. Industrial trucks shall be kept in a clean condition, free of excess oil and grease.
Noncombustible agents shall be used for cleaning trucks. Precautions regarding toxicity,
ventilation, and fire hazard shall be consistent with the agent of solvent used.

63
HANDANDPOWERTOOLS 1. INTRODUCTION
1.1. The use of hand and power tools can cause:
Eye injuries from shattered tools, flying chips, and dust or debris while working
overhead,
Cuts, lacerations from moving parts,
Electric shock,
Strains from taking awkward positions or overuse, and
Injuries to others if tools are dropped from elevations.
2. BASIC TOOL SAFETY RULES
2.1. Always use the right tool for the job. Inspect it before each use and only operate it according to
the manufacturers’ instructions. Never use a tool, machine, or device that you do not know
how to use.
2.2. Maintain tools properly. Keep edges sharp on cutting tools such as saws, chisels, and drill bits.
2.3. Make sure that any guards which come with the tool are in place.
2.4. Inspect power cords regularly for signs of wear. Never carry a tool by its cord.
2.5. Always use required personal protective equipment, including eye protection, hearing
protection and gloves. At a minimum, eye protection which meets the requirements of ANSI
Z87 must be worn whenever using power tools, power equipment, and certain hand tools,
including hammers and cutters.
2.6. Effective means must be used to protect tools from falling from heights and endangering
employees below. Tools and tool buckets must always be appropriately secured when climbing
and working at heights. Tools lanyards that attach to a harness are available. Tools shall never
be left unsecured on elevated places such as tower members. Never drop or throw tools — use
hand lines.
2.7. To avoid injury to internal organs or the spine in case of a fall, do not carry tools over your
stomach or the middle of your back when working in an elevated position.
2.8. Treat all tools with care. Store them properly instead of just throwing them in the back of a
truck. Use tool boxes or tool chests to keep tools organized.
2.9. Be sure you have firm footing and good balance before using any tool.

64
2.10. Do not wear loose clothing or jewelry that could become entangled in power tools.
2.11. Mark damaged tools “Do Not Use” and take them out of service immediately. Only authorized
employees may repair tools.
3. JOB SET‐UP
3.1. Whenever using any type of tool, try to keep your work close and in front of you and in position
so you won’t strain muscles, apply force in awkward positions, or have to bend, twist, or
overextend your reach.
3.2. Be sure to keep good footing and maintain good balance. Keep the ground or floor surface free
from debris and tripping or slipping hazards.
3.3. If you develop pain or soreness, take a break by doing something else.
4. HAND TOOLS
4.1. Do not use impact tools such as chisels, punches and hammers that have become worn or
mushroomed. Never use a screwdriver as a chisel.
4.2. Do not use tools with loose, cracked or splintered handles.
4.3. Leather or cut‐resistant gloves (such as Kevlar) must be worn when cutting with a hand‐held
cutter, such as a utility knife. This includes cutting cable jacket to install connectors and ground
leads, stripping cable during electrical work to tower lights and controllers, cutting non‐metallic
cable to cover ground leads, opening cartons and spools of materials, and removing weather
proofing from wave guides.
4.4. When cutting by hand, use a vise or other device, rather than your non‐cutting hand, to hold an
object being cut. If that is not possible, keep the non‐cutting hand far away from the cut. Also,
keep your body away from the hazard by making sure you cut in a direction away from it.
5. POWER TOOLS
5.1. Guards that come with tools for the point of operation or other moving parts must always be
used as designed and never removed.
5.2. Do not wear loose clothing and jewelry that can get caught in moving parts.
5.3. Operate tools within design limits.
5.4. Do not secure work with your hands or body parts. Use both hands to operate the tool.

65
Electric Tools
5.5. To protect the user from shock, electric power tools must either be double insulated or have a
three‐wire plug. The plastic housing of double insulated power tools provides one of the levels
of the “double” insulation. Do not use a double insulated tool if the housing is cracked or
broken.
5.6. When used outside or in damp areas, electric power tools must be protected with a Ground
Fault Circuit Interrupter (GFCI).
5.7. Make sure power cords are fully insulated and plugs are not damaged. Do not carry, hoist or
lower portable tools by the power cord. Do not yank a cord to disconnect it. Keep cords away
from heat, oil, and sharp edges. Keep cords out of standing water.
5.8. Avoid use in wet locations.
5.9. Disconnect tools when not in use, before servicing and cleaning, and when changing
accessories.
5.10. Do not hold the switch button while carrying a plugged‐in tool.
5.11. Store electric power tools in a dry place.
5.12. Electrically operated equipment shall be de‐energized before repair or adjustments are
performed.
Abrasive Wheels
5.13. Cutting or grinding wheels may “explode” or throw off flying fragments if they are used
improperly or have a crack. Always treat abrasive wheels very carefully.
5.14. Do not remove any 180 degree guards around the wheel that come with the tool. Any abrasive
wheel with a diameter of more than 3 ½ inches requires a guard.
5.15. Make sure the operating speed of tool is less than the rating of the wheel.
5.16. Always use eye and face protection.
5.17. Use as directed in the manufacturer’s instructions. Never apply undue force.

66
Pneumatic Tools
5.18. One hazard of using tools powered by compressed air is getting hit by a tool attachment or by a
fastener being used with the tool. Ensure the tool is fastened securely to the air hose to
prevent a disconnection. Use a short wire or positive locking device attaching the air hose to
the tool.
5.19. Gloves and/or heavy rubber grips should be used to dampen vibration when using a
jackhammer. Hearing protection and a dust mask may be required.
5.20. The use of compressed air for cleaning purposes must be reduced to 30 psi or less. Compressed
air is never to be used for cleaning or blowing dust from any part of the body or clothing.
Gasoline Powered Tools
5.21. The main hazard of gasoline powered tools is the ignition of flammable vapors. The flash point
of gasoline is ‐40 degrees F, which means it is extremely flammable.
5.22. Gasoline, may only be used and stored in UL/FM Approved, metal safety cans. Among other
features, these cans have self‐closing lids to controls vapors and spills.
5.23. Gasoline and other flammable liquids may never be used for cleaning tools, equipment, work
surfaces or your hands. Use solvents and/or hand cleaners designed for this purpose.
5.24. Before refilling a fuel‐powered tool tank, shut down the engine and allow it to cool down. The
auto ignition temperature of gasoline is 495° F. This temperature can be exceeded on the
surface of a hot engine or tool.
5.25. No smoking or open flames are permitted in the area when gas‐powered tools are being fueled.
5.26. Carbon monoxide from gas‐powered engines can kill you in a matter of minutes. Never operate
a gas‐powered tool in an enclosed area.
5.27. Pouring gasoline from one container to another may generate a charge of static electricity,
which could ignite the gasoline vapors. To avoid this, maintain metal‐to‐metal contact when
pouring.
5.28. To avoid igniting vapors by electrical sparks if gasoline spills near an electrical switch, make sure
the spill is cleaned up and all vapors have completely evaporated before turning on the switch.

67
Powder Actuated Tools
5.29. Anyone who uses a powder‐actuated tool must be suitably trained and knowledgeable about
all OSHA and ANSI safety requirements.

68
HAZARDCOMMUNICATION
1. GENERAL 1.1 ATC Employees who can reasonably anticipate occupational exposure to potentially
hazardous chemicals shall be given all necessary protection and training to reduce the likelihood of injury from these substances.
2. PROCEDURES
In order to comply with 29 CFR 1910.1200 and 29 CFR 1926.59 the following Hazard Communication Procedures will be implemented by American Tower Corporation:
LABELING: 2.1 All containers onsite are to be labeled identifying the contents and listing appropriate
hazard warnings. Labels may include words, pictures or symbols and cannot be removed or defaced.
MSDS: 2.2 Material Safety Data Sheets are to be obtained from the chemical manufacturer,
distributor or supplier. MSDSs are stored on the ATC Portal and are to be available to employees at all times via their mobile laptop.
TRAINING: 2.3 Employees will be provided information and training on occupational risks and how to
minimize exposures. Training will be provided to Employees within 10 days of employment or prior to starting any work assignment where a risk of occupational exposure might be anticipated. Training records must be kept for three years.
2.4 If an Employee has the potential to be exposed to any hazardous substance, training will
include:
1. The location and availability of the written hazard communication program, including MSDS and a list of hazardous chemicals.
2. Use of engineering and work practice controls including PPE employees can take to eliminate or minimize exposure.
3. An explanation of how to read and understand hazard placards, MSDS and other labels. 4. An explanation of the routes of exposure and dangers posed by certain chemicals.
3. SPILL AND EMERGENCY PROCEDURES In a situation where a major release or spill has occurred:
3.1 Do not touch the contaminated area or risk safety to try and stop a spill or release. 3.2 Call 911 immediately after you have evacuated to a safe area. Contact the ATC
Environmental Compliance Manager and your immediate supervisor immediately. If the

69
ECM does not respond, follow the call‐down list on the Emergency Response Pocket Card.
3.3 Assess opportunity to control and contain the flow of leaking product(s) by shutting
down valves and electricity to ignition sources.
3.4 If safe, contain potential offsite flow by diversion, creation of a berm or use of absorbent materials until emergency response personnel have arrived at the site.
3.5 Complete the Hazardous Materials Spill/Release Report located on the EH&S Portal.
3.6 Take photographs, if you are able.
The Hazardous Materials Spill/Release Report is to be completed:
For ALL spills and releases – not just emergencies.
For ALL incidents involving ATC, tenant, or unknown source.
With accurate and detailed information.
Send to [email protected] and your immediate supervisor within 24 hours.
4. FORMS AND QUALITY RECORDS AND RESOURCES
Form
Number
Title
Hazardous Material Emergency Response Plan
Hazardous Materials Spill Report

70
HAZARDOUSLOCATIONS
1. GENERAL
1.1. Hazardous locations such as condemned or abandoned buildings, while rare, may be
encountered while attempting to access American Tower sites. Such locations present hazards
to employees in the form of vermin, squatters, hygiene problems such as human and animal
waste, mold and other exposures. The structures themselves may be dilapidated and utilities
have usually been disconnected.
1.2. A condemned building is one that has been declared by a municipal inspector to be unsafe to
live in or to use. It is both illegal and against company policy to enter a building that has been
condemned.
1.3. A cell tower may become structurally unsound for a number of reasons including the following:
Storm damage
Corrosion over time
Impact to the tower or its guyed anchors from a vehicle
Damage from fallen antennas
Other causes
Such towers are not to be climbed for any reason.
2. PROCEDURES
2.1. American Tower employees are not to enter condemned buildings. They should instead
contact their direct supervisor and the Environmental, Health and Safety Department for
direction.
2.2. If employees suspect a tower or its anchors may be structurally damaged, they are not to climb
it for any reason. If employees are instructed to climb a tower they believe to be unsound, they
must instead contact their manager and the Environmental, Health and Safety Department
immediately.
2.3. Towers that show severe corrosion or impact damage must first be evaluated by a competent
person. The tower will instead be evaluated by use of an aerial device. Any needed repairs
such as guying, bracing or other means must be completed before American Tower employees
are again allowed to climb the structure.

71
HAZARDOUSMATERIALSHANDLINGANDSTORAGE
1. GENERAL 1.1. The Federal Resource Conservation and Recovery Act of 1976 (“RCRA”) sets strict standards for
the “cradle‐to‐grave” management of hazardous wastes. These standards are written and enforced by the U.S. Environmental Protection Agency (“EPA”). It is ATC’s intent to comply with the various local, state, and federal environmental laws, to practice good safety practices, and to avoid future liabilities.
2. PROCEDURE 2.1. Worker Health and Safety – All Employees working with hazardous materials will be provided
appropriate personal protection equipment (footwear, masks, clothing and eyewear), emergency eyewash, and ventilation systems.
2.2. Training – Employees will be trained on the hazards, precautions and procedures for the safe storage, safe handling and use of all potentially harmful materials relevant to the work area or job requirements
2.3. Hazardous Materials ‐ must be stored in clearly labeled containers or vessels.
2.4. Storage and handling of hazardous materials ‐ must be in accordance with local, state and
federal guidelines, and appropriate to their hazard characteristics.
2.5. Hazardous Materials incidents may be recognized by sight, sound or smell.
2.6. In the event of a hazardous material incident:
Your first concern should be for your personal safety and the safety of those around you;
You should immediately leave the area;
Avoid driving into the area;
Avoid direct contact with the material;
Avoid creating sparks or sources of heat which could cause the materials to ignite and burn;
Contact your supervisor immediately.
Contact the EH&S Department immediately
2.7. Emergency Procedures Fire Emergencies Involving Chemicals or Hazardous Waste
Call the Fire Department (911)
Set off a fire alarm and evacuate the building
Use a fire extinguisher or fire hose if it is possible to do so without jeopardizing your personal safety
Report emergency to your supervisor
Report emergency to the EH&S Department
Chemical or Biological Spills

72
Evacuate the area to the extent appropriate and warn fellow workers and supervisors
Contact Supervisor immediately.
Contact ATC’s EH&S Department.
Take appropriate action to contain the spill without jeopardizing your personal safety.
Medical Emergencies Involving Chemical or Hazardous Wastes
Seek medical care for the injured person immediately
Report the matter to your supervisor immediately.
Contact the EH&S Department.
3. PERSONAL PROTECTIVE EQUIPMENT 3.1. Protective Eyewear is to be worn when:
Working with any chemical substance
Mowing grass
Moving drums of corrosive materials
Welding
Using cleaning materials such as strong solvents, or other corrosive chemicals in cleaning facilities
3.2. Foot Protection is to be worn when: Working in a warehouse
Moving operations involving heavy equipment
Work involving contact with any chemical substance
3.3. Respiratory Protection is required when: Handling any chemicals
Working on asbestos abatement projects
Working with pesticides
Painting and sanding operations
3.4. Arms, hands and torso protection. The selection of appropriate gloves and clothing depend on factors such as design, permeability and strength. Many chemical permeate or break through certain materials in relatively short periods of time, voiding the protection. Protective equipment for your arms, hands and torso is required when:
Working with any chemicals
Any asbestos abatement
Working with insulation

73
HEATILLNESSPREVENTION All ATC Employees who have a potential occupational exposure to high outdoor temperatures shall: 1. Participate in annual seasonal training on Heat Illness Prevention and how to minimize, recognize
and treat exposure to heat stress. Training will be provided to Employees within 60 days of employment or prior to starting any work assignment where a risk of occupational exposure might be anticipated. Training records must be kept for three years.
2. During particularly hot weather, supervisors should remind workers at tailgate meetings about the importance of rest breaks and frequent water consumption throughout the shift as well as the location of shade. Advise employees of signs/symptoms of heat‐related illnesses.
3. Use engineering and work practice controls to eliminate or minimize employee exposure to heat.
Modify working hours to perform strenuous tasks at cooler times of the day, when possible, or rotate tasks.
4. When modifying the work shift is not possible, more water and rest breaks must be provided. 5. Employees shall carry water in sufficient quantity to provide one quart per employee per hour for
drinking for the entire shift. 6. Supervisors and coworkers should monitor newly hired employees to ensure they acclimatize safely
the first few days on the job or employees who have been on an extended absence. 7. Completion of a Job Site Analysis form must include location of the nearest medical facilities, clear
and precise directions to the work site and procedures for contacting emergency medical facilities. 8. If an Employee shows signs of heat related stress, the following steps are to be followed:
8.1. Immediately stop what you are doing and move the employee to a cool, shaded area. Move to an air conditioned area, if available, such as the company truck.
8.2. If heat stroke is suspected, seek immediate medical attention. Use the emergency contact information from the ATC Job Site Analysis form.
8.3. If employee is conscious, provide cool drinking water.
8.4. Remove any excess layers of clothing and cover with a wet towel or cloth.
8.5. Fan or mist the person. If available, apply ice packs to the neck, underarms, groin areas or
other pulse points.
8.6. Notify employee’s supervisor as soon as possible, particularly if there has been any fainting or loss of consciousness.
74
LEADPAINT
1. GENERAL It is the policy of American Tower Corporation to provide a safe and healthful environment for its employees. This policy is designed to ensure that American Tower employees follow the appropriate procedures to prevent building occupants, visitors, maintenance personnel and contractors and themselves from exposure to hazardous levels of lead.
2. AREAS OF CONCERN 2.1. Most buildings built before 1978 contain some lead‐containing paint.
2.2. Lead‐containing paint was used because of its excellent adherence and durability.
2.3. Lead paint has a pleasant, sweet taste.
2.4. Chips, dust and flakes of lead paint have the potential to cause illness that is irreversible.
2.5. Lead‐containing paint is usually found on windowsills in window wells, near doors that rub
against floors and casings, and the soil because of years of scraping, blistering and peeling paint. It can also be found on telecommunications and broadcast towers.
2.6. Employees, outside contractors and other persons often dry scrape, burn off or in other
ways create dusts and fumes that may be injurious to themselves and others.
2.7. Lead may present in paint chips, dust, soil or demolition debris.
2.8. States may have particular solid waste and hazardous waste requirements for lead‐containing paint.
2.9. OSHA worker safety requirements must be followed when conducting any lead‐containing
paint activity including maintenance work. (26 CFR 1926.26) 3. PROCEDURES
3.1. Training. All Employees involved in a lead abatement project will be trained in safe and appropriate lead abatement procedures. Only Employees who are properly trained will be allowed to participate in any lead abatement process.
3.2. Restrict Entry to Work Area. Post warning signs immediately outside all entrances and exits to the work area. Only Employees directly involved in the project may enter the work area.
3.3. Wear Appropriate Clothing. Disposable overalls minimize contamination of clothing by
lead dust and help to prevent the spread of lead dust outside of the work area. Gloves and other special clothing may be required for protection. Non‐disposable clothing may be used; however, it must be cleaned properly to dispose of any lead particles or dust. Change your clothes and wash your hands and face when you leave the work area.

75
3.4. Use Appropriate Safety Equipment. A respirator is recommended during the demolition
phase of lead abatement or at other times when airborne lead levels can be expected to be high. A paper dust mask will not protect you from lead dust. Further safety equipment, special clothing, or additional respiratory protection may also be required.
3.5. No Smoking or Eating in the Work Area. Store any eating or smoking materials away from
the work area. Leave the work area and wash your hands and face before eating or smoking.
3.6. Contain Lead Dust and Debris Within the Work Area. Keep lead dust and debris in the work
area. Wear disposable shoe covers, and remove them when you leave the work area.
3.7. Do Not Use Unsafe Methods. Never Burn Lead Paint with an Open Flame Torch. Do Not Sand or Scrape Dry Lead Paint. Follow the guidelines set forth under OSHA and the EPA.
3.8. Work Safely With Chemicals. Follow the manufacturer’s instructions carefully when using
any chemical stripper.
3.9. Medical Concerns: Employees who work in construction, painting, repair, maintenance or demolition in old buildings (or towers) are likely to be exposed to lead. Lead poisoning can cause damage without any symptoms. Blood tests are important to anyone who works with lead on the job. An adult who has lead poisoning may notice fatigue, irritability, headache, weight loss, stomachache or constipation. Chronic overexposure may result in severe damage to your blood‐forming, nervous, urinary and reproductive systems. It may also result in kidney disease with few, if any, symptoms appearing before extensive damage has occurred. Employees found to have elevated blood levels may be reassigned to work areas that do not have potential for lead exposures. This reassignment will continue until blood levels indicate that blood lead concentrations have returned to acceptable levels.
3.10. Prohibited methods of abatement of lead‐based paint include:
Stripping paint on site with methylene chloride based solutions
Torch or flame burning
Heating paint with a heat gun above 1100 degrees Fahrenheit
Sandblasting 3.11. When chipping loose paint:
mist the work area to minimize airborne dust
when using a putty knife or scraper, carefully scrape loose paint flakes and deteriorated surfaces
collect all debris and paint chips created on 6‐mil plastic sheeting and place in waste drum
vacuum entire work area thoroughly using a HEPA vacuum
3.12. Cleanup. Cleanup of the abatement area must be done daily, at the end of each work day, and, at the end of the abatement project, a minimum of 24 hours after active abatement

76
has ceased. Workers must wear protective clothing and equipment, including respirators during all cleanup activities. Disposable gloves must be worn during the cleanup. Large demolition type debris should be wrapped and sealed in plastic. Small debris and other surfaces should be sprayed with a water mist to minimize re‐aerosolization of settled dust, before sweeping. Dry sweeping is prohibited. Waste is to be placed in a double 4‐mil or single 6‐mil plastic bag, sealed and moved to the designated waste storage area. Cleaning equipment should also be cleaned using a HEPA vacuum and washing with a high‐phosphate solution. Gloves, sponges, disposable towels and any other non‐cleanable materials used in the cleaning of lead painted or contaminated surfaces must be placed in plastic bags, labeled as “Hazardous Waste Paint Materials” and dated.
3.13. Metal Surfaces. All painted metal surfaces shall be assumed to be lead‐containing unless sampling of a manufacturer’s specifications show otherwise. When welding or cutting lead painted surfaces, powered air purifying respirators (PAPR’s) with HEPA filters are required. PAPR’s are recommended for all welding and cutting operations unless ventilation is in place to control contaminants.

77
LOCKOUT/TAGOUT 1. GENERAL REQUIREMENTS
1.1. “Lockout” is the process of turning off and locking out the flow of energy from a power source
to a piece of equipment or a circuit. Lockout is accomplished by installing a lock and a tag at the
power source.
1.2. “Tagout” refers to situations where it is unfeasible to perform lockout and only a tag is used.
1.3. The purpose of lockout/tagout is to prevent the unexpected energizing or start‐up of a
machine, equipment, circuit or the release of stored energy. Lockout procedures must be used
whenever performing:
service or maintenance work on machines or equipment;
work on de‐energized electrical circuits;
work in areas where radiofrequency radiation levels above the Maximum Permissible
Exposure cannot be eliminated or reduced to an acceptable level;
there is a risk of unexpected start‐up of machinery or equipment or release of hazardous
energy.
1.4. Tagout is used in situations where it is unfeasible to perform lockout and only a tag is used. It is
rare for lockout to be infeasible.
1.5. Lockout/tagout is not required on cord and plug equipment where the plug is under the
exclusive control of the person performing the work.
1.6. Refer to the ATC Safety Procedure on Radiofrequency Radiation for more information about
lockout when working in, or around, RF fields.
2. LOCKOUT/TAGOUT PROGRAM
2.1. ATC personnel will typically not be required to perform lockout/tagout. In the event such
procedures are required, a comprehensive lockout program must be instituted consisting of:
Developing a written program
Establishing specific lockout procedures
Providing appropriate locks and other hardware
Training employees
Monitoring the effectiveness of the program
If you are required to perform lockout, contact the EH&S Department.
78
MOTORVEHICLESAFETY
1. GENERAL
1.1 This Policy applies to employees in all ATC business units, subsidiaries and affiliates.
1.2 This Policy governs:
The use of company vehicles;
Personal vehicles used on Company business; and
Rental vehicles used on Company business. 1.3 The requirements of this Policy are in addition to those set forth by local, state and
federal motor vehicles laws.
2. POLICY
2.1 American Tower Corporation is committed to ensuring the safety of its employees and
the public and recognizes that accidents result in needless personal injury, economic
loss, and inefficient operations. It is therefore the policy of ATC to minimize the risk
of motor vehicle accidents in the conduct of Company business.
3. REQUIREMENTS
3.1 Authorized Drivers and Business Use
3.1.1 Driver Qualifications. An Employee‐driver must:
Be at least 21 years old;
Have a valid driver’s license for the type of vehicle he/she is to drive; and
Have an acceptable driving record (refer to Tables 1‐4 in sections 6.3.2 and 6.4.2).
Employee‐drivers of Company vehicles must also understand how to operate
any auxiliary equipment on the vehicle including, but not limited to, generators,
winches, and hydraulic equipment.
3.1.2 Authorized Drivers. Company vehicles may only be driven by authorized ATC
Employee drivers. A Senior Manager designates employees who are authorized

79
to drive Company vehicles. A non‐ATC employee may never drive a Company
vehicle; this includes contractors and family members. An Employee‐driver may
not “loan” his/her assigned vehicle to another employee without the approval
of a Senior Manager.
3.1.3 Authorized Use of Vehicle. Company vehicles and rental vehicles may only be
used for Company business.
Limited exceptions
When an Employee‐driver is away from home, a Company or rental vehicle may
be used for limited, reasonable personal purposes that do not involve the
consumption of alcohol and/or any violation of the Code of Conduct Policy.
When an Employee‐driver is authorized to park a Company vehicle at his/her
home, he/she may make an incidental stop to conduct an errand, such as buying
groceries, as long as the errand does not include transporting family members or
other passengers not authorized by this Policy, the consumption of alcohol, any
violation of the Code of Conduct Policy or other violations of this Policy.
3.1.4 Authorized Passengers. Authorized passengers in Company vehicles are limited
to ATC employees, customers and clients. Such persons are permitted only
when necessary for conducting Company business.
3.1.5 Overnight Parking. Company vehicles must be locked and parked at the office
overnight except where authorized by a Senior Manager. At no time will
vehicles be parked in an unauthorized parking area or area where the vehicle’s
presence would induce a hazard to the motoring public or pedestrians.
3.2 Employee‐drivers’ Responsibilities
3.2.1 Maintaining Vehicle Conditions. The Employee‐driver is required to maintain
his/her Company vehicle in good operating condition. Employee‐drivers must
adhere to preventative maintenance schedules, have required oil changes
performed, and replace tires and brakes when necessary.

80
3.2.2 Mandatory Safety Inspections. The Employee‐driver must make a safety
inspection once per week. This includes checking:
Brakes
Steering
Tires (tread depth and air pressure)
Lights
Turn Signals
Emergency Flashers
Brake Lights
Windshield Wipers
Belt condition
Fluid levels
Mirrors
Check for leaks and/or spills under engine compartment
Proper hitch connections
The Employee‐driver must correct any deficiencies identified in the inspection
before operating the vehicle.
3.2.3 Radar Detectors. Radar detection equipment is not permitted in any Company vehicle at any time.
3.2.4 Emergency Equipment. The Employee‐driver is required to ensure that his/her
Company vehicle is equipped with a fully‐charged fire extinguisher and a properly stocked first aid kit.
3.2.5 Secure Materials for Transport. Tools or equipment should be secured while
being transported to prevent unsafe movement of materials. During an incident/accident or when making sudden maneuvers, loose objects can slide around or become airborne, injuring the driver and any passengers. Objects that could become a hazard should be secured or stored outside the passenger compartment.
3.2.6 Vehicle Security. Employee‐drivers are required to maintain the security of
their vehicles and the security of tools and equipment. Vehicles must be kept locked and all valuable items must be kept out of plain view.
3.2.7 Weapons Prohibited. Guns or other weapons are not permitted in any
Company vehicle at any time.

81
3.2.8 Transporting Passengers. Authorized passengers (as defined in section 5.1.4) may only be transported while sitting in appropriate seats. Under no circumstances may any person ride on or in a fender, running board, truck bed or trailer. At no time is an Employee‐driver to offer transport to non‐work‐related individuals. Transport of hitchhikers is specifically prohibited.
3.2.9 Defensive Driving. Employee‐drivers are expected to drive defensively at all
times.
3.2.10 Compliance with the Law. Employee‐drivers must be aware of, and comply
with, local and state motor vehicle laws and regulations that apply in the locality
in which they are driving.
3.2.11 Use of Seat Belts. The Employee‐driver and any passengers in any vehicle used
on Company business must always wear safety belts while the vehicle is in
motion. It is required that the Employee‐driver make sure all passengers wear
safety belts.
3.2.12 Wireless Phone Usage. Employee‐drivers are prohibited from using a wireless phone while their vehicle is in motion unless specialized equipment (such as a mounted speakerphone or headset) is used that permits hands‐free operation (refer to the Business Travel and Entertainment Expense Reporting Policy for information on reimbursement of such equipment). A wireless phone may only be used without hands‐free equipment if the vehicle is stationary and safely parked off the roadway. If a local or state law regarding the use of wireless phones is more restrictive, then the more restrictive requirement applies.
3.2.13 Usage of Other Equipment. Employee‐drivers are prohibited from using a
computer, PDA, portable navigation device, MP3 player or similar device while their vehicle is in motion. These and similar devices may only be used if the vehicle is stationary and safely parked off the roadway. If a local or state law regarding the use of these and similar devices is more restrictive, then the more restrictive requirements apply.
3.2.14 Distracted Driving. Employee‐drivers are not to engage in activities that are distracting and could be a contributing factor in driver inattention.
3.2.15 No Company Reimbursement for Fines/Penalties. The Employee‐driver has
sole responsibility for any and all moving violations, traffic tickets and/or parking tickets incurred while using a Company vehicle or incurred while driving on Company business. The cost of these infractions is not eligible for reimbursement or direct payment by the Company.
3.2.16 Incident and Injury Reporting. An Employee‐driver must report as soon as
possible to (a) his/her supervisor, (b) the Corporate Environmental Safety and Health Department, and (c) Human Resources any:

82
Vehicle incident/accident or any incident involving a motor vehicle that results in personal injury, injury to others, property damage to others or damage to an ATC vehicle;
Temporary or permanent suspension or revocation of his/her license;
Any physical or mental impairment, temporary or permanent, that would impact his/her ability to operate a motor vehicle safely;
Any moving violation that occurs while conducting Company business;
Any violation that results from the personal use of any motor vehicle that will cause disqualification from driving on Company business (refer to Section 6.3.2, Tables 1, 2 and 3); and
Any incident or accident involving a motor vehicle that results in personal injury, injury to others or damage to an ATC vehicle.
Employee‐drivers are required to complete the Motor Vehicle Incident Report and send it to claims‐[email protected], [email protected] and to the Employee‐Driver’s immediate supervisor within 24 hours.
3.3 Loss of Company Driving Privilege
3.3.1 Driving is a Privilege. Notwithstanding anything else stated in this policy or
other ATC Policies:
Driving a vehicle on Company business is a privilege that can be withdrawn by ATC at any time, with or without cause.
If an Employee‐driver’s license is revoked or suspended for any reason and driving is necessary for the job, employment may be terminated.
When the driving privilege is abused, as determined by the Company, the amount for damages (other than normal wear and tear) for vehicle misuse or abuse may be deducted from an employee’s paycheck/expense reports or a full demand for payment may be made.
3.3.2 Driver Infraction Tables. To ensure the safety of Company employees and the
public, Tables 1, 2 and 3 which follow, set forth ATC Policies on Employee‐driver Infractions:

83
ATC POLICIES ON DRIVER INFRACTIONS
Table 1: Immediate Termination
The use of alcohol or drugs while at work (which includes driving on Company business).
A DUI or DWI violation, citation or arrest for alcohol or drugs, or refusal to submit to an alcohol or drug test, if the violation occurred while driving an ATC vehicle and/or on Company business, whether during business hours or after hours.
The manufacture, transportation, distribution, dispensation or use, as well as the attempted or actual purchase or sale of drugs in conjunction with the possession or use of a Company vehicle.
Any felony citation or arrest, whether driving on Company business or for personal reasons, that involves the use of a motor vehicle including but not limited to:
Hit and Run or leaving the scene of an accident;
Motor vehicle theft; or
Homicide, involuntary manslaughter, or assault with a motor vehicle.
Table 2: Immediate revocation of Company driving privileges. Employee‐drivers may not drive on Company
business for at least one year, and may be subject to other discipline, up to and including, termination.
A DUI or DWI violation, citation or arrest for alcohol or drugs, or refusal to submit to an alcohol or drug test, if the violation occurred while driving a non‐ATC vehicle for personal reasons.
A moving violation, whether driving on Company business or for personal reasons, which the Company in its sole discretion determines to be serious, including, but not limited to:
Driving on a suspended, cancelled or revoked license;
Use of false motor vehicle documents such as a license or registration;
Reckless driving;
Aggressive driving (“road rage” as determined under local law where the incident occurred)
Any combination of three (3) or more moving violations or preventable motor vehicle accidents in the previous twelve (12) months while driving on Company business or for personal reasons.
Failure to report suspension, cancellation or revocation of a driver’s license.
Termination of employment may result if an Employee‐driver is not able to meet the essential functions of his/her position without a valid driver’s license.

84
Table 3: Possible revocation of Company driving privileges. Employee‐drivers are subject to discipline, up to
and including termination.
Any combination of two (2) or more moving violations in the previous twelve (12) months, whether driving on Company business or for personal reasons.
One (1) or more preventable motor vehicle accidents, based on the seriousness of the accident, the degree of employee negligence, and the Employee‐driver’s previous accident record.
Failure to timely report a motor vehicle accident while driving a Company vehicle or otherwise while driving on Company business.
Failure to follow any of the requirements of this Policy including ATC safety procedures such as wearing a safety belt and properly maintaining a Company vehicle.
3.3.4 Preventable Vehicle Accidents. “Preventability” will be determined by ATC for individual motor vehicle accidents (preventability is not the same thing as “fault” ‐ refer to the Definitions section of this Policy). A finding of preventability may result in discipline, up to and including termination, based on the seriousness of the accident, the degree of employee negligence, and the Employee‐driver’s previous accident record. In addition, attendance may be required at a Company‐approved Defensive Driving program. The Environmental Safety and Health Department determines the preventability of individual accidents, in conjunction with Corporate Human Resources and Operations.
3.4 Motor Vehicle Records Checks
A Motor Vehicle Records (MVR) check must be performed on every prospective ATC Employee‐driver, including verification that he/she holds a valid driver’s license. 3.4.1 Prospective Employee‐driver Infractions Table. In order to qualify to drive on
Company business, a prospective Employee‐driver must have an acceptable driving record. The following infractions will exclude a new hire candidate from being allowed to drive on Company business:

85
Table 4: Infractions That Will Exclude a New Hire Candidate from Driving on Company Business
A DUI or DWI violation, citation or arrest for alcohol or drugs, or refusal to submit to an alcohol or drug test within the last three (3) years (subject to state laws).
The manufacture, transportation, distribution, dispensation or use, as well as the attempted or actual purchase or sale of drugs or alcoholic beverages in conjunction with the possession or use of a motor vehicle.
Any felony citation or arrest that involves the use of a motor vehicle including, but not limited to:
Hit and run or leaving the scene of an accident;
Motor vehicle theft; or
Homicide, involuntary manslaughter, or assault with a motor vehicle.
Any serious violation within the last twelve (12) months, including without limitation:
Driving on a suspended, cancelled or revoked license;
Use of false motor vehicle documents such as a license or registration;
Reckless driving; or
Aggressive driving (“road rage” as determined under local law where the incident occurred).
3.4.2 Employer at Will Records Check. ATC reserves the right to perform an MVR check on any Employee‐driver at any time with or without cause. ATC will act on MVRs as prescribed in Tables 1, 2 and 3 in section 6.3.2, Driver Infraction Tables.
3.5 Company Use of Personal Motor Vehicles
3.5.1 Permitted Use of Personal Vehicle. An Employee‐driver may use his/her personal motor vehicle for driving on Company business when:
Driving is not typically part of the employee’s job;
No appropriate Company vehicles are available; and/or
Otherwise as authorized by a Senior Manager.
3.5.2 Personal Vehicle Minimum Insurance Requirements. An Employee‐driver who uses his/her personal motor vehicle on Company business must have the following minimum insurance coverage:
Bodily injury liability of $100,000/$300,000; and
Property damage liability of $50,000.
A certificate of insurance must be provided by the Employee‐driver to the Environmental Safety and Health Department upon Company request. In
86
the event of an accident, the Employee‐driver’s personal auto insurance provides the primary coverage.
3.5.3 Insurance Cost Non‐reimbursable. An Employee‐driver has sole responsibility for
the cost associated with maintaining this level of insurance. The cost of insurance is not eligible for reimbursement or direct payment by the Company.
3.5.4 Prohibition on Use of Motorcycles/Off Road Vehicles. Motorcycles are not
permitted to be driven on Company business. Use of any off‐road vehicle is limited to site access and must be approved by the employee’s senior manager who will ensure the employee is properly trained for the operation of such a vehicle prior to granting permission.
3.6 Renting Vehicles for Company Business
3.6.1 Policy Compliance. Employee‐drivers of rented vehicles will be required to comply with all provisions outlined in the Motor Vehicle Policy.
3.6.2 When to Rent a Vehicle. Employees should rent vehicles only when it is the
most efficient means of transportation available. In the event a vehicle is rented for Company business, Employee‐drivers should obtain a vehicle for the most cost efficient rate. Insurance coverage provisions will vary depending upon the rental company selected by the employee.
3.6.3 Selecting a Rental Company. Employee‐drivers renting vehicles shall comply
with Company guidelines for selecting a car‐rental company, as set forth in the Summary of Preferred Providers for Car Rentals located on the ATC Portal.
3.6.4 Other Rental Companies. When not using ATC’s preferred provider(s), the
following guidelines should be followed:
The Employee‐driver should refuse the optional insurance when asked by the rental company.
If asked for proof of insurance the Employee‐driver should provide the following
information:
Company Name, Address, Insurance Carrier and Policy #
American Tower
116 Huntington Avenue, 11th Floor
Boston, MA 02116
American Tower Claims Administrator

87
Phone: (617) 375‐7500
AIG Auto Policy # 5349648
3.6.5 Rental Vehicle Incident Reporting. If an incident or accident occurs, regardless
of the car rental company used, the Employee‐driver must complete the Motor Vehicle Incident Report, notify his/her supervisor and the Environmental Safety & Health Department as soon as possible and notify the American Tower Claims Administrator at claims‐[email protected] within 24 hours to report the incident or accident.
The Claims Administrator will follow up with the car rental company to obtain incident, accident and damage information. If the incident or accident is not the fault of the Employee‐driver, the Claims Administrator will work with the AIG claims subrogation division to recoup our expenses.
3.7 Alcohol or Drug Use Associated with Employee‐Drivers
3.7.1 Prohibition on Drug and/or Alcohol Use. The unauthorized or inappropriate use of alcohol or drugs adversely affects an Employee‐driver’s ability to safely operate a vehicle. Such behavior jeopardizes the safety and health of the driver, fellow passengers, and constitutes a risk to the general public and ATC. While at work (which includes any driving on Company business or driving of a Company vehicle at any time) an Employee‐driver may not be under the influence of:
Illegal drugs;
Alcohol;
Prescription drugs that are not used pursuant to a physician’s order;
Prescription drugs that are considered unsafe for use when driving; or
Improper dose of prescription/non‐prescription medications. ATC reserves the right to administer discipline, up to and including termination,
based upon its own investigation of an alcohol or drug‐related incident, whether or not the employee's conduct leads to criminal charges or conviction. When ATC has reasonable suspicion, as determined by Human Resources, that an Employee‐driver is under the influence of any of the above, said Employee‐driver will be required to take a drug and alcohol test in accordance with ATC’s procedures. A positive test result or failure to take a drug and alcohol test will result in disciplinary action, up to and including termination.
3.7.2 Prescription Medications. Employee‐drivers who have been prescribed
prescription medications that include warnings regarding driving, operation of machinery, inducement of drowsiness, etc., are prohibited from driving a Company vehicle during the period they are taking such medications. In

88
addition, Employee‐drivers must notify his/her supervisors or Human Resources immediately when they are required to take such medications.
3.7.3 Mandatory Drug and Alcohol Testing Timelines. Drug and alcohol tests must
be performed as soon as possible on any Employee‐driver involved in any motor vehicle incident or accident that involves a Company vehicle, or when driving on company business, regardless of fault.
The following time limits apply:
An alcohol test should be conducted within 2 hours after an incident or accident and must be conducted within 8 hours. (Note: the Employee‐driver must be advised not to consume any alcohol until he/she has taken the alcohol test).
A drug test should be conducted within 8 hours after the incident or accident and must be conducted within 32 hours.
3.7.4 Consequences for Failure to Timely Test. Employee‐drivers who fail to obtain the required tests in the specified timeline will face disciplinary action up to and including immediate termination unless there is an intervening reason that the test could not feasibly be performed within the specified time parameters. Any such exception must be fully documented and present a viable, verifiable justification for not completing the required tests in the time allotted. Senior Managers in conjunction with Human Resources will evaluate said justification.
3.7.5 Testing Locations and Procedures. Each Employee‐driver and his or her supervisor have been provided with instruction regarding testing locations and procedures for drug and alcohol tests to include after‐hours and weekend testing. If there are any questions, contact Human Resources immediately.
4. RESPONSIBILITIES
4.1 Employee‐drivers will:
Comply with all the requirements of this policy and state and local motor vehicle laws and regulations;
Drive defensively and provide routine maintenance for their vehicles; and
Report all accidents, incidents and/or injuries immediately.

89
4.2 Managers and supervisors will:
Ensure that only qualified personnel drive on company business.
Immediately report all motor vehicle accidents that are reported to them by Employee‐drivers to the ATC Claims Administrator, the Environmental Safety and Health Department, and Corporate Human Resources.
Ensure that the Employee‐driver has completed and submitted all necessary incident reporting forms.
Ensure that the Employee‐driver has timely completed the required Drug and Alcohol Testing.
4.3 Human Resources will:
Coordinate new hire MVR checks.
In conjunction with the Environmental Safety and Health Department and Operations personnel, determine the preventability of individual motor vehicle accidents.
Coordinate post‐accident drug and alcohol tests.
Work directly with managers, supervisors and the Environmental Safety and Health Department to carry out timely and appropriate disciplinary action up to and including termination.
4.4 Environmental Safety and Health personnel will:
Maintain the motor vehicle incident reporting and investigation processes and procedures.
In conjunction with Corporate Human Resources and Operations personnel, determine the preventability of individual motor vehicle accidents.
5. Forms and Quality Records
Form Number Title Custodian Retention
SFTY FRM‐010 Company Vehicle Usage Form Corporate Safety and
Health
5 years
RM‐FORM‐002 Motor Vehicle Incident Report ATC Claims
Administrator
5 years

90
MUSCULOSKELETALDISORDERSANDBACKINJURIES
1. MUSCULOSKELETAL DISORDERS
1.1. Musculoskeletal disorders (MSDs) are injuries of the muscles, nerves, tendons, ligaments,
joints, cartilage, and spinal discs. Common MSDs include tendonitis, tenosynovitis, carpal
tunnel syndrome, epicondylitis, neck and shoulder pain, and low back pain.
1.2. MSDs can result from one‐time incidents, but more often than not result from activities
performed over a period of time. These types of MSDs are also sometimes referred to as
cumulative trauma disorders (CTDs). Many types of work activities, from those in construction
to those in office work, can put stress on your body.
2. MSD RISK FACTORS
2.1. Awkward postures refer to positions of the body that differ significantly from neutral positions.
A neutral position is one that requires the least amount of muscle activity to maintain. For
example, when a person's arm is hanging straight down with the elbow close to the body, the
shoulder is said to be in a neutral position. Awkward postures contribute to MSDs because they
increase the muscle force required to do the job. Examples:
In overhead work, the shoulders are far from their neutral position.
Working with your wrists bent at an extreme angle, rather than straight in line with the
forearm puts increased stress on tendons, and sometimes on nerves, running through
the wrist.
Lifting or carrying a load when it’s far away from your body increases the stress on your
lower back. So does lifting while twisting.
2.2. Tasks or motions that require the application of higher force place greater loads on muscles,
tendons, ligaments and joints. Obviously, lifting or moving a heavy object requires more force
than lifting a lighter object. And using a heavy power tool requires more force than using a
lighter tool. High forces cause muscles to fatigue more quickly. They also may lead to irritation,
inflammation or strains and tears of muscles, tendons and other tissues.
2.3. Repetition is performing the same motions over and over again with little variation. Even if the
force required is low, repetition can gradually wear on muscles and tendons. Fatigue and strain
can occur because there may be inadequate time for recovery.
2.4. Contact stress occurs when you lean against workstation edges, press tool handles into the
palms of your hand, or pound with the hand. Contact stress commonly affects soft tissues and
can inhibit blood flow, tendon and muscle movement, and nerve function. Standing in one spot
on a tower for a long period of time can cause pain in the feet if boots don’t have good soles
and support.

91
2.5. There are two types of vibration that cause stress on the body. Localized vibration from the use
of power tools can affect the hands, wrists and arms. Whole body vibration can occur when
operating heavy‐duty vehicles or machinery and can lead to back trouble.
2.6. Static postures put increased loads on the muscles and tendons, which contributes to fatigue.
This occurs because the lack of movement impedes blood flow necessary for proper muscle
function.
2.7. Cold temperatures can reduce the dexterity and sensitivity of the hand. Cold reduces blood
flow to the hands and feet and can cause you to apply more grip force to hold objects.
2.8. When an MSD occurs, it’s common to find multiple risk factors present. For example:
Holding a heavy object overhead while reaching,
Repetitive typing with the wrist in an awkward position
Lifting of a heavy object that involves a twisting motion.
3. PREVENTING MSDs
3.1. Just because your job may involve one or more risk factors for MSDs doesn’t mean there is
nothing you can do about it. Here are some tips:
Be aware of MSD risk factors such as awkward postures, force, repetition, contact
stress, vibration, static postures and cold temperatures.
Always try to work in a neutral position:
o Shoulders relaxed
o Elbows at about a 90° angle
o Wrists straight
o Spine supported in its natural alignment
o Head directly above your shoulders
If you are performing a repetitive task, take mini‐breaks to give affected body parts a
chance to recover. If possible, do another task that affects different muscle groups for a
while.
Reduce the amount of stress on your muscles, tendons and nerves by:
o Keeping tools in good condition
o Minimizing the effects of vibration by wearing gloves and keeping tools well
maintained
o Avoiding or minimizing contact stress
Take any discomfort you might experience seriously, especially if the problem doesn't
seem to go away after a day or two. Do not ignore feelings of tingling, numbness, or
pain — talk to your supervisor at American Tower and get medical attention. When a

92
problem is evaluated and treated quickly, the medical consequences will be less severe
and any necessary recovery time will be shortened.
If you have any concerns or suggestions for improving your job – or even for equipment
modifications – let your supervisor know. You can also speak to someone at ATC’s
Environmental, Health and Safety Department to arrange an evaluation of your work
environment by them or a third party.
4. BACK INJURIES
4.1. Tower work involves many tasks that can place our backs at risk of injury. Lifting or moving
heavy objects, making long reaches, bending or twisting, using our back over and over again,
and even staying in the same position for extended periods of time can lead to a back injury.
4.2. Sometimes just one wrong move can lead to a back injury. However, most back problems result
from the accumulation of stresses put on the back every day. You can go for years lifting things
the wrong way, twisting out of joint, and reaching beyond your limits before an injury results.
4.3. The most common type of low back pain is from sprains and strains to the muscles and
ligaments that support the back. In severe cases, the vertebrae can become misaligned or
otherwise extra stress can be placed on the discs. Eventually, a disc wall can wear out, bulge
and press against a nerve. This is referred to as a herniated disc. Herniated discs can be very
painful.
4.4. The heavier the load – or the further you hold it from your body – the more your muscles are
strained and the more your discs are compressed. Think of your back as a lever. When the load
is close to the fulcrum, a smaller amount of force is required than when the load is further
away from the fulcrum. It’s the same when you bend over to lift an object. The pressure on
your back is many times greater than the weight of the object itself. And when you bend and
twist at the same time the compressive forces on the discs and the risk of muscle strain are
greatly increased. If enough pressure is applied over time, the discs that separate the vertebrae
can become weak and even collapse.
5. PROPER LIFTING TECHNIQUES
5.1. Stretch. It’s important to get your body ready by stretching your muscles before you do any
lifting. This is especially important early in the day, or if you’re just coming off a break.
5.2. Clear Path. Before carrying a load, be familiar with the path you will be taking. Make sure you
know where any irregularities are, and that the surface is free of clutter or anything that could
trip you or cause you to slip. Once a load is lifted, you want to carry it directly to its
destination.

93
5.3. Size Up The Load Before Trying To Lift It. Test the weight of a load by lifting at one of the
corners. If it’s too heavy, admit it. The best things to do are: (1) use a mechanical lifting device,
or (2) get help from a fellow worker.
Long objects, such as pipes and lumber, may not be heavy, but the weight might not be
balanced and such lifting could also result in back sprain. Such objects should be carried by two
more people.
5.4. Get Close. Always get as close to the load as possible. Even light loads can significantly increase
the pressure on your spine when you lean forward with them or hold them away from your
body.
5.5. Lift With The Legs. The single most important rule when lifting is to bend the knees. Take a tip
from professional weightlifters. They can lift tremendous weights because they lift with their
legs, not their backs. If the load seems manageable, spread your feet for balance, and bend
your knees. Keep your head, shoulders, and hips in a straight line. Slowly draw the load in to
your torso, and stabilize it. Then, lift with your legs. Your abdomen, legs and buttocks should do
all the work.
5.6. Don’t Twist. Never twist while lifting or carrying a load. If you need to change the direction you
are facing move your feet. Twisting while lifting or carrying puts extreme pressure on your
back.
5.7. Place the Load Properly. When you get to your destination, it’s best to put the load on a
surface that’s waist high. But when you have to put it on the ground, simply reverse the
process, slowly bending your knees, and smoothly placing the load, without twisting or
bending.
6. OTHER THINGS YOU CAN DO TO PREVENT BACK INJURIES
6.1. Lose Extra Weight. Being overweight, especially having a pot belly, can put extra strain on the
spine. You probably don’t think about the fact that when you bend over to lift, you’re also
lifting the 100 pounds or so that your upper body weighs. Every extra pound up front puts
about ten pounds of strain on the back when lifting. It also makes it harder to climb a tower.
6.2. Exercise Regularly. You should routinely stretch and strengthen the muscles that hold your
back in place, especially if you use your back to make a living. Sudden stress on tight or weak
back muscles can lead to trouble.
7. OFFICE ERGONOMICS
7.1. Work Stations. Sitting in front of a computer all day can also lead to several forms of
Cumulative Trauma Disorders. Most common are wrist pain, headaches, neck and shoulder

94
pain, and back aches. These are usually the result of having the keyboard, monitor, mouse or
chair positioned incorrectly.
7.2. Ergonomics. “Ergo” is the Greek word for “work” and “Nomic” means “to study,” the study of
work. By studying the setup of the desk, chair and computer, adjustments can be made to keep
the body in neutral position (see 2.1 above.) Since people vary so much in height and size, the
setup may be different for each person.
7.3. Chairs. Most office chairs can be adjusted in a number of ways besides height. The backrest,
the arm rests and the seat may often be raised or lowered. Take the time to fit the chair to
your height and build. This may reduce backache and neck ache. Attempt to have the knees,
elbows and feet as close to right angles as possible. If your feet do not reach the floor, consider
a foot stool to spread your body weight over a greater area.
7.4. Computer Monitors. Adjust your monitor so that the top of the screen is parallel with your eye
level and at about arm’s reach distance. When your screen is too low or too high, your head
must tilt up or down, often leading to neck pain. Try to balance the weight of your head over
your shoulders. Headaches are often the result of monitor glare or poor resolution. Take the
time to adjust the settings on the monitor and to remove any dust regularly.
7.5. Keyboards. The keyboard should be positioned at about elbow height so that forearms are
parallel to the floor. Elbows should be held close to the body so that wrists are not curved. Try
to relax shoulders while typing and light touch type. You may wish to use a wrist rest in front of
the keyboard.
7.6. Computer Mouse. The computer mouse can be a much greater source of wrist and shoulder
pain than the keyboard. The constant grip and fine movements can cause strain to the tendons
if used for long periods of time. Place the mouse at the same height and distance as the
keyboard and remember to take frequent breaks. Consider using an ergonomically shaped
mouse that better suits the shape of your hand and remember that the sensitivity of the mouse
can be adjusted in Windows.
7.7. Telephones. Employees should not pinch the telephone handset between their shoulder and
ear. Holding this static posture for a long period of time will result in decreased blood flow and
possible strain to muscles and tendons. Consider using a headset if you spend a large part of
your day on the telephone.
7.8. Document Holders. If performing data entry, place documents at the same distance from the
eyes and at the same angle as the monitor. A stand or document holder should be used.
7.9. Laptop Computers. Laptop computers were never intended for all‐day use. If you adjust the
keyboard correctly for your wrists, your monitor will be too low resulting in neck strain. If you

95
adjust the monitor correctly, the keyboard will be too high causing hand and wrist strain. If
your primary computer is a laptop, consider a plug‐in keyboard or an additional monitor.
7.10. Take Breaks. Finally, employees are encouraged to take regular short breaks from their
workstations to stretch. Most musculoskeletal injuries tend to occur at the end of the day
when muscles are fatigued. If possible, switch to another activity. Contact the EH&S
Department with any questions about workstation setup.

96
OSHAINSPECTIONS1. INTRODUCTION
1.1. Under the Occupational Safety and Health Act of 1970 (the Act), the Occupational Safety and
Health Administration (OSHA) conducts workplace inspections. These inspections are made by
compliance safety and health officers, generally without giving advance notice. (Note: There
are currently 26 states which administer their own OSHA programs, including inspections.)
An inspection may be conducted for any of the following reasons:
Imminent Danger
An imminent danger situation is any condition where there is reasonable certainty that a
danger exists that can be expected to cause death or serious physical harm either immediately
or before the danger can be eliminated through normal enforcement procedures.
Catastrophes and Fatal Accidents
OSHA investigates fatalities and accidents resulting in a death or the hospitalization of three or
more employees overnight. The employer must report such incidents to OSHA within 8 hours.
OSHA investigates to determine the cause of these incidents and whether existing OSHA
standards were violated.
Complaints and Referrals
Formal employee complaints of unsafe or unhealthful working conditions and referrals from
any source about a workplace hazard may result in an inspection. The Act gives each employee
the right to request an OSHA inspection when the employee believes he or she is in imminent
danger from a hazard or when he or she thinks that there is a violation of an OSHA standard
that threatens physical harm.
Programmed Inspections
Programmed inspections are aimed at specific high‐hazard industries, workplaces, occupations,
or other industries identified in OSHA’s current inspection procedures. OSHA selects industries
for inspection either randomly or on the basis of factors such as the injury incidence rates,
previous citation history, or employee exposure to toxic substances. OSHA also may develop
special emphasis programs that are local, regional, or national in scope.
Follow‐up Inspections
Follow‐up inspections determine if previously cited violations have been
corrected.

97
2. GENERAL
2.1. In the event of an OSHA inspection, be courteous. Make sure the compliance officer knows you
respect and recognize the importance of the job he/she is doing. Sometimes discussions about
an alleged safety or health hazard can become touchy. Sometimes a compliance officer may not
know much about tower operations and/or otherwise be in error. Regardless, never become
argumentative; there will be time to contest any citations at a later date.
2.2. Always tell the truth. Making false statements to an OSHA compliance officer can result in
personal penalties of up to 6 months in jail and a $10,000 fine.
2.3. Do not offer any unsolicited explanations or opinions or otherwise volunteer information that
the compliance officer has not directly requested. Do not offer to demonstrate any procedures.
If you do not know the answer to a question, say so.
2.4. Do not admit to any violations and do not "agree" that a hazard or violation exists. Be careful
about making commitments or promises.
2.5. Make sure your actions and comments communicate that American Tower is fully committed
to employee safety and health and that we have an active safety and health program.
2.6. The senior person on site must take notes on everything that goes on including any comments
the compliance officer may make about potential violations.
3. PRESENTATION OF CREDENTIALS
3.1. If an OSHA compliance officer arrives at your job site you should immediately inform your
supervisor who must in turn contact the EH&S Department.
3.2. An onsite inspection begins with the presentation of the compliance officer’s credentials, which
include both a photograph and a serial number. Record the individual’s name and badge
number as well as the time and date. Remember that your state’s OSHA may use a different
name. The compliance officer’s ID card in Arizona will read ADOSH, in Washington it will be
WISHA, etc. If you have any doubts about the validity of the compliance officer’s credentials,
contact the EH&S Department. These can be verified by contacting the local OSHA office.
Anyone who attempts to collect a penalty while on site or promote the sale of an item or
service is not an OSHA compliance officer.
4. OPENING CONFERENCE
4.1. The compliance officer will describe the scope of the inspection, walk around procedures,
employee representation and employee interviews. An authorized representative of the
employees, if any, has the right to go along.

98
The compliance officer will also consult privately with a reasonable number of employees
during the inspection. The Act prohibits discrimination in any form by employers against
workers because of anything they say or show the compliance officer during an inspection.
4.2. The compliance officer may ask to review injury and illness records. Advise him/her they are
kept in the EH&S office. Contact EH&S to arrange for the records to be forwarded to the
compliance officer.
5. WALK AROUND
5.1. The compliance officer and representatives will walk through the site, inspecting for hazards
and talking to employees. Take the inspector to his/her requested destination along the most
direct route (avoiding detours that might expand the inspection). Note that compliance officers
are not permitted to unduly disturb work operations during an inspection. They must act
“within reasonable limits and in a reasonable manner.”
5.2. The compliance officer may point out some apparent violations that can be corrected
immediately. While the law requires that these hazards must still be cited, prompt correction is
viewed as a sign of good faith. However, even though you may correct something, do not
“agree” that it is a hazard.
5.3. If the compliance officer takes photos and ATC has a camera present, take similar photos.
6. CLOSING CONFERENCE
6.1. After the walk around, the compliance officer will hold a closing conference with the employer
and the employee representatives to discuss the findings. Sometimes an OSHA compliance
officer will try to leave without discussing the results of the inspection to avoid an
uncomfortable confrontation, but do not allow this to happen. Ask for a "closing conference"
and ask what citations the compliance officer anticipates as a result of the inspection. Take
notes.
6.2. When the inspection is completed, a comprehensive written report must be prepared and sent
to the EH&S Department.
7. RECEIPT OF CITATIONS AND NOTIFICATION OF PENALTY
7.1. Violations will be sent by mail in an official Citation and Notification of Penalty (CNP). When a
CNP is received, contact the Director, Environmental Health and Safety immediately. The
company only has 15 working days to hold an informal conference with OSHA and/or formally
contest the alleged violations and/or penalties. Once this 15 day window passes, the violations
and associated penalties stand.
7.2. The EH&S Department will coordinate all follow‐up correspondence and other contacts with
OSHA after the inspection.

99
PERSONALPROTECTIVEEQUIPMENT
1. HEAD PROTECTION
Basic Requirements
1.1. Hard hats must be worn at all times on ATC sites. There are no exceptions to this rule – even if a
worker will only be on site for “a couple of minutes.” If you see someone on an ATC site not
wearing a hard hat, tell them to put one on.
1.2. Head protection is otherwise required if you work in any situation where there is risk of injury
from falling objects of if you work near exposed electrical conductors that could contact the
head.
1.3. ATC provides at no cost to the employee two hard hat models; a standard hard hat and a Petzl
Best.
All climbers must have a Petzl Best hard hat that must be worn when climbing. The chin
strap must always be secured when wearing a Petzl Best.
A standard hard hat must be worn when working on the ground to provide the
additional protection offered by a brim.
Hard Hat Approval and Classes
1.4. Hard hats resist penetration, absorb the shock of a blow and lessen injury. The shell of the hard
hat is designed to absorb some of the impact. The suspension, which consists of the headband
and strapping, is even more critical for absorbing impact. It must be adjusted to fit the wearer
and to keep the shell a minimum distance of 1 1/4 inches above the wearer’s head.
1.5. Hard hats must meet the requirements of American National Standards Institute (ANSI)
Standard Z89.1‐1997 and must have an ANSI Z89.1‐1997 marking on them that includes their
“class.” ANSI hard hat classes are based on electrical resistance as follows:
G – Proof tested to 2,200 Volts
E – Proof tested to 20,000 Volts
C – Not for protection against electrical hazards
Standard hard hats used by ATC must either be class G or E, but as a practical matter will
always be Class E.
1.6. The Petzl Best currently only carries an older ANSI Z89.1‐1986 marking, and a Class C rating.
Even though the “C” rating means it does not offer electrical protection under the ANSI

100
standard, the helmet is rated as providing protection up to 440 volts under the applicable
European Standard (EN 397). This is sufficient for our typical operations.
Inspecting and Replacing Your Hard Hat
1.7. Check your hard hat daily for dents, cracks, or penetration. Inspect the shell, suspension, and
headband. If there are any defects, remove it from service. A defective hard hat will not provide
the proper amount of protection.
1.8. Ultraviolet (UV) exposure takes a toll on hard hats. Minimize UV exposure by keeping your hard
hat out of the rear window shelf of your vehicle.
1.9. Hard hats must be replaced at least every 5 years and after any impact.
1.10. To clean a hard hat, use warm, soapy water.
2. EYE PROTECTION
Basic Requirements
2.1. Eye protection must be worn whenever you are:
using power tools or equipment;
using certain hand tools, including hammers and cutters;
welding or oxy‐gas cutting;
performing cadweld operations; and
clearing brush.
Eye protection must also be used whenever performing overhead work and tools, dust, or debris
can fall into your eye.
2.2. When welding or oxy‐gas cutting, eye protection with a specially numbered filtering lens must
be worn to protect your eyes from radiant energy. When wearing a welding helmet, safety
glasses or goggles must also be worn.
2.3. Eye protection must be worn in any other situation where there is exposure to:
Flying particles;
Molten metal that may splash;
Radiation from welding which can cause painful corneal or retinal burns; and
Corrosive liquids, vapors, and gases.

101
Safety Glasses
2.4. Safety glasses are the basic form of eye protection used by ATC. ATC provides at no cost to each
field employee two pair; one is clear and the other is tinted for protection from the sun.
2.5. Safety glasses must meet the requirements of ANSI Z87.1‐2003. They are required to withstand
the impact of a steel ball traveling at a speed of 150 feet per second. Safety frames also have to
meet strength standards. Safety glasses which meet the ANSI criteria will be marked “Z87.” If
they do not have the “Z87” marking, they do not qualify as safety glasses.
2.6. Side shields are required on safety glasses. The wrap‐around style of most safety glasses used
today serve as side shields.
2.7. If lenses become pitted, scratched, or broken, contact your supervisor to obtain a new pair.
2.8. Ordinary prescription eye glasses do not provide the required protection. Personnel who wear
ordinary prescription eye glasses will need to wear:
Prescription safety glasses, or
Goggles that fit over the ordinary eye glasses without disturbing them, or
Contact lenses with standard safety glasses.
3. HAND PROTECTION
Basic Requirements
3.1. ATC employees must wear appropriate protective gloves whenever:
the hands are at risk of injury from cuts,
handling heavy materials,
tower climbing, or
welding or torch‐cutting.
3.2. Leather or cut‐resistant gloves (such as Kevlar) must be worn when cutting with a hand‐held
cutter, such as a utility knife. This includes cutting cable jacket to install connectors and ground
leads, stripping cable during electrical work to tower lights and controllers, cutting non‐metallic
cable to cover ground leads, opening cartons and spools of materials, and removing weather
proofing from wave guides.
The use of cotton work gloves when cutting with a utility knife is not acceptable. Only leather
or cut‐resistant gloves may be worn.
3.3. When handling heavy objects, gloves must be worn to aid in gripping the object and to prevent
cuts and abrasions from sharp or rough edges.

102
3.4. Gloves must be worn when climbing to prevent cuts from galvanizing drips and sharp edges,
abrasions from repeated contact with rough steel, and exposure to bird feces.
3.5. Heavy duty leather gloves must be worn when welding or torch cutting to prevent against
burns from heat and sparks.
3.6. The use of work gloves is not required when work activities require the ability to complete
detailed work with the fingers, such as terminating wire. Also, work gloves should generally not
be worn when operating rotating tools or equipment, such as a conduit threader, a drill press,
or other rotating machinery.
Protective Gloves
3.7. ATC will provide each employee with a pair of general purpose leather work gloves and, for use
in cold weather, cotton liners. Leather gloves generally provide the best all around protection
against cuts and abrasions from sharp objects when climbing, using a utility knife, handling
materials, and sparks from welding and cutting operations.
The use of a Kevlar glove with a rubber palm and fingers is encouraged. These gloves provide
superior cut resistance and some climbers prefer the improved grip provided by the rubber.
3.8. Glove preference can vary based on the individual, particularly when climbing. Therefore,
gloves used for climbing may be purchased locally and/or an employee may use a glove he/she
has purchased. However, leather or cut‐resistant gloves (Kevlar) must be used when cutting by
hand. Cotton or other fabric gloves (including those with rubber palms and fingers) may only be
used when climbing.
3.9. When gloves become worn, they are to be turned in for a replacement pair. Employees who
repeatedly lose gloves may be required to pay for replacements.
4. FOOT PROTECTION
4.1. Foot injuries are most likely to occur when:
Heavy or sharp objects fall on your foot.
Something rolls over your foot.
An object pierces the sole of your shoe.
4.2. All employees must wear sturdy, leather work boots or shoes when:
On ATC jobsites
Working in warehouses or in the outside yard.

103
Tennis shoes or other footwear is not permitted. Employees who climb may prefer an
“aggressive” tread to facilitate climbing.
5. HEARING PROTECTION
5.1. Hearing loss can result from exposure to high noise levels, usually over a period of time. ATC
employees are not generally exposed to noise in excess of recognized exposure limits.
5.2. If you are concerned about noise levels in a particular work operation, contact the EH&S
Department. An evaluation can be performed and/or you may be provided with ear plugs or
ear muffs as deemed necessary.
6. RESPIRATORY PROTECTION
6.1. ATC employees may not utilize any type of respirator, except as described below, without the
prior approval of the EH&S Department.
6.2. An employee may voluntarily use a filtering face piece (dust mask) for an additional level of
comfort and protection against airborne particulate matter.
6.2.1. This type of respirator does not provide protection from airborne hazardous or toxic
materials
6.2.2. This type of respirator provides some relief from pollen, spores and larger particulate
matter.
6.3. When an employee uses a filtering face piece (dust mask) on a voluntary basis, the following
information from Appendix D to the OSHA Respirator Standard must be provided to the
employee and an appropriate record maintained:

104
Information for Employees Using Respirators When Not Required Under
OSHA Standards
Respirators are an effective method of protection against designated hazards when properly
selected and worn. Respirator use is encouraged, even when exposures are below the exposure
limit, to provide an additional level of comfort and protection for workers. However, if a
respirator is used improperly or not kept clean, the respirator itself can become a hazard to the
worker. Sometimes, workers may wear respirators to avoid exposures to hazards, even if the
amount of hazardous substance does not exceed the limits set by OSHA standards. If your
employer provides respirators for your voluntary use, or if you provide your own respirator,
you need to take certain precautions to be sure that the respirator itself does not present a
hazard.
You should do the following:
1. Read and heed all instructions provided by the manufacturer on use, maintenance,
cleaning and care, and warnings regarding the respirators limitations.
2. Choose respirators certified for use to protect against the contaminant of concern.
NIOSH, the National Institute for Occupational Safety and Health of the U.S. Department
of Health and Human Services, certifies respirators. A label or statement of certification
should appear on the respirator or respirator packaging. It will tell you what the
respirator is designed for and how much it will protect you.
3. Do not wear your respirator into atmospheres containing contaminants for which your
respirator is not designed to protect against. For example, a respirator designed to filter
dust particles will not protect you against gases, vapors, or very small solid particles of
fumes or smoke.
4. Keep track of your respirator so that you do not mistakenly use someone else's
respirator.
Reviewed With: By:
_________________________________ _____________________________
Employee Signature ATC Representative
______________________________
Date

105
PORTABLELADDERS
1. SELECT THE RIGHT LADDER FOR THE JOB
1.1. A ladder must be long enough to safely work from. If a ladder is not long
enough for the job, suspend work until a ladder of the proper length is
obtained or another appropriate method of climbing is provided.
1.2 The ladder must have a label certifying that it complies with specifications of the American
National Standards Institute (ANSI) and that it is listed by Underwriters Laboratories (UL).
Ladders are rated by ANSI in classes as:
IAA Special Duty 375 pounds IA Extra Heavy Duty, Professional 300 pounds I Heavy Duty, Industrial 250 pounds II Medium Duty, Commercial 225 pounds III Light Duty, Household 200 pounds
1.3 ATC personnel may only use fiberglass or wood ladders rated Class I – 250 pounds or higher.
Class II, III or aluminum ladders may never be used. ATC personnel may not use the foldable (or
“Versa”) type of ladders that can be set up as scaffolds.
2. INSPECT A LADDER BEFORE YOU USE IT
2.1. Any ladder can develop a problem that makes it unsafe. Each time you use a ladder, inspect it
for loose or damaged rungs, steps, rails or braces. Also check for loose screws, bolts, hinges and
other hardware. Make certain the spreaders on stepladders can be locked in place and both
rung hooks of an extension ladder engage. Make sure the ladder has safety feet which will
provide more stability and reduce the chances of the ladder slipping while you work on it.
2.2. Never use a defective ladder. Defective ladders must be tagged as “Do Not Use.” Ladders must
never be painted, as paint can hide defects.
3. SET UP THE LADDER PROPERLY
3.1. A ladder must be set on a solid, level surface. If a ladder must be used on soft ground, place a
piece of plywood underneath it. In these cases, you will also need someone to hold the base of
the ladder while you climb and tie it off.
3.2. Stepladders must be fully opened with the spreaders locked.
3.3. Extension or straight ladders must be placed at a four‐to‐one ratio. This means the base of the
ladder must be one foot away from the base of the point of support for every four feet of
height to the top of the point of support.

106
3.4. If you plan to climb onto a roof or other
platform from a ladder, the ladder must
extend at least three feet above the edge.
3.5. If you must set a ladder in a traffic area, a
barricade or guard must be used to prevent
collisions. Lock or block any nearby door that
opens toward you. Keep areas around the top
and bottom of the ladder clear.
3.6. Never use ladders in a horizontal position as
scaffolds or work platforms.
3.7. Use only the manufacturer’s fittings to extend
a ladder. Never extend ladders by tying ladders
together with rope or by other makeshift
arrangements. Do not place ladders on top of
boxes, vehicles, or other objects to increase
height.
3.8. ATC‐approved ladder lengths:
Stepladders 20 feet maximum
Portable Rung Ladders 30 feet maximum (single section)
Portable Rung Ladders 60 feet maximum (two sections)
3.9. The overlap on two‐section extension ladders must be at least as follows:
36' ladder 3'overlap
36‐48' ladder 4' overlap
48‐60' ladder 5' overlap
4. CLIMB AND DESCEND LADDERS CAUTIOUSLY
4.1. Always face the ladder when ascending or descending and maintain 3 point contact.
4.2. Carry your tools in a tool belt or raise and lower them with a hand line.
4.3. To avoid slipping, always check the rungs and the bottoms of your boots for slippery substances
(e.g., mud) before climbing.
5. BE SECURE WHILE WORKING ON A LADDER
5.1. Whenever possible, the top of an extension ladder must be tied off so it cannot slip or move.

107
5.2. You should secure yourself to an extension ladder. In some cases, it may be possible to wrap
your positioning lanyard around both a top rung of the ladder and the object the ladder is
resting against to provide both fall restraint and to prevent inadvertent movement of the
ladder. In other cases, separate lashing will be required to tie‐off the ladder.
5.3. To maintain your balance, never reach too far to either side or to the rear of a ladder. Keep
your belt buckle between the ladder rails.
5.4. Never climb on the top or top step of a stepladder or the top 3 rungs of an extension ladder.
5.5. Never “walk” a ladder. Get off the ladder and move it.
5.6. Only one person is permitted on a ladder at a time.
6. LADDER STORAGE
6.1. Ladders should be stored in well ventilated areas and in a manner that will prevent sagging and
warping. Straight ladders are best stored in flat racks or on wall brackets. Step ladders should
be stored in the vertical, closed position. Wood ladders should be protected from moisture,
insect damage and excessive heat. Moisture and sun exposure are the two main enemies of
wood ladders and can rapidly shorten the useful life of a ladder.
6.2. Do not throw ladders around (e.g., into the back of a truck) and do not throw heavy items on
top of them. When transporting ladders, make sure they are properly secured.

108
RADIOFREQUENCYRADIATION1. RESPONSIBILITIES
1.1 The Lighting Technician Supervisor, or equivalent, is responsible to work with the Site
Owner and Carriers to ensure ATC employees and/or subcontractor employees will not
be overexposed to RF radiation.
1.2 The Director of DAS Solutions and/or DAS Solution team is responsible to work and
coordinate with the Utility company and/or Site Owner to ensure ATC employees and/or
subcontractor and/or Utility company employee will not be overexposed to RF
radiation.
2. PROCEDURES
2.1 If an RF survey has been performed in the work environment (e.g., tower or rooftop), then appropriate safety procedures, based on the RF field strengths present, will be adhered to. These procedures include:
Avoiding the area around the antenna(s) where excessive exposures exist.
Limiting exposure time while in the RF field so that the MPE is not exceeded.
Wear a properly calibrated RF monitor while performing work at the site. 2.2 If an RF survey has not been performed:
Wear a properly calibrated RF monitor while performing work at the site.
Make an analysis of whether any employees will be exposed above the MPE. If so, determine the required amount of time antenna(s) must be powered down and to what levels, or whether they must be shut down completely. Consult with the Site Owner and/or appropriate technical personnel as required to make this determination.
Coordinate with the Site Owner as to when antenna(s) can be appropriately powered down, or shut down completely. Make sure the job is conducted so that employees will not be overexposed to RF radiation.
If an agreement cannot be reached with the Site Owner and/or Carriers with respect to power‐down requirements, contact the Director, Environmental Health and Safety.
2.3 When power is turned off, or reduced to an acceptable level, while an employee is in an
RF field:

109
Transmitters will be locked and tagged out, so that such power cannot be raised by remote control from another location. Transmitters will not be turned off by remote control. A competent representative is required to be on site to perform these duties.
Transmitters will remain powered down until informed by the Operations Manager or supervisor that everyone is clear of RF hotspots.
3. PERSONAL RF MONITORS
3.1 Personal RF Monitors are required to be used by all ATC employees at any time they may be exposed to an RF environment or are near any radiating equipment or waveguide. Always wear the monitor on your torso facing forward. This is especially important at microwave frequencies where there is concern over leaks and eye damage.
3.2 When a personal RF Monitor alarms the employee must immediately leave the location
and contact their supervisor. Employees should never remain in an area that has RF field levels high enough to activate the monitor’s alarms. The supervisor must contact the Operations Manager and the steps outlined in Section 5 above must be followed.
3.3 The Nardalert A8862 personal RF monitor is the standard monitor acceptable for use in
ATC. Ordering information can be found on the ATC Standard Fall Protection and Safety Gear List.
3.4 Personal RF monitors will be calibrated annually or per the manufacturer’s specified calibration schedule.
4. RF SAFETY RULES FOR EMPLOYEES Rooftops:
4.1 Personnel will heed warnings on any posted RF signage. 4.2 Only authorized and trained personnel shall be allowed to perform work on rooftop sites.
4.3 RF Safety training will be conducted prior to any work at the site.
4.4 All personnel are required to wear RF monitors while performing work at the site.
4.5 If work cannot be completed safely, the equipment shall be Locked/Tagged Out.
Broadcast Towers:
4.6 Personnel will heed warnings on any posted RF signage.

110
4.7 Only authorized and trained personnel shall be allowed to perform work on broadcast tower sites.
4.8 RF Safety training will be conducted prior to any work at the site.
4.9 Personnel working for greater than 6 minutes near any RF emitting surface (front) of a directional antenna will stay at least 8 feet away from the emitting surface.
4.10 All personnel are required to wear RF monitors while performing work at the site.
4.11 If work cannot be completed safely, the equipment shall be Locked/Tagged Out.
Communication Towers:
4.12 Personnel will heed warnings on any posted RF signage.
4.13 Only authorized and trained personnel shall be allowed to perform work on communication tower sites.
4.14 RF Safety training will be conducted prior to any work at the site.
4.15 All personnel are required to wear RF monitors while performing work at the site.
4.16 If work cannot be completed safely, the equipment shall be Locked/Tagged Out.
Outdoor DAS Sites:
4.17 Personnel will heed warnings on any posted RF signage.
4.18 Only authorized and trained personnel shall be allowed to perform work on Outdoor DAS sites.
4.19 RF Safety training will be conducted prior to any work at the site.
4.20 All personnel are required to wear RF monitors while performing work at the site.
4.21 If work cannot be completed safely, the equipment shall be Locked/Tagged Out.
General Rules:
4.22 Only authorized entrants shall be allowed access to site. 4.23 Before entering the antenna area, look for advisory signs that warn of areas with
potentially excessive levels of RF. In such cases, make sure appropriate safeguards are applied to minimize exposure.
4.24 Assume all antennas are active and radiating at full power. The intermittent nature of

111
communications activity makes it difficult to know the operational status of various transmitters.
4.25 Keep a safe distance. Maintain a minimum 3 feet clearance from all antennas.
The greatest risk of exposure occurs when closest to an antenna. RF exposure rapidly decreases with distance from the antenna. Be aware of the potential for more than one antenna to impact any given area. Do not assume conditions are safe on the backside of antennas since RF energy can emanate from these areas.
4.26 Be sensitive to time spent in RF fields. A good method to comply with the RF MPE is to
minimize the exposure time. When working in the vicinity of tower mounted antennas, follow the maxim “keep on moving” to avoid unnecessary and prolonged exposure in close proximity to antenna.
4.27 Protect your eyes. Never look into an open waveguide or coax connector unless you verify
that the power is off and the transmitter is locked or tagged out. Keep your eyes an absolute minimum of 12 inches from any waveguide, especially near connections and components, such as switches.
4.28 Do not connect or disconnect RF connectors with power applied.
4.29 Do not operate base station antennas in equipment room.
4.30 Never operate transmitters without shields during normal operation.
4.31 Notify owners and disable appropriate transmitters before working on antennas.
4.32 In the event that an employee is exposed to RF radiation, immediately seek medical
treatment. Complete the RF Exposure Notification Form located on the EH&S Portal and return to the Environmental Health & Safety Department at as soon as possible.
5. TRAINING
Training is an integral component of an RF Safety Awareness Program. It provides employees, supervisors and managers with a broad technical background relating to RF radiation, a review of the FCC exposure standards and the biological effects of RF exposure to the human body. Employees are required to complete RF training provided by ATC. Employees will be trained to understand the RF exposure hazards to which they may be subjected to as a result of their employment and how to prevent harm to themselves and others from the exposure. Employees trained in RF awareness need to be able to recognize and understand various RF warning devices that may include signs, barriers, fencing, cones, flashing lights, area monitors and roped off areas. Documentation of training will be maintained with ATC’s safety training records.

112
6. TOWER SIGN STANDARDS AND TEMPLATES
Do not enter any area marked by any type of RF safety sign indicating significant RF fields. In addition to the RF hazard to you, your equipment may not operate properly.
6.1 Signs are required: (1) before tower construction; (2) upon completed construction; and
(3) after closing for acquired towers.
6.2 Signs are to be replaced when (1) damaged; and/or (2) faded (brittle). Metal signs are to be used at all times.
6.3 Owned Sites ‐ Required Signs
1. 1‐2 American Tower signs (ATCID 12 X 18 and ATCID 18 X 24). If there is more than one tower at a site, mount 1 ATC sign onto each tower base with its specific ASR# and mount only 1 ATC sign on the compound entry gate without any FCC ASR#.
2. 1 Yellow RF Program Notice Sign (ATCNOT 12 X 18) – Install this sign on the compound entry gate near the ATC sign or on the building door.
3. 4 Yellow RF Area Signs (ATCCAUT 12 X 18) – Attach one of these signs in a conspicuous place on each side of the fence around the site.
4. 1 Red RF Warning Sign (ATCWARN 12 X 18) – Install this sign in a conspicuous place at the base of the tower.
5. 1 American Tower Sign ‐ Owned Shelter and Building Number Sign (ATCBLDG 4 X 12) – Post this sign with the building number label on each ATC owned building at the site.
There must be an ATC sign with the Site Number and FACC ASR# at both the access road gate
and compound fence. 6.4 Managed Sites – Required Signs
1. 1‐2 American Tower “Managed By” Signs (ATCMB 12 X 18 and ATCMB 18 X 24). 2. 1 Yellow RF Program Notice Sign (ATCNOT 12 X 18) – Install this sign on the
compound entry gate near the ATC sign or on the building door. 3. 4 Yellow RF Area Signs (ATCCAUT 12 X 18) – Attach one of these signs in a
conspicuous place on each side of the fence around the site. 4. 1 Red RF Warning Sign (ATCWARN 12 X 18) ‐ Install this sign in a conspicuous place
at the base of the tower. 6.5 Outdoor DAS Sites – Required Signs
1. 1 Yellow RF Area Sign (Oracle Part # SD/2GB) ‐ Attach one of these signs to the DAS utility box so that it is visible to any person ascending the pole, tower or structure.
6.6 ATC RF Program Notice Sign lists the following information:
All personnel are required to have an electromagnetic energy awareness training.
Only authorized personnel are allowed to enter this site. Obey all posted signs.
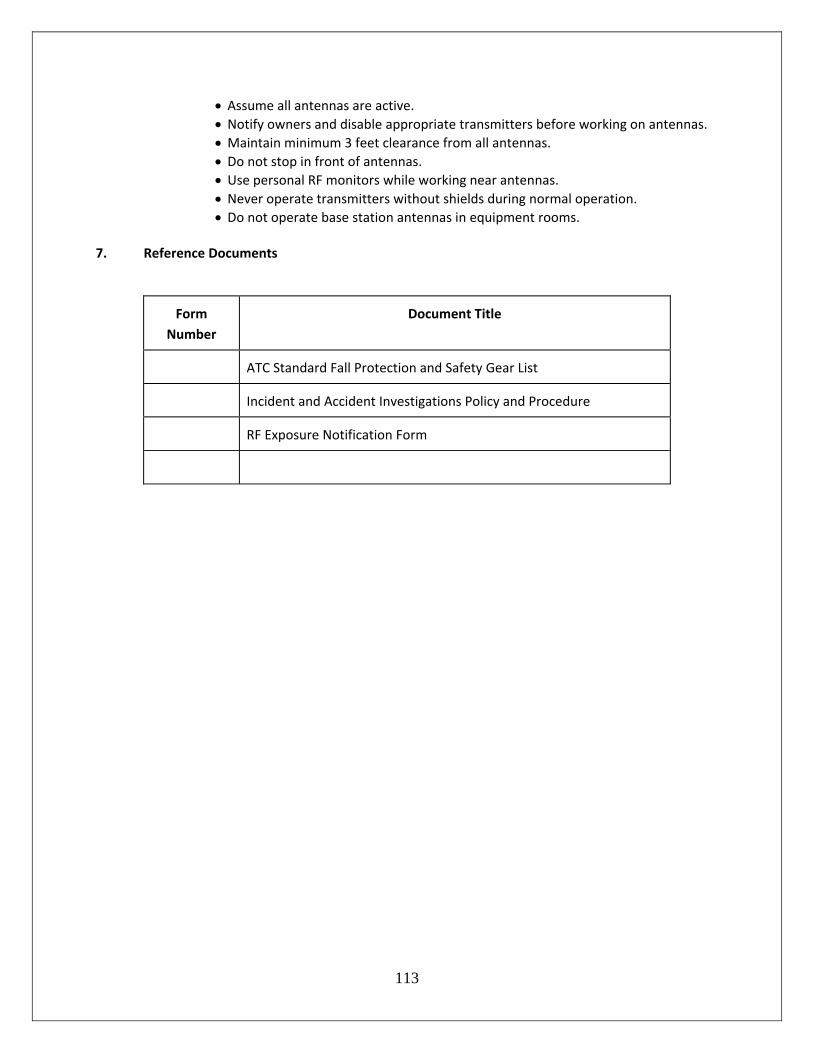
113
Assume all antennas are active.
Notify owners and disable appropriate transmitters before working on antennas.
Maintain minimum 3 feet clearance from all antennas.
Do not stop in front of antennas. Use personal RF monitors while working near antennas.
Never operate transmitters without shields during normal operation.
Do not operate base station antennas in equipment rooms.
7. Reference Documents
Form
Number
Document Title
ATC Standard Fall Protection and Safety Gear List
Incident and Accident Investigations Policy and Procedure
RF Exposure Notification Form

114
ROPESAFETY1. GENERAL
1.1. This Procedure applies to employees in all ATC business units, subsidiaries and affiliates.
1.2. This Procedure sets forth:
Requirements for the selection and purchase of ropes.
Minimum Best Practices for the use of ropes. This procedure does not include all required rope safety procedures, nor all inspection criteria. Personnel who use ropes must continually educate themselves on the use, care, maintenance and inspection of ropes, and read and study manufacturer instructions provided with the specific rope they are using.
2. RESPONSIBILITIES
2.1. Lighting Technician Supervisor must ensure crews are provided with all the gear necessary to
perform their jobs safely, including adequate and well‐maintained ropes.
2.2. Foremen must assure that ropes used by crew members are adequate for the intended load(s) and in good condition. Foremen must never allow any unsafe gear, including ropes, to be used.
2.3. Employees must only use ropes adequate for intended load(s) and in good condition. Employees must report rope defects and/or any shock loads placed on ropes to their foremen (refer to 4.5.5 below).
2.4. Lighting Technician Supervisor must review rope use during site visits and bring any deficiencies noted to the attention of the crew foreman and Operations Manager.
3. REQUIREMENTS
3.1. Rope Selection
3.1.1. Table 1. ATC Standard Ropes sets forth the ropes which must be used for specific
applications in ATC. These ropes were specifically chosen based on their properties, strength, quality, cost, color and availability. (Note: As of July 2004, existing ropes in satisfactory condition do not have to be discarded.
3.1.2. Any new rope purchases not in accordance with the ATC standard must be preapproved by the EH&S Department.

115
Table 1: ATC Standard Ropes
Load Line Load Line
Alternatives Life Line
Controlled Descent Line
Model NET TECH Orange
NET TECH Yellow
NET TECH PTS‐3 Sterling HTP Static
Size 3/8 inch 5/8 inch 5/8 inch 1/2 inch (12.5mm)
Material Polyester Polyester Nylon Polyester
Weave Double Braid Kernmantle Double Braid 3 Strand Kernmantle
Color Orange Yellow Orange Blue
Eyelets Galvanized eyelets
at both ends
Galvanized eyelets at both
ends Thimbles at both
ends Soft sewn eyelets at both ends
Coated¹ Yes Yes Urethane Coating No
Minimum Breaking Strength² 8,800 pounds 13,900 pounds 10,800 pounds 10,180 pounds
Maximum Working Load (w/o knots or sharp bends) 1,760 pounds 2,780 pounds
Only 1 person may be secured to a
lifeline
Only 1 person may be secured to
a controlled descent line
1
All ropes listed are moisture, mildew and UV resistant. 2
A working load factor of 5:1 from the minimum breaking strength is used in rigging operations. A factor of 10:1 is used when human life is involved.
3.2. Maximum Working Loads 3.2.1. For all lifts, an evaluation must be performed to assure a rope will safely support the
load. In order to do this you must:
Know the minimum breaking strength (MBS) of the rope,
Know, or estimate, the weight of the object to be lifted,
Reduce the MBS by the appropriate working load factor (5:1 for rigging of loads; 10:1 when human life is involved), and
Further reduce the MBS by 50% to account for any knots or sharp bends.
Regardless of any maximum working load calculations, only one person may be secured to a lifeline or controlled descent line.

116
3.3. Tag Lines 3.3.1. Used load lines and other ropes may be used as tag lines as long as they are free from
significant cuts, abrasions and wear. Make sure a tag line is identified as such by storing it in an appropriately labeled plastic trash can (“Tag Line Only – Not to be Used for Load”). A tag line failure can still cause a serious accident, so tag lines should be regularly inspected and removed from service when they show evidence of significant cuts, abrasions or wear.
3.4. Inspection, Care and Maintenance 3.4.1. It is important to inspect your rope thoroughly before and after each use. This should
be done visually and by sliding the rope through your hands foot by foot. If the rope is worn, abraded or cut, remove it from service and tag it “Do Not Use.” Ropes often wear faster on the ends, so it may be possible to cut them off, heat the new ends to seal them, and continue to use the good section.
3.4.2. Washing ropes prevents dirt from getting embedded in the fibers. Ropes may be washed in a bucket in warm water using a mild detergent. They should then be rinsed thoroughly.
3.5. Rope Use 3.5.1. Ropes should never be exposed to sharp edges. If sharp edges or points can’t be
avoided, make sure you protect the rope by placing a piece of canvas, rubber matting or similar material between the rope and the sharp edge. Make sure you secure the material so it won’t become dislodged.
3.5.2. Personnel should never stand in line with a rope under tension. If the rope fails, it may recoil with considerable force.
3.5.3. The diameter of a sheave should be at least 8 times greater than the rope diameter. This is to avoid creating a sharp bend in the rope, thereby reducing its strength. This means the diameter of a sheave for a ½ inch rope should be at least 4 inches; for a 5/8 inch rope it should be at least 5 inches. The groove diameter should be at least 10% greater than the rope diameter to prevent the rope from being inadvertently cut by the sharp edge of the groove.
3.5.4. Splices should be used instead of knots whenever possible because knots reduce the overall strength of a rope. For this reason, ATC standard ropes are all provided with eyelets. A knot causes lifting forces to be applied to the rope crosswise which is its weaker direction. The actual amount of strength reduction varies based on the type of knot; however as a rule of thumb, use a 50% reduction when determining the maximum load that can be lifted. Also, for the same reason, avoid sharp bends in a rope because this will also greatly reduce strength. For ropes up to 5/8 inch diameter, any bend tighter than 4” reduces the strength of a rope.

117
3.5.5. Any sudden load that exceeds the work load by more than 10% is considered a shock load. Synthetic fibers have a memory and retain the effects of being overloaded or shock loaded and can fail at a later time even though loaded within the work load range. Sudden 4‐inch drops can actually double the load on a rope. If there is reason to believe a line has been shock loaded above its recommended working load, it should be logged. If a number of these instances occur, the line should be rotated and carefully inspected.
3.5.6. Never step on a rope. This causes dirt and crystals to embed in the fibers and abrade them with each use.
3.5.7. ATC standard ropes are not greatly affected by being wet, nevertheless, try to keep all ropes as dry as possible. Polyester does not absorb as much water as many other fibers, such as nylon.
3.5.8. Assume that all chemicals are bad for your rope, but specifically avoid acids, alkalis and bleach.
3.6. Storage 3.6.1. Ropes should be stored in a cool, dry place away from chemicals and direct sunlight.
3.6.2. Store ropes in plastic trash cans with holes in the bottom. Use a cover to keep out rain.
Label rope storage containers appropriately as: Load Line, Lifeline, Controlled Descent Line, and Tag Line. It’s also a good idea to include the in‐service date on the container.
3.6.3. When stowing a rope in a container, slide it through your hands and let it lay as it falls. Inspect the rope as you slide it through your hands.
3.7. Maximum Service Life 3.7.1. A rope should be replaced as needed based on its condition (cuts, wear and abrasions)
and shock loading it has been subject to. In general, a rope that is used on a regular basis should be discarded after no more than one year of use. Regardless of the extent of use, a rope must be discarded after being in service for 3 years.
3.8. Records 3.8.1. The ATC Rope In‐Service Date Record must be maintained for all ropes. One copy should
be maintained in the office with the Tool and Equipment Inventory in the truck file; a second copy should be retained by the foreman and kept with the rope at the jobsite.
4. Forms and Quality Records
Form Number Title Custodian Retention
SFTY FRM‐008 ATC Rope In‐Service Date Record EH&S Discard when rope is discarded
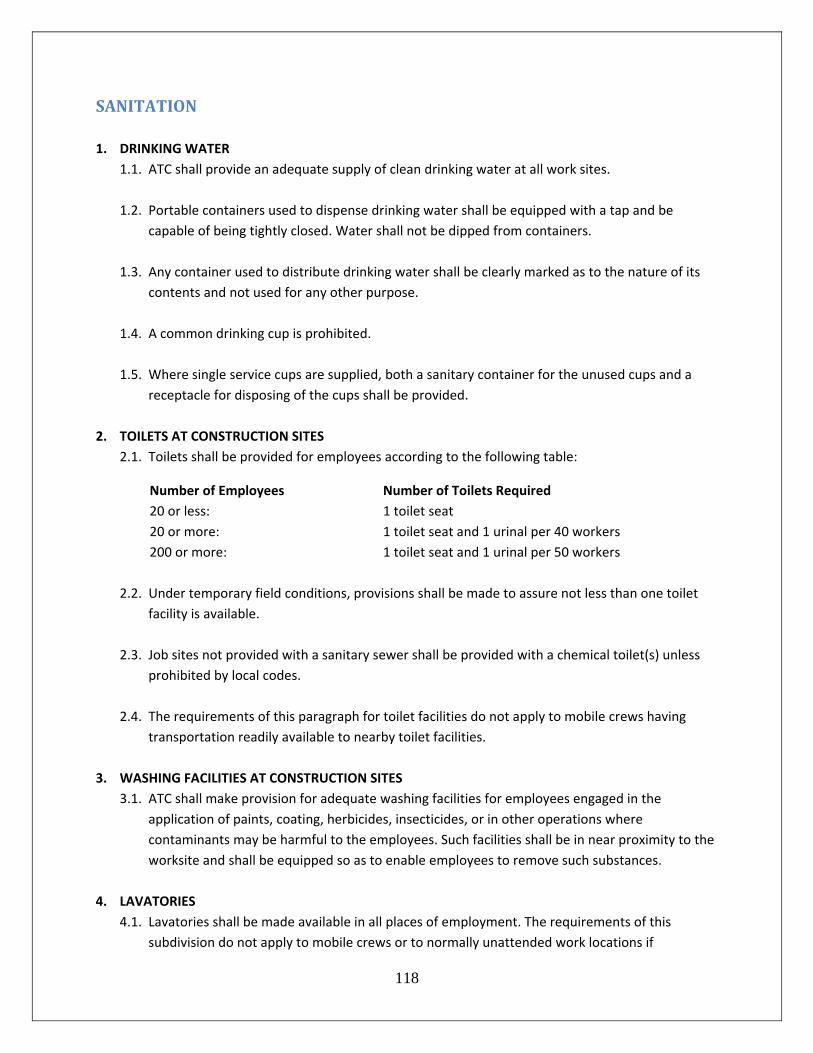
118
SANITATION
1. DRINKING WATER
1.1. ATC shall provide an adequate supply of clean drinking water at all work sites.
1.2. Portable containers used to dispense drinking water shall be equipped with a tap and be
capable of being tightly closed. Water shall not be dipped from containers.
1.3. Any container used to distribute drinking water shall be clearly marked as to the nature of its
contents and not used for any other purpose.
1.4. A common drinking cup is prohibited.
1.5. Where single service cups are supplied, both a sanitary container for the unused cups and a
receptacle for disposing of the cups shall be provided.
2. TOILETS AT CONSTRUCTION SITES
2.1. Toilets shall be provided for employees according to the following table:
Number of Employees Number of Toilets Required
20 or less: 1 toilet seat
20 or more: 1 toilet seat and 1 urinal per 40 workers
200 or more: 1 toilet seat and 1 urinal per 50 workers
2.2. Under temporary field conditions, provisions shall be made to assure not less than one toilet
facility is available.
2.3. Job sites not provided with a sanitary sewer shall be provided with a chemical toilet(s) unless
prohibited by local codes.
2.4. The requirements of this paragraph for toilet facilities do not apply to mobile crews having
transportation readily available to nearby toilet facilities.
3. WASHING FACILITIES AT CONSTRUCTION SITES
3.1. ATC shall make provision for adequate washing facilities for employees engaged in the
application of paints, coating, herbicides, insecticides, or in other operations where
contaminants may be harmful to the employees. Such facilities shall be in near proximity to the
worksite and shall be equipped so as to enable employees to remove such substances.
4. LAVATORIES
4.1. Lavatories shall be made available in all places of employment. The requirements of this
subdivision do not apply to mobile crews or to normally unattended work locations if

119
employees working at these locations have transportation readily available to nearby washing
facilities that meet the other requirements of this paragraph.
4.2. Each lavatory shall be provided with either hot and cold running water or tepid running water.
4.3. Hand soap or similar cleansing agents shall be provided.
4.4. Individual hand towels or sections thereof (of cloth or paper), warm air blowers or clean
individual sections of continuous cloth toweling, convenient to the lavatories, shall be provided.
5. EATING AND DRINKING AREAS
5.1. No employee shall be allowed to consume food or beverages in a toilet room or in any area
where they may be exposed to a hazardous material or chemicals.
6. VERMIN CONTROL
6.1. So far as reasonably practicable, every enclosed workplace shall be constructed, equipped, and
maintained so as to prevent the entrance and harborage of rodents, insects, and other vermin.
A continuing and effective extermination program shall be instituted where their presence is
detected.
7. HANTAVIRUS
7.1. Hantavirus pulmonary syndrome (HPS) is a potentially deadly lung infection transmitted by
infected rodents through their urine, droppings, or saliva. The virus is mainly transmitted to
people when they breathe in air contaminated with the virus. In the United States, deer mice
(along with cotton rats and rice rats in the southeastern states and the white‐footed mouse in
the northeastern states) carry the hantavirus that causes HPS. HPS was first recognized in the
Southwest in 1993 and has since been identified in over half the states in the U.S.
7.2. When opening an unused shelter or other building, open the doors and windows and allow the
space to air out before entering. Upon entering, look for rodent droppings and avoid them.
Under no circumstances should dust be stirred‐up by sweeping or vacuuming droppings, urine
or nesting materials.
7.3. If concerned about the potential for exposure, a dust mask with an N‐100 filter may be worn.
Suitable models include the 3M #8233 N100 respirator and the Moldex N100 respirator.
Regardless of which brand of dust mask chosen, ensure it has a type N‐100 filter because this
type traps the smallest of particles. The EH&S Department should also be contacted if a dust
mask is to be worn so additional OSHA‐required information can be provided.
7.4. Professional exterminators are required for buildings with confirmed Hantavirus infection or
heavy rodent infestations. However, small amounts of rodent droppings, urine or nesting
materials may be cleaned using the following procedures.

120
Put on latex, nitrile or rubber gloves. A dust mask with an N‐100 filter should also be
worn.
Spray mouse nests and droppings with a 10% chlorine bleach solution or equivalent
disinfectant and allow it to sit for 30 minutes. A suitable chlorine bleach solution can be
prepared by mixing 1½ cups of household bleach in 1 gallon of water.
Once everything is wet, take up contaminated materials with a damp towel being
careful to avoid making materials airborne. Place the materials in plastic bags, then seal
and dispose of the bags in the trash or incinerator. Dispose of cleaning materials in the
same manner.
Wash all potentially contaminated hard surfaces with the bleach or disinfectant
solution.
If dead rodents are found, spray them with the bleach solution or disinfectant, then
double‐bag along with all cleaning materials and bury, burn or throw out in appropriate
waste disposal system. If burning or burying is not feasible, contact your local or state
health department about other disposal methods.
Finally, disinfect gloves with disinfectant or soap and water before taking them off. After
taking off the clean gloves, thoroughly wash hands with soap and warm water.

121
SCISSORLIFTS 1. GENERAL
1.1. Scissor lifts are considered to be portable or moveable scaffolds in the OSHA standard.
1.2. Only trained personnel may operate scissor lifts.
1.3. The following training, at a minimum, is required:
1.3.1. OSHA 10‐Hour
1.3.2. Fall Protection
1.3.3. Scissor Lift Operator
2. FALL PROTECTION
2.1. A full body harness shall be worn with a fall restraint lanyard that attaches to the rail or to the
floor depending on the model
2.2. You must always be firmly tied off inside the guardrails.
2.3. The guardrail on a scissor lift is typically 39 inches high
2.3.1. The guardrail is only designed to withstand a force of 200 lbs
2.3.2. The guardrail is not a 5,000 lb. anchor
2.4. Use a positioning strap attached to the designated anchor point on the scissor lift model
3. OPERATION
3.1. Only use a scissor lift on an even surface
3.2. Watch out for potholes, drop offs, bumps or debris
3.3. Always lower a scissor lift before moving it to a different location
3.4. Above 15 feet the potential for tip over exists
3.4.1. Do not stand on the rail and reach over the edge of the basket as this could unbalance the
lift
3.4.2. Avoid pushing hard against an overhead beam as this could cause you to tip
122
TRANSPORTINGHAZARDOUSMATERIALS1. GENERAL
1.1 ATC Employees who travel on commercial and/or private air carriers for purposes of
conducting business on behalf of ATC are required to comply with all DOT, FAA and TSA regulations and individual air carriers’ rules for transporting hazardous materials.
1.2 ATC Employees will ensure through any means necessary, including but not limited to
on‐line research of current lists of allowable and prohibited hazardous materials
published by DOT, FAA and TSA, and confirmation by agents of the airline providing
transportation ALL hazardous materials planned for transporting are properly
permitted, labeled, packaged, and stored in checked and/or carry‐on luggage in
accordance with DOT’s Hazardous Materials Regulations. Though allowable under DOT
regulations, some hazardous materials may, at times, be prohibited by individual
airlines, other nations, or TSA rules.
1.3 Any Employee who violates any aspect of the Travel Policy is subject to discipline, up to and including termination.

123
WELDINGANDCUTTINGSAFETY 1. GENERAL
1.1. Only trained personnel may perform welding or cutting operations.
1.2. At least one 5 pound ABC fire extinguisher must be available wherever welding or cutting
operations are taking place (additional fire extinguisher capacity is suggested). If welding or
cutting operations are conducted aloft, fire extinguisher(s) must also be brought aloft.
1.3. Welding or cutting may only be performed in areas that are made safe from fire. All
combustible materials must be removed or relocated at least 35 feet from the welding or
cutting area. Where this is impracticable, combustibles such as plastic sheathed cable must be
protected with fire‐resistant shields or blankets.
1.4. Welding or cutting may only be performed in areas that have sufficient ventilation. If welding or
cutting needs to be performed in an enclosed area, special precautions are required. This work
should be subcontracted to a company that specializes in this type of work.
1.5. When working above ground level, care must be taken to protect workers below from stray
sparks and slag from welding taking place. Use an appropriate container for disposing of
electrodes and rod stubs.
1.6. All welders and cutters must wear flame‐resistant gloves that provide the heat resistance
necessary for the specific task.
1.7. Clothing must provide sufficient coverage and be made of suitable materials to minimize skin
burns caused by sparks, spatter or ultraviolet and infrared ray flash burns. Long sleeve shirts
must be worn, clothing should not be torn, and sleeves and collars should be kept buttoned.
1.8. Adequate first‐aid equipment must be available at all times.
1.9. Welding should not be done directly on a concrete floor because heat can cause steam to build
up in the floor and cause an explosion.
1.10. Welding, cutting, or other hot work may not be performed on used drums, barrels, tanks or
other containers that contained flammable or toxic materials.
1.11. Arc welding cables and other equipment must be placed so that they are clear of passageways,
ladders, and stairways.

124
1.12. The operator must inspect welding equipment and report any equipment defect or safety
hazard and the use of the equipment shall be discontinued until its safety has been assured.
Repairs shall be made only by qualified personnel.
1.13. All instructions supplied by equipment manufacturers are to be followed at all times.
2. ARC WELDING
2.1. A welding helmet must be used for arc welding or cutting operations. The eye shade must be
appropriately tinted and the helmet worn so as to protect the eyes, face, neck and ears from
the direct radiant energy of the arc.
2.2. Welding areas should be kept dry. Machines that have become wet must be thoroughly dried
and tested before being used. If the welding area is wet or damp, or the operator is actively
perspiring, he/she should wear electric insulating rubber gloves.
2.3. All connections to arc welding machines must be checked before starting operations.
2.4. Cables with damaged insulation or exposed bare conductors must be replaced.
3. OXY‐GAS WELDING AND CUTTING
3.1. Appropriately tinted goggles or other suitable eye protection must be used during all gas
welding or oxygen cutting operations.
3.2. Only friction lighters may be used to light welding torches.
3.3. Plastic disposable cigarette lighters can be dangerous around heat and flame. Do not carry
them in pockets while welding or cutting.
Refer to Section Q for additional information on Compressed Gas Safety
4. WELDING OR CUTTING MONOPOLES
4.1. Do not weld or torch cut a monopole unless absolutely necessary. Plastic sheathed cables can
ignite and burn from the heat generated in cutting or welding operations. Consider every
possible alternative including the installation of cables on the outside of the pole and check
with the client and with zoning to confirm there are no structural issues.
4.2. A cutting wheel should always be used to cut a hand hole. Make sure you cut the hole precisely
to fit the size of the ring. This will minimize both the amount of welding necessary and sparks
that could enter the pole.
4.3. Where welding on a monopole cannot be avoided, it may be possible to use a low heat transfer
weld process.
125
The welding should be performed over short durations to minimize heat build‐up inside
the tower.
Exposed cables should be protected by fire retardant blankets.
Backing material should be used to prevent slag and sparks from entering the tower.
A person should be assigned fire watch duties (not only for the tower, but also for the
surrounding area) for at least half an hour after completion of welding. Fire
extinguishers and a water supply should be kept nearby (recognize they may not be fully
effective in extinguishing a fire in coax).
5. EXOTHERMIC WELDING (CADWELDING)
5.1. Igniter materials must be stored in an approved container and kept away from extreme heat,
sparks and moisture.
5.2. Only use a mold for the conductor size and surface to be welded.
5.3. Make sure the mold is free of defects, cracks and extreme wear. Molten metal temperatures
inside the mold reach 4,000 degrees Fahrenheit.
5.4. Keep the mold free from moisture, as moisture turns to vapor with explosive force at high
temperatures. Molds can be dried with a torch before first use.
5.5. Safety glasses must be worn. Leather gloves and long‐sleeve protection must be worn to
prevent contact burns.
5.6. A flint igniter must be used to start a reaction. Never use a match or open flame, which may
result in serious burns.
5.7. Keep the lid closed and locked tightly to avoid flash and possible eye damage. Do not look
directly into the “flash” as it can cause temporary blindness.
5.8. Avoid inhalation of fumes.
5.9. Never substitute a penny or other material for crucibles (tin discs) to cover
tap hole.

126
THIS PAGE INTENTIONALLY LEFT BLANK