rr 2160 mkii - outlaw audio
TRANSCRIPT

RR 2160 MkII Stereo RetroReceiver
® Owner’s Manual
STANDBY PHONES LEVEL AUX SPEAKER SPEAKER EQEXTERNAL
LOOPUSB
TONE OFF BASS BALANCE TREBLE
SOURCE
RECORD
VOLUME
MENU
ENTER
RR2160
MUTE
Mk II

RR2160 MkII Owner’s Manual
Outlaw Audio RR2160 MkII Stereo RetroReceiver 2
Please Read First
Caution: To reduce the risk of electric shock, do not remove the cover. No user serviceable parts inside. Refer to qualified personnel.
Warning: To reduce the risk of fire or electric shock, do not expose this appliance to rain or moisture.
The lightning flash with arrowhead, within an equilateral triangle, is intended to alert the user to the presence of uninsulated “dangerous voltage” within the product’s enclosure that may be of sufficient magnitude to constitute a risk of electrical shock to persons.
The exclamation point within an equilateral triangle is intended to alert the user to the presence of important operating maintenance (servicing) instructions in the literature accompanying the appliance.
Warning: Important Safeguards • Read instructions: All safety and operating instructions
should be read before the unit is operated. • Retain instructions: The safety and operating instructions
should be retained for future reference. • Heed warnings: All warnings on the unit and in the operating
instructions should be adhered to. • Follow instructions: All operating and use instructions
should be followed. • Water and Moisture: Do not use the unit near water – for
example, near a bath tub, wash bowl, kitchen sink, laundry tub; in a wet basement; or near a swimming pool.
• Accessories: Do not place the unit on an unstable cart, stand, tripod, bracket, or table. The unit may fall, causing serious injury to a child or adult, and serious damage to the unit. Any mounting of the unit should follow the manufacturer’s instructions, and should use a mounting accessory recommended by the manufacturer.
• Wall or Ceiling Mounting: The unit should be mounted to a wall or ceiling only as recommended by the manufacturer.
• Ventilation: Slots and openings in the cabinet are provided for ventilation and to ensure reliable operation of the unit and to protect it from overheating, and these openings must not be blocked or covered. The openings should never be blocked by placing the unit on a bed, sofa, rug, or other similar surface. The unit should not be placed in a built-in installation such as a bookcase or rack unless proper ventilation is provided. There should be free space of at least 3 - 6 in. (7.6 - 15.25 cm) and an opening behind the unit.
• Heat: The unit should be situated away from heat sources such as radiators, heat registers, stoves, or other units (including amplifiers) that produce heat.
• Power Sources: The unit should be operated only from the type of power source indicated on the marking label. If you are not sure of the type of power supplied to your home, consult your unit dealer or local power company.
• Grounding or Polarization: The unit may be equipped with a polarized alternating current line plug (a plug having one blade wider than the other). This plug will fit into the power outlet only one way. This is a safety feature. If you are unable to insert the plug fully into the outlet, try reversing the plug. If the plug should still fail to fit, contact a licensed electrician to replace your obsolete outlet. Do not defeat the safety purpose of the polarized plug.
• Power-Cord Protection: Power-supply cords should be routed so that they are not likely to be walked on or pinched by items placed upon or against them, paying particular attention to cords where they enter a plug, a convenience receptacle, and the point where they exit from the unit.
• Lightning: For added protection for the unit during a lightning storm, or when it is left unattended and unused for long periods of time, unplug it from the wall outlet and disconnect any antenna or cable system. This will prevent damage to the unit due to lighting and power-line surges.
• Cleaning: unplug the unit from the wall outlet before cleaning. The unit should be cleaned only as recommended by the manufacturer.
• Overloading: Do not overload wall outlets, extension cords, or integral convenience receptacles as this can result in a risk of fire or electric shock.
• Object and Liquid Entry: Never push objects of any kind into the unit through openings as they may touch dangerous voltage points or short-out parts that could result in a fire or electric shock. Never spill liquid of any kind on the unit.
• Servicing: Do not attempt to service the unit yourself as opening or removing covers may expose you to dangerous voltage or other hazards. Refer all servicing to qualified service personnel.
• Damage Requiring Service: Unplug the unit from the wall outlet and refer servicing to qualified service personnel under the following conditions: When the power supply cord or plug is damaged, If liquid has been spilled, or objects have fallen into the unit, If the unit has been exposed to rain or water, If the unit does not operate normally by following the operating instructions. Adjust only those controls that are covered by the operating instructions as an improper adjustment of other controls may result in damage and will often require extensive work by a qualified technician to restore the unit to its normal operation, If the unit has been dropped or damaged in any way, and great care should be exercised in handling, and the unit should be examined by qualified service personnel, When the unit exhibits a distinct change in performance (this indicates a need for service). • Replacement Parts: When replacement parts are
required, be sure the replacement parts used have the same characteristics as the original part. Unauthorized substitutions may result in fire, electric shock, or other hazards.
IMPORTANT SAFETY NOTE Before connecting a new component such as the RR2160MkII to your audio or home theater system it is always good practice to make certain that all components are turned off, and preferably unplugged from their AC power source. Many modern electronics products feature automatic turn-on circuits that may be activated during an installation, causing the potential for damage to electronic components and/or speakers. Such damage is not covered by product warranties and Outlaw Audio specifically disclaims responsibility for any such damage.
PrecautionsVerify the Line Voltage Your new RR2160MkII has been factory configured for 120V (+/- 3%) AC lines. Connecting the unit to a line voltage other than that for which it is intended can create a safety and fire hazard, and may damage the RR2160 MkII. If you have any questions about the voltage requirements for your specific model, or about the line voltage in your area, contact Outlaw Audio before plugging the unit into a wall outlet.
FCC:This device complies with Part 15 of the FCC rules. Operationis subject to the following two conditions: (1) this device may not cause harmful interference, and (2) this device must accept any interference received, including interference that may cause undesired operation.
ATTENTION: RISQUE DE CHOC ELECTRIQUENE PAS OUVRIR

RR2160 MkII Owner’s Manual
Outlaw Audio RR2160 MkII Stereo RetroReceiver 3
Veuillez d'abord lire
Mise en Garde: Pour réduire le risque de choc électrique, ne retirez
Avertissement: Pour réduire les risques d'incendie ou de choc
Le flash avec une pointe de flèche, dans un triangle équilatéral, estdestiné à alerter l'utilisateur de la présence d'une "tension dangereuse" non isolée dans l'enceinte du produit qui peut être d'une amplitudesuffisante pour constituer un risque de choc électrique pour lespersonnes.Le point d'exclamation, dans un triangle équilatéral, est destiné à alerter l'utilisateur de la présence d'importantes instructions demaintenance (entretien) de fonctionnement dans la documentationaccompagnant l'appareil.
Avertissement: sauvegardes importantes • Lisez les instructions: Toutes les instructions de sécurité et de
fonctionnement doivent être lues avant d'utiliser l'appareil. • Conserver les instructions: Les instructions de sécurité et
d'utilisation doivent être conservées pour une utilisation future.• Tenez compte des avertissements: Tous les avertissements
sur l'appareil et dans le mode d'emploi doivent être respectés.• Suivre les instructions: Toutes les instructions de fonctionnement
et d'utilisation doivent être suivies. • Eau et humidité: N'utilisez pas l'appareil près de l'eau; par
exemple, près d'une baignoire, d'un lavabo, d'un évier de cuisine,d'une cuve à lessive, dans un sous-sol humide ou près d'une piscine.
• Accessories: Ne placez pas l'appareil sur un chariot, un support, un trépied, un support ou une table instable. L'appareil peut tomber,blessant gravement un enfant ou un adulte et endommageant sérieusement l'appareil. Tout montage de l'unité doit suivre les instructions du fabricant et doit utiliser un accessoire de montage recommandé par le fabricant.
• Montage mural ou au plafond: L'unité doit être montée sur un mur ou un plafond uniquement selon les recommandations du fabricant.
• Ventilation: Les fentes et ouvertures de l'armoire sont prévues pour la ventilation et pour assurer un fonctionnement fiable del'unité et pour la protéger des surchauffes, et ces ouvertures nedoivent pas être obstruées ou couvertes. Les ouvertures ne doiventjamais être cadencées en plaçant l'unité sur un lit, un canapé, un tapis ou toute autre surface similaire. L'unité ne doit pas être placée dans une installation intégrée telle qu'une bibliothèqueou un rack à moins qu'une ventilation appropriée soit fournie. Il doit y avoir un espace libre d'au moins 3 à 6 pouces (7.6 - 15.25 cm) et une ouverture derrière l'unité.
• Chaleur: L'unité doit être située loin des sources de chaleur telles que les radiateurs, les registres de chaleur, les poêles ou d'autres unités (et amplificateurs) qui produisent de la chaleur.
• Sources d'énergie: L'appareil ne doit être utilisé qu'avec le typede source d'alimentation indiqué sur l'étiquette de marquage.Si vous n'êtes pas sûr du type d'alimentation fourni à votre domicile, consultez votre revendeur ou la compagnie d'électricitélocale.
• Mise à la terre ou polarisation: L'unité peut être équipée d'uneprise de ligne à courant alternatif polarisée (une prise ayant une lame plus large que l'autre). Cette fiche ne s'insérera dans la prisede courant que dans un sens. C'est un dispositif de sécurité. Si vous ne parvenez pas à insérer complètement la fiche dans la prise,essayez d'inverser la fiche. Si la fiche ne parvient toujours pas à s'adapter, contactez un électricien agréé pour remplacer votre priseobsolète. N'annulez pas l'objectif de sécurité de la fiche polarisée.
• Protection du cordon d'alimentation: Les cordons d'alimentation doiventêtre acheminés de manière à ce qu'ils ne soient pas susceptibles d'être piétinés ou pincés par des objets placés sur ou contre eux, en accordantune attention particulière aux cordons où ils entrent dans une prise, uneprise de courant et le point où ils sortent du unité.
• Foudre: Pour une protection supplémentaire de l'appareil pendant un orageou lorsqu'il est laissé sans surveillance et inutilisé pendant de longuespériodes, débranchez-le de la prise murale et débranchez toute antenne ou système de câbles. Cela évitera d'endommager l'unité en raison de la foudre et des surtensions de la ligne électrique.
• Nettoyage: Débranchez l'appareil de la prise murale avant de le nettoyer.L'unité doit être nettoyée uniquement selon les recommandations du fabricant.
• Surcharge: Ne surchargez pas les prises murales, les rallonges ou lesprises de courant intégrées car cela peut entraîner un risque d'incendieou de choc électrique.
• Entrée d'objets et de liquides: N'introduisez jamais d'objets de quelquenature que ce soit dans l'appareil par les ouvertures car ils pourraient toucher des points de tension dangereux ou court-circuiter des piècessusceptibles de provoquer un incendie ou un choc électrique. Ne renversez jamais de liquide d'aucune sorte sur l'appareil.
• Entretien: N'essayez pas de réparer l'appareil vous-même car l'ouvertureou le retrait des couvercles peut vous exposer à une tension dangereuseou à d'autres dangers. Confiez toutes les réparations à un technicienqualifié.
• Dommages nécessitant une réparation: Débranchez l'appareil de laprise murale et confiez la réparation à un technicien qualifié dans les conditions suivantes:
Lorsque le cordon d'alimentation ou la fiche est endommagé,Si du liquide a été renversé ou des objets sont tombés dans l'appareil,Si l'appareil a été exposé à la pluie ou à l'eau,Si l'appareil ne fonctionne pas normalement en suivant lesinstructions d'utilisation.Ajustez uniquement les commandes qui sont couvertes par les instructionsde fonctionnement, car un réglage incorrect des autres commandes peutentraîner des dommages et nécessitera souvent un travail approfondi parun technicien qualifié pour restaurer l'unité à son fonctionnement normal,Si l'unité est tombée ou a été endommagée de quelque manière que cesoit, et une grande prudence doit être apportée à la manipulation, et l'unité doit être examinée par un personnel de service qualifié,Lorsque l'unité présente un changement de performance distinct(cela indique un besoin de service).• Pièces de rechange: Lorsque des pièces de rechange sont
nécessaires, assurez-vous que les pièces de rechange utilisées ont lesmêmes caractéristiques que les pièces d'origine. Les substitutions nonautorisées peuvent provoquer un incendie, une décharge électriqueou d'autres dangers.
Remarque de sécurité importante Avant de connecter un nouveau composant tel que le RR2160MkII à votre systèmeaudio ou home cinéma, il est toujours recommandé de vous assurer que tous les composants sont éteints, et de préférence débranchés de leur source d'alimentationCA. De nombreux produits électroniques modernes disposent de circuits de misesous tension automatiques qui peuvent être activés lors d'une installation, ce quipeut endommager les composants électroniques et / ou les haut-parleurs. Cesdommages ne sont pas couverts par les garanties des produits et Outlaw Audiodécline expressément toute responsabilité pour de tels dommages.
PrécautionsVérifier la tension de ligneVotre nouveau RR2160MkII a été configuré en usine pour des lignes CA 120 V (+/- 3%). La connexion de l'appareil à une tension secteur autre que celle pourlaquelle il est prévu peut créer un risque de sécurité et d'incendie et peut endommager le RR2160MkII. Si vous avez des questions sur la tension secteur dansvotre région, contactez Outlaw Audio avant de brancher l'appareil dans une prisemurale.
ATTENTION: RISQUE DE CHOC ELECTRIQUENE PAS OUVRIR
pas le couvercle. Aucune pièce réparable par l'utilisateur à l'intérieur. Consulter un personnel qualifié
électrique, n'exposez pas cet appareil à la pluie ou à l'humidité.
FCC Cet appareil est conforme à la partie 15 des règles de la FCC. Son fonctionnement est soumis aux deux conditions suivantes: (1) cet appareil ne doit pas provoquer(2) cet appareil doit accepter toute interférence reçue, y compris les interférencespouvant entraîner un fonctionnement indésirable.

RR2160 MkII Owner’s Manual
Outlaw Audio RR2160 MkII Stereo RetroReceiver 4
NOTE: It is always a good idea to avoid using any audio or video equipment on the same AC circuit as equipment with motors, such as air conditioners or refrigerators. This will lessen the possibility of power variation and electrical start-up noise affecting your sound system.
Power Cord The removable power cord that is shipped with the RR2160 MkII is specifically designed to be used with this product. DO NOT use any other power cord, as that may reduce the unit’s performance and possibly create a safety hazard. In particular, DO NOT use standard IEC type power cords designed for computers and other business equipment products, as they have a three prong plug that is not meant for use with the RR2160 MkII. Should the power cord require replacement, use an identical type, or contact Outlaw Audio for service.
Handle the AC Power Cord Gently When disconnecting the power cord from an AC outlet, always pull the plug, never pull the cord. If you do not intend to use the RR2160 MkII for any considerable length of time, disconnect the plug from the AC outlet. If the power cord is replaced, make certain that it is of similar gauge. As with all electrical devices, do not run power cords under rugs or carpets or place heavy objects on them. Damaged power cords should be replaced immediately with cords meeting factory specifications.
AC Fuse The fuse is located inside the chassis and is not user-service-able. If power does not come on, contact Outlaw Audio.
Wiring Cables that are run inside of walls should have the appropriate markings to indicate compliance with, and listing by the UL , CSA or other standards required by the UL, CSA, NEC or your local building code. Questions about cables inside of walls should be referred to a qualified custom installer, or a licensed electrician or low-voltage contractor.
Installation Location To assure proper operation and to avoid the potential for safety hazards, place the unit on a firm and level surface capable of supporting it’s weight. When placing the unit on a shelf, be certain that the shelf and any mounting hardware can support the weight of the unit and any additional items in the equipment rack, or on the shelf.
When positioning the RR2160 MkII in its final location, make certain that it has adequate ventilation on all sides, as well as on the top and bottom. In particular, it is a good idea to provide at least three to six inches of room above the unit for air circulation. DO NOT place CDs, DVDs, videotapes, owner’s manuals, or other paper on top of, or beneath, the unit, or in-between multiple amplifiers in a stack. This will block airflow, causing heat build-up, degraded performance, and may create a possible fire hazard.
If the unit is to be enclosed in a cabinet or rack, make certain there is adequate air circulation. Sufficient ventilation should be provided so that hot air may exit, and cool air may enter the cabinet. In some instances, a small cooling fan may be required to insure adequate airflow through the cabinet. If you are in doubt as to the ventilation requirements for your specific installation, please contact us. Also, do not place the RR2160 MkII directly on a carpeted surface, as this will inhibit airflow underneath as well as create a potential fire hazard.
Avoid installation in humid locations, in extremely hot or cold locations, or in areas that are exposed to direct sunlight or space heating equipment.
Do Not Open the Cabinet There are no user serviceable components inside this product. Opening the cabinet may present a shock hazard, and any modification to the product will void your guarantee. If water or any
metal object, such as a paper clip, coin or a staple, accidentally falls inside the unit, disconnect it from the AC power source immediately, and contact Outlaw Audio for further instructions. Recording Copyright Recording of copyrighted material for other than personal use is illegal without permission of the copyright holder.
Note to CATV system installer This reminder is provided to call the CATV system installer’s attention to Article 820-40 of the NEC, ANSI/NFPA 70, which provides guidelines for proper grounding and, in particular, specifies that the cable ground shall be connected to the grounding system of the building, as close to the point of cable entry as practical. FCC Information for User CAUTION: ANY changes or modifications not expressly approved by the party responsible for compliance could void the user’s authority to operate the equipment.
NOTE: This equipment has been tested and found to comply with the limits for a Class B digital device, pursuant to Part 15 of the FCC Rules. These limits are designed to provide reasonable protection against harmful interference in a residential installation.
This equipment generates, uses and can radiate radio frequency energy and, if not installed and used in accordance with the instructions, may cause harmful interference to radio communications. However, there is no guarantee that interference will not occur in a particular installation. If this equipment does cause harmful interference to radio or television reception, which can be determined by turning the equipment off and on, the user is encouraged to try to correct the interference by one or more of the following measures:
Reorient or relocate the receiving antenna. Increase the separation between the equipment and receiver. Connect the equipment into an outlet on a circuit different from that to which the receiver is connected.
Outdoor Antenna Installation Safe Antenna and cable Connection If an outside antenna or cable system is connected to the equipment, be sure the antenna or cable system is grounded so as to provide some protection against built up static charges and voltage surges. Section 810 of the National Electrical Code, ANSI/NFPA 70 (in Canada, part 1 of the Canadian Electrical Code) provides information with respect to proper grounding of the mast and supporting structure, grounding of the lead-in wire to an antenna discharge unit, size of grounding conductors, location of antenna discharge unit, connection to grounding electrodes and requirements for the grounding electrode.
Keep Antenna Clear of High Voltage Power Lines or Circuits An outside antenna system should be located well away from power lines, electric light or power circuits and where it will never come into contact with these power sources if it should happen to fall. When installing an outside antenna, extreme care should be taken to avoid touching power lines, circuits or other power sources as this could be fatal. Because of the hazards involved, antenna installation should be left to a professional.
Consult the dealer or an experienced radio/TV technician for help.FCC Radiation Exposure StatementThis equipment complies with FCC radiation exposure limits set forth for an uncontrolled environment. This equipment should be installed and operated with a minimum distance of 20cm between the radiator andyour body

RR2160 MkII Owner’s Manual
Outlaw Audio RR2160 MkII Stereo RetroReceiver 5
Table of Contents 2 5 5 6 6 6 7 9
10
11 12 13 16 17 18 1818 18
22 22 22 22 23 23 23 24 24 24 25 2526 27 27 28
28 28 29 30 31 32
Please Read First A Brief Note on This Manual For Future Reference Quick Guide to Features Unpacking Accessories RR2160 MkII Front Panel RR2160 MkII Rear Panel Remote Control Connecting Your RR2160 MkII
Connecting and Using Antennas Connecting Source Components Loudspeaker Connections Subwoofer and Bass Management External Amplifier Connections 12 Volt Trigger IR Input and Output USB Power Ports AC Power Connection
Operation Power Listening to a Source Using the Volume Control Muting the Volume Speaker A/B Selection Speaker EQ Adjusting Tone Controls Balance Adjustment Using Headphones Recording Setting Sleep Timer Using the Tuner Playing Audio Files from a USB Source Using the Internet Radio Playing Audio Files from your phone RR2160 MkII Setup Menu
Care and Maintenance Cleaning When You’re Away
Troubleshooting RR2160 MkII Specifications Notes Outlaw Audio Limited Warranty
Thank you for purchasing the Outlaw Audio RR2160 MkII Stereo RetroReceiver. Like its original predecessor, the RR2150, your new RetroReceiver is a full-featured stereo receiver with exterior styling inspired by art deco table radios of the past. This handsome aluminum face has been paired with modern circuitry, parts selection, assembly techniques, and features to provide state-of-the-art audio performance.
A Brief Note on This Manual To get the maximum performance and enjoyment from your RR2160 MkII, please take a few minutes to read this manual. This advice may seem counter to the Outlaw approach to audio, but the pages that follow will help you get full benefit of the RR2160 MkII.It contains everything you need to know to connect, configure, and use your new receiver. You’ll learn how to make your RR2160 MkII work with all of the other components in your system, and how to adjust its settings for the best possible performance.
If you have any questions about your RR2160 MkII, its installation or operation, please contact us at:support.outlawaudio.comYou may also find fellow Outlaws hanging out at the Outlaw forum, the Saloon. Stop in by clicking on “Customer Forum” near the topof our home page at www.outlawaudio.com.
For Future Reference: Serial Number:
_____________________________ Date of Purchase:
_____________________________
The contents of this manual are Copyright © 2020 by Outlaw Audio, LLC, and may not be duplicated or reproduced by any means, whether physical, electronic or otherwise without prior written consent from Outlaw Audio.
Outlaw Audio and the Outlaw Audio logo are registered trademarks of Outlaw Audio, LLC.
Specifications are those in effect at the time of printing. Outlaw Audio reserves the right to change specifications or designs at any time without notice without obligation to modify existing units.

RR2160 MkII Owner’s Manual
Outlaw Audio RR2160 MkII Stereo RetroReceiver 6
Quick Guide to the Features We’ll explain the RR2160 MkII’s many features later in this manual, but first we wanted to identify some of the key features so you can watch for those you’re most interested in.
• High Power Stereo Amplifier2 x 110 watts continuous power, 20 Hz to 20 kHz @ 8 ohms, <0.05% THD, both channels driven
• 7 Analog Inputs Connect all of your analog audio sources with ease. Included are a rear panel Phono input (moving coil or moving magnet), four rear analog inputs, an external processor loop, and a front panel 3.5mm auxiliary input for an MP3 player.
• 1 Front and 2 Rear USB inputs Connect a USB-enabled device, a USB storage device, or a computer for playback of audio files or to use the RR2160 MkII and an external sound card.
• Separate Signal Paths for Listening and Recording Listen to one source while recording another.
• Preamp Outputs and Main Amplifier Inputs These enable easy system configuration with additional power amplifiers, electronic crossovers, equalizers, etc.
• A/B Speaker Selector Switch• Front Panel Adjustable Speaker Equalization
This selector adds a half-octave of bass boost at selected frequencies for better bass response with compact bookshelf speakers.
• Front Panel Tone Control Defeat • High-performance FM/FM Stereo Tuner with
HD Radio and 20 Presets. • Audiophile-quality Preamplifier and Power
Amplifier Stages Necessary for critical music listening.
• Headphone jack with level control. • 12 Volt Trigger
Use this output for control of external system components (amplifier, video projector, etc.) so they turn on and off in sync with your RR 2160.
• Infrared (IR) Input and Output Use these to control your RR 2160 even when it is hidden behind closed doors – not that you’d ever want to do that!
• Precision Volume Control• Removable IEC-style Power Cord
Unpacking Your RR2160 MkII has traveled to you in packaging designed to protect it from the hardships of shipping that it inevitably must endure. We recommend you retain these materials for use if you move or if the unit ever needs to be shipped back to the Outlaws for any reason.
You can minimize the size of the carton and packaging for storage. Flatten the inner and outer cartons by carefully opening the top and bottom flaps and folding them flat. Do the same with all cardboard inserts. For foam and other packaging that can’t be folded, save it in the unit’s protective plastic bag.
The RR2160 MkII is not light, and the heavier internal components are not evenly distributed. Lift with your legs, not your back! Also be careful about knobs on the front panel and connectors on the rear panel.
Accessories Accompanying your RR2160 MkII are several accessories. Please check to make sure the following are included in the box:
• Remote control • 2 AAA batteries for the remote control • AC power cord • FM antenna • (2) U-shaped jumpers (installed on rear of unit) • Owner’s Manual

RR2160 MkII Owner’s Manual
Outlaw Audio RR2160 MkII Stereo RetroReceiver 7
RR2160 MkII Front Panel
F1 Tone Off (Defeat) Control (Page 23) Press to take the tone controls out of the signal path so that they have no effect regardless of where they’re set. The button’s blue LED will light when tone controls are inactive.
F2 Bass Control (Page 23) Turn to change the amount of low frequency information being sent to your speakers or headphones. This control is inactive when the Tone Off button (F1) is active. NOTE: When using small speakers (those with limited bass handling capability) be careful when increasing bass content, particularly if any Speaker EQ (F15) settings are active.
F3 Balance Control (Page 24) Turn to adjust for left-right imbalances.
F4 Front Panel DisplayThis display shows the selected input or radio station currently tuned, the current volume, and menu items when operating or setting up your RR2160 MkII.
F5 Treble Control (Page 23) Turn to change the amount of high frequency information being sent to your speakers or headphones. This control is inactive when the Tone Off button (F1) is active.
F6 Tuning Up (Menu Select) (Pages 25, 28) F7 Tuning Down (Menu Select) (Pages 25, 28)
Press to tune to a broadcast frequency higher or lower than the one currently selected. Also use this button with the Menu and Enter buttons (F8 and F9) to navigate menus.
F8 Menu (Pages 27, 28) Hold down this button (2-3 seconds) to access and navigate the RR2160 MkII’s setup menu. Briefly press this button to move back in menus or to navigate available selections for Internet Radio.
F9 Enter (Pages 27, 28) When navigating a menu (F8), this button will access sub-menus or select highlighted options.
F10 On/Standby (Page 22) When the RR2160 MkII is plugged in and the Master Power switch (R11) is On, pressing the front panel On/Standby button will toggle the unit from standby condition (everything off except for the IR sensor and associated circuitry) to fully operational. When the unit is in standby mode, the button’s blue LED will light.
F11 Headphone Jack (Page 24) Connect a 1/4 inch phone plug (or an adaptor) here for headphone listening.
F12 Headphone Level Control (Page 24) Turn to control headphone volume.
F13 Aux Input Jack (Pages 12, 22) Use this stereo 3.5mm jack to plug in any portable audio device with a headphone or line-level output.
F14 Speaker Selector (Page 23) When two pairs of speakers are connected to the RR2160 MkII, this will let you select which pair is active.
F15 Speaker EQ (Page 23) Press to cycle through the available Speaker EQ settings.
STANDBY PHONES LEVEL AUX SPEAKER SPEAKER EQEXTERNAL
LOOPUSB
TONE OFF BASS BALANCE TREBLE
SOURCE
RECORD
VOLUME
MENU
ENTER
RR2160
MUTE
Mk II
F1 F2 F3 F5F4 F6 & F7
F19
F8 F9
F10 F11 F12 F13 F14 F15 F16 F17 F18 F20 F21
RR2160 MkII Owner’s Manual
Outlaw Audio RR2160 MkII Stereo RetroReceiver 8
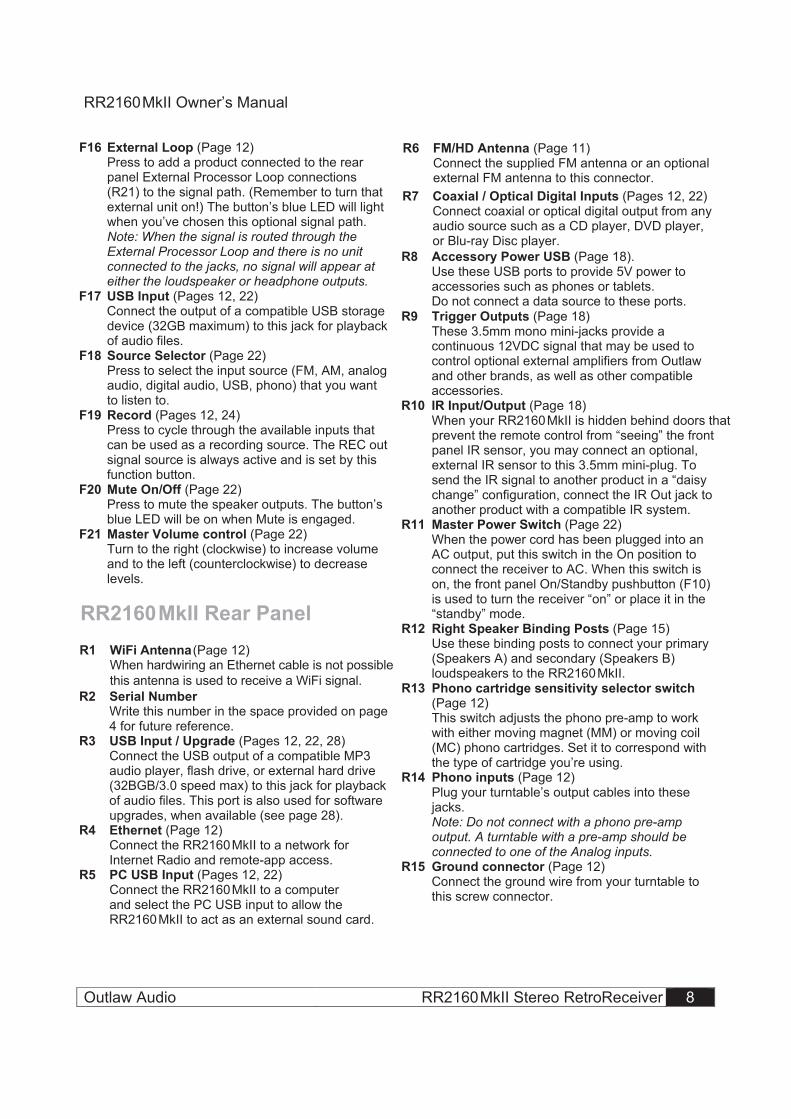
F16 External Loop (Page 12) Press to add a product connected to the rear panel External Processor Loop connections (R21) to the signal path. (Remember to turn that external unit on!) The button’s blue LED will light when you’ve chosen this optional signal path. Note: When the signal is routed through the External Processor Loop and there is no unit connected to the jacks, no signal will appear at either the loudspeaker or headphone outputs.
F17 USB Input (Pages 12, 22) Connect the output of a compatible USB storage device (32GB maximum) to this jack for playback of audio files.
F18 Source Selector (Page 22) Press to select the input source (FM, AM, analog audio, digital audio, USB, phono) that you want to listen to.
F19 Record (Pages 12, 24) Press to cycle through the available inputs that can be used as a recording source. The REC out signal source is always active and is set by this function button.
F20 Mute On/Off (Page 22) Press to mute the speaker outputs. The button’s blue LED will be on when Mute is engaged.
F21 Master Volume control (Page 22) Turn to the right (clockwise) to increase volume and to the left (counterclockwise) to decrease levels.
RR2160 MkII Rear Panel
R2 Serial NumberWrite this number in the space provided on page 4 for future reference.
R3 USB Input / Upgrade (Pages 12, 22, 28) Connect the USB output of a compatible MP3 audio player, flash drive, or external hard drive (32BGB/3.0 speed max) to this jack for playback of audio files. This port is also used for software upgrades, when available (see page 28).
R4 Ethernet (Page 12) Connect the RR2160 MkII to a network for Internet Radio and remote-app access.
R5 PC USB Input (Pages 12, 22) Connect the RR2160 MkII to a computer and select the PC USB input to allow the RR2160 MkII to act as an external sound card.
R7 Coaxial / Optical Digital Inputs (Pages 12, 22) Connect coaxial or optical digital output from any audio source such as a CD player, DVD player, or Blu-ray Disc player.
R1 WiFi Antenna (Page 12) When hardwiring an Ethernet cable is not possiblethis antenna is used to receive a WiFi signal.
R6 FM/HD Antenna (Page 11) Connect the supplied FM antenna or an optional external FM antenna to this connector.
R8 Accessory Power USB (Page 18). Use these USB ports to provide 5V power to accessories such as phones or tablets.Do not connect a data source to these ports.
R9 Trigger Outputs (Page 18) These 3.5mm mono mini-jacks provide a continuous 12VDC signal that may be used to control optional external amplifiers from Outlaw and other brands, as well as other compatible accessories.
R10 IR Input/Output (Page 18) When your RR2160 MkII is hidden behind doors that prevent the remote control from “seeing” the front panel IR sensor, you may connect an optional, external IR sensor to this 3.5mm mini-plug. To send the IR signal to another product in a “daisy change” configuration, connect the IR Out jack to another product with a compatible IR system.
R11 Master Power Switch (Page 22) When the power cord has been plugged into an AC output, put this switch in the On position to connect the receiver to AC. When this switch is on, the front panel On/Standby pushbutton (F10) is used to turn the receiver “on” or place it in the “standby” mode.
R12 Right Speaker Binding Posts (Page 15) Use these binding posts to connect your primary (Speakers A) and secondary (Speakers B) loudspeakers to the RR2160 MkII.
R13 Phono cartridge sensitivity selector switch(Page 12) This switch adjusts the phono pre-amp to work with either moving magnet (MM) or moving coil (MC) phono cartridges. Set it to correspond with the type of cartridge you’re using.
R14 Phono inputs (Page 12) Plug your turntable’s output cables into these jacks. Note: Do not connect with a phono pre-amp output. A turntable with a pre-amp should be connected to one of the Analog inputs.
R15 Ground connector (Page 12) Connect the ground wire from your turntable to this screw connector.

RR2160 MkII Owner’s Manual
Outlaw Audio RR2160 MkII Stereo RetroReceiver 9
R16 Analog 1 Inputs (Pages 12, 22) R17 Analog 2 Inputs (Pages 12, 22)R18 Analog 3 Inputs (Pages 12, 22)R19 Analog 4 Inputs (Pages 12, 22)
Connect the line-level analog audio outputs of sources such as a CD player, DVD/Blu-ray Disc player, network media player, Bluetooth or streaming adapter or dongle, satellite or cable box to these jacks.
R20 Record Output jacks (Pages 12, 24) Connect analog audio inputs from your recording device or encoder for digital storage to these jacks. Note: These are fixed-level outputs and are not affected by the RR2160 MkII’s volume control. If you’re using a portable recording device (MiniDisc recorder, etc.), you may use shielded stereo “Y” cords (3.5 mm stereo miniplug to two RCA-type jacks) to go from it to the RR2160 MkII.
R21 External Processor Loop connections(Page 12) Connect an external processor (equalizer, electronic crossover, surround processor, etc.) to these jacks. These outputs are also fixed-level. The Loop input may also be used as an additional analog input.
R22 Bass Management selector switch(Page 16) This switch lets you adjust the internal crossover (bass management system) to route user-selected low frequencies to the subwoofer output (R25) while the rest of the audio signal is sent to the amplifier and then to the main loudspeakers.
R23 Preamplifier outputs (Page 17) These outputs allow you to connect a high output power amplifier if needed. Simply remove the jumpers and connect the preamp outputs to the inputs of the additional amplifier.Note: Removing the jumpers means that the RR2160 MkII’s internal amplifier does not receive a signal and cannot send any output to the speakers connected to it. Use shielded “Y” cords to connect both the internal amplifier and another amplifier to the receiver’s preamp section.
R24 Main Amp inputs (Page 17) These inputs are normally connected to the preamplifier outputs by jumpers. (See R23 above.)
R25 Subwoofer outputs (Page 17) Connect a powered subwoofer to either the SUB1 or SUB2 output. Make sure you’ve set the Bass Management selector switch (R22) correctly. The output from this connector is variable and controlled by the Master Volume setting (F21).
R26 Left Speaker Binding Posts (Page 15) Use these binding posts to connect your primary (Speakers A) and secondary (Speakers B) speakers to the RR2160 MkII.
R27 AC Socket (Page 18) Connect the supplied AC power cord to this socket before turning on the Master Power Switch (R11).
+-
+-
+ -
+ -
ETHERNET
MAININ
SUB1
MASTER POWER
ON OFF
OUTPHONO
PHONOGROUND
MC MM
IN1 2 3 4
SUB2
PREOUT
RECOUT
AUDIO INEXTERNAL
PROCESSOR
L
R
L
R
L
R
BASSMANAGEMENT
ACCESSORY POWER5V DC / 1.0A MAXCOAX 1PC-USB COAX 2
OPT 1 OPT 2 TRIGGEROUT IR-IN
1 2IR-OUT
USB PLAY/UPGRADER
SERIAL NUMBER:
60 80 100 BP
RIGHTSPEAKERS
A
B
A
B
LEFTSPEAKERS
HD RADIO ANT.RR2160 MkIIOutlaw Audio, LLCEaston, MA USAwww.outlawaudio.comDesigned in the USAMade in China
AC INPUT 120V~ 60HzPOWER CONSUMPTION 400W
WiFi ANT.
R1 R2R3
R4 R5 R6 R7 R8 R9 R10
R11
R12 R13 R14 R16 - R19 R20 R21 R22 R23 R25 R26 R27R15 R24

RR2160 MkII Owner’s Manual
Outlaw Audio RR2160 MkII Stereo RetroReceiver 10
Remote Control C1 Power On (Page 22)
Press this button to turn on the RR2160 MkII. C2 Power Off (Page 22)
Press this button to place the receiver in standby mode. C3 Source/Input Selectors (Page 22)
Press the button corresponding to the name of the input you wish to listen to. For the analog audio inputs (ANA), coaxial digital audio inputs (COAX), optical digital inputs (OPT), USB inputs (USB), and Internet Radio inputs (NET),press the button multiple times to cycle through the input choices.
C4 Numeric Keypad (0-9) (Page 25) Press these buttons to enter numbers for different functions such as direct input of station frequencies and direct access to preset stations for the tuner.
C5 Record (Pages 12, 24) Press this button to cycle through the available analog inputs that can be used as the recording source.
C6 Menu (Pages 27, 28) Hold down this button to access the RR2160 MkII’s setupmenu, or press it briefly to navigate back when utilizing Internet Radio or the setup menu.
C7 Cursor Control (Pages 25, 26, 28) The Left and Right buttons provide balance control. The Up and Down buttons provide the same function as the Tuning Up/Down buttons (F6/F7 on the front panel) when using the tuner or navigating USB or Internet Radio.
C8 Treble control (Page 23) This button and the Left/Right cursor buttons control the treble setting, which is displayed on the front panel display.
C9 Volume Up/Down (Page 22) Press these buttons to raise or lower the volume.
C10 Speaker EQ (Page 23) Press this button to cycle through the available Speaker EQ settings.
C11 Tuner Mode (Page 25) This button selects either the “FM Stereo” or “FM Mono” tuner mode.
C12 Display (Page 28) This button adjusts the brightness of the front panel display.
C13 Direct (Page 25) This button starts the process of selecting a broadcast station directly. Within five seconds of pressing the button, key in a broadcast frequency using the numeric pad (C4).
C14 Sleep (Page 25) Press this button to activate the sleep function, which turns the RR2160 MkII off after a user-selectable amountof time.
ON
OPTANA
1 2 3
4 5 6
8
0REC
Vol +
P
P
T
T.Scan-SPK EQ
Disp
Mem
SLEEP
T.Mode
Direct
ENTER
SPK A/B
9
USB AUX
OFF
PHONO
Mute
Menu
Treble Bass
Exit
_
C1
C2
C3
C4
C5
C6
C7
C8
C9
C11
C13
C14
C10
C12
C15
C16
C17
C18C19
C20
C21
C22
COAX
NET LOOP TNR
7
Vol
.Scan+
.Scan+
.Scan-

RR2160 MkII Owner’s Manual
Outlaw Audio RR2160 MkII Stereo RetroReceiver 11
C15 Speaker Selector (Page 23) When two pairs of speakers are connected to the RR2160 MkII, this button selects which pair is active.
C16 Exit (Page 28) Press this button to exit the RR2160 MkII’s setup menu.
C17 Enter (Pages 26 - 28) When navigating the setup menu (C6), pressing this button will access sub-menus or select highlighted options. Or, press to choose a new track after using the Up/Down cursor arrows (C7) to search for another track.
C18 Bass (Page 23) This button and the Left/Right cursor buttons provide control of the bass setting, which is displayed on the front panel display. NOTE: When using small speakers (those with limited bass handling capability) be careful when increasing bass content, particularly if any Speaker EQ (C10) settings are active.
C19 Mute On/Off (Page 22) Press this button to mute the speaker outputs. The front panel mute button’s blue LED will be on when Mute is engaged.
C20 Tuner Scan Up/Down (Pages 25, 28) When the tuner is in use, press these buttons to go to the next higher or lower broadcast frequency.
C21 Preset Up/Down (Page 26) Press these buttons to scan up and down through the list of radio station frequencies that you have programmed into the RR2160 MkII.
C22 Memory (Page 26) Press this button to begin the process of entering a radio station’s frequency into the tuner memory for quick recall.
Connecting Your RR2160 MkII Before trying to connect your RR2160 MkII to other system components, please observe the following simple precautions:
• Don’t connect the power cord to either the AC outlet or your RR 2160 until you’ve made all other connections.
• Always turn off any device before connecting it to the RR2160 MkII. Better yet, unplug the device from its AC power source, as automatic turn-on signals may inadvertently turn the product on. Better safe than sorry!
• Always pay attention to the warnings, options, and specific procedures contained in the instructions that came with the component you’re connecting.
• For analog connections, remember that red input jacks = right channel audio white input jacks = left channel audio
• Insert all plugs and connectors securely. If you don’t, you may experience noise, poor performance, or equipment damage.
• DO NOT bundle audio connection cables with power cords and speaker cables. To get the performance you expect, run all the power cords down one side of the cabinet, all the signal connections down the other side, and the speaker cables down the center.
• Connect your speakers after you’ve connected all your other components to the RR2160 MkIIbut before you connect the power cord.
Connecting and Using an Antenna
The RR2160 MkII has an internal FM/FM Stereo/ HD tuner with a connection for the FM antennae.
FM Antenna
Connect the supplied FM dipole antenna by screwing the antenna’s coaxial connector onto the FM antenna connector (R6).
Note: This antenna is for indoor use only. For best reception, fully extend the antenna and experiment with its positioning to get the strongest signal. If FM reception with the supplied indoor antenna does not provide a strong enough signal for acceptable reception, we recommend using an optional amplified indoor or high-gain outdoor antenna.

RR2160 MkII Owner’s Manual
Outlaw Audio RR2160 MkII Stereo RetroReceiver 12
WiFi Antenna
Use this antenna to pull a WiFi signal in situationswhere a wired Ethernet connection cannot be connected to the rear of the RR2160 MkII.Experiment with the antenna’s position to obtain the strongest signal.
Connecting Source Components
Connect your input sources as shown below. Once the source is connected you may select it by pressing the front panel Source selector (F18) to step through your various input choices. The RR2160 MkII will show which input is currently enabled by displaying the name on the front panel display.
Phono
Plug your turntable’s output cables into the L/R Phono inputs (R14). Make sure you’ve connected Left to Left and Right to Right. Next, attach the ground connection from your turntable’s tonearm to the ground connector screw terminal (R15).
Finally, set the phono cartridge sensitivity selector switch (R13) to either MM (moving magnet) or MC (moving coil) to correspond with the type of cartridge you are using. Note that some high output moving coil cartridges work better when this selector is set to MM.
USB
Use a “fast USB” cable to connect a Windows or Mac based computer to the RR2160 MkII’s rear panel USB 2.0 input (R5).
Recording Device
Using shielded RCA-to-RCA cables, connect your recording device’s analog audio outputs to one of the RR2160 MkII’s analog inputs (R16-R19). Next, connect your recording device’s analog audio inputs to the RR2160 MkII’s L/R Record outputs (R20).
There are two points you need to remember:
• The REC outputs “fixed-level” in that they are not affected by the RR2160 MkII’s volume control.
• You must select the source you want to record by using the Record Selector (F19 or C5).
If your recording device has the 3.5 mm stereo miniplugs often used on portable audio products, use an optional adaptor cable to complete your connections.
Aux
Connect a music player, smartphone, tablet, streaming adapter or any other playback device with a stereo 3.5 mm jack for either headphone or line-level output to the RR2160 MkII’s front panel Aux input (F13).
CD/DVD/BD/Video
Using shielded RCA-to-RCA cables, connect the analog audio outputs of a CD, DVD, Blu-ray Disc player, or A/V source (VCR, satellite or cable box, etc.) to one set of the RR 2160’s analog inputs (R16-R19). As with other sources, make sure to connect Left to Left and Right to Right. To connect the BTR-250D, you can use the 3.5mm to RCA cable suppled with the BTR. For sources that offer a coaxial or optical digital output, they may be connected to a coaxial or optical digital input instead of an analog input.
NOTE: The RR2160 MkII does not have any video inputs for a DVD/BD player or other video device. Any video connections should be made directly to an appropriate input on your display device.
Ethernet
Connect the RR2160 MkII to your home network with an Ethernet cable for access to Internet Radio.
External Loop
Description of External Loop
This external processor loop (R21) allows you to insert a wide variety of external devices such as equalizers or surround processors into the RR2160 MkII’s signal path. However, its use is optional. If your system doesn’t need the added flexibility, make sure that the blue LED in the External Loop button (F16) is not illuminated. Since the External Loop may be switched in or out, it is best suited to devices that you might use with some input sources, but not all. In addition, the input of the External Loop may be used alone as an additional input.

RR2160 MkII Owner’s Manual
Outlaw Audio RR2160 MkII Stereo RetroReceiver 13
External Loop Connections
Using shielded RCA-to-RCA cables, connect the external processor’s analog audio outputs to the RR2160 MkII’s L & R analog audio inputs. Next, connect the external processor’s analog audio inputs to the RR2160 MkII’s analog audio outputs.
Remember these two points.
• You must push the front panel External Loop button (F16) or the LOOP button of the Source/Input selector buttons on the remote (C3) to route the audio signal to and from the external processor. The button’s blue LED will light when the external loop is active.
• The external processor loop is a “fixed level” loop. The loop output is not affected by the RR2160 MkII’s Master Volume Control.
Preamplifier Outputs/Main Amplifier Inputs
The RR2160 MkII is shipped with U-shaped jumpers that connect the preamplifier and power amplifier sections of the receiver. For most systems no change is needed here, as you will use both sections of the RR2160 MkII. However, if you wish to use an optional, external amplifier, remove the jumper plugs and connect the left and right output jacks on the RR2160 MkII to the matching inputs on your amplifier. Save the jumper plugs for use should you later wish to return to normal operation.
These jacks also provide a means to insert an equalizer or other device controller in the audio signal path when you wish to have that device ALWAYS be used. A good example of this is the external equalizer/controller used with certain brands of speakers.
To connect an external processor so that it is always in the audio path, remove the two U shaped jumpers. As noted above, you will want to put them someplace safe in case you need them later. You may want to store them with this manual or bag and tape them to the rear or underside of the RR2160 MkII.
Connect the RR2160 MkII’s L & R Preamp audio outputs (R23) to the inputs of the external processor. Next, connect the outputs of the external processor to the RR2160 MkII’s Main amp audio inputs (R24).
Loudspeaker Connections
The connections between the RR2160 MkII and your loudspeakers are critical to good sound. Although there’s a lot of debate about the “best” speaker wire and the “best” connectors, our advice is to use what you feel is appropriate. However, we do feel that there is one vital guideline: If the run from your RR 2160 to a speaker is less than 40 feet, use speaker wire with a conductor diameter that’s identified as “16 gauge” or lower. For longer runs, use a minimum of 14 gauge wiring.
If you’re confused by the “gauge,” you’re not alone. The standard in wire measurements is called AWG, or American Wire Gauge. The AWG number refers to the diameter of one conductor only (speaker wire has two conductors) and smaller gauge numbers mean larger conductors. Here’s a short list of gauge numbers and their corresponding diameters:
12 gauge .0808" 14 gauge .0641" 16 gauge .0508" 18 gauge .0402" 22 gauge .0254"
You can see that “hardware store” 22 or 24 gauge wire is very thin. We don’t recommend it for any serious audio application. Even 18 gauge “zip cord” (also called “lamp cord”) is not that substantial. Our minimum recommendation is 16 gauge, and 14 gauge is better. 12 gauge is excellent but is comparatively hard to work with (it usually doesn’t bend easily and terminations – lugs or banana plugs – are problematic.) The advantage of large diameter wire is that, all else being equal, it has less resistance to current flow than thin wire. Wherever possible, the same length of speaker wire should be used for both speakers, even if one is positioned closer to the RR2160 MkII than the other.

RR2160 MkII Owner’s Manual
Outlaw Audio RR2160 MkII Stereo RetroReceiver 14
Connecting Audio Equipment to the RR2160 MkII
+-
+-
+ -
+ -
ETHERNET
MAININ
SUB1
MASTER POWER
ON OFF
OUTPHONO
PHONOGROUND
MC MM
IN1 2 3 4
SUB2
PREOUT
RECOUT
AUDIO INEXTERNAL
PROCESSOR
L
R
L
R
L
R
ACCESSORY POWER5V DC / 1.0A MAXPC-USB COAX 2
OPT 2 TRIGGEROUT IR-IN
1 2IR-OUT
USB PLAY/UPGRADER
SERIAL NUMBER:
RIGHTSPEAKERS
A
B
A
B
LEFTSPEAKERS
HD RADIO ANT.RR2160 MkIIOutlaw Audio, LLCEaston, MA USAwww.outlawaudio.comDesigned in the USAMade in China
AC INPUT 120V~ 60HzPOWER CONSUMPTION 400W
WiFi ANT.
COAX 1OPT 1
BASSMANAGEMENT60 80 100 BP
CD PLAYER/ AUDIO SOURCE
BLU-RAY PLAYER/ AUDIO SOURCE
PORTABLE AUDIO PLAYERTO FRONT PANEL AUX
TV/ OPTICAL OUTPUT
TURNTABLE CD TRANSPORT/ DIGITAL COAX OUTPUT
NETWORK AUDIO PLAYER/ OPTICAL OUTPUTCOMPUTER/USB OUTPUT

RR2160 MkII Owner’s Manual
Outlaw Audio RR2160 MkII Stereo RetroReceiver 15
Connecting Recording Equipment and An External Processor to the RR2160 MkII
+-
+-
+ -
+ -
ETHERNET
MAININ
SUB1
MASTER POWER
ON OFF
OUTPHONO
PHONOGROUND
MC MM
IN1 2 3 4
SUB2
PREOUT
RECOUT
AUDIO INEXTERNAL
PROCESSOR
L
R
L
R
L
R
ACCESSORY POWER5V DC / 1.0A MAXPC-USB COAX 2
OPT 2 TRIGGEROUT IR-IN
1 2IR-OUT
USB PLAY/UPGRADER
SERIAL NUMBER:
RIGHTSPEAKERS
A
B
A
B
LEFTSPEAKERS
HD RADIO ANT.RR2160 MkIIOutlaw Audio, LLCEaston, MA USAwww.outlawaudio.comDesigned in the USAMade in China
AC INPUT 120V~ 60HzPOWER CONSUMPTION 400W
WiFi ANT.
COAX 1OPT 1
BASSMANAGEMENT60 80 100 BP
RECORDING DEVICE EXTERNAL PROCESSOR E.G. EQ OR COMPRESSOR
RLL R
OUTPUTS OUTPUTSINPUTS INPUTS
RLL R
Speaker Connections
Many Outlaws will use full range speakers with theRR2160 MkII. These speakers reproduce the entireaudible range from a single enclosure. Some will augment their full range speakers’ bass outputcapability by adding a subwoofer. In still other cases,some will use compact “monitor” or bookshelf speakers with limited low end performance incombination with a separate subwoofer. Regardlessof the configuration, brand or model of your speakers,the RR2160 MkII is uniquely designed to provide outstanding sound quality.
The speaker binding posts (R12 and R26) arefive-way connectors with gold-plated contactareas that accept bare wire, pin terminations,spade lugs, and banana plugs.
The choice is yours.
NOTE: You can use two pairs of loudspeakers(A and B) with the RR2160 MkII, but whendoing so it is important to use speakers of theproper impedance rating. The RR2160 is ratedto handle speaker loads as low as 4 Ohms.When using two pairs of speakers, the speakersare connected in parallel. As a result, two setsof 8 Ohm speakers become a 4 ohm load whenrun at the same time. Two sets of 6 Ohm loadspeakers running at once result in a 3 Ohm load,which can cause power transformer problemsand result in power transformer failure. Lowerimpedance speakers (6 and 4 ohm) may beused as either Speaker A or speaker B, butcannot be run simultaneously (A + B).
Physical Connections
The RR2160 MkII accommodates two separate pairsof speakers so that you may have one pair in your main listening room and another in a remote location such as a patio or kitchen. Speaker connections aremade the same way for both sets of speakers, butalways make certain that you connect a pair of speakers, not just one. As the audio sent to both pairsof speakers is the same, it makes no difference whichpair is connected to which set of terminals.
RR2160 MkII Owner’s Manual
Outlaw Audio RR2160 MkII Stereo RetroReceiver 16
Bare Wire or Pin Terminations
Unscrew the outer barrel of the speaker connector until you see the hole in its center post. Insert the conductor or pin into the hole and screw the outer barrel tightly.
• Spade Lugs: These look like small two-pronged forks. Unscrew the barrel enough to place the lug’s prongs around the inner post and then retighten the barrel.
• Banana Plugs: Insert them into the holes in the end of each post/barrel assembly. Just push them in carefully and you’re done.
CAUTION: DO NOT over tighten the barrels. This isn’t a contest of strength. Just hand tighten the barrel enough to insure good contact so that it is snug to the wire or termination device and the speaker terminal.
Whichever type of termination you use, it is important to make sure that the individual wire strands that make up each conductor bundle are tightly wrapped together and that there are no frayed ends that protrude past the speaker terminal or the wire termination for that conductor. This will prevent short circuits and possible amplifier failure.
Remember these three points:
• Make sure to observe proper continuity and polarity.
• For continuity, make sure you connect your main Left speaker to System A’s Left terminals and your main Right speaker to the System A Right terminals. Then connect your secondary speakers to System B terminals, making sure to connect the Left speaker to the Left terminals and the Right speaker to the Right terminals. Care here will save a lot of time later.
• The RR2160 MkII’s speaker connections are color-coded. Red terminals are “+” or “hot” while black terminals are “–” or “ground.” For proper polarity, make sure that you’ve connected the proper speaker’s “+” terminal (the one with the red barrel) to your speaker’s “+” terminal. Then connect the “–“ terminal (it has a black barrel) to the same speaker’s “–“ terminal. It’s that simple.
A Note On Polarity/Phase
When speakers are connected correctly, they are said to be “in phase.” This is critical to proper sound reproduction as it means that the drivers in each speaker work together, with the cones in each speaker moving in the same direction at the same time. When speakers are hooked up “out of phase,” the drivers in each speaker respond differently to the amplifier’s signal. For example, the drivers of the left speaker will push out when the drivers of the right speaker pull in, producing a very imprecise, almost “ghostly,” stereo image or poor bass performance. No, there’s nothing dangerous about hooking speakers up “out of phase.” You won’t damage anything, it just won’t sound good.
Subwoofers and Bass Management Settings
The RR2160 MkII is unique among stereo receivers in that it has built-in bass management, a feature common, if not required, for multi-channel products, but not found in the two-channel world. While traditional two-channel systems have long used full-range speakers, modern audio systems – even those designed for two-channel music – may use frequency limited bookshelf speakers.
Bass Management
Rather than provide a simple subwoofer output that places the burden of bass management on the subwoofer, the RR2160 MkII includes a custom designed analog bass management system. The internal crossover is a symmetrical 2nd order (12 dB/octave) Butterworth filter set. BP (Bypass) duplicates the full range signal sent to your speakers at the subwoofer output. This enables you to utilize the crossover in your subwoofer.
If your system includes a subwoofer, read on for the configuration steps. If you are not using a subwoofer, skip to the next section.
Subwoofers come in two varieties, powered and passive. Powered subwoofers include their own built-in amplifier and are by far the most popular, while passive subwoofers require the use of a separate, external amplifier. You can use either type with your RR2160 MkII.

RR2160 MkII Owner’s Manual
Outlaw Audio RR2160 MkII Stereo RetroReceiver 17
Powered Subwoofers
Use a shielded interconnect cable to connect either of the RR2160 MkII’s subwoofer output jacks (R25) to the subwoofer’s line input jack. If the subwoofer has more than one input jack, check its owner’s manual to see which input you should use for a monaural bass signal. Then follow any specific connection and/or configuration instructions supplied with the subwoofer.
We suggest that you use the rear panel Bass Management switch (R22) rather than your powered sub’s internal crossover. You’ll find the RR2160 MkII’s circuitry exceptionally clean and freeof noise compared to similar circuits in most subs.
Passive (non-amplified) subwoofer
Modified “bi-amp” option: The modified “bi-amp” configuration uses the RR2160 MkII’s internal crossover and is used most often:
Set the RR2160 MkII’s Bass Management switch (R22) to the crossover frequency (60, 80, or 100 Hz) that is appropriate for your speakers.
Connect one of the RR2160 MkII’s subwoofer output jacks (R25) to the input of the amplifier used to power the subwoofer and the output of the subwoofer amplifier to the subwoofer.
Traditional “bi-amp” option: The traditional “bi-amp” configuration requires an external electronics crossover and separate power amplifier:
Set the Bass Management switch (R22) to BP (bypass). Remove the U-shaped jumpers that connect the preamp outputs (R23) and power amp inputs (R24).
Connect the RR2160 MkII’s preamp outputs to the crossover’s inputs. Connect the crossover’s high pass outputs to the RR2160 MkII’s main amp inputs. Then connect the crossover’s low pass outputs to the inputs of the amplifier you will use to drive your subwoofer and connect that amplifier to the subwoofer.
Adjust the crossover to best integrate the output of the wide range speakers and the subwoofer.
External Amplifier Connections
You can use a separate, external power amplifier either as a substitute for the RR2160 MkII’s internal amp or to supplement the internal amp when adding additional speakers in a different area of your home. If following Option 1 or Option 2 listed below, an additional amplifier will only amplify the source you select with the RR2160 MkII’s input selector (F18 and C3 for front panel and remote control respectively).
As with any component that is connected to the RR2160 MkII, always make sure that both the RR2160 MkII and the additional amplifier are OFF or disconnected from any AC power source when making these connections. A misstep here could result in severe damage to your amplifier and/or loudspeakers.
There are a number of options available to connect an external amplifier:
Option 1: Using an external amplifier only.
Remove the pre-out/main-in U-shaped jumpers. Connect the preamplifier outputs (R23) to theexternal amplifier’s inputs. Next, connect yourspeakers to the external amplifier.
This option lets you control the volume produced by any speakers connected to the new amplifier with the RR2160 MkII’s volume control.
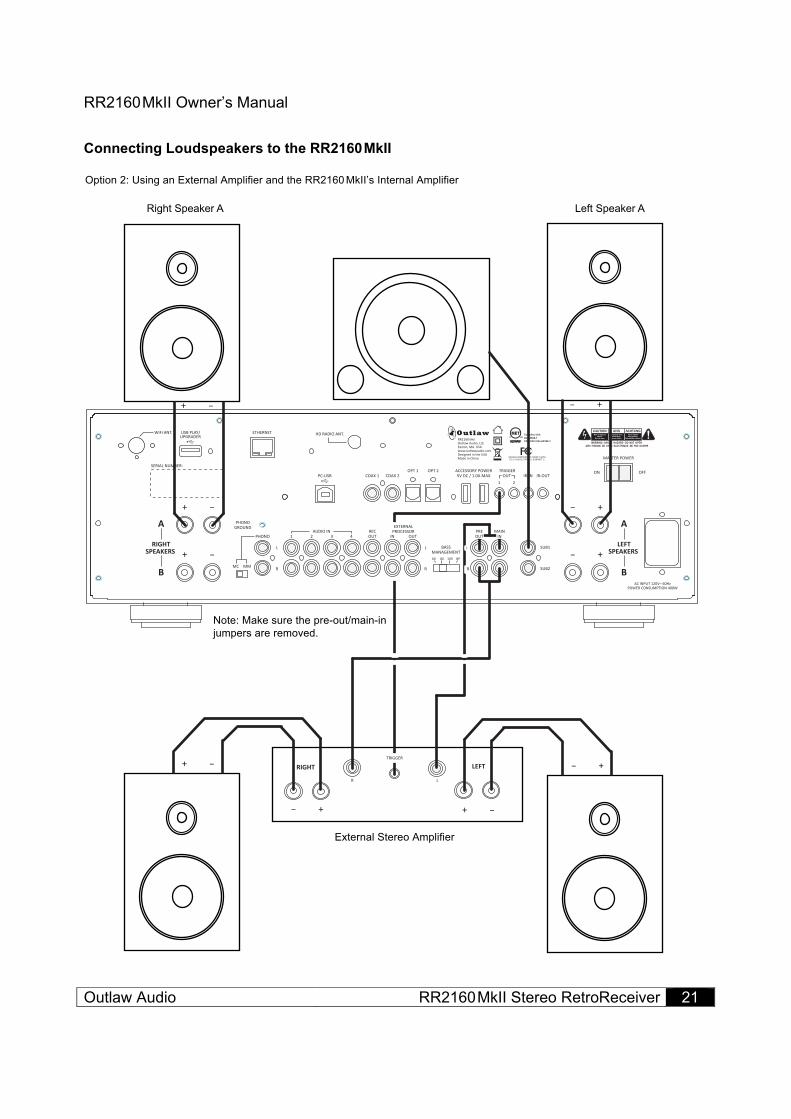
Option 2: Using an external amplifier AND the RR2160 MkII’s internal amplifier for two sets of speakers fed with the same source and at the same relative volume level.
Remove the pre-out/main-in U-shaped jumpers. Using a pair of shielded RCA “Y” interconnects, connect the RR2160 MkII’s left channel preamp output to both the RR2160 MkII’s main amplifier inputs and to the left channel inputs of the new amplifier. Repeat the step above for the right channel.
This option lets you control the volume produced by any speakers connected to the new amplifier with the RR2160 MkII’s volume control.

RR2160 MkII Owner’s Manual
Outlaw Audio RR2160 MkII Stereo RetroReceiver 18
Option 3: Using the External Loop as an additional audio output.
Although the EXTERNAL LOOP IN can be used as an additional input, the EXTERNAL LOOP OUT can be used to send audio to another receiver or integrated amplifier.
As the EXTERNAL LOOP OUT is always sending the active signal out at a fixed level, you would not want to connect it directly to an amplifier unless it had an external volume control.
Option 4: Using an external amplifier to send a second source to a second set of speakers.
Do not remove the pre-out/main-in jumpers. Connect the RR2160 MkII’s REC OUT outputs (R20) to the external amplifier’s inputs. Next, connect the speakers to the external amplifier.
Use the RR2160 MkII’s volume control to adjust the level to the speakers connected to the RR2160 MkII.
The input for the source fed to the external amplifier and the speakers connected to it is selected with the front panel Record Selector (F19). As the output is fixed, we strongly advise that you either use an amplifier with built-in volume control for this application, or that an optional speaker-level volume control be installed between the outputs of the external amplifier and the speakers. Be certain that the volume control is capable of handling the power output from your external amplifier.
Note: In regards to the second zone, if you wish to monitor only the same source as your main zone all the time, you can utilize the External Loop OUT instead of the REC OUT.
12 Volt Trigger
The RR2160 MkII has two 12 volt Trigger outputs that provide a 12 volt DC signal that can be used to control compatible external components such as amplifiers, blinds and projection screens.
To control an external device such as an Outlaw power amplifier with the RR2160 MkII, connect either one of the Trigger Outputs (R9) on the rear panel to the matching “Trigger” or “Control” input on the external component.
Once the two units are connected, the external component will turn on when the RR2160 MkII is on, and off when the RR2160 MkII is turned off.
IR Input and Output
The RR2160 MkII has an IR input and IR output that can be used with external IR remote sensors.
To use the RR2160 MkII’s remote when the receiver is concealed, connect an external IR sensor to the IR Input. A 3.5mm mono cable may be connected to the IR Output to pass the IR signals through to an additional concealed component, such as a CD player.
USB Power Ports
These ports may be used to supply 5 VDC power to phones, tablets or other accessories. The total current draw cannot exceed 1000ma. These ports do not enable the "Fast Charge" mode on some phones.
AC Power Connection
Insert the supplied power cord into the AC input socket (R27), and then connect it to a non-switched AC outlet. If a power conditioner or other device is used between the receiver and the AC power source, it is your responsibility to make certain that the external device is capable of handling the power drawn by the receiver. Use of external power products not compatible with the RR2160 MkII may create a safety hazard.
It is important to use the supplied power cord, not a standard IEC 3-prong (grounded) power cord. If the power cord is replaced, be certain to use one with identical configuration and capacity.
CAUTION: Before you plug the power cord into an AC wall outlet, confirm that you’ve made all connections to the RR2160 MkII first.
WARNING: Never disconnect the power cord at the RR2160 MkII end while the other end is still plugged into an AC outlet. This may cause an electric shock. Always connect power by plugging into the AC outlet last and disconnect by unplugging from the AC outlet first.

RR2160 MkII Owner’s Manual
Outlaw Audio RR2160 MkII Stereo RetroReceiver 19
Connecting Loudspeakers to the RR2160 MkII
+-
+-
+ -
+ -
ETHERNET
MAININ
SUB1
MASTER POWER
ON OFF
OUTPHONO
PHONOGROUND
MC MM
IN1 2 3 4
SUB2
PREOUT
RECOUT
AUDIO INEXTERNAL
PROCESSOR
L
R
L
R
L
R
ACCESSORY POWER5V DC / 1.0A MAXPC-USB COAX 2
OPT 2 TRIGGEROUT IR-IN
1 2IR-OUT
USB PLAY/UPGRADER
SERIAL NUMBER:
RIGHTSPEAKERS
A
B
A
B
LEFTSPEAKERS
HD RADIO ANT.RR2160 MkIIOutlaw Audio, LLCEaston, MA USAwww.outlawaudio.comDesigned in the USAMade in China
AC INPUT 120V~ 60HzPOWER CONSUMPTION 400W
WiFi ANT.
COAX 1OPT 1
BASSMANAGEMENT60 80 100 BP
+-+ -
+ - +-
Note: Make sure the pre-out/main-injumpers are inserted properly.
Right Speaker B Left Speaker B
Right Speaker A Left Speaker A

RR2160 MkII Owner’s Manual
Outlaw Audio RR2160 MkII Stereo RetroReceiver 20
Connecting Loudspeakers to the RR2160 MkII
+-
+-
+ -
+ -
ETHERNET
MAININ
SUB1
MASTER POWER
ON OFF
OUTPHONO
PHONOGROUND
MC MM
IN1 2 3 4
SUB2
PREOUT
RECOUT
AUDIO INEXTERNAL
PROCESSOR
L
R
L
R
ACCESSORY POWER5V DC / 1.0A MAXPC-USB COAX 2
OPT 2 TRIGGEROUT IR-IN
1 2IR-OUT
USB PLAY/UPGRADER
SERIAL NUMBER:
RIGHTSPEAKERS
A
B
A
B
LEFTSPEAKERS
HD RADIO ANT.RR2160 MkIIOutlaw Audio, LLCEaston, MA USAwww.outlawaudio.comDesigned in the USAMade in China
AC INPUT 120V~ 60HzPOWER CONSUMPTION 400W
WiFi ANT.
COAX 1OPT 1
BASSMANAGEMENT60 80 100 BP
+-+ -
Note: Make sure the pre-out/main-injumpers are removed.
RIGHT LEFT
+- + -
TRIGGER
L
R
Option 1: Using an External Amplifier
External Stereo Amplifier
LR
RR2160 MkII Owner’s Manual
Outlaw Audio RR2160 MkII Stereo RetroReceiver 21
Connecting Loudspeakers to the RR2160 MkII
+-
+-
+ -
+ -
ETHERNET
MAIN
SUB1
MASTER POWER
ON OFF
OUTPHONO
PHONOGROUND
MC MM
IN1 2 3 4
SUB2
PRERECOUT
AUDIO INEXTERNAL
PROCESSOR
L
R
L
R
ACCESSORY POWER5V DC / 1.0A MAXPC-USB COAX 2
OPT 2 TRIGGEROUT IR-IN
1 2IR-OUT
USB PLAY/UPGRADER
SERIAL NUMBER:
RIGHTSPEAKERS
A
B
A
B
LEFTSPEAKERS
HD RADIO ANT.RR2160 MkIIOutlaw Audio, LLCEaston, MA USAwww.outlawaudio.comDesigned in the USAMade in China
AC INPUT 120V~ 60HzPOWER CONSUMPTION 400W
WiFi ANT.
COAX 1OPT 1
BASSMANAGEMENT60 80 100 BP
+-+ -
Note: Make sure the pre-out/main-injumpers are removed.
RIGHT LEFT
+- + -
TRIGGER
L
R
Option 2: Using an External Amplifier and the RR2160 MkII’s Internal Amplifier
External Stereo Amplifier
LR
+ - +-
Right Speaker A Left Speaker A
OUT IN
RR2160 MkII Owner’s Manual
Outlaw Audio RR2160 MkII Stereo RetroReceiver 22
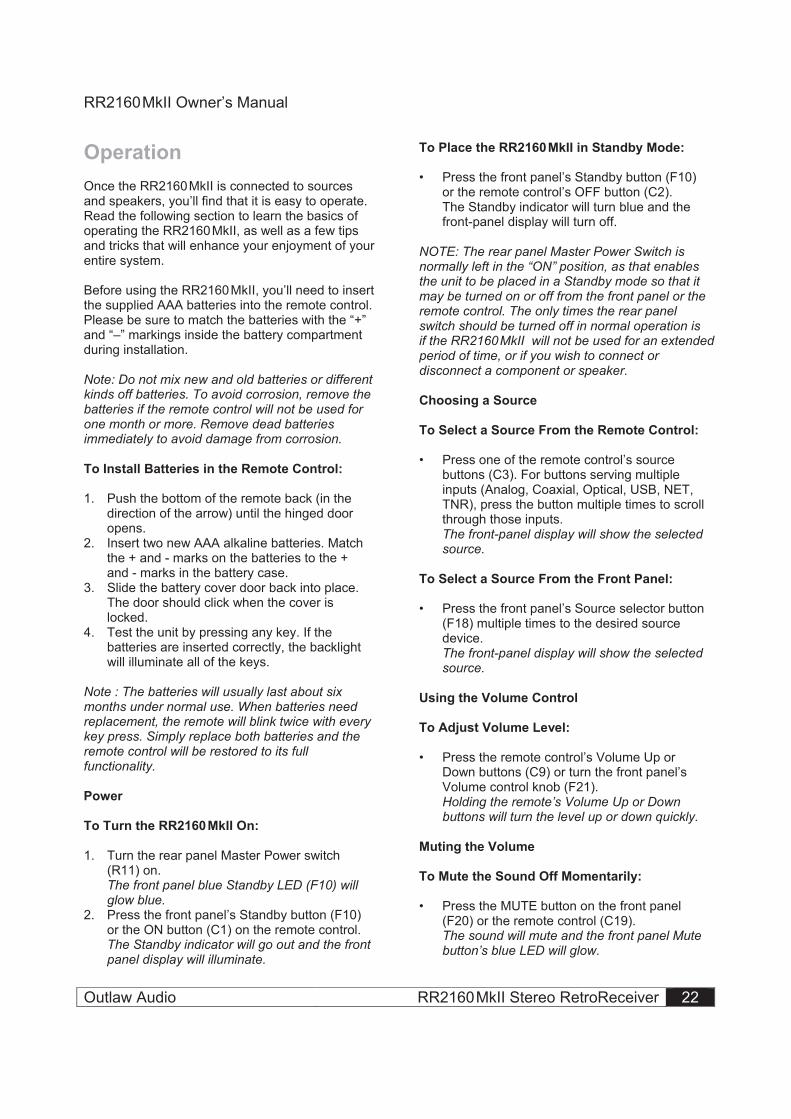
OperationOnce the RR2160 MkII is connected to sources and speakers, you’ll find that it is easy to operate. Read the following section to learn the basics of operating the RR2160 MkII, as well as a few tips and tricks that will enhance your enjoyment of your entire system.
Before using the RR2160 MkII, you’ll need to insert the supplied AAA batteries into the remote control. Please be sure to match the batteries with the “+” and “–” markings inside the battery compartment during installation.
Note: Do not mix new and old batteries or different kinds off batteries. To avoid corrosion, remove the batteries if the remote control will not be used for one month or more. Remove dead batteries immediately to avoid damage from corrosion.
To Install Batteries in the Remote Control:
1. Push the bottom of the remote back (in the direction of the arrow) until the hinged door opens.
2. Insert two new AAA alkaline batteries. Match the + and - marks on the batteries to the + and - marks in the battery case.
3. Slide the battery cover door back into place. The door should click when the cover is locked.
4. Test the unit by pressing any key. If the batteries are inserted correctly, the backlight will illuminate all of the keys.
Note : The batteries will usually last about six months under normal use. When batteries need replacement, the remote will blink twice with every key press. Simply replace both batteries and the remote control will be restored to its full functionality.
Power
To Turn the RR2160 MkII On:
1. Turn the rear panel Master Power switch (R11) on. The front panel blue Standby LED (F10) will glow blue.
2. Press the front panel’s Standby button (F10) or the ON button (C1) on the remote control. The Standby indicator will go out and the front panel display will illuminate.
To Place the RR2160 MkII in Standby Mode:
• Press the front panel’s Standby button (F10) or the remote control’s OFF button (C2). The Standby indicator will turn blue and the front-panel display will turn off.
NOTE: The rear panel Master Power Switch is normally left in the “ON” position, as that enables the unit to be placed in a Standby mode so that it may be turned on or off from the front panel or the remote control. The only times the rear panel switch should be turned off in normal operation is if the RR2160 MkII will not be used for an extended period of time, or if you wish to connect or disconnect a component or speaker.
Choosing a Source
To Select a Source From the Remote Control:
• Press one of the remote control’s source buttons (C3). For buttons serving multiple inputs (Analog, Coaxial, Optical, USB, NET, TNR), press the button multiple times to scroll through those inputs. The front-panel display will show the selected source.
To Select a Source From the Front Panel:
• Press the front panel’s Source selector button (F18) multiple times to the desired source device. The front-panel display will show the selected source.
Using the Volume Control
To Adjust Volume Level:
• Press the remote control’s Volume Up or Down buttons (C9) or turn the front panel’s Volume control knob (F21). Holding the remote’s Volume Up or Down buttons will turn the level up or down quickly.
Muting the Volume
To Mute the Sound Off Momentarily:
• Press the MUTE button on the front panel (F20) or the remote control (C19). The sound will mute and the front panel Mute button’s blue LED will glow.

RR2160 MkII Owner’s Manual
Outlaw Audio RR2160 MkII Stereo RetroReceiver 23
To Turn Muting Off:
• Press the MUTE button or adjust the volume level to restore volume to its previous level.
Speaker A/B Selection
The RR2160 MkII allows you to connect two pairs of speakers, each of which will be sent the same output signal. Four options are available, depending on which you select with the Speaker Selector button (F14 or C15). Each time you press the button, a different option will appear on the bottom line of the front panel.
• Select “Speaker A” to listen to speakers connected to the “A” speaker output terminals only.
• Select “Speaker B” to listen to speakers connected to the “B” speaker output terminals only.
• Select “Speaker A+B” position to listen to both sets of speakers.
• Select “Speaker Off” to disable all speakers connected to the RR 2160. The front panel Speaker button’s blue LED will turn off.
Speaker EQ
The RR2160 MkII’s unique speaker EQ circuit allows you to add an additional 6dB (about one-half octave) of bass at and below a specific frequency to increase the low end performance of traditional bookshelf speakers. Particularly with sealed (rather than ported) designs with eight or ten inch mid-range drivers, this circuit helps compensate for the roll-off at the low end of the speaker’s range. It is not generally recommended for use when a separate subwoofer is connected.
It is important to understand that this circuit is not a replacement for the traditional “Bass Control”, which applies a wide boost or cut at a center frequency of 50Hz. Further, this circuit is not part of the bass management circuit, described on page 16.
To Activate Speaker EQ:
1. Look at the specification for your speakers and check for the lowest frequency your speakers are able to reproduce.
2. Press the Speaker EQ button (F15 or C10) multiple times to select an EQ setting using a frequency that is either at the speaker’s lower frequency, or one notch above it. Options
include 55Hz, 65Hz, and 80z. There are no hard rules as to which way to set this, if indeed you feel it contributes to the sound of your system at all. A variety of conditions, including the type of speakers in use, the room acoustics and your personal listening preferences are all factors here. If you like the way the system sounds, choose the setting that works best for you.
To Deactivate Speaker EQ:
• Press the Speaker EQ button (F15 or C10) until the front panel display reads “EQ OFF” and the front panel Speaker EQ button’s blue LED turns off.
Note: Be careful about using this circuit when the bass control is turned to its maximum boost. That is almost guaranteed to provide an undesirable result!
Adjusting Tone Controls
The RR2160 MkII offers front panel tone controls that may be adjusted to suit your listening taste. You may also take the tone controls out of the circuit completely for “flat” operation.
To Adjust the Tone Controls:
1. Ensure the Tone Off button (F1) is not engaged and that the button’s blue LED is OFF.
2. Turn the Bass control knob (F2) clockwise or counterclockwise, or press the Bass button on the remote (C18) and use the left and right navigation buttons (C7). You can adjust the bass cut or boost within a range of ± 10 dB. The 0dB value represents the setting where bass is neither added nor removed.
3. Turn the Treble control knob (F5) clockwise or counterclockwise, or press the Treble button on the remote (C8) and use the left and right navigation buttons (C7). You can adjust the treble cut or boost within a range of ± 10 dB. The 0dB value represents the setting where treble is neither added nor removed.

RR2160 MkII Owner’s Manual
Outlaw Audio RR2160 MkII Stereo RetroReceiver 24
To Disable the Tone Controls: • Press the Tone Off button (F1).
The front panel will say “TONE OFF” and the button’s blue LED will light to remind you that the tone controls are deactivated. Note: While Tone Off is engaged, theLoudness Curve found in the menu will be deactivated.
Balance Adjustment
The left/right balance of the RR2160 MkII’s output may be adjusted by using the Balance Control.
To Adjust the Balance:
• Turn the Balance control knob (F3) clockwise or counterclockwise, or press the left and right navigation buttons on the remote (C7). Turning the knob clockwise or pressing the right button emphasizes the right speaker more. Turning the knob counterclockwise or pressing the left button emphasizes the left speaker. As adjustments are made, the front panel will display “BALANCE” followed by the current balance setting. This will be “00” for equal left/right balance, “L01” to “L20” for minimum to maximum left emphasis, or “R01” to “R20” for minimum to maximum right emphasis.
Using Headphones
You can use headphones for private listening without disturbing others or for critical listening. Be aware that the headphone experience is not the same as using speakers. Although some listeners prefer headphones, most prefer the loudspeaker experience better. It’s your choice.
To Listen to the RR2160 MkII Using Headphones:
1. Plug in any pair of headphones using a standard 1/4 inch stereo headphone jack into the front panel input (F11). For headphones used with portable devices, you may need a 3.5mm to 1/4 inch adaptor available at most electronics parts stores.
2. Use the headphone Level (F12) control to the right of the headphone jack to set the sound level for the headphones.
3. Use the Balance (F3), Bass (F2) and Treble (F5) controls to adjust the sound output of the headphones.
Note: The RR2160 MkII’s volume control also affects headphone output. The headphone jack is switched, so plugging in headphones will mute your speaker output. WARNING: Make sure to turn your volume down before unplugging your headphones as this will send audio back to your speakers; this could be quite loud and you do not want to damage your speakers.
Recording The RR2160 MkII allows you to send the signal from any analog input source to a recording device properly connected to the rear panel Record Output jacks (R20). Note that unlike many current audio products, the RR2160 MkII has a separate record output bus so that you may listen to one source (selected with the remote control or the front panel Source control) and record a different source. It is important to remember this, as you may be used to always having the source you are listening to being sent to the record output.
To Record from a Selected Input Source:
1. Prepare your recording device. Follow the recommended procedure from the recorder manufacturer about input settings, levels etc.
2. Select the source you want to record by using the front panel Record selector (F19 or C5).
3. Place the device in record mode to begin recording.
To Monitor Your Recording:
• Set the Source selector (F18 or C3) to your recording device. Audio from your recording device will play through the RR 2160.
To Listen to Another Source During Recording:
• Set the Source selector (F18 or C3) to the desired input source. Audio from the selected source will play through the RR2160 MkII. Audio to the recording will not be affected.

RR2160 MkII Owner’s Manual
Outlaw Audio RR2160 MkII Stereo RetroReceiver 25
Setting Sleep Timer
The RR2160 MkII’s sleep timer automatically shutsthe unit off after a predetermined amount of time.
To Activate the Sleep Timer:
1. Press the remote control’s Sleep button (C14). The front panel display will show “Sleep” and the number of minutes until the unit shuts off immediately below the word “Sleep.”
2. Press the Sleep button repeatedly until you’ve chosen the amount of “sleep time” you want. The available choices are: 0.5HR 1.0HR 1.5HR 2.0HR 2.5HR3.0HR 3.5HR 4.0HR OFF
Using the Tuner
The RR2160 MkII’s tuner is exceptionally flexible and user-friendly. It is, however, the only source that must be set up to match your listening preferences. Once you’ve followed the simple steps shown in the following pages, you’ll be able to easily enjoy your favorite radio broadcasts.
The HD Radio tuner supports Program Service Data, which will scroll station or song information across the second line of the front panel.
Selecting Tuner Mode
To Select the Tuner from the Front Panel:
1. Press the Source Selector (F18) until TUNER appears in the front panel display.
2. Using the Up and Down tuning buttons (F6 and F7 respectively), tune to the station you want to listen to.
To Select the Tuner from the Remote Control:
1. Press the TNR input button (C3) on the remote control to select the tuner.
2. Press the navigation Up and Down buttons (C7) to select the desired station, or use the Tuner Scan Up and Down buttons (C20) to scan between stations broadcasting a signal.
3 When the tuner detects an HD Radio station, it will tune to the first available HD station
(HD1). A slight lag in acquiring this HD station is normal. Some (but not all) HD Radio stations offer additional channels (HD2, HD3, etc.) in addition to the main station programming carried on HD1. If multiple HD Radio stations are available, the navigation Up and Down buttons (C7) may be used to select those additional HD stations.
Note: The RR2160 MkII will indicate if additional HD Radio channels are available by showing a “+” next to the current HD channel (“HD1+”). HD Radio reception, as with normal AM and FM, may vary due to your distance from the transmitter. In some cases, you may be able to tune in the main station but not the HD Radio channels. For a complete list of HD Radio stations, go to https://hdradio.com/stations.
FM Tuner Mode
To Change the FM Tuner Mode (Mono or Stereo):
• Press TUNER MODE on the remote control (C11) to select the desired mode. STEREO will tune stereo signals. MONO will tune either mono or stereo signals. When a station’s signal is weak in the STEREO mode, selecting mono will often provide a signal that is more acceptable by switching to the mono sound mode.
Direct Tuning
You may tune up or down through the FM bands using the Up/Down tuning controls on the front panel or remote, but sometimes you may wish to tune a station directly. That is easy to do on the RR2160 MkII by following these steps:
Once you’ve entered the complete frequency, the tuner will automatically tune to it.
To Enter a Frequency (Station) Directly:
1. Press DIRECT on the remote control (C13). The current frequency will go blank on the front panel display.
2. Use the 10 numeric keys on the remote control (C4) to enter the desired frequency. For example, to enter 89.3 FM, simply punch in 893. The numbers will appear on the front panel display as you key them in. The tuner will automatically tune to the new frequency.

RR2160 MkII Owner’s Manual
Outlaw Audio RR2160 MkII Stereo RetroReceiver 26
Memorizing Your Favorite Stations
Once you have tuned to a station, you may enter it into the receiver’s memory so that it may be easily recalled for future listening. The tuner memory holds up to 20 stations in any order you choose.
To Program Stations into Memory Using the Remote Control:
1. Tune to the FM, or HD station you want the RR2160 MkII to memorize.
2. Press the Memory button on the remote control (C22). A number will appear directly to the left of the station frequency on the top line of the front panel display.
3. Within 5 seconds, enter a two-digit memory number (from 01 to 20) using the remote control’s numeric keypad (C4). If a station preset already existed at this value, it will be replaced by the new number. Note that individual HD Radio stations (HD1, HD2, etc.) may be saved to separate presets.
4. Repeat these steps for any additional stations, up to a total of 20.
Tuning a Preset Station
Once a station’s frequency is entered into the receiver’s memory, it is easy to recall the station or scan through the list of preset stations.
To Select a Preset Station:
• With tuner selected as your source, enter the two digit preset number of the desired station using the 10 numeric keys on the remote control (C4).
To Manually Scan Through Preset Stations:
• With tuner selected as your source, press the Preset Up or Preset Down buttons on the remote control (C21) until the desired station is heard.
Playing Audio Files from a USB Source
When we created our original RetroReceiver, the RR 2150, the focus was on a classic, back-to-basics analog design with some modern touches. For the RR2160 MkII, we’ve kept that focus, but we had to tip our hats to the rapid and significant
growth of media files as an audio source. With that in mind, the RR2160MkII’s trio of USB ports (front, one rear, and one rear for PC) offer two ways to play audio files.
USB “thumb drive” memory sticks and similar devices with a maximum capacity of 32GB may be connected to the Front USB or Rear USBinput so that files stored on the device can beplayed by the RR2160 MkII. A variety of file formats are supported, with a maximum bit depth and sampling rate of 24bit/192kHz. No file folder.navigation is supported, so all files on the device will be sorted alphanumerically regardless of the folder they are saved in. If listening to content via a USB thumb drive, please ensure you pause playback before disconnecting the drive.
Playing Audio Files from a USB Device:
1. Connect USB device to either the front USB input (F17) or rear USB input (R2).
2. Select the Front USB or Rear USB input using the Source button (F18) or by pressing the USB source selector button on the remote (C3). Playback of the first file will start automatically after the RR2160 MkII has cataloged the files.
3. Use the Up and Down Navigation buttons on the remote (C7) or the Tuning Up and Tuning Down buttons on the front panel (F6 and F7) to scroll through the available files and press the Enter button (C17 or F9) to select a file, and the Enter button to pause or resume playback. The second line of the front panel display will show the file name of the chosen file with a number in front of it that is assigned when the files are sorted. During playback, the second line will display the elapsed time. When a new file loads, the title will display before the elapsed time indicator returns.
The PC USB input allows the RR2160 MkII to act as an external sound card for a PC or Mac. With this input, any file format supported by the computer is supported, with bit depth and sampling rates up to 24bit/192kHz. If using a Windows based machine, please visit www.outlawaudio.com/support to download the appropriate driver. If using a Mac, this is not necessary.
RR2160 MkII Owner’s Manual
Outlaw Audio RR2160 MkII Stereo RetroReceiver 27
Playing Audio from a Computer
• When a computer is connected to the PC USB port (R5), select the PC USB input using the Source button (F18) or by pressing the USB source selector button on the remote (C3). Once that input is selected, any audio from the computer will be played through the RR2160 MkII.
Using the Internet Radio
The RR2160 MkII’s Internet Radio source connects you to a huge library of radio stations that are available for free streaming over the Internet.
1. Make sure the receiver is connected to your home network using an Ethernet cable to the Ethernet input, or using WiFi.
2. Select the Internet Radio input using the Source button (F18) or by pressing the NET source selector button on the remote (C3).
3. Sort the available stations by pressing MENU (C6 on the remote, F8 on the front panel) and using the Up and Down Navigation buttons on the remote (C7) or the Tuning Up and Tuning Down buttons on the front panel (F6 and F7) to scroll through the available categories. Use the ENTER button (C17 on the remote, F9 on the front panel) to select options from the list, and use MENU to move backward through the list.
4. Once a category has been selected, use the Up and Down Navigation buttons on the remote (C7) or the Tuning Up and Tuning Down buttons on the front panel (F6 and F7) to scroll through the available categories. The second line of the front panel display will show the name of the chosen station.
The RR2160 MkII provides access to a large and regularly-updated list of available online sources. The availability of specific stations or channels is determined by the individual provider. Outlaw Audio cannot guarantee the continued availability of any Internet program source. Setting & Removing Favorites with Internet Radio
Navigating through so many stations can be tedious. We recommend saving some of your most liked sta-tions to your favorites list:
1. While listening to a station, press the MEM button, on the remote (C22). 2. The front panel display will show “Add Favorite”
If listening to one station, but browsing through a list of others, pressing the MEM button will addthe station that is currently displayed on the frontpanel (whether you are listening to it or not).
3. To view your favorites, navigate to the Top level option of “Favorites”. Then, press the ENTER button (C17 on the remote, F9 on the front panel).
While viewing a station on your favorites list, you maypress and hold the MEM button for roughly 2 secondsto remove it from your favorites list. The front panel display will then show “Del Favorite”.
Configuring WiFi
The RR2160 MkII’s includes WiFi capabilities incase a physical connection to your modem or router isn’t feasible. To configure:
1. Hold the MENU button (C6, or F8) until themenu shows on the front panel display.
2. Select “Network Setup” by scrolling with the Up and Down Navigation arrows (C7, F6/7)and then pressing the ENTER button (C17,F9)
3. Network Wizard will show on the front panel display. Press the ENTER button to select it. “Scanning” will now show on the display. Oncedone, use the Navigation arrows until you see the appropriate WiFi network. Press the ENTER button to select the appropriate network.
4. You will now need to enter your WiFi password.Use the Navigation arrows to navigate throughthe alphanumeric characters. Press the ENTERbutton to select a character. When you are doneentering the password, submit it by navigatingto the character and pressing the ENTERbutton. Once connected, you can back out of thenetwork setup by pressing the MENU button.
Note: If you are trying to navigate into or out of a very large category or sub-category, suchas World Music, you will need to press theENTER or RETURN button twice.
RR2160 MkII Owner’s Manual
Outlaw Audio RR2160 MkII Stereo RetroReceiver 28
RR2160 MkII Setup Menu
The MENU button provides access to a simple setup menu with several options for adjusting your RR2160 MkII.
1. Press the MENU button (C6 on the remote, F8 on the front panel) for 2-3 seconds. Front panel will display “Setting” on the top line and “Version” on the second line.
2. Use the Up and Down Navigation buttons on the remote (C7) or the Tuning Up and Tuning Down buttons on the front panel (F6 and F7) to scroll through the available menu options. Use the ENTER button (C17 on the remote, F9 on the front panel) to access a menu and the MENU button to go back a level. Use the EXIT button (C16) to exit the setup menu.
The menu options are outlined below.
• System Info o Device Name
• Brightness o 100% o 50% o 25% o Off
• Factory Reset
Network Setup allows you to connect to your wireless network. Software update allows the user to install a firmware if instructed to do so by Outlaw Audio.
Different versions can be checked under the systeminfo option.
Brightness allows you to change the brightness of the front panel. This adjustment is also available from the remote using the “DISP” button (C12).
Default Volume will allow you to configure whatvolume level the RR2160 MkII turns on at.
Care and Maintenance Cleaning
To clean normal dust, wipe your RR2160 MkII with a clean, soft, dry cloth.
If the dirt has really accumulated (Outlaws aren’t always the most meticulous people, are they?), first wipe the surface with a soft cloth that’s slightly dampened with mild soapy water. Follow that with a fresh cloth dampened with clean water. Wipe dry immediately!
NEVER use benzene, thinner, alcohol or any other volatile cleaning agent. Do not use abrasive cleaners, as they may damage the finish of the metal parts.
Avoid spraying insecticide, waxes, polishing agents, or any aerosol product near the unit.
When You’re Away
If you will not be using your home theater system for an extended period of time, it’s always a good idea to turn everything off.
For the RR2160 MkII, this means turning off the rear panel’s Master Power switch (R11). This will prevent the automatic turn on circuits from accidentally turning the system on during your absence.
You may want to unplug all your other components, too.
If you think there’s a possibility of electrical storms during your absence, it’s also a very good idea to disconnect all “downleads” (cable and satellite antenna connections, etc.) to prevent high voltage spikes that may damage your components.
o Firmware Versiono MCU Version o Tuner Version o App Version o SSID o MAC Addresso IP1 Addresso IP2 Address
• Network Setup o Network Wizard
• Software Update o MCU Upgradeo NET Upgrade
• Default Volume o Volume Default
o Default Vol Set ON OFF
-70dB to -40dB• Loudness
o ON OFF
Factory Reset will erase all user settings and return the unit to factory default values.
Loudness This is a variable loudness control thatautomatically boosts the bass and treble dependingupon what volume level the receiver is set to. It is
automatically disabled when the volume is broughtup to -30dB or higher. If you tend to listen at lower volume levels, this can help provide a responsethat is perceived as more even.

RR2160 MkII Owner’s Manual
Outlaw Audio RR2160 MkII Stereo RetroReceiver 29
TroubleshootingYour new RR2160 MkII is designed to provide years of trouble-free operation. However, the complexity of today’s sophisticated home theater systems means that you might encounter an occasional problem with your system. You’ll find some of the more common issues listed below.
If your problem persists, please contact us at: support.outlawaudio.com
snoitpO noituloS esuaC elbissoP motpmySUnit does not turn on when remote or front panel buttons are pressed
si droc rewop CA niatrec ekaM rewoP CA oNplugged into a live outlet
Make certain rear panel MAIN POWER switch is ON
Intermittent buzzing in tuner Interference from local sources Move or relocate the antenna
Move the antenna or unit away from computers, fluorescent or neon lights, or appliances with motors
Unit does not respond to remote commands
Low remote battery power
Remote sensor is obscured
Change the batteries
Make certain the front-panel remote sensor is not blocked or connect an external remote sensor
No sound from one or both channels
Poor connections
Incorrect speaker mode
Check interconnects to the amplifier and speakers
Check speaker selector to make sure connected speakers are turned on.

RR2160 MkII Owner’s Manual
Outlaw Audio RR2160 MkII Stereo RetroReceiver 30
RR2160 MkII Specifications Audio Section Continuous Average Power Both channels driven
110 watts/channel (8Ω. 20Hz to 20kHz, <0.05% THD) 165 watts/channel (4Ω. 20Hz to 20kHz, <0.05% THD)
Input Sensitivity/Impedance High Level 200mV/37kΩMM Phono 3.3mV/47kΩMC Phono 0.6mV/47kΩ
Bass Management High-Pass Slope Adjustable 60Hz/80Hz/100Hz/Bypass
12 dB/octave (2nd order) Low-Pass Slope 12 dB/octave (2nd order)
lortnoC enoTBass Center Frequency/Range 50Hz ± 10dB
Treble Center Frequency/Range 10kHz ± 10dB Frequency Response @ 1W 20Hz to 20kHz (+ 0dB/-0.5dB) S/N Ratio 96dB unweighted Transient IMD Unmeasurable
General Supply Voltage 120W, 60Hz only Power Consumption
Standby 0.4W Idle 70W
At Full Load 400W max. Trigger Output Sequential Delay 50 mA @ 12 VDC continuous USB Accessory Power Output 5V DC / 1.0A max.
sehcni 0.51 x 57.5 x 1.71 snoisnemiD .sbl 3.82 thgieW
HD Radio Technology manufactured under license from iBiquity Digital Corporation. U.S. and Foreign Patents. For patents see www.patents.dts.com. HD Radio and the HD, HD Radio, and "ARC" logos are registered trademarks or trademarks of iBiquity Digital Corporation in the United States and/or other countries.
Version 1.0

RR2160 MkII Owner’s Manual
Outlaw Audio RR2160 MkII Stereo RetroReceiver 31
Notes

RR2160 MkII Owner’s Manual
Outlaw Audio RR2160 MkII Stereo RetroReceiver 32
Outlaw Audio Limited Warranty This warranty protects the owner of the Outlaw RR2160 MkII RetroReceiver (the PRODUCT) for two(2) years from the date of purchase*. This warranty covers all defects in material and workmanship with the following specific exceptions. These are:
• Damage caused by improper installation or adjustment
• Damage caused by accident, unreasonable use or neglect
• Damage from failure to follow instructions contained in this Owner’s Manual
• Damage from the performance of repairs by someone not authorized by Outlaw Audio
• Any unit on which the serial number has been effaced, modified, or removed
• Damage occurring during shipment • Units which have been altered or modified in
design, appearance or construction.
This warranty covers only the actual defects within the PRODUCT itself. IT DOES NOT cover costs of installation in (or removal from) a fixed installation, or normal setup, claims based on any misrepresent-tation by the seller, or performance variations resulting from installation related circumstances such as signal quality, AC power or incompatibilities with speakers and/or other system components.
During the warranty period, Outlaw Audio will, at their option, either repair the defect, or replace the defective product, or the defective parts, or components thereof at no charge to the owner for parts and labor covered by this warranty. If necessary repairs are not covered by this warranty, or if a unit is examined which is not in need of repair, you will be charged for the repairs and/or the examination. If non-warranted repairs are needed, we will notify you of the estimated cost and ask for your authorization to perform said repairs.
You must pay shipping charges incurred in getting your Product to the factory. We will pay the return shipping charges if the repairs are covered by the warranty.
Please save the original shipping cartons, as the unit MUST be returned in the original carton and packing. (Replacement cartons are available at a modest charge.)
If your product needs service, please contact usat support.outlawaudio.com
You will need to present the original bill of sale to establish the date of purchase. In the event that the proof of purchase cannot be established with the original receipt, the warranty period shall be determined by the earliest date of manufacture shown on the unit, provided that the serial number label has not been altered in any manner, or by our records relating to that serial number.
In the event that you wish to return your Outlaw Product back to us, for any reason, please call to arrange for a Return Authorization Number. This will ensure that your problem is discussed with a service technician who will determine if there is a quick solution to your problem.
Outlaw Audio shall not be liable for, in any way responsible for, any incidental or consequential damages of any kind. Some states do not allow limitations on how long an implied warranty lasts and/or do not allow the exclusion of incidental or consequential damages; therefore, the limitations and exclusions stated herein may not apply to you. This warranty gives you specific legal rights; and you may also have other rights that vary from state to state.
THERE ARE NO WARRANTIES GIVEN BY OUTLAW AUDIO THAT EXTEND BEYOND THE DESCRIPTION GIVEN HEREIN. ANY IMPLIED WARRANTIES OF FITNESS FOR PURPOSE SOLD, MERCHANTABILITY, DESCRIPTION, QUALITY OR ANY OTHER MATTERS ARE LIMITED TO THE TERMS OF THE EXPRESSED LIMITED WARRANTY STATED HEREIN.
Products are sold on the basis of specifications applicable at the time of sales. Outlaw Audio shall have no obligation to modify products once they have been sold.
This warranty is applicable only in North America.
*Outlaw Audio's warranty is limited to ninety (90) daysfrom the date of original purchase for any Outlaw Audio product that is used for professional or commercial purposes, or any other income-producing purpose.