robotics(–(mechanics(and(circuits(( ( unit(length:(6weeks(...
TRANSCRIPT

Robotics – Mechanics and Circuits Unit Length: 6 Weeks
Science Unit Plan
Teacher: Holly Robinson
Grade: 9 Course: PWC
Unit Title: Robotics – Mechanics and Circuits LEARNING TARGETS LT3: I can use mechanics to measure, calculate, describe and represent the motion and energy of an object. LT9: I can identify, describe and calculate work, force, and power. LT12: I can identify, describe, and calculate magnetic and electric forces, charges and fields. LT13: I can use Ohm’s Law to design and build series and parallel circuits. UNIT OVERVIEW Overall summary of the unit, activities, tasks, and/or content.
Students will research principles of energy, circuitry, electricity and magnetism, and simple machines to investigate the components of robots, and demonstrate an understanding of the reliance of a robot on the relationships of these concepts. The problem base for this science unit is to design and build an appropriate circuit and apply principles of conservation of energy and mechanical advantage for the optimal function of a robot. The students will also identify their research and explain why these particular circuit configurations and simple/compound machines were utilized. MOTIVATORS Hooks for the unit and supplemental activities. (PBL scenarios, video clips, websites, literature) Students will begin each portion of the unit with hooks that include:
• a video of a first-‐person point of view on a roller coaster https://youtu.be/WO6st8W3y_o • an analysis of two seemingly identical circuits that behave very differently (classroom demonstration) • a demonstration with the van de Graaf generator (classroom demonstration) • a video of an electromagnet doing some heavy lifting https://youtu.be/3jXRZMuyjnQ • a real-‐life, painstakingly-‐constructed Rube Goldberg machine https://youtu.be/_ve4M4UsJQo
Students will be further motivated by projects, which include building a roller coaster, wiring a house for optimal safety and convenience, designing and carrying out a demonstration for the van de Graaf generator, building a working electromagnet, and constructing a working Rube Goldberg contraption.
Week Learning Targets
Materials & Resources
Instructional Procedures Differentiated Instruction
Assessment
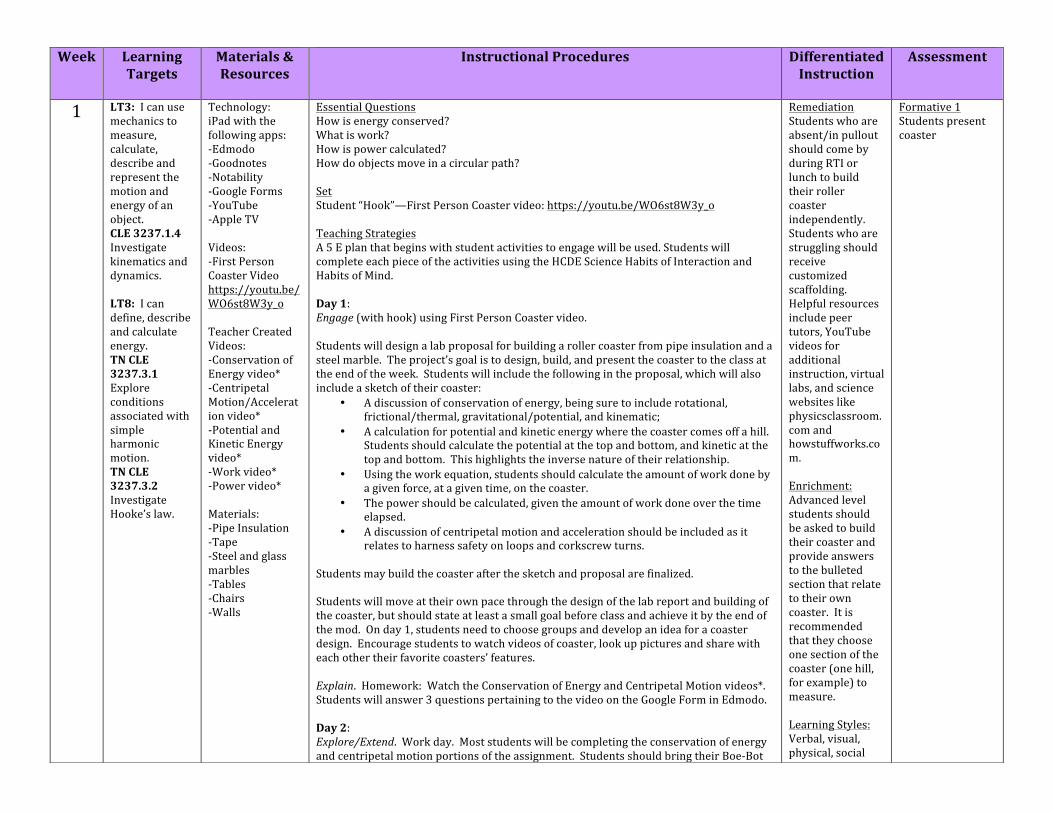
1 LT3: I can use mechanics to measure, calculate, describe and represent the motion and energy of an object. CLE 3237.1.4 Investigate kinematics and dynamics. LT8: I can define, describe and calculate energy. TN CLE 3237.3.1 Explore conditions associated with simple harmonic motion. TN CLE 3237.3.2 Investigate Hooke’s law.
Technology: iPad with the following apps: -‐Edmodo -‐Goodnotes -‐Notability -‐Google Forms -‐YouTube -‐Apple TV Videos: -‐First Person Coaster Video https://youtu.be/WO6st8W3y_o Teacher Created Videos: -‐Conservation of Energy video* -‐Centripetal Motion/Acceleration video* -‐Potential and Kinetic Energy video* -‐Work video* -‐Power video* Materials: -‐Pipe Insulation -‐Tape -‐Steel and glass marbles -‐Tables -‐Chairs -‐Walls
Essential Questions How is energy conserved? What is work? How is power calculated? How do objects move in a circular path? Set Student “Hook”—First Person Coaster video: https://youtu.be/WO6st8W3y_o Teaching Strategies A 5 E plan that begins with student activities to engage will be used. Students will complete each piece of the activities using the HCDE Science Habits of Interaction and Habits of Mind. Day 1: Engage (with hook) using First Person Coaster video. Students will design a lab proposal for building a roller coaster from pipe insulation and a steel marble. The project’s goal is to design, build, and present the coaster to the class at the end of the week. Students will include the following in the proposal, which will also include a sketch of their coaster:
• A discussion of conservation of energy, being sure to include rotational, frictional/thermal, gravitational/potential, and kinematic;
• A calculation for potential and kinetic energy where the coaster comes off a hill. Students should calculate the potential at the top and bottom, and kinetic at the top and bottom. This highlights the inverse nature of their relationship.
• Using the work equation, students should calculate the amount of work done by a given force, at a given time, on the coaster.
• The power should be calculated, given the amount of work done over the time elapsed.
• A discussion of centripetal motion and acceleration should be included as it relates to harness safety on loops and corkscrew turns.
Students may build the coaster after the sketch and proposal are finalized. Students will move at their own pace through the design of the lab report and building of the coaster, but should state at least a small goal before class and achieve it by the end of the mod. On day 1, students need to choose groups and develop an idea for a coaster design. Encourage students to watch videos of coaster, look up pictures and share with each other their favorite coasters’ features. Explain. Homework: Watch the Conservation of Energy and Centripetal Motion videos*. Students will answer 3 questions pertaining to the video on the Google Form in Edmodo. Day 2: Explore/Extend. Work day. Most students will be completing the conservation of energy and centripetal motion portions of the assignment. Students should bring their Boe-‐Bot
Remediation Students who are absent/in pullout should come by during RTI or lunch to build their roller coaster independently. Students who are struggling should receive customized scaffolding. Helpful resources include peer tutors, YouTube videos for additional instruction, virtual labs, and science websites like physicsclassroom.com and howstuffworks.com. Enrichment: Advanced level students should be asked to build their coaster and provide answers to the bulleted section that relate to their own coaster. It is recommended that they choose one section of the coaster (one hill, for example) to measure. Learning Styles: Verbal, visual, physical, social
Formative 1 Students present coaster

to class on this day and complete the portion of the PBL that describes the centripetal motion of the Boe-‐Bot’s wheel. Explain. Homework: Watch the Kinetic and Potential Energy video*, and complete the 3 questions in Google Docs. Day 3: Explore/Extend. Work day. Most students will be completing the potential and kinetic energy portion of the assignment. Explain. Homework: Watch the Work video. Complete the 3 questions in Google Docs. Then, watch the Power video. Complete the 3 questions in Google Forms. Day 4: Explore/Extend. Work day. Most students will be completing the work measurements/equations and the power measurements/equations for the assignment. Day 5: Evaluate. Students will present their coaster design to the class in a presentation lasting no longer than 3-‐5 minutes. Students who built the coaster should run it at this time. Summarizing Strategy Students will present their coaster design/coaster to the to the class. Students should discuss the function of the coaster as it relates to each of the bulleted points above. Homework First Person Coaster video https://youtu.be/WO6st8W3y_o Conservation of Energy video* Potential and Kinetic Energy video* Work video* Power video* *I recorded my own lecture videos using sophia.com. To ensure students receive the appropriate content and video length, it is recommended you record and post videos for your students.
2 and 3
LT13: I can use Ohm’s Law to design and build series and parallel circuits. TN CLE 3237.4.2 Explore static and current electricity. TN CLE 3237.4.3 Investigate Ohm's law. TN CLE
Technology: iPad with the following apps: -‐Edmodo -‐Goodnotes -‐Notability -‐Google Forms -‐YouTube -‐Apple TV Videos: -‐Ohm’s Law video -‐Series/Parallel Circuits video
Essential Questions What are the essential components of a circuit? How does electricity travel through a circuit? How can I quantify electrical circuitry components? Set Engage: Show students a teacher-‐prepared series and parallel circuits. Challenge students to explain why the light bulbs in series shut off with breaking of the circuit, while those in parallel do not. Teaching Strategies A 5 E plan that begins with student activities to engage will be used. Students will complete each piece of the activities using the HCDE Science Habits of Interaction and Habits of Mind.
Remediation: Students should report during RTI time or lunch to design and build a series/parallel/combination circuit and to perform related calculations. Struggling students should be given customized scaffolding, and
Formative 2 Students will complete and submit the combo circuit diagram and calculation

3237.4.4 Compare and contrast series and parallel circuits. TN CLE 3237.4.5 Analyze components of electrical schematic diagrams.
-‐Combination Circuits video Lab Materials: -‐Circuit building boards -‐D-‐cell batteries -‐Receptacles -‐Light bulbs -‐Light bulb receptacles -‐Wires -‐Resistor wires -‐Switches Other: -‐Fab Lab circuit kits -‐Snap-‐A-‐Circuit kits -‐Parallax Boe-‐Bot Kit
Day 1: Explore. Students should bring their Boe-‐Bot and headphones to class each day. The students’ goal for this 2-‐week portion of the class will be twofold:
• to plan and build a combination-‐wired “house” using circuit kits; • to complete the schematic and build the circuitry portion of their Boe-‐Bot.
Students should watch the video, complete research, and begin their plan for the simple circuit.
The following steps are recommended:
• Students will watch the schematics video and answer the questions. After answering the check up questions in Google Forms, students will draw a simple sample diagram of a string of bulbs wired in series. Each major circuit diagram symbol should be included (battery, switch, circuit lines and resistor). After obtaining teacher approval, the student and a partner should build the circuit. Students need to indicate the flow of the electrons in the circuit.
• Students will use an ammeter to measure a “known” quantity-‐-‐a battery and the
resistances of resistor wires. After practicing and demonstrating proficiency to the teacher, students should be given an “unknown” light bulb. Students should design a process to determine the resistance, in Ohms, of the light bulb. Students should calculate the resistance of the wire, given the value of the current and voltage of the battery. Then, they should verify their findings by measuring the resistance of the light bulb itself. Students should add at least one more bulb and calculate the total resistance, current and voltage.
• After completing the above task, students should complete the same process for
their Boe Bot’s LED light circuit. Students should add only a single light. This should include the switch, battery, circuit line and resistor, which, in this case, is the light. This should be documented for the Operations Manual.
• Ask students to complete the same task as when they built in series, only this
time, to place the lights in parallel. Students should sketch a parallel set up for their circuit, and, once approved, should build it. Students should again take measurements with the ammeter and compare them to previously calculated totals. The measurements should be a surprise to students (who have presumably calculated for series). Ask students for possible reasons that the measurements do not agree with the calculations.
• Students should then examine their Boe-‐Bot to determine if the resistors added
follow parallel or series conventions. They should then begin drawing and labeling the appropriate schematic. This should be documented for the Operations Manual.
• Students should join all their circuit boards together to create a single circuit in
the “house”. Students should obtain approval for the design, which should include at least 1 parallel branch and 1 combo branch, and calculate Ohm’s law values for this circuit (a combo circuit). Students should build it and test its function.
provided with additional resources. Specifically for calculations, YouTube instructional videos, simpler worksheets and peer tutors are very helpful for Ohm’s Law. Students remediating should be assigned problems that are series or include a “total” resistance; asking to calculate total resistance from parallel resistors can be confusing for beginners. CPO step-‐by-‐step circuit building labs and physicsclassroom.com are also good resources. Enrichment: Advanced students may be asked to design circuits that meet specific mathematical or usage parameters. Learning Styles: Verbal, visual, physical, social

• Students should then complete a review of their Boe-‐Bot to determine if there
are any (or should have) any combination circuits present. Corresponding diagrams and calculations should be completed/performed. This should be documented for the Operations Manual.
Students will also complete an anchor activity for this unit. This activity is an independent research project to map the pathways of two electrons. The electrons’ journey should be traced from their “generation” at a power plant of the student’s choice, to their consumption by an average household. Students should work on this assignment a little each day in class, and include the following: Proficient
• Type of energy plant, including how this generates energy, must be discussed. • Electrical potential energy/voltage differential must be discussed. • The requirements of a circuit must be given. • The direction of electron flow between the anode and cathode must be
explained. • A discussion of voltage drop versus resistance must be provided. • Discuss the role of the transformers on the power lines.
Advanced
• Evaluate the effectiveness of a surge protector. • An electrical storm resulted in a downed power line. Discuss how the voltage in
this wire is stored/routed/dispersed Explain. Homework: Students should watch the Ohm’s Law video. Students need to complete the 3 questions in Google Forms. Day 2: Explore. Students should watch the video, complete research, and begin their plan for the simple circuit. Day 3: Explore/Extend. Work day. Most students will be taking measurements of know quantities, designing the series circuit, and making the calculation. Day 4: Explore/Extend. Work day. Most students will be taking measurements of known quantities, designing the series circuit, and making the calculation. Explain. Homework: Students should complete an Ohm’s Law practice problem sheet. Day 5: Extend. Work day. Most students will be completing the parallel portion of the circuit design/build/calculation. Day 6: Explore/Extend. Work day. Most students will be completing the parallel portion of the circuit design/build/calculation.

Homework: Complete parallel circuit Ohm’s practice problems. Watch the combination circuits video, and complete the 3 questions in Google Forms. Day 7: Explore/Extend. Work day. Most students will be joining each room’s circuits. Day 8: Explore/Extend. Work day. All students should be joining the circuits of each room to complete the house’s circuit. Day 9: Explore/Extend. Work day. Students should test the circuit, complete their sketch of the finalized product, label it, and begin their calculation. They should also disassemble their circuits and put the components away. Day 10: Evaluate. This is a work day. Students should use this day to edit their Operations Manuals, finish up their Theme 5, and submit their total-‐house combo circuit calculation. Summarizing Strategy Calculate the combo circuit’s Ohm’s Law values (single-‐question quiz). Submit to teacher individually. Homework Ohm’s Law video and problem set Series and parallel video and problem set Combo circuits video and problem set
4
LT12: I can identify, describe, and calculate magnetic and electric forces, charges and fields. TN CLE 3237.4.1 Distinguish among electric forces, electric charges, and electric fields. TN CLE 3237.4.6 Investigate magnetic poles, magnetic fields, and electromagnetic
Technology: iPad with the following apps: -‐Edmodo -‐Goodnotes -‐Notability -‐Google Forms -‐YouTube -‐Apple TV Videos: -‐Charge Fields and Diagrams video -‐Scrapyard Magnet https://youtu.be/3jXRZMuyjnQ Materials: -‐Van de Graaf generator
Days 1-‐3 Essential Questions How do we represent charges? Set Student “Hook”: Discharge demonstration using the two-‐globe setup of the van de Graaf generator. Teaching Strategies A 5 E plan that begins with student activities to engage will be used. Students will complete each piece of the activities using the HCDE Science Habits of Interaction and Habits of Mind. Day 1: Engage students with a demonstration using the van de Graaf generator. A simple globe-‐to-‐globe discharge works well for this purpose. For this unit, students will design a demonstration for middle-‐school level students to use with the van de Graaf generator. The demonstration should include:
Remediation: Students should use RTI time to design their manual. Students who are struggling should receive customized scaffolding. Those struggling with static electricity concepts can visit physicsclassroom.com, or complete a virtual lab to enhance understanding. Enrichment: Advanced level students, with
Formative 3 Students will turn in their completed manual Formative 4 Students will demonstrate effectiveness of magnet

induction. -‐Generator accessories Student-‐supplied items (w/ teacher approval): -‐Nails -‐Copper wire -‐Batteries -‐Paperclips
• a user manual for the generator (any medium is fine), which will include: o a diagram with labels for each part of the generator (output terminal, upper
brush, upper roller, belt, lower brush, lower roller, and motor); o a detailed description of how the generator works (this should be a
walkthrough that details what happens at each of the parts labeled); o safety information; o how to perform the experiment/demonstration with the generator; o information on how to repair commonly worn parts (the belt, the
grounding wire, and the brush); and o a charge diagram for the generator and 3 particles nearby (2 positive, 1
negative). Students meeting these requirements and providing a signed parental permission form will be allowed to carry out their experiment using the generator.
Day 2: Explore/Explain. Work day. Most students will be completing research and outlining a format for the manual. Homework: Watch the charge fields/diagrams video and complete the charge fields worksheet. Day 3: Evaluate. Finalize the experiment and present it to the class. Days 4-‐5 Essential Questions How do magnets work? How are magnetic charges represented? Set Student “Hook”: Scrapyard magnet: https://youtu.be/3jXRZMuyjnQ Teaching Strategies A 5 E plan that begins with student activities to engage will be used. Students will complete each piece of the activities using the HCDE Science Habits of Interaction and Habits of Mind. Students will complete a project in which they will build an electromagnet capable of picking up a small box of paperclips. Working in groups of no more than two, they must design the magnet and get teacher approval prior to building. The design must include:
• a sketch • a materials list • a step-‐by-‐step procedure for construction • a sketch of the magnetic field lines between the magnet and the box of
paperclips. Day 4: Explore/Explain. Work day. Students will research ideas and materials and begin to
parental permission, should carry out a demonstration using the generator. Learning Styles: Verbal, visual, physical, social

design their electromagnet. Homework: Field lines video and 3 practice questions answered in Google Forms. Day 5: Evaluate. Students should complete construction and demonstrate the effectiveness of their magnet for the class. Summarizing Strategy Presentation of the magnet to the class. Homework Field lines video
5 and 6
LT3: I can use mechanics to measure, calculate, describe and represent the motion and energy of an object. CLE 3237.1.4 Investigate kinematics and dynamics.
Technology: iPad with the following apps: -‐Edmodo -‐Goodnotes -‐Notability -‐Google Forms -‐YouTube -‐Apple TV Videos: -‐Honda Motor Compay’s “The Cog” video: https://youtu.be/_ve4M4UsJQo Materials: -‐All lab equipment -‐Any items brought from home (with prior teacher approval) -‐Craft supplies (cords, tape, glue, etc.) -‐Found items -‐Scales -‐Balances -‐Meter sticks
Essential Questions Why do we use tools? Set Show (Engage) students “The Cog” by the Honda Motor Company. https://youtu.be/_ve4M4UsJQo Teaching Strategies A 5 E plan that begins with student activities to engage will be used. Students will complete each piece of the activities using the HCDE Science Habits of Interaction and Habits of Mind. Day 1: Students will be designing and building a mini-‐Rube Goldberg Machine. Each team of 2 will include all 6 simple machines in their design, along with at least 3 compound machines. Students’ machines must:
• have a goal/purpose • run continuously after being started
Students must have their design approved by the teacher before beginning construction. The proposal must include a sketch, a materials list, and a calculation of mechanical advantage for each of the simple machines. Homework: Mechanical Advantage video, along with completion of 3 practice problems in Google Forms. Day 2: Explore. Work day. Most students will still be designing. Day 3: Explore/Explain: Work day. Most students will be submitting proposals and beginning construction. Day 4: Explore/Extend: Work day. Most students will be constructing.
Remediation: Students who are absent or in pull out programs should use RTI time or lunch to work on their team’s machine. Students who are struggling should be given customized scaffolding. Helpful activities include labeling Rube Goldberg drawings with each simple and compound machine found in the drawing, and simplified mechanical advantage problems. Peer tutors may also be helpful. Enrichment: Advanced level students should offer assistance as peer tutors to struggling groups. Additionally, added requirements for
Formative 5 Students will run Rube Goldberg machine, and show mechanical advantage calculations Summative Students submit a portfolio with their designs and calculations

Day 5: Explore/Extend: Work day. Most students will be finishing construction. Day 6: Evaluate: Presentation day. Students will share their machine and run it for the class. Day 7: Extend. Work day. Students will devise a plan to link all of the machines in the class. A new calculation for mechanical advantage at their link point will be submitted by each team. The last team will calculate mechanical advantage for the device that accomplishes the finishing task. Day 8: Extend. Work Day. Students should link the devices, make the new calculations, and run the machine. Day 9: Unit 5 Portfolio workday. At this time, students should complete an analysis of their Boe-‐Bot’s 6 simple machines, and at least one compound machine, in terms of mechanical advantage in their Operations Manual. Day 10: Unit 5 Summative Portfolio (Students should submit finalized drafts of the lab notebook they kept for this unit. Any revisions or corrections should be completed. ) Summarizing Strategy Mechanical Advantage calculation Homework Watching Mechanical Advantage video Mechanical Advantage Problems
difficulty can be assigned (a compound machine that uses 3 simple machines, for example). Learning Styles: Verbal, visual, physical, social