repairing the mgb rubber bumpers by john “the mg … · member tech tips repairing the mgb rubber...
TRANSCRIPT

Page 1 of 7
Member Tech Tips
Repairing the MGB Rubber BumpersBy John “The MG Doc” Mangles, owner – All British Car Repair
As a professional restorer, I’ve been asked many times how to repair / refinish the rubber bumpers ofthe MGB. After years of use, many bumpers have nicks and scratches as well as a weathered look dueto sun bleaching. In this article, I’ll try to explain how to properly refresh their appearance.
As with any kind of repairs, proper safety equipment is a must. For this job I’ll use a dust mask, ear &eye protection for grinding / sanding, a charcoal respirator for painting, and rubber gloves for thechemicals. Be sure to read and follow the directions on all the products. Some can be hazardous toyour health!
The tools needed will be a grinder, a sanding block or DA sander, a small auto body filler spreader, ablow gun (for compressed air), and a heat gun.
Supplies needed will be plenty of clean water; plenty ofclean lint-free rags; a Scotch Brite ™ pad; cleaningdetergent; wax and grease remover; 80, 180, 220, 320 and400 grit sandpaper; masking tape; a flexible bumper repairkit; and flexible bumper paint – not to mention plenty ofelbow grease.
With this particular repair, I used a paint spray gun for therefinishing; however, the flexible bumper paint comes in anaerosol can if you don’t happen to have spray equipment.For ease of working, you might want to remove the bumper. I started with the bumper on the car thenremoved it for final sanding, cleaning, and painting.
Start by first removing all lights, bumper stickers, and the MG emblem, then clean the bumper with agood quality wax and grease remover. I used DuPont’s Prep-Sol ™ #3919S following the directions onthe can. Next, wash the bumper with a cleanser such as Fantastic or 409 and the Scotch Brite pad –scrubbing it to within an inch of its life – then rinse it with plenty of clean water. Now you are readyto make the repairs.
Start by sanding the bumper (every bit of it) with the 80-grit sandpaper to remove any and all of thepaint from the surface. I used a DA type air sander; but it can be done by hand, it just takes longer.Clean all sanding dust from surface then wash and dry using clean, lint-free towels.Some dents and deformations can usually be removed using a paint stripping heat gun. To do this,play the heat on the inside (if possible) and outside of the area until it softens a bit. Be careful not toheat too much or you’ll have more repairs to do. As the area softens, pull or push the area into place,
The Products John Used:
- DuPont 3919S Prep-Sol™ solvent (wax and
grease remover)
- 3M Automix™ EZ Sand Flexible Parts Repair
- 3M 80, 180, 220, 320, & 400 grit sandpaper
- 3M Scotch Brite™ scuff pad (red or grey)
- SEM™ #39104 Flexible Bumper Coater (paint)
Products supplied by Automotive Finishes, INC. St. Louis, MO
Page 2 of 7
using your fingers (careful, it’s HOT) or some other sort of tool and then cool it down using coolwater. If the area does not respond properly, heat and cool until it does.
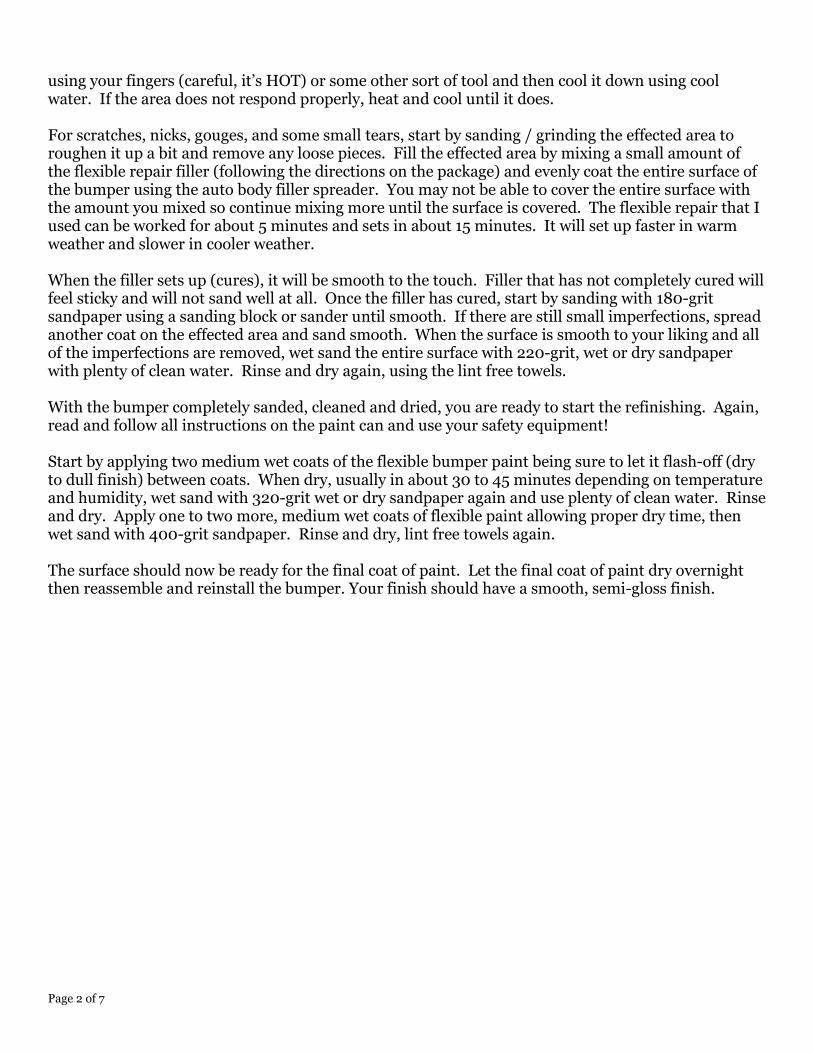
For scratches, nicks, gouges, and some small tears, start by sanding / grinding the effected area toroughen it up a bit and remove any loose pieces. Fill the effected area by mixing a small amount ofthe flexible repair filler (following the directions on the package) and evenly coat the entire surface ofthe bumper using the auto body filler spreader. You may not be able to cover the entire surface withthe amount you mixed so continue mixing more until the surface is covered. The flexible repair that Iused can be worked for about 5 minutes and sets in about 15 minutes. It will set up faster in warmweather and slower in cooler weather.
When the filler sets up (cures), it will be smooth to the touch. Filler that has not completely cured willfeel sticky and will not sand well at all. Once the filler has cured, start by sanding with 180-gritsandpaper using a sanding block or sander until smooth. If there are still small imperfections, spreadanother coat on the effected area and sand smooth. When the surface is smooth to your liking and allof the imperfections are removed, wet sand the entire surface with 220-grit, wet or dry sandpaperwith plenty of clean water. Rinse and dry again, using the lint free towels.
With the bumper completely sanded, cleaned and dried, you are ready to start the refinishing. Again,read and follow all instructions on the paint can and use your safety equipment!
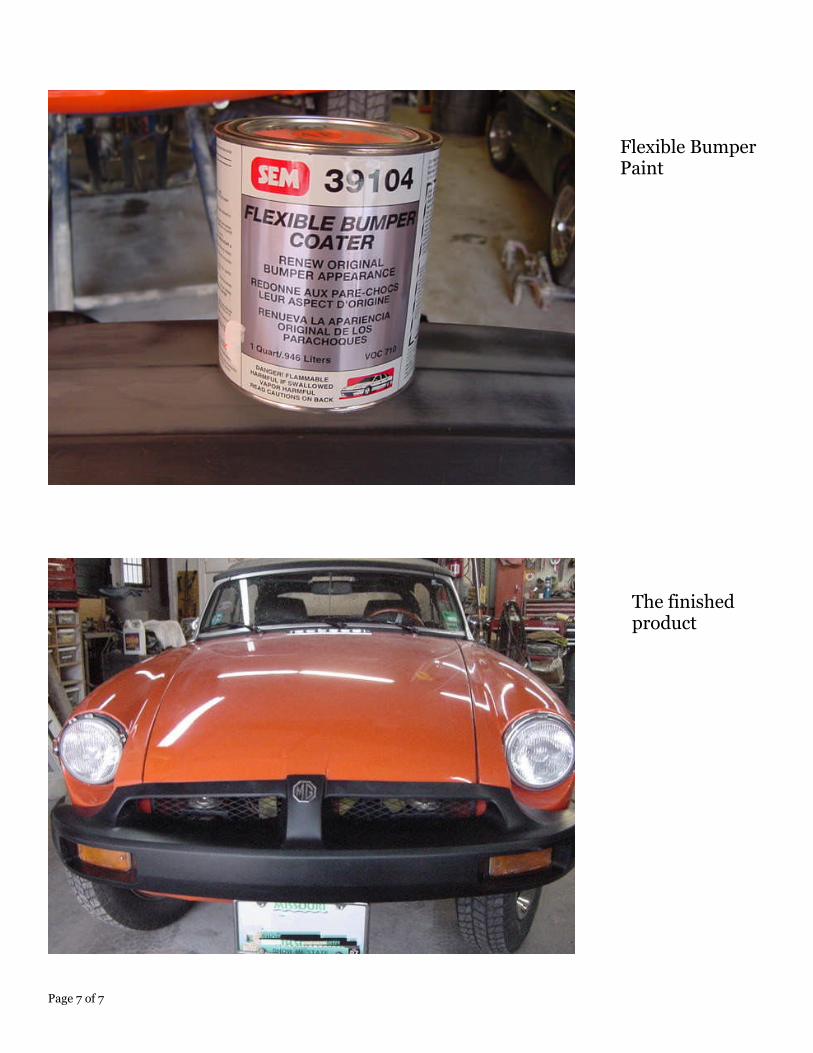
Start by applying two medium wet coats of the flexible bumper paint being sure to let it flash-off (dryto dull finish) between coats. When dry, usually in about 30 to 45 minutes depending on temperatureand humidity, wet sand with 320-grit wet or dry sandpaper again and use plenty of clean water. Rinseand dry. Apply one to two more, medium wet coats of flexible paint allowing proper dry time, thenwet sand with 400-grit sandpaper. Rinse and dry, lint free towels again.
The surface should now be ready for the final coat of paint. Let the final coat of paint dry overnightthen reassemble and reinstall the bumper. Your finish should have a smooth, semi-gloss finish.

Page 3 of 7
The Process in Pictures
Before anyrepairs takeplace. Noticethe dull, crazedfinish. Homerestorers shouldremovebumpers first
What you’llneed

Page 4 of 7
Bumper aftercleaning withwax & greaseremover andinitial sanding
Bumper afterfiller is appliedand beforesanding

Page 5 of 7
Bumper aftersanding filler
Automix Filler
Page 6 of 7
Automix fillerbefore mixing
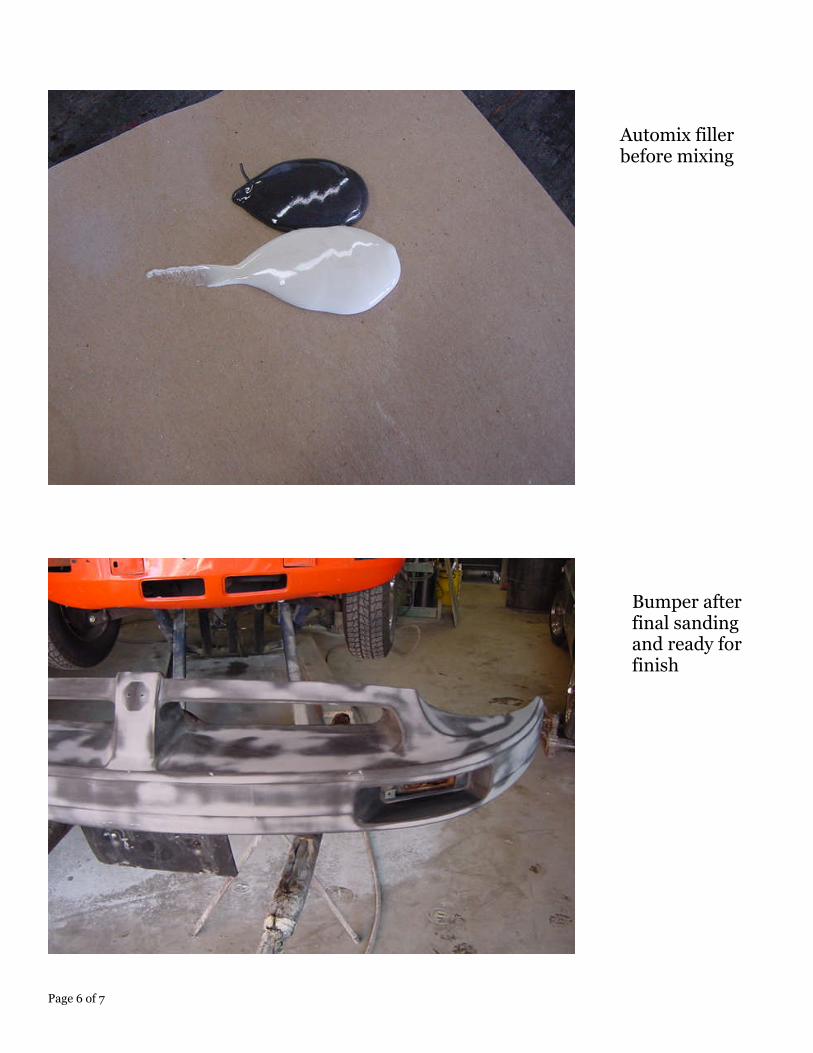
Bumper afterfinal sandingand ready forfinish
Page 7 of 7
Flexible BumperPaint
The finishedproduct