release notes for cisco unified communications … notes for cisco unified communications manager...
TRANSCRIPT

Release Notes for Cisco Unified Communications Manager and IMand Presence Service, Release 11.5(1)SU3First Published: 2017-08-17
Last Modified: 2018-04-09
Americas HeadquartersCisco Systems, Inc.170 West Tasman DriveSan Jose, CA 95134-1706USAhttp://www.cisco.comTel: 408 526-4000 800 553-NETS (6387)Fax: 408 527-0883

© 2018 Cisco Systems, Inc. All rights reserved.

C O N T E N T S
Revision History 7
C H A P T E R 1 About this Release 1
Revision History 1
About Release Notes 2
Supported Versions 2
Documentation for this Release 3
CLI Commands 4
Cisco Prime License Manager 4
OpenJDK Migration 4
C H A P T E R 2 Upgrades 5
Upgrade Procedures 5
Version Requirements 5
Supported Upgrade and Migration Paths 6
Deployments on Cisco Media Convergence Servers Hardware 6
Deployments on Virtual Machines 7
Upgrade Path Restrictions for Release 11.5(x) 9
COP Files Required for Upgrades to Release 11.5 9
Requirements and Limitations 11
Upgrade Requirements with Standalone Prime License Manager 11
Cisco Jabber During Upgrade 11
Deprecated Phone Models 11
OS Admin Account Required for CLI-Initiated IM and Presence Upgrades 12
Rolling Back to Previous Versions 13
Upgrading with FIPS Mode Enabled 13
Upgrades with Mixed Mode Enabled Require an Encryption License 13
Database Migration Required for Upgrades with Microsoft SQL Server 14
Upgrades from 11.5(1)SU2 with Push Notifications Enabled 17
Release Notes for Cisco Unified Communications Manager and IM and Presence Service, Release 11.5(1)SU3
iii

C H A P T E R 3 New and Changed Features 19
Authenticated Network Time Protocol Support 19
CLI Updates for Authenticated NTP 20
OS Administration Online Help Updates 20
NTP Servers Settings 20
Cisco Spark Remote Device 20
Calendar Integration with Office 365 20
Cisco Jabber Authentication via OAuth Refresh Logins 21
Configure Refresh Logins for Cisco Jabber 24
Regenerate Keys for OAuth Refresh Logins 25
Revoke Existing OAuth Refresh Tokens 25
Compliance to Common Criteria 26
Emergency Notifications Paging 26
Advanced Notification Paging Configuration Task Flow 27
Install the InformaCast Virtual Appliance 27
Configure Connection to InformaCast 29
Configure Panic Button 30
Configure CallAware Emergency Call Alerting 32
Paging Interactions 33
Advanced Notification Paging Interactions 34
Encryption License Requirement for Mixed-Mode 34
Enhanced Sign-In Experience for Cisco Jabber During SSO and Non-SSO 35
Enhanced Usability in the User Device Association Screen 36
Minimum TLS Version Control 36
CLI Commands for Minimum TLS Version 37
Security Guide Updates 38
TLS Overview 38
TLS Prerequisites 38
TLS Configuration Task Flow 39
Set Minimum TLS Version 39
Set TLS Ciphers 40
Configure TLS in a SIP Trunk Security Profile 40
Add Secure Profile to a SIP Trunk 41
Configure TLS in a Phone Security Profile 42
Release Notes for Cisco Unified Communications Manager and IM and Presence Service, Release 11.5(1)SU3iv
Contents

Add Secure Phone Profile to a Phone 42
Add Secure Phone Profile to a Universal Device Template 43
TLS Interactions and Restrictions 44
TLS Interactions 44
TLS Restrictions 44
Push Notifications Enhancements for Cisco Jabber on iPhone and iPad 49
TLS as a Communication Protocol for Syslog and FileBeat 50
Upgrade External Database Table Values for Microsoft SQL Datatype 51
C H A P T E R 4 Important Notes 53
Features and Services 53
Media Sense does not record the Consult Call with Selective Recording 53
Interoperability 53
AXL Requests to Unified CM Nodes 53
Cisco Unified Attendant Console Support 54
IM and Presence Service Interoperability with Expressway-C 54
Tomcat Certificate Regeneration with SAML SSO Deployment 54
IM and Presence Service 54
Intercluster Peering Not Supported with Cisco Unified Presence 8.6 54
Reset High Availability Following IM and Presence Service Node Outage 54
IM and Presence Server Pings to Jabber Are Not Configurable 55
Persistent Chat Character Limit with Microsoft SQL Server 55
Miscellaneous 55
Bandwidth Allocations for 88xx SIP Phones 55
Route Filter and Associated Route Patterns 55
C H A P T E R 5 Documentation Update for Defects 57
Command Line Interface Reference Guide 57
utils dbreplication clusterreset 57
Security Guide 57
Certificates 57
System Error Messages 58
Missing Device Type ENUM Values 58
Missing Reason Codes for LastOutOfServiceInformation Alarms 59
Online Help for Cisco Unified Communications Manager 61
Release Notes for Cisco Unified Communications Manager and IM and Presence Service, Release 11.5(1)SU3
v
Contents

DHCP Subnet Setup Tips 61
Insufficient Information About Opus Codec 61
Incorrect Time Period Example 62
Insufficient Information About Time Schedule 62
Insufficient Information on LDAP User Authentication 63
Remote Destination Configuration Page In the OLH Needs To Be Updated 63
SIP Profile Field Descriptions Are Missing 64
SIP Profile Settings 64
Release Notes for Cisco Unified Communications Manager and IM and Presence Service, Release 11.5(1)SU3vi
Contents

Revision History
DescriptionDate
Initial publishAug 17 2017
Added revision history tableSep 28 2017
Added important note on bandwidth allocations for 88xx phones.
Removed Enhanced CTL and ITL Trust information, which is not available withthis release.
October 23, 2017
Added topics on missing ENUM values for CSCvd71818 and CSCvg70867.December 13, 2017
Release Notes for Cisco Unified Communications Manager and IM and Presence Service, Release 11.5(1)SU3
7

Release Notes for Cisco Unified Communications Manager and IM and Presence Service, Release 11.5(1)SU38
Revision History

C H A P T E R 1About this Release
• Revision History, page 1
• About Release Notes, page 2
• Supported Versions, page 2
• Documentation for this Release, page 3
• CLI Commands, page 4
• Cisco Prime License Manager, page 4
• OpenJDK Migration, page 4
Revision HistoryRevisionDate
Initial publishAugust 17, 2017
Updated information related to documentation defect CSCvg10775.October 06, 2017
Updated information related to release version.October 12, 2017
Added important note on route filters and associated route patterns.November 2, 2017
Added respin releases 11.5(1)SU3a and 11.5(1)SU3b to the SupportedVersions list
December 06, 2017
Removed procedures for Office 365 calendar integration and redirectedreaders to the newMicrosoft Outlook Calendar Integration Guide forconfiguration.
December 22, 2017
Added Important Note on persistent chat character limit whenMicrosoftSQL Server is the external database.
February 14, 2018
Release Notes for Cisco Unified Communications Manager and IM and Presence Service, Release 11.5(1)SU3
1

RevisionDate
AddedDocumentationUpdate about the SIP Profile Settings informationin the online help.
April 09, 2018
About Release NotesThese release notes describe new features, requirements, restrictions, and caveats for Cisco UnifiedCommunicationsManager and IM and Presence Service. These release notes are updated for everymaintenancerelease but not for patches or hot fixes.
Unified Communications Manager, the call-processing component of the Cisco Unified CommunicationsSystem, extends enterprise telephony features and capabilities to IP phones, media processing devices, VoIPgateways, mobile devices, and multimedia applications.
IM and Presence Service collects information about user availability, such as whether users are usingcommunications devices (for example, a phone) at a particular time. IM and Presence Service can also collectinformation about individual user communication capabilities, such as whether web collaboration or videoconferencing is enabled. Applications such as Cisco Jabber and Unified Communications Manager use thisinformation to improve productivity among employees, that is, to help employees connect with colleaguesmore efficiently and determine the most effective way to engage in collaborative communication.
In the past, export licenses, government regulations, and import restrictions have limited the ability ofCisco to supply Unified Communications Manager and IM and Presence Service worldwide. Cisco hasobtained an unrestricted U.S. export classification to address this issue; IM and Presence Service supportsan export unrestricted (XU) version only. The unrestricted version differs from previous releases of IMand Presence Service in that it does not contain strong encryption capabilities.
Be aware that after you install an unrestricted release, you can never upgrade to a restricted version. Youare not allowed to perform a fresh installation of a restricted version on a system that contains an unrestrictedversion.
Note
Supported VersionsThe following software versions are supported with Release 11.5(1)SU3:
• Cisco Unified Communications Manager 11.5.1.13902-2 (11.5(1)SU3b)
• Cisco Unified Communications Manager 11.5.1.13901-3 (11.5(1)SU3a)
• Cisco Unified Communications Manager 11.5.1.13900-52 (11.5(1)SU3)
• IM and Presence Service 11.5.1.13900-57
Version Mismatch Not Supported
For your 11.5(1)SU3 deployment to be supported, both Cisco Unified Communications Manager and IM andPresence Service must be running 11.5(1)SU3 versions. Running an 11.5(1)SU3 version of Cisco Unified
Release Notes for Cisco Unified Communications Manager and IM and Presence Service, Release 11.5(1)SU32
About this ReleaseAbout Release Notes

Communications Manager with an earlier version of IM and Presence Service is not supported. Similarly,running an 11.5(1)SU3 version of IM and Presence Service with an earlier version of Cisco UnifiedCommunications Manager is not supported.
Documentation for this ReleaseIn addition to these Release Notes, the following documentation is published for this release:
New Documentation for this Release
The following table contains documents that were published specifically for the 11.5(1)SU3.
Table 1: Documentation for Release 11.5(1)SU3
DescriptionDocuments
Refer to the Readme for information on installing anddeploying the release, as well as bug fixes and updatesthat are includes in your release.
ReadMe Files for 11.5(1)SU3:
• ReadMeFile for CiscoUnified CommunicationsManager
• ReadMe File for Cisco Unified CM IM andPresence Service
Refer to this guide for the Command Line Interface(CLI) commands that are available for a CiscoUnifiedCommunications Solution.
Command Line Interface Reference Guide
Use this guide to configure an external database tostore information synchronized from the IM andPresence Service. This release includes updates to thetable values for Microsoft SQL Server externaldatabases.
Database Setup Guide for the IM and PresenceService
This solution document describes the PushNotifications solution for Cisco Jabber on iPhone andiPad. As of this release, this solution now supportspush notifications for voice and video calls as wellas IM and Presence.
Deploying Push Notifications for Cisco Jabber foriPhone and iPad
Existing Documentation from Release 11.5(x)
Where an 11.5(1)SU3 version of a document exists (for example, the Database Setup Guide), you should usethe SU3 version. However, if no 11.5(1)SU3 version of that document exists, you can use existing 11.5(x)documentation. For information on the documentation set that is available for Release 11.5(x), refer to theDocumentation Guide for Cisco Unified CommunicationsManager and the IM and Presence Service, Release11.5(1) at:
http://www.cisco.com/c/en/us/td/docs/voice_ip_comm/cucm/docguide/11_5_1/cucm_b_documentation-guide-cucm-imp-1151.html
Release Notes for Cisco Unified Communications Manager and IM and Presence Service, Release 11.5(1)SU3
3
About this ReleaseDocumentation for this Release

CLI CommandsFor a complete list of CLI commands that are available with this release, refer to the Command Line InterfaceReference Guide for Cisco Unified Communications Solutions, Release 11.5(1)SU3 at https://www.cisco.com/c/en/us/support/unified-communications/unified-communications-manager-callmanager/products-maintenance-guides-list.html.
Cisco Prime License ManagerCisco Unified Communications Manager Release 11.5(1)SU3 and SU4 are compatible with Cisco PrimeLicenseManager Release 11.5(1)SU2. If you are deploying a standalone Cisco Prime LicenseManager, makesure that your Prime License Manager version is 11.5(1)SU2. Otherwise, Cisco Unified CommunicationsManager cannot synchronize its license usage with the standalone Prime License Manager.
If you are upgrading to Cisco Unified Communications Manager Release 11.5(1)SU3 or SU4, and you arerunning a standalone version of Prime License Manager, upgrade your Prime License Manager instance to11.5(1)SU2 before you upgrade Cisco Unified Communications Manager.
With co-resident Prime License Manager deployments, Cisco Unified Communications Manager andCisco Prime License Manager are compatible automatically.
Note
OpenJDK MigrationFor this release, Cisco has migrated to the Open Java Development Kit (OpenJDK) platform from OracleJDK for Cisco Unified Communications Manager programming and application development.
Release Notes for Cisco Unified Communications Manager and IM and Presence Service, Release 11.5(1)SU34
About this ReleaseCLI Commands

C H A P T E R 2Upgrades
• Upgrade Procedures, page 5
• Version Requirements, page 5
• Supported Upgrade and Migration Paths, page 6
• Requirements and Limitations, page 11
Upgrade ProceduresFor detailed procedures on how to upgrade your system, refer to the Upgrade and Migration Guide for CiscoUnified Communications Manager and IM and Presence Service, Release 11.5(1) at the following URL:
http://www.cisco.com/c/en/us/td/docs/voice_ip_comm/cucm/upgrade/11_5_1/cucm_b_upgrade-guide-cucm-115.html
Version RequirementsAll servers in a Cisco Unified CommunicationsManager cluster must run the same release. The only exceptionis during a cluster software upgrade, during which a temporary mismatch is allowed.
The following software versions are supported with Release 11.5(1)SU3:
• Cisco Unified Communications Manager 11.5.1.13902-2 (11.5(1)SU3b)
• Cisco Unified Communications Manager 11.5.1.13901-3 (11.5(1)SU3a)
• Cisco Unified Communications Manager 11.5.1.13900-52 (11.5(1)SU3)
• IM and Presence Service 11.5.1.13900-57
Version Mismatch Not Supported
For your 11.5(1)SU3 deployment to be supported, both Cisco Unified Communications Manager and IM andPresence Service must be running 11.5(1)SU3 versions. Running an 11.5(1)SU3 version of Cisco UnifiedCommunications Manager with an earlier version of IM and Presence Service is not supported. Similarly,
Release Notes for Cisco Unified Communications Manager and IM and Presence Service, Release 11.5(1)SU3
5

running an 11.5(1)SU3 version of IM and Presence Service with an earlier version of Cisco UnifiedCommunications Manager is not supported.
Supported Upgrade and Migration PathsUse the following tables to determine whether you can upgrade or migrate from your currently installedversion, and which of the supported upgrade methods are available to you:
• Direct upgrades using either the Cisco Unified CMOSAdmin interface or the Cisco Prime CollaborationDeployment (PCD) Upgrade task
• Migrations using the PCD Migration task
If an upgrade or migration from your current release is not supported, see the instructions in the "Upgradingfrom Legacy Releases" chapter of the Upgrade and Migration Guide for Cisco Unified CommunicationsManager and IM and Presence Service.
Deployments on Cisco Media Convergence Servers HardwareYou cannot install or run Cisco Unified Communications Manager and the IM and Presence Service directlyon server hardware; you must run these applications on virtual machines. The tables below list the supportedmigration paths for deployments that are currently running on Cisco 7800 Series Media Convergence Server(MCS 7800) hardware. All of the supported migration paths listed below are physical-to-virtual (P2V)migrations.
The tables below list the upgrade paths supported for MCS 7800 Series servers, with the followingexceptions:
Note
• MCS 7816-C1 for Business Edition 3000 (BE3000)
• MCS 7828 for Business Edition 5000 (BE5000)
PCDmigrations are not supported for BE3000 and BE5000 deployments.We recommend a fresh installationfor upgrades from these products.
Table 2: Cisco Unified Communications Manager Releases Installed on MCS 7800 Series Hardware
Supported MethodToFrom
PCD Migration11.5(x)6.1(5)
PCD Migration11.5(x)7.1(3) and 7.1(5)
PCD Migration11.5(x)8.x
PCD Migration11.5(x)9.x
Release Notes for Cisco Unified Communications Manager and IM and Presence Service, Release 11.5(1)SU36
UpgradesSupported Upgrade and Migration Paths

Table 3: Cisco Unified Presence and IM and Presence Releases Installed on MCS 7800 Series Hardware
Supported MethodToFrom
PCD Migration11.5(x)CUP 8.5(4)
PCD Migration11.5(x)CUP 8.6(3), 8.6(4), and 8.6(5)
PCD Migration11.5(x)IM and Presence 9.x
Deployments on Virtual MachinesThe tables below list the supported upgrade and migration paths for Cisco Unified Communications Managerand IM and Presence Service deployments that are currently running on virtual machines. All of the supportedupgrade and migration paths listed below are virtual-to-virtual (V2V). Service Updates (SU) within each pathare supported, unless otherwise indicated.
Table 4: Cisco Unified Communications Manager Releases Installed on Virtual Machines
Supported MethodToFrom
Cisco Unified OS Admin (DirectRefresh)
PCD Migration
PCD Upgrade (Direct Refresh)
11.5(x)8.6(x)
PCD Migration
PCD Upgrade (Direct Refresh)
11.5(x)9.0(x)
PCD Migration
PCD Upgrade (Direct Refresh)
Cisco Unified OS Admin (DirectRefresh)
11.5(x)9.1(x)
PCD Migration
PCD Upgrade (Direct Standard)
11.5(x)10.0(x)
PCD Migration
PCD Upgrade (Direct Standard)
Cisco Unified OS Admin (DirectStandard)
11.5(x)10.5(x)
Exceptions exist for some 10.5(2) SUreleases; see Upgrade Path Restrictionsfor Release 11.5(x), on page 9 for moreinformation.
Note
Release Notes for Cisco Unified Communications Manager and IM and Presence Service, Release 11.5(1)SU3
7
UpgradesDeployments on Virtual Machines

Supported MethodToFrom
Cisco Unified OS Admin (DirectStandard)
PCD Migration
PCD Upgrade (Direct Standard)
11.5(x)11.0(1)
Cisco Unified OS Admin (DirectStandard)
PCD Migration
PCD Upgrade (Direct Standard)
11.5(y)11.5(x)
Table 5: Cisco Unified Presence and IM and Presence Releases Installed on Virtual Machines
Supported MethodToFrom
PCD Migration11.5(x)CUP 8.5(4)
PCD Migration
PCD Upgrade (Direct Refresh)
11.5(x)CUP 8.6(3), 8.6(4), and 8.6(5)
Cisco Unified OS Admin (Direct Refresh)11.5(x)CUP 8.6(x)
PCD Migration
PCD Upgrade (Direct Refresh)
11.5(x)IM and Presence 9.0(x)
PCD Migration
PCD Upgrade (Direct Refresh)
Cisco Unified OS Admin (Direct Refresh)
11.5(x)IM and Presence 9.1(x)
PCD Migration
PCD Upgrade (Direct Standard)
PCD Upgrade (Direct Standard)
11.5(x)IM and Presence 10.0(x)
PCD Migration
PCD Upgrade (Direct Standard)
Cisco Unified OS Admin (Direct Standard)
11.5(x)IM and Presence 10.5(x)
Cisco Unified OS Admin (Direct Standard)
PCD Migration
PCD Upgrade (Direct Standard)
11.5(x)IM and Presence 11.0(1)
Release Notes for Cisco Unified Communications Manager and IM and Presence Service, Release 11.5(1)SU38
UpgradesDeployments on Virtual Machines

Supported MethodToFrom
Cisco Unified OS Admin (Direct Standard)
PCD Migration
PCD Upgrade (Direct Standard)
11.5(y)IM and Presence 11.5(x)
Upgrade Path Restrictions for Release 11.5(x)Upgrade and migration paths generally support the Service Updates (SU) within each path; however, thereare some exceptions for specific SU releases. The table below lists the exceptions for upgrades and migrationsto Cisco Unified Communications Manager Release 11.5(x).
Table 6: Restrictions to Supported Upgrade and Migration Paths, Cisco Unified Communications Manager Release 11.5(x)
DescriptionToFrom
Path is unsupported. For thesereleases, upgrade to 11.5(1)SU2instead.
11.5(1.10000-6) through11.5(1.120xx)
10.5(2)SU5
COP Files Required for Upgrades to Release 11.5The tables below lists the upgrade paths that require COP files. You must install COP files on each nodebefore you begin an upgrade using the Cisco Unified OS Admin interface, or before you begin an upgrade ormigration using the Prime Collaboration Deployment (PCD) tool. If you are using PCD, you can perform abulk installation of the COP files before you begin the upgrade.
Table 7: Required COP Files for Upgrades and Migrations to Cisco Unified Communications Manager Release 11.5(x)
Upgrade TypeToFrom
Refresh upgrade. Required COP files:
• ciscocm.version3-keys.cop.sgn
Optional COP files:
• ciscocm.vmware-disk-size-reallocation-<latest_version>.cop.sgn)
• ciscocm.free_common_space_v<latest_version>.cop.sgn
11.5(x)8.6(x)
Release Notes for Cisco Unified Communications Manager and IM and Presence Service, Release 11.5(1)SU3
9
UpgradesUpgrade Path Restrictions for Release 11.5(x)

Upgrade TypeToFrom
Refresh upgrade. Required COP files:
• ciscocm.version3-keys.cop.sgn
Optional COP files:
• ciscocm.vmware-disk-size-reallocation-<latest_version>.cop.sgn)
• ciscocm.free_common_space_v<latest_version>.cop.sgn
11.5(x)9.1(x)
Standard upgrade; no COP file required.11.5(x)10.5(x)
Standard upgrade; no COP file required.11.5(x)11.0(x)
Standard upgrade; no COP file required.11.5((y)11.5(x)
Table 8: Required COP Files for Refresh Upgrades from Cisco Unified Presence Releases
Upgrade TypeTo IM and PresenceRelease
From Cisco UnifiedPresence Release
Refresh upgrade. Requires the following COP files:
• cisco.com.cup.refresh_upgrade_v<latest_version>.cop
• ciscocm.version3-keys.cop.sgn
11.5(x)8.5(4) through 8.6(1)
Table 9: Required COP Files for Refresh Upgrades from IM and Presence Service Releases
Upgrade TypeTo IM and PresenceRelease
From IM andPresence Release
Refresh upgrade. Requires the following COP file:
• ciscocm.version3-keys.cop.sgn
11.5(x)9.1(x)
Standard upgrade; no COP file required.11.5(x)10.5(x)
Standard upgrade; no COP file required.11.5(x)11.0(x)
Standard upgrade; no COP file required.11.5(y)11.5(x)
Release Notes for Cisco Unified Communications Manager and IM and Presence Service, Release 11.5(1)SU310
UpgradesCOP Files Required for Upgrades to Release 11.5

Requirements and LimitationsThis section contains requirements and limitations to consider when upgrading your system.
Upgrade Requirements with Standalone Prime License ManagerCisco Unified Communications Manager Release 11.5(1)SU3 and SU4 are compatible with Cisco PrimeLicenseManager Release 11.5(1)SU2. If you are deploying a standalone Cisco Prime LicenseManager, makesure that your Prime License Manager version is 11.5(1)SU2. Otherwise, Cisco Unified CommunicationsManager cannot synchronize its license usage with the standalone Prime License Manager.
If you are upgrading to Cisco Unified Communications Manager Release 11.5(1)SU3 or SU4, and you arerunning a standalone version of Prime License Manager, upgrade your Prime License Manager instance to11.5(1)SU2 before you upgrade Cisco Unified Communications Manager.
With co-resident Prime License Manager deployments, Cisco Unified Communications Manager andCisco Prime License Manager are compatible automatically.
Note
Cisco Jabber During UpgradeIt is not essential requirement that all users must log out from Cisco Jabber, when upgrading the IM andPresence Service. However, it is always a best practice that users are log out from Cisco Jabber during theupgrade.
Deprecated Phone Models
Deprecated Endpoints
The following phone models are deprecated and are not supported by Cisco Unified CommunicationsManagerRelease 11.5(x). If you are using any of these phone models and you upgrade to release 11.5(x), you will beunable to use the phone after the upgrade. After you switch over to the new release, registration on the phonewill be blocked.
• Cisco IP Phone 12 S
• Cisco IP Phone 12 SP
• Cisco IP Phone 12 SP+
• Cisco IP Phone 30 SP+
• Cisco IP Phone 30 VIP
• Cisco Unified IP Phone 7902G
• Cisco Unified IP Phone 7905G
• Cisco Unified IP Phone 7910
Release Notes for Cisco Unified Communications Manager and IM and Presence Service, Release 11.5(1)SU3
11
UpgradesRequirements and Limitations

• Cisco Unified IP Phone 7910G
• Cisco Unified IP Phone 7910+SW
• Cisco Unified IP Phone 7910G+SW
• Cisco Unified IP Phone 7912G
• Cisco Unified Wireless IP Phone 7920
• Cisco Unified IP Conference Station 7935
For additional information refer to the Field Notice:Cisco Unified Communications Manager Release 11.5(x)does not support some deprecated phone models.
http://www.cisco.com/c/en/us/td/docs/voice_ip_comm/cucm/rel_notes/11_5_1/fieldNotice/cucm_b_fn-deprecated-phone-models-1151.html
Upgrades that Involve Deprecated Phones
If you are using any of these phones on an earlier release and you want to upgrade to this release, do thefollowing:
1 Confirm whether the phones in your network will be supported in Release 11.5.
2 Identify any non-supported phones.
3 For any non-supported phones, power down the phone and disconnect the phone from the network.
4 Provision a supported phone for the phone user. You can use the Migration FX tool to migrate from oldermodel to newer model phones. For details, go to: http://refreshcollab.cisco.com/webportal/46/CUCM%20Readiness%20Assessment#endpoint_refresh_tool.
5 Once all the phones in your network are supported by Release 11.5, upgrade your system.
Deprecated phones can also be removed after the upgrade.When the administrator logs in to Cisco UnifiedCommunicationsManager after completing the upgrade, the system displays a warning message notifyingthe administrator of the deprecated phones.
Note
Licensing
You do not need to purchase a new device license to replace a deprecated phone with a supported phone. Thedevice license becomes available for a new phone when you either remove the deprecated phone from thesystem, or when you switch to the new Cisco Unified Communications Manager version, and the deprecatedphone fails to register.
OS Admin Account Required for CLI-Initiated IM and Presence UpgradesIf you are using the utils system upgrade CLI command to upgrade IM and Presence Service nodes, youmust use the default OS admin account, as opposed to a user with administrator privileges. Otherwise, theupgrade will not have the required privilege level to install essential services, thereby causing the upgrade tofail. You can confirm the account’s privilege level by running the show myself CLI command. The accountmust have privilege level 4.
Release Notes for Cisco Unified Communications Manager and IM and Presence Service, Release 11.5(1)SU312
UpgradesOS Admin Account Required for CLI-Initiated IM and Presence Upgrades

Please note that this limitation exists for CLI-initiated upgrades of IM and Presence Service only and doesnot apply to Cisco Unified Communications Manager. Also note that this limitation may be fixed for newerISO files. Refer to your ISO Readme file for details on your specific ISO file. For up to date information onthis limitation, see CSCvb14399 at https://bst.cloudapps.cisco.com/bugsearch/bug/CSCvb14399.
Rolling Back to Previous VersionsIf you run into any upgrade issues and you need to roll back to a previous version, you must roll back boththe Cisco Unified Communications Manager and the IM and Presence Service installations to the previousversion or you will have a non-supported version mismatch.
It's not supported to roll back the Cisco Unified Communications Manager version and leave the IM andPresence Service version at 11.5(1)SU3. Similarly, it's not supported to roll back the IM and Presence Serviceversion and leave the Cisco Unified Communications Manager version at 11.5(1)SU3.
Upgrading with FIPS Mode EnabledFor Release 11.5(x), Cisco Unified Communications Manager and IM and Presence Service do not supportRSA certificates with key-sizes that are less than 2048 bits when FIPS mode is enabled. This affects servercertificates and LSCs.
If you are upgrading to Release 11.5(x) with FIPS mode enabled and you are using RSA key-sizes that areless than 2048 bits on your current version, then you can carry out one of the following items to resolve theproblem.
You can either:
• Regenerate the effected certificates before you upgrade if your current version supports key-sizes of2048 bits, or
• Regenerate the effected certificates after you upgrade to Release 11.5(x).
If you choose this option, then secure connections are not allowed to use the effectedcertificates until they have an RSA key-size of 2048 bits or greater.
Note
Upgrades with Mixed Mode Enabled Require an Encryption LicenseThis release requires that you have an encryption license installed in order to run CiscoUnified CommunicationsManager in mixed mode. If you are upgrading from an earlier release of Cisco Unified CommunicationsManager, and cluster security is set to mixed-mode, you must obtain an encryption license and install it inCisco Prime License Manager.
If you upgrade from an earlier release with mixed-mode enabled, but you do not have an encryption licenseinstalled, a warning message on the encryption license requirement displays on the user interface immediatelyfollowng the upgrade. You will also receive theCiscoSystemEncryptionNotAllowed alert. Your system willcontinue to operate in mixed-mode, but you will be unable to update the CTL file and will continue to receivethis alert until you either install an encryption license or move the cluster security setting back to non-secure
Release Notes for Cisco Unified Communications Manager and IM and Presence Service, Release 11.5(1)SU3
13
UpgradesRolling Back to Previous Versions

mode. Cisco recommends that you install the encryption license at the earliest to ensure that you can continueto run mixed mode without any disruption.
If you were not running mixed-mode prior to the upgrade, you will be unable to move the cluster intomixed-mode unless you have an encryption license applied against Cisco Unified Communications Manager,and a sync has been completed.
Ordering and Installing License Files
The following table describes how to update your system with an encryption license.
Table 10: Updating your System with an Encryption License
DescriptionTaskStep
Use the CUCM-PLM-ENC-K9= part numberto order encryption licenses via the ProductUpgrade Tool at https://tools.cisco.com/gct/Upgrade/jsp/index.jsp.
For further information on ordering licenses,refer to the Cisco Unified CommunicationsSolutions Ordering Guide for your release athttp://www.cisco.com/c/en/us/partners/tools/collaboration-ordering-guides.html.
If you are using multiple instancesof Cisco Prime License Manager inyour deployment, you must order aseparate encryption license for eachPrime License Manager instance.
Note
Obtain an ENC PAK license file.Step 1
Follow the "Upgrade Existing Licenses"procedure in the Cisco Prime LicenseManager User Guide, Release 11.5(1)SU2 athttp://www.cisco.com/c/en/us/support/cloud-systems-management/prime-license-manager/products-user-guide-list.html.
Install the encryption license file in CiscoPrime License Manager.
Step 2
In Cisco Prime License Manager, select theProduct Instances tab and click Synchronizelicenses.
For additional detail, see the Cisco PrimeLicense Manager User Guide, Release11.5(1)SU2.
Synchronize licenses.Step 3
Database Migration Required for Upgrades with Microsoft SQL ServerIf you have Microsoft SQL Server deployed as an external database with the IM and Presence Service andyou are upgrading from 11.5(1), 11.5(1)SU1, or 11.5(1)SU2, you must create a new SQL Server database and
Release Notes for Cisco Unified Communications Manager and IM and Presence Service, Release 11.5(1)SU314
UpgradesDatabase Migration Required for Upgrades with Microsoft SQL Server

migrate to the new database. This is required due to enhanced data type support in this release. If you don'tmigrate your database, schema verification failure will occur on the existing SQL Server database and servicesthat rely on the external database, such as persistent chat, will not start.
After you upgrade your IM and Presence Service, use this procedure to create a new SQL Server databaseand migrate data to the new database.
This migration is not required for Oracle or PostgreSQL external databases.Note
Before You Begin
The database migration is dependent on theMSSQL_migrate_script.sql script. Contact Cisco TACto obtain a copy.
Table 11:
TaskStep
Create a snapshot of your external Microsoft SQL Server database.Step 1
Create a new (empty) SQL Server database. For details, see the following chapters in theDatabase Setup Guide for the IM and Presence Service:
1 "Microsoft SQL Installation and Setup"—Refer to this chapter for details on how tocreate your new SQL server database on your upgraded IM and Presence Service.
2 "IM and Presence Service External Database Setup"—After your new database iscreated, refer to this chapter to add the database as an external database in the IM andPresence Service.
Step 2
Run the System Troubleshooter to confirm that there are no errors with the new database.
1 From Cisco Unified CM IM and Presence Administration, choose Diagnostics >System Troubleshooter.
2 Verify that no errors appear in the External Database Troubleshooter section.
Step 3
Restart the Cisco XCP Router on all IM and Presence Service cluster nodes:
1 From Cisco Unified IM and Presence Serviceability, choose Tools > Control Center- Network Services.
2 From the Server menu, select an IM and Presence Service node and click Go.
3 Under IM and Presence Services, select Cisco XCP Router and click Restart.
Step 4
Release Notes for Cisco Unified Communications Manager and IM and Presence Service, Release 11.5(1)SU3
15
UpgradesDatabase Migration Required for Upgrades with Microsoft SQL Server

TaskStep
Turn off services that depend on the external database:
1 From Cisco Unified IM and Presence Serviceability, choose Tools > Control Center- Feature Services.
2 From the Server menu, select an IM and Presence node and click Go.
3 Under IM and Presence Services, select the following services:.
Cisco XCP Text Conference Manager
Cisco XCP File Transfer Manager
Cisco XCP Message Archiver
4 Click Stop.
Step 5
Run the following script to migrate data from the old database to the new databaseMSSQL_migrate_script.sql.
Contact Cisco TAC to obtain a copy of thisscript
Note
Step 6
Run the System Troubleshooter to confirm that there are no errors with the new database.
1 From Cisco Unified CM IM and Presence Administration, choose Diagnostics >System Troubleshooter.
2 Verify that no errors appear in the External Database Troubleshooter section.
Step 7
Start the services that you stopped previously.
1 From Cisco Unified IM and Presence Serviceability, choose Tools > Control Center- Feature Services.
2 From the Server menu, select an IM and Presence node and click Go.
3 Under IM and Presence Services, select the following services:.
Cisco XCP Text Conference Manager
Cisco XCP File Transfer Manager
Cisco XCP Message Archiver
4 Click Start.
Step 8
Confirm that the external database is running and that all chat rooms are visible from aCisco Jabber client. Delete the old database only after you're confident that the newdatabase is working.
Step 9
Release Notes for Cisco Unified Communications Manager and IM and Presence Service, Release 11.5(1)SU316
UpgradesDatabase Migration Required for Upgrades with Microsoft SQL Server

Upgrades from 11.5(1)SU2 with Push Notifications EnabledIf you are upgrading from the 11.5(1)SU2 release and you had Push Notifications enabled in the old release,you must disable Push Notifications in the current release and then follow the onboarding process to enablePush Notifications once again. This is required due to API changes in this release that were not a part of the11.5(1)SU2 release. Your upgraded system will not be able to send troubleshooting logs to the Cisco Cloudunless you disable Push Notifications and then follow the onboarding process for this release.
After you upgrade your system, do the following:
Procedure
PurposeCommand or Action
Follow these steps:Disable PushNotifications
Step 1
1 FromCiscoUnified CMAdministration, chooseAdvanced Features> Cisco Cloud Onboarding
2 Uncheck the following check boxes:
• Enable Push Notifications
• Send Troubleshooting information to the Cisco Cloud
• Send encrypted PII to the Cisco Cloud for troubleshooting
3 Click Save.
For the full onboarding process, see the "Push NotificationsConfiguration Task Flow" in theDeploying Push Notifications for Cisco
Enable PushNotificationsfor this release.
Step 2
Jabber on iPhone and iPad document at http://www.cisco.com/c/en/us/td/docs/voice_ip_comm/cucm/im_presence/pushNotifications/11_5_1_su2/cucm_b_push-notification-deployment-iPhone-iPad.html.
Release Notes for Cisco Unified Communications Manager and IM and Presence Service, Release 11.5(1)SU3
17
UpgradesUpgrades from 11.5(1)SU2 with Push Notifications Enabled

Release Notes for Cisco Unified Communications Manager and IM and Presence Service, Release 11.5(1)SU318
UpgradesUpgrades from 11.5(1)SU2 with Push Notifications Enabled

C H A P T E R 3New and Changed Features
• Authenticated Network Time Protocol Support, page 19
• Cisco Spark Remote Device, page 20
• Calendar Integration with Office 365, page 20
• Cisco Jabber Authentication via OAuth Refresh Logins, page 21
• Compliance to Common Criteria, page 26
• Emergency Notifications Paging, page 26
• Encryption License Requirement for Mixed-Mode, page 34
• Enhanced Sign-In Experience for Cisco Jabber During SSO and Non-SSO , page 35
• Enhanced Usability in the User Device Association Screen, page 36
• Minimum TLS Version Control, page 36
• Push Notifications Enhancements for Cisco Jabber on iPhone and iPad, page 49
• TLS as a Communication Protocol for Syslog and FileBeat, page 50
• Upgrade External Database Table Values for Microsoft SQL Datatype, page 51
Authenticated Network Time Protocol SupportWith this release, the authenticatedNetwork Time Protocol (NTP) capability for CiscoUnified CommunicationsManager is supported. This support is added to secure the NTP server connection to Cisco UnifiedCommunications Manager. In the previous releases, the Cisco Unified Communications Manager connectionto the NTP server was not secure.
This feature is based on symmetric key-based authentication and is supported by NTPv3 and NTPv4 servers.Cisco Unified CommunicationsManager supports only SHA1-based encryption. The SHA1-based symmetrickey support is available from NTP version 4.2.6 and above.
• Symmetric Key
• No Authentication
Release Notes for Cisco Unified Communications Manager and IM and Presence Service, Release 11.5(1)SU3
19

You can check the authentication status of the NTP servers through administration CLI or NTP Server Listpage of the Cisco Unified OS Administration application.
CLI Updates for Authenticated NTPFor the authenticated NTP support feature, the following new CLI command is added for this release:
• utils ntp auth symmetric-key—This command helps you enable or disable authentication of theselected NTP server. The authentication is based on symmetric keyID and key. The symmetric key isstored in the encrypted format in Cisco UnifiedCommunications Manager.
OS Administration Online Help UpdatesFollowing column has been added in the NTP Server List page of the Cisco Unified Operating SystemAdministration application.
NTP Servers Settings
Table 12: NTP Server Configuration Settings
DescriptionField
Displays the authentication status of an NTP server.NTP Authentication Status
Cisco Spark Remote DeviceCisco Spark remote devices (Spark-RDs) are strongly recommended for your hybrid deployment becausethey do not require a license or MTP insertion, and contain further bug fixes. To use this option, you mustuse Unified CM 10.5(2)SU5, 11.0(1a)SU3, or 11.5(1)SU3. For unsupported releases, the CTI-RD is usedinstead, which requires a license and insertion of an MTP. For manual and automatic creation on a supportedrelease, you must use Cisco Spark-RDs for new activations. CTI-RDs created with an earlier release willcontinue to work until they are migrated to Cisco Spark-RDs.
For more information about Cisco Spark remote devices and supported configuration for Hybrid Call Services,see http://www.cisco.com/go/hybrid-services-call
Calendar Integration with Office 365With this release, you can integrate the IM and Presence Service with an Office 365 server for MicrosoftOutlook calendar integration. This configuration allows the IM and Presence Service to pull user calendarinformation from an Office 365-hosted Microsoft Outlook and display it as a part of a user's presence status.If the user's Outlook calendar indicates that the user is in a meeting, that status gets pulled through and displaysin the user's presence status.
Release Notes for Cisco Unified Communications Manager and IM and Presence Service, Release 11.5(1)SU320
New and Changed FeaturesCLI Updates for Authenticated NTP

This integration has been tested successfully with 15,000 IM and Presence users system, where 5,000 usershave a meeting at the top of the hour.
For configuration details, refer to the documentMicrosoft Outlook Calendar Integration with the IM andPresence Service.
User Interface Updates
To support this feature, the Presence Gateway Settings window has been updated as follows
• The Presence Gateway Type field includes a new gateway option: Office 365 Server.
• The following HTTP Proxy fields are added: (HTTPProxy URL,HTTPProxy Username, andHTTPProxy Password). An HTTP Proxy is required if the IM and Presence Service can't access the Office365 server directly.
New Service Parameter
A new service parameter, Office365 Calendar Information Pull Interval, has been added for configuringthe PULL interval with an Office 365 server. The IM and Presence Service is not currently able to pull calenderinformation on an ad hoc basis. It can only pull calendar information at regularly scheduled intervals, asconfigured with this service parameter, which has a default setting of 60 minutes. Make sure to schedule aninterval that meets your deployment needs.
Calendaring Troubleshooter
The Calendaring Troubleshooter portion of the SystemTroubleshooter (Diagnostics > SystemTroubleshooter)has been updated for Office 365 integration. When the IM and Presence Service is integrating with an Office365 server, the troubleshooter confirms that the presence gateway is properly configured, and is reachable.
Cisco Jabber Authentication via OAuth Refresh LoginsCisco Jabber clients, as of Jabber Release 11.9, can use OAuth Refresh Logins to authenticate with CiscoUnified CommunicationsManager and the IM and Presence Service. This feature improves the user experiencefor Cisco Jabber by providing the following benefits:
• After an initial login, provides seamless access to resources over the life of the refresh token.
• Removes the need for Cisco Jabber clients to re-authenticate frequently.
• Provides consistent login behavior in SSO and non-SSO environments.
With OAuth Refresh Logins, Cisco Unified Communications Manager issues clusterwide access tokens andrefresh tokens that use the OAuth standard. Cisco Unified Communications Manager and IM and PresenceService use the short-lived access tokens to authenticate Jabber (the default lifespan for an access token is 60minutes). The longer-lived refresh tokens provide Jabber with new access tokens as the old access tokensexpire. So long as the refresh token is valid the Jabber client can obtain new access tokens dynamically withoutthe user having to re-enter credentials (the default refresh token lifespan is 60 days).
All access tokens are encrypted, signed, and self-contained using the JWT format (RFC7519). Refresh tokensare signed, but are not encrypted.
Release Notes for Cisco Unified Communications Manager and IM and Presence Service, Release 11.5(1)SU3
21
New and Changed FeaturesCisco Jabber Authentication via OAuth Refresh Logins

OAuth authentication is also supported by Cisco Expressway and Cisco Unified Connection. Make sureto check with those products for compatible versions. Refer to Cisco Jabber documentation for details onJabber behavior if you are running incompatible versions.
Note
Authentication Process
When a Cisco Jabber client authenticates, or when a refresh token is sent, Cisco Unified CommunicationsManager checks the following conditions, each of which must be met for authentication to succeed.
• Verifies the signature.
• Decrypts and verifies the token.
• Verifies that the user is an active user. For example, an LDAP-synced user whom is subsequentlyremoved from the external LDAP directory, will remain in the database, but will appear as an inactiveuser in the User Status of End User Configuration.
• Verifies that the user has access to resources, as provided by their role, access control group, and userrank configuration.
For backward compatibility, older Jabber clients and supporting applications such as the Cisco UnifiedReal-Time Monitoring Tool can authenticate using the implicit grant flow model, which is enabled bydefault.
Note
Enterprise Parameter Updates
To support this feature, the following enterprise parameters are added under the SSOandOAuthConfigurationheading:
• OAuth with Refresh Login Flow—This parameter controls the login flow used by clients such asJabber when connecting to Unified CM. OAuth with Refresh Login Flow "enabled" allows the client touse an oAuth-based Fast Login flow to provide a quicker and streamlined login experience, withoutrequiring user input to re-log in (such as after a network change). The option requires support from theother components of the Unified Communications solution, such as Expressway and Unity Connection(compatible versions with refresh login flow enabled). The OAuth with Refresh Login Flow "disabled"option preserves existing behavior and is compatible with older versions of other system components.Note: ForMobile and Remote Access deployment with Jabber, It is recommended to enable this parameteronly with a compatible version of Expressway which supports oAuth with Refresh login flow.Incompatible version may impact Jabber functionality. Please refer the specific product documents forsupported version and configuration requirements.
• OAuth Refresh Token Expiry Timer (days)— This parameter determines the OAuth Refresh tokenexpiry timer in days. Updates to this parameter take effect immediately and refresh tokens issued afterthe change will use the new expiry timer and previously issued refresh tokens will cease to be valid.
Certificate Updates
To support this feature, the self-signed AUTHZ certificate has been added to handle authentication withOAuth tokens. This certificate lives on the Cisco Unified Communications Manager publisher node and
Release Notes for Cisco Unified Communications Manager and IM and Presence Service, Release 11.5(1)SU322
New and Changed FeaturesCisco Jabber Authentication via OAuth Refresh Logins

replicates the signing and encryption keys to all Cisco Unified CommunicationsManager and IM and PresenceService cluster nodes. The certificate is self-signed, using a locally-generated public-private key pair andshould not be an X.509 certificate.
If you think that either the signing key or encryption key has been compromised, you can regenerate eitherset of keys. Make sure to sync your new keys with Cisco Expressway and Cisco Unity Connection.
CLI Updates
To support this feature, the following CLI commands are new for this release:
• set key regen authz signing—Run this command on the Cisco Unified Communications Managerpublisher node to regenerate the asymmetric RSA key pair for signing OAuth access tokens and refreshtokens.
• set key regen authz encryption—Run this command on the CiscoUnified CommunicationsManagerpublisher node to regenerate the symmetric encryption key that encrypts OAuth access tokens and refreshtokens.
• show key authz signing—This command displays the OAuth refresh login encryption key checksumand last synced time on both publisher and subscriber nodes.
• show key authz encryption—This command displays the OAuth refresh login signing key checksumand last synced time on both publisher and subscriber nodes.
Troubleshooting
The following table highlights useful logs for troubleshooting OAuth SSO configuration. Trace does not needto be configured for these logs.
To set SAML SSO logs to a detailed level, run the set samltrace level debug CLI command.Note
Table 13: Logs for Troubleshooting OAuth Refresh Logins
Log DetailsLogs
Each time a new SSO App operation is completed, new log entries aregenerated here:
/var/log/active/platform/log/ssoApp.log
SSO Logs
SSO and OAuth operations are logged in ssosp logs. Each time SSO isenabled a new log file is created here:
/usr/local/thirdparty/Jakarta-tomcat/logs/ssosp/log4j/
Ssosp Logs
Certificate logs are located at the following location. Each time theAuthz certificate is regenerated, a new log file is generated:
/var/log/active/platform/log/certMgmt*.log
SSO and OAuth Configuration
Release Notes for Cisco Unified Communications Manager and IM and Presence Service, Release 11.5(1)SU3
23
New and Changed FeaturesCisco Jabber Authentication via OAuth Refresh Logins

Configure Refresh Logins for Cisco JabberUse this procedure to enable Refresh Logins with OAuth access tokens and refresh tokens in Cisco UnifiedCommunicationsManager. OAuth Refresh Logins provides a streamlined login flow that doesn't require usersto re-login after network changes.
To ensure compatibility, make sure that the various Unified Communications components of yourdeployment, such as Cisco Jabber, Cisco Expressway and Cisco Unity Connection, support refresh logins.Once OAuth Refresh Logins are enabled, disabling the feature will require you to reset all Cisco Jabberclients.
Note
Before You Begin
You must be running a minimum release of Cisco Jabber 11.9. Older versions of Jabber will use the ImplicitGrant Flow authentication model from previous releases.
Procedure
Step 1 From Cisco Unified CM Administration, choose System > Enterprise Parameters.Step 2 Under SSO Configuration, do either of the following:
• To enable OAuth Refresh Logins, set the OAuth with Refresh Login Flow enterprise parameter toEnabled.
• To disable OAuth Refresh Logins, set the OAuth with Refresh Login Flow enterprise parameter toDisabled. This is the default setting.
Step 3 If you enabled OAuth Refresh Logins, configure expiry timers for access tokens and refresh tokens byconfiguring the following enterprise parameters:
• OAuth Access Token Expiry Timer (minutes)—This parameter specifies the expiry timer, in minutes,for individual OAuth access tokens. The OAuth access token is invalid after the timer expires, but theJabber client can request and obtain new access tokens without the user having to re-authenticate solong as the refresh token is valid. The valid range is from 1 - 1440 minutes with a default of 60 minutes.
• OAuth Refresh Token Expiry Timer (days)—This parameter specifies the expiry timer, in days, forOAuth refresh tokens. After the timer expires, the refresh token becomes invalid and the Jabber clientmust re-authenticate to get a new refresh token. The valid range is from 1 - 365 days with a default of60 days.
Step 4 Click Save.Once you've saved the configuration, reset all Cisco Jabberclients.
Note
Release Notes for Cisco Unified Communications Manager and IM and Presence Service, Release 11.5(1)SU324
New and Changed FeaturesConfigure Refresh Logins for Cisco Jabber

Regenerate Keys for OAuth Refresh LoginsUse this procedure to regenerate both the encryption key and the signing key using the Command LineInterface. Complete this task only if the encryption key or signing key that Cisco Jabber uses for OAuthauthentication with Cisco Unified Communications Manager has been compromised. The signing key isasymmetric and RSA-based whereas the encryption key is a symmetric key.
Note • After you complete this task, the current access and refresh tokens that use these keys become invalid.
•We recommend that you complete this task during off-hours to minimize the impact to end users.
• The encryption key can be regenerated only via the CLI below, but you can also use the Cisco UnifiedOSAdministration GUI to regenerate the signing key. Choose Security >CertificateManagement,select the AUTHZ certificate, and click Regenerate.
Procedure
Step 1 On the Cisco Unified Communications Manager publisher node, log in to the Command Line Interface .Step 2 If you want to regenerate the encryption key:
a) Run the set key regen authz encryption command.b) Enter yes.
Step 3 If you want to regenerate the signing key:a) Run the set key regen authz signing command.b) Enter yes.
The Cisco Unified CommunicationsManager publisher node regenerates keys and replicates the new keysto all Cisco Unified CommunicationsManager cluster nodes, including any local IM and Presence Servicenodes.
What to Do Next
You must regenerate and sync your new keys on all of your UC clusters:
• IM and Presence central cluster—If you have an IM and Presence centralized deployment, your IM andPresence nodes are running on a separate cluster from your telephony. In this case, repeat this procedureon the Cisco Unified Communications Manager publisher node of the IM and Presence Service centralcluster.
• Cisco Expressway or Cisco Unity Connection—Regenerate the keys on those clusters as well. See yourCisco Expressway and Cisco Unity Connection documentation for details.
Revoke Existing OAuth Refresh TokensUse an AXLAPI to revoke existing OAuth refresh tokens. For example, if an employee leaves your company,you can use this API to revoke that employee's current refresh token so that they cannot obtain new access
Release Notes for Cisco Unified Communications Manager and IM and Presence Service, Release 11.5(1)SU3
25
New and Changed FeaturesRegenerate Keys for OAuth Refresh Logins

tokens and will no longer be able to log in to the company account. The API is a REST-based API that isprotected by AXL credentials. You can use any command-line tool to invoke the API. The following commandprovides an example of a cURL command that can be used to revoke a refresh token:
curl -k -u "admin:password" https://<UCMaddress:8443/ssosp/token/revoke?user_id=<end_user>
where:
• admin:password is the login ID and password for the Cisco Unified Communications Manageradministrator account.
• UCMaddress is the FQDN or IP address of the Cisco Unified Communications Manger publisher node.
• end_user is the user ID for the user for whom you want to revoke refresh tokens.
Compliance to Common CriteriaWith Release 11.5(1) SU3, both Cisco Unified Communications Manager and IM and Presence Service canrun in Common Criteria mode. This running mode runs on a FIPS-enabled system, and allows the system tocomply with Common Criteria guidelines.
Common Criteria mode can be configured by running the following CLI commands on each cluster node:
• utils fips_common_criteria enable - Run this command to turn Common Criteria mode on.
• utils fips_common_criteria disable - Run this command to turn off Common Criteria mode.
• utils fips_common_criteria status - Run this command to confirmwhether CommonCriteriamodeis on or off for a particular cluster node.
TLS connection between the MS SQL external database server and the IM and Presence Service server is notsupported when Common Criteria mode is enabled on the IM and Presence Service server.
Emergency Notifications PagingWith this release, Cisco Unified Communications Manager comes with a provisioning wizard that allows youto quickly provision and configure advanced notification services.
The Cisco Paging Server product is offered through InformaCast Virtual Appliance. It is a software solutionthat transforms devices on your network into a powerful system for IP paging and emergency call alerting. Itintegrates easily with Cisco phones, overhead speakers, strobes, panic buttons, and more, to increase the speed,reach, and success rate of your emergency alerts.
User Interface Updates for Advanced Notification Services
In the Advanced Features menu of the Cisco Unified Communications Manager Administration, theEmergency Notifications Pagingwizard has been added.Emergency Notifications Paging is a full-featuredemergency notification and paging solution that allows you to reach an unlimited number of Cisco IP phonesand various devices and systems with text and audio messages. It includes the following features:
• InformaCast advanced notification
• Panic button configuration
Release Notes for Cisco Unified Communications Manager and IM and Presence Service, Release 11.5(1)SU326
New and Changed FeaturesCompliance to Common Criteria

• Text and audio notification to IP phones when a user dials an emergency services number (CallAware)
For more information about InformaCast Virtual Appliance, see https://www.singlewire.com/informacast.html.
Advanced Notification Paging Configuration Task FlowPerform the following tasks to integrate InformaCast Paging Server with Cisco Unified CommunicationsManager for IP paging and emergency call alerting. It includes the following features:
• InformaCast advanced notification
• Panic button configuration
• Text and audio notification to IP phones when a user dials an emergency services number (CallAware)
Procedure
PurposeCommand or Action
Download the InformaCast OVA file from theSinglewire website and upload it to vSphere.
Install the InformaCast Virtual Appliance,on page 27.
Step 1
Configure Cisco Unified CommunicationsManager and InformaCast.
Configure Connection to InformaCast, onpage 29.
Step 2
Configure a panic button to send a text and audionotification to IP phones.
Configure Panic Button, on page 30.Step 3
Configure emergency call text and audionotifications.
Configure CallAware Emergency CallAlerting, on page 32.
Step 4
Install the InformaCast Virtual ApplianceSinglewire supports InformaCast Virtual Appliance on the VMware ESXi platform, which is managed throughthe vSphere client.
To view a list of Singlewire-supported VMware ESXi versions, go to this URL: https://www.singlewire.com/compatibility-matrix and click the Server Platforms link under InformaCast Platformsection.
Note
If you have purchased a license, refer to https://www.singlewire.com/icva-kb-activate to activate yourlicense. This will ensure that Emergency Notifications stay active after the 90-day trial.
Note
Release Notes for Cisco Unified Communications Manager and IM and Presence Service, Release 11.5(1)SU3
27
New and Changed FeaturesAdvanced Notification Paging Configuration Task Flow

For more details on the installation, including InformaCast screen captures, go to this URL: https://www.singlewire.com/icva-kb-install.
Note
Before You Begin
Import InformaCast Virtual Appliance using the vSphere client. This can be downloaded from your VMwareserver.
Procedure
Step 1 Download the OVA file from the Singlewire website and then log in to the vSphere client.If you are using InformaCast on the Communications Manager Business Edition 6000, you aresupplied with a DVD in a package with an OVA on it (physical media).
Note
The vSphere Client window appears.Step 2 From the vSphere Client window, choose File > Deploy OVF Template.
The Deploy OVF Template dialog box appears.Step 3 Click the Deploy from File radio button and then click Browse to select the saved the OVA file (or to the
OVA file on the supplied DVD). After you select the OVA file, click Open.The Source location is selected in the Deploy OVF Template dialog box.
Step 4 Click Next to continue.The Deploy OVF Template dialog box refreshes and OVF Template Details appears.
Step 5 Click Next to verify the Name and Location, and then click Next to select the network to store the newvirtual machine files.
It is good practice to place the Virtual Appliance on the same VLAN as your Cisco UnifiedCommunications Manager.
Tip
Step 6 Click Next to continue, and then click Finish.The InformaCast Virtual Appliance begins importing.
Step 7 From the vSphere Client window, click Hosts and Clusters icon and then select your host server.The vSphere Client window refreshes.
Step 8 Click theConfiguration tab and select theVirtualMachine Startup/Shutdown link in the Software section.Step 9 Click the Properties link.
The Virtual Machine Startup and Shutdown dialog box appears.Step 10 Check theAllow virtual machines to start and stop automatically with the system check box under System
Settings.Step 11 Under Startup Order, scroll to theManual Startup section and select your virtual machine (by default, this
is Singlewire InformaCast VM), and then move it from theManual Startup section to theAutomatic Startupsection, by using theMove Up button. After moving it, click OK.The InformaCast Virtual Appliance starts and stops automatically with the server on which it is hosted. Nowyou can turn on InformaCast's virtual machine and set its network configuration.
Step 12 Choose View > Inventory > VMs and Templates and then select your virtual machine.Step 13 Choose the Inventory > Virtual Machine > Open Console
The Singlewire InformaCast VM console window appears.Step 14 InformaCast configuration starts for the first time. During this configuration, perform the following tasks for
the InformaCast Virtual Appliance:a) Accept Cisco End User License Agreement (EULA)
Release Notes for Cisco Unified Communications Manager and IM and Presence Service, Release 11.5(1)SU328
New and Changed FeaturesAdvanced Notification Paging Configuration Task Flow
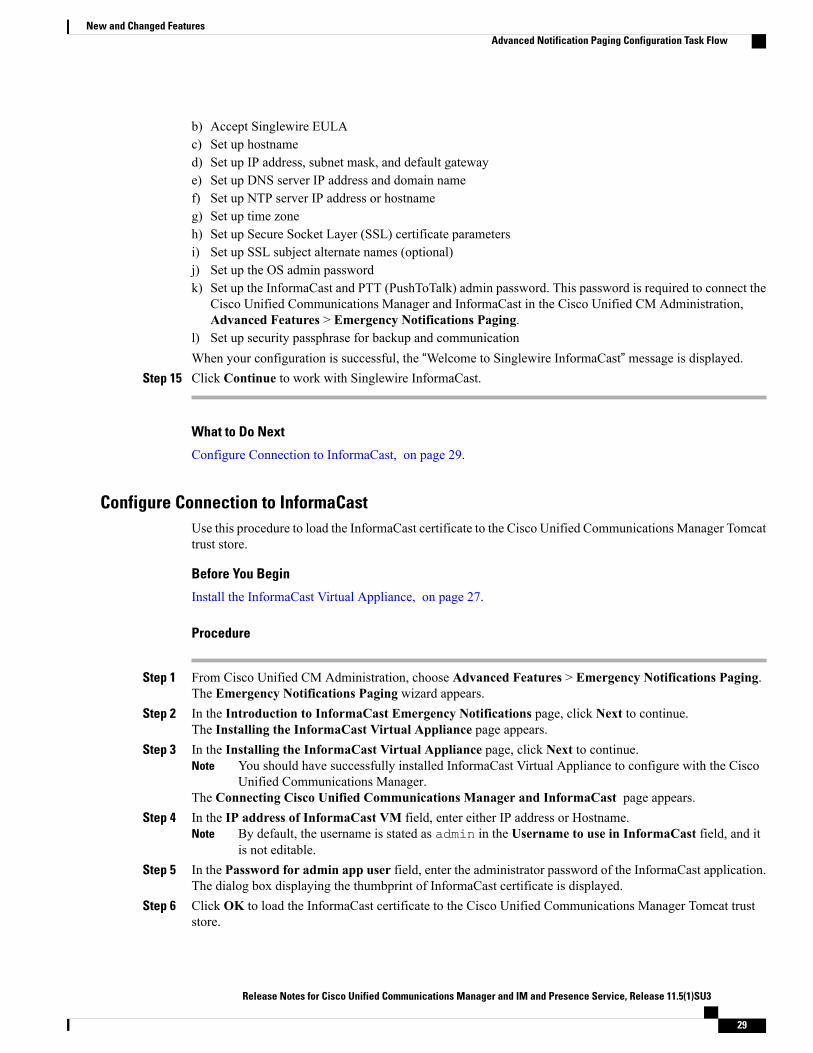
b) Accept Singlewire EULAc) Set up hostnamed) Set up IP address, subnet mask, and default gatewaye) Set up DNS server IP address and domain namef) Set up NTP server IP address or hostnameg) Set up time zoneh) Set up Secure Socket Layer (SSL) certificate parametersi) Set up SSL subject alternate names (optional)j) Set up the OS admin passwordk) Set up the InformaCast and PTT (PushToTalk) admin password. This password is required to connect the
Cisco Unified Communications Manager and InformaCast in the Cisco Unified CM Administration,Advanced Features > Emergency Notifications Paging.
l) Set up security passphrase for backup and communicationWhen your configuration is successful, the “Welcome to Singlewire InformaCast” message is displayed.
Step 15 Click Continue to work with Singlewire InformaCast.
What to Do Next
Configure Connection to InformaCast, on page 29.
Configure Connection to InformaCastUse this procedure to load the InformaCast certificate to the Cisco Unified CommunicationsManager Tomcattrust store.
Before You Begin
Install the InformaCast Virtual Appliance, on page 27.
Procedure
Step 1 From Cisco Unified CM Administration, choose Advanced Features > Emergency Notifications Paging.The Emergency Notifications Paging wizard appears.
Step 2 In the Introduction to InformaCast Emergency Notifications page, click Next to continue.The Installing the InformaCast Virtual Appliance page appears.
Step 3 In the Installing the InformaCast Virtual Appliance page, click Next to continue.You should have successfully installed InformaCast Virtual Appliance to configure with the CiscoUnified Communications Manager.
Note
The Connecting Cisco Unified Communications Manager and InformaCast page appears.Step 4 In the IP address of InformaCast VM field, enter either IP address or Hostname.
By default, the username is stated as admin in the Username to use in InformaCast field, and itis not editable.
Note
Step 5 In the Password for admin app user field, enter the administrator password of the InformaCast application.The dialog box displaying the thumbprint of InformaCast certificate is displayed.
Step 6 Click OK to load the InformaCast certificate to the Cisco Unified Communications Manager Tomcat truststore.
Release Notes for Cisco Unified Communications Manager and IM and Presence Service, Release 11.5(1)SU3
29
New and Changed FeaturesAdvanced Notification Paging Configuration Task Flow

Configuration process starts.When the configuration is successful, the Status field displays the completion status.Note
Step 7 Click Next.The wizard performs the following tasks:
• Activates SNMP service
• Configures SNMP Service with locally generated random credentials
• Activates CTI Manager Service
• Configures Cisco Unified Communications Manager for InformaCast
• Creates new region (1 per cluster)
• Creates new device pool (1 per cluster)
• Creates SIP trunk (1 per cluster)
• Creates route group (1 per cluster)
• Creates route list
• Creates role
• Creates app user
• Configures InformaCast for Cisco Unified Communications Manager
• Creates a cluster
• Refreshes recipient groups
• Sets SIP access to deny
• Creates SIP access
What to Do Next
Configure Panic Button, on page 30.
Configure Panic ButtonUse this procedure to configure a panic button to send a text and audio notification to IP phones. This allowsyou to initiate a one click alarm if there is emergency.
Before You Begin
Configure Connection to InformaCast, on page 29.
Procedure
Step 1 From Cisco Unified CM Administration, choose Advanced Features > Emergency Notifications Paging.
Release Notes for Cisco Unified Communications Manager and IM and Presence Service, Release 11.5(1)SU330
New and Changed FeaturesAdvanced Notification Paging Configuration Task Flow

The Emergency Notifications Paging wizard appears.Step 2 In the Introduction to InformaCast Emergency Notifications page, click Next to continue.Step 3 In the Installing the InformaCast Virtual Appliance page, click Next to continue.Step 4 In theConnectingCisco UnifiedCommunicationsManager and InformaCast page, clickNext to continue.
The Configuring a Panic Button page appears.Step 5 From the Choose pre-recorded message by name drop-down list, select the pre-recorded message to be
displayed on Cisco Unified IP phones and various devices and systems in emergency.You can change the pre-recordedmessage in InformaCast administration, as required.Note
Step 6 In the Enter DN to trigger the panic button field, enter the Directory Number (DN), which includes thedigits 0 to 9, asterisks (*), and pound signs (#). Default value is ***5.
Step 7 From the Route Partition drop-down list box, select a partition to restrict access to the route pattern.If you do not want to restrict access to the route pattern, select <None> for the partition.Note
Step 8 Click Choose Phones to Send Notification button.The Phones to Send Notification dialog box appears.
Step 9 From the Phones to Send Notification dialog box, select the Cisco Unified IP phones to send the pre-recordedmessage. The dial pattern entered by you (for example, ***5) is configured as speed dial on the selectedphones.The selected Cisco Unified IP phones are displayed in the Selected Phones to Send Notification list box.
Step 10 Click Add Rules, to create a new rule for the selected Cisco Unified IP Phones to receive notifications.a) Select one of the parameters from the drop-down list box. The available options are Device Pool,
Description, and Directory Number.b) In the second drop-down list box, select a criteria from the following options:
• Does
• Does not
c) In the third drop-down list box, select a criteria from the following options:
• Begins with
• Ends with
• Contains
d) In the text box, enter the search criterion.Minimum of one new rule and maximum of new five rules can be created. TheAdd Rules buttongets disabled when five rules are created.
Note
To delete a rule, click Delete Rulesbutton.
Note
e) ClickTest Rules, to validate the created rules. When the test rule is completed with more than zero phones,the Next button is enabled.
Phones added to Cisco Unified Communications Manager at a later date that match this rule will beincluded as recipients in notifications to this group.
Note
Step 11 Click Next.The wizard performs the following tasks:
• Adds a speed dial for the entered DN to the selected phones. If the selected phones have unused speeddials assigned to existing phone button templates, this speed dial appears directly on the selected phones.
Release Notes for Cisco Unified Communications Manager and IM and Presence Service, Release 11.5(1)SU3
31
New and Changed FeaturesAdvanced Notification Paging Configuration Task Flow

If the selected phones do not have unused speed dial buttons, the panic button speed dial is created, butit does not appear on the phone.
• Adds route pattern for entered DN in selected partition using created route list.
• Creates an InformaCast DialCast entry for the entered DN to send the selected message to the phonesmatching the selected rules.
What to Do Next
Configure CallAware Emergency Call Alerting, on page 32.
Configure CallAware Emergency Call AlertingUse this procedure to configure the CallAware emergency call alerting details. This sends a text and audionotification to IP phones when an emergency number is dialed. It can also detect calls to numbers other than911.
Before You Begin
Configure Panic Button, on page 30.
Procedure
Step 1 From Cisco Unified CM Administration, choose Advanced Features > Emergency Notifications Paging.The Emergency Notifications Paging wizard appears.
Step 2 In the Introduction to InformaCast Emergency Notifications page, click Next to continue.Step 3 In the Installing the InformaCast Virtual Appliance page, click Next to continue.Step 4 In theConnectingCisco UnifiedCommunicationsManager and InformaCast page, clickNext to continue.Step 5 In the Configuring a Panic Button page, click Next to continue.
The Configuring CallAware Emergency Call Alerting page appears.Step 6 From the Choose pre-recorded message by name drop-down list, select the pre-recorded message to be
displayed on Cisco Unified IP phones and various devices and systems in emergency.You can change the pre-recordedmessage in InformaCast administration, as required.Note
Step 7 Click Choose Emergency Route Patterns button.The Route Patterns dialog box appears.
Step 8 From the Route Patterns dialog box, select the route patterns by checking the box next to the desired patterns.a) Click the Save Selected/Changes button.The selected route patterns are displayed in the Selected Route Patterns list box.
Step 9 Click Add Rules, to create a new rule for the selected Cisco Unified IP Phones to receive notifications.a) Select one of the parameters from the drop-down list box. The available options are Device Pool,
Description, and Directory Number.b) In the second drop-down list box, select a criteria from the following options:
• Does
Release Notes for Cisco Unified Communications Manager and IM and Presence Service, Release 11.5(1)SU332
New and Changed FeaturesAdvanced Notification Paging Configuration Task Flow

• Does not
c) In the third drop-down list box, select a criteria from the following options:
• Begins with
• Ends with
• Contains
d) In the text box, enter the search criterion.Minimum of one new rule and maximum of five new rules can be created. TheAdd Rules buttongets disabled when five rules are created.
Note
To delete a rule, click Delete Rulesbutton.
Note
e) ClickTest Rules, to validate the created rules. When the test rule is completed with more than zero phones,the Finish button is enabled.
Phones added to Cisco Unified Communications Manager at a later date that match this rule will beincluded as recipients in notifications to this group.
Note
Step 10 Click Finish.The wizard performs the following tasks:
• Adds External Call Control profile for InformaCast
• For each selected route pattern, modify that route pattern to reference the External Call Control profile
• Creates a recipient group with rules that match phones to receive the notification
• Creates an InformaCast routing request with the selected message and recipient group
The Summary page appears and confirms the successful configuration of InformaCast with Cisco UnifiedCommunications Manager. For more information, see https://www.singlewire.com.
Paging Interactions• Advanced Notification Paging Interactions, on page 34
Release Notes for Cisco Unified Communications Manager and IM and Presence Service, Release 11.5(1)SU3
33
New and Changed FeaturesPaging Interactions

Advanced Notification Paging Interactions
Table 14: Advanced Notification Paging Interactions
InteractionFeature
You can configure the EmergencyNotifications Pagingwizardusing InformaCast Release 11.5(1)SU3 and later versions inbasic paging mode only.
You can configure call monitoring to route patterns thatcontain digits only in the Emergency Notifications Pagingwizard. For route patterns that contain wildcard characters,configure in InformaCast.
Emergency Notifications Paging
Encryption License Requirement for Mixed-ModeThis release of Cisco Unified Communications Manager introduces support for encryption licenses. If youwant to enable mixed-mode in Cisco Unified CommunicationsManager, you must have an encryption licenseinstalled in Cisco Prime License Manager and applied against Cisco Unified Communications Manager.
Fresh Installations
Upon installing your cluster, you will be unable to move the cluster into mixed-mode unless you have anencryption license applied against Cisco Unified Communications Manager, and a sync has been completed.If you do not have an encryption license, and you attempt to move the cluster into mixed-mode, an emptyCTL file will be generated and the cluster will remain in non-secure mode.
Upgrades
If you upgrade from an earlier release with mixed-mode enabled, but you do not have an encryption licenseinstalled, a warning message on the encryption license requirement displays on the user interface immediatelyfollowng the upgrade. You will also receive theCiscoSystemEncryptionNotAllowed alert. Your system willcontinue to operate in mixed-mode, but you will be unable to update the CTL file and will continue to receivethis alert until you either install an encryption license or move the cluster security setting back to non-securemode. Cisco recommends that you install the encryption license at the earliest to ensure that you can continueto run mixed mode without any disruption.
If you were not running mixed-mode prior to the upgrade, you will be unable to move the cluster intomixed-mode unless you have an encryption license applied against Cisco Unified Communications Manager,and a sync has been completed.
User Interface Updates
In the Cisco Unified CM Administration interface's License Usage Report window, a new field has beenadded to the Cisco Prime License Manager section:
• Encryption License installed—This field contains a True or False value that indicates whether anencryption license is installed.
Release Notes for Cisco Unified Communications Manager and IM and Presence Service, Release 11.5(1)SU334
New and Changed FeaturesEncryption License Requirement for Mixed-Mode

Ordering and Installing License Files
The following table describes how to update your system with an encryption license.
Table 15: Updating your System with an Encryption License
DescriptionTaskStep
Use the CUCM-PLM-ENC-K9= part numberto order encryption licenses via the ProductUpgrade Tool at https://tools.cisco.com/gct/Upgrade/jsp/index.jsp.
For further information on ordering licenses,refer to the Cisco Unified CommunicationsSolutions Ordering Guide for your release athttp://www.cisco.com/c/en/us/partners/tools/collaboration-ordering-guides.html.
If you are using multiple instancesof Cisco Prime License Manager inyour deployment, you must order aseparate encryption license for eachPrime License Manager instance.
Note
Obtain an ENC PAK license file.Step 1
Follow the "Upgrade Existing Licenses"procedure in the Cisco Prime LicenseManager User Guide, Release 11.5(1)SU2 athttp://www.cisco.com/c/en/us/support/cloud-systems-management/prime-license-manager/products-user-guide-list.html.
Install the encryption license file in CiscoPrime License Manager.
Step 2
In Cisco Prime License Manager, select theProduct Instances tab and click Synchronizelicenses.
For additional detail, see the Cisco PrimeLicense Manager User Guide, Release11.5(1)SU2.
Synchronize licenses.Step 3
Enhanced Sign-In Experience for Cisco Jabber During SSO andNon-SSO
From this release, the sign-in experience for Cisco Jabber will be similar for Single Sign-On (SSO) andnon-SSO. The refresh token feature enhances the Jabber user experience across devices and especially forJabber on Mobile. The login flow for Jabber non-SSO is now similar to Jabber SSO . An end user can nowsign-in by generating an OAuth code, which in turn generates an access token and a refresh token to enablelogging in to Jabber. When an access token expires, the refresh token is used to generate the access token.This prevents the login flow from being repeated and enhances performance during Jabber sign-in.
Release Notes for Cisco Unified Communications Manager and IM and Presence Service, Release 11.5(1)SU3
35
New and Changed FeaturesEnhanced Sign-In Experience for Cisco Jabber During SSO and Non-SSO

Cisco Jabber Client version 11.9.0 supports the refresh token feature.
Enhanced Usability in the User Device Association ScreenTheUser Device Association screen allows administrators to associate or disassociate devices with end usersand application users. As of Release 115.1 SU3, the user interface of theUser Device Association screen hasbeen enhanced to ensure that an admin is sure about working on the selected user. TheRemove All AssociatedDevices button has been realigned on the UI to prevent an admin from unintentionally removing devicesassociated with a user.
User Interface Updates
• The User ID of the selected user is displayed in the User Device Association screen. The followinglabels have been updated:
• The name of the section User Device Association is now updated to User Device AssociationFor <User ID>.
• The name of the check box Show the devices already associated is now updated to Show thedevices already associated with <User ID>.
• The Remove All Associated Devices button is now available at the right corner of the toolbar todistinguish it from other toolbar buttons.
• The confirmation message displayed on clicking the Remove All Associated Devices button nowspecifies the user ID and number of devices selected for disassociation.
• The Remove All Associated Devices button is not displayed when the filter is applied. This ensuresthat an admin does not unintentionally disassociate all the associated devices.
Minimum TLS Version ControlThis release of Cisco Unified CommunicationsManager and IM and Presence Services includes the minimumTransport Layer Security (TLS) protocol version configuration support. Use this feature to configure theminimum TLS version to comply with the organization security policies.
The supported TLS versions are TLS 1.0, 1.1, and 1.2. By default, TLS 1.0 is configured. After you configurethe minimum TLS version, both the minimum version and the higher versions are supported.
Before you configure the minimumTLS version, ensure that the following products support secure connectionof the selected minimum TLS version configured or above with Cisco Unified Communications Manager andIM and Presence Services. If this requirement is not met, upgrade the product to a version that supports theinteroperability for selected minimum TLS version configured or above when you configure the minimumTLS version.
• Skinny Client Control Protocol (SCCP) Conference Bridge
• Transcoder
• Hardware Media Termination Point (MTP)
• SIP Gateway
Release Notes for Cisco Unified Communications Manager and IM and Presence Service, Release 11.5(1)SU336
New and Changed FeaturesEnhanced Usability in the User Device Association Screen

• Cisco Prime Collaboration Assurance
• Cisco Prime Collaboration Provisioning
• Cisco Prime Collaboration Deployment
• Cisco Unified Border Element (CUBE)
• Cisco Expressway
• Cisco TelePresence Conductor
Note • This feature is implemented at Command Line Interface and is applicable to both Cisco UnifiedCommunications Manager and IM and Presence Services.
• Cisco Unified Communications Manager and IM and Presence Services Release 9.x and below donot support TLS 1.1 and above. Hence, before you proceed for interoperability of these applicationsof Release 9.x with Cisco Unified Communications Manager and IM and Presence Services ofRelease 11.5(1)SU3 and above, configureminimumTLS version as 1.0. This configuration is requiredfor functions, such as Extensible Messaging and Presence Protocol (XMPP) federation deployment,Extension Mobility Cross Cluster (EMCC), Inter Cluster Sync Agent (ICSA), and SIP Trunkfunctionality that do not support TLS 1.1 and above.
• You can enable Common Criteria mode along with configuration of minimum TLS version. If youdo so, the applications continue to comply with Common Criteria requirements and disable TLS 1.0secure connections at application level.When the common criteria mode is enabled, you can configurethe minimumTLS version as either 1.1 or 1.2 for the applications. If you try to configure the minimumTLS version as 1.0, an error appears at Command Line Interface. For details on Common Criteriamode, see the Compliance to Common Criteria topic of the Command Line Interface ReferenceGuide for Cisco Unified Communications Solutions.
To configure the minimum TLS version, see the CLI Commands for Minimum TLS Version, on page 37topic.
CLI Commands for Minimum TLS VersionFor the minimum TLS version feature, the following new CLI commands are added for this release:
• set tls min-version—This command sets the minimum version of Transport Layer Security (TLS)protocol.
• show tls min-version—This command shows the minimum configured version of Transport LayerSecurity (TLS) protocol.
For additional information on these CLI commands, see the Command Line Interface Reference Guide forCisco Unified Communications Solutions at https://www.cisco.com/c/en/us/support/unified-communications/unified-communications-manager-callmanager/products-maintenance-guides-list.html.
Release Notes for Cisco Unified Communications Manager and IM and Presence Service, Release 11.5(1)SU3
37
New and Changed FeaturesCLI Commands for Minimum TLS Version

Security Guide UpdatesThe new chapter, “TLS Setup”, is added to the Security Guide for Cisco Unified Communications Manager.The chapter is added to include theMinimum TLS Version Control feature that is introduced with this release.The chapter provides an overview of TLS, its prerequisites, how to configure TLS, and the interactions andrestrictions.
TLS OverviewTransport Layer Security (TLS) provides secure and reliable signaling and data transfer between two systemsor devices, by using secure ports and certificate exchange. TLS secures and controls connections among CiscoUnified Communications Manager-controlled systems, devices, and processes to prevent access to the voicedomain.
TLS PrerequisitesBefore you configure the minimum TLS version, make sure that your network devices and applications bothsupport the TLS version. Also, make sure that they are enabled for TLS that you want to configure with CiscoUnified Communications Manager and IM and Presence Services. If you have any of the following productsdeployed, confirm that they meet the minimumTLS requirement. If they do not meet this requirement, upgradethose products:
• Skinny Client Control Protocol (SCCP) Conference Bridge
• Transcoder
• Hardware Media Termination Point (MTP)
• SIP Gateway
• Cisco Prime Collaboration Assurance
• Cisco Prime Collaboration Provisioning
• Cisco Prime Collaboration Deployment
• Cisco Unified Border Element (CUBE)
• Cisco Expressway
• Cisco TelePresence Conductor
You will not be able to upgrade conference bridges, Media Termination Point (MTP), Xcoder, PrimeCollaboration Assurance, and Prime Collaboration Provisioning.
If you are upgrading from an earlier release of Cisco Unified Communications Manager, make sure thatall your devices and applications support the higher version of TLS before you configure it. For example,Cisco Unified Communications Manager and IM and Presence Services, Release 9.x supports TLS 1.0only.
Note
Release Notes for Cisco Unified Communications Manager and IM and Presence Service, Release 11.5(1)SU338
New and Changed FeaturesSecurity Guide Updates

TLS Configuration Task Flow
Procedure
PurposeCommand or Action
By default, Cisco Unified Communications Managersupports a minimum TLS version of 1.0. If your security
(Optional) Set Minimum TLSVersion, on page 39.
Step 1
needs require a higher version of TLS, reconfigure thesystem to use TLS 1.1 or 1.2.
Configure an enterprise parameter for the TLS cipher optionsthat Cisco Unified Communications Manager supports.
Set TLS Ciphers, on page 40.Step 2
Assign TLS connections to a SIP Trunk. Trunks that usethis profile use TLS for signaling. You can also use the
Configure TLS in a SIP TrunkSecurity Profile, on page 40 .
Step 3
secure trunk to add TLS connections to devices, such asconference bridges.
Assign a TLS-enabled SIP trunk security profile to a SIPtrunk to allow the trunk to support TLS. You can use the
Add Secure Profile to a SIP Trunk,on page 41.
Step 4
secure trunk to connect resources, such as conferencebridges.
Assign TLS connections to a phone security profile. Phonesthat use this profile use TLS for signaling.
Configure TLS in a Phone SecurityProfile, on page 42.
Step 5
Assign the TLS-enabled profile that you created to a phone.Add Secure Phone Profile to aPhone, on page 42.
Step 6
Assign a TLS-enabled phone security profile to a universaldevice template. If you have the LDAP directory
(Optional) Add Secure PhoneProfile to a Universal DeviceTemplate, on page 43.
Step 7
synchronization configured with this template, you canprovision phones with security through the LDAP sync.
Set Minimum TLS Version
By default, Cisco Unified Communications Manager supports a minimum TLS version of 1.0. Use thisprocedure to reset the minimum supported TLS version for Cisco Unified Communications Manager and theIM and Presence Service to a higher version, such as 1.1 or 1.2.
Before You Begin
Make sure that the devices and applications in your network support the TLS version that you want to configure.For details, see TLS Prerequisites, on page 38.
Release Notes for Cisco Unified Communications Manager and IM and Presence Service, Release 11.5(1)SU3
39
New and Changed FeaturesSecurity Guide Updates

Procedure
Step 1 Log in to the Command Line Interface.Step 2 To confirm the existing TLS version, run the show tls min-version CLI command.Step 3 Run the set tls min-version <minimum> CLI command where <minimum> represents the TLS version.
For example, run set tls min-version 1.2 to set the minimum TLS version to 1.2.
Step 4 Perform Step 3 on all Cisco Unified Communications Manager and IM and Presence Service cluster nodes.
What to Do Next
Set TLS Ciphers, on page 40
Set TLS Ciphers
Use this procedure to configure the ciphers that Cisco Unified Communications Manager supports forestablishing TLS connections.
Procedure
Step 1 From Cisco Unified CM Administration, choose System > Enterprise Parameters.Step 2 In Security Parameters, configure a value for theTLSCiphers enterprise parameter. For help on the available
options, refer to the enterprise parameter help.Step 3 Click Save.
What to Do Next
Configure TLS in a SIP Trunk Security Profile, on page 40
Configure TLS in a SIP Trunk Security Profile
Use this procedure to assign TLS connections to a SIP Trunk Security Profile. Trunks that use this profile useTLS for signaling.
Procedure
Step 1 From Cisco Unified CM Administration, choose System > Security > SIP Trunk Security Profile.Step 2 Perform one of the following steps:
• Click Add New to create a new SIP trunk security profile.
Release Notes for Cisco Unified Communications Manager and IM and Presence Service, Release 11.5(1)SU340
New and Changed FeaturesSecurity Guide Updates

• Click Find to search and select an existing profile.
Step 3 In the Name field, enter a name for the profile.Step 4 Configure the Device Security Mode field value to Encrypted or Authenticated.Step 5 Configure both the Incoming Transport Type and Outgoing Transport Type field values to TLS.Step 6 Complete the remaining fields of the SIP Trunk Security Profile window. For help on the fields and their
configuration, see the online help.Step 7 Click Save.
What to Do Next
Add Secure Profile to a SIP Trunk, on page 41
Add Secure Profile to a SIP Trunk
Use this procedure to assign a TLS-enabled SIP trunk security profile to a SIP trunk. You can use this trunkto create a secure connection to resources, such as conference bridges.
Before You Begin
Configure TLS in a SIP Trunk Security Profile, on page 40
Procedure
Step 1 From Cisco Unified CM Administration, choose Device > Trunk.Step 2 Perform one of the following steps:
• Click Add New to create a new trunk.
• Click Find to search and select an existing trunk.
Step 3 If you are creating a new trunk, select the trunk type and protocol, and click Next.Step 4 For the Device Name field, enter a device name for the trunk.Step 5 From the Device Pool drop-down list, choose a device pool.Step 6 From the SIP Profile drop-down list, choose a SIP Profile.Step 7 From the SIP Trunk Security Profile drop-down list, choose the TLS-enabled SIP Trunk Profile that you
created in the previous task.Step 8 In the Destination area, enter the destination IP address. You can enter up to 16 destination addresses. To
enter additional destinations, click the (+) button.Step 9 Complete the remaining fields in the Trunk Configuration window. For help with the fields and their
configuration, see the online help.Step 10 Click Save.
If you are connecting the trunk to a secure device, you must upload a certificate for the secure deviceto Cisco Unified Communications Manager. For certificate details, see the “Certificates” topic ofSecurity Guide for Cisco Unified Communications Manager.
Note
Release Notes for Cisco Unified Communications Manager and IM and Presence Service, Release 11.5(1)SU3
41
New and Changed FeaturesSecurity Guide Updates

What to Do Next
Configure TLS in a Phone Security Profile, on page 42.
Configure TLS in a Phone Security Profile
Use this procedure to assign TLS connections to a Phone Security Profile. Phones that use this profile useTLS for signaling.
Procedure
Step 1 From Cisco Unified CM Administration, choose System > Security > Phone Security Profile.Step 2 Perform one of the following steps:
• Click Add New to create a new profile.
• Click Find to search and select an existing profile.
Step 3 If you are creating a new profile, select a phone model and protocol, and click Next.If you want to use a universal device template and LDAP sync to provision security through theLDAP sync, select Universal Device Template as the Phone Security Profile Type.
Note
Step 4 Enter a name for the profile.Step 5 From the Device Security Mode drop-down list, select either Encrypted or Authenticated.Step 6 (For SIP phones only) From the Transport Type, select TLS.Step 7 Complete the remaining fields of the Phone Security Profile Configurationwindow. For help with the fields
and their configuration, see the online help.Step 8 Click Save.
What to Do Next
Add Secure Phone Profile to a Phone, on page 42
Add Secure Phone Profile to a Phone
Use this procedure to assign the TLS-enabled phone security profile to a phone.
To assign a secure profile to a large number of phones at once, use the Bulk Administration Tool to reassignthe security profile for them.
Note
Procedure
Step 1 From Cisco Unified CM Administration, choose Device > Phone.Step 2 Perform one of the following steps:
• Click Add New to create a new phone.
Release Notes for Cisco Unified Communications Manager and IM and Presence Service, Release 11.5(1)SU342
New and Changed FeaturesSecurity Guide Updates

• Click Find to search and select an existing phone.
Step 3 Select the phone type and protocol and click Next.Step 4 From the Device Security Profile drop-down list, assign the secure profile that you created to the phone.Step 5 Assign values for the following mandatory fields:
• MAC address
• Device Pool
• SIP Profile
• Owner User ID
• Phone Button Template
Step 6 Complete the remaining fields of the Phone Configuration window. For help with the fields and theirconfiguration, see the online help.
Step 7 Click Save.
What to Do Next
Add Secure Phone Profile to a Universal Device Template, on page 43
Add Secure Phone Profile to a Universal Device Template
Use this procedure to assign a TLS-enabled phone security profile to a universal device template. If you haveLDAP directory sync configured, you can include this universal device template in the LDAP sync througha feature group template and user profile.When the sync occurs, the secure profile is provisioned to the phones.
Procedure
Step 1 From Cisco Unified CMAdministration, chooseUserManagement >User/Phone Add >Universal DeviceTemplate.
Step 2 Perform one of the following steps:
• Click Add New to create a new template.
• Click Find to search and select an existing template.
Step 3 For the Name field, enter a name for the template.Step 4 From the Device Pool drop-down list, select a device pool.Step 5 From theDevice Security Profile drop-down list box, select the TLS-enabled security profile that you created.
The Phone Security Profile must have been created with Universal Device Template as the devicetype.
Note
Release Notes for Cisco Unified Communications Manager and IM and Presence Service, Release 11.5(1)SU3
43
New and Changed FeaturesSecurity Guide Updates

Step 6 Select a SIP Profile.Step 7 Select a Phone Button Template.Step 8 Complete the remaining fields of the Universal Device Template Configuration window. For help with the
fields and their configuration, see the online help.Step 9 Click Save.
What to Do Next
Include the Universal Device template in an LDAP directory synchronization. For details on how to set upan LDAP Directory sync, see the “Configure End Users” part of the System Configuration Guide for CiscoUnified Communications Manager.
TLS Interactions and Restrictions
TLS Interactions
InteractionFeature
You can enable Common Criteria mode along withconfiguration of minimumTLS version. If you do so,the applications continue to comply with CommonCriteria requirements and disable TLS 1.0 secureconnections at application level. When the commoncriteria mode is enabled, you can configure theminimum TLS version as either 1.1 or 1.2 for theapplications. For details on Common Criteria mode,see the Compliance to Common Criteria topic of theCommand Line Interface Reference Guide for CiscoUnified Communications Solutions.
Common Criteria mode
TLS Restrictions
The following table highlights issues that you may run into when implementing Transport Layer Security(TLS) version 1.2 on legacy phones, such as 79xx, 69xx, 89xx, 99xx, 39xx, and IP Communicator. To verifywhether your phone supports secure mode in this release, refer to the Phone Feature List Report in CiscoUnified Reporting. The feature restrictions on legacy phones and the workaround to implement the feature islisted in the following table:
The workarounds are designed to get the impacted feature functioning in your system. However, they donot guarantee TLS 1.2 compliance for that feature.
Note
Release Notes for Cisco Unified Communications Manager and IM and Presence Service, Release 11.5(1)SU344
New and Changed FeaturesSecurity Guide Updates

Table 16: Transport Layer Security Version 1.2 Restrictions
RestrictionFeature
Legacy phones in EncryptedMode do not work. Thereis no workaround.
Legacy phones in Encrypted Mode
Legacy phones in Authenticated Mode do not work.There is no workaround.
Legacy phones in Authenticated Mode
IP Phone services using secure URLs based onHTTPS do not work.
Workaround to use IP Phone services: Use HTTP forall underlying service options. For example, corporatedirectory and personal directory. However, HTTP isnot recommended as HTTP is not as secure if youneed to enter sensitive data for features, such asExtension Mobility. The drawbacks of using HTTPinclude:
• Provisioning challenges when configuringHTTP for legacy phones and HTTPS forsupported phones.
• No resiliency for IP Phone services.
• Performance of the server handling IP phoneservices can be affected.
IP Phone services using secure URLs based onHTTPS.
EMCC is not supported with TLS 1.2 on legacyphones.
Workaround: Complete the following tasks to enableEMCC:
1 Enable EMCC over HTTP instead of HTTPS.
2 Turn on mixed-mode on all Cisco UnifiedCommunications Manager clusters.
3 Use the same USB eTokens for all Cisco UnifiedCommunications Manager clusters.
ExtensionMobility Cross Cluster (EMCC) on legacyphones
LSC is not supported with TLS 1.2 on legacy phones.As a result, 802.1x and phone VPN authenticationbased on LSC are not available.
Workaround for 802.1x: Authentication based onMIC or password with EAP-MD5 on older phones.However, those are not recommended.
Workaround for VPN: Use phoneVPN authenticationbased on end-user username and password.
Locally Significant Certificates (LSC) on legacyphones
Release Notes for Cisco Unified Communications Manager and IM and Presence Service, Release 11.5(1)SU3
45
New and Changed FeaturesSecurity Guide Updates

RestrictionFeature
Encrypted Trivial File Transfer Protocol (TFTP)configuration files are not supported with TLS 1.2 onlegacy phones even with Manufacturer InstalledCertificate (MIC).
There is no workaround.
Encrypted Trivial File Transfer Protocol (TFTP)configuration files
Legacy phones lose trust when CallManagercertificate is renewed. For example, a phone cannotget new configurations after renewing the certificate.This is applicable only in Cisco UnifiedCommunications Manager 11.5.1
Workaround: To prevent legacy phones from losingtrust, complete the following steps:
1 Before you enable the CallManager certificate,set the Cluster For Roll Back to Pre 8.0enterprise parameter to True. By default, thissetting disables the security.
2 Temporarily allow TLS 1.0 (multiple CiscoUnified Communications Manager reboots).
CallManager certificate renewal causes legacy phonesto lose trust
TLS 1.2 connections to older versions of CiscoUnified CommunicationsManager that do not supportthe higher TLS version do not work. For example, aTLS 1.2 SIP trunk connection to Cisco UnifiedCommunicationsManager Release 9.x does not workbecause that release does not support TLS 1.2.
You can use one of the following workarounds:
•Workaround to enable connections: Usenonsecure trunks, although this is not arecommended option.
•Workaround to enable connections while usingTLS 1.2: Upgrade the non-supported version toa release that does support TLS 1.2.
Connections to non-supported versions of CiscoUnified Communications Manager
Release Notes for Cisco Unified Communications Manager and IM and Presence Service, Release 11.5(1)SU346
New and Changed FeaturesSecurity Guide Updates

RestrictionFeature
CTL client does not support TLS 1.2.
You can use one of the following workarounds:
• Temporarily allow TLS 1.0 when using the CTLclient and then move the Cluster to CommonCriteria mode. Configure Minimum TLS to 1.1or 1.2
• Migrate to the Tokenless CTL by using the CLICommand utils ctl set-cluster mixed-mode inCommon Criteria mode. Configure MinimumTLS to 1.1 or 1.2
Certificate Trust List (CTL) Client
There is no workaround.Address Book Synchronizer
Cisco Unified Communications Manager Ports Affected by Transport Layer Security Version 1.2
The following table lists the Cisco Unified Communications Manager Ports Affected By TLS Version 1.2
Table 17: Cisco Unified Communications Manager Ports Affected by Transport Layer Security Version 1.2
Cisco Unified CommunicationsManager Operating in CommonCriteria Mode
Cisco Unified CommunicationsManager Operating in Normalmode
Destination/ListenerProtocolApplication
MinimumTLSversion1.2
MinimumTLSversion1.1
MinimumTLSversion1.0
MinimumTLSversion1.2
MinimumTLSversion1.1
MinimumTLSversion1.0
TLS 1.2TLS 1.1,TLS 1.2
TLS 1.1TLS 1.2TLS 1.1,TLS v1.2
TLS 1.0,TLS 1.1,TLS 1.2
443HTTPSTomcat
TLS 1.2TLS 1.1,TLS 1.2
TLS 1.1TLS 1.2TLS 1.1,TLS 1.2
TLS 1.0,TLS 1.1,TLS 1.2
2443SignallingConnectionControlPart(SCCP)
SCCP-SEC-SIG
TLS 1.2TLS 1.1,TLS 1.2
TLS 1.1TLS 1.2TLS 1.1,TLS 1.2
TLS 1.0,TLS 1.1,TLS 1.2
2444ProprietaryCTL-SERV
TLS 1.2TLS 1.1,TLS 1.2
TLS 1.1TLS 1.2TLS 1.1,TLS 1.2
TLS 1.0,TLS 1.1,TLS 1.2
2749QuickBufferEncoding(QBE)
ComputerTelephonyIntegration(CTI)
Release Notes for Cisco Unified Communications Manager and IM and Presence Service, Release 11.5(1)SU3
47
New and Changed FeaturesSecurity Guide Updates

Cisco Unified CommunicationsManager Operating in CommonCriteria Mode
Cisco Unified CommunicationsManager Operating in Normalmode
Destination/ListenerProtocolApplication
MinimumTLSversion1.2
MinimumTLSversion1.1
MinimumTLSversion1.0
MinimumTLSversion1.2
MinimumTLSversion1.1
MinimumTLSversion1.0
TLS 1.2TLS 1.1,TLS 1.2
TLS 1.1TLS 1.2TLS 1.1,TLS 1.2
TLS 1.0,TLS 1.1,TLS 1.2
3804TransmissionControlProtocol(TCP)
CAPF-SERV
TLS 1.2TLS 1.1,TLS 1.2
TLS 1.1TLS 1.2TLS 1.1,TLS 1.2
TLS 1.0,TLS 1.1,TLS 1.2
7501Notapplicable
InterclusterLookupService(ILS)
TLS 1.2TLS 1.1,TLS 1.2
TLS 1.1TLS 1.2TLS 1.1,TLS 1.2
TLS 1.0,TLS 1.1,TLS 1.2
8443SimpleObjectAccessProtocol(SOAP)
AdministrativeXML(AXL)
TLS 1.2TLS 1.2TLS 1.1TLS 1.2TLS 1.2TLS 1.29443TCPHighAvailable-Proxy(HA-Proxy)
TLS 1.2TLS 1.1,TLS 1.2
TLS 1.1TLS 1.2TLS 1.1,TLS 1.2
TLS 1.0,TLS 1.1,TLS 1.2
5061(configurablewithtrunk)
SessionInitiationProtocol(SIP)
SIP-SIG
TLS 1.2TLS 1.1,TLS 1.2
TLS 1.1TLS 1.2TLS 1.2TLS 1.26971,6972
TCPHA Proxy
8443:TLS 1.2
8443:TLS 1.1,TLS 1.2
TLS 1.18443:TLS 1.2
8443:TLS 1.1,TLS 1.2
8443:TLS 1.0,TLS 1.1,TLS 1.2
8080,8443
HTTPSCiscoTomcat
TLS 1.2TLS 1.1,TLS 1.2
TLS 1.1TLS 1.2TLS 1.1,TLS 1.2
TLS 1.0,TLS 1.1,TLS 1.2
2445ProprietaryTrustVerificationService(TVS)
Release Notes for Cisco Unified Communications Manager and IM and Presence Service, Release 11.5(1)SU348
New and Changed FeaturesSecurity Guide Updates

Instant Messaging and Presence Ports Affected by Transport Layer Security Version 1.2
The following table lists the InstantMessaging& Presence Ports Affected By Transport Layer Security Version1.2:
Table 18: Instant Messaging & Presence Ports Affected by Transport Layer Security Version 1.2
Instant Messaging &Presence Operating inCommon Criteria mode
Instant Messaging &Presence Operating inNormal mode
Destination/Listener
Minimum TLSversion 1.2
Minimum TLSversion 1.1
Minimum TLSversion 1.0
Minimum TLSversion 1.2
Minimum TLSversion 1.1
Minimum TLSversion 1.0
TLS 1.2TLS 1.1, TLS1.2
TLS 1.1TLS 1.2TLS 1.1, TLS1.2
TLS 1.0, TLS1.1, TLS 1.2
443
TLS 1.2TLS 1.1, TLS1.2
TLS 1.1TLS 1.2TLS 1.1, TLS1.2
TLS 1.0, TLS1.1, TLS 1.2
5061
TLS 1.2TLS 1.1, TLS1.2
TLS 1.1TLS 1.2TLS 1.1, TLS1.2
TLS 1.0, TLS1.1, TLS 1.2
5062
TLS 1.2TLS 1.1, TLS1.2
TLS 1.1TLS 1.2TLS 1.1, TLS1.2
TLS 1.0, TLS1.1, TLS 1.2
7335
TLS 1.2TLS 1.1, TLS1.2
TLS 1.1TLS 1.2TLS 1.1, TLS1.2
TLS 1.0, TLS1.1, TLS 1.2
8083
TLS 1.2TLS 1.1, TLS1.2
TLS 1.1TLS 1.2TLS 1.1, TLS1.2
TLS 1.0, TLS1.1, TLS 1.2
8443
Push Notifications Enhancements for Cisco Jabber on iPhoneand iPad
With this release, the Push Notifications for Cisco Jabber on iPhone and iPad solution has been enhancedwith the following updates:
• Voice and Video Call Support—Cisco Unified Communications Manager now uses Push Notificationsto send voice and video calls to Cisco Jabber on iPhone or iPad clients that are in suspended mode. Thisupdate removes the need to use the cellular network to reach Jabber on iPhone and iPad clients that arein suspended mode, thereby decreasing your network costs.
• High Availability for IM and Presence—This release adds failover protection for PushNotifications-enabled IM and Presence sessions over Cisco Jabber on iPhone or iPad. With this feature,the backup node in the subcluster can take over a failed session without a need for any user action. Thebackup node can completely recreate the IM session so that the user does not lose the IM history.
• Troubleshooting Options—This release provides additional troubleshooting options for troubleshootingand debugging your system. This ensures that your system remains up and running at all times.
Release Notes for Cisco Unified Communications Manager and IM and Presence Service, Release 11.5(1)SU3
49
New and Changed FeaturesPush Notifications Enhancements for Cisco Jabber on iPhone and iPad
For additional detail on the Push Notifications solution with Release 11.5(1)SU3, refer to Deploying PushNotifications for Cisco Jabber on iPhone and iPad at http://www.cisco.com/c/en/us/td/docs/voice_ip_comm/cucm/im_presence/pushNotifications/11_5_1_su2/cucm_b_push-notification-deployment-iPhone-iPad.html.
User Interface Updates
With this release, the Enable Push Notifications and Send Troubleshooting and Analytics Informationto Cisco Cloud check box in the Cisco Cloud Onboarding window has been replaced with the followingnew fields:
• Enable Push Notifications— Check this check box to enable Push Notifications voice, video and IMand Presence support for Cisco Jabber on iPhone and iPad clients.
• Send Troubleshooting information to the Cisco cloud—When the check box is checked, Cisco UnifiedCommunications Manager and IM and Presence Service cluster sends alarm syslog files at regularintervals to the Cisco Cloud. Cisco uses this information for proactive debugging and problem resolution.
• Send encrypted PII to the Cisco cloud for troubleshooting—When this check box is checked, CiscoUnified Communications Manager encrypts all troubleshooting data that can be used to identify thepartner before sending to the Cisco Cloud (for example, device names or hostnames).
CLI Commands for Troubleshooting Push Notifications
Push Notifications provides the following CLI commands, which can be run on the Cisco UnifiedCommunications Manager publisher node for troubleshooting:
• utilsmanagementAgent alarms pushfrequency—Run this command to configure the interval followingwhich Cisco Unified Communications Manager sends Push Notifications alarms to the Cisco Cloud.The default value is 30 minutes.
• utils managementAgent alarms pushlevel—Run this command to configure the minimum severitylevel for which Cisco Unified Communications Manager sends Push Notifications alarms to the CiscoCloud. The default severity is Error.
• utils managementAgent alarms pushnow—Run this command to upload Push Notifications alarmsto the Cisco Cloud immediately, without waiting for the interval to expire.
TLS as a Communication Protocol for Syslog and FileBeatCisco Unified Communications Manager and IM and Presence Service will be made Common Criteriacompliant from version 11.5.1 SU3 onwards. It is mandatory to use Transport Layer Security (TLS) 1.2 as acommunication protocol to comply with Common Criteria guidelines. As of Release 11.5(1) SU2, TransportLayer Security (TLS) 1.2 can be used as a communication protocol for syslog and FileBeat. The TLS 1.2protocol enables the establishment of a secure connection in the following scenarios:
• Connecting Cisco Unified Communications Manager and IM and Presence Service with syslog servers
• Connecting FileBeat client with external logstash servers
Administrators can configure TLS for remote syslog and FileBeat using CLI commands.
Release Notes for Cisco Unified Communications Manager and IM and Presence Service, Release 11.5(1)SU350
New and Changed FeaturesTLS as a Communication Protocol for Syslog and FileBeat

Note • Ensure that the syslog server supports TLS 1.2 protocol as a secure connection will be establishedonly if the syslog server supports TLS 1.2 protocol.
• In Common Criteria Mode, strict host name verification will be implemented. Hence, it is requiredto configure the server with a fully qualified domain name (FQDN) which matches the certificate.
New CLI Commands for Protocol Switch
Administrators with privilege level 4 access can configure TLS as the communication protocol using thefollowing CLI commands:
• CLI command for remote syslog communication:utils remotesyslog set protocol tls- Sets TLS as the communication protocol for connectingCisco Unified Communications Manager and IM and Presence Service with syslog servers
• CLI commands for FileBeat clients:
◦utils filebeat tls enable- Enables a secure connection between the FileBeat client and thelogstash server.
◦utils filebeat tls disable- Disables the TLS for FileBeat client.
◦utils filebeat tls status- Displays the status for TLS.
New Alarms to Indicate Loss of Connection
An alarm TLSRemoteSyslogDeliveryFailed with severity ERROR_ALARM triggers if the connection betweenCisco Unified Communications Manager or IM and Presence Service with syslog servers is lost. An alertCisco TLSRemoteSyslogDeliveryFailed is also sent to RTMT Alert Central.
Upgrade External Database Table Values for Microsoft SQLDatatype
In earlier versions of IM and Presence Service, there was no option to write Unicode characters to a persistentchat room when Microsoft SQL server is configured as external database.
With this release, Microsoft SQL Datatype values are upgraded from text to nvarchar (new size) and varchar(existing size) to nvarchar (existing size) in the following tables:
• AFT_LOG Table
• TC_ROOMS Table
• TC_USERS Table
• TC_MESSAGES Table
• TC_TIMELOG Table
• TC_MSGARCHIVE Table
Release Notes for Cisco Unified Communications Manager and IM and Presence Service, Release 11.5(1)SU3
51
New and Changed FeaturesUpgrade External Database Table Values for Microsoft SQL Datatype

• JM Table
For detailed information on Microsoft SQL Datatype values, refer to Database Setup for IM and PresenceService on Cisco Unified Communications Manager, Release 11.5(SU3).
Release Notes for Cisco Unified Communications Manager and IM and Presence Service, Release 11.5(1)SU352
New and Changed FeaturesUpgrade External Database Table Values for Microsoft SQL Datatype

C H A P T E R 4Important Notes
• Features and Services, page 53
• Interoperability, page 53
• IM and Presence Service, page 54
• Miscellaneous, page 55
Features and Services
Media Sense does not record the Consult Call with Selective RecordingWhen Selective Recording is configured, the Media Sense server does not record the consult call during atransfer. For example, if a call between an agent and a customer is being recorded, and the agent initiates atransfer to another agent, the consult call that takes place between the two agents, prior to the call beingtransferred, is not recorded.
To ensure that the consult call is recorded, the agent must press the ‘Record’ softkey when the consult callstarts.
Interoperability
AXL Requests to Unified CM NodesIf you run Cisco TelePresenceManagement Suite (TMS) for scheduling, then the node that you add it to sendsmultiple AXL queries to fetch endpoint information. Because of the load that TMS generates, we recommendthat you do not configure other applications that use AXL (such as Cisco Emergency Responder or CiscoUnified Attendant Console) to send AXL requests to these nodes.
Release Notes for Cisco Unified Communications Manager and IM and Presence Service, Release 11.5(1)SU3
53

Cisco Unified Attendant Console SupportThis information applies to CSCva12833.
Cisco Unified Attendant Console Releases 11.x and earlier are not compatible with Cisco UnifiedCommunications Manager Release 11.5(1). You must install or upgrade to Cisco Unified Attendant ConsoleAdvanced Release 11.0.1.
See here for more information.
IM and Presence Service Interoperability with Expressway-CTo interoperate Cisco Unified IM and Presence Service Release 11.5(1) and Expressway-C, you must berunning a minimum version of Expressway-C X8.8. IM and Presence Service 11.5(1) does not support earlierversions of Expressway-C.
If you are upgrading from an earlier release where you are already interoperating with Expressway-C, upgradeyour Expressway-C system to X8.8. After upgrading Expressway-C, you can upgrade your IM and PresenceService.
Tomcat Certificate Regeneration with SAML SSO DeploymentIf you regenerate Tomcat certificates within a SAMLSSODeployment, youmust also generate a newmetadatafile in Cisco Unified Communications Manager and upload that metadata file to the IdP.
IM and Presence Service
Intercluster Peering Not Supported with Cisco Unified Presence 8.6Cisco Unified Presence 8.6 is not supported as an intercluster peer for Cisco Unified IM and Presence Service11.x. For information on supported intercluster peer configurations, see the Compatibility Matrix for CiscoUnified Communications Manager and IM and Presence Service at http://www.cisco.com/c/en/us/td/docs/voice_ip_comm/cucm/compat/11_x/cucm_b_cucm-imp-compatibility-matrix-11x.html#CUP0_RF_I0092C6B_00.
Reset High Availability Following IM and Presence Service Node OutageThis documentation update addresses CSCuz86028.
During an IM and Presence Service node outage, caused for example by a node reboot or a node networkoutage. If this results in a High Availability failover, ensure that after fallback has occurred that you resetHigh Availability (HA).
You can do this by first disabling HA and then enabling HA on the Presence Redundancy GroupsConfiguration window on Cisco Unified Communications Manager.
Release Notes for Cisco Unified Communications Manager and IM and Presence Service, Release 11.5(1)SU354
Important NotesCisco Unified Attendant Console Support

IM and Presence Server Pings to Jabber Are Not ConfigurableIM and Presence server updates the presence status of the user as Unavailable if it does not receive a keep-alivefrom the client after two 1-minute pings.
The timings for these pings are hard-coded on the server side and are not configurable.
Persistent Chat Character Limit with Microsoft SQL ServerIf you have Persistent Chat configured with Microsoft SQL Server as the external database, chat messageswhere the total message body (HTML tags + text message) exceeds 4000 characters are rejected and are notdelivered. See CSCvd89705 for additional detail. This issue exists from Release 11.5(1)SU3 onward.
Miscellaneous
Bandwidth Allocations for 88xx SIP PhonesIf you are deploying 88xx phones with the SIP protocol, note that these phones will use more bandwidth thanthe recommended 32 kbps while registering to Cisco Unified Communications Manager. Make sure to takeaccount for the higher bandwidth requirement over registration when you configure your QoS bandwidthallocation in the APIC-EM Controller.
Route Filter and Associated Route PatternsWhen configuring your call routing, make sure that you don't assign a single route filter to too many routepatterns. A system core could result if you were to edit a route filter that has hundreds of associated routepatterns, due to the extra system processing that is required to update call routing for all of the route patternsthat use the route filter. Create duplicate route filters to ensure that this does not occur. For more informationsee CSCup04938.
Release Notes for Cisco Unified Communications Manager and IM and Presence Service, Release 11.5(1)SU3
55
Important NotesIM and Presence Server Pings to Jabber Are Not Configurable

Release Notes for Cisco Unified Communications Manager and IM and Presence Service, Release 11.5(1)SU356
Important NotesRoute Filter and Associated Route Patterns

C H A P T E R 5Documentation Update for Defects
• Command Line Interface Reference Guide, page 57
• Security Guide, page 57
• System Error Messages, page 58
• Online Help for Cisco Unified Communications Manager, page 61
Command Line Interface Reference Guide
utils dbreplication clusterresetThis documentation update resolves CSCvf93618.
The utils dbreplication clusterreset command is deprecated, instead run utils dbreplication reset commandto repair replication.admin:utils dbreplication clusterreset
********************************************************************************************This command is deprecated, please use 'utils dbreplication reset' to repair replication!********************************************************************************************
Executed command unsuccessfullyFor more details on utils dbreplication reset command, see the “Utils Commands” chapter in the CommandLine Interface Guide for Cisco Unified Communications Solutions at https://www.cisco.com/c/en/us/support/unified-communications/unified-communications-manager-callmanager/products-maintenance-guides-list.html.
Security Guide
CertificatesThis documentation update resolves CSCvg10775.
Release Notes for Cisco Unified Communications Manager and IM and Presence Service, Release 11.5(1)SU3
57

The following note is omitted from the “Security Overview” chapter in Security Guide for Cisco UnifiedCommunications Manager.
The maximum supported size of certificate for DER or PEM is 4096 bits.Note
System Error Messages
Missing Device Type ENUM ValuesThis update is for CSCvg70867.
The System Error Messages for Cisco Unified Communications Manager file is missing the following ENUMdefinitions for the 78XX and 88xx phones.
Device TypeValue
Cisco IP Phone 7821508
Cisco IP Phone 7841509
Cisco IP Phone 7861510
Cisco IP Phone 8831544
Cisco IP Phone 8841568
Cisco IP Phone 8851569
Cisco IP Phone 8861570
Cisco IP Phone 781136665
Cisco IP Phone 882136669
Cisco IP Phone 881136670
Cisco IP Phone 884536677
Cisco IP Phone 886536678
Cisco IP Phone 8851NR36686
Cisco IP Phone 8865NR36701
Release Notes for Cisco Unified Communications Manager and IM and Presence Service, Release 11.5(1)SU358
Documentation Update for DefectsSystem Error Messages

Missing Reason Codes for LastOutOfServiceInformation AlarmsThis update is for CSCvd71818.
The System Error Messages for Cisco Unified Communications file is missing some ENUM values for theLastOutOfServiceInformation set of alarms. Following is a complete list:
DescriptionReason Code
TCPtimedOut - The TCP connection to the Cisco Unified CommunicationManager experienced a timeout error
10
TCPucmResetConnection - The Cisco Unified Communication Manager resetthe TCP connection
12
TCPucmAbortedConnection - The Cisco Unified Communication Manageraborted the TCP
13
TCPucmClosedConnection - The Cisco Unified CommunicationManager closedthe TCP connection
14
SCCPKeepAliveFailure - The device closed the connection due to a SCCPKeepAlive failure
15
TCPdeviceLostIPAddress - The connection closed due to the IP address beinglost. This may be due to the DHCP Lease expiring or the detection of IP addressduplication. Check that the DHCP Server is online and that no duplication hasbeen reported by the DHCP Server
16
TCPdeviceLostIPAddress - The connection closed due to the IP address beinglost. This may be due to the DHCP Lease expiring or the detection of IP addressduplication. Check that the DHCP Server is online and that no duplication hasbeen reported by the DHCP Server
17
TCPclosedConnectHighPriorityUcm - The device closed the TCP connection inorder to reconnect to a higher priority Cisco Unified CM
18
TCPclosedUserInitiatedReset - The device closed the TCP connection due to auser initiated reset
20
TCPclosedUcmInitiatedReset - The device closed the TCP connection due to areset command from the Cisco Unified CM
22
TCPclosedUcmInitiatedRestart - The device closed the TCP connection due toa restart command from the Cisco Unified CM
23
TCPClosedRegistrationReject - The device closed the TCP connection due toreceiving a registration rejection from the Cisco Unified CM
24
RegistrationSuccessful - The device has initialized and is unaware of any previousconnection to the Cisco Unified CM
25
Release Notes for Cisco Unified Communications Manager and IM and Presence Service, Release 11.5(1)SU3
59
Documentation Update for DefectsMissing Reason Codes for LastOutOfServiceInformation Alarms

DescriptionReason Code
TCPclosedVlanChange - The device closed the TCP connection due toreconfiguration of IP on a new Voice VLAN
26
Power Save Plus27
Phone Wipe (wipe from CUCM)30
Phone Lock (lock from CUCM)31
TCPclosedPowerSavePlus - The device closed the TCP connection in order toenter Power Save Plus mode
32
ConfigVersionMismatch - The device detected a version stampmismatch duringregistration Cisco Unified CM
100
Config Version Stamp Mismatch101
Softkeyfile Version Stamp Mismatch102
Dial Plan Mismatch103
TCPclosedApplyConfig - The device closed the TCP connection to restarttriggered internally by the device to apply the configuration changes
104
TCPclosedDeviceRestart - The device closed the TCP connection due to a restarttriggered internally by the device because device failed to download theconfiguration or dial plan file
105
TCPsecureConnectionFailed - The device failed to setup a secure TCP connectionwith Cisco Unified CM
106
TCPclosedDeviceReset - The device closed the TCP connection to set the inactivepartition as active partition, then reset, and come up from the new active partition
107
VpnConnectionLost - The device could not register to Unified CM because VPNconnectivity was lost 109 IP Address Changed
108
IP Address Changed109
Application Requested Stop (service control notify to stop registering)110
Application Requested Destroy111
Last Time Crash114
ClientApplicationClosed - The device was unregistered because the clientapplication was closed
200
Release Notes for Cisco Unified Communications Manager and IM and Presence Service, Release 11.5(1)SU360
Documentation Update for DefectsMissing Reason Codes for LastOutOfServiceInformation Alarms

DescriptionReason Code
OsInStandbyMode - The device was unregistered because the OS was put instandby mode
201
OsInHibernateMode - The device was unregistered because the OS was put inhibernate mode
202
OsInShutdownMode - The device was unregistered because the OS was shutdown
203
ClientApplicationAbort - The device was unregistered because the clientapplication crashed
204
DeviceUnregNoCleanupTime - The device was unregistered in the previoussession because the system did not allow sufficient time for cleanup
205
DeviceUnregOnSwitchingToDeskphone - The device was unregistered becausethe client requested to switch from softphone to deskphone control
206
DeviceUnregOnSwitchingToSoftphone - The device is being registered becausethe client requested to switch from deskphone control to softphone
207
DeviceUnregOnNetworkChanged - The device is being unregistered becausethe client detected a change of network
208
DeviceUnregExceededRegCount - The device is being unregistered because thedevice has exceeded the maximum number of concurrent registrations
209
DeviceUnregExceededLoginCount - The device is being unregistered becausethe client has exceeded the maximum number of concurrent logons
210
Online Help for Cisco Unified Communications Manager
DHCP Subnet Setup TipsThis documentation update resolves CSCve07463.
The DHCP subnet setup tip is incorrect in the Cisco Unified CM Administration Online Help. The correctinformation for “DHCP Subnet Setup Tips” is as follows:Changes to the server configuration do not take effect until you restart DHCP Monitor Service.
Insufficient Information About Opus CodecThis documentation update resolves CSCva48193.
Release Notes for Cisco Unified Communications Manager and IM and Presence Service, Release 11.5(1)SU3
61
Documentation Update for DefectsOnline Help for Cisco Unified Communications Manager

The “SystemMenu” chapter inCisco Unified CMAdministration Online Help contains insufficient informationabout the Opus Codec field. The following note is omitted from the guide.
The Advertise G.722 Codec service parameter in the Enterprise Parameters Configuration windowshould be set to Enabled for the SIP devices to use Opus codec. For more information on enterpriseparameters, see the System Configuration Guide for Cisco Unified Communications Manager at http://www.cisco.com/c/en/us/td/docs/voice_ip_comm/cucm/admin/11_5_1/sysConfig/CUCM_BK_SE5DAF88_00_cucm-system-configuration-guide-1151.html.
Note
Incorrect Time Period ExampleThis documentation update resolves CSCvb74432.
The time period documentation contains an incorrect example that can cause configuration problems. Itsuggests to use a date range for a single day time period: "Choose a Year on value of Jan and 1 and an untilvalue of Jan and 1 to specify January 1st as the only day during which this time period applies."
That is incorrect; please avoid using this example for the "Year on...until" option for time periods.
Insufficient Information About Time ScheduleThis documentation update resolves CSCvd75418.
The Time Schedule Settings topic in the “Call RoutingMenu” chapter of theCisco Unified CMAdministrationOnline Help contains insufficient information about the selected time period for a day. The following scenariois omitted from the guide:
Table 19: Time Schedule Settings
DescriptionField
Time Period Information
Release Notes for Cisco Unified Communications Manager and IM and Presence Service, Release 11.5(1)SU362
Documentation Update for DefectsIncorrect Time Period Example

DescriptionField
Scenario:
If multiple time periods are associated to a time schedule and the time periods doesnot overlap. However, overlap in a day, then the single day period takes precedenceand other time periods for that day is ignored.
Example 1: Three time periods are defined in the time schedule:
Range of Days: Jan 1 - Jan 31: 09:00 - 18:00
Day of Week: Mon - Fri: 00:00 - 08:30
Day of Week: Mon - Fri: 18:30 - 24:00
In this case, even though the times are not overlapping, Range of Days is ignoredfor a call on Wednesday at 10:00.
Example 2: Three time periods are defined in the time schedule:
Single Day: Jan 3 2017 (Tues): 09:00 - 18:00
Day of Week: Mon - Fri: 00:00 - 08:30
Day of Week: Mon - Fri: 18:30 - 24:00
In this case, even though the times are not overlapping, Day of Week is ignored fora call on Jan 3 at 20:00.
If Day of Year settings is configured, then the Day of Year settings isconsidered for the entire day (24 hours) and Day of Week settings, Rangeof Days settings for that particular day is ignored.
Note
Selected Time Periods
Insufficient Information on LDAP User AuthenticationThis documentation update resolves CSCvc30013.
The LDAP Authentication Settings in the System Menu chapter in Cisco Unified CM Administration OnlineHelp contains insufficient information about LDAP User Authentication. The following note is omitted fromthe guide:
You can do LDAP User Authentication using the IP address or the hostname. When IP address is usedwhile configuring the LDAP Authentication, LDAP configuration needs to be made the IP address usingthe command utils ldap config ipaddr. When hostname is used while configuring the LDAPAuthentication, DNS needs to be configured to resolve that LDAP hostname.
Note
Remote Destination Configuration Page In the OLH Needs To Be UpdatedThis documentation update resolves CSCvb88447.
The "Device Menu" chapter in Cisco Unified CMAdministration Online Help contains incorrect informationin the “Remote Destination Configuration Settings” help page. The following information was either incorrector omitted in the relevant fields.
Release Notes for Cisco Unified Communications Manager and IM and Presence Service, Release 11.5(1)SU3
63
Documentation Update for DefectsInsufficient Information on LDAP User Authentication

• The Timer Information field has incorrect information in the help page. It states the time in“milliseconds”, the correct time is set in “seconds”.
• The Timer Informationsection lists incorrect order in the help page. The correct orders of the fieldsare: Delay Before Ringing Timer, Answer Too Soon Timer, and Answer Too Late Timer.
• The Owner User ID field is omitted. Following is the description for this field:
• Owner User ID— From drop-down list, choose the appropriate end user profile to which theremote destination profile can be associated later.
SIP Profile Field Descriptions Are MissingThe online help in Cisco Unified Communications Manager Releases 11.5(1)SU3 and SU4 contains an errorin the SIP Profile Settings topic for the online help. This topic may be missing the SIP Profile field descriptions.If this is the case, refer to the following topic for the list of field descriptions.
SIP Profile SettingsThe following table describes the available settings in the SIP Profile Configuration window.
Table 20: SIP Profile Settings
DescriptionField
SIP Profile Information
Enter a name to identify the SIP profile; for example, SIP_7905. The value caninclude 1 to 50 characters, including alphanumeric characters, dot, dash, andunderscores.
Name
This field identifies the purpose of the SIP profile; for example, SIP for 7970.The description can include up to 50 characters in any language, but it cannotinclude double-quotes ("), percentage sign (%), ampersand (&), back-slash (\),or angle brackets (<>).
Description
This field specifies the default payload type for RFC2833 telephony event. SeeRFC 2833 for more information. In most cases, the default value specifies theappropriate payload type. Be sure that you have a firm understanding of thisparameter before changing it, as changes could result in DTMF tones not beingreceived or generated. The default value specifies 101 with range from 96 to 127.
The value of this parameter affects calls with the following conditions:
• The call is an outgoing SIP call from Cisco Unified CommunicationsManager.
• For the calling SIP trunk, theMedia Termination Point Required check boxis checked on the SIP Trunk Configuration window.
Default MTP TelephonyEvent Payload Type
Release Notes for Cisco Unified Communications Manager and IM and Presence Service, Release 11.5(1)SU364
Documentation Update for DefectsSIP Profile Field Descriptions Are Missing

DescriptionField
The Early Offer for G.Clear Calls feature supports both standards-based G.Clear(CLEARMODE) and proprietary Cisco Session Description Protocols (SDP).
To enable or disable Early Offer for G.Clear Calls, choose one of the followingoptions:
• Disabled
• CLEARMODE
• CCD
• G.nX64
• X-CCD
Early Offer for G.ClearCalls
The Session Level Bandwidth Modifier specifies the maximum amount ofbandwidth needed when all the media streams are used. There are three SessionLevel BandwidthModifiers: Transport Independent Application Specific (TIAS),Application Specific (AS), and Conference Total (CT).
Select one of the following options to specify which Session Level BandwidthModifier to include in the SDP portion of SIP Early Offer or Reinvite requests.
• TIAS and AS
• TIAS only
• AS only
• CT only
SDP Session-levelBandwidth Modifier forEarly Offer andRe-invites
This feature indicates how Unified Communications Manager handles theUser-Agent and Server header information in a SIP message.
Choose one of the following three options:
• SendUnified CommunicationsManager Version Information as User-AgentHeader—For INVITE requests, the User-Agent header is included with theCMversion header information. For responses, the Server header is omitted.Unified Communications Manager passes through any contact headersuntouched. This is the default behavior.
• Pass Through Received Information as Contact Header Parameters—Ifthis option is selected, the User-Agent/Server header information is passedas Contact header parameters. The User-Agent/Server header is derivedfrom the received Contact header parameters, if present. Otherwise, theyare taken from the received User-Agent/Server headers.
• Pass Through Received Information as User-Agent and Server Header—Ifthis option is selected, the User-Agent/Server header information is passedas User-Agent/Server headers. The User-Agent/Server header is derivedfrom the received Contact header parameters, if present. Otherwise, theyare taken from the received User-Agent/Server headers.
User-Agent and Serverheader information
Release Notes for Cisco Unified Communications Manager and IM and Presence Service, Release 11.5(1)SU3
65
Documentation Update for DefectsSIP Profile Field Descriptions Are Missing

DescriptionField
Cisco Unified Communications Manager uses the Dial String Interpretationpolicy to determine if the SIP identity header is a directory number or directoryURI.
Because directory numbers and directory URIs are saved in different databaselookup tables, Cisco Unified CommunicationsManager examines the charactersin the SIP identity header's user portion, which is the portion of the SIP addressthat is before the @ sign (for example, user@IP address or user@domain).
To configure the Dial String Interpretation, choose one of the following optionsfrom the drop-down list box:
• Always treat all dial strings as URI addresses—Cisco UnifiedCommunications Manager treats the address of incoming calls as if theywere URI addresses.
• Phone number consists of characters 0–9, A–D, *, and + (others treated asURI addresses)—Cisco Unified Communications Manager treats theincoming call as a directory number if all the characters in the user portionof the SIP identity header fall within this range. If the user portion of theaddress uses any characters that do not fall within this range, the addressis treated as a URI.
• Phone number consists of characters 0-9, *, and + (others treated as URIaddresses)—Cisco Unified Communications Manager treats the incomingcall as a directory number if all the characters in the user portion of the SIPidentity header fall within this range. If the user portion of the address usesany characters that do not fall within this range, the address is treated as aURI.
If the user=phone tag is present in the Request URI, Cisco UnifiedCommunications Manager always treats the dial string as a numberregardless of what option you choose for the Dial String Interpretationfield.
Note
Dial String Interpretation
Select On to enable Cisco Unified Communications Manager to honor thepreference of audio codecs in received offer and preserve it while processing.Select Off to enable Cisco Unified Communications Manager to ignore thepreference of audio codecs in received offer and apply the locally configuredAudio Codec Preference List. The default will select the service parameterconfiguration.
Accept Audio CodecPreferences in ReceivedOffer
Release Notes for Cisco Unified Communications Manager and IM and Presence Service, Release 11.5(1)SU366
Documentation Update for DefectsSIP Profile Field Descriptions Are Missing

DescriptionField
This feature designates how Cisco Unified Communications Manager handlesmid-call updates to codecs or connection information such as IP address or portnumbers.
If the box is checked, duringmid-call codec or connection updates Cisco UnifiedCommunications Manager sends an INVITE a=inactive SDP message to theendpoint to break the media exchange. This is required if an endpoint is notcapable of reacting to changes in the codec or connection information withoutdisconnecting the media. This applies only to audio and video streams withinSIP-SIP calls.
If the box is unchecked, Cisco Unified Communications Manager passes themid-call SDP to the peer leg without sending a prior Inactive SDP to break themedia exchange. This is the default behavior.
For early offer or best effort early offer enabled SIP trunks, thisparameter will be overridden by the Send send-receive SDP in mid-callINVITE parameter.
Note
Require SDP InactiveExchange for Mid-CallMedia Change
This field determines the inclusion of Confidential Access Level headers inINVITE and 200 OK messages. Valid values are as follows:
• Disabled—CAL headers are not included.
• Preferred— CAL headers are included and confidential-access-level tag isadded in the Supported header.
• Required— CAL headers are included and confidential-access-level tag isadded in the Require and Proxy-Require headers.
Confidential AccessLevel Headers
Choose one of the following options for SIP profile
• None—Choose this option for Cisco Unified Communications Managerto filter out known SDP attributes only. By default, this option is selected.
• Pass all unknown SDP attributes—Choose this option for mediaadaptation and resilience (MARI). To ensure that the session level MARIattributes pass the unknown attributes through Cisco UnifiedCommunications Manager, choose this value on the SIP profile, which isassociated with both the originating device and the terminating device.
SDPTransparency Profile
Release Notes for Cisco Unified Communications Manager and IM and Presence Service, Release 11.5(1)SU3
67
Documentation Update for DefectsSIP Profile Field Descriptions Are Missing

DescriptionField
Checking this check box and configuring this SIP Profile on the SIP trunk allowsthe Cisco Unified Communications Manager administrator to:
• Apply a specific calling search space to redirected contacts that are receivedin the 3xx response.
• Apply digit analysis to the redirected contacts to make sure that the call getrouted correctly.
• Prevent DOS attack by limiting the number of redirection (recursiveredirection) that a service parameter can set.
• Allow other features to be invoked while the redirection is taking place.
Getting redirected to a restricted phone number (such as an international number)means that handling redirection at the stack level causes the call to be routedinstead of being blocked. This behavior occurs if the Redirect by Applicationcheck box is unchecked.
Redirect by Application
By default, Cisco Unified Communications Manager signals the calling phoneto play local ringback if SDP is not received in the 180 response. If SDP isincluded in the 180 response, instead of playing ringback locally, Cisco UnifiedCommunicationsManager connects media, and the calling phone plays whateverthe called device is sending (such as ringback or busy signal). If you do notreceive ringback, the device to which you are connecting may be including SDPin the 180 response, but it is not sending any media before the 200OK response.In this case, check this check box to play local ringback on the calling phone andconnect the media upon receipt of the 200OK response
Even though the phone that is receiving ringback is the calling phone,you need the configuration on the called device profile because itdetermines the behavior.
Note
Disable Early Media on180
The parameter allows the system to accept a signal from Microsoft Exchangethat causes it to switch the call from audio to T.38 fax. To use this feature, youmust also configure a SIP trunk with this SIP profile. For more information, seeChapter 68, Trunk "Configuration."
The parameter applies to SIP trunks only, not phones that are runningSIP or other endpoints.
Note
Outgoing T.38 INVITEInclude Audio mline
If this checkbox is checked, this SIP profile on the trunk allows you to send afax offer with a valid IP address and with Send Receive SDP mode.
If this checkbox is not checked, this SIP profile on the trunk allows you to senda fax offer with a null IP address and with Send Receive SDP mode.
This parameter applies only to trunks, not phones that are running SIP or otherendpoints. It applies only for T38 fax relay and, by default, this checkbox isunchecked.
Offer valid IP andSend/Receive mode onlyfor T.38 Fax Relay
Release Notes for Cisco Unified Communications Manager and IM and Presence Service, Release 11.5(1)SU368
Documentation Update for DefectsSIP Profile Field Descriptions Are Missing

DescriptionField
This option allows a dual-stack SIP trunk to offer both IPv4 and IPv6 media.
When you check both the Enable ANAT and the MTP Required check boxes,Cisco Unified Communications Manager inserts a dual-stack MTP and sendsout an offer with two m-lines, one for IPv4 and another for IPv6. If a dual-stackMTP cannot be allocated, Cisco Unified Communications Manager sends anINVITE without SDP.
When you check the Enable ANAT check box and the Media Termination PointRequired check box is unchecked, Cisco Unified Communications Managersends an INVITE without SDP.
When the Enable ANAT and Media Termination Point Required check boxesdisplay as unchecked (or when an MTP cannot be allocated), Cisco UnifiedCommunications Manager sends an INVITE without SDP.
When you uncheck the Enable ANAT check box but you check the MediaTermination Point Required check box, consider the information, which assumesthat an MTP can be allocated:
• Cisco Unified CommunicationsManager sends an IPv4 address in the SDPfor SIP trunks with an IP Addressing Mode of IPv4 Only.
• Cisco Unified CommunicationsManager sends an IPv6 address in the SDPfor SIP trunks with an IP Addressing Mode of IPv6 Only.
• For dual-stack SIP trunks, Cisco Unified Communications Managerdetermines which IP address type to send in the SDP based on theconfiguration for the IP Addressing Mode Preference for Media enterpriseparameter.
• For dual-stack SIP trunks, Cisco Unified Communications Managerdetermines which IP address type to send in the SDP based on theconfiguration for the IP Addressing Mode Preference for Media enterpriseparameter.
Enable ANAT
This feature designates how Cisco Unified Communications Manager handlesmid-call updates to codecs or connection information such as IP address or portnumbers.
If the box is checked, duringmid-call codec or connection updates Cisco UnifiedCommunications Manager sends an INVITE a=inactive SDP message to theendpoint to break the media exchange. This is required if an endpoint is notcapable of reacting to changes in the codec or connection information withoutdisconnecting the media. This applies only to audio and video streams withinSIP-SIP calls.
For early offer enabled SIP trunks, this parameter will be overridden bythe Send send-receive SDP in mid-call INVITE parameter.
Note
If the box is unchecked, Cisco Unified Communications Manager passes themid-call SDP to the peer leg without sending a prior Inactive SDP to break themedia exchange. This is the default behavior.
Require SDP InactiveExchange for Mid-CallMedia Change
Release Notes for Cisco Unified Communications Manager and IM and Presence Service, Release 11.5(1)SU3
69
Documentation Update for DefectsSIP Profile Field Descriptions Are Missing

DescriptionField
This feature enables Cisco Unified Communications Manager to relay analphanumeric hostname of a caller by passing it through to the called device oroutbound trunk as a part of the SIP header information.
• If the box is unchecked, the IP address for Cisco Unified CommunicationsManager will be passed to the line device or outbound trunk instead of theuser’s hostname. This is the default behavior.
• If the box is checked, Cisco Unified Communications Manager will relayan alphanumeric hostname of a caller by passing it through to the calledendpoint as a part of the SIP header information. This enables the calledendpoint to return the call using the received or missed call list. If the callis originating from a line device on the Cisco Unified CommunicationsManager cluster, and is being routed on a SIP trunk then the configuredOrganizational Top-Level Domain (e.g., cisco.com) will be used in theIdentity headers, such as From, Remote-Party-ID, and P-Asserted-ID. Ifthe call is originating from a trunk on Cisco Unified CommunicationsManager and is being routed on a SIP trunk then:
◦If the inbound call provides a host or domain in the caller’sinformation, the outbound SIP trunk messaging will preserve thehostname in the Identity headers, such as From, Remote-Party-ID,and P-Asserted-ID
◦If the inbound call does not provide a host or domain in the caller'sinformation, the configured Organizational Top-Level Domain willbe used in the Identity headers, such as From, Remote-Party-ID, andP-Asserted-ID
Use Fully QualifiedDomain Name in SIPRequests
This checkbox should be checked for third-party AS-SIP endpoints as well asAS-SIP trunks to ensure proper Assured Service behavior. This setting providesspecific Assured Service behavior that affects services such as Conference factoryand SRTP.
Assured Services SIPconformance
Check this check box to configure this SIP Profile for external QoS support.With this feature enabled, you can use an APIC-EM Controller to manage QoSfor SIP media flows for devices that use this SIP Profile. The default value isunchecked.
This check box appears only if the External QoS Enable serviceparameter is set to True.
Note
Enable External QoS
Parameters used in Phone
This field specifies the time, in seconds, after which a SIP INVITE expires. TheExpires header uses this value. Valid values include any positive number; 180specifies the default.
Timer Invite Expires(seconds)
Release Notes for Cisco Unified Communications Manager and IM and Presence Service, Release 11.5(1)SU370
Documentation Update for DefectsSIP Profile Field Descriptions Are Missing

DescriptionField
This field is intended to be used by SIP endpoints only. The endpoint receivesthis value via a tftp config file. The end point reregisters Timer Register Deltaseconds before the registration period ends. The registration period getsdetermined by the value of the SIP Station KeepAlive Interval service parameter.Valid values for Timer Register Delta range from 32767 to 0. The default valueis 5.
Timer Register Delta(seconds)
This field is intended to be used by SIP endpoints only. The SIP endpoint receivesthe value via a tftp config file. This field specifies the value that the phone thatis running SIP sends in the Expires header of the REGISTER message. Validvalues include any positive number; however, 3600 (1 hour) specifies the defaultvalue.
If the endpoint sends a shorter Expires value than the value of the SIP StationKeepalive Interval service parameter, Cisco Unified Communications Managerresponds with a 423 "Interval Too Brief".
If the endpoint sends an Expires value that is greater than the SIP StationKeepalive Interval service parameter value, Cisco Unified CommunicationsManager responds with a 200 OK that includes the Keepalive Interval value forExpires.
For mobile phones that are running SIP, Cisco Unified CommunicationsManager uses the value in this field instead of the value that the SIPStation KeepAlive Interval service parameter specifies to determine theregistration period.
Note
For TCP connections, the value for the Timer Register Expires fieldmust be lower than the value for the SIP TCPUnused Connection serviceparameter.
Note
Timer Register Expires(seconds)
This field specifies the lowest value, in milliseconds, of the retransmission timerfor SIP messages. Valid values include any positive number. Default specifies500.
Timer T1 (msec)
This field specifies the highest value, in milliseconds, of the retransmission timerfor SIP messages. Valid values include any positive number. Default specifies4000.
Timer T2 (msec)
This field specifies the maximum number of times that an INVITE request getsretransmitted. Valid values include any positive number. Default specifies 6.
Retry INVITE
This field specifies the maximum number of times that a SIP message other thanan INVITE request gets retransmitted. Valid values include any positive number.Default specifies 10.
Retry Non-INVITE
Release Notes for Cisco Unified Communications Manager and IM and Presence Service, Release 11.5(1)SU3
71
Documentation Update for DefectsSIP Profile Field Descriptions Are Missing

DescriptionField
Click the radio button that corresponds to how you want to manage QoS foraudio and video calls for devices that are associated to this SIP Profile
• Common Port Range for Audio and Video—Choose this option if youwant to use a common port range that can handles both the audio and videomedia stream.
• Separate Port Ranges for Audio and Video—Choose this option if youwant to set up a distinct port range for the audio stream and a distinct portrange for the video stream.
Media Port Ranges
This field designates the start real-time protocol (RTP) port for media. Mediaport ranges from 2048 to 65535. Default specifies 16384.
This field appears when you selectCommon Port Range for Audio and Videoas theMedia Port Range.
Start Media Port
This field designates the stop real-time protocol (RTP) port for media. Mediaport ranges from 2048 to 65535. Default specifies 32766.
This field appears when you selectCommon Port Range for Audio and Videofor theMedia Port Range.
Stop Media Port
Create a port range for audio by entering the start of the port range. For example,16384. The audio port range cannot overlap the video port range.
This field appears when you select Separate Port Ranges for Audio and Videofor theMedia Port Range.
Start Audio Port
Enter the ending of the port range for audio calls. The audio port range must notoverlap the video port range. For example, 32766.
This field appears when you select Separate Port Ranges for Audio and Videofor theMedia Port Range.
Stop Audio Port
Create a port range for the video stream of a video call by entering the beginningof the port range. For example, 32767. The video port range cannot overlap withthe audio port range.
This field appears when you select Separate Port Ranges for Audio and Videofor theMedia Port Range.
Start Video Port
Enter the ending of the port range for audio calls. The audio port range must notoverlap the video port range.
This field appears when you select Separate Port Ranges for Audio and Videofor theMedia Port Range.
Stop Video Port
Select the value that you want to assign as the DSCP value for audio-only calls.The Default Option is to use the value of the DSCP for Audio Calls serviceparameter.
DSCP for Audio Calls
Release Notes for Cisco Unified Communications Manager and IM and Presence Service, Release 11.5(1)SU372
Documentation Update for DefectsSIP Profile Field Descriptions Are Missing

DescriptionField
Select the value that you want to assign as the DSCP value for video calls. TheDefault Option is to use the value of the DSCP for Video Calls service parameter.
DSCP for Video Calls
Select the value that you want to assign as the DSCP value for audio portion ofa video call. The default option is to use the value that is configured in the DSCPfor Audio Portion of Video Calls service parameter.
If you choose a different DSCP value for audio portion of video callsthan you configured for DSCP Video Calls, it could mean that the audioand video streams within a single video call could have different DSCPmarkings and different QoS policy control, which could result in lipsync issues that result from network bandwidth issues.
Note
DSCP for Audio Portionof Video Calls
Select the value that you want to assign as the DSCP value for TelePresencecalls. The default option is to use the value of the DSCP for TelePresence Callsservice parameter.
DSCP for TelePresenceCalls
Select the value that you want to assign as the DSCP value for the audio portionof TelePresence calls. The default option is to use the value of the DSCP forTelePresence Calls service parameter.
DSCP for Audio Portionof TelePresence Calls
This URI provides a unique address that the phone that is running SIP sends toCisco Unified Communications Manager to invoke the call pickup feature.
Call Pickup URI
This URI provides a unique address that the phone that is running SIP sends toCisco Unified Communications Manager to invoke the call pickup group otherfeature.
Call Pickup Group OtherURI
This URI provides a unique address that the phone that is running SIP sends toCisco Unified CommunicationsManager to invoke the call pickup group feature.
Call Pickup Group URI
This URI provides a unique address that the phone that is running SIP sends toCisco Unified Communications Manager to invoke the meet me conferencefeature.
Meet Me Service URI
This field configures the user= parameter in the REGISTER message.
Valid values follow:
• none—No value gets inserted.
• phone—The value user=phone gets inserted in the To, From, and ContactHeaders for REGISTER.
• ip—The value user=ip gets inserted in the To, From, and Contact Headersfor REGISTER.
User Info
Release Notes for Cisco Unified Communications Manager and IM and Presence Service, Release 11.5(1)SU3
73
Documentation Update for DefectsSIP Profile Field Descriptions Are Missing
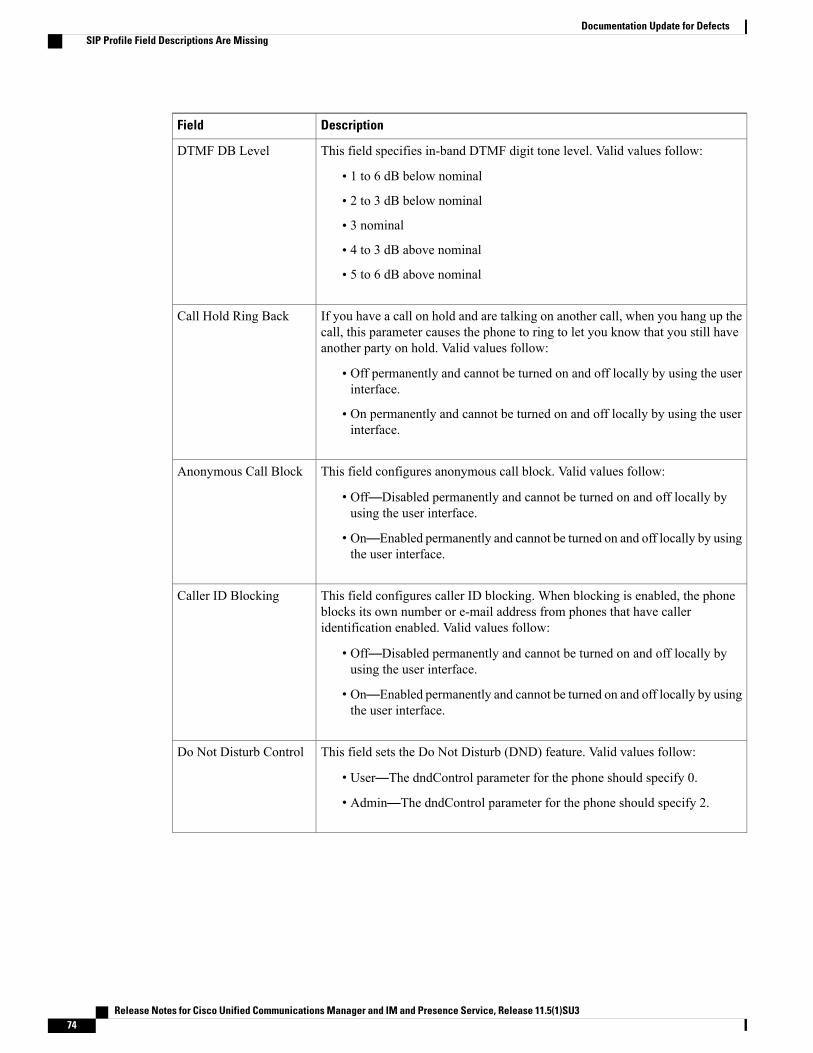
DescriptionField
This field specifies in-band DTMF digit tone level. Valid values follow:
• 1 to 6 dB below nominal
• 2 to 3 dB below nominal
• 3 nominal
• 4 to 3 dB above nominal
• 5 to 6 dB above nominal
DTMF DB Level
If you have a call on hold and are talking on another call, when you hang up thecall, this parameter causes the phone to ring to let you know that you still haveanother party on hold. Valid values follow:
• Off permanently and cannot be turned on and off locally by using the userinterface.
• On permanently and cannot be turned on and off locally by using the userinterface.
Call Hold Ring Back
This field configures anonymous call block. Valid values follow:
• Off—Disabled permanently and cannot be turned on and off locally byusing the user interface.
• On—Enabled permanently and cannot be turned on and off locally by usingthe user interface.
Anonymous Call Block
This field configures caller ID blocking. When blocking is enabled, the phoneblocks its own number or e-mail address from phones that have calleridentification enabled. Valid values follow:
• Off—Disabled permanently and cannot be turned on and off locally byusing the user interface.
• On—Enabled permanently and cannot be turned on and off locally by usingthe user interface.
Caller ID Blocking
This field sets the Do Not Disturb (DND) feature. Valid values follow:
• User—The dndControl parameter for the phone should specify 0.
• Admin—The dndControl parameter for the phone should specify 2.
Do Not Disturb Control
Release Notes for Cisco Unified Communications Manager and IM and Presence Service, Release 11.5(1)SU374
Documentation Update for DefectsSIP Profile Field Descriptions Are Missing

DescriptionField
Cisco Unified IP Phones 7940 and 7960 do not support ssh for login access orHTTP that is used to collect logs; however, these phones support Telnet, whichlets the user control the phone, collect debugs, and look at configuration settings.This field controls the telnet_level configuration parameter with the followingpossible values:
• Disabled (no access)
• Limited (some access but cannot run privileged commands)
• Enabled (full access)
Telnet Level for 7940 and7960
This field enables the admin to select one of the cluster’s defined Resource PriorityNamespace network domains for assignment to a line via its SIP Profile.
Resource PriorityNamespace
Cisco Unified Communications Manager requires a keepalive mechanism tosupport redundancy. This field specifies the interval between keepalive messagesthat are sent to the backup Cisco Unified Communications Manager to ensurethat it is available in the event that a failover is required.
TimerKeepAlive Expires(seconds)
This field specifies the time, in seconds, after which a subscription expires. Thisvalue gets inserted into the Expires header field. Valid values include any positivenumber; however, 120 specifies the default value.
Timer Subscribe Expires(seconds)
Use this parameter in conjunction with the Timer Subscribe Expires setting. Thephone resubscribes Timer Subscribe Delta seconds before the subscription periodends, as governed by Timer Subscribe Expires. Valid values range from 3 to 15.Default specifies 5.
Timer Subscribe Delta(seconds)
Use this configuration variable to determine the maximum number of times thatthe phone allows a call to be redirected before dropping the call. Default specifies70 redirections.
Maximum Redirections
This field specifies the time in microseconds that passes when the phone goesoff hook and the first digit timer gets set. The value ranges from 0 - 150,000microseconds. Default specifies 15,000 microseconds.
Off Hook to First DigitTimer (microseconds)
This URI provides a unique address that the phone that is running SIP sends toCisco Unified Communications Manager to invoke the call forward feature.
Call Forward URI
Release Notes for Cisco Unified Communications Manager and IM and Presence Service, Release 11.5(1)SU3
75
Documentation Update for DefectsSIP Profile Field Descriptions Are Missing

DescriptionField
This URI provides a unique address that the phone that is running SIP sends toCisco Unified Communications Manager to invoke the abbreviated dial feature.
Speed dials that are not associated with a line key (abbreviated dial indices) donot download to the phone. The phone uses the feature indication mechanism(INVITE with Call-Info header) to indicate when an abbreviated dial numberhas been entered. The request URI contains the abbreviated dial digits (forexample, 14), and the Call-Info header indicates the abbreviated dial feature.Cisco Unified Communications Manager translates the abbreviated dial digitsinto the configured digit string and extend the call with that string. If no digitstring has been configured for the abbreviated dial digits, a 404 Not Foundresponse gets returned to the phone.
Abbreviated Dial URI
This check box determines whether the Cisco Unified IP Phones 7940 or 7960,when the conference initiator that is using that phone hangs up, should attemptto join the remaining conference attendees. Check the check box if you want tojoin the remaining conference attendees; leave it unchecked if you do not wantto join the remaining conference attendees.
This check box applies to the Cisco Unified IP Phones 7941/61/70/71/11when they are in SRST mode only.
Note
Conference Join Enabled
Check this check box to enable setting connection address to 0.0.0.0 per RFC2543when call hold is signaled to Cisco Unified Communications Manager. Thisallows backward compatibility with endpoints that do not support RFC3264.
RFC 2543 Hold
This check box determines whether the Cisco Unified IP Phones 7940 and 7960caller can transfer the second leg of an attended transfer while the call is ringing.Check the check box if you want semi-attended transfer enabled; leave itunchecked if you want semi-attended transfer disabled.
This check box applies to the Cisco Unified IP Phones 7941/61/70/71/11when they are in SRST mode only.
Note
Semi Attended Transfer
Check this check box if you want voice activation detection (VAD) enabled;leave it unchecked if you want VAD disabled. When VAD is enabled, no mediagets transmitted when voice is detected.
Enable VAD
Check this check box if you want stutter dial tone when the phone goes off hookand a message is waiting; leave unchecked if you do not want a stutter dial tonewhen a message is waiting.
This setting supports Cisco Unified IP Phones 7960 and 7940 that run SIP.
Stutter Message Waiting
Check this box to enable MLPP User Authorization. MLPP User Authorizationrequires the phone to send in an MLPP username and password.
MLPPUserAuthorization
Normalization Script
Release Notes for Cisco Unified Communications Manager and IM and Presence Service, Release 11.5(1)SU376
Documentation Update for DefectsSIP Profile Field Descriptions Are Missing

DescriptionField
From the drop-down list box, choose the script that you want to apply to this SIPprofile.
To import another script, go to the SIP Normalization Script Configurationwindow (Device > Device Settings > SIP Normalization Script), and importa new script file.
A normalization script in the SIP profile is only valid for non-trunkdevices.
Caution
Normalization Script
Optionally, enter parameter names and parameter values. Valid values includeall characters except equals signs (=), semi-colons (;), and non-printablecharacters, such as tabs. You can enter a parameter name with no value.
To add another parameter line, click the + (plus) button. To delete a parameterline, click the - (minus) button.
You must choose a script from the Normalization Script drop-down listbox before you can enter parameter names and values.
Note
ParameterName/Parameter Value
Check this check box to enable tracing within the script or uncheck this checkbox to disable tracing. When checked, the trace.output API provided to the Luascripter produces SDI trace
Cisco recommends that you only enable tracingwhile debugging a script.Tracing impacts performance and should not be enabled under normaloperating conditions.
Note
Enable Trace
Incoming Requests FROM URI Settings
Enter the pattern that you want to use for calling line ID, from 0 to 24 digits. Forexample, in North America:
• 555XXXX=Variable calling line ID, where X equals an extension number.The CO appends the number with the area code if you do not specify it.
• 55000 = Fixed calling line ID, where you want the Corporate number tobe sent instead of the exact extension from which the call is placed. TheCO appends the number with the area code if you do not specify it.
You can also enter the international escape character +.
Caller ID DN
Enter a caller name to override the caller name that is received from theoriginating SIP Device.
Caller Name
Trunk Specific Configuration
Release Notes for Cisco Unified Communications Manager and IM and Presence Service, Release 11.5(1)SU3
77
Documentation Update for DefectsSIP Profile Field Descriptions Are Missing

DescriptionField
Cisco Unified Communications Manager only accepts calls from the SIP devicewhose IP address matches the destination address of the configured SIP trunk.In addition, the port on which the SIP message arrives must match the one thatis configured on the SIP trunk. After Cisco Unified Communications Manageraccepts the call, Cisco Unified CommunicationsManager uses the configurationfor this setting to determine whether the call should get rerouted to another trunk.
From the drop-down list box, choose the method that Cisco UnifiedCommunications Manager uses to identify the SIP trunk where the call getsrerouted:
• Never—If the SIP trunk matches the IP address of the originating device,choose this option, which equals the default setting. Cisco UnifiedCommunications Manager, which identifies the trunk by using the sourceIP address of the incoming packet and the signaling port number, does notroute the call to a different (new) SIP trunk. The call occurs on the SIPtrunk on which the call arrived.
• Contact Info Header—If the SIP trunk uses a SIP proxy, choose this option.Cisco Unified Communications Manager parses the contact header in theincoming request and uses the IP address or domain name and signalingport number that is specified in the header to reroute the call to the SIPtrunk that uses the IP address and port. If no SIP trunk is identified, the calloccurs on the trunk on which the call arrived.
• Call-Info Header with purpose=x-cisco-origIP—If the SIP trunk uses aCustomer Voice Portal (CVP) or a Back-to-Back User Agent (B2BUA),choose this option. When the incoming request is received, Cisco UnifiedCommunications Manager parses the Call-Info header, looks for theparameter, purpose=x-cisco-origIP, and uses the IP address or domain nameand the signaling port number that is specified in the header to reroute thecall to the SIP trunk that uses the IP address and port. If the parameter doesnot exist in the header or no SIP trunk is identified, the call occurs on theSIP trunk on which the call arrived.
This setting does not work for SIP trunks that are connected to aCisco Unified Presence proxy server or SIP trunks that are connectedto originating gateways in different Cisco Unified CM groups.
Tip
Reroute IncomingRequest to new Trunkbased on
Select a configured Resource Priority Namespace list from the drop-downmenu.Configure the lists in the Resource Priority Namespace List menu that is accessedfrom System >MLPP > Namespace.
Resource PriorityNamespace List
Release Notes for Cisco Unified Communications Manager and IM and Presence Service, Release 11.5(1)SU378
Documentation Update for DefectsSIP Profile Field Descriptions Are Missing

DescriptionField
This field configures SIP Rel1XX, which determines whether all SIP provisionalresponses (other than 100 Trying messages) get sent reliably to the remote SIPendpoint. Valid values follow:
• Disabled—Disables SIP Rel1XX.
• Send PRACK if 1XX contains SDP—Acknowledges a 1XXmessage withPRACK, only if the 1XX message contains SDP.
• Send PRACK for all 1XX messages—Acknowledges all1XX messageswith PRACK.
You need not configure the above field ifConnect InboundCall beforePlaying Queuing Announcement checkbox is checked in the TrunkSpecific Configuration.
Note
SIP Rel1XX Options
Session Timer with Update: The session refresh timer allows for periodic refreshof SIP sessions, which allows the Unified CommunicationsManager and remoteagents to determine whether the SIP session is still active. Prior to Release 10.01,when the Unified Communications Manager received a refresh command, itsupported receiving either Invite or Update SIP requests to refresh the session.When the Unified Communications Manager initiated a refresh, it supportedsending only Invite SIP requests to refresh the session. With Release 10.01, thisfeature extends the refresh capability so that Unified Communications Managercan send both Update and Invite requests.
Specify whether Invite or Update should be used as the Session RefreshMethod.
Invite (default):
Sending a mid-call Invite request requires that an offer SDP be specifiedin the request. This means that the far end must send an answer SDP inthe Invite response.
Update: Unified CommunicationsManager sends a SIP Update request,if support for the Update method is specified by the far end of the SIPsession either in the Supported or Require headers. When sending theUpdate request, the Unified CommunicationsManager includes an SDP.This simplifies the session refresh since no SDP offer/answer exchangeis required.
Note
If the Update method is not supported by the far end of the SIP session,the Unified CommunicationsManager continues to use the Invitemethodfor session refresh.
Note
Session Refresh Method
Release Notes for Cisco Unified Communications Manager and IM and Presence Service, Release 11.5(1)SU3
79
Documentation Update for DefectsSIP Profile Field Descriptions Are Missing

DescriptionField
This field configures Early Offer support for voice and video calls.When enabled,Early Offer support includes a session description in the initial INVITE foroutbound calls. Early Offer configuration settings on SIP profile apply only toSIP trunk calls. These configuration settings do not affect SIP line side calls. Ifthis profile is shared between a trunk and a line, only a SIP trunk that uses theprofile is affected by these settings.
TheMedia Transfer Point (MTP) Required check box on the Trunk Configurationwindow, if enabled, overrides the early offer configuration on the associated SIPprofile. Cisco Unified Communications Manager sends the MTP IP address andport with a single codec in the SDP in the initial INVITE.
From the drop-down list box, select one of the following three options:
• Disabled (Default value) - Disables Early Offer; no SDP will be includedin the initial INVITE for outbound calls.
• Best Effort (no MTP inserted)
◦Provide Early Offer for the outbound call only when caller side'smedia port, IP and codec information is available.
◦Provide Delayed Offer for the outbound call when caller side's mediaport, IP and codec information is not available. No MTP is insertedto provide Early Offer in this case.
• Mandatory(insert MTP if needed) - Provide Early Offer for all outboundcalls and insertMTPwhen caller side's media port, IP and codec informationis not available.
Early Offer support forvoice and video calls
Video Call Traffic Class determines the type of video endpoint or trunk that theSIP Profile is associated with. From the drop-down list box, select one of thefollowing three options
• Immersive—High-definition immersive video.
• Desktop—Standard desktop video.
• Mixed—A mix of immersive and desktop video.
Cisco Unified Communications Manager Locations Call Admission Control(CAC) reserves bandwidth from two Locations video bandwidth pools, "VideoBandwidth" and/or "Immersive Bandwidth", depending on the type of calldetermined by the Video Call Traffic Class.
Video Call Traffic Class
Select Strict From URI presentation Only to select the network providedidentity.
Select Strict Identity Headers presentation Only to select the user providedidentity.
Calling LineIdentification Presentation
Release Notes for Cisco Unified Communications Manager and IM and Presence Service, Release 11.5(1)SU380
Documentation Update for DefectsSIP Profile Field Descriptions Are Missing

DescriptionField
Check this check box for the SIP trunk to pass the b-number that identifies theconference bridge across the trunk instead of changing the b-number to the nullvalue.
The terminating side does not require that this field be enabled.
Checking this check box is not required for Open Recording Architecture (ORA)SIP header enhancements to the Recording feature to work.
Enabling this check box allows the recorder to coordinate recording sessionswhere the parties are participating in a conference.
Deliver ConferenceBridge Identifier
Check this check box if you want to create a trunk that supports early offer.
Early Offer configurations on SIP profile apply to SIP trunk calls. Theseconfigurations do not affect SIP line side calls. If this profile is shared betweena trunk and a line, only the SIP trunk that uses the profile provides early offer.
When checked, theMedia Termination Required check box on the TrunkConfiguration window overrides the early offer configuration on theassociated SIP profile. The Cisco Unified Communications Managersends the MTP IP address and port with a single codec in the SDP inthe initial INVITE.
Note
Early Offer support forvoice and video calls(insert MTP if needed)
Check this check box to prevent Cisco Unified Communications Manager fromsending an INVITE a=inactive SDP message during call hold or media breakduring supplementary services.
This check box applies only to early offer or best early offer enabledSIP trunks and has no impact on SIP line calls.
Note
When you enable Send send-receive SDP in mid-call INVITE for an early offeror best early offer SIP trunk in tandem mode, Cisco Unified CommunicationsManager inserts MTP to provide sendrecv SDP when a SIP device sends offerSDP with a=inactive or sendonly or recvonly in audio media line. In tandemmode, Cisco Unified Communications Manager depends on the SIP devices toinitiate reestablishment of media path by sending either a delayed INVITE ormid-call INVITE with send-recv SDP.
When you enable both Send send-receive SDP in mid-call INVITE and RequireSDP Inactive Exchange for Mid-Call Media Change on the same SIP Profile,the Send send-receive SDP in mid-call INVITE overrides the Require SDPInactive Exchange forMid-CallMedia Change, so CiscoUnified CommunicationsManager does not send an INVITE with a=inactive SDP in mid-call codecupdates. For SIP line side calls, the Require SDP Inactive Exchange for Mid-CallMedia Change check box applies when enabled.
To prevent the SDP mode from being set to inactive in a multiple-holdscenario, set the Duplex Streaming Enabled clusterwide serviceparameter (System > Service Parameters) to True.
Note
Send send-receive SDP inmid-call INVITE
Release Notes for Cisco Unified Communications Manager and IM and Presence Service, Release 11.5(1)SU3
81
Documentation Update for DefectsSIP Profile Field Descriptions Are Missing

DescriptionField
If the box is checked, Cisco Unified Communications Manager is configured toallow supported SIP endpoints to use the Binary Floor Control Protocol to enablepresentation sharing.
The use of BFCP creates an additional media stream in addition to the existingaudio and video streams. This additional stream is used to stream a presentation,such as a PowerPoint presentation from someone’s laptop, into a SIP videophone.If the box is unchecked, Cisco Unified Communications Manager rejects BFCPoffers from devices associatedwith the SIP profile by setting the BFCP applicationline and associated media line ports to 0 in the answering SDP message. This isthe default behavior.
BFCP is only supported on SIP networks. BFCP must be enabled on allSIP trunks, lines, and endpoints for presentation sharing to work. BFCPis not supported if the SIP line or SIP trunk uses MTP, RSVP, TRP orTranscoder.
Note
Allow PresentationSharing using BFCP
Check this check box to enable support for iX media channel.Allow iX ApplicationMedia
Check this box to allow passthrough of configured line device caller informationfrom the SIP trunk.
Allow Passthrough ofConfigured Line DeviceCaller Information
Check this box to reject anonymous incoming calls.Reject AnonymousIncoming Calls
Check this box to reject anonymous outgoing calls.Reject AnonymousOutgoing Calls
Release Notes for Cisco Unified Communications Manager and IM and Presence Service, Release 11.5(1)SU382
Documentation Update for DefectsSIP Profile Field Descriptions Are Missing

DescriptionField
This option applies when incoming SIP signals do not indicate support for multiplecodec negotiation and Cisco Unified Communications Manager can finalize thenegotiated codec.
When this check box is checked, the endpoint behind the trunk is capable ofhandling multiple codecs in the answer SDP.
For example, an endpoint that supports multiple codec negotiation calls the SIPtrunk and Cisco Unified Communications Manager sends a Delay Offer requestto a trunk. The endpoint behind the trunk returns all support codecs without theContact header to indicate the support of multiple codec negotiation.
In this case, Cisco Unified Communications Manager identifies the trunk ascapable of multiple codec negotiation and sends SIP response messages back toboth endpoints with multiple common codecs.
When this check box is left unchecked, Cisco Unified CommunicationsManageridentifies the endpoint behind the trunk as incapable of multiple codec negotiation,unless indicated otherwise by SIP contact header URI. Cisco UnifiedCommunications Manager continues the call with single codec negotiation.
Configure Allow multiple codecs in answer SDP for the following:
• Third-party SIP endpoints that support this capability
• SIP trunks to third-party call controls servers that uniformly support thiscapability for all endpoints
Do not configure this capability for SIP intercluster trunks to Cisco SME or otherCisco Unified Communications Manager systems.
Allow multiple codecs inanswer SDP
When this check box is checked, for calls that Cisco Unified CommunicationsManager routes to a learned directory URI, learned number, or learned pattern,Cisco Unified Communications Manager adds the x-cisco-dest-route-stringheader to outgoing SIP INVITE and SUBSCRIBE messages and inserts thedestination route string into the header.
When this check box is left unchecked, CiscoUnified CommunicationsManagerdoes not add the x-cisco-dest-route-string header to any SIP messages.
The x-cisco-dest-route-string header allows Cisco Unified CommunicationsManager to route calls across a Cisco Unified Border Element.
Send ILS LearnedDestination Route String
Enable this check box if you want Cisco Unified Communications Manager tosend the carrier a CONNECT message before playing the hunt groupannouncements. You should enable this feature if the carrier trunk does notsupport in-band call status updates or if external callers report that they are unableto hear hunt group announcements.
Connect Inbound Callbefore Playing QueuingAnnouncement
SIP OPTIONS Ping
Release Notes for Cisco Unified Communications Manager and IM and Presence Service, Release 11.5(1)SU3
83
Documentation Update for DefectsSIP Profile Field Descriptions Are Missing

DescriptionField
Check this check box if you want to enable the SIP OPTIONS feature. SIPOPTIONS are requests to the configured destination address on the SIP trunk.If the remote SIP device fails to respond or sends back a SIP error response suchas 503 Service Unavailable or 408 Timeout, Cisco Unified CommunicationsManager tries to reroute the calls by using other trunks or by using a differentaddress.
If this check box is not checked, the SIP trunk does not track the status of SIPtrunk destinations.
When this check box is checked, you can configure two request timers.
Enable OPTIONS Ping tomonitor destination statusfor Trunks with servicetype “None (Default)”
This field configures the time duration between SIP OPTIONS requests whenthe remote peer is responding and the trunk is marked as In Service. If at leastone IP address is available, the trunk is In Service; if all IP addresses areunavailable, the trunk is Out of Service.
The default value specifies 60 seconds. Valid values range from 5 to 600 seconds.
Ping Interval forIn-service and PartiallyIn-service Trunks(seconds)
This field configures the time duration between SIP OPTIONS requests whenthe remote peer is not responding and the trunk is marked as Out of Service. Theremote peer may be marked as Out of Service if it fails to respond to OPTIONS,if it sends 503 or 408 responses, or if the Transport Control Protocol (TCP)connection cannot be established. If at least one IP address is available, the trunkis In Service; if all IP addresses are unavailable, the trunk is Out of Service.
The default value specifies 120 seconds. Valid values range from 5 to 600seconds.
Ping Interval forOut-of-service SIPTrunks (seconds)
This field specifies themaximumwaiting time before retransmitting theOPTIONSrequest.
Valid values range from 100 to 1000 milliseconds. The default value specifies500 milliseconds.
Ping Retry Timer(milliseconds)
This field specifies the number of times that Cisco Unified CommunicationsManager resends the OPTIONS request to the remote peer. After the configuredretry attempts are used, the destination is considered to have failed. To obtainfaster failure detection, keep the retry count low.
Valid values range from 1 to 10. The default value specifies 6.
Ping Retry Count
Release Notes for Cisco Unified Communications Manager and IM and Presence Service, Release 11.5(1)SU384
Documentation Update for DefectsSIP Profile Field Descriptions Are Missing