rather than on classroom discussions of theory and teacher ... · joseph g. barkan aaron brown...
TRANSCRIPT

DOCJMENT RESUME
ED 023 602 SE 005 413Resource Material for Teachers --Science. Career Guidance Series.New York City Board of Education, Brooklyn, N.Y. Bureau of Curriculum Development.Pub Date 66Note-192p.Available from-New York City Board of Education, Publications sales Office, 110 Livingston Street, Brooklyn,New York 11201 3200.
EDRS Price MF 4075 HC Not Ava4lable from EDRS.Descriptors-Biology, Chemistry, *Curriculum, Grade 9, Instructional Materials, Physics, Science Activities,*Secondary School Science, *Teaching Guides
Identifiers-Board of Education, New York, New York CityThis resource guide was prepared to offer teachers and supervisors practical
suggestions for the teaching of science to the pupils in the Career Guidance Program.The material presented parallels, as closely as possible, the regular science programfor grade nine. However, many of the basic concepts and skills were drawn from theseventh year and eighth year regular science curricula. Material in this guide coversthree science areas: chemistry, physics, and biology. Emphasis has been placed onproviding the pupils with experiences ib the manipulation and use of science materialsrather than on classroom discussions of theory and teacher demonstrations. It isrecommended that the three science areas included be taught in sequence as theconcepts and skdls developed in each area are designed to provide the pupils with theknowledges and skills required for the development of material in subsequent areas.Material in each area has been presented in the form of daily lesson plans. Eachlesson is presented in the form of a problem, followed by a list of required materialsand a suggested procedure. (BC)
1

Career
U.S. DEPARTMENT OF HEALTH, EDUCATION & WELFARE
OFFICE OF EDUCATION
THIS DOCUMENT HAS BEEN REPRODUCED EXACTLY AS RECEIVED FROM THE
PERSON OR ORGANIZATION ORIGINATING IT. POINTS OF VIEW OR OPINIONS
STATED DO NOT NECESSAMLY REPRESENT OFFICIAL OFFICE OF EDUCATION
POSITION OR POLICY.
tziciance
erio
c.4
RESOURCE MATERIAL FOR TEACHERS
BOARD OF EDUC4141014 CIT)' OF NEW YORKA
i'Vftiiigsron to reproduce this copyrighted work has been granreelil
titot%- Educational Resources Information Center (ERIC) and
Alikeoffditizatforr operating under corttract with the U.S. Office oir
1111/11111t3o to reproduce documents included in the ERIC system/*111141141ref rufcrofiche only, hut this right Is not conferred toOftYletlereffite mIcrofiche received from the ERIC Document Re-110)***An Cooke Further reproduction of aly part requireF
4,001001ARnirt rtririntli$ Education of the City a New York
Copies of this publication may be purchased from: Board of Education of the Cityof New York, Publications Sales Office, 110 Livingston Street, Brooklyn, New York11201. Checks should be made payable to: Auditor, Board of Education. Price, $2.00.

CURRICUL LLET1 0 1966-67 SEiiES
CAREERGUIDANCESERIES
tt'$ *Pt I:1,i
:4;1' !14:10;
I a.!;41 I
BOARD OF EDUCATION CITY OF NEW YORK
tor

,=c:8
OIFIIVI-Zain-c5CDCD =L7L7I-
2gEg.-1.
E00.VI= Tuwe,<
.-J 5), L-4.1 74C., 0 = 5=1.1.tGISW §iIM
ETI.Ot..)
LCC.E11 1 ...J, E%..
ww C5c6i2e
BOARD OF EDUCATION
President
LLOYD K. GARRISON
Vic e-Presid.ent
ALFRED A. GIARDINO
MeMbers
JOSEPH G. BARKANAARON BROWN
THOMAS C. BURKEMORRIS IUSHEWITZ
JOHN H. LOTZCLARENCE SENIOR
MRS. ROSE SHAPIRO
SuRerintendent of Schools
BERNARD E. DONOVAN
Executive De umtendent of.L29.101AE
JOHN B. KING
r.2...y.absofSel-DeutSerirlools
FREDERICK W. Buirs
Business Affairs
THEODORE H. LANG
Personnel
JOSEPH O. LORETAN
Instruction and Curriculum
Ex9.c...u.blasairatcar41.91,223, s
EUGENE E. HUI12
.-.00101,11...=1110.1111.0101.1will.01*0.1.01.10.1101.010N.O111
Copyright 1966By the Board. of Education of the City of New York
Application for permission to reprint any section of this material shouldbe made to the Superintendent of Schools, 110 Livingston Street, Brooklyn,N.Y. 11201. Reprint of any section of this material should carry the line,"Reprinted from (title of plIblication) by permission of the Board of Edu-cation of the City of New York."

- FOREWORD -
In an age of great scientific and technological advancesit is paramount for us to prepare our young people forthe demands and opportunities of our changing society.The task:becomes truly challenging when we are dealingwith the pupils in the Career Guidance Program.
This teaching guide capitalizes on the natural curios-ity of young people to lead. them to explore, search for,and discover scientific ideas. The material presentedconcentrates less on theory and. more on experimentationwith the hope that it will enkindle in these pupils aninterest and a desire for fUrther development and train-ing in the area.
July, 1966
JOSEPH 0. LORETANDeputy Superintendent of Schools
THE CAREER GUIDANCE PROGRAM
The Career Guidance Program grew out of a deep concern on thepart of the JUnior High School Edvision for the nnny pupils who wereover-age, frustrated, retarded in most school stibjects, and indiffer-ent to education. The typical pupil in this group has a poor self-image, few or no aspirations either academic or vocational, and isbiding his time until he can drop out of school.
During the school year 1957-1958, Dr. Joseph O. Loretan, De-puty Superintendent of Instruction and. Curriculum Division*, andET. Morris Krugman, Associate Superintendent of the Division of ChildWelfare **I and five selected and interested. principals worked on aplan and structure to create a program for these potential dropouts.In Septetber 1958, six classes were organized in the 7th, 8th and 9thgrades of five junior high schools. It was hoped that with special-ized and intensive guidance and a curriculum centered around the worldof work these pupils would remain in school and be infused. with a de-sire to set higher educational goals for themselves.
In each of these schools a teacher was designated curriculum co-ordinator to work:with the other teachers of these experimental class-es to prepare opecial materials. Most of the schools used the coreapproach. A ja area was chosen as the center of learning, e.g., Gar-ment Trades, Food Handling, etc. All instruction in the various sUb-ject areas served to develop and to extend the learnings connectedwith the particular jai) area chosen. In Septetber 1960, the JuniorHigh School Division appointed a Job-Placement Supervisor to providepart-time employment for youngsters who wanted to earn money while inschool.
This experiment was expanded to include a total of twenty-fcarjunior high schools in Septetber 1962 and thirty junior high schoolsin February 1963. The program now was organized in the 9th grade,since this was the terminal ytar of the junior high school and it wasat this time that young people had to make a serious decision: Shouldthey go on to high school or should they go to work? Therefore, aconcentrated effort had to be made at this point to raise their educa-tional and vocational aspirations if these pupils were to be motivatedto seek higher learning. The program was introduced into the juniorhigh schools that requested it. It comprised a unit of three classes,each with a maximum register of fifteen pupils. A full-time advisorwas assigned in each school to meet with each class for group guidancetwice a week and with every pupil individually at least once a week.An industrial arts teacher was also assigned full-time to instruct thepupils in pre-vocational and avocational skills.
* formerly Associate Supt. j.H.S.** now retired

Three years of experimentation and a study of similar programsthroughout the nation showed that a new teaching approach was essen-tial in every sUbject area, if these youngsters were to be rehabili-tated and redirected. Adaptations or "watered-down" versions of thetraditional curriculum without a modified approach presented learn-ing situations which were only too familiar and were filled with thefailures and frustrations of the past. It was also evident thatonce these pupils had spent some time in a Career Guidance class theybegan indicating that they no longer wanted to go to work; they nowwanted to prepare themselves for high school.
Thus, in Fdbruary 1963) a team of specialists in each of thecurriculum areas began to work on specially-designed teaching guidesin guidance and jdb placement, language arts) speech, social studies,science, mathematics and industrial arts. To prepare these guidesthe curricttlum specialists visited each of the schools that had beenin the Career Guidance Program from two to five years and studied theteacher-prepared. materials in use, Observed and conferred with thepupils in the classes, and interviewed the teachers and. supervisorsto become oriented with the pupils' backgrounds, aspirations) cul-tures, interests, and. needs. Workshop committees composed of teachers)advisors, and assistant principals were organized to work with eachcurriculum specialist. As the teaching material was developed it wastried out experimentally in selected schools and evaluated.
By SepteMber 1963, teaching guides in seven stibject areas weremade available in mimeograph form to all the schools in the program.The subject matter developed departed largely from the jdb-centeredthemes and concentrated on the skills and subject matter necessary forfurther study in high school; less on theory and. more on the functionaland manipulative aspects of each sUbject area so as to present the puppils with true-to-life prOblems and situations. Beginning SepteMber1963) the area of Office Practice was included to equip the pupils withimmediate saleable skills for Obtaining part-time jas and to motivatethem toward further vocational work in high school.
Through a continuous program of evaluation by teachers) supervisors,and curriculum consultants, the teaching guides were revised and extend-ed and the present series evolved: Guidance and. abb Placement, LanguageArts) Mathematics) Social Studies I) Social Studies II) Social Stupdies III, Speecbl Science, Industrial Arts, and Office Practice.
In SepteMber 1965) with the reorganization of the schoolsBev York:City, the 8th grade became the terminal grade in some juniorhigh schools. Thus) the Career Guidance Program was laaced In the 8thgrade of seventeen of these schools. At present there is a total offifty-two schools in the Career Guidance Program.
CHEMISTRY
PHYSICS
BIOLOGY
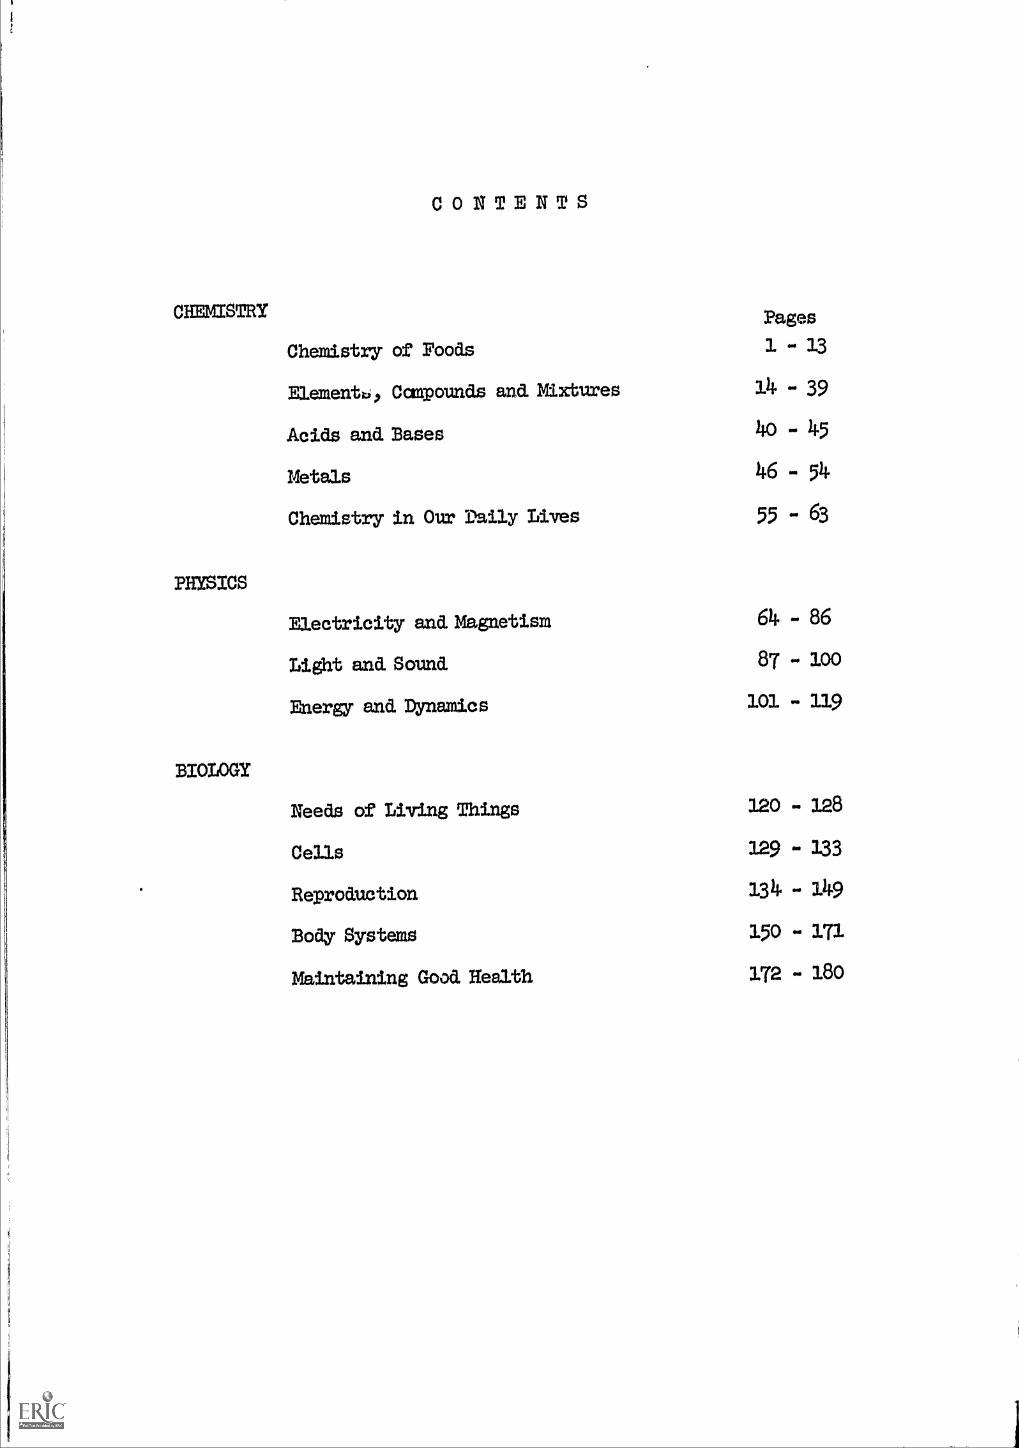
CONTENTS
Pages
Chemistry of Foods 1 - 13
E1ement6, Compounds and. Mixtures 14 - 39
Acids and Bases 40 - 45
Metals 46 - 54
Chemistry in Our Daily Idves 55 - 63
Electricity and Magnetism 64 - 86
Light anAL Sound 87 - 100
Energy and Dynamics 101 - 119
Needs of Living Things 120 - 128
Cells 129 - 133
Reproduction 134 - 149
Body Systems 150 - 171
Maintaining Good. Health 172 - 180

ACKNOWIMMENTS
This resource guide was prepared under the general direc-tion of Max Rubinstein*, Assistant Superintendent, Junior HighSchool Division, with the cooperation of Martha R. Finkler**,Acting Associate Superintendent, Junior High School Division.Irving Anker who was appointed staff Superintendent, in Feb-ruary 1966, Office of Junior High Schools, has encouraged thisproject with his deep interest and cooperation.
Gida Cavicchia, Coordinator of the Career Guidance Provam,served as project director with the cooperation of WiUla Peace,
Coordinator of Pupil Personnel of the Career Guidance Program.
Alice Pataky***, Junior High School Science Coordinator,planned., organized. and. was the principal writer of the original'manual which was prepared. during the school year 1962-1963, withthe assistance of teachers of science in the Career Guidance
Program: Edward. Ham, J-136,X; Alfred.14olini, J-136,K; and. Mar-tin Zung, J-55,X. Others who made contrit,utions were: PaulKahn, Julius Schwartz, Peter Greenleaf and. Howard Sassone.
After three years of try-out and. evaluation, the material
was revised durl.ng the summer of 1966 by a ccamnittee of teachers
and superviscrz. The ccsamittee included Joyce Cherry, J-118,M;
Stanley Leibowitz, 47-263,1C; and Jerome Levy, J-294X. Alice Pa-
taky acted. as chairman and coordinated the work of the earmittee.
Others who provided. suggestions and advice were: Louis Weiss:
Chairman of Chemistry and Biology, Brooklyn Technical High School,
and. Max Kohn, Chairman of the Industrial Processes Department,Brooklyn Technical High School.
Sam Schenberg, Director of Science; Sam Pried, Acting Assist-
ant Director; and, Alfred Beck, former Assistant Director of Science,
served as consultants.
* now Dist. Supt., Dist. #29,Q.'X* retired*** ilow Asst. Principal, 3-265,K.

Special thanks are extended to neabers of the Bureau of
Curriculum Research: William Bristow, Assistant Superintendent,and Leonard Simon, Acting Assistant Director.
Elena Lucchini designed the cover.
Maurice Bassecher, Editor, had over-all responsibility for
design and production.
The material was typed for photo offset by Mildred:Bradt.
Acknowledged with grateful gratitude and sincere appreci-
ation is the assistance given by the many supervisors and tea-
chers who used the material in classroam try-out and. played a
part in the evaluation and revision:
Manhattan - 3-3, 3-13, 3-22, 3-43, j-44, 3-88, 3-99,
3-1152 3-118, J-120, j-164
Bronx
Brooklyn
Queens
- 3-22,J-142
- 3-33,3-210,
- j-16,
3-55,
3-49,
J-263
3-142
3-98,
3-50,
J-118,
3-64,
3-133,
3-126,
3-136,
3-136, 3-166,
INTRODUCTION
This resource guide was prepared to offer teachers and supervisors
practical suggestions for the teaching of science to the pupils in the Career
Guidance Program. The material presented parallels as closely as possible
the regular 9th-Year Science curriculum. However, since many of the pupils in
the Career Guidance Program do not have the necessary background in sciehce to
start the advanced work of the 9th-Year, many of the basic concepts and skills
were drawn from the 7thm.Year and 8th-Year regular science curricula.
The material in this guide covers only three science areas: Chemistry,
Physics, and Biology. Earth Science, which is also included in the regular 9th-
/ear course of study was omitted because it would be impossible to cover four
areas in the one year the pupils spend in a Career Guidance class. Emphasis has
been placed on pmviding the pupils with many experiences in the manipulation and
use of science materials rather than on classroom discussions of theory and teache
demonstrattons. loath this in mind, many of the lessons include a pupil worksheet
designed to engage pupils in laboratory experiences.
The three science areas included in this guide should be taught in the
sequence presented: Chemistry, Physics, and Biology for optimum results, as the
concepts and skills developed in each area are designed to equip the pupils mith
the knowledges and skills required for the development of material in the sub-
sequent areas. The material in each area has been presented in the form of
daily lesson plans. Each lesson is presented in the form of a problam, followed
by a list of naquired materials and a suggested procedure. The lessons of each
of the areas should be taught consecuUvely, since the sequence of presentation
is developmental.
It is recommended that the teacher acquaint himself with eachlesson well in advance of presentation for the purpose of securing the
materia:ks suggested and becoming familiar and proficient with their use. Itis also suggested that the out-of-license and inexperienced teachers consult
with the regular science teachers and laboratory assistant of the school forassistance in special teaching techniques and handling of special equip/sant.
If pupil ability and interest warrant its and time permits, theteacher may present further lessons as presented in the 9th-Tear science
course of study.
PROBLEM 1. HOW AM I LIKE A BURNING CANDLE?
OUTCOMM:
Gases fram a candle and exhaled air contain caebon dioxide and water.
The gas that turns limewater milky is caebon dioxide.
A chemical change remits in one or more new sUbstances being formed.
Chemists use symbols and formulas for clarity and brevity.
MATERIALS:test tubesrUbber tubingtanks or other samples of gases
also see pupil worksheets
PROCEDURE:
1. Ask the class if they think there could be any similarity between them
and burning candles.2. Distribute pupil materials. Read instructions together. Be sure to
set up proper procedure for distribution and collection of materials.
3. Demonstrate proper way to light a match - striking away from you and
closing cover.4. Circulate as the children are working and offer suggestions as needed.
5. When pupils have completed the acttvities and returned equipment
demonstrate that limewater is a test for caebon dioxtde by bubbling
several gases through limewater in individual test tubes. You might
use air, nitrogen, oxygen, etc. Point out the reaction only occurs
when catbon dioxide is present.
6. Write on the chalkboard: makeslimewater + caebon dioxide -----.3.chalk + water
7. Explain that a chemical change took place and that new substances were
formed.8. Introduce chemical symbols by asking children to write "caebon dioxide"
as fast as possible. At the same time write CO2 on the board.
9. Elicit the dbvious advantage that this notation saves time. Explain
also that the symbols are international and can be understood regard-
less of the language spoken.
10. Give the pupils syMbols C for caebon, 0 for oxygen, H for hydrogen.
11,. Write the formulas, Ca(OH)2 for limewater, CaCO3 for calcium catbon-
ate or chalk, H20 for water.
12. Explain that they will be using syMbols occasionally and that they
should know same of the cammon syMbols and formulas.
13. Assist children in answering the questions on their wwksheets.
- 1

PUPIL WORKSHEET
PROBLEM 1. Haw am I like a burning candle?
MATERIALS:limewater metal traytest tube candlestraw matchesglass plate
WHAT TO DO:
1. Fill a test tube * full with limewater. Using the straw, blow gentlyinto the limewater.
2. The limewater
3. Exhale (breath out) onto the glass plate.
4.. What happened?
ilM1111
5. Stand your candle in the tray following the teacher's directions on how tomake it stick. Light the candle.
6. Quickly pass the glass plate over, but not touching, the flame.
T. What happened to the glass plate?
8. Place a bottle upside down over the burning candle until the flame goesout.
9. Quickly turn the bottle over and add sane limewater. Gently shake thebottle to mix contents.
10. Write what happened.
QUESTIONS TO ANSWER:
1. What happened when zrou exhaled into limewater?
2. What happened when gases frcen a burning candle were mixed with limewater?
3. What gas is known by its reaction with limewater?
4. Why can limewater be called a "test for carbon dioxide"?
5. What other substance was given off by breathing and burning?
6. What is the easy way to write carbon dioxide?
T. What is the easy way to write water?

PROBLEM 2. HOW CAN WE USE THE CHEMICAL, IODINE, TO TEST FOODS?
OUTCOMES:
Iodine changes to a blue-black substancestarch.This reaction is a chemical change.
MATERIALS:See pupil worksheet. Ftepare
Lugol's solutionglucose or dextrosecorn or olive oilcornstarch or flour2% peptone or beef broth
PROCEDURE:
when it comes in contact with
for class:- iodine solution- simple sugar- fat- starch- protein
1. Distribute pupil worksheets and. meterials.
2. Read directions with the pygls. Assist with proper techniques ofpouring, mixing, etc.
3. Answer the questions on the worksheet with the class.
4 Explain that the substances they used are substances found in foods.Show a chart of the nutrients.Point out that there are several different vitamins and minerals.
5. Define nutrients as chemical substtmces found in foods that are neces-sary for good health.
6. Have children start a chart:
NUTRIENT I TEST CHANGE SEEN
Starch
PUPIL WORKSHEET
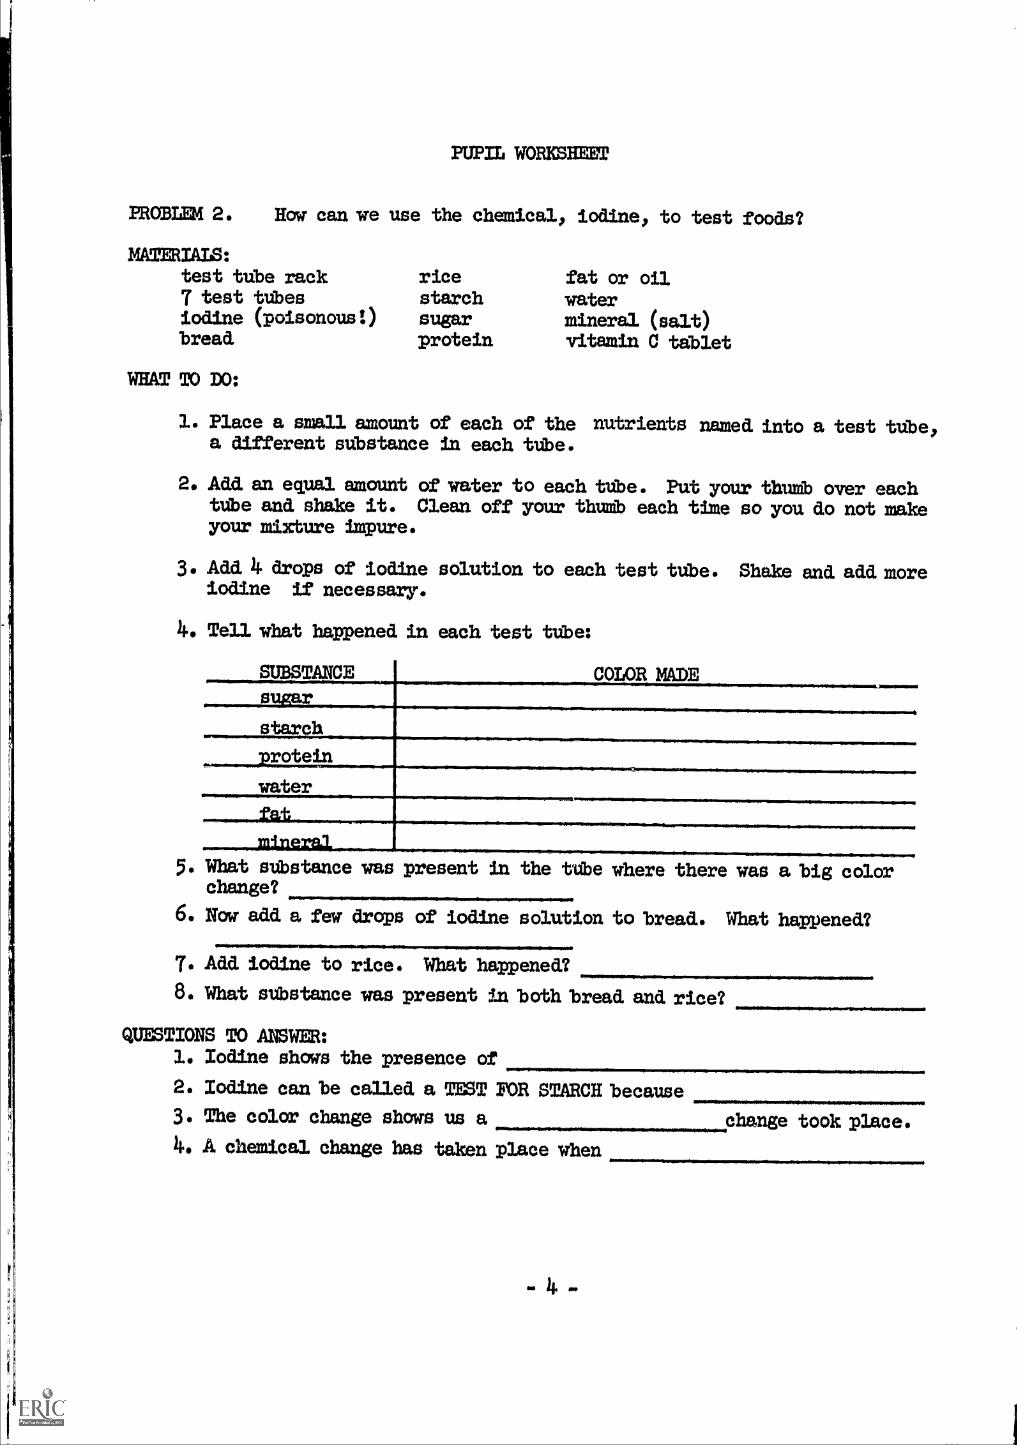
PROBLEM 2. How can we use the chemical, iodine, to test foods?
MATERIALS:test tube rack7 test taresiodine (poisonous!)bread
WHAT TO DO:
ricestarchsugarprotein
fat or oilwatermineral (salt)vitamin C tablet
1. Place a small amount of each of the nutrients named into a test tUbela different sUbstance in each tUbe.
2. Add. an equal amount of water to each tube. Put your thumb over eachtUbe and shake it. Clean off your thuMb each time so you do not makeyour mixture impure.
3. Add. 4 drops of iodine solution to each test tube. Shake and add. moreiodine if necessary.
4. Tell what happened in each test tee:
SUBSTANCE COLOR MADE
sugar
starch.
.....p.Eotein
water
......tia---____mineral
...............................
5. What sUbstance was present in the tube where there was a. big colorchange?
6. Now add a few drops of iodine solution to bread. What happened?
7. Add. iodine to rice. What happened?
8. What sUbstance was present in both bread. and rice?
QUESTIONS TO ANSWER:1. Iodine ohms the presence of
2. Iodine can be called. a TEST FOR STARCH because
3. The color change shows us a change took place.
4. A chemical change has taken place when
PROBLEM 3. HOW CAN WE FLND OUT IF A FOOD HAS SUGAR IN IT?
OUTCOMES:
Benedict's solution (blue) when heated. with a simple sugar changes color.This color change shows that a chemical change took, place.The degree of color change is an indication of the amount of sugarpresent: fram green to yellow, to orange, to brick red.
MATERIALS:
7 test tubes in rackalcohol lampmatchesnutrients listed in previous lessonsee impil worksheet
PROCKDURE:
test tUbe holder
1. Set up 7 test tlibes, each containing a pure nutrient as listed yesterday.
2. Add. about one-half inch of Benedict's solution to each tube. Demonstrateproper way to light an alcohol lamp. (Be sure lamp is on tray and. thatyou don't hold the lamp as spilled alcohol will burn outside the lamp.)
3. Heat each test tube carefully, shaking gently, and. being sure the mcuthis pointed away from aIl:people,
4. The contents in each tUbe will remain blue except for the one containingsimple sugar which turns brick red. (Be sure you have not used sucroseor table sugar.)
5. Distribute materials and. worksheets.
6. When the children have finished, review results ytth them.
NOTE: Lemon, although it contains much sugar, tastes sour becauseof its high acid content.)
PROBLEM 3.
MATERIALS:
PUPIL WORKSHEET
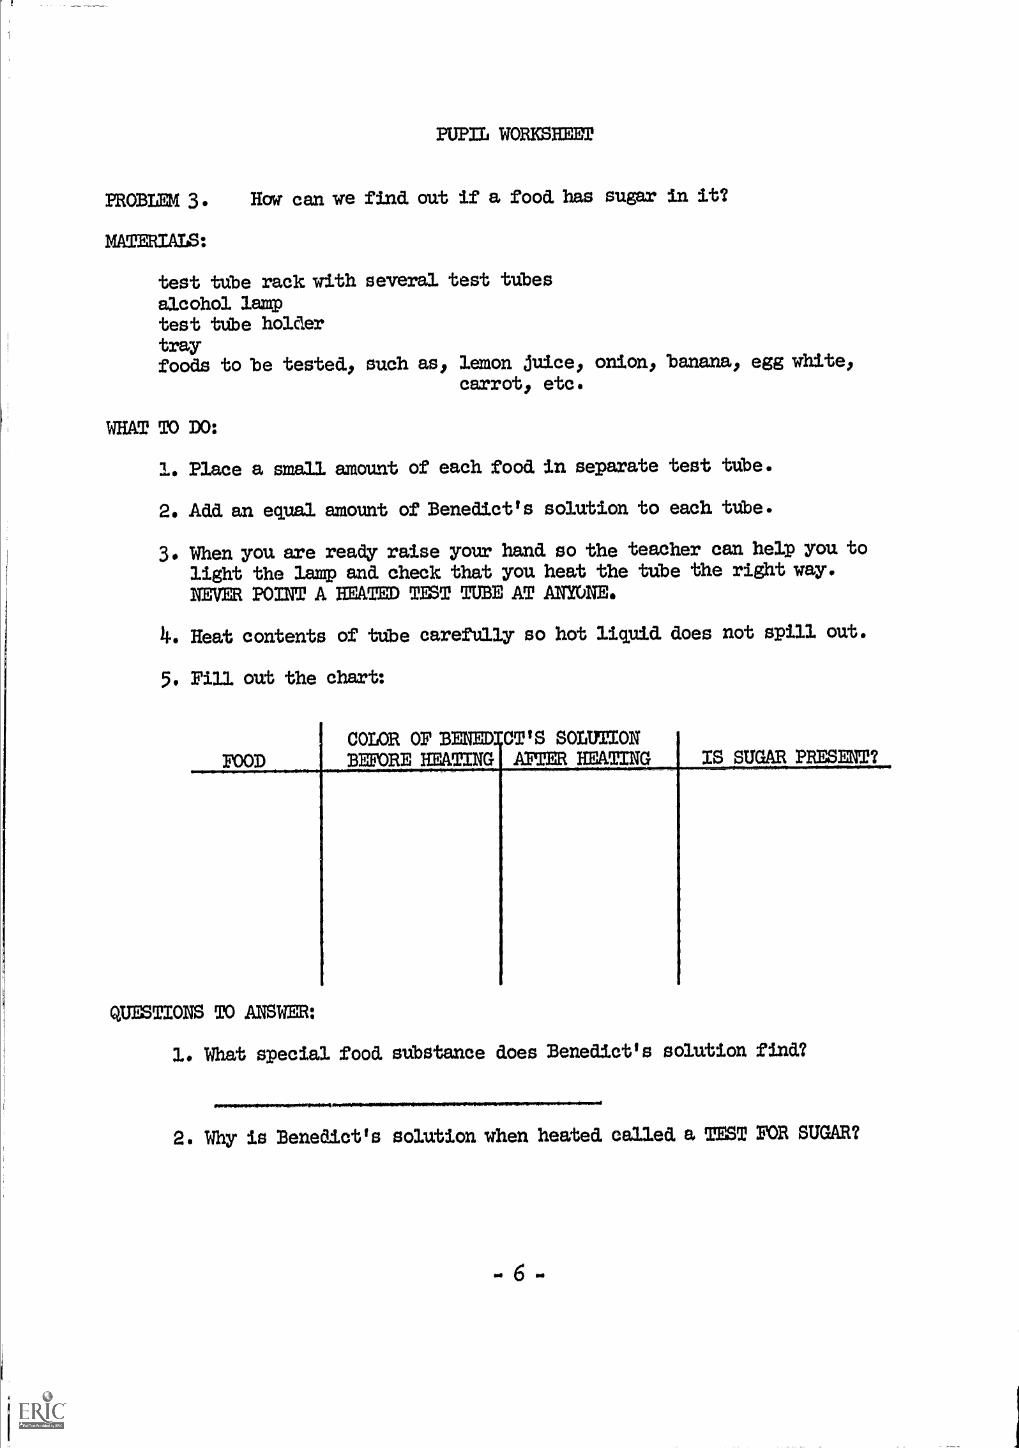
Haw can we find out if a food has sugar in it?
test ttibe rack: with several test tubes
alcohol lamptest tube holdertrayfoods to be tested, such as, lemon juice, onion, banana, egg white,
carrot, etc.
WHAT TO DO:
1. Place a small amount of each food in separate test tube.
2. Add. an equal amount of Benedict's scaution to each tUbe.
3. When you are ready raise your hand. so the teacher can help you to
light the lamp and. check that you heat the tube the right way.
NEM POINT A HEATED TEST TUBE AT ANYONE.
4. Heat contents of tUbe carefully so hot liquid does not spill out.
5. Fill out the chart:
COLOR OF BENED CT'S SOLUTIONFOOD BEFORE HEATING ATTER HEATING IS SUGAR PRESENT?
QUESTIONS TO ANSWER:
1. What special food substance does Benedict's solution find?
2. Why is Benedict's solution when heated called a TEST FOR SUGAR?

PROBLEM 4. WHAT ARE THE TEL TO FIND PROTEINS AND FATS IN FOODS?
OUTCOMES:
Biuret solution turns purple or violet when ivotein is present.A translucent or "greasy" spot on a brmu paper bi9g is a positive testfor fat.
MATERIALS:brown paper bagcorn or olive oilmargarinesee pupil worksheet
PROCEDURE:
a fatty food sudh as a doughnutchart of nutrients
1. Review the meaning of "food test."
2. Write the word "Biuret" * on the board. Tell the pupils bow to pro-nounce it. Tell them that this substance is used to test for protein.
3. Distribute materials and worksheets. Assist pupils as they work.
4. When materials have been collected, turn to a wall chart of thenutrients and look for fats. Determine with the children that oiland margarine are mainly fats. Place same oil and some margarine onthe brown paper. Hold the paper up to the light to see the character-istic translucent stain.
5. Test a food for its fat content. A fried fbod. will show good results.
6. Explain that the stain does not "dry" up. Point out that in someparts of the world today and in years past "windows" were made thisway to admit some light into dwellings.
7. Go over the questions on the pupil worksheets.
8. Review all the tests done so far. Remind the children to fill dataon their charts started two lessons ago.
* To prepare Biuret solution: Nix 2.5 cc. of 3% copper sulfatesolution with 100 cc. of a 1 sodium hydroxide. Prepare freshas it deteriorates in about 211. hours.
- 7 -
PUPIL WORKSIME
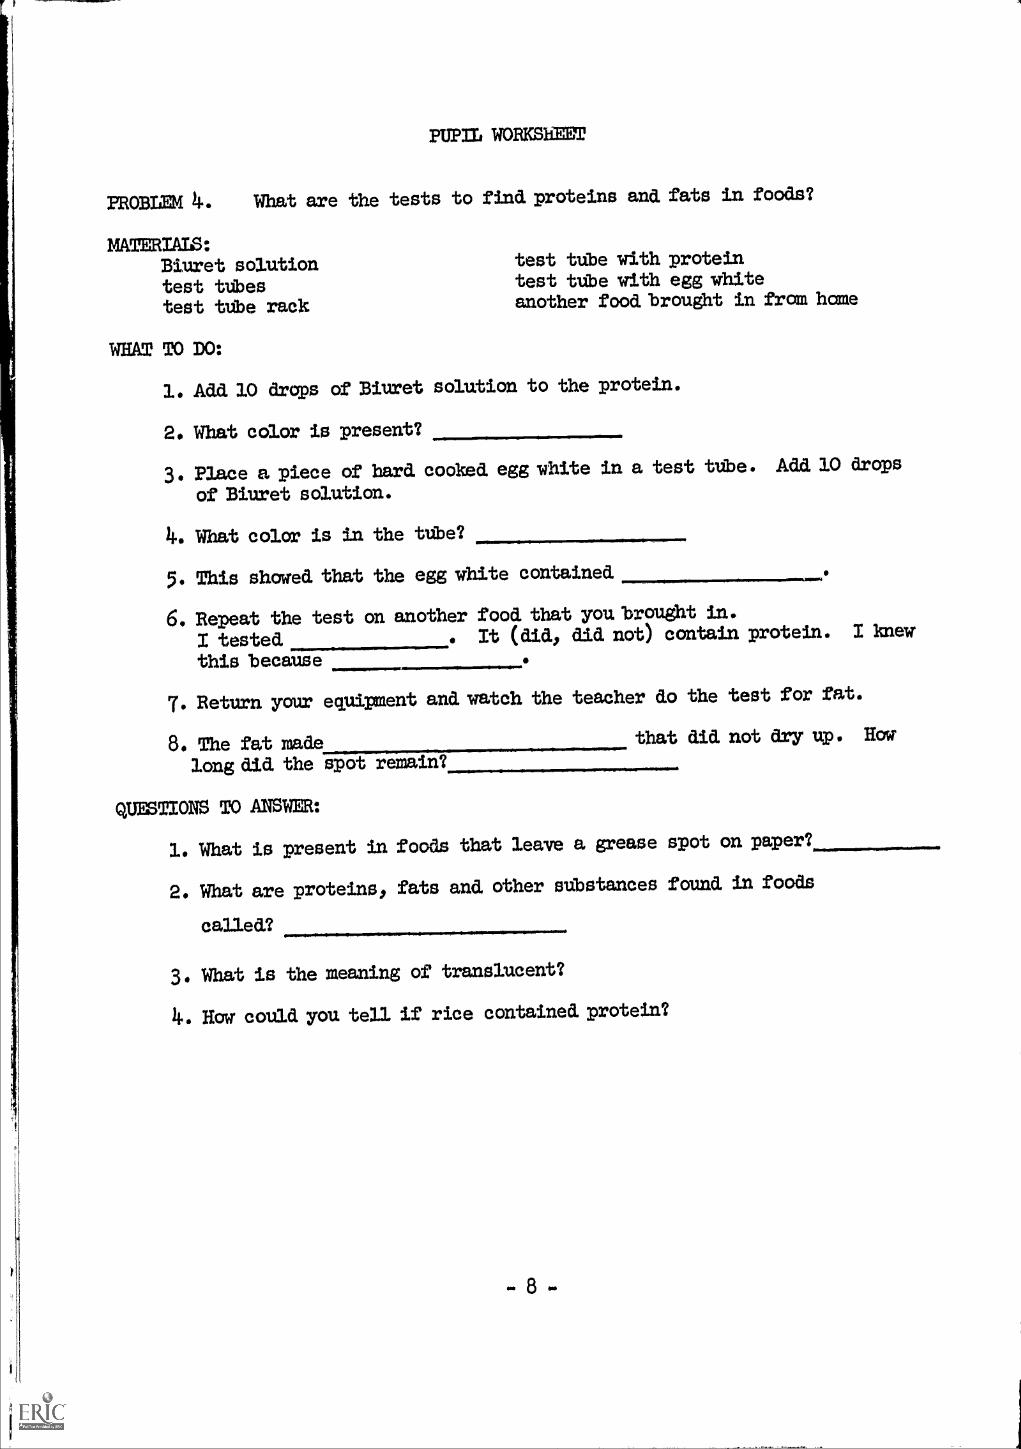
PROBLEM 4. What are the tests to find, proteins and. fats in foods?
MATERIALS:Biuret solutiontest tUbestest tube rack
test tube with proteintest tube with egg whiteanother food. brought in from home
WHAT TO DO:
1. Add 10 drops of Bivret solution to the protein.
2. What color is present?
3. Place a piece of hard. cooked. egg white in a test tube. Add. 10 drops
of Biuret solution.
16 What color is in the tube?
5. This showed. that the egg white contained. .
6. Repeat the test on =other food. that you brought in.
I tested. It (did., ad. not) contain protein. I knew
this because .
7. Return your equipment and. watch the teezher d.o the test for fat.
8. The fat made that did not dry up. How
long did. the spot remain?
QUESTIONS TO ANSWER:
1. What is present in foods that leave a grease spot on paper?
2. What are proteins, fats and. other substances found. in foods
called.?
3. What is the meaning of translucent?
11.. How could. you tell if rice contained. protein?

PROBLEM 5. HOW CAN WE TEST FOR OTHER SUBSTANCES FOUND IN FOODS?
OUTCOMES:
The blue chemical, Indophenol, becomes clear when Vitamin C is added.
If a sample of food is burned as completely as possible) the ash remainingis the mineral content of the food. This test only shows that there areminerals in the food, but does not tell which minerals are present.
Heating a food causes the water in the food to evaporate. As the wateris cooled again it fOrms droplets of water that we can see.
MATERIALS:
see pupil worksheets
PROCEMURE:
1. Explain that there are many different vitamins and minerals, and thata separate test is required to identify each.
2. Distrfbute pupil wwksheets and trays of materials. Caution the classnot to touch the materials until told.
3. Identify the materials in the tray. Read and explain the test forVitamin C*. Then have the class do the procedures on the worksheet.
4. Repeat this method with the tests for minerals and. water.
5. After the pupils have dbtained a mineral ash from the peanut, explainthat there axe many chemicals called minerals. The ash they see is amixture of several different chemicals.
E. Have children complete their charts.
*NOTE: If the pupils Obtain a pink color when they test forVitamin C, explain that this is day temporary and isof no importance. The turning of the indophenol fromablue color to colorless is the test. Sometimes thepink color will not appear.
- 9 -
PUPIL WORICSIMET
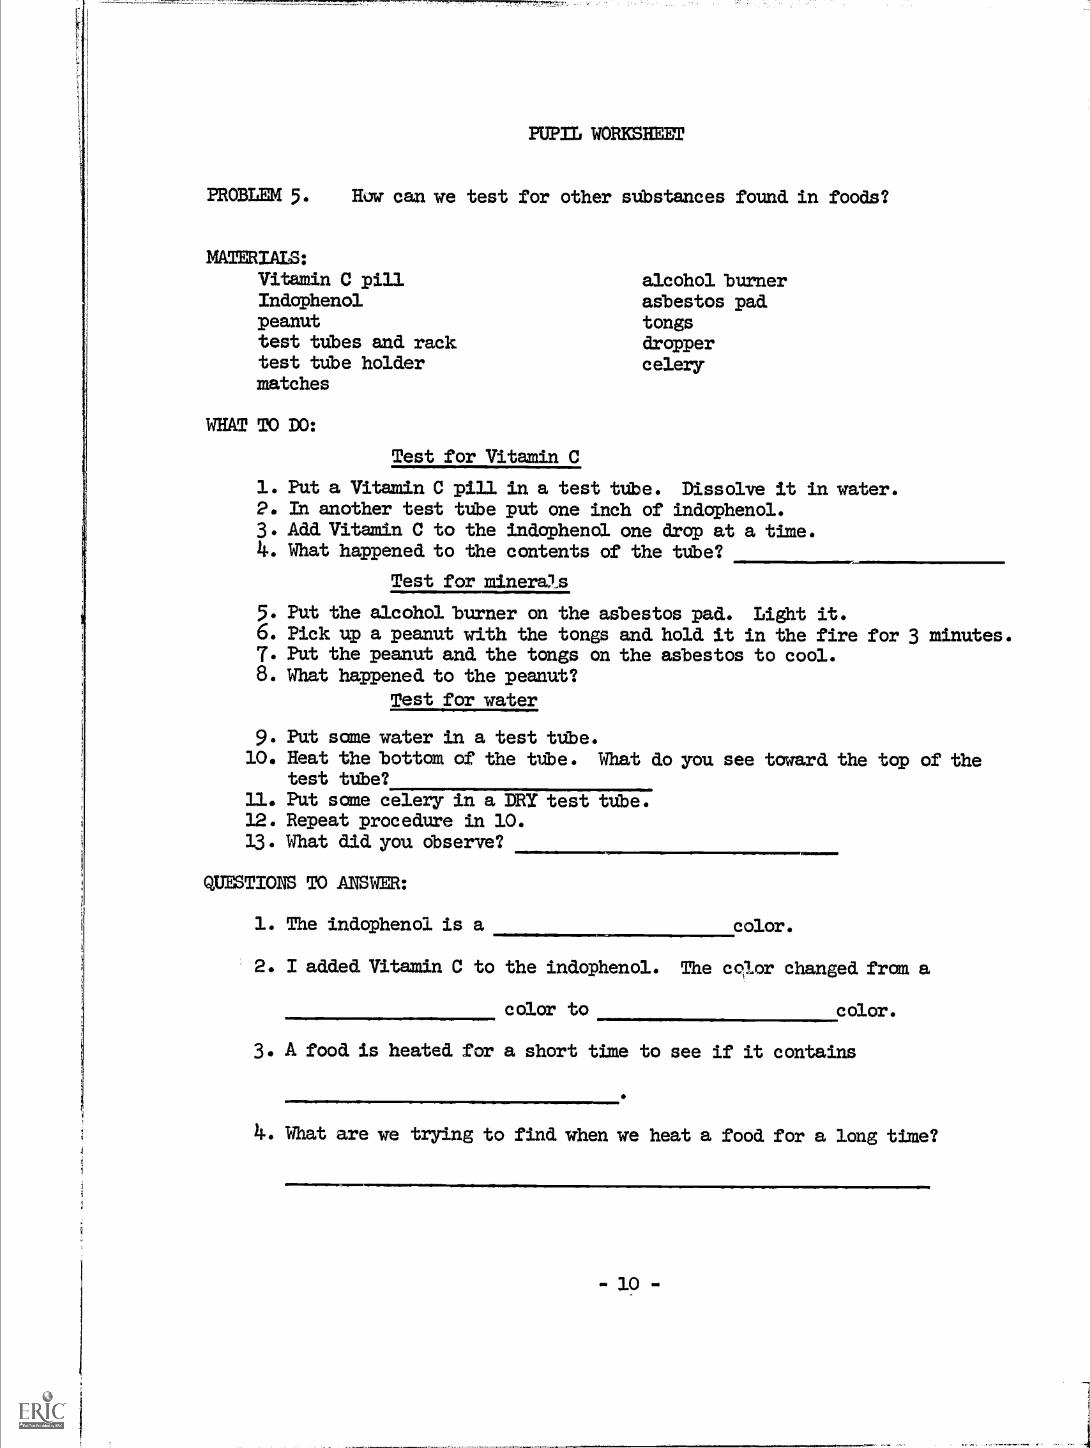
PROBLEM 5. How can we test for other substances found in foods?
NIEERIAIS:
Vitamin C pillIndophenolpeanuttest ttibes and racktest tilbe holdermatches
WHAT TO DO:
alcohol burnerasbestos padtongsdroppercelery
Test for Vitamin C
1. Put a Vitamin C pill in a test tube. Dissolve it in water.P. In another test tUbe rmt one inch of indophenol.3. Add Vitamin C to the indophenol one drap at a time.4. What happened to the ccatents of the tUbe?
Test for minerea
5. Put the alcohol burner on the aebestos pad. Light it.6. Pick up a peanut with the tongs and hold it in the fire for 3 minutes.7. Put the peanut and the tongs on the aebestos to cool.8. What happened to the peanut?
Test for water
9. Put some water in a test tube.100 Heat the bottom of the tube. What do you see toward the top of the
test tube?11. Put some celery in a ECY test tube.12. Repeat procedure in 10.13. What did. you Observe?
QUESTIONS TO ANSWER:
1. The indophenol is a
2. I added Vitamin C to the indcphenol.
color to
color.
The color changed from a
color.
3. A food is heated for a short time to see if it contains
4. What are we trying to find yben we heat a food for a long time?

PROBLEM 6. WHAT SUBSTANCES ARE FOUND IN FOODS?
OUTCOMES:
Focds contain certain necessary materials called nutrients.The nutrients are: carbohydrates (starch and sugar), proteins, fats,minerals, vitamins and water.
MATERIALS:
food. chests for pupil distribution
PROCEDURE:
1. Have pupils check charts and. name the nutrients while you list theman the chalkboard.
2. Tell pupils to use their charts to answer the questions on theirworksheets.
3. When pupils have finished, go over the questions with them.4. Define the word. NUTRIENT and review the list of nutrients.5. Point out that each nutrient is needed for a specific reason and
that each one is necessary.6. Tell the children to bring in foods to test tomorrow.
PUPIL WORKSHEET
PROBLEM 6. What sUbstances are found in foods?
MA2ERIAIS:
Food chart
WHAT TO DO:
Ute your food charts to answer the following questions:
1. Name three foods that have a lot of sugar.
2. Name three foods that have a lot of starch.
3. Which foods have a lot of protein?
4. Which foods have a lot of fat?
5. Which foods have no water?
6. Which foods have a lot of water?
7. Why is milk such a good food?
8. Which sUbstances are found in mind
9. Which sUbstances are found in coffee?
10. Which foods are made of on4 one chemical sUbstance?
- 11.-
PROBLEM 7. HOW CAN WE ANAL= SOME OF THE FOODS THAT WE EAT?
OUTCOMES:
The nutrients we need are not found in every food.
Most foods contain more than one nutrient.
MATERIALS:
see Tapil worksheet and materials in Prdaems 2,f- 6
PROCEDURES:
1. Distribute worksheets and. materials.
2. Remind pupils to follow procedures given in prdblems 2 - 6.
3. After pupils have tested their foods, have them report results
for class comparison.
4. Ccapare the class results with nutrient charts.

PUPIL WORKSHEET
PROBLEM 7. How can we analyze some of the foods that we eat?
MATERIALS:
Benedictts solutionIodineBiuret solutionlndophenoltest tUbes and racktest tUbe holderdroppersbreadworksheets for prOblems 2 - 6
'WHAT TO DO:
brown bag paperalcohol burnermatchestongsring standtest tUbe clampglass platefoods brought from home
1. Follow the procedures given in prOblems 2 - 5 to test bread for each
nutrient.
2. Write YES in the space on the chart if you find a food chemical.Write NO if yau do not find it. An orange has been tested and re-
sults listed.
3. Test the foods you brought fram home .
4. Write the name of the food on the chart. Put YES in the space if the
food. has the chemical: write NO if it does not.
FOOD STARCH PROTEIN VITAMIN C FAT SUGAR WATER MINERALS
Orange no no yes no yes yes yes
Bread
QUESTIONS TO ANSWER:
1. What are the chemicals you found in foods called?
2. Did any food have all the chemicals you need?
13

PROBLII1 8. WHAT IS MATTER?
OUTCOMLS:
Matter takes up space and has weight.Air is matter although it can't be seen.To see if something fits a definition, compare the characteristics stateawith the characteristics of the object.
MATERIALS:
plastic bagbaaanced sticksee pupil wrksheet
PROCEDME:
2 flasks glass and rubber tubingone-holed stoppers string
1. Explain that scientists say that anything that takes up space and hasweight is called. matter.
2. Write MAliat on the board..
3. Show the class various liquids and solids and say, "Is this matter?" "Why?"
4. Wave a plastic bag to collect same air in it. Hold opening closed and al-low pupils to feel that there is something in the bag.
5. Ask, "How can yau find out if air can be called matter?" Knelt that itmust take up space and have weight to be called. matter.
6. Demonstrate that air has weight by doing the following:
Tie strings around the necks of two large flasks with single-holed stop-pers and tubing. Suspend the flasks from each end of a yard stick ormeter stick. Suspend the center of the stick from a support, and findthe pant at which the flasks just balance each other. Pupp out air fromone flask. Clamp tube closed and place it at the same spot on the stick.The class will observe that this flask is now lighter and the stick dipsdown on other side.
7. Elicit that the loss in weight was due to the air you removed and thatair has weight.
8. Caution the class not to tauch the materials. Distribute trays of materi-als and. pupil worksheets.
9. Help the pupils identify materials and label the diagram.
10. Read and demonstrate each step.
CAUTION: Show how to insert the funnel and glass tube into the rubberstopper and tubing. The glass and rubber must be moistenedwith water to reduce friction. A gentle twisting motionshould be used and pressure should. be applied as close as possi-ble to the end of the funnel or tubing being inserted into thestopper.
PUP IL WORKSHEET
PROBLEM 8. Does air take up space?
MATERIALS:
funnel pinch clamp flask2-holed stopper ring stand. clamprubber tubing bottle waterglass tlibe tray
WHAT TO DO:
Read the whole procedure before starting.
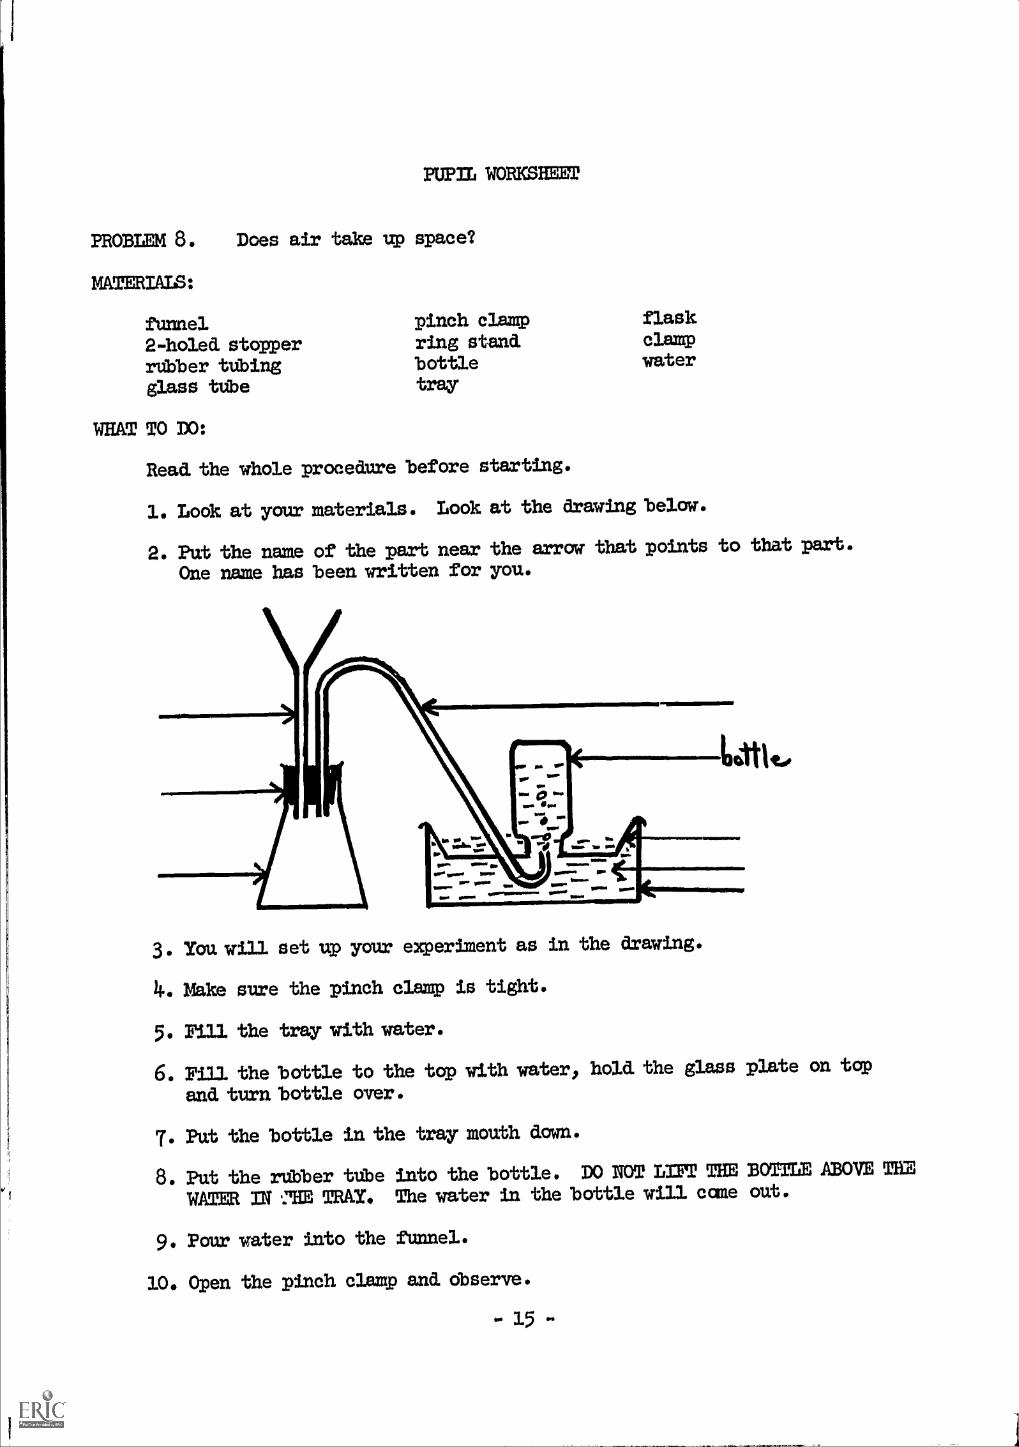
1. Look at your materials. Look at the drawing below.
2. l'hut the name of the part near the arrow that points to that part.One name has been written for you.
3. You will set up your experiment as in the drawing.
4. Make sure the pinch clamp is tight.
5. Fill the tray with water.
6. Fill the bottle to the top with water, hold. the glass plate on tapand turn bottle over.
7. Put the bottle in the tray mouth down.
8. Put the rtibber tube into the bottle. DO NOT L.Lifte THE BUITLE ABOVE THE
WATER 3IN 'ME TRAY. The water in the bottle will cane out.
9. Pow water into the funnel.
10. Open the pinch clamp and. observe.
- 15 -
QUESTIONS TO ANSWER:
1. What &id. you see when water went into the funnel?
2. The pinch clamp did not let the in the flask go intothe bottle.
3. The water in the bottle went down because the in the flask
went through the and pushed. the
out. This shows that air takes up
4. How do you Imow that air is matter?
HOMEWORK:
Put an (X) near things that are matter.
Example: wood X
a. table
b. a very small piece of sugar
c. noise
d, water
e. a shadow
f. dust
g. iron nail
h. heat
L. air
J. steam
PROBLEM 9.
OUTCOMES:
HOW SMALL CAN MATTER BE?
Matter is composed of invisible particles.These particles are in motion.
MATERIALS:sugardilute ammonium hydroxidecopper sulfatemicroscope or microprojector
dropper1000 mi" graduated cylinderglass slidesee pupil worksheet
PROCEDURE:1. Hame the class watch you dissolve some sugar in water.
2. Ask some students to examine the sugar solution and tell you if they can
see the sugar.
3. Display a microscope or microprojector and elicit that this instrument
makes dbjects larger.
4. Put a few draps of sugar solution on a slide and let the class dbserve
them under the microscope.
5. Ask, "How do you know that the sugar is still there?" Elicit that they
saw you add the sugar and that they would be dble to taste it.
6. Elicit that the sugar breaks up into very small particles that can't be
seen with the naked eye or a microscope.
T. Ldstribute trays of materials and pupil worksheets.
8. Explain that the graduated cylinder is similar to a measuring cup. They
btth tell haw much space a material occupies.
9. When the pupils have finished, do the following demonstration:
Display cylinder wit".1, 40m1. of sugar and another with 40 ml. of marbles.
Identify the marbles as representing water. Pour the sugar into the cy-
linder with the marbles, and have a student read the final volume. Elicit
that the sugar particles filled the spaces between the water paTticles.
Therefore, the volume of the sugar and water mixture is less than the
sum total of each component.
10. Show bow to smell a material correct4r by waving the hand over the mouth
of the test tee toward you. Camtion the class never to put their noses
into the test tube because the material might be poisonous and they cauld
get a lethal dose. Smell a tube of cologne or ammonia or other sUbstance
with an odor, Particles move so yau smell them,
U. Demonstrate that natter is composed of small particles that move in an-
other wai.
Drop a small crystal of copper sulfate into a large graduated cylinder
of water.Set on a high shelf to stand for about one month to dbserve diffusion.
- 17 -
PUPIL WORKS=
PROBLEM 9. How small can matter be?
MATERIALS:2 - 100m1. graduated. cylinderssugar
water
WHAT TO DO:1. Pour a little water into a graduated. cylinder.
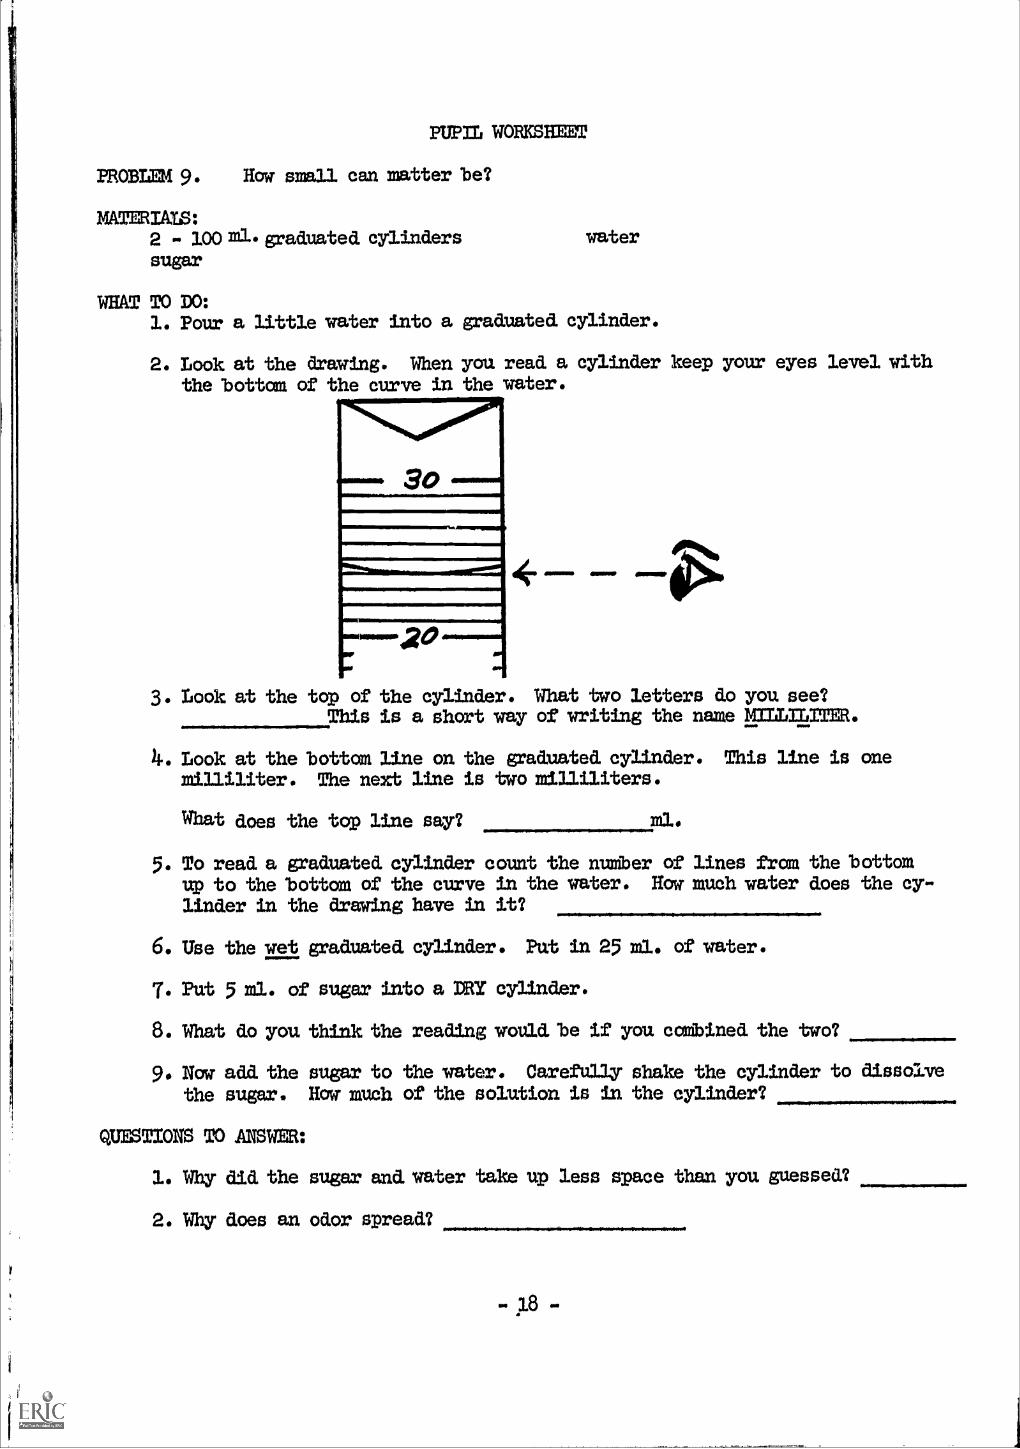
2. Look at the drawing. When yau read a cylinder keep your eyes level withthe bottom of the curve in the water.
30
mmormerwriValimmemmm
w
3. Look at the top of the cylinder. What two letters do you see?This is a short way of writing the name MILLILITER.
4. Look at the bottom line on the graduated cylinder. This line is anemilliliter. The next line is two milliliters.
What does the top line say? ml.
5. To read a graduated cylinder count the nuMber of lines from the bottomup to the bottom of the curve in the water. How much, water does the cy-
linder in the drawing have in it?
6. Ube the wet graduated, cylinder. Put in 25 ml. of water.
7. Put 5 ml. of sugar into a DRY cylinder.
8. What do you think the reading would be if yau combined the two?
9. Naw add the sugar to the water. Carefully shake the cylinder to dissolvethe augar. How much of the solution is in the cylinder?
WESTIONS TO ANSWER:
1. Why did the sugar and. water take up less space than you guessed?
2. Why dtes an odor spread?
PROBLEM 10. WHAT ARE COMPOUNDS?
OUTCOMES:
Matter that can be broken dcwn rather easay into simpler sUbstances is
called a compound.
Water can be decomposed into oxygen and hydrogen.
Oxygen supports codbustion. To test for oxygen use a glowing splint. It
will make the splint btrat into flame.
Hydrogen burns. To test for it use a burning splint. It will burn and a
"pap" will be heard.
Formulas are used to write the names of compounds quickly.
MATERIALS:
see pupil worksheet
PROCEDURE:
1. Recall from the last lesson that the sugar and. water were made up of
very small particles. Have the class stbstantiate reasons for believing
that these could, or could not be decomposed.
2. Caution the pupils not to touch the materials. Distribute trays of
materials and. pupil worksheets to the class.
3. Have the pupils do one procedure at a time, after they have read it and
it has been discussed.
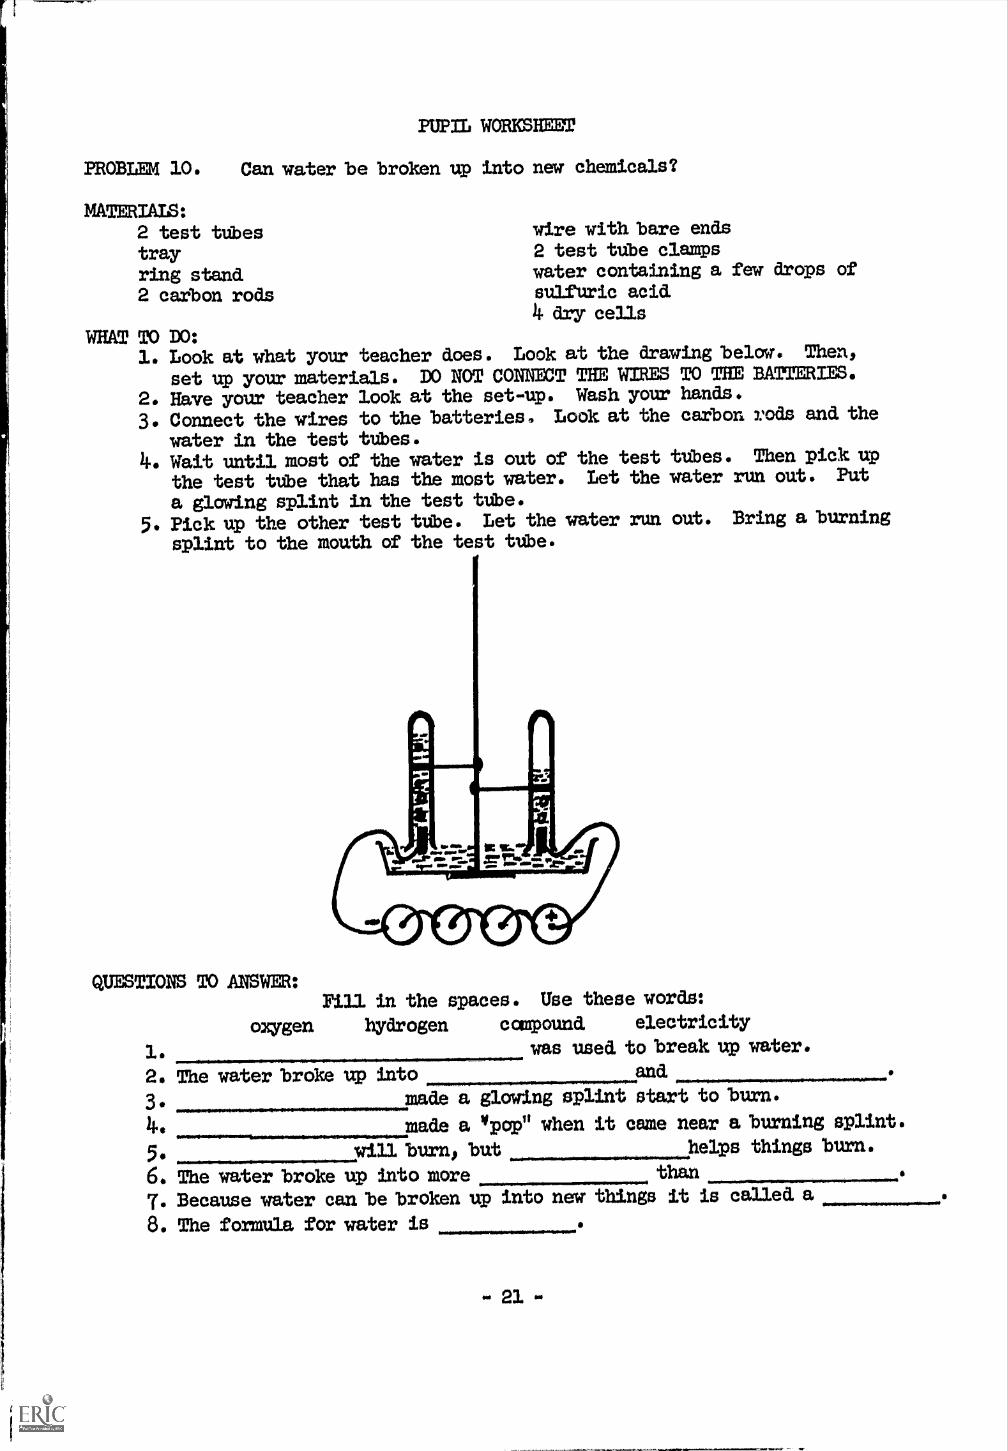
4. Demonstrate how to set up the equipment using the drawing on the work-
sheet as a guide.Wrap the bare end of two wires around the carbon rods to make electrodes.
Fill the tray with water to which has been added a few drops of sulfuric
acid. This solution should be very dilute. Then insert the carbon elec-
trodes into the test tdbes, and samerge the test ttbes in the water to
fill. Clamp the test tubes in place. Connect in series ( to )
5. Inspect the pupil's set-ups.
6. Help the pupils understand that an electric current is being passed
through the water.
7. Direct the pupil' attention to the btbbles in the test ttbes. Also,
elicit that water is lower in one tube than in the other.
-19-
8. After the students test the one gas with a glowing splint and. observethat the splint bursts into flame, identify the gas as oxygen. Write theword. on the blackboard. Explain that oxzrgen helps things burn, but doesnot itself burn.
9. When the pupils test the other gas and observe that it explodes with a"pop", identify this gas as hydrogen. Write the word on the blackboardand explain that hydrogen burns rapidly.
10. Using a molecular model consisting of colored spheres, show how the wa-ter particles broke up into (wizen and. hydrogen. Place the colored.balls representing oxygen in one beaker, and the colored balls represent-ing hydrogen in the other. Have a student count the balls in the oxygenbeaker and. ccenpare it with the number of balls in the hydrogen beaker.Ask, "Which takes up more space - the oxygen or the hydrogen?" Elicitthat the hydrogen takes up more space because there are more hydrogenatoms.
Note: The water model should have two spheres of one color(hydrogen) joined with one sphere of a differentcolor (oxygen).
11. Write on the boar& water oxygen + hydrogen
12. Lead the class to an understanding that a chemical change occurred. be-cause a new material was produced. Explain that because water was brokenup into new substances it is called. a compound..
13. Challenge a student to race you in writing the chemical name for wateron the boaxd. Instead. of writing the name, you use the formula 1120.Elicit that this method. is quicker and. easier. Tell the class that youused. a formula, and. that there is a short way of writing the name ofevery conpound.
- 20 -
PUPIL WORESIEET
PROBLEM 10. Can water be broken up into new chemicals?
MATERIALS:2 test tubestrayring stand2 carbon rods
wire with bare ends2 test tube clampswater containing a few drops ofsulfuric acid4 dry cells
WHAT TO DO:1. Look at what your teacher does. Look at the drawing below.. Then,
set up your materials. DO NOT CONNECT THE WIRES TO VIE BATTERIES.2. Hhve your teacher look at the set-up. Wash ycur hands.
3. Connect the wires to the batteries. Look at the carbon rods and the
water in the test ttbes.4.. Wait until most of the water is out of the test ttbes. Then lAck: up
the test tube that has the most water. Let the water run out. Put
a glowing splint in the test tube.
5. Pick:up the other test tube. Let the water rwa out. Bring a burning
splint to the mouth of the test tilbe.
QUESTIONS TO ANSWER:Fill in the spaces. Use these words:
oxygen hydrogen ccurpound. electricity
1. was used. to break up water.
and2. The water broke up into
3 made a gloving splint start to burn.16 made a 4p0pn when it came near a burning splint.5. will burn) but helps things burn.6. The water broke up into more than
7. Because water can be broken up into new things it is called a
8. The formula for water is
- 21 -
PROBLEM U. HOW .ARE SMALL PIECES OF MATAlt D.1.1..r.dtEINT?
OUTCOMES:
Matter in its simplest form is called an element.Merauric oxide can be decomposed into the elements mercury and oxygen.Mel,oury, oxygen, hydrogen, carbon, etc. are examples of elements.ftzbol,I. are used to write the names of elements quickly.Compoumds are ccmposed of elements.
MATIMIALS:
mercurytest tubesbunsen burnerring stand.
PROCEIX3RE:
clampmatchesbeakerglass tUbing
1. Distribute trays of materials and pupil worksheets.
2. Elicit that during the last lesson, water was decomposed. It iscalled a canpound because it can be broken up into new materials.
3. After the pupil activity do the following demonstration:
MLIIMDA: Heat mercury in a camnercial apparatus that consists ofmercury and blue glass chips in a sealed tUbe.
MEITHODB: Ptur about e mercury in a 12" Pyrex test tube. To pre-vent spilling place a one-holed stopper into this test tube with along piece of glass tithing to another large tUbe standing in a beakerof cold water, mouth up. Cover the beaker with a cardboard in whicha hole has teen punched out for the tube. The test tUbe in water willkeep mercury vapor out of the classroom and this vapor will condense
into liquid mercury.
4. Compare the mercuric oxide that broke up and the mercury which did notdecompose. &plain that matter that cannot be broken up is called anelement. State that scientists have tried to lbreakmercury up by heat-ing it or passing electricity through it, but it does not lxneak up into
new materials.
5. Recall that there is a short way of writing the names of elements.These are called synibols.
6. Display saAples of various elements, and write their names and syMbolson the blackboard. Tell the class that there are only 104 kinds ofmatter that are elements and that most of these are not common.
-22-

PUPIL WORKSHEET
PROBLEM 11. How are small pieces of matter different?
MATERIALS:mercuric oxide alcohol burnerring stand matchesclamp test tubetest tube splint
WHAT TO DO:
Fill the bottom of a dry test tube with mercuric oxide.2. Clamp the test tube to the ring stand.3. Put the alcohol burner under the test tUbe. DO NOT LIGHT THE ALCOHOL
BURNER.4. Have your teacher check the set-up.5. Light the alcohol burner.6. Watch the mercuric oxide. Let it get a little dark. Light a splint
and blow out the fire. KEEP YOUR NOSE AWAY FROM THE TEST TUBE.7. Put the glowing splint into the mouth of the test tUbe. What happen-
ed?This is a test to detect the presence of oxygen.
8. Heat the mercuric oxide five minutes or more.9. What do you see at the sides of the test tube?
QUESTIONS TO .ANSWER:
1. What waa coming from the mouth of the test tithe?
2. What was the shiny matter on the side of the test tube?
3. This experiment shows that mercuric oxide breaks up into
and
4. Mercuric oxide can be broken up into new things. It is called
a
compounds.
. Water and are also called
5. Your teacher heated in a test tube.
It (did or did not) break up into new matter.
is called an because it does
not lmmak up. ) and
are also wiled elements.
7. How many different elements do we knowi
- 23 -
PROBLEM 12.
OUTCOMES:
CAN WE MAIO A COMPOUND BY JOINING ELEMENTS?
Canpounds can beElemeats joiningThe sage product
MNPERIALS:flaskthistle tube2-hole stopperglass tubing
made by joining elements.to form compounds are examples of chemical changes.
can result from different chemical changes.
rubber tubingcollecting bottlesbunsen burnermossy zinc
dilute sulfuric acidglass Taatestra4ghmatches
PROCEDURE:1. Review by eliciting that compounds can be decanposed into elements.
Water breaks up into ovgen and hydrogen; mercuric oxide d.ecanposes
into mercury and oxygen.
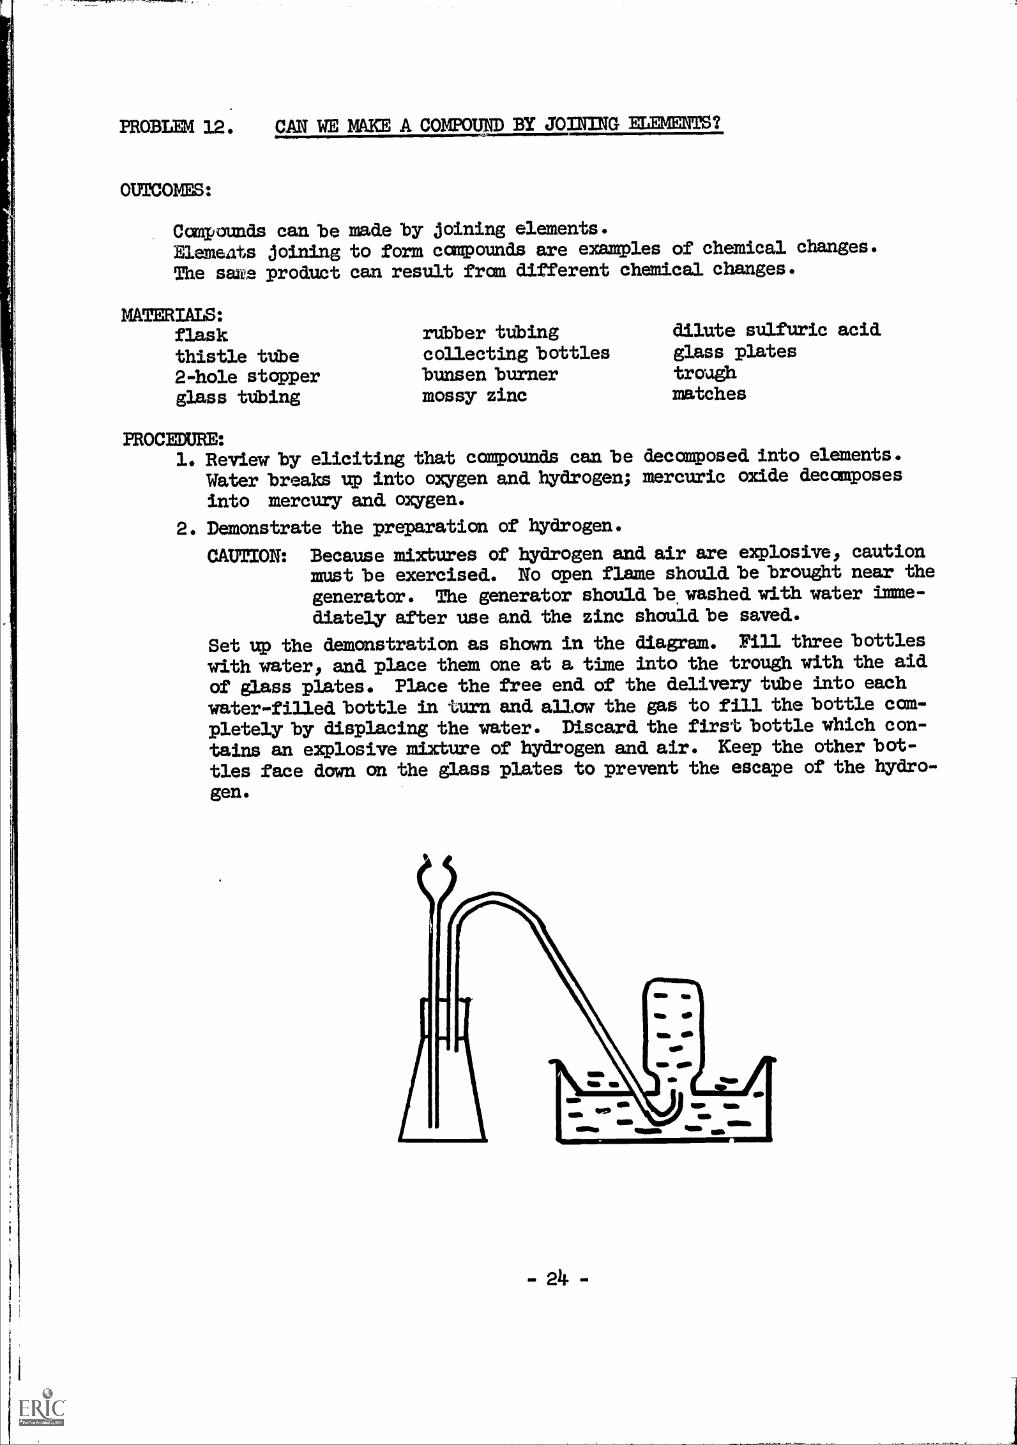
2. Demonstrate the preparation of hydrogen.
CAUTION: Because mixtures of hydrogen and air are explosive, caution
must be exercised. No open flame should. be brought near the
generator. The generator should be washed with water Imme-diately after use and the zinc should be saved.
Set up the demonstration as shown in the diagram. Pill three bottleswith water, and place them one at a time into the trough with the aid
of glass plates. Place the free end of the delivery tube into eachwater-filled bottle in turn and allow the gas to fill the bottle com-
pletely by displacing the water. Discard the first bottle which con-tains an explosive mixture of hydrogen and air. Keep the other bot-
tles face down on the glass plates to prevent the escape of the hydro-
gen.
-

3. Test one bottle of gas with a burning splint held. at the mouth of thebottle. KEEP AWAY FROM THE GENERATOR. Have the class note that thisis hydrogen by the fact that it burns.
4. State that the problem for this lesson is to find, out if elements cancombine to form ccanpounds.
5. Promptly point to the cloudy appearance of the bottle after the hydr-gen burns. Look for steam inside bottle.
6. Elicit that water (steam) was formed. when the hydrogen burned.
7. Have a student write the symbol for hydrogen on the board. Then, elicitthat oxygen was needed by writing the formula for water on the board.
8. Ask, "Where did the oxygen come from?"
9. Caution the class not to touch the materials. Distribute trays ofmaterials and PUPIL WORKSHEETS.
10. Guide the pupils through the procedures. Demonstrate how to use a bal-ance, and. have the class follow you step by step.
U. After the pupil activity, explain that even though there are 1.04 ele-ments, thousands of conipounds can be made from these by ccmbining theelements in different ways. This is similar to the thousands of wordsthat can be made by various combinations of only twenty-six letters.
12. Answer the questions together.
- 25 -

PIMil WORKSHEET
PROBLEM 12. Can we make a compound. by joining elements?
MATERIALS:balance steel wool (fine #000)
crucible pipe-stem trianglealcohol burner ring standmatches ring
WHAT TO DO:
1. PUt a small pdece of steel wool in a crucible.2. Weigh the crucible on the balance. It weighed3. CarefUlly take the crucible off the balance. Leave the weights
in the same place on the balance.4. Put the ring on the ring stand and the pipe-stem triangle on the ring.5. Put the crucible in the pipe-stem triangle.6. Heat the crucible for 10 minutes or more. Then, let the crucible cool.
7. Put the crucible back on the balance. What happens?
QUESTIONS TO ANSWER
1. Hydrogen cannot be broken up and is called an
2. A flame will make hydrogen
3. When the hydrogen burned we saw on the sides of the
bottle.
4 To make water, we need
5. The crucible was
and hydrogen.
after we burned the iron.
6. The iron joined with the in the air.
7. When two elements join to make a compound it is called
a change.
8. Write E next to the Elements. Write C next to the Compounds.
SulfUr E Mercuric Oxide
Sugar Carbon Dioxide
Oxygen Iron
Hydrogen Magnesium
Water Mercury
- 26
PROBLEM 13. WHAT ARE PHYSICAL CHANGEST
OUTCOMES:
Matter may exist as solid, liquid or gas.Solids have definite shape and volume; liquids have definite volume buttake the shape of the container; gases have neither definite shape nor de-finite volume.Changing from solid to liquid. or gas and vice versa are physical changes.Breaking, bending, tearing and. cutting are other examples of physical change.After a physical change, the same sUbstance is still present.
MATERIALS:ice cUbeiodinebeakers of various sizesgraduated cylinderballoon
PROCEDURE:
flaskrubber bandbunsen burnermatchessee Nos. 10, 11
1. Display a beaker of water, elicit its formula and. write it on the black-bcard. Now, show a piece of ice, write "ice" on the board and itsformula, 1120. Challenge the class to give the formula for water vapor.
2. Elicit that chemically, ice, water, and. water vapor are the same. All ofthem could. be decomposed into oxygen and hydrogen.
3. Place an ice cUbe in several different sized containers.
Azat, "Has the shape of the ice cube changed?" "Does it take up the sameamount of space?" Lead the pupils to understand that ice is called asolid. because it has a definite shape and takes up a definite mnount ofspace.
4. Ptmr a, measured volume of water into one of the containers used in theice demonstration. Pour it into another container, and measure the volumeagain. Elicit that the volume has stayed the same although the shape ofthe water has changed. Explain that water is called. a liquid because itsvolume stays constant but its shape changes with the container.
5. With a rubber band, attach a small balloon to a flask containing a littlewater. Heat the flask. Have the class observe that the water mpor fillsthe balloon and. takes the shape of the balloon and. flask. Explain that ifmatter fills any space it can and, takes the shape of the container it is agas.
6. Display various solids and liquids, and have the pupils identify them assuch. Elicit names of gases they have already learned.
T. Have the class identify iodine crystals as being solid. CarefUlly heatsame iodine in a test tUbe, and direct the class to Observe the solidchange to a gas and. back to a solid. Iodine will be deposited near themouth of the test tUbe.
-27-
8. Have the class fill in the chart on the WORKSHEET.
9. Ask, "What type of change takes place when a solid. becames liquid or
gas?" Elicit that this must be a physical change because you start and
end with the same chemical substance.
10. Distribute trays of materials containing wood. splint, chalk, magnesium
ribbon, paper, scissors, mortar and. pestle, copper wire.
11. Direct the pupils to break a piece of wood, cut a strip of magiesiun
ribbon, tear a piece of paper, crush a piece of chalk, bend a copper
wire.
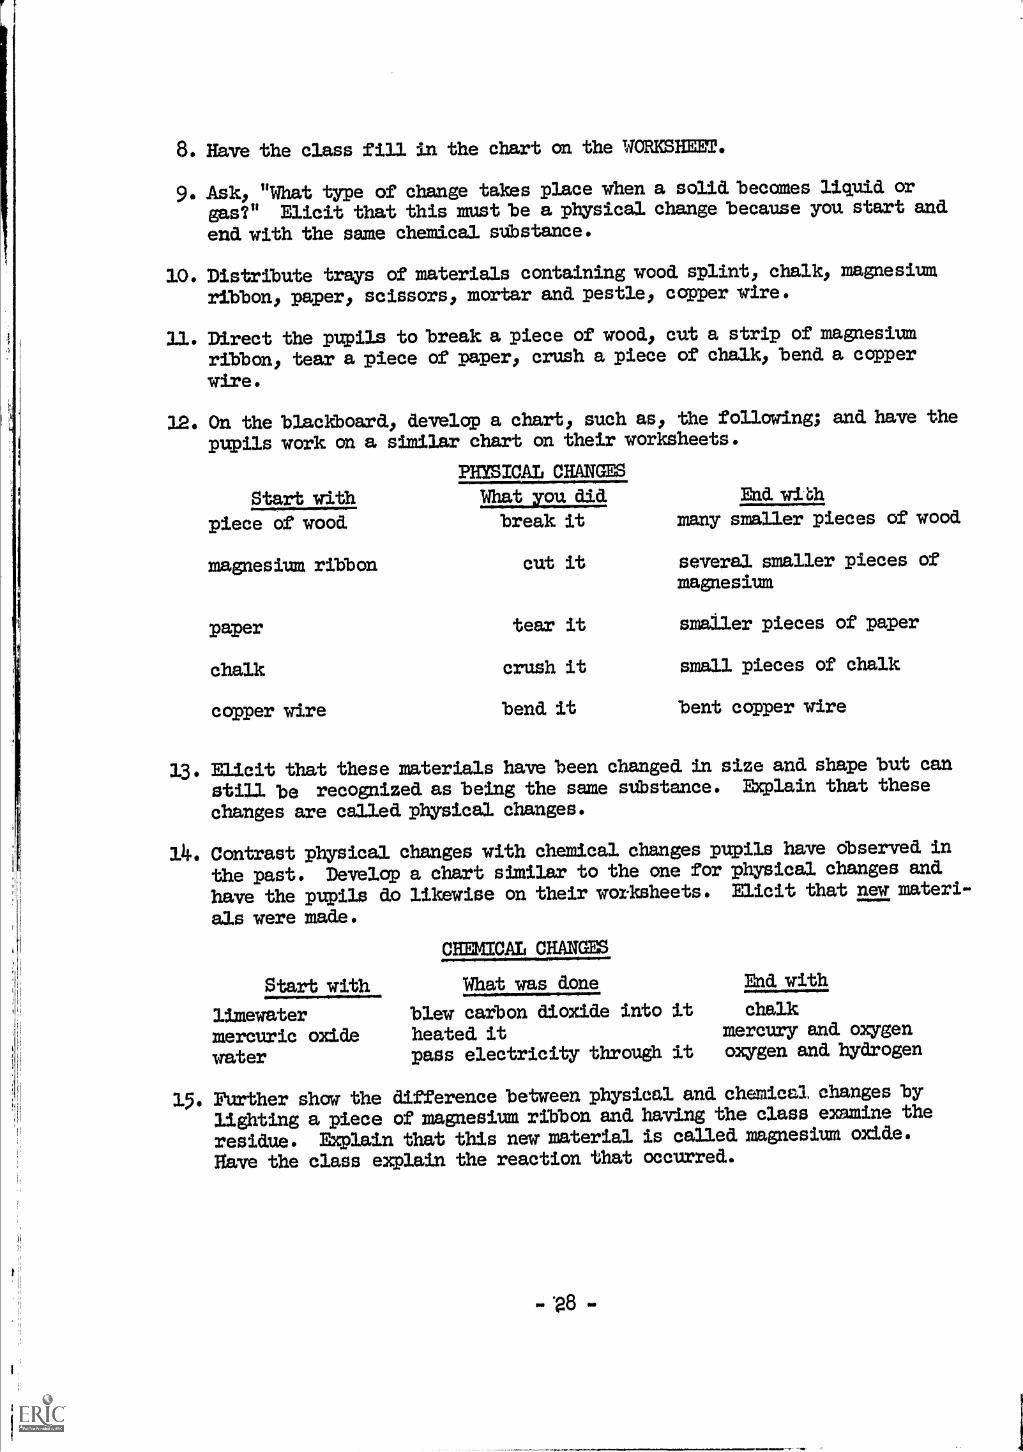
12. On the blackboard, develop a chart, such as, the following; and. have the
pupils work on a similar chart on their worksheets.
PH/SICAL CHANGES
Start with What you did End with
piece of wood break it many smaller pieces of wood
magnesium ribbon cut it several smaller pieces ofmagnesium
paper tear it smaller pieces of paper
chalk crush it small pieces of chalk
copper wire bend it bent copper wire
13. Elicit that these materials have been changed in size and shape but can
still be recognized as being the same sUbstance. EXplain that these
changes are caned, physical changes.
14. Contrast physical changes with chemical changes pupils have dbserved in
the past. Develop a chart similar to the one for physical changes and
have the pupils do likewise on their worksheets. Elicit that new materi-
als were made.
Start with
CHEMICAL CHANGES
What was done End with
limewater blew carbon dioxide into it chalk
mercuric oxide heated it mercury and oxygen
water pass electricity through it oxygen and hytrogen
15. Further slam the difference between physical and chemical changes by
lighting a piece of magnesium rinon and. having the class examine the
residue. &plain that this new material is called magnesium oxide.
HaNe the class explain the reaction that occurred.
.28
PUPIL WORKSHEET
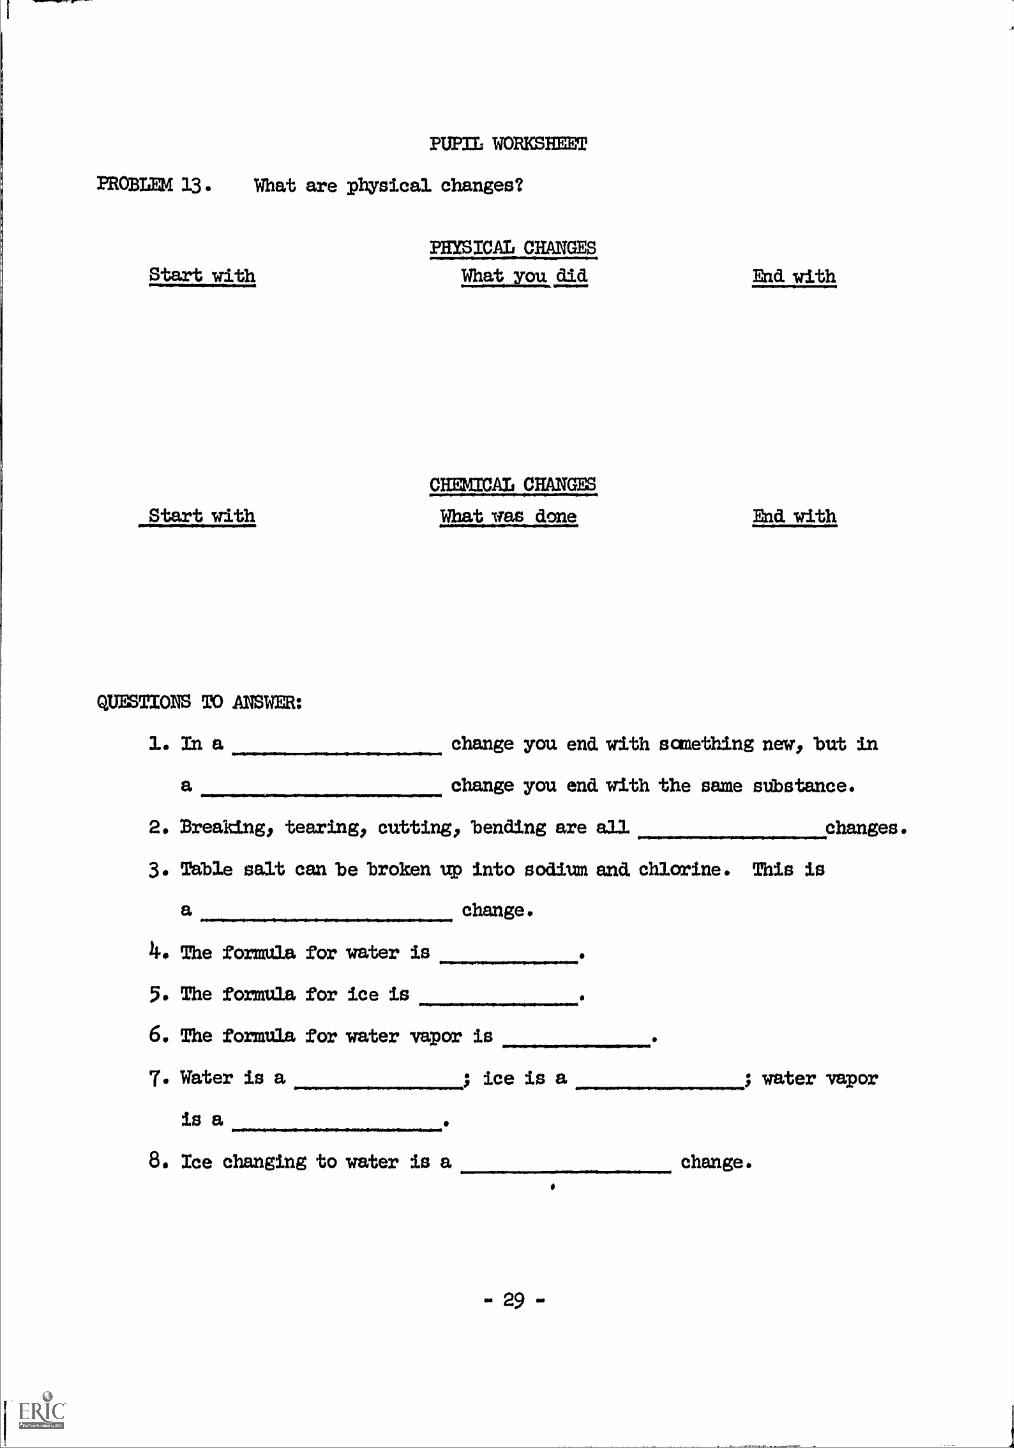
PROBLEM 13. What are physical changes?
Start with
Start with
PHYSICAL CHANGES
What you did. End. with
CHEMICAL CHANGES
What was done End with
QUESTIONS TO ANSWER:
1. In a change you end. with sanething new, but in
a change you end. with the same substance.
2. Breaking, tearing, cutting, bending are all changes.
3. Table salt can be broken up into soditun and. chlorine. This is
a hange.
4. The formula for water is
5. The formula for ice is
6. The formula for water vapor is
7. Water is a
is aice is a ; water vapor
8. Ice changing to water is a change.
- 29
PROBLEM 14. WHAT IS TIE DIFFERENCE BEITWEEN A MT= AND A COMPOUND?
OUTCOMM:
The parts of a mixture are not chemically codbined, retain their originalproperties, and can be separated easily.
The parts of a compound combine in definite, unvarying amounts.
In a mixture, the amounts of the coaponents can vary greatly.
Compounds result from chemical changes.
MATERIALS:
See pupil worksheet.
PROCEDURE:
1. Distribute trays of materials and. PUPIL WORKSHEETS.
2. Guide the class through the procedures eldborating where necessary.
3. When the pupils make the compound. more heat maybe needed than can besupplied. by an alcohol burner. After they have begun to heat the testtube, call eadh graap to the fwront and help them complete the reactionusing the bunsen burner.
16 Answer questions on worksheet with class.
30

PUPIL WORKSHEET
PROBLEM 3.4.. What is the difference between a mixture and a con:pound.?
MATERIALS:iron filingsiron powdersulfuralcohol burner
WHAT %0 DO:
matchesring standevaporating dishpaper towels
Part A - Makini; a Mixture
balancetest tubetest tube clam
1. Look at the iron filings. Test them with the magnet.2. Look at the sulfUr. Hold the magnet to the sulfur.3. PUt some iron and sulfUr in the evaporating dish. Nix them
together,4. Separate the iron from the sulftr.
Part B Making a Compund
1. Weigh (Jut 6 grams of iron powder end. 4. grams of sulfur.
2. Mix them together on a piece of paper.3. Put the mixture in a DRY test tube.
4. Put the test tube in a clam). Put the c3.amp on the ring stand.
5. Heat the test tube until you see it get red.. Then heat it
5-10 minutes more.6. Put the test tube in a beaker of cold. water. This will break the
test ttibe.
7. Look at the inside of the tube. Test it with a magnet.
QUESTIONS TO .ANSWER:
1. Mbat color are the iron filings?2. Do the iron filings stick to the magnet?3. What color is the sulfur? Does it stick to the magnet?
4. When we mix the iron and sulfur,'the iron looks and
the sulfur has a color. They stay the same.
5. Do you know* how much iron is in the mixture?6. Do you know how much sulfur is in the mixture?7. Did. you have to weigh the iron and. sulfur to make a mixture?8. Does the iron stick to the magnet after you mix the iron and sulfur?
9. Did. you have to weigh the iron and. sulfur to form a compound.?10. After you heat the mixture, do the iron and sulfur look as they did.
before?After you heatA
U.
made is calledelementsiron sulfide is
the mixture, can you, pull out the iron with a magnet?change made something new. The new substance we
a It is made up of theand The formula for
- 31 -

PROBLEM 15. ROW CAN A MIXTURE BE SEPARATED?
OUTCOMES:
Scone mixtures can be separated. by filtration.The parts of a mixture retain their original properties.
Filtration is one step in the purification of water.
MATERIALS:
see pupil worksheet
PROCIDURE:
1. Elicit that in the last lesson the class separated a mixture of iron
and. sulfur using a magnet.
2. Distribute trays of materials to every two or three pupils.
3. Direct the groups to make a mixture of salt and. sand., and. examine the
mixture with a hand. lens.
is.. Elicit that because this is a mixture, the sand. and. salt still look the
same and could be separated. by sorting out the salt particles; the sand.
and sat were not weighed carefully and. were not chemically canbined.
5. Challenge the class to suggest ways in which the mixture could be separ-
ated. Lead. them to suggest the use of water to dissolve the salt, and
the use of a sieve to separate the salt water fran the sand. Encourage
them to plan a method. of separating the salt and water.
6. Distribute PUPIL NORKSHEETS.
7. Have a student read. each procedure and then, after the teacher demon-strates the required. technique, have the class perform the operation.
8. After the pupil activity, elicit that large particles could be removed.fran our water supply by filtration.
9. Demonstrate the purification of water by filtration.
Pour muddy water through a tunnel that is filled. with fine and coarsesand, and. fine and coarse gravel.
PROBLEM 15.
PUPIL WORFSBEET
Haw can a mixture be separated.?
MAMERLALS:mixture of sand and. saltbeakeralcohol burnerfunnelstirring rod.filter paper
WHAT TO DO:
1. Add water to the mixture of salt
tripod or ring stand and ringevaporating dishvire gauzetongsadbestosband lens
and sand.
2. Stir the mixture with the stirring rod..
3. Fold. the filter paper.
4. Wet the funnel and. put in the filter paper.
5. Put the funnel in the tripod or clamp.
6. Put a clean evaporating dish under the funnel.
7. Pour a little of the mixture into the funnel. Don't pour the mixture
over the top of the filter paper.
8. Separate the salt from the sand..
9. Pour out most of the salt water.
10. Heat the salt water that is left in the evaporating dish.
11. Wait until the water is gone. Pick up the evaporating dish with the
tongs and put it on the asbestos. TIES EVAPORATING DISH IS WRY HOT.
QUBSTIONS TO ANSWER:
1. What were the parts of the mixture in this experiment?
2. Wby did you stir the mixture with water?
3. What happened. when you heated. the salt water?
4. Why did. the sand. stay in the funnel?

PROBLEM 16. HOW CAN WE GET DRINKING WATER FROM THE SEA?
OUTCOMES:
A method of converting sea water to fresh water is needed in dry countries
that don't have sources of fresh water and by ships at sea.
Distillation is a method of removing salt from sea water.
Distillation involves salt latter being heated and the steam that is pro-
duced being cooled and changed back to water.
The water-cycle is a natural process that is very similar to distillation.
Salt flats are produced in such areas as the Salt Lakes and the Dead. Sea.
MATERIALS:
flaskring standsclampsringwire gauzebunsen burner
PROCEDURE:
matchescondenserstoppersrubber tubingbeaker
1. Ask, "Wily can't we drink sea water?" Elicit that it is too salty and
that it makes a person very ill.
2. Question the class about situations in which sea water must be converted.into drinking wa.ter. Elicit such examples as ships at sea, arid. coun-tries, Guantanimo Bay military installation.
3. Have the class consider filtration as a means of separating the parti-cles, but lead them to reject it because particles of salt will gothrough a filter.
4. Discuss the method. used to separate the water from the salt in the lastlesson. Have them recall the food. test for water, and lead. the pupilsto suggest cooling steam as a means of recovering the water.

5. Construct a distillation apparatus as shown below. Pass a condenseraround and have the pupils examine it; then direct them to draw theset-up in their notdbooks and label the parts.
6. Tell the class that this process is called distillation. In the nextlesclon they will distill a mixture of water and table salt, but todemonstrate the process you will use a colored chemical in place ofsalt.
7. Distill a mixture of copper sulfate and. water, explaining what happensin each part.
8. Discuss the water cycle and show how it is similar to the distillationprocess. Water is heated. by the sun and, is changed to a vapor. Thevapor rises and is cocied, and eventually falls back to earth.as rain.
9. Have the class explain how salt flats developed in the Salt Lakes andDead Sea areas.
- 35 -

PROBLEI 17. HOW IS A MIXTURE DISTIMED?
OUTCOMES:
Distillation is the result of physical changes.
MATERIALS:see pupil worksheetsilver nitrate solution
test tube racktest tithes
salt solution - Make a salt solution of known composition by dissolving
the salt in water and mixing thoroughly. Give the same
volume to each group, and the groups will be able to cam-
pare their techniques and efficiency in separating the
nixture.
PROCEDURE:
1. Explain that in this lesson the class will separate a salt water mixture.
The groups will compete to see which one will collect the greatest amount
of pure water.
2. Distribute trays of materials and. PUPIL WORKSHEETS.
3. Show them again how the glass tube is inserted in the rubber stopper.
As a safety precaution, cover the tithe with a paper towel where you in-
tend. to grip it.
4. Demonstrate how to arrange the distillation apparatus.
5. After you check the groups, caution them to stop heating the mixture be-
fore it is dry.
6. Have each group report the amount of liquid collected.
7. Make a concentrated table salt solution and. add silver nitrate solution.
Direct the class to Observe the deep white color that is Obtained. Ex-
plain that if less salt were present, the color would not be as white.
8. Pour the same amount of sample from each group into labeled test tdbes.
Set the test tUbes in a rack at the front of the roam. Add. silver ni-
trate solution to each of the samples. Have the class draw conclusions
about the "purity" of the namples.
9. Have the class discuss the physical changes that occur during the dis-
tillation process.
10. Encourage the pupils to think of ways in which they could. have im-
proved. the purity of the water. Lead. them to conclude that a more ef-
ficient cooling system would. help.
- 36 -
PUPIL WORKSHEET
PROBLEM 17.
MATERIALS:
salt and. water mixturerubber stopper and glass ttbering stand and test tube clampeight-inch test tubealcohol burnersix-inch test tubesmall graduated cylinder250m1. beakerpaper towelsmatches
WHAT TO DO?
1. Put the 8-inch test ttbe in the clamp.
2. Put 20 cc. of the salt and water mixture in the 8-inch test ttbe.
3. Put the rubber stopper in the mouth of the test ttbe.
4. At the end of the glass ttbe put a small test ttbe to catch the water.
5. HAVE YOUR TEACHER CHECK THE SET-UP.
6. Plan how you will cool the steam.
7. Light the alcohol burner and. begin to distill. DO NOT BOIL THE SALTWATER UNTIL THE TEST TUBE IS DRYI Let a few drops of salt water stayin the big tect tube.
8. Find out how much water you distilled. Use the graduated cylinder.
. Give this "pure" water to your teacher.
QUESTIONS TO ANSWER:
1. How much water did you get? 14b.
2. How did yau cool the steam?
3. was used to see how much salt was left in thewater. Was your sample pure?
4. What did the long glass tube taln the place of in the experiment yau sawin the last lesson?
5. What is distillation?
-37-
PROBLEM 18. HOW IS CHROMATOGRAPHY USED TO SEPARATE MIXTURES?
OUTCOMIDS:
Chromatography is a method. used. to separate small amounts of substances
in mixtures.
Ink is a mixture of several chemicals.
MAMMALS:see pupil worksheetsstrips of filter paper (The paper should be long enoAgh to reach from the
bottle top to the bottom of the glass jar.)
medicine droppers or solid glass rodswashable black or other ink
tapepaper towelsunknown mixture (Make a mixture of one or more substances the pupils have
tested. Label the test tubes with nuMbers and record the
components.)
PROCEDURE:
1. Elicit from the class that when a paper napkin is placed in a liquid,
the liquid slowly rises and spreads.
2. EXplain that scientists discovered that if 'different kinds of small
particles are mixed in the liquid, they will travel along the paper at
different speeds. Eventually the various slibstances will separate into
tends.
3. Demonstrate and explain the technique of chromatography.
Fhsten a strip of filter paper to a pencil with tape. Place a drop of
mixture to be separated at tbe bottom of the strip and allow it to dry.
Fill the bottle with e of water or alcohol solvent and. place the pen-
cil across the top of the bottle so that the lower end of the filter
paper touches the solvent. Be sure that the spot of the mixture is
close to, but not touching the solvent. Cover the bottle with paper
toweling and. allow the separation to proceed.
16 Distribute trays of materials and. PUPIL WORKSHEETS.
- 38 -

PROBLEM 18.
MATERIALS:inkwater11. bottles
dropperalcohol
PUPIL WORKSHEET
How is chromatography used. to separate mixtures?
strips of filter papermixture of food colorsWright's stainunknown mixture
WHAT TO DO:
1. Add a few drops of ink to a little water. Hold. a strip of filter paper
so the end. reaches into the liquid. What happens?
2. Separate a mixture of food. colors. How did. the strip of paper look?
3. Place t inch of alcohol and.* inch of water in a bottle. Ad.d Wright's
stain and. test with paper strip. What did. you see?
4. Find out what the unknown mixture contains. It can contain anything
you have already tested.
QUISTIONS TO ANS'WER:
1. What color or colors did. you find, in ink?
2. What colors did. you find in the mixture of food. colors?
3. What colors did. you find. in Wright's stain?
Z. Your unknown mixture has the colors
. What do you think it isT
.0.1101144111.111110111=0.
HOMEWORK:
Separate mixtures in yomr house using chromatography. In place of filter
paper you can use white blotters or paper towels.
- 39 -
PROBLEM 19. WHAT ARE ACIDS?
OUTCOMES:
Acids turn blue litmus red..
Many camnon substances are acidic.
Acids contain the element hydrogen.
Acids react with metals to liberate hydrogen
NATERIALS:see pupil worksheetsTo prepare dilute acids, add one part conc. acid to ten parts water.
PROCEDURE:
1. Tell the children they will be, working with acids today - hydrochloric,sulfuric and. acetic acids. Have the children look up and. give the for-mu3As for each: 1101, H2SO4, HC2H302.
2. Hhve the children point out that eadh of these compounds contains hy-drogen. This. is characteristic of all acids.
3. Distribute materials and. worksheets and. assist pupils with exercise.
Atter materialr.i have been collected, gather results of acid tests:lemon, vincrar, grapefruit, twat° are uramples of acids. Ask thechildren to give a word. to describe the taste. Acids taste sour.
5. Write characteristics of acids on the board. as they are given bypupils.
a. Acids are chemical canpounds.b. They contain the element hydrogen.c. They tast sour.d. They turn blue litmus red..e. They react with metals 'and liberate hydrogen.

PUPIL WORKS=
PROBLEM 19. What are acids?
MATERIALS:3 test tubes red. and. bluq litmus papersdilute hydrochloric acid splintsdilute sulfuric acid. mossy zincdilute acetic acid matchesglass plate substances from home to test for acidityglass stirring rod paper towel
WHA.T TO DO:
1. Wet the glass plate. Lay 3 piaces of blue and. 3 pieces of red. litmuspaper on it.
2. Dip the stirring rod into the hydrochloric acid.. Touch the rod. to apiece of red. and. to a piece of blue litmus. What happened.?
3. Wash the rod. with water. Then test the sulfuric acid. in the same way.What happened.?
4. Wash the rod. again with water and. test acetic acid.. What happened.?
5. Test lemon juice, aspirin, vinegar or other substances you broughtfrom home with the red. and the blue litmus papers. Make a list of thesubstances and. tell next to each what happened and. whether or not thesubstance is acidic.
6. Now place a amall piece of mossy zinc into each of three test tUbes.
7. Add. hydrochloric acid. to one test tube. Add. sulfuric acid. to the se-cond. and. acetic acid. to the third. ttibe. What do you see?
8. Bring a burning splint to the mouth of each test tube. What happened.?
QMSTIONS TO ANSWRR:
1. What happened to red. litmus paper when you put acid. on it?
2. Mat happened to blue litmus paper when you put acii on it?
3. What happened. when dilute acid, was added to mossy zinc?
4 How do you know which gas was formed.?
5. What other characteristics of acids do you know?
PROBLEM 20. WHAT ARE BASES?
OUTCOMES:
Bases turn red. liimnis blue.
Bases feel slippery.
Bases contain an OH or hydroxide group.
MATERIALS:
see pupil worksheet bunsen burnertest tubes 5% solution of sodium hydroxide
PROCEDURE:
1. List the chemicals the children will test today - sodium hydroxide:potassium hydroxide and. ammoniun hydroxide. Have the children pointout that each has hydroxide in its name. Now write the formulas foreach -
Neil, KOH) NH3OH
2. Identify these as belonging to a group of chemicals called. bases.
3. Distribute materials and. worksheets.
be. When materials have been collected: tell the children that the follow-ing substances are weak bases: human blood.: baking soda, borax) milkof magnesia. Lye) lime water) washing soda and. ammonia water arestrong bases.
5. Demonstration: Bases dissolve wool but not cotton
Boil a small sample of wool for three or four minutes in a 5% solutionof sodium hydroxide. Have the class observe that the wool is completelydissolved,.
Repeat using cotton, and. have the class observe that the cotton did. notdissolve. Elicit that this could be a wazf of testing a fabric for its
wool content.
6. Suttmarize by listing characteristics of bases.
7. Give children strips a' litmus paper ana have thea test some toiletsoaps at home.

;
PROBLEM 20. What are bases?
MATERIAIS:
test tubesodium hydroxidepotassium hydroxideamnoniun hydroxide
WHAT TO DO:
PUPIL WORKSHEET
cottonseed. oilglass platestirring rod.red. and. blue litmus paper
1. Wet the glass plate. Put three pieces of red and. three strips of bluelitanus paper on it.
2. Dip the stirring rod. into the sodium hydroxide:. Touch the rod. to apiece of red. and to a piece of blue litmus paper. What happened.?
3. Wash the rod. with water.
4. Dip the stirring rod. into potassium hydroxide and. test it with litmuspaper. What happened.?
5. Wash the rod and. test the aimnonium hydroxide with lit= paper.What happened.?
6. Rub a drop of sodium hydroxide between two of your fingers. WASH YOURHAND AT ONCE. IMP YOUR HANDS AWAY FROM YOUR EYES. How did it feel?
7. Put one inch of water in a test tube.
8. Add. a few drcps of cottonseed oil to the test tube. Shake the testtube. Let the test tube stand. for two minutes. What did, you see?
9. Add. a few drops of sodium hydroxide to the same test tube. Shake thetest tube. Let the test tribe stand for two minutes. What happened.?
QUESTIONS TO ANSWER:
1. How do you use litmus paper to test for a base?
2. Why do you think the oil and. water mixed. after sodium hydroxide wasadded?
3. What are the formulas for sodium hydroxide..., potassium hydroxide
, and. ammonium hydroxide.....?
11.. What cc...mon substances do you know of that are bases?
143
PRO 21. WHAT HAPPENS WHEN AN ACID AND A BASE ARE MIXED?
OUTCOMES:
Neutralization is a proceso where an acid. and a base canbine to form a
salt and water.
Neutral solutions are neither acid.i.c nor basic.
MATERIALS:phenolphthalein2 test tUbesdilute sodium hydroxide - add 20 grams of solid sodium hydroxide to a
liter of water
dilute hydrochloric acid - add 1 part conc. BM to 23 parts water
see pupil worksheet
PROCEDURE:
1. Elicit procedure for identifying an acid or a base.
2. Now show a bottle of pheno3.phthalein to the class and. explain that it
is an indicator. Add. a few draps to test tube containing dilute HC1.Add. an equal number of draps to dilute NaOH to note color reaction in
base.
3. Distribute materials and. worksheets. Caution pupils to wipe up spills
and. to rinse skin or clothes with water immediately.
4. Write the equation on the board:
NaOH 4- HC1 --------->, Na01 + H.20
ammamtam hydrodaloric sodium water
hydroxide acid chloride(tdble salt)
5. Review questions on worksheet. Emphasize that neutralization is a
chemical change in which an acid. and. a base canbine to form a salt
and. water.
6. Display a variety of salts, such as, calcium chloride, ammonium di-chromate, sodium carbonate, sodium bicarbonate, copper sulfate. Ex-
plain that these are salts and. that salts are formed when acids and.
bases are mixed..
NOTE: NaC1 is a neutral salt; others may be acidic or basic. These
salts react with water to form an acid. or a base. The process
is called, hydrolysis and. takes place when the salt of a strong
acid. and. a weak base, or the salt of a weak acid. and. a strong
base is added. to water.
Pe 411.
PUPIL WORM=
PROBLIM 21. What happens when an acid. and a base are mixed.?
MATERIALS:
dilute sodittn hydroxide phenolphthaleindilute hydrochloric acid, matchesevaporating dish stirring rodalcohol burner graduated. cylindertripod tongsmedicine droppers asbestrhand. lens
WHAT TO DO:
1. Put 10 ml. of sodium hydroxide in an evaporating dish.
2. Add. a few drops of phenolphthalein.
3. Use a dropper and. add. hydrochloric acid. drop by clrop. Stir after youadd. each drop. Stop adding acid. when one drop takes away the color.How many drops did you add.?
4. Heat the evaporating dish until all the water is gone.
5. Pick up the dish with tongs. Let it cool on the asbestos.
6. Look at what is left in the dish with a hand. lens. What does it looklike?
QUESTIONS TO AMER:
1. To what group of chemicals does sodium hydroxide belong?
2. Why dia. the color of the phenolphthalein disappear when you added acid.?
3. What kind .fve change took place?
11.. Why do you think this process is called. neutralization?
PROBLEK 22. WHAT ARE SOME PROPERTIES OF METALS?
OUTCOMES:
Elements can be classified as metals or non-metals.
We identify an element by its properties.
Among the properties of metals are:
a. silver-gray color exceptions gold2 copper)b. solid state exception -mercury)c. shine or lustre
MATERIALS:Periodic Table of the Elementssee pupil worksheet
NOTE: stopper and seal mercury, phosphorus and iodine in separatetest tubes. Caution pupils that they are poisonous anddangerous to handle. Rest of elements should be placed inbox for easy distribution.
PROCEDURE:
1. Review the definition of element.
2. Distribute trays of materials and PUPIL WORKSHEETS. Caution the classnot to open the sealed tubes.
3. Tell the pupils that elements can be divided into two main groups -metals and non-metals. Instruct the class to pick out the metalsfrom the cigar box.
4. Correct errors in classification and question the pupils as to theirreasons for calling an item a metal. Explain that features by whichwe recognize a sUbstance are called its properties.
5. Bhve one student describe another student. Write the essential pointsof the description on the board. Explain that these could. be con-sidered his properties. The more we know about persons or things, theeasier it is to identify them.
6. Display the Periodic Chart of the Elements. Hhve the pupils locateelements they know. Lead them to note that the metals are on the leftside of the chart and that approximately 75% of the elements are classi-fied as metals. They should also realize that all metals except mercuryare solids; yet, non-metals are either gases or solids at ordinary tem-peratures, except bromine which is a
7. Direct the class to examine the sulfur, phosphorus, and iodine and notetheir dull appearanees. Compare this with the shiny appearance of themetals.
8, Elicit the colors of various non-metals. Compare these with the silver-gray appearance of most metals.
9. Review the properties of metals discussed in this lesson.
10. Assign class to suggest other properties of metals.
- 46 -
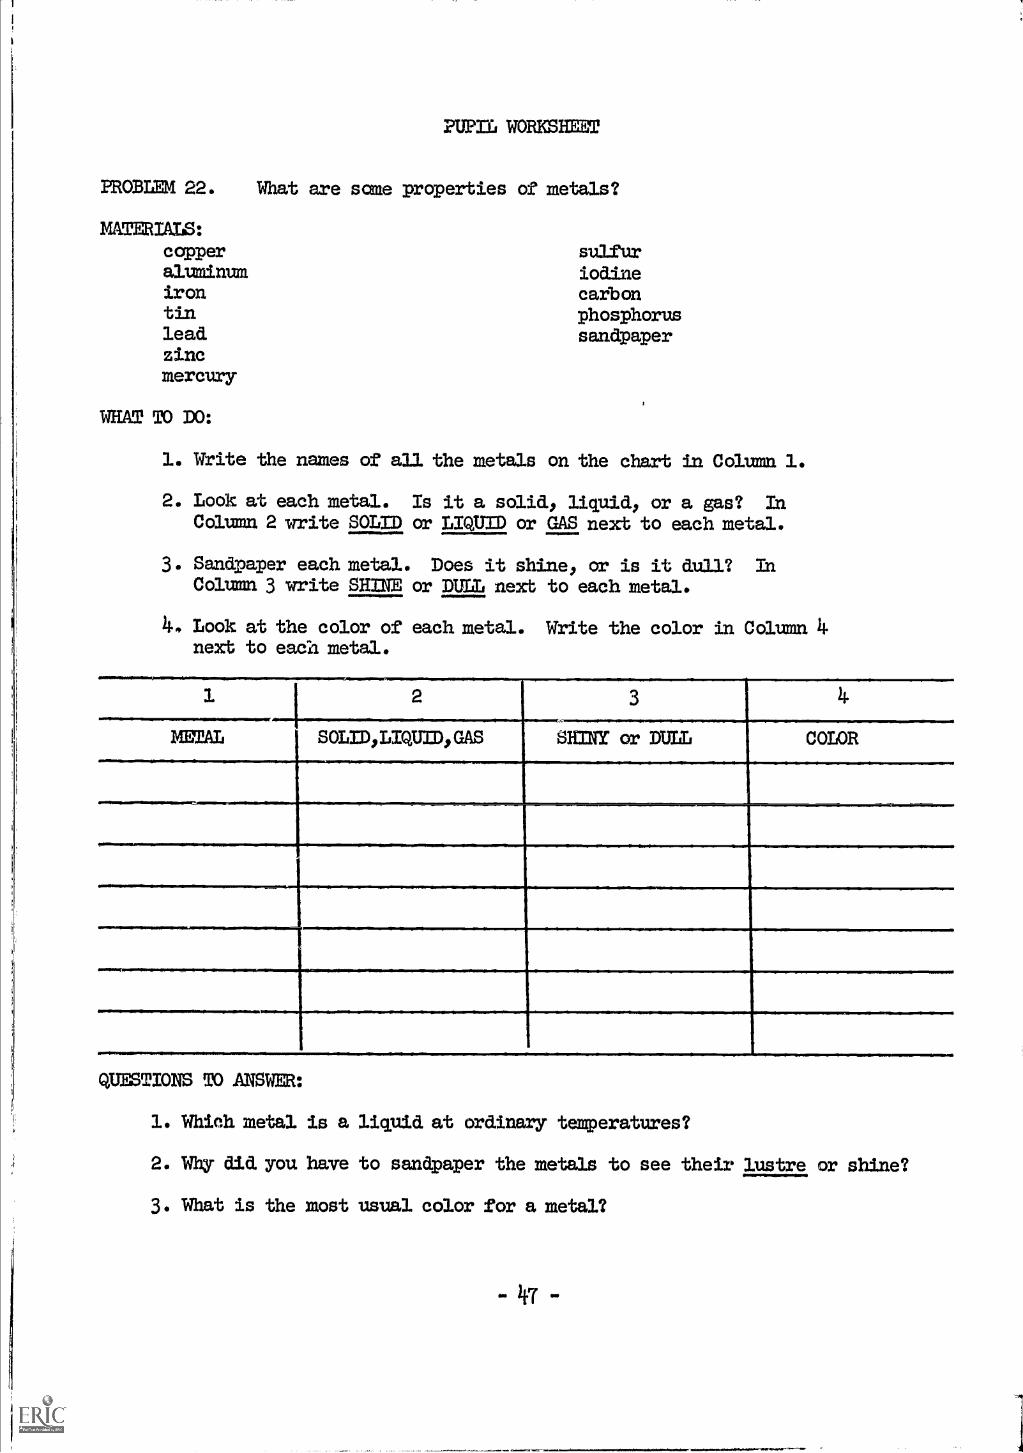
Puns WORKSHEET
PROBLEM 22. What are some properties of metals?
ELATERIMS:
copperaluminumirontinleadzincmercury
WHAT TO DO:
1. Write the names of all the metals
2. Look at each metal.Column 2 write SOLID
3. Sandpaper each. metal.Column 3 write SHINE
4. Look at the color ofnext to eadh metal.
OWNINMNIMI/MNMO,1=MMIIIIMMOIsIIMMMIIIIIMI
sulfuriodinecarbonphosphorussandpaper
on the chart in Column 1.
Is it a solidl liquidl or a gas? Inor LIQUID or GAS next to each. metal.
Dtes it shine, or is it dull? Inor DULL next to each metal.
each metal. Write the color in Column 4
2 3
MEML SOLID, LIQUID, GAS SHINY or DULL COLOR
QUESTIONS TO ANSWER:
1. Which metal is a liquid at ordinary temperatures?
2. Why did. you have to sandpaper the metals to see their lustre or shine?
3. What is the mcot usual color for a metal?

PROBLEM 23, WHAT ARE SONE OTHER PROPERTIES OF METALS?
OUTCOMES:Metals are good conductors of heat.Metals are good conductors of electricity.
MATERIALS:2 test tubes2 thermometers
powdered sulfuriron filingssee pupil worksheet
ring stand and clampsbunsen. burner
PROCEDURE:1. Fill one large test tUbe with iron filings and another tube with powdered
sulfur. Insert thermometers into the top of contents of each tae. Taketemperature readings before and after heating each tUbe at the bottom foran equal period of time. Compare the heat conductivities of the metaland non-metal.
2. Recall other examples: Spoon getting hot, hot pot handle, etc.
3. Distribute materials and worksheets. Go over questions.
PUP31 WORKSHEET
PROBLEM 23. What are same other properties of metals?
MATERIALS:strips of copper, aluminum, iron, tin, lead, zinc, rubber, paperwood splint wires 2 1.5 volt batteriesglass rod 2 alligator clips 3 volt lamp in socket
WHAT TO DO:
1. Set up your equipment as in the diagram.
2. Test the electrical conductivity of each substance given to youby puttingit between the two alligator clips.
3. Make a list of the materials you are testing. Next to the name, state ifthe light went on or not. In a thirdcolumn, call it a conductor if it letelectricity go through or a non-conductor if it did. not let electricity gothrough it.
QUESTIONS TO ANSWER:
1. Why are metals used. for making pots and pans?2. Which metals are most commonly used for pots and. pans?3. Why are metals used. for making electrical wires?4. Why is copper the most commonly used. metal for electrical wires?5. Can you think of any properties of metals we have not discussed?
Hint: Metals can be made into wires and sheets.
PROBLEM 24. WHAT ARE SOME CHEMICAL REACTIONS OF METALS?
OUTCOMES:
Metals coMbine with non-metals.
Mtre active metals replace less active metals in a compound.
Metallic salts (compounds) may decompose into metals and non-metals.
Metals may change places in reactions between their campounds.
MATERIALS:
silver nitrate solutionsodium chloride (table salt) solutionsee pupil worksheet
PROCEDURE:
1. Recall the pupil activities in which iron was burned and in which ironand sulfur were heated. Have the class identify the metal (iron) andnon-metals (omygen and sulfur) that took part in these chemical changes.Elicit that a metal combined. with a non-metal.
2. Recall the pupil activity in which mercuric oxide was heated. Elicitthat this compound decouposed into mercury (metal) and oxygen (non-
metal).
3. Prepare clear solutions of sodium chloride and silver nitrate.Have the class identify these as compounds and. write their formulas onthe blackboard. Mix these chemicals and elicit that a chemical changehas occurred as evidenced by the white precipitate. Complete the equa-tion on the blackboard as follows:
A4103 -I- NaC1 17003 -I- AgC1
silver sodium sodium silvernitrate chloride nitrate chloride
Have students identify the silver and sodium as being the metallicparts of the compounds, and elicit that in this chemical change themetallic elements changed places. (If allowed to stand in the lightthe precipitate gets darker as silver salts are sensitive to light.It breaks down into silver and chlorine).
4. Distribute trays of materials and. PUPIL WORKSHEETS.
1.49-
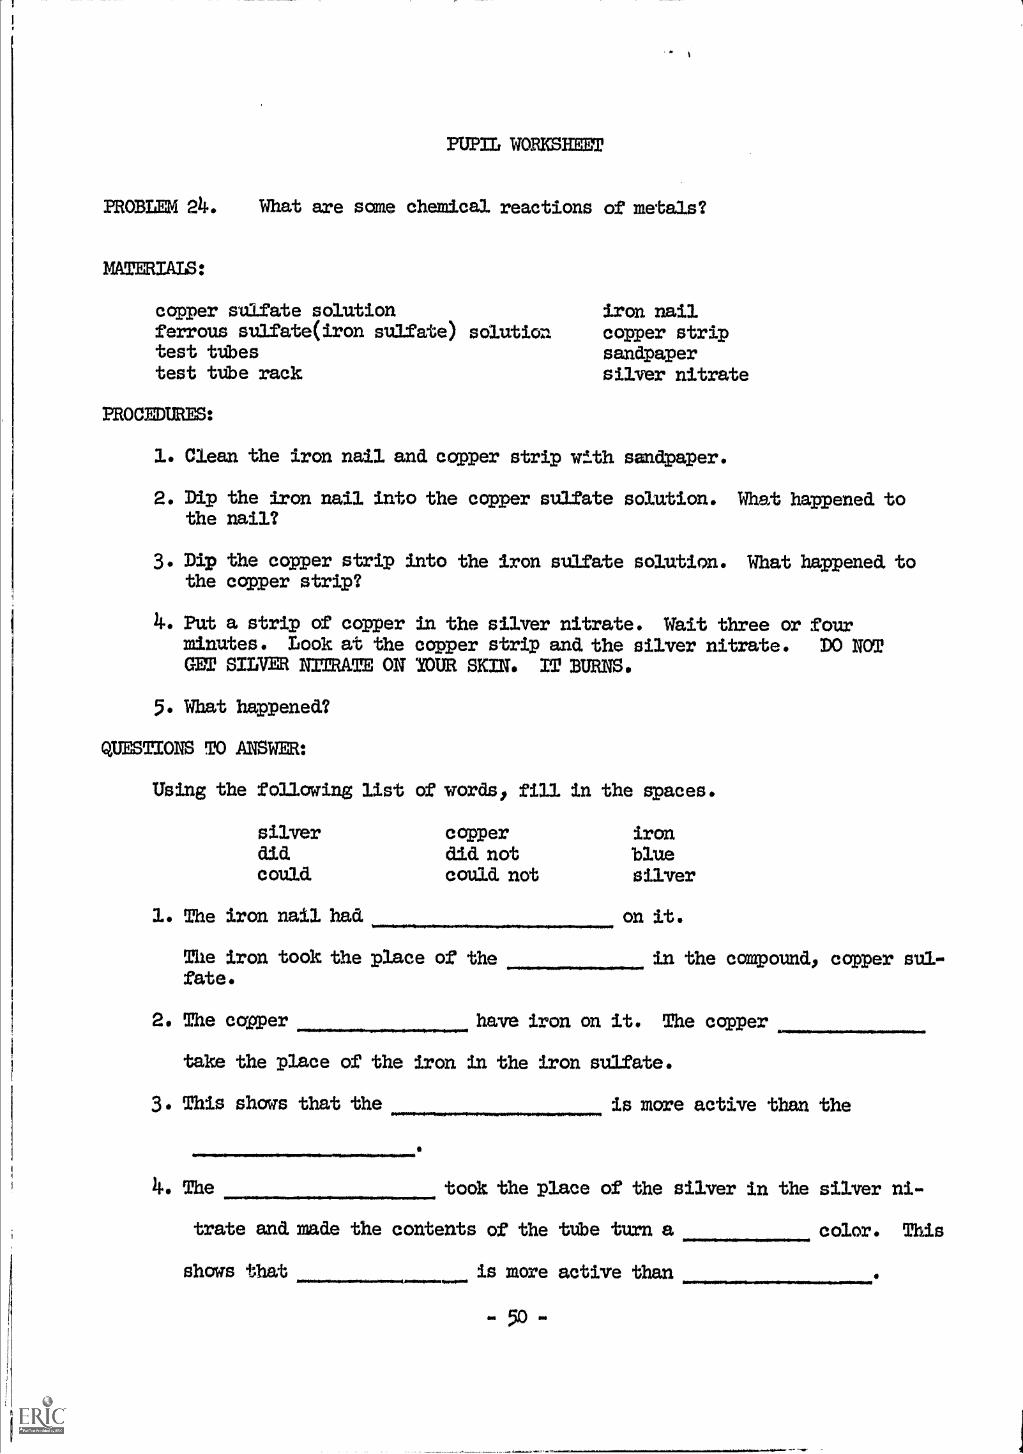
PUPIL WORKSBEET
PROBLEM 24. What are same chemical reactions of metals?
MATERIALS:
copper sulfate solution iron nailferrous sulfate(iron sulfate) solution copper striptest tubes sandpapertest tithe rack silver nitrate
PROCEDURES:
1. Clean the iron nail and copper strip with sandpaper.
2. Dip the iron nail into the copper sulfate solution. What happened tothe nail?
3. Dip the copper strip into the iron sulfate solution. What happened tothe copper strip?
4. Put a strip of copper in the silver nitrate. Whit three or fourndnutes. Look at the copper strip and. the silv-er nitrate. DO NOTGET SILVER NIMATE ON /OUR SKIN. IT BURNS.
5. What happened?
QUESTIONS TO ANSWER:
Using the following list of mwds, fill in the spaces.
silver copper irondid did. not bluecould could not silver
1. The iron nail had on it.
The iron took the place of the in the campound, copper sul-fate.
2. The copper have iron on it. The copper
take the place of the iron in the iron sulfate.
3. This shows that the is more active than the
4. The took the place of the silver in the silver ni-
trate and. made the contents of the tUbe turn a color. This
shows that is mcve active than
PROBLEM 25. HOW ARE METALS SEPARATED FROM THEIR ORES?
OUTCOMES:
Ores axe naturally occurring minerals from which the pure metals areextracted.Most metals are not found free in nature but are chemically combinedwith other elements. a.
Physical processes, such as, wet panaing, flotation, magnetic separationare used to separate the ores from other earthy materials.Chemical changes are needed to separate the pure metals fram the non-metallic parts of the ores.
MATERIALS:
ore samples - cee 1. below
PROCEDURE:
1. Show samples of ores. Write their names and chemical formulas on theboard. For example:
avprite - copper oxide Cu20litharge - lead oxide - PbOhematite - iron oxide Pe203bauxite - aluminum oxide - A1203galena - lead sulfide PbScinndbar -mercuric sulfide - H,g$
iron pyrites - iron sulfide (fool's gold) - Fe52smithsonite - zinc carbonate - ZinCO3
magnesium caXbonate mg003lead carbonate Pb003
2. Point out that the ores axe chemical compounds containing metals andnon-metals. Have children identity elements in the compounds named.
3. Explain that ores are found mixed with sand and other earthy materialsand that by physical processes, the ores are separated fram the othermaterials. Assign pupils to do research on:
a. wet panningb. magnetic separationc. separation by flotation
4. Explain that when the ore has been extractedl it mmst now be treatedchemically to remove the pure metal.
5. Look at the list on the board. Have the children point out, for example,that the oxygen must be removed from the first four ores, etc.
6. Ldstribute materials and pupil worksheets.
7. Go over questions with class.
8. Explain that other processes arc used to separate metals from other com-pounds. Interested pupils may be assigned task of reporting on the blastfurnace, roasting sulfides or carbonates, etc.
9. In preparation for the lext lesson do the following demonstration;Insert some clean steel wool in a cylinder. Clamp the cylinder to a ringstand, and, lower it into a beaker of water so that its mouth is about inbelow the surface of the water. Set up another cylinder in the same man-ner except omit the steel, wool. This cylinder will act as a control.VOTE: Clean the steel wool first by dipping it into dilute 1111030 rinsing
it with water, and dipping it into dilute acetic acid.
- 51 -

PUPIL WORKSHEET
PROBLEM 25. How can we separate a metal from its ore?
MATERIALS:test tube matchesring stand copper oxide (wire form)test tube clamp charcoal (powdered)rubber stopper with right angle balancealcohol burner beakerlimewater glass ttibe
WHAT TO DO:
1. Weigh out 2 grans of copper oxide and 5 grans of charcoal.
2. Mix the copper oxide and charcoal on a paper.
3. Put the mixture in a test ttibe and clamp the test ttibe to the ringstand.
4. Put the rubber stopper and glass ttibe into the test tUbe.
5. Put limewater in another test ttibe.
6. Put the end of the glass tithe into the limewater.
7. Heat the copper oxide and charcoal carefully for 10 minutes.
8. What happens to the limewater?
9. After 10 ninutes take the burner away, and TAKE OUT THE STOPPER AVDGLASS TUBE.
10. Let the test tube cool. Then empty the mixture into a beaker.
11. Rinse away the charcoal with water. What is left in the beaker?
QUESTIONS TO ANSWER:
1. What element is charcoal made of?
2. Why did the limewater change color?
3. Where did the c42bon come from?
4. Where did the oxygen come from?
5. What kind of change took place?
v52 -

PROBLEM 26. HOW CAN WE PROTECT METALS FROM CORROSION?
OUTCOMES:
Most metals react with gases in the atmosphere to form compounds.They are cceted. with some material that protects them from the atmosphere.Electricity can be used to coat one metal with another.Electroplating involves a chemical change.
MATERIALS:
demonstration with steel wool set up in last lessonexamples of corroded, metalsplated objects: nickel plated., chrome plated., etc.see pupil worksheet
PROCEDURE:
1. Inspect the steel wool from the demonstration set up yesterday to see therusting.
2. Show other examples of corrosion: tarnished silver, corroded alum:!-zm..,corroded copper. Ntte the differences in color and texture between rmeand corroded. metals.
3. Ask for other examples of corrosion they have noted and. have them suggestways of preventing it by:
a. paintingb. oiling or greasingc. plating as in galvanized steel
4. Pass around dbjects labeled "nickel plated'', "chrome plated", etc. Eli-cit that plating is coating one metal with another.
5. Distribute materials and worksheets.
6. Go over questions. Point out tlist metals don't all corrode equally.Some, like iron, continue rusting throughout the materials. Others, likealuminum stop when the entire surface is corroded and forms a protectivecoating.
7. Elicit importance of electroplating with examples.

!MIL WORKSHEET
PROBLEM 26. How can we protect metals from corrosion?
MATERIALS:
2 carbon rods wire5% solution of copper sulfate alligator clips
2 dry-cells beakerteaspoon
WHAT TO DO:
1. Set up the ammtE as in the diagram. Follow the diagram carefully.Do not let the carbon rods touch each other.
2. Raise your hand when you have finished setting up the equipment so yourteacher can check it.
3. Let it run for 5minutes. Then look at the two rods. What happened?4. Take off the coated rod and connect the spoon instead. Place the spoon
and the carbon rod into the copper sulfate solution.5. Wait another 5 minutes. Then examine the spoon. What happened to it?6. Take the equ3pment apart and return it.
QUESTIODIS TO ANSWER:
1. Where did the copper that coated the spoon come from?
2. What is the chemical formula for carper sulfate?
3. How do you know copper sulfate is a compound?
4. What broke up the copper sulfate?
5. Why are some metals electroplated?
754-

PROBLEM 27. WHAT ARE SOME USES OF COMMON CHEMICAL COMPOUNDS FOUND LI 'no; HOME?
OUTCOIES:
Many chemical canpounds are known to tts under different names.Sodium hydroxide (lye) is important for the manufacture of some soaps.Baking powder is a mixture of chemical compounds that produce carbondioxide for leavening.
MAMMALS:sod.ium hydroxide20% solution of sodium hydroxideconmercial lyerubbing alcohololive oil or coconut oil
PROW-MUMS:
evaporating dishbunsen burnerbeaker of saturated salt solutionstirring rodammonia watersee pupil worksheet
1. Display solid sodium hydroxide and. a 20% solution of sodium hydroxide.Tell the pupils that the ccsmnon name for sodium hydroxide is lye. Writethe chemical name, and formula, NaOH, on the board. Elicit that sodiumhydroxide is a conpound. and, as the class learned previously, it is avery strong base.
2. Demonstrate the preparation of soap. Use extreme caution in heating.Keep pupils away frail prep table.Add 10 ml. of rubbing alcohol to two teaspoonfuls of olive oil or coconutoil in an evaporating dish. Add. 5 ml. of the 20% NaOH, and. heat gentlywhile stirring. After the odor of the alcohol has disappeared., pour themixture into a beaker containing a warm saturated solution of salt (dis-solve as much salt in warm water as -possible). Stir this mixture for oneminute, and allow it to settle. The soap collects at the top and may beladled off. Make suBs by shaking a small amount of the soap with bornewater in a test tube.
3. Write on the board: Fat + Lye Soap 4. GlycerineTell the pupils that the salt water helped separate the soap fron theglycerine.
4. Display a comnerciai drain-cleaner. Tell the pupils that it contains lyein solid form, and. that it unclogs drains by acting on the grease astiodium hydroxide acted on the fat. Note the POISON label,
5. Display a bottle of conmaercial household. ammonia. Elicit that this hasthe same smell as the base, anmionium hydroxide, and is in fact the samechemical. Have the class suggest reasons for its being used, in the home(ise. a base breaks up oil particles)
6. Distribute materials and. worksheets.
55 -

PUPIL WORKSHEET
PROBLEM 27. How is baking powder made and. used?
MA1TRIALS:cream of tartarbaking sodacornstarchbeakersplint
WHAT TO DO:
test tubeslime waterflamrone-hole ribber stopperwith glass tube
rubber tubeteaspoonalcohol burnermatches
1. In a dry beaker mix ane teaspoon of baking soda: one teaspoon of creamof tartar and. one teaspoon of starch.
2. Put ndature in a dry test tUbe. Stopper with the one-holed stopper towhich is attadhed a rubber tube.
3. Insert the free end of the lifter tUbe into a test Ube containing limewater. What happened?
4. Ntw add a little water to the mixture and see if anything happens to thelime water.
5. What did you see?
6. In another dry beaker mix one teaspoon baking soda: two teaspoons creamof tartar and one teaspoon starch.
7. Add one teaspoon flour and some water to make a dry paste.
8. Put a small ball of this mixture (a dough) into a large spoon and. warmgently over the alcohol lamp.
9. What happens to the dough?
QUESTIONS TO ANSWER:
1. What gas was made?
2. How do these bubbles of gas help make baked foods?
3. What are the chemical name and the formula for baking soda?
4. What is in baking powder?
5. Do you know any other common chemicals used at hame?
-56-
,

PROBLEM 28. WHAT ARE SOMB COMMON MAN.:MADE MATERIALS:
OUTCOINES:
Many materials we use in our daily lives are the results of chemicalresearch.
MATMIALS:
400 ml. beakeranaline hydrochloride40% formaldehyde
PROCEDURE:
glass rodgraduate cylindersee pupil worksheet
1. Point to different objects in the room and have the class identifythe man-made materials found in them. For example, plastics, paperproducts, painted materials, alloys were creations of the laboratory.
2. Encourage them to think of personal materials and. products they usedaily, such as, shaving cream, deodorants, cold cream, hair prepara-tions, etc. Point out that many of these were marketed only re-cently.
3. Tell the class to watch you carefully to try to discover what ma-terial you are making. Demonstrate the preparation of a plastic.
Simultaneously pour 100 ml. of a saturated solution of analine hy-drochloride and 100m1. of 40% formaldehyde solution (formalin) intoa 400 ml. beaker. Stir with a glass rod. Pour the thick daxt brownsubstance into a mold.
4.. Have the class identify the sUbstance as a plastic. Tell them thenames of the compounds you used and elicit that a chemical changehad produced a new product.
5. Distribute materials and. worksheets.

PUPIL WORKSHEET
FT(BLEM 28. How can we prepare cold cream?
MATERIAIS:
ammonium stearate beakerclear mineral oil stirring rodbalance perfume or cologne
WHAT TO DO:
1. Weigh 300 grams of ammonium stearate.Weigh 30 grams of mineral oil.
2. Mix the annonium steasate and. mineral oil.Add. perfume.
3. Using a man's fragrance can make this a type of shaving cream.
QUESTIONS TO ANSWER:
1. How do you know that cold cream (or shaving cream) is a mixture and
not a compaund2
2. How many other kinds of things can you think of that are made through
chemistry?
PROBLEM 29. HOW ARE PAINTS MADE?
OUTCOMES:
Paint is a mixture of colored pigment, oil and a dryer.Pigments can be made by simple chemical reactions.Dryers are chemicals that speed up the rate of drying.
MATERIALS: see pupil work sheet
PROCEDURE:
1. Mcplain that paint can be made by combining a colored chemical with oil,and that sometimes another chemical called a dryer is added.
2. Distribute materials and. worksheets to each group of two or three pupils.3. Go over questions. Emphasize the fact that paints are mixtures.
PUPIL WORKSHEET
PROBLEM 29. How are paints made?
MATERIALS:carbon blackammonium dichromatealcoholturpentinelinseed oil
WHAT TO DO:
dryerxnatches
asbestosdropper
spatulamortar and pestlewoodpaint brush
1. Make a small hill of ammonium dichromate on the adbestos. Put six dropsof alcohol on top.
2. Carefully light the alcohol with a match.3. Put the green compound. you made into the mortar with a few drops of
seed oil.4. Grind and mix the green pigment with the linseed oil. Add. a little
pentine to make the paint thinner.5. Paint the letter A on a piece of wood.6. hada little dryer to the paint. Paint the letter B on a new piece
woo&7. Paint another piece of wood with plain linseed oil.8. Put some caebon black in a clean mortar. Add linseed oil and grind it
with the carbon black.9. Add a little dryer and thin the paint with turpentine. Paint another
piece of wood.10. Set all the pieces aside. Check them at the end of the lesson.
QUESTIONS TO ANSWER:
1. What are the materials that go into making paint?2. What reasons can you think of for painting things?3. Next to a physical change write the letter E. next to a chemical change
write the letterlIon the line.
lin-
tur-
of
a. Burn ammonitun dichromate
b. Add. linseed oil to pigment
c. Mix turpentine and. paint
d. Grind the green pigment
59
Kind of Change
PROBLIII 30. ROW DOES A FIRE EXTINGUISIER PUT OUT FIRES?
OUTCOMES:
Burning is the rapid caMbination of a substance with oxygen.For a substance to burn it must have a sufficient supply of air and ahigh enough kindling temperature.
Carbon dioxide is a heavy gas that does nab support coMbustion.
MATERIALS:2 candleslarge jarsmall jarmatcheswood
PROCEDURE:
flaskone-holed. stopper with tuberubber tubewooden splint
dilute sulfuric acidsod.i.um bicarbonate
limewatertank of carbon dioxide2 test tubes
1. Demonstrate that air is needed for a substance to burn.
Ligbt two candles and simultaneously place a large jar over one and asmall jar over the other. When the candles go out, elicit that the can-dles needed air (oxygen) to burn and that they went out wben the airsupply was used pp. The candle with the larger air supply-was able toburn for a longer period of time.
2. Demonstrate that a material must be hot enough before it begins to blirn.
Bring a lighted metal near a thick:piece of wood. Elicit that the wood
does not catch on fire because it is not hot enough. Explain that asubstance must reach a certain temperature before it begins to burn,and that this temperature is called its kindling temperature.
3. Recall that in past lessons they burned hydrogen and iron. Elicit that
in both cases the chemical change that occurred involved the combina-
tion of a substance with oxygen. Explain that this is the definitionof burning used. by scientists - the rapid chemical coMbination of a sub-
stance with oxygen.
4. Ask:the class, "Now that you know what a fire needs toburn, how can youuse this information to put out a fire?" Elicit that cutting off the
air supply ar cooling the fire will put the fire out. Ptint out that re-
moving the fuel will also rmt out the fire.
5. Demonstrate that carbon dioxide can be made by adding dilute sulfuric acid
to sodium bocarbonate (baking soda).
Use a flask with a one-holed stopper and a glass tae. Connect a rubber
tube and. raace it in lime weter. Elicit that the lime water turns milkybecause the gas that is generated is carbon dioxide. SEE FIGURE. Explain
that these are the 'WO chemicals used in soda-acid fire extinguishers.Pour carbon dioxide gas over a, burning candle. Plage a, burning splint in
a second bottle of carbon dioxide. Elicit that the carbon dioxide does
not burn. It is also a heavy gaq, therefore it can be rowed.
-60-
6. Distribute trays of materials and. pupil worksheets.
7. Designate a safe place where the pupils can test their extinguishers.
PUPIL WORKSawe
PROBLEM 30. Hew can we make a carbon dioxide fire extinguisher?
MATERIALS:sodium bicarbonate stirring rodketchup bottle small test tUbebottle cap with hole in center stringvinegar wash basinbeaker
'WM TO DO:
1. Mix three teaspoonfuls of sodium bicarbonate with same water in a beaker.
2. Fill one-half of the ketchup bottle with the mixture.
3. Fill the small test tube almost to the top with vinegar. The vinegar
is taking the place of the sulfuric acid.
4. Carefully lower the small test tube into the bottle without spilling anyvinegar. Screw the cap on the bottle tightly.
5. Start a small fire with, paper in awash. basin after you check with yourteacher.
6. Turn the bottle over and, point it to the fire. What happened?
QUESTIONS TO ANSWER:
1. What was formed when sodium bicarbonate and vinegar were mixed?
2. What kind, of change took, place?
3. What two properties of carbon dioxide make it good for putting out fires?
4. What are the three things necessary for burning to take place?
5. What principle is used in putting out any fire?
-61

PROBLEM 31. HOW IS A PHOTOGRAPH MADE?
OUTCOMES:
Silver salts which are sensitive to light are used to make photognaphs.
A developer is used to bring dbaut a rapid change of the silver salts.
Hypo makes the contrasts in the photograph permanent bydissolving the
silver salts.
MATERIALS:4 trays developer sodium chloride
key water silver nitrate
pictures and negatives hypo 2 test tubes
PROOEDURE:
1. Add a small amount of sodium chloride solution to a solution of silver
nitrate. Pour the contents into 2 test tUbes. Place one tUbe in the
dark and expose the other one to a strong light.
2. Recall from an earlier lesson that silver chloride was formed and. that it
was changed by light. The dark material formed was silver. Elicit that
the more light that strikes the salt, the more silver is formed and the
darker the contents.
3. Examine the tUbe kept in the dark. Now expose it to light and add a
little develqper solution to see the immediate darkening.
EXplain that photographic paper is made by coating paper with same of
these ligbt-sensitive silver salts. Film is made by coating a celluloid
base with a gelatin emulsion of salts.
5. Have the pupils examine same pictures to see light and dark areas. Recall
that dark areas were exposed to most light.
6. Examine same negatives. Point out that light and dark areas axe reversed.
(When film was exposed, white Object reflected much light so film got dark.
Black Objects reflected less light, film is not exposed much.)
7. Use a slow printing paper, such as Velite, in a darkened classroom. Have
the pupils place keys or other Object an the paper and expose to light.
8. Demonstrate developing pictures and tell pupils they will do this in class
next time. In each of four trays place respectively: developer, N./a:ter,
with a few drops of acetic acid, hypo fixer, water.
a. Aattate print in developer until image appears.
b. Etp into water in second tray (otop bath).
c. Mace in hypo or fixer and agitate occasionally for 10 minutes.
(This dissolves rest of silver salts.)
d. Place in fresh water for 15 minutes or more to wash off all
chemicals. (Change water often.)
9. Review process of exposing and developing prints. (Films are extremely
sensitive to light and. can only be developed in a photographic dark roan.)
10. Assign pupils to bring in negatives for next lesson.
(Tomorrow distribute materials and, worksheets as soan as class enters
classroom.) - 62 -

PUPIL WORKSHEET
PROBLEM 31. How is a photograph made?
MATERIALS:
4 trays developer Velite paper3 tongs water glass platenegatives hypo light source
WHAT TO DO:
1. Set up 4 trays as your teacher did last lesson - developer, water witha few drops of acetic acid, hypo, plain water.
2. Take one piece of paper out of the envelope. Place a negative over thepaper, then the glass plate.
3. &pose them to a bright light for a slow count of ten.
4. Drop the paper into the developer. Holding it with the tongs shake ituntil the image appears. Then drop it into the water.
5. Pick:picture up immediately with second pair of tongs.Do this quickly as paper is still able to change color.
6. Drop picture into hypo or fixer. Ube third pair of tongs to shake pic-ture. Leave picture in hypo at least 10 minutes before you put it intothe last tray.
7. Make another print. Change the length of time that you let the lightshine on the paper and. negative.
8. You may leave several pictures in the hypo at the same time. Do notlet any of the hypo get into the developer or the developer won't work.
QUESTIONS TO ANSWER:
1. Why are silver salts used for photographs?
2, What does the developer do?
3. Why does a film become a "negative"?
How does the "negative" make a "positive" picture?
5. What is the purprse of the hypo?
63
PROBLEM 1. WHAT IS ELECTRICITY?
OUTCOMS:
Electricity is composed of very tiny particles which can move and produce
heat.Matter is electrical in nature.a bald-up or ccalection of electrie.ty is known as static electricity.
MATERIALS:
Tesla coilsee pupil worksheet
PROCEDURE:
1. Motivate by asking, "Has anyone ever seen electricity?"
2. Demonstrate a Tesla coil by doing the following:
a. Draw a small circle on a piece of paper and send a spark fromthe Tesla coil through the center of the circle. Pass the paper
around and let the pupils Observe the small holes.
b. Concentrate the spark on a second piece of paper until iteither scorches or catches fire.
3. Elicit explanations from the class. Point out that the Tesla coilproduces high frequency alternating current and that particles aregiven off which produce heat when they move.
4. Distribute pupil wrksheets. Read the list of materials with theclass before distributing materials.
5. Distribute materials. Circulate while pupils are working, makingsuggestions and giving help.
6. Go over results of pupil activity and. review answers to questions.
T. Summarize lesson by eliciting the outcomes.

PUPIL WORKSHEET
PROBLEM 1. What is electricity?
MATMIALS:rubber rod.glass rod,plastic pen
silk clothfur strip
WHAT TO DO:1. Touch a SMAll piece of paper (4 inch square) with a glass rod, /libber
rod, or plastic pen.2. Rub each of the rods or the pen with the silk cloth. Then touch each
one to the paper. Write on the chart below what happened.
3. Rub each thing with the fur strip. What happened?4. Rub the glass and. rubber rods together.
THINGS RUBBED AND TOUCHED TO PAPER WHAT HAPPENED?
rlibber rod and silk
glass rod and silk
plastic pen and silk
raiber rod and fur
glass rod and. fur
plastic pen and fur
miner rod and glass rod
QUESTIONS TO ANSWER:1. When did the glass rodl raber =Id, and. pen attract the pieces of paper?
2. Which types of materials must be rubbed together to produce an attrac-
tion?
3. When have you noticed electricity attracting something or snapping?
4. Why do you think that ruUbing the rod or pen made it attract the paper?
5. What does this tell US about how matter is made?
- 65 -

PROBLEa 2. WHAT IS MEANT BY AN ELECTRIC CURRENT?
OUTCOMES:
An electric current is a movement of electricity through a substance.
Current electricity continues to flow under the right conditions while
a discharge due to a build up of static electricity occurs once.
MATERIALS:
see pupil worksheet
PROCEDURE:
l. Describe a person walking along a thick carpet. He touches a metal
door kndb and gets a shock. Ha places his hand on the kndb again and
nothing happens.
2. Elicit explanations fram the class to bring out facts that a charge of
static electricity had been built up and that there was a sudden dis-
charge when the person touched the kndb.
3. Distribute materials and. worksheets.
Be sure pupils wind, wires in correct direction around screws.
If. When pupils have ccmpleted. the exercise and. have returned materials,
go over answers to questions.
5. Recall the person waking on the carpet to point out that there was a
single discharge. Have pupils point out tbat in today's lesson the
electricity continues to flow as long as we keep the equipment connected.
66-
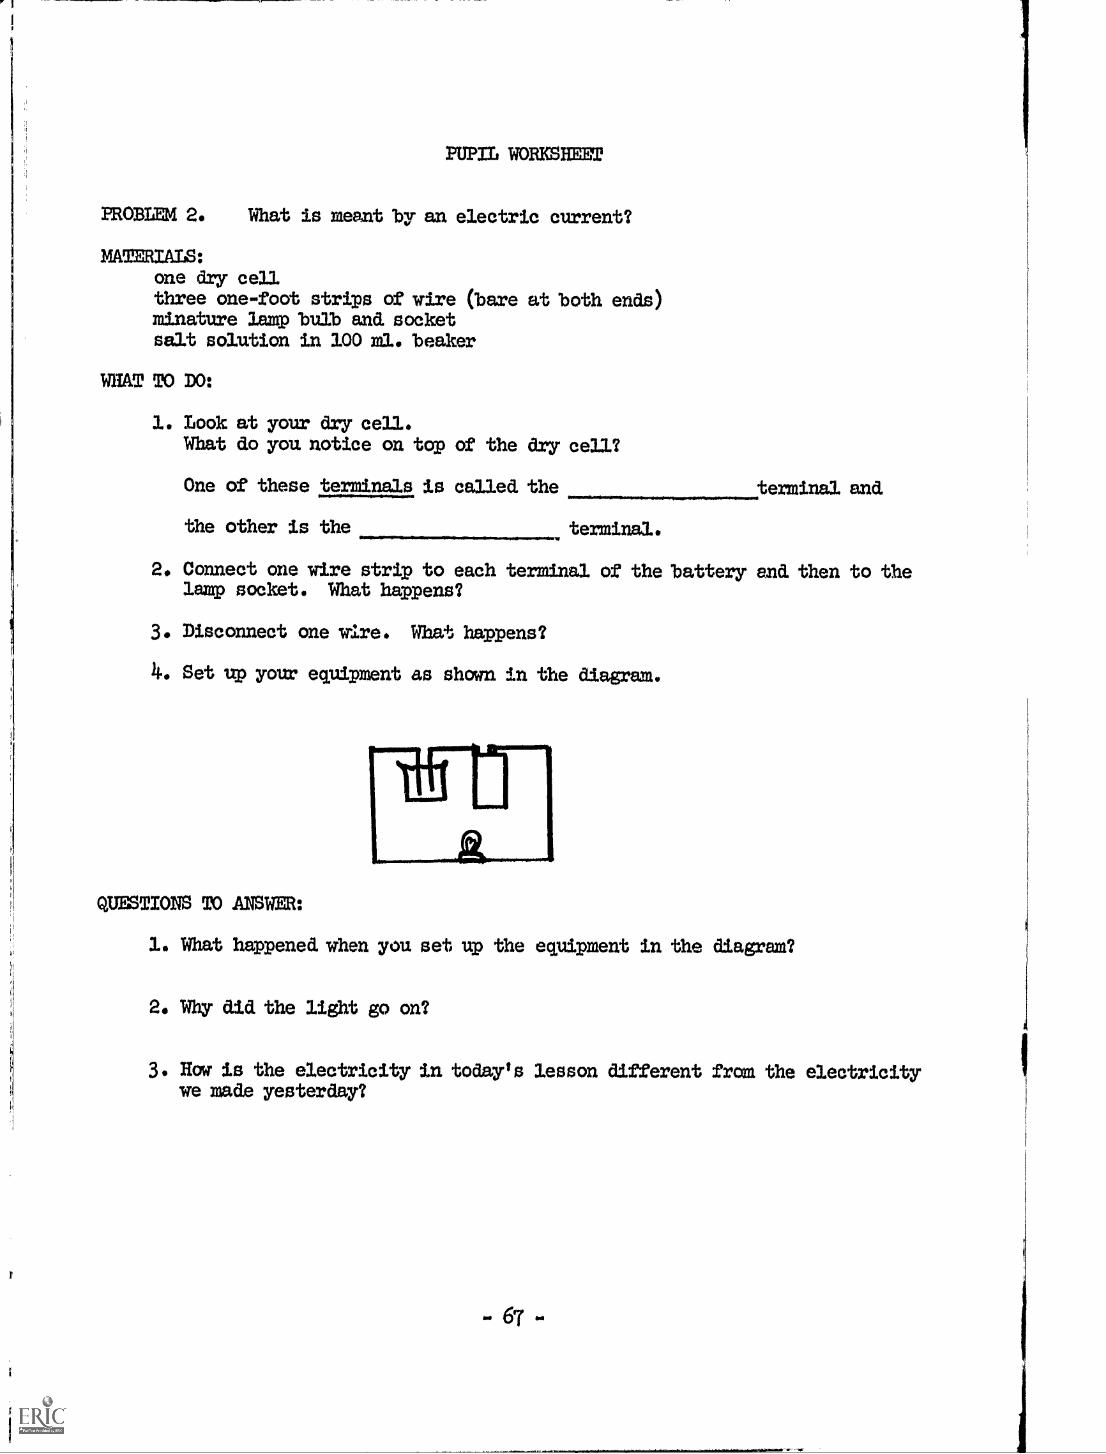
PUPIL WORKSHEET
MOBLEY' 2. What is neant by an electric current?
MATERIALS:one dry cellthree one-foot strips of wire (baxe at both ends)minature lamp bulb and socketsalt solution in 100 ml. beaker
WHAT TO DO:
1. Look at your dry cell.What do you notice on top of the dry cell?
One of these terminals is called the terminal and
the other is the terminal.
2. Connect one wire strip to each terminal of the battery and then to thelamp socket. What happens?
3. Disconnect one wire. What happens?
4. Set up your equipment as shown in the diagram.
QUESTIONS TO ANSWER:
1. What happened when you set up the equipment in the diagram?
2. Why did the light go on?
3. How is the electricity in today's lesson different fram the electricitywe made yesterday?

PROBLEM 3. ITHAT IS MEANT BY AN ELECTRIC CIRCUIT?
OUTCOMES:
In order to flow, electricity must follow a definite path.
The path must be complete or the current will not flow.
MATMIALS:
dry cellone foot strip of insulated wire
see pupil worksheet
PROCEDURE!
1. Recall yesterday's lesson where pupils learned that a current was a con-
tinuous flow of electricity.
2. Elicit that an electric source and a path are needed. Introduce the
word. "circuit" and explain that this is the name given to the electrical
path.
3. Distribute materials and worksheets.
Pupils are to learn to follow the diagram. Be sure they hook up dry
cells in series, i.e., plus to minus.
4. Show the students what is meant by a short circuit by placing a wire
across the two terminals of a dry cell. A student can cautiously touch
the wire to feel the heat generated.
NOTE: Don't leave the dry cell short-circuited. for more than 30
seconds.
5. Stunmarize by pointing out that the path must be complete or the current
will not flow and. that switches are devices used to close or complete a
circuit.
68
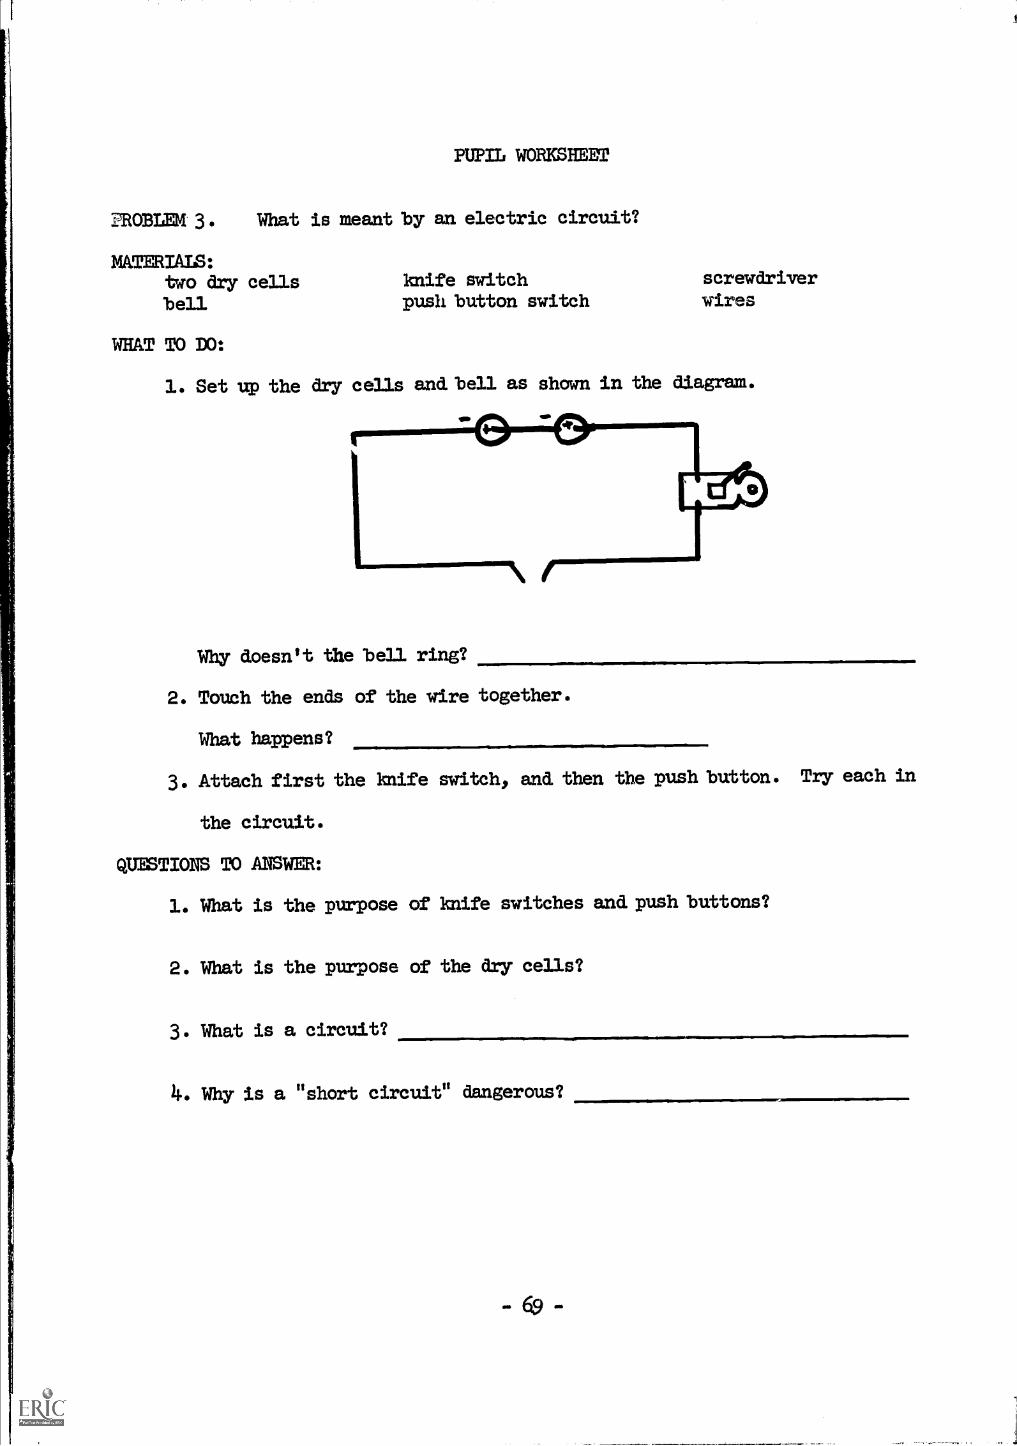
PUPIL WORIOHEET
PROBLEM 3. What is meant by an electric circuit?
MATERIALS:two dry cellsbell
WHAT TO DO:
knife switchpush button switch
screwdriverwires
1. Set up the dry cells and. bell as shown in the diagram.
le*
Why doesn't the bell ring?
2. Touch the ends of the wire together.
What happens?
3. Attach first the knife switch, and. then the push button. Try each in
the circuit.
ctiThETIONS TO ANSWER:
1. What is the purpose of knife switches and. push buttons?
2. What is the purpose of the dry cells?
3. What is a circuit?
4. Why is a "short circuit" dangerous?
69

PROBLEM 4. HOW DO WE DRAW AN ELECTRIC CIRCUIT?
OUTCOMES:
To make things simple, electricians use symbols when drawing electrical
circuits.
MATERIALS:dry cellsminiature lamp and socketknife switch
MOCEDURES:
3 lengths of wirewiring diagram from
a radio or TV
1. Set up three dry cells in series, connected to a knife-switch and aminiature lamp.
2. Have the pupils draw the set-up at their seats.
3. On the chalkboard draw the set-up using a schematic.
4. Have the students conclude that the schematic is the easier diagram todraw. Explain that this type of drawing is called a "schematic."
5. Explain the symbols by showing how they relate to the actual item.
NOTE: An old dry cell which has been cut open will show the longand short terminals of the power source schematic.
6. Draw some other symbols, and show an actual wiring diagram from a radioor TV.
Bell Er0
push button
+ connected wires
wires crossing butnot connected
7. Give the children practice at "reading" schematics duplicated in ad-vance or drawn on the board.
-7P-

PROBLEM 5. WHAT ARE RTNCTRICAL INSULATORS AND CONDUCTORS?
OUTCOMES:
Materials which carry an electric current are called conductors.
Materials which do not carry an electric current are called insulators.
Metals are good conductors of electricity.
MATERIALS:
see pupil woftsheet(Metal strips should all be same size, that of a glass slide.)
PROCEDURE:
1. Recall lesson fram chemistry unit in which electrical conductivity ofmetals is estdblished.
2. Distribute materials and. worksheets.
3. Review questions.
4. Show various pieces of electrical equipment to note conductors and in-sulators; light bulb, plug, lamp socket, etc.
5. Together with the class, set up a set of safety rules:
a. Never touch an electrical device that is in use when you are wet.
b. Never let electrical appliances get wet.
c. Be sure all electrical wiring is free of breaks.
d. Any others that are suggested by pupils.
6. Be sure children are fully aware of fact that impure water (water isusually impure.) is a conductor of electricity and that the body's mainprotection is the skin. If the skin is wet, it offers little protection.Remind them, too, that ordinary house current can kill a person.

PUPIL WORKSHEET
PROBLEM 5. What are electrical conductors and insulators?
MATERIALS:2 dry cellswiresgalvanometer2 alligator clips
WHAT TO DO:
3 volt lamp in socketglass slideelectrician's tape (to test)strips of copper, aluminum, zinc, iron,
rubber
1. Set up the equipment as you did in Chemistry, Problem 231 except thatyou will use a galvanometer in addition to a lamp in the circuit.
2. Test each strip of material by clipping it between the two clips.Break the circuit quickly so you don't run the dry cells down.
3. Fill in the chart below. Write down the best and the poorest metalconductors.
CONDUCTOR NON-CONDUCTOR
^r-
QUESTIONS TO ANSWR:
1. What is another name for a non-conductor?
2. Why are bell buttons and wall switches made of plastic?
3. Do you think air is an insulator or a conductor?
4. How many other materials do you know of that are insulators?
5. What is the purpose of insulators?
6. In the human body a conductor or an insulator?
-72-

PROBLEM 6. ROW DOES ELECTRICITY PRODUCE HEAT?
OUTCOMES:
Heat is produced. when electricity flows through a sUbstance.
The amount of heat produced depends on the mount of current, thethickness of the wire and the material of which the conductor is made.
MATERIALS:
see impil worksheet
PROCEDURE:
1. Review results of yesterday's lesson to recall that metals are not allequally good conductors.
2. Distribute materials and. worksheets.
3. Show the heating elements in an iron, toaster, heater, etc. Explainthe nichrame wire is generally used in these appliances.
4. Introduce the term "resistance" and explain that nichrame has morethan 50 times the resistance of similar sized copper wires.
5. &plain or demonstrate that when wires made of the same materials aretested. we find:
a. The longer the wire, the more heat is made.
b. The thinner the wire, the more heat is made.
6. Summarize:
a. Heat is produced. When electricity flows through a sUbstance.
b. The more electricity that flows through a wire, the more heatis produced.
0. Some sUbstances have higher resistance, that is, they don'tlet electricity go through easily, so they produce more heat.
"73-

PUPIL WORKSHEET
PROBLEM 6. How does electricity produce heat?
MATERIALS:1 thermometer
12-inch piece of bare copper wire12-inch piece of bare nichrame wire
WHAT TO DO:
insulated wire3 dry cellslight bulb in socket
1. Make a circuit using one dry cell, insulated wire, light bulb insocket, and. the piece of bare copper wire. Leave one wire loose.
2. Carefully wrap 3 turns of the bare vire around the bulb of thethermometer. Complete the circuit. Wait 10 Seconds. Read thetemperature and disconnect the wire. What is the temperature?
3. Now place the bare nichrame wire in the circuit in place of thebare copper wire. What is the temperature?
4. Now place the bare copper wire back in the circuit. Add two moredry cells and again check the temperature in 10 seconds. What isthe temperature?
QUESTIONS TO ANSWER:
1. Which wire made the most heat?
2. When did the copper wire get hotter, with one dry cell or withthree?
3. What two things did. you, find that made a difference in the amountof heat made by electricity?
-

PROM 7. WHY ARE FUSES PLACED IN A CMCUIT?
OUTCOMES:
Fuses are safety devices placed in a circuit to prevent wires from over-heating and creating a fire.
MATERIALS:power packknife switchminiature lamp and bulb
PROCEDURE:
several lengths of wirevarious wipes of fusesfuse wires
1. Review the previous lesson by asking, "What happens when electricitypasses through a wire?"Then ask, "What happens as we increase the amount of electricity pass-ing through the wire?"
2. Have a student gradually iacrease the amount of current flowing througha piece of fuse wire inserted into a circuit with a lamp. Ircrease thecurrent until the wire relts. Explain that we use the term "over-loaded!' to describe a circuit that has too much current flowing throughit. Hame children understand thatfusewire is especially made to nmltwhen a certain temperature is reached.
3. Pass around fuses (plug and cartridge type) and have the pupils readthe ampere nutbers and describe the thickness of the metal in the fuse.Remind them that each allows a certain amount of electricity to flowthrough. When, more than that flows through the wire, the temperaturerises and the wire melts.
4. Place a 10-app fuse in a circuit as shown in diagram.
NOTE: The fuse cam be placed in a lamp socket.Have a pupil complete the circuit. Open the circuit and replacethe 10-amp fuse with a low-rated fuse or 0.1 or 0.5 amps. Haveanother pupil complete the circuit. (The wire should. melt.) Ex-pasin that when the fuse wire melts we say the circuit has "blown".
3. Discuss, "Why are fuses made with different ratings?"
6. Demonstrate how a fuse is replaced.
7. Explain how circuit breakers are used in place of fuzes.
8. AB a summary ask, "Why is it dangerous to replace a 10-amp fuse with a20-amp fuse?"
- 75 -

PROBLEM 8. HOW CAN WE CHECK AND REWIRE A PLUG?
OUTCOVMS:To develop the skills needed to make simple electrical repairs.
MATERIALS:Plug and. frayed. wiretwo lengths of double strand. electric cord.
see pupil worksheet
PROCEDUM1. Show the class a plug and. wire where the wire is frayed..
2. Have the students point out that this would. be dangerous because:a. A person could. touch the bare wires.
b. A short-circuit is possible.3. Distribute materials and pupil worksheets. Assist pupils and. check work.
PUPIL WORNSHEET
PROBLEM 8. How can we check and. rewire a plug?
MATERIALS:plugsome electrical tapescrewdriver
3 lengths of doUble strandelectral cord
WHAT TO DO:
1« Wire a plug by following the steps below:a. Divide one double strand. electrical cord. into two parts
for a length of approximately two inches,b. Bare the ends of each strand. of wire for about
one-ha.12 inch.
c. Wrap all the wire strands around. tbe screws.
d. The bare wires must not touch each other. WHY?
e. The wires should. be wrapped. around. the screw in the same direction
as the screw is turned. to tighten it.
2. Splice two lengths of cord. together by the following steps:
a. Divide each length of double strand, electrical cord. into two
parts for a length of approximately two inches and. remove the in-
sulation from these ends.b. Leave one strand, long and. cut the other strand, down to one inch.
(See diageam).
a. Twist the long strand. of cord. A together with the short strand. of
cord. B. Twist the short strand. of cord. A together with the long
strand. of cord B.d. Wrap tape around each strand separately. WHY?
e. Now wrap the two strands of insulted. wire together.
CAUTION: NEVER cut or work on any wire or plug whit3h is connected.
to an electrical source.
- 76 -

PROBLEM 9. HOW IS ELECTRICITY MEASURED?
OUTCOMES:
Several devices can be used to measure electricity.
Voltmeters measure voltage or electrical pressure.
Ammeters measure amperes or amount of electricity flowing.
MATERIALS:
ammeter bathrocm scalevoltmeter quart containerpicture of watt-hour meter see pupil worksheet
PROCEDURE:
1. Pour or collect water in a quart container so it takes 10 seconds tofill the container. &plain that since it took 10 seconds to fill thequart contalner, the rate or amount of flow is 1 quart per 10 seconds.
2. Show an ammeter and explain that this meter measures the rate of flowof electrons or the electric current in amperes.
3. Press against a scale to show that a force or push against an abjectcan be measured. Explain that the amount of wash against somethingis called pressure.
4. Shaw a voltmeter and explain that this meter measures the force orpressure drtving the electrons around the circuit.
5. Distribute materials and. worksheets.
6. EXplain that the home watt-hour meters measure the amount of electric-ity we use during a certain period of time.
7. Summarize by reviewing the functions of each meter.
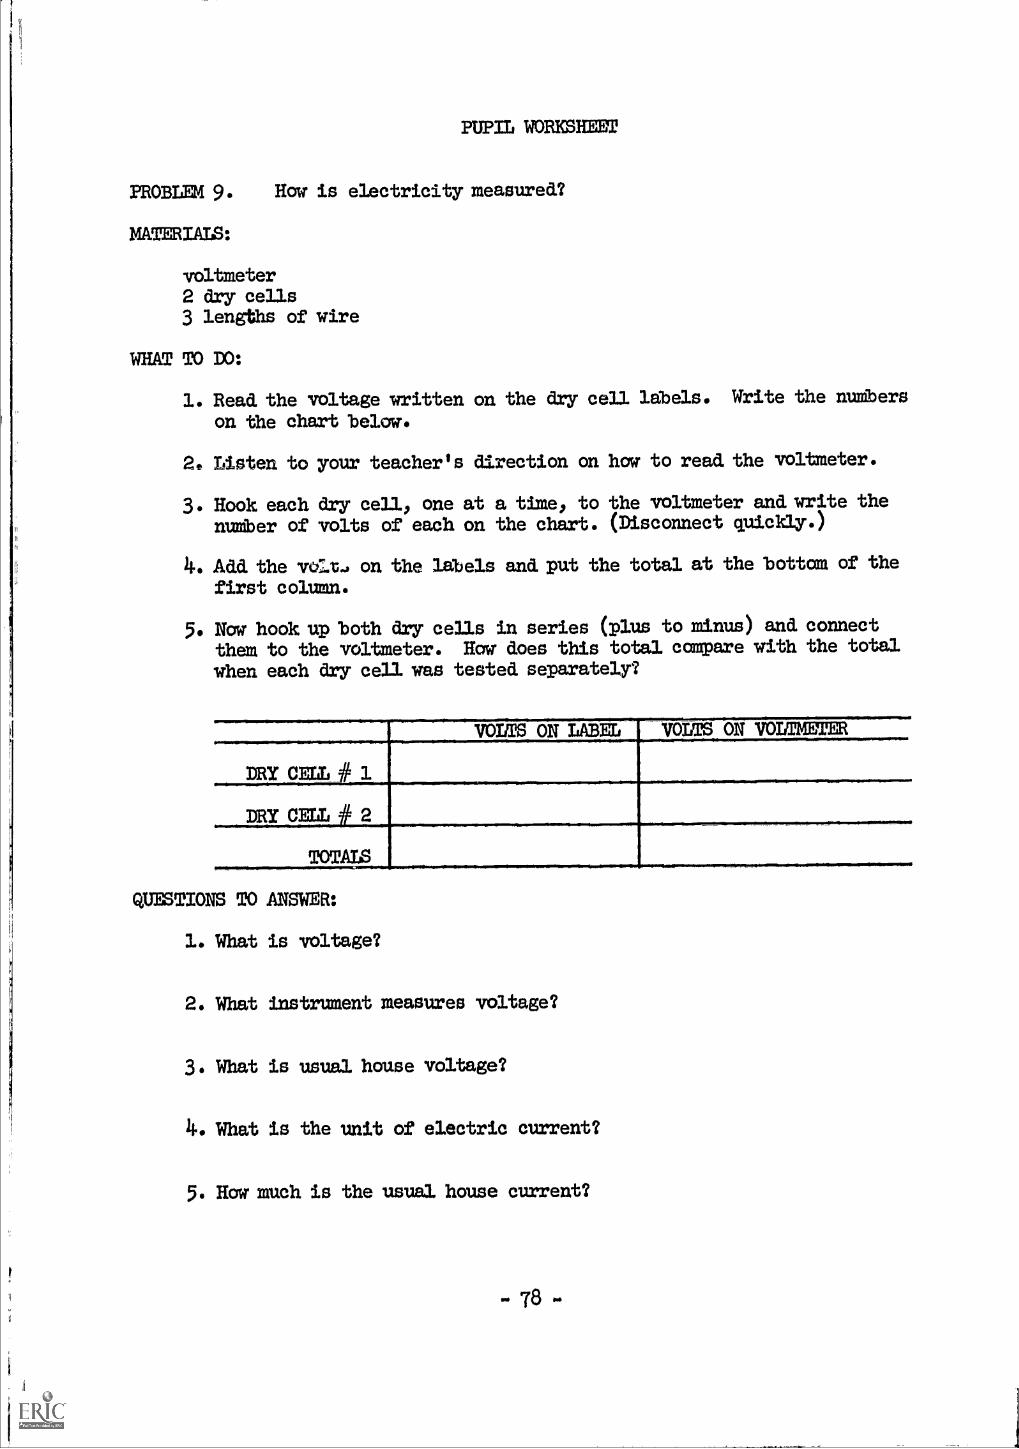
PROBLEM 9.
MATERIALS:
PUPIL WORKSHEET
How is electricity measured?
voltmeter2 dry cells3 lengths of wire
WHAT TO DO:
1. Read the voltage written on the dry cell ldbels. Write the nuMbers
on the chart below.
20 Listen to your teacher's direction on how to read the voltmeter.
3. Hook each dry cello one at a time, to the voltmeter and. write the
nuMber of volts of each on the chart. (Disconnect quickly.)
4. Addthe volt., on the ldbels and. put the total at the btttam of the
first column.
5. Now hookup both dry cells in series (plus to minus) and connect
them to the voltmeter. How does this total compare with the total
wben each dry cell was tested separately?
VOLTS ON LABEL VOLTS ON VOLTMETER
T3.------''at------..----------------------------DRY"
DRY CELL # 2
TOTALS
QUESTIONS TO MISTIER:
1. What is voltage?
2. What instrument measures voltage?
3. What is usual house voltage?
4. What is the unit of electric current?
5. How much is the usual house current?
-78"
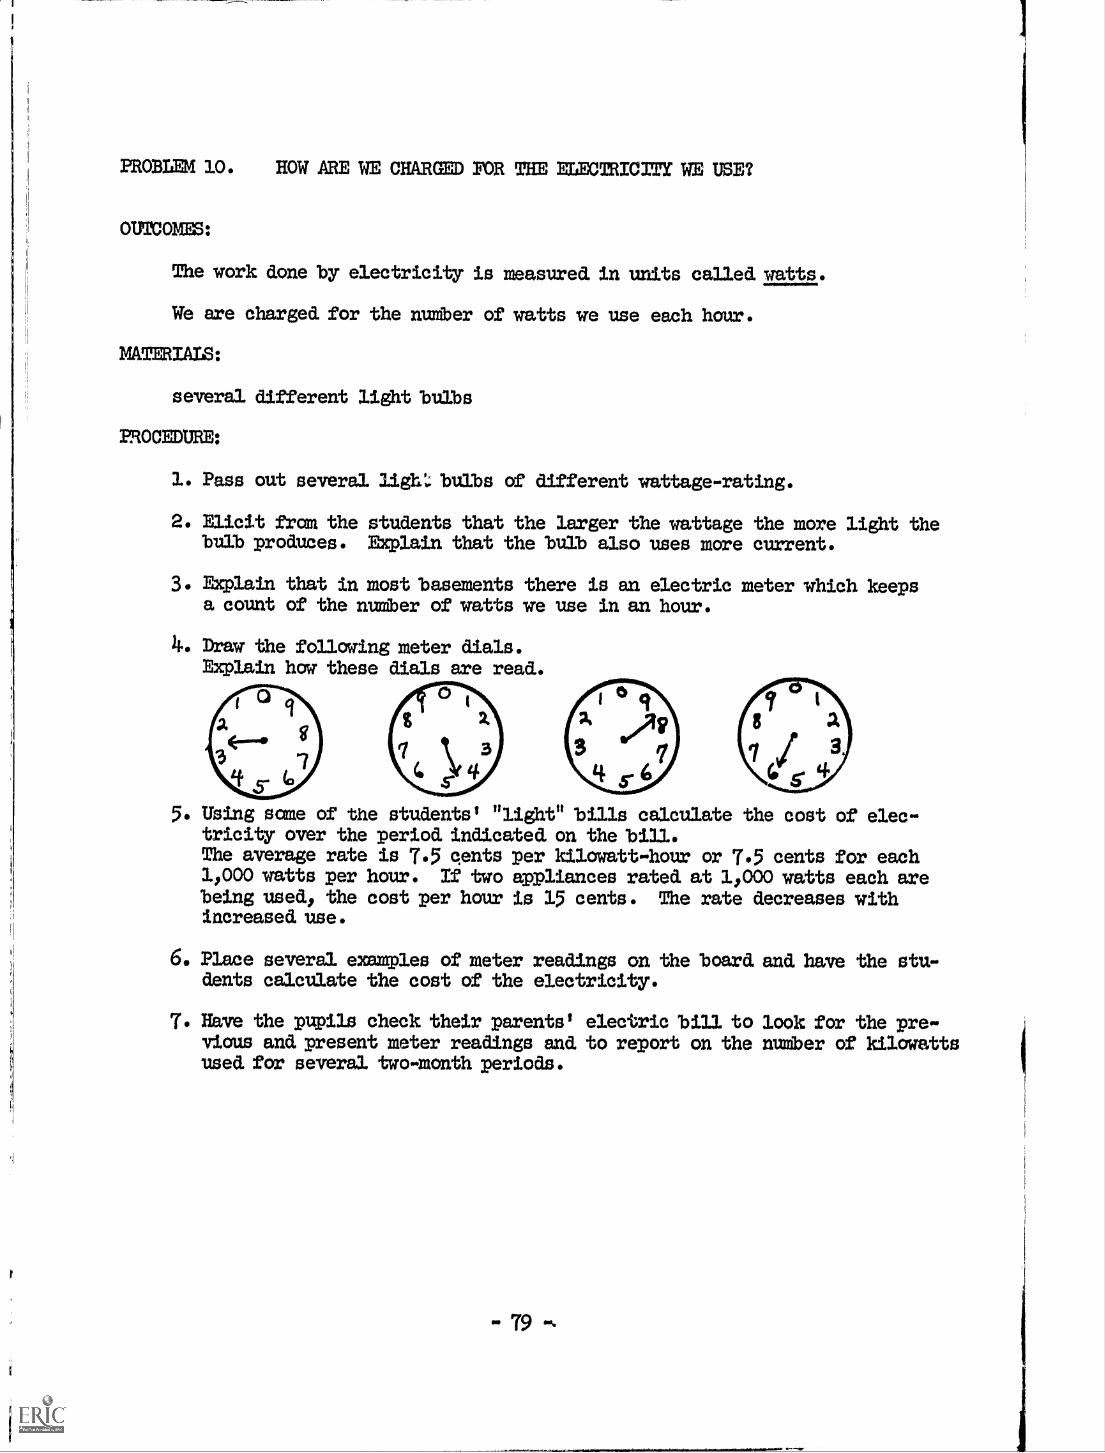
PROBLEM 10. HOW ARE WE CHARGED FOR THE MECTRICITY WE USE?
OUICOMMS:
The work done by electricity is measured in units called watts.
We are charged for the number of watts we use each hour.
MASTRIAIS:
several different light bulbs
PROCEDURE:
1. Pass out several ligh. bulbs of different wattage-rating.
2. Elicit from the students that the larger the wattage the more light theblab produces. Explain that the bulb also uses more current.
3. EXplain that in most basements there is an electric meter which keepsa count of the nuMber of watts we use in an hour.
4. Draw the following meter dials.Explain how these dials are read.
5. Using some of the students' "light" bills calculate the cost of elec-tricity over the period indicated, on the 'bill.The average rate is 7.5 gents per kilowatt-hour or 7.5 cents for each1,000 watts per hour. 12 two appliances rated at 1,000 watts each arebeing used, the cost per hour is 15 cents. The rate decreases withincreased. use.
6. Place several examples of meter readings on the board and have the stu-dents calculate the cost of the electricity.
7. Have the pupils check their parents' electric bill to lodk for the pre-vious and. present meter readings and to report on the nuMber of kilowattsused. for several two-month periods.

PROBLEM 11, HOW CAN WE MAKE PrmCTRICITY?
OUTCOMES:
Electricity is produced chemically when we use two different metals anda solution that allows electricity to flow through it (an electrolyte).
NATERIALS:galvanometer lemonstrip of ccpper and zinc 2 lengths of wiresee pupil worksheet (alligator clip at one end)
PROCEDURE:
1. Ddsplay the strips of metal and the lsmon. Askl "Can a lemon produce
electricity?"
2. Attach the lengths of wire to the strips of metal and to the galvano-
meter. Dip the ends of the metal strips into the lemon. Elicit what
happened. Point out that lemons contain acids and that acids in solu-
tion are electrolytes.
3. Distribute materials an a. pupil worksheets.
4. &plain that there are other combinations which produce electricity,such as, two different types of lead and sulfuric acid in an automo-bile battery.
5. Cut open an old dry cell. Have pupils identify the caebon rod, themetal container (zinc), and an electrolyte paste. Explain that theblack: paste contains the metal, manganese, and ammonium chloride
which is slightly acid in solution.Write formulas on the board and. have the children suggest acid. may
be HC1.
6. Be sure children understand that acidl base or salts added to waterbecame electrolytes. Pure water does not conduct electricity.
8Q

PROBLEM 12. WHAT IS A MAGNET?
OUICOMES:
Magnets are dbjects that attract certain metals.The ends of a maemet are called pcles.Poles that are alike repel each other. Poles that are the same attract
each other.A magnet produces an invisible field of force known as a magnetic field.
MATERIALS:
ring stand and clampfine thread or hair tied to a paper clipsee pupil worksheet
PROCEDURE:
1. Suspend a paper clip in "mid-air". (See diagram)
2. Elicit from the students that something from the magnet must be pull-
ing on the clip.
3. Pass a piece of paper between the clip and. the magnet.
4. To visibly demonstrate the magnetic field, use a section of a waxed
milk carton. Place a magnet under the carton, sprinkle some iron
filings on it, lift it careful.34y and heat it. After a few seconds
the wax should melt. Remove the piece of carton and allow to cool.
A fairly accurate picture of the magnetic field should. be Obtained.
5. Distribute materials and. pupil worksheets.Go over questions at end..

PROBLEM 12. %bat is a magnet?
MATERIALS:
iron filings2 magnetssheet of plain white paper
WHAT TO DO:
PUPIL WORKSHEET
various metallic andnon-metallic items
1. Try to pick up each one of the items on your tray with one of yourmagnets. On the chart below write the name of the item in thecorrect column.
PICKED UP (ATTRACTED) DID NOT PICK UP
2. Using both magnets: place the end of one magnet next to the end of theother magnet. What happened?
3. Take one magnet and turn it around so that the other end comes next tothe first magnet. What happened?
4. Lay the magnets end to end on the table with enough space between thenso they don't move. Cover with a piece of paper. Sprinkle iron filingson the paper. Draw a picture of what you saw.
5. Return the iron filings to the shaker. Turn one magnet around and re-peat what was done in 4.
WESTIONS TO ANSWER:
1. What happens when two like poles come near each other?
2. What happens when two unlike poles come near each other?
3. How does the picture of the lines between two like poles look?
4. How does the picture of the lines between two unlike poles look?
5. What is meant by magnetic field?
6. Why cud. we use iron filings?
7. What kinds of things are attracted by magnets?
- 82 -

PROBLEM 13. HOW CAN WE USE ELECTRICITY TO MAKE A MAGNET?
OUTCOMES:
An electric current can produce a. magnetic field.The strength of an electramagnet can be increased, by ad&ng:
a. more currentb. more coils of wire
MATERIALS:ring stand and clamps compass
2 dry cells iron nail
length of insulated wire see pupil worksheet
PROCEDURE:
1. Demonstrate Oersted's theory by sending a current through an insulated
wire. Place a compass near the wire and have the students Observe the
effect on the needle when the current is turned on and off. (Use two
dry cells).2. Elicit from the students that it seems as if the electric current is
producing a magnetic field.3. Demonstrate how to make an electramagnet 'by wrapping several turns of
insulated. wire around an iron nail.4. Distribute materials and worksheets.5. Go over questions at end of lesson.
PUPIL WORKSHEET
PROBLEM 13. How can we use electricity to make a magnet?
MATERIALS:2 dry cells1 two-foot length of insulated wire1 iron nail
6 to 8 paper clipsor tacks
WHAT TO DO:
1. Wrap 15 turns of wire around an iron nail) attach the ends to a dry cell
and see howmany paper clips or tacks you can pick up. Write your re-
sults below.2. Connect another dry cell into the circuit and repeat the experiment.
Write your results on the chart below.3. Repeat the entire experiment) this time use 30 turns of wire. Write all
results below.
Turnsof Wire
3.
Number of Tacks Picked Upwith One ftr Cell
Number of Tacks Picked. Upwith Two Dry Cells
0
QUESTIONS TO ANSWER:
1. Why can a magnet be made using electricity?
2. How can you increase the strength of an electromagnet?
3. What makes an electramagnet so useful?- 83 -
MN*.

PROBLEM l. HOW HAVE MAGNETS HELPED MAN?
OUTCOMES:
Some metals can be turned into magnets.The earth acts as a giant magnet.Directions are found on the earth by using a magnet called a compass.Electromagnets are used to lift heavy amounts of metals, and. to operatebells, telephones, telegraphs, etc.
MATERIALS:lodestonecompass
PROCEDURE:
telegraph, telephone, bell, buzzer, etc.see pupil worksheet
1. Show the class a natural magnet (lodestone) and demonstrate that it isa magnet.
2. Place a canpass on the desk. Move the needle end. allow it to come torest. Move the compass again. Elicit frail the students the fact thatthe earth must be attracting the needle in a particular direction.Ask them to point out how Ire can use this attraction.
3. Give each pupil a bar magnet) an iron nail and two paper clips.
11.. Tell them to make the nails into magnets by stroking the nail in onedirection only with one pole of the magnet. Have them test the nailby picldng up the clips.
5. Elicit that they have made permanent magnets and. that these nails aresimilar to the bar magnet and. the compass needle.
6. Compare the permanent magnet with the electromagnet to point out thatelectromagnets are temporary magnets. They are magnets only while theelectricity flows thrcugh the wires.
7, Point out that electromagnets are used. in a greater variety of objectsbecause it can be turned off and. on and. because its strength can bevaried.
8. Show the objects or pictures and. explain how the magnet is used:a. electrcmagnet crane - This moves large masses of iron and. steel.b. telephone receiver - An electromagmt receives an electric cur-
rent that varies. This makes the magnetism change in strengbhand pull on the diaphragn with changing force of attraction andvibrations are set up.
c. bell or buzzer - Pressing the button closes the circuit and.makes an electrcmagnet which attracts the clapper. When theclapper is pulled it hits the bell.
9. Elicit other ways in which magnets affect our lives. Explain thatelectric motors contain electromagnets and. permanent magnets. Thusany device using an electric motor is an example of the usefulness ofmagnets.
PROBLEM 15. HOW CAN MAGNETS MAKE ELECTRICITY?
OUTCOMES:
When a coil of wire is moved through a magnetic field, electricityis produced.
Devices that produce electricity electricityb.y magnetism are knownas generators.
MATERIALS:
large coil of wiretdble top galvaaometerbar magnet
PROCEDURE:
hana generatorsee pupil worksheet
1. Display a large coil of wire connected to a galvanometer.EXplain that Michael FaradNy set a similar experiment and then askedhimself the following. "If electricity can produce magnetism, canmagnetism produce electricity?"Move magnet near coil to see movement of needle.
2. Distribute materials and. worksheets.
3. Go over questions.
4. Demonstrate a hand generator. Hhve pupils examine, to name parts,and operate, to show the greater the speed of operation, the morethe electricity.
5. Refer back to lesson on magnetic lines of force to explain that coilcuts these lines of force and electricity flows.
6. Review that the following are needed to generate electricity:
a, a coil of vire in a closed circuit.
b. a magnetic field
c. notion
PROBLEM 15.
MATERIALS:
PUPIL WORKSHEET
How can magnets muke electricity?
galvanometercoil of wiremagnet
WHAT TO DO:
1. Connect the bared ends of the coil to the terminals of the galvano-meter. CAUTION: The galvanometer should be handled with great care.
2* Do the following experiments and record the results of each in thetable below:
a. Hbld the coil of wire and. move the north pole of themagnet in slowly.
b. Repeat) moving the magnet rapidly.
c* Repeat both experiments using the south pole.
d. Place the magnet in the coil and don't move it.
e. Mbve the coil of wire past the magnet.
TABLE OF RESULTS
Galvanometer Reading Direction
N.Tole in slowlyN-pole in rapidly
.1:-Mle°utra-------V..QY..---..-------------------S-pole in slowlyAtpole ia madlyMagnet not moving in coilCoil moving past magnet
QUESTIONS TO ANSWER:
1. Besides the coil and the magnet) what else was needed to create anelectric current?
2* Does current have a direction? How do you know?
3. Hbw does the speed of a moving magnet affect the current?
86 -
PROBLEM 16. WHAT DO WE KNOW.ABOUT LIGHT?
OUTCOMES:
We must have light in order to see.Light is composed of colors.Light travels in a straight line at the speed of 186,000 miles per second.Light can be blockedl partially transmitted, or completely transmitted.Opaque Objects block light. Translucent Objects allow some light to passthrough. Transparent Objects allow almost all the light to pass throughthem.
MATERIALS:cigar box 2 pieces of cardboard with smallshort length of ribber taing hole in eachprim
PROCEECRE:
1. Unseen by the class, place an Object in a cigar box which has a smallhole punched in ane end. Close the cover and ask a student to lookinto the box. Have another student look through the hole, but thistime open the cover. Ask both students what they saw. Ask the classto explain.
2. Discuss what happens when same one walks into a dark movie theater.aplain what would happen in a light-proof room.
3. Have a student lodk into a short length of bent ribber tubing. Thenhave him straighten the tube and look through it. Ask, "What does thistell us dbout light?"
4. Have another mil hold the two pieces of cardboard. before his eyesdbout a foot apart. Let him look through one hole and move the othercardboardaround to see that the holes must be on a line with the eyeand the light source.
5. Elicit or state that light travels or leaves the Object that makes thelight. The speed at which it moves is 186,000 niles each second.
6. Pass sunlight coming through a hole in a large cardboard or the lightfrau a ivojector through a glass priam to show that white light is com-posed of several colors.
7. Distribute the following materials:
square of waxed, paper caadlesquare of glass square of imod
8. Instruct the class to light the candle and look at the flame throughthe wax paper, the glass and the wed. Then, they are to complete thechart.
OBJECT AMOUNT OF LIGHT I.ALL, SOME, NONE TYPE OF OBJECT
Clear ss
Waxed mer
Block of wood.
9. Summarize by eliciting outcomes.
-87..

PROBLEM 17. WHY DO WE SEE THINGS?
OUTCOMES:
Light nmnt came fram the object to the eye to be seen.
Same Objects give off their own light.
Most Objects are seen by reflected light.
Colored Objects reflect those colors that we see and. absorb the
other colors.
MATERIALS:
cigar box with a hole at one endseveral Objects in baxsee pmpil worksheet
PROCEDURE:
1. Allow someone to lock into the hole in the cigar box to identify any
of the Objects. Keep the lid closed.
2. Now open the lid, while someone looks through the hole.
Elicit that light now shone on the Objects and. was then sent to the
eye. &plain that this is called reflection and that most Objectsare seen by reflected light.
4. Recall that it is diffiadlt to see clean, clear glass which transmitsmost of the light falling on it.
5. Elicit that white light is made up of several colors. Explain that
white light tWat shines on something maybe partially absorbed. Forexample, the green plants absotb most of the light except the green
rays. These are reflected and we see a green plant.
6. DistrXbute materials and worksheets. Assist pupils in making accurate
observations and drawings.
88

PUPIL WORKSHEET
PROBLEM 17. What is reflection?
MATERIALS:
paper dbject
ruler protractormirror
WHAT TO DO:
1. Place the paper flat on the desk. Stand the mirrow up at the edgeof the paper.
2. Place an Object on the paper near a corner away from the mirror.
3. Looking with one eye may, look at the reflection of the Object.
4. Put one mark at the point on the mirror where you saw the image.Place another mark on the paper right under the place where youreye was.
5. Now draw one line from the eye to the point at the mirror. Drawanother line from the mirror to the dbject.
6. Now construct a line at the point on the mirror at right angles tothe mirror.
7. Measure the two angles. The line from the dbject and the right angleline form the angle of incidence. What does this angle measure?
8. The other line and the right angle line form the angle of reflection.What does this angle measure?
9. Repeat the dbove procedure using different points.
QUESTIONS TO ANSWER:
1. What is the law of reflection?
2. What must happen in order for us to see something?
3. Mbat is the smallest size mirror a person can use to see his fullimage? (Use the law of reflection to figure it out.)
.89-

PROBLEM 18. HOW DO LENSES HELP US TO ME?
OU'ICOMES:
Lenses refract (bend) light.Convex lenses can be used to magnify dbjects.Concave lenses spread the light out.
MATKRIALS:
light source round flask filled with fluorescein and
concave and convex lenses optical disc apparatus (water
see pupil worksheet
PROCEDURE:
1. Display several dbjects using lenses, such as, eye glasses, camera,
microscope, magnifying glass, etc., to show the importance of lenses.
2. Tell the class that the shape of the lens determines what happens to
the light that passes through it. Explain that when light passes
fram one substance into another, the light bends. Thus, when light
goes from air into glass and back into air, it has been bent twice.
3. Distribute materials and. worksheets.
I. When pupils have finished, go over the questions.
5. Using the optical disc apparatus, pass light through each lens and
through the flask of water and fluorescein.
6. Have the pupils draw pictures of the light rays passing through some
lenses.
7. Elicit the outcames as a summary of the lesson.
.90
PUPIL WORKSHEET
PROBLEM 18. Htw do lenses help us to see?
MATERIALS:
concave lens convex:lens
WHAT TO DO:
1. Pick up one lens and, run your fingers over both surfaces. How doesit feel?
2. Now feel the other lens. How does this one feel?
3. Draw a picture of each lens as if you are looking at a cross sectionof the lens.
4. Label the one that bulges out in the middle a convex lens. Label theother one concave.
5. Look at some words on the worksheet through the convex lens. How dothey look.
6. Do the same with the concave lens. What did. you see?
OESTIONS TO ANSWER:
1. What material axe the lenses made of?
2. How would you describe this material in terms of what happens to lightthat shines on it?
5. Why does a lens make dbjects appear smaller or larger?
4. What are same uses of convex lenses?
5 What are same uses of concave lenses?
-91-
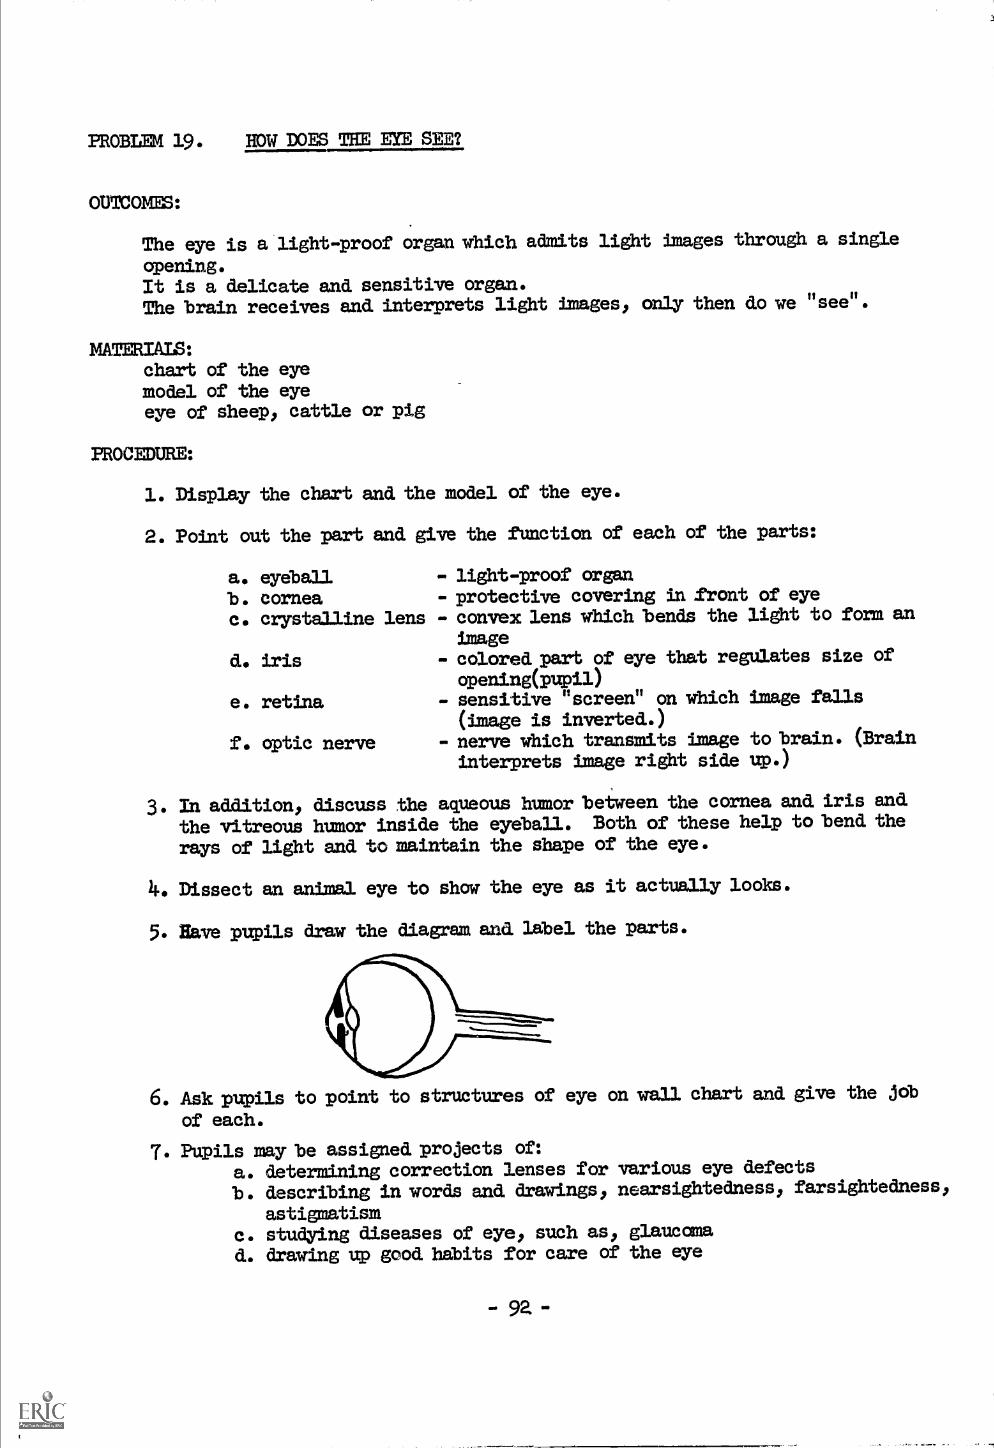
PROBLEM 19. HOW DOES THE EYE SEE?
OUTCOMES:
The eye is a light-proof organ which admits light images through a single
opening.It is a delicate and sensitive organ.The brain receives and interprets light images, only then do we see
u.
MATERIALS:chart of the eyemodel of the eyeeye of sheep, cattle or pig
PROCEDURE:
1. Disamy the chart and the model of the eye.
2. Point out the part and give the function of each of the parts:
a. eyeballb. corneac. crystalline lens
d. iris
e. retina
f. optic nerve
- light-proof organ- protective covering in tront of eye- convex lens which bends the light to form an
image- colored part of eye that regulates size of
opening(pupil)- sensitive "screen" on which image falls(image is inverted.)
- nerve which transmits image to brain. (Brain
interprets image right side up.)
3. In addition, discuss the aqueous humor between the cornea and iris and
the vitreous humor inside the eyeball. Both of these help to bend the
rays of light and to maintain the shape of the eye.
4. Dissect an animal eye to show the eye as it actually looks.
5. Have pupils draw the diagram and. label the parts.
6. Ask pupils to point to structures of eye on wall chart and give the jdb
of each.
7. Pupils may be assigned projects of:a. determining correction lenses for various eye defectsb. describing in, words awl drawings, nearsightedness: farsightedness,
astigmatiamc. studying diseases of eye, such as, glaucomad. drawing up good habits for care of the eye
- 92. -
PROBLEM 20. HOW DOES THE MICROSCOPE WORK?
OUTCOMES:
Instruments with more than one lens are called compound instruments.The microscope has several lenses.The microscope has a mirror to catch and reflect light.
MATERIAIB:
microscopechart of microscope (see biology section)see pupil worksheet
PROCEDURE:
1. Show the microscope to the class. Point out the mirror, the hole inthe stage, the Objective lenses and the eyepiece lens.
2. Show how the mirror mtmes. Allow a pupil to rn his fingers over themirror and describe it as having one plane or flat surface and onethat is concave.
3. Draw on the board a broaAbeam of light being reflected from a flatsurface.
4. Draw a narrowbeam being made to diverge or spread by a concave mirror.
5. EXplain that the flat mirror is used with sunlight and the concavemirror is used with artificial light.
6. Hhve pupils state the law of reflection and use that to explain theuse of the mirror to direct light through the opening.
7. Allow one or two pupils to look at the Objective lenses for the 10Xand the 40X marks. EXplain that this means the one makes things ap-pear ten times as large and the other makes the image forty times as
large as the Object.
8. Now indicate the eyepiece lens and tell the class that this magnifiesthe image ten tines. Guide the class to see that the final magnifi-cations will be 100 and 400 times normal size.
9. Elicit that image is inverted as it passes through a lens.
10. Distribute pupil materials and. worksheets.
- 93 -

PUPIL WORKSHEET
1-ROBLE4 20. How can we make a simple microscope?
MATERIALS:
strip of metal (4"x1")hammerthin nail
WHAT TO DO:
1. With the hammer and the nail, punch a small hole through the centerof the metal strip.
2. Make a one-inch bend on each end of the metal strip. Place the bentmetal strip on your desk so that it stands without falling over.
3. Place a amall drop of water on the hole. This instrument is calleda water-drop microscope.
4. Observe the drop of water. Does it look like a convex or a concavelens?
5. Write a small letter "e" on a piece of paper. Place it under the mi-croscope and look through the water drop. Press gently on the metalto get a clearer image. Haw does the size of "e" compare to the imagethrough the water drop?
QUESTIONS TO ANSWER:
1. Why does the waterdrop make the "e" appear larger?
2. What is the purpose of the lenses in a microscope?
3. Wby do we need a mirror on the microscope?
4. What kind of material do you need to be able to see it through thecompound microscope?
-94-
PROBLEM 21. HOW DO WE USE LIGHT TO TAKE PICTURES?
OUTCOMES:
Photography is a process which uses light to chemically produce apermanent picture.Cameras gather light images and focus them on a film.
MATERIALS:vge test tube
57o silver nitrate solution5% sodtam chloride solutiontest tube racklight sourcefilm strip projectorsee pupil worksheet
PROCEDURE:
1. As a review, mix the silver nitrate and sodium chloride solutions to-gether. Divide the suspension which is formed equally between bothtest tlibes. Place one in front of the light source and the other in adark area. Later in the lesson show the results.
2. Make several drawings an the bcard to show how the camera lenses formimages.
3. Explain that cheaper cameras have a single fixed lens which will givea good image at most distamces beyond six feet.
4. More expensive cameras are made so lenses can be moved to give clear-est picture possible at various distances.
5. Distribute pupil materials and worksheets.
6. When pupils have completed, show the enlarging effect of a slide pro-jector. Recall how contact prints were made in chemistry. Point outthat negative maybe put into an enlarger similar to the slide projec-tor which can be moved to produce clear images of various sizes.
-95.-

PUPIL WORKSHEET
PROBLEM 21. How can we make a pinhole camera?
MATERIALS:
shoe box (brought fran hane)dull black water paint and large brushsheet of thin white paper (tracing paper)tape
pin
WHAT TO DO:
1. Paint the inside of the shoe box black.
2. Cut out one end. of the shoebox and. replace it with the white paper.
3. Make a small hole in the center of the opposite end of the shoe box.
4. Cover the box and point the pinhole end. toward a bright object. Ifan image is not seen make the pinhole slightly larger.
1
I
I
QUESTIONS TO ANSWER:
1. Why aa. you paint the inside of the box black?
2. How did the pinhole act like a lens?
3. Is the image inverted?
4. If you wanted to take a picture where would the film be placed?
PROBLEM 22. WHAT FORM OF LIGHT .ARE USED IN THE HOME?
OUTCOMES:
Artificial light is produced. by chemical changes and. transformation ofelectrical energy.
Some common forms of lighting include:a. incandescent lampb. fluorescent lampc. "neon." signs
MATERIALS:magnesium striptongsadbestos padburnerhand generator
PROCEDURE:
electric heater or a glowing wire set-upfluorescent lamp demonstratorpower packassorted Geisler Wipes
1. Burn a strip of magnesium. Elicit that burning is a chemical changewhich produces beat and light.
2. Display the ash and recall that a new product results.
3. Describe Edison's search for a melt-resistant material) and the ulti-mate result. (carbonized sewing thread in a airless container)
4. Demonstrate an electric heater. Explain that the heater contains avery thick) heat-resistant metal. Recall that heat is produced. aselectricity flows. Point out there is also some light.
5. Demonstrate a light bulb lit b3ra hand generator. Examine the fila-ment of a light bulb to note that it is long and thin. Recall thatelectricity flowing through very thin wires produces much heat. Pointout that this filament becomes so hot it glows.
6. Demonstrate the fluorescent lamp apparatus and. describe its method oflight production.Electricity strikes mercury vapor which sends electrically charged par-ticles into the fluorescent chemical coating the lamp.
7. Demonstrate several Geisler tUbes, and explain that "neon" signs areactually tUbes containing many different kinds of glowing gases) notonly neon gas. The gas determines the color.
8. Summarize as follows:
Main types of artificial lighting
a. Incandescent lampb. Fluorescent lampc. "Neon" signs
-97-
- Method of production
Glowing metalsGlowing chemicalsGlowing gases
PROBLEM 23. WHAT IS SOUND?
OUI'COMES:
Sounds are caused by vibrating 'bodies.Sounds travel at the speed of 1,100 feet per second.
MATERIALS:
bell, switch, and battery connected in seriessee pupil worksheet
PROCEDURE:
1. Have all the pupils close their eyes and listen. Ask:them to describewhat happened.
2. As they tell some of the sounds they heard, explain that they are goingto learn something about sound.
3. Distribute materials and worksheet. Have bell set up at demonstrationtable.
When exercises have been canpletedl go over questions.
5. Explain that the vibrations nust fall between 20 and 20,000 vibrationsper second to be heard..
6. Hhve children think of thunder storms to recall that the thunder clapalways sounds after the lightning is seen.
7. Elicit that light travels at 1860000 miles per second. Tell the pupilsthat sound. vibrations travel through the air at approximately 1100 feetper second. Explain htm. people often estimate how far away a storm isWthe time interval between the fladh and the sound.
8. Sunnarize by haring pupils list what they have learned about sound..
PROBLEM 23. WHAT IS SOUND?
MATERIALS:pith ball and string250 cc beaker of water
WHAT TO DO:
PUPIL WORKSHEET
rubber band.tuning fork
1. Hold. a pith ball by its string. Gently tap a tuning fork on a rubberheel and. allow it to touch the pith ball. Mat happened.?
2. Now tap the tuning fork firmly: and. repeat what you did.. Whathappened?
3. This time tap the tuning fork gent3y and. dip the ends of the forkinto a beaker of water. What happened?
4. Repeat but strike the fork firmly. Did. anything change?
5. Stretch a rubber band. Have your partner pluck on the rubber band,first gently, then firmly. What did you. hear?
6. On your teacher's desk you will find. a bell circuit. Complete thecircuit and. hold. your pith ball near the striker. What happens tothe pith ball?
QUESTIONS TO ANSMIR:
1. Was there any difference in the motion of the pith ball when the tun-ing fork was struck firmly and when it was struck gently?
2. Was there any difference in the sound made by the tuning fork?
3. When did the water splash more?
4. Did. the rubber band. sound. differently when plucked. hard. rather thangently?
5. What did. each of these experiments show you about what causes sound.?
6. Met did. you learn about the loudness of sound?
7. What is the word. that describes fast motion back and. forth?
99
PROBLEM 211..
OUTCOMES:
HOW DOES SOUND TRAWL?
Sounds travel through matterSounds travel better throughgases.Sounds must travel through avacuum.
MATIDRIALS:
bell in vacuum jarpower packvacuum, pump2 small stones
PROCLURE:
in waves.solid. and. liquid materials than through
substance. There are no sounds in a
Slinky toy or spring1 empty fish tank1 fish tank filled, with water
1. Stretch out a Slinky on the desk. Grasp both ends and. with shortjerking motions snap one end. of the Slinkr. Explain that soundtravels through the air in the same fashion as the motion throughthe spring.
2. Give the following instructions to the class:
a. Sit up straight in your chair, extend your ann onto the desk, and.
gently scratch the desk with yaur finger.b. Place your ear on the desk and. scratch gently.
(Make sure your arm is extended away from you.)
3. Ask, "Did you hear a difference in the sound?""When was the sound louder?"
4. Have a pupil go up to the teacher's desk and place his ear next tothe fish tank filled with water. Tap two stones together underwater.Then have ltim place his ear next to the tank without water. Tap thestones together inside the tank.
5. Have him ten in which tank the sounds were louder.
6. Ask for experiences at the beach or pool which also show that soundstravel better in liquids than in air.
7. Turn on the bell in the jar. Evacuate the air from the jar and. elicit
what happens. Have the students observe the striker still moving.
8. As a summary or hanework assignment have the students come to the con-clusion that sounds generally travel better through solids and liquidsthan through gases end, that sounds must travel through a medium. Thereare no sounds in a vacuum because there is no stibstance to transmit thevibrations.
- 100 -

PROBLEM 25. WHAT ARE SOME DIFFERENT FORMS OF ENERGY?
OUTCOMES:There are two kinds of energy:
kinetic - the energy of doing samething (motion)potential - stored energy
Energy may be found in different forms:mechanical chemicalelectrical radiant (heat and light)
MATERIALS:ruler candles (2) flashlightbeaker (100 ml.) tesla coil 2 beakers (250 ml.)eggbeater hand generator dry cellmatch hammer
PROCEDURE:1. Elicit from the students their concepts of the word energy.
2. &plain that simply stated, energy means to have the ability to movesomething.
3. Place a ruler on a cylindrical Object. Place a penny on one end of theruler and hold a, book over the other end. Explain that the book haspotential (stored) energy because it can do something. Drop the bookonto the ruler. Elicit what happened.
4. Elicit and list on the'board different forms of energy.
5. Hold up the dbjects listed above and have the pupils fill in a chartsuch as the one below.
ITEM KIND OF EMERGY
or kin2A191........-.
FORM OF ENERGY
EXAMPLE:-.2.21a4a1;
Pttential ChemicalDry cellEggbeater
in use
Unlit candle0
Burningcandle
OperatingTesla Coil
HandGenerator
Hammerin use
RunningWater
A litFlashlight
NOTE: If a sink is unavailable for the running water experiment, pourthe water back and. forbh between two beakers.

1PROBLEM 26 . wile HAPPENS TO ENERGY WETS IT IS USED?
OUTCOMES:
Energy is neither created or destroyedl but is transformed from oneform to another.
MERU'S:
wet cell (zinc strip, carbon rod, in a jar of saturated ammoniumchloride)
miniature lamp and socketband generatorradiametersee pupil wrksheet
PROCEDURE:
1. Display a, wet cell and elicit the type of energy involved.
2. Connect the wet cell to a miniature lamp socket and elicit the energyconversions wtich take ;aace. (chemical to electrical to radiant)
3. Crank a hand generator. Elicit the energy conversions which take
place.
4.. Place a radiometer in light and elicit the energy conversion.
5. Distribute materials and worksheets.
6. Go over results.
402

PUPIL WORKSHEET
FROMM 26. What happens to energy when it is used.?
MATERIALS:
match metal striphammer wood splintasbestos pad safety lighter
WHA.T TO DO:
I. Look at the chart below and. do what it says in the columnheaded. "Experiment."
2. Next to each experiment write down the enerfor you start with andthe energy you end up with.
EXPERIMENT ENERGY AT THEBEGINNING
ENERGY AT THI, END
Strike a match
Rub hands to:etherHamner a metal strip
feel the stri
Burn a wood. splint
Strike a safetylighter
QUESTIONS TO ANSWIM:
1. How is running water used. to generate electricity?
2. What kinds of energy changes take place in the body?
3. What is the law of the Conservation of Energy?
- 103 -
1

PROBLEM 27. WHAT ARE SIMPLE MACHINES?
OUTCOMES:A simple machine is a device which enables us to do work more conveniently.Some simple machines are:
levers wheel and, axle
pulleys screws
inclined planes wedge
MATERIALS:cord18-inch rulerpulleysspring balance
wedgepaperobject to be weighed.pictures of various machines
wood. plank 8" long x widedrill and bit or screwdriver
and. screw
PROCEDURE:1. Stack up 3 or 4. textbooks and. have a student attempt to raise one end. of
the stack with one finger.2. Place an 18-inch ruler about 3 inches under the books. Place a pencil
under the ruler, near the books. Have the same student press on theruler with his finger. Elicit which method. required less effort. Ex-plain that the ruler acted as a simple machine called a lever.
3. Elicit examples of levers: automobile bumper jack, crowbar, etc.
4. Weigh an object on a spring balance. Nov weigh it using a system ofpv/leys. (Do not use a single fixed. pulley as this only chaages direc-tion of force. Although this is useful, show a system which reducedthe effort.)
5. Elicit examples of pulleys in use: block and tackle on ship for liftingcargo, pulleys on scaffolds, etc.
6. To demonstrate wheel and, axle, open a door by turning the door knob.Remove the knob and try to turn the stem.
7. Elicit other examples, such as, water faucet, screw driver (handle is
thicker), automobile steering wheel.8. Briefly show examples of the inclined plane. Do not go into detail as
pupils will do a laboratory lesson on the inclined plane tomorrow.9. Show -that the screw is a form of inclined. plane 'by making a right tri-
angle out of paper and, wrapping it around. a pencil. The cut edges make
a spiral, the threads, of a screw. Elicit examples of screws, such as,
sone car jacks.10. Show a wedge and elicit that it is two inclined planes against each
other. Elicit its use in splitting apart objects.U. Sumarize by listing the six simple machines on the board, and sane of
their uses.
PROBLEM 28. HOW CAN WE TELL IF A SIMPLE MACHINE SAVES WORT?
OUTCOMES:A simple machine is a device that enables us to do work better.It usually enables us to use less force but requires us to move thatforce through a greater distance.Work equals force times distance.The work that comes out of a machine cannot be greater than the work thatgoes into it.
MATERIALS:
see pupil worksheet
PROCEDURE:
1. Distribute materials and worksheets.2. Go ovnr answers to questions.3. Elicit outcomes.
PUPIL WORKSHEET
PROBLEM 28. How can we tell if a simple machine saves effort?
MATERIALS:spring scale rulerthread or string an (bject to be weighedinclined plane board and cart (not to exceed 200 grams)
WBAT TO DO:1. Ybur teacher will demonstrate how to use and read the spring scale.
2. Fbr practice, weigh the object in your tray. (Use tbe thread to tiethe Object to the scale.) Write the weight find in the space below.Do nct go on until your teacher checks it.
Weight of dbject
3. Weigh the cart by lifting it wlth the spring scale 4 inches off thedesk. This is the force needed to lift the cart.
Weight of cart Distance moved
4. Raise one end of the inclined. plane 4 inches off the desk. Pull thecart up the inclined plane with the spring scale. AS you are doingthis carefully, check:the scale, and record the reading below. (Donot take the reading as you: begin to pull but as you are rolling.)
Weight of cart on the inclined. plane Distance moved
5. Work is known as the product of a force x the distance it moves some-thing.
a. How much work ad. you do when you lifted the cart four inches?b. How much work ad you do when you pulled the cart up the in-
clined plane?
QUESTIONS TO ANSWER:1. Did the inclined plane increase the height to which the object was
lifted?
2. Did the machine increase the amount of work you got out?
3. What good did the machine do?
4. Where have you seen inclined planes used to help do work?
-105-

PROBLEM 29.
OUTCOMES:
HOW DOES TIE HUMAN BODY ACT AS A MACHINE?
The body is mostly a cadbination of levers.Same parts of the body act as inclined planes or screws.
MATERIALS:chiselscrewdriver
PROCEDURE:
screw, set halevay into a block of woodhuman skeleton
1. Hhve each student stretch out his arm and raise a textbook off thedesk.
NOTE: Be sure the arms are held stiff and the textbook is a large one.
2. Then instruct the students to bend their elbows and repeat the process.Ask, "Which method is easier?" Point out that the arm is itself alever with a fulcrum at the elbow.
3. Draw or show the point of a chisel. "What simple machine does thechisel represent?" (inclined plane) Explain that the purpose of thechisel is to drive the point through or under something. Ask, "Whatdbjects in the mouth act as chisels?" (incisor teeth)
4. Pcdnt to the screw set into the wood and challenge a student to drivethe screw into the wood without twisting his arm or using a hammer.NOTE: This can be accomplished by the student if he holds the screw-
driver onto the screw and walks around in a circle.
5. Have a student perform the normal function with the screwdriver. Callattention to the motion of his arm. Elicit the simple machine thismotion represents. (screw)
6. Study the human skeleton to move the bones as they would normally moveto point out the hinged joints and movements, the ball and socketjoints and movements.
7. HaNe pupils make a list in their books of the various examples given.
-106-

PROBLEM 30. WHAT IS WEIGHT?
OUTCOMES:
An matter has weight.The weight of a body depends upon the gravitational force upon thebody.Units of weight include pAnds, ounces and grams.
MMERIAIS:
spring scaleseveral objects to be weighedsee pupil worksheet
PROCEDURE:
1. Drcp several dbjects. Ask, "Why are they falling?" The studentsshould understand that gravity is calthing the dbjects to fall bypulling them toward the earth.
2. Ask., "Can we measure the pull of gravity on an dbject?"Elicit methods - heft, variety of scales.
3. Demonstrate by weighing several dbjects on a spring scale.
4. Explain that all matter has weight. Refer back to the chemistryunit and elicit that even air has weight. Recall that a balancescale was used.
5. EXplain that scientists weight things in units called grams. Dis-cuss weights in Europe.
6. Give out pupil materials and worksheets.
7. Elicit how many grams equal one ounce (30 g.)
8. Elicit the outcomes.
-107-
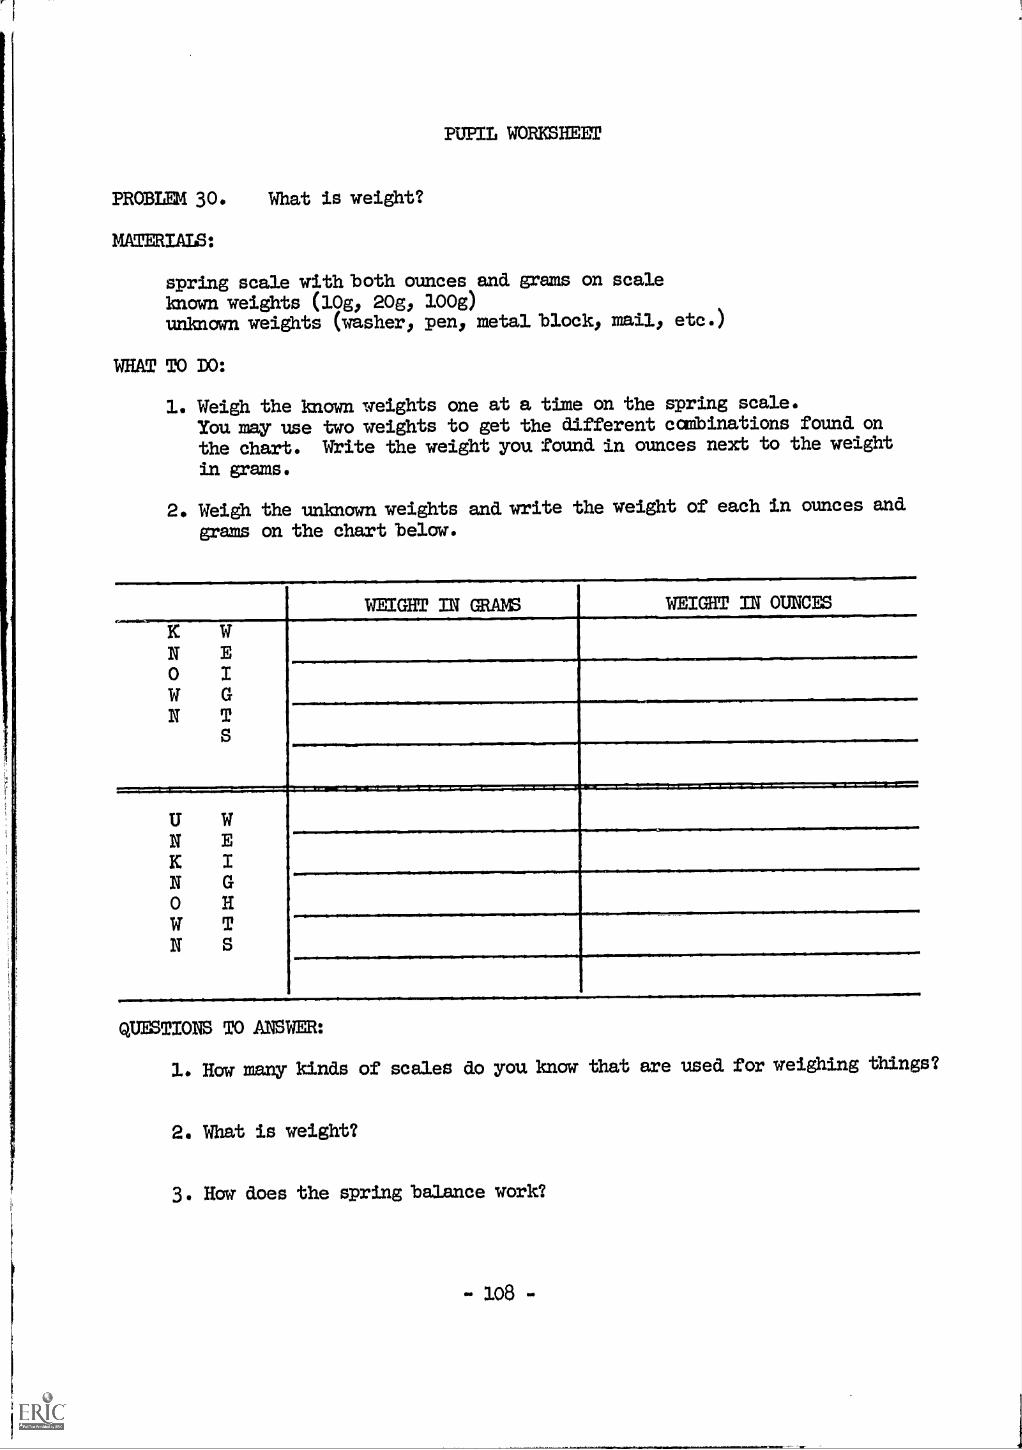
PROBLEM 30.
MATERIALS:
What is weight?
PUPIL WORKSHEET
spring scale with both ounces and grams on scalekm= weights (10g, 20g, 100g)unknown weights (washer, pen, metal block, mail, etc.)
WHAT TO DO:
1. Weigh the known weights one at a time on the spring scale.
You may use two weights to get the afferent canbinations found on
the chart. Write the weight you found in ounces next to the weight
in grams.
2. Weigh the unknown weights and write the weight of each in ounces and
grams on the chart below.
WEIGHT IN GIAMS WEIGHT IN OUNCES
K WN EO IW GN T
U WN EK IN GO HW TN S
QUESTIONS TO ANSWER:
1. How many kinds of scales do you know that are used for weighing things?
2. What is weight?
3. How does the spring balance work?
- 108 -

PROBLEM 31. WHAT IS MEANT BY PRESSURE?
OUTCOMES:
Pressure is producedlby the weight of an dbject.Pressure is the force on a surface.Air pressure exerts a very powerful force.
MATERIALS:bunsen burner vacuum pumptripod Magdebberg hemispheregallon can rulerbarometer
PROCEDURE:
1. Have a pupil place his hand flat on his desk. Place your hand on hisand apply pressure. Elicit fram the student that he is feeling pressureon his hand. Askl "What is causing the pressure?"
2. Demonstrate air pressure by heating a small amount of water in a galloncan. After steam has been coming out of the can for several seconds,turn off the flame and cap the can.NOTE: As the steam in the can cools and condenses, a partial vacuum
is formed inside the can. The outside pressure being sa muchgreater crushes the can.
3. Hhve a student evacuate the air from the Magdenberg hemispheres. Se-lect two large boys and have them attempt to pull the hemispheres a-part. Explain that air alone is holding the spheres together. Thencall on a small boy, open the stopcock, and have the student separatethe hemispheres.
4. Draw a long narrow column on the board. Explain that if this repre-sented a column of air one inch square at the base, it would extendupward over two hundred miles. Hhve the class picture weighing thatcolumn and state that it would. weigh almost fifteen pounds.
5. EXplain that each square inch column wouldweight the saue so we sayair pressure is equal to approximately 15 Ibs. per sugare inch.
6. Hhve the pupils figure the total force exerted downward on an dbjectby air.
7. Shaw one or more barometers and explain that the air pressure isenough to hold. up a column of mercury about 30 inches. Show thereadings on an aneroid baraneter. Explain the weather reports onair pressure.
8. Elicit the outcomes.
- 109 -
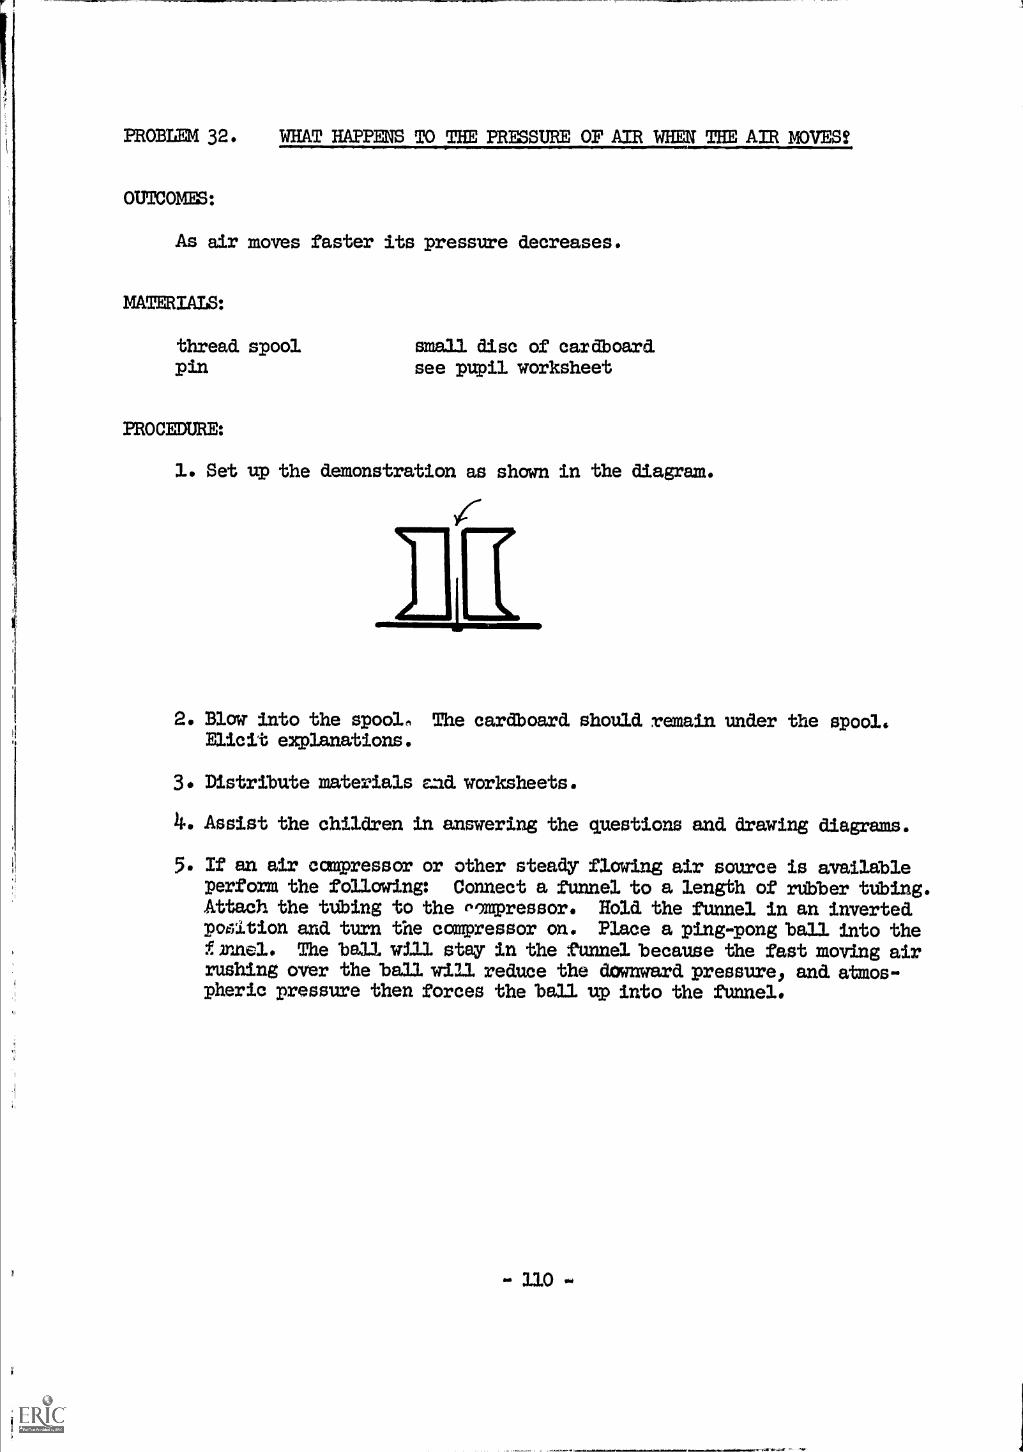
PROBLEM 32. WHAT HAPPENS TO THE PRESSURE OF AIR WHEN THE AIR MOVES?
OUTCOMES:
As air moves faster its pressure decreases.
MATERIALS:
thread. spoolpin
PROCEDURE:
sma13. disc of cardboard.see pupil worksheet
1. Set up the demonstration as shown in the diagram.
2. Blow into the spool, The cardboard. should. remain under the spoolsElicit explanations.
3. Distribute materials and. worksheets.
4. Assist the children in answering the questions and drawing diagram.
5. If an air canpressor or other steady flowing air source is availableperform the following: Connect a funnel to a length of rubber tubing.Attach the tubing to the ompressor. Hold. the tunnel in an inverted.pozition and. turn the compressor on. Place a ping-pong ball into the1:Innel. The ball will stay in the -I`unnel because the fast moving airrushing over the ball will reduce the dOwnward. pressure, and. atmos-pheric pressure then forces the ball up into the funnel.
irnllO.w

PUPIL WORKSBEER
PROBLEM 32. What happens to the pressure of air when the air moves?
MATERIALS:
3 x 5 yellow paper2 - ping-pong 'mils with thread. attached
WHAT TO DO:
1. Hold. the paper on one edge between your thumb and. forefinger.
2. Bring the paper up to your lips and. blov across the .12k of the
paper. What happened?
3. Was this what you had. expected.?
4. Repeat. Did the same thing happen.Draw diagrams to show what haoened.
5. Suspend. the two ping-pong balls by holding the strings 2 or 3 inchesapart. Blow between the two balls. What happened.?
6. Draw diagrams to show what happened.
QUES7IONS TO ANSICII:
1. How do you explain the fact that the paper went up as you blew?
2. Why dia. the ping-pong balls movetoward each other?
3. Why does the shower curtain crowd. in toward. you when you are tak-ing a shower?
11.. What is Bernoulli's principle?
5. Using Bernoulli's principle, haw could. you explain how an atomizer
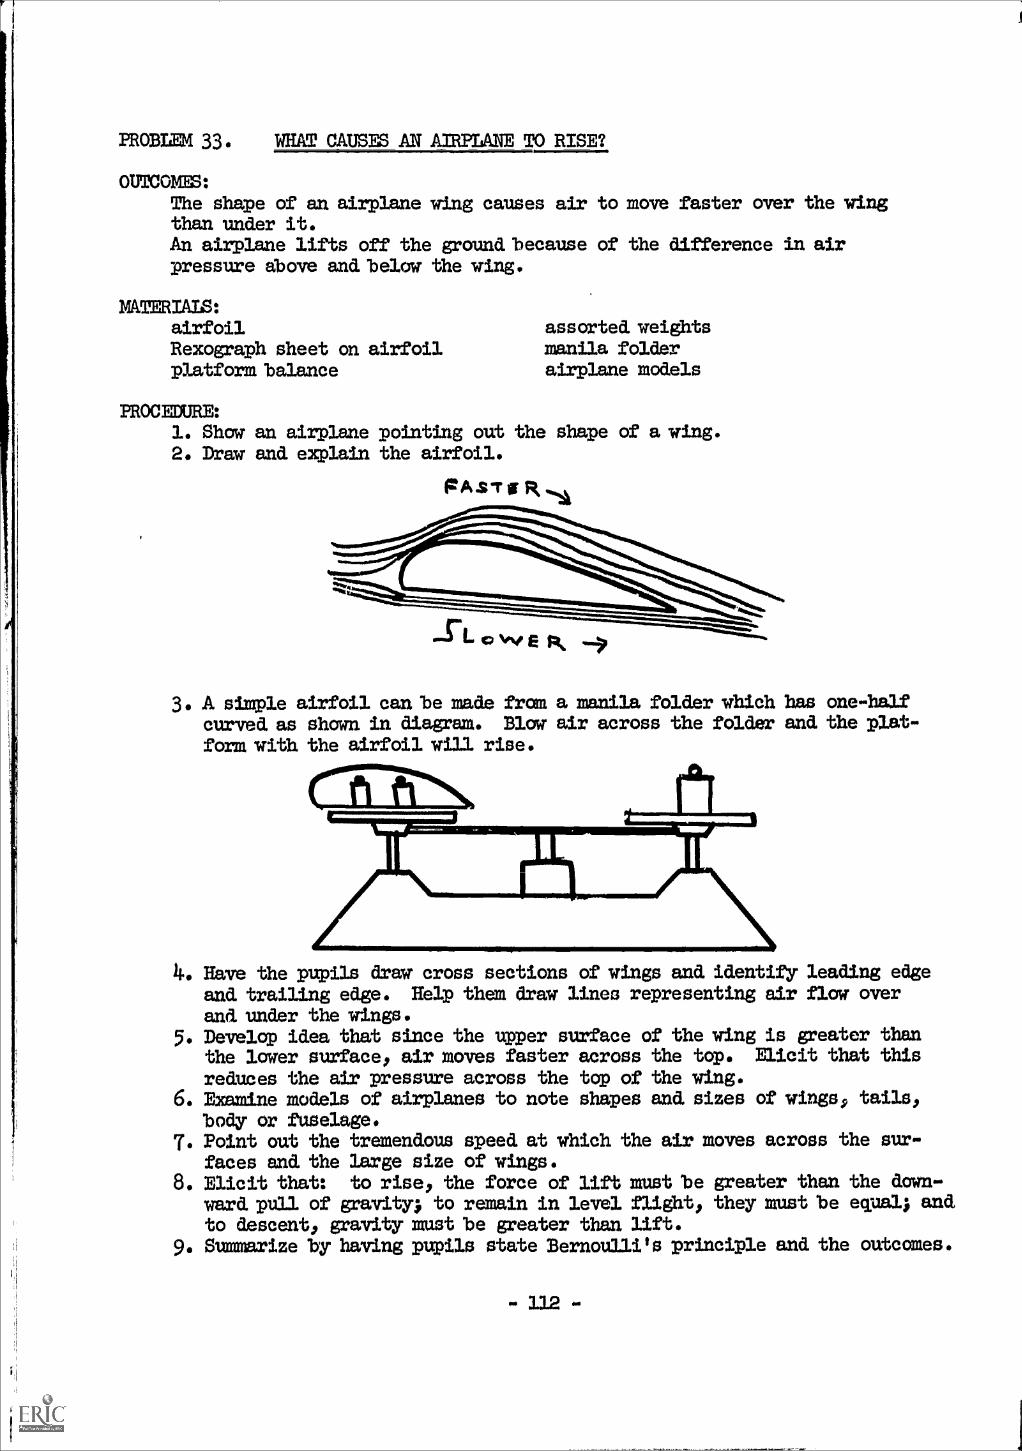
PROBLEM 33. WHAT CAUSES AN AMPLANE TO RISE?
OUTCOMES:The shape of an airplane wing causes air to move faster over the wingthan under it.An airplane lifts off the ground because of the difference in airpressure above and. below the wing.
MAMMALS:airfoilRexograph sheet on airfoilplatform balance
assorted. weightsmanila folderairplane models
PROCEDURE:1. Show an airplane pointing out the shape of a wing.2. Draw and explain the airfoil.
PAST 111
LQWEK
3. A simple airfoil can be made from a manila folder which has one-halfcurved as shown in diagram. Blow air across the folder and. the plat-form with the airfoil will rise.
4.. Have the pupils draw cross sections of wings and. identify leading edgeand. trailing edge. Help them draw lines representing air flow overand. under the wings.
5. Develop idea that since the upper surface of the wing is greater thanthe lower surface, air moves faster across the top. Elicit that this
reduces the air pressure across the top of the wing«6. Examine models of airplanes to note shapes and. sizes of wings, tails,
body or fuselage.7. Point out the tremendous speed at which the air moves across the sur-
faces and the large size of wings.8. Elicit that: to rise, the force of lift niust be greater than the down-
ward pull of geavity; to remain in level flight, they must be equal; andto descent, gravity must be greater than lift.
9. Summarize by having pupils state Bernoulli's principle and. the outcomes.
- 112
PROBLEM 34. WHAT IS EaSPLACEMENT?
OUTCOMES:
An Object samerged in a fluid displaces its awn volume of the fluid.
MATERIALS:
graduated cylindermetal cubeoverflow canwatersee pupil worksheet
PROCEDURE:
1. Call two pupils to the front of the room. Tell one to stand on a
spot. Tell the other pupil to stand on the same spot. Have pupilspoint out that the first one would have to move first. State thattwo dbjects cannot occupy the same space at the same time.
2. Tell the story told about Archimedes who sat in the tub and noticedthat the water rose. As he sank deeper into the tub, the water rose
higher. He saw that he was pushing water away or was taking itsplace. This is called displacement.
3. Explain that the class will study the displacement of water by dbjects
lowered into it. Distribute materials and worksheets.
4. Assist the pupils with their exercise and go over questions.
5. Demonstrate by first lowering a clibe into graduated cylinder and theninto an overflow can that either method can be used to determine dis-placement or volume. Measure overflow water in a cylinder.
6. Elicit outcomes as a summary of lesson.
113

PUPIL WORKSHEET
PROBLEM 34. What is displacement?
MATERIALSseveral metal cubes of various sizes stringseveral irregular rocks or other dbjects that sink waterruler with centimeter scalegraduated cylinder large enough to fit cubes and rocks into
WHAT TO DO:
1. Use your ruler to measure each side of a cUbe. Write its size onthe chart below.
2. Now figure the volume of the cube.(Vcaume equals length xwidth x height.)Enter the volume on the chart.
3. Measure each cube in the same way, entering the information on thechart.
4. Put enough water into graduated cylinder to half fill it. Writethe height of the water on the chart.
5. Tie a string around a cube and carefully lower it into the cylinderuntil it is under water. Elm' what is the water level? Write thatnumber on the chart.
6. How much water was displaced?
7. Repeat for each cube and each rock.
8. Canplete the chart.
dbject length ofof side
measuredvolume
height ofwater inc Under
height withdbjectin water
.
waterdislaced
cube #1
Ube
cube hUbe .4
rock il
rock i IIIIIIIIIIIIIIIIIIIIIIIIIIIII
rock 4 IMIIIIIIIIIIIIIIIIIMIIMMMI

qUESTIONS TO ANSWER:
1. How did. the volume of cube number 3, cm:pare to the amount of waterdisplaced.?
2. Were the reults the same for each ctibe?
3. How much water is displaced. where an object is lowered into water?
4. How can you measure the volume of an irregular solid?
5. How could you use this idea to measure one-half cup of buttereasily?

PROBLEM 35. WHAT HAPPENS TO OBJECTS WHEN THEY ARE PLACED IN WATER?
OUTCOHES:
Same Objects placed in water sink, others float.
Objects placed in water lose weight.
The loss of weight in water is due to an upward push of the water,known as buoyancy.
An object that floats is pushed upward by a force equal to its weight.
MATERIALS:
see pupil worksheet
PROCEDURE:
1. Recall that the class discovered that water was displaced when anyObject was lowered into it.
2. Tell the class they will investigate further what happens when some-thing is lowered into water.
3. Distribute materials and worksheets.
4. Review questions at end.
3.2.6
(l)

PUPIL WORESHEET
PROBLEM 35. What happens to Objects when they are placed in water?
MATERIALS:spring scaleblocks or cylinders of wood: cork.several pieces of stringlarge beaker (500 ml)
WHAT TO DO:
1. On the chart below write the name of the items on your tray.
2. Weigh each item and. record the weight of each below.
3. Half-fill your beakers with water. With the spring scale stillattachedl lower the Objects one at a time into the water. Observe
the weight of each and record it below. Also Observe whether or
not the Object is floating or sinking. Record your Observations
on the chart.
4. Subtract the -weight of the Object in water fram the weight of theObject in air and this will give the buoyant force (upward push)
of the water on the Object.
ITEM WEIGHT IN AIR WEIGHT IN WATERblillib
ORFLOATS
BUOIAAUXupward. push
of water
USSTIONS TO ANSWER:
1. What happened to the weight of each Object when it was placed in water?
2. How much weight did a floating Object lose?
3. Why is it easier to carry someone in the water than it is on land?
- 117-
PROBLEM 36. WRY DO OBJECTS SINK OR FLOAT?
OUTCOMES:
An Object will float if it weighs the same as the weight of the water
it displaces.
An Object will sink if it weighs more than the weight of the water itdisplaces.
MATERIALS:
graduate cylindermetal clibe
see pupil wwksheet
PROCKDURE:
rulerbalance scale
1. Review:a. An Object displaces water when it is lowered into it.
b. All Objects lose weight when they are placed in water.
c. A floating Object loses its entire weight in water.
2. Distribute materials and worksheets.
3. When pupil exercises are complete, measure a cUbe. Measure the waterdisplaced. Children should recall that they are the same.
4.. Now weigh the displaced water and weigh the Object suspended in waterto point out that the weight loss of the Object is equal to the weightof the displaced water or the weight of a volume of water equal tothe volume of the Object. In other wcrds, a body that sinks loses asmuch weight as the weight of its own volume of water.
5. Elicit that an Object that floats displaces only its awn weight ofwater. When it has gone down deep enough to displace enough water toequal its weight, it stays at that level.
6. Go over questions on pupil worksheet.
-118-
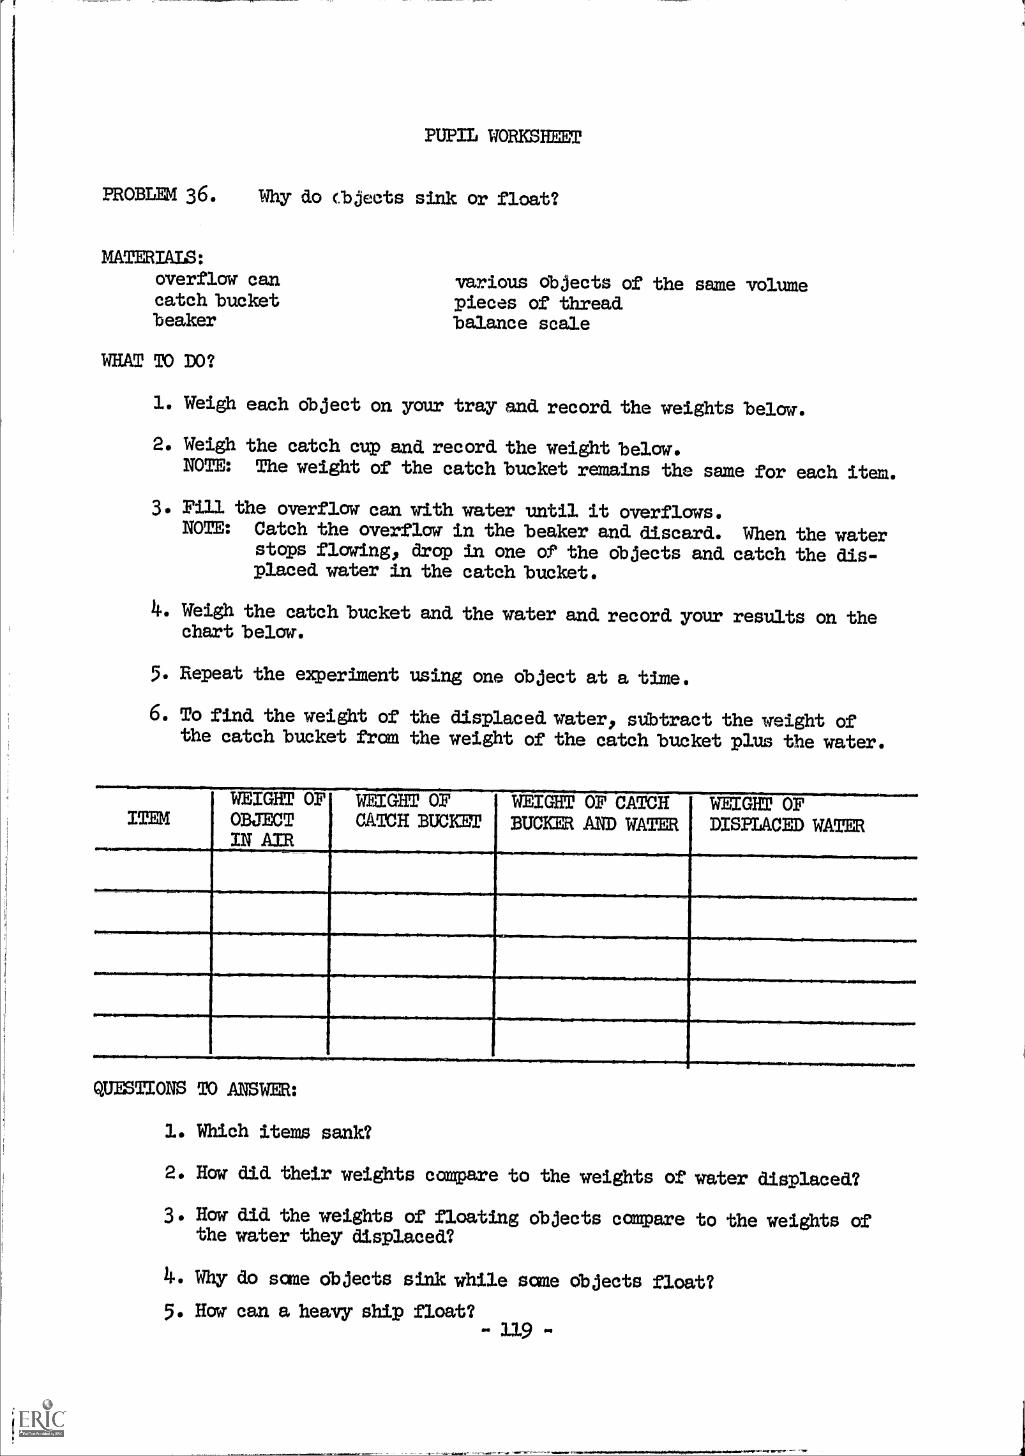
PUPIL WORKSHEET
PROBLEM 36. Why do Cbjeets sink or float?
MATERIALS:overflow cancatch bucketb eaker
WHAT TO DO?
various Objects of the same volumepieces of threadbalance scale
1. Weigh each dbject on ycur tray and record the weights belay.
2. Weigh the catch cup and. record the weight below.NOTE: The weight of the catch bucket remains the same for each
3. Fill the overflow can with water until it overflows.NOTE: Catch the overflow in the beaker and discard.
stops flowing, drop in one of the dbjects andplaced water in the catch. bucket.
4. Weigh the catch bucket and the water and. record yourchart below.
5. Repeat the experiment using one dbject at a time.
6. To find the weight of the displaced. water, subtract the weight ofthe catch bucket fram the weight of the catch bucket plus the water.
item.
When the watercatch the dis-
results on the
ITEMWEIGHT OFOBJECTIN AIR
WEIGHT OFCATCH BUCKET
WEIGH2 OF CATCHBUCKIKR AND WATER
WEIGHT OFDISPLACED WATER
......---.
QUESTIONS TO ANSWER:
1. Which items sank?
2. Haw did their weights compare to the weights of water displaced?
3. How did the weights of floating objects compare to the weights ofthe water they displaced.?
4. Why do some dbjects sink while same dbjects float?
5. How can a heavy ship float?
-

.so
PROBLEM 1. HOW CAN wE GROW LIVING THINGS MR STUDY?
OUTCOMMS: Living things require special conditions (optimum conditions) for
growth.
MATERIALS:
PROCEDURE:
specimens set up as samples
Ggy specimens pupils did not bring in
neterials for hay infusion: hay or dry leaves, jar or beaker,
water from pond., 'from cut flowers, or tap water that has been
standing 24 hnursalso see pupil worksheet
(Pupils should. have brought in previously the wide mouth jars and speci-
mens to be grown. Those specimens that pupils could not get should. be
ready for pupils to set up.)
1. Write the word. BIOLOGY on the chalkboard..
2. Elicit simple definition that Biology is the study of living things.
3. Set up hay infusion for protozoa by placing a 3ma13. amount of hay or
dried, grass or other leaves into the jar of water. Place in a dark
place for 214. to 48 hours. Explain that protozoa (microscapic animals)
will grow in the water and will be studied. later.
I. Distribute equipment an-1 mil worksheets. Have samples ready to il-
lustrate how they should. assemble their materials. Provide tape for
labeling individual work. It is not necessary for each pupil to set
up all specimens but be sure to have at least one of each. It is wise
to have duplicates of bread mold, and. beans.
5. Supervise work and assign a place for the jars to stand, for future
obrIervation. Ptrpils should. be reminded. that they are to make periodic
izibse.mations and. that they are to add. water when necessaxy.
6. Explain that pupils cannot complete problem immediately and the liv-
ing things will be studied at various times during the unit, but have
pupils point out that in each specimen set up, water was present.
NOTE: Earthworms may be found. after a heavy rain under rocks
or piles af leaves in the park. At other tines, they
may be found. near the surface of the soil near wet
drains and other wet places, or they may be purchased
in sone pet shops.
- 120 -
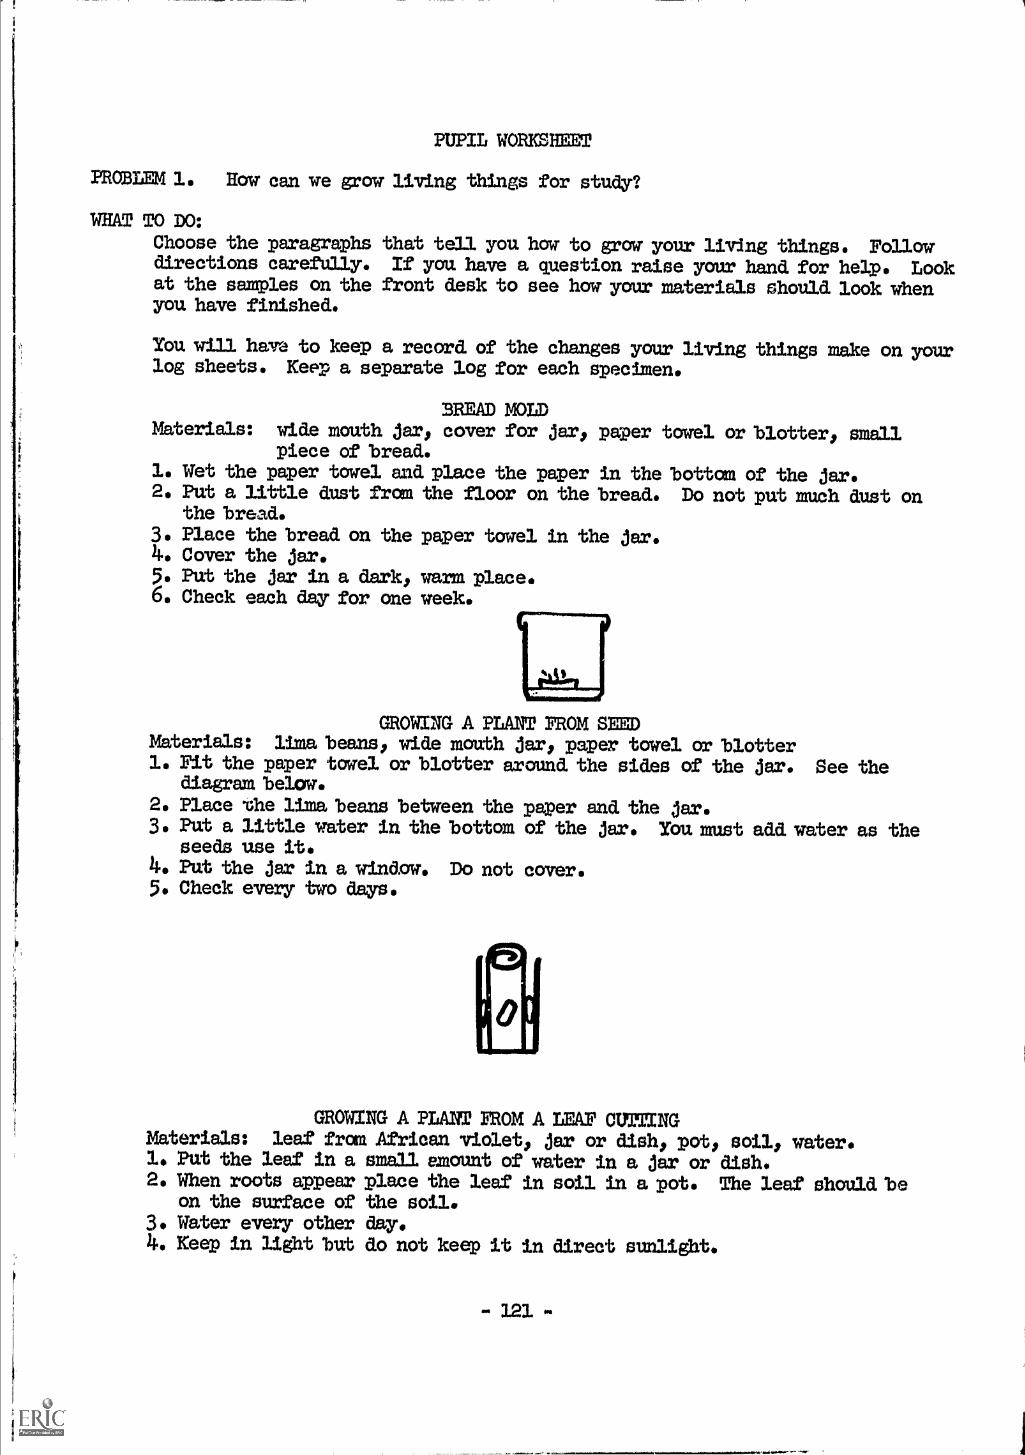
PUPIL WORIXIMET
PROBLEM 1. How can we grow living things for study?
WHAT TO DO:Choose the paragraphs that tell you how to grow your living things. Followdirections carefully. If yau have a question raise your hand for help. Lookat the samples on the front desk to see how your materials should look whenyou have finished.
You will have to keep a record of the changes your living things make on yourlog sheets. Keep a separate log for each specimen.
BREAD MOLDMaterials: wide mouth jar, cover for jar, paper towel or blotter, small
piece of bread.1. Wet the paper towel and place the paper in the bottom of the jar.2. Put a little dust frcen the floor on the bread. Do not put much dust on
the bread.3. Place the bread. on the paper towel in the jar.4. Cover the jar.5. Put the jar in a dark, warn place.6. Check each day for one week.
GROWING A PLANT FROM SEIMMaterials: li3na beans, wide mouth jar, paper towel or blotter1. Fit the paper towel or blotter around the sides of the jar. See the
diagram below.2. Place zhe lima beans between the paper and. the jar.3. Put a little water in the bottom of the jar. You must add. water as the
seeds use it.4 Put the jar in a window. Do not cover.5. Check every two days.
GROWING A PLANI' FROM A LEAF CUTIIINGMaterials: leaf from African violet, jar or dish, pot, soil, water.1. Pat the leaf in a small amount of water in a jar or dish.2. When roots appear place the leaf in soil in a pot. The leaf should. be
on the surface of the soil.3. Water every other day.4. Keep in light but do not keep it in direct sunlight.
- 121 -
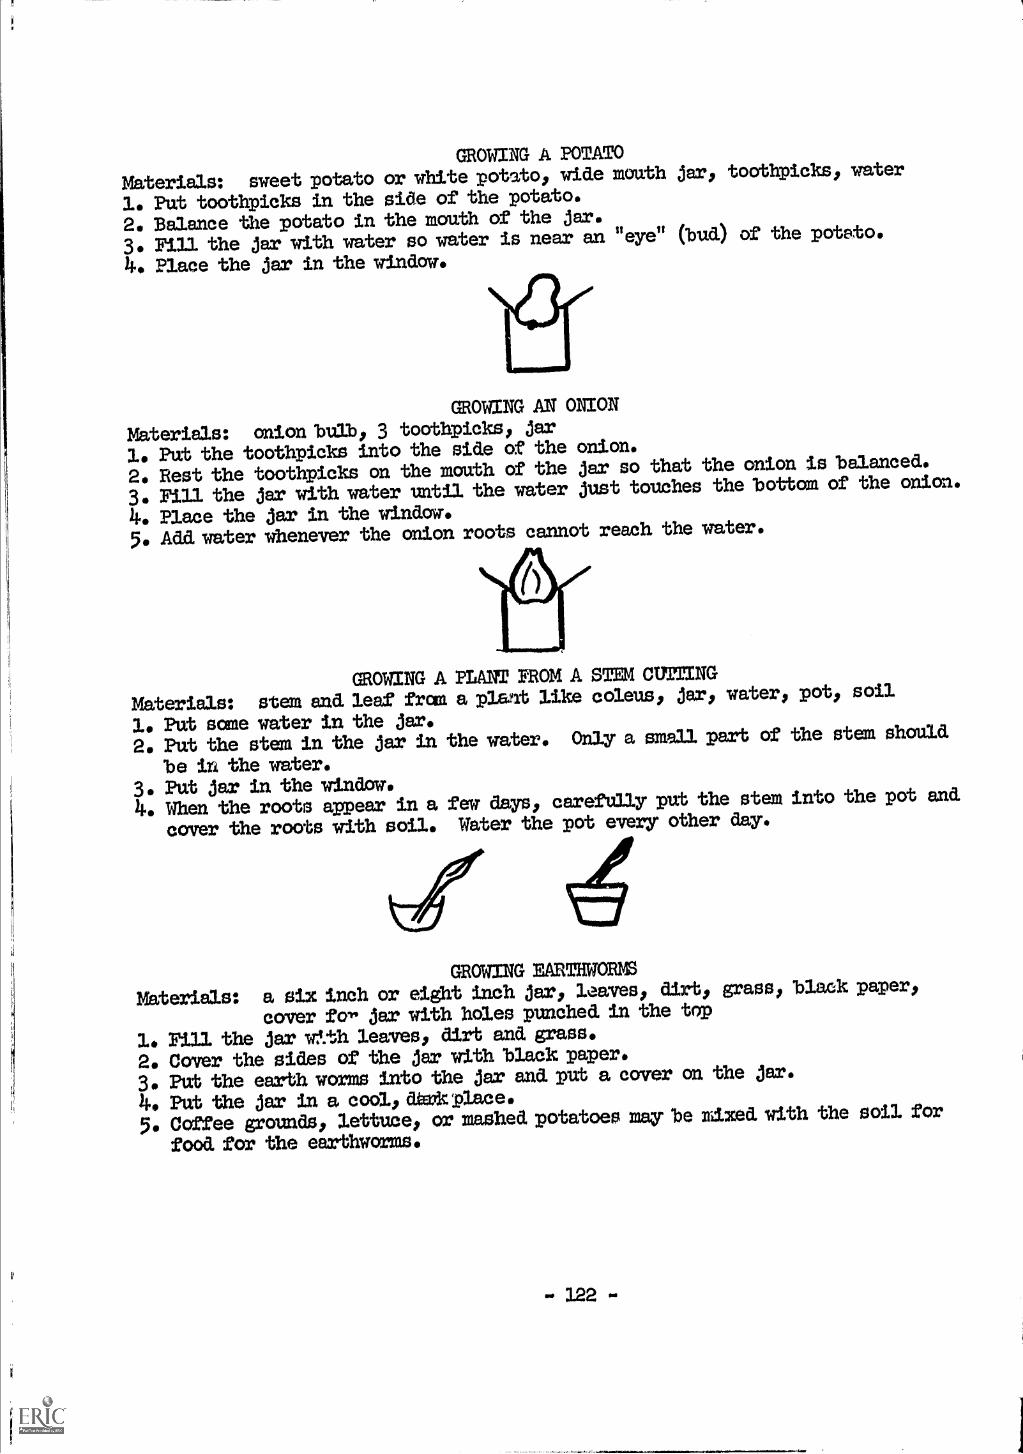
'f
GROWING A POTATO
Materials: sweet potato or white potato, wide mouth jar, toothpicks, water
1. Put toothpicks in the side of the potato.
2. Balance the potato in the mouth of the jar.
3. Fill the jar with water so water is near an "eye" (bud) of the potsto.
4. Place the jar in the window.
GROWING MT ONION
Materials: onion bulb, 3 toothpicks, jar
1. Put the toothpicks into the side of the onion.
2. Rest the toothpicks on the mouth of the jar so that the onion is balanced.
3. Fill the jar with water until the water just touches the bottom of the onion.
4. Place the jar in the window.
5. Add water whenever the onion roots cannot reach the water.
GROWING A PLANT PROM A SEM CUTTING
Materials: stem and. leaf frce, a plant like coleus, jar, water, pot, soil
1. Put some water in the jar.
2. ait the stem in the jar in the water. Only a small parb of the stem should
be in the water.3. Put jar in the window.
4. When the roots appear in a few days, carefully put the stem into the pot and.
cover the roots with soil. Water the pot every other day.
GROWING EARTHWORMS
Materials: a six inch or eight inch jar, leaves, dirt, grass, black paper,
cover fol, jar with holes punched. in the top
1. rill the jar wl.th leaves, dirt and. grass.
2. Cover the sides of the jar with black paper.
3. Put the earth wonas into the jar and put a cover on the jar.
4. Put the jar in a cool, Wolk place.
5. Coffee grounds, lettuce, or mashed potatoes may be mixed with the soil for
food. for the earthworms.
- 122 -
PROBLEM 2. HOW CAN TIE NICROSCOFE HELP DS STUDY LIVING TBINGS?
OUTCOMES: The microscope is an instrument 2or letting us see small objects.
MAMIALS:microscope lens paperchart or projected. chart ar the microscopesee pupil worksheet
PROCEDURE:
1. Holdup a microscope and ask, pupils to explain how it is used.Point out that it is an important tool in science.
2. Display a large chart or project a transparency. Quickly pointoub some of the parts.
3. Distribute pupil parksheets and. microscopes.
4. Carefully point out each of the following while pupils identifyparts and perform the action on their microscopes and label i;-.rtson their diagrams:
a. The microscope has several lenses:eyepiece lenslow power lens - short objectivehigh power lens - long o'ajective
You may recall the work in Physics on the lens.b. Point out the body tube. Have students move tube up slowly
with the large adjustment knob. Return to place.c. Move tube up with the small adjustment knob. Point out the dif-
ference in the movement and. that the large one is used. to find.the material and. the small one is to make what you see sharperand clearer. Use low power first and only use the small knobwith high power.
d.. Point out mtrror and. show how to get light. Ask why mirror wasturned. toiiird.7.7rhe windowe
e. Point out stale, clamps and. ev,....a.m.gaskasee, and. condenser.Trace the path of light to the eye.
5. Check to see that all diagrams are completay labeled. Review partsbrien.y.
6. Read, instructions frora worksheet as students work and. follow step-by-step.Check work where called far on the morksheet. When step six is com-pleted., pass out slide for 1,ractice focus.
7. Summarize by:
eliciting names of parts on demonstration microscope in front.eliciting procedure for finding light and. other steps learned.
- 123 -

Ft3P.LL WORIT'HEET
PROBLEM 2. How can the microscope help vs study living things?
MATERIAIS:
L. microscope2. lens paper3. slide of plant cell (You gct this later.)
MU MUST KEEP THIS WORKSHEET FOR USE MIME= 7OU USE THE MICROSCOPE.

WHAT TO DO:
1. Clean lenses and. mirror by wiping gently with lens paper.2. Clean the lens in the opening in the stage.3. Put the low power objective into place by turning it around. until
you feel it click.4. Look through the eyekiece lens and. at the same timo vurn the
mirror toward. the window until you see a :eull circle of brigAtlight.
5. While you are looking at the light, turn the wheel of thecondenser from number one to number five. What happens to thelight in your field?
6. Raise your hand. for checking.7. Place your slide on the stage of the microscope a.nd. clamp.8. Mile you. are looking through the eyepiece, RAISE the tube slowly
until you see your material, 'using the 3.a....1.Le ..s......tmer_rk knob.
9. If your picture is not clear, use the smL-13.. E. jai11st:tient knob to
make the field. clear.10. liaise your hand. for checking.n. Turn the hgh 2 aer. oblective into place.12. Use MI% the small advlustmeii t knob to make the field. clear.13. Raise yaur ha nd. for checking.
14. Draw what you. see.
15. Get your microscope ready to be put away:a. Remove slideb. Turn the mirror level with the tablec. Tulin the lenses so that neither is in place (Neutral
position)d. Put the ttibe all the way down
=TIM TO ANSWRR:
1. The condenser of the microscope changes the
The large adjustment knob moves the
small adjustment knob is used. for
3. 21he job of the mirror is to
11.. The low power lens is found in the
BRING THIS WORICSBEET TO CLASS NEM TINE AND EACH TIMEOU ARE TO ME BC MICROSCOES
ag5
objective.
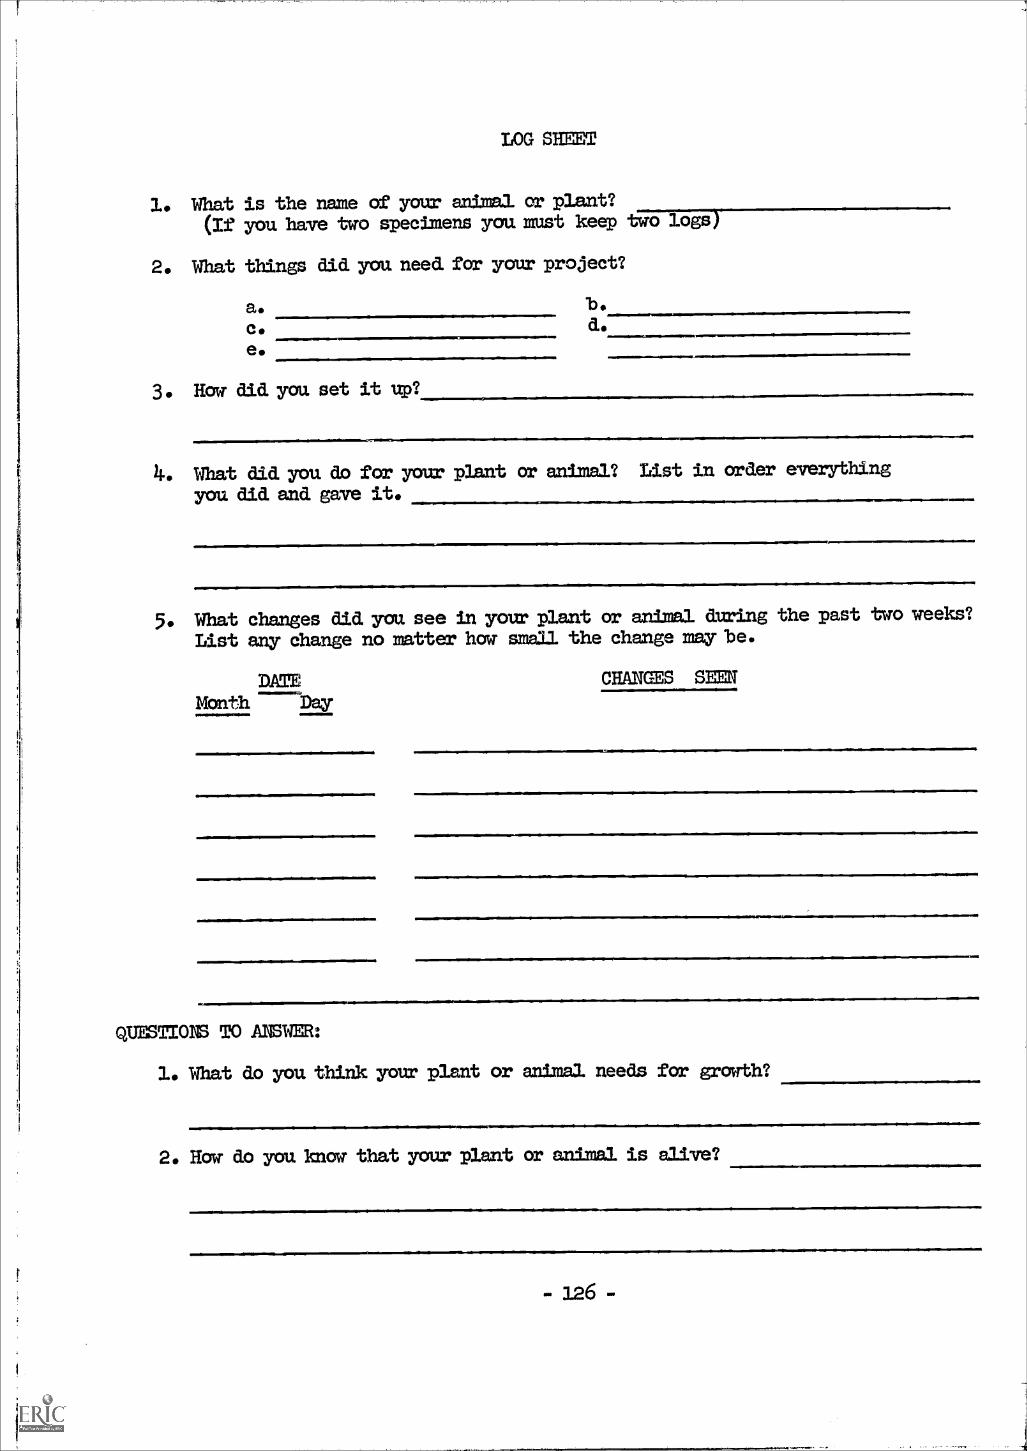
LOG SHEET
1. What is the name of your animal or plant?(If you have two specimens yourmst keep two logs)
2. What things did you need for your project?
a.C.e.
3. How did. you set it up?
b.d.
4. What did. you do for your plant or animal? List in order ever3rthingyou did and gave it. M1111111.011
5. What changes ad. you see in your plant or animal during the past two weeks?List any change no matter how small the change may be.
DATE CHANCES SEEN
Mcerth Day
QUESTIONS TO AUSW1311:
1. What do you think your plant or anlmal needs for growth?
2. How do you know that your plant or animal is alive?
- 126 -
PROBTJEM 3. HOW DO WE KNOW SOMETHING IS ALIVE?
=COM: Living things carry on certain life pmcesses that non-livingthings cannot perform.
MATERIALS:
PROCEDURE:
For the pupils:a small, mcka plastic flower or
leafa rubber insect
For the teacher:Set up on advance -
chart of yeast buddingmicroscopeslide and cover slip
a small growing plant (ivy)elodea in water with snail in test tubeearthworm(You may substitute for a living thinga tree outside window, etc.)
package of yeasttwo jars or flaskssugarwarm water
1. Distribute to students in the groups the pupil materials listed above.You may add any you tel will be helpful in solving the prdblem.
2. Have the pupils separate the materials into two groups - livingthings and. non-living things.
3. Elicit and list on the boaxe reasons for the groupings made. For ex..-ample the following life functions may be cited:
digestioningestionrespirationexcretf4nresponse to stimmlilocomotionreproduction
4. Show the class the jars containing yeast which were set up in advancewith one jar containing actively growing yeast in warm sugar water andthe other in water without sugar. Elicit differences between the twojars of yeast. Ask which they think contains the live yeast.
5. Point out that the sugar is food for the yeast and the gas of theblZbles is the waste given off by the ycast.
6. Make two slides of the yeast cells and set up two nicroscopes. Cutdown light to make the yeast more visible. Budding can be seen un-der high power.
7. Have students observe yeast under the microscope for budding. Showthem budding on the chart so they will kilow what to look for. Ifyou center some budgling cells in the field, then you can point themout more easily.
- 127 -

8. Explain that this budding is reproduction of yeast.
9. Prepare two slides, each containing a drop of water fran the hayinfusion set up yesterday. Stages of microscopes should be parallelto table.
10. Allow children to cane up to observe the protozoa moving.
11. If a plant, such as Mimosa (Sensitive plant), is available, touchthe leaflets gently and. observe them fold back.
12. Have pupils sutmnarize by listing the functions they observed whichindicate that sanething is olive.
33. Tell the children to bring in a list of ten living things, some ofwhich cannot be seen, with the reasons they think they are alive.They are also to check their specimens set up previously to enter ontheir log sheets reasons they consider these things to le alive.
NOTE:
THIS MUST BE DONE AT THE FM OF THIS LLSSON FOR USE ABOUT THREEDAIS LAM.
Get four sterile covered Petri dishes with nutrient agar in them.On one place a hair fran a student, on another dirt fran under thefingernail. Expose one to air for several minutes. Do not put any-thing on the fourth plate and. do not open it.
Incubate the dishes until needed. in the lesson "How do one celledplants and animals reproduce asexually?"
- 128 -
PROBLEM 4. WHY ARE CELLS CALLED THE BUILDING BLOCKS OF LIVING THINGS?
OUTCMIES: All living things are made of one or more small units called cells.
YATERIALS:
PROCKDURE:
Cells are small units of living nsterial.
bioscope hay infusion
chart showing a typical plant cell slide and coverslip
and a typical animal cellsee pupil worksheet
1. Distribute equipment and worksheets. Guide the pupils through
procedure.Show how to put cover slip on properly.
2. Elicit that the appearance of the cells is like bricks.
Have them make compariscms among the different preparations.
3. When thetrumt is canpleted project a slide of protozoa fran the
hay infusion. Have the pupils compare these cells with the other
cells. Elicit differences.Explain that same living things are made of only one cell, while
other living things are made of many cells put together.
(Movement of protozoa can be slowed down by placing a few strands
of cotton on slide.)
4. Summarize by eliciting answers to questions on worksheet.
NOTE:
If your time is limited and. you know the group will not finish,
only have them prepare the slide of elodeal look at the pre .
pared slide of epithelium andthe slide of protozoa. You may
even mit the prepared slide if you must.
129
PUPIL WORKSHEET
PROBLEM 4. Why are cells called the building blocks of living things?
MATERIALS:onionelod.ea
slideIodine solution
Lugol'sworksheetworksheet on the microscope
WHAT TO DO:
coverslipmicroscopedropperforcepsslide of epitheliumwater
lens paperpaper towel
1. Clean your slide and. cover slip using the water and. paper towel.
Be careful not to break the cover slip.
2. Place a small leaf of elodea. on the slide using forceps.
3. Place a drop of water over the leaf on the slide.
4. Put a cover slip over the leaf the way your teacher shows you.
5. Set your slide aside where it will not be disturbed..
6. Get your microscope ready for work. Use your worksheet for helpin getting it ready.
7. Look at the leaf under the microscope.Draw what you see.
8. Clean your slide again.
9. Place a thin section of onion skin on your slide.
10. Put a drop of the Lugoll s solutiot. on the onion skin.
11. Put a coverslip over the onion.
12. Look at the onion skin under the microscope
13. Draw what you see.
130

14. a. How is the onion skin like the elodea?b. How are they different?
15. LoOk at the slide of epithelium under the microscope.
16. Draw mbat you see.
17. a. How are these cells different from the cells you have seen?b. How are these cells like the cells you have seen?
18. Clean up your wrk area.
19. Look at the cells your teacher is showing.
20. a. Draw the cells you see.
b. How are these cells like the cells you have seen?0. How are these cells different from the other cells you have seen?
QUESTIONS TO ANSWER:
1. The blocks that you saw are called
2. All the living things we saw mere made of
3. The animals the teacher showed were maBe up of(how many)
4. What differences did, you find, between the plant cells and. the
animal cells?
5. Make a diagram of each kind of cell (plant and animal) to show
these differences.
- 131 -
PROBLEM 5. WHAT DIFFERENT TYPES OF CELLS MAKE UP OUR BODIES?
OUTCOMES: All living things are made of cells.Our bodies are made of cells.There are many kinds of cells to do many different jdbs.
MATERIALS: slides of different types of cells to project or drawings of
these cells. ( a filmstrip would be helpful if availdble)
See pupil worksheet
PROCEDURE:
1. Ask the children what they think the human body is made of.
2. Elicit that since we are living things we must be composed of
cells.
3. Ask if students think that skin would have the same type of cell
as the nmscle under the skin. Ask for a reason for any answer.They should conclude that since skin does a different jdb from
nuscle that their cells maybe different.
4. DistrZute worksheet. Do eadh step and have the students repeatas soon as you have shown them. Check work yhere required on
the worksheet.
5. When completedl ccalect equipment quickly.
6. Project slides, or show pictures, of different types of cells.Elicit the differences shown among the different types of cells.Explain something of the jdb of the cells.
7. Sumnarize by having children name four kinds of cells that make
up the body.
8. Ask:children to prepare a chart of five kinds of cells at home:
TYPE OF CELL jOB DONE
NOTE: Add. approximately 1.48 gm. metbylene blue dye to 100 ral.
of 95% isopropyl alcohol. To use this stock solution, mix10m1. solution with 90 ml. distilled water.
132

PUPIL WORKSHEET
PROBLEM 5. What different types of cells make up our bodies?
MATERIALS:glass slidecover slippaper toweltoothpick with flat edgedropper bottle of Lugo Vs solution
WHAT TO DO:
lens papermicroscopebottle of waterworksheet of microscope
1. Clean your slide and. cover slip using the water and paper towel. Be
careful not to break the cover slip.2. Scrape the inside of your check gently with the flat edge of the tooth-
pick. You will not see much on the toothpick, but the material is
there.3. Gently rub the flat edge of the toothpick on th center of the slide so
you get the material on the slide. ma you will see is a sm:11 bit of
whitish liquid on the slide.4. Put two drops of Lugol's solution on the material.
5. Place the cover slip on the slide.a. Hold the cover slip by the edge.b. Put one edge at the edge of the liquid on the slide.
c. Then drop the cover slip. DO NOT PRESS THE COVER SLIP DOWN.
6. Set your slide aside where it will not be disturbed.
7. Get your microscope ready for work. Get light. Use your old worksheet
for help, in getting the microscope ready.8. Raise your hand for your teacher to check the light.
9. Now put the slide on the stage end. clamp.10. Focus on the material on the slide.
U. Raise your hand for checking.12. Turn to high power carefully. Raise your hand. for help if you need. it.
BE VERY CA:REML. DO NOT BREAIC ThE SLIDE. DO NOT LET TIM LENS TOUCH
TEE SLIDE.13. Raise your hand. for checking.14. Draw what you see.13. Clean up your work area.
a. Remove slide.b. Put the microgcope away.c. Put all equipment in the proper place.
qUESTIONS TO ANSWER:
1. We made a slide showing
P. The material on the slide came from
34. The inside of the jaw is nade of
Ilwa011101011.0.1L-41.11M.1.111
.41**=r0......1r1

PROBLEM 6. HOW DO ONE CIMED PLANTS AND AtTEMAL9 REPRODUCE ASEXUAILY?
OUTCOMES: Asexme reproduction is reproduction of a new living thing fromone parent.Fission is one method of asexual reproduction in which a livingthing divides into two equal parts. Bacteria and, protozoa
reproduce lqfission.Budding is another method of asexual reproduction inwhich theorganism divides into unequal parts. /east reproduce by budding.
MATERIALS:Petri dishes with, bacterial colonieschart of protozoa showing fissionchart of bacteria showing fissionchart of yeast showing buildingsee pupil worksheet
PROCEDURE:1. Show pupils the Petri dishes on which colonies of bacteria are
growing. Recall that these were started. by placing hair onone, placing dirt from under the fingernail on another, andexposing the third one to air.
2. Ask where the large nuMbers of bacteria came from to note thatreproduction has letken place. Explain that bacteria are micro-scopic plants but many bacteria together form visible colonies.
3. Have pupils examine the fourth dish. Ptdnt out that this one issterile, that it is known as a CONTROL and is like eadh of theother dishes in eadh respect exnept the one and. that it providesa comparison.
4. Distribute eqpipment and worksheets. Guide pupils in their
slide study.
5. Explain that a paramecium is a protozoa. Point out other pro-
tozoa on wall chart.
6. Go over questions on the pupil wtrksheet with the class.
PUPIL WORKSTIEET
PROBLEM 6: How do one celled plants and animals reproduce asexually?
MATERIALS:mdcroscopelens paperslide of paramecium
WHAT TO DO:
L. Set up the microscope following the directions given previously.
2. Wipe slide gently with lens paper to remove any finger prints.
Handle the slide by the edge ofl1y.
3. Place slide on the stage and clamp. Look at the slide.
I. Draw what you see.
5. Paramecium is one kind of animal called They repro-
duce by This method. is reproduction
because there is parent for a new paramec .±TinTITT)e formed.
6. Clean up your work area.
QUESTIONS TO ANSWER:
1. Asexual reproduction means
2. Paramecium reproduces by
3. Bacteria reproduce by
11.. Yeast reproduce by
5. The methods of reproduction mentioned are becauseonly one parent is needed to make a new plant ar animal like the
parent.
- 135 urn

7'
FROMM 7. HOW DO SOME =CELLULAR PLANTS AND ANIMALS REPROIXJCE ASEKUAILY?
OUTCOMES: Bread. mold. reproduces by sporulation.Sane higher plants reproduce and. regenerate parts by vegetative
propagation.Hydra reproduces by budding.Sane higher animals can regenerate parts. They cannot reproduce
a whole new organism asexually.
MATERIALS:
Growth experiments: bread. mold, African violet, coleus stem, earthworm,anion
Live Hydra, if available Chart of Hydra showing buddingChart of bread mold. showing partsSee pupil worksheet
PROCEDURE:1. Display samples of bread mold. grown by the students and plants
grown frau parbs of plants - African violet, coleus stem, onionbulb, potato.Point out the plants that are beginning to grow frau a smallpart.
2. Elicit the nuMber of parents needed. Vxplain that this kindof asexual reproduction is called vegetative propagation.
3. Show a live Hydra or a preserved specimen. Use a chart toshow budding.
4. Distribute worksheets and. materials.
5. Display chart of bread mold with MIAs labeled. Guide the pu-pils through the worksheet activity. Explain that the sporescan stay alive without growing for a long time until they reachoptimum conditions. Elicit what these conditions are. Elicitthat sane of these spores must have been in the dust they puton the bread..
6. Give abher exagples of vegetative propagation, for examille,
straw'bervd plant or spider plant growing fraa runners (longstems), new bulbs fran a single bulb, potatoes fran tubers,
banana fran stem cuttings) and. ferns fran rhizaaes (under-ground. stems.)
7. Briefly explain regeneration and. distinguish between regener-ation of a parb and. reproduction a a new organism.
a. Lobster can regenerate a lost claw.b. Sane lizards can lose their tails and. regenerate new ones.
8« Have pupils list various ways of vegitative reproduction withexamples of each.
- 336 -

PUPIL WOREMET
PROBLEM 7: How do some multicellular plants and. animals reproduce asexually?
MATERIALS:bread mold growing slide and cover sliphand lens forcepshand. microscope dropperlens paper jrz or beaker
WHAT TO DO:1. Look at the bread mold. through the hand lens.
2. Draw what you see. Use the chart in the front of the room to find out
the names of what you saw.
3. With forceps, carefully take same bread mold. frcta the jar and. put it on
the slide. Do nab take much.4.. ma a drop of water to the bread mold.5. Put on a cover sl.p. Be sure not to press the cover slip down.6. Set the microscope for light.7. Look at the slide under the microscope.8. Draw what you see. Have your teacher check to see that your mold. is not
too thick. Use the chart in the front of the rocen to find out the =esof the parbs you see.
QUESTIONS TO ANSWER:
1. The small round. objects which are inside the bell-like part of thebread mold are
2. Bread. mold. reprdcrilie"'material to grow.
3. Make a list of the other many celled plants and animals tbat you, heard.about todez. Tell how they reproduce asexual:1.y.
0
falling on the right
NAN OR ANIMAL HOW THU REPRODUCE ASIOCULTLY
11.0 Regeneration mewls
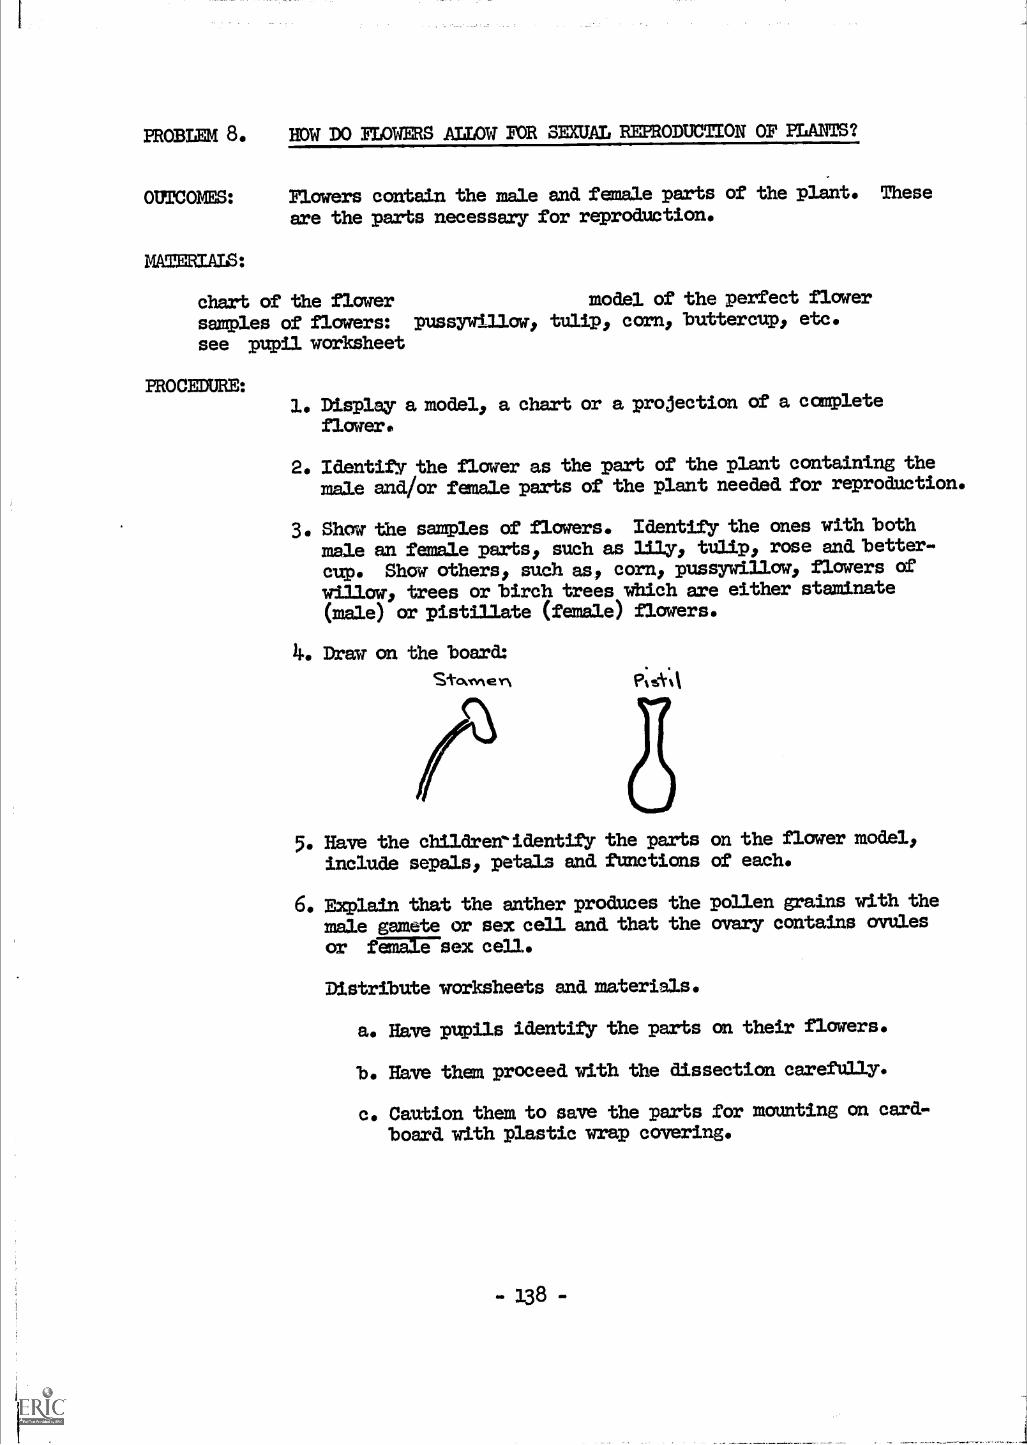
PROBLEM 8. ROW DO FIAWERS ALLOW FOR SEXUAL REPRODUCTION OF PLANTS?
OUTCOMES: Flowers contain the male and female parts of the plant. These
are the rerts necessary for reproduction.
MAMRIALS:
chart of the flower model of the perfect flower
swmples of flowers: pussywillow, tulip, corn, buttercup, etc.
see pupil worksheet
PROCEDURE:1. Displw a, model, a chart or a, projection of a complete
flower.
2. Identify the flower as the part of the plant containing the
male and/or female parts of the plant needed for reproduction.
3. Show the samples of flowers. Identify the ones with both
male an female parts, such as lily, tulip, rose and. better-
cup. Show others, such as, corn, pussywillow, flowers of
willow, trees or birch trees which are either staminate(male) or pistillate (female) flowers.
4. Draw on the board»
Starne '41 si-I
5. Have the children`identify the parts on tbe flower =del,include sepals, petals and functions of each.
6. Explain that the anther produces the pollen grains with themale gamete or sex cell and. that the ovary contains ovules
or female sex cell.
Distribute worksheets end. materials.
a. Have pupils identify the parts on their flowers.
b. Have them proceed with the dissection carefully.
c. Caution them to save the parts for mcmnting on card.-
board with plastic wrap covering.
- 138 -

PUPIL WORKSHEMT
PROBLEM 8. How do flowers allow for sexual reproduction in plants?
MATERIALS:large flower1 such as, gladiolus or tulip forcepsrazor blade (single edge) or scalpel hand lens
chart
WHAT TO DO:
1. Find all the parts you named. earlier.2. Remove sepals. Why does a flower have sepals?3. Remove petal.s carefully. Why do same flowers have petals?4. Find the stamens (male) and, pistil (femal).5. Find the anther and, filament parts of the stamen.6. Find. the stigma, style, and. ovary parts of the pistil.
T. Draw a stamen and label the 8. Draw the pistil and label the
anther and. filament stigma, style and. ovary
9. Touch an anther to the stigma. What happens? Use the hand. lens to
look at the stigma before and. after it is touched with the anther.
10. Shake an anther over paper. The material which fell on the paper is
called
U. Make a crosswise cut tbrough the ovary. Inside the ovary there are
many They axe attached to the ovary wall.Use the hand. lens to Iiiok inside the ovary closely.
12. Moimt your flower parts on a cardboard and, label them at home.
QUESTIONS TO .ANSWER:
1. The male part of the flower is the which has two paxts
and
2. The pollen grains are found on the Pollen grains
are femareT.---
3. The female part of the flower is the which has
three parts
4. The ovules are found in the . They are
(male, female).
5. We know the stigma of the flower isstuck to the stigma.
139 -
because the

PROBLEM 9: HOW DOES ITEMIZATION TAM PLACE IN THE FLOM?
OUTCOMES: Flowers must be pollinated for reproduction to take place.
Pollination is the transfer of pollen to the stigma of the
same or different flower.
Fertilization in the flower is the union of the sperm nu-
cleus of the pollen grain and the ovule.
MATERIALS:chart showing pollination and fertilization
flower model
PROCEDURE:1. Display the chart and the flower model.
2. Define pollination. Elicit three ways that pollination could
be accomplished. Some pupils will know insects (bees) and
wind, transfer pollen. Explain that pollen can be transferred
from the anther to the stigna of the same flower by the natu-
ral movement of the flower (self-pollination).
3. Explain the importance of pollination using corn as an exam-
ple. Corn is wind pollinated (cross-pollinated). If a stalk
should be isolated (behind a barn or other building) so that
the wind cannot get any pollen to it, no ears or corn (no
kernels) will be produced. Same reason to be elicited later
fran the students.
4 Distribute worksheets showing stages from pollination to fer-
tilization. Elicit: the parts already known, such as, the
pistil, stigma, ovary. Ube model or chart to refresh memory
on parbs.
5. Recall that the stigma contains a sticky material to catch
the pollen and provide for the growth of the pollen tdbe.
6. Trace the development of pollen tlibel nuclei traveling down
the tUbe, and =Lon with the ovule. Define fertilization.
Point out parts on each diagram on the chart so that thgy can
note the changes that take place.
7. Suanarize by answering the questions an the worksheet with
the pupils.
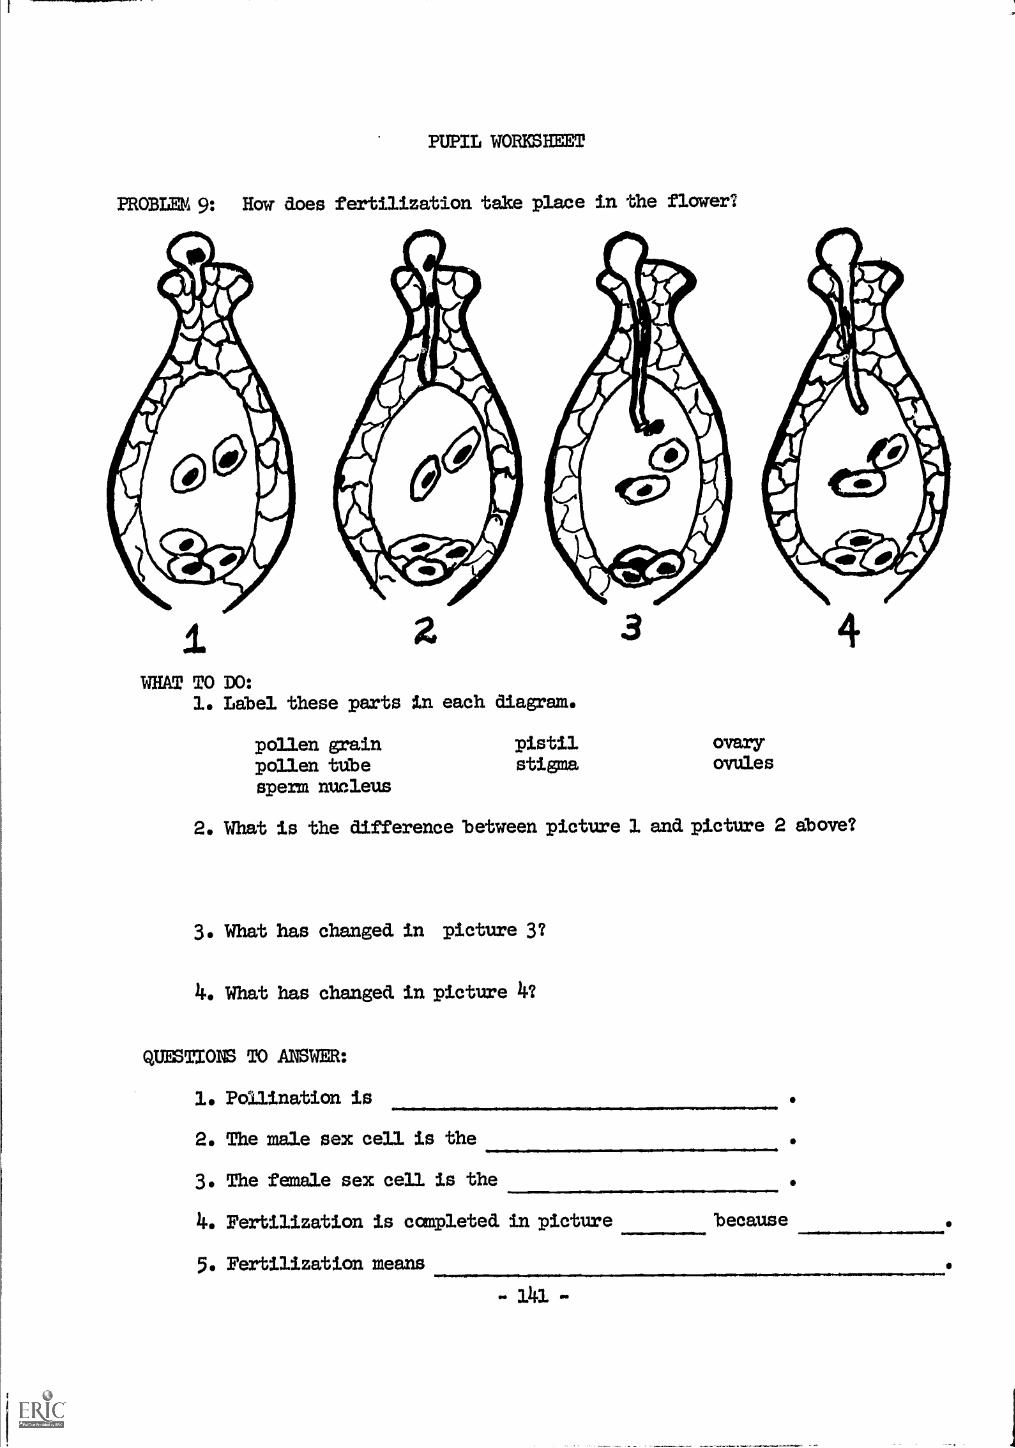
PUPIL WORKSHEET
MOWN 9: How does fertilization take place in the flower?
WHAT TO EO:1. Label these parts in each diagram.
pollen grainpollen tUbesperm nucleus
pistil ovarystigma ovules
2. What is the difference between picture 1 and picture 2 above?
3. What has changed in picture 3?
4. What has changed in picture 4?
QUESTIONS TO ANSWER:
1. Pollination is
2. The male sex cell is the
.4101mallfl.ININNIPOIIIII
3. The female sex cell is the
4. Fertilization is completed in picture
5. Fertilization means
because
PROBLEM 10. WHAT ARE FRUITS AND SEEDS!?
OUTCOMES: The fertilized egg (zygote) develops into a seed.
The ovary exound. the seed. develops into the fruit.
Any plant structure containing seeds is a fruit.
MATERIALS:! chart on fruits and seeds samples of vexious fruits andi
i museum jar of bean seeds (try to include sane
geminating seed. grown in class by students fruits we do not eat: e.g.,
see pupil worksheet rose - maple tree)
PORCEDURE:1. Review briefly the process that produced the fruit. Use pic-
tures where possible to show pollination by insect.
2. Explain that after fertilization most of the original parts
of the flower die and fall away but the fertilized egg cell
divides many times and. develops into what we call a seed..
The ovary which contains the fertilized egg grows and. stores
food. and. is called a fruit.
3. Show samples of fruits and seed.
4. Work step-by-step with the class as outlined on the worksheet.
5. Do review exercises on worksheet identifying fruits and seeds
with pupils.
6. Have children list "fruits" and. "vegetables". Now explain
that all plants are vegetables (botanically) and. any plantstructure containing seeds is a fruit. Thus peppers, squash,
etc. are fruits.
7. Suggested. Hanework:
Give the class a list of plant parts and have pupils identify
the fruits and. the seeds on the list.
ear of corn lima bean
corn kernels pickle
cucumber squash
tomato lettuce
string bean watermelon
PUPIL WORKSHEET
PROBLEM 10. What are fruits and. seeds?
MATERIALS:pea pod. (fruit)hand. lens
dissecting needlerazor blade or scalpelpaper for drawing diagrams
WHAT TO DO:1. Look at the fruit (pea pod.) yoti have on your table. Look for any parts
of the flower that may still be present.a. Find, the blossom end. of the fruit 'where the flower was before the
fruit developed..b. Find, the stem end. where the fruit is attached, to the plant.
c. Look for sane sepals that may be at the stem end.
d. You may see the old, stigma and. stamens at the blossam end.«2. Draw a large diagram of your fruit (pea pod). Label the blossom end.,
stem end., and other parbs if present.3. Carefully split your pea pod. in half along the seams. Be careful not
to loosen the seeds (peas) inside.4. Find. where the peas are attached to the wall of the fruit.
5. Draw a picture of the peas (seeds) in the pod. attached. to the pod(fruit).
Label the diagram.6. Remove one of the seeds (peas). Using the lens, look at the scar at the
place where the pea was attached.. There is a very small opening near the
scar called. the micropyle. This is where the pollen tube entered.
7. Remove the outer ai-77ye1ieed. coat) of material around. the seed. Be care-
full not to destroy anything underneath. When the seed. coat is removed.)
you will see a small tail-like part called, the hypocotyl.
8. Draw a diagram of the seed. showing the hypocotyl...
9. Carefully split the seed. (pea) in half. It is easy to do this along the
split or line you see around. the seed.. Look at the small part attached.
to the hypocotyl. This is the Embryo or ming plant. The two haves are
the seed. leaves. They contain food. for the young plant to grow on untilit has ro.)ts.
10. Draw a diagram of the split pea showing one seed. leaf kind. the embryo.
Look at the jar your teacher has to see the parts clearly.
QUESTIONS TO ANSWER:
1. The pea is really a
2. The old. ovary is now the
. The pod is a
The old. ovules are now
3. What must happen to the flower before a fruit and. seeds can be made?
11.. Write the meanings of these words in your notebooks:
micropyle hypocotyl embryo
- 143 -

FROMM 11. HOW DO SOME AM= REPRODUCE SEMALLY?
OUTCOMES: Frogs and. most fish reproduce by external fertilization and
external development of the eggs.
The frog reproduces by external ferti3.ization and. development.
The frog develops frau egg to adult through many stages calledifmetamorphosis".
MATERIALS:fish containing roe (eggs) - perch is a good. specimen.
transparency for overhead projector of the internal structure of fish
showing the reproductive system.transparency or cheat of reproduztive organs af frog showing extern.al dif-ferences *between male and female.
chart and/or museum jar showing stages of metammhosis of frog.
see pupil worksheet
FROCKIXIRE:
1. Show dissection of female fish. To dissect the fish: Make a
ventral cut fran the vent to the region between the pectoral
fins and. fran there to the base of each pectaral fin. Remove
a flap of body wall frau each side of the medial cut to ex-
pose the body cavity.
2. Show transparency to identify the reproductive parts of the
fish.a. In the female there will usually be a large mass of
eggs ca, roe covered by a thin membrane. The oviduct
cam be txaced to the cloaca.
b. Di the male, two long, thin, white structures running
almost the entire lengbh at' the body cavity are testes*
A sperm duct leads to the cloaca.
3. Recall the term a'3erbilization - the union of egg and, sperm.
Point out that fertilization is external in most fish. The
female deposits her eggs in a chosen place. The male followsand deposits sperm over the eggs. Fertilization can then
take place.
16 If time permits, you, may tell of some peculiar reproductivehabits a fish like salmon, stickleback and geunion.
5. Using the chart of trog, locate reproductive parts of themale and. female frog.
6. Using a charb of museum jar showing metamorphosis, point outthe stages of development a the frog frau fertilization toadult.
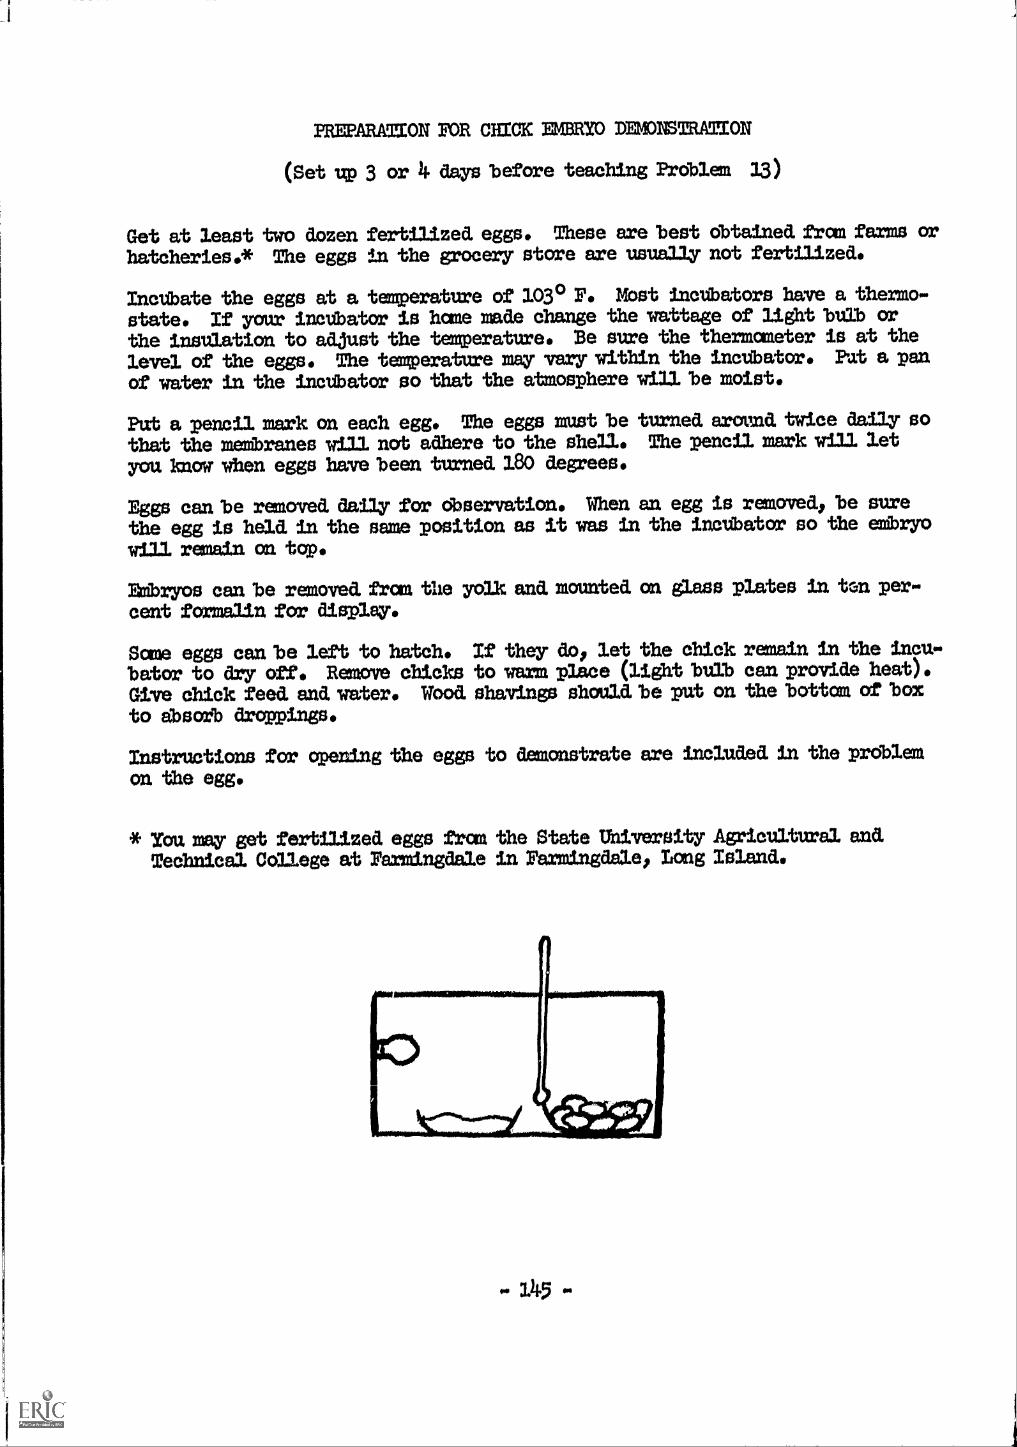
PREPARATION FOR CHICK EMPHYD DEMONSTRATION
(Set up 3 or lj. days before teaching Problem 33)
Get at least two dozen fertilized. eggs. These are best obtained fran farms or
hatcheries.* The eggs in the grocery store are usually not fertilized.
Inctthate the eggs at a temperature or 103° F. Most incubators have a thenno-
state. If ya= inatibator is hane made change the wattage or light bulb or
the insulation to adjust the temperatme. Be sure the thermaneter is at the
level of the eggs. The temperature may vary within the inctibator. Pat a pan
or water in the incvhatar so that the atmosphere will be moist.
Put a pencil mark on each egg. The eggs must be tamed aroma. twice daily so
that the membranes will nab adhere to the shell. The pencil mark will let
you Icaow Vhen eggs have been turned. 180 degrees.
Eggs can be removed. daily for observation. When an egg is removed, be sure
the egg is held, in the same position as it was in the incubatar so the eaxibryowill remain on top.
3Anbryos can be removed frau the yolk and. mounted. on glass plates in tan per-cent formalin for display.
Sane eggs can be len to hatch. If they do, let the chick remain in the incu-bator to dry off. Renove chicks to warn place (light bulb can provide heat).Give chick feed. and. water* Wood. shavings should be put on the bottom or boxto absorb droppings.
Instructions for opening the eggs to demonstrate are inialuded. in the problemon the egg.
* You may geib ferbilized. eggs frora the State University Agricultural and.Tecbacal College at Farmingdale in Farmingdale, Long Island.
145

PROBLEM 12. HOW DOES A FERTnazam EGG DEVELOP?
OUTCOMES: The fertilized egg divides many times.
The cells divide through a process called. mitosis.
The group of new cells change shape*
MAMMALS:
chart of developing egg of starfishprepared slides of starfish eggchart of mitosisindividual pupil charts of mitosis and, of developing egg
PROCEDURE:
1. Show chart of stages of developing starfish egg* The unfer-tilized. egg shows the nucleus. The fertilized, egg is sur-rounded. by a fertilization membrane so no nucleus is seen*
2* Explain that the egg cells divide into a round cluster ofcells called, a morula* The division continues until thereis a hollow bail of cells filled with livid. called ablastula* Division continues and one side of the blastulabecomes pushed in and. structure two cell layers thick isformed. - a gastrula*
3. Stusay slides of the developing egg* Point out same stagesseen on the chart*
16 Give out worksheets of mitosis. Label parts with class sothey will readily see the changes from stage to stage* Ex-plain that all cells divide this way*(This is true excerpt for sex cells during gametogenesis.Gametes must ttadergo reduction division (meiosis) to ad-just the chroinoscee number* If the class is sufficientlyinterested. and. able, you may go into this.)
5 As a review, bave pupils Libel the three stages of the de-veloping egg on their charts. Explain that very little ifemy growth takes place in the early stages of cell divisionso cells get smaller as numbers increase.

runt WOREshnior
PROBLIVI 12. How d.oes a fertilized. egg develop?
MATERIALS:blank chart of mitosis - cell divisionblank chart of developing egg
WHAT TO DO:1. Label eadh "phase" of mitosis. Ube the teacher's chart as a guide.
What does "phase" ntemn2
2. On the diagrmn of the resting stage, label the following parts:nucleuscell membranesytoplasm
3* Loa: at the second. diagram. What differences do you see betweenthis diagrmn and. the first diagram?
Do you see aAy new partsi Where did these parts came from?
44. Look at eadh diagram. Find the differences in each diagram. Thelong :aod-like parts are chromosomes.
5. Ldbel on each diagram:chronosamescon membranecytoplasm
6* What has haypened to the nucleus?
QUESTIONS TO ALCM:
1. The part of the cell that changes the most when a cell divides isthe
2. When the nucleus begins to divide, the material in the nucleusarranges itself into
3* Can you, tell how a new cell is made? Tell what changes take raaceia the cell stepmby-step to make a new cell.
a.
b.
C.
d.
e.
Ldbel the stages on the diagram of the egg.

PROBLEM 33. WHAT CHANGES TAKE PLACE IESI3E THE EGG BEFORE THE EGG HATCHES?
OUTCOME'S: Mu.ch of the egg material provides food. for the developing embryo.
The fertilized, egg goes through many changes in order to developinto a chick.
It takes twenty-one days for the egg to develop under the properconditions a temerature and. moisture.
The embryo of the chicken develops very much as numnals do, in-cluding htnnans.
MATERIALS:a three or four daysaline solution - 9finger bowl
PROCEDURE:
chick embryogm. iodine free salt(tvo. e- ) in 1000 cc water at 1030 P.
charts of developing chick embryo
1. Review and. elicit, if possible, that =eh cell division bas taken placeinside the egg fran the time it was fertilized until now. Explain thatthe egg has developed, beyond. the gastrula stage.
2. To demonstrate the four-day chick embryo, by doing the following:a. Assemble the equipment - finger bowl b.alf-full of the
saline solution which is 103° P. You may use a probe asa pointer.
b. Remove the egg from the inctthator only when you are readyto open and. show it to the group.
- 148

c. Be sure to hold. the egg in the same position as it was inthe incubator so that the embryo will be on tap. Crack theegg gent3.y on the edge of the finger bowl.
d.. In the three-day or four-day embryo the heart is beatingand. will continue to beat for a half hour if the saline isat 103° F.
3. Show these parts to tbe pupils. Project diagram if possible.
Other eggs should. be removed and. opened at later stages close to10, 14, 16, 18: 21 days. Open in the same maimer as the four-day
egg. In 21 days sane may hatch.
4. After several dbservations of the eMbryos have been made, ask,"What conditions are necessary for the egg to hatch?"
5. Start filling in tb chart below. Follow procedure above until alldata bave been entered.Whet changes take lace inside the e before it hatches?
8 days
10 dap
14 dap
16 days
18 days
daYs
loes.m.0111111,01.11..W.11.1.
vallsOM11001.1.1.1101M4
6. Explain that these changes in the egg axe very similar to the d.evelop-merit of human enthryos but the human takes mach longer to develop.
Nate: The questions may be used. as a worksheet of observations forthe pApi3.s. Duplicate the questions of the sumnary with amplespace for the pupils to write in their observations. Be sureto give them things to look for When you show them, e.g.,heart, body, head, 11.4ibs, eyes, size, shape.Identify organs. Look for groups ar organs that form systems.

PROBLEM 14. HOW DOES THE BODY WORK?
OUTCOMES: The body has many parts or systems that work together to make
it function.
Organs that work together to do a specific jdb form a system.
MATERIALS:manikinwall charts of eadh system - digestive, respiratory, circulatory, nervous,
excretory, muscular, skeletal
unlabeled diagrams of systems
PROCEDURE:1. Ask the class to name same of the functions or activties of
the body, such as, brathing, eating, moving, etc.
2. Ask them to consider each of these activities to determine
if the activity is performed by the entire body or if speci-
fic parts are involved in order to develop idea of systems.
3. Display the manikin and. have pupils help "dissect" it and
identify organs.
4. Point out a group of organs that form a system, i.e., they
work together to perform a specific job.
5. Hang the charts of the systems in front of the class.
6. Distribute worksheets and blank charts of the systems.
7. Have the pupils label the blank charts using the manikin and
large charts for reference. Have them canplete the worksheets.
Circulate, giving assistance.
8. Stanmarize by compiling in chart form information elicited
from pupils:
system job I organs that make up the system
9. Point out that one system depends on the work of other
systems. Explain that the body must have all systems func-
tioning properly.
10. Have the children:Complete at home the charts begun in class.
- 150 -

PUPIL WORKSHEET
PROBLEM ill, Hov does the body vork?
MATERIAIS:bladk diagrams of systemspictures of organs youbrought in
WHAT TO DO:
1. Lax& at the manikin in the front of the room. Make a list of organsyou see.
2. Tell what the jdb of each organ is. Write the jdb next to the name.
3. Look at the large charts in the front of the roam. Find a blankchart that is like the large charts.
a. Write the title of the system on eadh chart.
b. Ldbel tbe organs.
4. Arrange the pictures of organs you brought in in groups that gotogether.
QUESTIONS TO ANSWER:
L. Each group of organs working together to do a special jdb is called
2, How is it possible to fit all the groups of organs into the body?
3. Fill in the summmry chart:
SYSTEM ORGANS IN THAT SYSTEM JOB OF SYSTEM

PROBLEM 15: HOW DOES THE DIGESME SYSTEM DO ITS JOB?
OUTCOMES: Each organ of the digestive system helps to change food. into a
soluble form.Soluble (digested.) food. enters the blood fran the small intestine
where digestion has been completed.Food. must be made water soluble to be used. by the body.
Food is used CT needed in the cells of the body.
MAMMALS:chart of digestive systemmodel or picture of Taluspupil diagrams of digestive system
manikinpicture of stanach wall
PROCEDURE:1. Show the chart of the digestive system.
Trace the path of the food. through the system eliciting names of organs
as you trace. Expl.ain that the liver, gall bladder and pancreas are ac-
cessory organs and that food, does not pass through them. Have children
check their charts of systems as you work with wall chart.
2. Describe the function of each organ. Show picture of stanach lining to
elicit reason stomach is suited. for its job of churning and mixing.
3. Explain that digestion is started in the mouth and. is canpleted in the
small intestines. (Process takes about 15 hours.) Fran here digested. food.
materials enter the blood to go to the cells of the body. Other materials
which cannot be digested. pass through large intestines and rectum to leave
body.
16 Explain that food. has not becane a part of the body until it has left the
digestive system or alimentary canal. The food. materials which we cannot
digest, for example, plant cellulose, are never "in the body", they pass
through the "tube within a tube."
5. Show a model of a villus. On the cross section, show that food must pass
thtough vessel walls and. cell membranes to enter blood.
6. Have pupils mmarize the lesson by tracing the path of food. using the mani-
kin. Allow them to dissect the model to describe an organ and its function.
PROBLEM 16. WHAT CHENEWAI, CHANGES TAKE PLACE IN TEE MOUTH AND STOMACH?
OinCOMES: Starch is changed to sugar by saliva in the mouth.Sane proteins are digested In the stanach.
MATERIALS:two beakers of water starch suspension - 1 on. starch intwo 10" pieces of cellulose tibing 1000 cc hot water
see pupil worksheets starch suspension + saliva
PR0CEDLE1E:1. Have children recall the tests for starch and sugar.
2. Distribute materials and. assist pupils in their obsemations.
3 When they have completed, ask, "Why is digestion necessary?" and. set up
the demonstration in the diagram. The cellulose tubing represents intes-
tines. Tie tight knots and rinse thoroughly before placing in beakers.
Be sure there is enough water in beakers for pupil tests tanorrow.
PUPIL WORKSHEET
PROBLEM 16. What chemical changes take place in the mouth and. stomach?
MATERIALS:
7 test tubes in a racktest tube holderLugol' s solutionBenedict' s solutionstarch suspension
droppersmatcheslabelcotton
1% solution hydrochloric acid.1% solution pepsincooked. egg white
alcohol burner
WHAT TO DO:1. Set up 6 test tubes with the following things:
a. starch suspensionb. starch suspensionc. starch suspension and. saliva ishake to mix)d. starch suspension and. saliva shake to mix)e. salivaf. saliva
2. Allow the tubes to stand. while you continue.
3. Into a clean test tube, place some cooked. egg white.
14.. Add. equal amounts of pepsin and hydrochloric acid.. This mixbure is likethe juices of the stomach.
5. Stopper the tube with cotton, label it with your name, and. give it toyour teacher for storage in a a warm place until tomorrow.
6. Now test the tubes abovea. for starch: test tubes a$ c$ eb. for sugar: test tubes b$ d$ f
7. There was a positive starch test in the tube containing8. There was a positive sugar test in the tube containing
QUESTIONS TO ANSWER:1. Did the saliva contain sugar or starch?
2. Did the starch suspension contain sugar?
3. How can you explain that starch plus saliva contained sugar?
14.. What happens to bread. in the mouth?
5. (Answer tomorrow) What h.appened to the egg white?

PROBLEM 17. WHY IS DIGESTION NECESSARY?
OUTCOMES: The same as the outcomes listed in the previous lesson.
MATERIALS:chart of the digestive system
manikinthe two beakers set up during previous lesson
see pupil worksheet
PROCEDURE:1. Distribute wmksheets and the equipment for the lesson.
2. Display the osmosis set-ups and review what the parts of the
set-up represent.
3. Help pupils answer the questions in the procedure.
Recall that Lugolls solution is used to show when starch is
present and. Benedict's scaution is used to show when sugar
is present. Do this before the pupils make the tests.
4. Check them carefely as they make the tests for starch and
sugar.Be sure they know how to beat properly in the test for sugar.
5. When they hame completed the tests and questions, develop
with them the reason starch must be changed. to sugar. EXplain
that for any material to enter the cells, it must be dble to
go through the wall of the small intestine and the wsll of the
bloodtUbe and, to enter the cell through the cell membrane.
6. Explain that nutrients must be changed into a form dble to
enter the cells. These materials are changed chemically.
This is digestion. Point out that the organs of the di-
gestive 175BIZE7Eat to change the food chemically so it is
dissolved and can enter the cell where it is used.
7. Develop the chart on the 'worksheet with the pupils.
8. Summarize by:
a. Eliciting the path of food in the body
b. Eliciting what happens tofoodin each place or organ
of the systemc. Eliciting a definition of digestion
Answering, "Why must food. be digested2"
-154-

PROBLEK 17:
PUPIL WORKS=
Why is digestion ncesssary/
MAMMALS:water fran the two beakers set up in the previous lessontest tUbes Lugo los iodine solutionburner Benedict t s solution
WHAT TO DO:1. Look at the beakers on the table in the front of the roan.
a. In one beaker there is in the taing.b. In the other beaker there is in the tubing.
c. The tubing represents and the water represents
2. Get sane water from the beaker containing tube of starch and water andpour into a test tube.
3. Put a few drops of Lugolts iodine solution into the test tae.Why did. you put iodine solution in the water? What does this show/
a. The starch (ad., did. not) go through the membrane.b. I can tell because
11.. Po= sane water from the beaker where the starch and. saliva were inin a test tube.
50 Add. sane Lugolls iodine solution to the water. What happens?
6. Test water frau each beaker with Benedict's solution. Heat gently.What does this show?
Swe material ad. go through one membrane. I know this because
7. In the tubing with starch and. saliva
8. In the body starch must be changed. toThis change begins in the
was made.
QUESTIONS TO ANSWER:1. The organs of the digestive system are:
2. When starch is digested., the starch is changed to
3. The other food. materials must be changed cw
nst digestion happens in the
5. We must digest food. because

PROBLEM 18.
OUTCOMES:
HOW DOES THE BODY USE THE FOOD WE EAT?
Fooda are needed:a. to produce heatb. to produce energyc. for growth and. repair
d. to regulate body functionsThe chief energy foods are those foods containing carbohydrates
and/or fats and oils.
MAMMA'S:spray can corerbutter or manerinewickwater
PROOMBE:
thermometercalorie chartsfood chartsmatches
1. Take the cover of a spray can such as that used for hair
sprays or spray starch. Add. water to the outer ring and
place a small amount of melted butter containing a string
wick in the center section. Take the temperature of the
water. Then ignite the wick and when the butter has burned,
take the temperature of the water again to show that heat
was produced when the butter burned.
2. Hold. a piece of luaxp sugar with tongs. Dip the sugar into
cigarette ashes. Then ignite it to show sugar is a fuel and
will burn to produce beat and energy.
3. Refer back to chemistry unit and. have children describe burn-
ing as an olddation process, i.e. something combining with
oxygent
Hold. a peanut by tongs or on a dissecting needle and ignite
it.
5. Have calorie charts available for pupils to look up calorie
values for butter, peanut and sugar. Explain that a calorie
is a unit of heat and. therefore high calorie fooda are our
energy foods.
6. Have children summarize that fooda do a 'variety of jobs:
that particular stibstances in foods do special jobs; that
our chief energy fooda are those containing carbohydratesand/or fats or oils. (Proteins can be uaed. to provide energy
when necessary.)
-156-

PROBLEM 19. WHAT MAZEIRIALS ARE NEEDED FOR GROWTH .AND REPAIR?
OUTCOMES: Proteins axe needed. for growth and. repair.Minerals are needed. in small amounts to replace lost mineralsand. also for general body maintenance.
MATERIALS:bacteria that have been incubated. for one or two days in tubes containingnutrients (below)bone that has had. calcium removed by being soaked in dilute hydrochloricacid.hemoglobin (iron) charts
PROCEDURE:
NOTE: Pure specimens of non-pathogenic bacteria can probablybe obtained. fran a neighborhood. college
1. Display bacteria that have been incubated, ina. 2% solution of glucoseb. peptone solutionc. fat suspensiond.. water
e. peptone and. glucose
2. Examine the tubes for greatest degree of growth and repro-duction (most cloudiness). The peptone and sugar shouldbe first, peptone alone, second.
3. Elicit that proteins are needed for growth and the form-ation of new material.
Display a bone which has been in dilute hydrochloric acid.for a few days to remove the calcim. Have children ex-amine it to see it is flexible. Have them point out theneed. for calcium in maktrig bones and teeth hard.
5. Show a color chart of blood. 'with varying amounts of themineral, iron.
6. Smonarize by having pupils:a. Give uses of protein and name scone tissues
of body needing protein.b. Name some important minerals and. the tissues
that need. them.
Tomorrow's lesson will be a pupil research lesson. For this reason, only aworksheet will be given.

PUPIL WORKSBEE2
PROBLEM 20: Why are vitamins necessary for good. health?
MATERIALS:charbs on vitamins - food. sources, uses in body, and deficiency diseaserstories of vitamin deficiency researchtexbbooks
WHAT TO DO:1. Use the books to find. stories of the studies of vitamins and. the de-
ficiency diseases. You are to keep a record. of several. You willalso get a chance to report in class.
2. List below sane people involved. with the studies, the diseases theystudied and. the vitamin involved.
NAME DISEASE VITAMIN
3* What were the results of studies made where animals were fed pure nu-trients lacking vitamins?
Using a chart of the vitamins, make a list of the ones known to be im-portant, what they axe needed. for and. sane foodB that supply the vita-mins.
5. Which vitamin cannot be stored. in the body and. therefore must be re-plenished. daily?
6. Which other nutrients, besides vitamins, are regUators of bodyfunctions?
7. What can you say about the amount of each vitamin needed.?
8. Why is vitamin D called. the "sunshine vitamin"?
9. Why is bread. labeled. "enriched."?
10. Is it necessary to take vitamin pills? Why?
Raise your hand. when you have canpleted. so your teacher will know* you can becalled. on to reporb your findings.
- 158 -
PROBLEM 21: WRY IS TIE HEART SO IMPORTANT?
OUTCOMDS: The blood. travels in a one way closed. system of tubes.The heart pumps or pushes the blood, through the body.
MATERIALS:model of villichart of circulatory systemgoldfidhmicroscopesee pupil worksheet
PROCMURE:
slidecotton or gauzechart of heartPetri dish
1. Show chart of circulatory system. Elicit if possible theorgans in the system - heart, arteries, veins, capillaries.Point out arteries and. veins (use color code - usually red.for artery and, blue for vein). Point out how blood iscarried. to all cells of the body through capillaries.
2. Show circulation in tail of goldfish:a. Place goldfish on slide. Wrap the fish and. slide
together Nrith wet gauze or cover with large wadof wet cotton. Leave tail exposed.
b. Place in Petri dish and. place on stage of microscope.c. Keep tall wet by using dropper.d. Focus sharply. It is necessary to check the focus
between viewings by the pupils because the fish maymove.
3. Point out that the brick-like structures are the cartilageblocks that make the skeleton of the goldfish tail (likethe fingers in our bards). The moving particles are cellsof the blood traveling through capiLlaries. Explain thatblood. moves through the body in a similar manner.
Explain that arteries take blood. away from the heart and.veins, take blood to the heart. Capillaries join arteriesto veins and. allow for materials to leave and. enter theblood. Micit what type of vessel was seen in the modelof the irt111. Look at model of the to recall food,
absorption.
5. Explain that at the same time blood. is traveling to allother parts of the body through the other blood, vessels.Show aorta and. the many branches of it.
6. Trace the path of blood. through the heart. Explain that theheart has two parts. One side, the right, pumps only to thelungs and, the left side pumps to the body. Elicit the im-portance of this arrangement.
7. Summarize by having pupils trace path of 'blood. fran one placein the body to another. Emphasize the heart. Caution themthat blood, can never by-pass the heart once it has entered avein from a capillary network.
159 -
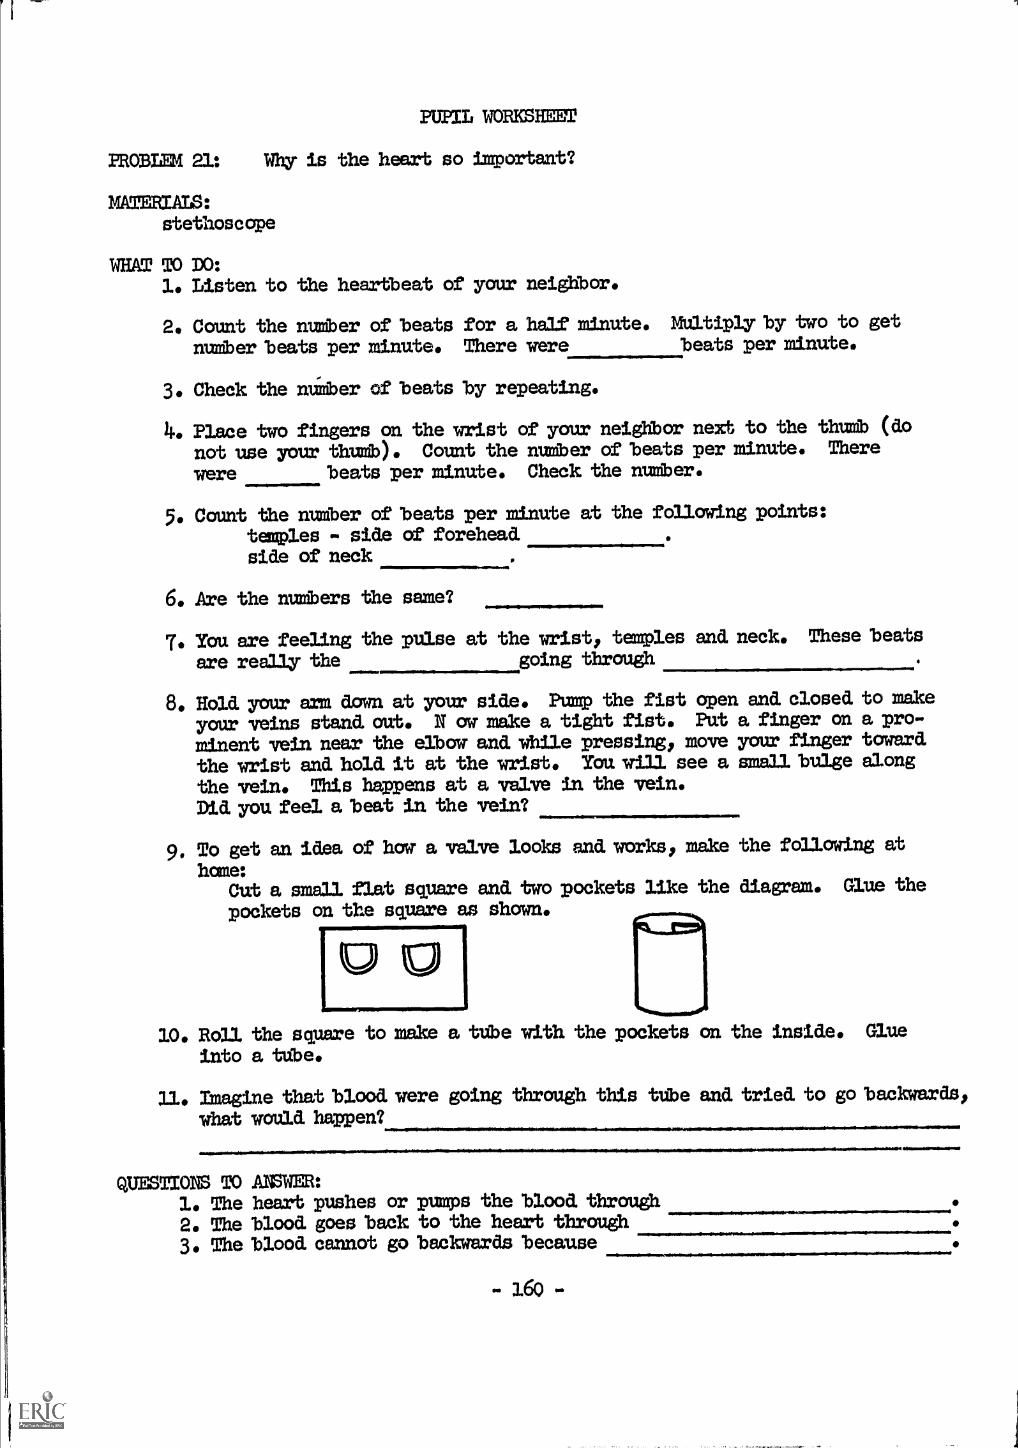
PUPIL WORICSHIRET
FROMM 21: Why is the heart so important?
MATERIALS:stethoscope
WHAT TO DO:1. Listen to the hearbbeat of your neighbor.
2. Count the /ranker of beats for a half minute. Multiply by two to get
=ter beats per minute. There were beats per minute.
3. Check the nimber of beats by repeating.
Place two fingers on the wrist of your neighbor next to the thumb (do
not use your thine). Count the number of beats per minute. There
were beats per minute. Check the number.
5. Count the number of beats per minute at the following points:
temp3.es - side of foreheadside of neck
6. Are the numbers the same?
7. You are feeling the pulse at the wrist, tenvles and. neck. These beats
are really the going through
8. Hold your arm down at your side. Pump the fist open and closed to make
your veins stand out. N ow make a tight fist. Put a finger on a pro-
minent vein near the elbow and while pressing, move your finger toward
the wrist and. hold. it at the wrist. You will see a small bulge along
the vein. This happens at a valve in the vein.Did. you feel a beat in the vein?
9. To get an idea of how a valve looks and works, make the following at
hane:Cut a small flat square and two pockets like the diagram. Glue the
pockets on the square as shown.
L" 111.081ftwolosonOl.
10. Roll the square to make a tee with the pockets an the inside. Glue
into a tee.
U. Imagine that blood. were going through this tube and tried. to go backwards,
what would. happen?
QUESTIONB TO AMER:1. The hearb pushes or pumps the blood. through2. The blood goes back to the hearb through3. The blood. cannot go backwards because
-160-

PROBLKM 22: HOW DOES OXYGEN GET IMO THE BLOOD?
OUTCOMES: We breathe in air and. extract the oxygen in the lungs.
The respiratory system prepares the oxygen for entering
the blood.
MATERIALS:pluck or hazlet ordered from a local butcher shop in advance
chaxt of respiratory system
PROCEIVRE:1. Examine the wall chart of the respiratory system. Point out
the structures and elicit names.
2. Have pupils check their charts to fill in omissions. AB
they check their charts, trace the path of the air telling
what happens to it as it enters each structure.
34, Gather the pupils around the hazlet.
ao Point out the cartilage rings of the trachea, the
branching, the color and consistency of the lungs.
Insert a tUbe into a bronchiole andblawcarefaly.Out into the lung to see the spangy appearance.
b. Examine the heart to see the size and shape, the lo-
cation, the largelaooi vessels.c. Cut open the heart along the sides to see the insides
of the four chaMbers and the valves.
d. Trace thebloodthrcmgh the heart emphasizing that
blood enters the heart with a, low oxygen =tent. Asit goec through the right atrium and then the right
ventrical it goes to the lungs. In the lungs it picks
up oxygen and goes back to the left side of the heart*
Then it la pumped to all parts of the body.
e. Pcdnt out how closely the heart and. lungs are asso-
ciated.f. LOC& for parts of the diaphragm.
Point out that this is the nmscle that controls air
going in ar out of the lungs.g. Referback to the chart of the respiratory system
to stuLly the alveoli to note blood vessels where ox-
ygen enters the blood stream am.d. caxbon dioxide leaves
it to enter the lungs and be exhaled.
h. Assign the special project of malIng a breathing ap-paratus demonstration.
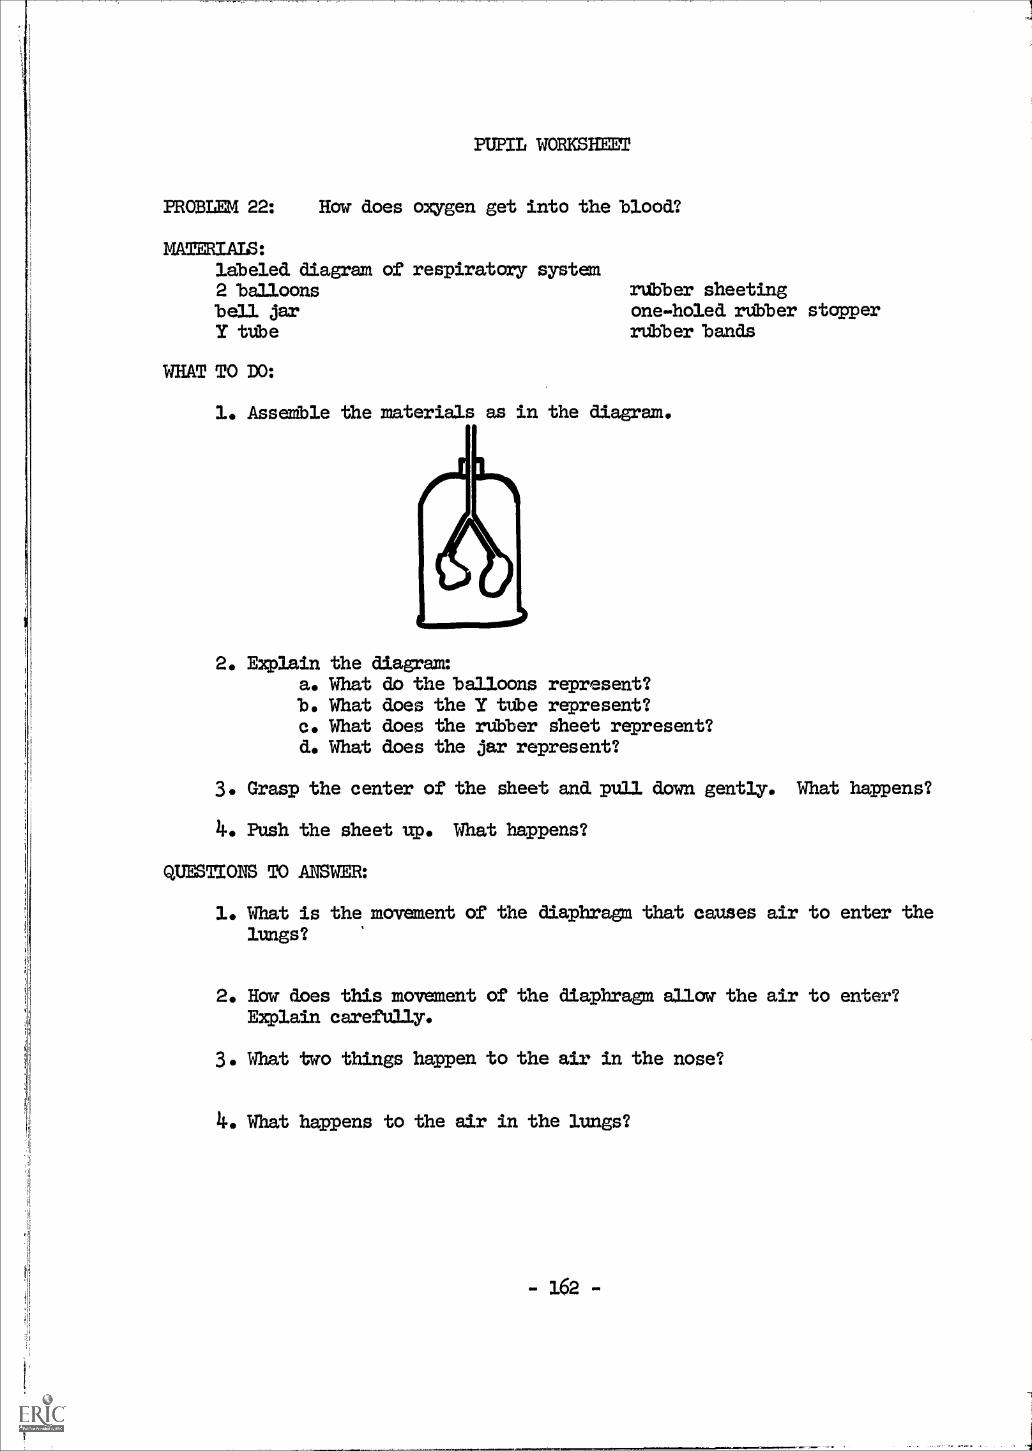
PUPIL WORKSHEET
PROBLEM 22: How does oxygen get into the blood?
MATERIALS:labeled diagram of respiratory system2 balloons rubber sheetingbell jar one-holed rubber stopperY tube rubber bands
WHAT TO DO:
1. Assedble the materials as in the diagram.
2. Explain the diagrm:a. What do the balloons represent?b. What does the Y tlibe represent?c. What does the rubber sheet represent?d. What does the jar represent?
3. Grasp the center of the sheet and. pull down gently. What happens?
4. Push the sheet up. What happens?
QUESTIONS TO ANSWER:
1. What is the movement of the diaphragm that causes air to enter thelungs?
2. How does this movement of the diaphragm allow the air to enter?Explain carefully.
3. What two things happen to the air in the nose?
4. What happens to the air in the lungs?
- 162 -

PROBLEM 23: WHAT JOBS MUST BLOOD DO?
OUTCOMES: Liquid part of the blood carries stored foods and sane liquid
wastes.Red cells carry oxygen to the cells and carbon dioxide away fran
the cells.Some white cells fight bacteria.Blood clots to prevent blood loss.Antibodies in the blood help to fight foreign materials in the
body.The liquid part carries chemicals made by glands to other organs
of the body.Blood is made of red corpuscles, white cells, platelets and a
colorless liquid called plasma.
MATERIAIS:charb of blood cellscentrifugeoutdated blood from hospitalphoto micrograph or diagram of blood smear that shows red and white cells
see pupil worksheet
PROCEDURE:
1. Elicit and review the jdbs of the blood covered so far - carry-ing food to the cells, carrying oxygen to cells.
2. Run blood in centrifuge to show that the blood is about half
cells and half liquid. The cellular material will go to the
bottom of the centrifuge tube. Call attention to the red mass
at the bottom.
3. Demonstrate how a blood, smear is made.
4. Guide pupils through the worksheet exercises.
5. Elicit the comosition of the blood after the children com-
plete their work.
6. Tell them the functions of the various parts to be written on
their sumnary charts. (See Outcanes.)
7. Demonstrate the clotting mechanism using the outdated blood.
Allow 50 cc. to clot in a flask. (A pinch of calcitm chloride
may hasten the process.)
8. Summarize by helping children complete the charts on the
worksheets.
- 163 -

PUPIL WORMEET
PROBLEM 23: What jobs must blood do?
MATERIALS:microscope 2 slideslens paper coverslipblood prepared. slide of blood
WHAT TO DO:1. Get your microscope ready for work.
2. Watch how your teacher prepares a blood smear.
3. Now you make a blood smear.
4. Look at the slide under the microscope.a. Why is the blood not very red?
b. What do you see on the slide?
5. Look easefully between the many red corpuscles. You may see a fewcells which are large and granular. These are white cells.Look at the picture of a blood smear. Your teacher has to checkycur observation.
6. Now look at ytur prepared slide under the nicroscope. The bloodhas been stained so you can see the cells better.
7. Draw a diagram of several red corpuscles and any white cells you see.
QUESTIONS TO ANSWER:
1. Blood is made of a liquid called with cells andcells floating in the liquid.
2. The part of the blood which is red is
3. The liquid part of the blood is in color.
Your teacher will help you ecanplete your chart but first put iz the things youknow.
PARTS OF BLOOD JOB OF THIS PART OF BLOOD

-
PROBLEM 24: HOW ARE WASTLS REMOVED FROM THE BODY?
OUTCOMES: The excretory system removes most liquid wastes.Urine is made of urea, water and salts.The kidneys rid the body of urea.Sweat glands of the skin remove urea, salt and water from thebody.
=MIMS:kidney - fresh chart of kidney showing tubules and Bowman's capsulemodel of kidney chart of sweat glandsee pupil worksheet
PROCEDURE:
1. Review parts of the excretory system.
2. Display fresh kidney. Cut kidney open lengthwise to showcortex and. medullary regions and pelvic region.Point out that the kLdney is made of many tubules beginningwith the capsule. Show how liquid wastes can leave capil-laries and enter the cup of the capsule. Liquid. from theblood. sbailiar to the plasma leaves the blood and as thisliquid. passes through the length of the tubules most of theuseful material re-enters the blood stream through other ca-pillaries. The liquid remaining in the kidney tubules isurine. This flows into the bladder in the pelvic area throughthe ureter. It is stored in the bladder until eliminatedfran the body.
3. Trace the path of the urine.
16 What is the canpostion of urine? * Distribute worksheets.Be sure to do each test with pupils. Do not let them proceed=til all are ready to go on.
5. Give the correct cauposition of normal urine as:95% water2.3% urea 1.0 % chlorides (salts).05% glucose 1.65% other materials
Mention that urea is the harmful waste product. In large a-mounts in the body urea is a poison. It is made by the chemi-cal changing of proteins.
6. Show a charb or diagram of sweat gland. Point out that thebody sweats or perspires. Elicit that the perspiration tastessalty. Tell them it contains water, salt and urea - wasteproducts of the cells.
* Artificial urine is prepared. by:Adding 10 grains of glucose or dextrose
5 grains of sodium chloride10 grains of urea (on S-1 list)
5 grams of albumin (white of egg may be used.)to 1000 iii. of water.Be sure mixture is slightly acid, if not, add a few drops of HC1. Usetea to color the urine.Make sane samples with different amounts of salt, sugar and albumin forunknowns.
NOTE: Urine does not normally contain sugar or albumin but any urinalysis willinclude a routine test for these. It is included in the urine samplefor practice for the pupils.
- 165 -

PUPIL WORKSHEET
PROBLEM 24: What is the composition of urine?
MATERIALS:a bottle of' artificial urine burnerred. and blue litmus medicine droppertest tu.be rack with 4 test tubes graduated cylindertest tae hold.er urease tabletdropper bottles containing Benedict's solution, si3ver nitrate:
36% acetic acid, phenolphthalein
WBAT TO DO:1. Look at the sample.
The color is Urine is (clear, cloudy)
2. Test with litmus paper.Urine is (acidl base, neutral)
3. Test for sugar:a. Put 5 ml. of urine in ab. Put 5 ml. of Benedict'sc. Heat gently.d. This urine sample
test tUbe.solution in test tUbe.
(does, does not) contain sugar.
4. Test for salt:a. Put 5 ml. of urine in a test tilbe.b. Add a few drops of silver nitrate.c. If you see a white material, there is salt in the urine.d. This sample of urine contains salt.
5. Test for urea:a. Put 5 ml. of urine in test Woes.b. Add 1 urease tdblet and a fey drops of phenolphthalein.c. If you see a red color then urea is in the urine.
6. Test for albumin:a. Fill a test tube three-fourths full of urine.b. Heat the upper portion until it boils. Be careful not to
have it boil out of the tUbe.c. Add three drops of acetic acid and boil again.d. If you see a white material the protein, albumin, is in
the urine.
QUESTIONS TO ANSWER:
1. Thesample of urine we tested contained
2. What materials are found in normal urine?
3. Sugar and albumin are not usually found in urine. What does it meanif you do find them?
11... If a large amount of salt is found in urine what does it tell youdbout the person's diet?
-166-
PROBLEM 25: HOW DOES THE BODY KNOW WHAT IS GOING ON AROUND IT?
OUTCOMES: Our nervous system is adapted for carrying messages.Our senses, with their nerve endings, receive stimuli and sendmessages to spinal cord and brain.There are special relays for the reactIon response to answerthe stiaulus-reflexes.There are special areas of the brain that receive and. answermessages from particular parts of the bc4v.
MATERIALS:charts: nervous system, taain, eye, ear, cross-section fo skin
models: ear and eye
PROCEDURE:1. Review the structure and function of the eye. Emphasize the
nerve endings in the retina, the optic nerve and the needfor the message to reach the brain.
2. Quickly review the production of vibrations and their inter-
pretation by the ear as sound. Display chart or model of
the ear. Point out parts necessary for hearing. (Semicir-
cular canals play a role in balance, not hearing). Pointout the auditory nerve leading to the brain. This must befUnctioning prcperly if the vibrations are to be "heard".
J Show chart of cross-section of skin. Review some of the
functions of skin, such as, the protection it offers a-gainst germ invasion, excretory function by production ofperspiration, temperature regulation and irritdbility(sensitivity to stimuli of various kinds). Point out nerve
endings in skin. Elicit some of "feelings" it senses:heat, pain, touch.
4. Show chart of nervous system. Point out central nervoussystem consisting of spinal cord and. brain..
5. Distribute pupil charts or hame children draw diagrams ofcentral nervous system. Hame them ldbel the parts of thebr'ain, the spinal cord and one or two sensory and. motor
nerves.
6. When children have completed their diagrams, review thefunctions of nervous system, particularly that of sensingwhat is going on around or to the body. Ptdnt out that anyfeeling that is understood or recogpized has been receivedby the brain.
PROBLEM 26:
OUTCOMILS:
WHAT ARE REE'LEK ACTIONS?
Reflexes are rapid., involuntary and. usually protectivereactions to stimuli.
MATERIALS:chart of nervous systemdiagram of stimulus and. reflex actionchart of skin cross section
PROCEDURE:3.. Distribute materials and. have children canplete exercise.2. Have children report on results.3. Elicit that they had. reacted. to a stimuluB before they were aware of what
had. happened..
16 Elicit other times this happens.a. putting hand. on hot objectb. stepping barefoot on a sharp rock
5. Remind. them that the hand. came up before they actually felt the pain, inother words, before the message reached the brain.
6. Have pupils name the simple reflexes they know.a, iris reflex (contraction or dilation as a result of light stimulus)b. sneeze reflexc. blinking reflexd.. patellar reflex (knee jerk)e. same responses to dangerous conditions (touching hot object)
7. Summarize that reflexes are rapid., involuntary and. usually protective.
PROBLEM 26:
MATERIALS:
WHAT TO1.
2.
3.
540
6.7.
8.9.
10.U.
PUPIL WORKSHEET
What are reflex actions?
paper and, pencil
DO:
Working in pairs, one menter is to cover his eyes fox. one minute untilthe parbner says to uncover eyes.Stare directly at each other.What happened. to the eyes of the person who had. had. them covered?
Repeat.Now change roles. The other person covers his eyes.One member is to cross one lime over the other with a relaxed. leg.Now strike his knee just below the knee cap quickly and. carefully with theback of your hand..Raise your hand. if you need. the teacher's help.
What happened.?Change places and. repeat.Snap your fingers in front of your parbner's face without touching him.What happens.
QUESTIONS TO AMER:1. What three reflex actions did. you observe?2. What is a reflex action?3. Name sane other reflex actions.4. What axe conditioned. reflexes? (The mouth watering at the sight of food.
is an example.)- 168 -

PROBLEM 27: HOW DOES REPETITION AFFECT OUR ACTIONS?
OUTCOMES: Habits are formed. by constant repetition.Concentration and. training can change a habit.
MAMMALS: stop watch
PROCEDURE:1. Tell the pupils to write their names ten times as fast as they
can, then raise their hands when finished.. Write time range onboard..
2. Now instruct them to write their names with the other hand..Stop them at the end. of the longest time needed. in first part.
3. Elicit that the first group of signatures was neater, that theywrote automatically the first time but had. to think of each let-ter and. how to make each letter the second time.
4. Now instruct the pupils to write the passage you dictate butinstruct them not to cross the "t° s" nor dot the "ils". Dictateas quickly as pupils can follow:
"Hitch your wagon to a star. A stitch in time savesnine. Don't cross your bridges till you come tothem. Time and. tide wait for no man. Don't emityour chickens before they hatch."
5. Have each pupil count the number of times he failed. to omitcrossing the "t" and. dotting the "i" to emphasize how hardit is for most of us to ignore a habit.
6. Find. out how many pupils play musical instruments or type.Elicit that each of these activities is a voluntary activity,that is, the person is aware of, and, directs or controls, theactivity. Point out that constant practice and. repetition in-crease the speed. and. accuracy in most skill activities.
7. Have the pupils hold. hands in a circle formation. Designate alead. man. He is to squeeze the hand. of the person to the rightuntil the action gets back to the lead. man who calls out whenhis hand. is squeezed.. Use a stop watch to time ten successivetrials. Put time needed for each trial on the board.. Thereshould. be rapid. improvements at first, but plateaus may bereached. There may even by same regression. This is charact-eristic of learning. (Repeat tomorrow.)
8. Tell children to practice writing their names with the "wrong"hand. for one week to check progress.
9. Sumarize:
Habits are formed. by constant repetition. We are usuallynot aware of an action which is a habit.
Concentration and. training can change a habit.
Repetition can increase speed at which we performvoluntary actions.
- 169 -

PROBLEMS 28 and. 29: HOW DO ORGANS AND Symms REALLY LOOK IN AN ORGANISM?
OUTCOMES: The organs and. systems look somewhat different from the charts.These organs of the frog are similar to those in our body.
MATERIALS:freshly killed. and pithed frogdissection panpinsdissecting needles
PROCEDURE:
forcepsscissorsprdbewall charts of systems of frog
1. Explain carefully reason for dissection. Dissections are done tosee the organs as they are naturally and. are done with an atti-tud.e of scientific investigation.
2. Have students observe closely as you dissect thePin the frog to the tray by putting pins through
3. Picking up the skin with forceps cut the frog asdiagram.
4. Cut through, the muscle layer underneath the skinBe careful not to cut deep or the organs 1 1 be
frog.the feet.
shown in the
in the same way.destroyed..
5. Lay the flaps back and anchor.
6. This is just a demonstration of techniques of dissection.
7. Review method of dissection.Review the body systems and. organs the pupils are to see thefollowing day. Hearb will beat for approximately a half hourafter pithing.
PROCEDURE: (second day).
1. DistrZbute the worksheets and equipment. Distribute the frogsonly when the class is ready for work.
2. Guide than carefully through the procedure on the worksheet.
3. Ansist pupils who are having difficulty.
4. Summarize by eliciting their Observations and the outcomes.
- 170 -
PUPIL WORKSHEET
PROBLEM 29: How do the organs and systems really look in an organism?
MATERIALS:frogdissecting pan forcepspins
dissecting needles
WHAT TO1«2.
3.4.
5.6.
7.8.
scissorsprdbe
EO:
Look at your frog. How do skin markings help you tell male from female?Pin the frog down the way your teacher did.Begin to cut the skin only the my the teacher showed. ytm..Pin the flaps of skin back.Under the skin you seeNow cut the next layer IIREFEEF-Fan as you =Tyco= teacher do.Be careful not to damage any organs underneath.Pin the flaps back.Observe all the organs you see. If agy egg mass is present remove it.List all the organs you see.
g. Push the prdbe gently through the mouth, dawn the throat. You shouldsee the end of the prdbe in the stomach.
10. Removethe intestines and measure their length.Compare mith the length of the body camity. How did such a long intes-tine fit into such a small apace?
U. Identify the Texts of the reproductive system.12. Push all the organs over to the side so you can see the nerves near the
spine. Trace a nerve to the leg.13. Remove some skin from the leg. iind the continuation of the nerve in
the leg.14. Pinch the nerve. What happens to the leg?15. Find, the heart and. the veins and arteries near the heart.16. Note how the tongue is attadhed. Why is it attached this way?
17. Notice how all the tUbes lead to one cloaca.
QUESTIONS TO ANSWER:
1. Which systems did you see?
2. Which organs did. you see? Organize them by systems.
3. Which organs looked. different fran the way you expected them to look?
-171-

PROBLEM 30: BDW CAN WE HELP MAINTAIN GOOD HEALTH BY PROPER MEAL FLAMING?
OUTCOMES: We must plan meals that will include the proper amounts ofeach nutrient.We must balance our meals. To do this we use the Basic Fourfood chart which has been organized to include all required
nutrients.
MAZERIALS:chart of nutrientscharb of vitaminsBe.e.c Four food. charb
PROCEDURE:1. Display charts of food. nutrients and the vitamins.
2. Ask one or two pupils to plan a menu for one day using these
charts. Elicit that this is very difficult.
3. Point ou.t that we must have enough of all the nutrients to be
healthy.
J. Ask the children to name some foods they eat. Write them on
the board grouping them into the four food. groups.
5« Ask the children to suggest headings for each group.
6. Display a chart of the "basic four" and. explain its use.
7. Have the children plan meals for one day.
8. Then have them take out their logs of meals they ate for one
week and. analyze each dayts meals for balance.
a 172 a

PROBLEM 31:
OUTCOMES: Exercise maintains muscle tone«Exercise stimulates the circulation and respiration.
MATERI.ALS:
PROCEDURE:
HOW DOES EXERCISE HELP TO KEEP THE BODY HEALTHY?
chart of mscles
1. Have pupils perform the activities on the wrksbeet. Helpthem answer the questions on the worksheet.
2. Elicit what happens when a muscle which has been inactiveis used. a great deal in a short time.
a« riding a bicycle far first time in springb. laving baseball the first day outc. swirraing the first time in a long time
3. Explain that the more often a muscle is usee, the strongerand. more reliable it is when called. on for use. Muscleswhich are seldom used. axe easily strained. and. pulled«
Point out scene of the large muscles of the body on thechart.
5. Explain that while exercising, all body functions are givena boost and. so general body tone is boosted«
a. weight is more easily controlled.b« appetite is stimulated.c. circulation is improved.
6. Explain the imporbance of exercise by telling how peoplewho axe in bed. for long periods in hospitals axe givenexercise by nmses«
7. Summarize by eliciting the reactions of the body to exercise«Dlicit the long range effects.
- 173 -

PUPIL WORKSHEET
PROBIEM 31. How does exercise help to keep the body healthy?
MATERIALS: stethoscope
WHAT TO DO:
1. Count the number of heart beats per minute of your neighbor.
The number of beats per minute is
2. Now have your neighbor do 10 push ups or sit ups, or jump 20 times.
3. Now count the number of heart beats per minute again.
The umber of beats per minute is
Why is there a difference?
4. Repeat the steps but this time you do the exercise and. let yourneighbor count the number of your heartbeats per minute.
Before I did the exerci6e rify number of beats per mie was
Alter I dia. the exercise the number of beats per minute was
5. Do you notice any difference in the way you are breathing afterexercise? Explain.
QUESTIONS TO ANSWER:
1. Exercise (increased, decreased) my circulation.
I know because
2. Exercise my respiration.
I know because
3. A lot of exercise can cause other changes in the body.
Can you male a list of other changes made by exercise.
PROBLEM 32: WHAT HAPF".0S WHEN SOME ORGANISMS INVADE OUR BODY?
OUTCOMES: Bacteria growing at a rapid rate cause local infections whenthey enter the body where the skin is broken.Bacteria produce toxims which interrupt normal body functions.
Pexasites can cause damage to tissues.Protozoa can interrupt normal functions.
MATERIALS:3 or 4. Petri dishes with nutrient agarbacteria in brothwater containing decaying meatfiLlstrip and/or charts: life cycle of sane parasites like hookworm,
tapeworm; protozoa, such as amoeba, malarial
flagellatepicture of white blood cell leaving capillary and. ingesting bacterium
PROCEDURE:1. *Set up demonstration to show the prevalence of bacteria. Incubate
until tomorrow.a. Take dirt frail the fingern -all of pupil and place on Petri dish.
b. Have a student breathe on agar.c. Expose Petri dish to air for several minutes.
d.. Keep a control plate.
*Incubate the water containing decaying meat. (food poisoning)
2. Prom their previous work with bacteria elicit why body has good condi-
tions for bacterial growth - food, moisture, darkness, warmth.
3. Recall and/or explain body protection - skin, moist sticky linings to
catch bacteria, cough and sneezes to expel foreign material, anti-bodies in the blood. and. the action of phagocytes (white blood cells).
4. Explain how rapid growth of bacteria can cause an accumulation of
mucus in nose and throat in body's attempt to get rid. of bacteria.
In lungs, fluid. may collect in extreme cases. Why is this dangerous?
5. Elicit what happens when skin is broken and. bacteria enter and. an in-
fection begins. Tell that pus is the acctmxulation of white blood cells
that were unsuccessful in killing the bacteriao Display a picture of
this process.
6. Show life cycle of certain parasites. Explain damage they can do -
a. Worms bore through tissues and. cause permanent damage.
b. Warms live on the food of the body.c. Malarial yrotozoa live in the blood. producing tox:tns.
7. Point out that many diseases are caused by viruses, exceedingly tiny
organisms.
8. Summarize by assisting pupils in filling in a chart of organisms and.
conditions they can cause,Conclude that specific diseases are caused by specific germs.
- 175 -
PROBLEM 33: HOW CAN WE PREVENT HARMFUL ORGANISMS FROM ENTERING BODY?
OUTCOMES: Cleanliness of body and. of materials we use can prevent manybacterial infections.Proper care of breaks in the skin can prevent infection.Proper preparation and storage of foods can prevent infections(food poisoning).Drinking water that is properly treated prevents protozoan and.bacterial infections.We can eliminate the conditions for worm infestation to occur.
=TRIALS: Petri dishes and other materials from incUbator
PROCEDURE:1. Point out fran the colonies in the Petri dishes that bacteria
are found. everywhere. Elicit the source of the ones grown.
2. Using the information from the previous lesson on life cycles,etc., help pupils think of ways of preventing the invasion oforgardsms.
a. Keep dirt fran under fingernails. Wash hands.b. Don't put bands in mouth.c. Use clean private utensils.d.. Use antiseptics on cuts and scratches.e. Use disinfectantu to clean areas at home where germs
may breed. (Explain that antiseptics usually preventgerms frau multiplying. Disinfectants, which arestronger, kill them.)
PUPIL WORKSHEET
PROBLEM 33: How can we prevent harmful organisms from invading the body?
WHAT TO DO:Next to the list below, give ways you think we can prevent theconditions that sane harmful organisms cause in our body. Howcan we keep these organisms out of the body?
ORGANISMSOR
CONDITION
BACMIAL infection
cuts
colds
trichina
hookworm
malaria
tapeworm
food. poisoning.176-

PROBLEM 34.: Baw ARE CBEMICALS USED TO HELP TBE BODY MOT IBTECTION?
OUTCOMES: Antibiotics prevent germ growth.Antitoxins and vaccines help give the body immunities to germs.
Many drugs used correctly can correct temporary poor health
conditions of the body.
MAMMALS:disc containing antibiotics2 bacterial cultures on Petri ashes
PROCEDURE:
forceps
1. Place a disc containing antibiotics on the agar near a bac-
terial colony. Cover. Incubate this dish and the control
dish. Check both dishes tomorrow and following days to seeif bacterial growth is halted near antibiotic. Sane bac-.
teria are affected, sane are not.
2. Ask children to describe the smallpox vaccination. Explain
that vaccines contain dead or weakened germs. When these
germs enter the body, the body makes its own antibodies and
antitoxins. Point out that it takes time for the immunityto develop, but that it is long lasting.
3. Explain that there are times when immediate immunities are
needed. If a person has been exposed to a serious disease,
he may be given serimis containing antibodies or antitoxins
already made by an animal or other person. When these are
injected into a person, he starts fighting the infection im-
mediately; however, the effects don't usually last very long.
4.. Elicit diseases fran which the pupils or their siblings have
been protected: polio, smallpox, diphtheria, measles, ty-
phoid., whooping cough, tetanus, tuberculosis.
5. Define:a. toxins - poisons made by germs
b. antitoxins - chemicals made by the body to counteractthe toxins
c. foreign body - any substance not normally found in the
bodyd. antibodies - cells or substances made by the body to
destroy the germs that enter
e. antibiotics - chemicals that are special medicinesgiven to fight sane infections alreadystarted
6. Caution that medicines should only he used when prescribed, by
the doctor for that particular person, because:
a. People are sometimes allergic to a drug.
b. If overused, some drugs lose their effectiveness.
Body may build up a tolerance or even antibodies to
combat the effects.
7. Illicit that medicines are given as temporary and. drastic
actions by physicians to cure d:T.seases and. are not to be
taken unless prescribed.
- 177 -

PROBLEM 35:
OUTCOMES:
MATERIALS:picture
PROCEDURE:
WHAT CHANGES DOES ALCORDL MAKE IN OUR BODY?
Alcohol is a depressant and slows dawn body fUnctions.
Continued use of alcohol causes a severe damage of livertissue called cirrhosis.
Alcohol affects the nervous system, causing sluwer reflexes,changes in behavior, poor motor control.
of a normal live and liver with cirrhosis evident
1. Elicit effect too much alcohol has on a person. Keep re-sponses of pupil from straying. They should realize that:
a. sense of balance is upsetb. vision may seen impaired.c. response to stimuli is slow - reflexes almost lost
2. Explain reason for conditions elicited:
a. Alcohol is quickly absorbed by the blood and quicklytravels through the body
b. Alcohol affects the nervous system and the brain.Many times people are injured. because of poor nervousfunction. Since the nervous system is slowed, down all
body functions are slowed down.
3. E2cplain that frequent use of alcohol can cause permanentliver damage. Display pictures to show cirrhosis.
4. Elicit same of controls on use of, and adverbising of, al-c ohol beverages.
a. "Hexd liquors" are not adverbised on T.V.b. Liquor may not be sold. to minors.c. Sane states forbid its sale cconplete37, others forbid
its sale in bars and. taverns, but not in bottles, etc.
5. Summarize by reviewing the outcomes.
- 178 -

PROBLEM 36: HOW DOM TOBACCO AFFECT THE BODY?
=COMM: Tobacco contains nicotine and. tars which can cause poor healthwhen accumulated. in the body.
Many scientists and doctors believe that smoking can cause cancer.
MATERIALS:cigarettewatch glassfilmstrip and booklets on smoking and. cancer
(available from the American Cancer Institute)
PROCEDURE:1. Burn a cigarette completely in a watchglass. Show the tars'
residue on the watchglass.
2. Explain that not all these tars enter the lungs, but some do.The tars accumulate in the lungs with continued smoking.
3. Show frau fiLmstrip or in booklets how* scientists have takencigarette tars and. produced cancers on plants and in laboratoryanimals. The amount of tars required to produce the cancer isgreat and would. take many years to accumulate that amount inthe lungs.
4. Point out that sane people seem to be more susceptible to can-cer than others.
5. Other than cancer, smoking can:
a. impair respiration (Athletes 'usually do not smoke, es-pecially swimmers and. runners because it produces diffi-
culty in breathing.)b. irritate the throat (Coughing often develops and. per-
sists. Infections are then easily started. in the throat.)c. constrict the blood. vessels (This reduzes blood flow to
various parts of the body.)d. Increase rate and. strengbh of heart beate. depress the appetite
6. Point out that smoking often becomes a habit which is wry hard.to bre;:us and. that the younger a person is when he starts, themore likely he is to became addicted. to smoking.
-179-
PROBLEM 37: HOW DO NARCOTICS AFFECT talb BODY?
OUTCOMES: The body often develops a dependence on narcotics so the person
becomes addicted.Some narcotics are used to kill pain or induce sleep but only
under doctor's care.Narcotics are so dangerous that their use and sale by indivi-
duals is forbiddran by law except when prescribedty a physician,
MATERIALS:booklets and other materials on narcotics
PROCEDURE:1. Elicit, if possible, the symptoms of narcotics addictions
such as:a. need for increasingly larger doses
b. weakened, thin bodyc. tremendous cramingd. loss of appetitee. gradmal decline of health often resulting in earl.y death.
2. Explain that narcotics are habit forming. EMen when given by
doctors, the doctors are careful to watch for signs of addic-
tion. In addition, overdosesare usually fatal.
3. Discuss legitimate uses of narcotics.a. Morphine is used to induce sleep particularly* when a
person is in yein.b. Opiates, cocaine and barbiturates are used to relieve
pain and/or induce sleep.
4. Explain that marijuana has no use in medicine because of its
variable effect. Its danger lies in fact that it usually leads
to more dangerous drugs.
5. Caution that heroin is completely outlawed in the Uhited
States becavoe it cannot be controlled. A single dose usually
leads to addiction. Because it is illegal, it is expensive and.
a person may do anything to get the money. He feels he cannot
live without the drug.
6. Elicit that the terrible tragedies are the facts that human
lives are destroyedl addicts exhibit antisocial behavior, vic-
tims became unemployable.
7. Arrange for a speaker from repartament of Health or Police
Department.