quality assessment and performance improvement (qapi ... · pdf filequality assessment and...
TRANSCRIPT

QAPI Operational Guide Page 1 of 50
Quality Assessment and
Performance Improvement (QAPI) Health Plan Management System (HPMS)
QAPI Module Operational Guide
Version 1.0
Prepared by the Medicare Choice Ionizations for the
Centers for Medicare & Medicaid Services (CMS)
Prepared by the Medicare+Choice Quality Review Organizations for the
Centers for Medicare & Medicaid Services (CMS) April 2003

QAPI Operational Guide Page 2 of 50
Contents: QAPI Module Operational Guide
3 Introduction 5 Accessing the QAPI Module 6 Basic Navigation Principles 6 QAPI Menu 7 Screen-by-Screen Navigation 8 Mouse versus Keyboard 9 Copying Text from an Existing Document 10 Saving Information 11 QAPI Projects Menu 14 Entering New Projects 18 Review Element 1: Project Title, Type, Focus Area 19 Review Element 2: Topic Relevance 22 Review Element 3: Quality Indicator(s) 27 Review Element 4: Baseline Study and Analysis 29 Element 5: Baseline Study Population and Baseline Measurements/Performance 32 Review Element 6: Interventions Aimed at Achieving Demonstrable
Improvement 35 Review Element 7: Demonstrable Improvement 37 Saving or Submitting a Project 38 Entering Sustained Improvement Information 39 Review Element 1S: Subsequent or Modified Interventions Aimed at
Achieving Sustained Improvement 40 Review Element 2S: Sustained Improvement 42 External Consultation and Lessons Learned 44 Submitting Projects 47 Reviewing Existing Projects 48 Printing Projects 48 Printing Using the Reports Function 50 Printing from the Browser
Page

QAPI Operational Guide Page 3 of 50
Introduction The Quality Assessment and Performance Improvement (QAPI) Module is a Web-based data collection tool that allows Centers for Medicare & Medicaid Services (CMS)-contracted Medicare+Choice Organizations (M+COs) to submit information on QAPI projects for evaluation and approval. This QAPI Module—designed by three quality improvement organizations (QIOs)—enables M+COs to input their project data (via the Internet) on an online QAPI Project Completion Report. The M+CO submits this electronic report to the Health Plan Management System (HPMS) database for the Medicare + Choice Quality Review Organization (M+CQRO) to review and score the report and for CMS to evaluate (based on QAPI Standards) and approve the project scores. Currently, there are three M+CQROS, consisting of QIO staff from California, Maryland, and New York. The purpose of this Operational Guide is to provide instructions on accessing the QAPI Module, navigating the screens, and entering information in the various fields. For information on QAPI project requirements and the expected content of the QAPI Project Completion Report, consult the Medicare Managed Care Manual, Chapter 5 – Quality, and the QAPI Instructional Guide. There is also an online WebEx QAPI Project Submission Training Module that is accessible on each M+CQRO’s Web site. It provides technical user information in a video/audio format. The related links are provided below. http://www.lumetra.com/healthplans/mcqro/qapitools/index.asphttp://webex.dfmc.org/mcqro/ http://ipro.org/index/qapi_webex
Note: Prior to entering QAPI project results, you are strongly encouraged to download and print out the tools related to the Web submission of QAPI projects. These tools may be downloaded from the CMS Medicare Quality in Managed Care Web site at http://cms.hhs.gov/healthplans/quality/.
To download the tools, scroll down to the section marked “Evaluation of Projects, Guidebooks” and select each of the following documents to view and print: • Project Completion Report
The Project Completion Report is a document that lists the information that is required for submission of a QAPI project. The Web-based tool is based on this document.
• Project Review Tool Reviewers Guidelines The Project Review Tool Reviewers Guidelines is a document that provides the review and scoring criteria that are applied to QAPI projects submitted by M+COs. The M+CQROs use another Web-based tool to review and score submitted projects.

QAPI Operational Guide Page 4 of 50
• Instructional Guide
The Instructional Guide is the most important document that you should refer to when entering QAPI project information into the Web-based tool. The Instructional Guide contains information about each of the review elements that are required for submission of a QAPI project report. It includes instructions for entry, descriptions, background information, Standards interpretation, and examples. Print this Instructional Guide and have it at your fingertips when entering information into the QAPI Module

QAPI Operational Guide Page 5 of 50
Accessing the QAPI Module
In order to access the QAPI Module, you must be able to login to the Health Plan Management System (HPMS) with a unique username and password. The HPMS maintains a high level of confidentiality. Each M+CO has a separate and secured access to only its projects and reviews, which are identified by its organization’s “H” number. If you do not yet have an HPMS username and password, you may apply for them by accessing the application form on the CMS Web site at: http://cms.hhs.gov/data/requests/CMSCompSys.pdf
Print out and complete the application form, sign the privacy agreement on page 2, and submit the original signed form to CMS. You are not required to obtain the CMS approval signatures; CMS staff will obtain them. It takes approximately two weeks to process an application, and you will be mailed your user ID, password, and instructions on accessing HPMS. Mail the completed application form to the following address:
Centers for Medicare & Medicaid Services Attention: Neetu Balani
7500 Security Boulevard Mailstop Central 4-14-21
Baltimore, Maryland 21244-1850 If you have any questions about applying for an HPMS account, you may contact Neetu Balani at (410) 786-2548. Once you receive your username and password from CMS, you should immediately attempt to login to HPMS. If you have any problems accessing the system, you should call Don Freeburger at (410) 786-4586. If you have problems with the QAPI Module, please contact Pam Nicholson at CMS at (410) 786-0263.

QAPI Operational Guide Page 6 of 50
Basic Navigation Principles When you initially login to HPMS, the program opens to this screen. The main menu is located on the left side of the window. On the main menu, under Modules, select “QAPI.”
QAPI Menu There are three options available on the main QAPI menu: 1. Create New Project 2. View/Modify Project 3. View Scored Project To select any of these options, simply click on the appropriate option.

QAPI Operational Guide Page 7 of 50
Screen-by-Screen Navigation The QAPI Module is organized into Review Elements, representing the areas on which the M+CQROs will evaluate the QAPI projects. The Review Elements are listed on the left-hand side of each screen. When you enter information into a particular Review Element, that Review Element will appear in yellow on the left-hand side. You can move from screen to screen or Review Element to Review Element by using the menu on the left. However, be aware that once information has been entered into a Review Element screen, it must be SAVED using the “SAVE” button at the bottom of the screen. If you choose another Review Element from the left, without saving the information, it will not be saved to the database and will require re-entry. Additional information on saving the report is covered later in this section.

QAPI Operational Guide Page 8 of 50
Mouse versus Keyboard The QAPI Module, like all of HPMS, has been designed to be Section 508 compliant, which requires that Federal agencies' electronic and information technology is accessible to people with disabilities, including employees and members of the public. You may navigate the site using the mouse, the keyboard, or a combination of both. To navigate the site using the keyboard, use the “TAB” key to move from link to link. Once you have reached the desired link, press “ENTER” to go to that link. To go back a page, tab until the link marked “BACK” is highlighted and press “ENTER.” To navigate using the mouse, simply move the mouse pointer to the desired link and left-click once. The browser’s “BACK” and “FORWARD” buttons may be moved to navigate from screen to screen.
Note: Remember that information that is not saved on each screen will be lost upon moving to another screen.
QAPI Operational Guide Page 9 of 50
Copying Text from an Existing Document If you have a document with information that is pertinent to the reporting tool, you may copy it directly to the reporting tool to save data entry time.
Note: Be sure to note the character entry limits on each field, as some are restricted in the amount of text that can be entered.
To copy information from an existing document to the Web tool, follow these steps: • Open the document in the appropriate software. • Highlight (select) the information to be copied from the document. • Copy the information using the software’s copy function (generally, in the Edit menu
there should be an option to copy, or if using the keyboard press CTRL-C). • Return to the Web-based report tool. • Left-click once in the text field into which the information should be placed. • Paste the information using the browser’s paste function (generally, in the Edit menu
there should be an option to paste, or, if using the keyboard, press CTRL-V).

QAPI Operational Guide Page 10 of 50
Saving Information The QAPI Module is a “live” module. The information that you enter into the module will be dynamically saved to the supporting database, if (and only if) you click the “SAVE” button at the bottom of each page. After saving, you will be directed to the next page or Review Element. Subsequent navigation to the pages previously saved will display the information that had been previously saved to the supporting database. If the “SAVE” button is not visible on the screen, be sure you are at the bottom of the section. Due to space constraints, not all of the information may be displayed on the screen. By using the vertical scroll bars on the right hand side of the screen, you can move to view the sections that are further down.

QAPI Operational Guide Page 11 of 50
QAPI Projects Menu To begin entering a project, you must first login to HPMS. If you do not have an HPMS account, please refer to Section 2, Accessing the QAPI Module, of this guide for instructions on how to obtain an HPMS account. Once you login to HPMS, you must select the QAPI Module from the HPMS menu on the left-hand side. Selecting the QAPI Module will take you to the main QAPI screen. The MAIN QAPI SCREEN
There are several areas of information on the main QAPI Module screen that should be noted. Listed in the top right-hand side menu bar are “Home,” “MCO Contacts,” and “Help.” Clicking on “Home” will return you to the HPMS home page. “MCO Contacts” contains General MCO Information Reports that can be accessed by Region and/or “H” Number.

QAPI Operational Guide Page 12 of 50
Clicking on “HELP” opens a new window containing help information for the QAPI Module. It is the same information that you also will find in the Instructional Guide. You are encouraged to consult either the online help or the Instructional Guide for assistance in completing the report. The Help screen is organized by Review Element. Clicking on a Review Element heading will bring up the information from the Instructional Guide that is relevant to that Review Element.
At the bottom of the initial Help screen under “Documents in Adobe Acrobat format,” you will see links to the Instructional Guide, the Project Completion Report, and the Project Review Tool. It may be useful to minimize the Help screen (click on minus sign [-] in upper right corner of window) for easy access while completing the report.

QAPI Operational Guide Page 13 of 50
From the main QAPI screen, you may choose the following options: 1. Create New Project – This option allows you to enter a new QAPI project. 2. View / Modify Project – This option allows you to view an existing QAPI project that
has already been entered, or modify an existing QAPI project that has already been entered.
Note: Modifications can only be made if the project has NOT been submitted to
CMS.
3. View Scored Project – Once the QAPI project is submitted, the M+CQRO team has reviewed and scored it, and CMS has approved it, you may view the completed review. Once you receive a notification that the project review is complete, CMS expects you to use this option to view scored projects, and you are required to confirm receipt of the project review within seven days of the notification.

QAPI Operational Guide Page 14 of 50
Entering New Projects The Web-based reporting tool allows entry of the following types of projects: • CMS National Projects • M+CO-Selected Projects • Local Market Place Initiatives • CMS-Directed Projects • Multi-Year Projects Reporting of the M+CO-Selected Projects via the QAPI Module is required only for 1999 and 2000 projects. In addition, only baseline and demonstrable improvement data are required; reporting sustained improvement data for these projects is optional. Per a CMS July 1, 2002, memo by Mr. Robert Donnelly, Director, Health Plan Policy Group, M+CO-Selected QAPI projects are eliminated effective 2002. For the 2001-selected project, the M+CO must identify its project area and baseline but does not have to maintain its project for improvement. Information will be reported for 2001 M+CO-Selected Projects via email to [email protected]. Because entering CMS National Projects and M+CO-Selected Projects is similar, this guide begins with the steps to enter both of these project types. Differences in the tool between these two project types will be clearly marked. To begin entry of information for a new project, click on "Create New Project" in the menu list on the left-hand side of the main screen. A red asterisk to the left of the field denotes required fields. In order to successfully submit a project, you must enter information in all required fields Select an “H” Number Each M+CO's “H” number will be listed here. Select your M+CO “H” number from the list. If you do not see your number, please notify Don Freeburger at CMS. Unfortunately, if your M+CO “H” number is not listed, you will need to wait until the omission has been corrected to enter your QAPI project. Subunit of Reporting In some instances, M+COs may want to report on projects that do not encompass their entire contract (“H”) number. This is especially relevant for those large organizations that conduct their business in a geographically defined manner within the larger “H” number. These subunits will be determined by counties. It is not expected that many plans will report on subunits, and those that do should report on more than one project to ensure that all counties within the “H” number have been accounted for. If you do not have a subunit level of reporting, click “NO” and then “CONTINUE.” If you do have a subunit level of reporting, click “YES” and then “CONTINUE.”

QAPI Operational Guide Page 15 of 50
Counties in the Subunit Select the county or counties that are contained in the subunit level. You may select more than one county by holding down the “CTRL” key while clicking on the counties.
Based on the “H” number selected in the first screen, the name of the M+CO, the state, and the CMS regional office are pre-populated. If there are any errors in the information, contact your Plan Manager at your corresponding Regional Office for assistance. In order to facilitate timely submission of the QAPI report, you are advised to complete the report while the error is being resolved.

QAPI Operational Guide Page 16 of 50
Project Title Enter a brief Project Title in the space provided. Note: There is a 200-character limit to this field. Project Type Select the project type from the list. If the project is a CMS National Project, select the appropriate project type and year. The other options are M+CO-Selected Project, Local Market Initiative, or Other CMS-Directed Project. If the project selected is the CMS National Project-Clinical Health Disparities (2003), you will be prompted to select a clinical area (Diabetes, Pneumonia, Congestive Heart Failure, Breast Cancer Screening) and a population (American Indian/Alaskan Native, Asian, Black/African American, Native Hawaiian/Pacific Islander, Hispanic/Latino). If the project selected is the CMS National Project-Culturally and Linguistically Appropriate Services (2003), you will be prompted to select either language access or organizational support. Your browser will then be re-directed to a special CLAS project module.
Project Initiation Year If the project is NOT a CMS National Project, select the project initiation year. Typically, a project is considered initiated when it has reached the point of baseline data collection.

QAPI Operational Guide Page 17 of 50
Principal Contact Information Enter the principal contact information in the spaces provided. This contact should be the person that M+CQRO and/or CMS staff may contact if there are any questions regarding the QAPI project submission. Reporting Level Select the reporting level – either standard or multi-year. If “multi-year” is selected, you will be prompted to enter project approval information. You are encouraged to read information on multi-year project reporting in the QAPI Instructional Guide.
Once you have entered all the required items (those marked with a red asterisk *), click on “Create New Project.” Once you click on “Create New Project,” a unique project identifier is created in the system, and you are taken to the next screen.
Note: Be absolutely sure that the information that has been entered up to this point is correct, as these items are used in uniquely identifying a project. Once these items have been entered and saved to the system, changes CANNOT be made to the information.
Once you have entered the identifying information on the first set of screens, the following four items will be used to uniquely identify the project and will appear as the header information on each subsequent screen throughout the QAPI Module: Project Title, Project Type, Project Initiation Year, and Sub-unit(s) of Reporting.
QAPI Operational Guide Page 18 of 50
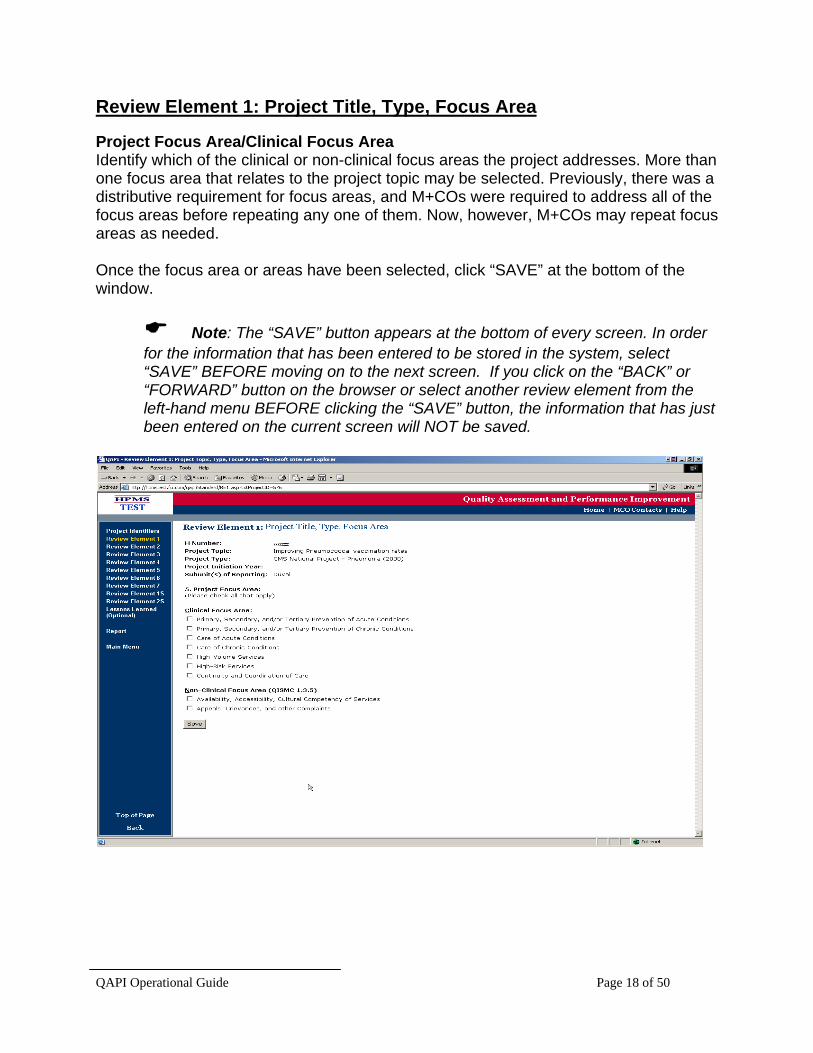
Review Element 1: Project Title, Type, Focus Area Project Focus Area/Clinical Focus Area Identify which of the clinical or non-clinical focus areas the project addresses. More than one focus area that relates to the project topic may be selected. Previously, there was a distributive requirement for focus areas, and M+COs were required to address all of the focus areas before repeating any one of them. Now, however, M+COs may repeat focus areas as needed. Once the focus area or areas have been selected, click “SAVE” at the bottom of the window.
Note: The “SAVE” button appears at the bottom of every screen. In order for the information that has been entered to be stored in the system, select “SAVE” BEFORE moving on to the next screen. If you click on the “BACK” or “FORWARD” button on the browser or select another review element from the left-hand menu BEFORE clicking the “SAVE” button, the information that has just been entered on the current screen will NOT be saved.

QAPI Operational Guide Page 19 of 50
Review Element 2: Topic Relevance
Note: Review Element 2 is not required for a CMS National Project. If you are entering a CMS National Project, you may either click the “CONTINUE” button to advance to Review Element 3 or select Review Element 3 from the menu on the left.
You must complete the Topic Relevance section for all other project types (i.e., M+CO-Selected, Local Market Place Initiatives, and CMS-Directed Special projects). Carefully read the Instructional Guide prior to completing this section, as it provides detailed information on what to enter in this section. If you are entering an M+CO-Selected Project, you must complete the required information for Review Element 2 before you can proceed to Review Element 3.
1. Topic Relevance to the Medicare Population You should document the selection and prioritization process that steered your organization to choose this specific topic for your M+CO population. According to the Instructional Guide, the process should be systematic and data-driven and include:

QAPI Operational Guide Page 20 of 50
• Information on the use of continuous data collection • An analysis of comprehensive aspects of patient care and member services • A process that considers the greatest practical benefit for your Medicare enrollees • The prevalence of a condition among, or a need for a specific service by, the
organization’s enrollees • Enrollee demographic characteristics and health risks • The interest of consumers in the topics addressed • Network provider input • Topic selection and prioritization in comparison with other potential topics within the
organization 2. Topic Relevance Determined By You must check from the list provided all the reference sources used to select the project topic. If you select the reference source “Literature Review,” the next screen will prompt for citations related to the literature review.
Note: Three citations are required. A fourth is optional.

QAPI Operational Guide Page 21 of 50
For all other reference source choices, a text box will appear. Enter a narrative description for each reference source selected, including title, year, source, page number, and volume number for each reference. 3. Aspect of Clinical Care that Relates to a Focus Area Select all aspects that apply and describe the data sources and analysis process used to determine the clinical focus area. 4. Aspect of Non-Clinical Care Services Select all aspects that apply and describe the data sources and analysis process used to determine the non-clinical focus area.
Note: After completing Review Element 2, click “SAVE.”

QAPI Operational Guide Page 22 of 50
Review Element 3: Quality Indicator(s) In the quality indicator section, as for the other sections, it is highly recommended that you refer to the Instructional Guide for the information required for this review element. You are required to report on at least one indicator for each project. Variations to this requirement, as with the two required indicators for the 2001 National Congestive Heart Failure project, are at the discretion of CMS. You may report on more than one indicator. However, each indicator must be entered separately.
1. Indicator Defined By Select who defined the indicator from the choices provided. This is a required field. Click “CONTINUE”. If HEDIS is selected as the indicator source, you will be prompted to select the HEDIS
Version used from the drop-down menu.

QAPI Operational Guide Page 23 of 50
2. Indicator Statement Enter a concise statement that describes the quality indicator. This indicator statement is used as a header that will appear at the top of each subsequent screen that is relevant to the quality indicator.
Note: If using a HEDIS indicator, you may cite the specifications used (e.g., HEDIS 2000 – Volume 2 – Technical Specifications, pp. 24-27) for the indicator statement rather than entering the full text description of the indicator statement. If you did not strictly follow the HEDIS specifications, or received a “NR” designation for the measure, then all variations to the HEDIS specifications MUST be described and justified.

QAPI Operational Guide Page 24 of 50
3. Indicator Numerator Statement Describe the numerator (criterion).
Note: If using a HEDIS indicator, you may cite the specifications used (e.g., HEDIS 2000 – Volume 2 – Technical Specifications, pp. 24-27) for the indicator statement rather than entering the full text description of the indicator statement. If you did not strictly follow the HEDIS specifications, or received a “NR” designation for the measure, then all variations to the HEDIS specifications MUST be described and justified.
4. Indicator Denominator Statement Describe the denominator (# of eligible cases).
Note: If using a HEDIS indicator, you may cite the specifications used (e.g., HEDIS 2000 – Volume 2 – Technical Specifications, pp. 24-27) for the indicator statement rather than entering the full text description of the indicator statement. If you did not strictly follow the HEDIS specifications, or received a “NR” designation for the measure, then all variations to the HEDIS specifications MUST be described and justified.
5. Indicator Inclusion Criteria Describe the limiting criteria used to further refine the numerator or denominator, or to define who is eligible and ineligible. Note: If using a HEDIS indicator, you may cite the specifications used (e.g.,
HEDIS 2000 – Volume 2 – Technical Specifications, pp. 24-27) for the indicator statement rather than entering the full text description of the indicator statement. If you did not strictly follow the HEDIS specifications, or received a “NR” designation for the measure, then all variations to the HEDIS specifications MUST be described and justified.

QAPI Operational Guide Page 25 of 50
6. Indicator Exclusion Criteria Describe the limiting criteria used to further refine the numerator or denominator, or to define who is eligible and ineligible.
Note: If using a HEDIS indicator, you may cite the specifications used (e.g., HEDIS 2000 – Volume 2 – Technical Specifications, pp. 24-27) for the indicator statement rather than entering the full text description of the indicator statement. If you did not strictly follow the HEDIS specifications, or received a “NR” designation for the measure, then all variations to the HEDIS specifications MUST be described and justified.
7. M+CO-Selected Performance Target for this Indicator This performance target is the desired level of achievement or a lofty goal for which the M+CO strives but may not necessarily reach. If you do not attain your stated performance target for a given QAPI project, it will not result in a failing score for this review element, provided that an improvement is achieved. 8. Rationale/justification for Performance Target Chosen Enter the rationale or justification used in choosing the performance target. Refer to the Instructional Guide for relevant information and suggestions on appropriate rationale/justification. 9. Indicator Will Measure Change(s) in Select what type of change the indicator will measure. The standards require that the quality indicator measures a change in one of the listed options. More than one may be selected.

QAPI Operational Guide Page 26 of 50
Completing an Indicator and Entering Another Indicator After completing of all the required information for Review Element 3, if you have additional indicators to enter, then select “Save and Enter Another Indicator.” You will be prompted to enter the appropriate information for Review Element 3 for the additional indicator.
If there are no additional indicators, and all the required information for Review Element 3 is completed, then select “Save & Continue to Review Element 4.” The items in Review Element 4 will appear.
Note: The indicator statement you entered is used to identify the indicator for the remainder of the project report. If you enter more than one indicator, there will be prompts to select the relevant indicator for each subsequent screen.

QAPI Operational Guide Page 27 of 50
Review Element 4: Baseline Study and Analysis If more than one indicator has been previously entered, there will be a prompt to select the relevant indicator reported for this screen.
1. Baseline Data Period Enter the actual time period for which the data were collected (Refer to the Instructional Guide for more details). 2. Baseline Data Source(s) Check the data sources that apply and enter a description for each entry (Refer to the Instructional Guide for more details). 3. Methods of Data Collection Enter a description of the data collection methodology that describes the efforts that you took to ensure validity and reliability (Refer to the Instructional Guide for more details). 4. Data Analysis Enter a description of the methods that were used to analyze the data and calculate the quality indicators (Refer to the Instructional Guide for more details).

QAPI Operational Guide Page 28 of 50
Note: If more than one Quality Indicator has been entered, you may select “Save and enter another baseline study.” If “Save and enter another baseline study” is selected, you will be prompted to first select an indicator and then to complete the items in Review Element 4 for the selected indicator.
If there are no additional baseline studies, save and continue to Review Element 5 to enter the information for the current indicator.

QAPI Operational Guide Page 29 of 50
Review Element 5: Baseline Study Population and Baseline Measurements/Performance If more than one indicator has been previously entered, there will be a prompt to select the relevant indicator reported for this screen.
1.1 Entire Population Size Enter the number that reflects your entire population at baseline. 1.2 Sampling If sampling was used, select “YES,” and then enter the sample size number. Refer to the Instructional Guide for relevant information on justification of the sample sizes and methodology. 1.3 Sampling Justification If sampling was used, you should provide a justification for the sample size that was chosen, the sampling methodology that was employed, and a description of the sampling methodology (Refer to the Instructional Guide for more details).

QAPI Operational Guide Page 30 of 50
2.1 Baseline Numerator Enter the number of cases in the numerator. 2.2 Baseline Denominator Enter the number of cases in the denominator. 2.3 Baseline Performance Enter the baseline rate as a percentage. 2.4 Performance Target The performance target is provided for information purposes and corresponds to the information entered in Review Element 3, Item 7, M+CO-Selected Performance Target. 3. Barrier Analysis This section is optional, but highly encouraged, especially for those M+COs that encountered issues during the first measurement, such as vaccine shortages. Information on action taken to overcome a barrier adds value to the project report.

QAPI Operational Guide Page 31 of 50
Note: If you entered more than one Quality Indicator, you may select “Save and
enter another baseline study.” If this is selected, you will be prompted to first select an indicator and then to complete the items in Review Element 5 for the selected indicator.
If there are no additional baseline studies, save and continue to Review Element 6 to enter the information for the current indicator.

QAPI Operational Guide Page 32 of 50
Review Element 6: Interventions Aimed at Achieving Demonstrable Improvement All the information for each intervention is entered at one time. At least one intervention is required. Reporting on all interventions is encouraged and will assist the reviewers in understanding the work that has been done on the QAPI project. 1. Intervention Type Select the type of intervention from the options listed.

QAPI Operational Guide Page 33 of 50
2. Target Audience(s) Choose the audience(s) targeted within this intervention. QAPI projects should include interventions that are system-wide and multi-faceted in their approach (Refer to the Instructional Guide for additional information). 3. Intervention Description Enter a narrative description of the intervention within the 4000-character limit of the text box (Refer to the Instructional Guide for additional information). 4. Initiation Date Provide the actual date on which the intervention was initiated. 4a. Intervention Timeframe Select whether the intervention is ongoing or had a discrete end-date. Be sure to provide dates for the ongoing interventions (i.e., quarterly and bimonthly) in the description. If there is an end-date, enter the date.

QAPI Operational Guide Page 34 of 50
5. Intervention Partners Enter any partners in the interventions from the list provided. If “other” is chosen, provide a description. 6. Additional Information Indicate whether intervention materials will be sent to the M+CQRO reviewers. You are encouraged to send in additional information, such as brochures, educational materials, etc., to assist in the evaluation of the report. This information should be sent to your assigned M+CQRO. When “YES” is selected, the address of the assigned M+CQRO will appear on the screen.

QAPI Operational Guide Page 35 of 50
Review Element 7: Demonstrable Improvement For each of the indicators entered in Review Elements 3-5, complete Review Element 7: Demonstrable Improvement. To enter the information for Demonstrable Improvement, select the appropriate indicator (if more than one indicator has been entered). 1. Demonstrable Improvement Data Period Enter the start- and end-dates for the data measurement period. 2. Changes in Study between Baseline and Demonstrable Improvement Select “NO” if there were no changes in the study and in the eligible population. Select “YES” if there were changes in the study or measurement methodology between the baseline and re-measurement. Describe the change and reason it occurred in the space provided.
QAPI Operational Guide Page 36 of 50
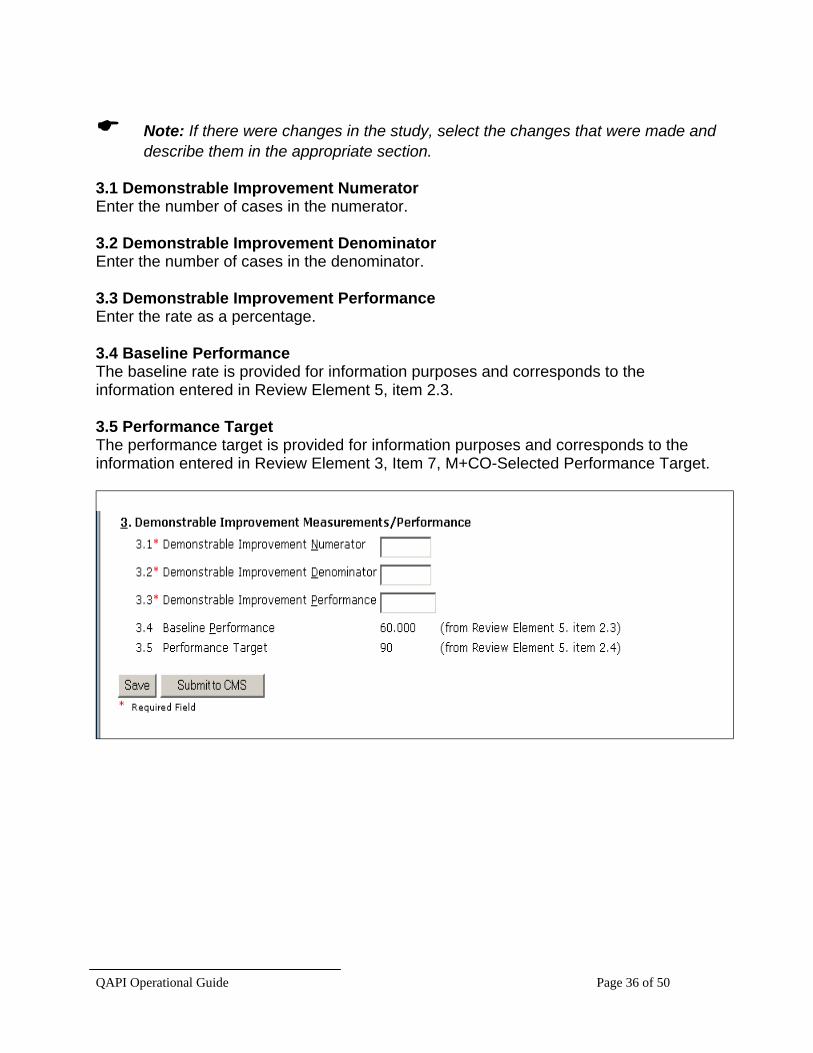
Note: If there were changes in the study, select the changes that were made and
describe them in the appropriate section. 3.1 Demonstrable Improvement Numerator Enter the number of cases in the numerator. 3.2 Demonstrable Improvement Denominator Enter the number of cases in the denominator. 3.3 Demonstrable Improvement Performance Enter the rate as a percentage. 3.4 Baseline Performance The baseline rate is provided for information purposes and corresponds to the information entered in Review Element 5, item 2.3. 3.5 Performance Target The performance target is provided for information purposes and corresponds to the information entered in Review Element 3, Item 7, M+CO-Selected Performance Target.

QAPI Operational Guide Page 37 of 50
Saving or Submitting a Project After the completion of Review Element 7, most M+COs will select the submit button to send the completed project report to CMS for review. However, you can save what has been entered to review before submission by selecting “SAVE” at the bottom of the screen, then you may return at any time prior to submission to modify the information by using the “View/Modify” option on the main QAPI Module screen.
Note: Once you submit the information to CMS by selecting the “SUBMIT” button, no further modifications can be made.
If any information required for submission of the QAPI Project (all fields marked with the red asterisk *) has not been entered, the system will provide a “Review Elements Completion Status” page. This page will list the Review Elements that have not been fully completed. To return to these Review Elements to enter additional information, select the Review Element from the left-hand menu. If you have elected to report on a subunit, you will be prompted to confirm the subunits selected. If the counties measured at the Demonstrable Improvement level are different than those measured at the Baseline, indicate that there were changes and select the counties that currently apply. To submit the completed QAPI report to CMS, select “SUBMIT.”
Note: Once this selection has been made, no further modifications may be made to the submitted information.
Upon successful submission, a screen will appear thanking you for the project submission.

QAPI Operational Guide Page 38 of 50
Entering Sustained Improvement Information If you are reporting on a sustained improvement cycle and would like to do so at the same time as demonstrable improvement reporting, select the “PROJECT IDENTIFIER” button. Clicking on this button will recall the first screen of information with the Review Elements listed in the left-hand menu. To enter the information for Sustained Improvement, select “Review Element 1S” from the left-hand menu.

QAPI Operational Guide Page 39 of 50
Review Element 1S: Subsequent or Modified Interventions Aimed at Achieving Sustained Improvement At this first screen, you are prompted to select one of three options: Add a New Intervention, Modify an Existing Intervention, or Continue/on-going interventions. Choose the appropriate answer and click “CONTINUE.”
If you added or modified interventions, a screen will appear where the appropriate information can be entered for each intervention, as in Review Element 6 in this guide. If “Add a New Intervention” is selected, a screen will appear and all intervention information should be entered as before. For changes to an existing intervention, all previous interventions will be listed. You will be prompted to select the intervention type to modify. All of the intervention information previously entered for Review Element 6 will appear. Make the appropriate changes and then select “MODIFY INTERVENTION.” If there were no changes to existing interventions, choose “Continue/on-going interventions.” Submission of additional intervention information or materials is not required but suggested as in Review Element 6.

QAPI Operational Guide Page 40 of 50
Review Element 2S: Sustained Improvement If more than one indicator has been entered in Review Elements 3-5 and 7, you will be prompted to select the indicator for reporting sustained improvement. The Sustained Improvement screens are very similar to the Baseline and Demonstrable Improvement screens.1. Sustained Improvement Data Period Enter the start- and end-dates for the Sustained Improvement data collection period. 2. Changes in the Study between Baseline and Sustained Improvement Select “NO” if there were no changes in the study and in the eligible population. Select “YES” if there were changes in the measurement methodology between the baseline and the remeasurement. Describe the change and the reason in the space provided.

QAPI Operational Guide Page 41 of 50
3.1 Sustained Improvement Numerator Enter the number of cases in the numerator. 3.2 Sustained Improvement Denominator Enter the number of cases in the denominator. 3.3 Sustained Improvement Performance Enter the rate as a percentage.
After entering the information for Review Element 2S, select “SAVE AND CONTINUE.”

QAPI Operational Guide Page 42 of 50
External Consultation and Lessons Learned 1. External Consultation from the QIO Identify and describe any external consultation and technical assistance from the state QIO. Be sure to indicate the type of technical assistance provided. You may select more than one type of assistance from the list provided. 2-5. Lessons Learned, Barriers, System Level Changes, Consultation and Technical Assistance from Other Organizations (OPTIONAL)
Note: This section is optional but highly recommended, as it also can help the reviewer in understanding the effort that you made or will make to improve in the future.

QAPI Operational Guide Page 43 of 50
Lessons Learned applies to an overall assessment of the project, including strengths and weaknesses, breakthroughs, and room for further improvement. Barriers refer to any special challenges or problems that arose. It also applies to obstacles and if they were overcome. This analysis may point to the need for further improvement. System Level Changes made or planned refers to any additional organizational changes made or planned after sustained improvement. Consultation and Technical Assistance refers to any assistance provided by an organization other than the state QIO. Be sure to identify the organization and the type of assistance provided. More than one type of assistance may be selected from the list.

QAPI Operational Guide Page 44 of 50
Submitting Projects After completing Lessons Learned, most M+COs will select the submit button to send the completed project report to CMS for review. However, to save what has been entered in order to review the information before submission, select “SAVE” at the bottom of the screen, then you may return at any time to modify the information by using the “View/Modify” option at the main QAPI Module screen.
Note: Once the information has been submitted to CMS by selecting the “SUBMIT” button, no further modifications can be made.
If any information required for submission of the QAPI Project (all fields marked with the red asterisk *), has not been entered, the system will provide a “Review Elements Completion Status” page. This page will list the Review Elements that have not been fully completed. To return to these Review Elements to enter additional information, select the Review Element from the left-hand menu. If you have elected to report on a subunit, you will be prompted to confirm the subunits selected. If the counties that were measured at the Sustained Improvement level are different than those that were measured at the Baseline level, indicate that there were changes and select the counties that currently apply. To submit the completed QAPI report to CMS, select “SUBMIT.”
Note: Once this selection has been made, no further modifications may be made to the submitted information.

QAPI Operational Guide Page 45 of 50
Upon successful submission, a screen will appear thanking you for the project submission.
After Submission of the Project If further clarification of a review element is needed, the assigned M+CQRO reviewer will contact the person identified as the principal contact in the project identifiers section regarding specific questions prior to completing the review. The M+CQRO team will evaluate your project within 90 days. CMS will review the M+CQRO's report to determine if the evaluation is complete and final. Although it is anticipated that the reviews will be completed prior to the 90-day mark, project review from CMS may not be final within the 90-day review period. If you have any questions about this process or the status of your project review, please contact your CMS regional office representative. When the evaluation is finalized by the CMS Central Office, you will be notified. To view the results of your review, please login to your HPMS account, access the QAPI Module, and select “View Scored Project” to review your results. You are expected to confirm receipt of review within seven days or one week of the notification.

QAPI Operational Guide Page 46 of 50
If a Corrective Action Plan (CAP) is required, or you have questions or concerns about your evaluation, please contact your CMS regional office (RO) representative within 45 days of the notification of the completed review.
Note: If a CAP is required, you must contact your CMS RO.

QAPI Operational Guide Page 47 of 50
Reviewing Existing Projects To review existing projects that have been entered, select “View/Modify Project” from the main QAPI menu. Select the “H” number and click “CONTINUE.” If you know the project type you wish to review, select it from the drop-down menu and click “SEARCH.” All projects that have been entered for this “H” number will appear on the next screen, with the Sub-units (if applicable), Submission Status, Project Type, Initiation Year, and Reporting Level. To view the saved information for a project, simply click on the “Project Title” link. To view the information in each Review Element, either select the Review Element from the left-hand menu, or you use the “CONTINUE” button at the bottom of each screen to page through the screens. Remember, if the project has already been submitted, no changes may be made to the information already entered.

QAPI Operational Guide Page 48 of 50
Printing Projects To print the project information, you may either print from the reports function or from the browser. Printing Using the Reports Function To print using the reports function, select the “Report” option from the lower left-hand side of the menu. You may receive the following warning, click “YES.”
After a few moments (please be patient, the report takes time to load), a report window will appear within the QAPI/HPMS window.

QAPI Operational Guide Page 49 of 50
This report contains all of the information that has been entered for this project in a printer-friendly format. Depending on the amount of information entered, this report may be 12 or more pages long. To navigate the report, click on the right-arrow button within the report window to advance a page, or the left-arrow button within the report window to go back a page.
To print, select the printer icon on the report window, not the one on the Internet Explorer menu bar.

QAPI Operational Guide Page 50 of 50
Printing from the Browser To print using the browser, simply go to the screen you wish to print and select File-Print. Choose your local printer and click OK.
Note: Reports may not appear as well formatted when printing from the browser.