pump stations- discharge sequence and operation … for proposals alameda corridor maintenance of...
TRANSCRIPT

Request for Proposals Alameda Corridor
Maintenance of Way Services
APPENDIX I
Pump Stations-Discharge Sequence
andOperation and
Maintenance Manual

GREENLEAF AND NADEAU PUMP STATIONS
OPERATION AND MAINTENANCE MANUAL

TABLE OF CONTENTS
Page
1. INTRODUCTION………………………………………………………………….1 2. GROUNDWATER PUMP………………………………………………………...4 3. MAGNETIC FLOW METER……………………………………………………...9 4. COMBUSTIBLE GAS SENSOR………………………………………………..11 5. RAIN GAUGE…………………………………………………………………….14 6. FIRST FLUSH PUMP……………………………………………………………16 7. ALUM METERING PUMP………………………………………………………21 8. OIL / WATER SEPARATOR……………………………………………………25 9. ACTIVATED CARBON DRUM…………………………………………………30 10. STORM WATER PUMP………………………………………………………...31
11. CLEAN-OUT SUMP PUMP…………………………………………………….36
12. SERVICE WATER…………………………………………………………….…40
13. VALVES (BUTTERFLY VALVE, CHECK VALVE, PLUG VALVE, BALL VALVE, PRESSURE RELEASE VALVE, PRESSURE CONTROL VALVE, SHEAR VALVE, GATE VALVE)………………………..42
14. VENTILATORS…………………………………………………………………..45
15. EXHAUST FAN…………………………………………………………………..48

1
1. INTRODUCTION The Mid-Corridor Trench pump stations are located on the east side of the trench near Nadeau Street and on the west side of the trench near Greenleaf Boulevard and provide flooding protection for the Mid-Corridor Trench. The watershed area drained by the pump stations extends the full width and length of the trench and includes the area between about Santa Fe Avenue to the north and State Route 91 (SR-91) Artesia Freeway to the south. At each end, where the tracks reach the elevation of the adjacent ground, there is a flood barrier. The barrier is intended to prevent the intrusion of runoff and flood waters from outside of the trench into the trench storm water removal systems. Each pump station contains four sets of pumps that perform different functions. In addition, there is an extensive list of supporting equipment including control systems, power supply, ventilation equipment, control building and related facilities. The two pump stations have a slightly different layout due to their size limitations, but contain the same amount of equipment, and have the same logic for operation. There are a total of 11 pumps at each pump station and are labeled groundwater pumps, first flush pumps, storm water pumps and sump pumps. These are described below. Groundwater Pumps - The groundwater pumps are submersible pumps that discharge clean-up/wash-down flows, infiltrating ground waters, and storm water runoff from the initial start of a rain event (<0.10” of rain) into the Los Angeles County Sanitation District (LACSD) sanitary sewer system. There are 2 groundwater pumps in each of the groundwater wet wells with one set as the lead pump and the other set as the lag pump. The discharge from these pumps is regulated by a LACSD industrial waste permit. However, in order to access the LACSD sanitary sewer at the Nadeau Pump Station, the discharge must first flow through a small section of sewer pipe owned by the Los Angeles County Department of Public Works (LACDPW). Therefore, there is a second industrial waste permit from LACDPW regulating the discharge. At both locations, the industrial waste permits regulate the daily discharge volume, flow rate, hours of discharge, and concentrations of compounds. These pumps are linked to a combustible gas sensor and rain gauge to prevent unauthorized discharges into the LACSD sanitary sewer and a flow meter for monitoring purposes. The groundwater wet well was designed to store the volume of one tank car in the event of a serious accident. First Flush Pumps – The first flush pumps are rotary lobe pumps that discharge between 0.1” and 0.5” of rain (following the shutdown of the groundwater pumps), mechanical failure of the groundwater pumps, or if a large rain event occurs and overcomes the pumping capacity of the groundwater pumps. There are 3 first flush pumps in each of the first flush wet wells with one set as a lead

2
pump, two set as a lag pumps. Their discharge flows into a series of oil/water separators to remove contaminants before discharging into the closest surface water body via the local storm drain system. The discharge from these pumps is regulated by a National Pollutant Discharge Elimination System (NPDES) permit. To support the work of the oil/water separators, there is an alum metering system and an activated carbon drum system. Storm Water Pumps – The storm water pumps are vertical turbine pumps that discharge greater than 0.5” of rain or if a large rain event occurs and overcomes the pumping capacity of the groundwater and first flush pumps. There are 4 storm water pumps in each of the storm water wet wells with one set as a lead pump, and the other 3 set as lag pumps. Their discharge flows directly into the closest surface water body via the local storm drain system regulated by a NPDES permit. Clean-out Sump Pumps - The sump pumps are 2 additional submersible pumps with one located in the first flush wet well and a second located in the storm water wet well. These pumps are used at the end of the rainy season to completely empty these 2 wet wells for maintenance purposes and to prevent the breeding of mosquitos and other insects. The groundwater, first flush and storm water pump systems are connected to their own individual magnetic flow meters which measure and indicate both the instantaneous flow rate and the total flow quantity (to date) for each system. The groundwater pumps are linked to its magnetic flow meter to prevent unauthorized discharges into the LACSD sanitary sewer and through a small portion of the LACDPW sanitary system. If the total daily flow quantity is exceeded per the set volume included in the permits, the programmable logic control (PLC) will shut down the groundwater pumps until the following day. The first flush and storm water pump systems do not have the same restrictions. Service water is available near each of these pumping systems as well as at grade near the alum system to allow for clean-up and hosing down. Additionally, it may be used to fill the wet wells in order to calibrate, and/or operate the pumps for maintenance purposes. There are many types of valves included throughout each of the pump stations and these are used to isolate pumps and separators, control flow rate and direction, for the purpose of safety and when service or repairs are needed on a specific unit. There are two different types of fan units, one to provide air changes in the main control building (exhaust fan) and one to facilitate air changes in the wet wells (ventilator).

3
The following sections identify and describe the above mentioned equipment, purpose of this equipment, relationship to adjacent units, operation, controls, operational problems and maintenance. Refer to the attached as-built mechanical drawings for the location of this equipment at the Greenleaf and Nadeau Pump Stations.

4
2. GROUNDWATER PUMP
2.1 PURPOSE: To discharge clean-up/wash-down flows, infiltrating ground waters, and storm water runoff from the initial start of a rain event (less than 0.1” of rain) into the Los Angeles County Sanitation District (LACSD) sanitary sewer system.
2.2 EQUIPMENT: Two (2) constant speed submersible pumps (P-101/102 Greenleaf Pump Station [GPS] and P-601/602 Nadeau Pump Station [NPS]) are provided to pump the waste waters, ground waters, and/or storm waters from the groundwater sump into the LACSD sanitary sewer. One pump is placed on lead and the other is on lag. These designations are manually rotated throughout the year to extend the life of each pump. A mercury float switch system consisting of two (2) floats, LSL-103/LSH-103 GPS and LSL-603/LSH-603 NPS are provided to control pump operation.
2.3 RELATIONSHIP TO ADJACENT UNITS
During wet weather periods, if the water level in the wet well continues to rise and exceeds the high level setting, LSH-103 NPS and LSH-603 GPS, the water will eventually flow over the weir baffle into the adjacent first flush pump wet well while the pumps are pumping. The operating groundwater pump will be stopped by the signal from the level switch LSH-110 GPS and LSH-610 NPS in the first flush pump wet well, which will also activate the operation of first flush pump, or the rain gauge level switch LS-105 GPS and LS-605 NPS, where the rainfall indicator is set at 0.1” level. Note: the rain gauge level switch will be reset 2 hours and 45 minutes after the end of the rain event and the groundwater pumps will resume operation.
A combustible gas sensor, AE-112 GPS and AE-612 NPS, is installed about one foot below the galvanized steel grating, which is directly above the groundwater pumps, to detect the presence of combustible gases in the groundwater pump wet wells.
At any time when the catalytic bead combustible gas sensor detects any combustible gases with a concentration at 15% lower explosive limit (LEL) the sensor switch, ASH-11 GPS and ASH-612 NPS, will actuate an alarm at the PLC cabinet in the control building and at the Alameda Corridor Control Center through the common alarm. The alarm will remain indicating on the PLC cabinet until it is manually reset. Should the combustible gas level reach the upper alarm level (20% LEL), the sensor switch ASSHH-12 GPS and ASHH-612 NPS will shut down the operation of the groundwater pumps and actuate an alarm at the PLC panel and at the Alameda Corridor Control Center through the common alarm. The sensor switch ASHH-112 GPS and

5
ASHH-612 NPS will also prevent the first flush pumps and ventilator from running until the alarm is manually reset. Magnetic flow meters, FE-104 GPS and FE-604 NPS, sense the pump discharge and instantly record the flow rate and total flow quantity on the indicator / transmitter device, which is integrally mounted directly on the flow meter. The device also transmits the flow rates to the PLC cabinet in the pump control building for recording. Should the daily flow quantity reached the LACSD permitted limits (36,000 gallons per day [gpd] GPS and 19,200 gpd NPS), the operating groundwater pump will be stopped by the signal from the magnetic flow meters and will also activate the operation of first flush pumps.
2.4 OPERATION
2.4.1 Initial Start-up before Operation
1. Check for proper cleanliness (free of sediment, trash, etc.) of the pump
wet well to avoid damage to the pump casing and impeller. 2. If the pumps is being lowered down along guide bars to the discharge
head connection, check to be sure that the pump casing nozzle is properly engaged with the discharge head.
3. Check pump discharge valves for proper operation. 4. Verify the level sensors are operational. 5. Check to be sure that the wet well is filled with water before the pumps
are run for any period of time.
Each pump should be started by placing the selector switch in the “HAND” position on the control building panel with the operator inspecting for excessive noise, vibration, etc. If it runs smoothly, it should be placed in the normal mode of operation (“AUTO” position), which will be controlled by the settings of the level switches (LSL-105/LSH-105 GPS and LSL-605/LSH-605 NPS). When the pump is in the operation, all of the valves and piping associated with the pump operation should be checked for leaks and proper operation. The magnetic flow meter (FE-104 GPS and FE-604 NPS) on the pump discharge manifold should be checked to verify the readout of the total pumping flow rate.
2.4.2 Normal Operation
Operation of the groundwater pumps include the automatic starting and stopping of the pumps by the level switches, rain gauge or combustible gas sensor. The selector switch should be placed in the “AUTO” position on the control building panel during normal operation. The level switches in the pump wet well will automatically control the pumping operation in response to the water level in the wet well. The wet well water levels at
6
which the float switches automatically start and stop the pumps are as follows:
Level Switches Activated Elevation Function LSH-103 GPS/LSH-603 NPS 3’-0” from floor Start Pump
LSL-103 GPS/LSL-603 NPS 12” from floor Stop Pump
2.4.3 Emergency Operation
The groundwater storage provided in the wet well was designed to have sufficient capacity to hold a full tank cargo volume of the freight train in the event of an accident. In the event of a tank cargo spillage, the groundwater pumps should only be operated in “HAND” mode (manual) or turned off. The operator has to be present at the site to make sure there are no pollutants discharged into the LACSD sanitary sewer that exceed discharge limits and should act in accordance with the ACTA Emergency Response Plan. Depending on the analytical results, the spillage may have to be removed by vacuum truck for off-site disposal.
If the combustible gas sensor detects combustible gases in the wet well, and activates the sensor alarm at 20% LEL, the operation of the groundwater pumps will be shut down completely. The operator should investigate the condition in accordance with the ACTA Emergency Response Plan.
If the lead pump breaks down, a visual alarm will be indicated at the PLC panel and at the Alameda Corridor Control Center through the common alarm. The lag pump should be placed into service. The inoperative pump should be taken out of service by turning it off (placing it in the “OFF” mode) and inserting a lock out/tag out tag in the handle to prevent it from being used. The operator should investigate the condition of the pump and determine if it can be repaired or should be replaced. In any case, the inoperative unit should be put back into service as soon as possible.
2.5 CONTROLS
2.5.1 Flow Control
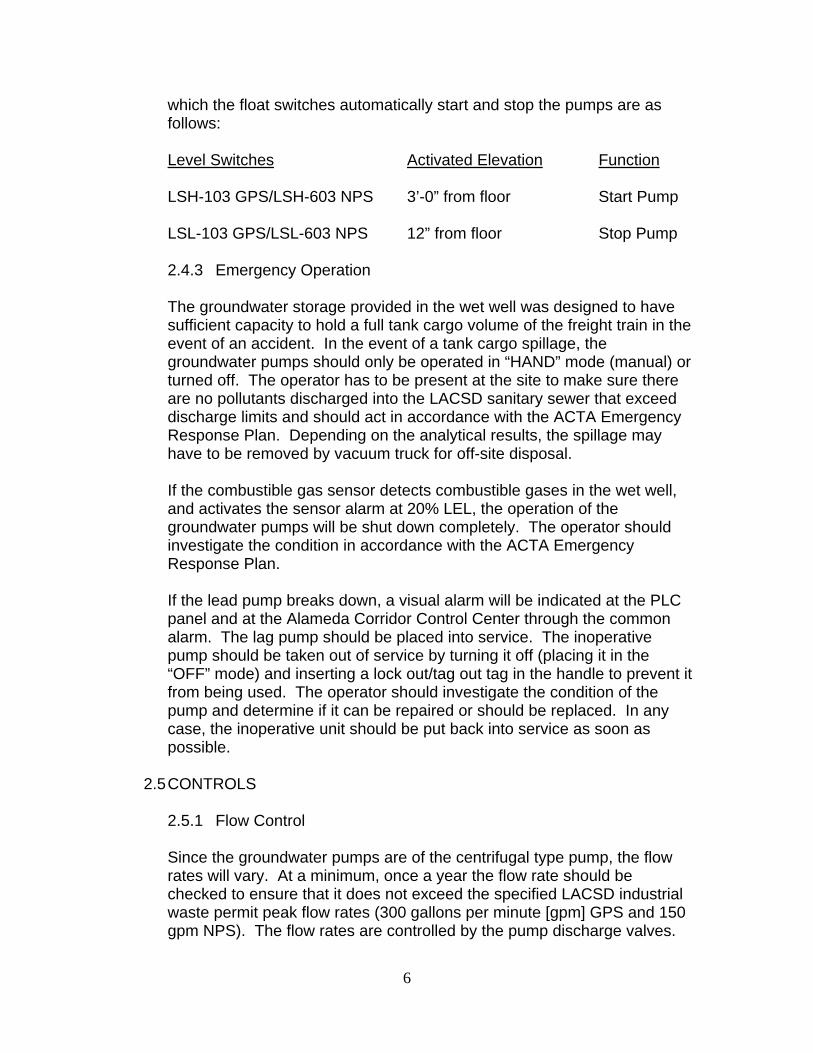
Since the groundwater pumps are of the centrifugal type pump, the flow rates will vary. At a minimum, once a year the flow rate should be checked to ensure that it does not exceed the specified LACSD industrial waste permit peak flow rates (300 gallons per minute [gpm] GPS and 150 gpm NPS). The flow rates are controlled by the pump discharge valves.

7
Due to the vibration caused by the movement of trains, this discharge valve may be effected by opening or closing a little bit each time thus altering the flow rates. The flow rate is checked on the magnetic flow meters located on the pump discharge piping and should be adjusted accordingly.
2.5.2 Electrical Control
The electrical controls for the groundwater pumps are located on the PLC cabinet and the motor control center in the pump station control building at the street level. The lead and lag pumps are selected by pressing the buttons on the front of the PanelMate unit located on the front of the PLC cabinet. The pump may be placed in the OFF, AUTO (automatic), or HAND (manual) position on the front of the motor control center. Caution: When the pump is manually controlled, care should be taken so that the pump does not continue pumping after the liquid level in the wet well has decreased to the bottom of the pump inlet. Operation of the pump in a dry condition may cause damage to the pump.
2.6 OPERATIONAL PROBLEMS
2.6.1 Mechanical Equipment Problems
Clogging of the pumps and their associated piping may be a problem. The rectangular ditches along the Corridor trench walls are covered with galvanized steel gratings and screens are installed prior to the drop inlet into the underneath detention basin and groundwater wet well. Foreign materials such as vegetation and trash (Styrofoam and plastic materials) are known to enter the detention basin and groundwater wet well. Due to the concerns that some unexpected foreign materials may get into the groundwater pump wet well and cause clogging problems in the pumps and piping, routine checking and cleaning of the ditches along the Corridor trench should be done and recorded.
For additional mechanical equipment problems, the manufacture’s operation and maintenance manuals for the submersible pumps should be checked.
2.6.2 Trouble Shooting
Refer to the manufacture’s operation and maintenance manuals for the Flygt Pumps or the abs/Sulzer Pumps for trouble shooting. The recommended remedies are provided to solve the possible operational problems on the pumps and motors.

8
2.7 MAINTENANCE
2.7.1 Preventative Maintenance
Refer to the Operation and Maintenance Manuals for the Flygt Pumps or the abs/Sulzer Pumps for preventative maintenance. Particular attention should be paid on the following: 1. Visual inspection for worn and damaged parts. 2. Check for oil chamber leaks, oil level, and the requirement of oil
change. 3. Check for cable entry leaks, damage on the outer jacket, and replace
as required.
The recommended schedules and the types of oil should be followed. Also, as a safety precaution, all work on the motors, which are of the explosion-proof type, should be performed by authorized Flygt and abs/Sulzer personnel.
2.7.2 Maintenance During Operation Periods
The pump and motor should be checked for operational problems such as excessive noise, vibration or other abnormal conditions. In addition, check to see that: 1. The level switches respond to the rising and falling water level in the
wet well. 2. The unit starts and stops as designated.

9
3. MAGNETIC FLOWMETER
3.1 PURPOSE: To measure and indicate both the instantaneous flow rate and the total flow quantity (to date) through the magnetic flow meter.
3.2 EQUIPMENT: Separate flow meters (FE-104/-111/-206 GPS and FE-604/-611/-706 NPS) are installed, respectively, to measure the discharges from groundwater, first flush runoff, and storm water pumps.
3.3 RELATIONSHIP TO ADJACENT UNITS
The flow meters are provided to measure the following pump discharges: Flow Meter FE-104 GPS and FE-604 NPS: Groundwater Pumps P-101/P-102 GPS and P-601/P-602 NPS Flow Meter FE-111 GPS and FE-611 NPS: First Flush Pumps P-106/P-107/P-108 GPS and P-606/P-607/P-608 NPS Flow Meter FE-206 GPS and FE-706 NPS: Storm Water Pumps P-201/P-202/P-203/P-204 GPS and P-701/P-702/P-703/P-704 NPS 3.4 OPERATION
3.4.1 Initial Start-up before Operation
1. Check units for proper installation, mounting, and electrical
connections. 2. Ensure that the meter readings are accurate only when the power is on
and the pipe is in full flow conditions.
3.4.2 Normal Operation
The flow meter senses the pump discharge and has the instantaneous and the total flow quantity at the moment displayed locally on the indicator / transmitter device, which is integrally mounted directly on the flow meter. The device also transmits the flow rates to the PLC cabinet in the pump control building for recording. The flow meters installed at the pump station have the following flow ranges: Flow Meter FE-104 GPS and FE-604 NPS: 100 to 400 gallons per minute (gpm) Flow Meter FE-111 GPS and FE-611 NPS: 1,050 to 2,100 gpm

10
Flow Meter FE-206 GPS and FE-706 NPS: 6,000 to 12,600 gpm
3.4.3 Emergency Operation
In case of a power failure or equipment breakdown, the flow meter sensor will not operate. The meter will function only after the power is resumed (either from main power or standby power) or the repair is done.
3.5 CONTROLS
3.5.1 Flow Control
Except for the straight runs installed at both upstream and downstream of the meter for accurate operation, no valve is provided for hydraulic flow control.
3.5.2 Electrical Control
No “On/Off” switch is provided for each flow meter. The meter is always ready to measure the flow rates so long as there is no power interruption.
3.6 OPERATIONAL PROBLEMS
In general, very few problems should occur with the meter, since there are no moving parts and obstruction less design through the meter tube. If repetitive erratic meter readings occur, the operator should contact the flow meter manufacturer (Danfoss Instrumark International) for checking, calibration, or repair.
3.7 MAINTENANCE
The magnetic flow meter is considered an almost “maintenance free” instrument. However, the instrument must be hydraulically calibrated annually in accordance with LACSD industrial wastewater discharge flow measurement requirements. Equipment calibration cannot be performed based on the installation configuration.

11
4. COMBUSTIBLE GAS SENSOR
4.1 PURPOSE: To detect the presence of combustible gases in the groundwater wet wells and prevent these gases from entering the LACSD sanitary sewer system and the storm drain system by shutting down the groundwater and first flush pumping systems and the ventilator.
4.2 EQUIPMENT: A combustible gas sensor, AE-112 GPS and AE-612 NPS, is installed about one foot below the galvanized steel grating, which is directly above the groundwater pumps, to detect the presence of combustible gases in the groundwater pump wet wells.
4.3 RELATIONSHIP TO ADJACENT UNITS
The combustible gas sensor is provided to measure the combustible gases in the groundwater wet well. At any time when the catalytic bead combustible gas sensor detects any combustible gases with a concentration at 15% lower explosive limit (LEL) the sensor switch, ASH-11 GPS and ASH-612 NPS, will actuate an alarm at the PLC cabinet in the control building and at the Alameda Corridor Control Center through the common alarm. The alarm will remain indicating on the PLC cabinet until it is manually reset. Should the combustible gas level reach the upper alarm level (20% LEL), the sensor switch ASSHH-12 GPS and ASHH-612 NPS will shut down the operation of the groundwater pumps and actuate an alarm at the PLC panel and at the Alameda Corridor Control Center through the common alarm. The sensor switch ASHH-112 GPS and ASHH-612 NPS will also prevent the first flush pumps and ventilator from running until the alarm is manually reset. 4.4 OPERATION
4.4.1 Initial Start-up before Operation
Prior to system start-up, the entire system should be visually inspected to ensure proper installation. The combustible gas sensor settings must be set and utilizes a visual menu system operated by means of a magnet. A magnet stick is supplied for this purpose. The menu system is used to configure alarm set-points, calibrate the sensor module, and for maintenance procedures and alarms acknowledge. The module menu system is operated by means of directing the magnet stick toward each of four independent hall-effect magnetic switches. Each switch functions as if it is a manually activated key. The keys are located above and below the faceplate display and are labeled “M”, “E”, and up and down arrows. The low alarm (15%), high alarm (20%), and methane concentration (50%) to be used for calibration

12
need to be set. Once these are set, the combustible gas sensor should be calibrated to verify this setting and operation.
4.4.2 Normal Operation
During normal operation, the combustible gas sensor readings will fluctuate slightly. As required by the LACSD, the span check/adjustment shall be performed on a regular basis (no less than twice per month) and the zero check/adjustment shall be done on a more frequent basis than the span check/adjustment (i.e., once per week versus twice per month). A calibration kit is maintained in the main control building for this purpose. The calibration readings shall be recorded on the Combustible Gas Detection Meter Calibration Check Record form maintained in the main control building. These forms shall be kept and retained for a period of four years. The combustible gas sensor utilizes a visual menu system operated by means of a magnet. A magnet stick is supplied for this purpose. The menu system is used to configure alarm set-points, calibrate the sensor module, and for maintenance procedures and alarms acknowledge. The module menu system is operated by means of directing the magnet stick toward each of four independent hall-effect magnetic switches. Each switch functions as if it is a manually activated key. The keys are located above and below the faceplate display and are labeled “M”, “E”, and up and down arrows. The SMC Instruction Manual on Table 6-1 shows the step by step process of the calibration procedures.
4.4.3 Emergency Operation
If the combustible gas sensor detects combustible gases in the wet well, and activates the sensor alarm at 20% LEL, the operation of the groundwater pumps will be shut down completely. The operator should investigate the condition in accordance with the ACTA Emergency Response Plan. In addition to the regular calibration schedule, and as required by the LACSD, the span check/adjustment shall be performed if the upper alarm level (20%) is reached. This is to ensure the continued proper operation of the unit. A calibration kit is maintained in the main control building for this purpose. The calibration readings shall be recorded on the Combustible Gas Detection Meter Calibration Check Record form maintained in the main control building. These forms shall be kept and retained for a period of four years.

13
4.5 OPERATIONAL PROBLEMS
The inspection and troubleshooting guide located in the SMC Instruction Manual can be used to determine the corrective action if a fault occurs. Examples of a fault include if the unit is unreliable, noisy, or cannot be calibrated.
4.6 MAINTENANCE
Operator should refer to the SMC Instruction Manual for maintenance procedures. A separate on/off switch has been installed adjacent to the unit to remove the system power.

14
5. RAIN GAUGE
5.1 PURPOSE: The rain gauge is installed in accordance with the discharge permit requirements of the LACSD. When the rainfall at the pump station area exceeds 0.1 inch, the level switch in the rain gage will send an electrical signal to the PLC cabinet to shutoff the operation of groundwater pumps. If the rainfall continues, the groundwater sump becomes full and the water spills over the weir wall into the first flush sump, where the water will be pumped to the oil/water separators for treatment prior to being discharged to the storm drain system. 5.2 EQUIPMENT: One (1) rain gauge, ME-105 GPS and ME-605 NPS, is provided to stop the pumping of the groundwater into the LACSD sanitary sewer system during rain events. The installation of the rain gauge is done in accordance with the discharge permit requirements of the LACSD.
5.3 RELATIONSHIP TO ADJACENT UNITS
The rain gauge is linked to the groundwater pumps by the PLC as described below.
5.4 OPERATION
Rain will fall in the 14” diameter funnel on the top of the rain gauge. As the rain collects in the float chamber, which is right below the funnel, a float ball will detect the level of the water. As the water level rises, the float will lift a magnetic piston into the operating zone of the level switch, LS-105 GPS and LS-605 NPS, which is installed with the float chamber. The switch will be actuated after approximately 0.1 inch of rain has fallen and will send an electrical signal to the PLC cabinet to shutoff the operation of the groundwater pumps. The following will also occur in accordance with the discharge permit requirements of the LACSD: The switch will turn on the green light on the front of the PLC cabinet. The
green light will stay lit while the groundwater pumps are deactivated. There is a 60 second delay from when the rain gauge has been activated
and when the water will drain from it (solenoid valve SV-105 GPS and SV-605 NPS).
Once the rain gauge has deactivated the groundwater pumps, they will remain deactivated for 2 hours and 45 minutes.
This timer will be reset every time the rain gauge is filled up again (after emptying every 60 seconds). This is to acknowledge that it is still raining outside.

15
5.5 OPERATIONAL PROBLEMS
The operator should maintain the cleanliness of the rainfall collection funnel. Any debris, such as tree litter, paper, plastic, and accumulation of dust in the funnel will clog the entrance to the float chamber and cause the gauge read to erroneously.
5.6 MAINTENANCE
Since a long period of dry weather season is predictable in Southern California, covering the top of the funnel may minimize the clogging problem during the dry season.

16
6. FIRST FLUSH PUMP
6.1 PURPOSE: To pump the first flush water, which are waters from the groundwater wet well, including rain waters between 0.1 inch and 0.5 inch during rainy periods, into the oil/water separators for oil and solids removal. The treated first flush water is then discharge into the 42” diameter storm drain line underneath West Alameda Street and then eventually disposed of into Compton Creek at GPS and 27” diameter storm drain line underneath Leota Street and then eventually disposed of into the Los Angeles River at NPS.
6.2 EQUIPMENT: Three (3) constant speed rotary lobe pumps (P-106/107/108 GPS and P-606/607/608 NPS) are provided to pump the water that flows over the weir from the groundwater wet well into the first flush wet well. These waters are pumped from the first flush wet well into the treatment equipment prior to discharge into the local storm drain system. One pump is placed on lead and the other two are placed on lag. These designations are manually rotated throughout the year to extend the life of each pump. A mercury float switch system consisting of three (3) floats, LSL-110/LSH-110/LSHH-110 GPS and LSL-610/LSH-610/LSHH-610 NPS are provided to control pump operation.
6.3 RELATIONSHIP TO ADJACENT UNITS
The first flush pumps are provided to pump between 0.1” and 0.5” of rainfall collected from the Corridor trench to the oil/water separators for treatment during rainy periods. If the water level in the wet well continues to rise and exceed the high level setting, LSHH-110 GPS and LSHH-610 NPS, the water will eventually flow over the weir baffle separating the first flush wet well and the storm water wet well. The first flush pumps will be stopped by the signal from the level switch LSM-205 GPS and LSM-705 NPS in the storm water wet well, which is to activate the operation of the storm water pumps. The first flush pumps will also be started again by the signal from the level switch LSL-205 GPS and LSL-705 in the storm water wet well, which is to stop the operation of the storm water after each storm event. The first flush pumps will continue pumping until the water level in their wet well reaches the pre-set lowest elevation and will be stopped by LSL-110 GPS and LSL-610 NPS. At any time when the catalytic bead combustible gas sensor detects any combustible gases with a concentration at 15% LEL the sensor switch, ASH-11 GPS and ASH-612 NPS, will actuate an alarm at the PLC cabinet in the control building and at the Alameda Corridor Control Center through the common alarm. The alarm will remain indicating on the PLC cabinet until it is

17
manually reset. Should the combustible gas level reach the upper alarm level (20% LEL), the sensor switch ASSHH-112 GPS and ASHH-612 NPS will shut down the operation of the groundwater pumps and actuate an alarm at the PLC panel and at the Alameda Corridor Control Center through the common alarm. The sensor switch ASHH-112 GPS and ASHH-612 NPS will also prevent the groundwater pumps and ventilator from running until the alarm is manually reset.
6.4 OPERATION
6.4.1 Initial Start-up before Operation
1. Check for proper cleanliness (free of large size rocks, wood residues,
trash, etc.) of the pump wet well to avoid damage to the pump casing and rotary lobes.
2. Check to be sure that the pump casing cover plate is properly bolted in place and the pump and motor drive shafts and driven belt are covered with safety guard. Safety guards are to prevent access to the rotating parts.
3. Check to ensure that the discharge pipe from rotary pups all the way to the oil/water separators is not blocked and valves are not closed to prevent damage to the pump by excessively high pressures. Note: Should the excessive discharge pressure occur, a 2” pressure relief valve installed on the pump discharge manifold will be activated and a portion of the pump discharge will be released back into the wet well through the grating opening directly above the wet well clean-out sump pump.
4. Check to ensure that the pump has no suction difficulties. If such a problem exists, fill either the suction or discharge nozzles with water and remove the plug from breather.
5. Check to ensure that the hydraulic oil canister installed on the top of the pump casing is filled adequately for the periods of operation.
6. Check to make sure all equipment items (pumps, motors, and valves) are properly lubricated.
7. Check pump discharge valves for proper operation. 8. Verify the level sensors are operational. 9. Check to be sure that the wet well is filled with water before the pumps
are turned on and run for any length of time. Each pump should be started by placing the selector switch in the “HAND” position on the control building panel with the operator inspecting for excessive heat, noise, vibration, etc. If it runs smoothly, it should be placed in the normal mode of operation (“AUTO” position), which will be controlled by the settings of the level switches (LSL-110/LSH-110/LSHH-110 GPS and LSL-610/LSH-610/LSHH-610 NPS). When the pump is in
18
the operation, all of the valves and piping associated with the pump operation should be checked for leaks and proper operation. The magnetic flow meter (FE-111 GPS and FE-611 NPS) on the pump discharge manifold should be checked to verify the readout of the total pumping flow rate.
6.4.2 Normal Operation
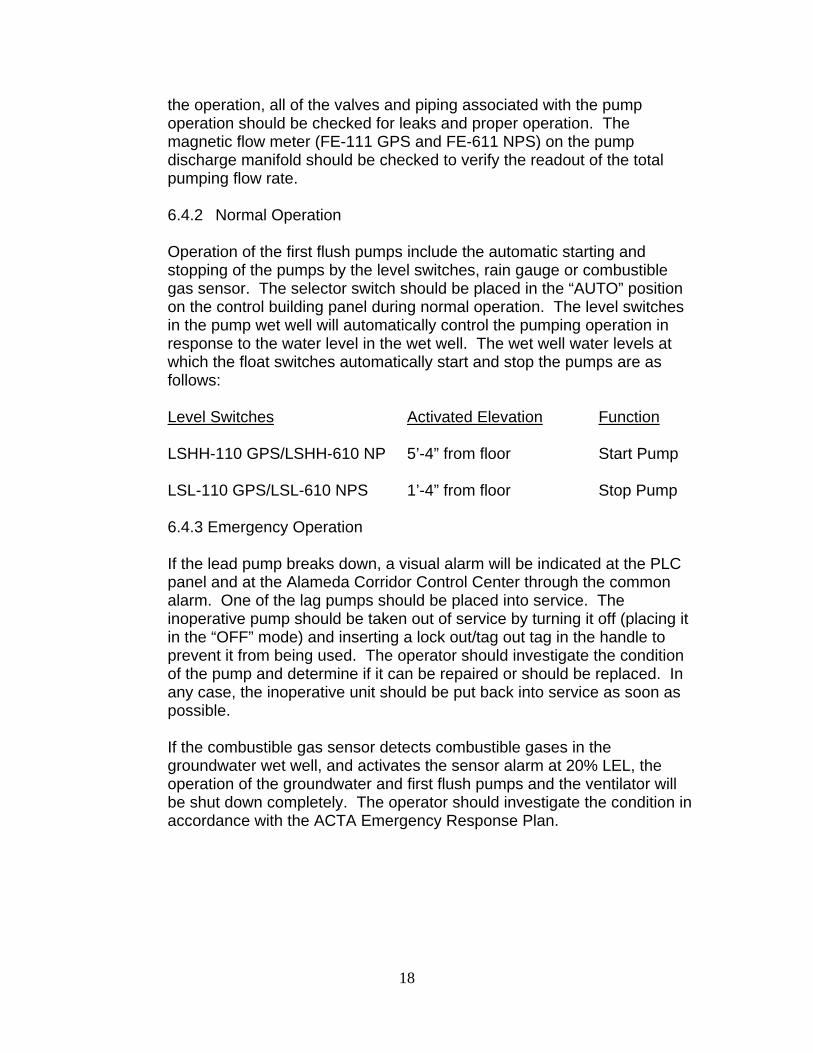
Operation of the first flush pumps include the automatic starting and stopping of the pumps by the level switches, rain gauge or combustible gas sensor. The selector switch should be placed in the “AUTO” position on the control building panel during normal operation. The level switches in the pump wet well will automatically control the pumping operation in response to the water level in the wet well. The wet well water levels at which the float switches automatically start and stop the pumps are as follows: Level Switches Activated Elevation Function LSHH-110 GPS/LSHH-610 NP 5’-4” from floor Start Pump LSL-110 GPS/LSL-610 NPS 1’-4” from floor Stop Pump 6.4.3 Emergency Operation
If the lead pump breaks down, a visual alarm will be indicated at the PLC panel and at the Alameda Corridor Control Center through the common alarm. One of the lag pumps should be placed into service. The inoperative pump should be taken out of service by turning it off (placing it in the “OFF” mode) and inserting a lock out/tag out tag in the handle to prevent it from being used. The operator should investigate the condition of the pump and determine if it can be repaired or should be replaced. In any case, the inoperative unit should be put back into service as soon as possible.
If the combustible gas sensor detects combustible gases in the groundwater wet well, and activates the sensor alarm at 20% LEL, the operation of the groundwater and first flush pumps and the ventilator will be shut down completely. The operator should investigate the condition in accordance with the ACTA Emergency Response Plan.

19
6.5 CONTROLS
6.5.1 Flow Control
Since the first flush pumps are a positive displacement type pump, their pumping flow rates remain constant regardless of the pumping heads incurred, therefore, any flow controls are not recommended. No isolation valves are allowed to be in the “CLOSED” positions in the pump discharge line. Closed pump discharge will ruin the pump unit in no time. The butterfly valve is an isolation valve for each pump and should be left in the fully “OPEN” position during normal operation.
6.5.2 Electrical Control
The electrical controls for the first flush pumps are located on the PLC cabinet and the motor control center in the pump station control building at the street level. The lead and lag pumps are selected by pressing the buttons on the front of the PanelMate unit located on the front of the PLC cabinet. The pump may be placed in the OFF, AUTO (automatic), or HAND (manual) position on the front of the motor control center. Caution: When the pump is manually controlled, care should be taken so that the pump does not continue pumping after the liquid level in the wet well has decreased to the bottom of the pump inlet. Operation of the pump in a dry condition may cause damage to the pump.
6.6 OPERATIONAL PROBLEMS
6.6.1 Mechanical Equipment Problems
1. Clogging of the pumps and their associated piping may be a problem,
though this should not occur. Due to the concerns that some unexpected foreign materials may get into the first flush pump wet well and cause clogging problems in the pumps and piping, routine checking and cleaning of the ditches along the Corridor trench should be done and recorded.
2. Quenching oil contamination may occur and the condition of the oil should be checked. If contamination is visible after the first 50 hours or every 200 operating hours thereafter, the quenching oil should be changed with oil recommended in the manufacture’s operation and maintenance manual.
3. If the pump housing shells wear out, re-adjust the segments per procedures described in the manufacture’s operation and maintenance manual.

20
For additional mechanical equipment problems, the manufacture’s operation and maintenance manuals for the submersible pumps should be checked.
6.6.2 Trouble Shooting
Refer to Vogelsang Pumps’ Installation, Operation and Maintenance Instructions for trouble shooting. The recommended remedies are provided to solve the possible operational problems on the pumps and motors.
6.7 MAINTENANCE
6.7.1 Preventative Maintenance
Refer to the Vogelsang Pumps’ Installation, Operation and Maintenance Instructions for the preventative maintenance schedule for pumps and preventative maintenance. Particular attention should be on changing the pump quenching oil and gear oil and the lubrication of the motor. The recommended schedules and the types of oil and lubricants should be followed.
In addition, the first flush pumps are normally operated during rain events. Operators should be aware of the forecasted weather conditions and conduct the necessary maintenance to have the pumping units ready for full operation prior to the start of the storm season.
6.7.2 Maintenance During Operation Periods
The pump and motor should be checked for operational problems such as excessive noise, vibration or other abnormal conditions. In addition, check to see that:
1. The level switches respond to the rising and falling water level in the
wet well. 2. The units start and stop as designated. 3. The motor speed comes up quickly and is maintained. 4. The motors do not spark excessively when starting or running.

21
7. ALUM FEED METERING PUMP
7.1 PURPOSE: To inject the aluminum sulfate (alum), which is used as a coagulant, into the oil/water separator influent to enhance oil/water/solids separation. The injection point is located directly on the first flush discharge manifold at the location very close to the storm water discharge box.
7.2 EQUIPMENT: Two (2) positive displacement hydraulically balanced diaphragm pumps (P-401/402 GPS and P-901/902 NPS) are provided. One pump is on duty and the other is used as a standby unit. The control panel, UCP-400 GPS and UCP-900 NPS, is installed near the pumps. A calibration chamber is provided on the pump suction header for checking the pump outputs. A float switch, LSL-405 GPS and LSL-905 NPS, is provided to shut down the pumps when the liquid level in the alum storage tank reaches the preset low level.
7.3 RELATIONSHIP TO ADJACENT UNITS
The operation of the slum feed pump is interlocked with the first flush runoff pumps. The alum solution is injected to the storm water only when the first flush pumps are operating. A vertical fiberglass chemical storage tank is provided near the pumps to supply the alum solution to the pumps. The tank is equipped with a float switch, LSL-405 GPS and LSL-905 NPS, to shut down the pump when the liquid level in the tank drops to the preset low level, and to actuate an alarm on the PLC cabinet in the pump control building.
7.4 OPERATION
7.4.1 Initial Start-up before Operation
1. Check to be sure that the gear and hydraulic reservoir oil has been
filled. 2. Check to see that the coupling guard is in place to prevent access to
moving parts. 3. Check to see that the pumping rates have been calibrated. 4. Check to be sure that there is adequate alum solution in the storage
tank for the expected periods of operation.
Each pump should be started by placing the selector switch in the “HAND” position with the operator inspecting for abnormal noise, vibration, etc. If it runs smoothly, it should be placed in the normal mode of operation

22
(“AUTO” position), which will be controlled by the operation of the first flush pumps. When the pump operation should be checked for leaks and proper operation. 7.4.2 Normal Operation
During normal operation, the operator selects the lead pump at the PLC control cabinet in the pump station control room and places the “HAND-OFF-AUTO” switch in “AUTO” position. Thereon, the pump will be started and stopped with the operation of the first flush pumps.
7.4.3 Emergency Operation
Breakdown of a pumping unit is not considered an emergency situation; however, the oil/water/solids separation performance will deteriorate. Pump failure will actuate an alarm at the PLC cabinet in the pump control building and at Alameda Corridor Control Center through the common alarm. The inoperative pump should be taken out of service by closing its suction and discharge valves. The lag pump should be put into service. The operator should investigate the condition of the pump and determine if it can be repaired or should be replaced. In any case, the inoperative unit should be put back into service as soon as possible.
7.5 CONTROLS
7.5.1 Flow Control
Alum feed rates should be adjusted periodically in accordance with the water quality of the storm water being pumped to the oil/water separators. Each pump is provided with a lock-in place micrometer knob adjustment for changing length of stroke, while in operation or idle, and thus changing the pump output. In addition, at the initial start-up operation, check to be sure that the pumping output is accurate by timing the solution level changes in the calibration cylinder, which is installed in the pump suction header. Refer to Pulsafeeder Pumps’ Installation, Operation, and Maintenance Instructions for calibration.
7.5.2 Electrical Control
The electrical controls for the alum feed metering pumps are located at the local control panel, UCP-400 GPS and UCP-900 NPS. The pumps are selected by the selector switch HS-403 GPS and HS-903 NPS on the UCP. The alternator in the panel will automatically alternate the pumps after each pumping event. Each pump is controlled by its “HAND-OFF-

23
AUTO” switch. Normally, the “HAND-OFF-AUTO” switch for each pump is in the “AUTO” position to automatically start/stop with the operation of the first flush pumps. The “HAND” and “OFF” positions of the “HAND-OFF-AUTO” selector switch are provided for the manual starting and stopping of the auger. Caution: When the pump is manually controlled, care should be taken so that the pump does not continue pumping after the liquid level in the storage tank has decreased to the pump inlet. Operation of the pump in a dry condition will damage the pump. All pumps running status, OL-401/402 GPS and OL-801/802 NPS, will be indicated on the UCP. Pump operational failure will also actuate an alarm at the PLC cabinet and at the Alameda Corridor Control Center through the common alarm.
7.6 OPERATIONAL PROBLEMS
7.6.1 Mechanical Equipment Problems
The operator should investigate the problem and determine if he can repair it or if a trained serviceman or a manufacturer’s representative is needed. In any case, the inoperative unit should be repaired and put back into service as soon as possible. Unless it is absolutely necessary, do not take the alum feed metering pumps out of service during rain events (arrange for the repair to be done during dry weather periods).
For additional mechanical equipment problems, the manufacture’s operation and maintenance manuals for the alum feed metering pumps should be checked.
7.6.2 Trouble Shooting
Refer to Pulsafeeder Pumps’ Installation, Operation and Maintenance Instructions manual for trouble shooting. The recommended remedies are provided to solve the possible operational problems on the pumps and motors.
7.7 MAINTENANCE
7.7.1 Preventative Maintenance
Refer to Pulsafeeder Pumps’ Installation, Operation and Maintenance Instructions manual for the preventative maintenance schedule for alum pumps and motors. Particular attention should be on the following:

24
1. Periodic inspection of the hydraulic diaphragm. 2. Periodic checking of hydraulic oil in the gear and oil reservoir. 3. Periodic checking of check valves in the pump head. 4. Periodic calibration of the pumping output. In addition, the alum feed metering pumps are normally operated during rain events. Operators should perform general inspections on the interior of the tank and conduct the necessary maintenance on the auger drives to have the units ready for full operation prior to the start of the storm season.
7.7.2 Maintenance During Operation Periods
The alum feed metering pumps and motors should be checked for operational problems such as excessive noise, heat, vibration or other abnormal conditions. In addition, check to see that the pump starts and stops in response to the operation of the first flush pumps.
25
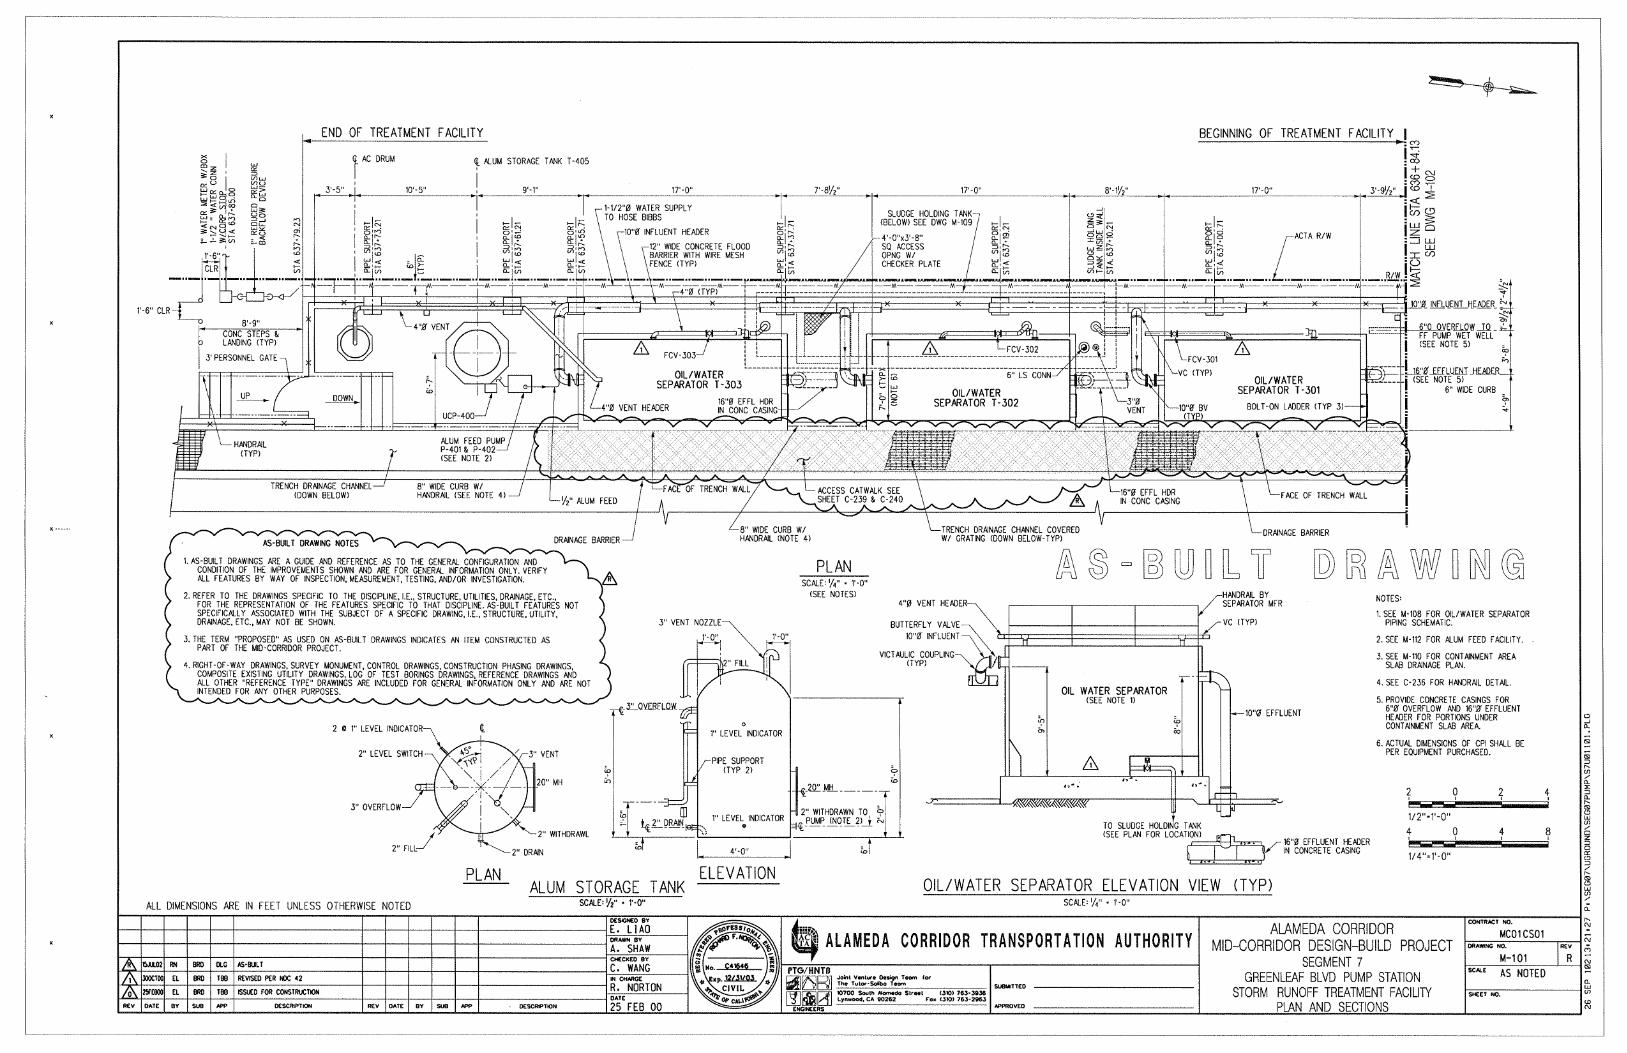
8. OIL/WATER SEPARATORS
8.1 PURPOSE: To remove the oil and settleable solids from the first flush storm water runoff prior to being discharged into the Los Angeles County Sanitation District (LACSD) sanitary sewer line.
8.2 EQUIPMENT: Three (3) corrugated plate interceptor oil/water separators (T-301/T-302/T-303 GPS and T-801/T-802/T-803 NPS) are provided to treat the storm water pumped from the first flush pumps. Each separator is complete with a separation chamber, oil chamber, effluent chamber and sludge chamber. A sludge auger assembly, complete with gear motor drive, is installed adjacent to each sludge hopper to convey the sludge from the hopper into the underground sludge holding tank. A total of six (6) sludge augers are provided. The operations of the auger assemblies are controlled by control panel (UCP-300 GPS and UCP-800 NPS) located near the storm water discharge box.
8.3 RELATIONSHIP TO ADJACENT UNITS The inlet valve of each oil/water separator is always in the “OPEN” position to receive the storm water from the first flush pumps. After oil/water separation, the oil removed in the separator is accumulated in the oil chamber until it is disposed of by a collection truck. The effluent water continuously overflows into a below-grade 16” diameter manifold line and then flows into the storm water discharge box. The solids settling in the separator hoppers are periodically removed in accordance with the timer settings in the control panel and dumped into the underground sludge holding tank. The sludge in the holding tank will need to be periodically hauled away by truck for off-site disposal. Prior to being discharged to the atmosphere, the vapors collected from the each of the covered oil/water separators are conveyed through a 4” diameter header to an activated carbon drum for removal of volatile organic compounds (VOCs).
8.4 OPERATION
8.4.1 Initial Start-up before Operation
1. Check to see that the inlet valve of each oil/water separator is in the “OPEN” position and the oil withdrawal valve is closed.
2. Check that the oil and effluent weir levels are properly set. 3. Check that the separators are filled with the clean water prior to
receiving the flow from first flush pumps. 4. Check that the gear unit of sludge auger has adequate oil level and
safety guard is in place to cover up the rotating shafts.

26
5. Check that the separator covers/lids are properly bolted with gaskets in place.
6. Check that the timer in the control panel is properly set for sludge removal intervals.
7. Verify that the carbon absorption drum has adequate capacity remaining.
Each sludge auger should be started by placing its selector switch in the “HAND” position with the operator inspecting for abnormal noise, vibration, etc. If it runs smoothly, it should be placed in the normal mode of operation (“AUTO” position), which is thereon controlled by the timer of the unit control panel (UCP-300 GPS and UCP-800 NPS).
8.4.2 Normal Operation
During normal operation, the operator should put all of the augers in the “AUTO” position on the unit control panel. Sludge removal will be done in accordance with the timer settings on each of the augers. When the augers are in operation, all the valves and piping associated with the auger operation should be checked for leaks and proper operation. The flow control valves (FCV-301/FCV-302/FCV-303 GPS and FCV-801/FCV-802/FCV-803 NPS), which are provided in each of the sludge lines, and are also controlled by the same panel. The valves will “OPEN” and “CLOSE” the operation of the augers. 8.4.3 Alternative Operation
Alternative methods of operation include the manual starting and stopping of the augers and shutting down the augers for maintenance or repairs. The operated auger should have its selector switch placed in the “HAND” or “OFF” position. (Refer to Section 1.5.1 Caution).
8.4.4 Emergency Operation
Breakdown of a sludge auger unit is not considered an emergency situation, since the sludge will be continuously accumulated in the hopper until it is withdrawn by manually opening the flow control valve. Without running of the auger, sludge will not be withdrawn evenly and completely out of the hopper. The electric motor actuated flow control valves, FCV-301/FCV-302/FCV-303 GPS and FCV-801/FCV-802/FCV-803 NPS, are of the Fail to Close type (i.e., the valve will remain in “CLOSED” position when it fails.

27
8.5 CONTROL
8.5.1 Electrical Control
The electrical control for the oil/water separators are located at the local control panel close to the storm water discharge box. Each sludge auger drive is controlled by its “HAND-OFF-AUTO” selector switch on the panel. Normally, the “HAND-OFF-AUTO” selector switch for each auger drive is in the “AUTO” position to provide automatic sludge removal through the timer controller of the panel. The “HAND” and “OFF” positions of the “HAND-OFF-AUTO” selector switch are provided for the manual starting and stopping of the auger. Caution: When the auger is manually controlled, care should be taken so that the auger does not continue to withdraw the sludge after the first flush pumps are stopped to feed the storm water into the separator. Operation of the augers for a long period of time, while no feed is coming from the first flush pumps, will drain the liquids out of the separator tank and well below its weir crest level. This may create a vacuum condition in the tank and create other maintenance problems afterwards, such as forming of oil and solids crusts on corrugate plates and weir plates (if liquid level is not resumed to the weir crest level), intake of fresh air into the vapor space, etc. Note: A 4” diameter pressure/vacuum relief valve is installed on the top of each separator to prevent the tank shell from excessive pressure/vacuum conditions. All auger running status, OL-301AB/OL-302AB/OL-303AB GPS and OL-801AB/OL-802AB/OL-803AB NPS, and failure alarms, OA-301AB/OA-302AB/OA-303AB GPS and OA-801AB/OA-802AB/OA-803AB NPS, are all indicated on the separator control panel.
8.6 OPERATIONAL PROBLEMS
8.6.1 Mechanical Equipment Problems
1. Overload of the auger drive. 2. Breakdown of the flow control valve. 3. Clogging of the sludge withdrawal pipe due to a long period of
inoperative auger or control valve. The operator should investigate the problem and determine if it can be repaired or if a trained serviceman is needed. In any case, the inoperative unit should be repaired and put back into service as soon as possible.

28
Unless it is absolutely necessary, do not take the separator out of service during rain events (arrange for the repair to be done during dry weather periods).
8.6.2 Trouble Shooting
Refer to Hydro-Flo Technologies’ Installation, Operation & Maintenance Instructions manual for trouble shooting. A list of trouble indicators include the following: 1. Effluent quality is deteriorating. 2. Offensive vapor is being generated. 3. Problem in removing the sludge. 4. Problem in removing the oil. Refer to the manual for individual trouble shooting guides and techniques to solve the possible operational problems.
8.7 MAINTENANCE
8.7.1 Preventive Maintenance
Refer to Hydro-Flo Technologies’ Installation, Operation & Maintenance Instructions manual for preventive maintenance schedule for auger motors and gear drives. Particular attention should be on the motor and gear drive lubrications. The recommended schedules and the types of lubricants should be followed. In addition, the oil/water separators are normally to operate during rain evens. Operators should perform general inspections on the interior of the tank and conduct the necessary maintenance on the auger drives to have the units ready for full operation prior to the start of the storm season. Safety Precautions: 1. Keep all flammable materials away from tanks. 2. Do not enter the tank until the atmosphere has been tested and it has
been shown to be safe to enter.
8.7.2 Maintenance During Operation Periods
The auger motors and gear drives should be checked for operational problems such as excessive noise, heat, vibration, or other abnormal conditions.

29
In addition, check to see if any leaks are occurring at the point where the auger shaft enters the tank. Adjust the packing gland as required.

30
9. ACTIVATED CARBON DRUM
9.1 PURPOSE: A 200 pound activated carbon drum is installed at the oil/water separator area to capture the volatile organic compounds (VOCs) in the vapor, which is emitted and collected from the gas space above the liquid surfaces of the oil/water separators.
9.2 EQUIPMENT: One (1) activated carbon drum with a dimension of approximately 24” diameter by 36” high is provided with a 2-inch inlet assembly kit, a 2-inch outlet assembly kit, and a 2-inch flexible hose connector. The hose connector is to connect the inlet of the activated carbon drum to the vent header on the oil/water separators. A ¼-inch shutoff sampling cock is installed on each of the tee fittings of the inlet and outlet assemblies. The entire activated carbon drum is placed on a concrete slab for easy maintenance.
9.3 RELATIONSHIP TO ADJACENT UNITS
The activated carbon drum is connected to the oil/water separators to remove VOCs from the vapor.
9.4 OPERATION
The activated carbon drum has to be replaced after the activated carbon inside the drum has captured or absorbed excessive VOCs and becomes saturated (i.e., the VOCs in the inlet and outlet of the drum have the same concentration). Based on the design data, it calculated that the air/vapor flow rate from the oil/water separators to the activated carbon drum is very slow, and the pressure drop through the activated carbon drum is negligible. Therefore, the 200 pound activated carbon drum may last up to two (2) years without replacement. However, to take some unexpected factors into consideration, such as higher oil concentration, it is recommended that the activated carbon drum be replaced once a year, unless periodic sampling confirms that the activated carbon drum is not exhausted. Sampling the VOC concentrations in the activated carbon in the drum should be performed by a trained individual.
9.5 OPERATIONAL PROBLEMS AND MAINTENANCE
1. Check to see that all piping, fittings, and hose connectors are properly
connected, and no vapor leaks. 2. Check the last date that the activated carbon drum was replaced, and a
test to confirm that the current drum is not exhausted.

31
10. STORM WATER PUMP
10.1PURPOSE: To pump the storm water runoff, which are waters from the first flush wet well, including rain waters greater than 0.5 inch during rainy periods. The water is discharge into the 42” diameter storm drain line underneath West Alameda Street and then eventually disposed of into Compton Creek at GPS and 27” diameter storm drain line underneath Leota Street and then eventually disposed of into the Los Angeles River at NPS.
10.2 EQUIPMENT: Four (4) constant speed vertical turbine pumps (P-201/202/203/204 GPS and P-701/702/703/704 NPS) are provided to pump the water that flows over the weir from the first flush wet well into the storm water wet well. One pump is placed on lead and the other three are placed on lag. These designations are manually rotated throughout the year to extend the life of each pump.
A mercury float switch system consisting of three (3) floats, LSL-205/LSM-205/LSH-205 GPS and LSL-705/LSM-705/LSH-705 NPS are provided to control pump operation. An additional float switch, LSHH-205 GPS and LSHH-705 NPS is also provided to actuate the high-high level alarm at the Control Room PLC cabinet and the common alarm at the Alameda Corridor Control Center, when the water level in the wet well is at the alarming level. A one-gallon oil reservoir is provided with each pump for automatic pump line shaft lubrication. The solenoid valve of the oiler assembly is interlocked with the storm water pump and will open to inject the oil to lubricate the line shaft bearings whenever the pump operates. A pressure switch (PSL-201/PSL-202/PSL-203/PSL-204 GPS and PSL-701/PSL-702/PSL-703/PSL-704 NPS) is provided with each pump to shut down the pumping unit, if the pump fails to achieve the operating pressure as sensed by the switch. In this case, the pumping pressure may not be adequate to fully open the check valve on the pump discharge.
10.3 RELATIONSHIP TO ADJACENT UNITS
The storm water pumps are provided to pump greater than 0.5” of rainfall collected from the Corridor trench during rainy periods. The storm water pumps have a pumping capacity corresponding to the 10-year peak rainfall. When a 50-year storm occurs, the balance of the runoff from this event will be stored in the wet well where it will be pumped out continuously until the water level reaches the pump shut-off level.
10.4 OPERATION
10.4.1 Initial Start-up before Operation

32
1. Check for proper cleanliness to avoid damage to the pump impellers
and bowls. 2. Check to be sure the oil reservoir is full of the proper oil. If necessary,
refer to Johnston Pump’s Operation and Maintenance Instructions. 3. Adjust the sight feed valve of the oiler assembly to have one drop per
second. 4. Check to make sure the pump shaft turns freely. 5. Check pump discharge valves for proper operation. 6. Check to make sure all equipment items (pumps, motors, and valves)
are lubricated. 7. Verify the level sensors are operational. 8. Check to be sure that the wet well is filled with water before the pumps
are turned on and run for any length of time. Each pump should be started by placing the selector switch in the “HAND” position on the control building panel with the operator inspecting for excessive heat, noise, vibration, etc. If it runs smoothly, it should be placed in the normal mode of operation (“AUTO” position), which will be controlled by the settings of the level switches (LSL-205/LSM-205/LSH-205 GPS and LSL-705/LSM-705/LSH-705 NPS). When the pump is in the operation, all of the valves and piping associated with the pump operation should be checked for leaks and proper operation. The magnetic flow meter (FE-206 GPS and FE-706 NPS) on the pump discharge manifold should be checked to verify the readout of the total pumping flow rate.
10.4.2 Normal Operation
Operation of the storm water pumps include the automatic starting and stopping of the pumps by the level switches, rain gauge or combustible gas sensor. The selector switch should be placed in the “AUTO” position on the control building panel during normal operation. The level switches in the pump wet well will automatically control the pumping operation in response to the water level in the wet well. The wet well water levels at which the float switches automatically start and stop the pumps are as follows:
Level Switches Activated Elevation Function
LSM-205 GPS/LSM-705 NPS 7’-4” from floor Start Pump
LSL-205 GPS/LSL-705 NPS 5’-0” from floor Stop Pump
LSHH-205 GPS/LSHH-705 NPS 10’-2” from floor Sound High-High Water Alarm

33
10.4.3 Emergency Operation
If the lead pump breaks down, a visual alarm will be indicated at the PLC panel and at the Alameda Corridor Control Center through the common alarm. One of the lag pumps should be placed into service. The inoperative pump should be taken out of service by turning it off (placing it in the “OFF” mode) and inserting a lock out/tag out tag in the handle to prevent it from being used. The operator should investigate the condition of the pump and determine if it can be repaired or should be replaced. In any case, the inoperative unit should be put back into service as soon as possible.
When the water level in the wet well exceeds the maximum preset level, it will actuate the level switch LSHH-205 GPS and LSHH-705 NPS and the high-high level alarm at the PLC cabinet in the pump control building and the common alarm at the Alameda Corridor Control Center through the common alarm.
10.5CONTROLS
10.5.1 Flow Control Each pump is provided with a discharge check valve and butterfly valve. The check will swing open and close with the on and off operation of the pump. The butterfly valve is an isolation and control valve for each pump and shall be locked in the appropriate position during normal operation.
10.5.2 Electrical Control
The electrical controls for the storm water pumps are located on the PLC cabinet and the motor control center in the pump station control building at the street level. The lead and lag pumps are selected by pressing the buttons on the front of the PanelMate unit located on the front of the PLC cabinet. The pump may be placed in the OFF, AUTO (automatic), or HAND (manual) position on the front of the motor control center. Caution: When the pump is manually controlled, care should be taken so that the pump does not continue pumping after the liquid level in the wet well has decreased to the bottom of the pump inlet. Operation of the pump in a dry condition may cause damage to the pump.
10.6 OPERATIONAL PROBLEMS
10.6.1 Mechanical Equipment Problems
Clogging of the pumps and their associated piping may be a problem, though this should not occur. The rectangular ditches along the Corridor

34
trench walls are covered with galvanized steel gratings and screens are installed at the drop inlet into the wet wells. The ditches are provided to convey the storm water or groundwater seepage from the Corridor trench into the underneath detention basin and storm water pump wet well. Foreign materials, such as large size gravel/rocks or trash are not expected. However, in the event unexpected foreign materials enter the wet well, routine checking and cleaning of the ditches along the Corridor trench should be done and recorded.
For additional mechanical equipment problems, the manufacture’s operation and maintenance manuals for the submersible pumps should be checked.
10.6.2 Trouble Shooting
Refer to Johnston Pumps’ Installation, Operation and Maintenance Instructions for trouble shooting. The recommended remedies are provided to solve the possible operational problems on the pumps. For the motors, refer to U.S. Electrical Motors Vertical High Thrust Motors Installation, Operation and Maintenance Manual.
10.7 MAINTENANCE
10.7.1 Preventative Maintenance
Refer to the Johnston Pumps’ Installation, Operation and Maintenance Instructions for the preventative maintenance schedule for pumps and refer to U.S. Electrical Motors Vertical High Thrust Motors Installation, Operation and Maintenance Manual for the preventative maintenance schedule for motors. The recommended schedules and the types of oil and lubricants should be followed.
In addition, the storm water pumps are normally operated during rain events. Operators should be aware of the forecasted weather conditions and conduct the necessary maintenance to have the pumping units ready for full operation prior to the start of the storm season.
10.7.2 Maintenance During Operation Periods
The pumps and motors should be checked for operational problems such as excessive noise, heat, vibration or other abnormal conditions. In addition, check to see that:
1. The level switches respond to the rising and falling water level in the
wet well. 2. The units start and stop as designated.

35
3. The motor speed comes up quickly and is maintained. 4. The motors do not spark excessively when starting or running.

36
11. CLEAN-OUT SUMP PUMP
11.1 PURPOSE: The clean-out sump pumps are used to drain the residual water remaining in the detention basin and both the first flush pump and storm water pump wet wells. The pumping operation is normally done during dry weather periods or preferably during summer time when the inspection on the interiors of the detention basin and wet wells is necessary or to prevent the breeding of insects. 11.2 EQUIPMENT: Two (2) constant speed submersible pumps (P-121/211 GPS and P-621/711 NPS) are provided, one in each individual wet well, to pump the residual water to the oil/water separators for solids removal prior to discharge into the storm drain system. A level switch, LSL-121/211 GPS and LSL-621/711 NPS, each equipped with one float, is provided in each sump to stop the pump operation. 11.3 RELATIONSHIP TO ADJACENT UNITS Each clean-out sump pump is operated independently. The clean-out or drainage water is pumped into the oil/water separators for solids removal. Make sure that the separators are ready to receive the clean-out water. The potable water from the hose bibs installed above the wet well openings should be used to hose down the interiors of the detention basin and wet wells. 11.4 OPERATION
11.4.1 Initial Start-up before Operation 1. Check for proper cleanliness (free of trash and debris) of the wet well
to avoid damage to the pump casing and impeller 2. If the pump is being lowered down along guide bars to the discharge
head connection, check to be sure that the pump nozzle is properly engaged with the discharge head.
3. Check pump discharge valves for proper operation. 4. Verify the level sensors are operational. 5. Check to be sure that the wet well is filled with water before the pumps
are run for any period of time. Each pump should be started by pushing the “START” pushbutton with the operator inspecting for abnormal noise, vibration, etc. If it runs smoothly, it should be able to be stopped by releasing the hand from the pushbutton. Thereon, it will be stopped by the low level switch (LSL) in the sump.
37
When the pump is in operation, all valves and piping associated with the pump operation should be checked for leaks and proper operation. 11.4.2 Normal Operation Once the “START” pushbutton is pushed, the operating pump will automatically stop when the liquid level in the sump drops to the level controlled by the low level switch LSL-121/LSL-211 GPS and LSL-621/LSL-711 NPS. The frequencies of the operations will be based on the inspection and maintenance schedule of the detention basin and pump wet wells. 11.4.3 Emergency Operation If one of the pumps breaks down, the inoperative pump should be taken out of service by closing the discharge plug valve and lifting the pump up and out of the wet well for inspection. The operator should investigate the condition of the pump and determine if he can repair it or if a trained serviceman or a pump manufacturer’s serviceman is needed. Since the two clean-out sump pumps are identical in their fabrication and performance, the pumps are interchangeable. The operable pup can be lifted up from one sump and lowered into the other sump and operated. In any case, the inoperative unit should be repaired and put back into service as soon as possible.
11.5 CONTROLS
11.5.1 Flow Control No flow control is required. All valves in the pump discharge line should be in full open position. 11.5.2 Electrical Control The electrical controls for the clean-out sump pumps are located at the unit control panel, UCP-120 GPS and UCP-620 NPS, near the sump openings. Though each pump is to operate independently, the two pumps share one common panel. Each pump is started by its local manual ‘START” pushbutton and stopped by the associated level switch (LSL) in the pump. The pumps running status, OL-121/211 GPS and OL-621/711 NPS, and failure alarms, OA-121/211 GPS and OA-621/711 NPS, will be indicated at the UCP-120 GPS and UCP-620 NPS.

38
11.6 OPERATIONAL PROBLEMS
11.6.1 Mechanical Equipment Problems 1. Should clogging in pump casing, valves, or piping, it should be cleaned
as soon as detected. Note: Submersible pumps as manufactured by Flygt Pumps, model CP 3127 are capable of passing a 3” diameter solid sphere.
2. Water enters into the pump oil chamber. Should this occur, the sensor in the oil chamber will activate an operational failure alarm on the UCP. The inoperative pump should be taken out of service by lifting it up out of the wet well. The operator should contact the Flygt serviceman for repair.
For additional mechanical equipment problems, the manufacture’s operation and maintenance manuals for the clean-out sump pumps should be checked. 11.6.2 Trouble Shooting Refer to Flygt Pumps’ Installation, Care and Maintenance Instructions manual for trouble shooting. The recommended remedies are provided to solve the possible operational problems on the pumps and motors.
11.7 MAINTENANCE
11.7.1 Preventative Maintenance Refer to Flygt Pumps’ Installation, Care and Maintenance Instructions manual for the preventative maintenance for pumps and electric motors. Particular attention should be on the following: 1. Visual inspection for worn and damaged parts. 2. Check for oil chamber leaks, oil level, and the requirement/frequency
for oil change. 3. Check for cable entry leaks, damage on outer jacket, and replace as
required. The recommended schedules and the types of oil should be followed. Also, as a safety precaution, all work on the motors, which are of the explosion-proof type, should be performed by authorized Flygt personnel or personnel authorized by Flygt.

39
11.7.2 Maintenance During Operation Periods The pump and motor should be checked for operational problems such as excessive noise, heat, vibration or other abnormal conditions. In addition, check to see that the level switch responds to the water level in the sump. Clean, and adjust as required.

40
12. SERVICE WATER
12.1 PURPOSE: A 1-1/2 inch potable water line is provided at the pump stations for cleaning up and hosing down the alum feed facility area, oil/water separator area, and the pumping facility area in the trench. Additionally, it may be used to fill the wet wells in order to calibrate, and/or operate the pumps for maintenance purposes. 12.2 EQUIPMENT: A 1-1/2 inch water line is connected to the City’s potable water supply line by a 1 inch water meter and a 1 inch reduced pressure type backflow preventer. The meter is installed in a below-grade meter box and backflow preventer, together with its two 1 inch isolation valves installed above ground in accordance with City Water Department requirements. The meter and backflow preventer are located outside of the barrier wall and south of alum storage tank at GPS and inside the vehicular gate and northeast of the main control building. A total of four (4) hose bibs are provided including two (2) hose bibbs of the wall mounted type are at the pumping facility areas – one near the access opening to the groundwater pumps and one near the access opening to the clean-up sump pumps opening and two (2) hose bibbs of the post mounted type are at the oil/water separators area – one near the oil/water separators and one near the alum storage tanks. 12.3 RELATIONSHIP TO ADJACENT UNITS Service water is independent of other units.
12.4 OPERATION Pumping facility area – When required for inspection, clean-up, calibration and maintenance, operator should use a hose of proper length. Connect hose to the hose bibb, and hose down the interiors of the wet wells and the basin and other areas as needed. If the wet wells/basins are entered, OSHA requirements shall be followed. Oil/water separator area – Since the oil/water is in an enclosed tank with an overflow outlet pipe connected to the below-grade manifold to the storm runoff discharge box, there should be no leakage or drips from the oil/water separator during normal operation. However, while the oil in the separator is withdrawn for truck hauling and disposal, oil may spill at the quick-coupler hose connection joint. If this occurs, a spill kit is available and stored in the main control building.

41
Alum feed facility area – If there is leakage at the hose coupling joint or spillage from the tank overflow pipe during tank fill, a spill kit is available and stored in the main control building. 12.5 MAINTENANCE Check for leaks in the service water system and repair as soon as possible.

42
13. VALVES (BUTTERFLY VALVES, CHECK VALVES, PLUG VALVES, BALL VALVES, PRV, PCV, SHEAR GATE)
13.1 PURPOSE:
Butterfly Valves: Butterfly valves are installed at the pump discharges of the first flush pumps (P-106/P-107/P-108 GPS and P-606/P-607/P-608 NPS) and storm water pumps (P-201/P-202/P-203/P-204 GPS and P-701/P-702/P-703/P-704 NPS) and at the inlets of the oil/water separators (T-301/T-302/T-303 GPS and T-801/T-802/T-803 NPS), are used to isolate the pump(s) and the separator(s), when service or repair on the unit is required. A 4” butterfly valve is also installed at each outlet of the oil withdrawal pipe of the oil/water separator to open/close for the truck connection. Swing Check Valve: Swing check valves are installed at the pump discharges of the first flush and storm water pumps to prevent the reversal of flow back into the pump impellers. Ball Check Valves: Ball check valves are installed at the pump discharges for the groundwater pumps (P-101/P-102 GPS and P-601/P-602 NPS) and clean- out sump pumps to prevent the reversal of flow back into the pump impellers. Plug Valves: Eccentric plug valves, equipped with motorized actuators, are installed at each outlet of oil/water separator sludge pipe for automatic sludge withdrawal. Manually operated eccentric plug valves are also installed on the discharge lines of each clean-out pump for isolation of the pump unit. Ball Valves: The PVC ball valves are installed throughout the alum feed lines for isolation of the alum liquid solution when the unit needs to be shut down for maintenance or repair. Pressure Reducing Valves (PRV): PRVs are installed at the discharge lines of the positive displacement type pumps, i.e., first flush pups (rotary lobes) and alum feed metering pumps (hydraulic diaphragm), to prevent overpressure on the pump casings and associated piping. Pressure Control Valves: A pressure control valve is installed on the discharge header of alum feed pumps for accurate operation of the pumps. Shear Gate Valve: A 4” shear gate valve is installed at the floor level on the wall between the groundwater pump wet well and the first flush pump wet well for cleaning and maintenance.
43
13.2 EQUIPMENT
Refer to PURPOSE section above for description.
13.3 RELATIONSHIP TO ADJACENT UNITS Refer to PURPOSE section above for description.
13.4 OPERATION
13.4.1 Initial Start-up before Operation All valves, regardless of type and function, require checking before being put into operation. 1. Visually inspect valve to insure it has been properly installed. 2. Are gaskets and/or packings properly installed? 3. Does valve move smoothly during operation? 4. No fluid leakage should be visible.
13.4.2 Normal Operation
All valves at the pump station are generally in Open or Close positions. Visual inspection for wear, corrosion, or hindered valve movement should be done regularly. Prior to storm seasons, all valves should be inspected, lubricated, and operated throughout their entire operating range to ensure that they have not become frozen or jammed in position and can achieve full shutoff in any circumstances.
13.5 CONTROLS
Except for the motorized eccentric plug valves (FCV-301/FV-302/FCV-303 GPS and FCV-801/FV-802/FCV-803 NPS) installed at the sludge outlet lines of oil/water separators, and the spring-loaded pressure valves, all other valves are manually operated to open or close as required. The operation of each motorized eccentric plug valve is controlled by the settings of the master timer KS-300 GPS and KS-800 NPS, which is in the local unit control panel (UCP-300 GPS and UCP-800 NPS) of the oil/water separators. The spring-loaded pressure relief valves will automatically pop open to release excessive pressure in the pump discharge lines of the positive

44
displacement pumps, such as first flush pumps and alum feed metering pumps. The setting of the spring is mechanically adjustable as required. 13.6 OPERATIONAL PROBLEMS
The most common operational problems with valves are the following: 1. Leakage from stem packing (butterfly valves, eccentric plug valves). 2. Leakage from diaphragm seal (pressure reducing valves). 3. Leakage from O-ring seals (PVC ball valves). 4. Leakage from valve seat (swing check valves). If leakage occurs, operator should refer to the valve manufacturer’s instruction manual for repair. The timing for repair should be scheduled to have minimum interference to the pumping operation. 13.7 MAINTENANCE Except for the valves installed with the groundwater pumps, which require regular maintenance during both the dry and wet weather conditions, all other valves are operated only during rain events. These valves should be thoroughly inspected for wear, corrosion, jamming, gasket replacement, and etc. or repaired, lubricated, replaced as necessary before the storm season comes. Operator should refer to the valve manufacturer’s catalogue sheets and installation and maintenance instructions for procedures for disassembly and re-assembly of valves.

45
14. VENTILATOR
14.1 PURPOSE: The ventilator is provided to facilitate air changes in the wet wells and associated underground detention basin. (NOTE: Refer to OSHA requirements for supplemental air supply for other sources, such as portable air blowers, and other safety devices should be put into use while working in the confined or enclosed space.) 14.2 EQUIPMENT: Ventilator (F-131 GPS and F-631 NPS) is installed at the south end of the storm water pumps to ventilate the air space above the liquid level in the wet wells. A local hand switch, HS-131 GPS and HS-631 NPS, and the timer switch, KS-131 GPS and KS-631 NPS, at the PLC cabinet of the pump control building are used to control the operation of ventilator. 14.3 RELATIONSHIP TO ADJACENT UNITS At any time when the catalytic bead combustible gas sensor detects some combustible gases with a concentration at 15% LEL the sensor switch, ASH-112 GPS and ASH-612 NPS, will actuate an alarm at the PLC cabinet in the pump control building and at the Alameda Corridor Control Center through the common alarm. The alarm will remain indicating on the PLC cabinet until reset pushbutton switch is pushed. Should the combustible gas level reach the upper alarm level (20% LEL), the sensor switch ASHH-112 GPS and ASHH-612 NPS will shut down the operation of the ventilator and actuate an alarm at the PLC cabinet in the pump control building and at the Alameda Corridor Control Center through the common alarm. The sensor switch ASHH-112 GPS and ASHH-612 NPS will also prevent the groundwater pumps and first flush pumps from running until the alarm is reset.
14.4 OPERATION
14.4.1 Initial Start-up before Operation
All valves, regardless of type and function, require checking before being put into operation. 1. Check to see that ventilator stack cap, safety guard, and motor base
plate are properly secured. Check and tighten all bolts, fasteners, and set crews as necessary.
2. Switch to the “HAND” position from the local hand switch, HS-131 GPS and HS-631 NPS, at the ventilator and allow the ventilator to run at full speed. Check for excessive vibration, unusual noise, proper belt tension, and proper lubrication. If any problem is indicated, switch off immediately, repeat the checking procedure in accordance with

46
ventilator manufacturer’s (Hartzell Fan, Inc.) installation, operation, and maintenance manual.
3. If the ventilator seems to be operating satisfactorily, switch to “OFF” position and let it completely stop, and then switch to “AUTO” position.
14.4.2 Normal Operation During normal operation, the operator should have the local selector switch, HS-131 GPS and HS-631 NPS, in the “AUTO” position. Thereon, the ventilator will be controlled by the timer switch at the PLC cabinet in the pump control interlocked with the combustible gas sensor.
14.5 OPERATIONAL PROBLEMS
14.5.1 Mechanical Problems The most common operational problems are excessive vibration and unusual noise due to improper driven belt tension and/or under-lubricated impeller and/or motor bearings. Check belt tension often. Ideal tension is the tension at which the belt will not slip under normal operating conditions. Also check sheave alignment. Sheaves that are not properly aligned cause belt wear and sheave wear. Motor bearings and ventilator impeller bearing should be greased at regular intervals in accordance with the manufacturer’s recommended schedule. See Hartzell’s Installation, Operation, and Maintenance Manual for proper type and amount of lubricants to be used and guidelines for checking belt tension. 14.5.2 Trouble Shooting Refer to Hartzell’s Installation, Operation and Maintenance Instructions manual for trouble shooting chart. The possible causes and related problems are indicated in the chart. The operator should investigate the problems and determine if he can repair it or if a ventilator manufacturer’s serviceman is needed. In any case, the unit should be repaired and put back into service as soon as possible.
14.6 MAINTENANCE
The ventilator should be on the regular maintenance list regardless of dry or wet weather conditions. Properly lubricate the impeller and motor bearings

47
and check the V-belt drive for proper alignment, tension, and excessive wear are the major tasks for good maintenance and minimum trouble operation. Also, check impeller for any buildup of foreign material or wear from abrasion. Clean the impeller of any foreign material. Replace the belt and/or the impeller if excessive vibration and wear occur.

48
15. EXHAUST FAN
15.1 PURPOSE: The exhaust fan is provided to have air changes in the main control building and dissipate the heat generated from the motor control center and other equipment. 15.2 EQUIPMENT: One (1) wall mounted exhaust fan is installed on the north wall of the main control buildings. 15.3 RELATIONSHIP TO ADJACENT UNITS The exhaust fan is independent of other units. 15.4 OPERATION
15.4.1 Initial Start-up before Operation 1. Check to see that mounting plate, fan hood, and motor are properly
secured. Check and tighten all bolts, fasteners, and set crews as necessary.
2. Switch on the electrical supply and allow the fan to run at full speed. Check for excessive vibration, unusual noise, and proper lubrication. If any problem is indicated, switch off immediately, repeat the checking procedure in accordance with the fan manufacturer’s (CFM Company/Greenheck) installation, operation, and maintenance manual.
3. If the fan seems to be operating satisfactorily, switch off and let it completely stop, and then switch on again to make sure it will operate smoothly from now on.
15.4.2 Normal Operation During normal operation, the operator should let the exhaust fan continuously run to have proper ventilation in the main control building.
15.5 OPERATIONAL PROBLEMS
15.5.1 Mechanical Problems The most common operational problems are excessive vibration and unusual noise due to under-lubricated fan and/or motor bearings. Motor bearing and fan bearings should be greased at regular intervals in accordance with the manufacturer’s recommended schedule.

49
15.5.2 Trouble Shooting Refer to CFM Company’s Installation, Operation and Maintenance Instructions manual for trouble shooting table. The possible causes, related problems and corrective actions are indicated in the table. The operator should investigate the problems and determine if he can repair it or if a ventilator manufacturer’s serviceman is needed. In any case, the unit should be repaired and put back into service as soon as possible.
15.6 MAINTENANCE
The exhaust fan should be on the regular maintenance list regardless of dry or wet weather conditions. Properly lubricate the fan and motor bearings and check for excessive noise and wear are the major tasks for good maintenance and trouble-free operation. Check fan impeller for any buildup of foreign material and clean up as necessary.