program all the things - how to develop iot devices using micropython
TRANSCRIPT
Program all the thingsHow to develop IoT devices using
MicroPython
Anna Gerber
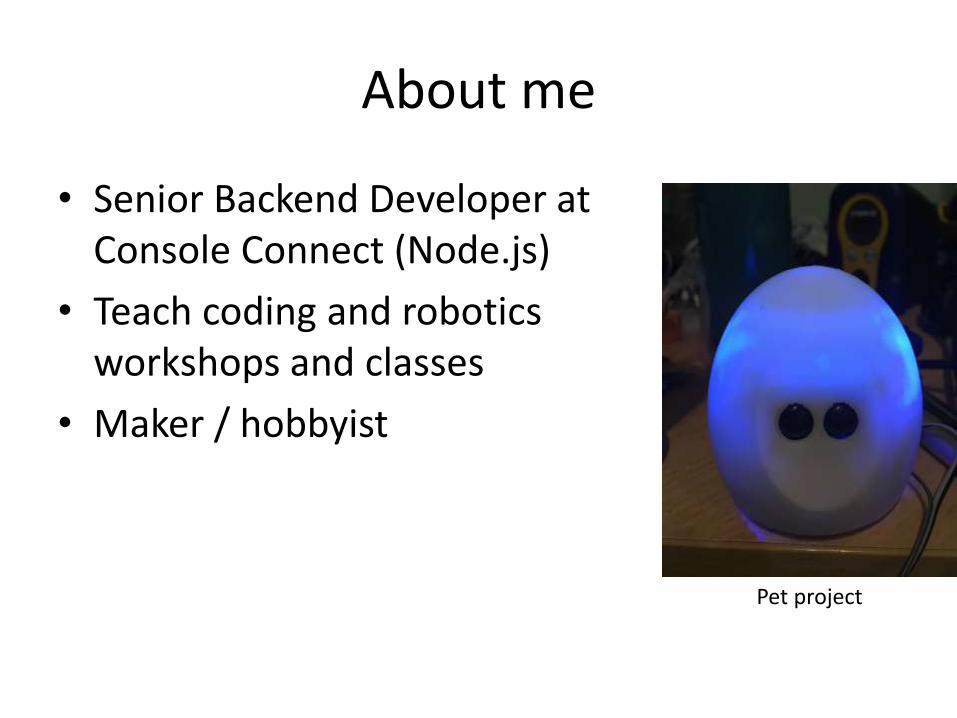
About me
• Senior Backend Developer at Console Connect (Node.js)
• Teach coding and robotics workshops and classes
• Maker / hobbyist
Pet project

Getting started developing IoT devices
• Design architecture & select language, development tools/platform
• Select hardware (sensors, actuators, dev board)
• Develop programs to read from sensors & control actuators
• Develop programs to communicate with other devices or services that process / analyze data
MicroPython
• Python 3.x for microcontrollers
• Features: REPL, filesystem, aims to be a compatible subset of Cpython & core libraries
• machine library for hardware / GPIO
• Open Source: MIT license
• https://github.com/micropython/micropython

SELECTING HARDWARE
MicroPython Compatible Hardware
• pyboard
• TI CC3200 microcontrollers (e.g. WiPy)
• 16 bit PIC microcontrollers
• Teensy 3.1
• Unix (for x86/x64/ARM/MIPS)
• ESP8266
• ESP32 (experimental)
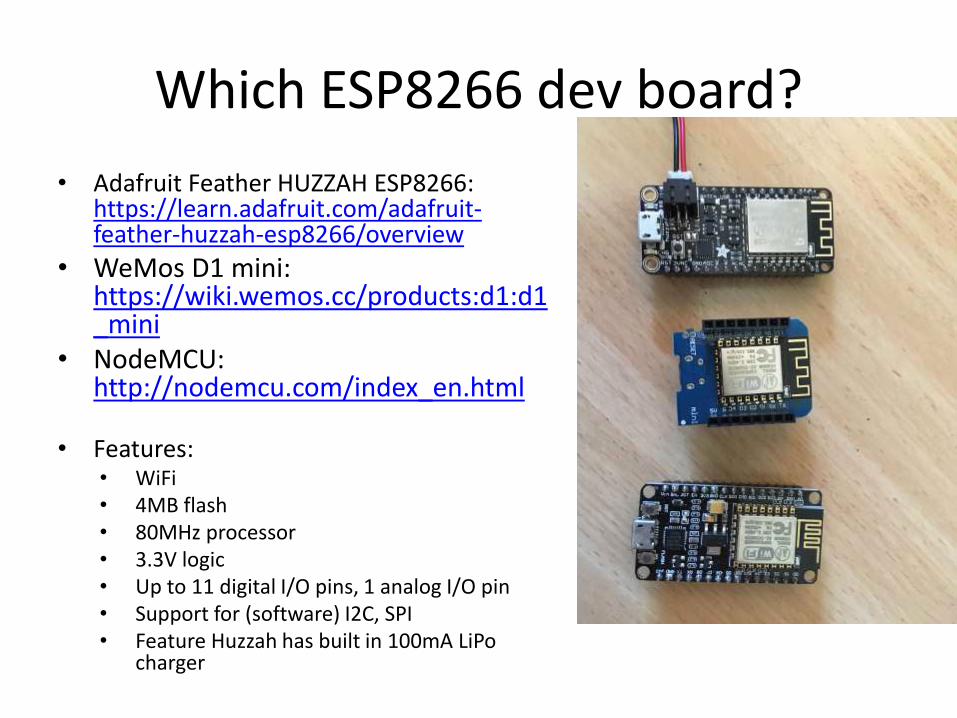
Which ESP8266 dev board?
• Adafruit Feather HUZZAH ESP8266: https://learn.adafruit.com/adafruit-feather-huzzah-esp8266/overview
• WeMos D1 mini: https://wiki.wemos.cc/products:d1:d1_mini
• NodeMCU: http://nodemcu.com/index_en.html
• Features:• WiFi• 4MB flash• 80MHz processor• 3.3V logic• Up to 11 digital I/O pins, 1 analog I/O pin• Support for (software) I2C, SPI• Feature Huzzah has built in 100mA LiPo
charger
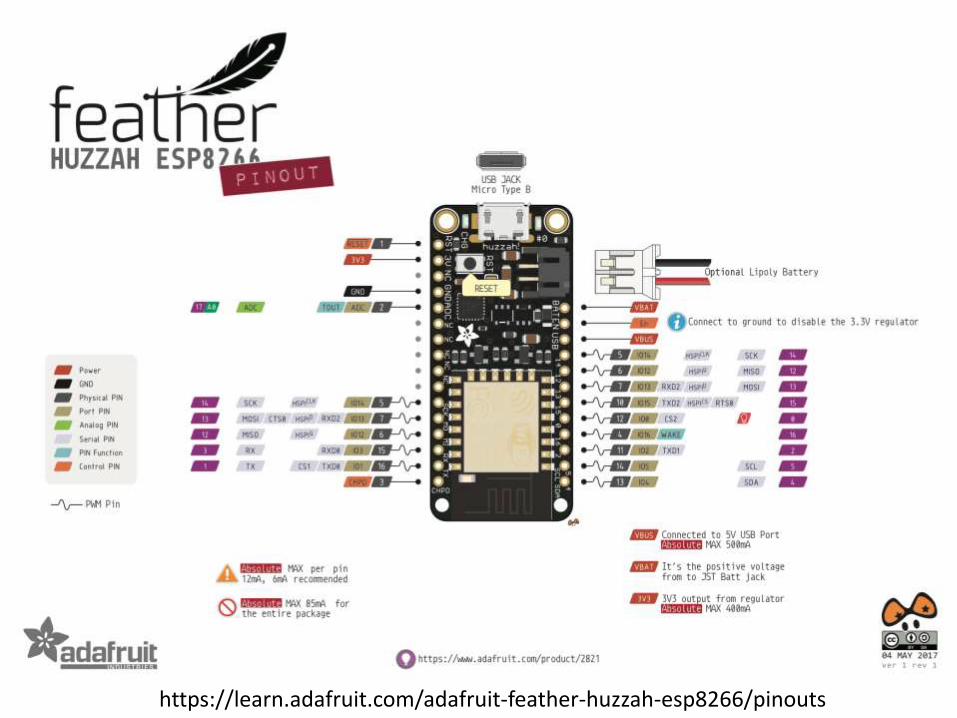
https://learn.adafruit.com/adafruit-feather-huzzah-esp8266/pinouts

Incremental prototyping
• Design the desired interactions
• Work out what components you'll need
• Develop a basic program for each individual component (e.g. read from button , play sound on buzzer, display pattern on LEDs)
• Develop networking / communication
• Use REPL to interactively tweak timings / behaviour
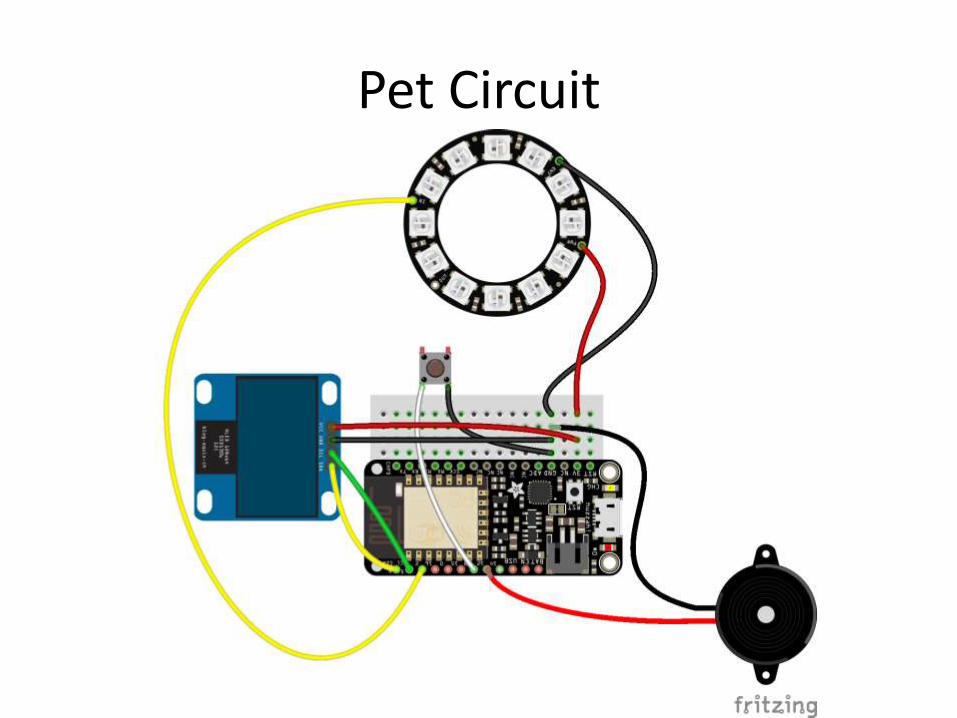
Pet Circuit

Preparing the board
• First install any USB-serial drivers required for your board e.g. CP2104, CH341
• Install Python and esptoolpip install esptool
https://github.com/espressif/esptool
• Erase the flash of the microcontroller if youhave used it before:esptool.py --port /dev/tty.SLAB_USBtoUART erase_flash

Flash the firmware
• Download the latest version (e.g. 1.9.1) of MicroPython from GitHub releases:
– https://github.com/micropython/micropython/releases
• Use esptool to upload the firmware file:• esptool.py --port /dev/tty.SLAB_USBtoUART --baud
460800 write_flash --flash_size=detect 0 ~/Downloads/esp8266-20170612-v1.9.1.bin
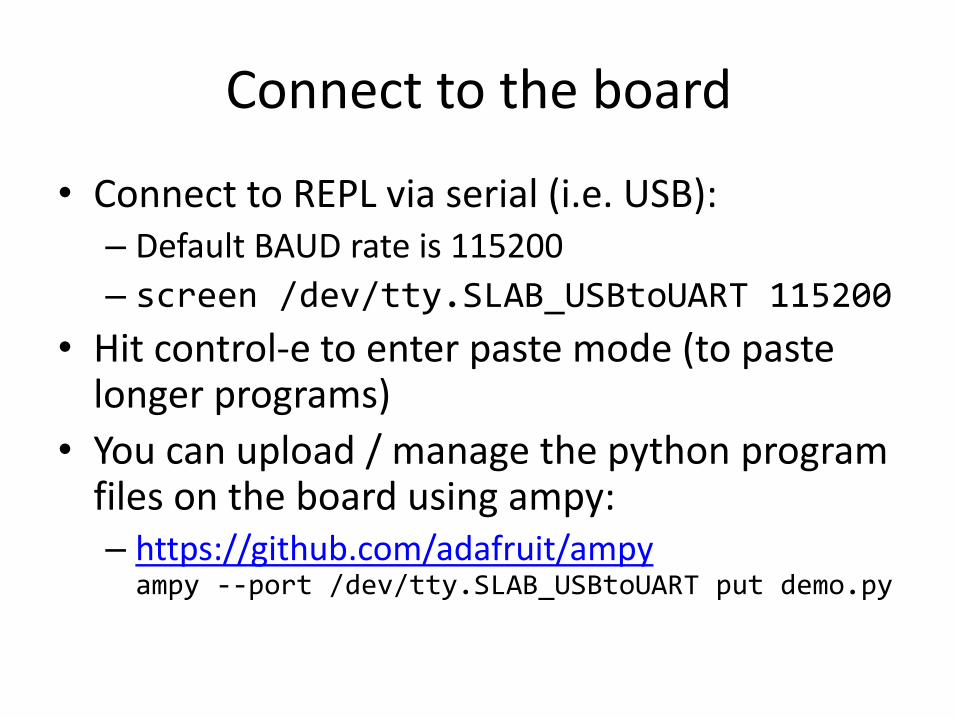
Connect to the board
• Connect to REPL via serial (i.e. USB):– Default BAUD rate is 115200
– screen /dev/tty.SLAB_USBtoUART 115200
• Hit control-e to enter paste mode (to paste longer programs)
• You can upload / manage the python program files on the board using ampy:– https://github.com/adafruit/ampyampy --port /dev/tty.SLAB_USBtoUART put demo.py
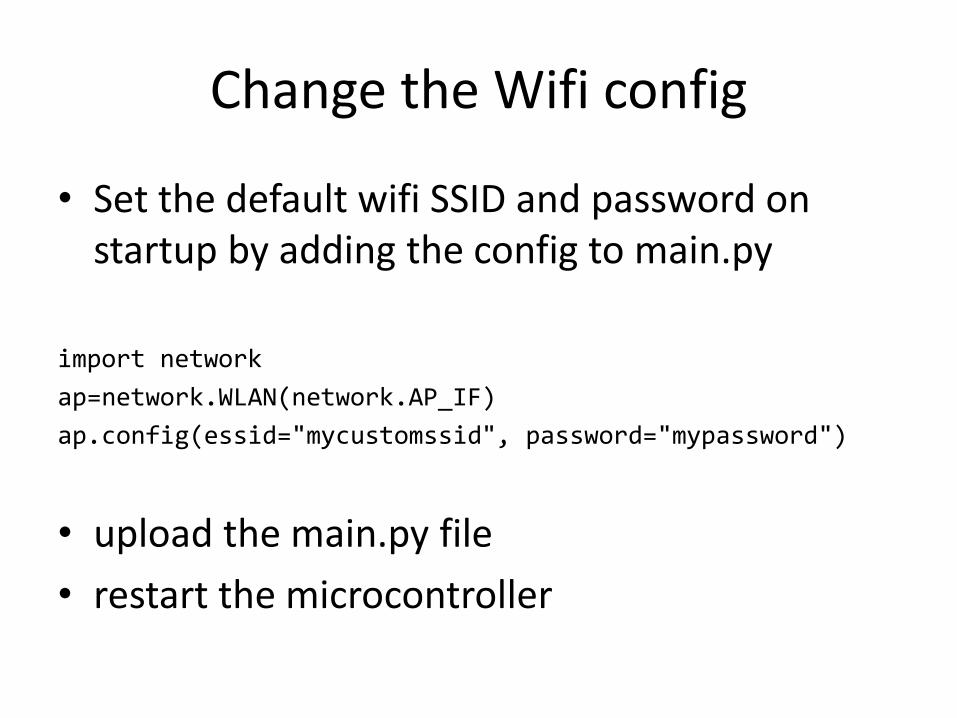
Change the Wifi config
• Set the default wifi SSID and password on startup by adding the config to main.py
import network
ap=network.WLAN(network.AP_IF)
ap.config(essid="mycustomssid", password="mypassword")
• upload the main.py file
• restart the microcontroller
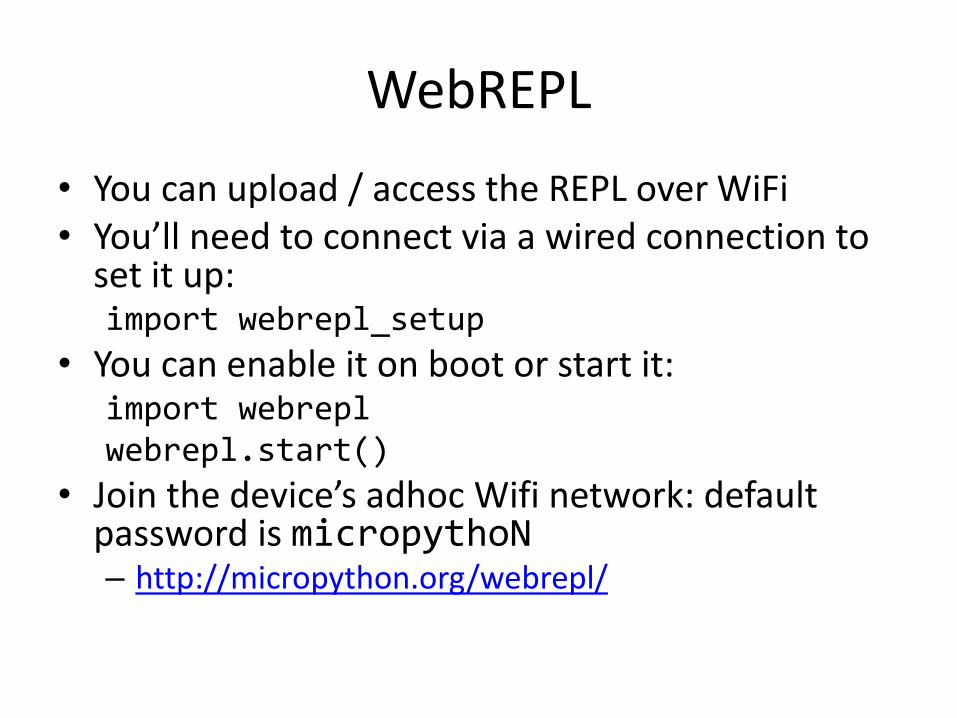
WebREPL
• You can upload / access the REPL over WiFi• You’ll need to connect via a wired connection to
set it up:import webrepl_setup
• You can enable it on boot or start it:import webreplwebrepl.start()
• Join the device’s adhoc Wifi network: default password is micropythoN– http://micropython.org/webrepl/

Uploading code using the WebREPL

DEVELOPING PROGRAMS
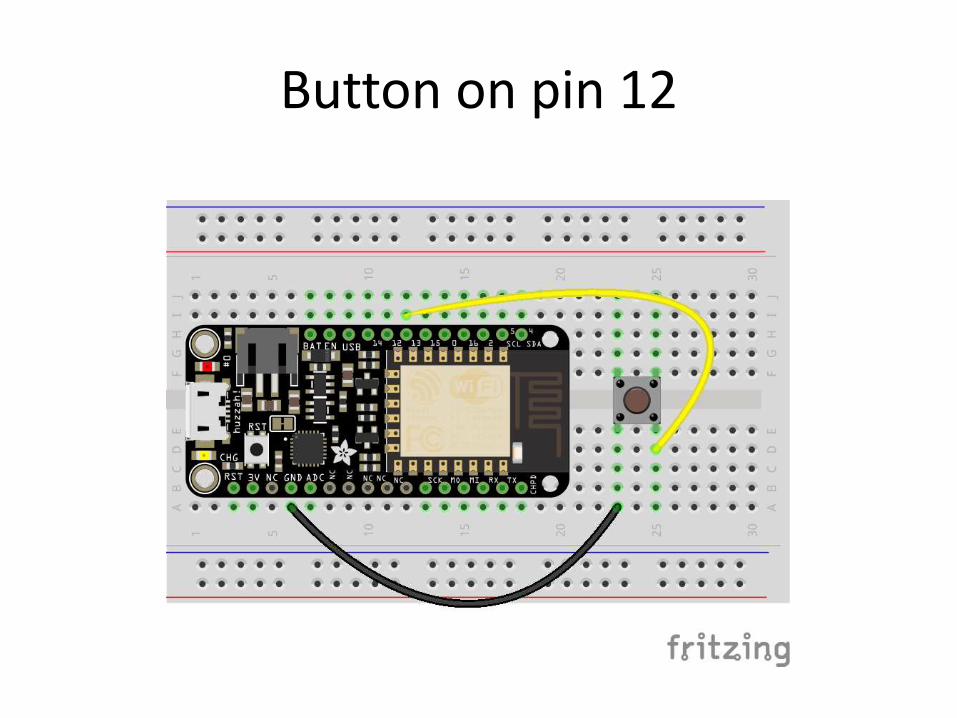
Button on pin 12
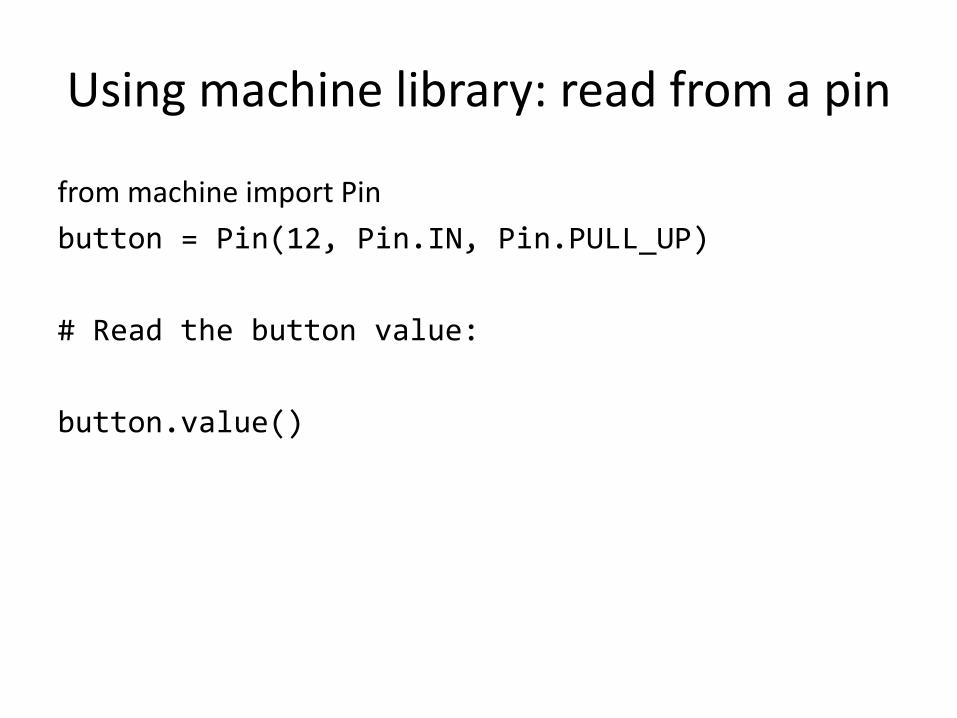
Using machine library: read from a pin
from machine import Pin
button = Pin(12, Pin.IN, Pin.PULL_UP)
# Read the button value:
button.value()
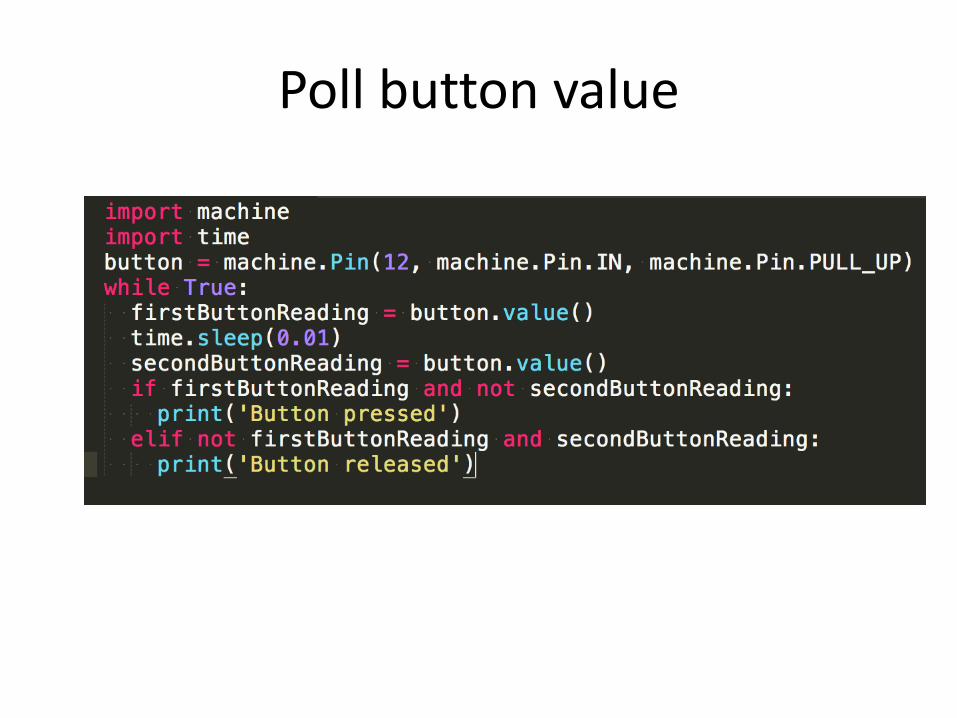
Poll button value
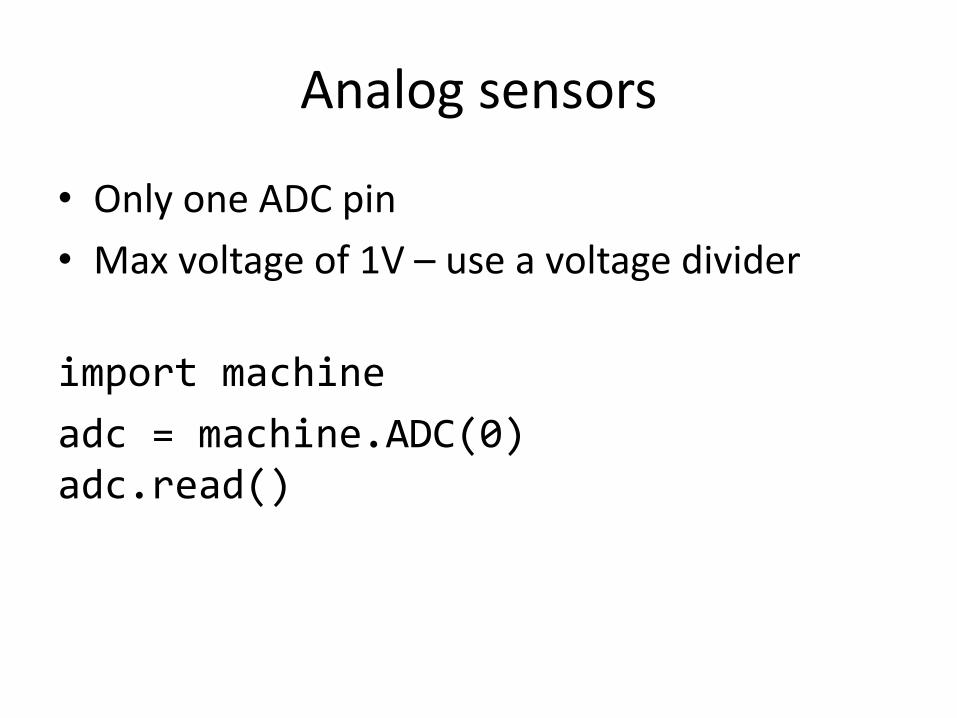
Analog sensors
• Only one ADC pin
• Max voltage of 1V – use a voltage divider
import machine
adc = machine.ADC(0)adc.read()
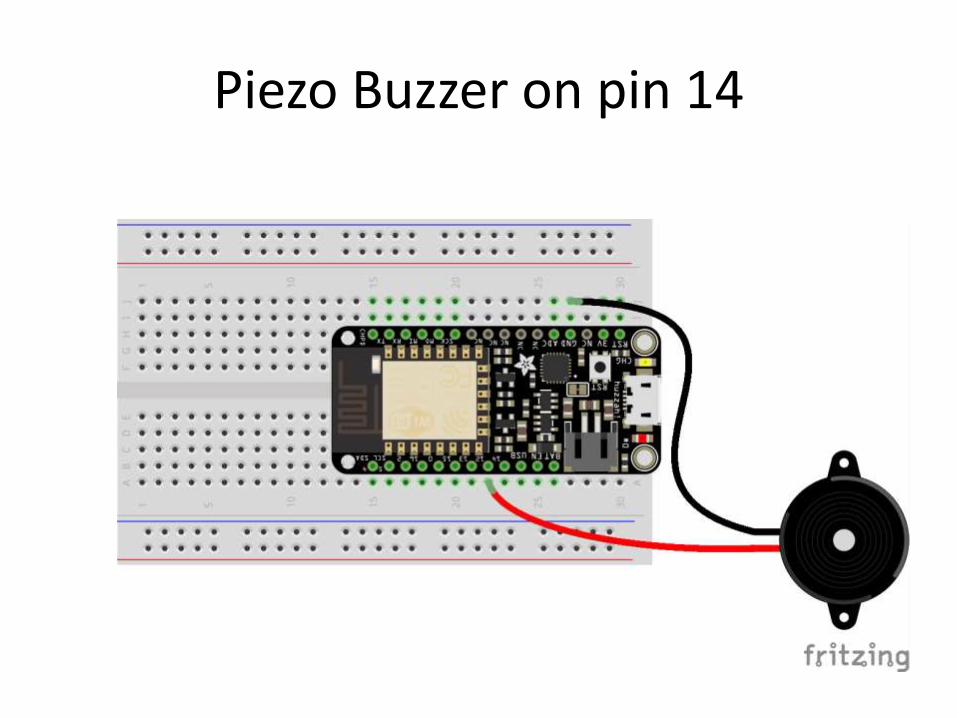
Piezo Buzzer on pin 14
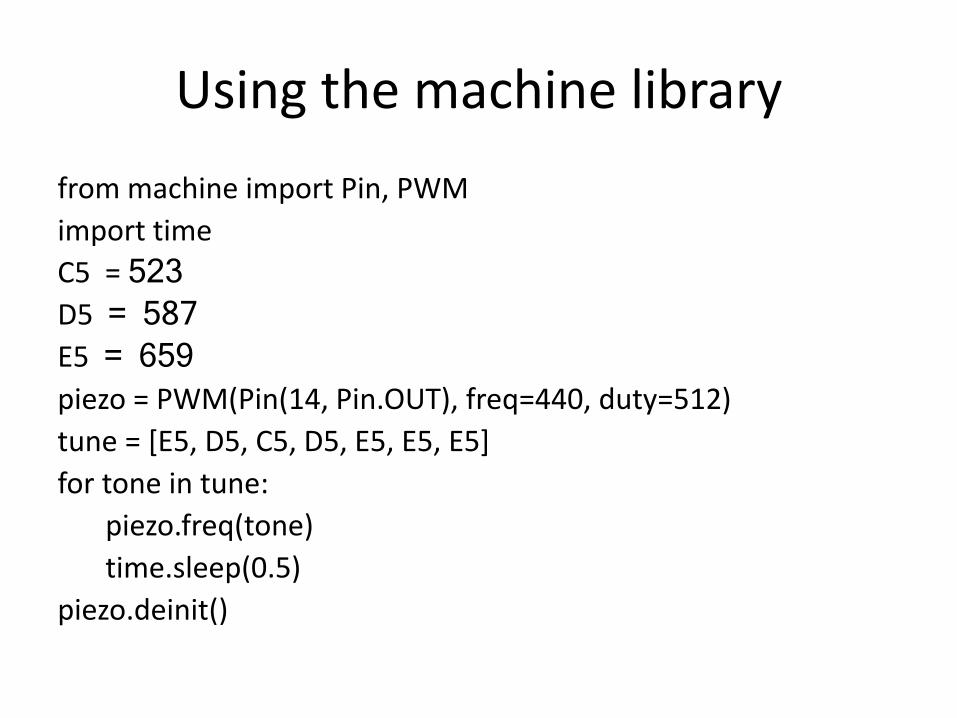
Using the machine library
from machine import Pin, PWM
import time
C5 = 523D5 = 587E5 = 659piezo = PWM(Pin(14, Pin.OUT), freq=440, duty=512)
tune = [E5, D5, C5, D5, E5, E5, E5]
for tone in tune:
piezo.freq(tone)
time.sleep(0.5)
piezo.deinit()
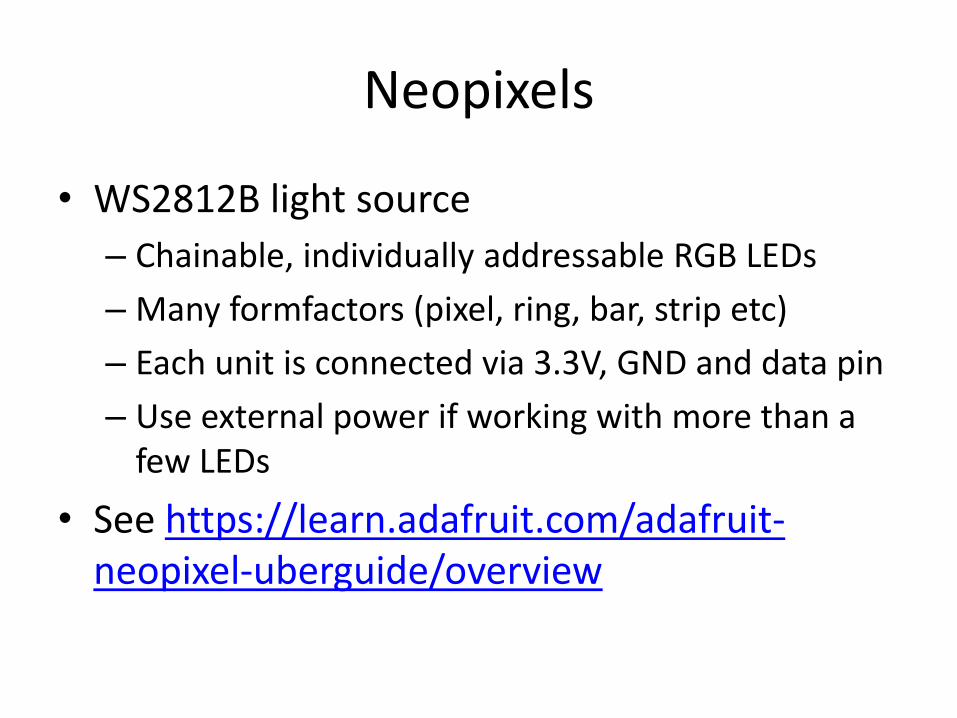
Neopixels
• WS2812B light source
– Chainable, individually addressable RGB LEDs
– Many formfactors (pixel, ring, bar, strip etc)
– Each unit is connected via 3.3V, GND and data pin
– Use external power if working with more than a few LEDs
• See https://learn.adafruit.com/adafruit-neopixel-uberguide/overview
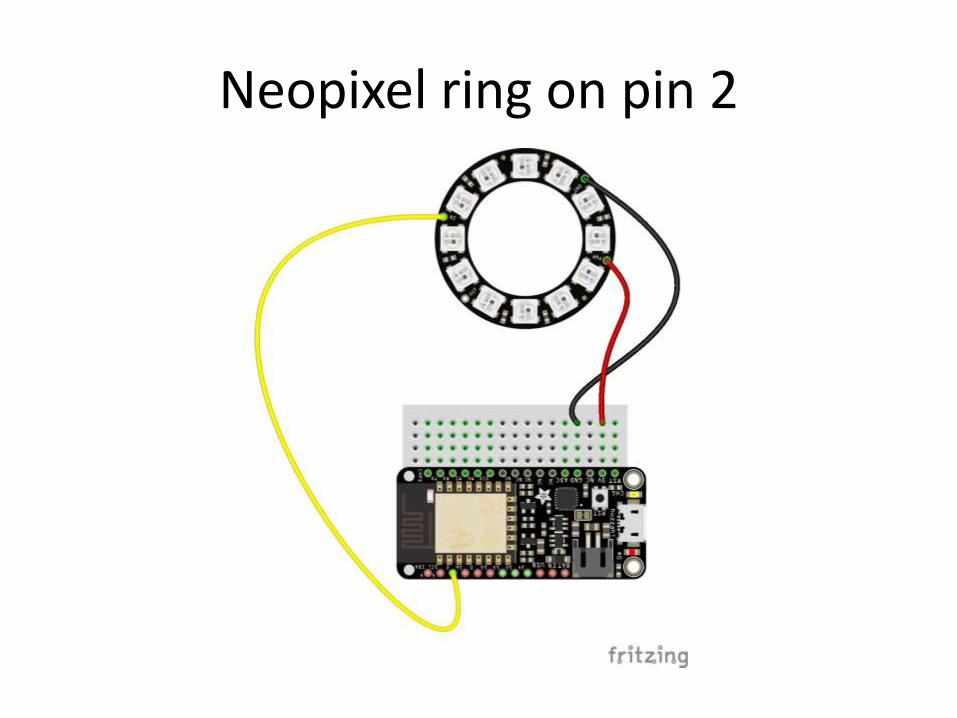
Neopixel ring on pin 2

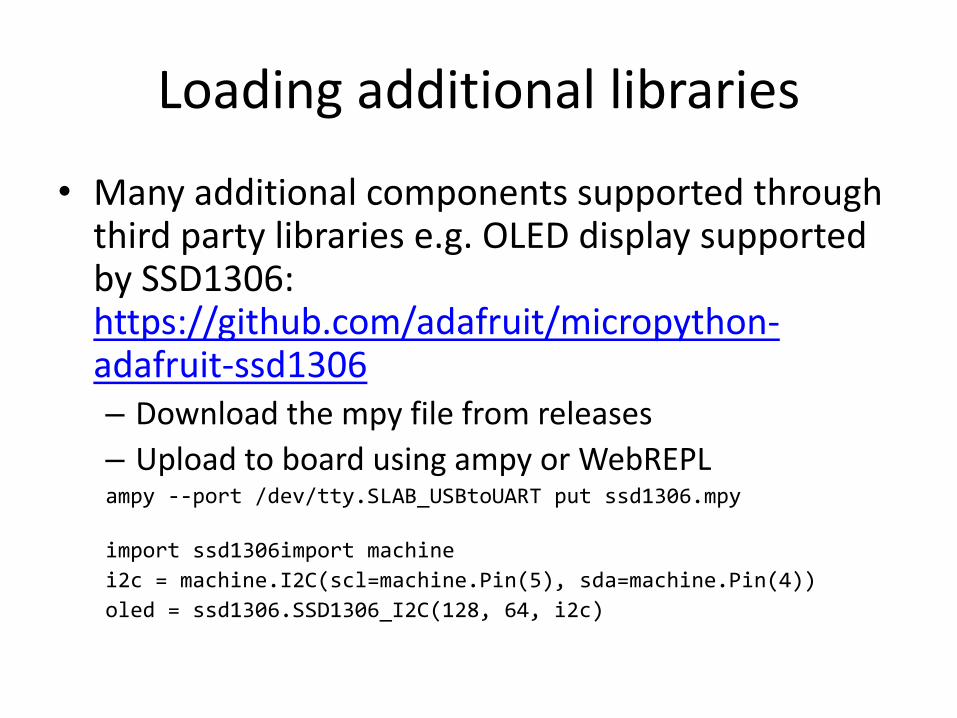
Loading additional libraries
• Many additional components supported through third party libraries e.g. OLED display supported by SSD1306: https://github.com/adafruit/micropython-adafruit-ssd1306– Download the mpy file from releases
– Upload to board using ampy or WebREPLampy --port /dev/tty.SLAB_USBtoUART put ssd1306.mpy
import ssd1306import machine
i2c = machine.I2C(scl=machine.Pin(5), sda=machine.Pin(4))
oled = ssd1306.SSD1306_I2C(128, 64, i2c)

COMMUNICATION

Basic web server (1/2)
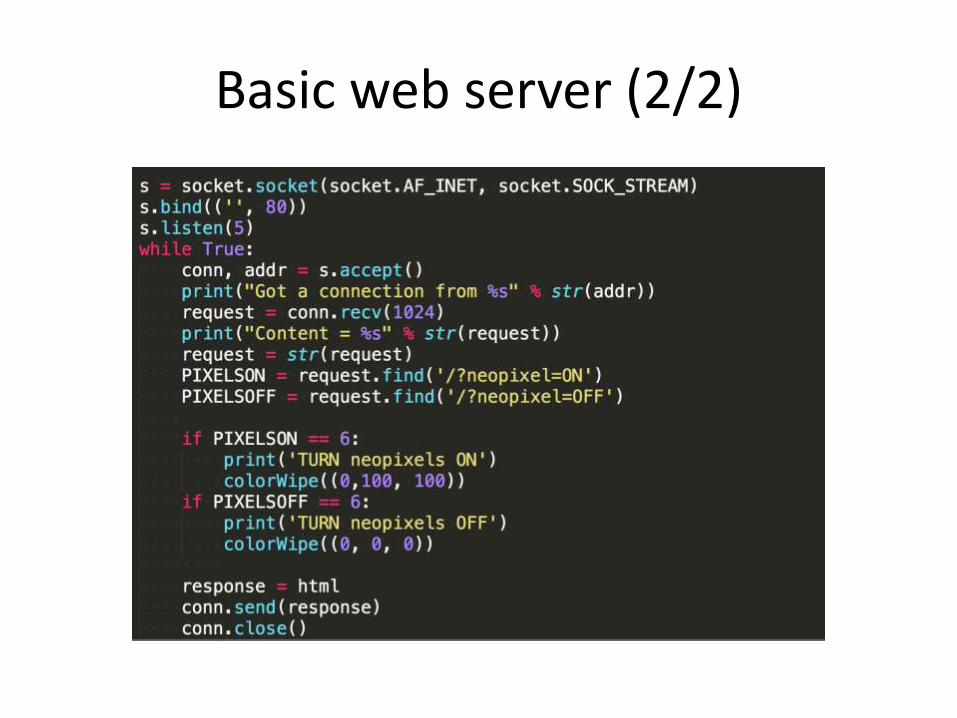
Basic web server (2/2)
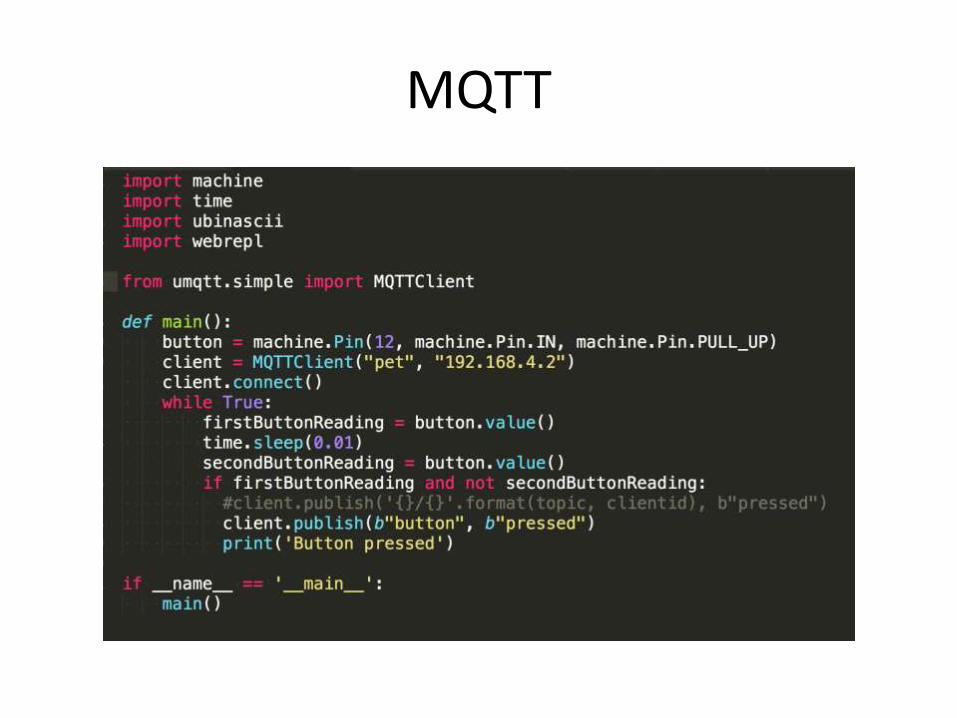
MQTT
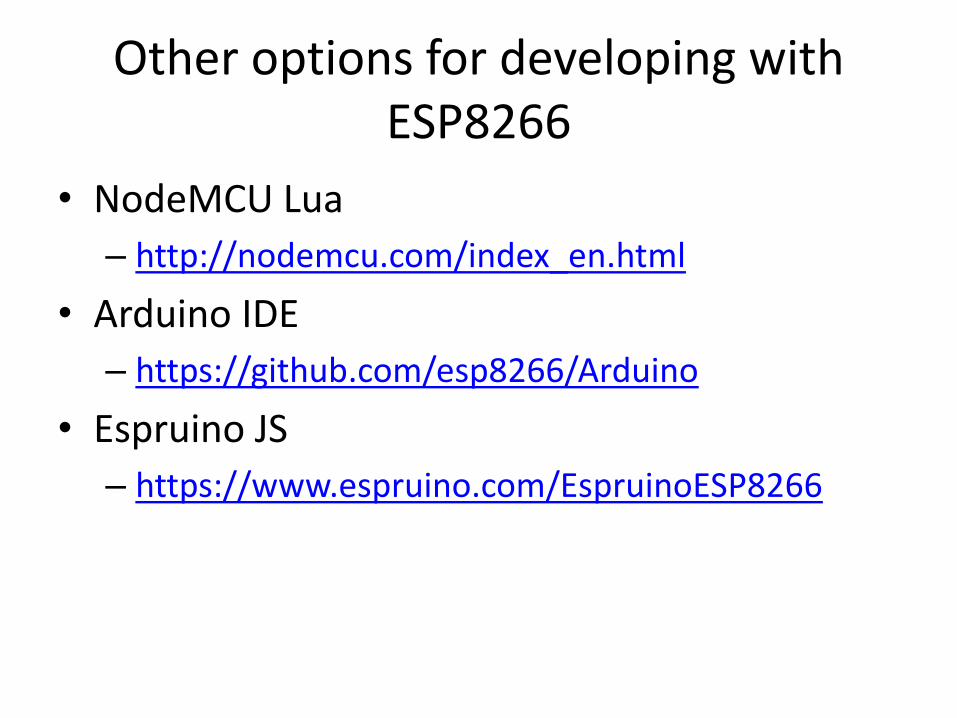
Other options for developing with ESP8266
• NodeMCU Lua
– http://nodemcu.com/index_en.html
• Arduino IDE
– https://github.com/esp8266/Arduino
• Espruino JS
– https://www.espruino.com/EspruinoESP8266
Why MicroPython?
• Clean, intuitive programs
• Great for teaching
• Interactive REPL ideal for experimentation & rapid prototyping
• Edge computing
Read more
• Anna’s blog:
– http://crufti.com/
• Twitter: @AnnaGerber
• Micropython ESP8266 Quick reference:
– https://docs.micropython.org/en/latest/esp8266/esp8266/quickref.html