procurve stack managementwhp-aus2.cold.extweb.hp.com/pub/...chap08-stacking.pdf · switch’s...
TRANSCRIPT

8
ProCurve Stack Management
Contents
Overview . . . . . . . . . . . . . . . . . . . . . . . . . . . . . . . . . . . . . . . . . . . . . . . . . . . . . . 8-3
Operation . . . . . . . . . . . . . . . . . . . . . . . . . . . . . . . . . . . . . . . . . . . . . . . . . . . . . . 8-4
Which Devices Support Stacking? . . . . . . . . . . . . . . . . . . . . . . . . . . . . . 8-5
Components of ProCurve Stack Management . . . . . . . . . . . . . . . . . . . . 8-6
General Stacking Operation . . . . . . . . . . . . . . . . . . . . . . . . . . . . . . . . . . . 8-6
Operating Rules for Stacking . . . . . . . . . . . . . . . . . . . . . . . . . . . . . . . . . . 8-8General Rules . . . . . . . . . . . . . . . . . . . . . . . . . . . . . . . . . . . . . . . . . . . 8-8Specific Rules . . . . . . . . . . . . . . . . . . . . . . . . . . . . . . . . . . . . . . . . . . . 8-9
Configuring Stack Management . . . . . . . . . . . . . . . . . . . . . . . . . . . . . . . . . . 8-10
Overview of Configuring and Bringing Up a Stack . . . . . . . . . . . . . . . 8-10General Steps for Creating a Stack . . . . . . . . . . . . . . . . . . . . . . . . 8-12
Using the Menu Interface To View Stack Status and Configure Stacking . . . . . . . . . . . . . . . . . . . . . . . . . . . . . . . . . . . . . . . . . 8-14
Using the Menu Interface To View and Configure a Commander Switch . . . . . . . . . . . . . . . . . . . . . . . . . . . . . . . . . . . . . . . . . . . . . . . . 8-14Using the Menu To Manage a Candidate Switch . . . . . . . . . . . . . 8-16
Using the Commander To Manage The Stack . . . . . . . . . . . . . . . . . . . 8-18Using the Commander To Access Member Switches for Configuration Changes and Monitoring Traffic . . . . . . . . . . . . . . 8-24Converting a Commander or Member to a Member of Another Stack . . . . . . . . . . . . . . . . . . . . . . . . . . . . . . . . 8-25
Monitoring Stack Status . . . . . . . . . . . . . . . . . . . . . . . . . . . . . . . . . . . . . 8-26
Using the CLI To View Stack Status and Configure Stacking . . . . . . 8-30Using the CLI To View Stack Status . . . . . . . . . . . . . . . . . . . . . . . 8-32Using the CLI To Configure a Commander Switch . . . . . . . . . . . 8-34Adding to a Stack or Moving Switches Between Stacks . . . . . . . 8-36Using the CLI To Remove a Member from a Stack . . . . . . . . . . . 8-41Using the CLI To Access Member Switches for Configuration Changes and Traffic Monitoring . . . . . . . . . . . . . . . . . . . . . . . . . . . 8-43
SNMP Community Operation in a Stack . . . . . . . . . . . . . . . . . . . . . . . 8-44
8-1

ProCurve Stack Management Contents
Using the CLI To Disable or Re-Enable Stacking . . . . . . . . . . . . . . . . 8-45
Transmission Interval . . . . . . . . . . . . . . . . . . . . . . . . . . . . . . . . . . . . . . . 8-45
Stacking Operation with Multiple VLANs Configured . . . . . . . . . . . . 8-45
Web: Viewing and Configuring Stacking . . . . . . . . . . . . . . . . . . . . . . . 8-46
Status Messages . . . . . . . . . . . . . . . . . . . . . . . . . . . . . . . . . . . . . . . . . . . . 8-47
8-2

ProCurve Stack ManagementOverview
Overview
This chapter describes how to use your network to stack switches without the need for any specialized cabling. For an overview of stacking features, refer to the table on page 8-4.
For general information on how to use the switch’s built-in interfaces, see:
■ Chapter 3, “Using the Menu Interface”
■ Chapter 4, “Using the Command Line Interface (CLI)”
■ Chapter 5, “Using the Web Browser Interface
■ Chapter 6, “Switch Memory and Configuration”
8-3

ProCurve Stack Management Operation
Operation
Stacking Features
ProCurve Stack Management (termed stacking) enables you to use a single IP address and standard network cabling to manage a group of up to 16 total switches in the same IP subnet (broadcast domain). Using stacking, you can:
■ Reduce the number of IP addresses needed in your network.
Feature Default Menu CLI Web
view stack status
view status of a single switch n/a page 8-27 thru page 8-29
page 8-32 page 8-46
view candidate status n/a page 8-32
view status of commander and its stack
n/a page 8-33
view status of all stacking-enabled switches in the ip subnet
n/a page 8-33
configure stacking
enable/disable candidate Auto-Join enabled/Yes page 8-16 page 8-38
“push” a candidate into a stack n/a page 8-16 page 8-38
configure a switch to be a commander n/a page 8-14 page 8-34
“push” a member into another stack n/a page 8-25 page 8-40
remove a member from a stack n/a page 8-22 page 8-41orpage 8-42
“pull” a candidate into a stack n/a page 8-18 page 8-37
“pull” a member from another stack n/a page 8-20 page 8-39
convert a commander or member to a member of another stack
n/a page 8-25 page 8-40
access member switches for configuration and traffic monitoring
n/a page 8-24 page 8-43
disable stacking enabled page 8-16 page 8-45
transmission interval 60 seconds page 8-14 page 8-45
8-4
ProCurve Stack ManagementOperation
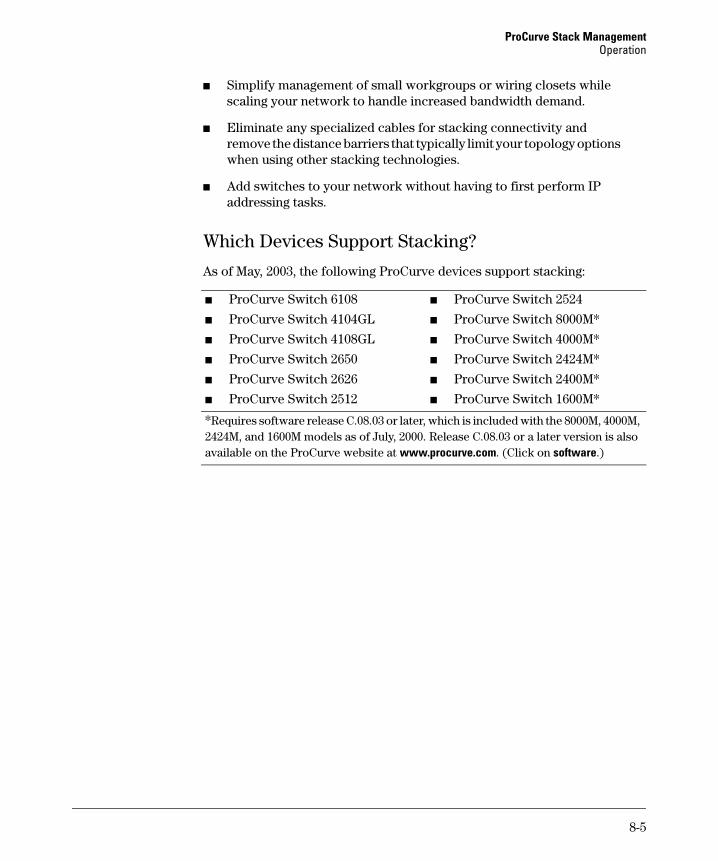
■ Simplify management of small workgroups or wiring closets while scaling your network to handle increased bandwidth demand.
■ Eliminate any specialized cables for stacking connectivity and remove the distance barriers that typically limit your topology options when using other stacking technologies.
■ Add switches to your network without having to first perform IP addressing tasks.
Which Devices Support Stacking?
As of May, 2003, the following ProCurve devices support stacking:
■ ProCurve Switch 6108
■ ProCurve Switch 4104GL
■ ProCurve Switch 4108GL
■ ProCurve Switch 2650
■ ProCurve Switch 2626
■ ProCurve Switch 2512
■ ProCurve Switch 2524
■ ProCurve Switch 8000M*
■ ProCurve Switch 4000M*
■ ProCurve Switch 2424M*
■ ProCurve Switch 2400M*
■ ProCurve Switch 1600M*
*Requires software release C.08.03 or later, which is included with the 8000M, 4000M, 2424M, and 1600M models as of July, 2000. Release C.08.03 or a later version is also available on the ProCurve website at www.procurve.com. (Click on software.)
8-5

ProCurve Stack Management Operation
Components of ProCurve Stack Management
Table 8-1. Stacking Definitions
Figure 8-1. Illustration of a Switch Moving from Candidate to Member
General Stacking Operation
After you configure one switch to operate as the Commander of a stack, additional switches can join the stack by either automatic or manual methods. After a switch becomes a Member, you can work through the Commander switch to further configure the Member switch as necessary for all of the additional software features available in the switch.
The Commander switch serves as the in-band entry point for access to the Member switches. For example, the Commander’s IP address becomes the path to all stack Members and the Commander’s Manager password controls access to all stack Members.
Stack Consists of a Commander switch and any Member switches belonging to that Commander’s stack.
Commander A switch that has been manually configured as the controlling device for a stack. When this occurs, the switch’s stacking configuration appears as Commander.
Candidate A switch that is ready to join (become a Member of) a stack through either automatic or manual methods. A switch configured as a Candidate is not in a stack.
Member A switch that has joined a stack and is accessible from the stack Commander.
Commander: Switch A
Member: Switch CCandidate: Switch B
Before: Stack named "Engineering" consists of Commander and Switch "C". Switch "B" is a Candidate eligible to join the stack.
Commander: Switch A
Member: Switch CMember: Switch B
After: Switch "B" joins the stack, thus changing from a Candidate to a Member of the stack.
Stack
Stack Name: Engineering
Stack Name: Engineering
8-6

ProCurve Stack ManagementOperation
Figure 8-2. Example of Stacking with One Commander Controlling Access to Wiring Closet Switches
Interface Options. You can configure stacking through the switch’s menu interface, CLI, or the web browser interface. For information on how to use the web browser interface to configure stacking, see the online Help for the web browser interface.
Web Browser Interface Window for Commander Switches. The web browser interface window for a Commander switch differs in appearance from the same window for non-commander switches. See figure 8-38 on page 8-46.
Member Switch 1
IP Address: None Assigned
Manager Password: leader
Candidate Switch
IP Address: None Assigned
Manager Password: francois
Non-Member Switch
IP Address: 14.28.227.105
Manager Password: donald
Member Switch 2
IP Address: None Assigned
Manager Password: leader
Wiring Closet "B"
Wiring Closet "A"
Commander Switch 0
IP Address: 14.28.227.100
Manager Password: leader
Use the Commander’s console or web browser interface to access the user interface on any Member switch in the same stack.
Network
8-7

ProCurve Stack Management Operation
Operating Rules for Stacking
General Rules
■ Stacking is an optional feature (enabled in the default configuration) and can easily be disabled. Stacking has no effect on the normal operation of the switch in your network.
■ A stack requires one Commander switch. (Only one Commander allowed per stack.)
■ All switches in a particular stack must be in the same IP subnet (broadcast domain). A stack cannot cross a router.
■ A stack accepts up to 16 switches (numbered 0-15), including the Commander (always numbered 0).
■ There is no limit on the number of stacks in the same IP subnet (broadcast domain), however a switch can belong to only one stack.
■ If multiple VLANs are configured, stacking uses only the primary VLAN on any switch. In the factory-default configuration, the DEFAULT_VLAN is the primary VLAN. (See “Stacking Operation with Multiple VLANs Configured” on page 8-45 and “The Primary VLAN” on page 2-6.)
■ Stacking allows intermediate devices that do not support stacking. This enables you to include switches that are distant from the Commander.
Figure 8-3. Example of a Non-Stacking Device Used in a Stacking Environment
Commander Switch Switch with Stacking Disabled or Not Available
Member Switch
Candidate Switch
8-8

ProCurve Stack ManagementOperation
Specific Rules
Table 8-2. Specific Rules for Commander, Candidate, and Member Switch
IP Addressing and Stack Name
Number Allowed Per Stack
Passwords SNMP Communities
Commander IP Addr: Requires an assigned IP address and mask for access via the network. Stack Name: Required
Only one Commander switch is allowed per stack.
The Commander’s Manager and Operator passwords are assigned to any switch becoming a Member of the stack. If you change the Commander’s passwords, the Commander propagates the new passwords to all stack Members.
Standard SNMP community operation. The Commander also operates as an SNMP proxy to Members for all SNMP communities config-ured in the Commander.
Candidate IP Addr: Optional. Configuring an IP address allows access via Telnet or web browser interface while the switch is not a stack member. In the factory default configu-ration the switch auto-matically acquires an IP address if your network includes DHCP service.Stack Name: N/A
n/a Passwords optional. If the Candidate becomes a stack Member, it assumes the Commander’s Manager and Operator passwords.
If a candidate has a password, it cannot be automatically added to a stack. In this case, if you want the Candidate in a stack, you must manually add it to the stack.
Uses standard SNMP community operation if the Candidate has its own IP addressing.
Member IP Addr: Optional. Configuring an IP address allows access via Telnet or web browser interface without going through the Commander switch. This is useful, for example, if the stack Commander fails and you need to convert a Member switch to operate as a replace-ment Commander.Stack Name: N/A
Up to 15 Members per stack.
When the switch joins the stack, it automatically assumes the Commander’s Manager and Operator pass-words and discards any pass-words it may have had while a Candidate.
Note: If a Member leaves a stack for any reason, it retains the passwords assigned to the stack Commander at the time of departure from the stack.
Belongs to the same SNMP communities as the Commander (which serves as an SNMP proxy to the Member for communities to which the Commander belongs). To join other communities that exclude the Commander, the Member must have its own IP address. Loss of stack membership means loss of membership in any commu-nity that is configured only in the Commander. See “SNMP Community Opera-tion in a Stack” on page 8-44.
8-9

ProCurve Stack Management Configuring Stack Management
N o t e In the default stack configuration, the Candidate Auto Join parameter is enabled, but the Commander Auto Grab parameter is disabled. This prevents Candidates from automatically joining a stack prematurely or joining the wrong stack (if more than one stack Commander is configured in a subnet or broadcast domain). If you plan to install more than one stack in a subnet, ProCurve recommends that you leave Auto Grab disabled on all Commander switches and manually add Members to their stacks. Similarly, if you plan to install a stack in a subnet (broadcast domain) where stacking-capable switches are not intended for stack membership, you should set the Stack State parameter (in the Stack Configuration screen) to Disabled on those particular switches.
Configuring Stack Management
Overview of Configuring and Bringing Up a Stack
This process assumes that:
■ All switches you want to include in a stack are connected to the same subnet (broadcast domain).
■ If VLANs are enabled on the switches you want to include in the stack, then the ports linking the stacked switches must be on the primary VLAN in each switch (which, in the default configuration, is the default VLAN). If the primary VLAN is tagged, then each switch in the stack must use the same VLAN ID (VID) for the primary VLAN. (Refer to “The Primary VLAN” on page 2-6, and “Stacking Operation with Multiple VLANs Configured” on page 8-45.)
■ If you are including an ProCurve Switch 8000M, 4000M, 2424M,
2400M, or 1600M in a stack, you must first update all such devices
to software version C.08.03 or later. (You can get a copy of the latest software version from the ProCurve Networking website and/or copy it from one switch to another. For downloading instructions, see appendix A, “File Transfers”, in the Management and Configuration
Guide for these switch models.)
8-10

ProCurve Stack ManagementConfiguring Stack Management
Options for Configuring a Commander and Candidates. Depending on how Commander and Candidate switches are configured, Candidates can join a stack either automatically or by a Commander manually adding (“pulling”) them into the stack. In the default configuration, a Candidate joins only when manually pulled by a Commander. You can reconfigure a Commander to automatically pull in Candidates that are in the default stacking configura-tion. You can also reconfigure a Candidate switch to either “push” itself into a particular Commander’s stack, convert the Candidate to a Commander (for a stack that does not already have a Commander), or to operate as a standa-lone switch without stacking. The following table shows your control options for adding Members to a stack.
Table 8-3. Stacking Configuration Guide
The easiest way to automatically create a stack is to:
1. Configure a switch as a Commander.
2. Configure IP addressing and a stack name on the Commander.
3. Set the Commander’s Auto Grab parameter to Yes.
4. Connect Candidate switches (in their factory default configuration) to the network.
This approach automatically creates a stack of up to 16 switches (including the Commander). However this replaces manual control with an automatic process that may bring switches into the stack that you did not intend to include. With the Commander’s Auto Grab parameter set to Yes, any switch conforming to all four of the following factors automatically becomes a stack Member:
Join Method1 Commander (IP Addressing Required)
Candidate (IP Addressing Optional)
Auto Grab Auto Join Passwords
Automatically add Candidate to Stack (Causes the first 15 eligible, discovered switches in the subnet to automatically join a stack.)
Yes Yes (default) No (default)*
Manually add Candidate to Stack(Prevent automatic joining of switches you don’t want in the stack)
No (default) Yes (default) Optional*
Yes No Optional*
Yes Yes (default) or No Configured
Prevent a switch from being a Candidate N/A Disabled Optional
*The Commander’s Manager and Operator passwords propagate to the candidate when it joins the stack.
8-11

ProCurve Stack Management Configuring Stack Management
■ Default stacking configuration (Stack State set to Candidate, and Auto Join set to Yes)
■ Same subnet (broadcast domain) and default VLAN as the Commander (If VLANs are used in the stack environment, see “Stacking Operation with a Tagged VLAN” on page 8-45.)
■ No Manager password
■ 14 or fewer stack members at the moment
General Steps for Creating a Stack
This section describes the general stack creation process. For the detailed configuration processes, see pages 8-14 through 8-37 for the menu interface and pages 8-30 through 8-42 for the CLI.
1. Determine the naming conventions for the stack. You will need a stack name. Also, to help distinguish one switch from another in the stack, you can configure a unique system name for each switch. Otherwise, the system name for a switch appearing in the Stacking Status screen appears as the stack name plus an automatically assigned switch number. For example:
Figure 8-4. Using the System Name to Help Identify Individual Switches
Stack with unique system name for each switch.
Stack named "Online" with no previously configured system names assigned to individual switches.
For status descriptions, see the table on page 8-47.
8-12

ProCurve Stack ManagementConfiguring Stack Management
2. Configure the Commander switch. Doing this first helps to establish consistency in your stack configuration, which can help prevent startup problems.
• A stack requires one Commander switch. If you plan to implement more than one stack in a subnet (broadcast domain), the easiest way to avoid unintentionally adding a Candidate to the wrong stack is to manually control the joining process by leaving the Commander’s Auto Grab parameter set to No (the default).
• The Commander assigns its Manager and Operator passwords to any Candidate switch that joins the stack.
• The Commander’s SNMP community names apply to members.
3. For automatically or manually pulling Candidate switches into a stack, you can leave such switches in their default stacking configuration. If you need to access Candidate switches through your network before they join the stack, assign IP addresses to these devices. Otherwise, IP addressing is optional for Candidates and Members. (Note that once a Candidate becomes a member, you can access it through the Commander to assign IP addressing or make other configuration changes.)
4. Make a record of any Manager passwords assigned to the switches (intended for your stack) that are not currently members. (You will use these passwords to enable the protected switches to join the stack.)
5. If you are using VLANs in the stacking environment, you must use the default VLAN for stacking links. For more information, see “Stacking Operation with a Tagged VLAN” on page 8-45.
6. Ensure that all switches intended for the stack are connected to the same subnet (broadcast domain). As soon as you connect the Commander, it will begin discovering the available Candidates in the subnet.
• If you configured the Commander to automatically add Members (Auto Grab = Yes), the first fifteen discovered Candidates meeting both of the following criteria will automatically join the stack:
– Auto Join parameter set to Yes (the default)
– Manager password not configured
• If you configured the Commander to manually add Members (Auto Grab set to No—the default), you can begin the process of selecting and adding the desired Candidates.
7. Ensure that all switches intended for the stack have joined.
8. If you need to do specific configuration or monitoring tasks on a Member, use the console interface on the Commander to access the Member.
8-13

ProCurve Stack Management Configuring Stack Management
Using the Menu Interface To View Stack Status and Configure Stacking
Using the Menu Interface To View and Configure a Commander Switch
1. Configure an IP address and subnet mask on the Commander switch. (See the chapter on IP addressing in the Management and Configuration
Guide.)
2. Display the Stacking Menu by selecting Stacking in the Main Menu.
Figure 8-5. The Default Stacking Menu
3. Display the Stack Configuration menu by pressing [3] to select Stack Configuration.
8-14

ProCurve Stack ManagementConfiguring Stack Management
Figure 8-6. The Default Stack Configuration Screen
4. Move the cursor to the Stack State field by pressing [E] (for Edit). Then use the Space bar to select the Commander option.
5. Press the downarrow key to display the Commander configuration fields in the Stack Configuration screen.
Figure 8-7. The Default Commander Configuration in the Stack Configuration Screen
6. Enter a unique stack name (up to 15 characters; no spaces) and press the downarrow key.
7. Ensure that the Commander has the desired Auto Grab setting, then press the downarrow key:
• No (the default) prevents automatic joining of Candidates that have their Auto Join set to Yes.
• Yes enables the Commander to automatically take a Candidate into the stack as a Member if the Candidate has Auto Join set to Yes (the default Candidate setting) and does not have a previously configured password.
8. Accept or change the transmission interval (default: 60 seconds), then press [Enter] to return the cursor to the Actions line.
9. Press [S] (for Save) to save your configuration changes and return to the Stacking menu.
Your Commander switch should now be ready to automatically or manually acquire Member switches from the list of discovered Candidates, depending on your configuration choices.
8-15

ProCurve Stack Management Configuring Stack Management
Using the Menu To Manage a Candidate Switch
Using the menu interface, you can perform these actions on a Candidate switch:
■ Add (“push”) the Candidate into an existing stack
■ Modify the Candidate’s stacking configuration (Auto Join and Transmission Interval)
■ Convert the Candidate to a Commander
■ Disable stacking on the Candidate so that it operates as a standalone switch
In its default stacking configuration, a Candidate switch can either automati-cally join a stack or be manually added (“pulled”) into a stack by a Commander, depending on the Commander’s Auto Grab setting. The following table lists the Candidate’s configuration options:
Table 8-4. Candidate Configuration Options in the Menu Interface
Using the Menu To “Push” a Switch Into a Stack, Modify the Switch’s
Configuration, or Disable Stacking on the Switch. Use Telnet or the web browser interface to access the Candidate if it has an IP address. Other-wise, use a direct connection from a terminal device to the switch’s console port. (For information on how to use the web browser interface, see the online Help provided for the browser.)
1. Display the Stacking Menu by selecting Stacking in the console Main Menu.
2. Display the Stack Configuration menu by pressing [3] to select Stack Configuration.
Parameter Default Setting Other Settings
Stack State Candidate Commander, Member, or Disabled
Auto Join Yes No
Transmission Interval
60 Seconds Range: 1 to 300 seconds
8-16

ProCurve Stack ManagementConfiguring Stack Management
Figure 8-8. The Default Stack Configuration Screen
3. Move the cursor to the Stack State field by pressing [E] (for Edit).
4. Do one of the following:
• To disable stacking on the Candidate, use the Space bar to select the Disabled option, then go to step 5.
Note: Using the menu interface to disable stacking on a Candidate removes the Candidate from all stacking menus.
• To insert the Candidate into a specific Commander’s stack:
i. Use the space bar to select Member.
ii. Press [Tab] once to display the Commander MAC Address param-eter, then enter the MAC address of the desired Commander.
• To change Auto Join or Transmission Interval, use [Tab] to select the desired parameter, and:
– To change Auto Join, use the Space bar.
– To change Transmission Interval, type in the new value in the range of 1 to 300 seconds.
Note: All switches in the stack must be set to the same transmis-sion interval to help ensure proper stacking operation. ProCurve recommends that you leave this parameter set to the default 60 seconds.
Then go to step 5.
8-17

ProCurve Stack Management Configuring Stack Management
5. press [Enter] to return the cursor to the Actions line.
6. Press [S] (for Save) to save your configuration changes and return to the Stacking menu.
Using the Commander To Manage The Stack
The Commander normally operates as your stack manager and point of entry into other switches in the stack. This typically includes:
■ Adding new stack members
■ Moving members between stacks
■ Removing members from a stack
■ Accessing stack members for individual configuration changes and traffic monitoring
The Commander also imposes its passwords on all stack members and pro-vides SNMP community membership to the stack. (See “SNMP Community Operation in a Stack” on page 8-44.)
Using the Commander’s Menu To Manually Add a Candidate to a
Stack. In the default configuration, you must manually add stack Members from the Candidate pool. Reasons for a switch remaining a Candidate instead of becoming a Member include any of the following:
■ Auto Grab in the Commander is set to No (the default).
■ Auto Join in the Candidate is set to No.
Note: When a switch leaves a stack and returns to Candidate status, its Auto Join parameter resets to No so that it will not immediately rejoin a stack from which it has just departed.
■ A Manager password is set in the Candidate.
■ The stack is full.
Unless the stack is already full, you can use the Stack Management screen to manually convert a Candidate to a Member. If the Candidate has a Manager password, you will need to use it to make the Candidate a Member of the stack.
1. To add a Member, start at the Main Menu and select:
9. Stacking...
4. Stack Management
You will then see the Stack Management screen:
8-18

ProCurve Stack ManagementConfiguring Stack Management
Figure 8-9. Example of the Stack Management Screen
2. Press [A] (for Add) to add a Candidate. You will then see this screen listing the available Candidates:
Figure 8-10. Example of Candidate List in Stack Management Screen
3. Either accept the displayed switch number or enter another available number. (The range is 0 - 15, with 0 reserved for the Commander.)
4. Use the downarrow key to move the cursor to the MAC Address field, then type the MAC address of the desired Candidate from the Candidate list in the lower part of the screen.
5. Do one of the following:
For status descriptions, see the table on page 8-47.
The Commander automatically selects an available switch number (SN). You have the option of assigning any other available number.
Candidate List
8-19

ProCurve Stack Management Configuring Stack Management
• If the desired Candidate has a Manager password, press the downarrow key to move the cursor to the Candidate Password field, then type the password.
• If the desired Candidate does not have a password, go to step 6.
6. Press [Enter] to return to the Actions line, then press [S] (for Save) to complete the Add process for the selected Candidate. You will then see a screen similar to the one in figure 8-11, below, with the newly added Member listed.
Note: If the message Unable to add stack member: Invalid Password appears in the console menu’s Help line, then you either omitted the Candidate’s Manager password or incorrectly entered the Manager password.
Figure 8-11. Example of Stack Management Screen After New Member Added
Using the Commander’s Menu To Move a Member From One Stack to
Another. Where two or more stacks exist in the same subnet (broadcast domain), you can easily move a Member of one stack to another stack if the destination stack is not full. (If you are using VLANs in your stack environ-ment, see “Stacking Operation with a Tagged VLAN” on page 8-45.) This procedure is nearly identical to manually adding a Candidate to a stack (page 8-18). (If the stack from which you want to move the Member has a Manager password, you will need to know the password to make the move.)
1. To move a Member from one stack to another, go to the Main Menu of the Commander in the destination stack and display the Stacking Menu by selecting
9. Stacking...
2. To learn or verify the MAC address of the Member you want to move, display a listing of all Commanders, Members, and Candidates in the subnet by selecting:
New Member added in step 6.
For status descriptions, see the table on page 8-47.
8-20

ProCurve Stack ManagementConfiguring Stack Management
2. Stacking Status (All)
You will then see the Stacking Status (All) screen:
Figure 8-12. Example of How the Stacking Status (All) Screen Helps You Find Member MAC Addresses
3. In the Stacking Status (All) screen, find the Member switch that you want to move and note its MAC address, then press [B] (for Back) to return to the Stacking Menu.
4. Display the Commander’s Stack Management screen by selecting
4. Stack Management
(For an example of this screen, see figure 8-9 on page 8-19.)
5. Press [A] (for Add) to add the Member. You will then see a screen listing any available candidates. (See figure 8-10 on page 8-19.) Note that you will not see the switch you want to add because it is a Member of another stack and not a Candidate.)
6. Either accept the displayed switch number or enter another available number. (The range is 0 - 15, with 0 reserved for the Commander.)
7. Use the downarrow key to move the cursor to the MAC Address field, then type the MAC address of the desired Member you want to move from another stack.
This column lists the MAC Addresses for switches discovered (in the local subnet) that are configured for Stacking.
Using the MAC addresses for these Members, you can move them between stacks in the same subnet.
For status descriptions, see the table on page 8-47.
8-21

ProCurve Stack Management Configuring Stack Management
8. Do one of the following:
• If the stack containing the Member you are moving has a Manager password, press the downarrow key to select the Candidate Password field, then type the password.
• If the stack containing the Member you want to move does not have a password, go to step 9.
9. Press [Enter] to return to the Actions line, then press [S] (for Save) to complete the Add process for the selected Member. You will then see a screen similar to the one in figure 8-9 on page 8-19, with the newly added Member listed.
N o t e : If the message Unable to add stack member: Invalid Password appears in the console menu’s Help line, then you either omitted the Manager password for the stack containing the Member or incorrectly entered the Manager pass-word.
You can “push” a Member from one stack to another by going to the Member’s interface and entering the MAC address of the destination stack Commander in the Member’s Commander MAC Address field. Using this method moves the Member to another stack without a need for knowing the Manager password in that stack, but also blocks access to the Member from the original Commander.
Using the Commander’s Menu To Remove a Stack Member. These rules affect removals from a stack:
■ When a Candidate becomes a Member, its Auto Join parameter is automatically set to No. This prevents the switch from automatically rejoining a stack as soon as you remove it from the stack.
■ When you use the Commander to remove a switch from a stack, the switch rejoins the Candidate pool for your IP subnet (broadcast domain), with Auto Join set to No.
■ When you remove a Member from a stack, it frees the previously assigned switch number (SN), which then becomes available for assignment to another switch that you may subsequently add to the stack. The default switch number used for an add is the lowest unassigned number in the Member range (1 - 15; 0 is reserved for the Commander).
8-22

ProCurve Stack ManagementConfiguring Stack Management
To remove a Member from a stack, use the Stack Management screen.
1. From the Main Menu, select:
9. Stacking...
4. Stack Management
You will then see the Stack Management screen:
Figure 8-13. Example of Stack Management Screen with Stack Members Listed
2. Use the downarrow key to select the Member you want to remove from the stack.
Figure 8-14. Example of Selecting a Member for Removal from the Stack
3. Type [D] (for Delete) to remove the selected Member from the stack. You will then see the following prompt:
Figure 8-15. The Prompt for Completing the Deletion of a Member from the Stack
For status descriptions, see the table on page 8-47.
Stack Member List
8-23

ProCurve Stack Management Configuring Stack Management
4. To continue deleting the selected Member, press the Space bar once to select Yes for the prompt, then press [Enter] to complete the deletion. The Stack Management screen updates to show the new stack Member list.
Using the Commander To Access Member Switches for Configuration Changes and Monitoring Traffic
After a Candidate becomes a stack Member, you can use that stack’s Commander to access the Member’s console interface for the same configu-ration and monitoring that you would do through a Telnet or direct-connect access.
1. From the Main Menu, select:
9. Stacking...5. Stack Access
You will then see the Stack Access screen:
Figure 8-16. Example of the Stack Access Screen
Use the downarrow key to select the stack Member you want to access, then press [X] (for eXecute) to display the console interface for the selected Member. For example, if you selected switch number 1 (system name: Coral Sea) in figure 8-16 and then pressed [X], you would see the Main Menu for the switch named Coral Sea.
For status descriptions, see the table on page 8-47.
8-24

ProCurve Stack ManagementConfiguring Stack Management
Figure 8-17. The eXecute Command Displays the Console Main Menu for the Selected Stack Member
2. You can now make configuration changes and/or view status data for the selected Member in the same way that you would if you were directly connected or telnetted into the switch.
3. When you are finished accessing the selected Member, do the following to return to the Commander’s Stack Access screen:
a. Return to the Member’s Main Menu.
b. Press [0] (for Logout), then [Y] (for Yes).
c. Press [Return].
You should now see the Commander’s Stack Access screen. (For an example, see figure 8-16 on page 8-24.)
Converting a Commander or Member to a Member of Another Stack
When moving a commander, the following procedure returns the stack mem-bers to Candidate status (with Auto-Join set to “No”) and converts the stack Commander to a Member of another stack. When moving a member, the procedure simply pulls a Member out of one stack and pushes it into another.
1. From the Main Menu of the switch you want to move, select
9. Stacking
2. To determine the MAC address of the destination Commander, select
2. Stacking Status (All)
Main Menu for stack Member named "Coral Sea" (SN = 1 from figure 8-16)
8-25

ProCurve Stack Management Configuring Stack Management
3. Press [B] (for Back) to return to the Stacking Menu.
4. To display Stack Configuration menu for the switch you are moving, select
3. Stack Configuration
5. Press [E] (for Edit) to select the Stack State parameter.
6. Use the Space bar to select Member, then press [v] to move to the Com-mander MAC Address field.
7. Enter the MAC address of the destination Commander and press [Enter].
8. Press [S] (for Save).
Monitoring Stack Status
Using the stacking options in the menu interface for any switch in a stack, you can view stacking data for that switch or for all stacks in the subnet (broadcast domain). (If you are using VLANs in your stack environment, see “Stacking Operation with a Tagged VLAN” on page 8-45.) This can help you in such ways as determining the stacking configuration for individual switches, identifying stack Members and Candidates, and determining the status of individual switches in a stack. See table 8-5 on page 8-26.
Table 8-5. Stack Status Environments
Screen Name Commander Member Candidate
Stack Status (This Switch) • Commander’s stacking configuration
• Data on stack Members:– Switch Number– MAC Address– System Name– Device Type– Status
• Member’s stacking configuration• Member Status• Data identifying Member’s
Commander:– Commander Status– Commander IP Address– Commander MAC Address
Candidate’s stacking configuration
Stack Status (All) Lists devices by stack name or Candidate status (if device is not a stack Member). Includes:• Stack Name• MAC Address• System Name• Status
Same as for Commander. Same as for Commander.
8-26

ProCurve Stack ManagementConfiguring Stack Management
Using Any Stacked Switch To View the Status for All Switches with
Stacking Enabled. This procedure displays the general status of all switches in the IP subnet (broadcast domain) that have stacking enabled.
1. Go to the console Main Menu for any switch configured for stacking and select:
9. Stacking ...
2. Stacking Status (All)
You will then see a Stacking Status screen similar to the following:
Figure 8-18. Example of Stacking Status for All Detected Switches Configured for Stacking
Viewing Commander Status. This procedure displays the Commander and stack configuration, plus information identifying each stack member.
To display the status for a Commander, go to the console Main Menu for the switch and select:
9. Stacking ...
1. Stacking Status (This Switch)
For status descriptions, see the table on page 8-47.
8-27

ProCurve Stack Management Configuring Stack Management
You will then see the Commander’s Stacking Status screen:
Figure 8-19. Example of the Commander’s Stacking Status Screen
Viewing Member Status. This procedure displays the Member’s stacking information plus the Commander’s status, IP address, and MAC address.
To display the status for a Member:
1. Go to the console Main Menu of the Commander switch and select
9. Stacking ...
5. Stack Access
2. Use the downarrow key to select the Member switch whose status you want to view, then press [X] (for eXecute). You will then see the Main Menu for the selected Member switch.
3. In the Member’s Main Menu screen, select
9. Stacking ...
1. Stacking Status (This Switch)
You will then see the Member’s Stacking Status screen:
8-28

ProCurve Stack ManagementConfiguring Stack Management
Figure 8-20. Example of a Member’s Stacking Status Screen
Viewing Candidate Status. This procedure displays the Candidate’s stacking configuration.
To display the status for a Candidate:
1. Use Telnet (if the Candidate has a valid IP address for your network) or a direct serial port connection to access the menu interface Main Menu for the Candidate switch and select
9. Stacking ...
1. Stacking Status (This Switch)
You will then see the Candidate’s Stacking Status screen:
Figure 8-21. Example of a Candidate’s Stacking Screen
8-29

ProCurve Stack Management Configuring Stack Management
Using the CLI To View Stack Status and Configure Stacking
The CLI enables you to do all of the stacking tasks available through the menu interface.)
Table 8-6. CLI Commands for Configuring Stacking on a Switch
CLI Command Operation
show stack[candidates | view | all]
Commander: Shows Commander’s stacking configuration and lists the stack members and their individual status.Member: Lists Member’s stacking configuration and status, and the status and the IP address and subnet mask of the stack Commander.
Options:candidates: (Commander only) Lists stack Candidates.view: (Commander only) Lists current stack Members and their individual status.all: Lists all stack Commanders, Members and Candidates, with their individual status.
[no] stack Any Stacking-Capable Switch: Enables or disables stacking on the switch.
Default: Stacking Enabled
[no] stack commander <stack name> Candidate or Commander: Converts a Candidate to a Commander or changes the stack name of an existing commander. “No” form eliminates named stack and returns Commander and stack Members to Candidate status with Auto Join set to No.
“No” form prevents the switch from being discovered as a stacking-capable switch.
Default: Switch Configured as a Candidate
[no] stack auto-grab Commander: Causes Commander to automatically add to its stack any discovered Candidate in the subnet that does not have a Manager password and has Auto-Join set to Yes.
Default: DisabledNote: If the Commander’s stack already has 15 members, the Candidate cannot join until an existing member leaves the stack.
8-30

ProCurve Stack ManagementConfiguring Stack Management
[no] stack member <switch-num> mac-address <mac-addr> [password <password-str>]
Commander: Adds a Candidate to stack membership. “No” form removes a Member from stack membership. To easily determine the MAC address of a Candidate, use the show stack candidates command. To determine the MAC address of a Member you want to remove, use the show stack view command.The password (password-str) is required only when adding a Candidate that has a Manager password.
telnet <1..15>
Used In: Commander Only
Commander: Uses the SN (switch number— assigned by the stack Commander) to access the console interface (menu interface or CLI) of a stack member. To view the list of SN assignments for a stack, execute the show stack command in the Commander’s CLI.
[no] stack join <mac-addr> Candidate: Causes the Candidate to join the stack whose Commander has the indicated MAC address. “No” form is used in a Member to remove it from the stack of the Commander having the specified address.Member: “Pushes” the member to another stack whose Commander has the indicated MAC address.
[no] stack auto-join Candidate: Enables Candidate to automatically join the stack of any Commander in the IP subnet that has Auto Grab enabled, or disables Auto-Join in the candidate.
Default: Auto Join enabled.
Note: If the Candidate has a Manager password or if the available stack(s) already have the maximum of 15 Members, the automatic join will not occur.
stack transmission-interval All Stack Members: specifies the interval in seconds for transmitting stacking discovery packets.
Default: 60 seconds
CLI Command Operation
8-31

ProCurve Stack Management Configuring Stack Management
Using the CLI To View Stack Status
You can list the stack status for an individual switch and for other switches that have been discovered in the same subnet.
Syntax: show stack [candidates | view | all]
Viewing the Status of an Individual Switch. The following example illustrates how to use the CLI in a to display the stack status for that switch. In this case, the switch is in the default stacking configuration.
Syntax: show stack
Figure 8-22. Example of Using the Show Stack Command To List the Stacking Configuration for an Individual Switch
Viewing the Status of Candidates the Commander Has Detected.
This example illustrates how to list stack candidates the Commander has discovered in the ip subnet (broadcast domain).
Syntax: show stack candidates
Figure 8-23. Example of Using the Show Stack Candidates Command To List Candidates
8-32

ProCurve Stack ManagementConfiguring Stack Management
Viewing the Status of all Stack-Enabled Switches Discovered in the IP
Subnet. The next example lists all the stack-configured switches discovered in the IP subnet. Because the switch on which the show stack all command was executed is a candidate, it is included in the “Others” category.
Syntax: show stack all
Figure 8-24. Result of Using the Show Stack All Command To List Discovered Switches in the IP Subnet
Viewing the Status of the Commander and Current Members of the
Commander’s Stack. The next example lists all switches in the stack of the selected switch.
Syntax: show stack view
Figure 8-25. Example of the Show Stack View Command To List the Stack Assigned to the Selected Commander
8-33

ProCurve Stack Management Configuring Stack Management
Using the CLI To Configure a Commander Switch
You can configure any stacking-enabled switch to be a Commander as long as the intended stack name does not already exist on the broadcast domain. (When you configure a Commander, you automatically create a corresponding stack.)
Before you begin configuring stacking parameters:
1. Configure IP addressing on the switch intended for stack commander and, if not already configured, on the primary VLAN. (For more on configuring IP addressing, see the chapter on IP addressing in the Management and
Configuration Guide.)
N o t e The primary VLAN must have an IP address in order for stacking to operate properly. For more on the primary VLAN, see “The Primary VLAN” on page 2-6.
2. Configure a Manager password on the switch intended for commander. (The Commander’s Manager password controls access to stack Mem-bers.) For more on passwords, see the local manager and operator pass-word information in the Access Security Guide for your switch.
Configure the Stack Commander. Assigning a stack name to a switch makes it a Commander and automatically creates a stack.
Syntax: stack commander < name-str >
This example creates a Commander switch with a stack name of Big_Waters. (Note that if stacking was previously disabled on the switch, this command also enables stacking.)
ProCurve(config)# stack commander Big_Waters
As the following show stack display shows, the Commander switch is now ready to add members to the stack.
8-34

ProCurve Stack ManagementConfiguring Stack Management
Figure 8-26. Example of the Commander’s Show Stack Screen with Only the Commander Discovered
Using a Member’s CLI to Convert the Member to the Commander of a
New Stack. This procedure requires that you first remove the Member from its current stack, then create the new stack. If you do not know the MAC address for the Commander of the current stack, use show stack to list it.
Syntax: no stack stack commander < stack name >
Suppose, for example, that a ProCurve switch named “Bering Sea” is a Member of a stack named “Big_Waters”. To use the switch’s CLI to convert it from a stack Member to the Commander of a new stack named “Lakes”, you would use the following commands:
The stack commander command configures the Commander and names the stack.
The Commander appears in the stack as Switch Number (SN) 0.
8-35

ProCurve Stack Management Configuring Stack Management
Figure 8-27. Example of Using a Member’s CLI To Convert the Member to the Commander of a New Stack
Adding to a Stack or Moving Switches Between Stacks
You can add switches to a stack by adding discovered Candidates or by moving switches from other stacks that may exist in the same subnet. (You cannot add a Candidate that the Commander has not discovered.)
In its default configuration, the Commander’s Auto-Grab parameter is set to No to give you manual control over which switches join the stack and when they join. This prevents the Commander from automatically trying to add every Candidate it finds that has Auto Join set to Yes (the default for the Candidate).
(If you want any eligible Candidate to automatically join the stack when the Commander discovers it, configure Auto Grab in the Commander to Yes. When you do so, any Candidate discovered with Auto Join set to Yes (the default) and no Manager password will join the stack, up to the limit of 15 Members.)
Removes the Member from the “Big_Waters” stack.
Converts the former Member to the Com- mander of the new “Lakes” stack.
The output from this command tells you the MAC address of the current stack Commander.
8-36

ProCurve Stack ManagementConfiguring Stack Management
Using the Commander’s CLI To Manually Add a Candidate to the
Stack. To manually add a candidate, you will use:
■ A switch number (SN) to assign to the new member. Member SNs range from 1 to 15. To see which SNs are already assigned to Members, use show stack view. You can use any SN not included in the listing. (SNs are viewable only on a Commander switch.)
■ The MAC address of the discovered Candidate you are adding to the stack. To see this data, use the show stack candidates listing.
For example:
Figure 8-28. Example of How To Determine Available Switch Numbers (SNs)
To display all discovered Candidates with their MAC addresses, execute show stack candidates from the Commander’s CLI. For example, to list the discov-ered candidates for the above Commander:
Figure 8-29. Example of How To Determine MAC Addresses of Discovered Candidates
Knowing the available switch numbers (SNs) and Candidate MAC addresses, you can proceed to manually assign a Candidate to be a Member of the stack:
Syntax: stack member < switch-number > mac-address < mac-addr > [ password < password-str > ]
Note: When manually adding a switch, you must assign an SN. However, if the Commander automatically adds a new Member, it assigns an SN from the available pool of unused SNs.
In this stack, the only SNs in use are 0 and 1, so you can use any SN number from 2 through 15 for new Members. (The SN of “0” is always reserved for the stack Commander.)
MAC addresses of discovered Candidates.
8-37

ProCurve Stack Management Configuring Stack Management
For example, if the HP 8000M in the above listing did not have a Manager password and you wanted to make it a stack Member with an SN of 2, you would execute the following command:
ProCurve(config)# stack member 2 mac-address 0060b0-dfla00
The show stack view command then lists the Member added by the above command:
Figure 8-30. Example Showing the Stack After Adding a New Member
Using Auto Join on a Candidate. In the default configuration, a Candi-date’s Auto Join parameter is set to “Yes”, meaning that it will automatically join a stack if the stack’s Commander detects the Candidate and the Com-mander’s Auto Grab parameter is set to “Yes”. You can disable Auto Join on a Candidate if you want to prevent automatic joining in this case. There is also the instance where a Candidate’s Auto Join is disabled, for example, when a Commander leaves a stack and its members automatically return to Candidate status, or if you manually remove a Member from a stack. In this case, you may want to reset Auto Join to “Yes”.
Status: [no] stack auto-join
ProCurve(config)# no stack auto-joinDisables Auto Join on a Candidate.
ProCurve(config)# stack auto-joinEnables Auto Join on a Candidate.
Using a Candidate CLI To Manually “Push” the Candidate Into a
Stack . Use this method if any of the following apply:
SN (Switch Number) 2 is the new Member added by the stack member command.
The new member did not have a System Name configured prior to joining the stack, and so receives a System Name composed of the stack name (assigned in the Commander) with its SN number as a suffix.
8-38

ProCurve Stack ManagementConfiguring Stack Management
■ The Candidate’s Auto Join is set to Yes (and you do not want to enable Auto Grab on the Commander) or the Candidate’s Auto Join is set to No.
■ Either you know the MAC address of the Commander for the stack into which you want to insert the Candidate, or the Candidate has a valid IP address and is operating in your network.
Syntax: stack join < mac-addr >
where: < mac-addr > is the MAC address of the Commander in the destination stack.
Use Telnet (if the Candidate has an IP address valid for your network) or a direct serial port connection to access the CLI for the Candidate switch. For example, suppose that a Candidate named “North Sea” with Auto Join off and a valid IP address of 10.28.227.104 is running on a network. You could Telnet to the Candidate, use show stack all to determine the Commander’s MAC address, and then “push” the Candidate into the desired stack.
Figure 8-31. Example of “Pushing” a Candidate Into a Stack
To verify that the Candidate successfully joined the stack, execute show stack all again to view the stacking status.
Using the Destination Commander CLI To “Pull” a Member from
Another Stack. This method uses the Commander in the destination stack to “pull” the Member from the source stack.
1. Telnet to the Candidate named “North Sea”.2. Use show stack all to display the Commander’s
MAC address.
3. Set the Candidate CLI to Config mode.4. Execute stack join with the
Commander’s MAC address to “push” the Candidate into the stack.
MAC Address for Stack Commander
8-39

ProCurve Stack Management Configuring Stack Management
Syntax: stack member < switch-number > mac-address < mac-addr > [ password < password-str >]
In the destination Commander, use show stack all to find the MAC address of the Member you want to pull into the destination stack. For example, suppose you created a new Commander with a stack name of “Cold_Waters” and you wanted to move a switch named “Bering Sea” into the new stack:
Figure 8-32. Example of Stack Listing with Two Stacks in the Subnet
You would then execute the following command to pull the desired switch into the new stack:
ProCurve(config)# stack member 1 mac-address 0060b0-df1a00
Where 1 is an unused switch number (SN).
Since a password is not set on the Candidate, a password is not needed in this example.
You could then use show stack all again to verify that the move took place.
Using a Member CLI To “Push” the Member into Another Stack. You can use the Member’s CLI to “push” a stack Member into a destination stack if you know the MAC address of the destination Commander.
Syntax: stack join <mac-addr>
where: < mac-addr > is the MAC address of the Commander for the destination stack.
Converting a Commander to a Member of Another Stack. Removing the Commander from a stack eliminates the stack and returns its Members to the Candidate pool with Auto Join disabled.
Move this switch into the “Cold Waters” stack.
8-40

ProCurve Stack ManagementConfiguring Stack Management
Syntax: no stack name < stack name> stack join < mac-address >
If you don’t know the MAC address of the destination Commander, you can use show stack all to identify it.
For example, suppose you have a switch operating as the Commander for a temporary stack named “Test”. When it is time to eliminate the temporary “Test” stack and convert the switch into a member of an existing stack named “Big_Waters”, you would execute the following commands in the switch’s CLI:
Figure 8-33. Example of Command Sequence for Converting a Commander to a Member
Using the CLI To Remove a Member from a Stack
You can remove a Member from a stack using the CLI of either the Commander or the Member.
N o t e When you remove a Member from a stack, the Member’s Auto Join parameter is set to No.
Using the Commander CLI To Remove a Stack Member. This option requires the switch number (SN) and the MAC address of the switch to remove. (Because the Commander propagates its Manager password to all stack members, knowing the Manager password is necessary only for gaining access to the Commander.)
Syntax: [no] stack member <switch-num> mac-address <mac-addr>
Eliminates the “Test” stack and converts the Commander to a Candidate.
Helps you to identify the MAC address of the Commander for the “Big_Waters” stack.
Adds the former “Test” Commander to the “Big_Waters” stack.
8-41

ProCurve Stack Management Configuring Stack Management
Use show stack view to list the stack Members. For example, suppose that you wanted to use the Commander to remove the “North Sea” Member from the following stack:
Figure 8-34. Example of a Commander and Three Switches in a Stack
You would then execute this command to remove the “North Sea” switch from the stack:
ProCurve(config)# no stack member 3 mac-address 0030c1-7fc700
where:
• 3 is the “North Sea” Member’s switch number (SN)
• 0030c1-7fc700 is the “North Sea” Member’s MAC address
Using the Member’s CLI To Remove the Member from a Stack.
Syntax: no stack join <mac-addr>
To use this method, you need the Commander’s MAC address, which is available using the show stack command in the Member’s CLI. For example:
Figure 8-35. Example of How To Identify the Commander’s MAC Address from a Member Switch
You would then execute this command in the “North Sea” switch’s CLI to remove the switch from the stack:
Remove this Member from the stack.
MAC Address of the Commander for the Stack to Which the“North Sea” Switch Belongs
CLI for “North Sea” Stack Member
8-42

ProCurve Stack ManagementConfiguring Stack Management
North Sea(config)# no stack join 0030c1-7fec40
Using the CLI To Access Member Switches for Configuration Changes and Traffic Monitoring
After a Candidate becomes a Member, you can use the telnet command from the Commander to access the Member’s CLI or console interface for the same configuration and monitoring that you would do through a Telnet or direct-connect access from a terminal.
Syntax: telnet <switch-number>
where: unsigned integer is the switch number (SN) assigned by the Com-mander to each member (range: 1 - 15).
To find the switch number for the Member you want to access, execute the show stack view command in the Commander’s CLI. For example, suppose that you wanted to configure a port trunk on the switch named “North Sea” in the stack named “Big_Waters”. Do do so you would go to the CLI for the “Big_Waters” Commander and execute show stack view to find the switch number for the “North Sea” switch:
Figure 8-36. Example of a Stack Showing Switch Number (SN) Assignments
To access the “North Sea” console, you would then execute the following telnet command:
ProCurve(config)# telnet 3
You would then see the CLI prompt for the “North Sea” switch, allowing you to configure or monitor the switch as if you were directly connected to the console.
The switch number (SN) for the “North Sea” switch is “3”.
8-43

ProCurve Stack Management Configuring Stack Management
SNMP Community Operation in a Stack
Community Membership
In the default stacking configuration, when a Candidate joins a stack, it automatically becomes a Member of any SNMP community to which the Commander belongs, even though any community names configured in the Commander are not propagated to the Member’s SNMP Communities listing. However, if a Member has its own (optional) IP addressing, it can belong to SNMP communities to which other switches in the stack, including the Commander, do not belong. For example:
Figure 8-37. Example of SNMP Community Operation with Stacking
SNMP Management Station Access to Members Via the Commander.
To use a management station for SNMP Get or Set access through the Commander’s IP address to a Member, you must append @sw<switch number> to the community name. For example, in figure 8-37, you would use the following command in your management station to access Switch 1’s MIB using the blue community:
snmpget < MIB variable > 10.31.29.100 blue@sw1
Note that because the gray community is only on switch 3, you could not use the Commander IP address for gray community access from the management station. Instead, you would access switch 3 directly using the switch’s own IP address. For example:
snmpget < MIB variable > 10.31.29.15 gray
Commander SwitchIP Addr: 12.31.29.100Community Names:
– blue– red
Member Switch 2IP Addr: NoneCommunity Names:
– none
Member Switch 3IP Addr: 12.31.29.15Community Names:
– public (the default)– gray
Member Switch 1IP Addr: 12.31.29.18Community Names:
– public (the default)
• The Commander and all Members of the stack belong to the blue and red communities. Only switch 3 belongs to the gray community. Switches 1, 2, and 3 belong to the public community
• If Member Switch 1 ceases to be a stack Member, it still belongs to the public SNMP community because it has IP addressing of its own. But, with the loss of stack Membership, Switch 1 loses membership in the blue and red communities because they are not specifically configured in the switch.
• If Member Switch 2 ceases to be a stack Member, it loses membership in all SNMP communities.
• If Member Switch 3 ceases to be a stack Member, it loses membership in the blue and red communities, but—because it has its own IP addressing—retains membership in the public and gray communities.
8-44

ProCurve Stack ManagementConfiguring Stack Management
Note that in the above example (figure 8-37) you cannot use the public community through the Commander to access any of the Member switches. For example, you can use the public community to access the MIB in switches 1 and 3 by using their unique IP addresses. However, you must use the red or blue community to access the MIB for switch 2.
snmpget < MIB variable > 10.31.29.100 blue@sw2
Using the CLI To Disable or Re-Enable Stacking
In the default configuration, stacking is enabled on the switch. You can use the CLI to disable stacking on the switch at any time. Disabling stacking has the following effects:
■ Disabling a Commander: Eliminates the stack, returns the stack Mem-bers to Candidates with Auto Join disabled, and changes the Commander to a stand-alone (nonstacking) switch. You must re-enable stacking on the switch before it can become a Candidate, Member, or Commander.
■ Disabling a Member: Removes the Member from the stack and changes it to a stand-alone (nonstacking) switch. You must re-enable stacking on the switch before it can become a Candidate, Member, or Commander.
■ Disabling a Candidate: Changes the Candidate to a stand-alone (non-stacking) switch.
Syntax: no stack (Disables stacking on the switch.) stack (Enables stacking on the switch.)
Transmission Interval
All switches in the stack must be set to the same transmission interval to help ensure proper stacking operation. ProCurve recommends that you leave this parameter set to the default 60 seconds.
Syntax: stack transmission-interval < seconds >
Stacking Operation with Multiple VLANs Configured
Stacking uses the primary VLAN in a switch. In the factory-default configura-tion, the DEFAULT_VLAN is the primary VLAN. However, you can designate any VLAN configured in the switch as the primary VLAN. (See “The Primary VLAN” on page 2-6.)
When using stacking in a multiple-VLAN environment, the following criteria applies:
8-45

ProCurve Stack Management Configuring Stack Management
■ Stacking uses only the primary VLAN on each switch in a stack.
■ The primary VLAN can be tagged or untagged as needed in the stacking path from switch to switch.
■ The same VLAN ID (VID) must be assigned to the primary VLAN in each stacked switch.
Web: Viewing and Configuring Stacking
Figure 8-38. Example of the Web Browser Interface for a Commander
The web browser interface for a Commander appears as shown above. The interface for Members and Candidates appears the same as for a non-stacking switches.
To view or configure stacking on the web browser interface:
1. Click on the Configuration tab.
2. Click on Stacking to display the stacking configuration for an individual switch, and make any configuration changes you want for that switch.
3. Click on Apply Changes to save any configuration changes for the individ-ual switch.
4. If the switch is a Commander, use the Stack Closeup and Stack Management buttons for viewing and using stack features.
To access the web-based Help provided for the switch, click on [?] in the web browser screen.
8-46

ProCurve Stack ManagementConfiguring Stack Management
Status Messages
Stacking screens and listings display these status messages:
Message Condition Action or Remedy
Candidate Auto-join Indicates a switch configured with Stack State set to Candidate, Auto Join set to Yes (the default), and no Manager password.
None required
Candidate Candidate cannot automatically join the stack because one or both of the following conditions apply:• Candidate has Auto Join set to No.• Candidate has a Manager password.
Manually add the candidate to the stack.
Commander Down Member has lost connectivity to its Commander. Check connectivity between the Commander and the Member.
Commander Up The Member has stacking connectivity with the Commander.
None required.
Mismatch This may be a temporary condition while a Candidate is trying to join a stack. If the Candidate does not join, then stack configuration is inconsistent.
Initially, wait for an update. If condi-tion persists, reconfigure the Commander or the Member.
Member Down A Member has become detached from the stack. A possible cause is an interruption to the link between the Member and the Commander.
Check the connectivity between the Commander and the Member.
Member Up The Commander has stacking connectivity to the Member. None required.
Rejected The Candidate has failed to be added to the stack. The candidate may have a pass-word. In this case, manually add the candidate. Otherwise, the stack may already be full. A stack can hold up to 15 Members (plus the Commander).
8-47

ProCurve Stack Management Configuring Stack Management
— This page is intentionally unused. —
8-48