presents bluegrass banjo v3 - bolder sounds · 2018-12-21 · features of the bluegrass banjo v3...
TRANSCRIPT
Presents
Bluegrass Banjo V3for NI Kontakt 4+
Go to Index: 2 1
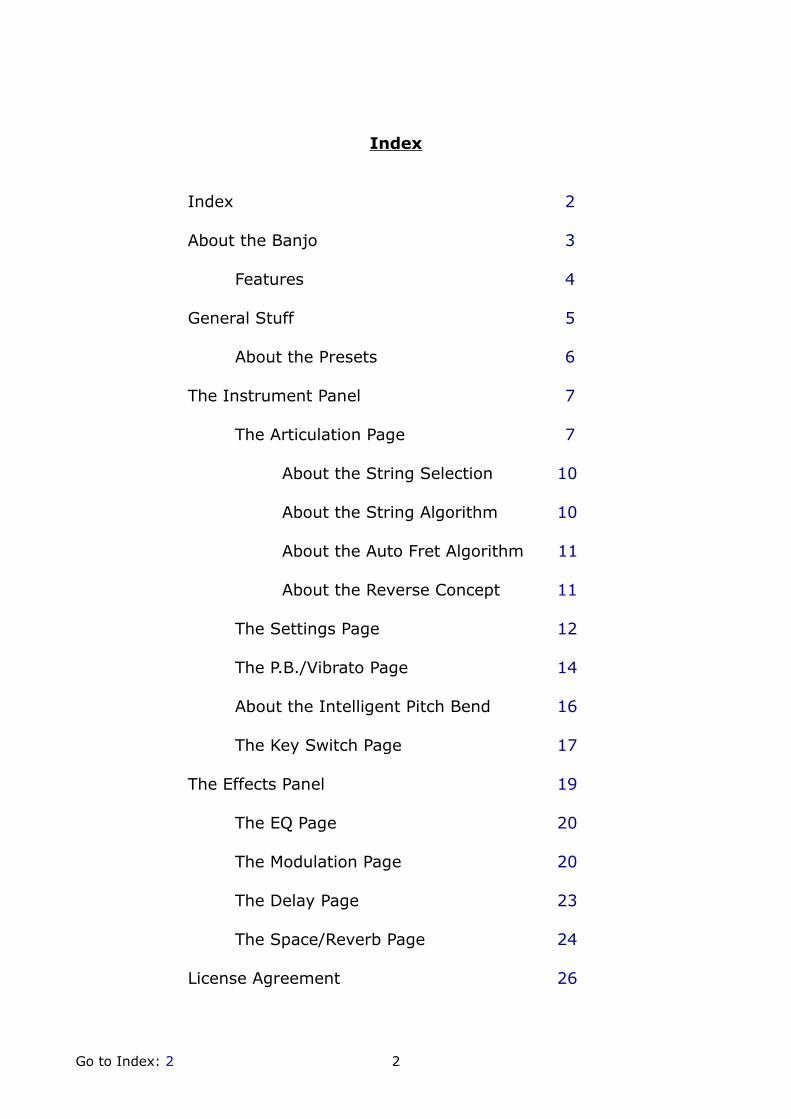
Index
Index 2
About the Banjo 3
Features 4
General Stuff 5
About the Presets 6
The Instrument Panel 7
The Articulation Page 7
About the String Selection 10
About the String Algorithm 10
About the Auto Fret Algorithm 11
About the Reverse Concept 11
The Settings Page 12
The P.B./Vibrato Page 14
About the Intelligent Pitch Bend 16
The Key Switch Page 17
The Effects Panel 19
The EQ Page 20
The Modulation Page 20
The Delay Page 23
The Space/Reverb Page 24
License Agreement 26
Go to Index: 2 2

Welcome to the Bluegrass Banjo version 3 sample library for the NI Kontakt 4+software sampler from Bolder Sounds!
In this library you will find a 5 string banjo which has the classic warm toneassociated with pre-war banjos as well as an instrument with plenty of punchto cut through a mix. Even though this library is called a Bluegrass samplelibrary, you will find it to be quite flexible across many different musical genres.
This library is extremely popular among Bolder Sounds users. We felt byadding new sampled articulations we could make it an even more effectivelibrary. The new samples include for new pluck positions along the string length of thebanjo as well as Scruggs-Keith tuner mechanism samples. A complete list ofnew features in version 3 is outlined below in this manual.
If you already own the Bluegrass Banjo library maybe you are wondering -"didI ever get version 2 of the Bluegrass Banjo?" Yes- you did. It was updated to version 2 very shortly after its initial release.
We hope you very much enjoy it!
Bo Clausen and Dennis Burns
Go to Index: 2 3

Features of the Bluegrass Banjo V3 Sample Library
• Up to 5 x independent round-robin per key, for each of the 5 strings ofthe banjo. Each string was sampled chromatically up to the 17th fret. Thefirst string was sampled beyond the 17th fret.
• All the strings are sampled on 5 different pluck positions of the banjo.
• The Pluck Positions can either be selected via Key Switches or via a veryadvanced Pluck Position velocity selection system. You can freely adjustat what velocity level the different positions will be selected and makeany kind of position combinations. All the settings can be saved asPresets.
• Various articulations: Hammer-On and Pull-Off, Half step and Whole stepSlide, Harmonic and Scrugg bends. All with 2 x independent round-robinper key.
• A very advanced and intelligent scripted Pitch Bend and Vibrato control.
• Detailed KSP scripted control of Fretting Position on the neck of thebanjo, including an Auto Fret Selection feature.
• A Key Switch Page where you can freely assign which key will trigger thevarious Key Switches and save the settings as Presets.
• 8 different effects - each with its own Preset menus, so you can save andrecall all the various parameters.
• And much more!
The full uncompressed size of this library is 3.15 GB. It has been Kontaktcompressed (.ncw) down to 1.52 GB for convenience of downloading and rapidloading into Kontakt.
Go to Index: 2 4
General StuffKONTAKT Compatibility:
This library requires NI KONTAKT version 4.2.4 or higher, and has been testedfor compatibility in KONTAKT 5. This library is NOT compatible with theKONTAKT 4 or 5 sample PLAYER, only the full retail KONTAKT SAMPLER. It willonly run in demo mode for 15 minutes on the KONTAKT PLAYER.
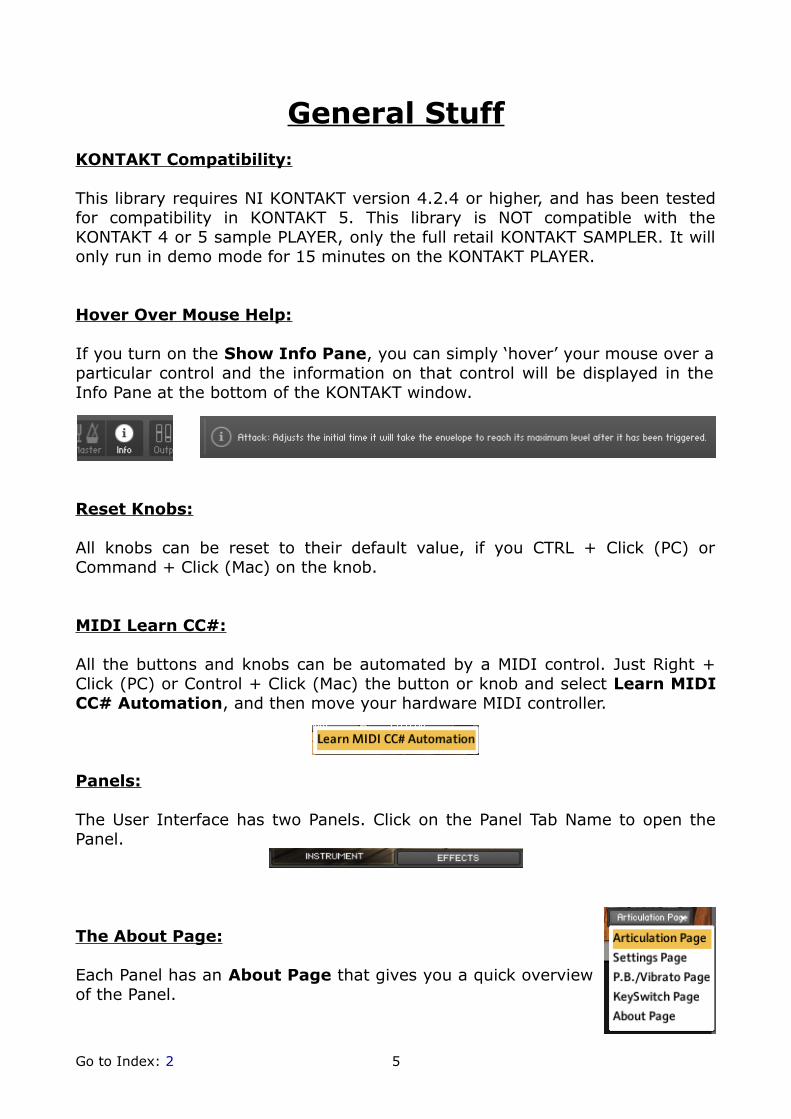
Hover Over Mouse Help:
If you turn on the Show Info Pane, you can simply ‘hover’ your mouse over aparticular control and the information on that control will be displayed in theInfo Pane at the bottom of the KONTAKT window.
Reset Knobs:
All knobs can be reset to their default value, if you CTRL + Click (PC) orCommand + Click (Mac) on the knob.
MIDI Learn CC#:
All the buttons and knobs can be automated by a MIDI control. Just Right +Click (PC) or Control + Click (Mac) the button or knob and select Learn MIDICC# Automation, and then move your hardware MIDI controller.
Panels:
The User Interface has two Panels. Click on the Panel Tab Name to open thePanel.
The About Page:
Each Panel has an About Page that gives you a quick overviewof the Panel.
Go to Index: 2 5
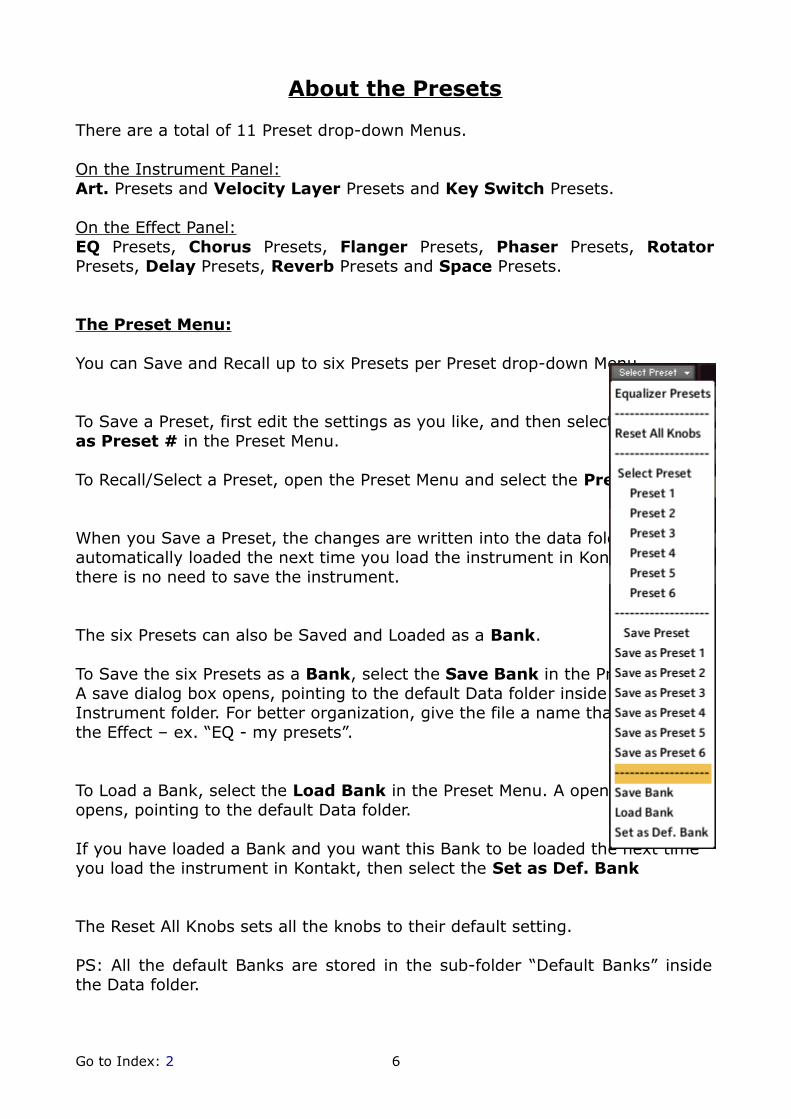
About the Presets
There are a total of 11 Preset drop-down Menus.
On the Instrument Panel:Art. Presets and Velocity Layer Presets and Key Switch Presets.
On the Effect Panel:EQ Presets, Chorus Presets, Flanger Presets, Phaser Presets, RotatorPresets, Delay Presets, Reverb Presets and Space Presets.
The Preset Menu:
You can Save and Recall up to six Presets per Preset drop-down Menu.
To Save a Preset, first edit the settings as you like, and then select the as Preset # in the Preset Menu.
To Recall/Select a Preset, open the Preset Menu and select the Preset #
When you Save a Preset, the changes are written into the data folder and thenautomatically loaded the next time you load the instrument in Kontakt. Sothere is no need to save the instrument.
The six Presets can also be Saved and Loaded as a Bank.
To Save the six Presets as a Bank, select the Save Bank in the Preset Menu.A save dialog box opens, pointing to the default Data folder inside the mainInstrument folder. For better organization, give the file a name that refers tothe Effect – ex. “EQ - my presets”.
To Load a Bank, select the Load Bank in the Preset Menu. A open dialog boxopens, pointing to the default Data folder.
If you have loaded a Bank and you want this Bank to be loaded the next timeyou load the instrument in Kontakt, then select the Set as Def. Bank
The Reset All Knobs sets all the knobs to their default setting.
PS: All the default Banks are stored in the sub-folder “Default Banks” insidethe Data folder.
Go to Index: 2 6
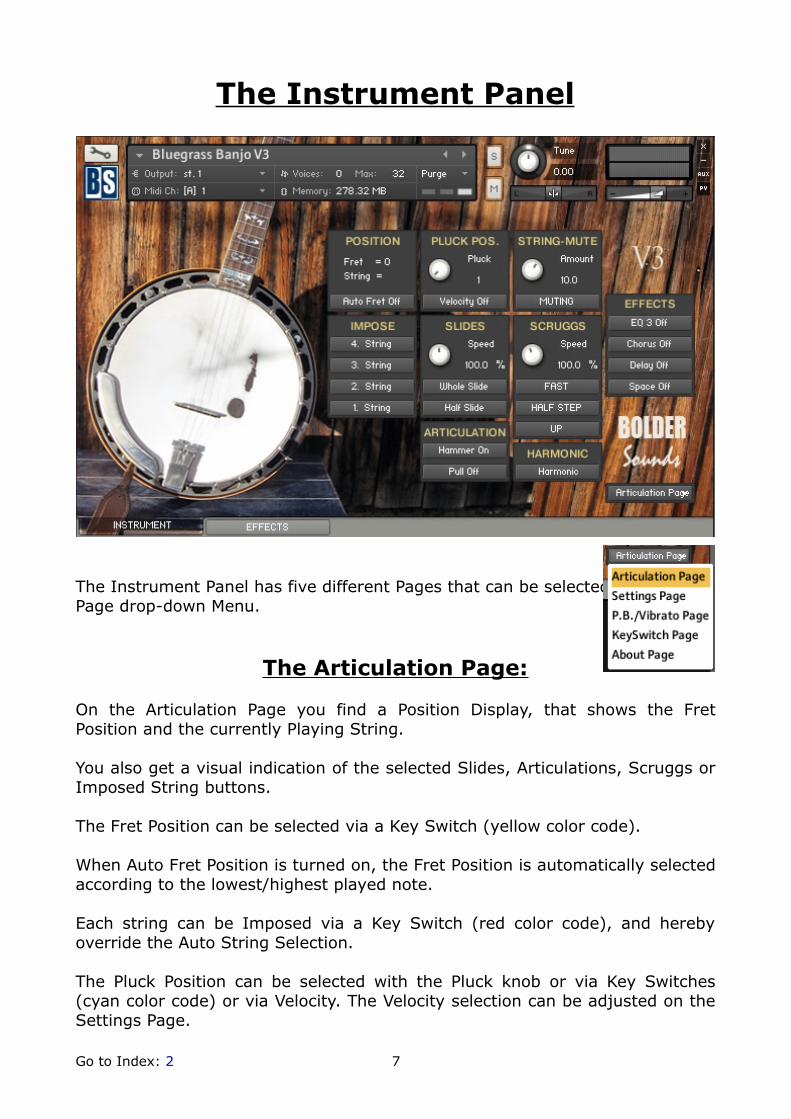
The Instrument Panel
The Instrument Panel has five different Pages that can be selected from thePage drop-down Menu.
The Articulation Page:
On the Articulation Page you find a Position Display, that shows the FretPosition and the currently Playing String.
You also get a visual indication of the selected Slides, Articulations, Scruggs orImposed String buttons.
The Fret Position can be selected via a Key Switch (yellow color code).
When Auto Fret Position is turned on, the Fret Position is automatically selectedaccording to the lowest/highest played note.
Each string can be Imposed via a Key Switch (red color code), and herebyoverride the Auto String Selection.
The Pluck Position can be selected with the Pluck knob or via Key Switches(cyan color code) or via Velocity. The Velocity selection can be adjusted on theSettings Page.
Go to Index: 2 7
You can select between two different Slides via Key Switches (green colorcode), and adjust the speed/tempo of the Slides.
Here you also find two Articulation buttons: Hammer On and Pull Off. They canbe selected via Key Switches (green color code).
The various attack settings of the Hammer On and Pull Off can be adjusted onthe Settings Page.
The String Muting can be Reverted via mouse-click and activated via KeySwitch (green color code), and the amount of the String Muting effect can beadjusted.
The three Scruggs buttons toggle between six different Scruggs modes. Theycan be Reverted via mouse-click and activated via Key Switches (green colorcode), and you can adjust the speed/tempo.
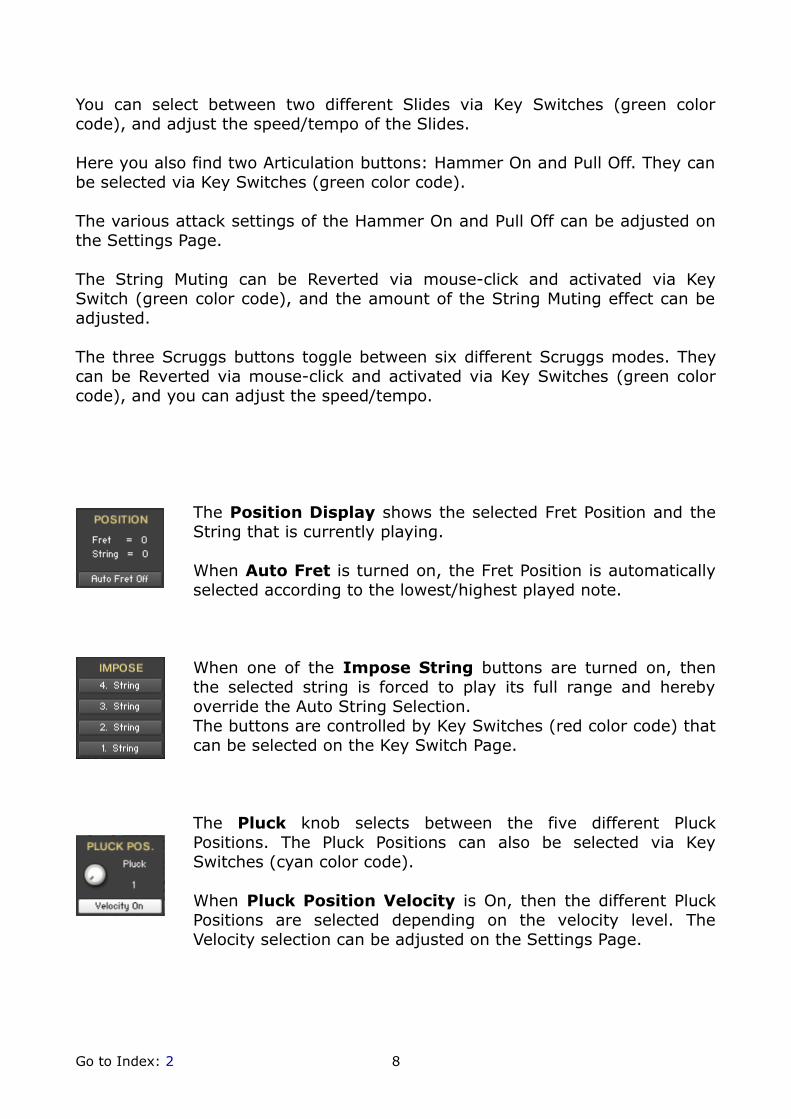
The Position Display shows the selected Fret Position and theString that is currently playing.
When Auto Fret is turned on, the Fret Position is automaticallyselected according to the lowest/highest played note.
When one of the Impose String buttons are turned on, thenthe selected string is forced to play its full range and herebyoverride the Auto String Selection.The buttons are controlled by Key Switches (red color code) thatcan be selected on the Key Switch Page.
The Pluck knob selects between the five different PluckPositions. The Pluck Positions can also be selected via KeySwitches (cyan color code).
When Pluck Position Velocity is On, then the different PluckPositions are selected depending on the velocity level. TheVelocity selection can be adjusted on the Settings Page.
Go to Index: 2 8
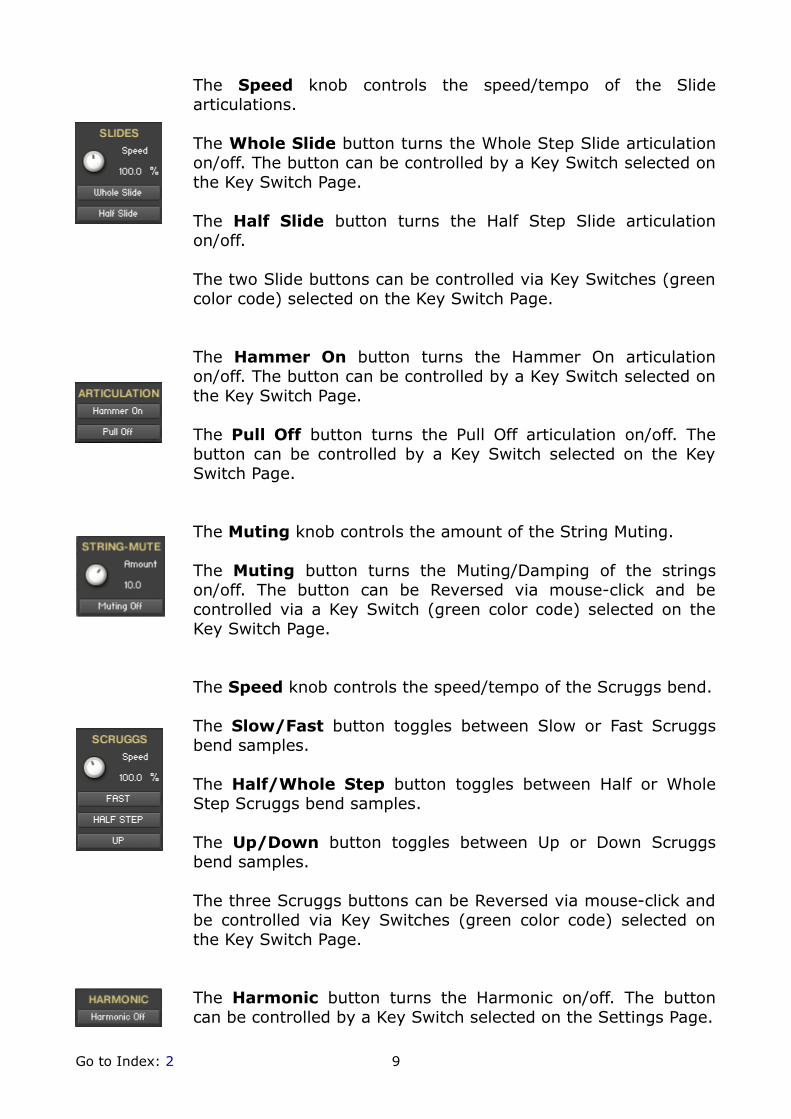
The Speed knob controls the speed/tempo of the Slidearticulations.
The Whole Slide button turns the Whole Step Slide articulationon/off. The button can be controlled by a Key Switch selected onthe Key Switch Page.
The Half Slide button turns the Half Step Slide articulationon/off.
The two Slide buttons can be controlled via Key Switches (greencolor code) selected on the Key Switch Page.
The Hammer On button turns the Hammer On articulationon/off. The button can be controlled by a Key Switch selected onthe Key Switch Page.
The Pull Off button turns the Pull Off articulation on/off. Thebutton can be controlled by a Key Switch selected on the KeySwitch Page.
The Muting knob controls the amount of the String Muting.
The Muting button turns the Muting/Damping of the stringson/off. The button can be Reversed via mouse-click and becontrolled via a Key Switch (green color code) selected on theKey Switch Page.
The Speed knob controls the speed/tempo of the Scruggs bend.
The Slow/Fast button toggles between Slow or Fast Scruggsbend samples.
The Half/Whole Step button toggles between Half or WholeStep Scruggs bend samples.
The Up/Down button toggles between Up or Down Scruggsbend samples.
The three Scruggs buttons can be Reversed via mouse-click andbe controlled via Key Switches (green color code) selected onthe Key Switch Page.
The Harmonic button turns the Harmonic on/off. The buttoncan be controlled by a Key Switch selected on the Settings Page.
Go to Index: 2 9
About String Selection
With string instruments, like the banjo, a certain note can often be played onmultiple strings. For example, D3 can be played on all four strings of the banjo,with each string having its own very distinctive sound.
When a real banjo player plays a note on the banjo, he will typically choose thestring on which the note can be played with a minimum of effort. That is,without moving the left hand too much.
When you play the sampled banjo instrument from a keyboard, it's a littlemore difficult to deal with the string selection.So we've made a script that will help you taking care of the string selection.
There are two different ways to select the strings that will be played:
1. You can either set/select a Fret Position, and then the scripted string-algorithm will automatically select the correct string according to the FretPosition.The Fret Position is set/selected with Key Switches (yellow color code).
2. Or you can override the Fret Position and Force/Impose the string thatyou want to play. You Impose a string by holding down a Key Switch (redcolor code).When you release the Impose String Key Switch key, the Fret Positionwill return back to the last selected position.
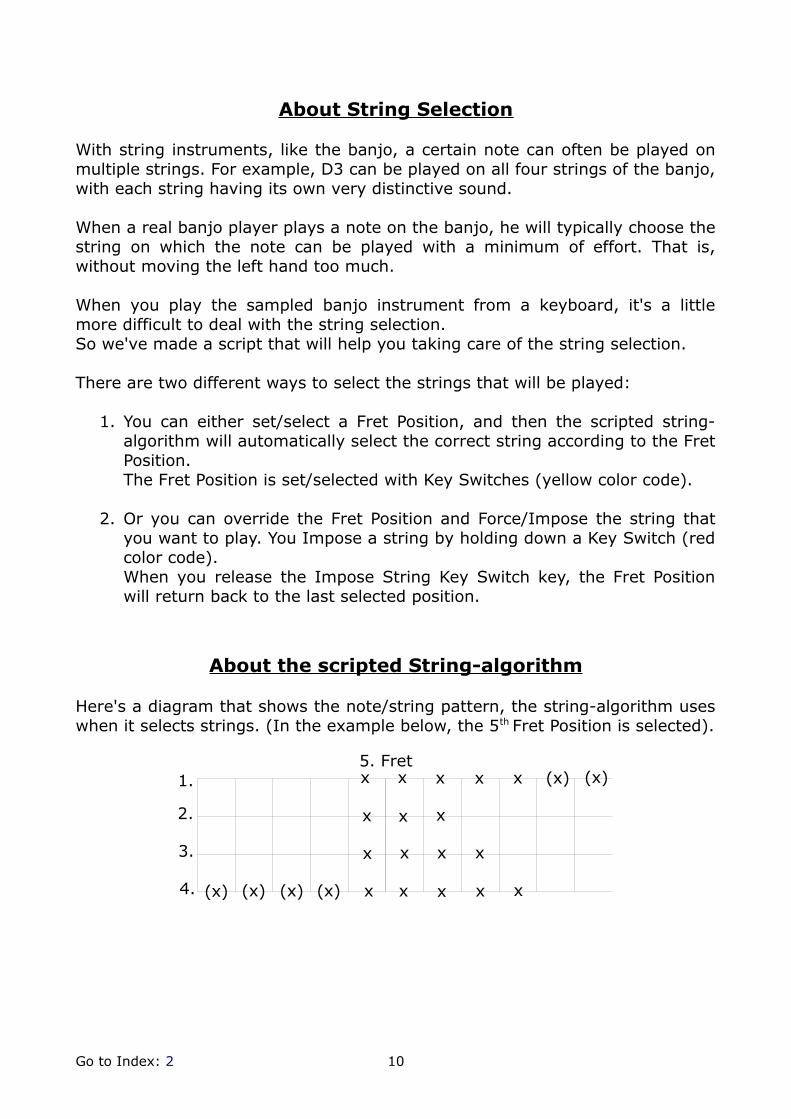
About the scripted String-algorithm
Here's a diagram that shows the note/string pattern, the string-algorithm useswhen it selects strings. (In the example below, the 5th Fret Position is selected).
Go to Index: 2 10
1.
2.
3.
4.
5. Fret
x xx x x
xxxx
x x x
x x x x x (x) (x)
(x)(x)(x)(x)

About the scripted Fret-algorithm
If you turn on the Auto Fret button, then a scripted Fret-algorithm kicks inand helps you select the Fret Position.
Here's how the Auto Fret-algorithm works:
As soon as a note is outside of the current "Fret Zone", a new Fret getsautomatically selected, all depending on if the note is higher or lower than thecurrent "Fret Zone".
A "Fret Zone" = All the notes that are inside the String-algorithm (the redrectangle) when a Fret is selected (five frets/half-steps).
In the example below, the 5th Fret Position is selected.
So playing a note outside the current “Fret Zone”, will move to a new Fret andhereby also move the “Fret Zone”.
If you want to override the Automatic Fret selection, you can still select theFret with the Key Switches.
About the Reverse Concept
The three Scruggs buttons – Fast/Slow, Half Step/Whole Stepand Up/Down – and the String Muting button, can all beReversed.
When you Reverse a button, via a mouse-click, the button isadded an asterisk after the button text, to show you that it isReversed.
The Reversed button now works in the opposite directionwhen you use the Key Switch to toggle the two differentarticulations.
Go to Index: 2 11
1.
2.
3.
4.
5. Fret
x xx x x
xxxx
x x x
x x x x x (x) (x)
(x)(x)(x)(x)

The Settings Page:
On the Settings Page you can adjust the various attack settings of the HammerOn and Pull Off Articulations. On this Page you can mouse-click the two Art.Buttons, to help you when you adjust the settings.
If the Pluck Position Velocity is turned On, then you can adjust the velocitylevels that will select the different Pluck Positions.
You can also select between 25 different combinations of Layers/PluckPositions.
Both the Articulation settings and the Pluck Position Velocity settings can beSaved/Recalled as Presets, and Saved/Loaded as a Bank.
Here you also adjust the Sustain Pedal release time and how much the velocitywill affect the Volume and the LP Filter Cutoff.
And last you can add body and string Resonance to the Banjo sound.
Go to Index: 2 12
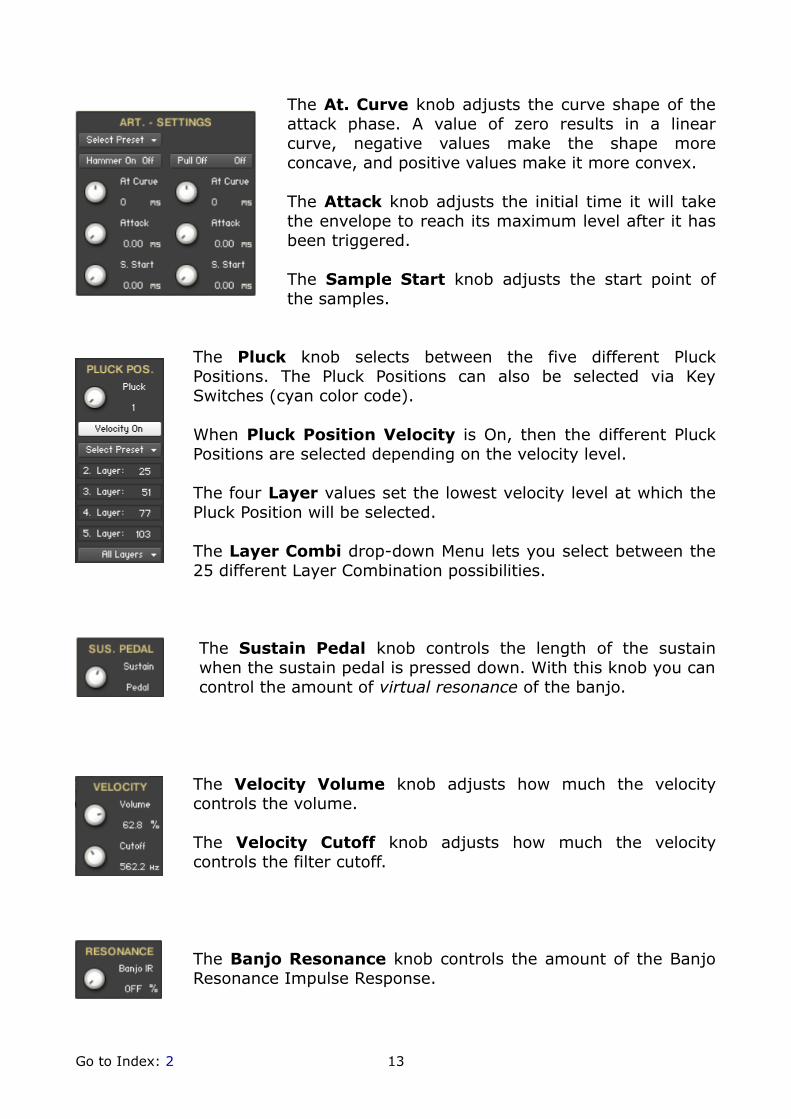
The At. Curve knob adjusts the curve shape of theattack phase. A value of zero results in a linearcurve, negative values make the shape moreconcave, and positive values make it more convex.
The Attack knob adjusts the initial time it will takethe envelope to reach its maximum level after it hasbeen triggered.
The Sample Start knob adjusts the start point ofthe samples.
The Pluck knob selects between the five different PluckPositions. The Pluck Positions can also be selected via KeySwitches (cyan color code).
When Pluck Position Velocity is On, then the different PluckPositions are selected depending on the velocity level.
The four Layer values set the lowest velocity level at which thePluck Position will be selected.
The Layer Combi drop-down Menu lets you select between the25 different Layer Combination possibilities.
The Sustain Pedal knob controls the length of the sustainwhen the sustain pedal is pressed down. With this knob you cancontrol the amount of virtual resonance of the banjo.
The Velocity Volume knob adjusts how much the velocitycontrols the volume.
The Velocity Cutoff knob adjusts how much the velocitycontrols the filter cutoff.
The Banjo Resonance knob controls the amount of the BanjoResonance Impulse Response.
Go to Index: 2 13

The P.B./Vibrato Page
On the P.B./Vibrato Page you select and adjust all the various Pitch Bend andVibrato settings.
The Pitch Bend range is set manually, and can be set independently for Up andDown Bend.
Moving the Pitch Wheel will only bend the last playing note.
The Pitch Bend can also have a scripted P.B. Vibrato added, when the PitchWheel is moved up or down and reaches its maximum.
The P.B. Vibrato can select between seven different waveforms.
The Vibrato can either work as a Global Vibrato or only add Vibrato to the lastplayed, and still held, note.
You can freely choose a CC# to control the Vibrato Amount, and set the Rangeof the controlled Vibrato Amount.
The Global Vibrato can select between two different waveforms.
The Last Note Vibrato can select between seven different waveforms.
Go to Index: 2 14
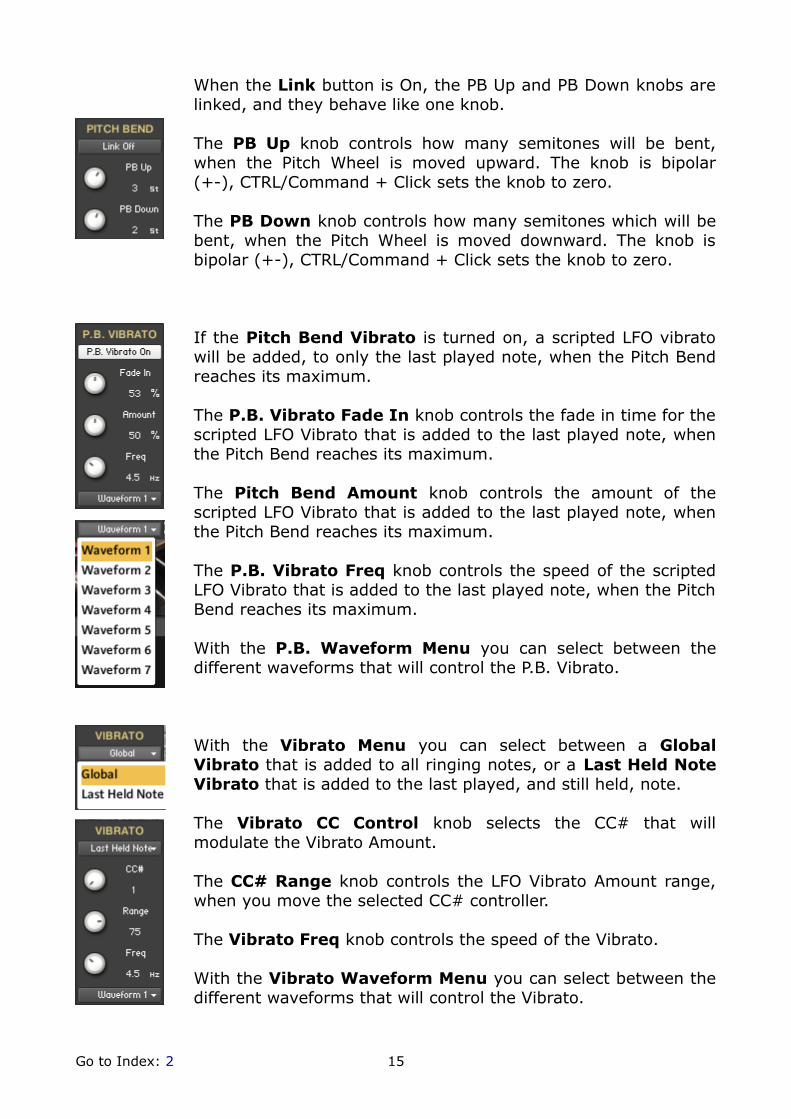
When the Link button is On, the PB Up and PB Down knobs arelinked, and they behave like one knob.
The PB Up knob controls how many semitones will be bent,when the Pitch Wheel is moved upward. The knob is bipolar(+-), CTRL/Command + Click sets the knob to zero.
The PB Down knob controls how many semitones which will bebent, when the Pitch Wheel is moved downward. The knob isbipolar (+-), CTRL/Command + Click sets the knob to zero.
If the Pitch Bend Vibrato is turned on, a scripted LFO vibratowill be added, to only the last played note, when the Pitch Bendreaches its maximum.
The P.B. Vibrato Fade In knob controls the fade in time for thescripted LFO Vibrato that is added to the last played note, whenthe Pitch Bend reaches its maximum.
The Pitch Bend Amount knob controls the amount of thescripted LFO Vibrato that is added to the last played note, whenthe Pitch Bend reaches its maximum.
The P.B. Vibrato Freq knob controls the speed of the scriptedLFO Vibrato that is added to the last played note, when the PitchBend reaches its maximum.
With the P.B. Waveform Menu you can select between thedifferent waveforms that will control the P.B. Vibrato.
With the Vibrato Menu you can select between a GlobalVibrato that is added to all ringing notes, or a Last Held NoteVibrato that is added to the last played, and still held, note.
The Vibrato CC Control knob selects the CC# that willmodulate the Vibrato Amount.
The CC# Range knob controls the LFO Vibrato Amount range,when you move the selected CC# controller.
The Vibrato Freq knob controls the speed of the Vibrato.
With the Vibrato Waveform Menu you can select between thedifferent waveforms that will control the Vibrato.
Go to Index: 2 15
About the Intelligent Pitch Bend
With the new scripted Intelligent Pitch Bend algorithm you can now do anykind of bend (one string bend):
1. Play one note and P.B.
2. Play a note and let it ring while you play a second note and P.B., thenonly the second (or last played note) will be P.B.
3. P.B. and then play a note, then move P.B. back to zero. If you have P.B.Vibrato turned on, then it'll be automatically ignored in this case.
4. Play one note and P.B. and then play a second note while you still holddown the first note/key, then only the first note is P.B.
Go to Index: 2 16
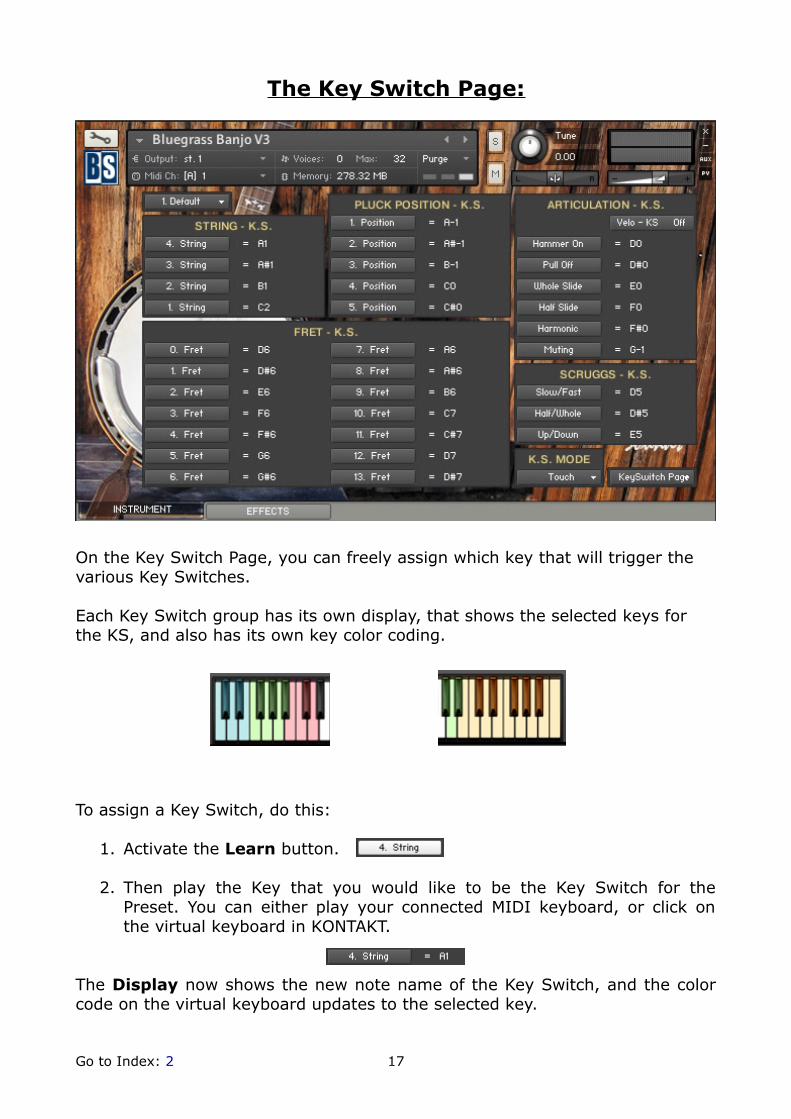
The Key Switch Page:
On the Key Switch Page, you can freely assign which key that will trigger the various Key Switches.
Each Key Switch group has its own display, that shows the selected keys for the KS, and also has its own key color coding.
To assign a Key Switch, do this:
1. Activate the Learn button.
2. Then play the Key that you would like to be the Key Switch for thePreset. You can either play your connected MIDI keyboard, or click onthe virtual keyboard in KONTAKT.
The Display now shows the new note name of the Key Switch, and the colorcode on the virtual keyboard updates to the selected key.
Go to Index: 2 17
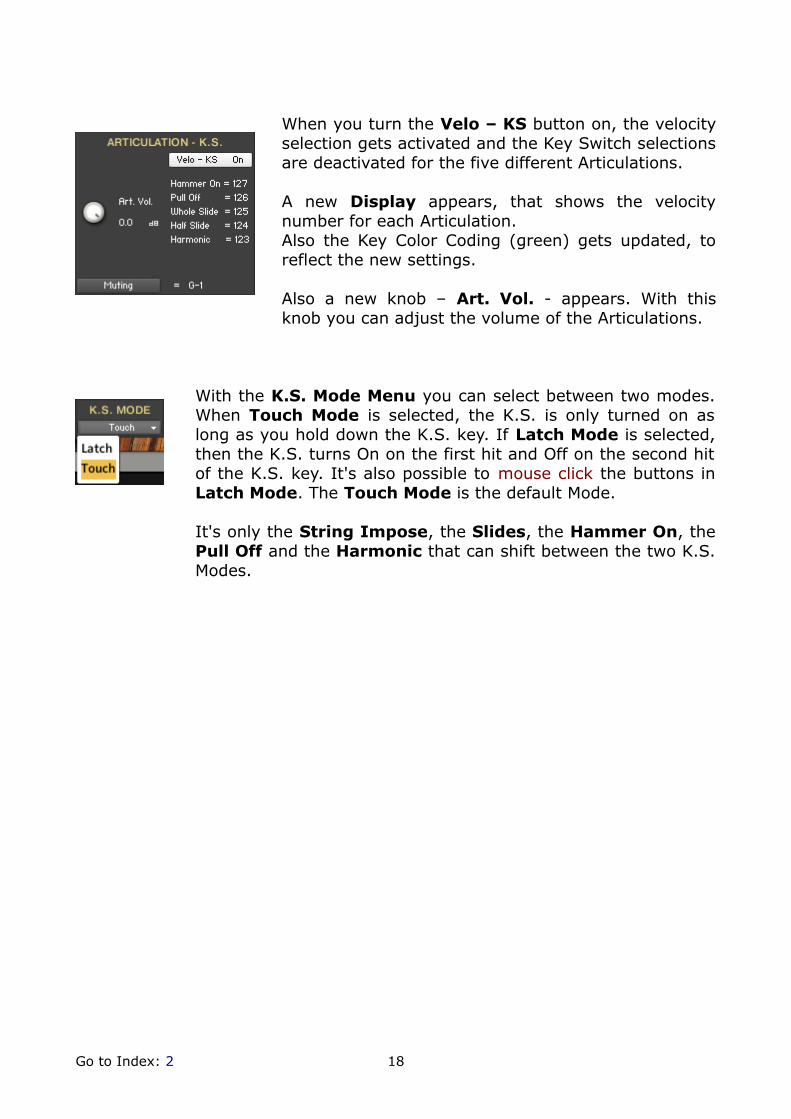
When you turn the Velo – KS button on, the velocityselection gets activated and the Key Switch selectionsare deactivated for the five different Articulations.
A new Display appears, that shows the velocitynumber for each Articulation. Also the Key Color Coding (green) gets updated, toreflect the new settings.
Also a new knob – Art. Vol. - appears. With thisknob you can adjust the volume of the Articulations.
With the K.S. Mode Menu you can select between two modes.When Touch Mode is selected, the K.S. is only turned on aslong as you hold down the K.S. key. If Latch Mode is selected,then the K.S. turns On on the first hit and Off on the second hitof the K.S. key. It's also possible to mouse click the buttons inLatch Mode. The Touch Mode is the default Mode.
It's only the String Impose, the Slides, the Hammer On, thePull Off and the Harmonic that can shift between the two K.S.Modes.
Go to Index: 2 18

The Effects Panel
The Effect Panel has four different Pages. Here you select and edit all thevarious Effect parameters. You can also Save/Recall up to six Presets for eachEffect, and Save/Load the Presets as Banks.
The Effects On/Off and the Pages:
The four Effect buttons turn the variousEffects On and Off, and open thecorresponding Page.You can also navigate between the differentEffect Pages, using the Page Menu.
Go to Index: 2 19
The EQ Page:
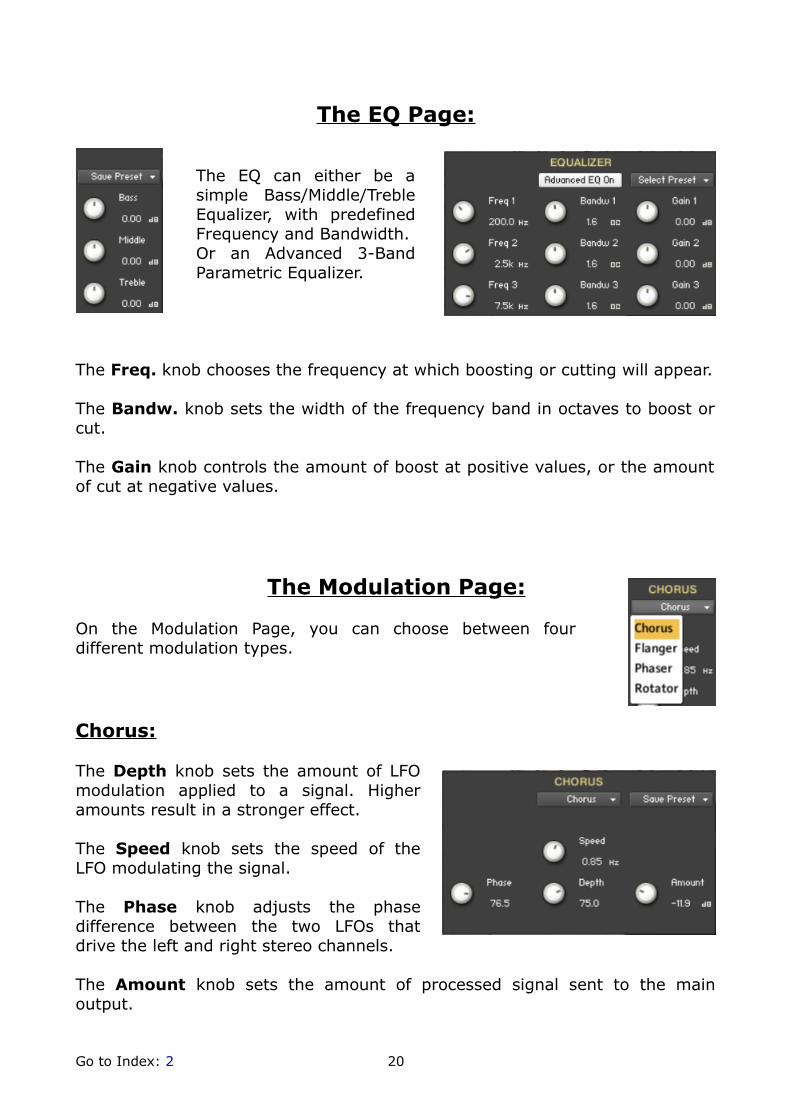
The EQ can either be asimple Bass/Middle/TrebleEqualizer, with predefinedFrequency and Bandwidth.Or an Advanced 3-BandParametric Equalizer.
The Freq. knob chooses the frequency at which boosting or cutting will appear.
The Bandw. knob sets the width of the frequency band in octaves to boost orcut.
The Gain knob controls the amount of boost at positive values, or the amountof cut at negative values.
The Modulation Page:
On the Modulation Page, you can choose between fourdifferent modulation types.
Chorus:
The Depth knob sets the amount of LFOmodulation applied to a signal. Higheramounts result in a stronger effect.
The Speed knob sets the speed of theLFO modulating the signal.
The Phase knob adjusts the phasedifference between the two LFOs thatdrive the left and right stereo channels.
The Amount knob sets the amount of processed signal sent to the mainoutput.
Go to Index: 2 20
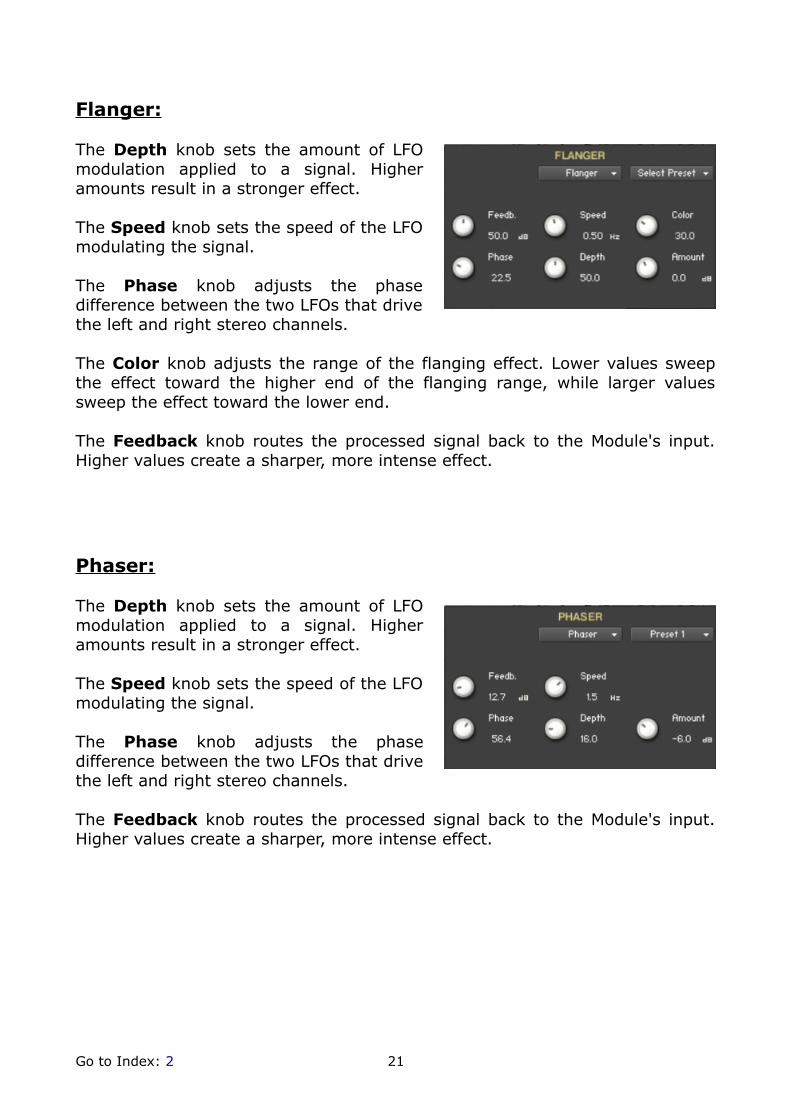
Flanger:
The Depth knob sets the amount of LFOmodulation applied to a signal. Higheramounts result in a stronger effect.
The Speed knob sets the speed of the LFOmodulating the signal.
The Phase knob adjusts the phasedifference between the two LFOs that drivethe left and right stereo channels.
The Color knob adjusts the range of the flanging effect. Lower values sweepthe effect toward the higher end of the flanging range, while larger valuessweep the effect toward the lower end.
The Feedback knob routes the processed signal back to the Module's input.Higher values create a sharper, more intense effect.
Phaser:
The Depth knob sets the amount of LFOmodulation applied to a signal. Higheramounts result in a stronger effect.
The Speed knob sets the speed of the LFOmodulating the signal.
The Phase knob adjusts the phasedifference between the two LFOs that drivethe left and right stereo channels.
The Feedback knob routes the processed signal back to the Module's input.Higher values create a sharper, more intense effect.
Go to Index: 2 21

Rotator:
The Acceleration High/Low knobs adjusts how quickly the rotors of thetreble/bass parts of the cabinets will react to speed changes. At the right-mostposition, the speaker will change it's speed instantly.
The Balance knob sets the ratio of the sound produced by the rotatingspeakers high frequency horn compared to the low frequency woofer. Highervalues produce more highs, lower values more bass.
The Distance knob edits the distance between the virtual microphones andthe rotating speaker. Higher values increase the distance.
The Wet Mix knob controls the effects strength. Turn fully clockwise to hearthe rotating speakers only.
The Output knob sets the rotators overall output level.
The Speed button switches the speed of the rotator speaker. Choose betweenslow and fast.
Go to Index: 2 22
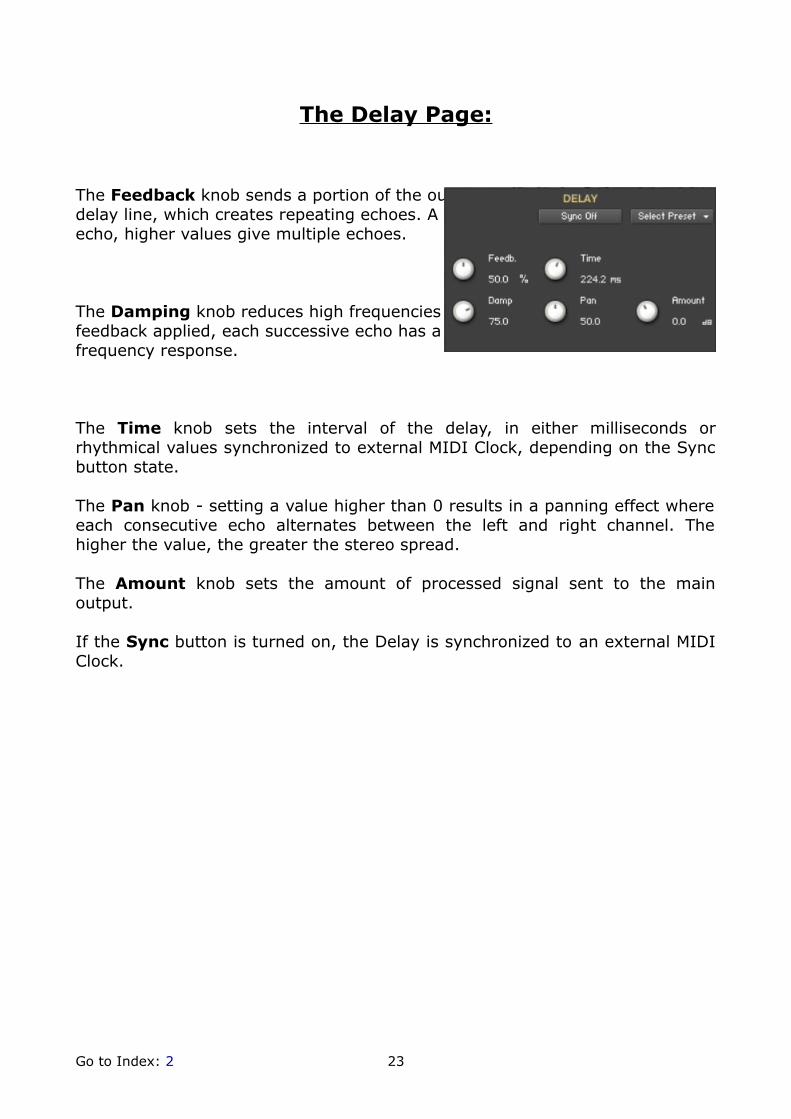
The Delay Page:
The Feedback knob sends a portion of the output back into the input of thedelay line, which creates repeating echoes. A value of 0 produces only oneecho, higher values give multiple echoes.
The Damping knob reduces high frequencies in the delayed signal. Withfeedback applied, each successive echo has a progressively lower high-frequency response.
The Time knob sets the interval of the delay, in either milliseconds orrhythmical values synchronized to external MIDI Clock, depending on the Syncbutton state.
The Pan knob - setting a value higher than 0 results in a panning effect whereeach consecutive echo alternates between the left and right channel. Thehigher the value, the greater the stereo spread.
The Amount knob sets the amount of processed signal sent to the mainoutput.
If the Sync button is turned on, the Delay is synchronized to an external MIDIClock.
Go to Index: 2 23
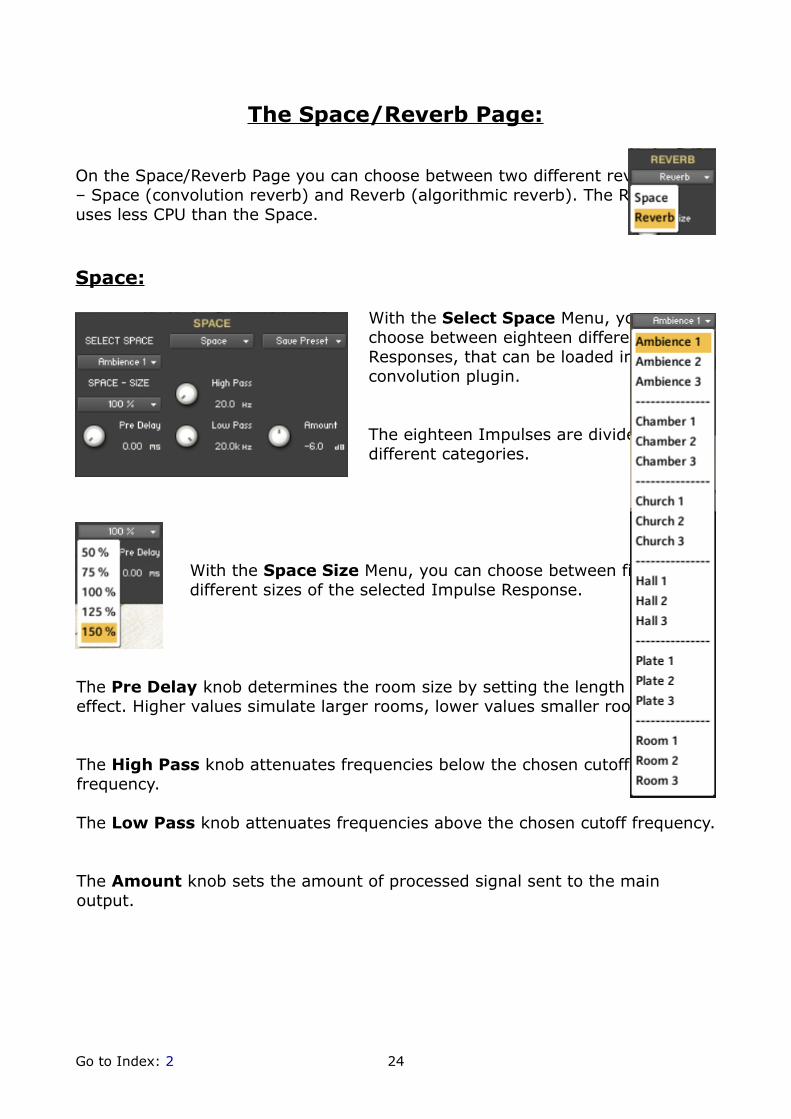
The Space/Reverb Page:
On the Space/Reverb Page you can choose between two different reverb types– Space (convolution reverb) and Reverb (algorithmic reverb). The Reverbuses less CPU than the Space.
Space:
With the Select Space Menu, you canchoose between eighteen different ImpulseResponses, that can be loaded into theconvolution plugin.
The eighteen Impulses are divided into sixdifferent categories.
With the Space Size Menu, you can choose between fivedifferent sizes of the selected Impulse Response.
The Pre Delay knob determines the room size by setting the length of theeffect. Higher values simulate larger rooms, lower values smaller rooms.
The High Pass knob attenuates frequencies below the chosen cutofffrequency.
The Low Pass knob attenuates frequencies above the chosen cutoff frequency.
The Amount knob sets the amount of processed signal sent to the mainoutput.
Go to Index: 2 24
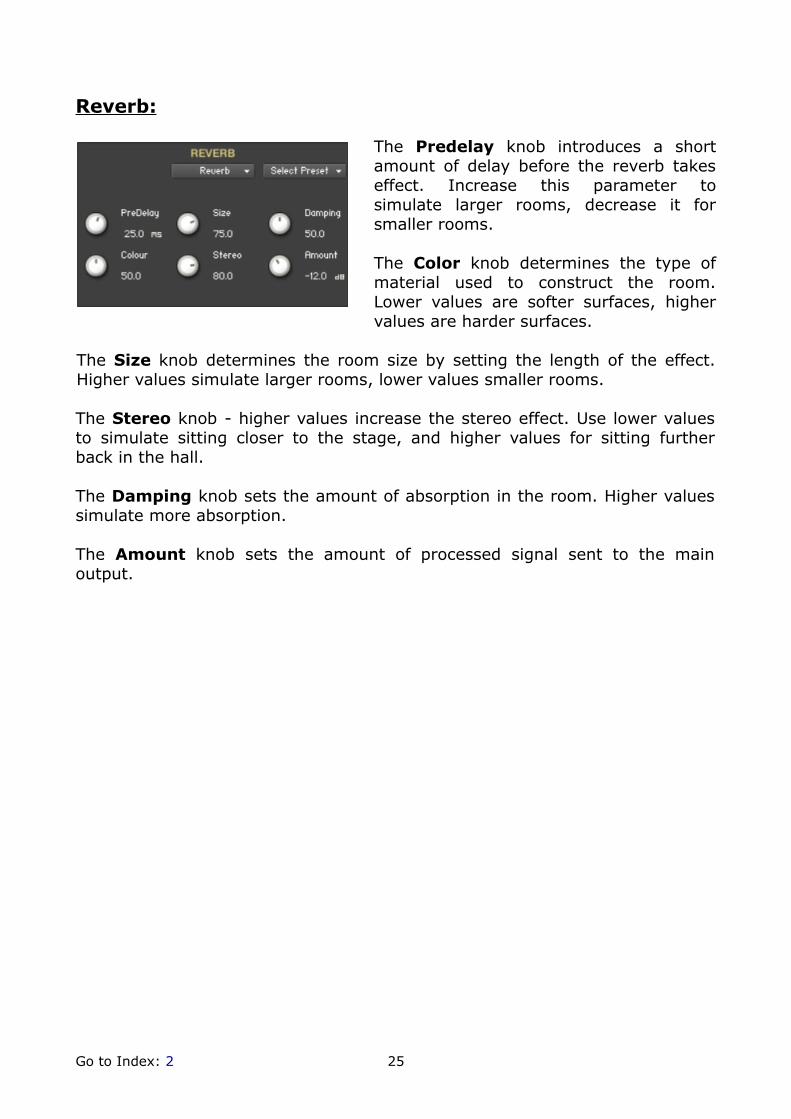
Reverb:
The Predelay knob introduces a shortamount of delay before the reverb takeseffect. Increase this parameter tosimulate larger rooms, decrease it forsmaller rooms.
The Color knob determines the type ofmaterial used to construct the room.Lower values are softer surfaces, highervalues are harder surfaces.
The Size knob determines the room size by setting the length of the effect.Higher values simulate larger rooms, lower values smaller rooms.
The Stereo knob - higher values increase the stereo effect. Use lower valuesto simulate sitting closer to the stage, and higher values for sitting furtherback in the hall.
The Damping knob sets the amount of absorption in the room. Higher valuessimulate more absorption.
The Amount knob sets the amount of processed signal sent to the mainoutput.
Go to Index: 2 25
==============================================
Script, Patch and Presets by Bo Clausen.
Enjoy the Bluegrass Banjo V3!
Dennis Burns - Bolder Sounds – February 2016
==============================================
Customer Support
For any questions, technical issues inquiries etc .... Please contact BolderSounds via email at [email protected].
==============================================
LICENSE AGREEMENT (EULA)
You have purchased a single-user license use these samples to be used in anytype of music production, i.e. making demos, records, remixes, commercials,jingles, post productions, commissioned pieces, sound tracks for film, theater,musicals, live performances, computer games or multimedia. Samples may notbe utilized or resold in the form of Sample Library Music or Sample-relatedendeavors (e.g. “Joe’s Sample Collection” which contains our products).Written permission from Bolder Sounds is required. You CAN NOT trade, re-sell, lend, rent, copy, duplicate, upload or download to any database, BBS, orServer any of our sounds because Bolder Sounds owns the rights to thesamples and programs, Bolder is licensing these to a single user for musicproduction. Use of these samples MAY NOT be utilized in separate commercialapplications such as the Apple ipad or the Android etc.. without written consentfrom Bolder Sounds.
Installation of this library constitutes full acceptance of these terms.
Creative Sample Libraries Since 1992
Go to Index: 2 26