practical application development with the cics … application development with the cics ......
TRANSCRIPT

Practical ApplicationDevelopment with the CICSJVM Server
This tutorial practically shows the installation and configuration of the CICSExplorer as well as an example for the development of Java applications for theJVM Server.The CICS Explorer is an interface for the local Eclipse IDE that is used for themanagement of CICS JVM Servers. It enables to communicate with the USSfile system and with the CICS region.In order to create a Java application for the JVM Server the following taskshave to be carried out (excluding the configurational tasks). Note that thebasic procedure for this tutorial has been adapted from Transaction Server forz/OS Version 4 Release 2 - Java Applications in CICS.
1. Create a Plug-in Project in Eclipse that represents the OSGi bundle
2. Create a CICS bundle
3. Include the OSGi bundle into the CICS bundle and assign the JVM Servername needed for its execution
4. Export the CICS bundle into the USS file system
5. Create the following definitions in the CICS SM Perspective
(a) JVM Server
(b) Bundle
(c) Program
(d) Transaction
6. Install all definitions into the CICS region
A step by step procedure for all tasks is provided within this tutorial.
1

The interaction of OSGi bundles, the JVM Server, CICS programs and trans-actions is illustrated in the following
2
Install the CICS Explorer SDK into EclipseRequirements
• Eclipse IDE v. 3.7 (and higher).
• CICS Explorer SDK (download from http://www-01.ibm.com/software/
htp/cics/explorer/).
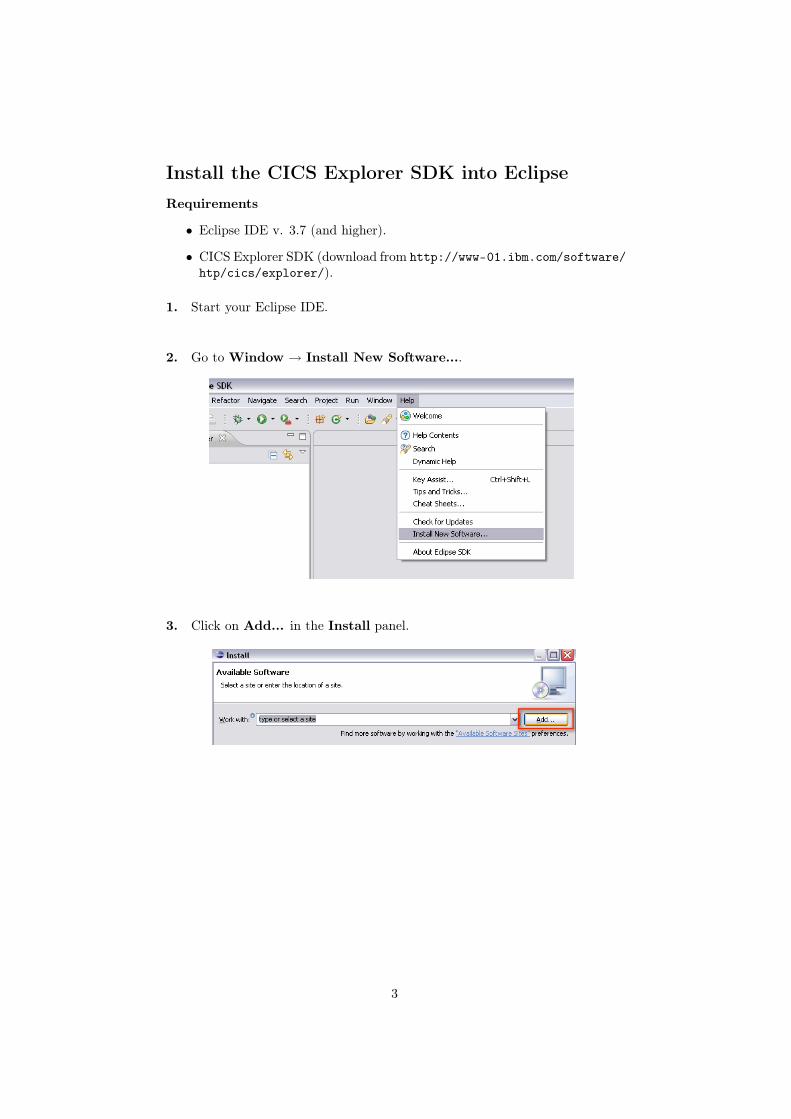
1. Start your Eclipse IDE.
2. Go to Window → Install New Software....
3. Click on Add... in the Install panel.
3

4. Name the repository, click on Archive... and browse to the CICS ExplorerSDK zip file.
5. Select all options in the Install panel and click Next.
6. Accept the license agreement and finish the installation.After restarting Eclipse several new Perspectives will be available. The onesimportant for this tutorial are the CICS SM and the z/OS.
4
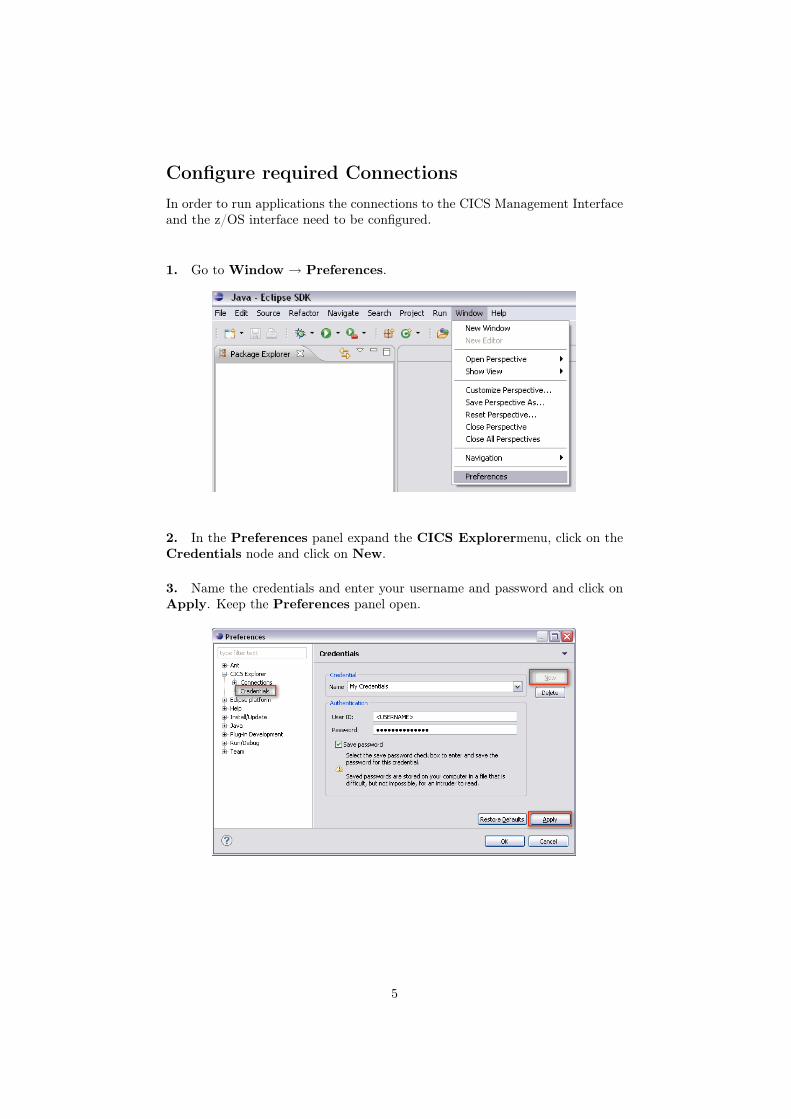
Configure required ConnectionsIn order to run applications the connections to the CICS Management Interfaceand the z/OS interface need to be configured.
1. Go to Window → Preferences.
2. In the Preferences panel expand the CICS Explorermenu, click on theCredentials node and click on New.
3. Name the credentials and enter your username and password and click onApply. Keep the Preferences panel open.
5
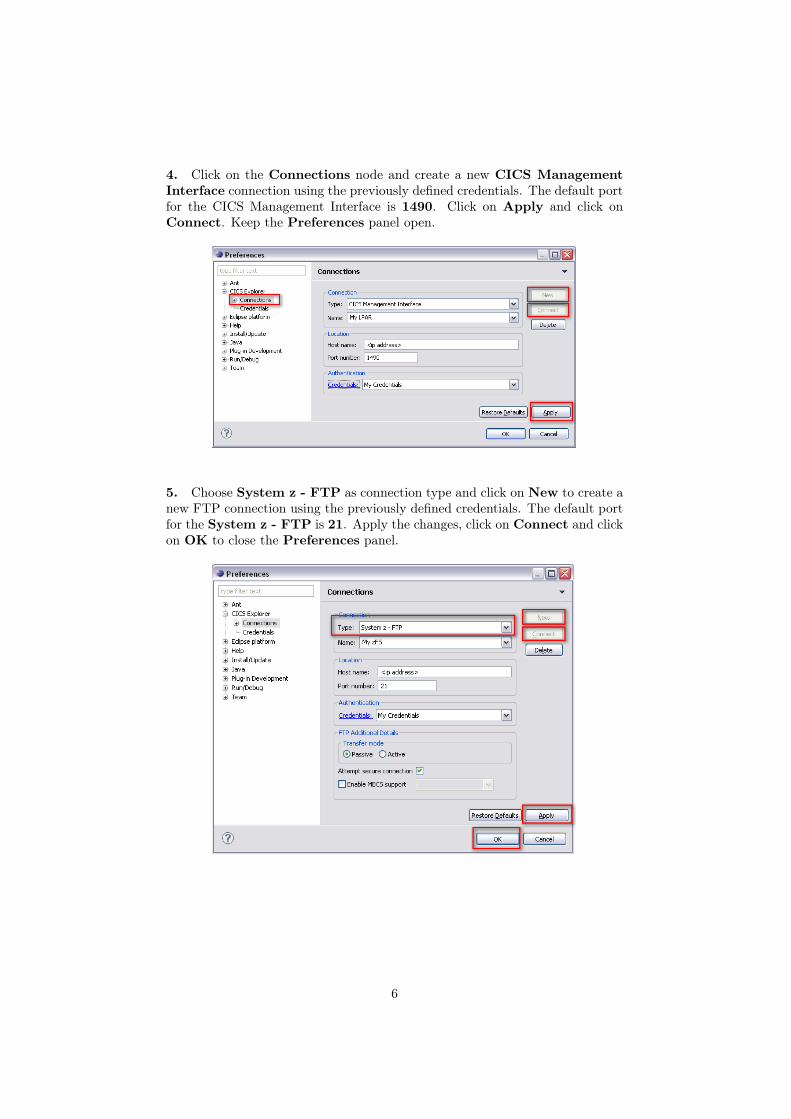
4. Click on the Connections node and create a new CICS ManagementInterface connection using the previously defined credentials. The default portfor the CICS Management Interface is 1490. Click on Apply and click onConnect. Keep the Preferences panel open.
5. Choose System z - FTP as connection type and click on New to create anew FTP connection using the previously defined credentials. The default portfor the System z - FTP is 21. Apply the changes, click on Connect and clickon OK to close the Preferences panel.
6
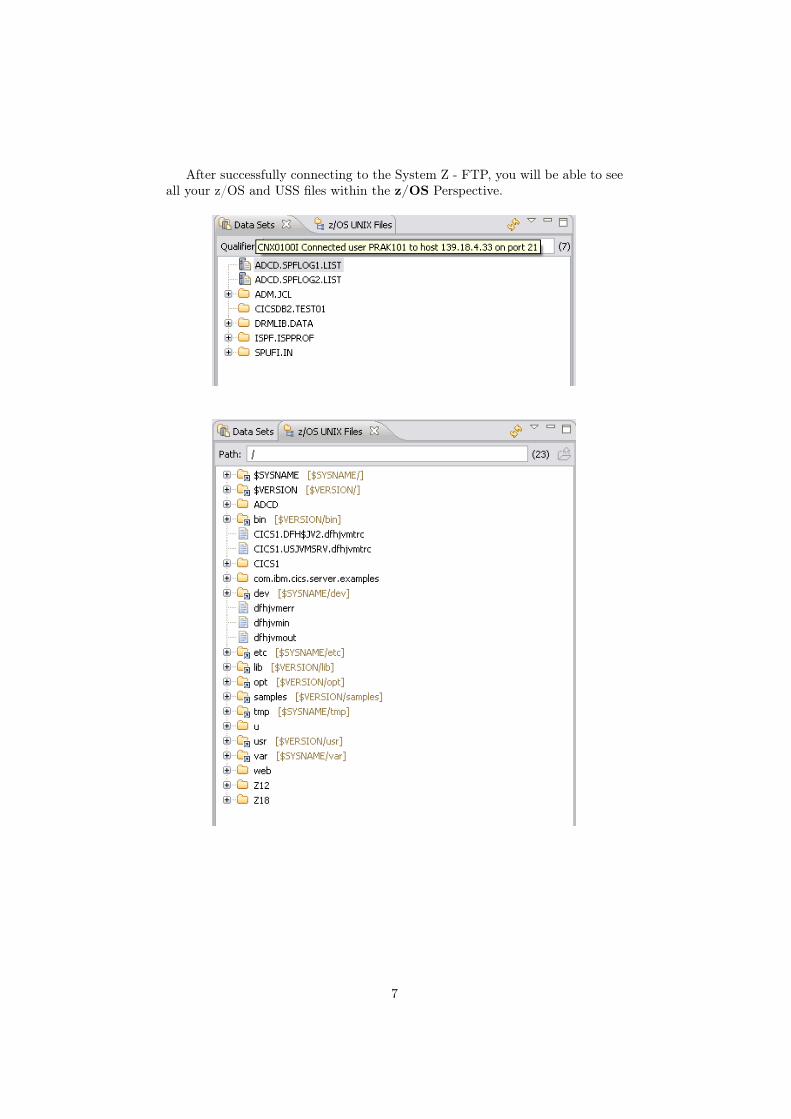
After successfully connecting to the System Z - FTP, you will be able to seeall your z/OS and USS files within the z/OS Perspective.
7
Configure the Target PlatformIn order to develop applications for the CICS JVM Server, the target platformneeds to be configured for the CICS TS 4.2 environment.
1. Go to Window → Preferences.
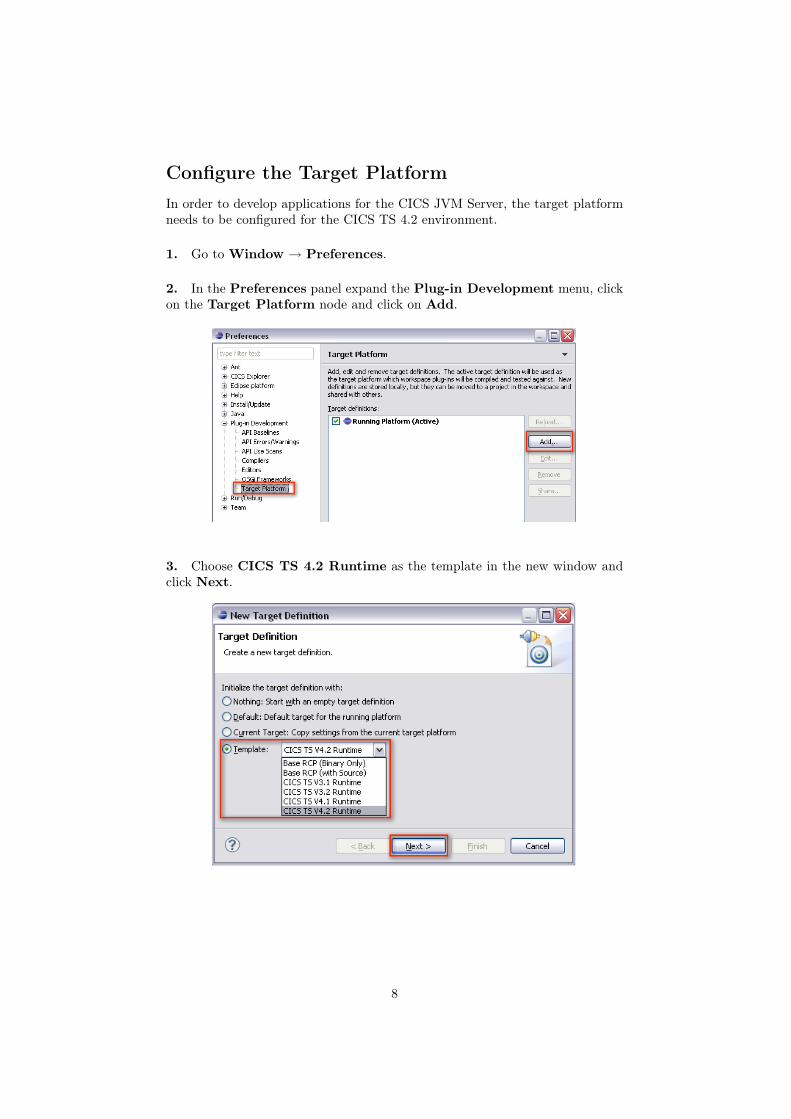
2. In the Preferences panel expand the Plug-in Development menu, clickon the Target Platform node and click on Add.
3. Choose CICS TS 4.2 Runtime as the template in the new window andclick Next.
8
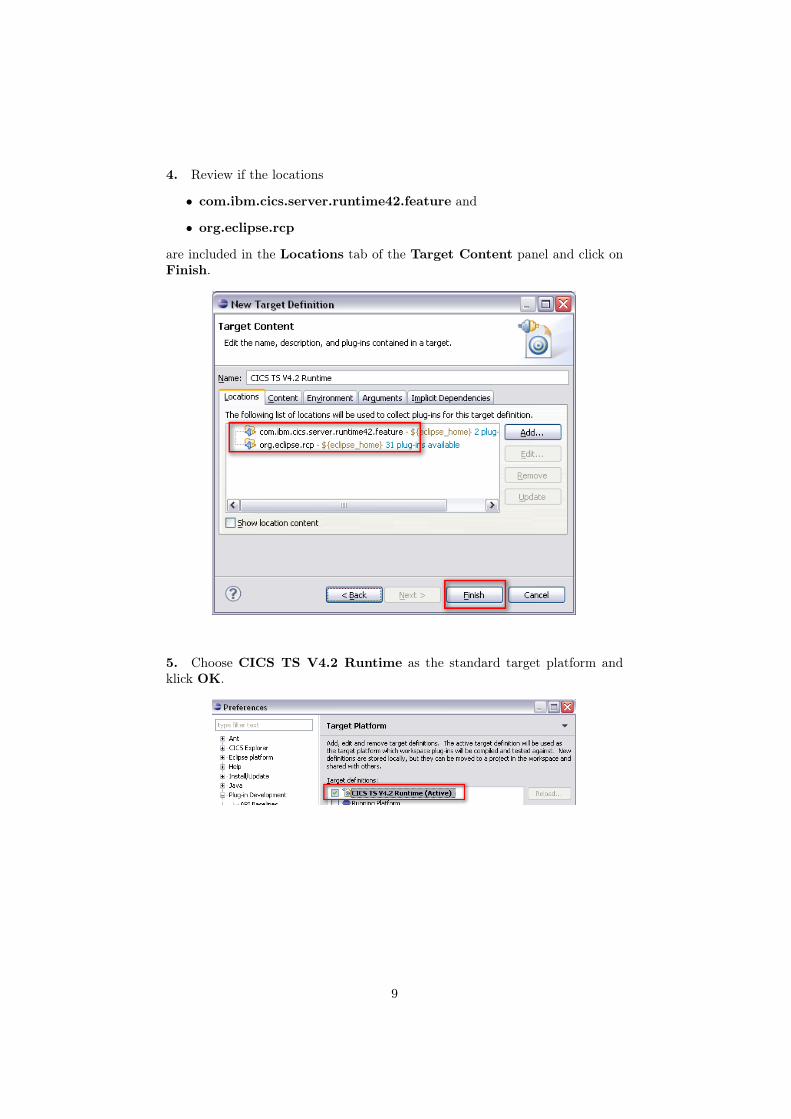
4. Review if the locations
• com.ibm.cics.server.runtime42.feature and
• org.eclipse.rcp
are included in the Locations tab of the Target Content panel and click onFinish.
5. Choose CICS TS V4.2 Runtime as the standard target platform andklick OK.
9

Create a HelloWorld ApplicationSince Eclipse is based on the OSGi Equinox Framework, OSGi bundles in Eclipseare designated as Plug-ins.
1. Open the Plug-in Development Perspective.
2. Create new Plug-in Project.
3. Enter the name of the project, choose standard as the target platform andclick Next.
10
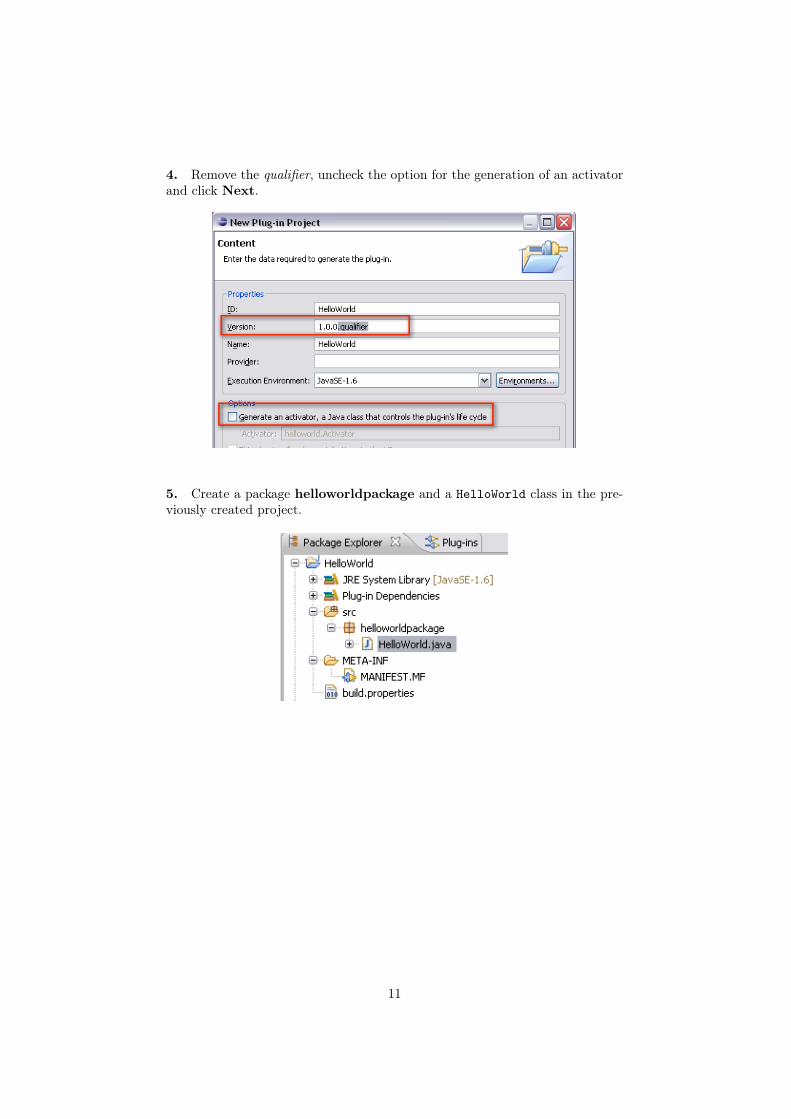
4. Remove the qualifier, uncheck the option for the generation of an activatorand click Next.
5. Create a package helloworldpackage and a HelloWorld class in the pre-viously created project.
11
6. Add the following code into the HelloWorld class (adapted from the HelloCICS World CICS Explorer Example).
package he l l owor ldpackage ;
import com . ibm . c i c s . s e r v e r . ∗ ;
pub l i c c l a s s HelloWorld {
pub l i c s t a t i c void main (CommAreaHolder CAH){
Task t = Task . getTask ( ) ;i f ( t == nu l l )
System . e r r . p r i n t l n (" HelloCICSWorld example : Can ’ t getTask ") ;
e l s et . out . p r i n t l n (" t r an sa c t i on s t a r t ed ") ;
t . out . p r i n t l n (" He l lo from a Java CICS app l i c a t i o n ") ;}
}
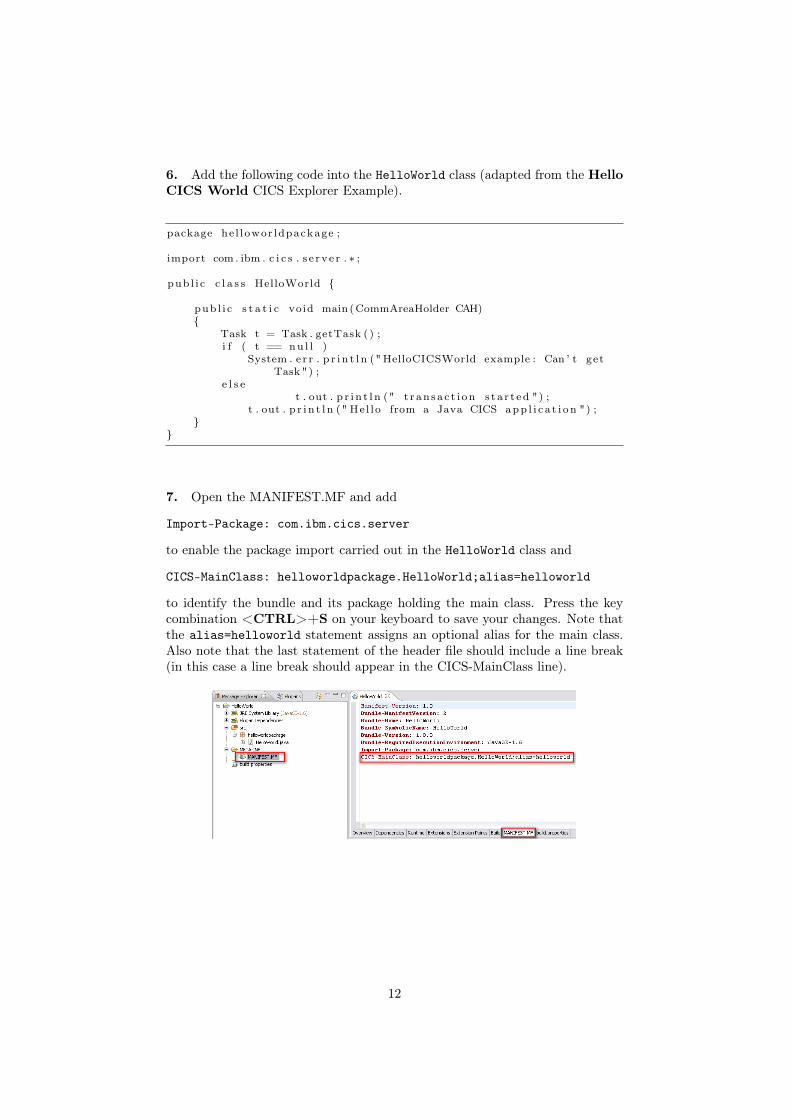
7. Open the MANIFEST.MF and add
Import-Package: com.ibm.cics.server
to enable the package import carried out in the HelloWorld class and
CICS-MainClass: helloworldpackage.HelloWorld;alias=helloworld
to identify the bundle and its package holding the main class. Press the keycombination <CTRL>+S on your keyboard to save your changes. Note thatthe alias=helloworld statement assigns an optional alias for the main class.Also note that the last statement of the header file should include a line break(in this case a line break should appear in the CICS-MainClass line).
12
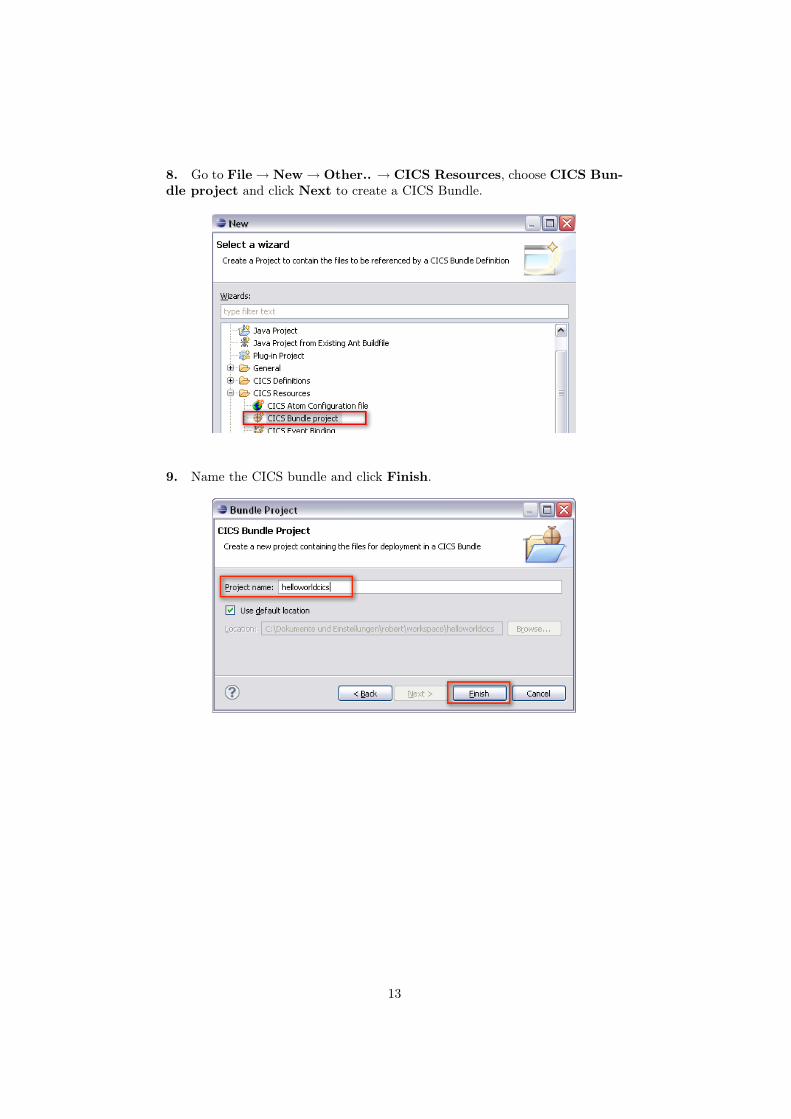
8. Go to File → New → Other.. → CICS Resources, choose CICS Bun-dle project and click Next to create a CICS Bundle.
9. Name the CICS bundle and click Finish.
13
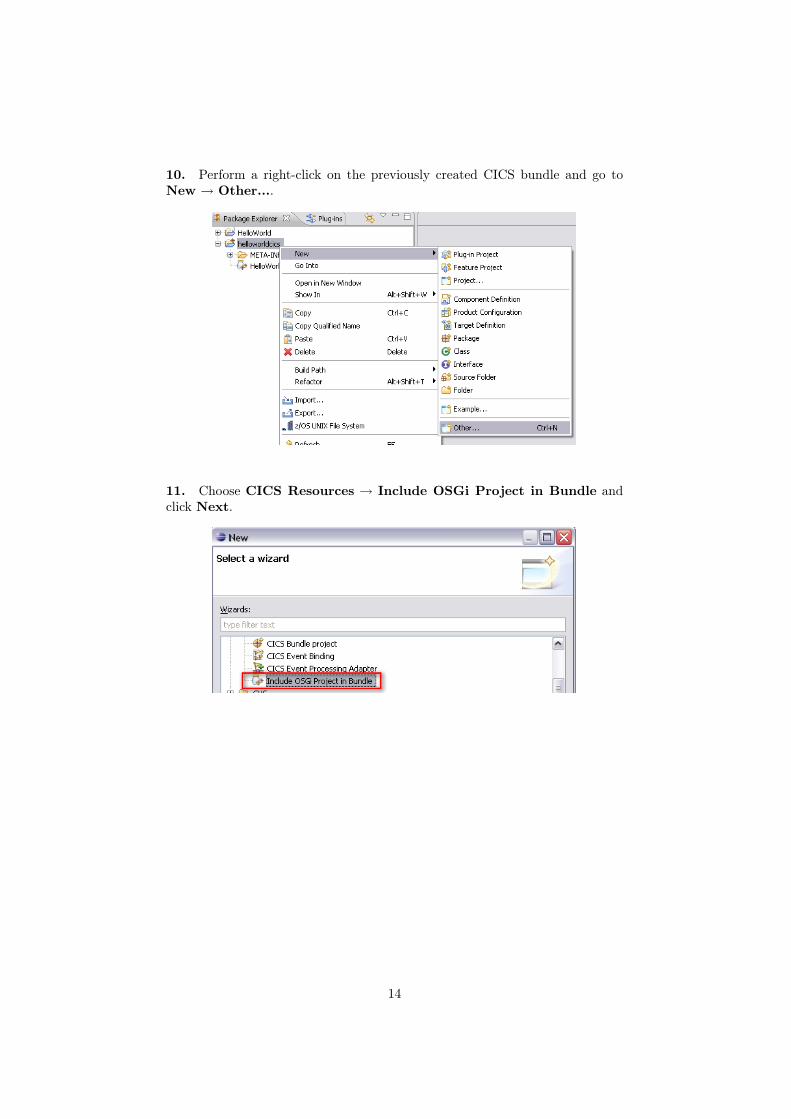
10. Perform a right-click on the previously created CICS bundle and go toNew → Other....
11. Choose CICS Resources → Include OSGi Project in Bundle andclick Next.
14
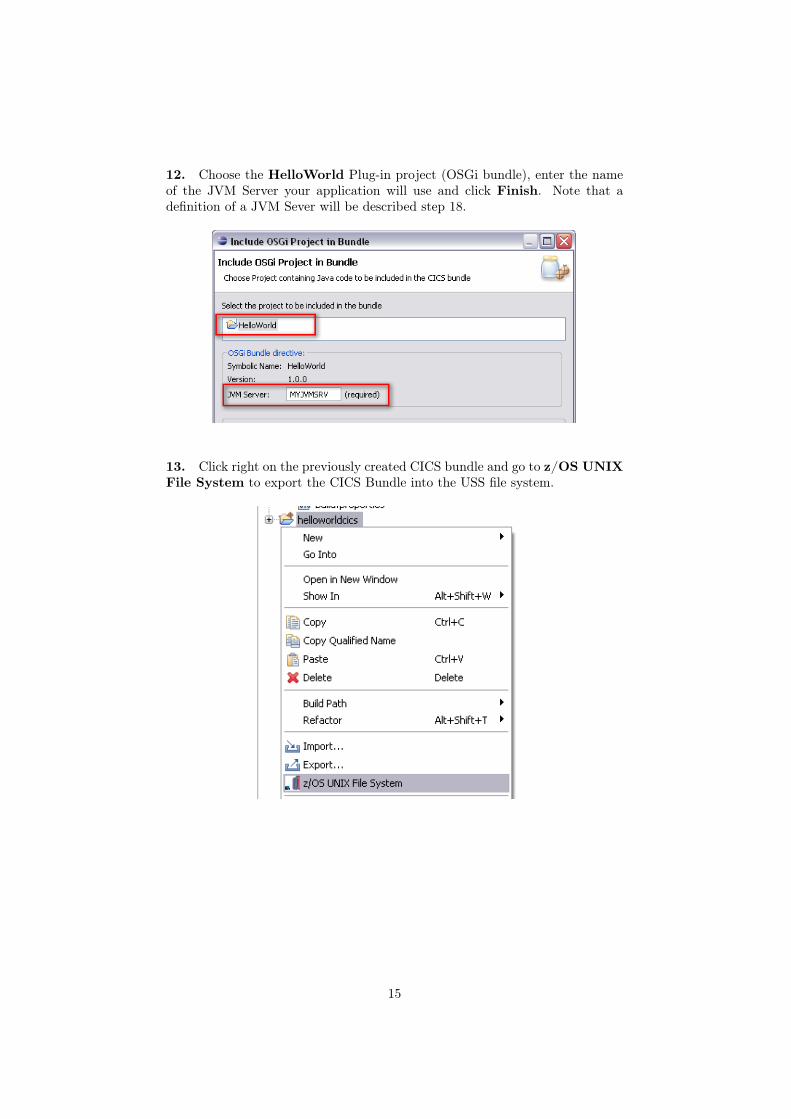
12. Choose the HelloWorld Plug-in project (OSGi bundle), enter the nameof the JVM Server your application will use and click Finish. Note that adefinition of a JVM Sever will be described step 18.
13. Click right on the previously created CICS bundle and go to z/OS UNIXFile System to export the CICS Bundle into the USS file system.
15

14. Choose the export directory and click Finish.
15. Open the CICS SM Perspective.
16. Click on the CICSPlex Repositories view, expand your CICS repositoryand select your CICS region
17. Since CICS requires a definition for each resource, it is mandatory to definea JVM Server, an OSGi bundle a program and a transaction.Go to Definitions → Bundle Definitions / JVM Server Definitions /
16
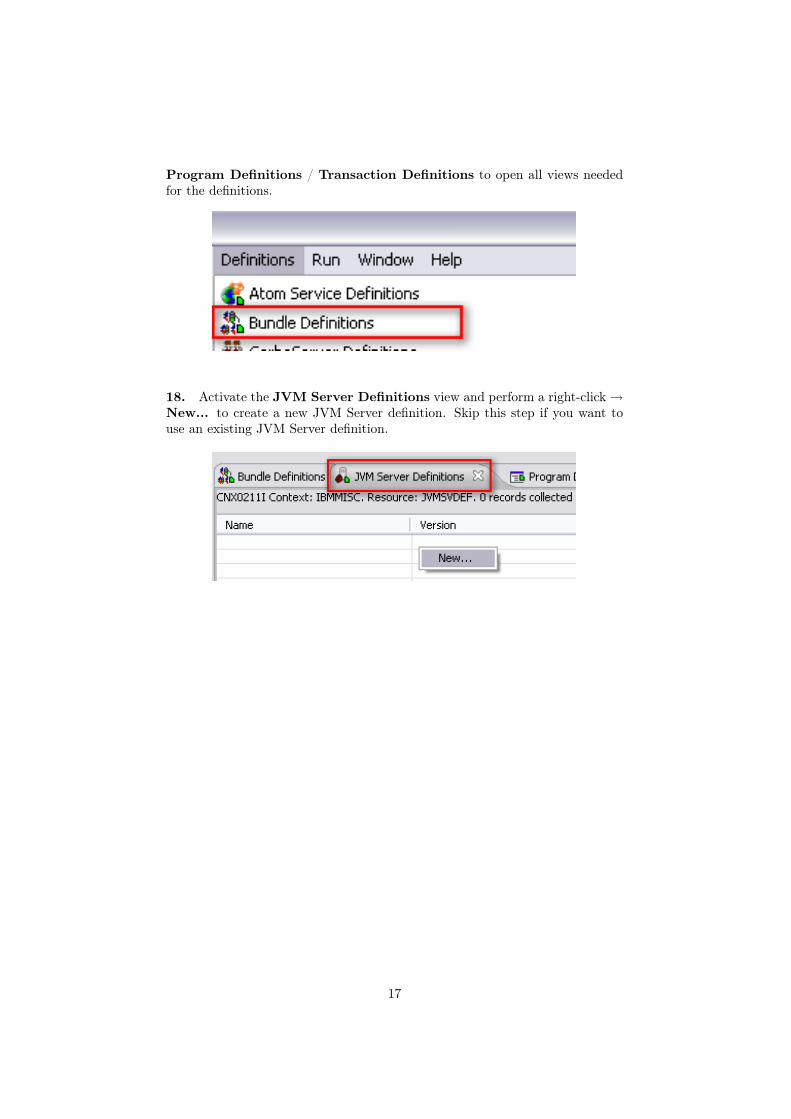
Program Definitions / Transaction Definitions to open all views neededfor the definitions.
18. Activate the JVM Server Definitions view and perform a right-click →New... to create a new JVM Server definition. Skip this step if you want touse an existing JVM Server definition.
17
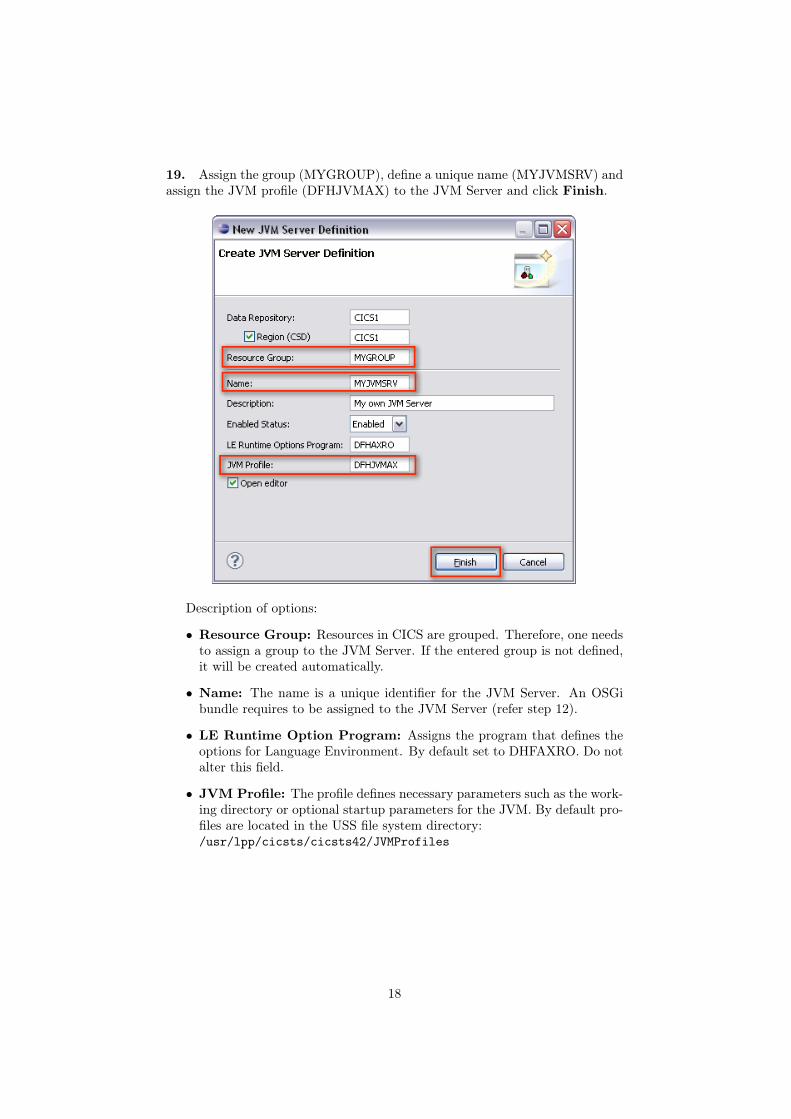
19. Assign the group (MYGROUP), define a unique name (MYJVMSRV) andassign the JVM profile (DFHJVMAX) to the JVM Server and click Finish.
Description of options:
• Resource Group: Resources in CICS are grouped. Therefore, one needsto assign a group to the JVM Server. If the entered group is not defined,it will be created automatically.
• Name: The name is a unique identifier for the JVM Server. An OSGibundle requires to be assigned to the JVM Server (refer step 12).
• LE Runtime Option Program: Assigns the program that defines theoptions for Language Environment. By default set to DHFAXRO. Do notalter this field.
• JVM Profile: The profile defines necessary parameters such as the work-ing directory or optional startup parameters for the JVM. By default pro-files are located in the USS file system directory:/usr/lpp/cicsts/cicsts42/JVMProfiles
18

To get a user-friendlier look on your definitions, find your resource groupand click in it. With it being activated, only your personal definitions will bedisplayed.
20. Perform a right-click → Install... on the new created JVM Server defini-tion.
21. Choose the CICS region for the installation and click OK.
19
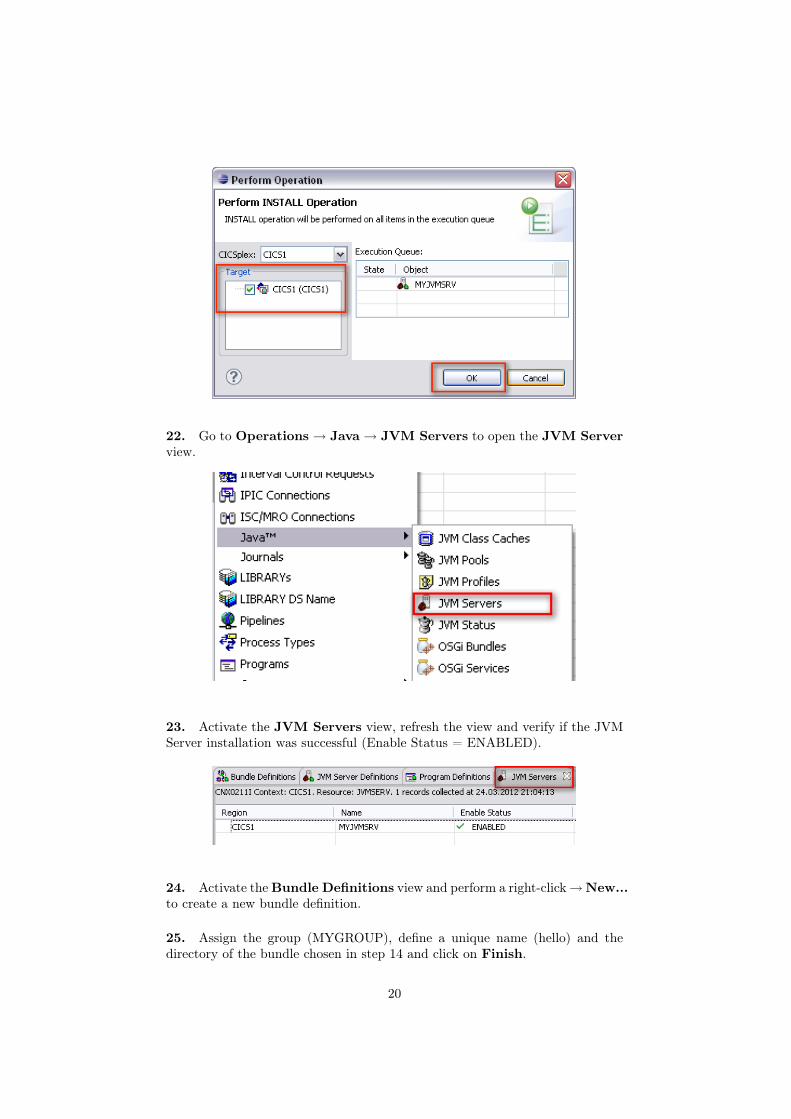
22. Go to Operations → Java → JVM Servers to open the JVM Serverview.
23. Activate the JVM Servers view, refresh the view and verify if the JVMServer installation was successful (Enable Status = ENABLED).
24. Activate the Bundle Definitions view and perform a right-click → New...to create a new bundle definition.
25. Assign the group (MYGROUP), define a unique name (hello) and thedirectory of the bundle chosen in step 14 and click on Finish.
20

26. Perform a right-click → Install... on the new created OSGi bundle defi-nition. Choose the CICS region for the installation and click OK.
21
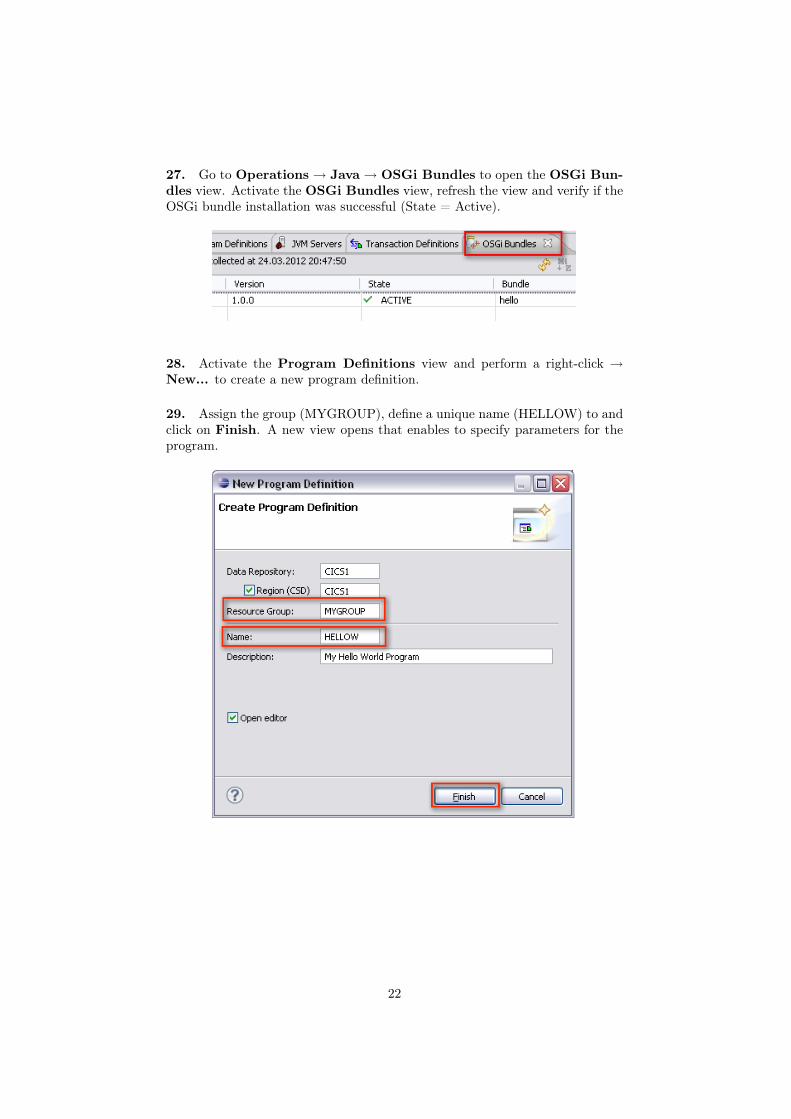
27. Go to Operations → Java → OSGi Bundles to open the OSGi Bun-dles view. Activate the OSGi Bundles view, refresh the view and verify if theOSGi bundle installation was successful (State = Active).
28. Activate the Program Definitions view and perform a right-click →New... to create a new program definition.
29. Assign the group (MYGROUP), define a unique name (HELLOW) to andclick on Finish. A new view opens that enables to specify parameters for theprogram.
22
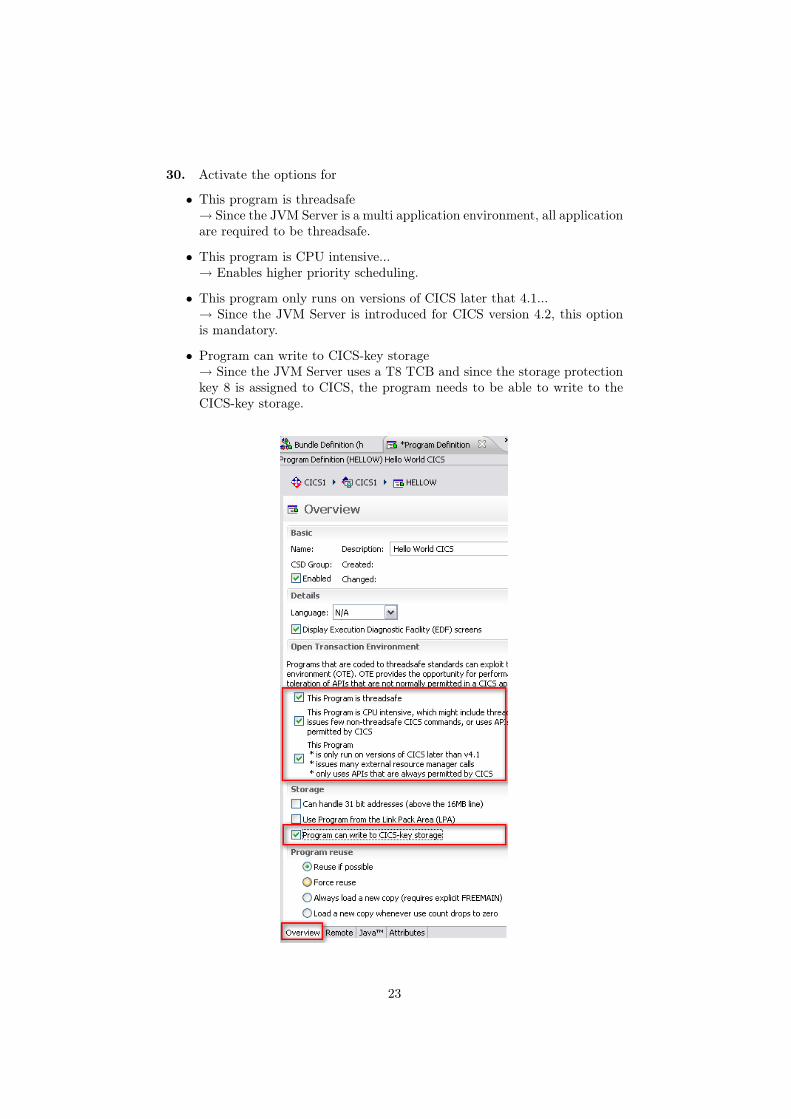
30. Activate the options for
• This program is threadsafe→ Since the JVM Server is a multi application environment, all applicationare required to be threadsafe.
• This program is CPU intensive...→ Enables higher priority scheduling.
• This program only runs on versions of CICS later that 4.1...→ Since the JVM Server is introduced for CICS version 4.2, this optionis mandatory.
• Program can write to CICS-key storage→ Since the JVM Server uses a T8 TCB and since the storage protectionkey 8 is assigned to CICS, the program needs to be able to write to theCICS-key storage.
23
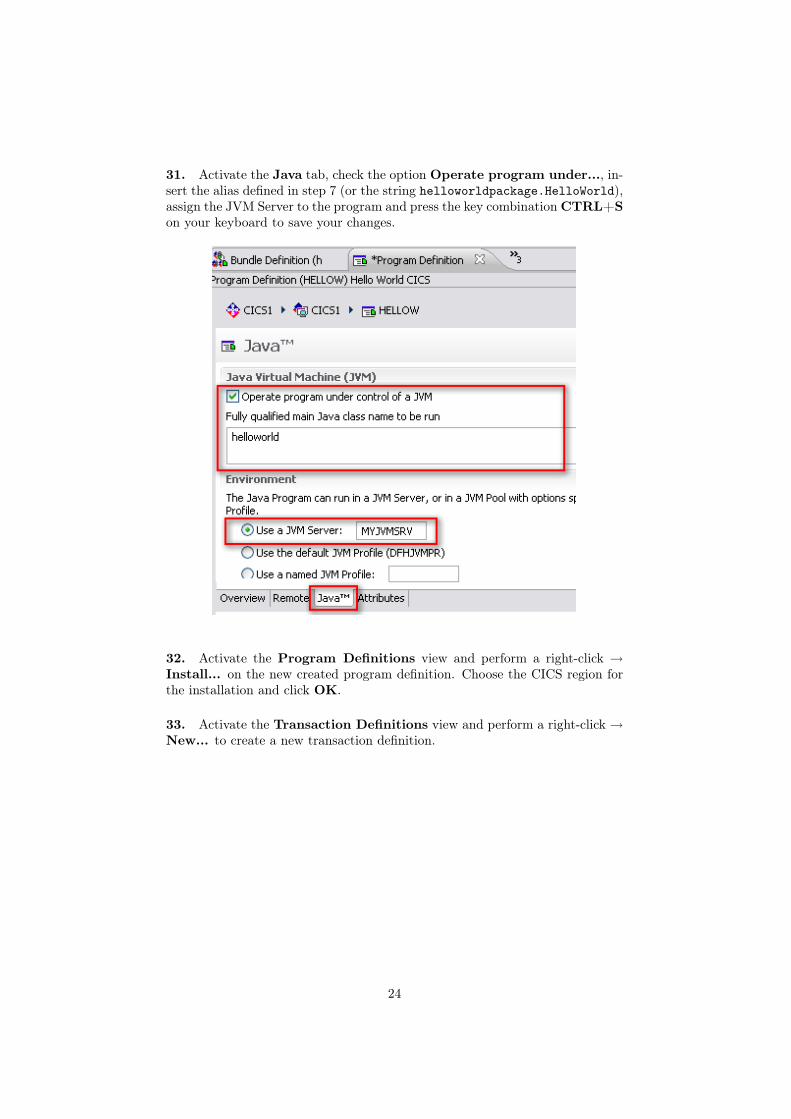
31. Activate the Java tab, check the option Operate program under..., in-sert the alias defined in step 7 (or the string helloworldpackage.HelloWorld),assign the JVM Server to the program and press the key combination CTRL+Son your keyboard to save your changes.
32. Activate the Program Definitions view and perform a right-click →Install... on the new created program definition. Choose the CICS region forthe installation and click OK.
33. Activate the Transaction Definitions view and perform a right-click →New... to create a new transaction definition.
24
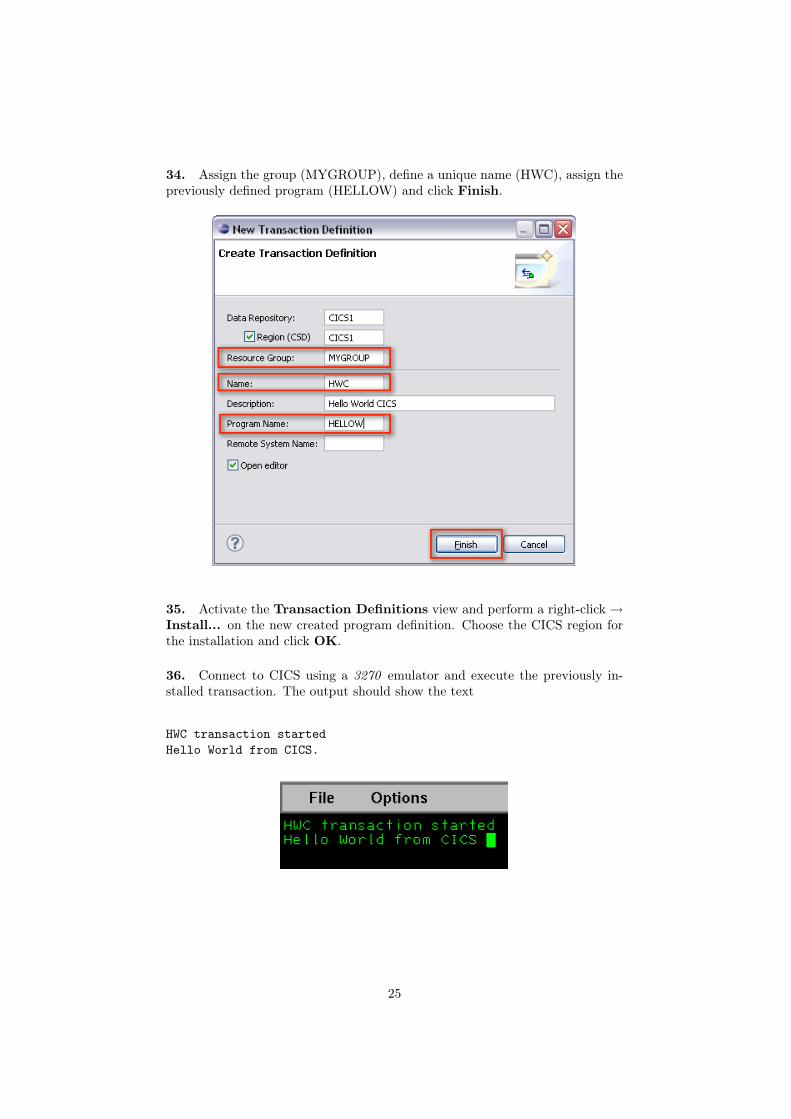
34. Assign the group (MYGROUP), define a unique name (HWC), assign thepreviously defined program (HELLOW) and click Finish.
35. Activate the Transaction Definitions view and perform a right-click →Install... on the new created program definition. Choose the CICS region forthe installation and click OK.
36. Connect to CICS using a 3270 emulator and execute the previously in-stalled transaction. The output should show the text
HWC transaction started
Hello World from CICS.
25