(powered by apache cloudstack) version citrix ... systems, inc., the citrix logo, ... new os...
TRANSCRIPT
Citrix CloudPlatform(powered by ApacheCloudStack) Version3.0.6 Release Notes
Revised February 19, 2012 1:45 pm Pacific
Citrix CloudPlatform (powered by Apache CloudStack) Version 3.0.6 Release Notes
Citrix CloudPlatform (powered by Apache CloudStack) Version3.0.6 Release NotesRevised February 19, 2012 1:45 pm Pacific
© 2012 Citrix Systems, Inc. All rights reserved. Specifications are subject to change withoutnotice. Citrix Systems, Inc., the Citrix logo, Citrix XenServer, Citrix XenCenter, and CloudPlatformare trademarks or registered trademarks of Citrix Systems, Inc. All other brands or products aretrademarks or registered trademarks of their respective holders.
Release notes for CloudPlatform version 3.0.6.
iii
1. Submitting Feedback and Getting Help 1
2. Newly Certified Operating Systems and Hypervisors 32.1. New OS Supported for Management Server .................................................................. 32.2. New Hypervisor Versions Supported ............................................................................. 32.3. New Hypervisor Hotfixes Supported .............................................................................. 32.4. New Supported OS for Guest Virtual Machines .............................................................. 3
3. Upgrade Instructions 53.1. Upgrade from 3.0.x to 3.0.6 .......................................................................................... 53.2. Upgrade from 2.2.x to 3.0.6 .......................................................................................... 93.3. Upgrade from 2.1.x to 3.0.6 ........................................................................................ 153.4. Upgrading and Hotfixing XenServer Hypervisor Hosts ................................................... 16
3.4.1. Upgrading to a New XenServer Version ............................................................ 163.4.2. Applying Hotfixes to a XenServer Cluster .......................................................... 17
4. What's New in 3.0.6 214.1. Juniper SRX Support for Shared Networks .................................................................. 214.2. Configuring Load Balancer and Firewall in Inline Mode ................................................. 214.3. Additional VMX Settings ............................................................................................. 214.4. Amazon EC2 API Support Extended ........................................................................... 22
4.4.1. EC2 Query API ............................................................................................... 224.4.2. Boto Client Support ......................................................................................... 234.4.3. Newer API and Tools Versions ......................................................................... 23
4.5. XenServer Hotfix Notification ....................................................................................... 234.6. Snapshot Job Throttling .............................................................................................. 244.7. Resetting SSH Keys to Access VM ............................................................................. 244.8. Security Groups in Advanced Zones (KVM Only) ......................................................... 244.9. Optional Public IP Assignment for EIP with Basic Zone ................................................ 254.10. Appending a Display Name to the Guest VM’s Internal Name ...................................... 254.11. Egress Firewall Rules ............................................................................................... 254.12. Microsoft Windows 8 for Guest Virtual Machines on KVM ........................................... 264.13. Support for CSP Packages ....................................................................................... 27
5. Known Issues in 3.0.6 295.1. Upgrading VMware In Place Not Supported ................................................................. 295.2. Instance UUID Is Displayed in the UI After 3.0.1 Upgrade ............................................. 295.3. Open Defects ............................................................................................................. 29
6. Issues Fixed in 3.0.6 35
7. API Changes from 3.0.5 to 3.0.6 377.1. Added API Commands in 3.0.6 ................................................................................... 377.2. Changed API Commands in 3.0.6 ............................................................................... 37

iv
Chapter 1.
1
Submitting Feedback and Getting HelpThe support team is available to help customers plan and execute their installations. To contact thesupport team, log in to the Support Portal1 by using the account credentials you received when youpurchased your support contract.
1 http://support.citrix.com/cms/kc/cloud-home/

2
Chapter 2.
3
Newly Certified Operating Systems andHypervisorsThis section describes the operating systems and hypervisors that have been newly tested andcertified compatible with CloudPlatform 3.0.6. Some earlier OS and hypervisor versions are alsostill supported for use with 3.0.6. For a complete list, see the System Requirements section of theCloudPlatform 3.0.6 Installation Guide.
2.1. New OS Supported for Management Server• RHEL 6.3
2.2. New Hypervisor Versions Supported• ESXi 5.1
• XenServer 6.1
• KVM is supported on RHEL versions 6.0 through 6.2
2.3. New Hypervisor Hotfixes Supported• ESXi 5.0.1 Update 1b
• XenServer 6.0.2 Patch 15
• XenServer 5.6 SP2 E20
2.4. New Supported OS for Guest Virtual Machines• Windows 8

4

Chapter 3.
5
Upgrade Instructions
3.1. Upgrade from 3.0.x to 3.0.6Perform the following to upgrade from version 3.0.0, 3.0.1, 3.0.2, 3.0.3, 3.0.4, or 3.0.5 to version 3.0.6.
1. If you are upgrading from 3.0.0 or 3.0.1, ensure that you query your IP address usage records andprocess them; for example, issue invoices for any usage that you have not yet billed users for.
Starting in 3.0.2, the usage record format for IP addresses is the same as the rest of the usagetypes. See bug CS-82221). Instead of a single record with the assignment and release dates,separate records are generated per aggregation period with start and end dates. After upgrading,any existing IP address usage records in the old format will no longer be available.
2. (VMware only) In each zone that includes VMware hosts, you need to add a new system VMtemplate.
a. While running the existing 3.0.x system, log in to the UI as root administrator.
b. In the left navigation bar, click Templates.
c. In Select view, click Templates.
d. Click Register template.
The Register template dialog box is displayed.
e. In the Register template dialog box, specify the following values (do not change these):
Field Value
Name systemvm-vmware-3.0.5
Description systemvm-vmware-3.0.5
URL http://download.cloud.com/templates/burbank/burbank-systemvm-08012012.ova
Zone Choose the zone where this hypervisor is used
Hypervisor VMware
Format OVA
OS Type Debian GNU/Linux 5.0 (32-bit)
Extractable no
Password Enabled no
Public no
Featured no
f. Watch the screen to be sure that the template downloads successfully and enters the READYstate. Do not proceed until this is successful.
3. Stop all Usage Servers if running. Run this on all Usage Server hosts.
1 http://bugs.cloudstack.org/browse/CS-8222
Chapter 3. Upgrade Instructions
6
# service cloud-usage stop
4. Stop the Management Servers. Run this on all Management Server hosts.
# service cloud-management stop
5. On the MySQL master, take a backup of the MySQL databases. We recommend performing thisstep even in test upgrades. If there is an issue, this will assist with debugging.
In the following commands, it is assumed that you have set the root password on the database,which is a CloudPlatform recommended best practice. Substitute your own MySQL root password.
# mysqldump -u root -p<mysql_password> cloud >> cloud-backup.dmp# mysqldump -u root -p<mysql_password> cloud_usage > cloud-usage-backup.dmp
6. Download CloudPlatform 3.0.6 onto the management server host where it will run. Get thesoftware from the following link:
https://www.citrix.com/English/ss/downloads/.
You need a My Citrix Account2.
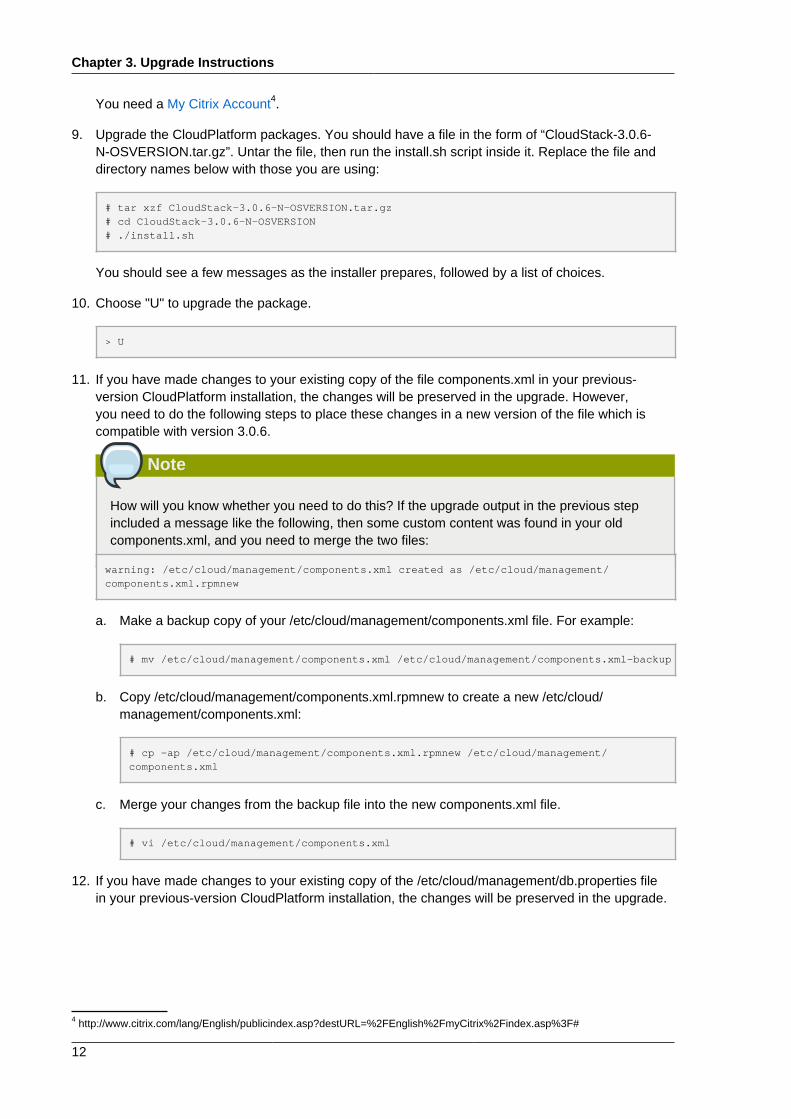
7. Upgrade the CloudPlatform packages. You should have a file in the form of “CloudStack-3.0.6-N-OSVERSION.tar.gz”. Untar the file, then run the install.sh script inside it. Replace the file anddirectory names below with those you are using:
# tar xzf CloudStack-3.0.6-N-OSVERSION.tar.gz# cd CloudStack-3.0.6-N-OSVERSION# ./install.sh
You should see a few messages as the installer prepares, followed by a list of choices.
8. Choose "U" to upgrade the package
>U
You should see some output as the upgrade proceeds, ending with a message like "Complete!Done."
9. If you have made changes to your existing copy of the file components.xml in your previous-version CloudPlatform installation, the changes will be preserved in the upgrade. However,you need to do the following steps to place these changes in a new version of the file which iscompatible with version 3.0.6.
2 http://www.citrix.com/lang/English/publicindex.asp?destURL=%2FEnglish%2FmyCitrix%2Findex.asp%3F#

Upgrade from 3.0.x to 3.0.6
7
Note
How will you know whether you need to do this? If the upgrade output in the previous stepincluded a message like the following, then some custom content was found in your oldcomponents.xml, and you need to merge the two files:
warning: /etc/cloud/management/components.xml created as /etc/cloud/management/components.xml.rpmnew
a. Make a backup copy of your /etc/cloud/management/components.xml file. For example:
# mv /etc/cloud/management/components.xml /etc/cloud/management/components.xml-backup
b. Copy /etc/cloud/management/components.xml.rpmnew to create a new /etc/cloud/management/components.xml:
# cp -ap /etc/cloud/management/components.xml.rpmnew /etc/cloud/management/components.xml
c. Merge your changes from the backup file into the new components.xml file.
# vi /etc/cloud/management/components.xml
10. Repeat steps 6 - 9 on each management server node.
11. Start the first Management Server. Do not start any other Management Server nodes yet.
# service cloud-management start
Wait until the databases are upgraded. Ensure that the database upgrade is complete. Afterconfirmation, start the other Management Servers one at a time by running the same command oneach node.
Note
Failing to restart the Management Server indicates a problem in the upgrade. Restarting theManagement Server without any issues indicates that the upgrade is successfully completed.
12. Start all Usage Servers (if they were running on your previous version). Perform this on eachUsage Server host.
# service cloud-usage start
13. (KVM only) Additional steps are required for each KVM host. These steps will not affect runningguests in the cloud. These steps are required only for clouds using KVM as hosts and only on theKVM hosts.

Chapter 3. Upgrade Instructions
8
a. Copy the CloudPlatform 3.0.6 tar file to the host, untar it, and change directory to the resultingdirectory.
b. Stop the running agent.
# service cloud-agent stop
c. Update the agent software.
# ./install.sh
d. Choose "U" to update the packages.
e. Start the agent.
# service cloud-agent start
14. Log in to the CloudPlatform UI as administrator, and check the status of the hosts. All hostsshould come to Up state (except those that you know to be offline). You may need to wait 20 or 30minutes, depending on the number of hosts.
Note
Troubleshooting: If login fails, clear your browser cache and reload the page.
Do not proceed to the next step until the hosts show in Up state. If the hosts do not come to theUp state, contact support.
15. If you are upgrading from 3.0.1 or 3.0.2, perform the following:
a. Ensure that the admin port is set to 8096 by using the "integration.api.port" global parameter.
This port is used by the cloud-sysvmadm script at the end of the upgrade procedure. Forinformation about how to set this parameter, see “Edit the Global Configuration Settings” in theAdvanced Installation Guide.
b. Restart the Management Server.
Note
If you don't want the admin port to remain open, you can set it to null after the upgrade isdone and restart the management server
16. Run the following script to stop, then start, all Secondary Storage VMs, Console Proxy VMs, andvirtual routers. Run the script once on one management server. Substitute your own IP addressof the MySQL instance, the MySQL user to connect as, and the password to use for that user. Inaddition to those parameters, provide the "-a" argument. For example:
Upgrade from 2.2.x to 3.0.6
9
# nohup cloud-sysvmadm -d 192.168.1.5 -u cloud -p password -a > sysvm.log 2>&1 &# tail -f sysvm.log
This might take up to an hour or more to run, depending on the number of accounts in the system.
17. (XenServer only) If needed, upgrade all Citrix XenServer hypervisor hosts in your cloud toa version supported by CloudPlatform 3.0.6 and apply any required hotfixes. The supportedversions are listed in Chapter 2, Newly Certified Operating Systems and Hypervisors. Instructionsfor upgrading XenServer software and applying hotfixes can be found in Section 3.4, “Upgradingand Hotfixing XenServer Hypervisor Hosts”.
Note
Troubleshooting tip: If passwords which you know to be valid appear not to work after upgrade, orother UI issues are seen, try clearing your browser cache and reloading the UI page.
3.2. Upgrade from 2.2.x to 3.0.61. Ensure that you query your IPaddress usage records and process them; for example, issue
invoices for any usage that you have not yet billed users for.
Starting in 3.0.2, the usage record format for IP addresses is the same as the rest of the usagetypes. See CS-82223. Instead of a single record with the assignment and release dates, separaterecords are generated per aggregation period with start and end dates. After upgrading to 3.0.6,any existing IP address usage records in the old format will no longer be available.
2. If you are using version 2.2.0 - 2.2.13, first upgrade to 2.2.14 by using the instructions in the2.2.14 Release Notes.
Note
(KVM only) If KVM hypervisor is used in your cloud, be sure you completed the step to inserta valid username and password into the host_details table on each KVM node as describedin the 2.2.14 Release Notes. This step is critical, as the database will be encrypted after theupgrade to 3.0.6.
3. While running the 2.2.x system (which by this step should be at version 2.2.14 or greater), log in tothe UI as root administrator.
4. Using the UI, add a new System VM template for each hypervisor type that is used in your cloud.In each zone, add a system VM template for each hypervisor used in that zone
a. In the left navigation bar, click Templates.
b. In Select view, click Templates.
3 http://bugs.cloudstack.org/browse/CS-8222
Chapter 3. Upgrade Instructions
10
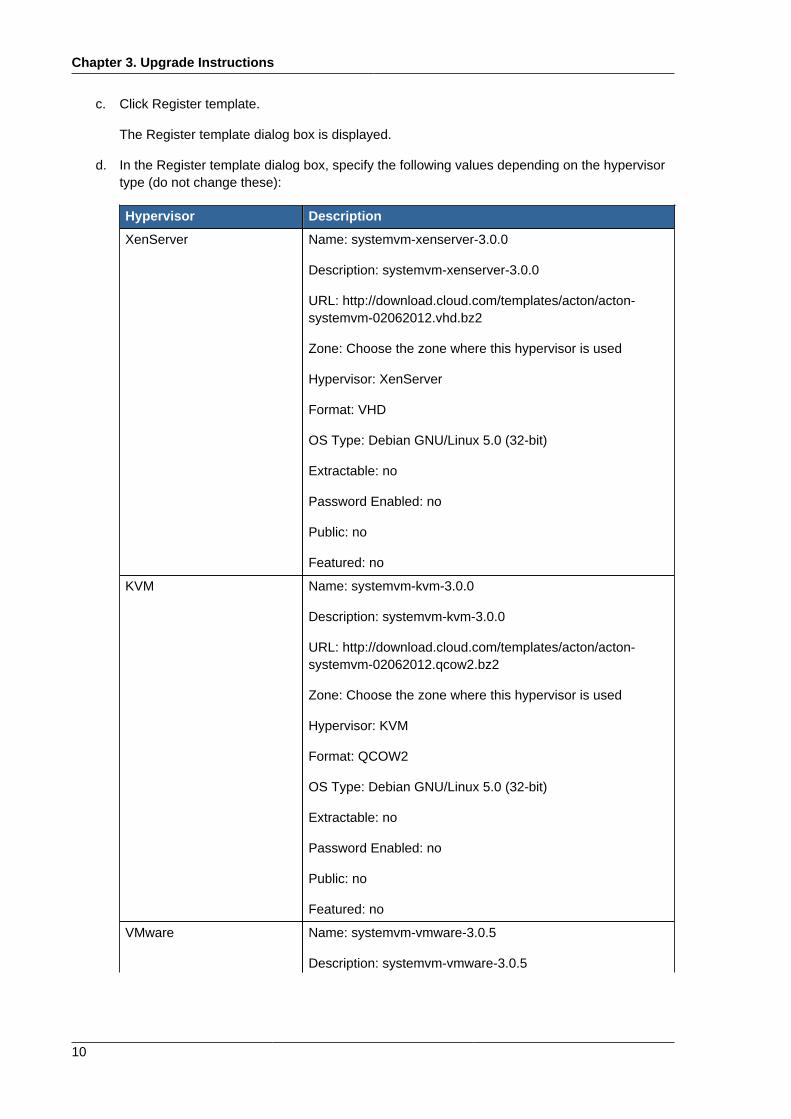
c. Click Register template.
The Register template dialog box is displayed.
d. In the Register template dialog box, specify the following values depending on the hypervisortype (do not change these):
Hypervisor Description
XenServer Name: systemvm-xenserver-3.0.0
Description: systemvm-xenserver-3.0.0
URL: http://download.cloud.com/templates/acton/acton-systemvm-02062012.vhd.bz2
Zone: Choose the zone where this hypervisor is used
Hypervisor: XenServer
Format: VHD
OS Type: Debian GNU/Linux 5.0 (32-bit)
Extractable: no
Password Enabled: no
Public: no
Featured: no
KVM Name: systemvm-kvm-3.0.0
Description: systemvm-kvm-3.0.0
URL: http://download.cloud.com/templates/acton/acton-systemvm-02062012.qcow2.bz2
Zone: Choose the zone where this hypervisor is used
Hypervisor: KVM
Format: QCOW2
OS Type: Debian GNU/Linux 5.0 (32-bit)
Extractable: no
Password Enabled: no
Public: no
Featured: no
VMware Name: systemvm-vmware-3.0.5
Description: systemvm-vmware-3.0.5

Upgrade from 2.2.x to 3.0.6
11
Hypervisor Description
URL: http://download.cloud.com/templates/burbank/burbank-systemvm-08012012.ova
Zone: Choose the zone where this hypervisor is used
Hypervisor: VMware
Format: OVA
OS Type: Debian GNU/Linux 5.0 (32-bit)
Extractable: no
Password Enabled: no
Public: no
Featured: no
e. Watch the screen to be sure that the template downloads successfully and enters the READYstate. Do not proceed until this is successful
f. If you use more than one type of hypervisor in your cloud, repeat these steps to download thesystem VM template for each hypervisor type.
Warning
If you do not repeat the steps for each hypervisor type, the upgrade will fail.
5. Stop all Usage Servers if running. Run this on all Usage Server hosts.
# service cloud-usage stop
6. Stop the Management Servers. Run this on all Management Server hosts.
# service cloud-management stop
7. On the MySQL master, take a backup of the MySQL databases. We recommend performing thisstep even in test upgrades. If there is an issue, this will assist with debugging.
In the following commands, it is assumed that you have set the root password on the database,which is a CloudPlatform recommended best practice. Substitute your own MySQL root password.
# mysqldump -u root -p<mysql_password> cloud >> cloud-backup.dmp# mysqldump -u root -p<mysql_password> cloud_usage > cloud-usage-backup.dmp
8. Download CloudPlatform 3.0.6 onto the management server host where it will run. Get thesoftware from the following link:
https://www.citrix.com/English/ss/downloads/
Chapter 3. Upgrade Instructions
12
You need a My Citrix Account4.
9. Upgrade the CloudPlatform packages. You should have a file in the form of “CloudStack-3.0.6-N-OSVERSION.tar.gz”. Untar the file, then run the install.sh script inside it. Replace the file anddirectory names below with those you are using:
# tar xzf CloudStack-3.0.6-N-OSVERSION.tar.gz# cd CloudStack-3.0.6-N-OSVERSION# ./install.sh
You should see a few messages as the installer prepares, followed by a list of choices.
10. Choose "U" to upgrade the package.
> U
11. If you have made changes to your existing copy of the file components.xml in your previous-version CloudPlatform installation, the changes will be preserved in the upgrade. However,you need to do the following steps to place these changes in a new version of the file which iscompatible with version 3.0.6.
Note
How will you know whether you need to do this? If the upgrade output in the previous stepincluded a message like the following, then some custom content was found in your oldcomponents.xml, and you need to merge the two files:
warning: /etc/cloud/management/components.xml created as /etc/cloud/management/components.xml.rpmnew
a. Make a backup copy of your /etc/cloud/management/components.xml file. For example:
# mv /etc/cloud/management/components.xml /etc/cloud/management/components.xml-backup
b. Copy /etc/cloud/management/components.xml.rpmnew to create a new /etc/cloud/management/components.xml:
# cp -ap /etc/cloud/management/components.xml.rpmnew /etc/cloud/management/components.xml
c. Merge your changes from the backup file into the new components.xml file.
# vi /etc/cloud/management/components.xml
12. If you have made changes to your existing copy of the /etc/cloud/management/db.properties filein your previous-version CloudPlatform installation, the changes will be preserved in the upgrade.
4 http://www.citrix.com/lang/English/publicindex.asp?destURL=%2FEnglish%2FmyCitrix%2Findex.asp%3F#

Upgrade from 2.2.x to 3.0.6
13
However, you need to do the following steps to place these changes in a new version of the filewhich is compatible with version 3.0.6.
a. Make a backup copy of your file /etc/cloud/management/db.properties. For example:
# mv /etc/cloud/management/db.properties /etc/cloud/management/db.properties-backup
b. Copy /etc/cloud/management/db.properties.rpmnew to create a new /etc/cloud/management/db.properties:
# cp -ap /etc/cloud/management/db.properties.rpmnew etc/cloud/management/db.properties
c. Merge your changes from the backup file into the new db.properties file.
# vi /etc/cloud/management/db.properties
13. On the management server node, run the following command. It is recommended that you use thecommand-line flags to provide your own encryption keys. See Password and Key Encryption inthe Installation Guide.
# cloud-setup-encryption -e <encryption_type> -m <management_server_key> -k <database_key>
When used without arguments, as in the following example, the default encryption type and keyswill be used:
• (Optional) For encryption_type, use file or web to indicate the technique used to pass in thedatabase encryption password. Default: file.
• (Optional) For management_server_key, substitute the default key that is used to encryptconfidential parameters in the properties file. Default: password. It is highly recommended thatyou replace this with a more secure value
• (Optional) For database_key, substitute the default key that is used to encrypt confidentialparameters in the CloudPlatform database. Default: password. It is highly recommended thatyou replace this with a more secure value.
14. Repeat steps 8 - 13 on every management server node. If you provided your own encryption keyin step 13, use the same key on all other management servers.
15. Start the first Management Server. Do not start any other Management Server nodes yet.
# service cloud-management start
Wait until the databases are upgraded. Ensure that the database upgrade is complete. Afterconfirmation, start the other Management Servers one at a time by running the same command oneach node.
16. Start all Usage Servers (if they were running on your previous version). Perform this on eachUsage Server host.
# service cloud-usage start

Chapter 3. Upgrade Instructions
14
17. (KVM only) Additional steps are required for each KVM host. These steps will not affect runningguests in the cloud. These steps are required only for clouds using KVM as hosts and only on theKVM hosts.
Note
After the 2.2.13 to 3.0.x upgrade on a KVM machine, Ctrl+Alt+Del button on the console viewof a VM doesn't work. Use Ctrl+Alt+Insert to log in to the console of the VM.
a. Copy the CloudStack 3.0.6 .tgz download to the host, untar it, and cd into the resultingdirectory.
b. Stop the running agent.
# service cloud-agent stop
c. Update the agent software.
# ./install.sh
d. Choose "U" to update the packages.
e. Start the agent.
# service cloud-agent start
18. Log in to the CloudPlatform UI as admin, and check the status of the hosts. All hosts should cometo Up state (except those that you know to be offline). You may need to wait 20 or 30 minutes,depending on the number of hosts.
Do not proceed to the next step until the hosts show in the Up state. If the hosts do not come tothe Up state, contact support.
19. Run the following script to stop, then start, all Secondary Storage VMs, Console Proxy VMs, andvirtual routers.
a. Run the command once on one management server. Substitute your own IP address of theMySQL instance, the MySQL user to connect as, and the password to use for that user. Inaddition to those parameters, provide the "-c" and "-r" arguments. For example:
# nohup cloud-sysvmadm -d 192.168.1.5 -u cloud -p password -c -r > sysvm.log 2>&1 &# tail -f sysvm.log
This might take up to an hour or more to run, depending on the number of accounts in thesystem.
b. After the script terminates, check the log to verify correct execution:
# tail -f sysvm.log
The content should be like the following:
Upgrade from 2.1.x to 3.0.6
15
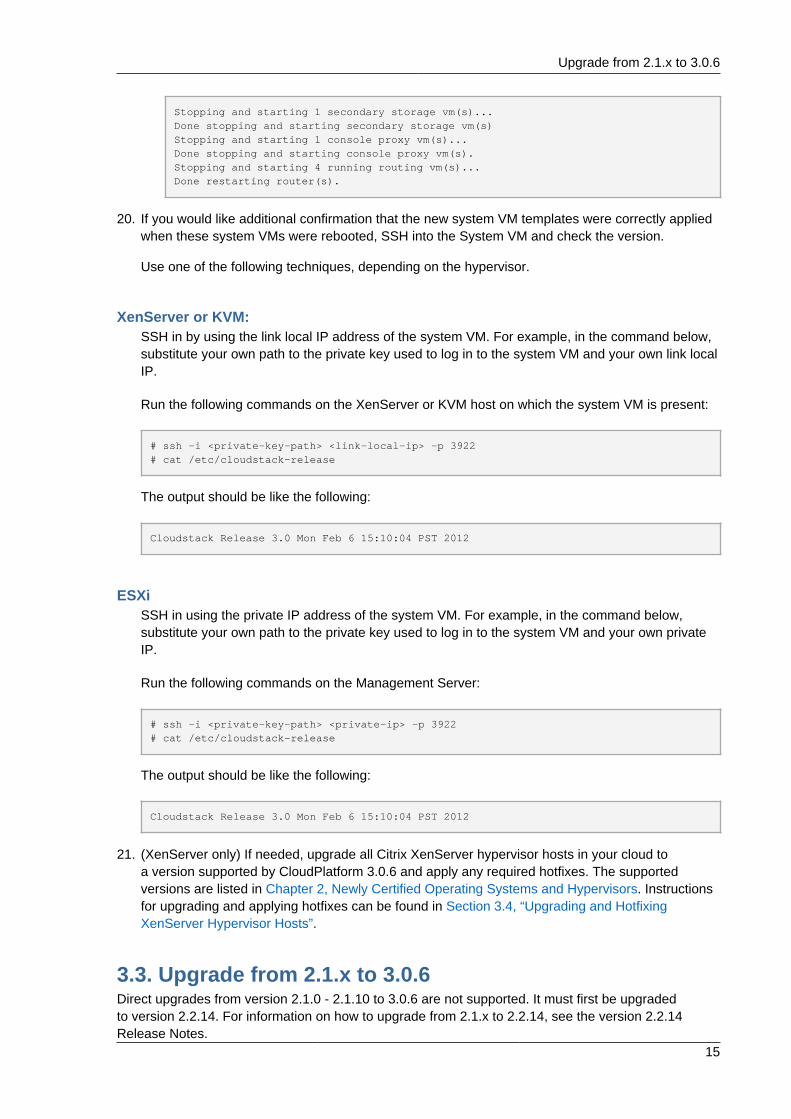
Stopping and starting 1 secondary storage vm(s)...Done stopping and starting secondary storage vm(s)Stopping and starting 1 console proxy vm(s)...Done stopping and starting console proxy vm(s).Stopping and starting 4 running routing vm(s)...Done restarting router(s).
20. If you would like additional confirmation that the new system VM templates were correctly appliedwhen these system VMs were rebooted, SSH into the System VM and check the version.
Use one of the following techniques, depending on the hypervisor.
XenServer or KVM:SSH in by using the link local IP address of the system VM. For example, in the command below,substitute your own path to the private key used to log in to the system VM and your own link localIP.
Run the following commands on the XenServer or KVM host on which the system VM is present:
# ssh -i <private-key-path> <link-local-ip> -p 3922# cat /etc/cloudstack-release
The output should be like the following:
Cloudstack Release 3.0 Mon Feb 6 15:10:04 PST 2012
ESXiSSH in using the private IP address of the system VM. For example, in the command below,substitute your own path to the private key used to log in to the system VM and your own privateIP.
Run the following commands on the Management Server:
# ssh -i <private-key-path> <private-ip> -p 3922# cat /etc/cloudstack-release
The output should be like the following:
Cloudstack Release 3.0 Mon Feb 6 15:10:04 PST 2012
21. (XenServer only) If needed, upgrade all Citrix XenServer hypervisor hosts in your cloud toa version supported by CloudPlatform 3.0.6 and apply any required hotfixes. The supportedversions are listed in Chapter 2, Newly Certified Operating Systems and Hypervisors. Instructionsfor upgrading and applying hotfixes can be found in Section 3.4, “Upgrading and HotfixingXenServer Hypervisor Hosts”.
3.3. Upgrade from 2.1.x to 3.0.6Direct upgrades from version 2.1.0 - 2.1.10 to 3.0.6 are not supported. It must first be upgradedto version 2.2.14. For information on how to upgrade from 2.1.x to 2.2.14, see the version 2.2.14Release Notes.
Chapter 3. Upgrade Instructions
16
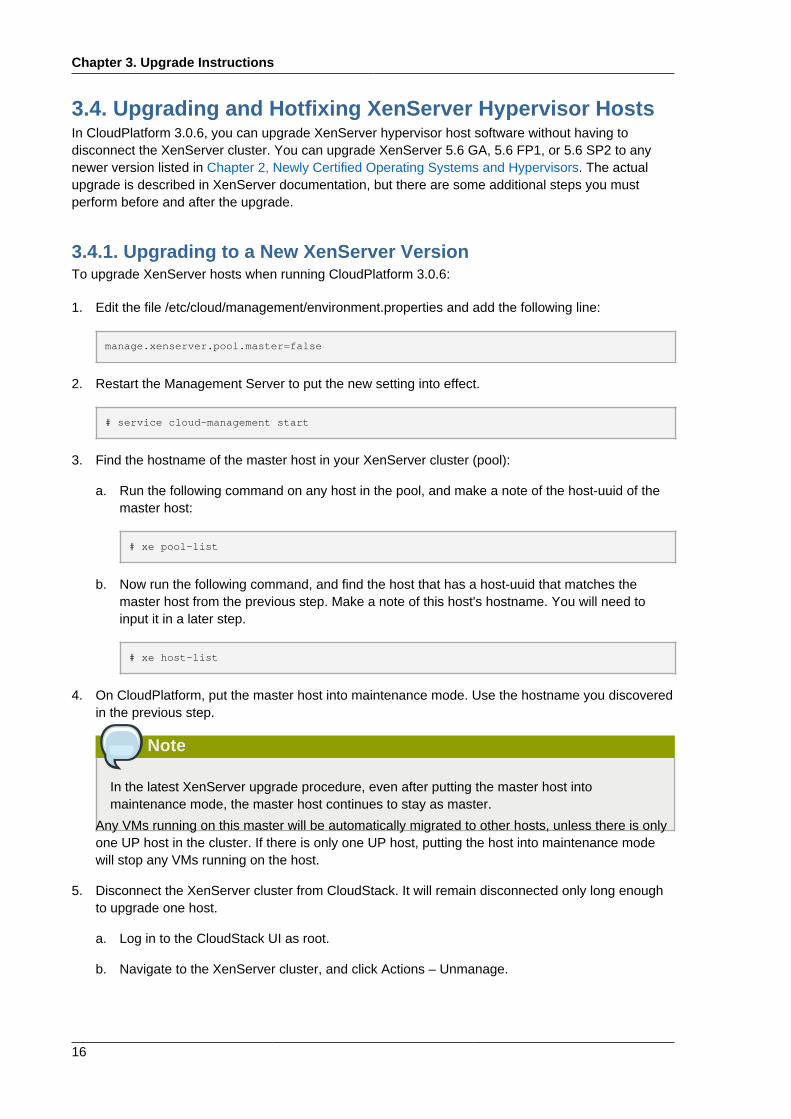
3.4. Upgrading and Hotfixing XenServer Hypervisor HostsIn CloudPlatform 3.0.6, you can upgrade XenServer hypervisor host software without having todisconnect the XenServer cluster. You can upgrade XenServer 5.6 GA, 5.6 FP1, or 5.6 SP2 to anynewer version listed in Chapter 2, Newly Certified Operating Systems and Hypervisors. The actualupgrade is described in XenServer documentation, but there are some additional steps you mustperform before and after the upgrade.
3.4.1. Upgrading to a New XenServer VersionTo upgrade XenServer hosts when running CloudPlatform 3.0.6:
1. Edit the file /etc/cloud/management/environment.properties and add the following line:
manage.xenserver.pool.master=false
2. Restart the Management Server to put the new setting into effect.
# service cloud-management start
3. Find the hostname of the master host in your XenServer cluster (pool):
a. Run the following command on any host in the pool, and make a note of the host-uuid of themaster host:
# xe pool-list
b. Now run the following command, and find the host that has a host-uuid that matches themaster host from the previous step. Make a note of this host's hostname. You will need toinput it in a later step.
# xe host-list
4. On CloudPlatform, put the master host into maintenance mode. Use the hostname you discoveredin the previous step.
Note
In the latest XenServer upgrade procedure, even after putting the master host intomaintenance mode, the master host continues to stay as master.
Any VMs running on this master will be automatically migrated to other hosts, unless there is onlyone UP host in the cluster. If there is only one UP host, putting the host into maintenance modewill stop any VMs running on the host.
5. Disconnect the XenServer cluster from CloudStack. It will remain disconnected only long enoughto upgrade one host.
a. Log in to the CloudStack UI as root.
b. Navigate to the XenServer cluster, and click Actions – Unmanage.

Applying Hotfixes to a XenServer Cluster
17
c. Watch the cluster status until it shows Unmanaged.
6. Upgrade the XenServer software on the master host:
a. Insert the XenXerver 6.0.2 CD.
b. Reboot the host.
c. Upgrade to the newer version of XenServer. Use the steps in XenServer documentation.
7. Cancel the maintenance mode on the master host.
8. Reconnect the XenServer cluster to CloudStack.
a. Log in to the CloudStack UI as root.
b. Navigate to the XenServer cluster, and click Actions – Manage.
c. Watch the status to see that all the hosts come up.
9. Upgrade the slave hosts in the cluster:
a. Put a slave host into maintenance mode.
Wait until all the VMs are migrated to other hosts.
b. Upgrade the XenServer software on the slave.
c. Cancel maintenance mode for the slave.
d. Repeat steps a through c for each slave host in the XenServer pool.
10. You might need to change the OS type settings for VMs running on the upgraded hosts, if any ofthe following apply:
• If you upgraded from XenServer 5.6 GA to XenServer 5.6 SP2, change any VMs that have theOS type CentOS 5.5 (32-bit), Oracle Enterprise Linux 5.5 (32-bit), or Red Hat Enterprise Linux5.5 (32-bit) to Other Linux (32-bit). Change any VMs that have the 64-bit versions of these sameOS types to Other Linux (64-bit).
• If you upgraded from XenServer 5.6 SP2 to XenServer 6.0.2, change any VMs that have theOS type CentOS 5.6 (32-bit), CentOS 5.7 (32-bit), Oracle Enterprise Linux 5.6 (32-bit), OracleEnterprise Linux 5.7 (32-bit), Red Hat Enterprise Linux 5.6 (32-bit) , or Red Hat Enterprise Linux5.7 (32-bit) to Other Linux (32-bit). Change any VMs that have the 64-bit versions of these sameOS types to Other Linux (64-bit).
• If you upgraded from XenServer 5.6 to XenServer 6.0.2, do all of the above.
3.4.2. Applying Hotfixes to a XenServer Cluster1. Edit the file /etc/cloud/management/environment.properties and add the following line:
manage.xenserver.pool.master=false
2. Restart the Management Server to put the new setting into effect.

Chapter 3. Upgrade Instructions
18
# service cloud-management start
3. Find the hostname of the master host in your XenServer cluster (pool):
a. Run the following command on any host in the pool, and make a note of the host-uuid of themaster host:
# xe pool-list
b. Now run the following command, and find the host that has a host-uuid that matches themaster host from the previous step. Make a note of this host's hostname. You will need toinput it in a later step.
# xe host-list
4. On CloudPlatform, put the master host into maintenance mode. Use the hostname you discoveredin the previous step.
Any VMs running on this master will be automatically migrated to other hosts, unless there is onlyone UP host in the cluster. If there is only one UP host, putting the host into maintenance modewill stop any VMs running on the host.
5. Disconnect the XenServer cluster from CloudStack. It will remain disconnected only long enoughto hotfix one host.
a. Log in to the CloudStack UI as root.
b. Navigate to the XenServer cluster, and click Actions – Unmanage.
c. Watch the cluster status until it shows Unmanaged.
6. Hotfix the master host:
a. Add the XenServer hot fixes to the master host.
i. Assign a UUID to the update file:
xe patch-upload file-name=XS602E015.xsupdate
The command displays the UUID of the update file:
33af688e-d18c-493d-922b-ec51ea23cfe9
ii. Repeat the xe patch-upload command for all other XenServer updates:XS602E004.xsupdate, XS602E005.xsupdate.
Take a note of the UUIDs of the update files. The UUIDs are required in the next step.
b. Apply XenServer hot fixes to master host:
xe patch-apply host-uuid=<master uuid> uuid=<hotfix uuid>
c. Repeat xe patch-apply command for all the hot fixes.

Applying Hotfixes to a XenServer Cluster
19
d. Install the required CSP files.
xe-install-supplemental-pack <csp-iso-file>
e. Restart the master host.
7. Cancel the maintenance mode on the master host.
8. Reconnect the XenServer cluster to CloudStack.
a. Log in to the CloudStack UI as root.
b. Navigate to the XenServer cluster, and click Actions – Manage.
c. Watch the status to see that all the hosts come up.
9. Hotfix the slave hosts in the cluster:
a. Put a slave host into maintenance mode.
Wait until all the VMs are migrated to other hosts.
b. Apply the XenServer hot fixes to the slave host:
xe patch-apply host-uuid=<master uuid> uuid=<hotfix uuid>
c. Repeat Step a through b for each slave host in the XenServer pool.
d. Install the required CSP files.
xe-install-supplemental-pack <csp-iso-file>
e. Restart the slave hosts.
Wait until all the slave hosts are up. It might take several minutes for the hosts to come up.
10. Cancel the maintenance mode on the slave hosts.
11. You might need to change the OS type settings for VMs running on the upgraded hosts, if any ofthe following apply:
• If you upgraded from XenServer 5.6 SP2 to XenServer 6.0.2, change any VMs that have theOS type CentOS 5.6 (32-bit), CentOS 5.7 (32-bit), Oracle Enterprise Linux 5.6 (32-bit), OracleEnterprise Linux 5.7 (32-bit), Red Hat Enterprise Linux 5.6 (32-bit) , or Red Hat Enterprise Linux5.7 (32-bit) to Other Linux (32-bit). Change any VMs that have the 64-bit versions of these sameOS types to Other Linux (64-bit).
• If you upgraded from XenServer 5.6 GA or 5.6 FP1 to XenServer 6.0.2, change any VMsthat have the OS type CentOS 5.5 (32-bit), CentOS 5.6 (32-bit), CentOS 5.7 (32-bit), OracleEnterprise Linux 5.5 (32-bit), Oracle Enterprise Linux 5.6 (32-bit), Oracle Enterprise Linux 5.7(32-bit), Red Hat Enterprise Linux 5.5 (32-bit), Red Hat Enterprise Linux 5.6 (32-bit) , or RedHat Enterprise Linux 5.7 (32-bit) to Other Linux (32-bit). Change any VMs that have the 64-bitversions of these same OS types to Other Linux (64-bit).

20

Chapter 4.
21
What's New in 3.0.6CloudPlatform 3.0.6 includes the following new features:
4.1. Juniper SRX Support for Shared NetworksCloudPlatform 3.0.6 extended Juniper SRX firewall support to the shared networks in Advancedzones. Previously, Juniper SRX was supported only on isolated networks. With the addition of thisfeature, the following network services are available to the VMs in a shared network. A subset of theseservices can be chosen while creating the Network Service offering for the shared network.
• Firewall
• Source NAT
• Static NAT
• Port forwarding
As always, the virtual router continues to provide the DNS, DHCP and IPAM services in sharednetworks.
With the addition of this functionality, you will have the ability to:
• Create shared networks in advanced zones with Firewall, StaticNAT, SourceNAT, DNS, and DHCPservices.
• Create shared networks in advanced zones only with DNS and DHCP.
• Create shared networks in basic zones with Elastic IP, Elastic LB, Security group, DNS, and DHCPservices.
The Static NAT, Port Forwarding, and Firewall services are available only on the acquired public IPsassociated with the shared network. The acquired public IPs provides these services to the VMs onthe shared network. If you create a Source NAT-enabled Network Offering for a shared network, apublic IP is by default provisioned and Source NAT is configured on the firewall device to providepublic access to the VMs on the shared network.
4.2. Configuring Load Balancer and Firewall in Inline ModeIn addition to side-by-side configuration, external Network elements, such as load balancer andfirewall, can now be deployed in inline mode. This feature is supported in isolated networks in anAdvanced zone. In inline mode, a firewall device is placed in front of a load balancing device. Thefirewall acts as the gateway for all incoming traffic, then redirects the load balancing traffic to the loadbalancer behind it. The load balancer in this case will not have direct access to the public network.
Supported devices are:
• F5 Big IP Load Balancer device
• Juniper SRX Firewall device
4.3. Additional VMX SettingsIn addition to the existing VMX parameters (rootDiskController, nicAdapter, and keyboard), you cannow use the keyboard.typematicMinDelay parameter in the registerTemplate API call. This parameter

Chapter 4. What's New in 3.0.6
22
controls the amount of delay for the repeated key strokes on remote consoles. For more informationon keyboard.typematicMinDelay, see keyboard.typematicMinDelay1.
4.4. Amazon EC2 API Support Extended
Note
This section describes changes to CloudPlatform's support for the Amazon EC2 API, and doesnot contain enough information to enable you to configure and use the API. For complete detailsand limitations, see the CloudPlatform 3.0.6 Installation Guide.
4.4.1. EC2 Query APICloudPlatform 3.0.6 provides compatibility with the Amazon Web Services (AWS) EC2 API throughboth SOAP and REST web services. Previously, CloudPlatform 3.0 provided compatibility with theEC2 API through SOAP calls only.
As always, the EC2 API calls are translated to CloudPlatform API calls.
The new Query API support provides a REST interface for passing EC2 API calls to CloudPlatform.The AWS Java SDK and AWS PHP SDK are both supported by this REST interface. All of thepreviously-supported SOAP calls now provide a REST equivalent.
The supported Query API calls are:
AllocateAddress AssociateAddress AttachVolume AuthorizeSecurityGroupIngress CreateImage CreateKeyPair CreateSecurityGroup CreateSnapshot CreateTags CreateVolume DeleteKeyPair DeleteSecurityGroup DeleteSnapshot DeleteTags DeleteVolume DeregisterImage DescribeAddresses DescribeAvailabilityZones DescribeImageAttribute DescribeImages DescribeInstanceAttribute DescribeInstances DescribeKeyPairs DescribeSecurityGroups DescribeSnapshots DescribeTags DescribeVolumes DetachVolume
1 http://kb.vmware.com/selfservice/microsites/search.do?language=en_US&cmd=displayKC&externalId=196
Boto Client Support
23
DisassociateAddress GetPasswordData ImportkeyPair ModifyImageAttribute RebootInstances RegisterImage ReleaseAddress ResetImageAttribute RevokeSecurityGroupIngress RunInstances StartInstances StopInstances TerminateInstances
4.4.2. Boto Client SupportUsing the Boto client, Java and PHP AWS SDK can run EC2 Query APIs in CloudPlatform 3.0.6.
4.4.3. Newer API and Tools VersionsCloudPlatform 3.0.6 supports a more recent version of the EC2 API, dated 2012-08-15. It is compliantwith the WSDL available at http://ec2.amazonaws.com/doc/2012-08-15/.
Clients can continue using existing EC2-compatible tools for SOAP calls. The version of EC2 APITools now supported is 1.6.2.0. The supported version is available at http://s3.amazonaws.com/ec2-downloads/ec2-api-tools-1.6.2.0.zip.
To make EC2 REST API calls, no registration is required. Registration is still required to use SOAPcalls. To make EC2 SOAP API calls, register by using the ‘cloudstack-aws-api-register’ script . The callto the registration script remains the same as in previous versions:
cloudstack-aws-api-register --apikey=<User’s CloudPlatform API key> --secretkey=<User’s CloudPlatform Secret key > --cert=<path/to/cert.pem>--url=http://<cloud-bridge-server>:7080/awsapi.
The updated ‘cloudstack-aws-api-register’ script can be found at http://download.cloud.com/releases/3.0.6/cloudstack-aws-api-register2.
4.5. XenServer Hotfix NotificationThe Alerts area of the Dashboard in the CloudPlatform UI will show notifications about new CitrixXenServer software updates as they become available. In this way, administrators can more easily beaware and take action when a hotfix is required to keep the XenServer hypervisor hosts up to date.CloudPlatform will give notification only for hotfixes that are applicable to the XenServer softwareversion currently running on hosts within the cloud. Before generating the alert, CloudPlatform willcheck to be sure the hotfix has not already been installed.
In addition to the alert in the Dashboard, all hotfixes available for XenServer hosts in the cloud aredisplayed under Events, when you open the Select View dropdown and choose Host Updates. Youcan also see the hotfixes available for a given host when you're viewing the host details (Infrastructure> Hosts > click host name), where you will see the new Updates tab.
You can get the same information about new XenServer hotfixes by calling these new API commands:
2 http://download.cloud.com/releases/3.0.6/cloudstack-aws-api-register.
Chapter 4. What's New in 3.0.6
24
• listHostUpdates—Tells which patches have and have not been applied to a given host
• listHostsWithPendingUpdates—Tells which hosts have not received a given patch
CloudPlatform checks for new hotfixes once a week. It can be configured to check for hotfixes more orless often through the global setting update.check.interval.
Additional configuration settings: CloudPlatform knows where to find the web-based Citrix feed forXenServer hotfix updates. In the unlikely event that Citrix changes this URL, it can be configuredthrough the global setting xen.update.url. You can also turn off the hotfix notification feature entirelyusing host.updates.enable.
4.6. Snapshot Job ThrottlingWhen a snapshot of a virtual machine is requested, the snapshot job runs on the same host wherethe VM is running or, in the case of a stopped VM, the host where it ran last. If many snapshotsare requested for VMs on a single host, this can lead to problems with too many snapshot jobsoverwhelming the resources of the host.
To address this situation, the cloud's root administrator can now throttle how many snapshot jobsare executed simultaneously on the hosts in the cloud by using the new global configuration settingconcurrent.snapshots.threshold.perhost. By using this setting, the administrator can better ensurethat snapshot jobs do not time out and hypervisor hosts do not experience performance issues due tohosts being overloaded with too many snapshot requests.
Set concurrent.snapshots.threshold.perhost to a value that represents a best guess about howmany snapshot jobs the hypervisor hosts can execute at one time, given the current resources of thehosts and the number of VMs running on the hosts. If a given host has more snapshot requests, theadditional requests are placed in a waiting queue. No new snapshot jobs will start until the number ofcurrently executing snapshot jobs falls below the configured limit.
The admin can also set job.expire.minutes to place a maximum on how long a snapshot request willwait in the queue. If this limit is reached, the snapshot request fails and returns an error message.
4.7. Resetting SSH Keys to Access VMWith the new API command resetSSHKeyForVirtualMachine, a user can set or reset the SSH keypairassigned to a virtual machine. With the addition of this feature, a lost or compromised SSH keypaircan be changed, and the user can access the VM by using the new keypair. Just create or register anew keypair, then call resetSSHKeyForVirtualMachine.
4.8. Security Groups in Advanced Zones (KVM Only)CloudPlatform 3.0.6 provides the ability to use security groups to provide isolation between guests ona single shared, zone-wide network in an advanced zone where KVM is the hypervisor. Previously,CloudPlatform 3.0 allowed the use of security groups in basic zones only. The isolation of guest trafficcould be achieved only through the use of multiple VLANs. The addition of support for security groupsin advanced zones allows a greater range of options for setting up guest isolation in a cloud. It alsoenables users of earlier CloudPlatform versions in the 2.2.x series to upgrade to 3.0.6 without the lossof this feature, which was supported in the previous networking model which was part of 2.2.x.
LimitationThe following are not supported for this feature:

Optional Public IP Assignment for EIP with Basic Zone
25
• Two IP ranges with the same VLAN and different gateway or netmask in security group-enabledshared network.
• Two IP ranges with the same VLAN and different gateway or netmask in account-specific sharednetworks.
• Multiple VLAN ranges in security group-enabled shared network.
• Multiple VLAN ranges in account-specific shared networks.
Security groups must be enabled in the zone in order for this feature to be used. For completeinformation on how to set up security groups, see the Installation Guide.
4.9. Optional Public IP Assignment for EIP with Basic ZoneAssigning public IP addresses to the VMs is now made optional for the EIP-enabled Basic Zones.Previously, a public IP is automatically allocated to each VM created in a EIP-enabled Basic zone.For deployments where public IPs are scarce, allocating a public IP to each VM is expensive. With theaddition of this feature, CloudPlatform 3.0.6 now gives you the flexibility to choose not to allocate apublic IP by default, and allocate only a private IP to the VM deployed in an EIP-enabled Basic zone.
This feature is designed only for the user VMs. The System VMs continue to get both public IP andprivate by default irrespective of the network offering configuration. Also, new cloud deployments thatuses the default shared network offering with EIP and ELB service in a Basic zone continue to getboth private and public IPs.
4.10. Appending a Display Name to the Guest VM’s InternalNameEvery guest VM has an internal name. The host uses the internal name to identify the guest VMs. Thedefault format of the internal name is i-<user_id>-<vm_id>-<instance.name> where instance.nameis a global parameter. A new global parameter, vm.instancename.flag, has now been added. If it isset to true, and if a display name is provided during the creation of a guest VM, the display name isappended to the internal name of the guest VM on the host. This makes the internal name format asi-<user_id>-<vm_id>-<displayName>. The default value of vm.instancename.flag is set to false. Thisfeature is intended to make the correlation between instance names and internal names easier inlarge data center deployments.
4.11. Egress Firewall RulesSupport for setting up egress firewall rules for the virtual routers in advanced zones is supported inCloudPlatform 3.0.6. This feature is specific to isolated networks in advanced zones.
By default, all the outbound traffic from a guest network to a public network is blocked. You can setegress firewall rules to allow outbound traffic to public networks. Traffic that does not match anyegress firewall rule remains blocked. When all egress firewall rules are removed, the default policy,Block, is applied.
Chapter 4. What's New in 3.0.6
26
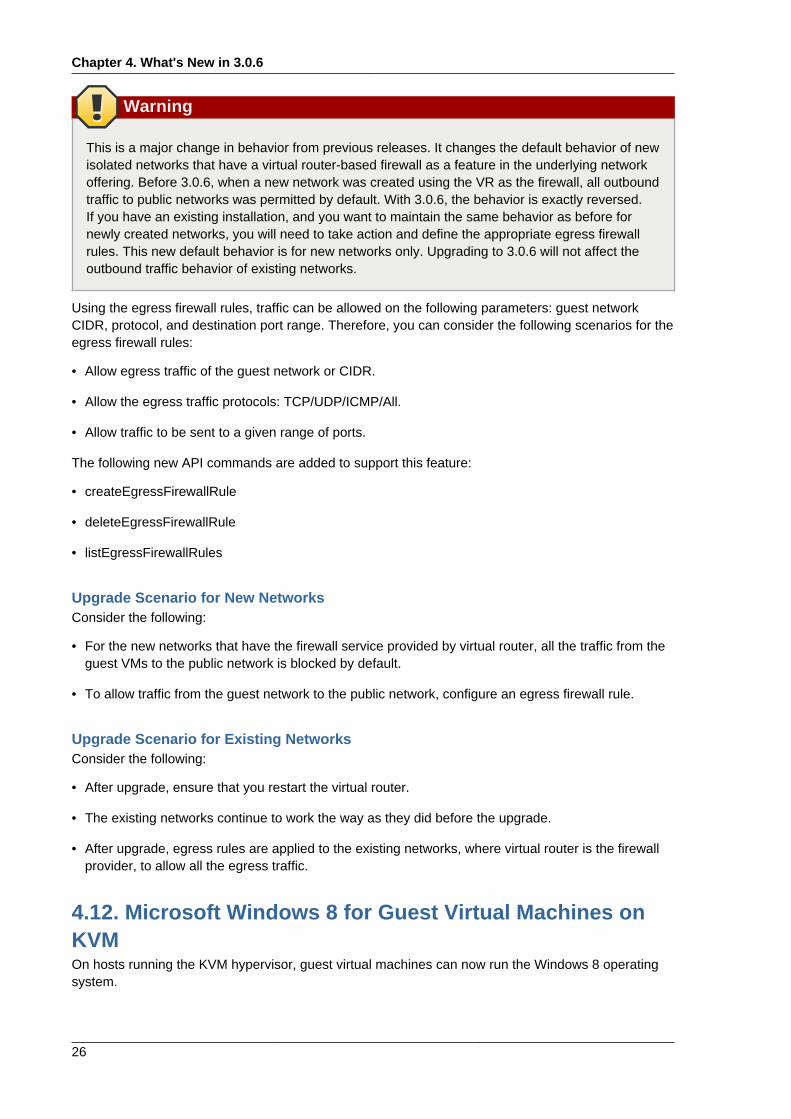
Warning
This is a major change in behavior from previous releases. It changes the default behavior of newisolated networks that have a virtual router-based firewall as a feature in the underlying networkoffering. Before 3.0.6, when a new network was created using the VR as the firewall, all outboundtraffic to public networks was permitted by default. With 3.0.6, the behavior is exactly reversed.If you have an existing installation, and you want to maintain the same behavior as before fornewly created networks, you will need to take action and define the appropriate egress firewallrules. This new default behavior is for new networks only. Upgrading to 3.0.6 will not affect theoutbound traffic behavior of existing networks.
Using the egress firewall rules, traffic can be allowed on the following parameters: guest networkCIDR, protocol, and destination port range. Therefore, you can consider the following scenarios for theegress firewall rules:
• Allow egress traffic of the guest network or CIDR.
• Allow the egress traffic protocols: TCP/UDP/ICMP/All.
• Allow traffic to be sent to a given range of ports.
The following new API commands are added to support this feature:
• createEgressFirewallRule
• deleteEgressFirewallRule
• listEgressFirewallRules
Upgrade Scenario for New NetworksConsider the following:
• For the new networks that have the firewall service provided by virtual router, all the traffic from theguest VMs to the public network is blocked by default.
• To allow traffic from the guest network to the public network, configure an egress firewall rule.
Upgrade Scenario for Existing NetworksConsider the following:
• After upgrade, ensure that you restart the virtual router.
• The existing networks continue to work the way as they did before the upgrade.
• After upgrade, egress rules are applied to the existing networks, where virtual router is the firewallprovider, to allow all the egress traffic.
4.12. Microsoft Windows 8 for Guest Virtual Machines onKVMOn hosts running the KVM hypervisor, guest virtual machines can now run the Windows 8 operatingsystem.
Support for CSP Packages
27
Windows 8 VMs are not yet supported on XenServer or VMware hosts. Windows 8 is not yetsupported by XenServer. Windows 8 is supported by VMware, but CloudPlatform code does not yetinclude an implementation of this feature.
4.13. Support for CSP PackagesThe CSP packages are now by default available with the XenServer 6.1 version. Earlier, the CSPpackages has to be manually installed to use the Security Groups functionality in a Basic zone.
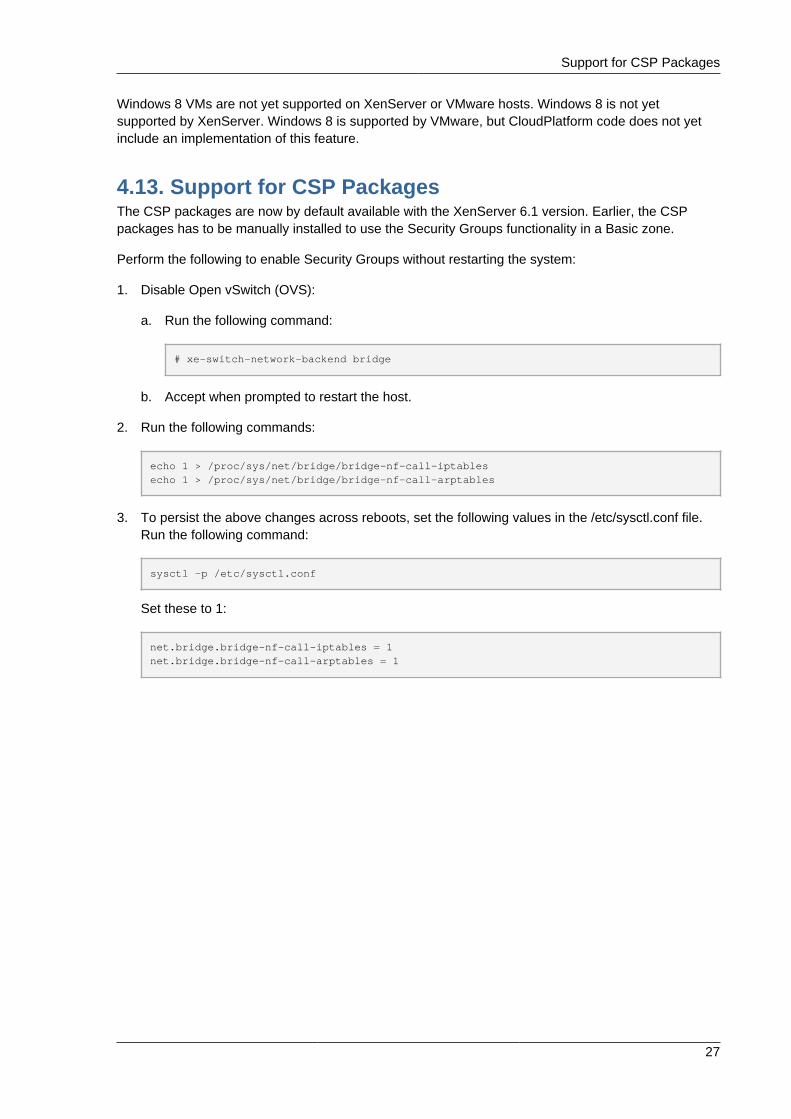
Perform the following to enable Security Groups without restarting the system:
1. Disable Open vSwitch (OVS):
a. Run the following command:
# xe-switch-network-backend bridge
b. Accept when prompted to restart the host.
2. Run the following commands:
echo 1 > /proc/sys/net/bridge/bridge-nf-call-iptables echo 1 > /proc/sys/net/bridge/bridge-nf-call-arptables
3. To persist the above changes across reboots, set the following values in the /etc/sysctl.conf file.Run the following command:
sysctl -p /etc/sysctl.conf
Set these to 1:
net.bridge.bridge-nf-call-iptables = 1net.bridge.bridge-nf-call-arptables = 1

28
Chapter 5.
29
Known Issues in 3.0.6
5.1. Upgrading VMware In Place Not SupportedVMware 5.1 is certified to work with this release. However, CloudPlatform 3.0.6 does not yet supportupgrading the hypervisor from an older version in an existing deployment.
5.2. Instance UUID Is Displayed in the UI After 3.0.1UpgradeAfter upgrading from version 3.0.1 to any higher version of CloudPlatform, the instance namedisplayed in the UI is as same as the UUID of the instance. This behaviour is as per the design.
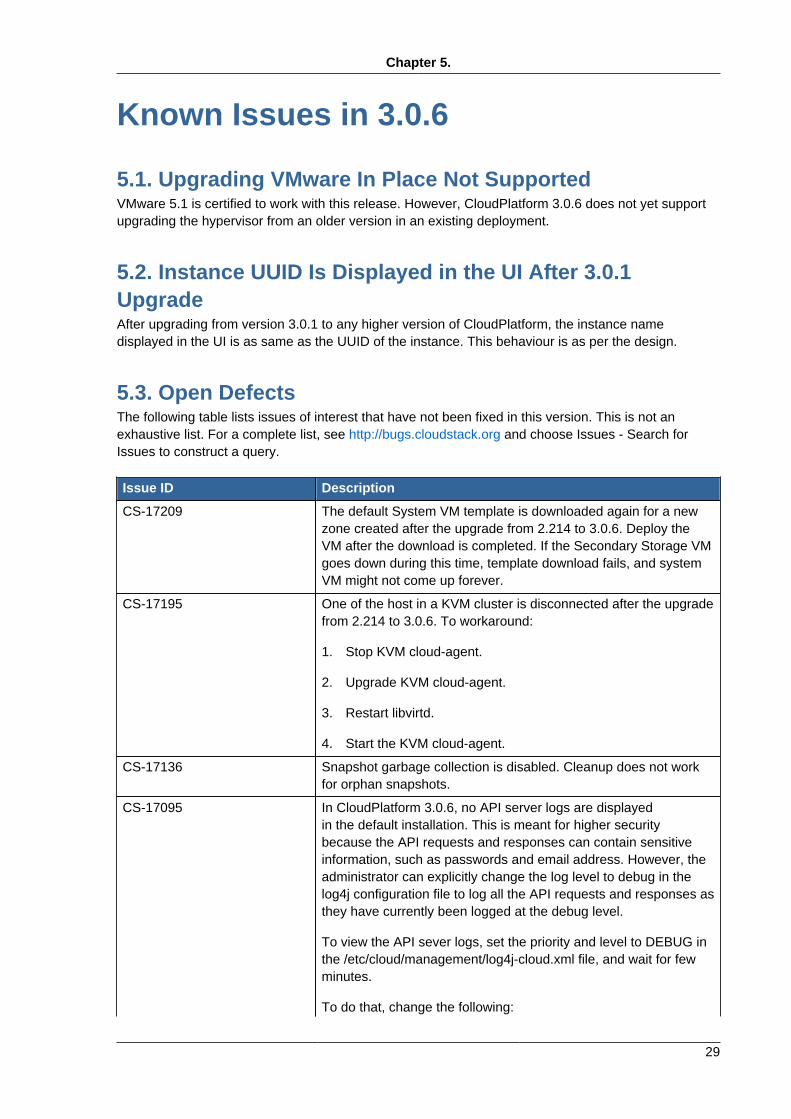
5.3. Open DefectsThe following table lists issues of interest that have not been fixed in this version. This is not anexhaustive list. For a complete list, see http://bugs.cloudstack.org and choose Issues - Search forIssues to construct a query.
Issue ID Description
CS-17209 The default System VM template is downloaded again for a newzone created after the upgrade from 2.214 to 3.0.6. Deploy theVM after the download is completed. If the Secondary Storage VMgoes down during this time, template download fails, and systemVM might not come up forever.
CS-17195 One of the host in a KVM cluster is disconnected after the upgradefrom 2.214 to 3.0.6. To workaround:
1. Stop KVM cloud-agent.
2. Upgrade KVM cloud-agent.
3. Restart libvirtd.
4. Start the KVM cloud-agent.
CS-17136 Snapshot garbage collection is disabled. Cleanup does not workfor orphan snapshots.
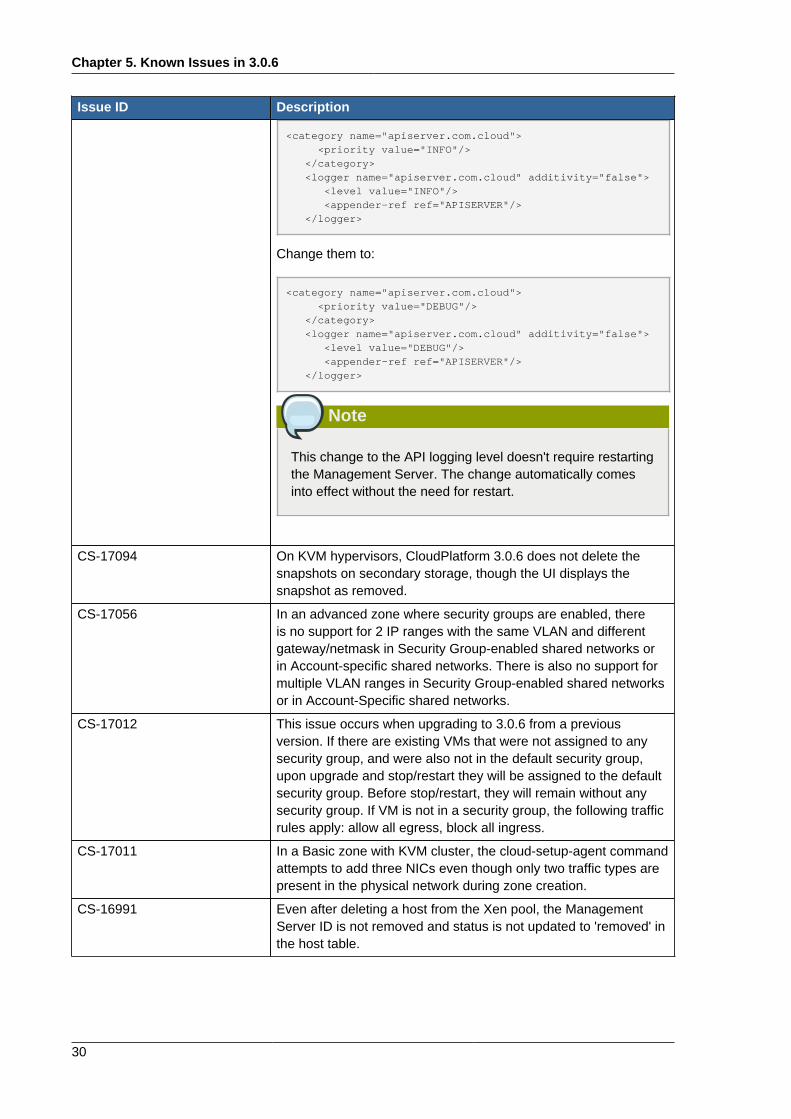
CS-17095 In CloudPlatform 3.0.6, no API server logs are displayedin the default installation. This is meant for higher securitybecause the API requests and responses can contain sensitiveinformation, such as passwords and email address. However, theadministrator can explicitly change the log level to debug in thelog4j configuration file to log all the API requests and responses asthey have currently been logged at the debug level.
To view the API sever logs, set the priority and level to DEBUG inthe /etc/cloud/management/log4j-cloud.xml file, and wait for fewminutes.
To do that, change the following:
Chapter 5. Known Issues in 3.0.6
30
Issue ID Description
<category name="apiserver.com.cloud"> <priority value="INFO"/> </category> <logger name="apiserver.com.cloud" additivity="false"> <level value="INFO"/> <appender-ref ref="APISERVER"/> </logger>
Change them to:
<category name="apiserver.com.cloud"> <priority value="DEBUG"/> </category> <logger name="apiserver.com.cloud" additivity="false"> <level value="DEBUG"/> <appender-ref ref="APISERVER"/> </logger>
Note
This change to the API logging level doesn't require restartingthe Management Server. The change automatically comesinto effect without the need for restart.
CS-17094 On KVM hypervisors, CloudPlatform 3.0.6 does not delete thesnapshots on secondary storage, though the UI displays thesnapshot as removed.
CS-17056 In an advanced zone where security groups are enabled, thereis no support for 2 IP ranges with the same VLAN and differentgateway/netmask in Security Group-enabled shared networks orin Account-specific shared networks. There is also no support formultiple VLAN ranges in Security Group-enabled shared networksor in Account-Specific shared networks.
CS-17012 This issue occurs when upgrading to 3.0.6 from a previousversion. If there are existing VMs that were not assigned to anysecurity group, and were also not in the default security group,upon upgrade and stop/restart they will be assigned to the defaultsecurity group. Before stop/restart, they will remain without anysecurity group. If VM is not in a security group, the following trafficrules apply: allow all egress, block all ingress.
CS-17011 In a Basic zone with KVM cluster, the cloud-setup-agent commandattempts to add three NICs even though only two traffic types arepresent in the physical network during zone creation.
CS-16991 Even after deleting a host from the Xen pool, the ManagementServer ID is not removed and status is not updated to 'removed' inthe host table.

Open Defects
31
Issue ID Description
CS-16921 Creating snapshot is failing because the snapshot chain is toolong. For more information, see Knowledge Base1.
CS-16912 Deleting physical network does not delete the network providerdevices, such as NetScaler, F5, and SRX.
CS-16857 EC2 REST API: using the noReboot option with the createImagecommand does not work as expected.
CS-16828 In F5 and SRX inline mode, deleting a port forwarding rule doesnot delete the corresponding rules from the security policies onSRX.
CS-16827 In F5 and SRX inline mode, after upgrading a network with thenetwork offering that has all the services provided by the virtualrouter to a network offering with SRX and F5, the sourceNATIP that was owned by the virtual router instance remain in theallocated state.
CS-16816 EC2 API: Some CloudPlatform error states are not matched by avalid error state in EC2.
CS-16812 EC2 API: Response shows a CloudPlatform error code rather thanan EC2 error code.
CS-16789 The Describe_Instances in the EC2 REST API provides invalidinformation for certain response parameters.
CS-16760 EC2 API: The start_time field in the response from acreateSnapshot command shows the time when the snapshot wascompleted, not the time when the snapshot was started.
CS-16738 The listZones API accepts the pagesize parameter incorrectly.
CS-16688 Shared network are created without the SourceNAT service.
CS-16683 Disabling Static NAT deletes all the firewall rules that are createdon the public IP.
CS-16660 Proper HTTP error code is not set with the error message returnedto the EC2 client.
CS-16355 Upgrading 2.2.14 to 3.0 is not supported for Juniper SRX.
CS-13618 The load balancing rules programmed on port 22 cannot bereached.
CS-13529 No validation is performed for IP address, and public and privateinterface values when adding an F5 device.
CS-13631 When one of VMs that is being load balanced is down, request tothe load balancing IP gets "Read error" and the subsequent retrysucceeds.
CS-16807 Creating multiple templates with the same name is allowed.
CS-16798 Upgrading from XenServer 6.0.2 to 6.1 does not work.
CS-16795 Powering off one VMware host in an HA-enabled VMware clusterfails to trigger HA, which causes an error.
1 http://docs.cloudstack.org/Knowledge_Base/Snapshots_fail_because_%22The_snapshot_chain_is_too_long%22
Chapter 5. Known Issues in 3.0.6
32
Issue ID Description
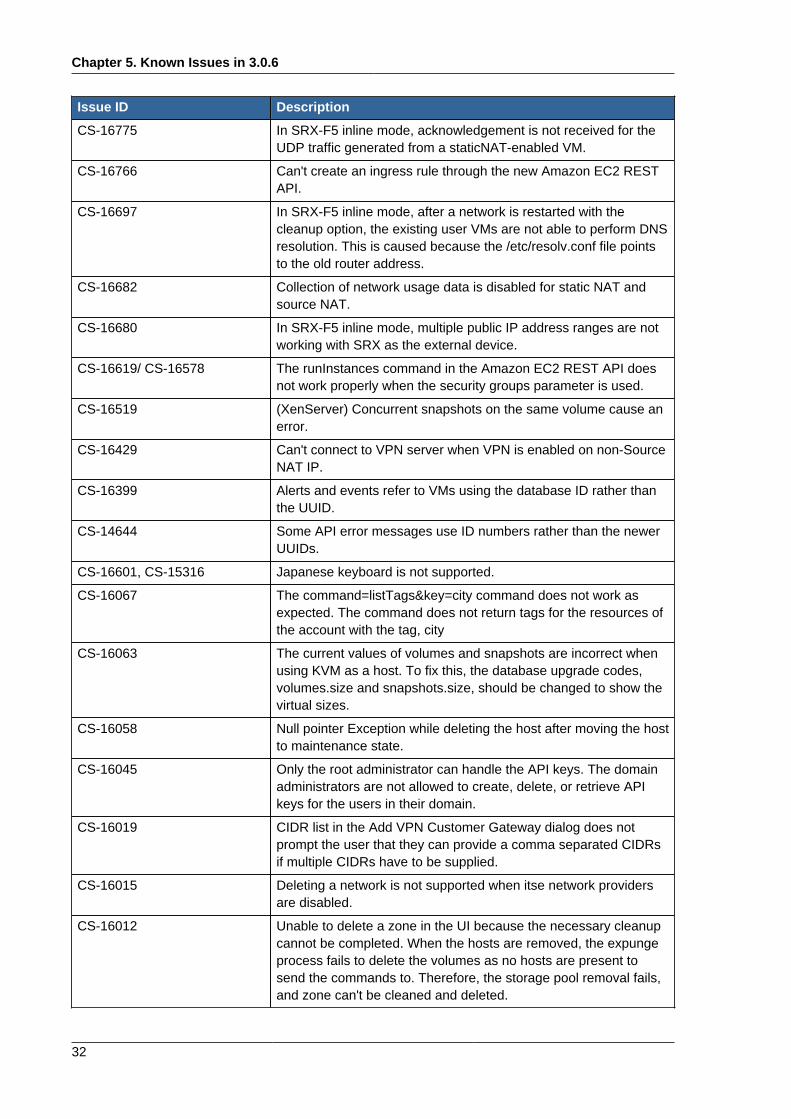
CS-16775 In SRX-F5 inline mode, acknowledgement is not received for theUDP traffic generated from a staticNAT-enabled VM.
CS-16766 Can't create an ingress rule through the new Amazon EC2 RESTAPI.
CS-16697 In SRX-F5 inline mode, after a network is restarted with thecleanup option, the existing user VMs are not able to perform DNSresolution. This is caused because the /etc/resolv.conf file pointsto the old router address.
CS-16682 Collection of network usage data is disabled for static NAT andsource NAT.
CS-16680 In SRX-F5 inline mode, multiple public IP address ranges are notworking with SRX as the external device.
CS-16619/ CS-16578 The runInstances command in the Amazon EC2 REST API doesnot work properly when the security groups parameter is used.
CS-16519 (XenServer) Concurrent snapshots on the same volume cause anerror.
CS-16429 Can't connect to VPN server when VPN is enabled on non-SourceNAT IP.
CS-16399 Alerts and events refer to VMs using the database ID rather thanthe UUID.
CS-14644 Some API error messages use ID numbers rather than the newerUUIDs.
CS-16601, CS-15316 Japanese keyboard is not supported.
CS-16067 The command=listTags&key=city command does not work asexpected. The command does not return tags for the resources ofthe account with the tag, city
CS-16063 The current values of volumes and snapshots are incorrect whenusing KVM as a host. To fix this, the database upgrade codes,volumes.size and snapshots.size, should be changed to show thevirtual sizes.
CS-16058 Null pointer Exception while deleting the host after moving the hostto maintenance state.
CS-16045 Only the root administrator can handle the API keys. The domainadministrators are not allowed to create, delete, or retrieve APIkeys for the users in their domain.
CS-16019 CIDR list in the Add VPN Customer Gateway dialog does notprompt the user that they can provide a comma separated CIDRsif multiple CIDRs have to be supplied.
CS-16015 Deleting a network is not supported when itse network providersare disabled.
CS-16012 Unable to delete a zone in the UI because the necessary cleanupcannot be completed. When the hosts are removed, the expungeprocess fails to delete the volumes as no hosts are present tosend the commands to. Therefore, the storage pool removal fails,and zone can't be cleaned and deleted.
Open Defects
33
Issue ID Description
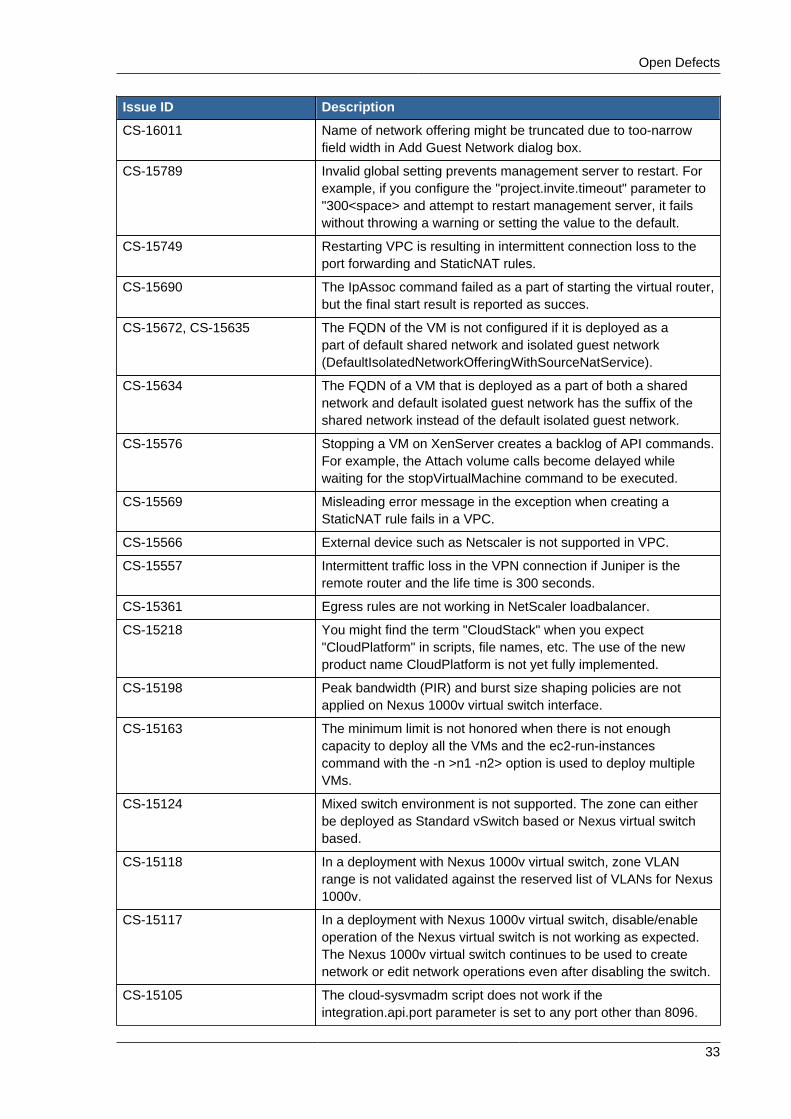
CS-16011 Name of network offering might be truncated due to too-narrowfield width in Add Guest Network dialog box.
CS-15789 Invalid global setting prevents management server to restart. Forexample, if you configure the "project.invite.timeout" parameter to"300<space> and attempt to restart management server, it failswithout throwing a warning or setting the value to the default.
CS-15749 Restarting VPC is resulting in intermittent connection loss to theport forwarding and StaticNAT rules.
CS-15690 The IpAssoc command failed as a part of starting the virtual router,but the final start result is reported as succes.
CS-15672, CS-15635 The FQDN of the VM is not configured if it is deployed as apart of default shared network and isolated guest network(DefaultIsolatedNetworkOfferingWithSourceNatService).
CS-15634 The FQDN of a VM that is deployed as a part of both a sharednetwork and default isolated guest network has the suffix of theshared network instead of the default isolated guest network.
CS-15576 Stopping a VM on XenServer creates a backlog of API commands.For example, the Attach volume calls become delayed whilewaiting for the stopVirtualMachine command to be executed.
CS-15569 Misleading error message in the exception when creating aStaticNAT rule fails in a VPC.
CS-15566 External device such as Netscaler is not supported in VPC.
CS-15557 Intermittent traffic loss in the VPN connection if Juniper is theremote router and the life time is 300 seconds.
CS-15361 Egress rules are not working in NetScaler loadbalancer.
CS-15218 You might find the term "CloudStack" when you expect"CloudPlatform" in scripts, file names, etc. The use of the newproduct name CloudPlatform is not yet fully implemented.
CS-15198 Peak bandwidth (PIR) and burst size shaping policies are notapplied on Nexus 1000v virtual switch interface.
CS-15163 The minimum limit is not honored when there is not enoughcapacity to deploy all the VMs and the ec2-run-instancescommand with the -n >n1 -n2> option is used to deploy multipleVMs.
CS-15124 Mixed switch environment is not supported. The zone can eitherbe deployed as Standard vSwitch based or Nexus virtual switchbased.
CS-15118 In a deployment with Nexus 1000v virtual switch, zone VLANrange is not validated against the reserved list of VLANs for Nexus1000v.
CS-15117 In a deployment with Nexus 1000v virtual switch, disable/enableoperation of the Nexus virtual switch is not working as expected.The Nexus 1000v virtual switch continues to be used to createnetwork or edit network operations even after disabling the switch.
CS-15105 The cloud-sysvmadm script does not work if theintegration.api.port parameter is set to any port other than 8096.

Chapter 5. Known Issues in 3.0.6
34
Issue ID Description
CS-15092 Connecting to the guest VMs through SSH is extremely slow, andit results in connection timeout.
CS-15037 Hairpin NAT is not supported when NetScaler is used for EIP.
CS-15009 The port_profile table will not be populated with port profileinformation. In this release, CloudPlatform directly connects to theVSM for all the port profile operations; therefore, no port profileinformation is cached.
CS-14939 Adding a VMware cluster is not supported when the ManagementNetwork is migrated to the Distributed Virtual Switch environment.
CS-14780 You are allowed to ping the elastic IP address of the VM eventhough no ingress rule is set that allows the ICMP protocol.
CS-14756 Installing KVM on RHEL 6.2 will result in unreliable networkperformance. Workaround: blacklist vhost-net. Edit /etc/modprobe.d/blacklist-kvm.conf and include vhost-net.
CS-14346 The UpdateVirtualMachine API call does not check whether theVM is stopped. Therefore, stop the VM manually before issuingthis call.
CS-14303 (was 14537) The IP addresses for a shared network are still being consumedeven if no services are defined for that network.
CS-14296 (was 14530) OVM: Network traffic labels are not supported.
CS-14291 (was 14523) The EIP/ELB network offering for basic zones does not supportmultiple NetScalers.
CS-14275 (was 14506) F5: Unable to properly remove a F5 device.
CS-14201 (was 14430) VMWare: Template sizes are being reported different dependingon whether the primary storage is using ISCSI or NFS.
CS-13758 (was 13963) vSphere: template download from templates created off of the rootvolume does not work properly.
CS-13733 (was 13935) vSphere: detaching an ISO from a restored VM instance fails.
CS-13682 (was 13883) Multiple NetScalers are not supported in Basic Networking.
CS-13599 (was 13359) Programming F5/NetScaler rules can be better optimized.
CS-13173 (was 13336) vSphere: cross cluster volume migration does not work properly.
CS-12714 (was 12840) Capacity view is not available for pods or clusters.
CS-12624 (was 12741) vSphere: maintenance mode will not live migrate system VM toanother host.
CS-11514 (was 11535) In-line mode for load balancer is not supported for all externaldevices.
Chapter 6.
35
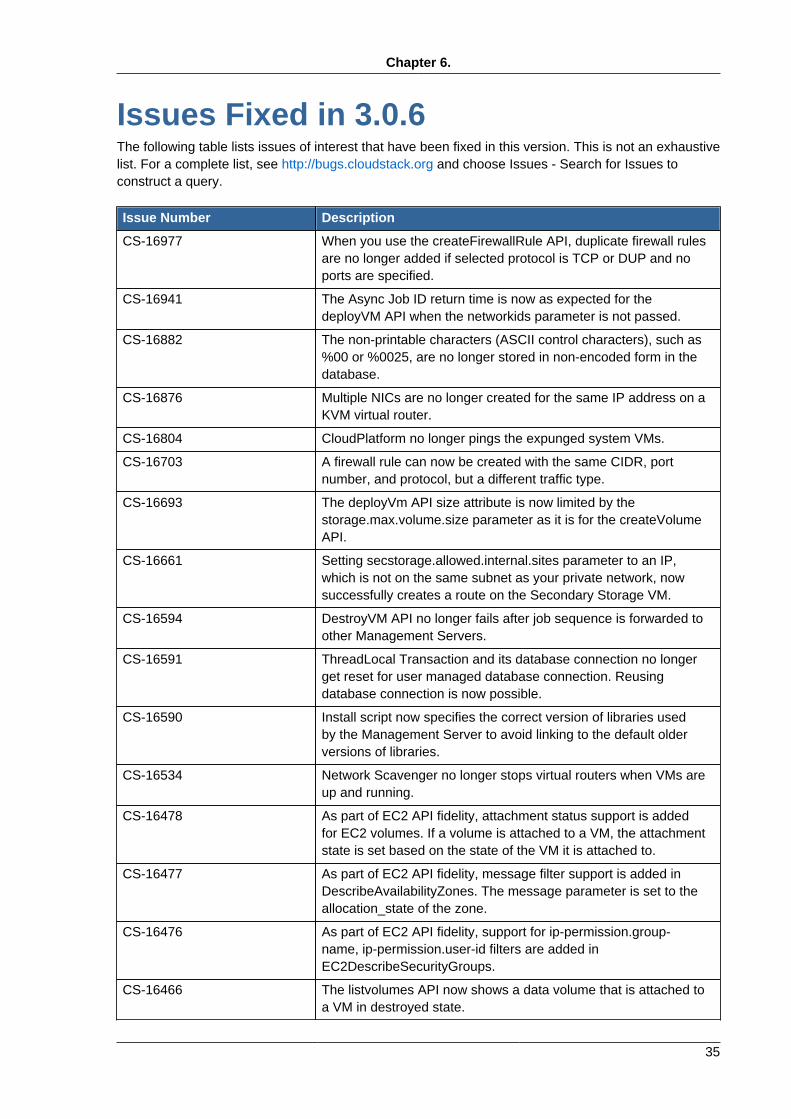
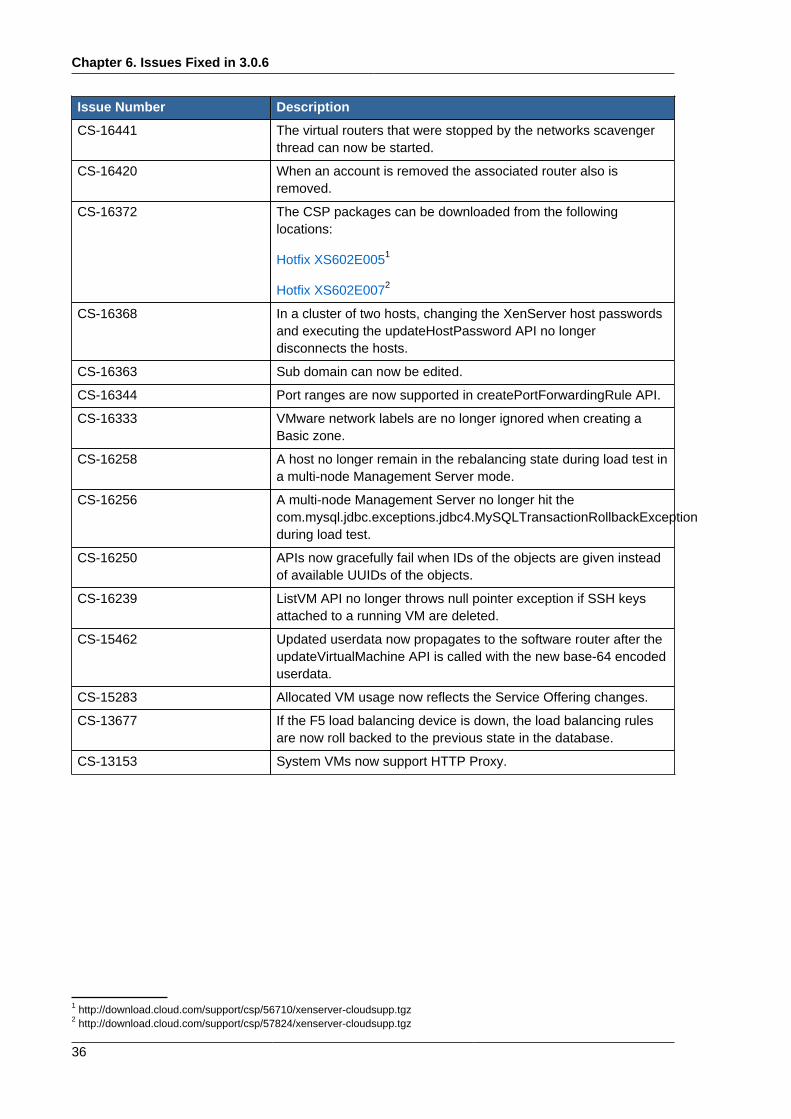
Issues Fixed in 3.0.6The following table lists issues of interest that have been fixed in this version. This is not an exhaustivelist. For a complete list, see http://bugs.cloudstack.org and choose Issues - Search for Issues toconstruct a query.
Issue Number Description
CS-16977 When you use the createFirewallRule API, duplicate firewall rulesare no longer added if selected protocol is TCP or DUP and noports are specified.
CS-16941 The Async Job ID return time is now as expected for thedeployVM API when the networkids parameter is not passed.
CS-16882 The non-printable characters (ASCII control characters), such as%00 or %0025, are no longer stored in non-encoded form in thedatabase.
CS-16876 Multiple NICs are no longer created for the same IP address on aKVM virtual router.
CS-16804 CloudPlatform no longer pings the expunged system VMs.
CS-16703 A firewall rule can now be created with the same CIDR, portnumber, and protocol, but a different traffic type.
CS-16693 The deployVm API size attribute is now limited by thestorage.max.volume.size parameter as it is for the createVolumeAPI.
CS-16661 Setting secstorage.allowed.internal.sites parameter to an IP,which is not on the same subnet as your private network, nowsuccessfully creates a route on the Secondary Storage VM.
CS-16594 DestroyVM API no longer fails after job sequence is forwarded toother Management Servers.
CS-16591 ThreadLocal Transaction and its database connection no longerget reset for user managed database connection. Reusingdatabase connection is now possible.
CS-16590 Install script now specifies the correct version of libraries usedby the Management Server to avoid linking to the default olderversions of libraries.
CS-16534 Network Scavenger no longer stops virtual routers when VMs areup and running.
CS-16478 As part of EC2 API fidelity, attachment status support is addedfor EC2 volumes. If a volume is attached to a VM, the attachmentstate is set based on the state of the VM it is attached to.
CS-16477 As part of EC2 API fidelity, message filter support is added inDescribeAvailabilityZones. The message parameter is set to theallocation_state of the zone.
CS-16476 As part of EC2 API fidelity, support for ip-permission.group-name, ip-permission.user-id filters are added inEC2DescribeSecurityGroups.
CS-16466 The listvolumes API now shows a data volume that is attached toa VM in destroyed state.
Chapter 6. Issues Fixed in 3.0.6
36
Issue Number Description
CS-16441 The virtual routers that were stopped by the networks scavengerthread can now be started.
CS-16420 When an account is removed the associated router also isremoved.
CS-16372 The CSP packages can be downloaded from the followinglocations:
Hotfix XS602E0051
Hotfix XS602E0072
CS-16368 In a cluster of two hosts, changing the XenServer host passwordsand executing the updateHostPassword API no longerdisconnects the hosts.
CS-16363 Sub domain can now be edited.
CS-16344 Port ranges are now supported in createPortForwardingRule API.
CS-16333 VMware network labels are no longer ignored when creating aBasic zone.
CS-16258 A host no longer remain in the rebalancing state during load test ina multi-node Management Server mode.
CS-16256 A multi-node Management Server no longer hit thecom.mysql.jdbc.exceptions.jdbc4.MySQLTransactionRollbackExceptionduring load test.
CS-16250 APIs now gracefully fail when IDs of the objects are given insteadof available UUIDs of the objects.
CS-16239 ListVM API no longer throws null pointer exception if SSH keysattached to a running VM are deleted.
CS-15462 Updated userdata now propagates to the software router after theupdateVirtualMachine API is called with the new base-64 encodeduserdata.
CS-15283 Allocated VM usage now reflects the Service Offering changes.
CS-13677 If the F5 load balancing device is down, the load balancing rulesare now roll backed to the previous state in the database.
CS-13153 System VMs now support HTTP Proxy.
1 http://download.cloud.com/support/csp/56710/xenserver-cloudsupp.tgz2 http://download.cloud.com/support/csp/57824/xenserver-cloudsupp.tgz
Chapter 7.
37
API Changes from 3.0.5 to 3.0.6
7.1. Added API Commands in 3.0.6• createEgressFirewallRule (creates an egress firewall rule on the guest network.)
• deleteEgressFirewallRule (deletes a egress firewall rule on the guest network.)
• listEgressFirewallRules (lists the egress firewall rules configured for a guest network.)
• resetSSHKeyForVirtualMachine (Resets the SSHkey for virtual machine.)
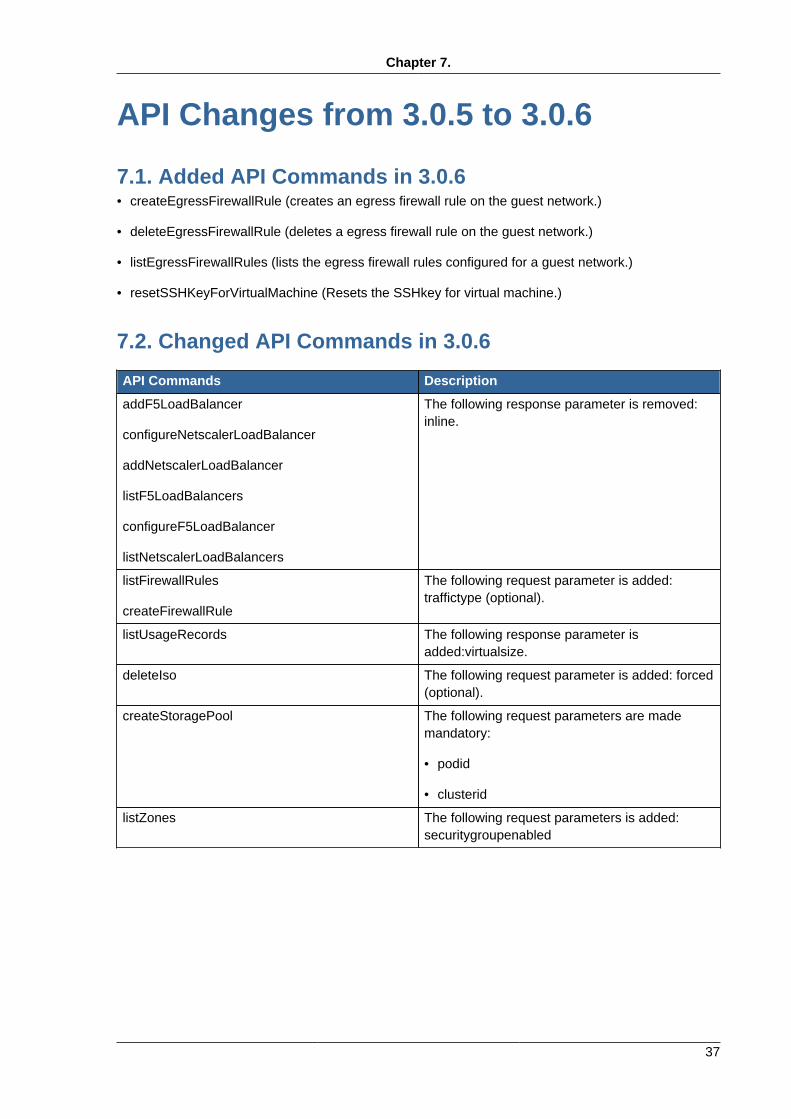
7.2. Changed API Commands in 3.0.6
API Commands Description
addF5LoadBalancer
configureNetscalerLoadBalancer
addNetscalerLoadBalancer
listF5LoadBalancers
configureF5LoadBalancer
listNetscalerLoadBalancers
The following response parameter is removed:inline.
listFirewallRules
createFirewallRule
The following request parameter is added:traffictype (optional).
listUsageRecords The following response parameter isadded:virtualsize.
deleteIso The following request parameter is added: forced(optional).
createStoragePool The following request parameters are mademandatory:
• podid
• clusterid
listZones The following request parameters is added:securitygroupenabled

38