poly studio usb video bar user guide 1.2
TRANSCRIPT

USER GUIDE 1.2.0 | December 2019 | 3725-62048-003A
Poly Studio USB Video Bar
Getting HelpFor more information about installing, configuring, andadministering Poly/Polycom products or services, go toPolycom Support.
Plantronics, Inc. (Poly — formerly Plantronics and Polycom)345 Encinal StreetSanta Cruz, California95060
© 2019 Plantronics, Inc. All rights reserved. Poly, the propellerdesign, and the Poly logo are trademarks of Plantronics, Inc.All other trademarks are the property of their respectiveowners.
Contents
Before You Begin................................................................................................3Audience, Purpose, and Required Skills.............................................................................3Related Poly and Partner Resources..................................................................................3
Getting Started................................................................................................... 4Poly Studio Overview.......................................................................................................... 4Powering On and Off...........................................................................................................5Navigating Poly Studio........................................................................................................ 5
Basic Poly Studio LED Indicators.............................................................................6Poly Studio Remote Control..................................................................................... 7Poly Studio Privacy Shutter......................................................................................8
Accessibility Features....................................................................................................... 10
Using Poly Studio.............................................................................................11Set Poly Studio as the Default Audio and Video Device................................................... 11Using Camera Presets...................................................................................................... 11Connect Poly Studio to a Bluetooth Device...................................................................... 12
Configuring Poly Studio Using Polycom Companion.................................. 13Initialize the Poly Studio USB Device Using the Setup Wizard.........................................13View Poly Studio Information............................................................................................ 14Update the Poly Studio USB Device and the Remote Control..........................................15Poly Studio User Settings................................................................................................. 15
Control the Device Camera.................................................................................... 16Configure Advanced Camera Settings................................................................... 16Pair the Poly Studio USB Device to a Bluetooth Device........................................ 17Configuring Audio Settings.....................................................................................18
Poly Studio Admin Settings...............................................................................................19Log In to Poly Studio Admin Settings..................................................................... 19Change Your Password..........................................................................................19Configure General Settings.................................................................................... 20Configuring Camera Tracking.................................................................................20Join a Wi-Fi Network.............................................................................................. 21Delete Known Wi-Fi Networks................................................................................23Configure Bluetooth Settings..................................................................................23Configure a Provisioning Server for Poly Studio USB Device................................24Certificate Signing Requests.................................................................................. 25
1

Import a Configuration File..................................................................................... 27Export a Configuration File to Your Local System..................................................28
Troubleshooting............................................................................................... 29Identifying Issues Using the LED Indicators......................................................................29Restart Your Poly Studio USB Device...............................................................................29Restore Default Settings................................................................................................... 30Reset Poly Studio to Factory Settings...............................................................................30Factory Reset Your Poly Studio USB Device Using Polycom Companion .......................31Pair the Bluetooth Remote Control with Poly Studio.........................................................31Troubleshoot the Remote Control..................................................................................... 31Test Your Camera Audio Input.......................................................................................... 32Display Camera Information On-Screen........................................................................... 32Download Log and Crash Files......................................................................................... 32Can't Upgrade, Reset, or Reboot Poly Studio via Polycom Companion...........................33
Contents
2

Before You BeginTopics:
• Audience, Purpose, and Required Skills
▪ Related Poly and Partner Resources
This chapter introduces overview information and references about Poly Studio (model P009) USB videobar, an all-in-one audio-video hub.
Audience, Purpose, and Required SkillsThis guide is intended for beginning users, as well as intermediate and advanced users who want to learnmore about the features available with Poly Studio.
Related Poly and Partner ResourcesSee the following sites for information related to this product.
▪ The Polycom Support Site is the entry point to online product, service, and solution supportinformation including Licensing & Product Registration, Self-Service, Account Management,Product-Related Legal Notices, and Documents & Software downloads.
▪ The Polycom Document Library provides support documentation for active products, services, andsolutions. The documentation displays in responsive HTML5 format so that you can easily accessand view installation, configuration, or administration content from any online device.
▪ The Polycom Community provides access to the latest developer and support information. Createan account to access Poly support personnel and participate in developer and support forums. Youcan find the latest information on hardware, software, and partner solutions topics, share ideas, andsolve problems with your colleagues.
▪ The Polycom Partner Network are industry leaders who natively integrate the Poly standards-basedRealPresence Platform with their customers’ current UC infrastructures, making it easy for you tocommunicate face-to-face with the applications and devices you use every day.
▪ The Polycom Collaboration Services help your business succeed and get the most out of yourinvestment through the benefits of collaboration.
3
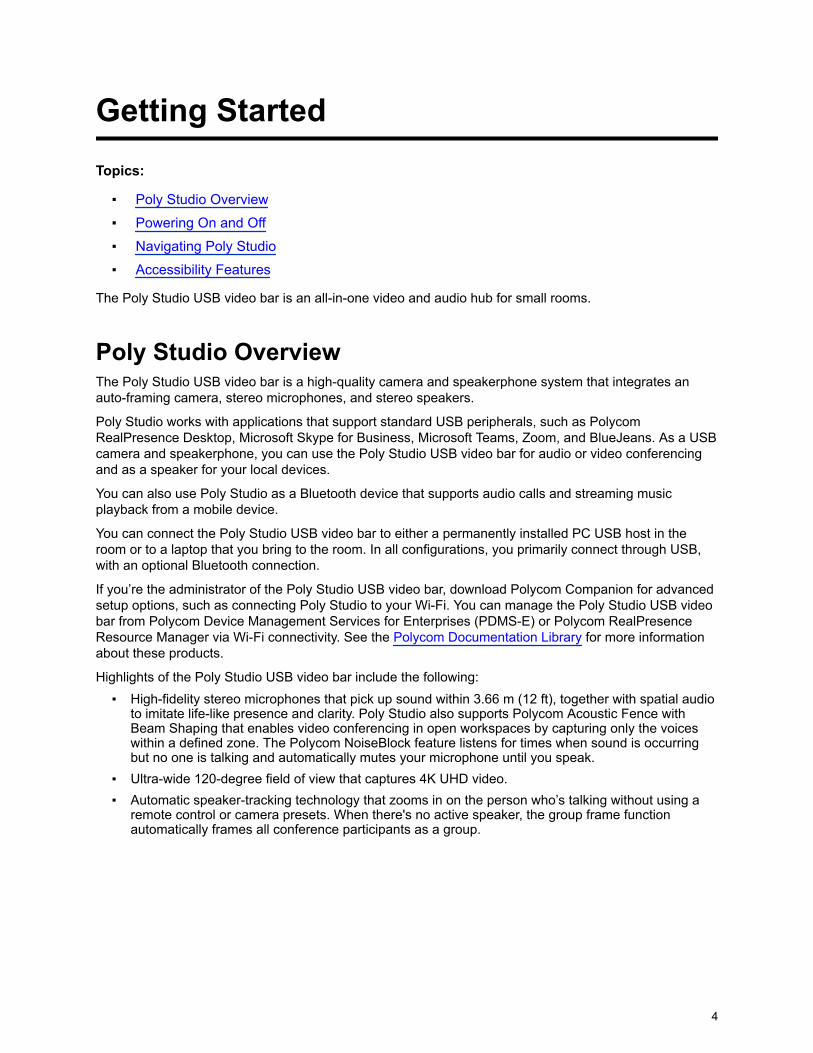
Getting StartedTopics:
▪ Poly Studio Overview
▪ Powering On and Off
▪ Navigating Poly Studio
▪ Accessibility Features
The Poly Studio USB video bar is an all-in-one video and audio hub for small rooms.
Poly Studio OverviewThe Poly Studio USB video bar is a high-quality camera and speakerphone system that integrates anauto-framing camera, stereo microphones, and stereo speakers.
Poly Studio works with applications that support standard USB peripherals, such as PolycomRealPresence Desktop, Microsoft Skype for Business, Microsoft Teams, Zoom, and BlueJeans. As a USBcamera and speakerphone, you can use the Poly Studio USB video bar for audio or video conferencingand as a speaker for your local devices.
You can also use Poly Studio as a Bluetooth device that supports audio calls and streaming musicplayback from a mobile device.
You can connect the Poly Studio USB video bar to either a permanently installed PC USB host in theroom or to a laptop that you bring to the room. In all configurations, you primarily connect through USB,with an optional Bluetooth connection.
If you’re the administrator of the Poly Studio USB video bar, download Polycom Companion for advancedsetup options, such as connecting Poly Studio to your Wi-Fi. You can manage the Poly Studio USB videobar from Polycom Device Management Services for Enterprises (PDMS-E) or Polycom RealPresenceResource Manager via Wi-Fi connectivity. See the Polycom Documentation Library for more informationabout these products.
Highlights of the Poly Studio USB video bar include the following:▪ High-fidelity stereo microphones that pick up sound within 3.66 m (12 ft), together with spatial audio
to imitate life-like presence and clarity. Poly Studio also supports Polycom Acoustic Fence withBeam Shaping that enables video conferencing in open workspaces by capturing only the voiceswithin a defined zone. The Polycom NoiseBlock feature listens for times when sound is occurringbut no one is talking and automatically mutes your microphone until you speak.
▪ Ultra-wide 120-degree field of view that captures 4K UHD video.▪ Automatic speaker-tracking technology that zooms in on the person who’s talking without using a
remote control or camera presets. When there's no active speaker, the group frame functionautomatically frames all conference participants as a group.
4

Powering On and OffThe Poly Studio USB video bar system doesn’t have a power button. When you plug in the power cord,the device turns on.
Navigating Poly StudioThe Poly Studio USB video bar includes an integrated device with a camera, speakers, a microphonearray, and a remote control.
Getting Started
5

Poly Studio Feature Descriptions
Reference Feature Feature Description
1 Camera Camera with a privacy shutter that enables ordisables the video input as you choose
2 Microphone array Stereo microphone that captures audio
3 LED light indicators Indicate the status and the tracked speaker
4 Speakers Stereo audio output
5 Privacy shutter lever Covers or uncovers the camera lens
6 Remote control pairing Enables the Bluetooth remote control pairing mode
7 Reset Resets the Poly Studio USB video bar to the factorysoftware version or clears all saved configurations
Basic Poly Studio LED IndicatorsThe Poly Studio USB video bar provides an LED light bar above the camera to help you understand thesystem’s behaviors.
Basic Poly Studio LED Indicators and Status
Indicator Position Status
Chasing white All while alternating Boot initialization in progress
Blinking blue Two in the middle Bluetooth in discovery
Solid blue for three seconds Two in the middle Bluetooth paired
Solid amber Two in the middle Eight in the middle
Blinking green or white All Incoming call
Solid green or amber Two in the middle Outgoing call
Solid green or white One or two (when in the middle),indicating the tracked speaker orthe direction of the camera
Four to eight (when in the middle),indicating the tracked speaker orthe direction of the camera
Solid white for three seconds Two in the middle Twelve in the middle
Solid red All Muted microphone
Getting Started
6

Poly Studio Remote ControlThe Poly Studio USB video bar provides a low-energy Bluetooth remote control, which automatically pairswith the USB video bar when you turn it on for the first time.
By default, Poly Studio enables the Group Framing and Speaker-Tracking function, which provideshands-free experience except for basic buttons like volume, mute, answer, and hang-up.
The remote control sleeps if it's inactive for 30 seconds. You can press any key or move it to wake it up.
Button Icon Button Name Description
1 Volume Up/Down Adjust speaker volume
2 Zoom In/Out Adjust camera zoom in/out whenthe group framing and speaker-tracking mode is off
3 Camera Directions Adjust the direction of camera whenthe group framing and speaker-tracking mode is off
4 Home Resets the camera to its originalstatus when the group framing andspeaker-tracking mode is off
Getting Started
7
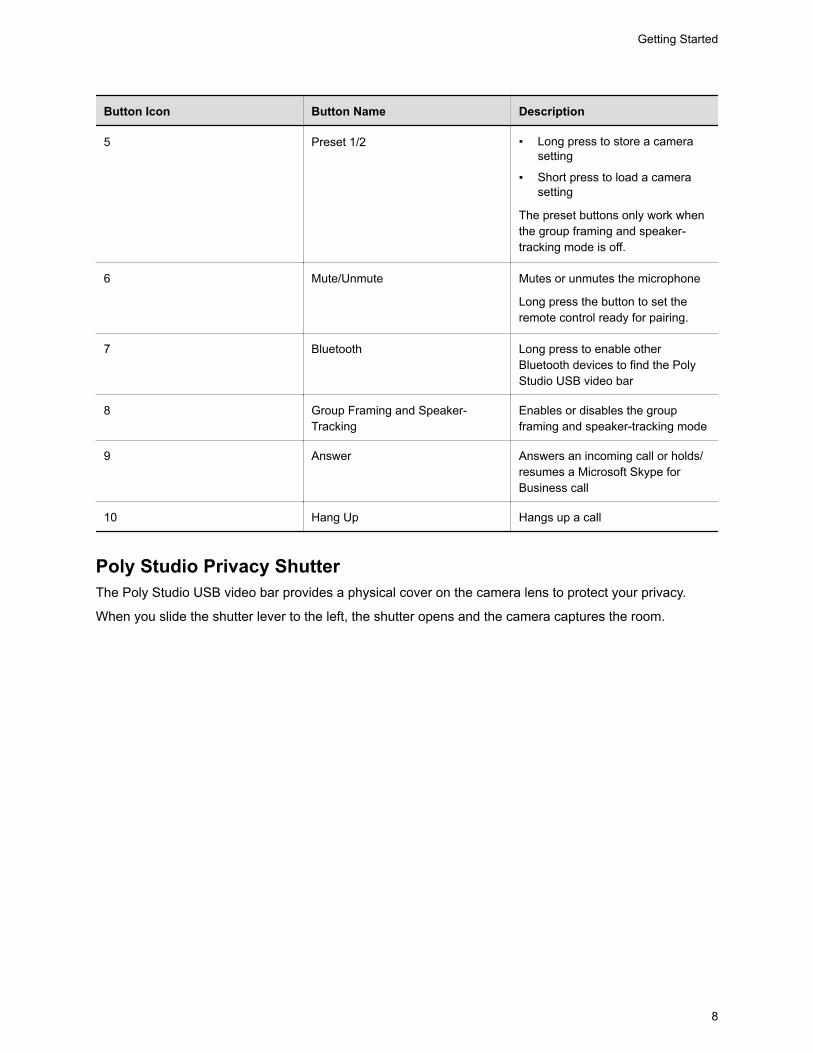
Button Icon Button Name Description
5 Preset 1/2 ▪ Long press to store a camerasetting
▪ Short press to load a camerasetting
The preset buttons only work whenthe group framing and speaker-tracking mode is off.
6 Mute/Unmute Mutes or unmutes the microphone
Long press the button to set theremote control ready for pairing.
7 Bluetooth Long press to enable otherBluetooth devices to find the PolyStudio USB video bar
8 Group Framing and Speaker-Tracking
Enables or disables the groupframing and speaker-tracking mode
9 Answer Answers an incoming call or holds/resumes a Microsoft Skype forBusiness call
10 Hang Up Hangs up a call
Poly Studio Privacy ShutterThe Poly Studio USB video bar provides a physical cover on the camera lens to protect your privacy.
When you slide the shutter lever to the left, the shutter opens and the camera captures the room.
Getting Started
8

When you slide the lever to the right, the shutter closes and the camera turns off.
Getting Started
9

If you close the camera privacy shutter during a call, the camera status changes from working to standingby, and the LED lights turn to solid amber.
Accessibility FeaturesThe Poly Studio USB video bar includes a number of features to accommodate hearing, vision, ormobility-impaired users.
Accessibility Feature Description
Visual and audio notifications LED indicators let you know when status changes,functions work, and whether features are enabled. Inmost cases an audio tone accompanies the LEDchanges.
Tactile buttons The mechanical buttons on the remote control and onthe device with visual contrast.
Adjustable volume You can raise or lower the volume using the remotecontrol.
Built-in speaker and microphone Poly Studio has speaker and microphone that allow youto hear audio and speak without having to use aheadset.
Getting Started
10

Using Poly StudioTopics:
▪ Set Poly Studio as the Default Audio and Video Device
▪ Using Camera Presets
▪ Connect Poly Studio to a Bluetooth Device
Once you plug in the power cable, you can start using the Poly Studio USB video bar.
Connect the Poly Studio USB video bar to your laptop or computer with the USB cable. Additionally, youcan also connect it to your Bluetooth host devices.
Set Poly Studio as the Default Audio and Video DeviceIf you use the Poly Studio USB video bar together with a supported application for video calls, you mayneed to set Poly Studio as the default audio and video device of your application.
The following is a general procedure that you can refer to. Your application may use different terms orcategories.
Procedure1. Go to your software client Settings.2. Find Audio Device and Video Device.3. Select Poly Studio as the device and click Save.
Poly Studio doesn’t support mixed types of audio and video input like PC mic with Poly Studiovideo. If you connect the Poly Studio USB video bar to a computer over USB and Bluetooth at thesame time, make sure that your application uses both audio and video input from Poly Studio overUSB.
Using Camera PresetsYou can save two settings for Pan, Tilt, Zoom, and Focus for the Poly Studio camera.
Using the presets to adjust the camera to your saved angle directly when the Group Framing andSpeaker-Tracking mode is off.
Save Camera PresetsThe two number buttons on the Poly Studio remote control serve as preset shortcuts.
Turn off the group framing and speaker-tracking mode before you save a preset.
Procedure1. Adjust the camera.2. Long press the 1 or 2 button on the remote control.
The middle LED lights stay white for three seconds with a notification sound.
11
Note: If the button already has a saved setting, your new setting overwrites it.
Call Camera PresetsIf your camera doesn’t track the speaker, you can use the preset buttons on the remote control to adjustthe camera angle.
Procedure1. Turn off the group framing and speaker-tracking mode.2. Press the 1 or 2 button on the remote control to restore the corresponding saved angle.
Connect Poly Studio to a Bluetooth DeviceConnect the Poly Studio USB device to a Bluetooth device and use it as the speaker and microphone ofthe device.
You can pair the Poly Studio USB device with a mobile phone, a computer or laptop, or a tablet.
Note: The Poly Studio USB device doesn’t support mixed types of audio and video input. If you connectit to a computer over USB and Bluetooth at the same time, make sure that your application usesboth audio and video input from Studio USB device over USB.
You can connect the Poly Studio USB video bar to a computer over USB and to a phone over Bluetooth.
Procedure1. On the remote control, long press Bluetooth to enable the paring mode.
The LED lights blink blue in the middle during the pairing process.2. On your device, enable Bluetooth and select from the list of available devices.
The middle LED lights keep solid blue for three seconds with a notification sound.
You can start playing music or make phone calls from the Poly Studio speakerphone once you connect.
Using Poly Studio
12
Configuring Poly Studio Using PolycomCompanionTopics:
▪ Initialize the Poly Studio USB Device Using the Setup Wizard
▪ View Poly Studio Information
▪ Update the Poly Studio USB Device and the Remote Control
▪ Poly Studio User Settings
▪ Poly Studio Admin Settings
You can configure the Poly Studio USB video bar using the Polycom Companion application.
You can configure the following settings on the Polycom Companion application:▪ Audio and video configurations▪ Camera control▪ Wi-Fi and Bluetooth configurations▪ Provisioning configuration▪ Software upgrade & reset▪ Downloading logs▪ Audio test
The Acoustic Fence with Beam Shaping feature and the Stereo sound are off by default. You need to goto the Polycom Companion application to enable them. Download the application on Polycom Support.
Initialize the Poly Studio USB Device Using the SetupWizardWhen you start up the Poly Studio USB device for the first time, or after you factory reset the system, thesetup wizard leads you through the minimum configuration steps.
Ask your network administrator for the provisioning server used in your deployment before you choosethe Server Type.
Note: If you select Auto provisioning mode, make sure that you already have the provisioning serveraddress, user name, and password in your DHCP option 66 or 150. For example, https://username:[email protected].
Procedure1. Connect the Poly Studio USB device to your computer, then select the Poly Studio USB video bar
tile from your Polycom Companion.2. Enter the admin password in the Password field (the default password is Polycom12#$).
13
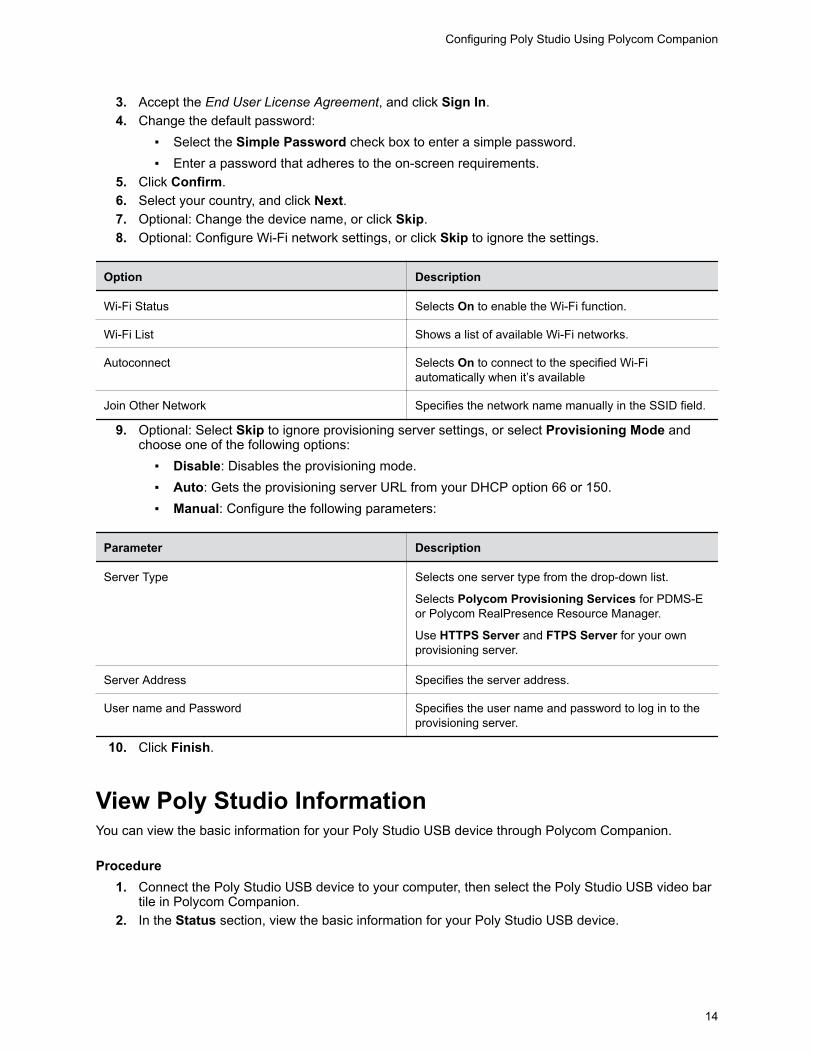
3. Accept the End User License Agreement, and click Sign In.4. Change the default password:
▪ Select the Simple Password check box to enter a simple password.▪ Enter a password that adheres to the on-screen requirements.
5. Click Confirm.6. Select your country, and click Next.7. Optional: Change the device name, or click Skip.8. Optional: Configure Wi-Fi network settings, or click Skip to ignore the settings.
Option Description
Wi-Fi Status Selects On to enable the Wi-Fi function.
Wi-Fi List Shows a list of available Wi-Fi networks.
Autoconnect Selects On to connect to the specified Wi-Fiautomatically when it’s available
Join Other Network Specifies the network name manually in the SSID field.
9. Optional: Select Skip to ignore provisioning server settings, or select Provisioning Mode andchoose one of the following options:
▪ Disable: Disables the provisioning mode.▪ Auto: Gets the provisioning server URL from your DHCP option 66 or 150.▪ Manual: Configure the following parameters:
Parameter Description
Server Type Selects one server type from the drop-down list.
Selects Polycom Provisioning Services for PDMS-Eor Polycom RealPresence Resource Manager.
Use HTTPS Server and FTPS Server for your ownprovisioning server.
Server Address Specifies the server address.
User name and Password Specifies the user name and password to log in to theprovisioning server.
10. Click Finish.
View Poly Studio InformationYou can view the basic information for your Poly Studio USB device through Polycom Companion.
Procedure1. Connect the Poly Studio USB device to your computer, then select the Poly Studio USB video bar
tile in Polycom Companion.2. In the Status section, view the basic information for your Poly Studio USB device.
Configuring Poly Studio Using Polycom Companion
14

Update the Poly Studio USB Device and the RemoteControlYou can use the Polycom Companion application to update the firmware of the Poly Studio USB deviceand the remote control.
After the Poly Studio USB device connects to your computer, the application checks for a new softwareversion from the server automatically. If the app detects a new version, the app displays a red dot on theFirmware Update tab as a reminder.
Note: Make sure your computer doesn’t enter sleep mode during the firmware update. Otherwise, theupdate may fail.
Procedure1. Connect the Poly Studio USB device to your computer, then select the Poly Studio USB video bar
tile from your Polycom Companion.2. Click the Firmware Update tab.
The application shows the current version and new version.3. Click Update to update a Poly Studio USB video bar USB device or a remote control in active
mode.
Note: If the remote control is in sleep mode, you can press any button to wake up the remotecontrol.
4. Enter the admin password to start the update (the default password is Polycom12#$).
Note: Do not disconnect the Poly Studio USB device while installing the update. If it disconnectsunexpectedly, you must finish the update immediately after reconnecting it.
Application shows the new version number and Up-to-Date after the update installs.
Poly Studio User SettingsYou can configure camera and audio settings, control the camera, and pair your device to the Poly StudioUSB video bar USB device through Polycom Companion.
Caution: Don’t unplug the USB cable or power cable of the Poly Studio USB video bar USB devicewhile changing the its settings on the Polycom Companion. This may cause unexpectederrors.
Configuring Poly Studio Using Polycom Companion
15

Control the Device CameraYou can enable speaker tracking and control the camera on the Poly Studio USB device through PolycomCompanion.
Procedure1. Connect the Poly Studio USB device to your computer, then select the Poly Studio USB video bar
tile from your Polycom Companion.2. Go to User Settings > Camera Control.3. Control the Poly Studio USB device through the following functions:
Button Name Description
Zoom In/Out Adjusts camera zoom in/out when the Tracking Modeis off.
Adjust Camera Directions Adjusts the direction of camera when the TrackingMode is off.
Preset 1/2 ▪ Select a preset card, and click Save to store acamera setting.
▪ Select a preset card, and click Select to load acamera setting.
Configure Advanced Camera SettingsYou can improve the video quality of the Poly Studio USB video bar USB device by configuring advancedcamera settings.
Room lighting can affect video quality. If the room is too bright or too dark for camera tracking to workproperly, you can improve the video quality by adjusting certain settings in Polycom Companion.
Procedure1. Connect the Poly Studio USB video bar USB device to your computer, then select the Poly Studio
USB video bar tile from your Polycom Companion.2. Go to User Settings > Camera Control.3. Select Advanced Camera Settings.4. Configure the following camera settings:
Camera Setting Description
Brightness Use the slider to adjust image brightness.
Contrast Use the slider to adjust image contrast.
Saturation Use the slider to adjust color saturation.
Sharpness Use the slider to adjust video sharpness.
Configuring Poly Studio Using Polycom Companion
16

Camera Setting Description
White Balance Specifies how the camera compensates for variationsin room light sources.
Select Auto or adjust the value manually. If you adjustmanually, select a color temperature value. The colortemperature values, measured in degrees Kelvin,correspond to the color of the ambient light in a room.
Gain Use the slider to adjust the signal amplification from thecamera.
Backlight Comp Enables or disables backlight compensation.
PowerLine Frequency (Anti Flicker) Change the number to prevent flicker in the video.
5. Do one of the following:▪ (Windows) Select Apply to save the changes or Default to restore the default settings.▪ (Mac) Select Save to save the changes or Reset to restore the default settings.
6. (Only for Windows) Select Camera Control to control the camera:
Settings Description
Zoom Adjust camera zoom in/out.
Exposure Set the exposure number.
Pan Adjust the up or down direction of the camera.
Tile Adjust the left or right direction of the camera.
7. Select OK.
Pair the Poly Studio USB Device to a Bluetooth DeviceConnect the Poly Studio USB device to a Bluetooth device and use it as the speaker and microphone ofthe device.
You can pair the Poly Studio USB device with a mobile phone, a computer or laptop, or a tablet.
Note: The Poly Studio USB device doesn’t support mixed types of audio and video input. If you connectit to a computer over USB and Bluetooth at the same time, make sure that your application usesboth audio and video input from Studio USB device over USB.
Procedure1. Connect the Poly Studio USB device to your computer, then select the Poly Studio USB video bar
tile from your Polycom Companion.2. Go to User Settings > Bluetooth Pair Mode.3. Select Start Pairing to start the Poly Studio USB video bar pairing mode.4. On your device, enable Bluetooth and select Poly Studio from the list of available devices.
You can start playing music or make phone calls from the Poly Studio speakerphone once you connect.
Configuring Poly Studio Using Polycom Companion
17

Configuring Audio SettingsYou can enhance the Poly Studio USB device audio experience. For example, to enable audio stereo orboost the bass.
Configure Polycom NoiseBlockWhen you enable Polycom NoiseBlock, the Poly Studio USB device automatically senses the ambientnoise in the room and prevents the noise from transmitting to the far-end during video conferences.
Procedure1. Connect the Poly Studio USB device to your computer, then select the Poly Studio USB video bar
tile from your Polycom Companion.2. Go to User Settings > Audio Settings.3. Set the option Polycom NoiseBlock to On.
Configure Audio StereoWhen you enable Stereo, the Poly Studio USB device uses two audio channels to provide stereo soundin a conference.
Procedure1. Connect the Poly Studio USB device to your computer, then select the Poly Studio USB video bar
tile from your Polycom Companion.2. Go to User Settings > Audio Settings.3. Set the option Stereo to On.
Configure Audio Bass BoostEnables this feature to amplify low frequencies in the audio.
Procedure1. Connect the Poly Studio USB device to your computer, then select the Poly Studio USB video bar
tile from your Polycom Companion.2. Go to User Settings > Audio Settings.3. Set the option Bass Boost to On.
Configure Acoustic FenceYou can enable and configure the Polycom Acoustic Fence feature to help define the audio fence aroundthe system.
Polycom Acoustic Fence technology creates a virtual audio fence that blocks sounds from outside thefence. It suppresses background noise during calls to enhance audio quality for call participants. The PolyStudio USB device defines the audio fence zone in a beam shape with three width options. The systempicks up sounds within the beam region and sends only those sounds to the far end.
Procedure1. Connect the Poly Studio USB device to your computer, then select the Poly Studio USB video bar
tile from your Polycom Companion.2. Go to User Settings > Audio Settings.
Configuring Poly Studio Using Polycom Companion
18

3. Select one of the following options for Acoustic Fence:▪ Off: Disable Acoustic Fence▪ Wide: Set a 120-degree beam region▪ Medium: Set a 90-degree beam region▪ Narrow: Set a 60-degree beam region
Configure Stereo for Skype for BusinessWhen you enable Stereo for Skype for Business, the Skype for Business audio outputs are stereo. Theitem is available when Stereo is enabled.
This feature is available to the Windows version of Polycom Companion only.
Procedure1. Connect the Poly Studio USB device to your computer, then select the Poly Studio USB video bar
tile from your Polycom Companion.2. Go to User Settings > Audio Settings.3. Set the option Stereo for Skype for Business to On.
Poly Studio Admin SettingsYou can configure Wi-Fi and Bluetooth, provision the Poly Studio USB video bar server, restart or factoryreset it, and import or export configuration files through the admin settings menu.
Caution: Don’t plug out the USB cable or power cable of the Poly Studio USB device while changingthe its settings on the Polycom Companion. This may cause unexpected errors.
Log In to Poly Studio Admin SettingsYou must enter the admin password to log in to the Admin Settings menu.
Procedure1. Connect the Poly Studio USB device to your computer, then select the Poly Studio USB video bar
tile in Polycom Companion.2. Select Admin Settings.3. Enter the admin password in the Password field (the default password is Polycom12#$).4. Select Sign In.
Change Your PasswordPoly recommends that you change your device’s password from the default for security reasons.
Procedure1. Connect the Poly Studio USB device to your computer, then select the Poly Studio USB video bar
tile in Polycom Companion.2. Go to Admin Settings > Password Settings.3. Enter your Current Password:
Configuring Poly Studio Using Polycom Companion
19
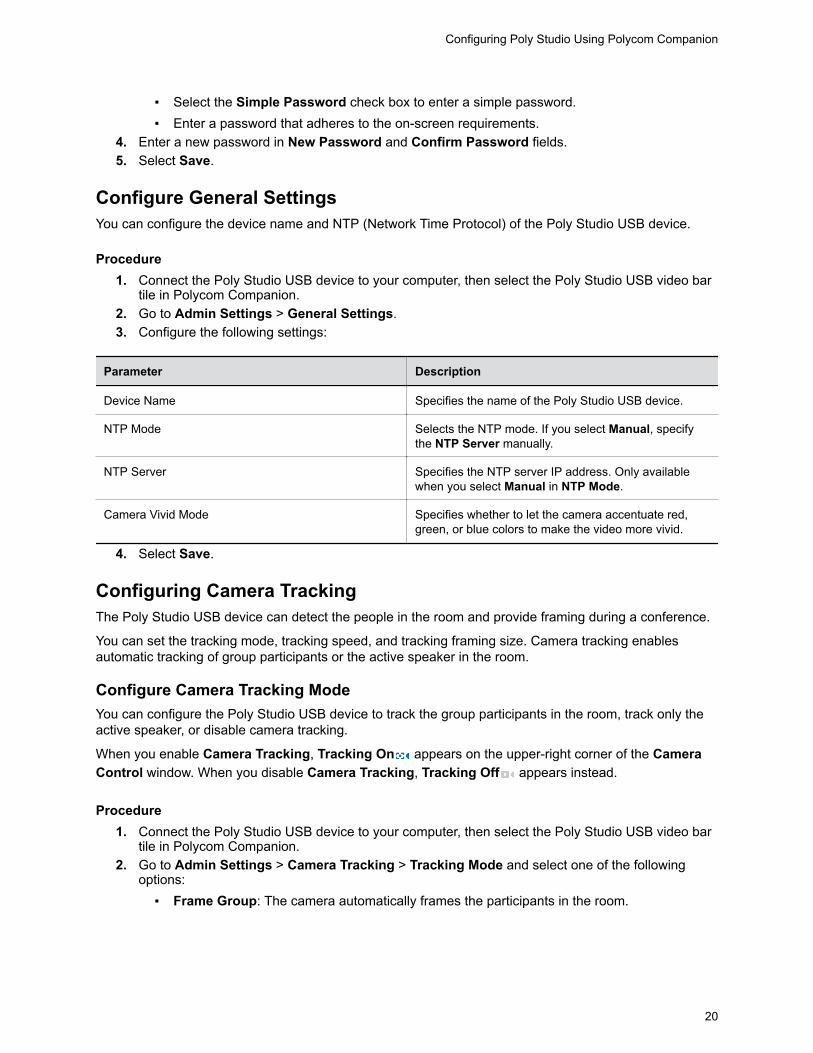
▪ Select the Simple Password check box to enter a simple password.▪ Enter a password that adheres to the on-screen requirements.
4. Enter a new password in New Password and Confirm Password fields.5. Select Save.
Configure General SettingsYou can configure the device name and NTP (Network Time Protocol) of the Poly Studio USB device.
Procedure1. Connect the Poly Studio USB device to your computer, then select the Poly Studio USB video bar
tile in Polycom Companion.2. Go to Admin Settings > General Settings.3. Configure the following settings:
Parameter Description
Device Name Specifies the name of the Poly Studio USB device.
NTP Mode Selects the NTP mode. If you select Manual, specifythe NTP Server manually.
NTP Server Specifies the NTP server IP address. Only availablewhen you select Manual in NTP Mode.
Camera Vivid Mode Specifies whether to let the camera accentuate red,green, or blue colors to make the video more vivid.
4. Select Save.
Configuring Camera TrackingThe Poly Studio USB device can detect the people in the room and provide framing during a conference.
You can set the tracking mode, tracking speed, and tracking framing size. Camera tracking enablesautomatic tracking of group participants or the active speaker in the room.
Configure Camera Tracking ModeYou can configure the Poly Studio USB device to track the group participants in the room, track only theactive speaker, or disable camera tracking.
When you enable Camera Tracking, Tracking On appears on the upper-right corner of the CameraControl window. When you disable Camera Tracking, Tracking Off appears instead.
Procedure1. Connect the Poly Studio USB device to your computer, then select the Poly Studio USB video bar
tile in Polycom Companion.2. Go to Admin Settings > Camera Tracking > Tracking Mode and select one of the following
options:▪ Frame Group: The camera automatically frames the participants in the room.
Configuring Poly Studio Using Polycom Companion
20

▪ Frame Speaker: The camera zooms in on an active speaker without use of a remote controlor camera preset.
▪ Off: Disables the camera tracking.
Note: To use the camera pan, tilt, and zoom options, you must set Tracking Mode to Off.3. Select Save.
Configure Camera Tracking SpeedYou can configure the camera tracking speed of the Poly Studio USB device.
Procedure1. Connect the Poly Studio USB device to your computer, then select the Poly Studio USB video bar
tile in Polycom Companion.2. Go to Admin Settings > Camera Tracking > Tracking Speed and select one of the following
options:▪ Normal(default): Detects meeting participants at a normal speed rate.▪ Slow: Detects meeting participants at a slow speed rate.▪ Fast: Detects meeting participants at a fast speed rate.
3. Select Save.
Configure Camera Tracking Framing SizeYou can configure the Poly Studio USB device tracking framing view.
Procedure1. Connect the Poly Studio USB device to your computer, then select the Poly Studio USB video bar
tile in Polycom Companion.2. Go to Admin Settings > Camera Tracking > Framing Size and select one of the following
options:▪ Tight: Establishes a close-up view of meeting participants.▪ Medium(default): Establishes a medium view of meeting participants.▪ Wide: Establishes a wide view of meeting participants.
3. Select Save.
Join a Wi-Fi NetworkYou can connect the Poly Studio USB video bar USB device to Wi-Fi through Polycom Companion.
Procedure1. Connect the Poly Studio USB video bar USB device to your computer, then select the Poly Studio
USB video bar tile from your Polycom Companion.2. Go to Admin Settings > Wi-Fi Settings.3. Select On in Wi-Fi Status to enable the Poly Studio USB video bar Wi-Fi function.
After you connect to a Wi-Fi network, connection status icon changes to .4. Do one of the following:
▪ Select a network from Wi-Fi Name. The app lists networks in order of signal strength.
Configuring Poly Studio Using Polycom Companion
21
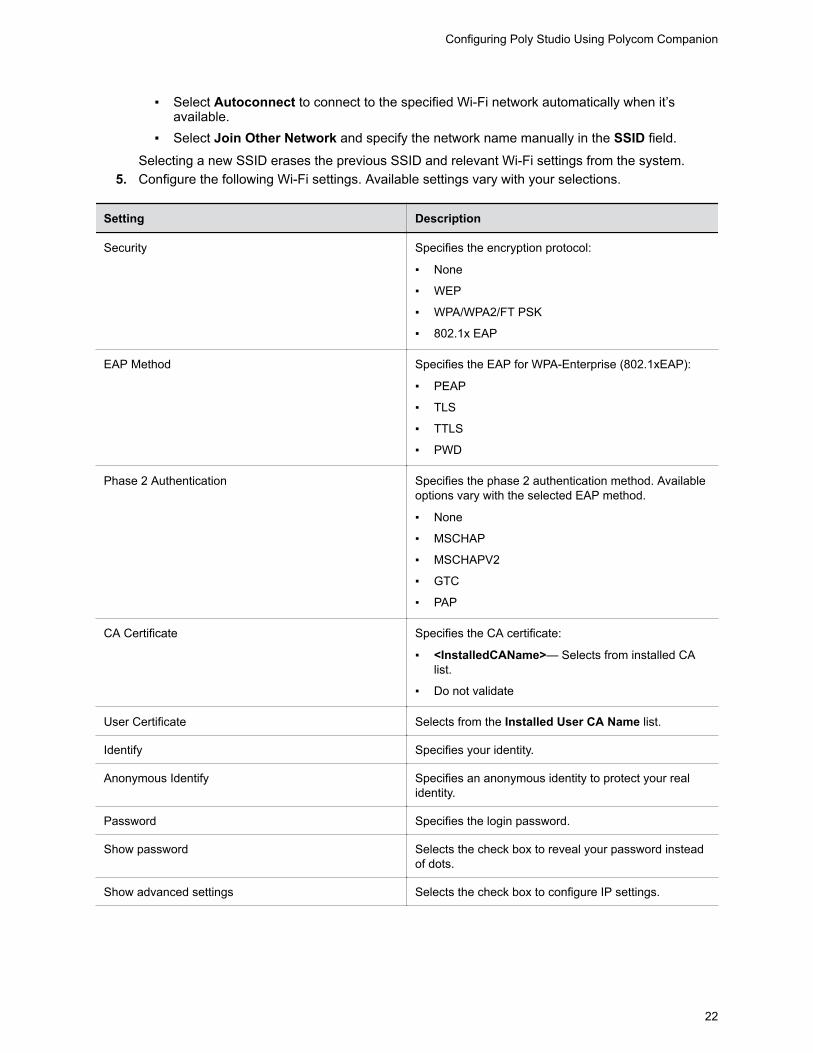
▪ Select Autoconnect to connect to the specified Wi-Fi network automatically when it’savailable.
▪ Select Join Other Network and specify the network name manually in the SSID field.
Selecting a new SSID erases the previous SSID and relevant Wi-Fi settings from the system.5. Configure the following Wi-Fi settings. Available settings vary with your selections.
Setting Description
Security Specifies the encryption protocol:
▪ None
▪ WEP
▪ WPA/WPA2/FT PSK
▪ 802.1x EAP
EAP Method Specifies the EAP for WPA-Enterprise (802.1xEAP):
▪ PEAP
▪ TLS
▪ TTLS
▪ PWD
Phase 2 Authentication Specifies the phase 2 authentication method. Availableoptions vary with the selected EAP method.
▪ None
▪ MSCHAP
▪ MSCHAPV2
▪ GTC
▪ PAP
CA Certificate Specifies the CA certificate:
▪ <InstalledCAName>— Selects from installed CAlist.
▪ Do not validate
User Certificate Selects from the Installed User CA Name list.
Identify Specifies your identity.
Anonymous Identify Specifies an anonymous identity to protect your realidentity.
Password Specifies the login password.
Show password Selects the check box to reveal your password insteadof dots.
Show advanced settings Selects the check box to configure IP settings.
Configuring Poly Studio Using Polycom Companion
22

Setting Description
IP Setting Specifies one method to set your network IP address:
▪ Static: specifies the IP settings manually.
▪ DHCP: obtains the IP settings automatically.
IP Address Specifies the IP address of the network.
Gateway Specifies the gateway of the network.
Subnet Mask Specifies the network mask address for the network.
DNS Address 1 Specifies the DNS server address of the network.
DNS Address 2 Specifies the alternate DNS server address of thenetwork.
6. Click Join to connect to the Wi-Fi network.
Delete Known Wi-Fi NetworksYou can delete the known Wi-Fi networks from Polycom Companion.
Procedure1. Connect the Poly Studio USB device to your computer, then select the Poly Studio USB video bar
tile from your Polycom Companion.2. Go to Admin Settings > Wi-Fi Settings.3. Click Manage Known Networks.4. Select the Wi-Fi network you want to delete.5. Click X.
Configure Bluetooth SettingsYou can turn on the Bluetooth function of the Poly Studio USB video bar USB device through PolycomCompanion.
Procedure1. Connect the Poly Studio USB video bar USB device to your computer, then select the Poly Studio
USB video bar tile from your Polycom Companion.2. Go to Admin Settings > Bluetooth.3. Set the Bluetooth Status option to On to enable Bluetooth on the Poly Studio USB video bar USB
device.4. Check Autoconnect to connect your device via Bluetooth to the Poly Studio USB video bar USB
device automatically.5. Set the Remote Control Connection option to On to enable the connection between the Poly
Studio USB video bar USB device and remote control.
Note: If you disable the Remote Control Connection, the Poly Studio remote controldisconnects from the Poly Studio USB video bar USB device. Pair the remote controlmanually after you re-enable the Remote Control Connection.
Configuring Poly Studio Using Polycom Companion
23

Configure a Provisioning Server for Poly Studio USB DeviceYou can configure a provisioning server for the Poly Studio USB video bar USB device through PolycomCompanion.
Make sure that the Poly Studio USB video bar USB device connects to a Wi-Fi network before connectingit to a provisioning server.
Ask your network administrator for the provisioning server used in your deployment before you choosethe Server Type.
Note: If you select Auto provisioning mode, make sure that you already have the provisioning serveraddress, user name, and password in your DHCP option 66 or 150. For example, https://username:[email protected].
Procedure1. Connect the Poly Studio USB video bar USB device to your computer, then select the Poly Studio
USB video bar tile from your Polycom Companion.2. Go to Admin Settings > Provisioning Server.3. Select Provisioning Mode and choose one of the following options:
▪ Disable: Disables the provisioning mode.▪ Auto: Gets the provisioning server URL from your DHCP option 66 or 150.▪ Manual: Configure the following parameters:
Parameter Description
Server Type Selects one server type from the drop-down list.
Selects Polycom Provisioning Services for PDMS-Eor Polycom RealPresence Resource Manager.
Use HTTPS Server and FTPS Server for your ownprovisioning server.
Server Address Specifies the server address.
User name and Password Specifies the user name and password to log in to theprovisioning server.
4. Select Save.
You can check the provisioning status in Status > Provisioning Server.For information about the parameters that Polycom RealPresence Resource Manager system orthe PDMS-E service uses to manage your Poly Studio USB video bar USB device, refer to thePoly Studio Provisioning Reference Guide available on Polycom Support.
Configuring Poly Studio Using Polycom Companion
24

Certificate Signing RequestsThe Polycom Companion application can generate certificate signing requests (CSRs) that are then sentto a certificate authority (CA) for official issuance. The CA is the trusted entity that issues, or signs, digitalcertificates for others.
Enable Peer Certificate ValidationYou can enable the peer certificate option to validate your provisioning server automatically.
Before you enable this setting, you must first install the CA certificates needed to validate yourprovisioning server certificates.
Procedure1. Connect the Poly Studio USB device to your computer, then select the Poly Studio USB video bar
tile in Polycom Companion.2. Go to Admin Settings > Certificates.3. Set the Always Validate Peer Certificates From Server option to On.
Create a Certificate Signing RequestYou can create a Certificate Signing Request (CSR) and send it to a CA to get a certificate to authenticateyour USB device. You may need to authenticate your USB device while connecting to your provisioningserver.
Note: To create a Provisioning User Certificate, you must use the Polycom Companion application togenerate the CSR.
Procedure1. Connect the Poly Studio USB device to your computer, then select the Poly Studio USB video bar
tile in Polycom Companion.2. Go to Admin Settings > Certificates.3. Select Create.4. Configure the following settings on the Create Signing Request page:
Field Description
Country Displays the country selected in Admin Settings >General Settings.
State or Province Specifies the state or province where your organizationis located. Default is blank. Maximum Characters: 128
City or Locality Specifies the city where your organization is located.Default is blank. Maximum Characters: 128
Organization Specifies your organization name.
Organizational Unit Specifies the unit of business defined by yourorganization. Default is blank. Maximum Characters: 64
Configuring Poly Studio Using Polycom Companion
25

Field Description
Common Name Specifies the name that the system assigns to theCSR.
Use the following guidelines when configuring theCommon Name:
▪ For systems registered in DNS, use the FQDN ofthe system.
▪ For systems not registered in DNS, use the IPaddress of the system. Maximum Characters: 64;truncated if necessary. Default is blank
5. Select Create.The system displays a message indicating that you created the CSR.
6. Select Download to download the CSR.You must send the CSR to your CA for signature. Normally, you log into the website of your CAand paste your CSR content into a form to submit it.
Install a CertificateAfter a CA signs your certificate, you can install it on the Poly Studio USB device.
You can install one certificate for each certificate type. If the system has an existing certificate for yourcertificate type, installing a new one overwrites it.
Note: A factory reset or factory restore deletes all installed certificates.
Procedure1. Connect the Poly Studio USB device to your computer, then select the Poly Studio USB video bar
tile in Polycom Companion.2. Go to Admin Settings > Certificates.3. Select Install and choose one of the following options:
▪ Wi-Fi CA Certificate: Certificate to authenticate the Certificate authority (CA) of the Wi-Finetwork
▪ Wi-Fi User Certificate: Certificate to authenticate users who are connecting to this Wi-Finetwork
▪ Provisioning CA Certificate: Certificate to authenticate the Certificate authority (CA) of theprovisioning server
▪ Provisioning User Certificate: Certificate to authenticate users who are connecting to theprovisioning server
4. Select a signed certificate from your local disk.
a. (Wi-Fi User Certificate only) Enter the Private Key Password and select Next.The system displays a message indicating the installation result.
Supported Certificate FormatsSupported certificate formats vary with your certificate type.
The following table lists the supported certificate formats by type.
Configuring Poly Studio Using Polycom Companion
26

Supported Certificate Formats
Certificate Type Format
Wi-Fi CA Certificate .pem, .crt
Wi-Fi User Certificate .p12
Provisioning CA Certificate .pem, .crt
Provisioning User Certificate .pem, .crt
.
View Installed Certificate DetailsYou can view the content of an installed certificate.
Procedure1. Connect the Poly Studio USB device to your computer, then select the Poly Studio USB video bar
tile in Polycom Companion.2. Go to Admin Settings > Certificates.3. Click the certificate you want to view in the Installed Certificates table.4. The Certificate Details window opens. To close it, select Close.
Delete an Installed CertificateYou may need to remove an expired certificate to install a newer version.
When a certificate expires, its Expiration Date turns red in the Installed Certificates table.
Procedure1. Connect the Poly Studio USB device to your computer, then select the Poly Studio USB video bar
tile in Polycom Companion.2. Go to Admin Settings > Certificates.3. Select the certificate you want to delete in the Installed Certificates table.4. At the bottom of the Certificate Details window, select Delete.
Import a Configuration FileYou can import a configuration file from your local system to the Poly Studio USB device.
Procedure1. Connect the Poly Studio USB device to your computer, then select the Poly Studio USB video bar
tile in Polycom Companion.2. Go to Admin Settings > Configuration.3. Select Import.4. Select the local configuration file you want to import.5. Select OK.6. Restart the Poly Studio USB device to make the change effective.
Configuring Poly Studio Using Polycom Companion
27
Export a Configuration File to Your Local SystemYou can export the Poly Studio configuration file from Polycom Companion to your local system.
Procedure1. Connect the Poly Studio USB device to your computer, then select the Poly Studio USB video bar
tile in Polycom Companion.2. Go to Admin Settings > Configuration.3. Select Export and select a directory to save the configuration file to.4. Select Save.
Configuring Poly Studio Using Polycom Companion
28
TroubleshootingTopics:
▪ Identifying Issues Using the LED Indicators
▪ Restart Your Poly Studio USB Device
▪ Restore Default Settings
▪ Reset Poly Studio to Factory Settings
▪ Factory Reset Your Poly Studio USB Device Using Polycom Companion
▪ Pair the Bluetooth Remote Control with Poly Studio
▪ Troubleshoot the Remote Control
▪ Test Your Camera Audio Input
▪ Display Camera Information On-Screen
▪ Download Log and Crash Files
▪ Can't Upgrade, Reset, or Reboot Poly Studio via Polycom Companion
If you experience issues with your Poly Studio USB video bar, try the following solutions to resolve certainissues.
Identifying Issues Using the LED IndicatorsThe LED light indicators provide troubleshooting information for your Poly Studio USB video bar.
Poly Studio LED Troubleshooting Indicators and Status
Indicator Position Status
Blinking red All Error preventing normal operation
Pulsing amber All Update in progress
Restart Your Poly Studio USB DeviceYou can restart your Poly Studio USB device from Polycom Companion.
Procedure1. Connect the Poly Studio USB device to your computer, then select the Poly Studio USB video bar
tile in Polycom Companion.2. Go to Admin Settings > System Restart.3. Select Restart.
29
Restore Default SettingsYou can erase all configuration and restore the Poly Studio USB video bar default settings.
Use the Polycom Companion application to configure some of the settings. The default settings to becleared include but are not limited to:
▪ Password▪ Remote control presets▪ Wi-Fi settings▪ Camera settings▪ Audio settings▪ Bluetooth settings▪ System information (such as system name)▪ Logs
The current version of software remains the same after restoring.
Procedure» Plug in the power cord and press the Reset button on the bottom of the USB video bar for 10
seconds.The LED lights start out chasing white, then turn to solid amber.
Note: If the Poly Studio camera is in use, such as in a call or in Camera Preview on the client,the Reset button doesn't work.
The Poly Studio USB video bar clears all saved settings and logs and reboots.
Restoring the defaults unpairs the remote control. Re-pair the remote control after the Poly Studio USBvideo bar reboots.
Reset Poly Studio to Factory SettingsYou can reset the Poly Studio USB video bar to factory settings if persistent issues remain aftertroubleshooting.
Warning: Your USB video bar goes back to the factory software version and erases all configuration andlogs.
Resetting the USB video bar to factory settings unpairs the remote control. You must re-pair the remotecontrol with the Poly Studio USB video bar after you reset the system.
Procedure1. Unplug the Poly Studio USB video bar to turn it off.2. Find the reset pinhole on the bottom of the USB video bar.3. Use a pin or paperclip to press and hold the reset button and plug in the USB video bar at the
same time to turn it on.
Troubleshooting
30

The Poly Studio USB video bar reboots with pulsing amber LED lights.
The Poly Studio USB video bar rolls back to the factory software version and loses all configuration andlogs.
Factory Reset Your Poly Studio USB Device UsingPolycom CompanionYou can factory reset your Poly Studio USB device, which removes all configurations and stored settings.
Procedure1. Connect the Poly Studio USB device to your computer, then select the Poly Studio USB video bar
tile in Polycom Companion.2. Go to Admin Settings > Factory Reset.3. Select Reset.4. Select OK to confirm the factory reset.
The system restarts automatically.
Pair the Bluetooth Remote Control with Poly StudioIf you reset or restore your Poly Studio USB video bar or replace the remote control, you must pair theremote control to the USB video bar.
Procedure1. Optional: If you want to replace an old remote control, remove the battery to disable it.2. Press and hold the Remote Control Pairing button on the bottom of the USB video bar until
the LEDs blink blue in the middle with a notification sound.The LED lights blink blue in the middle during the pairing process.
3. Long press Mute on the remote control until you hear a notification sound.
The middle LED lights keep solid blue for three seconds with a notification sound.
Troubleshoot the Remote ControlWhen the remote control power is lower than 7%, its performance becomes unstable.
You may experience issues like slow or no response from the remote control, or a random button keepsfunctioning.
Procedure1. Go to Polycom Companion to the check the battery status.2. If the battery runs out of power, change the battery. Refer to the Poly Studio Setup Sheet for
details.
Troubleshooting
31
Test Your Camera Audio InputIf you have audio problems when using your Poly Studio USB device, you may need to send an audiotest file to Polycom Support for troubleshooting.
Procedure1. Connect the Poly Studio USB device to your computer, then select the Poly Studio USB video bar
tile from your Polycom Companion.2. Go to Diagnostics > Audio Test.3. Select Start Test and speak into the Poly Studio USB device.
The test recording window lasts at most 3 minutes, or you can click Stop to stop the recording.4. Save the recording file to your local system and play it back to listen for any audio issues.
Display Camera Information On-ScreenYou can display the camera information of your Poly Studio USB device on the video output.
Note: Depending on the application using the Poly Studio USB device, the resolution displayed on thevideo output doesn’t necessarily reflect the maximum resolution supported by the Poly StudioUSB device.
Procedure1. Connect the Poly Studio USB device to your computer, then select the Poly Studio USB video bar
tile in Polycom Companion.2. Go to Diagnostics > On-Screen Display.3. Select On.
The camera parameters for your Poly Studio USB device display on the video output.
Download Log and Crash FilesYou can download the Poly Studio USB video bar log and crash files to assist in troubleshooting.
Procedure1. Connect the Poly Studio USB video bar USB device to your computer, then select the Poly Studio
USB video bar tile from your Polycom Companion.2. Go to Diagnostics > Logs.3. Click Download under Logs to download Poly Studio USB video bar system logs.4. Click Download under Crash Files to download Poly Studio USB video bar system crash log files.
Troubleshooting
32

Can't Upgrade, Reset, or Reboot Poly Studio viaPolycom CompanionWhen you use the Firmware Update, System Restart, or Factory Restart functions on PolycomCompanion, the application prompts an error message.
Problem:
When the camera of Poly Studio is in use, resetting, upgrading, or restarting the Poly Studio USB videobar doesn't work.
Workaround:
Make sure that the Poly Studio camera isn't in use and try again. For example, you can check whetherthe software client shows the video on the Camera Preview page using the Poly Studio USB video bar.
Troubleshooting
33