planck 2018 04 en - audionet - scientific...
TRANSCRIPT

PLANCK
Reference Compact Disc Player
User’s Manual


3
Contents
1 Preface 5
1.1 Included items 6
1.2 Transport 6
2 Overview front panel 7
3 Overview back panel 8
4 Installation and power supply 9
4.1 Placement 9
4.2 Mains connection 10
4.3 Orientation of mains plug 10
4.4 Connecting the external power supply AMPERE 11
5 Outputs and inputs 12
5.1 Analog audio outputs 12
5.2 Digital audio outputs 13
5.3 Digital audio inputs 15 5.3.1 SPDIF inputs 16 5.3.2 USB audio input 17
5.4 Audionet Link 19
6 Usage 21
6.1 Switching on and off 21
6.2 Inserting and removing discs 23
6.3 Control elements on the front panel 25
7 Audionet Metal Remote Control 26
7.1 Key assignment Metal Remote Control 27
7.2 Changing the batteries 29
7.3 Settings for Audionet preamplifiers 30
4
8 Playing discs 31
8.1 Playable disc types 31
8.2 Basic playback control 33
8.3 Searching 33
9 Playback options menu 35
9.1 Time display 36
9.2 Repeat playback 37 9.2.1 Repeat disc 38 9.2.2 Repeat track 38
9.3 Random playback 39
9.4 Time search 40
9.5 Program playback 41 9.5.1 Edit a playlist 43 9.5.2 Playing a playlist 45 9.5.3 Delete a playlist 46
10 Global setup menu 47
10.1 Set digital input 49
10.2 Set digital output mode 49
10.3 Set display brightness 50
10.4 Set AutoOff 51
10.5 Set AutoPlay 52
10.6 Overview of factory defaults 53
11 Security advice 54
12 Technical data 55
5
1 Preface The Audionet Scientists Team and its leading scholars congratulate you on your purchase of this unit, sending cheers directly from our research and development center.
The predecessor model ART G3 is widely considered to be one of the best-sounding CD players ever made, boasting unique acoustic and design character-istics that convinced music-lovers around the world. An impressive list of test victories, distinctions, and awards testifies to the long and triumphant reign of the ART G3.
Curtain call for the third generation of CD player: the new PLANCK is nothing less than Audionet’s final statement for reproducing the classical compact disc. At the same time, it also represents a thoroughbred high-end D/A converter. Its sound quality can be used via further digital systems, especially computers. This is possible via optical and electrical digital inputs.
The PLANCK is geared towards the requirements of classical stereophony. Ex-pert connoisseurs of high-quality musical reproduction will find the product not only delivers the aural satisfaction they dream of, but even opens up previously unknown musical realms. Combining craft with precision and presence, PLANCK fulfils its makers’ vision of pushing back the quality frontiers of classical CD play-back to rival the standard of advanced high-resolution media. PLANCK is equipped with the potential to become a further milestone in audiophile acoustic art.
Even if you’re an experienced aficionado of ultra-highend components, please start listening to your new Audionet PLANCK by reading this manual carefully before you plug it in. This will ensure you'll enjoy all functions of this unit without any compromise or potential disruption.
6
1.1 Included items
Included you will find the following items:
• The Compact Disc player Audionet PLANCK
• The Audionet Metal Remote Control
• The user's manual (that you are currently reading)
• One low resonance stabilizer made of black POM
• One standard mains cord
• One optical Toslink cable (Audionet Link)
1.2 Transport
Important
• Transport the PLANCK in the included package only.
• Never leave a CD or the stabilizer inside the PLANCK during transport. The sensitive mechanics of the drive could suffer damage.
• Always use the included bag to prevent scratches on the housing.
• Please allow the PLANCK to adapt to the climatic conditions in your listening room after the transport. As known for every optical device, low tempera-tures and humidity may cause the laser unit to be covered with condensation. Leave the drawer of the PLANCK open for several hours before switching the device on for the first time after transport.
7
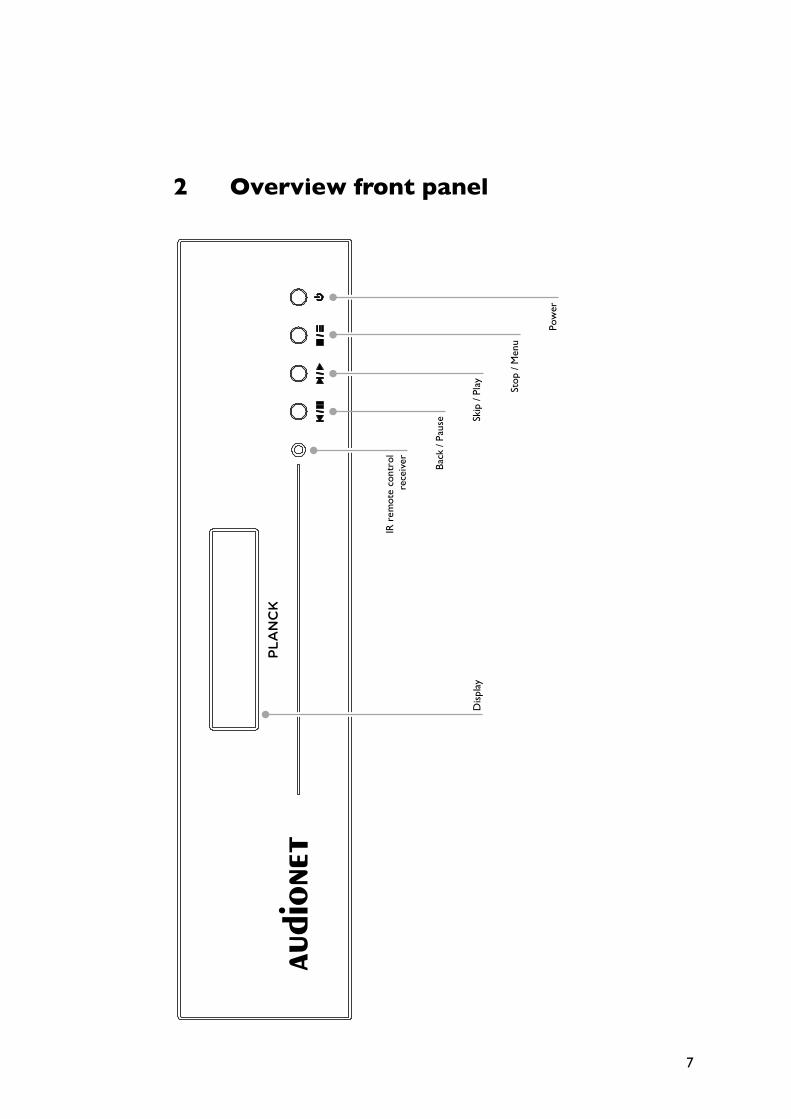
2 Overview front panel
PLANCK
audionet
PLA
NC
K
Pow
er
Stop
/ M
enu
Skip
/ Pl
ay
Back
/ Pa
use
IR r
emot
e co
ntro
l re
ceiv
er
Dis
play
8
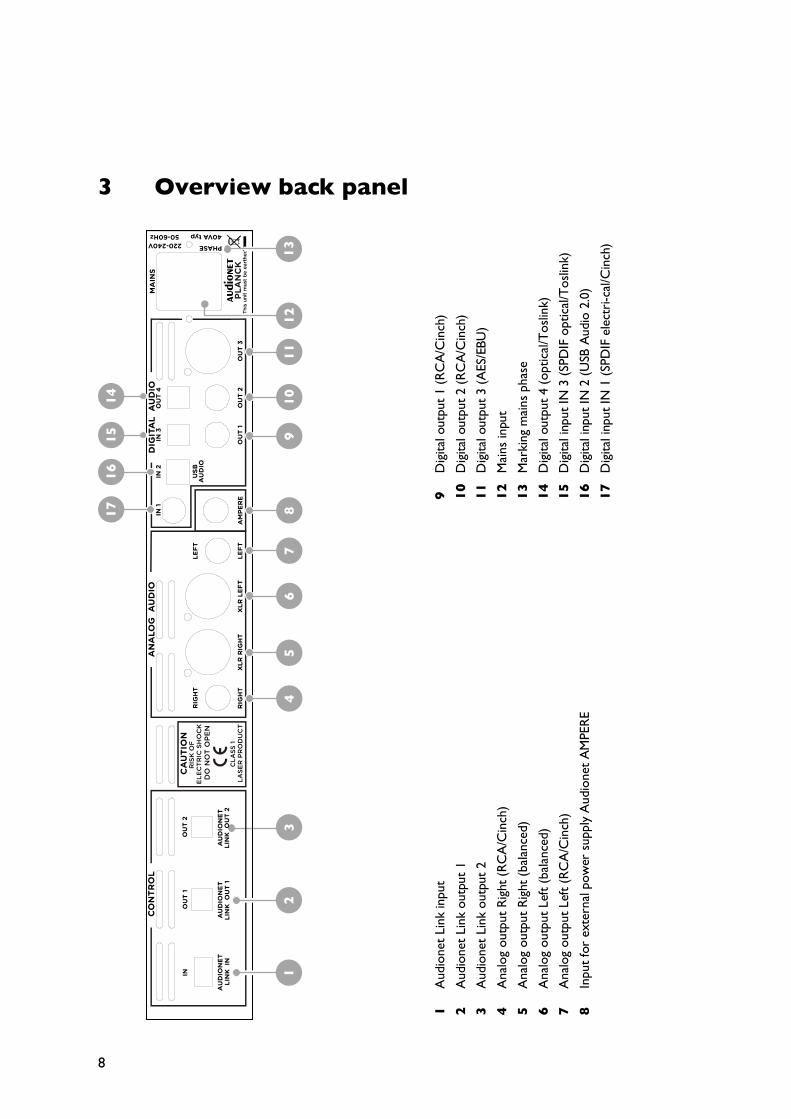
3 Overview back panel
1A
udio
net
Link
inpu
t
2A
udio
net
Link
out
put
1
3A
udio
net
Link
out
put
2
4A
nalo
g ou
tput
Rig
ht (
RC
A/C
inch
)
5A
nalo
g ou
tput
Rig
ht (
bala
nced
)
6A
nalo
g ou
tput
Lef
t (b
alan
ced)
7A
nalo
g ou
tput
Lef
t (R
CA
/Cin
ch)
8In
put
for
exte
rnal
pow
er s
uppl
y A
udio
net
AM
PER
E
9D
igita
l out
put
1 (R
CA
/Cin
ch)
10D
igita
l out
put
2 (R
CA
/Cin
ch)
11D
igita
l out
put
3 (A
ES/E
BU)
12M
ains
inpu
t
13M
arki
ng m
ains
pha
se
14D
igita
l out
put
4 (o
ptic
al/T
oslin
k)
15D
igita
l inp
ut IN
3 (
SPD
IF o
ptic
al/T
oslin
k)
16D
igita
l inp
ut IN
2 (
USB
Aud
io 2
.0)
17D
igita
l inp
ut IN
1 (
SPD
IF e
lect
ri-c
al/C
inch
)
12
3 13
11
10
9
8 7
6 5
4 2
1
14
15
16
17
9
4 Installation and power supply
Important
• While connecting or removing the PLANCK to or from a pre-amplifier, both units and the corresponding power amplifiers have to be switched off to pre-vent damage of the PLANCK or any of the connected units.
• Please make sure that all cables are in absolute best conditions! Broken shields or short-cut cables could damage the PLANCK and any other connected unit.
4.1 Placement
Important
• It is recommended to place the PLANCK into a high quality rack or onto a stable table.
• Do not expose the unit to direct sunlight.
• Do not place the PLANCK in close range to heat sources like radiators.
• Do not place the PLANCK on top of other units that produce heat, especially not on top of power amplifiers, preamplifiers or similar. Both units could suf-fer damage from thermal overload.
• Do not use the unit in a place where it is exposed to vibrations.
• Do not place the unit close to loudspeakers or in corners of a room where it is exposed to high levels of sonic energy. This might reduce the sound qual-ity of the unit.

10
4.2 Mains connection
The mains input * is located on the back panel of the PLANCK. Use the in-cluded mains cord to connect the unit to mains. If the use of a different power cord is preferred, make sure that it meets the electrical specifications and safety standards for your home country.
Important
• The electrical specifications of your home country must meet the electrical specifications printed on the back panel.
• The PLANCK is a Class I unit and must be earthed. Please ensure a stable earth connection. 'PHASE ' ('hot' pin) is marked on the back panel.
• Never pull the mains plug while the PLANCK is switched on! Always power the unit down to stand-by mode first, before pulling the mains cord from the mains input on the back panel. Wait at least 3 minutes before re-plugging the unit to mains.
The PLANCK should only be disconnected from mains in cases of extended ab-sence (like vacations) or if massive trouble on the mains power is to be expected. Pull the mains plug to completely disconnect the unit from mains.
4.3 Orientation of mains plug
The correct polarization of mains is important for reasons of audio clarity and stability. Please connect the mains cord so that the hot pin of the wall outlet is connected to the pin of mains input marked with 'PHASE' on the back panel of the unit.
* refer to numbers in section 'Overview back panel' on page 8.

11
4.4 Connecting the external power supply AMPERE
To use the optional external power supply AMPERE with your PLANCK follow these steps:
1. Make sure both – the PLANCK and the AMPERE – are switched off and disconnected from the mains.
2. Connect the AMPERE with the included cable to input jack on the back panel of the PLANCK. The shape of the plug pre-vents any wrong polarity. The small 'nose' inside the plug has to face upwards. Now screw the ring of the plug onto the AMPERE input jack .
3. Connect both (!) units (PLANCK and AMPERE) to mains.
4. Switch the AMPERE on at its back panel first.
5. Use the key at the front panel or the PLANCK key of the Audionet Metal Remote Control to switch the PLANCK on. The PLANCK is now ready for use, getting its power from the external power supply AMPERE.
6. To switch the PLANCK off into stand-by mode, use the key on the front panel or the PLANCK key of the Audionet Metal Remote Control.
Important
• Never power the AMPERE on or off on its back panel while the PLANCK is still switched on or during playback.
• For further information regarding the external power supply AMPERE, please consult its user's manual.
Tip
• Use a high quality cable to connect the AMPERE to mains. The sound will improve.

12
5 Outputs and inputs
Important
• During connection or removal of the PLANCK to or from a preamplifier, both units and the corresponding power amplifiers have to be switched off in order to prevent any damage of the PLANCK or other connected units.
• Please make sure that all cables are in absolute best condition! Broken shields or short-cut cables could damage the PLANCK and any other connected de-vice.
5.1 Analog audio outputs
4 RIGHT Analog audio output of the right channel (RCA / Cinch).
5 XLR RIGHT Analog audio output of the right channel (balanced / XLR).
6 XLR LEFT Analog audio output of the left channel (balanced / XLR).
7 LEFT Analog audio output of the left channel (RCA / Cinch).
7 6 5 4

13
5.2 Digital audio outputs
Connect the analog outputs and of your PLANCK to your (pre-)amplifier using high quality interconnectors. Alternatively the balanced analog outputs and may be used in case your (pre-)amplifier has no analog RCA / Cinch inputs.
9 Digital output OUT 1 (SPDIF) The digital audio signal is available at the digital output OUT 1 in the SPDIF format, depending on the setting of the option Set Digital Output Mode (refer to section 'Set digital output mode' on page 49).
10 Digital output OUT 2 (SPDIF) The digital audio signal is available at the digital output OUT 2 in the SPDIF format, depending on the setting of the option Set Digital Output Mode (refer to section 'Set digital output mode' on page 49).
11 Digital output OUT 3 (AES/EBU) The digital audio signal is available at the digital output OUT 3 in the AES/EBU format, depending on the setting of the option Set Digital Output Mode (refer to section 'Set digital output mode' on page 49).
14 Digital output OUT 4 (optical/TOSLink) Use an optical (TOSLink) cable to connect the optical digital output OUT 4 of the PLANCK to any unit with an optical digital input. The output signal depends on the setting of the option Set Digital Output Mode (refer to section 'Set digital output mode' on page 49).
11 10
14
9

14
Important
• The option Set Digital Output Mode has to be set to active in order to use the digital outputs OUT 1 to OUT 4 of your PLANCK. All digital outputs of the PLANCK are switched off, if the setting disabled is selected (refer to section 'Set digital output mode' on page 49).
The following table does list the digital output formats, which are available at the digital audio outputs of the PLANCK.
Digital Output Mode
OUT 1 SPDIF
OUT 2 SPDIF
OUT 3 AES/EBU
OUT 4 op-tical
enabled
44.1kHz / 16bit
Stereo PCM
44.1kHz / 16bit
Stereo PCM
44.1kHz / 16bit
Stereo PCM
44.1kHz / 16bit
Stereo PCM
disabled no signal no signal no signal no signal
Important
• Do not use any jumpers to short-circuit the digital outputs, if none of the digital outputs are used. Select the setting disabled of the option Set Digital Output Mode instead in order to switch all digital outputs off (refer to section 'Set digital output mode' on page 49).

15
5.3 Digital audio inputs
15 Digital input IN 3 (optical/TOSLink) Digital audio input IN 3 for connecting digital devices (e.g. CD-Players, DAT recorders) via optical fibre cable to the PLANCK.
16 Digital input IN 2 (USB Audio 2.0) Digital audio input IN 2 for connecting a computer for the playback of music and sound files using the sophisticated D/A-converter of the PLANCK. The PLANCK is recognized as 'USB Audio Device 2.0' by the operating system of your computer, e.g. Windows 7*. Use a standard audio player (e.g. Windows Media Player*) to play back your music through the PLANCK (refer to sec-tion 'USB audio input' on page 17).
17 Digital input IN 1 (SPDIF electrical/Cinch) Digital audio input IN 1 for connecting digital devices (CD-Players, DAT re-corders etc) via Cinch cable.
* 'Microsoft Windows' and 'Windows Media Player' are registered trademarks of Microsoft Corporation and
were only used for information purposes.
15 17 16
16
5.3.1 SPDIF inputs The digital input IN 1 as well as IN 3 may be used as SPDIF digital audio input, so that the sophisticated digital-to-analog converters of the PLANCK can transfer other digital sources as well (e.g. CD transports, DAT recorders).
1. Connect the electrical SPDIF input IN 1 to the SPDIF output of the source device using a suitable Cinch cable. In case that the source device is equipped with an optical SPDIF output, use an optical fibre (Toslink) cable to connect the source device to the optical input IN 3 of your PLANCK.
2. Switch the PLANCK on and select the digital input of your choice in the main menu (refer to section 'Set digital input' on page 49.)
3. Switch the source device on and start its playback.
The music of the source device is now played back by using the sophisticated digital-to-analog converters of the PLANCK.
Note
• The PLANCK supports the formats: PCM Stereo, sample rate 32 kHz up to 192 kHz, up to 24 bit resolution.
Important
• In order to listen to music via the SPDIF digital audio inputs of the PLANCK, make sure that the playback of a loaded disc is stopped first or no disc is loaded at all.
• You will only hear the audio from the disc during its playback with the PLANCK – no signals will be transported from the SPDIF audio interface, regardless which input is selected.
• Set the option Set Auto Off to to never off in the Global Setup menu, if the SPDIF audio function of the PLANCK is used. Otherwise the unit will shut down automatically after 30 minutes (refer to section 'Set AutoOff' on page 51).

17
5.3.2 USB audio input The USB Audio port IN 2 is a USB Type B socket, making it possible to connect the PLANCK directly to your PC by using a USB cable and the USB Audio 2.0 interface. The PLANCK is then used as the sound / playback device for your PC. The playback operates in asynchronous mode, i.e. the PLANCK uses its own clock generator and music is enjoyed without diminishing any sound quality.
The required driver needs to be installed on your PC in order to use USB Audio 2.0. The driver is already integrated in the operating system on Apple devices running OS X 10.6.4 or later as well as for for the latest Linux systems. To receive the driver for Windows based systems, please contact us via email at [email protected].
Note
• The driver is packed into a zip-file. To install the driver unpack the zip-file into a folder of your choice. Then open the chosen folder and start the in-stallation process, executing the file 'setup.exe'.
• All occurring security warnings can be confirmed with 'OK' during the instal-lation process.
• The PLANCK has to be connected with your PC via an USB cable during the installation process.
• You can choose your PLANCK as sound device / playback device of your PC after the successful installation. For configuration, open the system preferen-ces of your PC.
• Pay attention to the length of the USB cable. If the cable is too long, it might diminish the sound quality or cause dropouts during playback.
1. Connect the USB Audio input IN 1 with a suitable USB cable (plug type A to plug type B) to an unused USB port of the computer that is compatible with USB 2.0 or above and supports the Full Speed USB protocol.
2. Start the computer and switch on the PLANCK afterwards.

18
The PLANCK is recognized as newly added hardware by your computer. Depen-ding on the computers operating system, a warning might appear, asking to install a driver for the new hardware at the first connection of the PLANCK.
Also depending on the operating system, the PLANCK will be automatically set as standard device for sound playback. If necessary, please consult the manual to your operating system.
All music and sound files that are played on the computer are now sent to the sophisticated analog-to-digital converters of the PLANCK.
Note
• All volume and balance settings of the operating system or the sound applica-tion will still be active. When you hear no sound at all or if it has a low volume during the playback of sound and music files with your PLANCK, make sure that the operating systems or sound applications volume settings are not muted or set to a low level.
• The PLANCK supports the formats: PCM Stereo, sample rate 32 kHz up to 192 kHz, up to 24 bit resolution.
Important
• In order to listen to music via the USB Audio input of the PLANCK, make sure that the playback of a loaded disc is stopped first or no disc is loaded at all.
• Only audio from the disc is heard during CD playback with the PLANCK – no signals will be transported from the USB Audio interface.
• For the use of the USB Audio function of the PLANCK, set the Global Setup menu option Set Auto Off to never off. Otherwise the unit will shut down automatically after 30 minutes (refer to 'Set AutoOff' on page 51).

19
5.4 Audionet Link
1 Control input IN Audionet Link control input.
2 Control output OUT 1 Audionet Link control output 1.
3 Control output OUT 2 Audionet Link control output 2 (time-delayed in reference to control output OUT 1).
For your convenience, the PLANCK may be controlled remotely by an Audionet pre- or integrated amplifier using the 'Audionet Link' interface.
Connect the Audionet Link input of the PLANCK by a simple optical Toslink cable to the Audionet Link output of your Audionet preamplifier. As soon as the preamplifier is powered on or off at its front panel or by remote control, the PLANCK and all other units connected via Audionet Link will be switched on or off automatically as well.
For controlling further Audionet units automatically in a system by using the Au-dionet Link interface, connect the Audionet Link output OUT 1 or OUT 2 of the PLANCK to the Audionet Link input of the next Audionet unit (e.g. power amplifier) by using a simple optical Toslink cable.
1 2 3
20
Note
• The activation signal is passed to further Audionet units daisy chained to the Audionet Link output of your PLANCK with a slight delay to avoid all units powering up at the same time – preventing an overload of your mains fuse. First the control output OUT 1 is activated, afterwards OUT 2 is switched on.
• The PLANCK may still be switched on or off manually at any time by using the key on the front panel or the remote control.
Important
• If the option Set AutoOff has the value shut off in 30 min, the PLANCK will power down to stand-by mode automatically 30 minutes after the disc has stopped or after a key is used on the front panel as well as the remote control. This function works independently from a preamplifier that is connected via Audionet Link, i.e. the PLANCK shuts down automatically even if the preamplifier is still switched on (refer to section 'Set AutoOff' on page 51).

21
6 Usage
6.1 Switching on and off
Please make sure that the PLANCK is correctly connected to the (pre-)amplifier and the mains (refer to sections 'Installation and power supply' on page 9 and 'Outputs and inputs' on page 12). The display will light up with the Audionet logo, followed by a welcome message as soon as the PLANCK is connected to the mains. The display stays dark afterwards. The unit is in stand-by mode now.
Please make sure that the cover is closed before switching the unit on. Then power the PLANCK up by pressing the key on the front panel. The PLANCK will show the message WAKING UP...
If the cover is still open, the display reads OPEN. If you activated the unit with closed cover and no inserted disc, the message No Disc will appear in the dis-play after a short time.
Please refer to the sections 'Inserting and removing discs' on page 23 and 'Playing discs' on page 31 to read more on inserting, removing and playing discs.
If you would like to switch the unit off, press the key on the front panel. The message GOING TO SLEEP... will appear on the display while powering down the unit. Afterwards the display stays dark – the PLANCK is in stand-by mode.
Note
• The PLANCK powers up automatically after it is connected to mains and starts playing the inserted CD, if the option Set AutoPlay has the values power on only or power on & disc change (refer to section 'Set AutoPlay' on page 52).
• Of course the PLANCK may be switched on or off at any time with the Au-dionet Metal Remote Control (refer to section 'Audionet Metal Remote Con-trol' on page 26.

22
• If the unit is activated while the cover is still open, the PLANCK will issue the message:
Please close the cover. It is only possible to switch the unit on, if the cover is closed!
• If the cover is opened during power-up, the PLANCK interrupts the process with the warning:
Please close the cover first and switch the unit on again afterwards!
Using Audionet Link
The PLANCK may be controlled remotely by an Audionet pre- or integrated amplifier using the 'Audionet Link' interface.
Simply connect the Audionet Link input of the PLANCK by a standard optical Toslink cable to the Audionet Link output of your Audionet preamplifier. As soon as the preamplifier is powered on or off at its front panel or by remote control, the PLANCK and all other units connected via Audionet Link will be switched on or off automatically (refer to section 'Audionet Link' on page 19).
Attention:
Close cover before
switching on!!
Attention:
Keep cover closed
during power up!!
23
Note
• The activation signal is passed to further Audionet units daisy chained to the Audionet Link output of your PLANCK with a slight delay to avoid all units powering up at the same time – preventing an overload of your mains fuse. First the control output OUT 1 and afterwards OUT 2 is activated.
• The PLANCK may still be switched on or off manually at any time by using the key on the front panel or the remote control.
Important
• If the option Set AutoOff has the value shut off in 30 min, the PLANCK will power down to stand-by mode automatically 30 minutes after the disc has stopped or after a key is used on the front panel or remote control. This function is independent from a preamplifier connected via Au-dionet Link, i.e. the PLANCK shuts down automatically even if the preampli-fier is still switched on (refer to section 'Set AutoOff' on page 51).
6.2 Inserting and removing discs
Open the cover on top of the PLANCK by pushing backwards using the handle. Set a disc onto the spindle with the printed side facing upwards. Fix the disc with the included stabilizer ('Puck'). Please ensure that the stabilizer locates the disc in a centred and leveled position.
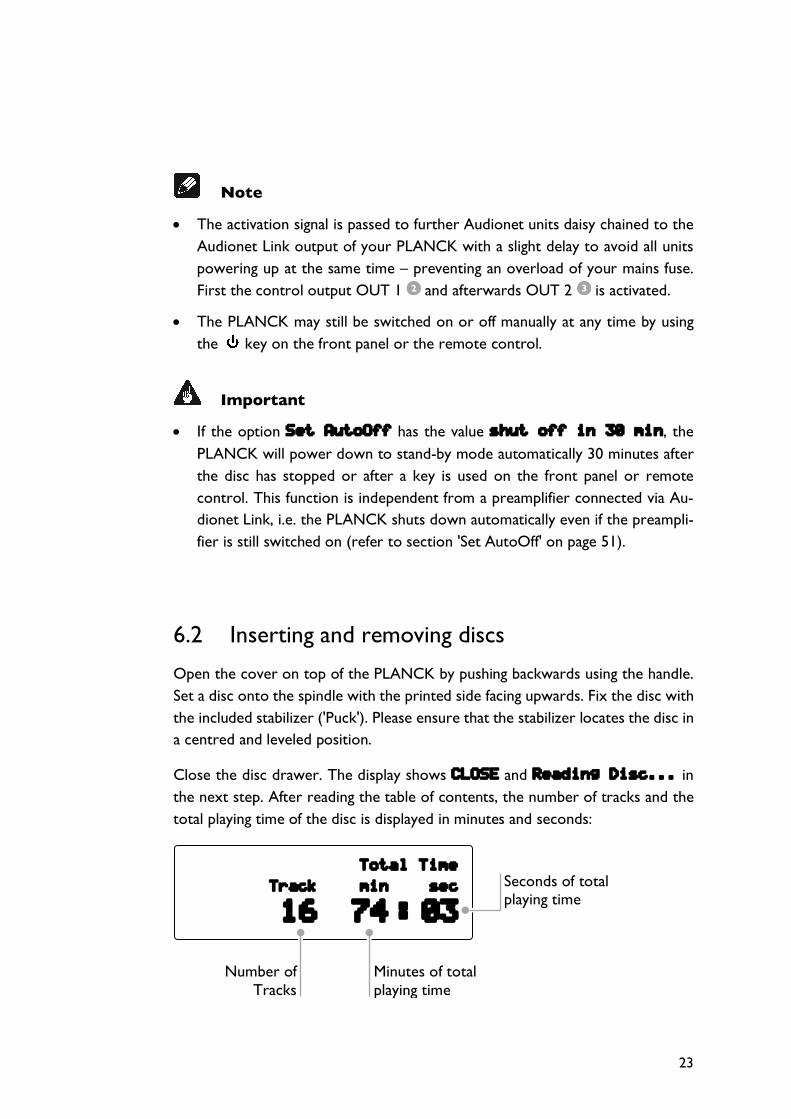
Close the disc drawer. The display shows CLOSE and Reading Disc... in the next step. After reading the table of contents, the number of tracks and the total playing time of the disc is displayed in minutes and seconds:
Total Time Track min sec
16 74 : 03
Minutes of total playing time
Number of Tracks
Seconds of total playing time
24
Stop the playback by pressing the key on the front panel or the < key of the Audionet Metal Remote Control before opening the cover. Please wait until the disc stops spinning, before removing the stabilizer in order to take out the disc.
As long as the cover remains open, the display reads Open.
Note
• The PLANCK needs a short moment to completely stop the disc, if the cover is opened during playback. Please wait until the disc stops spinning before removing it.
• The cover has to be closed completely in order to play back a disc.
• Always use the included stabilizer to fix the disc on the spindle. Otherwise the disc and the unit might suffer damage.
• Never load more than one disc at a time and do not use any additional stabilizers!
• Do not use any non-standard shaped discs available on the market since they might damage the unit.
• In case the option Set AutoPlay has the values disc change only or power on & disc change, the PLANCK starts the playback auto-matically as soon as you insert a disc and close the cover (refer to section 'Set AutoPlay' on page 52).
25
6.3 Control elements on the front panel
The front panel has 4 keys for controlling the PLANCK (refer to section Over-view front panel' on page 7). These keys control all basic playback functions as well as the setup options in the Global Setup menu.
Power the unit on or off.
Pressing this key shortly stops the playback. If it is pushed for at least 2 seconds, the Global Setup menu is entered and the key is then used to navigate through the menu items.
Push the key shortly to skip back to the beginning of the cur-rently playing track. Press the key again to skip to the start of previous tracks. Hold it down the for at least 2 seconds to pause the playback. To continue playing, press the key long again.
Press this key once to start the playback or to skip to the beginning of the next track. Push it again to skip to the start of further tracks.

26
7 Audionet Metal Remote Control Every function of the PLANCK is accessible by the Audionet Metal Remote Con-trol. Additionally, it is able to control power, volume, muting and the input chan-nel selection of an Audionet preamplifier.
PLANCK WATT
4/;
< ä
: 9
7 8
+ +
–
–
CH VOL
POWER
10 12
13 11
8
6
4
2 1
3
5
7
14
9

27
7.1 Key assignment Metal Remote Control
No. Key Function
1 PLANCK Power the PLANCK on or off.
2 WATT Power an Audionet preamplifier on or off.
3 9 Skip to previous track.
4 : Skip to next track.
5 ä Enter and navigate through the Global Setup & Playback Options menu.
6 Stop the playback.
7 7 Search backwards.
8 8 Search forwards.
9
Start or resume the playback; press long for pause.
10 CH + Select next input channel of Audionet preamplifier.
11 CH - Select previous input channel of Audionet preamplifier.
12 VOL + Increase volume of Audionet preamplifier.
13 VOL – Decrease volume of Audionet preamplifier.
14 Mute / un-mute Audionet preamplifier.
1 Power key PLANCK for PLANCK Use the power key PLANCK to switch the PLANCK on or off. This key has the same function as the key on the front panel. If the PLANCK is in stand-by mode, PLANCK switches the unit on. If the PLANCK is already switched on, PLANCK powers the unit off into stand-by mode.
2 Power key WATT for Audionet preamplifier Use the power key WATT to switch an Audionet preamplifier on or off. The key has the same function as the button on the preamplifiers front panel. In case the Audionet preamplifier is in stand-by mode, WATT switches the unit on. If the Audionet preamplifier is already switched on, WATT sets the unit into stand-by mode.
28
3 Skip back key 9 Skips back to the start of the current track. Press it again to skip to the start of previous tracks (refer to section 'Basic playback control' on page 33). It is also used for selecting options in the Global Setup menu (see section 'Global setup menu' on page 47) and the Playback Options menu (refer to section 'Playback options menu' on page 35).
4 Skip forward key : Skips to the beginning of the next track (refer to section 'Basic playback con-trol' on page 33). It is also used for selecting options in the Global Setup menu (see section 'Global setup menu' on page 47) and the Playback Options menu (refer to section 'Playback options menu' on page 35).
5 Setup key ä For entering and navigating through the Global Setup and Playback Options menu (see sections 'Global setup menu' on page 47 and 'Playback options menu' on page 35). This key works similar to the on the front panel.
6 Stop key < Stops the playback (refer to section 'Basic playback control' on page 33) and deletes playlists (see section 'Delete a playlist on page 46).
7 Search backwards key 7 Searches the disc backwards (refer to section 'Searching' on page 33). This key is also used for editing playlists (see section 'Edit a playlist' on page 43).
8 Search forwards key 8 Searches the disc forwards (refer to section 'Searching' on page 33). This key is also used for editing playlists (see section 'Edit a playlist' on page 43).
9 Playback/Pause key Starts or resumes the playback. Press and hold for longer than 2 seconds to pause the playback at the current disc position. Press the key again to resume playback (refer to section 'Basic playback control' on page 33).
10 Channel up key CH + Selects the next input channel of an Audionet preamplifier.
11 Channel down key CH - Selects the previous input channel of an Audionet preamplifier.

29
12 Volume up key VOL + Increases the volume setting of an Audionet preamplifier.
13 Volume down key VOL - Decreases the volume setting of an Audionet preamplifier.
14 Mute key Mutes an Audionet preamplifier. Press the key again to return to the previous volume setting.
7.2 Changing the batteries
In order to change the batteries of your Audionet Metal Remote Control, re-move the 6 Allen key head screws on the bottom side first.
The battery compartment is located on the left side of the circuit board. 2 bat-teries type 'AAA' or 'Micro' with a voltage of 1.5 V are needed.
Important
• Please mind the batteries orientation while inserting a new pair. The correct orientation is printed onto the bottom of the battery compartment.
Battery compartment
30
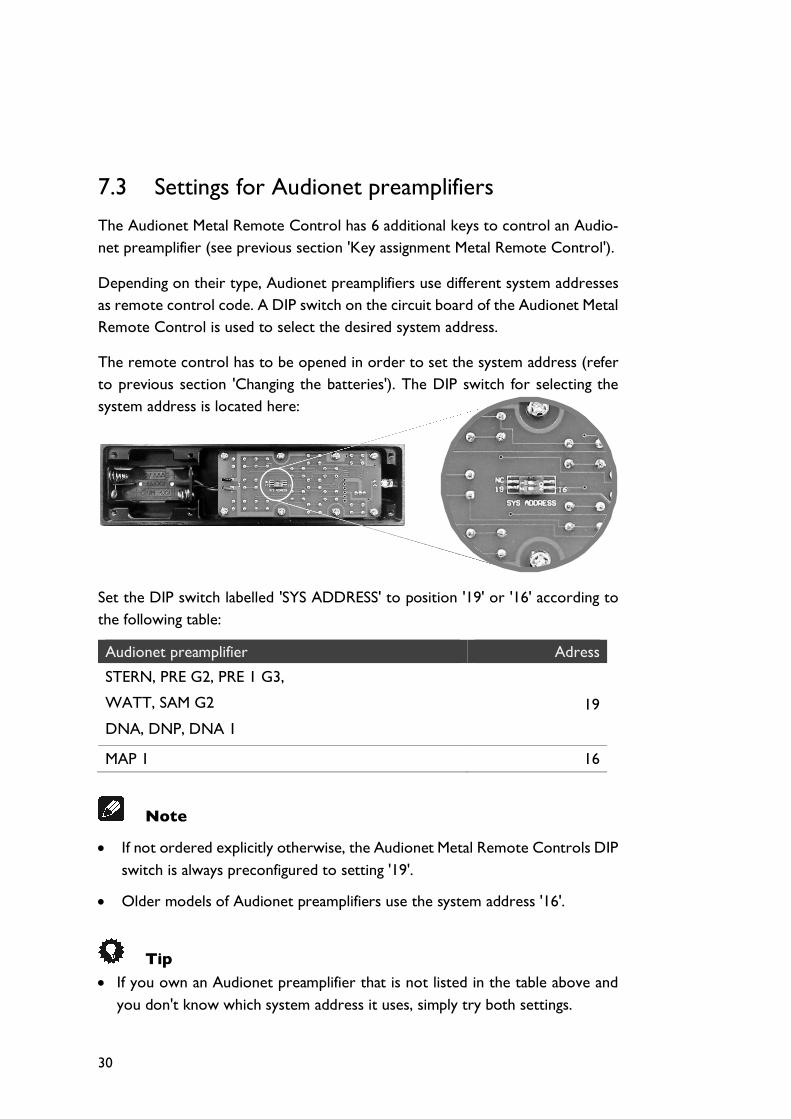
7.3 Settings for Audionet preamplifiers
The Audionet Metal Remote Control has 6 additional keys to control an Audio-net preamplifier (see previous section 'Key assignment Metal Remote Control').
Depending on their type, Audionet preamplifiers use different system addresses as remote control code. A DIP switch on the circuit board of the Audionet Metal Remote Control is used to select the desired system address.
The remote control has to be opened in order to set the system address (refer to previous section 'Changing the batteries'). The DIP switch for selecting the system address is located here:
Set the DIP switch labelled 'SYS ADDRESS' to position '19' or '16' according to the following table:
Audionet preamplifier Adress
STERN, PRE G2, PRE 1 G3,
WATT, SAM G2
DNA, DNP, DNA 1
19
MAP 1 16
Note
• If not ordered explicitly otherwise, the Audionet Metal Remote Controls DIP switch is always preconfigured to setting '19'.
• Older models of Audionet preamplifiers use the system address '16'.
Tip • If you own an Audionet preamplifier that is not listed in the table above and
you don't know which system address it uses, simply try both settings.
31
8 Playing discs If the PLANCK is not switched on yet, press the key on the front panel or the PLANCK key on the Audionet Metal Remote Control to power the unit on.
Open the cover on top of the unit by sliding it backwards.
Put a disc onto the spindle with the printed side facing upwards. Fix the disc with the included stabilizer ('Puck'). Please ensure that the stabilizer locates the disc in a centred and leveled position.
Important
• Never load more than one disc at a time and do not use any additional stabilizers!
Press the key on the front panel or the key of the Audionet Metal Remote Control to start the playback.
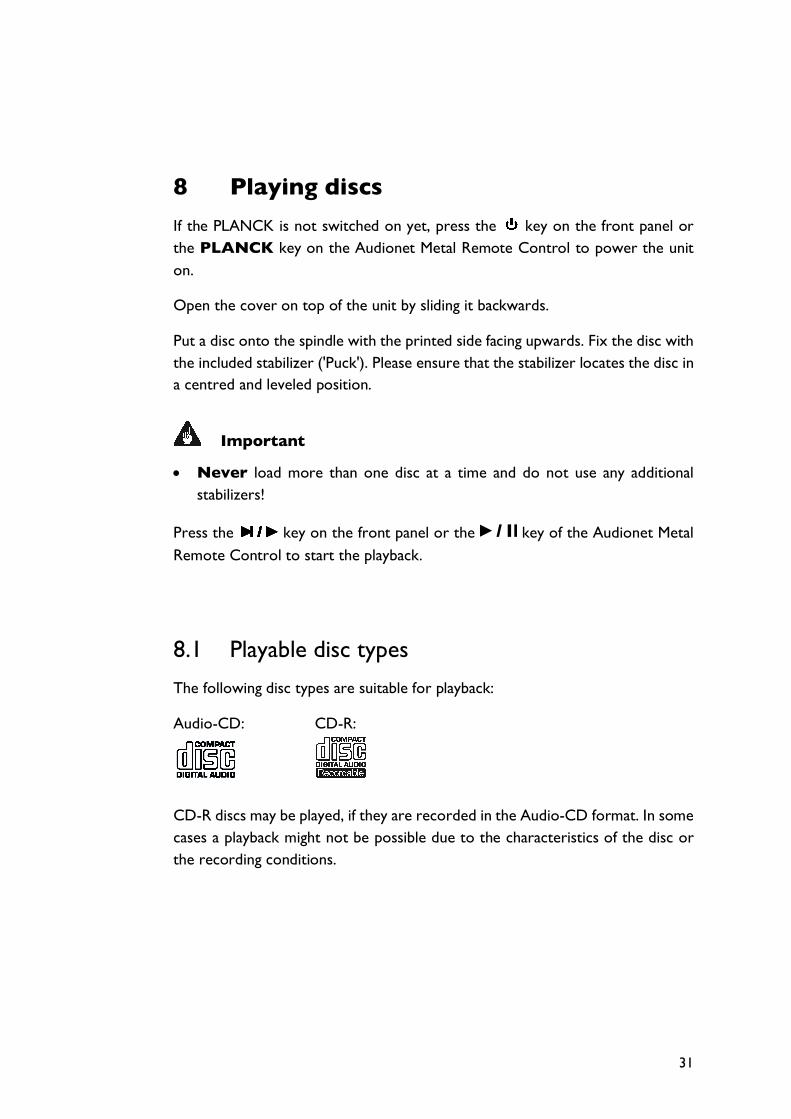
8.1 Playable disc types
The following disc types are suitable for playback:
Audio-CD: CD-R:
CD-R discs may be played, if they are recorded in the Audio-CD format. In some cases a playback might not be possible due to the characteristics of the disc or the recording conditions.
32
Important
• It is possible that some Audio CDs which are not compliant to the Red Book standard will not play correctly or not at all on the PLANCK. Particularly copy-protected CDs often violate the standard. Please notice the logos and notes on the CD or booklet.
• If you playback a DTS* Music CD with the PLANCK, all analog outputs will always send a high level noise that might damage your speak-ers!
• Make absolutely sure that you playback DTS Music CDs via a DTS-compatible AV (pre-)amplifier only. The AV (pre-)amplifier has to be connected to one of the digital outputs OUT 1 , OUT 2 , OUT 3 , or OUT 4 of the PLANCK.
• DTS Music CDs are usually marked:
Note
• The PLANCK is able to playback audio recorded on CD-G, CD-EXTRA and CD-TEXT discs
* DTS and the DTS Digital Surround are registered trademarks of Digital Theater Systems, Inc.
33
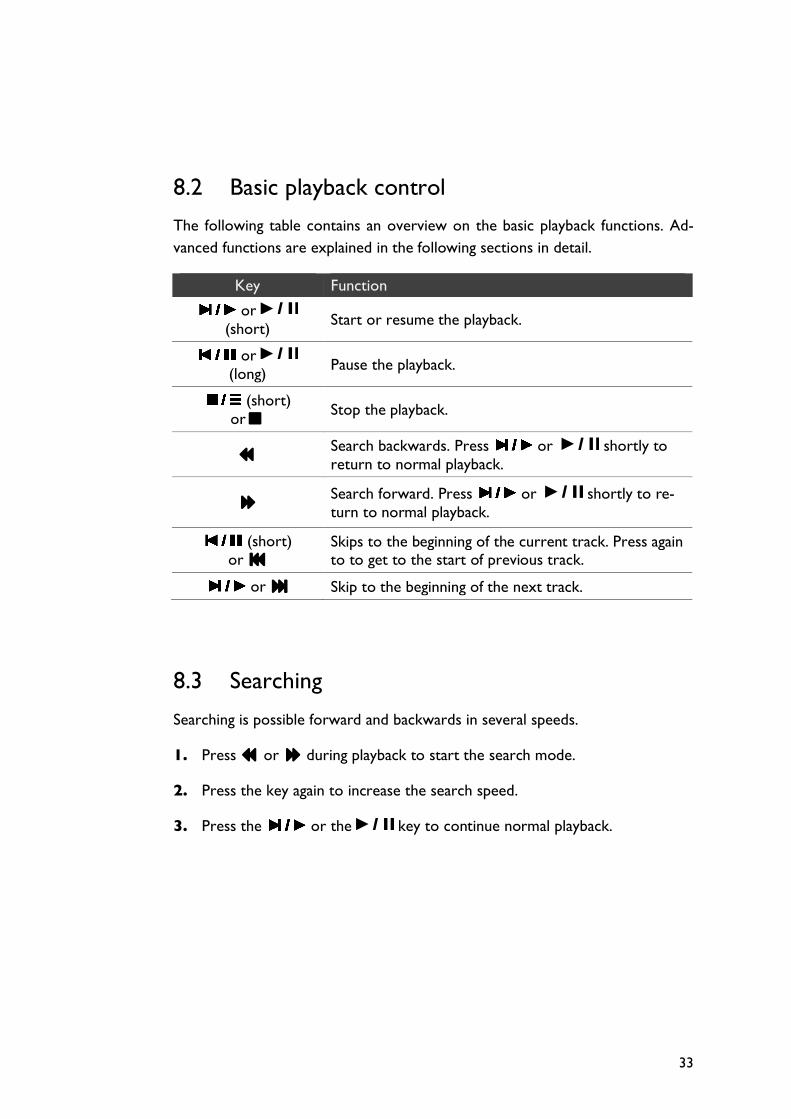
8.2 Basic playback control
The following table contains an overview on the basic playback functions. Ad-vanced functions are explained in the following sections in detail.
Key Function
or (short)
Start or resume the playback.
or (long)
Pause the playback.
(short) or<
Stop the playback.
7 Search backwards. Press or shortly to return to normal playback.
8 Search forward. Press or shortly to re-turn to normal playback.
(short) or 9
Skips to the beginning of the current track. Press again to to get to the start of previous track.
or : Skip to the beginning of the next track.
8.3 Searching
Searching is possible forward and backwards in several speeds.
1. Press 7 or 8 during playback to start the search mode.
2. Press the key again to increase the search speed.
3. Press the or the key to continue normal playback.
34
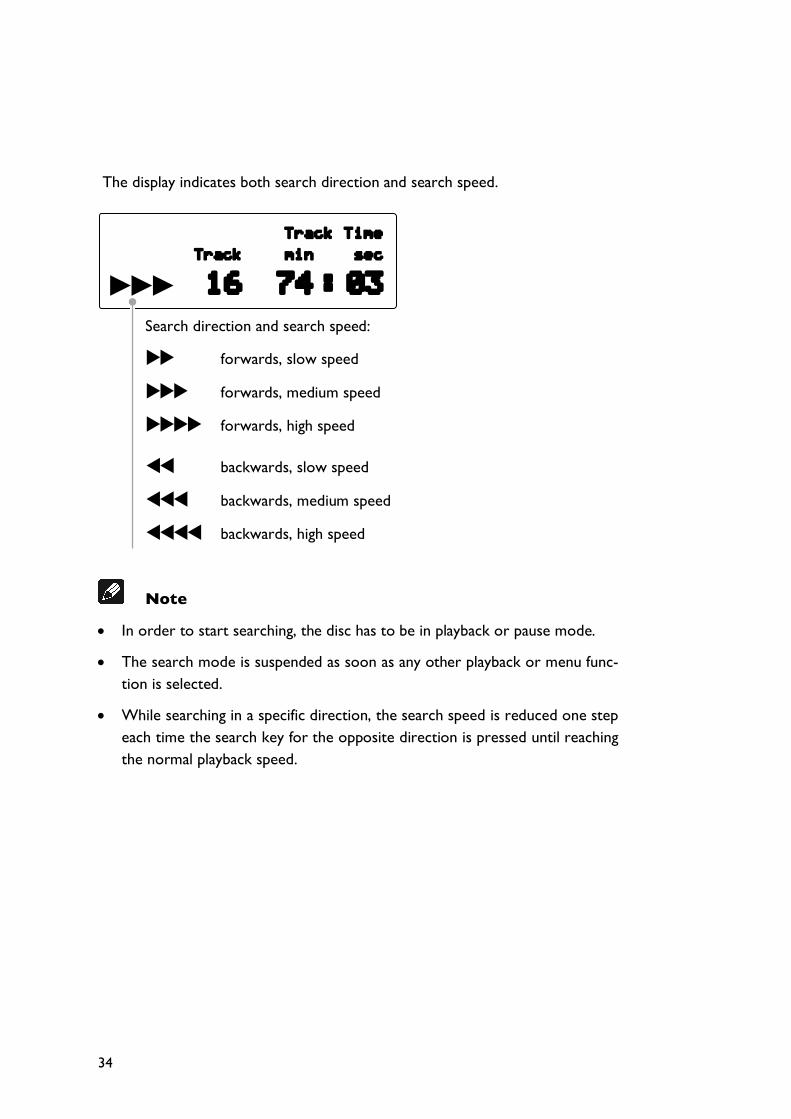
The display indicates both search direction and search speed.
Search direction and search speed:
uu forwards, slow speed
uuu forwards, medium speed
uuuu forwards, high speed
tt backwards, slow speed
ttt backwards, medium speed
tttt backwards, high speed
Note
• In order to start searching, the disc has to be in playback or pause mode.
• The search mode is suspended as soon as any other playback or menu func-tion is selected.
• While searching in a specific direction, the search speed is reduced one step each time the search key for the opposite direction is pressed until reaching the normal playback speed.
Track Time Track min sec
16 74 : 03
35
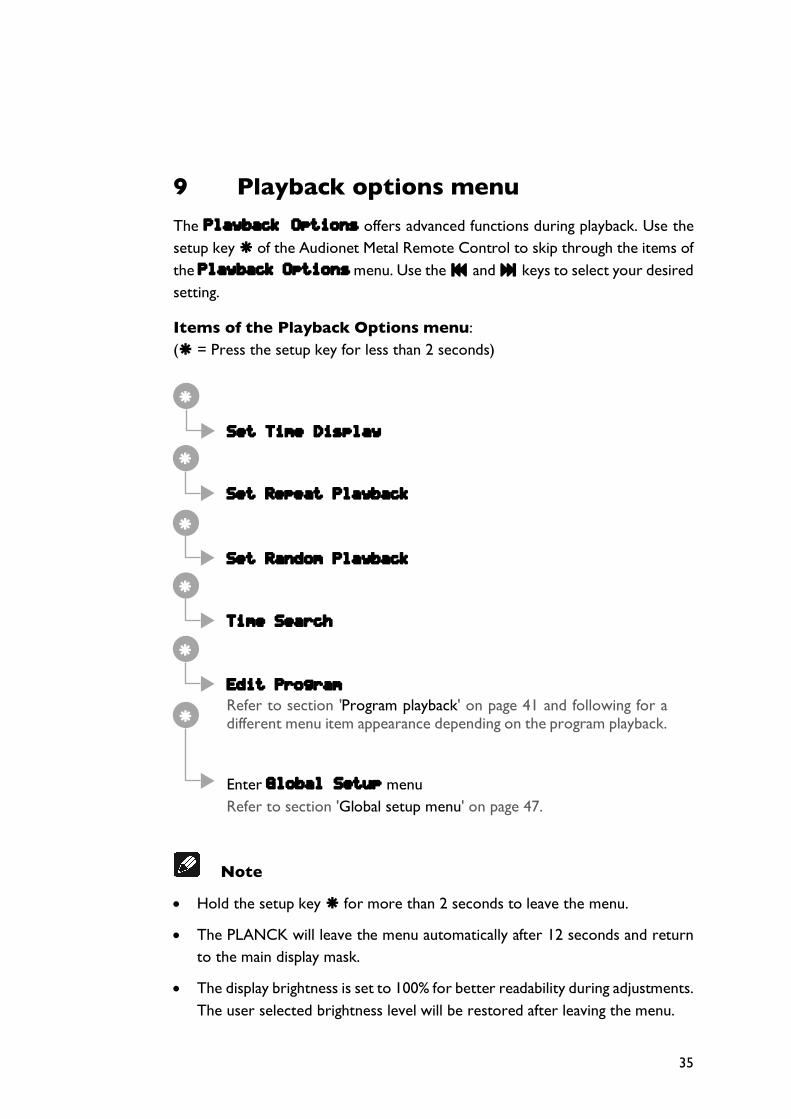
9 Playback options menu The Playback Options offers advanced functions during playback. Use the setup key ä of the Audionet Metal Remote Control to skip through the items of the Playback Options menu. Use the 9 and : keys to select your desired setting.
Items of the Playback Options menu: (ä = Press the setup key for less than 2 seconds)
Note
• Hold the setup key ä for more than 2 seconds to leave the menu.
• The PLANCK will leave the menu automatically after 12 seconds and return to the main display mask.
• The display brightness is set to 100% for better readability during adjustments. The user selected brightness level will be restored after leaving the menu.
ä
Set Time Display
ä
Set Repeat Playback
ä
Set Random Playback
ä
Time Search
ä
Edit Program
Refer to section 'Program playback' on page 41 and following for a different menu item appearance depending on the program playback. ä
Enter Global Setup menu Refer to section 'Global setup menu' on page 47.

36
Tip
• To enter the Global Setup menu directly, hold the setup key ä for more than 2 seconds. Navigate to next menu item by short keystrokes on ä.
9.1 Time display
Four different time display modes are available during the playback of a disc. Press the ä key of the Audionet Metal Remote Control once to get to the Playback Options menu. The first item is Set Time Display. Use the 9 and : keys to select desired display mode.
Four time display modes are available:
Track Time shows the time of the current track that is playing:
Track Remain shows the remaining playback time of the current track:
Playback Options
Set Time Display:
Track Time
Track Time Track min sec
05 02 : 49
Track Remain Track min sec
05 -03 : 08
37
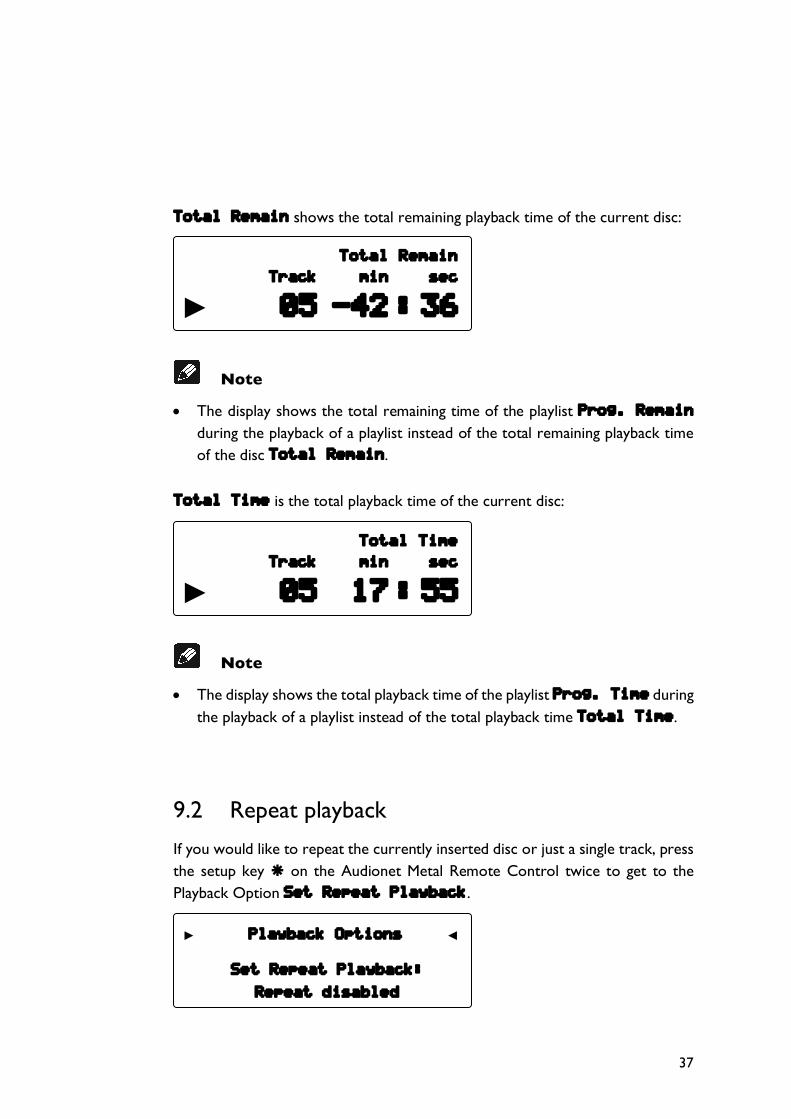
Total Remain shows the total remaining playback time of the current disc:
Note
• The display shows the total remaining time of the playlist Prog. Remain during the playback of a playlist instead of the total remaining playback time of the disc Total Remain.
Total Time is the total playback time of the current disc:
Note
• The display shows the total playback time of the playlist Prog. Time during the playback of a playlist instead of the total playback time Total Time.
9.2 Repeat playback
If you would like to repeat the currently inserted disc or just a single track, press the setup key ä on the Audionet Metal Remote Control twice to get to the Playback Option Set Repeat Playback.
Total Remain Track min sec
05 -42 : 36
Total Time Track min sec
05 17 : 55
Playback Options
Set Repeat Playback:
Repeat disabled
38
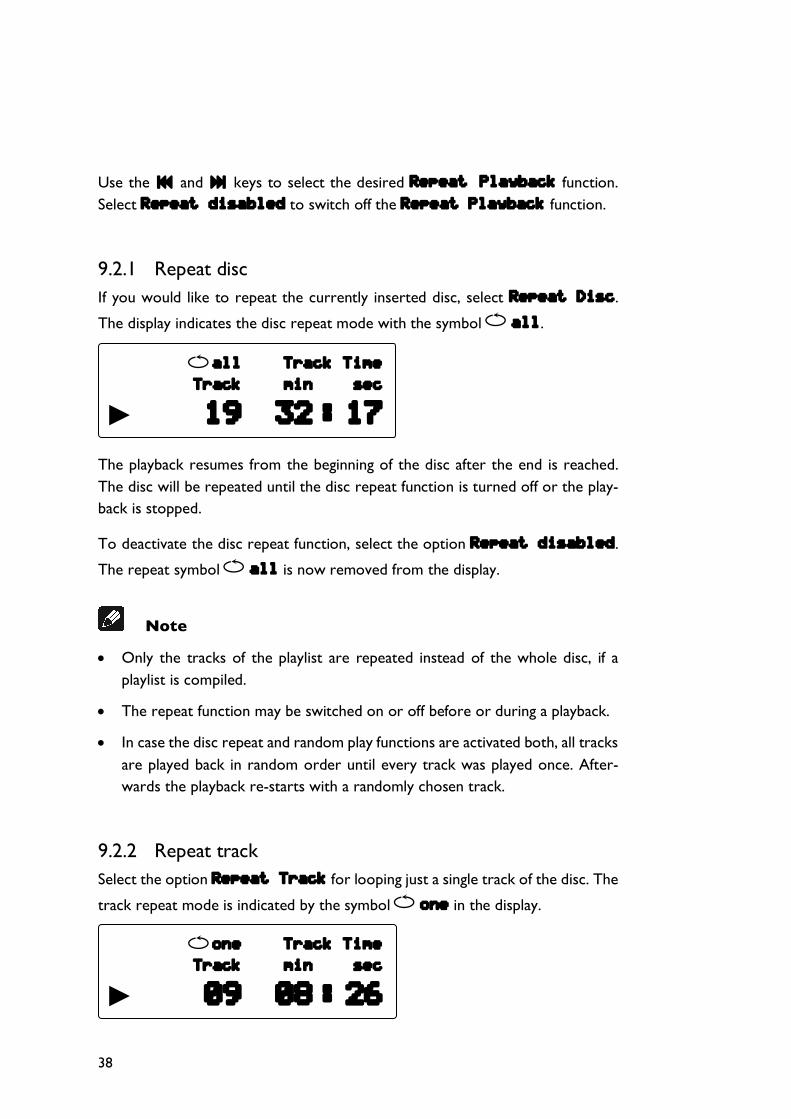
Use the 9 and : keys to select the desired Repeat Playback function. Select Repeat disabled to switch off the Repeat Playback function.
9.2.1 Repeat disc If you would like to repeat the currently inserted disc, select Repeat Disc.
The display indicates the disc repeat mode with the symbol all.
The playback resumes from the beginning of the disc after the end is reached. The disc will be repeated until the disc repeat function is turned off or the play-back is stopped.
To deactivate the disc repeat function, select the option Repeat disabled.
The repeat symbol all is now removed from the display.
Note
• Only the tracks of the playlist are repeated instead of the whole disc, if a playlist is compiled.
• The repeat function may be switched on or off before or during a playback.
• In case the disc repeat and random play functions are activated both, all tracks are played back in random order until every track was played once. After-wards the playback re-starts with a randomly chosen track.
9.2.2 Repeat track Select the option Repeat Track for looping just a single track of the disc. The
track repeat mode is indicated by the symbol one in the display.
all Track Time Track min sec
19 32 : 17
one Track Time Track min sec
09 08 : 26

39
The current track will be looped until the track repeat function is switched off or the playback stopped.
Select the option Repeat disabled to deactivate the track repeat function.
The track repeat symbol one is vanishing from the display.
Note
• The repeat function may be switched on or off before or during a playback.
• In case the track repeat and the random play functions are activated both, only the current track will be repeated nonetheless.
9.3 Random playback
Use this function to play the tracks of a disc or playlist in a randomly order.
Press the setup key ä on the Audionet Metal Remote Control three times to get to the Playback Option Set Random Playback.
Use the 9 and : keys to enabled or disable the Random Playback function. If Random Playback is enabled, the display indicates an active random play-back mode by the symbol Random:
The text Random vanishes from the display, if Random Playback is disabled.
Note
• Only tracks of the playlist are played in a random order on a compiled playlist.
Random Track Time Track min sec
19 32 : 17
Playback Options
Set Random Playback:
enabled
40
9.4 Time search
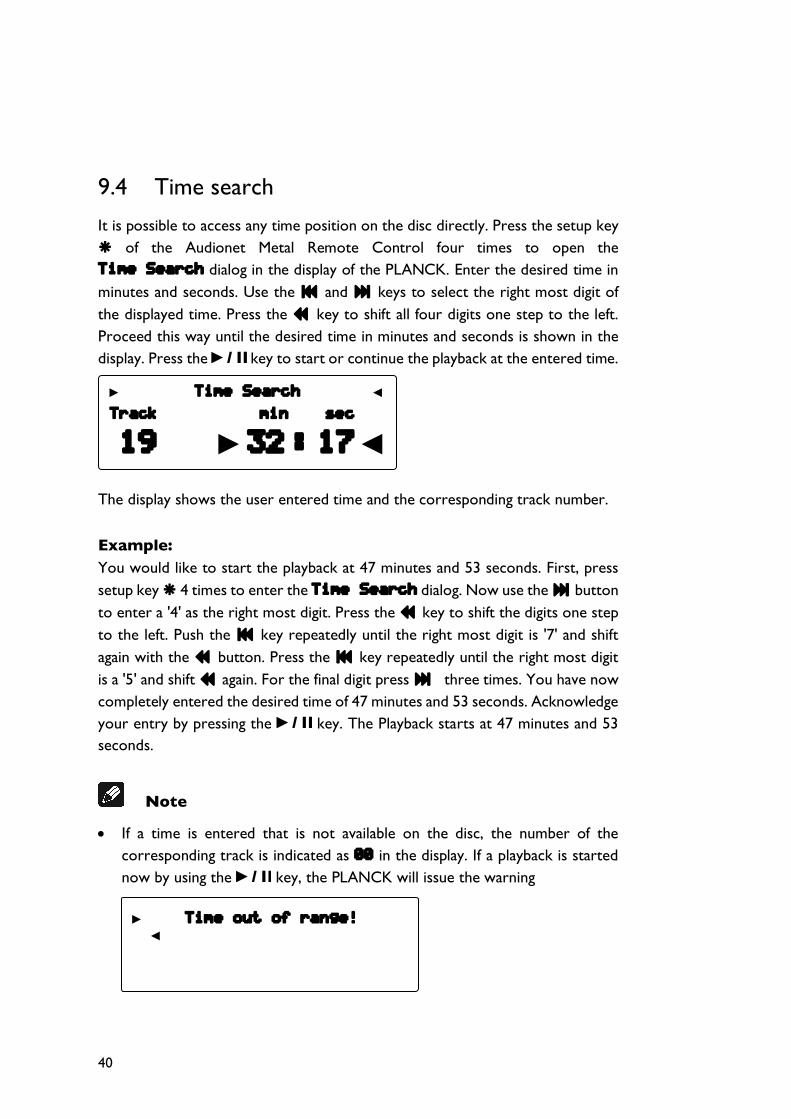
It is possible to access any time position on the disc directly. Press the setup key ä of the Audionet Metal Remote Control four times to open the Time Search dialog in the display of the PLANCK. Enter the desired time in minutes and seconds. Use the 9 and : keys to select the right most digit of the displayed time. Press the 7 key to shift all four digits one step to the left. Proceed this way until the desired time in minutes and seconds is shown in the display. Press the key to start or continue the playback at the entered time.
The display shows the user entered time and the corresponding track number.
Example: You would like to start the playback at 47 minutes and 53 seconds. First, press setup key ä 4 times to enter the Time Search dialog. Now use the : button to enter a '4' as the right most digit. Press the 7 key to shift the digits one step to the left. Push the 9 key repeatedly until the right most digit is '7' and shift again with the 7 button. Press the 9 key repeatedly until the right most digit is a '5' and shift 7 again. For the final digit press : three times. You have now completely entered the desired time of 47 minutes and 53 seconds. Acknowledge your entry by pressing the key. The Playback starts at 47 minutes and 53 seconds.
Note
• If a time is entered that is not available on the disc, the number of the corresponding track is indicated as 00 in the display. If a playback is started now by using the key, the PLANCK will issue the warning
Time Search
Track min sec
19 32 : 17
Time out of range!

41
to inform that this time is not available on the disk and that a playback at the desired time is not possible.
• Correct a wrong time entry by simply typing in available and correct time values. The currently selected digit is always switched to the first digit. The other digits are shifted one digit to the left when you press the 7 key. In this case, the first digit is always reset to '0'.
9.5 Program playback
Use this function to compile a playlist. Tracks will be played in the order they were programmed in the playlist.
Make sure the playback has stopped. Press the setup key ä on the Audionet Metal Remote Control for five times to go to the Playback Option Edit Pro-gram for compiling a playlist. While in program mode, the display shows the following information:
The first line of the display indicates that the PLANCK is now in the editing pro-grams/playlists mode.
The second line shows the number of the current program step as well as the total number of program steps which are so far on the playlist. Additionally, the number of the track which is currently occupying the chosen program step is indicated. The playlist in the above example consists of 19 program steps in total and step 19 is occupied by track number 2.
The third line informs about the total playing time of the playlist. The total playing time is 47 minutes and 13 seconds in the above example.
The forth line in shows the number of the track which is currently selected to be added to the next program step of the playlist. In this example it is track no. 7.
Edit Program Track 02 -> 19 of 19
Prog. Time: 47 min 13 sec
Add Track: 07
42
First the desired track must be selected with the 9 and : keys of the Audionet Metal Remote Control to add it to the playlist. Check your current selection at line 4 of the display. Press 8 to insert the the selected track into the playlist at the chosen step.
The change will appear in line 2 of the display and prove that the track was added successfully to the playlist: The total number of program steps was increased by one.
Now add all other tracks you like to the playlist as described above. The playback order corresponds to the programming order.
Note
• If you compiled a playlist and the program playback mode is active while the disc is stopped, the total program (playlist) playing time Prog. Time is in-dicated in the display instead of the total disc playing time Total Time.
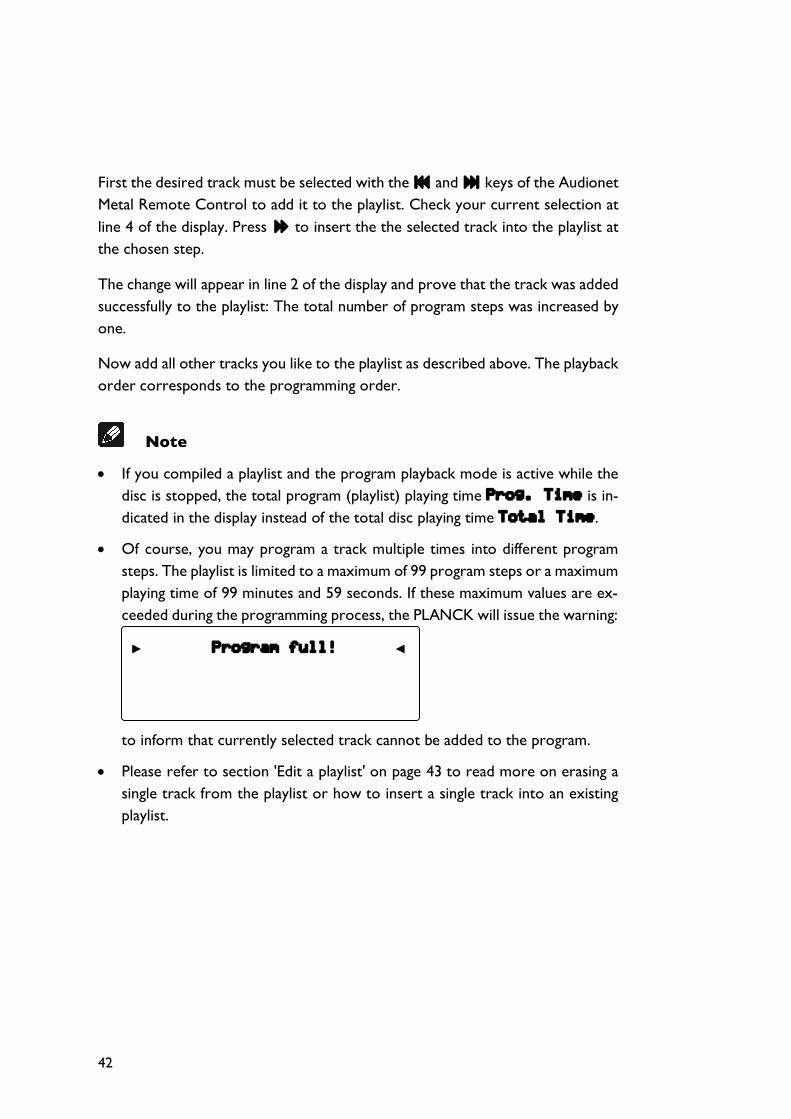
• Of course, you may program a track multiple times into different program steps. The playlist is limited to a maximum of 99 program steps or a maximum playing time of 99 minutes and 59 seconds. If these maximum values are ex-ceeded during the programming process, the PLANCK will issue the warning:
to inform that currently selected track cannot be added to the program.
• Please refer to section 'Edit a playlist' on page 43 to read more on erasing a single track from the playlist or how to insert a single track into an existing playlist.
Program full!
43
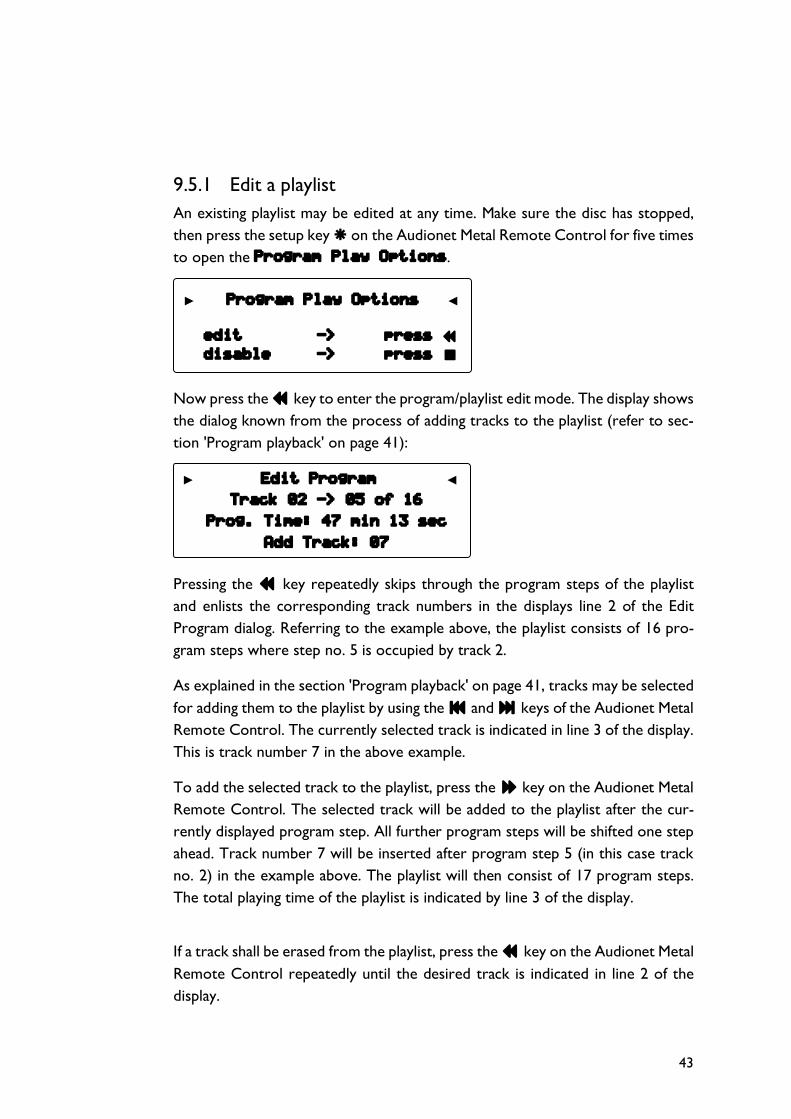
9.5.1 Edit a playlist An existing playlist may be edited at any time. Make sure the disc has stopped, then press the setup key ä on the Audionet Metal Remote Control for five times to open the Program Play Options.
Now press the 7 key to enter the program/playlist edit mode. The display shows the dialog known from the process of adding tracks to the playlist (refer to sec-tion 'Program playback' on page 41):
Pressing the 7 key repeatedly skips through the program steps of the playlist and enlists the corresponding track numbers in the displays line 2 of the Edit Program dialog. Referring to the example above, the playlist consists of 16 pro-gram steps where step no. 5 is occupied by track 2.
As explained in the section 'Program playback' on page 41, tracks may be selected for adding them to the playlist by using the 9 and : keys of the Audionet Metal Remote Control. The currently selected track is indicated in line 3 of the display. This is track number 7 in the above example.
To add the selected track to the playlist, press the 8 key on the Audionet Metal Remote Control. The selected track will be added to the playlist after the cur-rently displayed program step. All further program steps will be shifted one step ahead. Track number 7 will be inserted after program step 5 (in this case track no. 2) in the example above. The playlist will then consist of 17 program steps. The total playing time of the playlist is indicated by line 3 of the display.
If a track shall be erased from the playlist, press the 7 key on the Audionet Metal Remote Control repeatedly until the desired track is indicated in line 2 of the display.
Program Play Options
edit -> press 7 disable -> press <
Edit Program Track 02 -> 05 of 16
Prog. Time: 47 min 13 sec
Add Track: 07

44
Do erase the selected program step by pressing the < key now. The correspon-ding track is deleted from the playlist. All following program steps will be shifted a step back. The total number of program steps and the total playing time of the playlist are updated.
Example: Your playlist consists of the following tracks in the order:
Program step 1 2 3 4
Track no. 07 12 18 03
You would like to insert track 9 between the tracks 12 and 18 (respectively pro-gram steps 2 and 3). Repeat pressing 7 until line 2 of the display reads:
Press repeatedly : until the displays line 4 reads:
Insert track number 9 into the playlist by pressing the 8 key. The playback order will now change to:
Program step 1 2 3 4 5
Track no. 07 12 09 18 03
Now you would like to erase track no. 18 from the playlist. Repeat pressing 7 until line 2 of the display reads:
Edit Program Track 12 -> 02 of 04
Edit Program Track 12 -> 02 of 04
Prog. Time: 36 min 32 sec
Add Track: 09
Edit Program Track 18 -> 04 of 05
45
Remove track number 18 (respectively program step 4) from the playlist by press-ing <. The new playback order is:
Program step 1 2 3 4
Track no. 07 12 09 03
Important
• This function is only available by using the Audionet Metal Remote Control!
9.5.2 Playing a playlist As soon as the compiling process of the playlist is finished, the playback may be started by pressing the key on the Audionet Metal Remote Control or the
key on the front panel. The playback starts with the first track programmed in the playlist.
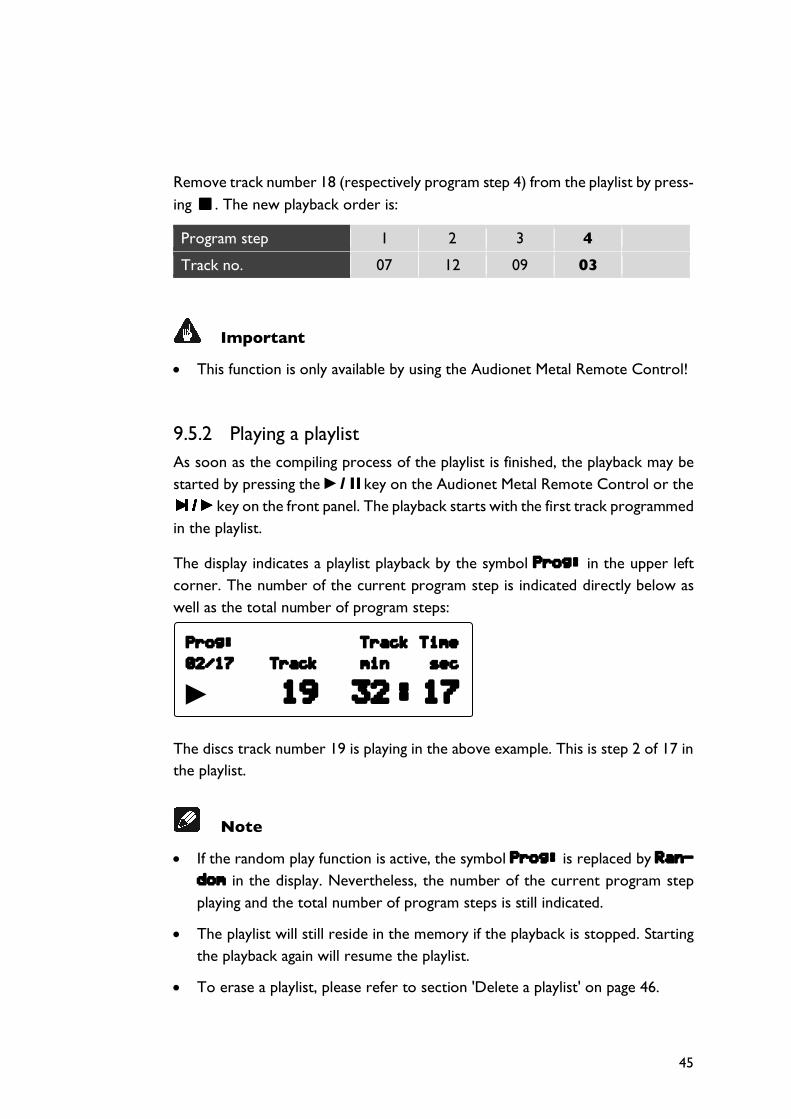
The display indicates a playlist playback by the symbol Prog: in the upper left corner. The number of the current program step is indicated directly below as well as the total number of program steps:
The discs track number 19 is playing in the above example. This is step 2 of 17 in the playlist.
Note
• If the random play function is active, the symbol Prog: is replaced by Ran-dom in the display. Nevertheless, the number of the current program step playing and the total number of program steps is still indicated.
• The playlist will still reside in the memory if the playback is stopped. Starting the playback again will resume the playlist.
• To erase a playlist, please refer to section 'Delete a playlist' on page 46.
Prog: Track Time 02/17 Track min sec
19 32 : 17
46
• To stop playing a playlist during playback and to return to normal playback, press the setup key ä of the Audionet Metal Remote Control for five times to get to the Program Play Options. Confirm disabling the Program Playback by using the < key. The PLANCK will continue to play in normal playback mode from the current track until the end of the disc.
• To restart the playback of the playlist which is still in the memory, stop the playback first (press <). Then press the setup key ä for five times to get to the Program Play Options again. Reactivate the program playback by pressing the 8 key. The program playback will start right after the or
key is used.
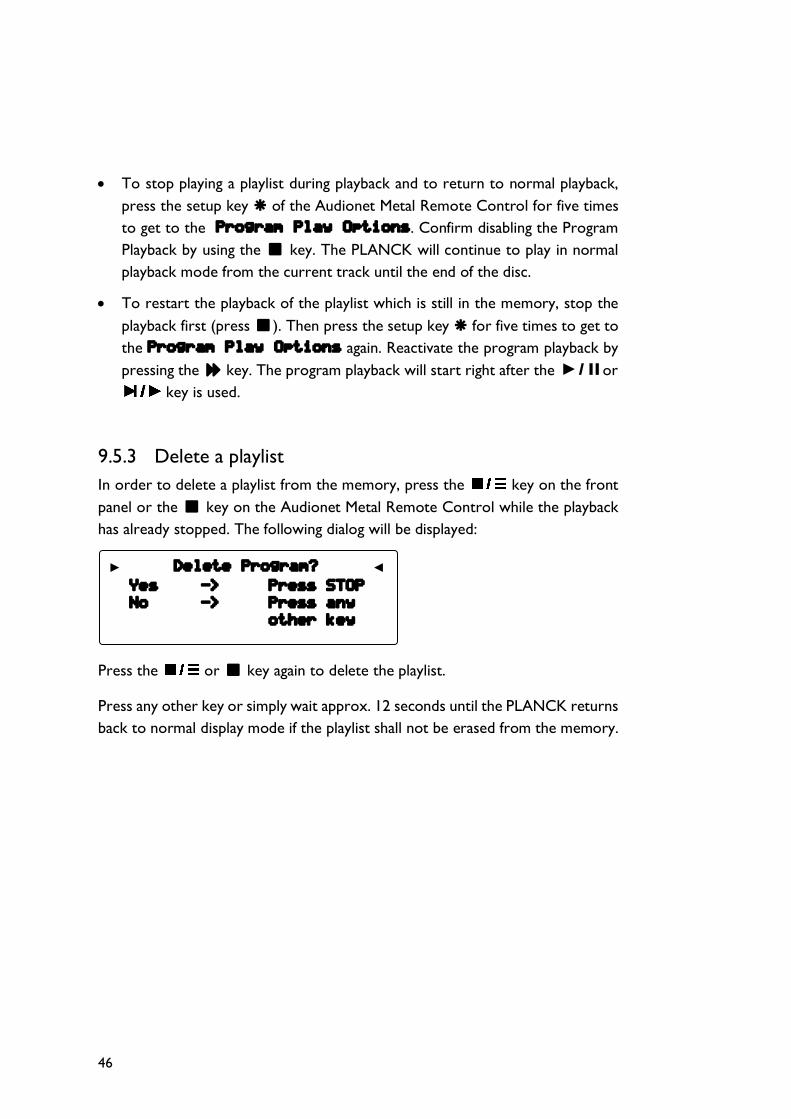
9.5.3 Delete a playlist In order to delete a playlist from the memory, press the key on the front panel or the < key on the Audionet Metal Remote Control while the playback has already stopped. The following dialog will be displayed:
Press the or < key again to delete the playlist.
Press any other key or simply wait approx. 12 seconds until the PLANCK returns back to normal display mode if the playlist shall not be erased from the memory.
Delete Program? Yes -> Press STOP No -> Press any
other key

47
10 Global setup menu Holding the key on the front panel for more than 2 seconds will enter the Global Setup menu. Press and hold the key for at least 2 seconds again to advance to the next menu item. After the last option the menu is dismissed. Use the and keys to adjust an option.
Order of items in the Global Setup menu: ( = hold for at least 2 seconds)
Tip
• All options of the Global Setup menu can be adjusted using the keys of the front panel. Using the Audionet Metal Remote Control might be much comfortable.
• Press and hold the setup key ä for more than 2 seconds to enter the Global Setup menu directly. Navigate to the next menu item by short keystrokes on ä.
Set Digital Input
Set Digital Output Mode
Set Display Brightness
Set AutoOff
Set AutoPlay
Exit menu...
48
• Use the 9 and : keys of the Audionet Metal Remote Control to select an option. While navigating through the Global Setup menu, the key on the front panel has the same function as the 9 button of the remote control. This applies to the and : keys as well.
Note
• The Global Setup menu may be entered at any time by holding the or ä key for at least 2 seconds – even during a playback.
• A short stroke on the key will still stop a running playback even during the use of the Global Setup menu (refer to 'Playing discs' on page 31).
• The PLANCK will automatically leave the Global Setup menu if no ad-justments are made within the last 12 seconds.
• The display brightness is set to 100% during adjustments in the Global Setup menu for a better readability. The user selected brightness level will be restored after leaving the menu.
• If you power the unit off to stand-by mode, all current adjustments will be stored in the non-volatile memory of the PLANCK. The unit will still remem-ber the settings after it is disconnected from the mains.
The options of the Global Setup menu are explained in detail through the following chapter.

49
10.1 Set digital input
Press the key once for at least 2 seconds to select the active digital input of the PLANCK. Use the and keys to select the preferred digital input.
disabled All digital inputs of the PLANCK are switched off.
IN 1 (electrical) Use this option to activate the digital input IN 1 .
IN 2 (USB Audio 2.0) Use this option to activate the USB Audio 2.0 in-put IN 2 .
IN 3 (optical) Use this option to activate the optical input (Toslink) IN 3 .
Tip
• Use the setup key ä of the Audionet Metal Remote Control to get to the menu item Set Digital Input. Use the 9 and : keys to select the preferred digital input.
10.2 Set digital output mode
Press the key long twice to adjust the output format of the digital outputs of the PLANCK. Use the and keys to select the output format.
active All digital outputs are active. Use this setting for sending digital audio data from the PLANCK to a preamplifier that is equipped with a digital audio input, e.g. Audionet DNx or Audionet MAP 1.
disabled All digital outputs are disabled. Select this option if none of the digital outputs of the PLANCK are used.

50
Important
• Do not short-circuit the digital outputs with any jumpers if they are not used. Select the setting disabled of the option Set Digital Output Mode instead in order to to switch off all digital outputs.
Tip
• Use the setup key ä of the Audionet Metal Remote Control to get to the menu item Set Digital Output Mode. Press the 9 and : keys to select the digital output format.
10.3 Set display brightness
Press the key long for three times to adjust the brightness of the display. Use the and keys to set the desired brightness.
Important
• The long-term use of the maximum brightness value (setting to 100%) may cause extended signs of wear resulting in a decay of contrast or brightness of individual pixels in the display. Do not use the display with a brightness set higher than the factory default setting of 75% over a longer period of time.
Note
• If set to Off, the display is only illuminated during setup adjustments and will be deactivated several seconds after the last entry. This does also apply for direct track access, time search and skipping or searching.
• If a disc has stopped, the cover is opened or no disc is inserted while the cover remains closed, the PLANCK automatically activates the display saver 10 minutes after the last user interaction.
• During active display saver, all messages are displayed at 25% brightness and varying locations, changing every 12 seconds to prevent any 'burn-in' effects to the display.

51
• During active display saver, the total playing time is displayed in the form 16 Tracks 74min 03sec while the disc has stopped.
Tip
• Use the setup key ä of the Audionet Metal Remote Control to return to the option Set Display Brightness. Use the 9 and : keys to adjust the brightness of the display.
10.4 Set AutoOff
To adjust the automatic shut-off feature of the PLANCK, press the key long for four times. Use the and keys to select the preferred func-tion.
never auto shut off The automatic shut-off feature is deacti-vated. The PLANCK stays powered on until it is switched off by the key on the front panel, the remote control or by Audionet Link.
auto shut off in 30 min The automatic shut-off feature is active. In case the PLANCK has stopped playback or the cover is left open for longer than 30 minutes without receiving any command from the keys on the front panel, the remote control or the Audionet Link, the unit will shut off to stand-by mode automatically.
Tip
• Use the setup key ä of the Audionet Metal Remote Control to navigate to the Set AutoOff menu item. Pressing the 9 or : key activates or de-activates the automatic shut-off feature.
52
10.5 Set AutoPlay
To adjust the automatic playback feature of the PLANCK, press the key long for five times. Use the and keys to select the preferred func-tion.
never The PLANCK never starts the playback auto-matically.
power on only The Playback starts automatically if the unit is being connected to mains while a disc is in-serted and the cover closed. Use this function to control the PLANCK by a timer.
disc change only The playback starts automatically as soon as a disc is inserted, the cover is closed and the table of contents of the disc is read.
power on & disc change Combination of the settings power on
only and Disc change only.
Tip
• Use the setup key ä of the Audionet Metal Remote Control to navigate to the Set AutoPlay menu item. Press the 9 and : keys to select the preferred setting.
53
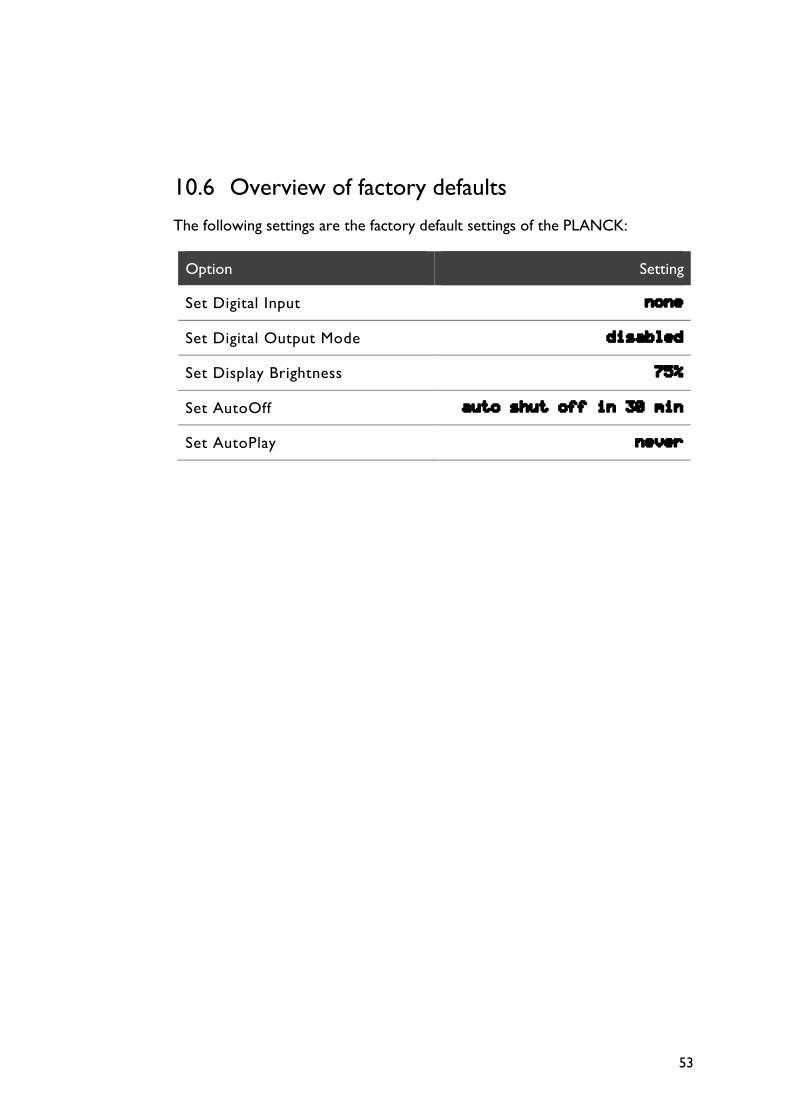
10.6 Overview of factory defaults
The following settings are the factory default settings of the PLANCK:
Option Setting
Set Digital Input none
Set Digital Output Mode disabled
Set Display Brightness 75%
Set AutoOff auto shut off in 30 min
Set AutoPlay never
54
11 Security advice
Important
• Avoid packaging material coming into children's hands!
• Only store and operate the unit in a dry room at a reasonable room temper-ature!
• Avoid moisture, any liquids, dirt or small objects of getting into the unit!
• Set the unit up in a sufficiently ventilated environment!
• Do not cover the unit!
• Do not open the unit. Unauthorised opening will void warranty!
• Do not short-circuit the outputs!
• The PLANCK, the preamplifier and the corresponding power amplifiers have to be switched off while connecting or removing the PLANCK in order to prevent any damage to these units or other connected devices.
• Use a dry cloth for cleaning!
We would like to wish you many exciting listening experiences with your new Audionet product.
If you still have any questions, do not hesitate to ask your competent Audionet dealer or contact us directly.
55
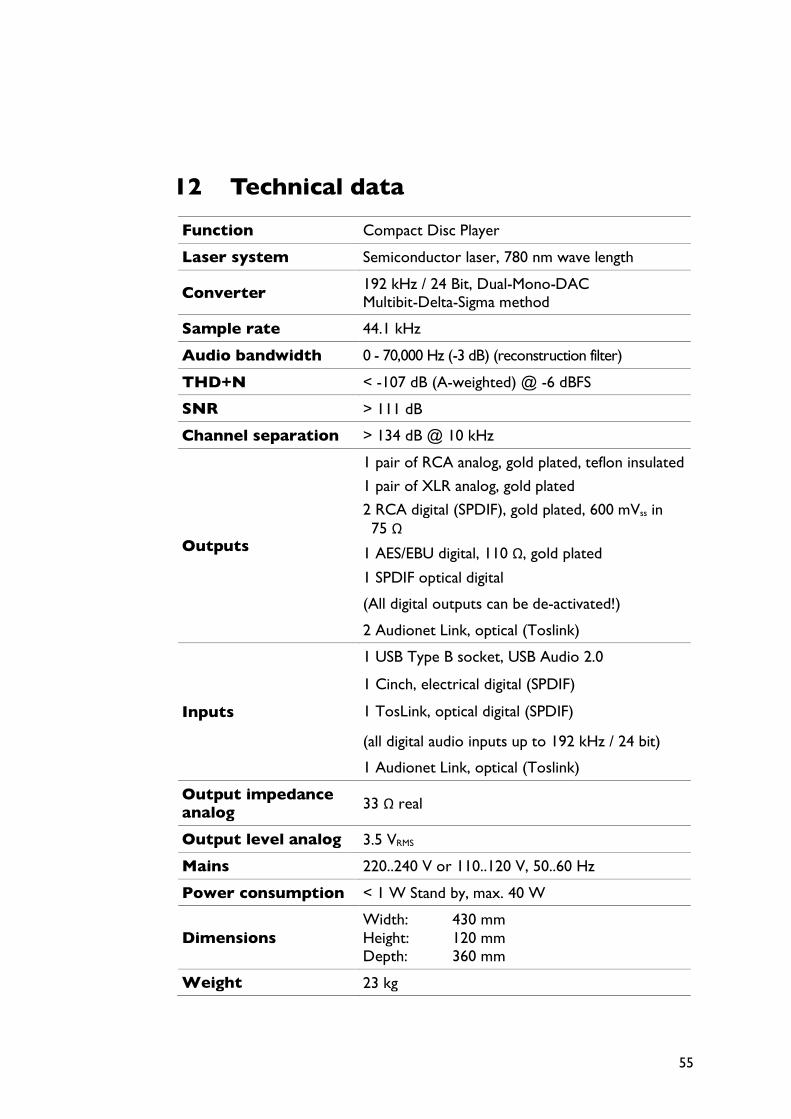
12 Technical data
Function Compact Disc Player
Laser system Semiconductor laser, 780 nm wave length
Converter 192 kHz / 24 Bit, Dual-Mono-DAC Multibit-Delta-Sigma method
Sample rate 44.1 kHz
Audio bandwidth 0 - 70,000 Hz (-3 dB) (reconstruction filter)
THD+N < -107 dB (A-weighted) @ -6 dBFS
SNR > 111 dB
Channel separation > 134 dB @ 10 kHz
Outputs
1 pair of RCA analog, gold plated, teflon insulated
1 pair of XLR analog, gold plated
2 RCA digital (SPDIF), gold plated, 600 mVss in 75 Ω
1 AES/EBU digital, 110 Ω, gold plated
1 SPDIF optical digital
(All digital outputs can be de-activated!)
2 Audionet Link, optical (Toslink)
Inputs
1 USB Type B socket, USB Audio 2.0
1 Cinch, electrical digital (SPDIF)
1 TosLink, optical digital (SPDIF)
(all digital audio inputs up to 192 kHz / 24 bit)
1 Audionet Link, optical (Toslink)
Output impedance analog 33 Ω real
Output level analog 3.5 VRMS
Mains 220..240 V or 110..120 V, 50..60 Hz
Power consumption < 1 W Stand by, max. 40 W
Dimensions Width: 430 mm Height: 120 mm Depth: 360 mm
Weight 23 kg
56
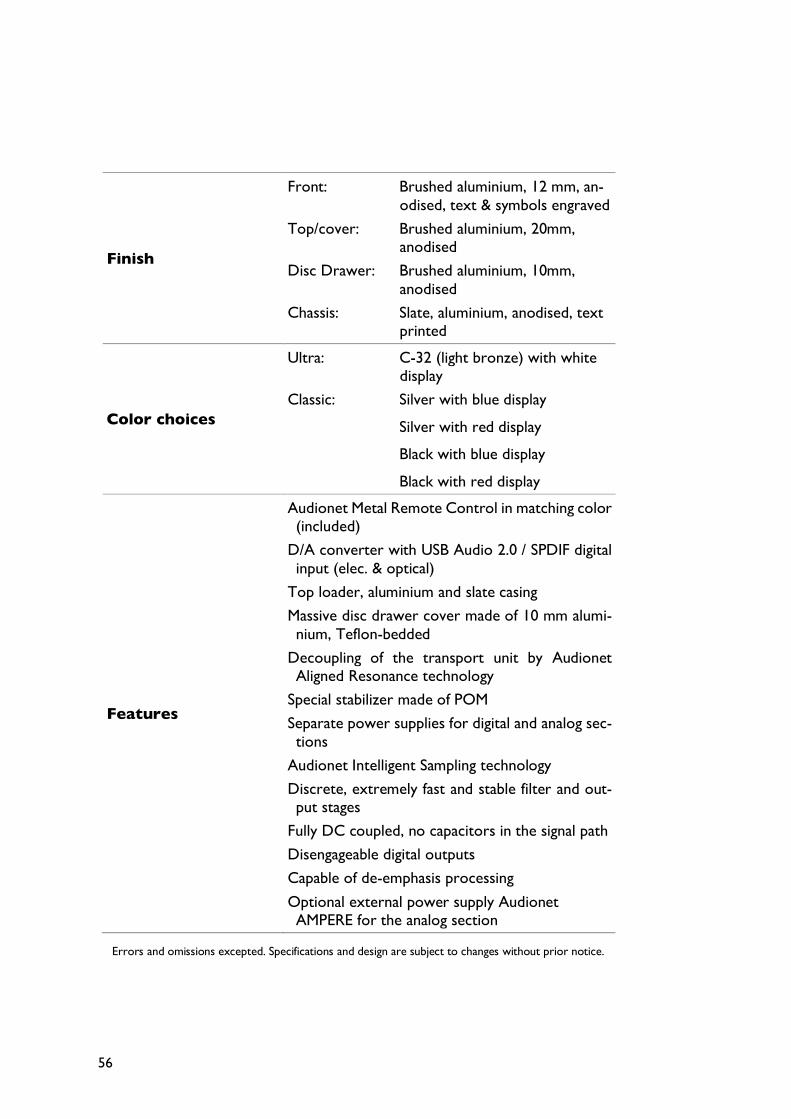
Finish
Front: Brushed aluminium, 12 mm, an-odised, text & symbols engraved
Top/cover: Brushed aluminium, 20mm, anodised
Disc Drawer: Brushed aluminium, 10mm, anodised
Chassis: Slate, aluminium, anodised, text printed
Color choices
Ultra: C-32 (light bronze) with white display
Classic: Silver with blue display
Silver with red display
Black with blue display
Black with red display
Features
Audionet Metal Remote Control in matching color (included)
D/A converter with USB Audio 2.0 / SPDIF digital input (elec. & optical)
Top loader, aluminium and slate casing
Massive disc drawer cover made of 10 mm alumi-nium, Teflon-bedded
Decoupling of the transport unit by Audionet Aligned Resonance technology
Special stabilizer made of POM
Separate power supplies for digital and analog sec-tions
Audionet Intelligent Sampling technology
Discrete, extremely fast and stable filter and out-put stages
Fully DC coupled, no capacitors in the signal path
Disengageable digital outputs
Capable of de-emphasis processing
Optional external power supply Audionet AMPERE for the analog section
Errors and omissions excepted. Specifications and design are subject to changes without prior notice.

57

58
is a trademark of Idektron GmbH & Co KG
Engineered and produced by: Idektron GmbH & Co. KG, Alboinstrasse 36-42, 12103 Berlin, Germany
en.audionet.de