photo lab manual - home : richland college the richland college photo lab manual was created in...
TRANSCRIPT
Richland College
PHOTO LAB MANUAL
Acknowledgments:
Thanks to the photography faculty, staff, and students for their recommendations and support.
Cover Photograph: Palm Reading, 2001 by Roxie Pillow
Written by Wayne Loucas
Richland College Photo Lab Manual, 12th edition: ©2005 Richland College
PHOT 1318 / ARTS 2356
PHOT 1319 / ARTS 2357
PHOT 2356 ARTS 2389
Continuing Education Darkroom Classes
Introduction..............................................................................................Associates In Arts Degree / Emphasis in Photographic/imaging............Photo Lab Rules and Regulations ...........................................................Photo Lab Hours......................................................................................Lockers ....................................................................................................Lab Safety................................................................................................
Hazardous Materials Training Session Overview ..........................Notice to Employees and Students.................................................
Darkroom Etiquette .................................................................................A Guide to Writing in your Journal ........................................................Film Development ...................................................................................
Loading Film ..................................................................................Development...................................................................................Film Development Sequence Chart................................................Kodak T-Max 100 and 400 Film Developing Chart.......................Kodak Tri-X and Plus-X Film Developing Chart ..........................Kodak High Speed Infrared and Technical Pan Film.....................Push-Processing Times T-Max 100 and 400..................................Push-Processing Times Plus-X and Tri-X......................................Kodak T-Max 3200 Processing Times............................................lford Film Developing Chart ..........................................................Chromogenic Black and White Film..............................................
The Enlarger ............................................................................................The Timer ................................................................................................Printing ....................................................................................................
Making a Contact Sheet .................................................................Making an Enlargement .................................................................Resin-Coated (RC) Paper-Print Developing Sequence ..................Fiber Paper-Print Developing Sequence.........................................Enlarging Station Checklist............................................................
Washing and Drying RC Prints ...............................................................
Table of Contents
1257789
131517181919222324252627282930313436384042434445
Washing and Drying Fiber Prints.....................................................................Printing with Contrast Filters............................................................................Retouching Prints.................................................................................................Using a Gray Card...............................................................................................Toning.....................................................................................................................
Sepia Toning............................................................................................... Selenium Toning........................................................................................Blue Toning.................................................................................................Selective Toning.........................................................................................
Roy's Guide to Infrared Photography..............................................................Dry Mounting.......................................................................................................Cutting Window Mats.........................................................................................Ethical and Legal Aspects of Photography....................................................Model Release......................................................................................................Student Photo/Imaging Exhibition...................................................................Slide Resource Library of Photography.........................................................Richland College Library - Photography Book List....................................
4648505254545556575861646973747577
1
The Richland College Photo Lab Manual was created in order to provide guidelines and instruc-
tion for those students taking photography classes that involve lab use. This manual is designed
to discuss these procedures as they apply to our particular lab, and to be used as a supplement to
your textbook. If you are a beginning student and have never worked in a darkroom, this manu-
al will familiarize you with basic information about darkroom procedures as they are carried out
in this lab. If you are a more advanced student, you will find this manual to be a valuable refer-
ence for more advanced processes and techniques.
It is suggested that you keep this manual with you when you come to class, since your instructor
may refer to it during lectures or demonstrations. It is also recommended that after a demonstra-
tion of a specific process, you review the pertinent material in this manual before attempting to
do the process on your own.
At Richland we have several instructors teaching photography classes that include darkroom use.
Because of this, it is not unusual that students in different class will learn photographic process-
es in slightly different ways. It is suggested that you follow your own instructor's advice and use
him/her as your primary resource for information on photo techniques. As you become more
experienced as a photographer, you will develop particular ways of doing things that work best
for you. The photo lab manual is a quick reference guide to help you access information that is
necessary to know, and most commonly utilized, in this lab.
Introduction

2
Associate in Arts DegreeEmphasis in Photographic / Imaging
Degree Plan
ThePhotographic/ ImagingDegree Planis an academic program designedfor students who are interested inbeginning an in-depth study in theareas of photography and digitalimaging. This plan will preparestudents for a career in profes-sional photographic/imaging in thefine art or commercial field. Technical proficiency and creativeexpression are emphasized toproduce a “whole” and meaningfulexperience.
Visit our Photographic /Imaging Web Site:
For More information, contact the Photography Department
in the Sabine Building, room S293, or call:
Wayne Loucas, Head of Photographic /Imaging 972-238-6078
Roy Cirigliana, Instructional Associate 972-238-6985
www.richlandcollege.edu/photoimaging.htm

Select oooonnnneeee course:Math 1314Math 1324Math 1332Math 1333Math 1342Math 1414Math 2412Or higher level
IN ORDER TO BE ELIGIBLE TO RECEIVE AN ASSOCIATE IN ARTS DEGREE WITH AN EMPHASIS INPHOTOGRAPHIC / IMAGING, A STUDENT MUST:
(1) Complete the total of 66 credit hours for this emphasis;*(2) Receive GPA (2) of at least 2.00 (“C”); and(3) Meet all TASP requirements.
Students who plan to transfer must work closely with an advisor.
CREDIT HOURS TO BE COMPLETED
CREDIT HOURS TO BE COMPLETED
Select eeeeaaaacccchhhh of the following:English 1301English 1302
* Speech 1311 OR any Foreign LanguageCourse 1311 or higher
Students must select Speech 1311 if seekingan AA or AS degree.
Select ttttwwwwoooo courses:Biology 1406, 1407, 1408, 1409;Chemistry 1405, 1407, 1411, 1412;Geology 1401, 1403, 1404, 1445;Physics 1401, 1402, 1405, 1407,
1411, 1412, 1415, 1417, 1425, 1426
COMMUNICATION
MATHEMATICS
LAB SCIENCE
9 15
8
3
History 1301, 1302Government 2301, 2302 Select oooonnnneeee course from the Following:
Anthropology 2346, 2351;Economics 1303, 2301, 2302, 2311;Psychology 2301, 2314, 2316;Sociology 1301, 1306, 2319
SOCIAL/BEHAVIORAL SCIENCES
INSTITUTIONAL OPTIONS 4
PHOTOGRAPHIC / IMAGING
HUMANITIES/VISUAL AND PERFORMING ARTS 9
18
Select oooonnnneeee course from each of the three groupings:I. Arts 1301, 1303, 1304; Dance 2303;
Drama 1310, 2366; Humanities 1301;Music 1306, 1308, 1309
II. English 2321, 2322, 2323, 2326,2327, 2328, 2331, 2332, 2333
III. Cultural Studies 2370;History 2321, 2322, 2380, 2381; Philosophy 1301, 2306, 2307, 2316,2317; Religion 1304
Intro To Digital Photography PHOT 1316 Photography I PHOT 1318 or ARTS 2356Photography II PHOT 1319 or ARTS 2357Introduction to Photoshop PHOT 2325Special Photographic Topics ARTS 2389
STRONGLY RECOMMENDEDAdvanced Photoshop PHOT 2326Academic Cooperative COMM 2389
TOTAL CREDITS 63
Associate in Arts Degree Emphasis in Photographic/Imaging
Physical Education 1164 aaaannnndddd Computer Science 1300 or higher
*61 Credit hours are required for the Associate in ArtsDegree without the Photographic / Imaging emphasis.
3

4
Program Description
The Associates in Arts Degree provides general academic courses and electives that enablestudents who intend to major in Photographic/Imaging to transfer to four-year institutions andearn a bachelors degree, or for students interested in completing an Associate in Arts degree. Students who plan to transfer to a four-year institution must consult with a DCCCD advisor inthe Counseling Center to ensure that selected courses will both transfer and apply toward theintended major.The Photographic/Imaging Degree Plan is designed for students who are interested in beginningan in-depth study of photography and digital imaging, and prepare students for a career in professional photographic/imaging either in the fine art or commercial field. Technical proficiency and creative expression are emphasized to produce a “whole” and meaningful experience.
5
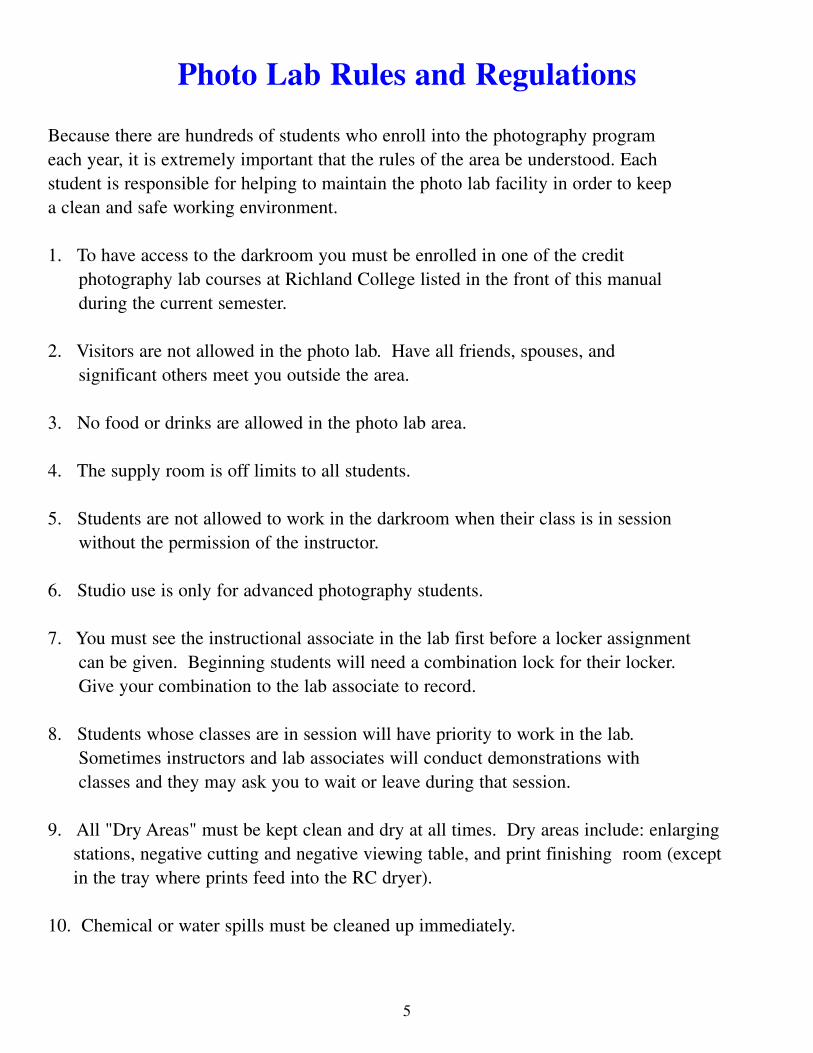
Because there are hundreds of students who enroll into the photography program each year, it is extremely important that the rules of the area be understood. Each student is responsible for helping to maintain the photo lab facility in order to keep a clean and safe working environment.
1. To have access to the darkroom you must be enrolled in one of the credit photography lab courses at Richland College listed in the front of this manual during the current semester.
2. Visitors are not allowed in the photo lab. Have all friends, spouses, and significant others meet you outside the area.
3. No food or drinks are allowed in the photo lab area.
4. The supply room is off limits to all students.
5. Students are not allowed to work in the darkroom when their class is in session without the permission of the instructor.
6. Studio use is only for advanced photography students.
7. You must see the instructional associate in the lab first before a locker assignment can be given. Beginning students will need a combination lock for their locker. Give your combination to the lab associate to record.
8. Students whose classes are in session will have priority to work in the lab. Sometimes instructors and lab associates will conduct demonstrations with classes and they may ask you to wait or leave during that session.
9. All "Dry Areas" must be kept clean and dry at all times. Dry areas include: enlarging stations, negative cutting and negative viewing table, and print finishing room (except in the tray where prints feed into the RC dryer).
10. Chemical or water spills must be cleaned up immediately.
Photo Lab Rules and Regulations
6
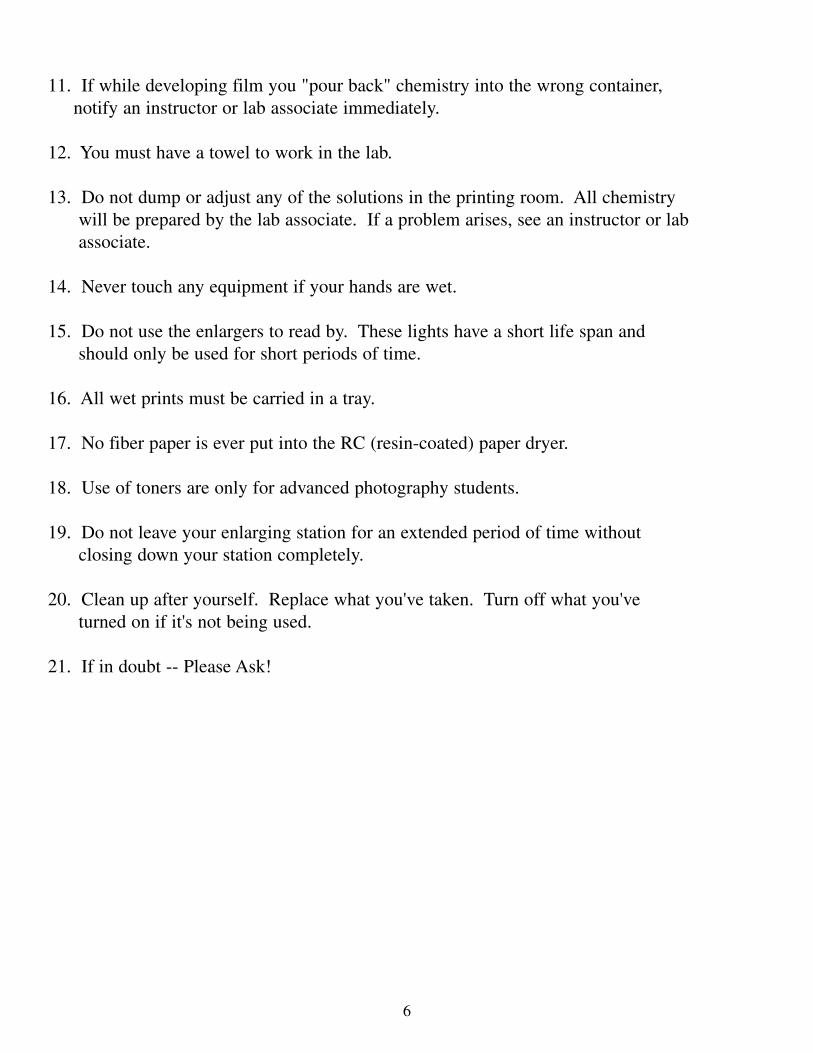
11. If while developing film you "pour back" chemistry into the wrong container, notify an instructor or lab associate immediately.
12. You must have a towel to work in the lab.
13. Do not dump or adjust any of the solutions in the printing room. All chemistry will be prepared by the lab associate. If a problem arises, see an instructor or lab associate.
14. Never touch any equipment if your hands are wet.
15. Do not use the enlargers to read by. These lights have a short life span and should only be used for short periods of time.
16. All wet prints must be carried in a tray.
17. No fiber paper is ever put into the RC (resin-coated) paper dryer.
18. Use of toners are only for advanced photography students.
19. Do not leave your enlarging station for an extended period of time withoutclosing down your station completely.
20. Clean up after yourself. Replace what you've taken. Turn off what you've turned on if it's not being used.
21. If in doubt -- Please Ask!

7
All students enrolled in a credit photography lab class at Richland will be offered a locker space
for the duration of the course. If you are a student in the beginning classes, you will be sharing
a footlocker with another student. If your class is during the day, the instructional associate in
the lab will assign a locker to you. If you are enrolled in an evening class, your instructor will
assign you a locker. The purchase of a combination lock is left to you to work out with the per-
son you share your locker with. All combinations of locks must be registered with a lab associ-
ate or your evening instructor before a locker can be assigned. Advanced students will be
assigned larger locker space to share, of which locks are provided. Again, lab associates or
evening instructors will assign these to you. It is not uncommon for some students to forget their
combination or locker number. These are available to you in the lab if the need arises. Lockers
must be emptied at the end of each course. Anything left in lockers after the course is over
becomes the property of the Richland College Photography Program unless other prior arrange-
ments are made. We suggest that you put your name on all personal items in case they get mis-
placed.
Monday, Wednesday, Friday 9:00 a.m. - 6:00 p.m.Tuesday, Thursday 9:00 a.m. - 9:00 p.m.
These lab hours apply only to credit photography classes.
Lab hours for Summer I & II sessions are only scheduled during the class time.
Photo Lab Hours
Lockers
8
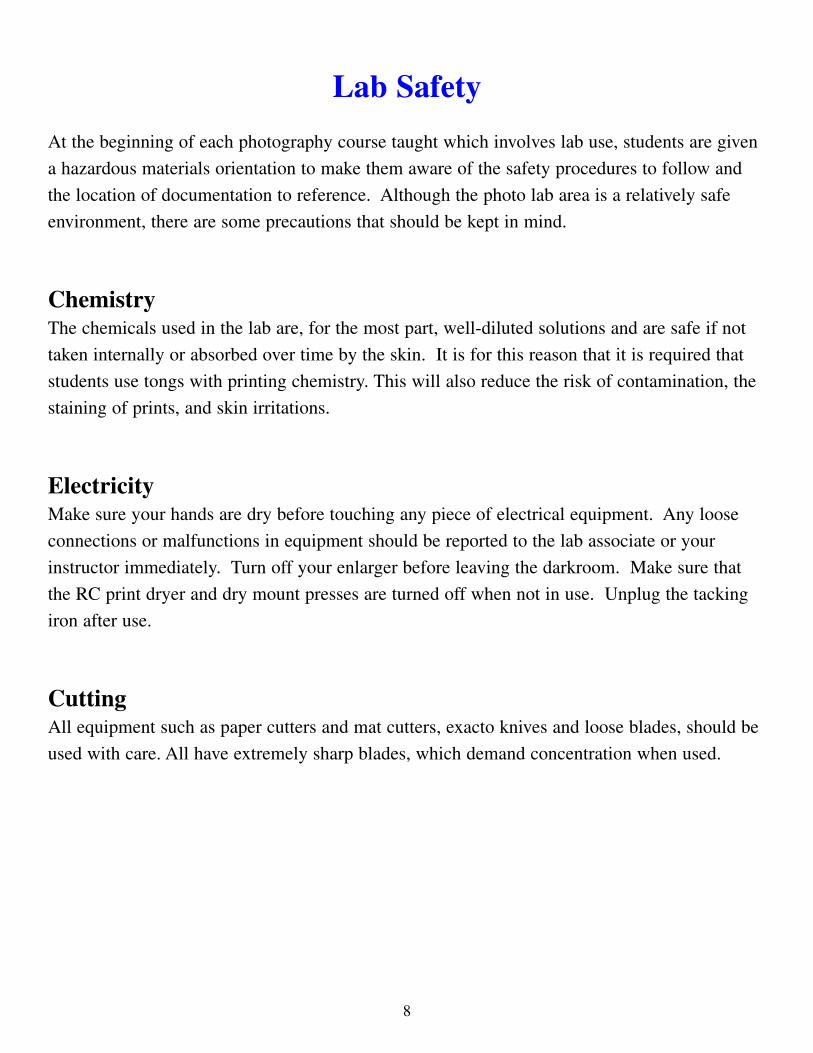
At the beginning of each photography course taught which involves lab use, students are given
a hazardous materials orientation to make them aware of the safety procedures to follow and
the location of documentation to reference. Although the photo lab area is a relatively safe
environment, there are some precautions that should be kept in mind.
ChemistryThe chemicals used in the lab are, for the most part, well-diluted solutions and are safe if not
taken internally or absorbed over time by the skin. It is for this reason that it is required that
students use tongs with printing chemistry. This will also reduce the risk of contamination, the
staining of prints, and skin irritations.
ElectricityMake sure your hands are dry before touching any piece of electrical equipment. Any loose
connections or malfunctions in equipment should be reported to the lab associate or your
instructor immediately. Turn off your enlarger before leaving the darkroom. Make sure that
the RC print dryer and dry mount presses are turned off when not in use. Unplug the tacking
iron after use.
CuttingAll equipment such as paper cutters and mat cutters, exacto knives and loose blades, should be
used with care. All have extremely sharp blades, which demand concentration when used.
Lab Safety

9
Hazardous Materials Training Session Overview
I. Location and Identification of Chemicals
A. In the film developing area there are the following containers of chemistry:Kodak HC-110 DeveloperKodak Indicator Stop BathKodak Rapid FixerFixer ReserveTKO Orbit Bath (Hypo Eliminator)Kodak Photo-Flo 200 solution
B. In the printing area there are the following chemicals:In containers: (Back of Lab)Kodak Dektol DeveloperKodak Rapid FixerKodak Indicator Stop Bath
In trays:Kodak Dektol DeveloperKodak Indicator Stop BathKodak Rapid Fixer
C. In Loading Room A are the following containers of chemicals used:Kodak Sepia Toner AKodak Sepia Toner BKodak Rapid Selenium Toner (1:4)Kodak Kodalith Developer AKodak Kodalith Developer BBerg Blue Toner
All of these containers have safety labels attached for quick reference. See sample on the next page.
10
CHEMIC
AL NAM
E DATE RECEIVED
EMERGENCY P
HONE NUM
BERS
MANUFACTURER
United
Stat
es/C
hemtre
c
Canad
a/Can
utec
800-
424-
9300
613-
996-
6666
Health HazardBLUE
Fire HazardRED
ReactivityYELLOW
Specific HazardWHITE
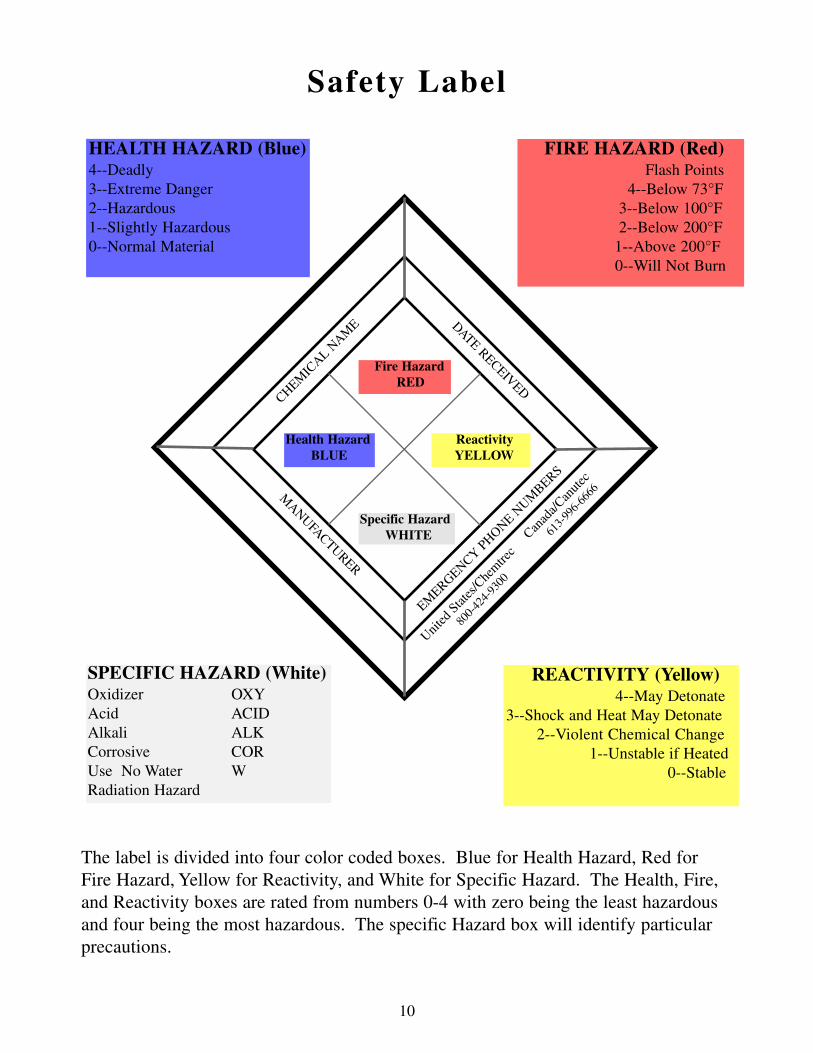
FIRE HAZARD (Red)Flash Points
4--Below 73°F3--Below 100°F2--Below 200°F
1--Above 200°F0--Will Not Burn
HEALTH HAZARD (Blue)4--Deadly3--Extreme Danger2--Hazardous1--Slightly Hazardous0--Normal Material
Safety Label
The label is divided into four color coded boxes. Blue for Health Hazard, Red forFire Hazard, Yellow for Reactivity, and White for Specific Hazard. The Health, Fire,and Reactivity boxes are rated from numbers 0-4 with zero being the least hazardousand four being the most hazardous. The specific Hazard box will identify particular precautions.
SPECIFIC HAZARD (White)Oxidizer OXYAcid ACIDAlkali ALKCorrosive CORUse No Water WRadiation Hazard
REACTIVITY (Yellow)4--May Detonate
3--Shock and Heat May Detonate2--Violent Chemical Change
1--Unstable if Heated0--Stable

11
A. Protective Equipment
Because the chemicals students have contact with are fairly diluted, it is usually
not necessary to wear protective equipment. There are some people whose skin
is very sensitive to some of the solutions, and therefore, it is recommended that
gloves be worn to prevent rashes or itching.
B. First Aid Treatment
We strongly impress upon students not to put their hands in any of the chemicals.
Some of the solutions, specifically the fixer and stop bath, are mild acids and can
sting you if there are any cuts on your hands. If this happens, rinse with water.
If you get any of the chemicals in your eyes, there are two eyewash stations
located in the lab. One is in the film developing area by Loading Room C, and
the other is in the printing room next to the storage room door. Place eye down
into the wash cup and squeeze the bottle to rinse out your eye. Report any
accidents to the lab associate or your instructor as soon as possible. If necessary
you will be taken to the Health Center or the College Police will be notified.
The Health Center is located in Room T110. Hours: Mon.-Thurs. 8:30 a.m. - 8:00
p.m. and Friday 8:30 a.m. - 3:00 p.m.
C. Clean-up of spills
Any spills should be reported to the lab associate or instructor immediately.
II. Handling of Chemicals

12
A. What the MSDS tell youThe MSDS are detailed reference publications on chemicals used in the Photo Lab.
Each chemical listed is comprised of about twelve sections.
They are as follows:
Identification
Product and Component Hazard Data
Physical Data
Fire and Explosive Hazard Data
Reactivity Data
Toxicity and Health Hazard Data
Personal Protection and Controls
Special Storage and Handling Precautions
Spill, Leak, and Disposal Procedures
Environment Effects
Transportation
References
B. Where to find the MSDSAll the sheets are kept in a green 3-ring binder on the green Safety Board
by the student lockers in the print finishing room.
C. What the Chemical Inventory Sheets tell youThese sheets list all the chemicals used in the lab and each manufacturers name,
address and telephone number. The CAS Number refers to individual components
which are considered hazardous will have numbers listed.
D. Where to find the Chemical Inventory SheetsThese sheets are kept in the green 3-ring binder with the MSDS on the Safety
Board in the finishing room.
III. Material Safety Data Sheets (MSDS) and Chemical Inventory
13
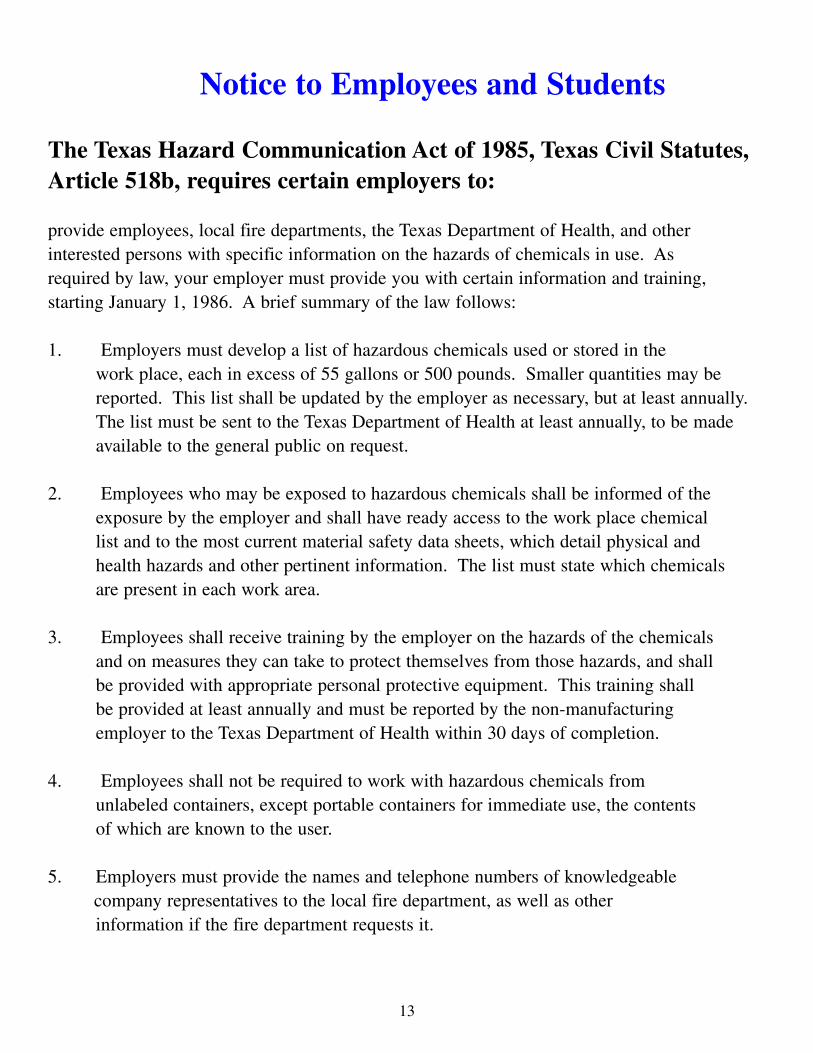
The Texas Hazard Communication Act of 1985, Texas Civil Statutes,Article 518b, requires certain employers to:
provide employees, local fire departments, the Texas Department of Health, and other interested persons with specific information on the hazards of chemicals in use. As required by law, your employer must provide you with certain information and training, starting January 1, 1986. A brief summary of the law follows:
1. Employers must develop a list of hazardous chemicals used or stored in the work place, each in excess of 55 gallons or 500 pounds. Smaller quantities may bereported. This list shall be updated by the employer as necessary, but at least annually. The list must be sent to the Texas Department of Health at least annually, to be made available to the general public on request.
2. Employees who may be exposed to hazardous chemicals shall be informed of the exposure by the employer and shall have ready access to the work place chemical list and to the most current material safety data sheets, which detail physical and health hazards and other pertinent information. The list must state which chemicals are present in each work area.
3. Employees shall receive training by the employer on the hazards of the chemicals and on measures they can take to protect themselves from those hazards, and shall be provided with appropriate personal protective equipment. This training shall be provided at least annually and must be reported by the non-manufacturing employer to the Texas Department of Health within 30 days of completion.
4. Employees shall not be required to work with hazardous chemicals from unlabeled containers, except portable containers for immediate use, the contents of which are known to the user.
5. Employers must provide the names and telephone numbers of knowledgeablecompany representatives to the local fire department, as well as other information if the fire department requests it.
Notice to Employees and Students

14
6. The following chemicals are exempted from coverage by this act: articles that do
not normally release hazardous chemicals, food, cosmetics, pesticides for use
(but no pesticide formulation), hazardous waste, and some other materials. Most of
these are covered by other acts. Manufacturers are exempt from some provisions of
the State law since they are covered under similar rules adopted by the Federal
Occupational Safety and Health Administration (OSHA).
7. Employees may file complaints with the Texas Department of Health, and may not
be discharged or discriminated against in any matter for the exercise of any rights
provided by this act. Employees and citizens may make written requests to the
Texas Department of Health to require listing of small quantities of certain highly
hazardous chemicals.
Employers may be subject to administrative penalties and civil orcriminal fines ranging from $500 to $25,000 for violations of this act.
Copies of specific MSDS can be made available to students by request. Please feel free
to ask the instructors or instructional associates any questions that relate to safety in the
photo lab area.
15
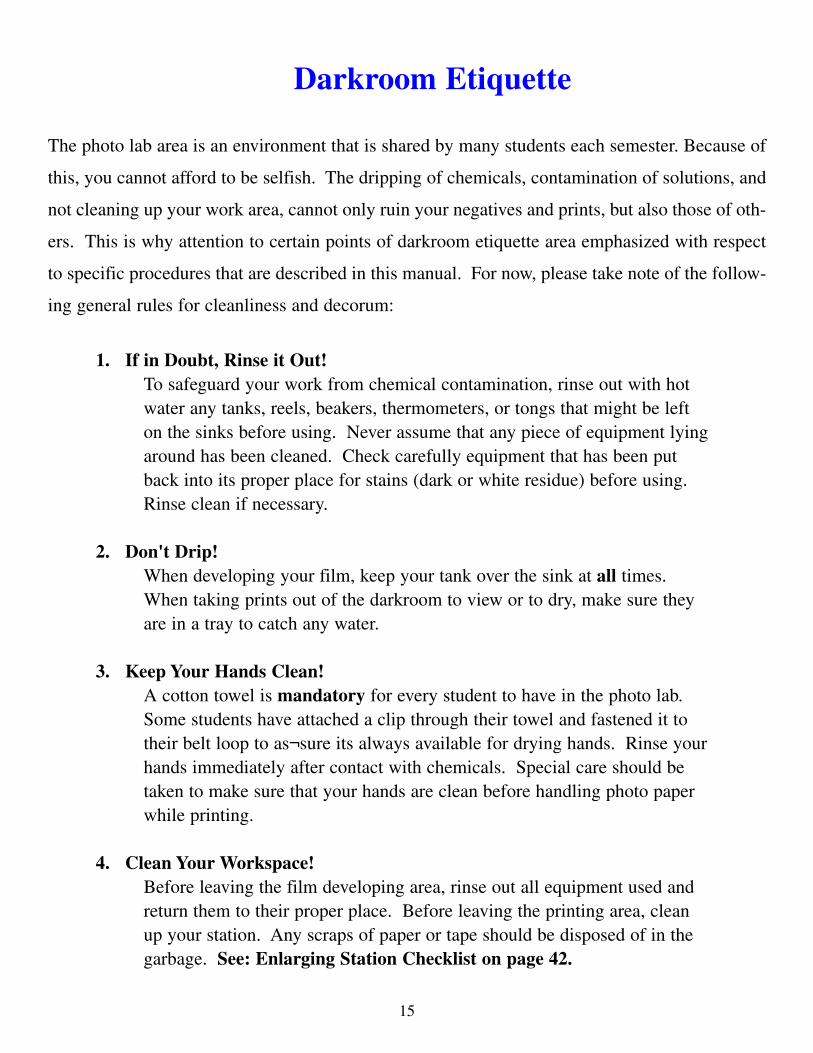
The photo lab area is an environment that is shared by many students each semester. Because of
this, you cannot afford to be selfish. The dripping of chemicals, contamination of solutions, and
not cleaning up your work area, cannot only ruin your negatives and prints, but also those of oth-
ers. This is why attention to certain points of darkroom etiquette area emphasized with respect
to specific procedures that are described in this manual. For now, please take note of the follow-
ing general rules for cleanliness and decorum:
1. If in Doubt, Rinse it Out!To safeguard your work from chemical contamination, rinse out with hot water any tanks, reels, beakers, thermometers, or tongs that might be left on the sinks before using. Never assume that any piece of equipment lying around has been cleaned. Check carefully equipment that has been put back into its proper place for stains (dark or white residue) before using.Rinse clean if necessary.
2. Don't Drip!When developing your film, keep your tank over the sink at all times. When taking prints out of the darkroom to view or to dry, make sure they are in a tray to catch any water.
3. Keep Your Hands Clean!A cotton towel is mandatory for every student to have in the photo lab. Some students have attached a clip through their towel and fastened it to their belt loop to as¬sure its always available for drying hands. Rinse your hands immediately after contact with chemicals. Special care should be taken to make sure that your hands are clean before handling photo paper while printing.
4. Clean Your Workspace!Before leaving the film developing area, rinse out all equipment used and return them to their proper place. Before leaving the printing area, clean up your station. Any scraps of paper or tape should be disposed of in the garbage. See: Enlarging Station Checklist on page 42.
Darkroom Etiquette

16
5. No Food or Drink!Keep all food and drinks outside of the photo lab area.
6. Knock and Lock!Always knock before entering any of the film loading rooms. Once inside, lock the door.
7. Non-Cooperation with Darkroom EtiquetteAny student who fails to comply with the basic points of darkroom etiquette as requested by his/her instructor or lab associate will be expelled from the lab.
17
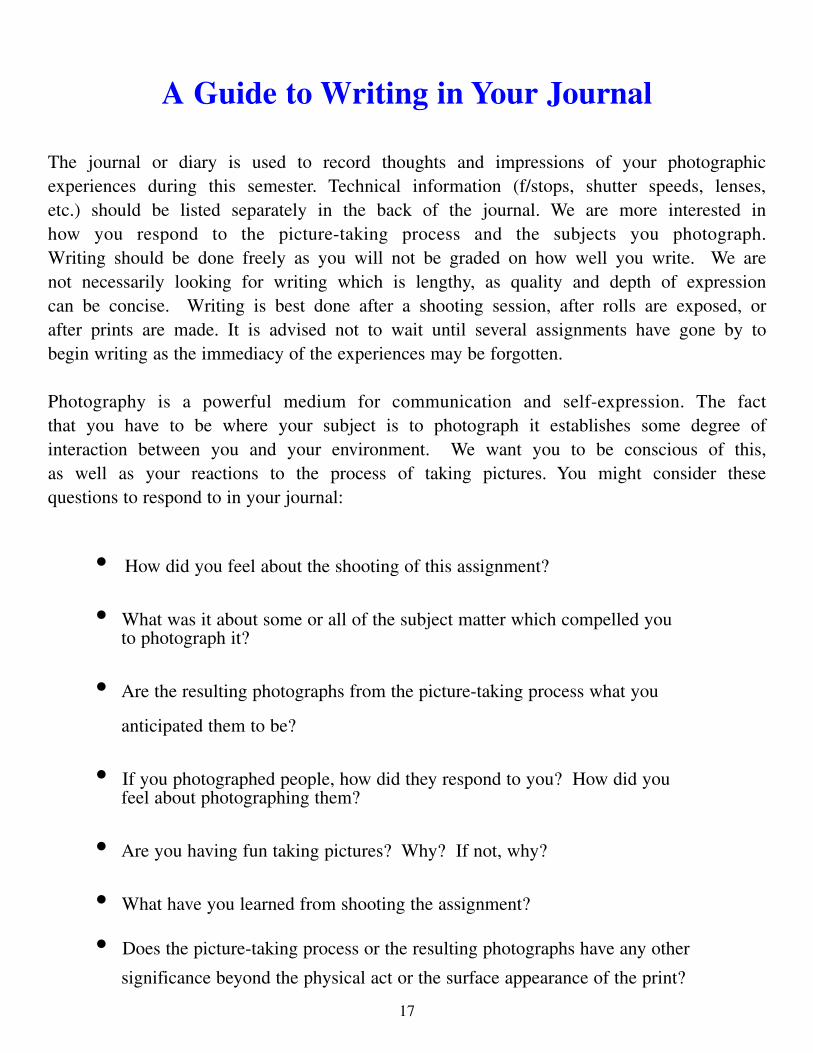
The journal or diary is used to record thoughts and impressions of your photographic experiences during this semester. Technical information (f/stops, shutter speeds, lenses, etc.) should be listed separately in the back of the journal. We are more interested in how you respond to the picture-taking process and the subjects you photograph. Writing should be done freely as you will not be graded on how well you write. We are not necessarily looking for writing which is lengthy, as quality and depth of expression can be concise. Writing is best done after a shooting session, after rolls are exposed, or after prints are made. It is advised not to wait until several assignments have gone by to begin writing as the immediacy of the experiences may be forgotten.
Photography is a powerful medium for communication and self-expression. The fact that you have to be where your subject is to photograph it establishes some degree of interaction between you and your environment. We want you to be conscious of this, as well as your reactions to the process of taking pictures. You might consider these questions to respond to in your journal:
A Guide to Writing in Your Journal
• How did you feel about the shooting of this assignment?
• What was it about some or all of the subject matter which compelled you to photograph it?
• Are the resulting photographs from the picture-taking process what you
anticipated them to be?
• If you photographed people, how did they respond to you? How did you feel about photographing them?
• Are you having fun taking pictures? Why? If not, why?
• What have you learned from shooting the assignment?
• Does the picture-taking process or the resulting photographs have any other
significance beyond the physical act or the surface appearance of the print?
18
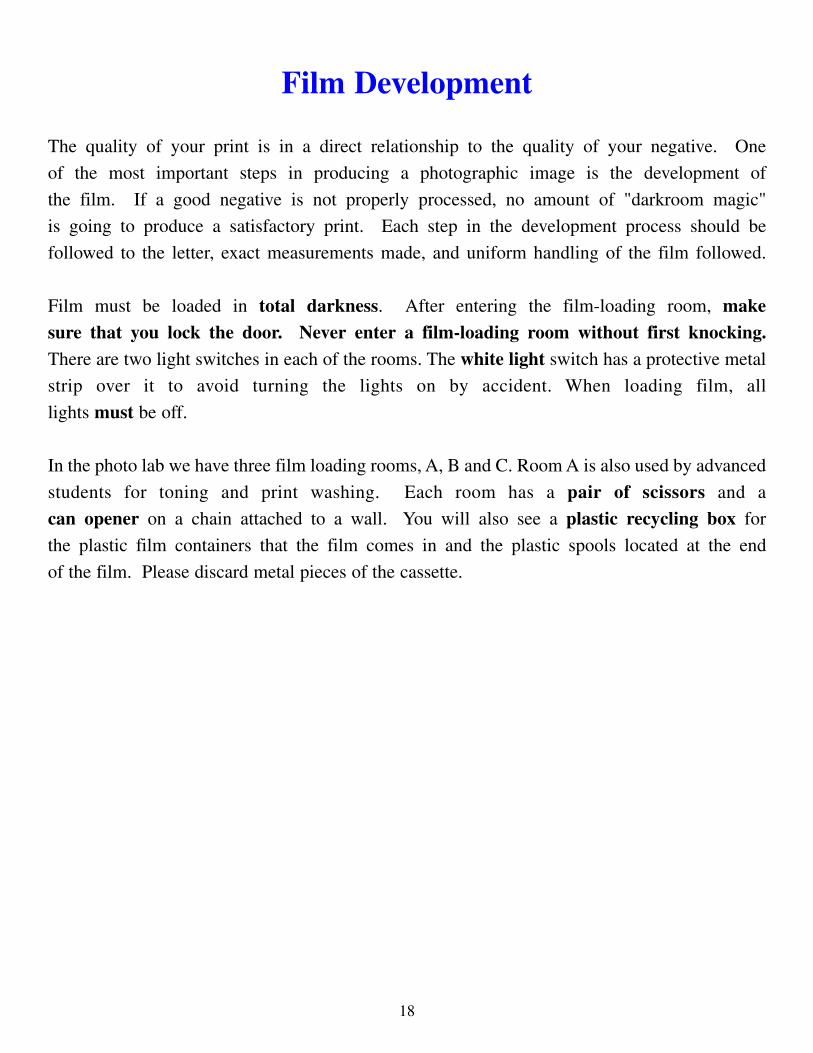
The quality of your print is in a direct relationship to the quality of your negative. One
of the most important steps in producing a photographic image is the development of
the film. If a good negative is not properly processed, no amount of "darkroom magic"
is going to produce a satisfactory print. Each step in the development process should be
followed to the letter, exact measurements made, and uniform handling of the film followed.
Film must be loaded in total darkness. After entering the film-loading room, make sure that you lock the door. Never enter a film-loading room without first knocking. There are two light switches in each of the rooms. The white light switch has a protective metal
strip over it to avoid turning the lights on by accident. When loading film, all
lights must be off.
In the photo lab we have three film loading rooms, A, B and C. Room A is also used by advanced
students for toning and print washing. Each room has a pair of scissors and a
can opener on a chain attached to a wall. You will also see a plastic recycling box for
the plastic film containers that the film comes in and the plastic spools located at the end
of the film. Please discard metal pieces of the cassette.
Film Development
19
You will need your film, a metal tank with enough reels to fill your tank, and a plastic lid witha cap. Lay these out on the counter top in the loading room so you have some idea where they are in the dark. In your class you will have a demonstration on how to loadthe film onto the reels. There is film in the photo-lab to use to practice with before rolling yourown. When you're ready:
1. Lock the door, turn off the light, pry off the flat end of the film cassette. 2. Take the film out and cut the narrow lead of the film. 3. Begin rolling onto the reel. 4. When complete, place rolled film into the tank and cover with the lid.
NOTE: If you have a difficult time rolling the film, do not turn the light on or open the door.Place film, as is, into a tank and cover with the lid. Find an instructor or lab associate and askthem to help you. If you have rolled the film onto the reels but would like it checked, the staffwill do this for you.
1. Development:For each roll of film, mix 1 oz. of HC-110 developer with 7 oz. of water. First, bring the watertemperature to what you've selected on the Time/Temperature developing chart (ideally between68° - 72°). Fill the measuring beaker with the amount of water needed for the number of rollsyou're developing. Go to the HC-110 container and pour the amount you need directly into thewater. Stir this working solution. Start the timer and pour into the top of the lid while holdingthe tank on an angle so liquid will not block up.
Carefully watch when pouring all chemicals into your tank to prevent spills and overflows.Place the cap on the lid, hold the tank top and bottom and agitate the first 15 seconds. After anyagitation, rap the tank down once or twice to dislodge any air bubbles on the film. Let thefilm sit and agitate 5 seconds of every 30 seconds until the development time is complete.Remove the cap only and dump the solution down the drain.Notes:
Loading Film
20
2. Stop Bath:Fill the tank with the stop bath solution and agitate continuously for 30 seconds. Pour back into the stop bath container.Notes:
3. Fixer:Fill the tank with fixer and agitate the first 15 seconds and 5 seconds every minute of fixingtime. Six (6) minutes is recommended. Pour back into the fixer container.Notes:
4. Rinse:Fill the tank with water and pour out 3 times with cold waters.Notes:
5. Orbit Bath:Fill the tank with this solution and agitate continuously for 30 seconds. Pour back into the Orbit Bath container.Notes:
6. Wash:Remove the reels from the tank and place onto the film holder. Put film into a washer and wash for 5 minutes.Notes:

21
7. Photo-Flo:Place film into the photo-flo container for 1 minute. Remove the film from the reel and hold
diagonally over the sink to drain. Note: No sponges, squeegees, or fingers are needed to drain
film. The less contact with the surface of the film the better.
Notes:
8. Dry:Make sure the dryer is turned off. If it isn't, turn it off and wait 10 seconds before opening the
door to avoid dust being sucked in. Hang the film towards the back of the cabinet and clip it
with a clothes pin at the bottom to hang straight. Check to see that your film is not touching
any other film. Dry for 15 minutes. Check the bottom of the film to feel if dry.
Notes:
9. Wash and return all reels, tanks, thermometers, and measuring beakers to their prop-er place.Notes:
10. Storage:Cut film into strips of 5 frames (35mm) and place into negative sleeves. Negatives should be
placed into the page with letters and numbers on the edges readable and in numerical order.
Do not leave negatives hanging in the film drying cabinet overnight.
Notes:

22
Film Developing Sequence
Developer
HC-110(See Developing
Chart for times andtemperatures)
Agitate the first 15seconds, then 5seconds every
30 seconds
Dump down drain
Stop Bath
30 seconds withcontinuous
agitation
Pour back into thesame container
Fixer
6 minutes Agitate the first 15
seconds, then 5 seconds every
minute
Pour back into thesame container
Hypo Eliminator(Orbit Bath)
30 seconds withcontinuous
agitation
Pour back intosame container
Final Wash
5 minutes
Photo-flo
1 minute
Dry
15 minutes
Rinse
3 changes of water
Fill the tank withwater and agitatefor a few seconds
Repeat this procedure two
more times
23
Pro
cess
ing
Ko
dak
T-M
ax B
lack
& W
hit
e F
ilm
Ko
dak
Film
Ko
dak
Dev
elo
per
Tem
per
atu
reH
C-1
10(D
il B
)D
-76
(1:1
)T-
Max
(1:4
)T-
Max
(1:7
)M
icro
do
l-X
Mic
rod
ol-
X(1
:3)
D-7
6
T-M
ax 1
00P
rofe
ssio
nal
Sm
all
tan
k
pro
ce
ss
ing
(8 o
r 1
6-o
nc
e t
an
k)
Ro
lls (
ag
ita
te o
nc
ep
er
30
se
co
nd
s)
Tra
y P
roc
es
sin
gS
he
ets
(c
on
tin
uo
us
a
git
ati
on
)
T-M
ax 4
00P
rofe
ssio
nal
Sm
all
tan
k
pro
ce
ss
ing
(8 o
r 1
6-o
nc
e t
an
k)
Ro
lls (
ag
ita
te o
nc
ep
er
30
se
co
nd
s)
Tra
y P
roc
es
sin
gS
he
ets
(c
on
tin
uo
us
a
git
ati
on
)
68°F
(2
0°C
) 7
0°F
(2
1°C
) 7
2°F
(2
2°C
) 7
5°F
(2
4°C
)
68°F
(2
0°C
) 7
5°F
(2
4°C
)
68°F
(2
0°C
) 7
0°F
(2
1°C
) 7
2°F
(2
2°C
) 7
5°F
(2
4°C
)
68°F
(2
0°C
) 7
5°F
(2
4°C
)
76
1/2
6 5
7 1
/25
1/2
65
1/2
54
1/2
7 1
/26
12
11 10
8 1
/2
12
1/2
11 10 9
87
1/2
76
1/2
76
1/2
6 1
/26
13
1/2
12
10
1/2
8 1
/2
10
1/2
98
1/2
7 1
/2
NR
20
18
1/2
16
NR
20
18
1/2
16
9 8 7 6 7 5 8 76
1/2
5 1
/2
75
1/2
10
10

24
Pro
cess
ing
Ko
dak
Tri
-X a
nd
Plu
s-X
B
lack
& W
hit
e F
ilm
Ko
dak
Film
Ko
dak
Dev
elo
per
Tem
per
atu
reH
C-1
10(D
il B
)D
-76
(1:1
)T-
Max
(1:4
)T-
Max
(1:7
)M
icro
do
l-X
Mic
rod
ol-
X(1
:3)
D-7
6
Tri-
X 4
00P
rofe
ssio
nal
Sm
all
tan
k
pro
ce
ss
ing
(8 o
r 1
6-o
nc
e t
an
k)
Ro
lls (
ag
ita
te o
nc
ep
er
30
se
co
nd
s)
Tri-
X 3
20P
rofr
ssio
nal
Plu
s-X
125
Pro
fess
ion
al
Sm
all
tan
k
pro
ce
ss
ing
(8 o
r 1
6-o
nc
e t
an
k)
Ro
lls (
ag
ita
te o
nc
ep
er
30
se
co
nd
s)
68°F
(2
0°C
) 7
0°F
(2
1°C
) 7
2°F
(2
2°C
) 7
5°F
(2
4°C
)
68°F
(2
0°C
) 7
5°F
(2
4°C
)
68°F
(2
0°C
) 7
0°F
(2
1°C
) 7
2°F
(2
2°C
) 7
5°F
(2
4°C
)
3 3
/43
1/2
32
1/2
4 3
/43
1/2
3 1
/23
2 3
/42
1/2
9 3
/49
8 1
/27
3/4
12
3/4
9 1
/4
8 1
/27
3/4
7 1
/46
NR
NR
9 1
/48
3/4
8 1
/47
1/2
10
1/4
7 1
/2
87
1/4
6 3
/45
3/4
17
16
15
13
1/3
13
11 3
/41
0 3
/49
1/4
6 3
/46
1/4
5 1
/24
3/4
96
1/2
5 1
/25
4 1
/24
NR
NR
25
Pro
cess
ing
Ko
dak
Hig
h S
pee
d In
frar
edan
d T
ech
nic
al P
an F
ilm
Ko
dak
Film
Ko
dak
Dev
elo
per
Tem
per
atu
reH
C-1
10(D
il B
)D
-76
(1:1
)D
-19
T-M
axTe
chn
ido
lL
iqu
idM
icro
do
l-X
(1:3
)D
-76
Hig
h S
pee
dIn
frar
ed(H
IE)
Tech
nic
alP
an24
1544
1564
15
68°F
(2
0°C
) 7
0°F
(2
1°C
) 7
2°F
(2
2°C
) 7
5°F
(2
4°C
)
68°F
(2
0°C
) 7
7°F
(2
5°C
) 8
6°F
(3
0°C
}
5 54
1/2
4 NR
NR
NR
65
1/2
5 4 NR
NR 9
7 1
/26
1/2
NR
NR
8 1
/27
1/2
7 6 NR
6 NR
26
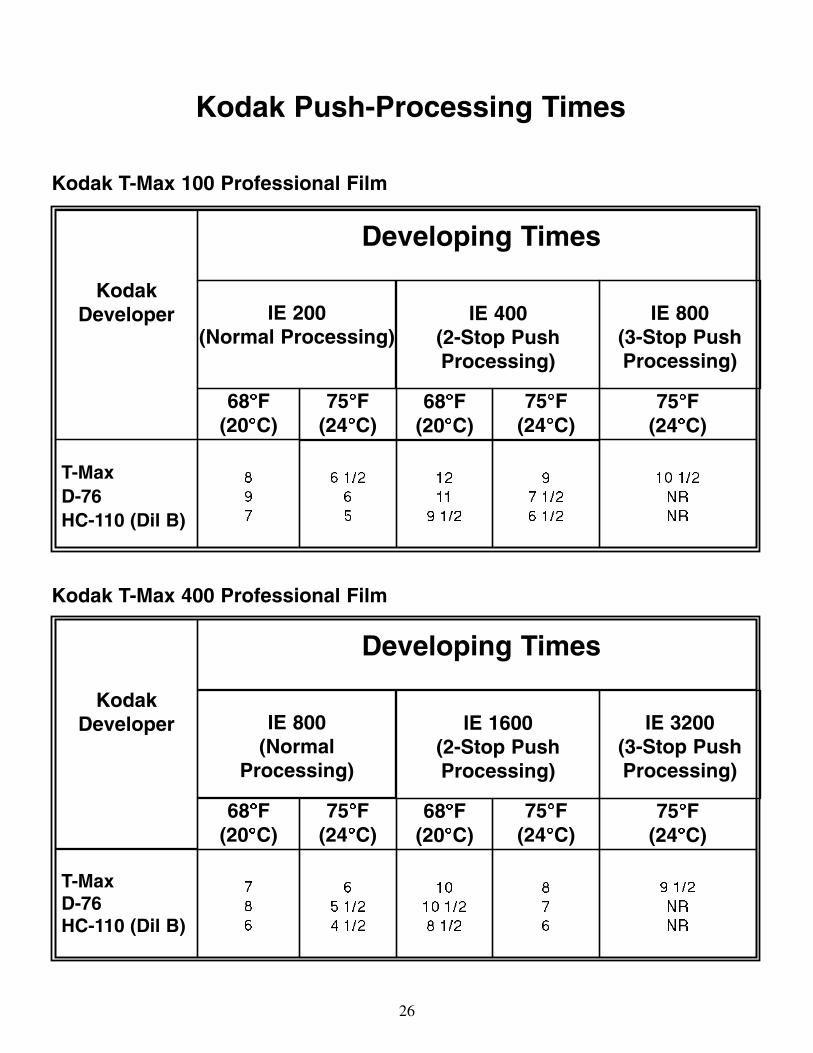
Kodak Push-Processing Times
KodakDeveloper
T-MaxD-76HC-110 (Dil B)
68°°°°F(20°°°°C)
75°°°°F(24°°°°C)
68°°°°F(20°°°°C)
75°°°°F(24°°°°C)
75°°°°F(24°°°°C)
IE 200(Normal Processing)
IE 400(2-Stop Push Processing)
IE 800(3-Stop Push Processing)
Developing Times
Kodak T-Max 100 Professional Film
897
6 1/265
1211
9 1/2
97 1/26 1/2
10 1/2NRNR
KodakDeveloper
T-MaxD-76HC-110 (Dil B)
68°°°°F(20°°°°C)
75°°°°F(24°°°°C)
68°°°°F(20°°°°C)
75°°°°F(24°°°°C)
75°°°°F(24°°°°C)
IE 800(Normal
Processing)
IE 1600(2-Stop Push Processing)
IE 3200(3-Stop Push Processing)
Developing Times
Kodak T-Max 400 Professional Film
786
6 5 1/24 1/2
1010 1/28 1/2
87 6
9 1/2NRNR

27
Kodak Push-Processing Times
KodakDeveloper
T-MaxD-76HC-110 (Dil B)
68°°°°F(20°°°°C)
75°°°°F(24°°°°C)
68°°°°F(20°°°°C)
75°°°°F(24°°°°C)
IE 250(Normal Processing)
IE 500(2-Stop Push Processing)
Developing Times
Kodak Plus-X Professional Film
6 1/277
4 1/245
8 3/49
9 1/2
6 1/45 1/26 1/2
KodakDeveloper
T-MaxD-76HC-110 (Dil B)
68°°°°F(20°°°°C)
75°°°°F(24°°°°C)
68°°°°F(20°°°°C)
75°°°°F(24°°°°C)
75°°°°F(24°°°°C)
IE 800(Normal
Processing)
IE 1600(2-Stop Push Processing)
IE 3200(3-Stop Push Processing)
Developing Times
Kodak Tri-X Professional Film
76 3/43 3/4
6 5 1/24 1/2
8 3/49 1/2
6
76 1/2 4 1/4
8 1/4NRNR
28
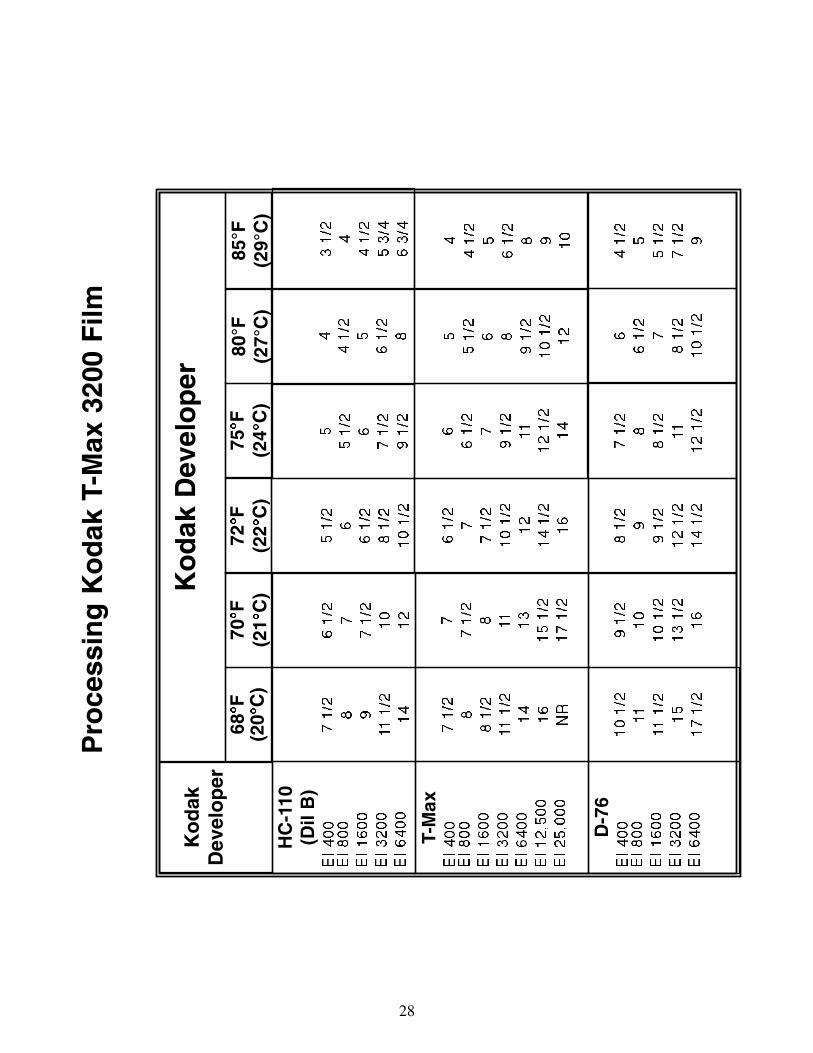
Pro
cess
ing
Ko
dak
T-M
ax 3
200
Film
Ko
dak
Dev
elo
per
Ko
dak
Dev
elo
per
68°°°° F
(20 °°°°
C)
70°°°° F
(21 °°°°
C)
72°°°° F
(22 °°°°
C)
75°°°° F
(24 °°°°
C)
80°F
(27°
C)
85°F
(29°
C)
HC
-110
(Dil
B)
EI
40
0E
I 8
00
EI
16
00
EI
32
00
EI
64
00
T-M
ax
EI
40
0E
I 8
00
EI
16
00
EI
32
00
EI
64
00
EI
12
,50
0E
I 2
5,0
00
D-7
6E
I 4
00
EI
80
0E
I 1
60
0E
I 3
20
0E
I 6
40
0
7 1
/28 9
11 1
/21
4
7 1
/28
8 1
/211
1/2
14
16
NR
10
1/2
1111
1/2
15
17
1/2
9 1
/21
01
0 1
/21
3 1
/21
6
8 1
/29
9 1
/21
2 1
/21
4 1
/2
7 1
/28
8 1
/211
12
1/2
4 1
/25
5 1
/27
1/2
9
66
1/2
78
1/2
10
1/2
6 1
/27
7 1
/21
01
2 77
1/2
8 11 13
15
1/2
17
1/2
5 1
/26
6 1
/28
1/2
10
1/2
6 1
/27
7 1
/21
0 1
/21
21
4 1
/21
6
55
1/2
67
1/2
9 1
/2
66
1/2
79
1/2
111
2 1
/21
4
44
1/2
56
1/2
8 55
1/2
6 89
1/2
10
1/2
12
3 1
/24
4 1
/25
3/4
6 3
/4
44
1/2
56
1/2
8 9 10
29
30
These are films that employ a dye to form the image similar to the dyes used in color negative
film. It must be processed in color C-41 chemistry. Although these are excellent films, it is not
recommended for a first semester's works. Many express color labs carry these Black and White
films, as these may be the only Black and White films they can process. Ask specifically for the
film recommended on your syllabus.
Do not process these films in our lab.
Ilford XP 2 Film / Kodak T-Max T400 CN
Chromogenic Black and White Film

31
The Beseler 45MXT enlarger will accept negative sizes up to 4" x 5." We have Cold-Light
Head enlargers in the darkroom. The Cold-Light Head uses Narrow Fluorescent tubing as a light
source that is directed through a diffuser to scatter the light. This avoids pronounced grain and
sharp contrast of condenser enlargers. This dif¬fused light will also de-emphasize dust, scratch-
es and other flaws in the negative. We have noticed that contrast will vary depending on the type
of paper used. The head generates relatively little heat, which reduces the likelihood of negatives
buckling and throwing part of the print image out of focus. The light projected is somewhat
dim, and thus more difficult to view the image. Here are some basic functions that will be
highlighted for your use:
• When placing the negative carrier into the enlarger make sure the enlarging light is off so light won't spill out to the rest of the lab. Move the Negative Stage Lever (#16) to open a space for the carrier. Place the negative carrier inside with the four pins facing down. It should drop down into place. Close the Negative Stage Lever to close the space.
• To raise or lower the enlarger, up or down, move the Elevation Switch (#4) until the enlarger is at the height you wish it to be. The higher up the enlarger is raised, the larger the projected image is going to be. The Elevation Switch (#4) also is an indicator for the Elevation Scale (#6). (Set the height to number 9 before leaving your station).
The Enlargers

32
Beseler 45MXT Enlarger

33
The lens has an aperture which opens and closes like your camera lens. There are f/stop num-
bers on the lens which you can't always see in the darkroom, so it is impor¬tant to know the
f/stops in order. If you're using a 35mm negative, you should have on a 50mm lens. These
lenses have an f/stop range from f/2.8 (wide open) to f16 (closed down). If you know the
sequence (f/2.8, f/4, f/5.6, f/8, f/11, f/16) you can always find the setting you want to use. For
example: If you want to use f/8, close down all the way (least amount of light) and open up
two stops to f/8. When the enlarging light is on you can see it get brighter and darker as you
turn the aperture ring.
The Lens
To Focus, open the lens aperture to f/2.8 to project the brightest amount of light and place the
Grain Focuser on top of the easel. While looking through the eye piece, turn the Focusing
Knob slowly on the left or right side until you see what looks like fine sand granules. This is
the grain of the negative. The image is now in sharp focus. Don't forget to stop the lens down
to the f/stop you're going to use for the exposure. Make your exposure as soon after focusing as
possible because focus will shift due to enlarger movement or negative buckling. Always refo-
cus before making an exposure.
To Focus the Image

34
As you will notice on the timer, there are parts of the face of it that have been taped off.
Please leave the tape on as it pertains to functions you will not be using.
This timer will give you up to 59 minutes, 59.9 seconds. The On/Off Power Switch (#2)
must be turned on to bring up the Digital Time Display (#6). The minutes, sec¬onds and
tenths of a second can be displayed by pushing the corresponding buttons (#7). The
Clear/Reset Button (#12) will reset the display to zeros.
To project the image for focusing, enlarger elevating and easel settings, press the On Button
(#11). To turn off the enlarger light, press the Time Button (also #11). Place a fresh sheet of
paper in the easel and press the Start/Hold Button (#13) to time your exposure.
Push the Start/Hold Button at any point to stop the exposure. Push again to resume the expo-
sure for the time remaining.
Before leaving your station, make sure the On/Off Power Switch (#2) is in the "Off"
position.
Model 545 Timer
The Timer

35
36
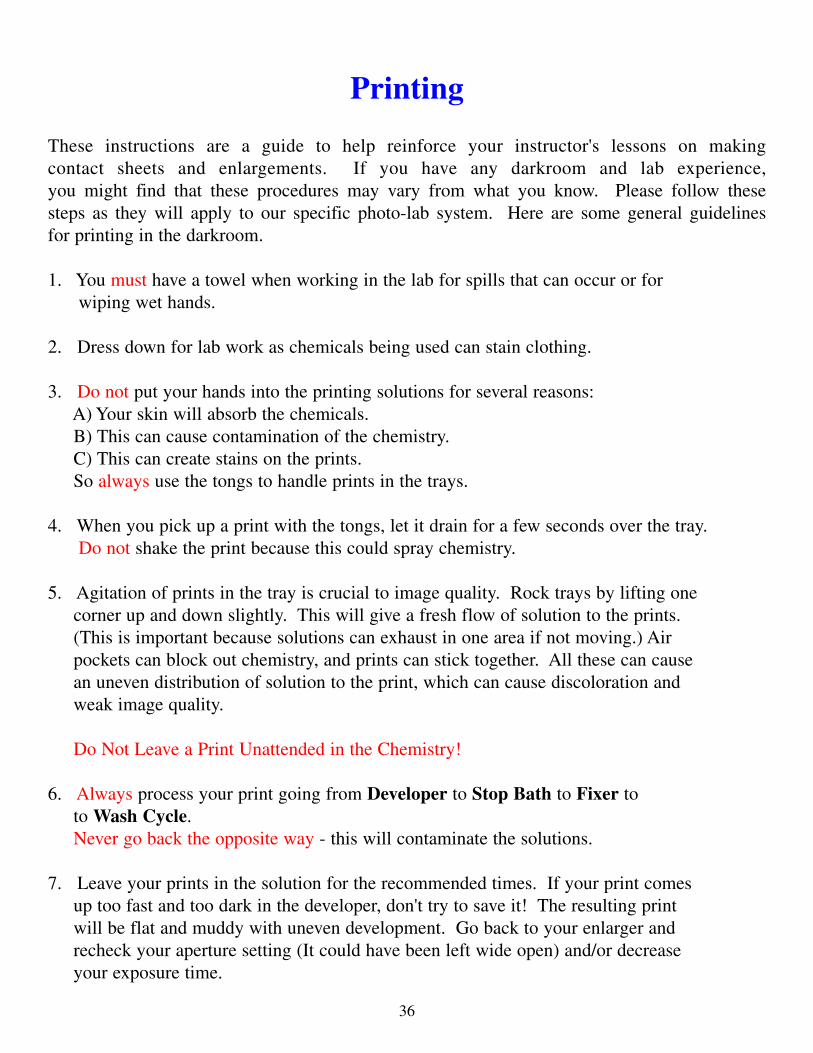
These instructions are a guide to help reinforce your instructor's lessons on making contact sheets and enlargements. If you have any darkroom and lab experience, you might find that these procedures may vary from what you know. Please follow these steps as they will apply to our specific photo-lab system. Here are some general guidelines for printing in the darkroom.
1. You must have a towel when working in the lab for spills that can occur or for wiping wet hands.
2. Dress down for lab work as chemicals being used can stain clothing.
3. Do not put your hands into the printing solutions for several reasons: A) Your skin will absorb the chemicals. B) This can cause contamination of the chemistry. C) This can create stains on the prints. So always use the tongs to handle prints in the trays.
4. When you pick up a print with the tongs, let it drain for a few seconds over the tray.Do not shake the print because this could spray chemistry.
5. Agitation of prints in the tray is crucial to image quality. Rock trays by lifting one corner up and down slightly. This will give a fresh flow of solution to the prints. (This is important because solutions can exhaust in one area if not moving.) Air pockets can block out chemistry, and prints can stick together. All these can cause an uneven distribution of solution to the print, which can cause discoloration and weak image quality.
Do Not Leave a Print Unattended in the Chemistry!
6. Always process your print going from Developer to Stop Bath to Fixer to to Wash Cycle. Never go back the opposite way - this will contaminate the solutions.
7. Leave your prints in the solution for the recommended times. If your print comes up too fast and too dark in the developer, don't try to save it! The resulting print will be flat and muddy with uneven development. Go back to your enlarger and recheck your aperture setting (It could have been left wide open) and/or decrease your exposure time.
Printing

37
8. If the print develops too light, adjust the aperture to allow more light through (open up) and/or increase exposure time. Note: Your test strip should be a good indicator of approximate exposure times. Remember: The more light that strikes the paper, the darker the print will be.
9. Viewing prints to judge exposure or overall quality of the print should always be done under the viewing light by the external door. Do not try to judge a print under safelight conditions because this will not give you an accurate assessment of your image, i.e., exposure, sharpness, scratches or dust marks, burning, dodging, and contrast decisions, etc.
10. Whenever you take a wet print away from the sink for viewing, rinse the print in water for a few seconds to remove some of the chemistry. Place wet prints in a tray and drain to avoid getting the floor wet.
11. The enlarging stations are dry areas. Any wet materials (trays, prints, etc.) must be kept away from these stations.
12. Open your box of paper only under safelight conditions.
13. Process your prints on the side of the sink that is nearest to the enlarger youworking at.
38
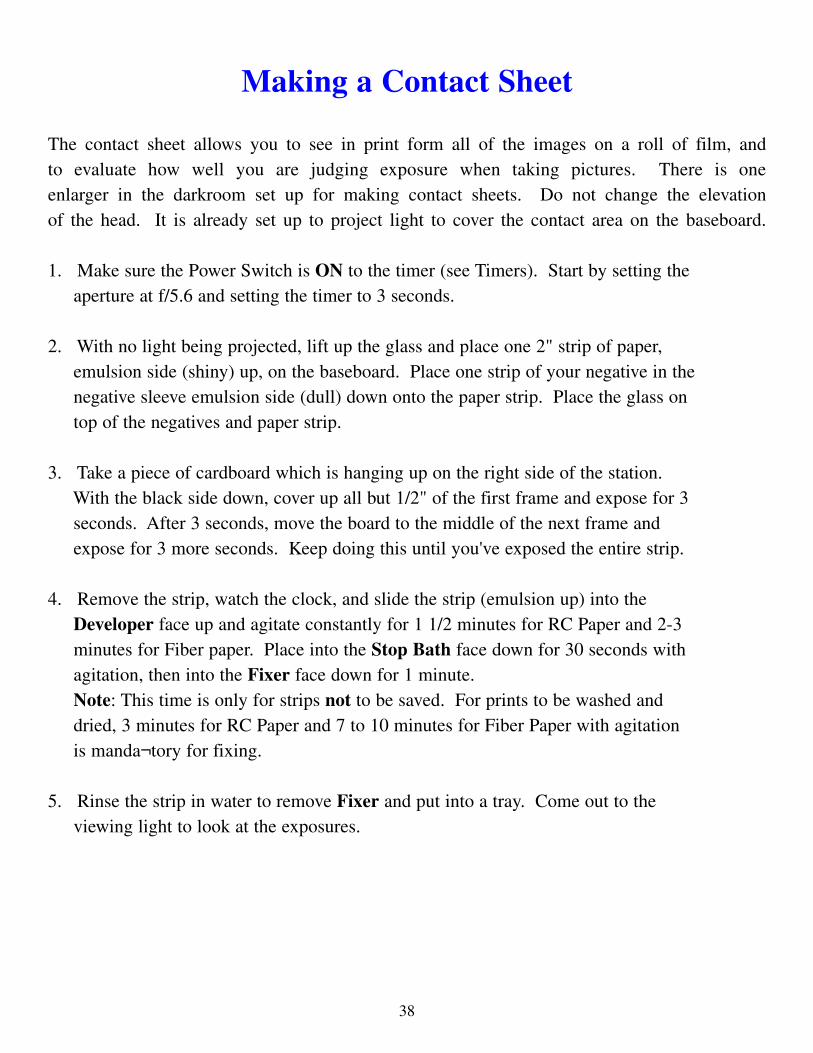
The contact sheet allows you to see in print form all of the images on a roll of film, and to evaluate how well you are judging exposure when taking pictures. There is one enlarger in the darkroom set up for making contact sheets. Do not change the elevationof the head. It is already set up to project light to cover the contact area on the baseboard.
1. Make sure the Power Switch is ON to the timer (see Timers). Start by setting the aperture at f/5.6 and setting the timer to 3 seconds.
2. With no light being projected, lift up the glass and place one 2" strip of paper, emulsion side (shiny) up, on the baseboard. Place one strip of your negative in the negative sleeve emulsion side (dull) down onto the paper strip. Place the glass on top of the negatives and paper strip.
3. Take a piece of cardboard which is hanging up on the right side of the station. With the black side down, cover up all but 1/2" of the first frame and expose for 3seconds. After 3 seconds, move the board to the middle of the next frame and expose for 3 more seconds. Keep doing this until you've exposed the entire strip.
4. Remove the strip, watch the clock, and slide the strip (emulsion up) into the Developer face up and agitate constantly for 1 1/2 minutes for RC Paper and 2-3 minutes for Fiber paper. Place into the Stop Bath face down for 30 seconds with agitation, then into the Fixer face down for 1 minute. Note: This time is only for strips not to be saved. For prints to be washed and dried, 3 minutes for RC Paper and 7 to 10 minutes for Fiber Paper with agitation is manda¬tory for fixing.
5. Rinse the strip in water to remove Fixer and put into a tray. Come out to the viewing light to look at the exposures.
Making a Contact Sheet

39
6. Looking at the sprockets you will notice divisions of exposures. Starting at 3 seconds (the lightest section) find the point where the sprockets go to black and there is no separation between exposures. Count from light to dark by threes to find this point. For example, 3, 6, 9, 12, with 12 seconds the last exposure where divisions can be seen. Do not judge the time to use by the images in the frames. How those images look (there relative lightness and darkness) can vary because of bracketing or miscalculating lighting conditions during the picture-taking process.
7. Once you find your time, set the timer for that time. Place the negative sleeve with all of the negatives on top of a fresh sheet of paper under the glass and expose for the time selected.
8. Process in trays for times given for the test strip, except Fix the full time. Use the results of the contact sheet to judge how well your picture-taking exposures are working, as well as any film processing problems that need to be addressed.
9. You need to use the "sprocket test strip method" only once if the variable remains the same. In other words, if you use the same film, paper, chemistry, dilution ratio and temperatures for film and paper processing, and the same enlarger, then you need not retest. But if any of these variables change, you must retest.
If your images on the contact sheet look too dark, then (given proper film development and the camera is functioning correctly) you are underexposing the film. Try cutting the ASA/ISO rating in half (400 to 200, 100 to 50) and bracket in full stops when exposing the next roll of film.
If your images come out too light on the contact sheet, try doubling the ASA/ISO rating (400 to800, 50 to 100, etc.) and bracket in full stops for the next roll you shoot.
If you have many images that are too light and too dark, this is more of a problem. Assuming again, that your camera is functioning properly, this is usually due to not making the correct exposure settings under various lighting conditions. Your instructor will help you correct this. See: Using a Gray Card on page 50.
40
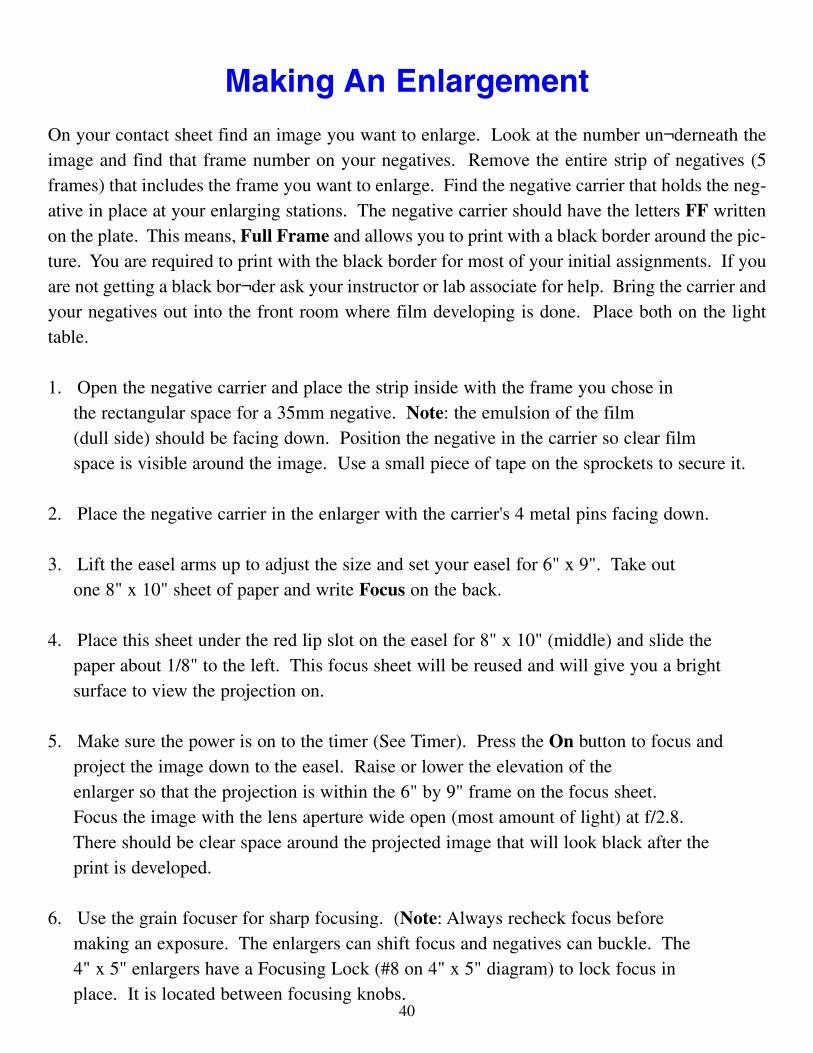
On your contact sheet find an image you want to enlarge. Look at the number un¬derneath theimage and find that frame number on your negatives. Remove the entire strip of negatives (5frames) that includes the frame you want to enlarge. Find the negative carrier that holds the neg-ative in place at your enlarging stations. The negative carrier should have the letters FF writtenon the plate. This means, Full Frame and allows you to print with a black border around the pic-ture. You are required to print with the black border for most of your initial assignments. If youare not getting a black bor¬der ask your instructor or lab associate for help. Bring the carrier andyour negatives out into the front room where film developing is done. Place both on the lighttable.
1. Open the negative carrier and place the strip inside with the frame you chose in the rectangular space for a 35mm negative. Note: the emulsion of the film (dull side) should be facing down. Position the negative in the carrier so clear film space is visible around the image. Use a small piece of tape on the sprockets to secure it.
2. Place the negative carrier in the enlarger with the carrier's 4 metal pins facing down.
3. Lift the easel arms up to adjust the size and set your easel for 6" x 9". Take out one 8" x 10" sheet of paper and write Focus on the back.
4. Place this sheet under the red lip slot on the easel for 8" x 10" (middle) and slide the paper about 1/8" to the left. This focus sheet will be reused and will give you a bright surface to view the projection on.
5. Make sure the power is on to the timer (See Timer). Press the On button to focus and project the image down to the easel. Raise or lower the elevation of the enlarger so that the projection is within the 6" by 9" frame on the focus sheet.Focus the image with the lens aperture wide open (most amount of light) at f/2.8. There should be clear space around the projected image that will look black after the print is developed.
6. Use the grain focuser for sharp focusing. (Note: Always recheck focus before making an exposure. The enlargers can shift focus and negatives can buckle. The4" x 5" enlargers have a Focusing Lock (#8 on 4" x 5" diagram) to lock focus in place. It is located between focusing knobs.
Making An Enlargement

41
7. Stop down the lens (smaller openings) to f/11 and set the timer for 3 seconds. Press the Time button and the enlarger light will turn off.
8. Remove the focus sheet from the easel and put it aside. Take out a test strip and place it in the easel emulsion side (shiny) up in an area of the image you consider to have the most important light and dark areas.
9. Cover up all but about 1/2 inch of the strip the long way using one of the boards hanging up at your station. Hold the Board with the black side down.
10. Push the Start button. This will time for 3 seconds. Expose another 1/2 inch andexpose for 3 seconds. Continue to do this until you have exposed the full strip. Be careful not to move the strip between exposures as this will cause a blurred image. Hold the board to block light just above the strip to avoid this.
11. Process in tray for the same time as your test for making a contact sheet. Rinse and view the strip in a tray out front by the viewing light.
12. You should see a variety of exposures from light to dark. (Remember, the lightest exposure has the least amount of time, and the darkest the most.) Select the best time, which can also be between the test times. For example, if 6 seconds is too light and 9 seconds is too dark, 7.5 seconds could be used. If the strip is overall too dark, reduce exposure time and/or close down lens aperture to f/16 and redo the strip. If the strip is overall too light, increase exposure time and/or open up the aperture to f8 and redo the strip. (Note: the exposure time and aperture settings are only guides, they can change according to negative density, enlargement size, paper used, etc.)
13. Once you've decided on a timea. throw away the strip;b. reset the timer for the time selected; c. press the On button to turn the enlarging light on; d. refocus wide open on your focusing sheet;e. stop down the lens and press the Time button to turn the light off;f. take out a full sheet of paper and place it in the easel; g. press the Start button to begin the exposure;h. process the print the same way as with your contact sheet.

42
Res
in-C
oat
ed (
RC
) P
aper
D
evel
op
ing
Seq
uen
ce
Dev
elo
per
1 1
/2 m
inu
tes
Co
nti
nu
ou
s A
git
ati
on
Sto
p B
ath
30
se
co
nd
s
Co
nti
nu
ou
s A
git
ati
on
Dry
ing
Bri
ng
pri
nts
ou
t in
a t
ray
to t
he
RC
dry
er
in t
he
pri
nt
fin
ish
ing
ro
om
Fin
al W
ash
(Sp
in)
Le
av
e p
rin
ts in
th
e s
pin
wa
sh
er
for
5 m
inu
tes
Ho
ldin
g T
ray
(Rin
se
)
Le
av
e p
rin
ts in
th
is t
ray
un
til r
ea
dy
fo
r w
as
hin
g
Fix
er
3 m
inu
tes
A
git
ati
on
43
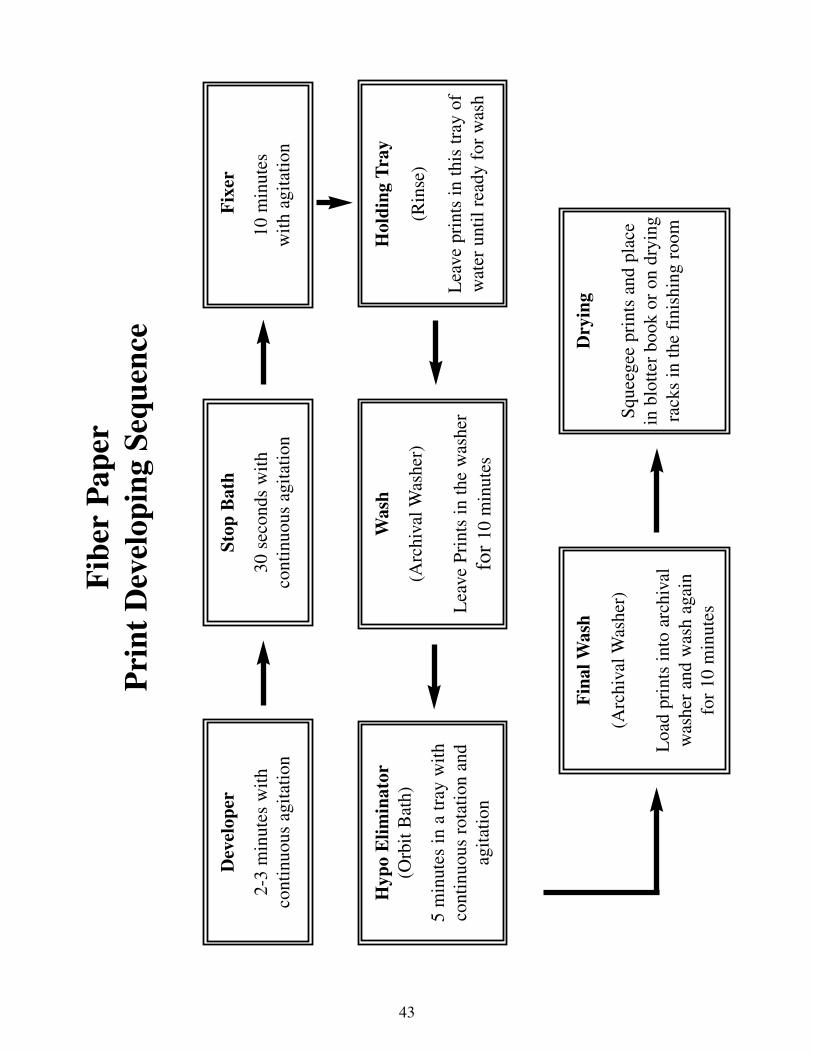
Dev
elop
er
2-3
min
utes
with
co
ntin
uous
agi
tatio
n
Hyp
o E
limin
ator
(Orb
it B
ath)
5m
inut
es in
a tr
ay w
ith
cont
inuo
us r
otat
ion
and
agita
tion
Fin
al W
ash
(Arc
hiva
l Was
her)
Loa
d pr
ints
into
arc
hiva
lw
ashe
r an
d w
ash
agai
n fo
r 10
min
utes
Dry
ing
Sque
egee
pri
nts
and
plac
ein
blo
tter
book
or
on d
ryin
gra
cks
in th
e fi
nish
ing
room
Was
h
(Arc
hiva
l Was
her)
Lea
ve P
rint
s in
the
was
her
for
10 m
inut
es
Hol
ding
Tra
y
(Rin
se)
Lea
ve p
rint
s in
this
tray
of
wat
er u
ntil
read
y fo
r w
ash
Stop
Bat
h
30 s
econ
ds w
ith
cont
inuo
us a
gita
tion
Fix
er
10 m
inut
es
with
agi
tatio
n
Fib
er P
aper
P
rint
Dev
elop
ing
Sequ
ence

44
Before you go to work• Log in: Print Name
Class SectionTime In
Before you leave• Turn off your enlarging light.
• Take your negative out of the negative carrier.
• Hang up the negative carrier by the handle on the left side of your station.
• Set enlarger at elevation #9.
• Turn off power switch on the timer.
• Set the easel to 6" X 9".
• Return any contrast filters to the filter box in the proper order.
• Hang up any burning and dodging boards used on the right side of your station.Note: Narrow board should be in front of the 8 X 10 inch black board, with the station number showing.
• Hand up dodging tool (lollipop shape) on the left side of your station.
• Place the grain focuser in the center of the easel.
• Clean up any scraps of paper or tape used.
• Log out: Time outInitial
Enlarging Station Checklist

45
All the prints you are going to make must go through a complete washing. Prints being held in the rinse tray are not washed. The spin washer works in 5 minute cycles. When you are ready to wash:
1. Take your prints and any others in the rinse tray. Open the cage and place them into the spin washer for 5 minutes (RC paper only). Note: The person who puts the prints into the washer is responsible for timing the wash, taking the prints out of the washer, and drying them.
2. Once this cycle begins, do not stop the washer to place more prints in; this will contaminate the wash. Wait until the 5 minute cycle is complete and the prints are removed before putting more prints in the washer.
3. Place prints into a tray and bring them out to the RC dryer. When the RC dryer is turned on it takes about 3 minutes to warm up. The thermostat light will go off when ready. The setting for the temperature should be at number 9, and the motor speed should be set at number 5. Do Not change these settings.
4. Place prints into the dryer face up. They will feed in slowly. Make sure prints do not overlap. Test strips to be saved should not go into the dryer because they can get caught up in the mechanism. Air-dry strips you wish to save.
5. Keep all wet material in the big tray where paper feeds into the dryer. All the other tabletops are Dry areas.
6. Dried prints which do not belong to you, should be placed into the print storage bin just to the right of the RC dryer.
7. Return wet trays to the enlarging areas.
Washing And Drying RC Prints

46
The fiber paper used by advanced students has a different washing cycle than Resin-CoatedPaper. Because solutions soak through fiber paper, it takes longer to clear the chemicals out.Make sure you allow at least 1 hour from the time you finish printing for the completion of thisprocess. Insufficient washing will result in discoloration, so follow these steps carefully: UseArchival Print Washers only! We have two of them. One is located in the film developing sink,the other is located in Loading Room A. Both work by just turning on the water, but the wash-er in Loading Room A needs the water started and then the flow set so the water stays consis-tently on the red water line located near the top of the washer.
1. Place prints from the Holding Tray (rinse) into a tray approximately two (2) timesthe size of the largest size paper used. For example, if you are using 8" x 10" paper, then place prints into an 11" x 14" tray. If you are using 11" x 14" paper, then place prints into a 16" x 20" tray.
2. Place prints into one of the archival washers. Place either 2 - 8" x 10"s vertically or1 - 11" x 14" horizontally into each slot and wash for 10 minutes.
3. Place prints back into the tray and pour enough Orbit Bath into the tray to cover the prints. Rotate the prints continuously for 5 minutes by taking the one on the bottom and bringing it to the top of the pile. Push it down under the solution.
4. Pour the Orbit Bath back into its container.
5. Place prints back into the Archival Washer.
6. Wash prints again for 10 minutes and squeegee when done.
7. Place prints in your blotter book or bring prints out to the finishing room for drying.
8. To air dry, place prints face down on the drying racks located under the large dry mount press. Prints will usually need to dry overnight.
Washing and Drying Fiber Prints
47
Note: Fiber paper prints will curl…its just their nature. The degree of curl is based on the paper manufacturer, the size of the paper, and the amount of humidity in whichthey are stored. To reduce the amount of curl in the prints there are a few things you can do.
* Let prints dry completely and place under weight for several hours. This will help to stretch out the fibers in the paper. I use books for 8 X 10 inch paper, but any flat object with some weight will do.
* Use a print flattening solution such as Edwal's Super-Flat. These solutions help the fibers to relax and flatten the image. There are mixed reviews on how well this works, but if you are determined, it might be an option to try.
* Dry mounting and window matting prints. Dry mounting will flatten the entire printonto a board. Window matting will hold down the edges of a print, which for smaller images won't show much waviness.
48
All beginning photography students are required to use Variable-Contrast Papers. These papers
will allow you to change contrast (the difference between dark and light tones in a print) without
changing to a different paper. Different paper manufacturers use different prefixes to designate
a paper as variable-contrast. For example: Ilford - Multigrade; Kodak - Polycontrast, Polymax;
Agfa - Multicontrast; and Oriental - Seagull Select VC. All of these papers will allow for the use
of these filters to change contrast. The contrast grade of your paper is approximately #2 without
the use of a filter. A #2 paper grade is considered to be a normal grade contrast. This means that
whatever contrast is in your negative will be reproduced in the print. The filter set is located at
each enlarging station and contains twelve (12) filters.
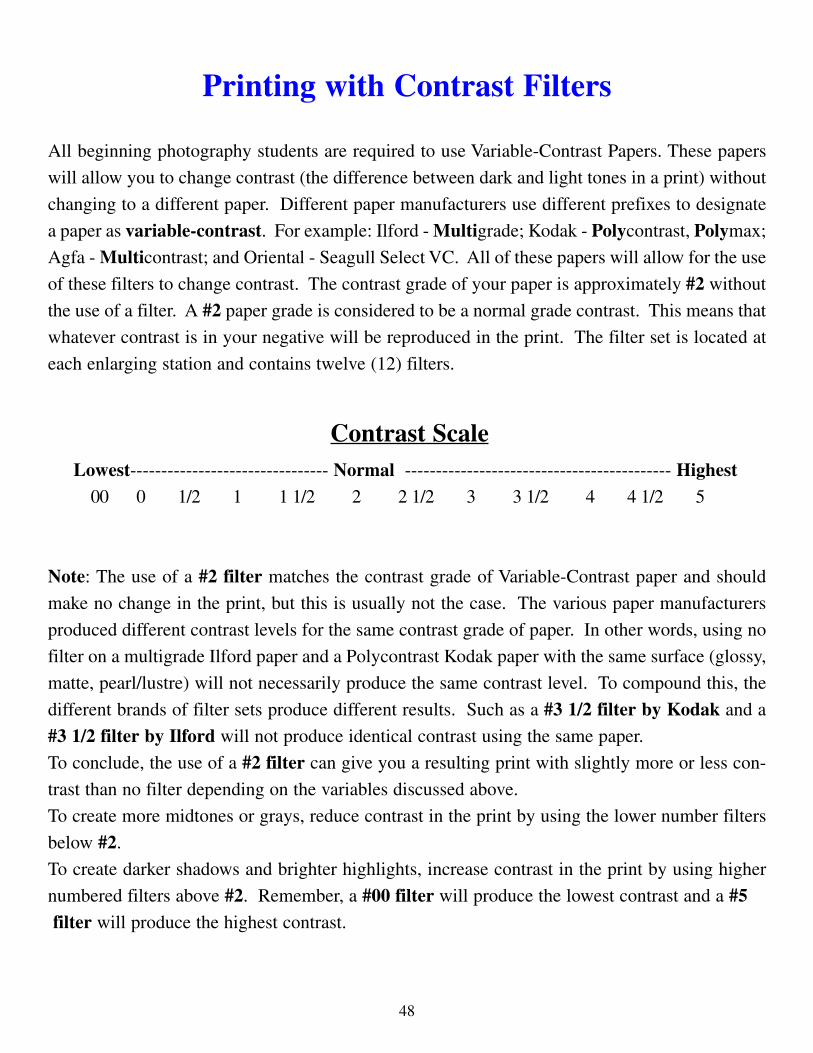
Contrast ScaleLowest-------------------------------- Normal ------------------------------------------- Highest
00 0 1/2 1 1 1/2 2 2 1/2 3 3 1/2 4 4 1/2 5
Note: The use of a #2 filter matches the contrast grade of Variable-Contrast paper and should
make no change in the print, but this is usually not the case. The various paper manufacturers
produced different contrast levels for the same contrast grade of paper. In other words, using no
filter on a multigrade Ilford paper and a Polycontrast Kodak paper with the same surface (glossy,
matte, pearl/lustre) will not necessarily produce the same contrast level. To compound this, the
different brands of filter sets produce different results. Such as a #3 1/2 filter by Kodak and a
#3 1/2 filter by Ilford will not produce identical contrast using the same paper.
To conclude, the use of a #2 filter can give you a resulting print with slightly more or less con-
trast than no filter depending on the variables discussed above.
To create more midtones or grays, reduce contrast in the print by using the lower number filters
below #2.
To create darker shadows and brighter highlights, increase contrast in the print by using higher
numbered filters above #2. Remember, a #00 filter will produce the lowest contrast and a #5filter will produce the highest contrast.
Printing with Contrast Filters
49
It's generally a good idea to make your test strip and first print without a filter. This way you
can fully assess its contrast needs as well as burning and dodging options. The use of
a filter between the lens and paper can obscure some detail depending on its condition, so if
you don't need one, you're better off.
The filter holder swings under the lens to hold the filter, but can cut out some of the image on
the corners if it is not aligned just right. Make sure you're projecting a full image. If you
decide a filter is necessary, focus your image with white light (no filter) because the
filter blocks out some light and can make it difficult to see the image. Place the filter in the
filter holder before exposing. It is suggested to make another test strip to make an accurate
exposure evaluation, but if you want to use the filter factor compensations, here they are:
• Going from No Filter to a #00 through #3 1/2 filter, double your exposure time (2x).
• Going from No Filter to #4, #4 1/2, #5 filter, quadruple your time (4x).
• Going from filters #00 through #3 1/2 to a 4, 4 1/2, 5 filter, double your time (2x).
Remember:
• When first using a filter, increase test time intervals for test strips. For example,
No filter . . . 3, 6, 9, 12, 15 sec at f/8. With a #3 filter . . . 6, 12, 18, 24, 30 at f/8
or 3, 6, 9, 12, 15 at f/5.6.
• Use only one filter at a time.
• Hold filters by the handle or on the sides. Do Not put fingers on the acetate filter
itself. They smudge and scratch very easily. Do Not attempt to clean them.
• Return filters to the filter storage tray in their proper order.
Exposing with Filtration
50
It is unavoidable that most prints will need to be retouched. Whenever you enlarge an image,any dust, lint or UFO that is sitting on the negative surface hitches a ride and grows with theenlargement size. Even with the most meticulous care of wiping, blowing, or brushing onthe negative, dust can still find its way to your film.
Helpful Hints to Avoid Retouching of Prints
1. When you make the first print from a negative and bring it out to the viewing light by the front door, along with your critical analysis of the print, look also at the surface of the print to check for dust spots. This way you can remove the dust from the negative before making your final print.
2. The anti-static cloth on your supply list for the class works best to repel dust. Wipe both sides of the negative with the cloth before placing the negative into the carrier.
3. Compressed air blows dust off but doesn't help repel dust. Important: Do Not tilt the can of compressed air while using. A gas will spray out and can stain your negatives. Keep the can upright and tilt the film when using.
4. Handle your negatives with care. Scratches on your film will show up on the print. If the scratch on the negative is showing up black on the print, for all intents and purposes, there's not much you can do. This is an emulsion scratch. If the scratch shows up white, this can be repaired. The scratch is refracting light away from the surface of the paper, leaving a white line. By filling in the scratch with Vaseline,Edwals No-Scratch, or nose grease (no kidding), light is redirected back on to the surface of the print. Make sure these are applied across the scratch and wiped offafterward.
To Retouch Your Prints You will need:
• Spotone #3
• a brush #000 or finer
• a small cup of water
• a scrap of white paper
• patience
Retouching Prints
51
Place a few drops of Spotone #3 on a surface that will not absorb it. (A plastic or metalspoon works well.) Let this dry overnight.
1. Wet the brush in water and brush the edge of the dried Spotone until some is absorbed into the brush.
2. On a scrap piece of white paper, brush out the Spotone from the brush until it shows up light gray. Important: Always start lighter than the area you need to match. You will build up to the value you need by applying more Spotone to it.
3. Apply the Spotone to a white spot of a dry print by using the point of the brush to fill the spot. Do not brush this on. Fill the spot one dab at a time.
4. If you are spotting a line, do not brush the length of the line but dab consecutive points on the line to fill it in.
5. Remember to stay within the borders of the spot, as the surrounding areas can also get darker with Spotone.
6. Spotone will dry quickly so work carefully. Spotone can be washed out of the printby soaking the paper in a final wash for about 10 minutes. Remember that this willwash out all the Spotone-mistakes or not.
Procedure
52
There is a direct relationship between the quality of your negative and the quality of your print.Exposure (picture-taking) and development (of film) together create the density and contrastyour image will have. Generally, students have very little problems with the film developmentprocess as long as they follow the step by step procedures. But film exposure problems canhaunt some students all semester. It goes like this:
Wrong Exposure = Poor Quality Negative = Poor Quality Print = Frustration for Wasting Time, Money, and Energy. Hmmm!
This can mostly be avoided by using a Gray Card to measure exposure. Why the GrayCard works will be explained by your instructor, but here is how to use it:
1. Place the Gray Card so that the gray surface is facing the camera. Make sure that the same light illuminating your subject is also illuminating the Gray Card.
2. Try to position the Gray Card as close to the subject as possible. For daylight exposures, exposure readings can be made near the camera as long as it receives the same intensity of light as the subject.
3. Make sure the Gray Card is positioned at the same angle as the subject.
4. It is also important that you read only the Gray Card. In other words, if your meter is in the camera, fill the screen with the Gray Card. The Gray Card does not have to be in focus. Be careful not to cast your shadow onto the Gray Card.
5. Meter as you would normally off the Gray Card and leave that setting. When you remove the Gray Card the meter reading will usually change, but Do Not adjust for the change. In other words, if your Gray Card reading is f/8 at a 1/125, but then by removing the Gray Card your camera meter indicates you are now over or underexposed, leave the setting at f/8 at a 1/125.
6. If your subject and lighting remain the same, you can bracket your exposure one stop over and one stop under for negative film. Bracket if you are not sure of exposure and would like to have some variations to choose from. Bracket only after your Gray Card exposure.
Using a Gray Card
53
7. If you are in low light conditions and your meter will not give you a reading, you can use the white side of the Gray Card. Measure light the same way as discussed but add 2 1/3 stops more to your exposure.
8. Remember if lighting conditions change, another Gray Card reading must be taken.
In conclusion:The use of a Gray Card is one means for judging exposure. It's a simple tool to give you moreaccurate meter readings, but it must be used to work for you. The result will be a qualitativedifference in the negatives and prints you produce.
54
Toners are used with black and white prints in order to improve permanence, alter the color,or enhance the quality. The toners used in the photo-lab are Sepia, Selenium, and Blue. All toners are harmful. Avoid any contact with skin and wash off immediately with cold waterif contact occurs. All the toners are kept above the sink in Loading Room A, and the toningof prints is done only in this room. This room is ventilated and has a long sink area for theprocess. Use only one toner at a time.
Trays and tongs used for toning can be found under the sink in loading Room A. Use onlythose trays which are labeled for specific toners. To prepare a print for toning it must beexposed, developed, fixed and washed. If a print is already dry, you need to soak it in waterfor a few minutes. It is suggested to have an extra untoned print of the same image at handfor a comparison. Log all uses of toners on the log sheet hanging on the wall to the right ofthe sink in Room A. All toned prints should be air dried face-up on the print dryingracks.
Sepia Toning
Sepia toner is used to make prints in sepia or brown colors and slightly increase the permanence of the print. Sepia toner is a two-bath process consisting of Sepia A solution(bleach) and Sepia B solution (toner). The solutions are stored above the sink in brown con-tainers, labeled Sepia A and Sepia B. After using one of the Sepia solutions, pour it back intoits container and rinse out the tray before using the other. Trays are also labeled for specificso¬lutions and come in two sizes to accommodate up to 8 x 10 prints, or up to 11 x 14 prints.
1. Pour Sepia A (bleach) into the tray labeled Sepia A. Place the print, image side up, into the solution making sure that all of the print is under the solution.
2. Agitate continuously until the dark areas of the print begin to look a little faded. Although a time for this is given in the Sepia package instructions (5-8 minutes), the exhaustion of the solution, the temperature at which it is used, and the toning effect desired, make judging by sight a better criterion. The bleach solution (A) is yellow, so to look at the progress of the bleaching, use a pair of tongs to hold the print out of the solution.
Toning(Advanced Photography Students Only)
55
3. When ready, remove the print and place it into another tray filled with water.
4. Rinse with running water for two minutes to remove all the bleach. If you are using the larger trays and have finished bleaching the prints you are toning, use a funnel under the sink and pour the A solution back into the container. Rinse out the Sepia A tray and place the Sepia B tray in the sink and pour the Sepia B (toner) solution into that tray. (Note: Three of the larger trays will not fit in the sink so the Sepia A tray needs to be removed when you have finished bleaching in it.) Warning: This solution smells like rotten eggs, or the result of eating bad refried beans, so don't glare at the person next to you.
5. After rinsing the print in running water for two minute, place the print into the Sepia B solution. The print will redevelop within a few seconds. Agitatecontinuously for one minute.
6. Wash fiber prints for 20 minutes and RC prints for 5 minutes. Do Not wash prints with other prints which have not been toned. Wash trays, tongs, and funnel and return them under the sink.
Selenium Toning
Selenium toner will help increase the permanence of the print, as well as produce richerblacks and change print color. The degree of change is based on the dilution of the toner,the length of time the print remains in the solution, and the type of paper used. The colorshift will be towards a reddish or purplish-brown. Selenium toner is a one-bath process. For archival toning, 5 minutes in the solution is sufficient. To produce a color change, a
minimum of 15 to 20 minutes in the solution is necessary. Warm tone papers require lesstime and will yield a greater color change.
1. Place a tray labeled "Selenium Toner" in the sink and pour solution from the Selenium toner container into it.
2. Place the print, image side up, into the solution and agitate continuously. Have an untoned print of the same image at hand to use to check toning results. It is moredifficult to see the degree of changes without a comparison print.
3. For a color shift, check the print after the first 10 minutes, and every 5 minutes thereafter by lifting the print out of the solution with tongs and checking to see itsprogress.
56
4. When sufficient, wash the print for 20 minutes in the archival washer.
5. Use the funnel under the sink to pour the Selenium toner back into the container.
6. Wash out trays, tongs, and funnel and return under the sink.
Blue Toning
Blue toner will change the color of the print to blue very quickly so be prepared. The degreeof color change will depend on how long the print is left in the solution. Pourthe contents intothe tray labeled for Blue toner. Do not wash blue toned prints in the archival washer. Traywash only.
1. Place the print, image side up, into the toning solution. Like the Selenium toner, this too is a one-bath process.
2. Agitate the print continuously until the desired degree of toning is reached.
3. Check the print about every 5-10 seconds with a comparison print to judge effect.
4. If a yellow or green cast is observed in the white areas of the print (this can occur if the print is left in the solution too long), rinse in water for 3 minutes and place the print into a separate tray of salt solution for about 5 minutes with agitation. The salt solution container is located above the sink.
5. Wash the print in a separate tray for about 10 to 15 minutes. Do Not let the stream of water fall directly onto the toned image.
6. Pour the Blue toner back into the container. Wash out trays, tongs, and funnel and return them under the sink.
57
Selective Toning
This is a technique of toning only selective areas of the print. Begin with a dry print.1. Using rubber cement, apply with a brush onto areas of the print you wish to
remain untoned. Overlap areas about 1/16 of an inch and allow to dry for about 10-15 minutes.
2. Push the overlapped rubber cement back to the edge of the areas you want to cover. Use your fingertip or a toothpick to do this.
3. Place the print in water for about 5 minutes and follow steps for toning process.Note: Be careful not to rub off the masking during the toning steps.
4. When the print is in the rinse for about 3 minutes after toning, gently rub off the rubber cement and discard. Do not let it wash down the drain.
5. Complete the final washing cycle.
If the rubber cement is too thick, combine in a separate cup, rubber cement and rubber cementthinner and apply to the print. Allow to dry and apply a second coat. It is sometimes difficult tosee where the cement has been applied because it dries clear, so look carefully to cover only theareas you want.
58
Facts:A. Both color and black and white infrared films have emulsions that are sensitized
to infrared radiation along with a portion of the visible light spectrum. Use of a filter over the camera lens or light source controls the amount of visible light reaching the film.
B. Infrared film can be used with electronic flash, tungsten photo lamps or daylight.
C. Infrared films are primarily designed for use in the scientific fields of photography,medicine, plant pathology, ecology, archeology, and laser photography. In additionto these uses, infrared can be used for pictorial and other non-technicalforms of photography (such as fine art). Landscape photography has a highdegree of clarity because infrared film penetrates much of the haze that obscuresphotos of distant scenes taken with ordinary films. Infrared film also shows contrastbetween subject matter where none may exist visually. This is especially truewhen shooting foliage that usually appears light-toned in black and white or redand magenta with color infrared.
D. Black and white infrared film alters the reproduction of tones as compared toconventional panchromatic films. Live foliage, which reproduces as dark gray tones on panchromatic films, becomes light tones on infrared. Blue skies and bodies of water appear black or dark in infrared photos.
Myths:Some people are under the impression that a camera loaded with infrared film can be used totake perfectly exposed pictures in total darkness. This is not the case. Just as with ordinaryfilms, a source of illumination is needed to record a scene with a camera.
The energy awareness that has occurred in the past few years has produced public interest inphotos showing heat loss of homes and buildings, called thermograms. Many people are ledto believe that thermograms can be made by using only infrared film and conventional photoequipment. Thermograms are produced by using infrared radiation and sophisticated electron-ic equipment. Infrared film is no more sensitive to moderate levels of heat than conventionalphotographic films.
Roy's Guide to Infrared Photography

59
Technical Data:There are several manufacturers of black and white infrared film. Kodak's film is available in35mm and 70mm, but not 120 or 220 rolls or sheet film. MACO's, Konica's, and Ilford's filmsare available in 35mm and 120 roll film sizes, and MACO's in 4x5” sheets as well. Amongthe film manufacturers making infrared film, the Kodak film is more sensitive to infrared light,and thus, reveals more of the "glowing" effect.
Development:Conventional black and white developers such as D-76, HC-110 and D 19 are recommended.Following the manufacturers instructions will produce acceptable results, however, for opti-mum results experimentation is advised. Since this film is noticeable grainy, close temperature control of processing solutions and fresh developers are recommended.
Film Loading:Since Kodak black and white infrared film is highly sensitive to infrared light, this film mustbe loaded in to the camera in total darkness (not just subdued light) or ambient in¬frared radi-ation will fog the film. A changing bag is a must to load film in the field. Plastic developingtanks are not recommended in the darkroom because infrared radia¬tion can penetrate themduring the development. Stainless steel is your best bet.
Exposure:Black and white infrared film has less exposure latitude than conventional black and whitefilms. Bracketing the exposure is strongly recommended. The camera's built-in meter cannotread infrared light, so it is not a very accurate guide for exposure. It should only be used as areference point for bracketing the exposure. ISO 100 to 400 is the advised setting, but only asa starting point. The Konica film is less sensitive and should be rated at about ISO 50. Anincident light meter is the best instrument for taking exposure readings. The automatic modeof most of today's cameras is definitely not recommended.
Filters:A #25 red filter is most commonly used with black and white infrared film since it effective-ly limits the exposure to the red and infrared portions of the spectrum. For less infrared effect,a yellow or orange filter can be used. Infrared photos taken without a filter don't differ great-ly from photos taken with conventional panchromatic films. Remember to allow for these filters in your light meter readings, usually opening the lens f-stop from one to three stops.

60
Flash:Electronic flash can be used with a visually opaque Kodak 88A, 87 or 87C gelatin filter
placed over the flash head. The filter on the flash will have a dim red glow when fired,
but no apparent flash of light, and no filter is required on the camera lens itself using this
method. Exposure using this method should be arrived at by trial and error. When using the
87 or 88A filter, ISO 25, or 87C, ISO 10 should be used as a starting point.
Focusing:Infrared rays focus at a different plane than visible light. Most lenses for SLR cameras have
an infrared focusing index mark engraved on the lens barrel. Focus normally, then shift the
lens barrel to this index mark. Stopping the lens down to f/8 or higher will result in greater
depth of field, thus rendering the infrared image sharp enough for most purposes.

61
Dry mount presses are available for your use in the print finishing room. Your instructorwill demonstrate its proper use. There are a number of methods for presenting your work,dry mounting is just one of them. Careless and improper use of the press will result in yourruining your photographs and possibly the press itself.The supplies you will need are: mount board or museum board (untextured, white on oneside), dry mount tissue (Seal Color Mount for resin-coated [RC] paper), Seal MT-5 Plusfor fiber-based paper.
Precautions:Never use the dry mount press without a cover sheet both above and below the print!Pressing without a cover sheet may ruin both your prints and the press. Do not use acover sheet that is wrinkled, it will impress the wrinkles right into your print.
Never exceed the recommended mounting temperature for the type of paper you aremounting. For RC and fiber based prints, a temperature of 200° F is sufficient and not to be exceeded; Excessive temperatures can scorch or melt your prints. Leaving the print in the press for too long a time can also burn it. A time of 30 seconds (or until the print is affixed firmly) is recommended.
Turn off the press and the tacking iron before leaving the area! Unplug the tacking iron and turn off the switch on the press. Failing to do so can create a fire hazard in the lab.
Exercise care when using the paper trimmers. When holding the print down, do notapply pressure toward the blade. Do not use the paper trimmers for cutting board. This will dull the blade. Collect all unwanted scraps and throw them in the garbage.(See instructions below.)
Procedures:1. Set the temperature on the press. Use 200°F for mounting resin-coated paper
and fiber-based prints.
2. Plug-in the tacking iron and set its thermostat at a high setting. Wait several minutes for both the press and the iron to heat up.
3. Remove excess moisture from both the print and the mount board. To do so, place each in the heated press separately for about 1 minute. Position the print and board under a protective sheet in the press to keep them from being scorched.
Dry Mounting
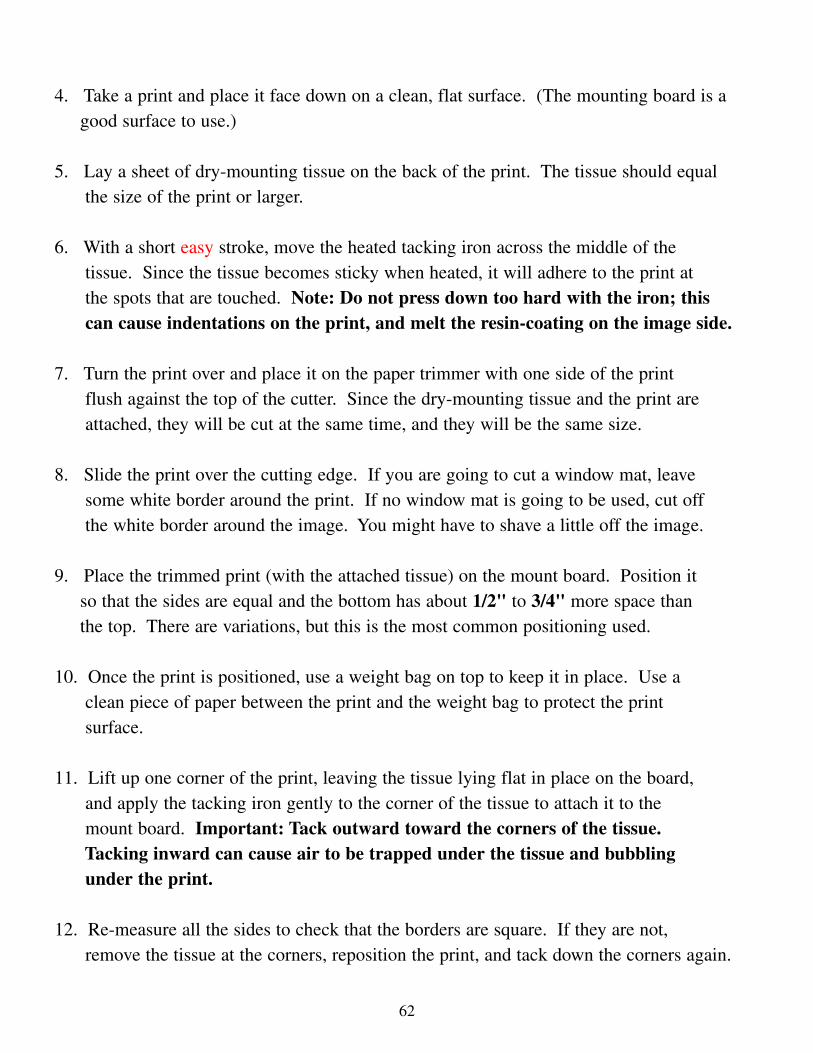
62
4. Take a print and place it face down on a clean, flat surface. (The mounting board is agood surface to use.)
5. Lay a sheet of dry-mounting tissue on the back of the print. The tissue should equal the size of the print or larger.
6. With a short easy stroke, move the heated tacking iron across the middle of the tissue. Since the tissue becomes sticky when heated, it will adhere to the print at the spots that are touched. Note: Do not press down too hard with the iron; this can cause indentations on the print, and melt the resin-coating on the image side.
7. Turn the print over and place it on the paper trimmer with one side of the print flush against the top of the cutter. Since the dry-mounting tissue and the print are attached, they will be cut at the same time, and they will be the same size.
8. Slide the print over the cutting edge. If you are going to cut a window mat, leavesome white border around the print. If no window mat is going to be used, cut off the white border around the image. You might have to shave a little off the image.
9. Place the trimmed print (with the attached tissue) on the mount board. Position it so that the sides are equal and the bottom has about 1/2" to 3/4" more space than the top. There are variations, but this is the most common positioning used.
10. Once the print is positioned, use a weight bag on top to keep it in place. Use a clean piece of paper between the print and the weight bag to protect the print surface.
11. Lift up one corner of the print, leaving the tissue lying flat in place on the board, and apply the tacking iron gently to the corner of the tissue to attach it to the mount board. Important: Tack outward toward the corners of the tissue. Tacking inward can cause air to be trapped under the tissue and bubbling under the print.
12. Re-measure all the sides to check that the borders are square. If they are not, remove the tissue at the corners, reposition the print, and tack down the corners again.

63
13. Place the print and the attached board in the dry mounting press. Be sure that the protective sheet is positioned between the heating plate of the press and theprint. Close the press for about 30 seconds, or until the print is affixed firmly tothe board.
14. Take the mounted print out of the press and gently bend the board (sides away from you) to check. If the print begins to lift off, place the print back into the press for a longer time.
15. If dry mount tissue is showing around the edges of the print after mounting, use an x-acto knife to trim it off.

64
Window mats are usually cut for pictures that have some value or importance, so it is
recommended that a high quality, acid-free rag board is used. The board is more
expensive, but it is archival and has excellent longevity. White and cream colors are
standard for this board, and it can come in cut sizes and full sizes up to 32" x 40".
Two-ply and four ply, are standard thicknesses of the board. Two-ply is cheaper and
not as rigid as four-ply. You will be happier with the four-ply board in the long run because
it offers more stability. Your instructor can recommend places to purchase this board, as
most photography stores do not stock it.
Make sure you use a new blade to cut your board. Ask for assistance to install the
blade if you don't know how. The cutter will make straight cuts and bevel cuts.
What you need to begin• Museum Board
• Linen tape or dry mount tissue
• A print to mount
• A ruler
• Weight bag
• Logan blades #269 for the wall mounted cutter, and #270 for the portable cutter
• Cotton Gloves
1. If you are going to dry mount the picture, turn on the dry mount press and plug
in the tacking iron to allow them to heat up.
2. If you are cutting a board down from a larger size, remember you will need two
pieces of board the exact same size for each picture (one board for mounting, the
the other for the window mat).
Cutting Window Mats
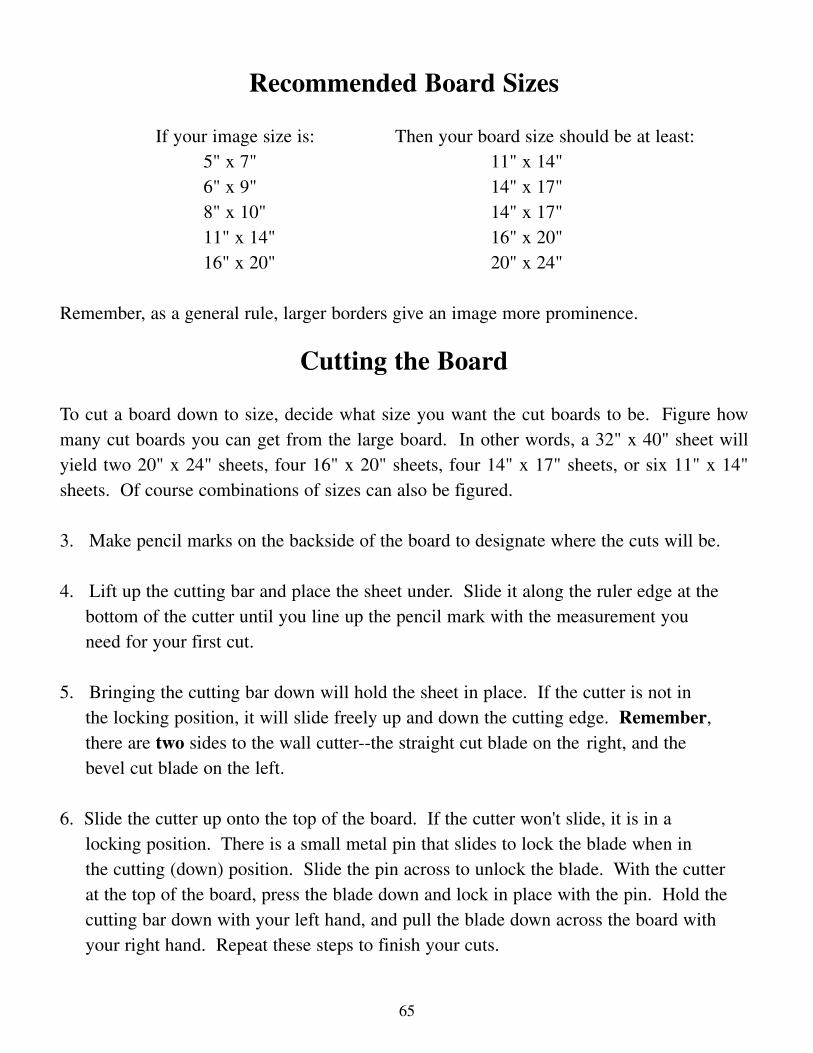
65
Recommended Board Sizes
If your image size is: Then your board size should be at least:5" x 7" 11" x 14"6" x 9" 14" x 17"8" x 10" 14" x 17"11" x 14" 16" x 20"16" x 20" 20" x 24"
Remember, as a general rule, larger borders give an image more prominence.
Cutting the Board
To cut a board down to size, decide what size you want the cut boards to be. Figure howmany cut boards you can get from the large board. In other words, a 32" x 40" sheet willyield two 20" x 24" sheets, four 16" x 20" sheets, four 14" x 17" sheets, or six 11" x 14"sheets. Of course combinations of sizes can also be figured.
3. Make pencil marks on the backside of the board to designate where the cuts will be.
4. Lift up the cutting bar and place the sheet under. Slide it along the ruler edge at thebottom of the cutter until you line up the pencil mark with the measurement you need for your first cut.
5. Bringing the cutting bar down will hold the sheet in place. If the cutter is not in the locking position, it will slide freely up and down the cutting edge. Remember, there are two sides to the wall cutter--the straight cut blade on the right, and the bevel cut blade on the left.
6. Slide the cutter up onto the top of the board. If the cutter won't slide, it is in a locking position. There is a small metal pin that slides to lock the blade when in the cutting (down) position. Slide the pin across to unlock the blade. With the cutter at the top of the board, press the blade down and lock in place with the pin. Hold thecutting bar down with your left hand, and pull the blade down across the board withyour right hand. Repeat these steps to finish your cuts.

66
Placement of the Print and Making the Window Size
Note: I recommend you do not mount the print until the window is cut. This will allow for movement of the print to compensate for any misalignment of the window.
1. Place the print on top of the board in the approximate area you want the image to be. Put a piece of paper under the weight bag and place on top of the print to hold it down. Begin to measure to equalize the sides, and measure to position the image with a little more space (1/2" to 3/4") at the bottom than the top.
2. Remember to measure to the image, not to the white border around the image. If you want to leave a little space between the image and the window mat, measure away from the image about 1/4". If you are measuring to the image, measure in past the image about 1/16" so that any white of the board will not show.
3. Write down the measurements from the edge of the board to the image of all thesides. On the back of the board for the window, chart and mark with a pencil where the corners of the window will be. For example:
4. Once the board is marked with the window points, place the board into the mat cutter with the point marks facing out. You are now going to use the bevel cutter to cut the window. Important: When using the wall mounted cutter, always cut
Point Marks
Bottom
Top
Side Side

67
with the bevel on the left side of the board. This will insure the bevel goes inward toward the image when the board is flipped over.
5. Slide the cutter up to the top left point on the board. Hold the cutting bar down securely and slide the cutter up so that the point of the blade starts to cut into the board an 1/8" above the left point mark. Push the blade into the board and cut straight down below the bottom left point mark about 1/8" also.
6. Lift up the cutting bar and rotate the board. Continue to cut on the left side of the board until all four sides are cut. Remember to start your cut 1/8" higher than the point mark at the top, to 1/8" past the point mark at the bottom. File or lightly sand down any rough edges of the cut.
Mounting the Print and Securing the Window Mat
1. Place the print in the center area on the back mounting board and put the window mat on top of it. Make sure that all the edges of both boards are aligned. (If the print is to be dry mounted, attach dry mount tissue to the back of it and trim. See: Dry Mounting on page 59.) Carefully move the print until it is correctly positioned behind the window. Put a weight bag with a protective sheet under it on top of the print to hold it in place.
2. Remove the window mat. Cut two 2" pieces of linen tape and peel the backing (or moisten, if gummed) off one strip and place across one top corner of the printso it adheres to the mounting board and the corner of the print. Repeat on the opposite top corner.
3. Place the window mat on top of the print and mounting board and align the board edges again. If the image sits under the window mat properly, Flip the window mat board as if you were flipping over a page upward. Make sure you do this on a flatsurface. (Flip sideways for a board viewed vertically.) *See the diagram on the nextpage.

68
4. Closely align the tops of both boards. Measure a strip of linen tape which will spanacross where the two boards meet. Adhere the tape to the boards to make a hinge.
5. Fold the window mat over on to the mounting board and align. Press down across the top to secure the taping.
6. Now your work is ready to be signed!

69
During every semester, in every class, the question of the ethics and legalities of picture-tak-ing is always an issue. It is important for students to know the parameters of these areas fortheir own knowledge and protection. This writing by Arnold Gassan should help to broadlyclarify some of these questions, but remember that there are judgments made due to a varietyof conditions which tend to obscure definitive answers.
RestrictionsBy and large, in our society a photographer is free to photograph what he or she wishes, butthere are some limits on what can be photographed, and what can be published. Some ofthese limits are established by law and some by good taste. For example, under the UnitedStates Code, it was formerly considered counterfeiting to photograph American currency.Now, in certain circumstances, for certain uses, it is permitted. You can make pictures ofalmost anybody in a public place, unless that person is protected by the law and the publicplace is not one in which photographs are prohibited, or where a permit is required. Someseemingly public spaces in fact require you to obtain permission to take photographs; e.g., theNew York subway and many museums.
PrivacyWe each own our faces, and therefore retain the right to privacy. An amateur photographer isunder fewer constraints than a professional, but either one should have permission from theperson photographed or the owner of property to use photographs for sale, profit, and mostpublic exhibitions.The following have been legally established as violations of privacy:
• publishing a photograph of a person's face or likeness or a photograph of their property for advertising or trade, without that person's permission
• disclosing embarrassing private facts to the public• using a picture to suggest a falsehood• trespassing to take a photograph
Permission to reproduce a photograph must be obtained by the photographer, and any¬onecan release the right to privacy; permission to reproduce photographs is easily obtained byhaving subjects sign a model release. A sample model release is shown at the end of this sec-tion; this can be photocopied and carried for use when needed.
Ethical and Legal Aspects of Photography

70
Not all uses of pictures require a release. No release is needed if the event is newswor-thy, and in general a release is often not sought when the picture is used in an editorial,rather than advertising or trade, context. But this is a legal gray area, and the trouble ofobtaining a release is small when compared to the expenses of protecting yourself ineven one legal suit for invasion of privacy.
Many art and commercial photographers do use or exhibit pictures of people and build-ings or other images without a release. At the least, they do so unethically, and they doso at their own financial risk. There have been several recent sizable financial settle-ments made to property owners whose buildings were unwisely used for advertising byphotographers who thought they were photographing public property.
Intrusion and TrespassIntrusion is legally similar to trespass: you need not step foot on another's property to beintrusive. The photographer is prohibited from being intrusive in the act of making apicture. Intrusion can be defined as making your presence evident even when you arenot physically on another person's property. Intrusion is more difficult to prove legallythan trespass, but it is usually unethical behavior, at the least. Photographers have beenarrested for going to unreasonable lengths to produce photographs; for example, by hiring boats and using telephoto lenses to photograph someone on a private beach.
Publicity and LibelA right of publicity is retained by many people who have created a celebrity value intheir name or features. Commercial use of photographs of pictures of such a person isconsidered subject to license contracts. This is different from being a newsworthy fig-ure, and has been considered as a capital asset by the courts.
Libel is defined as damaging a person's reputation by communicating a false statement.For many years, a newsworthy photograph of a public figure was not suitable for liableunless it was shown to be made with reckless disregard for the truth, or was deliberate-ly false to the reality of the situation. Obviously, a photograph can give a false impres-sion when it is changed by cropping, but powerful distortions of the physical reality ofthe situation can be created by choice of lens and point of view. Libel law is now beingreconsidered in the courts, and definitions of who is subject to libel may change.
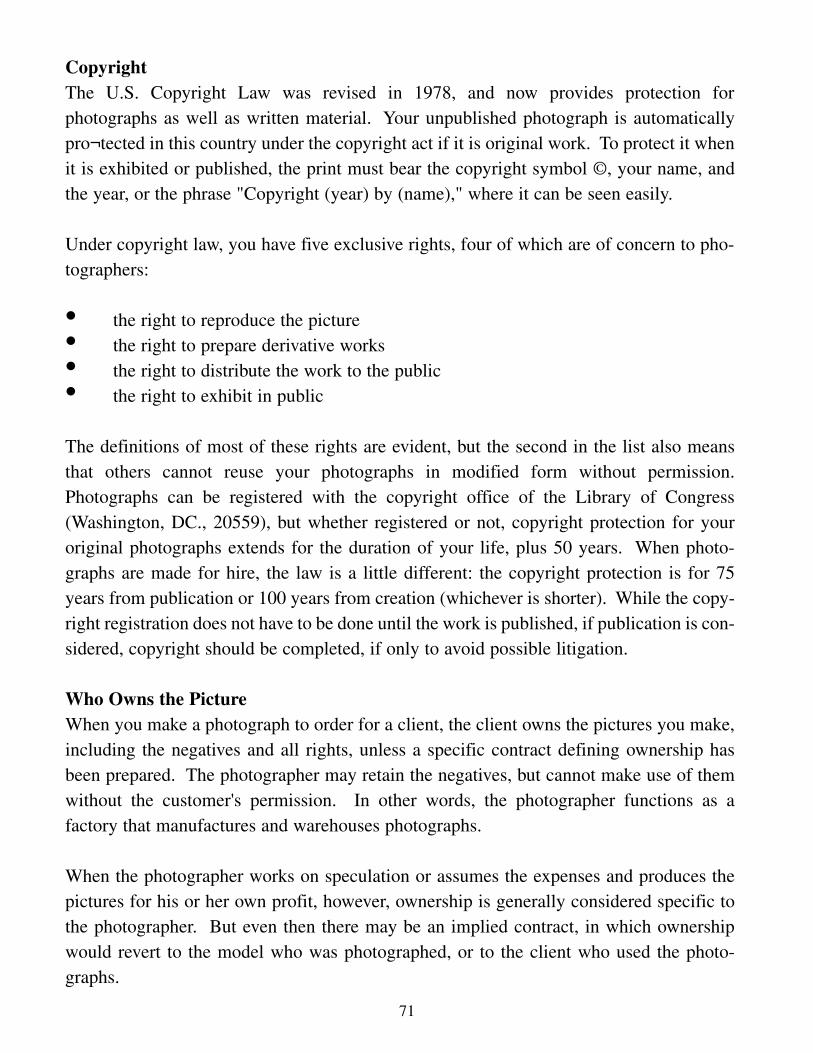
71
CopyrightThe U.S. Copyright Law was revised in 1978, and now provides protection for photographs as well as written material. Your unpublished photograph is automaticallypro¬tected in this country under the copyright act if it is original work. To protect it whenit is exhibited or published, the print must bear the copyright symbol ©, your name, andthe year, or the phrase "Copyright (year) by (name)," where it can be seen easily.
Under copyright law, you have five exclusive rights, four of which are of concern to pho-tographers:
• the right to reproduce the picture• the right to prepare derivative works• the right to distribute the work to the public• the right to exhibit in public
The definitions of most of these rights are evident, but the second in the list also meansthat others cannot reuse your photographs in modified form without permission.Photographs can be registered with the copyright office of the Library of Congress(Washington, DC., 20559), but whether registered or not, copyright protection for youroriginal photographs extends for the duration of your life, plus 50 years. When photo-graphs are made for hire, the law is a little different: the copyright protection is for 75years from publication or 100 years from creation (whichever is shorter). While the copy-right registration does not have to be done until the work is published, if publication is con-sidered, copyright should be completed, if only to avoid possible litigation.
Who Owns the PictureWhen you make a photograph to order for a client, the client owns the pictures you make,including the negatives and all rights, unless a specific contract defining ownership hasbeen prepared. The photographer may retain the negatives, but cannot make use of themwithout the customer's permission. In other words, the photographer functions as a factory that manufactures and warehouses photographs.
When the photographer works on speculation or assumes the expenses and produces thepictures for his or her own profit, however, ownership is generally considered specific tothe photographer. But even then there may be an implied contract, in which ownershipwould revert to the model who was photographed, or to the client who used the photo-graphs.

72
Because of this long-standing legal definition of ownership of photographs, it is wise tohave a licensing agreement before beginning work. This kind of contract helps assure thephotographer that only the usage of the pictures has been purchased, not the original pho-tographic materials themselves.
Obscenity and PornographyThe legal definitions of obscenity and pornography are unclear at present. Our society isvery confused about sex and art and photography. Ultimately, it seems that commu¬nitystandards prevail when defining permissible images. Where the photograph is exhibitedaffects a definition, as much as does the subject matter. An art gallery can show explicitnakedness and sexual relationships that might be cause for arrest if seen elsewhere. Theproof is on the photographer, should the question be raised, to show that the work, takenas a whole, has serious artistic value.
SummaryA photographer may photograph freely in most places, but this is limited by rights of pri-vacy, and definitions of trespass and intrusion. Sometimes these are hard to prove legally,and the photographer's own ethical standard prevails. A release is required for the photo-graph to be legally used for profit. All unpublished original photographs are protected bycopyright. Whether a photograph is obscene or not is often decided by community stan-dards, as there is no standard legal definition.
From Exploring Black & White Photographyby Arnold Gasson, WCB Publishers, 1989.

73
Model Permission form
Copy and carry in camera case or wallet.
Model Release Date:
Photographer:Address:Phone:
Description of photographs:
For consideration received, I give ______________________ permission to reproduce thephotograph(s) described, and I agree that _____________________________, and alllicensees and assignees, are entitled to use the photograph(s) described above in any man-ner or form whatsoever, either wholly or in part, in any medium, and in conjunction withany wording or other photographs or drawings, worldwide. I understand that I do not ownthe copyright of the photograph(s). I understand that all negatives and positives, togetherwith the prints shall constitute your property, solely and completely.
• I am over the age of majority
• I am the parent/guardian of _______________________________and I consent to
these conditions.
• (delete whichever does not apply).
Model's Name (printed):Signature:AddressWitness:

74
Richland College Student Photo/Imaging Exhibition
Every Spring Semester in the Brazos Gallery at Richland College we have aphoto/Imaging exhibition of work produced by students in the program. All studentsenrolled in credit photography and digital Imaging classes during the Spring Semester arerequired to enter at least one, and up to three, pieces into the show. Students enrolled inthese credit classes at Richland College during the previ¬ous Summer or Fall semesterare also eligible to submit work.The exhibition is juried by individuals in the community whose primary occupation isphotography or art in general. They might be educators, gallery directors, curators orphotographers. The juror is solely responsible for the photographs selected for the show,as well as for all of the prizes awarded except one - the John G. Jimison Award. Theprospectus handed out during the Spring Semester will describe all the details studentsneed to know about the exhibition.We are pleased to be able to offer students this unique opportunity to exhibit their workin such an excellent gallery space to be viewed by many people on the campus
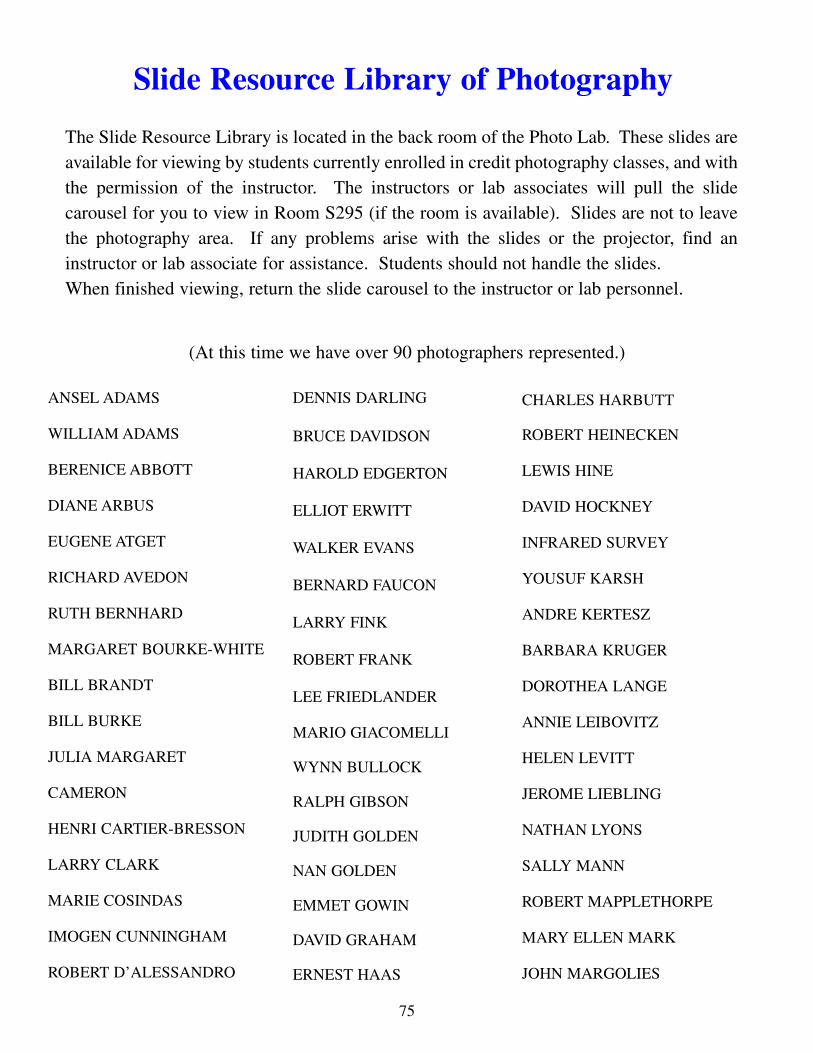
75
Slide Resource Library of Photography
The Slide Resource Library is located in the back room of the Photo Lab. These slides areavailable for viewing by students currently enrolled in credit photography classes, and withthe permission of the instructor. The instructors or lab associates will pull the slidecarousel for you to view in Room S295 (if the room is available). Slides are not to leavethe photography area. If any problems arise with the slides or the projector, find an instructor or lab associate for assistance. Students should not handle the slides. When finished viewing, return the slide carousel to the instructor or lab personnel.
(At this time we have over 90 photographers represented.)
ANSEL ADAMS
WILLIAM ADAMS
BERENICE ABBOTT
DIANE ARBUS
EUGENE ATGET
RICHARD AVEDON
RUTH BERNHARD
MARGARET BOURKE-WHITE
BILL BRANDT
BILL BURKE
JULIA MARGARET
CAMERON
HENRI CARTIER-BRESSON
LARRY CLARK
MARIE COSINDAS
IMOGEN CUNNINGHAM
ROBERT D’ALESSANDRO
DENNIS DARLING
BRUCE DAVIDSON
HAROLD EDGERTON
ELLIOT ERWITT
WALKER EVANS
BERNARD FAUCON
LARRY FINK
ROBERT FRANK
LEE FRIEDLANDER
MARIO GIACOMELLI
WYNN BULLOCK
RALPH GIBSON
JUDITH GOLDEN
NAN GOLDEN
EMMET GOWIN
DAVID GRAHAM
ERNEST HAAS
CHARLES HARBUTT
ROBERT HEINECKEN
LEWIS HINE
DAVID HOCKNEY
INFRARED SURVEY
YOUSUF KARSH
ANDRE KERTESZ
BARBARA KRUGER
DOROTHEA LANGE
ANNIE LEIBOVITZ
HELEN LEVITT
JEROME LIEBLING
NATHAN LYONS
SALLY MANN
ROBERT MAPPLETHORPE
MARY ELLEN MARK
JOHN MARGOLIES

76
RAY METZKER
SHEILA METZNER
JOEL MEYEROWITZ
DUANE MICHALS
ARNO MINKKINEN
LAZLO MOHOLY-NAGY
SARAH MOON
ARNOLD NEWMAN
NICHOLAS NIXON
RUTH ORKIN
OLIVIA PARKER
IRVING PENN
JOHN PFAHL
ROSAMOND WOLFF-PERCELL
MANN RAY
HERB RITTS
HOLLY ROBERTS
EVA RUBINSTEIN
SABASTIAO SALGADO
LUCAS SAMARAS
AUGUST SANDER
JAN SAUDEK
CINDY SHERMAN
STEPHEN SHORE
ARRON SISKIND
W. EUGENE SMITH
CHRIS STEELE-PERKINS
EDWARD STEICHEN
ALFRED STIEGILTZ
PAUL STRAND
JOYCE TENNESON
GEORGE TICE
ARTHUR TRESS
JURRY UELSMANN
DORIS ULMANN
BURK UZZLE
WEEGEE
WILLIAM WEGMAN
BRETT WESTON
EDWARD WESTON
MINOR WHITE
GARRY WINOGRAND
JOEL-PETER WITKIN

77
The books listed below are housed in the Richland College Library. Most are on reservebehind the checkout counter. The list is comprised primarily of books that are considered tobe monographs and present a body of work by one photographer. Many will include biogra-phical information on the artist, as well as some historical context for the work. We stronglyencourage students at all levels to study the work of others, especially those who have made asignificant contribu¬tion to the photographic medium.The Library also has a wide range of photography books which address a variety of subjectssuch as: Photographic History and Criticism, Darkroom Techniques, Photojournalism,Commercial Photography, Cinematography, Nature Photography, Travel Photography,Underwater Photography, and more.If you would like some suggestions about which of the photographers' work to look at, pleasefeel free to ask your instructor, or browse through the stacks in the Library.
Abbott, Bernice, Berenice Abbott: Documentary Photography of the 1930sAdams, Ansel, Classic ImagesAdams, Ansel, Photographs of the SouthwestAdams, Ansel, Singular ImagesAdams, Ansel, Portfolios of Ansel AdamsAdams, Ansel, Ansel Adams--Images, 1923-1974Adams, Robert, To Make It HomeAdams, Shelby Lee, Appalachian LegacyAdams, William, William AdamsArbus, Diane, Diane Arbus: An Aperture MonographArbus, Diane, RevelationsAtget, Eugene, Eugene Atget, 1857-1927Attie, David, Russian Self-PortraitsAustin, Alice, Alice's World: The Life and Photographs of Alice AustinAvedon, Richard, Evidence, 1944-1994Avedon, Richard, In the American West: 1979-1984Avedon, Richard, PortraitsBarnbaum, Bruce, Tone Poems-Book 2Bartram, Michael, Pre-Raphaelite Camera: Aspects of Victorian PhotographyBeaton, Cecil, Magic Image: The Genius of PhotographyBeaton, Cecil, Cecil Beaton: A RetrospectiveBeahan, Virginia, and McPhee, Laura, No Ordinary Land
Richland College Library - Photography Book List
78
Beaumont, Newhall, History of Photography, from 1839 to the Present
Boubat, Edouard, Edouard Boubat
Bourke-White, Margaret, Photographs of Margaret Bourke-White
Bourke-White, Margaret, Portrait of Myself
Brady, Mathew, Mathew Brady and His World
Brandt, Nick, On This Earth
Bravo, Manual Alvarez, Manual Alvarez Bravo
Bravo, Manual Alvarez, Nudes
Bridges, Marilyn, Markings, Aerial Views of Sacred Landscapes
Bruce, David, Sun Pictures: the Hill-Adamson Calotypes
Bruguiere, Francis Joseph, Bruguiere, His Photographs and His Life
Bullock, Wynn, Wynn Bullock
Bullock, Wynn, Wynn Bollock: The Enchanted Landscape
Callahan, Harry M., Callahan
Cameron, Julia Margaret, Julia Margaret Cameron: Her Life
And Photographic Work
Caponigro, Paul, Paul Caponigro
Cartier-Bresson, Henri, Man and Machine
Cartier-Bresson, Henri, Henri Cartier-Bresson
Cook, Diane, & Jenshel, Len, Aquarium
Cunningham, Imogen, Flora
Cunningham, Imogen, Imogen Cunningham
Cunningham, Imogen, On The Body
Davidson, Bruce, Central Park
Demeyer, Adolf, Baron, DeMeyer
Eakins, Thomas, Photographs of Thomas Eakins
Eisenstaedt, Alfred, Eisenstaedt's Celebrity Portraits
Emerson, P. H., P. H. Emerson: Photographer of Norfork
Erwitt, Elliott, Personal Exposures
Evans, Walker, Walker Evans
Evans, Fredrick H., Frederick H. Evans
Folberg, Neil, Celestial Nights
Ferrato, Donna, Living with the Enemy
Feinstein, Harold, One Hundred Flowers
Franck, Martine, One Day to the Next
79
Frank, Robert, Robert Frank: The Americans
Frank, Robert, Robert Frank
Frank, Robert, Moving Out
Freed, Leonard, Photographs 1954-1990
Friedlander, Lee, Friedlander
Friedlander, Lee, Self Portrait
Garduno, Flor, Witnesses Of Time
Graham, David, Land of the Free
Gernsheim, Helmut, History of Photography From the Camera Obscura to the
Beginning of the Modern EraGernsheim, Helmut, Origins of PhotographyGiacomelli, Mario, Mario GiacomelliGibson, Ralph, TropismGilpin, Laura, Laura Gilpin: An Enduring GraceGoldberg, Jim, Raised by WolvesGowin, Emmet, Emmet Gowin PhotographsGreen, Jonathan, Camera Work: A Critical AnthologyGriffiths, Philip Jones, Dark OdysseyHaas, Robert Bartlett, Eadweard Muybridge: Man in MotionHalsman, Philippe, A RetrospectiveHalsman, Philippe, Jump Book Harbutt, Charles, TravelogHeartfield, John, Photomontages of the Nazi PeriodHill, David Octavius, Early Victorian AlbumHine, Lewis, Passionate Journey, Photographs 1905-1937Hockney, David, Hockney on PhotographyHockney, David, David Hockney PhotographsHorst, Salute to the ThirtiesKahn, Nicholas, & Selesnick, Richard, ScotlandfuturebogKarsh, Yousuf, Karsh PortraitsKenna, Michael, Le Notre’s GardensKenna, Michael, Retrospective TwoKenna, Michael, A Twenty Year RetrospectiveKertesz, Andre, Andre KerteszKertesz, Andre, Sixty Years of PhotographyKruger, Barbara, Thinking of YouLange, Dorothea, Dorothea Lange: A Photographer's Life
80
Lange, Dorothea, Dorothea LangeLartigue, Jacques-Henri, Jacques-Henri LartigueLeibovitz, Annie, Annie Leibovitz, 1970-1990Lemagny, Jean-Claude, History of Photography: Social and Histoire
de la PhotographieLight, Michael, 100 SunsLux, Loretta, Loretta LuxMaddow, Ben, Faces: A Narrative History of the Portrait in PhotographyMaddoz, Chema, Chema MadozMager, Alison, Children of the Past in Photographic PortraitsMann, Sally, Immediate FamilyMapplethorpe, Robert, Robert Mapplethorpe by Richard MarshallMark, Mary Ellen, American OdysseyMark, Mary Ellen, Mary Ellen Mark 25 yearsMark, Mary Ellen, TwinsMartin, Paul, Paul Martin: Victorian PhotographerMcAuley, Skeet, Sign LanguageMenashe, Abraham, Inner GraceMeyer, Pedro, Truths & FictionsMichals, Duane, Now Becoming ThenMinkkinen, Arno, WaterlineMitchell, Margaretta, Recollections: Ten Women of PhotographyNewman, Arnold, One Mind's EyeNixon, Nicholas, Picture of PeopleNorfleet, Barbara, Champion Pig: Great Moments in Everyday LifeOld, Toby, Times SquaredParkeHarrison, Robert, The Architect’s BrotherParks, Gordon, Gordon ParksParks, Gordon, Gordon Parks: Whispers of Intimate ThingsPenn, Irving, Worlds in a Small RoomPfahl, John, Altered LandscapesPlachy, Sylvia, Self Portrait With Cows Going HomePlowden, David, CommonplacePullen, Melanie, High Fashion Crime ScenesRay, Man, Man RayRitts, Herb, Herb Ritts, Two VolumesRoberts, Holly, Works 1989-1999Rosenblum, Naomi, A History of Women Photographers

81
Salgado, Sebastiao, An Uncertain GraceSalgado, Sebastiao, WorkersSamaras, Lucas, SamarasSaudek, Jan, SaudekScharf, Aaron, Pioneers of PhotographySexton, John, Quiet LightSherman, Cindy, Cindy Sherman, 1975-1993Singh, Raghubir, The GangesSmith, W. Eugene, Photographs 1934-1975Smith, W. Eugene, Let Truth Be the PrejudiceSmith, W. Eugene, W. Eugene Smith, His Photographs and NotesSobieszek, Robert A., Art of Persuasion: A History of Advertising PhotographyStarn, Mike and Doug, Mike and Doug StarnSteel-Perkins, Chris, Pleasure PrincipleSteichen, Edward, Family of ManStieglitz, Alfred, Alfred StieglitzSturges, Jock, Last Day of SummerSzarkowski, John, Mirrors and Windows: American Photography Since 1960Tenneson, Joyce, IlluminationsTenneson, Joyce, Light WarriorsThoreau, Henry David, In Wildness is the Preservation of the WorldTress, Arthur, Arthur TressTress, Arthur, TalismanUelsmann, Jerry, Jerry N. UelsmannUelsmann, Jerry, Photo SynthesisUelsmann, Jerry, Process and PerceptionUzzle, Burk, Landscapes/PhotographsUzzle, Burk, All AmericanWegman, William, William WegmanWeston, Brett, Voyage of the EyeWeston, Edward, Edward Weston: Fifty YearsWeston, Edward, Forms of PassionWhite, Minor, Rites and PassagesWilson, Laura, Avedon at Work in the American WestWinogrand, Garry, Winogrand: Figments from the Real WorldWitkin, Joel-Peter, Gods of Earth and Heaven