phleb final screen ready
TRANSCRIPT

7/26/2019 Phleb Final Screen Ready
http://slidepdf.com/reader/full/phleb-final-screen-ready 1/127
WHO guidelines on drawing blood:
best practices in phlebotomy
7/26/2019 Phleb Final Screen Ready
http://slidepdf.com/reader/full/phleb-final-screen-ready 2/127
WHO guidelines
on drawing blood:
best practices in
phlebotomy

7/26/2019 Phleb Final Screen Ready
http://slidepdf.com/reader/full/phleb-final-screen-ready 3/127
WHO Library Cataloguing-in-Publication Data
WHO guidelines on drawing blood: best practices in phlebotomy.
1.Bloodletting – standards. 2.Phlebotomy – standards. 3.Needlestick injuries – prevention andcontrol. 4.Guidelines. I.World Health Organization.
ISBN 978 92 4 159922 1 (NLM classication: WB 381)
© World Health Organization 2010
All rights reserved. Publications of the World Health Organization can be obtained from WHOPress, World Health Organization, 20 Avenue Appia, 1211 Geneva 27, Switzerland(tel.: +41 22 791 3264; fax: +41 22 791 4857; e-mail: [email protected]). Requests forpermission to reproduce or translate WHO publications – whether for sale or for noncommercialdistribution – should be addressed to WHO Press, at the above address (fax: +41 22 791 4806;e-mail: [email protected]).
The designations employed and the presentation of the material in this publication do not
imply the expression of any opinion whatsoever on the part of the World Health Organizationconcerning the legal status of any country, territory, city or area or of its authorities, orconcerning the delimitation of its frontiers or boundaries. Dotted lines on maps representapproximate border lines for which there may not yet be full agreement.
The mention of specic companies or of certain manufacturers’ products does not imply thatthey are endorsed or recommended by the World Health Organization in preference to othersof a similar nature that are not mentioned. Errors and omissions excepted, the names ofproprietary products are distinguished by initial capital letters.
All reasonable precautions have been taken by the World Health Organization to verifythe information contained in this publication. However, the published material is being
distributed without warranty of any kind, either expressed or implied. The responsibility for theinterpretation and use of the material lies with the reader. In no event shall the World HealthOrganization be liable for damages arising from its use.
Printed by the WHO Document Production Services, Geneva, Switzerland

7/26/2019 Phleb Final Screen Ready
http://slidepdf.com/reader/full/phleb-final-screen-ready 4/127 iii
Contents
Acknowledgements .........................................................................................................................vii
Acronyms .........................................................................................................................................xi
Execuve summary ........................................................................................................................xiii
PART I BACKGROUND ...................................................................................................................... 1
1 Introducon .............................................................................................................................. 3
1.1 Overview ..................................................................................................................................... 3
1.1.1 Issues in phlebotomy ....................................................................................................... 3
1.1.2 The need for guidelines ................................................................................................... 4
1.1.3 Denions ........................................................................................................................ 4
1.2 Purpose and scope ...................................................................................................................... 5
1.3 Objecves .................................................................................................................................... 5
1.4 Target audience ........................................................................................................................... 5
1.5 Indicaons for blood sampling and blood collecon ................................................................... 5
1.6 Structure of document ................................................................................................................ 6
PART II ASPECTS OF PHLEBOTOMY .................................................................................................. 7
2 Best pracces in phlebotomy ...................................................................................................... 9
2.1 Background informaon on best pracces in phlebotomy ......................................................... 9
2.1.1 Planning ahead ................................................................................................................ 9
2.1.2 Using an appropriate locaon .......................................................................................... 9
2.1.3 Quality control ................................................................................................................. 9
2.1.4 Quality care for paents and health workers ................................................................. 10
2.1.5 Quality of laboratory sampling ...................................................................................... 11
2.2 Praccal guidance on best pracces in phlebotomy .................................................................12
2.2.1 Provision of an appropriate locaon .............................................................................. 12
2.2.2 Provision of clear instrucons ........................................................................................ 12
2.2.3 Procedure for drawing blood ......................................................................................... 122.3 Illustraons for best pracces in phlebotomy ...........................................................................18
3 Blood-sampling systems ............................................................................................................21
3.1 Background informaon on blood-sampling systems ...............................................................21
3.1.1 Closed systems ............................................................................................................... 21
3.1.2 Open systems ................................................................................................................. 22
3.2 Praccal guidance on blood-sampling systems .........................................................................22
3.2.1 Needle and syringe ........................................................................................................ 22
3.2.2 Choice of gauge ............................................................................................................. 22
3.3 Illustraons for blood-sampling systems ................................................................................... 23
4 Venepuncture for blood donaon .............................................................................................25
4.1 Background informaon on venepuncture for blood donaon ................................................ 254.1.1 Minimum requirements for venepuncture for blood donaon ....................................25
4.1.2 Before a blood donaon ................................................................................................ 26
4.2 Praccal guidance on venepuncture for blood donaon ..........................................................27
4.2.1 Collecng blood ............................................................................................................. 27
4.2.2 Aer a blood donaon ................................................................................................... 28
4.2.3 Adverse events in blood donaon ................................................................................. 29
5 Arterial blood sampling .............................................................................................................31
5.1 Background informaon on arterial blood sampling ................................................................31
5.1.1 Choice of site.................................................................................................................. 31
5.1.2 Complicaons related to arterial blood sampling .......................................................... 31
5.1.3 Sampling errors .............................................................................................................. 325.2 Praccal guidance on arterial blood sampling ...........................................................................32
5.2.1 Equipment and supplies ................................................................................................. 32
5.2.2 Procedure for arterial blood sampling using radial artery ............................................ 32
5.3 Illustraons for arterial blood sampling .................................................................................... 33

7/26/2019 Phleb Final Screen Ready
http://slidepdf.com/reader/full/phleb-final-screen-ready 5/127iv WHO guidelines on drawing blood: best practices in phlebotomy
6 Paediatric and neonatal blood sampling .....................................................................................35
6.1 Background informaon on paediatric and neonatal blood sampling ...................................... 35
6.1.1 Choice of procedure and site ........................................................................................ 35
6.2 Praccal guidance on paediatric and neonatal blood sampling ................................................ 35
6.2.1 Paent idencaon ..................................................................................................... 35
6.2.2 Venepuncture ................................................................................................................ 36
6.2.3 Finger and heel-prick .................................................................................................... 37
6.3 Illustraons for paediatric and neonatal blood sampling ..........................................................37
7 Capillary sampling ......................................................................................................................41
7.1 Background informaon on capillary sampling ......................................................................... 41
7.1.1 Choice of site ................................................................................................................. 41
7.1.2 Selecng the length of lancet ........................................................................................ 42
7.1.3 Order of draw ................................................................................................................. 42
7.1.4 Complicaons ................................................................................................................ 42
7.2 Praccal guidance on capillary sampling ................................................................................... 43
7.2.1 Selecon of site and lancet ............................................................................................ 43
7.2.2 Procedure for capillary sampling ................................................................................... 43
7.3 Illustraons for capillary sampling ............................................................................................. 45
PART III IMPLEMENTATION, EVALUATION AND MONITORING .........................................................47
8 Implemenng best phlebotomy pracces...................................................................................49
8.1 Seng policies and standard operang procedures .................................................................49
8.2 Procurement .............................................................................................................................. 49
8.2.1 Blood-sampling equipment ............................................................................................ 50
8.2.2 Protecon ...................................................................................................................... 50
8.3 Phlebotomy training .................................................................................................................. 51
8.4 Safe waste and sharps disposal ................................................................................................. 51
8.5 Prevenon and management of incidents and adverse events ................................................. 52
8.5.1 Paent related ............................................................................................................... 52
8.5.2 Health-worker related .................................................................................................... 53
8.5.3 Risk assessment and risk reducon strategies ............................................................... 54
9 Monitoring and evaluaon .........................................................................................................55
PART IV REFERENCES .....................................................................................................................57
PART V ANNEXES ...........................................................................................................................63
Annex A: Methods and evidence base ...........................................................................................65
Annex B: Infecon prevenon and control, safety equipment and best pracce ............................69
Annex C: Devices available for drawing blood ...............................................................................71
Annex D: Managing occupaonal exposure to hepas B, hepas C and HIV ..............................73
Annex E: Training course content for phlebotomists .....................................................................77Annex F: Explaining the procedure to a paent .............................................................................79
Annex G: Disassembly of needle from syringe or other devices .....................................................81
Annex H: Blood spillage ................................................................................................................83
Annex I: Modied Allen test ........................................................................................................85
Annex J: Cochrane review ............................................................................................................87
Annex references ..........................................................................................................................103
Glossary .......................................................................................................................................105

7/26/2019 Phleb Final Screen Ready
http://slidepdf.com/reader/full/phleb-final-screen-ready 6/127 v
Tables
Table 2.1 Elements of quality assurance in phlebotomy ................................................................... 10
Table 2.2 Infecon prevenon and control pracces ........................................................................ 12
Table 2.3 Recommended order of draw for plasc vacuum tubes .................................................... 16
Table 3.1 Recommended needle gauge, length and device for roune injecon and
phlebotomy procedures for dierent age groups .............................................................. 22
Table 4.1 Adverse events in blood donaon ..................................................................................... 29
Table 7.1 Condions inuencing the choice of heel or nger-prick .................................................. 41
Table 8.1 Summary of risks and risk-reducon strategies ................................................................. 54
Table B.1 Recommendaons for infecon prevenon and control, safety equipment
and best pracce ................................................................................................................ 69
Table C.1 Devices for drawing blood .................................................................................................. 71
Table D.1 Recommendaons for HBV post-exposure prophylaxis, according to immune status ......74
Table D.2 Recommended two and three-drug post-exposure prophylaxis regimens ........................ 75

7/26/2019 Phleb Final Screen Ready
http://slidepdf.com/reader/full/phleb-final-screen-ready 7/127

7/26/2019 Phleb Final Screen Ready
http://slidepdf.com/reader/full/phleb-final-screen-ready 8/127 Acknowledgements vii
Acknowledgements
The World Health Organization (WHO) Injection Safety and Related Infection Controlprogramme and the Safe Injection Global Network (SIGN) Secretariat in the WHO Department
of Essential Health Technologies (EHT) wish to express their thanks to the people listed belowfor their contribution to the development of these phlebotomy guidelines. The authors andreviewers are experts in the eld of injection safety and related infection control. Particularthanks go to Shaheen Mehtar of Stellenbosch University, South Africa, who prepared background documents for the consultation, and wrote the initial and nal drafts.
Development of this publication was supported by Cooperative Agreement CDC-RFA-CI09-903from:
• the Department of Health and Human Services/Centers for Disease Control and Prevention(CDC), Atlanta, United States of America (USA);
• the National Center for HIV, Viral Hepatitis, STD, and TB Prevention, Global AIDS
Program (GAP).
Technical authors and main reviewers
Internal authors and reviewers (WHO)
Dr Neelam DhingraCoordinatorBlood Transfusion Safety (BTS) WHO Headquarters (WHO/HQ), Health Systems and Services, Department of Essential Health
Technologies (HSS/EHT)
Dr Micheline Diepart Antiretroviral Treatment and HIV Care WHO/HQ, Department of HIV/AIDS (WHO/HQ/HTM/HIV)
Dr Gerald DziekanProgram Manager WHO Patient Safety Program (PSP) WHO/HQ, Department of Information, Evidence and Research (IER)
Dr Selma Khamassi, MD, MSc
Injection Safety and Related Infection Control SIGN Secretariat WHO/HQ/HSS/EHT/Diagnostic Imaging and Medical Devices (DIM)
Dr Fernando Otaiza, MD, MSc, Infection Prevention and Control in Health CareBiorisk Reduction for Dangerous Pathogens WHO Department of Epidemic and Pandemic Alert and Response
Mrs Susan Wilburn WHO, Department of Occupational and Environmental Health (OEH)

7/26/2019 Phleb Final Screen Ready
http://slidepdf.com/reader/full/phleb-final-screen-ready 9/127viii WHO guidelines on drawing blood: best practices in phlebotomy
External authors and reviewers
Dr Rana Al-Abdulrazzak Head of Donation Department & Hospital Liaison DepartmentKuwait Central Blood BankKuwait
Ms Patricia K BertscheManager, Global Occupational Health Services Abbott LaboratoriesUSA
Dr Nizam DamaniInternational Federation of Infection Control Northern Ireland
Dr Che-Kit LinHospital Chief ExecutiveHong Kong Red Cross Blood Transfusion Service
Hong Kong
Dr Lawrence MarumTeam Leader Medical TransmissionGlobal AIDS Program, HIV Prevention BranchCDC, Atlanta, USA
Professor Shaheen MehtarHead of Academic Unit for Infection Prevention and ControlTygerberg Hospital and Stellenbosch University, Cape TownSouth Africa
Dr Joseph Perz Acting Team Leader, Research and Field Investigations Epidemiology and Surveillance BranchDivision of Healthcare Quality Promotion (DHQP) CDC, Atlanta, USA
Dr Ruby PieterszManager of Department of Research and Education Plesmanlaan 125, 1066 CX AmsterdamThe Netherlands
Dr Christie ReedHIV Prevention BranchGlobal AIDS ProgramCDC, Atlanta, USA
Dr Dejana SelenicHIV Prevention BranchGlobal AIDS ProgramCDC, Atlanta, USA
Dr Steven WiersmaDivision of Viral Hepatitis
CDC, Atlanta, USA

7/26/2019 Phleb Final Screen Ready
http://slidepdf.com/reader/full/phleb-final-screen-ready 10/127 Acknowledgements ix
Experts who contributed to the development of the recommendaon
on skin disinfecon before blood collecon for transfusion purposes
Dr Michael Bell Associate Director for Infection Control, Division of Healthcare Quality Promotion, NCPDCID CDC, Atlanta, USA
Dr Barry CooksonDirector, Laboratory of HealthCare Associated Infection,Centre for Infections, Health Protection Agency, London, United Kingdom (UK)
Dr Peter HoffmanConsultant Clinical Scientist, Central Public Health LaboratoryLaboratory of HealthCare Associated Infection,Centre for Infections, Health Protection Agency, London, UK
Dr Carl McDonaldHead of Bacteriology, National Bacteriology Laboratory
National Health Service Blood and Transplant, London, UK
Dr Ziad MemishDirector, Gulf Cooperation Council States Center for Infection ControlHead, Adult Infectious Diseases SectionDept of Medicine and Infection Prevention and Control ProgramNational Guard Health AffairsKing Fahad National Guard Hospital, Saudi Arabia
Adjunct Professor Department of MedicineDivision of Infectious Diseases, University of Ottawa, Canada
Dr Shirley Paton MN, RNSenior Advisor, Health Care Associated InfectionsCentre for Communicable Diseases and Infection ControlPublic Health Agency of Canada
Peer review
Dr Michael BorgChair, International Federation of Infection Control Infection Control UnitMater Dei HospitalMsida MSD2090Malta
Dr Mary Catlin BSN, BA, MPH4210 Midvale Ave N.Seattle, WA 98103
Editorial work
Dr Hilary CadmanEditor in the Life Sciences (Board of Editors in the Life Sciences, USA), Biotext, Canberra, Australia
The EHT Department of WHO developed this document and Dr Selma Khamassi coordinatedthe work.

7/26/2019 Phleb Final Screen Ready
http://slidepdf.com/reader/full/phleb-final-screen-ready 11/127 x WHO guidelines on drawing blood: best practices in phlebotomy
Declaraon of interests
Conict of interest statements were collected from all contributors to the guideline development,the consultant contracted to undertake background reviews and the peer reviewers of the naldocument. No conict of interest was declared by any of those listed above.

7/26/2019 Phleb Final Screen Ready
http://slidepdf.com/reader/full/phleb-final-screen-ready 12/127 Acronyms xi
Acronyms
CDC Centers for Disease Control and Prevention, Atlanta, USA
EHT Department of Essential Health Technologies (WHO)
HBV hepatitis B virus
HCV hepatitis C virus
HIV human immunodeciency virus
HSS Health Systems and Services (WHO)
PEP post-exposure prophylaxis
SIGN Safe Injection Global Network
WHO World Health Organization

7/26/2019 Phleb Final Screen Ready
http://slidepdf.com/reader/full/phleb-final-screen-ready 13/127

7/26/2019 Phleb Final Screen Ready
http://slidepdf.com/reader/full/phleb-final-screen-ready 14/127Executive summary xiii
Execuve summary
Phlebotomy – the drawing of blood – has been practised for centuries and is still one of the mostcommon invasive procedures in health care. Each step in the process of phlebotomy affects thequality of the specimen and is thus important for preventing laboratory error, patient injury andeven death. For example, the touch of a nger to verify the location of a vein before insertion of
the needle increases the chance that a specimen will be contaminated. This can cause false bloodculture results, prolong hospitalization, delay diagnosis and cause unnecessary use of antibiotics.Jostling and jarring of test tubes in transit can lyse or break open red blood cells, causing falselaboratory results. Clerical errors in completing forms and identifying patients are common,costly and preventable. Other adverse effects for patients are common; they include bruisingat the site of puncture, fainting, nerve damage and haematomas. These guidelines outline thesimple but important steps that can make phlebotomy safer for patients.
Phlebotomy also poses risks for health workers. It is still common to see a phlebotomist carryout dangerous practices known to increase the risk of needle-stick injury and transmission ofdisease. Dangerous practices include:
• recapping used needles using two hands;• recapping and disassembling vacuum-containing tubes and holders;
• reusing tourniquets and vacuum-tube holders that may be contaminated with bacteria andsometimes blood;
• working alone with confused or disoriented patients who may move unexpectedly,contributing to needle-sticks.
Phlebotomy involves the use of large, hollow needles that have been in a blood vessel. Theneedles can carry a large volume of blood that, in the event of an accidental puncture, may be more likely to transmit disease than other sharps. Bloodborne organisms that have beentransmitted after needle-sticks include viruses such as hepatitis B and human immunodeciency
virus (HIV), bacteria such as syphilis and parasites such as malaria.
Producing the guidelines
These guidelines were produced to improve the quality of blood specimens and the safety ofphlebotomy for health workers and patients, by promoting best practices in phlebotomy.
In April 2008, the WHO Injection Safety programme – part of the Department of EssentialHealth Technologies (EHT) at WHO Headquarters in Geneva – convened a consultation on bestpractices for phlebotomy and blood collection. The consultation included special categories, suchas arterial blood sampling, capillary blood sampling and paediatric blood collection. A working
group of international experts and colleagues from WHO departments identied the need forphlebotomy guidelines, and this document was produced in response.
This document provides guidance on the steps recommended for safe phlebotomy, and reiteratesthe accepted principles for drawing and collecting blood. The guidelines are based on a literaturereview that focused on identifying systematic literature reviews and evidence relating specicallyto phlebotomy practices in developing countries. Draft guidelines and evidence were reviewed byan expert panel, who reached consensus on the recommendations.

7/26/2019 Phleb Final Screen Ready
http://slidepdf.com/reader/full/phleb-final-screen-ready 15/127 xiv WHO guidelines on drawing blood: best practices in phlebotomy
Protecng paents
To reduce the risk of adverse effects for patients, health workers undertaking phlebotomy needto be trained in procedures specic to the types of specimen they collect. Such procedures mayinclude arterial sampling, capillary sampling, blood culture collection and venous blood draws.Health workers who collect specimens from children and infants will need special training andpractice for these procedures. Phlebotomists working in settings with more technology may betrained in techniques for plasma and red cell exchange, photophoresis, stem cell collection andcord blood collection. Health workers may need to collect specimens from in-dwelling centrallines or arterial lines. Training should include techniques that ensure that the specimen collected will be adequate, and measures that reduce the risk of contamination, clerical error, infectionand injury.
When taking blood, health workers should wear well-tting, non-sterile gloves, and should alsocarry out hand hygiene before and after each patient procedure, before putting on gloves andafter removing them. The blood should be taken in a dedicated location that ensures patientcomfort and privacy. To remove the risk of environmental contamination with pathogens,counter and work surfaces, and chair arms should be cleaned with disinfectant at the startof each shift and when visibly dirty. To prevent infections and other adverse events, health workers should follow the guidelines on patient identication, hand hygiene, use of gloves, skindisinfection, use of appropriate blood-sampling devices and safe transportation of laboratorysamples.
Patient consent and cooperation are important components of respecting patient rights. Apatient information leaet or poster that explains the procedure in simple terms is helpful.
Protecng health workers
Best practices in phlebotomy protect health workers as well as patients. One way to reduce
accidental injury and blood exposure among health workers is to use safety (i.e. engineered)devices such as retractable lancets, syringes with needle covers or retractable needles and, whenappropriate, plastic laboratory tubes. Another approach is to eliminate two-handed needlerecapping and manual device disassembly, and instead dispose of the sharps into a puncture-resistant sharps container (i.e. a safety container) immediately after use. The best practice isto discard the needle and syringe, or needle and tube holder, as a single unit, into a sharpscontainer that is clearly visible and within arm’s reach. The size of the container should permitdisposal of the entire device rather than just the needle.
Institutions should conduct surveillance on sharps injuries and accidental exposure to blood, sothat preventable factors can be identied. Support services should also be available for health workers accidentally exposed to blood. These should include immunization with hepatitis B
before assuming duties that include potential exposure to blood and body uids, and post-exposure prophylaxis for HIV and hepatitis B. All health-care facilities should display clearinstructions for procedures to follow in case of accidental exposure to blood and body uids.
These guidelines also outline the responsibilities of managerial staff, including provision of:
• gloves in multiple sizes, single-use disposable needles, and syringes or lancing devices insufcient numbers to ensure that each patient has a sterile needle and collection device orequivalent for each blood sampling;
• sufcient laboratory sample tubes to prevent reuse and manual washing.

7/26/2019 Phleb Final Screen Ready
http://slidepdf.com/reader/full/phleb-final-screen-ready 16/127Executive summary xv
Best pracce in disinfecon
After reviewing the evidence on best practice in phlebotomy, the expert panel found that furtherevidence was needed on the best method for skin preparation before blood collection for thepurpose of blood transfusion. The panel commissioned a systematic review from the Cochranegroup to investigate the literature on whether “alcohol alone” or “any skin disinfectant followed by alcohol for skin preparation” is more effective in reducing the risk of blood contamination or bacteraemia.
The Cochrane group found that no research had been conducted to compare these two methods,and commented that, until better evidences emerges, decisions would probably need to be basedon convenience and cost.
In line with WHO guidelines for the development of recommendations, additional infectioncontrol experts were consulted. Based on expert opinion, including considerations ofconvenience and cost, these guidelines recommend a one-step procedure for skin preparation.Health workers should clean the skin with a combination of 2% chlorhexidine gluconate in 70%isopropyl alcohol, covering the whole area and ensuring that the skin area is in contact with thedisinfectant for at least 30 seconds; they should then should allow the area to dry completely(about 30 seconds).
Implemenng and revising the guidelines
In some countries, these guidelines will be adapted to meet local needs, although key stepsand recommendations will be maintained. The WHO Injection Safety programme can alsoprovide technical support for adapting and implementing the guidelines at regional andcountry levels, if requested. The feasibility of recommended practices and the impact of theguideline on phlebotomy practices will be evaluated by the WHO Injection Safety programme, incollaboration with WHO Regional Ofces. The recommendations in this document are expected
to remain valid until 2014, when they will be reviewed.

7/26/2019 Phleb Final Screen Ready
http://slidepdf.com/reader/full/phleb-final-screen-ready 17/127

7/26/2019 Phleb Final Screen Ready
http://slidepdf.com/reader/full/phleb-final-screen-ready 18/127
PART I BACKGROUND

7/26/2019 Phleb Final Screen Ready
http://slidepdf.com/reader/full/phleb-final-screen-ready 19/127
7/26/2019 Phleb Final Screen Ready
http://slidepdf.com/reader/full/phleb-final-screen-ready 20/1271 Introduction 3
1 Introducon
1.1 Overview
Phlebotomy – the drawing of blood – has been practiced for centuries and is still one of the
most common invasive procedures in health care (1). However, practice varies considerably between countries, and between institutions and individuals within the same country (2). Thesedifferences include variations in blood-sampling technique, training (both formal and “on-the- job”), use of safety devices, disposal methods, reuse of devices and availability of hepatitis B vaccine.
The methods and the evidence base used to develop this document are given in Annex A.
1.1.1 Issues in phlebotomy
By its nature, phlebotomy has the potential to expose health workers and patients to blood
from other people, putting them at risk from bloodborne pathogens. These pathogens includehuman immunodeciency virus (HIV), hepatitis B virus (HBV), hepatitis C virus (HCV), andthose causing viral haemorrhagic fevers (Crimean Congo haemorrhagic fever, Ebola, Lassa andMarburg) and dengue ( 3). For example, outbreaks of hepatitis B have been reported with the useof glucometers (devices used to determine blood glucose concentration) (4, 5 ). Diseases such asmalaria and syphilis may also be transmitted via contaminated blood (6, 7 ), and poor infection-control practices may lead to bacterial infection where the needle is inserted and contaminationof specimens.
If a blood sample is poorly collected, the results may be inaccurate and misleading to theclinician, and the patient may have to undergo the inconvenience of repeat testing. The threemajor issues resulting from errors in collection are haemolysis, contamination and inaccurate
labelling.
Factors that increase the risk of haemolysis include:
• use of a needle of too small a gauge (23 or under), or too large a gauge for the vessel;
• pressing the syringe plunger to force the blood into a tube, thus increasing the shear forceon the red blood cells;
• drawing blood specimens from an intravenous or central line;
• underlling a tube so that the ratio of anticoagulant to blood is greater than 1:9;
• reusing tubes that have been relled by hand with inappropriate amounts of anticoagulants;
• mixing a tube too vigorously;• failing to let alcohol or disinfectant dry;
• using too great a vacuum; for example, using too large a tube for a paediatric patient, orusing too large a syringe (10–20 ml).
Serious adverse events linked with phlebotomy are rare, but may include loss of consciousness with tonic clonic seizures. Less severe events include pain at the site of venepuncture, anxietyand fainting. The best documented adverse events are in blood transfusion services, wherepoor venepuncture practice or anatomical abnormality has resulted in bruising, haematomaand injury to anatomical structures in the vicinity of the needle entry. For example, one studyreported bruising and haematoma at the venepuncture site in 12.3% of blood donors (8). Nerve
injury and damage to adjacent anatomical structures occurred infrequently, and syncopeoccurred in less than 1% of individuals (8). Vasovagal attacks occurred occasionally, varyingfrom mild to severe; fainting was reported in 5.3% of cases and usually occurred in rst-timefemale blood donors (8-11).

7/26/2019 Phleb Final Screen Ready
http://slidepdf.com/reader/full/phleb-final-screen-ready 21/1274 WHO guidelines on drawing blood: best practices in phlebotomy
Injuries from sharps (i.e. items such as needles that have corners, edges or projections capable ofcutting or piercing the skin) commonly occur between the use and disposal of a needle or similardevice (12, 13). One way to reduce accidental injury and blood exposure among health workersis to replace devices with safety (i.e. engineered) devices (14–16). Safety devices can avoid up to75% of percutaneous injuries (17 ); however, if they are disassembled or manually recapped, orif the needle safety feature is not activated, exposure to blood becomes more likely. Eliminatingneedle recapping and instead immediately disposing of the sharp into a puncture-resistant
sharps container (i.e. a safety container) markedly reduces needle-stick injuries (18, 19).
Reporting of accidental exposure to blood and body uids is more frequent from well-established health-care systems; however, it is thought that the incidence of such exposures isactually higher in systems that are not so well equipped (20, 21).
Home-based care is a growing component of health delivery, and current global trends suggestthat home-based phlebotomy will become increasingly common. In this situation, strongerprotection of community-based health workers and the community will be needed. This can be achieved by improving sharps disposal, and by using safety needles with needle covers orretractable needles to minimize the risk of exposure to needles (22) and lancets.
1.1.2 The need for guidelines
Phlebotomy services are available worldwide in a range of health-care facilities (e.g. hospitals,outpatient facilities and clinics), and are usually performed by both medical and nonmedicalpersonnel. Laboratory staff or members of phlebotomy teams appear to achieve lower rates ofcontamination than staff who have broader responsibilities, even if both have the same training(23). For example, for obtaining a blood sample for routine genetic screening of babies, the useof capillary heel-pricks by a trained phlebotomist was found to be the most successful and pain-free blood-sampling procedure (capillary sampling is undertaken for rapid tests that requiresmall quantities of blood) (24).
Phlebotomy practice varies among health-care personnel, even though perceptions of risk aresimilar and there are guidelines for such practice (20, 25 ). To help standardize practice, severalcountries have established formal training that phlebotomists must undertake before they canpractice clinically, but physicians can often practice phlebotomy without formal training (26).
During phlebotomy procedures, the greatest concern is the safety of health workers and patients;therefore, guidance for staff on best practice is critical (27, 28). Training on, and adherence to,the guidance presented here should substantially reduce the risks to both patients and staff, and will improve blood collection for laboratory tests and from blood donors.
1.1.3 Denions
For the purposes of this document, the term “phlebotomy” covers the terms:
• blood sampling for purposes of laboratory tests;
• blood collection for donation.

7/26/2019 Phleb Final Screen Ready
http://slidepdf.com/reader/full/phleb-final-screen-ready 22/1271 Introduction 5
1.2 Purpose and scope
The aim of these guidelines is to summarize best practices in phlebotomy, to improve outcomesfor health workers and patients.
These guidelines recommend best practices for all levels of health care where phlebotomy ispractised. They extend the scope of the existing guidelines from the World Health Organization
(WHO) and the Safe Injection Global Network (SIGN), which is a WHO-hosted network. Theseexisting guidelines are:
• WHO Aide-memoire for a national strategy for the safe and appropriate use of injection(29);
• Best infection control practices for intradermal, subcutaneous, and intramuscular needleinjections ( 30).
This document also discusses best practices for venous and arterial blood sampling, and bloodcollection for transfusion for adult and paediatric populations. The document does not discusscollection from in-dwelling central lines, arterial lines or cord blood; also, it does not cover stemcell collection.
1.3 Objecves
The objectives of these guidelines are to:
• improve knowledge and awareness of the risks associated with phlebotomy among allhealth workers involved in the practice;
• increase safe practices and reduce bloodborne virus exposure and transmission;
• improve patient condence and comfort;
• improve the quality of laboratory tests.
1.4 Target audience
This document is aimed at:
• people who perform or supervise phlebotomy in the private and public sectors, in hospitals,community clinics and other health-care facilities, including those involved in home-basedcare;
• health trainers and educators;
• procurement ofcials (who need to be aware of which equipment and supplies are safe and
cost effective).
1.5 Indicaons for blood sampling and blood collecon
The most common use of blood sampling is for laboratory tests for clinical management andhealth assessment. Categories that require specialist training include:
• arterial blood gases for patients on mechanical ventilation, to monitor blood oxygenation;
• neonatal and paediatric blood sampling
– heel-prick (i.e. capillary sampling);
– scalp veins in paediatrics;

7/26/2019 Phleb Final Screen Ready
http://slidepdf.com/reader/full/phleb-final-screen-ready 23/1276 WHO guidelines on drawing blood: best practices in phlebotomy
• capillary sampling (i.e. nger or heel-pricks or, rarely, an ear lobe puncture) for analysis ofcapillary blood specimens for all ages; examples include testing of iron levels before blooddonation, blood glucose monitoring, and rapid tests for HIV, malaria and syphilis.
Blood collection is used to obtain blood from donors for various therapeutic purposes.
1.6 Structure of documentThis document is divided into ve parts:
• Part I introduces the topic and the document.
• Part II covers different aspects of phlebotomy. Each chapter in this part is divided intosections that give background information, practical guidance and illustrations (whereapplicable). Part 2 includes
– the steps recommended for safe phlebotomy, including accepted principles for drawingand collecting blood (Chapter 2);
– the various open and closed systems available for phlebotomy (Chapter 3);
– collection of blood for transfusion (Chapter 4);
– collection of arterial blood, for determination of blood gases (Chapter 5);
– aspects of blood sampling specic to paediatric and neonatal patients (Chapter 6);
– capillary sampling (Chapter 7)
• Part III deals with implementation, monitoring and evaluation; it covers
– ways to implement best practices in phlebotomy (Chapter 8);
– use of a monitoring and evaluation system to document improvements in phlebotomypractice (Chapter 9).
• Part IV lists the references.• Part V contains a set of annexes that provide additional information on specic topics; it
also includes a glossary.

7/26/2019 Phleb Final Screen Ready
http://slidepdf.com/reader/full/phleb-final-screen-ready 24/127
PART II ASPECTS
OF PHLEBOTOMY

7/26/2019 Phleb Final Screen Ready
http://slidepdf.com/reader/full/phleb-final-screen-ready 25/127

7/26/2019 Phleb Final Screen Ready
http://slidepdf.com/reader/full/phleb-final-screen-ready 26/1272 Best practices in phlebotomy 9
2 Best pracces in phlebotomy
This chapter covers all the steps recommended for safe phlebotomy and reiterates the acceptedprinciples for blood drawing and blood collection ( 31). The chapter includes backgroundinformation (Section 2.1), practical guidance (Section 2.2) and illustrations (Section 2.3)relevant to best practices in phlebotomy.
The information given in this section underpins that given in the remainder of Part II for specicsituations. Chapter 4 also provides information relevant to the procedure for drawing bloodgiven below in Section 2.2, but focuses on blood collection from donors.
Institutions can use these guidelines to establish standard operating procedures. Suchprocedures should clearly state the risks to patients and health workers, as well as the means toreduce those risks – discussed below in Sections 2.1.4 and 2.2.
2.1 Background informaon on best pracces in phlebotomy
Best practices in phlebotomy involve the following factors:
• planning ahead;
• using an appropriate location;
• quality control;
• standards for quality care for patients and health workers, including
– availability of appropriate supplies and protective equipment;
– availability of post-exposure prophylaxis (PEP);
– avoidance of contaminated phlebotomy equipment;
– appropriate training in phlebotomy;
– cooperation on the part of patients;
• quality of laboratory sampling.
2.1.1 Planning ahead
This is the most important part of carrying out any procedure, and is usually done at the start ofa phlebotomy session.
2.1.2 Using an appropriate locaon
The phlebotomist should work in a quiet, clean, well-lit area, whether working with outpatientsor inpatients.
2.1.3 Quality control
Quality assurance is an essential part of best practice in infection prevention and control (1). Inphlebotomy, it helps to minimize the chance of a mishap. Table 2.1 lists the main components ofquality assurance, and explains why they are important.

7/26/2019 Phleb Final Screen Ready
http://slidepdf.com/reader/full/phleb-final-screen-ready 27/12710 WHO guidelines on drawing blood: best practices in phlebotomy
Table 2.1 Elements of quality assurance in phlebotomy
Element Notes
Education and training Education and training is necessary for all staff carrying out phlebotomy. It shouldinclude an understanding of anatomy, awareness of the risks from blood exposure,and the consequences of poor infection prevention and control.
Standard operatingprocedures (SOPs)
SOPs are required for each step or procedure. They should be written and bereadily available to health workers.
Correct identication ofthe patient
Identication should be through matching to the laboratory request form.
• For blood donation, the identity of the donor should be accurately matched tothe results of screening tests.
• For blood sampling, after samples have been taken from a patient or donor, asystem of identication and tracking is essential to ensure that the sample iscorrectly matched with the result and with the patient or donor.
The condition of thesample
The condition of the sample should be such that the quality of the results issatisfactory.
Safe transportation Making safe transportation of blood or blood products part of best practices willimprove the quality of results from laboratory testing (32).
An incident reportingsystem
A system is required for reporting all adverse events. A log book or registershould be established with accurate details of the incident, possible causes andmanagement of adverse events (27 ).
2.1.4 Quality care for paents and health workers
Several factors can improve safety standards and quality of care for both patients and health workers, and laboratory tests. These factors, discussed below, include:
Availability of appropriate supplies and protecve equipment
Procurement of supplies is the direct responsibility of the administrative (management)structures responsible for setting up phlebotomy services. Management should:
• provide hand-hygiene materials (soap and water or alcohol rub), well-tting non-sterilegloves, single-use disposable needles, and syringes or lancing devices in sufcient numbersto ensure that each patient has a sterile needle and syringe or equivalent for each bloodsampling;
• make available sufcient laboratory sample tubes to prevent dangerous practices(e.g. decanting blood to recycle laboratory tubes).
Several safety-engineered devices are available on the market; such devices reduce exposure to blood and injuries. However, the use of such devices should be accompanied by other infectionprevention and control practices, and training in their use. Not all safety devices are applicableto phlebotomy. Before selecting a safety-engineered device, users should thoroughly investigateavailable devices to determine their appropriate use, compatibility with existing phlebotomy
practices, and efcacy in protecting staff and patients (12, 33). Annex B provides furtherinformation on infection prevention and control, safety equipment and best practice; Annex Cprovides a comprehensive guide to devices available for drawing blood, including safety-engineered equipment.
For settings with low resources, cost is a driving factor in procurement of safety-engineereddevices.
Where safety-engineered devices are not available, skilled use of a needle and syringe isacceptable.

7/26/2019 Phleb Final Screen Ready
http://slidepdf.com/reader/full/phleb-final-screen-ready 28/1272 Best practices in phlebotomy 11
Availability of post-exposure prophylaxis
Accidental exposure and specic information about an incident should be recorded in a register.
Support services should be promoted for those who undergo accidental exposure. PEP can helpto avert HIV and hepatitis B infections (13, 27 ). Hepatitis B immunization should be providedto all health workers (including cleaners and waste handlers), either upon entry into health-care
services or as part of PEP ( 34). Annex D has details of PEP for hepatitis B and HIV.
Avoidance of contaminated phlebotomy equipment
Tourniquets are a potential source of methicillin-resistant Staphylococcus aureus (MRSA), with up to 25% of tourniquets contaminated through lack of hand hygiene on the part of thephlebotomist or reuse of contaminated tourniquets ( 35 ). In addition, reusable nger-prickdevices and related point-of-care testing devices (e.g. glucometers) contaminated with bloodhave been implicated in outbreaks of hepatitis B (4, 5, 36).
To avoid contamination, any common-use items, such as glucometers, should be visibly clean before use on a patient, and single-use items should not be reused.
Training in phlebotomy
All staff should be trained in phlebotomy, to prevent unnecessary risk of exposure to blood andto reduce adverse events for patients.
• Groups of health workers who historically are not formally trained in phlebotomy should beencouraged to take up such training; lax infection prevention and control practices result inpoor safety for staff and risk to patients (20, 37 ).
• The length and depth of training will depend on local conditions; however, the trainingshould at least cover the essentials (see Annex E) ( 38).
• Supervision by experienced staff and structured training is necessary for all health workers,
including physicians, who undertake blood sampling.
Paent cooperaon
One of the essential markers of quality of care in phlebotomy is the involvement and cooperationof the patient; this is mutually benecial to both the health worker and the patient.
Clear information – either written or verbal – should be available to each patient who undergoesphlebotomy. Annex F provides sample text for explaining the blood-sampling procedure to apatient.
2.1.5 Quality of laboratory samplingFactors that inuence the outcome of laboratory results during collection and transportationinclude:
• knowledge of staff involved in blood collection;
• use of the correct gauge of hypodermic needle (see Table 3.1 in Chapter 3) to preventhaemolysis or abnormal results;
• the anatomical insertion site for venepuncture;
• the use of recommended laboratory collection tubes;
• patient–sample matching (i.e. labelling);
• transportation conditions;
• interpretation of results for clinical management.

7/26/2019 Phleb Final Screen Ready
http://slidepdf.com/reader/full/phleb-final-screen-ready 29/12712 WHO guidelines on drawing blood: best practices in phlebotomy
2.2 Praccal guidance on best pracces in phlebotomy
2.2.1 Provision of an appropriate locaon
• In an outpatient department or clinic, provide a dedicated phlebotomy cubicle containing:
– a clean surface with two chairs (one for the phlebotomist and the other for the patient); – a hand wash basin with soap, running water and paper towels;
– alcohol hand rub.
• In the blood-sampling room for an outpatient department or clinic, provide a comfortablereclining couch with an arm rest.
• In inpatient areas and wards:
– at the patient’s bedside, close the bed curtain to offer privacy
– ensure that blood sampling is done in a private and clean manner.
2.2.2 Provision of clear instrucons
Ensure that the indications for blood sampling are clearly dened, either in a written protocol orin documented instructions (e.g. in a laboratory form).
2.2.3 Procedure for drawing blood
At all times, follow the strategies for infection prevention and control listed in Table 2.2.
Table 2.2 Infection prevention and control practices
Do Do not
DO carry out hand hygiene (use soap and water oralcohol rub), and wash carefully, including wrists andspaces between the ngers for at least 30 seconds(follow WHO’s ‘My 5 moments for hand hygiene’ a)
DO NOT forget to clean your hands
DO use one pair of non-sterile gloves per procedureor patient
DO NOT use the same pair of gloves for more thanone patient
DO NOT wash gloves for reuse
DO use a single-use device for blood sampling anddrawing
DO NOT use a syringe, needle or lancet for morethan one patient
DO disinfect the skin at the venepuncture site DO NOT touch the puncture site after disinfecting it
DO discard the used device (a needle and syringe
is a single unit) immediately into a robust sharpscontainer
DO NOT leave an unprotected needle lying outside
the sharps container
Where recapping of a needle is unavoidable, DO usethe one-hand scoop technique (see Annex G)
DO NOT recap a needle using both hands
DO seal the sharps container with a tamper-proof lid DO NOT overll or decant a sharps container
DO place laboratory sample tubes in a sturdy rackbefore injecting into the rubber stopper
DO NOT inject into a laboratory tube while holding itwith the other hand
DO immediately report any incident or accidentlinked to a needle or sharp injury, and seekassistance; start PEP as soon as possible, followingprotocols
DO NOT delay PEP after exposure to potentiallycontaminated material; beyond 72 hours, PEP is NOTeffective
PEP, post-exposure prophylaxis; WHO, World Health Organization.a http://www.who.int/gpsc/5may/background/5moments/en/index.html

7/26/2019 Phleb Final Screen Ready
http://slidepdf.com/reader/full/phleb-final-screen-ready 30/1272 Best practices in phlebotomy 13
Step 1 – Assemble equipment
Collect all the equipment needed for the procedure and place it within safe and easy reach on atray or trolley, ensuring that all the items are clearly visible. The equipment required includes:
• a supply of laboratory sample tubes, which should be stored dry and upright in a rack; blood can be collected in
– sterile glass or plastic tubes with rubber caps (the choice of tube will depend on what isagreed with the laboratory);
– vacuum-extraction blood tubes; or
– glass tubes with screw caps;
• a sterile glass or bleeding pack (collapsible) if large quantities of blood are to be collected;
• well-tting, non-sterile gloves;
• an assortment of blood-sampling devices (safety-engineered devices or needles andsyringes, see below), of different sizes;
• a tourniquet;
• alcohol hand rub;
• 70% alcohol swabs for skin disinfection;
• gauze or cotton-wool ball to be applied over puncture site;
• laboratory specimen labels;
• writing equipment;
• laboratory forms;
• leak-proof transportation bags and containers;
• a puncture-resistant sharps container.
Ensure that the rack containing the sample tubes is close to you, the health worker, but awayfrom the patient, to avoid it being accidentally tipped over.
Step 2 – Idenfy and prepare the paent
Where the patient is adult and conscious, follow the steps outlined below.
• Introduce yourself to the patient, and ask the patient to state their full name.
• Check that the laboratory form matches the patient’s identity (i.e. match the patient’sdetails with the laboratory form, to ensure accurate identication).
• Ask whether the patent has allergies, phobias or has ever fainted during previous injectionsor blood draws.
• If the patient is anxious or afraid, reassure the person and ask what would make them morecomfortable.
• Make the patient comfortable in a supine position (if possible).
• Place a clean paper or towel under the patient’s arm.
• Discuss the test to be performed (see Annex F) and obtain verbal consent. The patient has aright to refuse a test at any time before the blood sampling, so it is important to ensure thatthe patient has understood the procedure.
For paediatric or neonatal patients, see Chapter 6.

7/26/2019 Phleb Final Screen Ready
http://slidepdf.com/reader/full/phleb-final-screen-ready 31/12714 WHO guidelines on drawing blood: best practices in phlebotomy
Step 3 – Select the site
General
• Extend the patient’s arm and inspect the antecubital fossa or forearm.
• Locate a vein of a good size that is visible, straight and clear. The diagram in Section 2.3,shows common positions of the vessels, but many variations are possible. The mediancubital vein lies between muscles and is usually the most easy to puncture. Under the basilic vein runs an artery and a nerve, so puncturing here runs the risk of damaging the nerve orartery and is usually more painful. DO NOT insert the needle where veins are diverting, because this increases the chance of a haematoma.
• The vein should be visible without applying the tourniquet. Locating the vein will help indetermining the correct size of needle.
• Apply the tourniquet about 4–5 nger widths above the venepuncture site and re-examinethe vein.
Hospitalized paents
In hospitalized patients, do not take blood from an existing peripheral venous access site
because this may give false results. Haemolysis, contamination and presence of intravenous uidand medication can all alter the results ( 39). Nursing staff and physicians may access central venous lines for specimens following protocols. However, specimens from central lines carry arisk of contamination or erroneous laboratory test results.
It is acceptable, but not ideal, to draw blood specimens when rst introducing an in-dwelling venous device, before connecting the cannula to the intravenous uids.
Step 4 – Perform hand hygiene and put on gloves
• Perform hand hygiene; that is
– wash hands with soap and water, and dry with single-use towels; or
– if hands are not visibly contaminated, clean with alcohol rub – use 3 ml of alcohol rubon the palm of the hand, and rub it into ngertips, back of hands and all over the handsuntil dry.
• After performing hand hygiene, put on well-tting, non-sterile gloves.
Step 5 – Disinfect the entry site
• Unless drawing blood cultures, or prepping for a blood collection, clean the site with a 70%alcohol swab for 30 seconds and allow to dry completely (30 seconds) (40–42).
Note: alcohol is preferable to povidone iodine, because blood contaminated with povidone
iodine may falsely increase levels of potassium, phosphorus or uric acid in laboratory testresults (6, 7 ).
• Apply rm but gentle pressure. Start from the centre of the venepuncture site and workdownward and outwards to cover an area of 2 cm or more.
• Allow the area to dry. Failure to allow enough contact time increases the risk ofcontamination.
• DO NOT touch the cleaned site; in particular, DO NOT place a nger over the vein to guidethe shaft of the exposed needle. It the site is touched, repeat the disinfection.

7/26/2019 Phleb Final Screen Ready
http://slidepdf.com/reader/full/phleb-final-screen-ready 32/1272 Best practices in phlebotomy 15
Step 6 – Take blood
Venepuncture
Perform venepuncture as follows.
• Anchor the vein by holding the patient’s arm and placing a thumb BELOW the venepuncture site.
• Ask the patient to form a st so the veins are more prominent.
• Enter the vein swiftly at a 30 degree angle or less, and continue to introduce the needlealong the vein at the easiest angle of entry.
• Once sufcient blood has been collected, release the tourniquet BEFORE withdrawingthe needle. Some guidelines suggest removing the tourniquet as soon as blood ow isestablished, and always before it has been in place for two minutes or more.
• Withdraw the needle gently and apply gentle pressure to the site with a clean gauze ordry cotton-wool ball. Ask the patient to hold the gauze or cotton wool in place, with thearm extended and raised. Ask the patient NOT to bend the arm, because doing so causes ahaematoma.
Step 7 – Fill the laboratory sample tubes
• When obtaining multiple tubes of blood, use evacuated tubes with a needle and tubeholder. This system allows the tubes to be lled directly. If this system is not available, use asyringe or winged needle set instead.
• If a syringe or winged needle set is used, best practice is to place the tube into a rack beforelling the tube. To prevent needle-sticks, use one hand to ll the tube or use a needle shield between the needle and the hand holding the tube.
• Pierce the stopper on the tube with the needle directly above the tube using slow, steadypressure. Do not press the syringe plunger because additional pressure increases the risk ofhaemolysis.
• Where possible, keep the tubes in a rack and move the rack towards you. Inject downwardsinto the appropriate coloured stopper. DO NOT remove the stopper because it will releasethe vacuum.
• If the sample tube does not have a rubber stopper, inject extremely slowly into the tubeas minimizing the pressure and velocity used to transfer the specimen reduces the risk ofhaemolysis. DO NOT recap and remove the needle.
• Before dispatch, invert the tubes containing additives for the required number of times (asspecied by the local laboratory).
Step 8 – Draw samples in the correct order
Draw blood collection tubes in the correct order, to avoid cross-contamination of additives between tubes. As colour coding and tube additives may vary, verify recommendations with locallaboratories. For illustration purposes, Table 2.3 shows the revised, simplied recommendedorder of draw for vacuum tubes or syringe and needle, based on United States NationalCommittee Clinical Laboratory Standards consensus in 2003 (43).

7/26/2019 Phleb Final Screen Ready
http://slidepdf.com/reader/full/phleb-final-screen-ready 33/12716 WHO guidelines on drawing blood: best practices in phlebotomy
Table 2.3 Recommended order of draw for plastic vacuum tubes
Orderof usea
Type of tube/usualcolourb
Additivec Mode of action Uses
1 Blood culture bottle(yellow-black stripedtubes)
Broth mixture Preserves viability ofmicroorganisms
Microbiology –aerobes, anaerobes,fungi
2 Non-additive tube
3 Coagulation tubed
(light blue top)Sodium citrate Forms calcium salts to
remove calciumCoagulation tests(protime andprothrombin time),requires full draw
4 Clot activator (red top) Clot activator Blood clots, and theserum is separated bycentrifugation
Chemistries,immunology andserology, blood bank(cross-match)
5 Serum separator tube(red-grey tiger top orgold)
None Contains a gel at thebottom to separateblood from serum oncentrifugation
Chemistries,immunology andserology
6 Sodium heparin (darkgreen top)
Sodium heparin orlithium heparin
Inactivates thrombin andthromboplastin
For lithium level usesodium heparin, for
ammonia level useeither
7 PST (light green top) Lithium heparinanticoagulant and agel separator
Anticoagulants withlithium, separatesplasma with PST gel atbottom of tube
Chemistries
8 EDTA (purple top) EDTA Forms calcium salts toremove calcium
Haematology, BloodBank (cross-match)requires full draw
9 Blood tube (pale yellowtop)
Acid-citrate-dextrose(ACD, ACDA orACDB)
Complement inactivation HLA tissue typing,paternity testing,DNA studies
10 Oxalate/uoride
(light grey top)
Sodium uoride and
potassium oxalate
Antiglycolytic agent
preserves glucose up tove days
Glucoses, requires
full draw (may causehaemolysis if shortdraw)
ACD, acid-citrate-dextrose; DNA, deoxyribonucleic acid; EDTA, ethylenediaminetetraacetic acid; HLA, human leucocyte antigen; PST, plasma
separating tube.a “1” indicates draw rst, and “10” draw last (if used).b Verify with local laboratory in case local colour codes differ.c Gently invert tubes with additives to mix thoroughly; erroneous test results may be obtained when the blood is not thoroughly mixed with the
additive.d If a routine coagulation assay is the only test ordered, then a single light blue top tube may be drawn. If there is a concern about
contamination by tissue uids or thromboplastins, then a non-additive tube can be drawn before the additive tube. The PST tube contains
lithium heparin anticoagulant and a gel separator; if used, draw in the order shown.
Source: Table adapted with permission from WebPath, Mercer University, United States (http://library.med.utah.edu/WebPath/webpath.html).
Order is based on United States National Committee for Clinical Laboratory Standards consensus (43).

7/26/2019 Phleb Final Screen Ready
http://slidepdf.com/reader/full/phleb-final-screen-ready 34/1272 Best practices in phlebotomy 17
Step 9 – Clean contaminated surfaces and complete paent procedure
• Discard the used needle and syringe or blood sampling device into a puncture-resistantsharps container.
• Check the label and forms for accuracy. The label should be clearly written with theinformation required by the laboratory, which is typically the patient’s rst and last names,le number, date of birth, and the date and time when the blood was taken.
• Discard used items into the appropriate category of waste. Items used for phlebotomy that would not release a drop of blood if squeezed (e.g. gloves) may be discarded in the general waste, unless local regulations state otherwise.
• Perform hand hygiene again, as described above.
• Recheck the labels on the tubes and the forms before dispatch.
• Inform the patient when the procedure is over.
• Ask the patient or donor how they are feeling. Check the insertion site to verify that it is not bleeding, then thank the patient and say something reassuring and encouraging before theperson leaves.
Step 10 – Prepare samples for transportaon
• Pack laboratory samples safely in a plastic leak-proof bag with an outside compartmentfor the laboratory request form. Placing the requisition on the outside helps avoidcontamination.
• If there are multiple tubes, place them in a rack or padded holder to avoid breakage duringtransportation.
Step 11 – Clean up spills of blood or body uids
If blood spillage has occurred (e.g. because of a laboratory sample breaking in the phlebotomy
area or during transportation, or excessive bleeding during the procedure), clean it up. Anexample of a safe procedure is given below.
• Put on gloves and a gown or apron if contamination or bleaching of a uniform is likely in alarge spill.
• Mop up liquid from large spills using paper towels, and place them into the infectious waste.
• Remove as much blood as possible with wet cloths before disinfecting.
• Assess the surface to see whether it will be damaged by a bleach and water solution.
• For cement, metal and other surfaces that can tolerate a stronger bleach solution, ood thearea with an approximately 5000 parts per million (ppm) solution of sodium hypochlorite
(1:10 dilution of a 5.25% chlorine bleach to water). This is the preferred concentration forlarge spills (44). Leave the area wet for 10 minutes.
• For surfaces that may be corroded or discoloured by a strong bleach, clean carefully toremove all visible stains. Make a weaker solution and leave it in contact for a longer periodof time. For example, an approximately 525 ppm solution (1:100 dilution of 5.25% bleach)is effective.
• Prepare bleach solution fresh daily and keep it in a closed container because it degradesover time and in contact with the sun.
If a person was exposed to blood through nonintact skin, mucous membranes or a puncture wound, complete an incident report, as described in WHO best practices for injections and
related procedures toolkit . For transportation of blood samples outside a hospital, equip thetransportation vehicle with a blood spillage kit. Annex H has further information on dealing witha blood spillage.

7/26/2019 Phleb Final Screen Ready
http://slidepdf.com/reader/full/phleb-final-screen-ready 35/12718 WHO guidelines on drawing blood: best practices in phlebotomy
5. Apply a tourniquet, about 4–5 nger widths
above the selected venepuncture site.4. Select the site, preferably at the antecubital
area (i.e. the bend of the elbow). Warming the
arm with a hot pack, or hanging the hand down
may make it easier to see the veins. Palpatethe area to locate the anatomic landmarks.
DO NOT touch the site once alcohol or other
antiseptic has been applied.
2.3 Illustraons for best pracces in phlebotomy
Figure 2. 1 Venepuncture in adults
1. Assemble equipment and include needle and syringe or vacuum tube, depending on which is to be used.
2. Perform hand hygiene (if using soap and water, 3. Identify and prepare the patient. dry hands with single-use towels).
Ulnar nerve
Basilic vein
Median
cubital vein
Ulnar artery

7/26/2019 Phleb Final Screen Ready
http://slidepdf.com/reader/full/phleb-final-screen-ready 36/1272 Best practices in phlebotomy 19
6. Ask the patient to form a st
so that the veins are more
prominent.
7. Put on well-tting, non-sterile
gloves.
8. Disinfect the site using 70%
isopropyl alcohol for 30 seconds
and allow to dry completely
(30 seconds).
9. Anchor the vein by holding
the patient’s arm and
placing a thumb BELOW the
venepuncture site.
10. Enter the vein swiftly at a
30 degree angle.11. Once sufcient blood has been
collected, release the tourniquet
BEFORE withdrawing the needle.
12. Withdraw the needle gently
and then give the patient a
clean gauze or dry cotton-wool
ball to apply to the site with
gentle pressure.
13. Discard the used needle and
syringe or blood-sampling
device into a puncture-
resistant container.
14. Check the label and forms for
accuracy.
15. Discard sharps and broken
glass into the sharpscontainer. Place items that can
drip blood or body uids into
the infectious waste.
16. Remove gloves and place
them in the general waste.Perform hand hygiene. If using
soap and water, dry hands
with single-use towels.

7/26/2019 Phleb Final Screen Ready
http://slidepdf.com/reader/full/phleb-final-screen-ready 37/12720 WHO guidelines on drawing blood: best practices in phlebotomy
Figure 2. 2 Filling tubes
1. If the tube does not have a
rubber stopper, press the
plunger in slowly to reduce
haemolysis (this is safer than
removing the needle).
2. Place the stopper in the tube. 3. Following laboratory instructions,
invert the sample gently to mix
the additives with the blood
before dispatch.

7/26/2019 Phleb Final Screen Ready
http://slidepdf.com/reader/full/phleb-final-screen-ready 38/1273 Blood-sampling systems 21
3 Blood-sampling systems
Users of these guidelines should read Chapter 2 before reading the information given below.This chapter covers background information (Section 3.1), practical guidance (Section 3.2) andillustrations (Section 3.3) relevant to closed and open blood-sampling systems.
Several blood-sampling systems are available for phlebotomy. The system most appropriatefor the procedure should be chosen. Annex C provides detailed information on all the systemsavailable for drawing blood, and outlines the advantages and disadvantages of each device.
3.1 Background informaon on blood-sampling systems
3.1.1 Closed systems
Closed systems for blood sampling are preferable because they have proven to be safer than opensystems (23).
Needle and syringe
The use of a hypodermic needle and syringe is the most common means of blood sampling.
Choice of gauge
If the needle is too large for the vein for which it is intended, it will tear the vein and cause bleeding (haematoma); if the needle is too small, it will damage the blood cells during sampling,and laboratory tests that require whole blood cells, or haemoglobin and free plasma, will beinvalid.
Blood collection for transfusion requires a larger gauge than is used for blood drawing.
Vacuum extracon systems
The use of vacuum extraction tube systems as closed systems for blood collecting reduces therisk of direct exposure to blood and has made it easier to take multiple samples from a single venepuncture.
Vacuum extraction systems are widely available in most well-resourced countries. These arerecommended, but users should check their own country’s recommendations. Although vacuumextraction systems are safe, training and skill is required for their use.
Double-ended needles are available in several recommended gauge sizes. The end covered bya rubber cuff is screwed into the barrel (also known as the tube holder, evacuated tube needleholder or bulldog). A thread separates the two ends, and this is where the barrel is screwed intoplace. The barrel holds the sample collection tube in place and protects the phlebotomist fromdirect contact with blood. The sample tube is under vacuum. Once the needle is in the vein, thetube is pressed on to the needle and the blood is drawn automatically into the sample tube by vacuum until the required amount is collected. This system comes complete with needle, barreland the laboratory sample tubes with appropriately coloured tops for different types of samples.Tubes for adult and paediatric specimens are available.
Discard the barrel and syringe as a single entity where possible. If there is a need to reuse the barrel, use a one-hand scoop technique (Annex G) to cover the sharp end of the needle and thus
to safely remove the needle from the barrel. Alternately, use a sharps container with a needleremoval hold, again employing a one-handed technique.
7/26/2019 Phleb Final Screen Ready
http://slidepdf.com/reader/full/phleb-final-screen-ready 39/12722 WHO guidelines on drawing blood: best practices in phlebotomy
Some systems have a mechanism that can be activated once the needle has been used; themechanism retracts the used needle into the barrel and snaps it shut. Others have a quick-release mechanism to dislodge the used needle into the sharps container.
Vacuum systems may also be used with a winged buttery needle and luer-lock connectors. Winged buttery needles are also available with safety-engineered devices.
The sharps container must be within arm’s reach and clearly visible, to ensure safe disposal ofsharps.
3.1.2 Open systems
Open systems include hypodermic needle and syringes, as well as winged steel needles attachedto a syringe.
3.2 Praccal guidance on blood-sampling systems
3.2.1 Needle and syringe
To use a needle and syringe system:
• open the packaging of the hypodermic needle from the hub end (back of the needle),keeping it capped;
• open the sterile packaging of the syringe from the plunger end (back of the syringe),keeping the nozzle protected in the packaging;
• carefully remove the syringe from the packaging and insert the nozzle of the syringe rmlyinto the exposed hub of the capped hypodermic needle;
• leave the needle and syringe in place until ready for use.
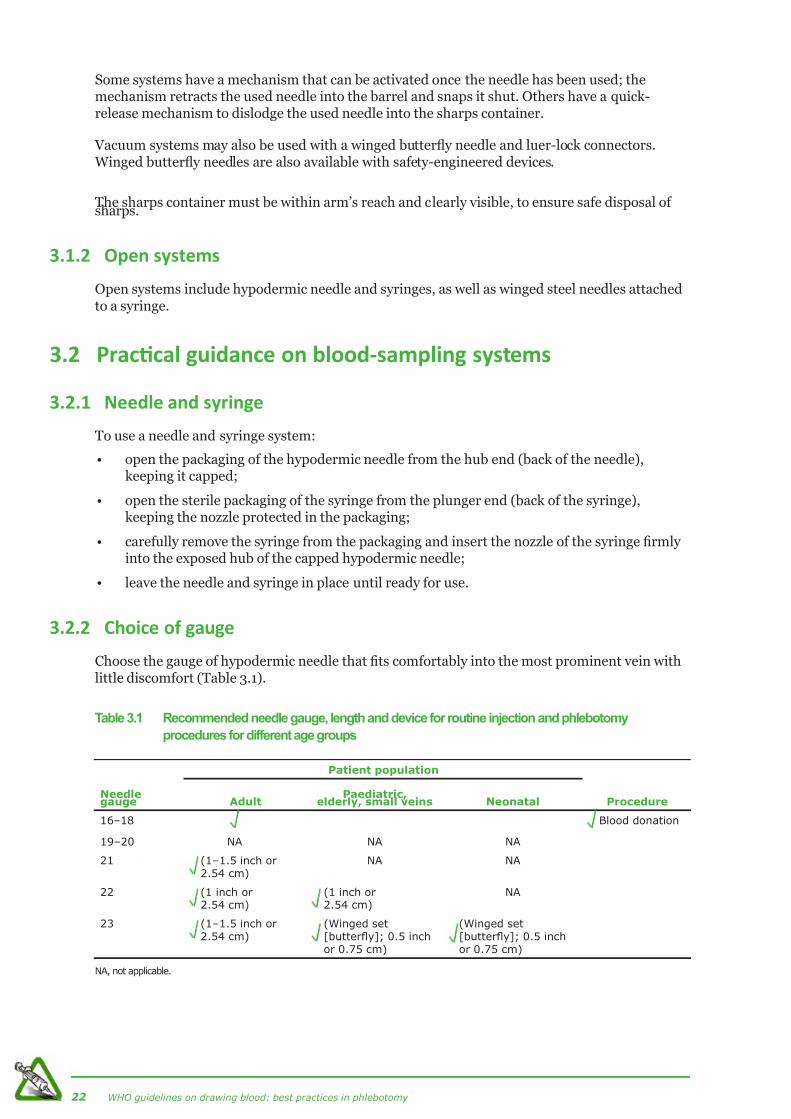
3.2.2 Choice of gauge
Choose the gauge of hypodermic needle that ts comfortably into the most prominent vein withlittle discomfort (Table 3.1).
Table 3.1 Recommended needle gauge, length and device for routine injection and phlebotomy
procedures for different age groups
Patient population
Needlegauge Adult
Paediatric,elderly, small veins Neonatal Procedure
16–18 Blood donation
19–20 NA NA NA
21 (1–1.5 inch or2.54 cm)
NA NA
22 (1 inch or2.54 cm)
(1 inch or2.54 cm)
NA
23 (1–1.5 inch or2.54 cm)
(Winged set[buttery]; 0.5 inchor 0.75 cm)
(Winged set[buttery]; 0.5 inchor 0.75 cm)
NA, not applicable.

7/26/2019 Phleb Final Screen Ready
http://slidepdf.com/reader/full/phleb-final-screen-ready 40/1273 Blood-sampling systems 23
3.3 Illustraons for blood-sampling systems
Figure 3.1 Blood-sampling systems
Needle and syringe system
Remove the syringe from the
packaging and insert the nozzle
of the syringe rmly into the
exposed hub of the cappedhypodermic needle.
Vacuum extraction system
The barrel holds the sample
collection tube in place and
protects the phlebotomist from
direct contact with blood. Do not
push the laboratory tube onto the
needle inside the barrel until the
needle is in the blood vessel, or
the vacuum will be lost.
Winged butterfy system
(vacuum extraction)
A vacuum system combined with
a winged buttery needle.
Do not push the laboratory tube
onto the needle inside the barrel
until the winged needle is inside
the blood vessel or the vacuum
will be lost.
Winged butterfy system
(syringe)
A syringe combined with a
winged buttery needle.

7/26/2019 Phleb Final Screen Ready
http://slidepdf.com/reader/full/phleb-final-screen-ready 41/127

7/26/2019 Phleb Final Screen Ready
http://slidepdf.com/reader/full/phleb-final-screen-ready 42/1274 Venepuncture for blood donation 25
4 Venepuncture for blood donaon
The information given here supplements that given in Chapters 2 and 3. Users of theseguidelines should read Chapters 2 and 3 before reading the information given below. Thischapter covers background information (Section 4.1) and practical guidance (Section 4.2)relevant to venepuncture for blood donation.
4.1 Background informaon on venepuncture for blood
donaon
Blood banks use various processes to try to prevent infections that can be transmitted byinfected blood donation. One important measure to prevent infection is to recruit donors frompopulations that are known to have low rates of infection for bloodborne diseases, such as voluntary, unpaid donors and people with no history of intravenous drug use. A second measureis to ask donors a series of additional screening questions (these will vary by region) to helpidentify those who may be at higher risk of infection. Phlebotomists must adhere strictly to the
rules for including and excluding blood donors. A third measure is to test donated blood forinfections common in the area before processing it for use for various therapeutic purposes.
The process for collecting blood from donors is similar to that used for blood sampling; however,a few additional measures are required for collection of donated blood. These measures areprimarily to ensure patient safety, but also to minimize exogenous contamination of a donated blood unit or its derived components, particularly contamination from the skin ora of thedonor’s arm. Because of the volume or blood collected and the length of storage, pathogens canmultiply during storage. Safe collection ensures that the blood products are safe for therapeuticuse throughout their shelf life.
Skin ora is a common source of contaminants; it is therefore important to use an effective
antiseptic on the donor’s arm before blood donation. Transfusion with blood components thatare contaminated with exogenous bacteria or other agents can cause fatal complications( 30, 45 ). Studies on the topic have been inconclusive (46); however, based on available literatureand expert opinion, the recommended option for skin antisepsis for blood donation is the one-step application of a combination of 2% chlorhexidine gluconate and 70% isopropyl alcohol for30 seconds, followed by 30 seconds drying time (47–49).
Blood donations should be collected only by trained and qualied blood transfusion servicespersonnel.
4.1.1 Minimum requirements for venepuncture for blood donaon
The relevant guidance given in Chapter 2 on planning, location and infection prevention andcontrol practices should be followed, as should the guidance in Chapter 3 on closed systems. Additional requirements for a collection system for blood donation are listed below.
• Equipment:
– All equipment used for collection of blood donations should be regularly calibrated,maintained and serviced, as required. Such equipment includes blood pressuremonitors, scales, donor couches or chairs, blood collection monitors or mixers, blood bag tube sealers, blood transportation boxes and blood bank refrigerators.
– Furniture and equipment in the area of blood donation and processing should be madeof cleanable surfaces (e.g. vinyl rather than fabric). Containers used to transport suppliesand specimens should also be cleanable by disinfectants such as sodium hypochlorite bleach solutions. Fabric or textile carriers should be machine washable.

7/26/2019 Phleb Final Screen Ready
http://slidepdf.com/reader/full/phleb-final-screen-ready 43/12726 WHO guidelines on drawing blood: best practices in phlebotomy
– A closed collection system with a sterile blood collection bag containing anticoagulant,and with an integrally attached tube and needle should be used. Some bags includediversion pouches to sequester the rst 20 ml of blood collected, to minimizecontamination from skin ora and the skin core ( 50). If blood for haemoglobin testing isgathered with a capillary stick, a single-use sterile lancet should be used and then placedimmediately in a safety box.
• Location:
– Premises should be of sufcient size for efcient operations, with separate areas forclean and dirty processes, clean running water, and surfaces cleanable by disinfectants.
– Floors should not be carpeted.
– Waiting areas should be outside the collection area, to minimize the risk of respiratorypathogens for workers.
– All xed and mobile blood donation sites should be safe, clean, hygienic and tidy, andshould meet dened standards of environmental safety.
– The donation sites should be organized in a way that ensures the safety of blood donors,staff and donated blood units, and avoids errors in the blood donation process.
4.1.2 Before a blood donaon
WHO has developed a set of basic requirements for blood transfusion services, which cover thesteps to take before donation ( 51). Blood donation should be voluntary; it should not involveduress, coercion or remuneration. Also, potential blood donors should be selected carefully,according to the national criteria for donor selection.
Before a person donates blood ( 52):
• the potential donor should be given pre-donation information, advice and counsellingabout the process of blood donation;
• a relevant history of the donor should be taken, covering health and high-risk behaviour,and including
– history of mastectomy (blood should be taken from the arm opposite the site of surgery)(48, 53);
– current and recent medications or chronic infections;
– history of prolonged bleeding or a past diagnosis of bleeding disorders;
– history of previous donations, to ensure the waiting period is respected;
• a preliminary physical check-up of the donor should be done, including weight, bloodpressure, signs of infection or scarring at potential sites;
• the donor should be offered uids, to help reduce the risk of fainting after blood donation( 54);
• the person should provide informed written consent, based on the national requirements.

7/26/2019 Phleb Final Screen Ready
http://slidepdf.com/reader/full/phleb-final-screen-ready 44/1274 Venepuncture for blood donation 27
4.2 Praccal guidance on venepuncture for blood donaon
4.2.1 Collecng blood
For collection of blood for donation, use the procedure detailed in Chapter 2 for blood sampling(e.g. for hand hygiene and glove use), as far as it is relevant, and follow the six steps given below.
Step1 – Idenfy donor and label blood collecon bag and test tubes
• Ask the donor to state their full name.
• Ensure that:
– the blood collection bag is of the correct type;
– the labels on the blood collection bag and all its satellite bags, sample tubes and donorrecords have the correct patient name and number;
– the information on the labels matches with the donor’s information.
Step 2 – Select the vein
• Select a large, rm vein, preferably in the antecubital fossa, from an area free from skinlesions or scars.
• Apply a tourniquet or blood pressure cuff inated to 40–60 mm Hg, to make the vein moreprominent.
• Ask the donor to open and close the hand a few times.
• Once the vein is selected, release the pressure device or tourniquet before the skin site isprepared.
Step 3 – Disinfect the skin
• If the site selected for venepuncture is visibly dirty, wash the area with soap and water, andthen wipe it dry with single-use towels.
• One-step procedure (recommended – takes about one minute):
– use a product combining 2% chlorhexidine gluconate in 70% isopropyl alcohol;
– cover the whole area and ensure that the skin area is in contact with the disinfectant forat least 30 seconds;
– allow the area to dry completely , or for a minimum of 30 seconds by the clock.
• Two-step procedure (if chlorhexidine gluconate in 70% isopropyl alcohol is not available,use the following procedure – takes about two minutes):
– step 1 – use 70% isopropyl alcohol;
– cover the whole area and ensure that the skin area is in contact with the disinfectant forat least 30 seconds;
– allow the area to dry completely (about 30 seconds);
– step 2 – use tincture of iodine (more effective than povidine iodine) or chlorhexidine(2%);
– cover the whole area and ensure that the skin area is in contact with the disinfectant forat least 30 seconds;
– allow the area to dry completely (about 30 seconds).
• Whichever procedure is used, DO NOT touch the venepuncture site once the skin has beendisinfected.

7/26/2019 Phleb Final Screen Ready
http://slidepdf.com/reader/full/phleb-final-screen-ready 45/12728 WHO guidelines on drawing blood: best practices in phlebotomy
Step 4 – Perform the venepuncture
Perform venepuncture using a smooth, clean entry with the needle, as described in step 6 ofSection 2.2.3. Take into account the points given below, which are specic to blood donation.
• In general, use a 16-gauge needle (see Table 3.1 in Chapter 3), which is usually attached tothe blood collection bag. Use of a retractable needle or safety needle with a needle cover ispreferred if available, but all should be cut off at the end of the procedure (as described in
step 6, below) rather than recapped.
• Ask the donor to open and close the st slowly every 10–12 seconds during collection.
• Remove the tourniquet when the blood ow is established or after 2 minutes, whichevercomes rst.
Step 5 – Monitor the donor and the donated unit
• Closely monitor the donor and the injection site throughout the donation process – lookfor:
– sweating, palor or complaints of feeling faint that may precede fainting;
– development of a haematoma at the injection site;
– changes in blood ow that may indicate the needle has moved in the vein, and needs to be repositioned.
• About every 30 seconds during the donation, mix the collected blood gently with theanticoagulant, either manually or by continuous mechanical mixing.
Step 6 – Remove the needle and collect samples
• Cut off the needle using a sterile pair of scissors.
• Collect blood samples for laboratory testing.
4.2.2 Aer a blood donaon
Donor care
After the blood has been collected:
• ask the donor to remain in the chair and relax for a few minutes;
• inspect the venepuncture site; if it is not bleeding, apply a bandage to the site; if it is bleeding, apply further pressure;
• ask the donor to sit up slowly and ask how the person is feeling;
• before the donor leaves the donation room, ensure that the person can stand up withoutdizziness and without a drop in blood pressure;
• offer the donor some refreshments.
Blood unit and samples
• Transfer the blood unit to a proper storage container according to the blood centrerequirements and the product ( 55–58).
• Ensure that collected blood samples are stored and delivered to the laboratory withcompleted documentation, at the recommended temperature, and in a leak-proof, closedcontainer ( 55, 57, 58).

7/26/2019 Phleb Final Screen Ready
http://slidepdf.com/reader/full/phleb-final-screen-ready 46/1274 Venepuncture for blood donation 29
4.2.3 Adverse events in blood donaon
Be aware of possible adverse events, and the actions to take if these occur (Table 4.1).
Table 4.1 Adverse events in blood donation
Adverseevent Incidence Cause Management Remarks
Haematoma 2–3% • Poor or failedvenepuncture
• Skin pierced at toogreat an angle – andexiting vein
• Needle puncturingthe vein twice duringthe donation
• Inadequate pressureafter the donation
• Apply pressure and a rmbandage
• Advise donor to move armfreely but to avoid heavylifting
• Apologize, and reassurethe donor
Give relevantcontact informationto donor in casethe donor has anyfurther inquiries
Vasovagalreaction
or faint,due to ahypothalamicresponseresulting inbradycardia,vomiting,sweating,arterialdilatation anda low bloodpressure
1% of alldonations
(but morefrequent inrst-timedonors –1.7% versus0.19%)
• Anxiety
• Lowered blood
volume and otherassociated causes:
– hypoglycaemia
– lack of uids
– poor sleep
• Atmosphere indonation room (hotor humid)
Signs and symptoms
• Staring
• Sighing
• Pallor or sweating
• Slow pulse
• Drop in bloodpressure
• Vomiting
• Loss of consciousness(occasionally)
• Convulsions (rare)
Mild vasovagal reaction
• Discontinue donation
• Recline chair
• Loosen clothes
• Monitor blood pressureand pulse
• Reassure donor
• Give uids to the donor todrink (recovery is usuallyrapid)
Severe vasovagal reaction
• Call physician
• If the donor becomesunconscious, put theperson in recovery
position (i.e. head to theside and chin up) andensure that airways areclear
• Occasionally, severe faintwith delayed recovery, orepileptiform episode withor without incontinence,might occur; this isusually an anoxic trather than epilepsy
• In the case of anepileptiform t, generally,do not report to donorbecause it may cause
unnecessary anxiety
• If incontinence occurs,then inform the donor anddeal with privately
Faints
• These are usually selflimiting and do not requireinvestigation becausethey have no underlyingpathology
Care of the donor
The physician will:
• explain to thedonor the natureof what hashappened
• reassure theperson that this isonly related to thedonation process
Future donations
• Severe faints –person should notdonate again
• Mild faints –person may
donate, butdefer if developsanother faintingattack

7/26/2019 Phleb Final Screen Ready
http://slidepdf.com/reader/full/phleb-final-screen-ready 47/12730 WHO guidelines on drawing blood: best practices in phlebotomy
Table 4.1 continued
Adverseevent Incidence Cause Management Remarks
Delayed faint(syncope)
1 in 10,000donors
• Physical stress
• Inadequate uidintake
• Cause unknown
Occurs 1–4 hoursafter donation, usuallyoutside the blood bank
Hot drinks or water beforedonating blood; sitting ina supine position, audioor visual distraction; andminimal pain and stress
during blood donation
Try to nd cause
Future donations
May donate, but ifdevelops a second
time, then defer
Arterialpuncture
1 in30,000–50,000
• Brachial arterysometimes liesanatomically veryclose to the vein
• Detected byobserving that theblood collected isbright red and has arapid ow
• May result in latecomplications such as
arteriovenous stulae
• Discontinue donationor continue if identiedtowards the completion ofthe donation
• Call the donor carephysician
• Apply rm pressure (bythe nurse or medicalstaff), for at least 15minutes
• Apply pressure bandage
and check the radial pulse
• Inform and reassuredonor, and explainthat the puncture isunlikely to have seriousconsequences, but thatbad bruising may occur,and healing takes about10–14 days
Give relevantcontact informationto donor in casethe person has anyfurther inquiries
Nervedamage
• Nerve endingsbrushed duringvenepuncture
• Pressure fromhaematoma
Symptoms and signs• Pain or parasthesia
• Motor or sensory loss
• Recovery is usuallyspontaneous and rapidwithin 24 hours (in rarecases, up to 6 months)
• Refer the donor to the
physician to explainand reassure the donor,and refer the donor to aneurologist if the damageis severe
Give relevantcontact informationto donor in casethe donor has anyfurther inquiries
Sources: (8–10, 54).

7/26/2019 Phleb Final Screen Ready
http://slidepdf.com/reader/full/phleb-final-screen-ready 48/1275 Arterial blood sampling 31
5 Arterial blood sampling
The information given here supplements that given in Chapters 2 and 3. Users of theseguidelines should read Chapters 2 and 3 before reading the information given below. Thischapter covers background information (Section 5.1), practical guidance (Section 5.2) andillustrations (Section 5.3) relevant to arterial blood sampling.
5.1 Background informaon on arterial blood sampling
An arterial blood sample is collected from an artery, primarily to determine arterial blood gases. Arterial blood sampling should only be performed by health workers for whom the procedureis in the legal scope of practice for their position in their country and who have demonstratedprociency after formal training.
The sample can be obtained either through a catheter placed in an artery, or by using a needleand syringe to puncture an artery. These syringes are pre-heparinized and handled to minimizeair exposure that will alter the blood gas values. This chapter describes only the procedure for a
radial artery blood draw.
5.1.1 Choice of site
Several different arteries can be used for blood collection. The rst choice is the radial artery, which is located on the thumb side of the wrist; because of its small size, use of this arteryrequires extensive skill in arterial blood sampling. Alternative sites for access are brachial orfemoral arteries, but these have several disadvantages in that they:
• may be harder to locate, because they are less supercial than the radial artery;
• have poor collateral circulation;
• are surrounded by structures that could be damaged by faulty technique.
5.1.2 Complicaons related to arterial blood sampling
There are several potential complications related to arterial blood sampling. The points belowlist some of the complications related to the procedure, and how they can be prevented ( 59).
• Arteriospasm or involuntary contraction of the artery may be prevented simply by helpingthe patient relax; this can be achieved, for example, by explaining the procedure andpositioning the person comfortably.
• Haematoma or excessive bleeding can be prevented by inserting the needle without
puncturing the far side of the vessel and by applying pressure immediately after blood isdrawn. Due to the higher pressure present in arteries, pressure should be applied for alonger time than when sampling from a vein, and should be supervised more closely, tocheck for cessation of bleeding.
• Nerve damage can be prevented by choosing an appropriate sampling site and avoidingredirection of the needle.
• Fainting or a vasovagal response can be prevented by ensuring that the patient is supine(lying down on their back) with feet elevated before beginning the blood draw. Patientsrequiring arterial blood sampling are usually inpatients or in the emergency ward, so willgenerally already be lying in a hospital bed. Children may feel a loss of control and ghtmore if placed in a supine position; in such cases, it may be preferable to have the childsitting on the parent’s lap, so that the parent can gently restrain the child.
• Other problems can include a drop in blood pressure, complaints of feeling faint, sweatingor pallor that may precede a loss of consciousness.

7/26/2019 Phleb Final Screen Ready
http://slidepdf.com/reader/full/phleb-final-screen-ready 49/12732 WHO guidelines on drawing blood: best practices in phlebotomy
5.1.3 Sampling errors
Inappropriate collection and handling of arterial blood specimens can produce incorrect results.Reasons for an inaccurate blood result include:
• presence of air in the sample;
• collection of venous rather than arterial blood;
• an improper quantity of heparin in the syringe, or improper mixing after blood is drawn;
• a delay in specimen transportation.
5.2 Praccal guidance on arterial blood sampling
5.2.1 Equipment and supplies
Assemble the relevant items described in Section 2.2.3, plus the following specimen collectionequipment and supplies:
• pre-heparinized syringe;
• needles (20, 23 and 25 gauge, of different lengths) – choose a size that is appropriate for thesite (smaller gauges are more likely to lyse the specimen);
• a safety syringe with a needle cover that allows the syringe to be capped before transport, without manually recapping (this is best practice for radial blood sampling);
• a bandage to cover the puncture site after collection;
• a container with crushed ice for transportation of the sample to the laboratory (if theanalysis is not done at the point of care);
• where applicable, local anesthetic and an additional single-use sterile syringe and needle.
5.2.2 Procedure for arterial blood sampling using radial artery
For sampling from the radial artery using a needle and syringe, follow the steps outlined below.
1. Approach the patient, introduce yourself and ask the patient to state their full name.
2. Place the patient on their back, lying at. Ask the nurse for assistance if the patient’sposition needs to be altered to make them more comfortable. If the patient is clenchingtheir st, holding their breath or crying, this can change breathing and thus alter the testresult.
3. Locate the radial artery by performing an Allen test (see Annex I) for collateral circulation.
If the initial test fails to locate the radial artery, repeat the test on the other hand. Oncea site is identied, note anatomic landmarks to be able to nd the site again. If it will benecessary to palpate the site again, put on sterile gloves.
4. Perform hand hygiene, clear off a bedside work area and prepare supplies. Put on animpervious gown or apron, and face protection, if exposure to blood is anticipated.
5. Disinfect the sampling site on the patient with 70% alcohol and allow it to dry.
6. If the needle and syringe are not preassembled, assemble the needle and heparinizedsyringe and pull the syringe plunger to the required ll level recommended by the locallaboratory.
7. Holding the syringe and needle like a dart, use the index nger to locate the pulse again,
inform the patient that the skin is about to be pierced then insert the needle at a 45 degreeangle, approximately 1 cm distal to (i.e. away from) the index nger, to avoid contaminatingthe area where the needle enters the skin.

7/26/2019 Phleb Final Screen Ready
http://slidepdf.com/reader/full/phleb-final-screen-ready 50/1275 Arterial blood sampling 33
8. Advance the needle into the radial artery until a blood ashback appears, then allow thesyringe to ll to the appropriate level. DO NOT pull back the syringe plunger.
9. Withdraw the needle and syringe; place a clean, dry piece of gauze or cotton wool over thesite and have the patient or an assistant apply rm pressure for sufcient time to stop the bleeding. Check whether bleeding has stopped after 2–3 minutes. Five minutes or moremay be needed for patients who have high blood pressure or a bleeding disorder, or aretaking anticoagulants.
10. Activate the mechanisms of a safety needle to cover the needle before placing it in the icecup. In the absence of a safety-engineered device, use a one-hand scoop technique (asexplained in Annex G) to recap the needle after removal.
11. Expel air bubbles, cap the syringe and roll the specimen between the hands to gently mixit. Cap the syringe to prevent contact between the arterial blood sample and the air, and toprevent leaking during transport to the laboratory.
12. Label the sample syringe.
13. Dispose appropriately of all used material and personal protective equipment.
14. Remove gloves and wash hands thoroughly with soap and water, then dry using single-use
towels; alternatively, use alcohol rub solution.
15. Check the patient site for bleeding (if necessary, apply additional pressure) and thank thepatient.
16. Transport the sample immediately to the laboratory, following laboratory handlingprocedures.
5.3 Illustraons for arterial blood sampling
Figure 5.1 Arterial blood sampling
Locate artery and take a sample

7/26/2019 Phleb Final Screen Ready
http://slidepdf.com/reader/full/phleb-final-screen-ready 51/127

7/26/2019 Phleb Final Screen Ready
http://slidepdf.com/reader/full/phleb-final-screen-ready 52/1276 Paediatric and neonatal blood sampling 35
6 Paediatric and neonatal blood sampling
The information given here supplements that given in Chapters 2 and 3. Users of theseguidelines should read Chapters 2 and 3 before reading the information given below. Thischapter covers background information (Section 6.1), practical guidance (Section 6.2) andillustrations (Section 6.3) relevant to paediatric and neonatal blood sampling.
6.1 Background informaon on paediatric and neonatal blood
sampling
This chapter discusses aspects specic to paediatric and neonatal blood sampling (60, 61). Anyone taking blood from children and neonates must be well trained and practiced in venepuncture techniques. A uniform sampling technique is important to reduce pain andpsychological trauma.
6.1.1 Choice of procedure and siteThe choice of site and procedure (venous site, nger-prick or heel-prick – also referred to as“capillary sampling” or “skin puncture”) will depend on the volume of blood needed for theprocedure and the type of laboratory test to be done. Venepuncture is the method of choicefor blood sampling in term neonates (62, 63); however, it requires an experienced and trainedphlebotomist. If a trained phlebotomist is not available, the physician may need to draw thespecimen. Section 7.1 provides information on when a capillary blood specimen from a nger-prick or a heel-prick is appropriate. The blood from a capillary specimen is similar to an arterialspecimen in oxygen content, and is suitable for only a limited number of tests because of itshigher likelihood of contamination with skin ora and smaller total volume.
Finger and heel-prick
Whether to select a nger-prick or a heel-prick will depend on the age and weight of the child.Section 7.1 explains which procedure to select, based on these two elements.
Patient immobilization is crucial to the safety of the paediatric and neonatal patient undergoingphlebotomy, and to the success of the procedure. A helper is essential for properly immobilizingthe patient for venepuncture or nger-prick, as described in Section 6.2.
6.2 Praccal guidance on paediatric and neonatal blood
sampling
6.2.1 Paent idencaon
For paediatric and neonatal patients, use the methods described below to ensure that patientsare correctly identied before taking blood.
• Use a wrist or foot band only if it is attached to the patient; DO NOT use the bed number ora wrist band that is attached to the bed or cot.
• If a parent or legal guardian is present, ask that person for the child’s rst and last names.
• Check that the name, date of birth and hospital or le number are written on the laboratory
form, and match them to the identity of the patient.

7/26/2019 Phleb Final Screen Ready
http://slidepdf.com/reader/full/phleb-final-screen-ready 53/12736 WHO guidelines on drawing blood: best practices in phlebotomy
6.2.2 Venepuncture
Venepuncture is the preferred method of blood sampling for term neonates, and causes less painthan heel-pricks (64).
Equipment and supplies for paediatric patients.
• Use a winged steel needle, preferably 23 or 23 gauge, with an extension tube (a buttery):
– avoid gauges of 25 or more because these may be associated with an increased risk ofhaemolysis;
– use a buttery with either a syringe or an evacuated tube with an adaptor; a buttery canprovide easier access and movement, but movement of the attached syringe may make itdifcult to draw blood.
• Use a syringe with a barrel volume of 1–5 ml, depending on collection needs; the vacuumproduced by drawing using a larger syringe will often collapse the vein.
• When using an evacuated tube, choose one that collects a small volume (1 ml or 5 ml) andhas a low vacuum; this helps to avoid collapse of the vein and may decrease haemolysis.
• Where possible, use safety equipment with needle covers or features that minimize bloodexposure. Auto-disable (AD) syringes are designed for injection, and are not appropriate forphlebotomy.
Preparaon
Ask whether the parent would like to help by holding the child. If the parent wishes to help,provide full instructions on how and where to hold the child; if the parent prefers not to help,ask for assistance from another phlebotomist.
Immobilize the child as described below.
• Designate one phlebotomist as the technician, and another phlebotomist or a parent to
immobilize the child.• Ask the two adults to stand on opposite sides of an examination table.
• Ask the immobilizer to:
– stretch an arm across the table and place the child on its back, with its head on top of theoutstretched arm;
– pull the child close, as if the person were cradling the child;
– grasp the child’s elbow in the outstretched hand;
– use their other arm to reach across the child and grasp its wrist in a palm-up position(reaching across the child anchors the child’s shoulder, and thus prevents twisting or
rocking movements; also, a rm grasp on the wrist effectively provides the phlebotomist with a “tourniquet”).
If necessary, take the following steps to improve the ease of venepuncture.
• Ask the parent to rhythmically tighten and release the child’s wrist, to ensure that there isan adequate ow of blood.
• Keep the child warm, which may increase the rate of blood ow by as much as sevenfold(65 ), by removing as few of the child’s clothes as possible and, in the case of an infant, by:
– swaddling in a blanket; and
– having the parent or caregiver hold the infant, leaving only the extremity of the site of venepuncture exposed.
• Warm the area of puncture with warm cloths to help dilate the blood vessels.
• Use a transilluminator or pocket pen light to display the dorsal hand veins and the veins ofthe antecubital fossa.

7/26/2019 Phleb Final Screen Ready
http://slidepdf.com/reader/full/phleb-final-screen-ready 54/1276 Paediatric and neonatal blood sampling 37
Drawing blood
• Follow the procedures given in Section 2.2.3 for:
– hand hygiene;
– advance preparation;
– patient identication and positioning;
– skin antisepsis (but DO NOT use chlorhexidine on children under 2 months of age).
• Once the infant or child is immobilized, puncture the skin 3–5 mm distal to (i.e. away from)the vein (66); this allows good access without pushing the vein away.
• If the needle enters alongside the vein rather than into it, withdraw the needle slightly without removing it completely, and angle it into the vessel.
• Draw blood slowly and steadily.
6.2.3 Finger and heel-prick
See Section 7.2, which describes the steps for both nger and heel-pricks, for paediatric andneonatal patients, and for adults.
Select the proper lancet length for the area of puncture, as described in Section 7.2.
6.3 Illustraons for paediatric and neonatal blood sampling
Figure 6.1 Paediatric and neonatal venepuncture
1. Use a winged steel needle,
usually 23 or 25 gauge, with
an extension tube (buttery).Keep the tube and needle
separate until the needle is in
the vein.
2. Collect supplies and equipment. 3. Perform hand hygiene (if
using soap and water, dry
hands with single-use towels).

7/26/2019 Phleb Final Screen Ready
http://slidepdf.com/reader/full/phleb-final-screen-ready 55/12738 WHO guidelines on drawing blood: best practices in phlebotomy
4. Immobilize the baby or child. 5. Put the tourniquet on the
patient about two nger widths
above the venepuncture site.
6. Put on well-tting, non-sterile
gloves.7. Attach the end of the winged
infusion set to the end of the
vacuum tube and insert the
collection tube into the holder
until the tube reaches the
needle.
8. Remove the plastic sleeve
from the end of the buttery.
9. Disinfect the collection site
and allow to dry.10. Use a thumb to draw the skin
tight, about two nger widths
below the venepuncture site.
11. Push the vacuum tube
completely onto the needle.
12. Blood should begin to ow into
the tube.13. Fill the tube until it is full or until
the vacuum is exhausted; if
lling multiple tubes, carefully
remove the full tube and replacewith another tube, taking care
not to move the needle in the
vein.
14. After the required amount
of blood has been collected,
release the tourniquet.

7/26/2019 Phleb Final Screen Ready
http://slidepdf.com/reader/full/phleb-final-screen-ready 56/1276 Paediatric and neonatal blood sampling 39
15. Place dry gauze over the
venepuncture site and slowly
withdraw the needle.
16. Ask the parent to continue
applying mild pressure.17. Remove the buttery from the
vacuum tube holder.
18. Dispose of the buttery in a
sharps container.19. Properly dispose of all
contaminated supplies.20. Label the tube with the patient
identication number and date.
21. Put an adhesive bandage on
the patient if necessary.22. Remove gloves, dispose
of them appropriately and
perform hand hygiene (if using
soap and water, dry hands
with single-use towels).

7/26/2019 Phleb Final Screen Ready
http://slidepdf.com/reader/full/phleb-final-screen-ready 57/127

7/26/2019 Phleb Final Screen Ready
http://slidepdf.com/reader/full/phleb-final-screen-ready 58/1277 Capillary sampling 41
7 Capillary sampling
The information given here supplements that given in Chapter 2. Users of these guidelinesshould read Chapter 2 before reading the information given below. This chapter covers background information (Section 7.1), practical guidance (Section 7.2) and illustrations(Section 7.3) relevant to capillary sampling.
Capillary sampling from a nger, heel or (rarely) an ear lobe may be performed on patients ofany age, for specic tests that require small quantities of blood. However, because the procedureis commonly used in paediatric patients, Sections 7.1.1 and 7.1.2 focus particularly on paediatriccapillary sampling.
7.1 Background informaon on capillary sampling
7.1.1 Choice of site
Adult paents
The nger is usually the preferred site for capillary testing in an adult patient. The sides of theheel are only used in paediatric and neonatal patients. Ear lobes are sometimes used in massscreening or research studies.
Paediatric and neonatal paents
Selection of a site for capillary sampling in a paediatric patient is usually based on the ageand weight of the patient. If the child is walking, the child’s feet may have calluses that hinderadequate blood ow. Table 7.1 shows the conditions inuencing the choice of heel or nger-prick.
Table 7.1 Conditions influencing the choice of heel or finger-prick
Condition Heel-prick Finger-prick
Age Birth to about 6 months Over 6 months
Weight From 3–10 kg, approximately Greater than 10 kg
Placement of lancet On the medial or lateral plantarsurface
On the side of the ball of the ngerperpendicular to the lines of thengerprint
Recommended nger Not applicable Second and third nger (i.e. middleand ring nger); avoid the thumband index nger because of calluses,and avoid the little nger because the
tissue is thin
Specimens requiring a skin puncture are best obtained after ensuring that a baby is warm, asdiscussed in Section 6.2.2.

7/26/2019 Phleb Final Screen Ready
http://slidepdf.com/reader/full/phleb-final-screen-ready 59/12742 WHO guidelines on drawing blood: best practices in phlebotomy
7.1.2 Selecng the length of lancet
Adult paents
A lancet slightly shorter than the estimated depth needed should be used because the pressurecompresses the skin; thus, the puncture depth will be slightly deeper than the lancet length. Inone study of 52 subjects, pain increased with penetration depth, and thicker lancets were slightly
more painful than thin ones (67 ). However, blood volumes increased with the lancet penetrationand depth.
Lengths vary by manufacturer (from 0.85 mm for neonates up to 2.2 mm). In a nger-prick, thedepth should not go beyond 2.4 mm, so a 2.2 mm lancet is the longest length typically used.
Paediatric and neonatal paents
In heel-pricks, the depth should not go beyond 2.4 mm. For premature neonates, a 0.85 mmlancet is available.
The distance for a 7 pound (3 kg) baby from outer skin surface to bone is:
• medial and lateral heel – 3.32 mm;
• posterior heel – 2.33 mm (this site should be avoided, to reduce the risk of hitting bone);
• toe – 2.19 mm.
The recommended depth for a nger-prick is:
• for a child over 6 months and below 8 years – 1.5 mm;
• for a child over 8 years – 2.4 mm.
Too much compression should be avoided, because this may cause a deeper puncture than isneeded to get good ow.
7.1.3 Order of draw
With skin punctures, the haematology specimen is collected rst, followed by the chemistryand blood bank specimens. This order of drawing is essential to minimize the effects of plateletclumping. The order used for skin punctures is the reverse of that used for venepuncturecollection. If more than two specimens are needed, venepuncture may provide more accuratelaboratory results.
7.1.4 Complicaons
Complications that can arise in capillary sampling include:
• collapse of veins if the tibial artery is lacerated from puncturing the medial aspect of theheel;
• osteomyelitis of the heel bone (calcaneus) (68);
• nerve damage if the ngers of neonates are punctured (69);
• haematoma and loss of access to the venous branch used;
• scarring;
• localized or generalized necrosis (a long-term effect);
• skin breakdown from repeated use of adhesive strips (particularly in very young or veryelderly patients) – this can be avoided if sufcient pressure is applied and the puncture siteis observed after the procedure.

7/26/2019 Phleb Final Screen Ready
http://slidepdf.com/reader/full/phleb-final-screen-ready 60/1277 Capillary sampling 43
7.2 Praccal guidance on capillary sampling
7.2.1 Selecon of site and lancet
• Using the guidance given in Section 7.1, decide whether to use a nger or heel-prick, anddecide on an appropriate size of lancet.
• DO NOT use a surgical blade to perform a skin puncture.
• DO NOT puncture the skin more than once with the same lancet, or use a single puncturesite more than once, because this can lead to bacterial contamination and infection.
7.2.2 Procedure for capillary sampling
Adult paents
Prepare the skin
• Apply alcohol to the entry site and allow to air dry (see Section 2.2.3).
• Puncture the skin with one quick, continuous and deliberate stroke, to achieve a good owof blood and to prevent the need to repeat the puncture.
• Wipe away the rst drop of blood because it may be contaminated with tissue uid or debris(sloughing skin).
• Avoid squeezing the nger or heel too tightly because this dilutes the specimen with tissueuid (plasma) and increases the probability of haemolysis (60).
• When the blood collection procedure is complete, apply rm pressure to the site to stop the bleeding.
Take laboratory samples in the correct order to minimize erroneous test results
• With skin punctures, collect the specimens in the order below, starting with haematologyspecimens:
– haematology specimens;
– chemistry specimens;
– blood bank specimens.
Paediatric and neonatal paents
Immobilize the child
• First immobilize the child by asking the parent to:
– sit on the phlebotomy chair with the child on the parent’s lap;
– immobilize the child’s lower extremities by positioning their legs around the child’s in across-leg pattern;
– extend an arm across the child’s chest, and secure the child’s free arm by rmly tuckingit under their own;
– grasp the child’s elbow (i.e. the skin puncture arm), and hold it securely;
– use his or her other arm to rmly grasp the child’s wrist, holding it palm down.
Prepare the skin
• Prepare the skin as described above for adult patients.
• DO NOT use povidone iodine for a capillary skin puncture in paediatric and neonatalpatients; instead, use alcohol, as stated in the instructions for adults.
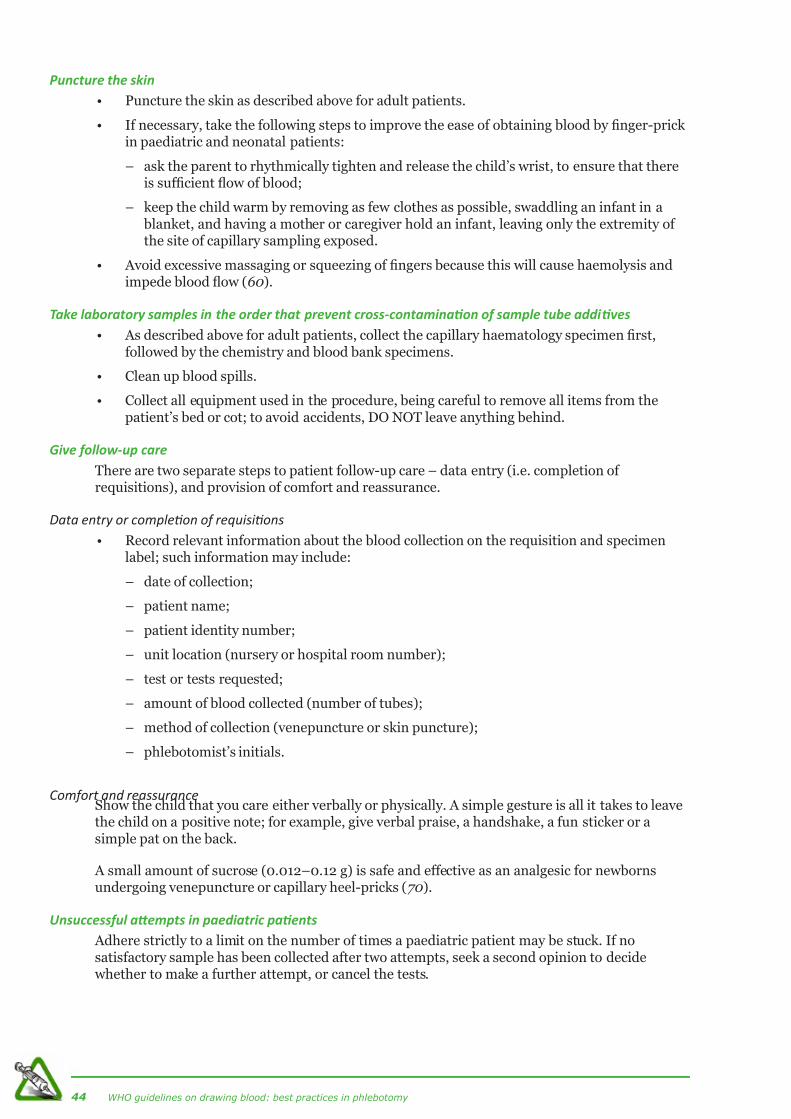
7/26/2019 Phleb Final Screen Ready
http://slidepdf.com/reader/full/phleb-final-screen-ready 61/12744 WHO guidelines on drawing blood: best practices in phlebotomy
Puncture the skin
• Puncture the skin as described above for adult patients.
• If necessary, take the following steps to improve the ease of obtaining blood by nger-prickin paediatric and neonatal patients:
– ask the parent to rhythmically tighten and release the child’s wrist, to ensure that thereis sufcient ow of blood;
– keep the child warm by removing as few clothes as possible, swaddling an infant in a blanket, and having a mother or caregiver hold an infant, leaving only the extremity ofthe site of capillary sampling exposed.
• Avoid excessive massaging or squeezing of ngers because this will cause haemolysis andimpede blood ow (60).
Take laboratory samples in the order that prevent cross-contaminaon of sample tube addives
• As described above for adult patients, collect the capillary haematology specimen rst,followed by the chemistry and blood bank specimens.
• Clean up blood spills.
• Collect all equipment used in the procedure, being careful to remove all items from thepatient’s bed or cot; to avoid accidents, DO NOT leave anything behind.
Give follow-up care
There are two separate steps to patient follow-up care – data entry (i.e. completion ofrequisitions), and provision of comfort and reassurance.
Data entry or compleon of requisions
• Record relevant information about the blood collection on the requisition and specimenlabel; such information may include:
– date of collection;
– patient name;
– patient identity number;
– unit location (nursery or hospital room number);
– test or tests requested;
– amount of blood collected (number of tubes);
– method of collection (venepuncture or skin puncture);
– phlebotomist’s initials.
Comfort and reassuranceShow the child that you care either verbally or physically. A simple gesture is all it takes to leavethe child on a positive note; for example, give verbal praise, a handshake, a fun sticker or asimple pat on the back.
A small amount of sucrose (0.012–0.12 g) is safe and effective as an analgesic for newbornsundergoing venepuncture or capillary heel-pricks (70).
Unsuccessful aempts in paediatric paents
Adhere strictly to a limit on the number of times a paediatric patient may be stuck. If nosatisfactory sample has been collected after two attempts, seek a second opinion to decide whether to make a further attempt, or cancel the tests.

7/26/2019 Phleb Final Screen Ready
http://slidepdf.com/reader/full/phleb-final-screen-ready 62/1277 Capillary sampling 45
7.3 Illustraons for capillary sampling
Figure 7.1 Capillary sampling
1. Lancet and collection tube. 2. Assemble equipment and
supplies.3. Perform hand hygiene (if using
soap and water, dry hands
with single-use towels).
4. Put on well-tting, non-sterile
gloves.5. Select the site. Apply 70%
isopropyl alcohol and allow to
air dry.
6. Puncture the skin.
7. Wipe away the rst drop of
blood.8. Avoid squeezing the nger too
tightly.9. Dispose of all sharps
appropriately.
11. Remove gloves and place in general waste.
Perform hand hygiene (if using soap and
water, dry hands with single-use towels).
10. Dispose of waste materials
appropriately.

7/26/2019 Phleb Final Screen Ready
http://slidepdf.com/reader/full/phleb-final-screen-ready 63/127

7/26/2019 Phleb Final Screen Ready
http://slidepdf.com/reader/full/phleb-final-screen-ready 64/127
PART III IMPLEMENTATION,
EVALUATION AND
MONITORING

7/26/2019 Phleb Final Screen Ready
http://slidepdf.com/reader/full/phleb-final-screen-ready 65/127

7/26/2019 Phleb Final Screen Ready
http://slidepdf.com/reader/full/phleb-final-screen-ready 66/1278 Implementing best phlebotomy practices 49
8 Implemenng best phlebotomy pracces
8.1 Seng policies and standard operang procedures
As explained in Chapter 1, these best practice guidelines for phlebotomy extend the scope of the
two WHO/SIGN documents on related topics that are currently available (29, 30). At the heartof the document are three principles.
• Standards of safe practice globally should be governed by evidence-based principles.
• Each phlebotomy service should, within its capacity, ultimately strive to achieve bestpractices.
• Health workers should be protected and allowed to work in a safe environment, armed withknowledge that reduces harm to themselves, patients and the community.
This chapter provides recommendations (in boxes) and gives further information for eachrecommendation (text below the boxes).
8.2 Procurement
Recommendaon on procurement (in conjuncon with the WHO guiding
principle for injecon device security (71)
Procurement agencies must ensure that all health-care facilies have
sucient supplies of phlebotomy and personal protecve equipment. Such
equipment must meet at least the minimum standards of sterility, quality and
safety to prevent complicaons related to unsafe pracces.
To prevent the complications related to unsafe practices discussed in Parts I and II of thisdocument, equipment (including materials for hand hygiene) and personal protective clothingmust be routinely available in sufcient quantities. Items needed include:
• personal protective equipment;
• safe blood-sampling equipment of high quality, based on a cost–effectiveness analysis ofthe country’s needs and nances;
• antiseptics.
All items to be used on more than one patient should be designed so that they can be cleanedand disinfected. Such items include laboratory transport boxes or trays, tourniquets, evacuated
tube holders, scissors and so on. Also, it is best to buy high-quality items even if they are moreexpensive. Trying to save money by purchasing cheap items that are of poor quality can be morecostly in the long run; for example, if items have to be replaced more frequently.
Governments and procurement agencies should work to ensure that appropriate products areavailable in the country, by:
• providing detailed technical specications to companies wishing to enter the market – suchspecications should include detailed minimum standards acceptable for safety, quality andusability;
• working with manufactures to communicate dened needs to improve products;
• working with national or international regulatory authorities to test products before
importation, to ensure they meet their stated claims and are more effective than cheaperproducts available on the market;

7/26/2019 Phleb Final Screen Ready
http://slidepdf.com/reader/full/phleb-final-screen-ready 67/12750 WHO guidelines on drawing blood: best practices in phlebotomy
• working together to ensure fair, transparent competition and input of end users duringproduct selection;
• conducting post-marketing surveillance to track defects and adverse events associated withproducts.
Facilities that cannot afford the supplies needed to minimize risk to staff and patients, orsupplies of the quality necessary for valid and reliable laboratory test results, should reassess whether they should offer phlebotomy or the related laboratory services.
8.2.1 Blood-sampling equipment
Recommendaon on blood-sampling equipment (Annex C)
Safety-engineered evacuated tube systems or winged needle sets are
safer than a hypodermic needle and syringe, but all are eecve for blood
sampling. Safety features (e.g. needle covers, needleless transfer systems
or adaptors, and retractable lancets) can further reduce the risks associated
with manual recapping, needle removal, disassembly and transfer of blood
from syringes to tubes.
• A needle and syringe is the most common tool for withdrawing large quantities of blood.
• A sterile single-use needle and syringe should be used for each patient, and should beplaced, as a single unit, into a sharps container immediately after use.
• Safety-engineered equipment offers better protection to the health worker, but should beappropriate for the specic task. Some devices designed to prevent reuse (e.g. auto-disablesyringes) are not appropriate for phlebotomy. Safety devices are more expensive, so ifresources are limited, their use may need to be restricted to procedures associated with the
greatest rates or risk of sharps injury.
• Capillary punctures should be performed using a sterile device – preferably with safetyfeatures that automatically retract the lancet – to help prevent both reuse and sharpsinjuries.
8.2.2 Protecon
Recommendaon on personal protecon
Health workers should wear well-ng, non-sterile gloves when taking
blood; they should also carry out hand hygiene before and aer each paent
procedure, before pung on and aer removing gloves.
Clean, non-sterile examination gloves in multiple sizes should be available for personnel whocarry out phlebotomy. It is recommended that:
• well-tting gloves are worn for each procedure, irrespective of the site of blood sampling orthe status of the patient; these gloves can be latex or latex-free, and should be non-sterile(i.e. examination gloves);
• the gloves are changed between patients;
• masks, visors and eye protection may also be needed if additional blood exposure is
anticipated; for example, during arterial blood sampling.

7/26/2019 Phleb Final Screen Ready
http://slidepdf.com/reader/full/phleb-final-screen-ready 68/1278 Implementing best phlebotomy practices 51
8.3 Phlebotomy training
Recommendaon on phlebotomy training (Annex E)
All health workers undertaking phlebotomy must be trained in infecon
prevenon and control procedures. Sta should receive training and
demonstrate prociency on the specic methods that they will use on the
job; for example, adult and paediatric sampling; and venous, arterial and
capillary blood sampling.
• Regular in-service training and supportive supervision should be provided.
• The training programme should provide theoretical and practical knowledge in bloodsampling and blood drawing ( 31).
• A certicate of competence should be issued upon successful demonstration of phlebotomyafter completion of the training programme.
8.4 Safe waste and sharps disposal
Recommendaon on safe disposal of sharps (72)
The blood-sampling device – a needle and syringe, evacuated needle and
tube holder, or winged buery – should be disposed of immediately aer
use as a single unit. It should be placed in a puncture-proof, leak-proof,
closable sharps container that is clearly visible and is placed within arm’s
reach of the health worker.
• The safe disposal of sharps is one of the major challenges, particularly in poorly resourcedcountries.
• Shortage of sharps containers can result in increases in needle-stick injuries due to:
– needle recapping;
– decanting of used sharps containers;
– recycling of containers;
– overlling of sharps containers.
• Another issue is that staff may separate a needle and syringe as a cost-saving exercise anddiscard the two parts in different waste systems.
• The immediate discard of used sharps into a puncture-resistant sharps container that can be closed is an essential part of managing waste without needle-stick injuries (73).

7/26/2019 Phleb Final Screen Ready
http://slidepdf.com/reader/full/phleb-final-screen-ready 69/12752 WHO guidelines on drawing blood: best practices in phlebotomy
8.5 Prevenon and management of incidents and adverse
events
Recommendaon on infecon control (Annex B)
Infecon control procedures that help to prevent health-care associated
infecons include:• hand hygiene;
• glove use;
• skin ansepsis;
• sterile, single-use blood-sampling devices;
• sharps containers;
• disinfecon of surfaces and chairs;
• cleaning and disinfecon of tourniquets;
• transportaon of laboratory samples in labelled, washable containers.
Annex B summarizes the recommendations for best infection control practices in phlebotomy.The points listed below contribute to infection control.
• The workplace should be clean, tidy and uncluttered. There should be no sign of bloodcontamination on the chairs, counters or walls. The working surface should be visibly clean.
• Hand hygiene (hand washing or use of an alcohol rub) should be carried out before well-tting, non-sterile gloves are put on and after they are removed (45 ).
• Only sterile, single-use blood-sampling devices should be used to take blood.
• Skin at the venepuncture site should be disinfected, taking into consideration the type of
specimen, the age and the allergy history of the patient (40–42).• Once the procedure has been completed and the blood sample or samples have been put
into the laboratory sampling tubes, the used devices should be discarded immediately into asharps container.
• Specimens should be transported in containers that help to prevent breakage or spillage of blood.
8.5.1 Paent related
Recommendaon on increasing paent condence (Annex F)
Health-care facilies should provide a paent informaon leaet or poster
explaining the procedure in simple terms, to increase paent condence.
• Patient information (leaets or posters) is recommended. In a busy clinic, there may not betime to explain the procedure to the patient, or the reason for the blood sample being taken.
• Information should be provided to a fully conscious patient in such a way that the personcan make an informed decision. Being well informed also helps the patient to relax and mayreduce discomfort during the procedure.
• If the patient is mentally incapacitated (e.g. through mental illness, organic impairment,
or traumatic or drug-associated loss of consciousness), essential blood sampling may becarried out without permission, in accordance with the institutional or national policy.However, the status of the patient should be clearly documented in the patient’s clinicalnotes.

7/26/2019 Phleb Final Screen Ready
http://slidepdf.com/reader/full/phleb-final-screen-ready 70/1278 Implementing best phlebotomy practices 53
• If the patient is unconscious or unable to give informed consent, the next of kin or legalguardian (which can be a court of law) can give permission for a blood sample to be taken.
• When carrying out blood sampling on a minor, verbal or written permission from theparent or legal guardian, or a court of law may be necessary for medicolegal reasons.
8.5.2 Health-worker related
Recommendaon on health worker and paent safety policies
A post-exposure prophylaxis protocol must be available in all health-care
facilies and phlebotomy areas, providing clear instrucons to follow in case
of accidental exposure to blood or body uids.
• Should an exposure occur, health workers should be aware of the policy on PEP. Ideally,this policy should offer support for exposure to HIV, HBV and HCV (27 ).
• Worksites should have clear notices giving the point of contact (both during the day and at
night) where staff may receive assistance, support and care, including PEP and the benetsof prompt reporting for preventing infection. This applies to potentially exposed patients as well.
• Occupational injuries should be reported in a system that allows medical management andtracking of exposed individuals, but also allows anonymous analysis of incidents, to identifyfactors that can be modied to prevent accidents. Some facilities supplement requests formedical management with periodic anonymous surveys to improve reporting of exposuresand near misses.
• The benets of PEP for HIV may be greatest if it is started as soon as possible; certainly, itshould be started no later than 72 hours after exposure (27 ). Both the source patient andthe exposed individual should undergo rapid testing to avoid unnecessary treatment. Based
on the test result or if the risk assessment requires it, antiretroviral therapy prophylaxisshould be proposed as soon as possible; ideally within the rst hours, and certainly no laterthan 72 hours after the exposure.
• Hepatitis B immunization should be offered to all those working in health-care facilities,and especially to phlebotomists. One to two months after completing the three-doseseries, the health worker should be tested to verify seroprotection (i.e. a concentration ofantibodies to hepatitis B surface antigen of at least 10 milli-international units per millilitre[10 mIU/ml]). This is important because follow-up – including repeat serology testing afterexposure to a patient positive for hepatitis B surface antigen – is unnecessary if the exposedperson was known to have responded to the vaccine. Titres will decrease over time, evenin those who are seroprotected, but the vaccinated person remains protected. In case of
exposure, national guidelines on PEP for HBV exposure should be consulted. If none areavailable, detailed instructions on the use of hepatitis B immune serum globulin (HBIG)and immunization against HBV are available from WHO (27 ).
• A fourth dose of hepatitis B vaccine should be offered to those who have completed theirimmunization but were tested 1–2 months after completing the vaccination and had ahepatitis B surface antibody titre below 10 mIU/ml. If fewer than three doses of hepatitis Bimmunization have been given, a course of hepatitis B immunization should be provided orcompleted.
• There is no recommended PEP for exposure to HCV. If feasible, testing of the sourcepatient and health worker may be helpful to ensure workers compensation in the case thatoccupationally acquired infection is demonstrated. Research on PEP for HCV is ongoing to
determine whether a regimen involving peginterfeon alfa-2b is effective. However, at leastone recent trial failed because none of the 213 workers exposed to HCV developed infection, whether they received PEP or not (74).

7/26/2019 Phleb Final Screen Ready
http://slidepdf.com/reader/full/phleb-final-screen-ready 71/12754 WHO guidelines on drawing blood: best practices in phlebotomy
8.5.3 Risk assessment and risk reducon strategies
There is a risk to both patients (or blood donors) and health workers if the phlebotomist is not well informed of the patient’s risks. A short clinical history from the patient is essential.
Risk can be reduced by following best practices in infection prevention and control, afterobtaining informed consent from the patient and blood donors (Table 8.1).
Table 8.1 Summary of risks and risk-reduction strategies
Risk Type of risk Risk reduction strategy
Patient/blood donors
Exposure to bloodborneviruses through reuse ofneedles, syringes and lancets,contaminated work surfaces
• Hepatitis B vaccine for workers
• Sterile single-use devices only
• Safety-engineered devices
• Clean work surfaces with disinfectant
Infection at blood sampling site • Perform hand hygiene
• Clean patient’s skin with 70% isopropyl alcohol andallow to dry
• Use sterile needle and syringe removed from thepackaging just before use
Pain at blood sampling site • Well-trained person should take the blood sample
• Venepuncture is less painful than heel-pricks inneonates
• Use needle of smaller gauge than the selected vein
Haematoma or thrombus • Enter vessel at an angle of 30 degrees or less
• Use gauge of needle smaller than the vein
• Apply pressure to a straight arm for 3–5 minutes afterdrawing blood
Extensive bleeding • Take a history to identify patients on anticoagulantsand with a history of bleeding
• Use a gauge of needle smaller than the vein
Nerve damage (8, 10) • Avoid nger-pricks for children
• Use antecubital vessels when possible
• Avoid probing
Vasovagal reaction
Syncope, fainting (8, 10)
• Hydrate patient, take postural blood pressure ifdehydrated
• Reduce anxiety
• Have patient lie down if the person expresses concern
• Provide audio-visusal distraction
Allergies • Ask about allergies to latex, iodine and alcohol beforestarting the procedure
Health worker Needle or sharps injury duringor after the procedure
Breakage of blood containers
Splashes (rare)
• Use safety devices such as needle covers, tube holdersthat release needles with one hand and safety lancets
• Avoid two-handed recapping and disassembly
• Place sharps container in sight and within arm’s reach
• Dispose of used sharps immediately
Exposure to blood • Hepatitis B vaccination
• Wear gloves
• Use evacuated tubes and transfer devices whendrawing multiple tubes
• Follow protocol for exposure to body uids and reportincident, even if post-exposure prophylaxis is notdesired
• Cover broken skin area with a waterproof dressing

7/26/2019 Phleb Final Screen Ready
http://slidepdf.com/reader/full/phleb-final-screen-ready 72/1279 Monitoring and evaluation 55
9 Monitoring and evaluaon
A monitoring and evaluation system should be in place to offer surveillance of management ofphlebotomy services and adverse events, and to document improvements. The indicators to useinclude:
• number and rate per 100 full-time workers of sharps exposures and other occupationalinjuries occurring among health workers in the past 12 months;
• number and rate of patients with adverse events in response to phlebotomy such ashaematoma, syncope, infection or nerve damage;
• number of reported cases of bloodborne pathogens transmitted during phlebotomy (diseasesurveillance for hepatitis B and C, and HIV) as part of a public health surveillance systemthat is capable of receiving and responding to reports of cases and clusters of infections;
• number (and percentage) of phlebotomy sessions where essential equipment was notavailable and phlebotomy sessions were cancelled;
• number (and percentage) of laboratory test results lost due to errors or poor quality; for
example – blood culture contamination rate;
– blood transfusion adverse events;
– haemolysis;
– number of specimens with illegible or missing paperwork or labels;
– number of specimens that could not be processed due to inadequate sample volumes;
• number (and percentage) of trained staff in the health-care facility working in phlebotomy;
• number (and proportion) of juniors who are supervised by trained staff.

7/26/2019 Phleb Final Screen Ready
http://slidepdf.com/reader/full/phleb-final-screen-ready 73/127

7/26/2019 Phleb Final Screen Ready
http://slidepdf.com/reader/full/phleb-final-screen-ready 74/127
PART IV REFERENCES

7/26/2019 Phleb Final Screen Ready
http://slidepdf.com/reader/full/phleb-final-screen-ready 75/127

7/26/2019 Phleb Final Screen Ready
http://slidepdf.com/reader/full/phleb-final-screen-ready 76/127References 59
References
1 Lavery I, Ingram P. Blood sampling: best practice. Nursing Standard , 2005, 19:55–65.
2 Shahangian S et al. Results of a survey of hospital coagulation laboratories in the UnitedStates. Archives of Pathology and Laboratory Medicine, 2005, 129:47–60.
3 Wagner D et al. Nosocomial acquisition of dengue. Emerging Infectious Diseases, 2004,10:1872–1873.
4 Dreesman JB, A et al. Outbreak of hepatitis B in a nursing home associated with capillary blood sampling. Epidemiology and Infection, 2006, 134(5):1102–1113.
5 Centers for Disease Control and Prevention. Transmission of hepatitis B virus among personsundergoing blood glucose monitoring in long-term care facilities – Mississippi, NorthCarolina and Los Angeles County, California, 2003–2004. Morbidity and Mortality Weekly Report , 2004, 54:220–223.
6 Chiavetta J et al. Estimated risk of transfusion transmitted infection in the Canadian blood
supply (1987–1996). Vox Sanguinis, 2000, 78(Suppl 1):360.
7 Moor ACE et al. Transfusion-transmitted diseases: risks, prevention and perspectives. European Journal of Haematology, 1999, 62(1):1–8.
8 Galena H. Complications occurring from diagnostic venepuncture. Journal of Family Practice, 1992, 34(5):582–584.
9 Newman B et al. The effect of whole-blood donor adverse events on blood donor return rates.Transfusion, 2006, 46:1374–1379.
10 Eder A. The American Red Cross donor haemovigilance program: complications of blooddonation reported in 2006. Transfusion, 2008, 48
11 Barker L. Venipuncture syncope – one occupational health clinic’s experience. Journal of the American Association of Occupational Health Nurses, 2008, 56(4):139–140.
12 Centers for Disease Control and Prevention. Evaluation of safety devices for preventingpercutaneous injuries among health-care personnel during phlebotomy procedures 1993–1995. Morbidity and Mortality Weekly Report , 1997, 46:21–25.http://www.cdc.gov/mmwr/preview/mmwrhtml/00045648.htm
13 Guidance for clinical health care personnel: protection against infection with blood-borneviruses. Recommendations of the Expert Advisory Group on AIDS and the Advisory Groupon Hepatitis. Wetherby, UK Department of Health, 1998.
14 Perry J, Jagger J. EPINet data report: injuries from phlebotomy needles. Advances in Exposure Prevention, 2003, 6(4):43–45.
15 Cullen B et al. Potential for reported needlestick injury prevention among healthcarepersonnel through safety device usage and improvement of guideline adherence: expert panelassessment. Journal of Hospital Infection, 2006, 63:445–451.
16 ALERT, Preventing needlestick injuries in health care settings. National Institute forOccupational Safety and Health, 1999.
17 Lamontagne F et al. Role of safety-engineered devices in preventing needlestick injuries in 32French hospitals. Infection Control and Hospital Epidemiology, 2007, 28:18–23.
18 Wilburn SE, Eijkemans G. Preventing needlestick injuries among healthcare workers: a WHO/ICN collaboration. International Journal of Occupational and Environmental Health,2004, 10:451–456.

7/26/2019 Phleb Final Screen Ready
http://slidepdf.com/reader/full/phleb-final-screen-ready 77/12760 WHO guidelines on drawing blood: best practices in phlebotomy
19 Wilburn S, Eijkemans G. Protecting health workers from occupational exposure to HIV,hepatitis, and other bloodborne pathogens: from research to practice. Asian-Pacic Newsletter on Occupational Health and Safety, 2007, 13:8–12.
20 Sacar S et al. Poor hospital infection control practice in hand hygiene, glove utilization, andusage of tourniquets American Journal of Infection Control , 2006, 34(9):606–609.
21 Castellaa A et al. Preventability of percutaneous injuries in healthcare personnel: a year-longsurvey in Italy. Journal of Hospital Infection, 2003, 55:290–294.
22 Infection control – prevention of healthcare-associated infections in primary andcommunity care. London, National Institute for Health and Clinical Excellence, 2003.http://www.nice.org.uk/page.aspx?o=CG002fullguideline
23 Berkeris L et al. Trends in blood culture contamination. A College of American PathologistQ-tracks study of 356 institutions. Archives of Pathology and Laboratory Medicine, 2005,123:1222–1226.
24 Jewell SM, J et al. Implementation and evaluation of a best practice initiative: venepuncturein the well baby. Advances in Neonatal Care, 2007, 7(5):222–229.
25 Little M et al. Percutaneous blood sampling practice in a large urban hospital. Clinical Medicine, 2007, 7:243–249.
26 Scerbo M et al. The efcacy of a medical virtual reality simulator for training phlebotomy. Human Factors: The Journal of the Human Factors and Ergonomics Society, 2006,48(1):72–84.
27 Guidelines on post exposure prophylaxis (PEP) to prevent human immunodeciency virus(HIV) infection. Geneva, World Health Organization and International Labour Organization,2008.http://www.who.int/hiv/pub/guidelines/PEP/en/index.html
28 Eye of the needle – surveillance of signicant occupational exposure to blood-borne virusesin healthcare personnel . London, Health Protection Authority, 2005.
29 Aide-memoire for a national strategy for the safe and appropriate use of injections. Geneva, World Health Organization.http://www.path.org/les/SIGN-Aide-Memoire.pdf
30 Hutin Y et al. Best infection control practices for intradermal, subcutaneous andintramuscular needle injections. Bulletin of the World Health Organization, 2003,81(7):491–500.
31 So you’re going to collect a blood specimen: an introduction to phlebotomy, 12th ed. USA,College of American Pathologists, 2007.
32 Lippi G et al. Phlebotomy issues and quality improvement in results of laboratory testing.Clinical Laboratory, 2006, 52:217–230.
33 Ford J. How to evaluate sharp safety-engineered devices. Nursing Times, 2008,104(36):42–45.
34 National Audit Ofce. A safer place to work – improving the management of health andsafety risks to staff in NHS trusts. London, NDA, 2003.
35 Leitch A et al. Reducing the potential for phlebotomy tourniquets to act as a reservoir formeticillin-resistant Staphylococcus aureus. Journal of Hospital Infection, 2006,63:428–431.
36 Louie R et al. Multicenter study of the prevalence of blood contamination on point-of-careglucose meters and recommendations for controlling contamination. Point of Care, 2005,4:158–163.

7/26/2019 Phleb Final Screen Ready
http://slidepdf.com/reader/full/phleb-final-screen-ready 78/127References 61
37 Rourke C, Bates C, Read R. Poor hospital infection control practice in blood sampling and useof tourniquets. Journal of Hospital Infection, 2001, 49:59–61.
38 Kermode M. Health worker safety is a prerequisite for injection safety in developingcountries. International Journal of Infectious Diseases, 2004, 8:325–327.
39 Norberg A et al. Contamination rates of blood cultures obtained by dedicated phlebotomy vsintra venous catheter. Journal of the American Medical Association, 2003, 289(6):726–729.
40 From AAALAC’s perspective, alcohol as a disinfectant . AAALAC International, 2001.http://www.aaalac.org/publications/Connection/Using_Alcohol_Disinfectant.pdf
41 Calfee D, Farr B. Comparison of four antiseptic preparations for skin in the preventionof contamination of percutaneously drawn blood cultures: a randomized trial. Journal ofClinical Microbiology, 2002, 40(5):1660–1665.
42 de Vries J, van Dorp W, van Barneveld P. A randomized control trial of alcohol 70% versusalcoholic iodine 2% in skin disinfection before insertion of peripheral infusion catheters. Journal of Hospital Infection, 1997, 36:317–320.
43 Procedures for the collection of diagnostic blood specimens by venipuncture. Approved
standard, H3-A5 . Wayne, PA, National Committee for Clinical Laboratory Standards, 2003.
44 Rutala W, Weber D, Committee HICPA. Guidelines for disinfection and sterilization inhealthcare facilities 2008. Atlanta, GA, Centers for Disease Control and Prevention, 2008.http://www.cdc.gov/ncidod/dhap/pdf/guideslines/Disinfection_nov_2008.pdf
45 WHO guidelines on hand hygiene in healthcare. Geneva, World Health Organization, 2009.http://whqlibdoc.who.int/publications/2009/9789241597906_eng.pdf
46 Webster J, Bell-Syer S, Foxlee R. Skin preparation with alcohol versus alcohol followed by any antiseptic for preventing bacteraemia or contamination of blood for transfusion.Cochrane Database of Systematic Reviews, 2009, Issue 3. Art. No.: CD007948. DOI:10.1002/14651858.CD007948.http://mrw.interscience.wiley.com/cochrane/clsysrev/articles/CD007948/frame.html
47 Pratt RJ et al. epic2: National evidence-based guidelines for preventing healthcare-associatedinfections in NHS hospitals in England. Journal of Hospital Infection, 2007, 65(Suppl 1):S1–S59.
48 McDonald C et al. Relative values of the interventions of diversion and improved donor-arm disinfection to reduce the bacterial risk from blood transfusion. Vox Sanguinis, 2004,86(3):178–182.
49 McDonald C. Bacterial risk reduction by improved donor arm disinfection, diversion and bacterial screening. Transfusion Medicine, 16(6):381–396.
50 Liumbruno G et al. Reduction of the risk of bacterial contamination of blood componentsthrough diversion of the rst part of the donation of blood and blood components. BloodTransfusion, 2009, 7(2):86–93.
51 Blood transfusion safety. Geneva, World Health Organization, 2009.http://www.who.int/bloodsafety/en/Blood_Transfusion_Safety.pdf
52 Basic requirements for blood transfusion services. Geneva, World Health Organization,2009.
53 McLaughlin S et al. Prevalence of lymphedema in women with breast cancer 5 years aftersentinel lymph node biopsy or axillary dissection: objective measurements. Journal of
Clinical Oncology, 2008, 26(32):5213–5219.54 Newman B et al. The effect of a 473-ml (16-oz) water drink on vasovagal donor reaction rates
in high school students. Transfusion, 2007, 47(8):1524–1533.

7/26/2019 Phleb Final Screen Ready
http://slidepdf.com/reader/full/phleb-final-screen-ready 79/12762 WHO guidelines on drawing blood: best practices in phlebotomy
55 Hillyer C et al. Bacterial contamination of blood components : risks, strategies andregulation. American Society of Hematology. Education Program, 2003:575–589.
56 Dhingra-Kumar N, Sharma A, Madan N. Analysis in quality assurance programme for HIVscreening in blood transfusion centres in Delhi. Bulletin of the World Health Organization,1997, 75(3):223–228.
57 Blajchman M. Bacterial contamination and proliferation during the storage of cellular bloodproducts. Vox Sanguinis, 1998, 74:155–159.
58 Blajchman M. Incidence and signicance of the bacterial contamination of bloodcomponents. Developmental Biology, 2002, 108:59–67.
59 American Association for Respiratory Care. AARC clinical practice guideline. Sampling forarterial blood gas analysis. Respiratory Care, 1992, 8(37):891–897.
60 Meites S. Skin-puncture and blood-collecting techniques for infants: updates and problems.Clinical Chemistry, 1998, 34(9):1890–1894.
61 Kristen M, Buckbee K. Implementing a pediatric phlebotomy protocol . 1994.http://ndarticles.com/p/articles/mi_m3230/is_n4_v26/ai_15410785
62 Shah V et al. Topical amethocaine gel 4% for intramuscular injection in term neonates: Adouble-blind, placebo-controlled, randomized trial. Clinical Therapeutics, 2008, 30(1):166–174.
63 Ogawa S et al. Venepuncture is preferable to heel lance for blood sampling in term neonates. Archives of Disease in Childhood. Fetal and Neonatal Edition, 2005, 90(5):F432–F436.
64 Shah V, Ohlsson A. Venepuncture versus heel lance for blood sampling in term neonates.Cochrane Database of Systematic Reviews, 2007, Issue 4:CD001452.
65 Blumenfeld T, Hertelendy W, Ford S. Simultaneously obtained skin-puncture serum, skin-puncture plasma, and venous serum compared, and effects of warming the skin before
puncture. Clinical Chemistry, 1997, 23(9):1705–1710.
66 Clagg M. Venous sample collection from neonates using dorsal hand veins. Laboratory Medicine, 1989, 20(4):248–250.
67 Fruhstorfer H, Schmelzeisen-Redeker G, Weiss T. Capillary blood sampling: relation betweenlancet diameter, lancing pain and blood volume. European Journal of Pain, 1999,3(3):283–286.
68 Lilien L et al. Neonatal osteomyelitis of the calcaneus: complication of heel puncture. Journalof Pediatrics, 1976, 88(3):478–480.
69 Pendergraph G. Handbook of phlebotomy, 3rd ed. Philadelphia, Lea & Febiger, 1992.
70 Stevens B, Yamada J, Ohlsson A. Sucrose for analgesia in newborn infants undergoing painfulprocedures. Cochrane Database of Systematic Reviews, 2004, Issue 3:CD001069.
71 Guiding principles to ensure injection device security. Geneva, World Health Organization,2003.http://apps.who.int/medicinedocs/en/d/Js4886e/
72 Management of solid health-care waste at primary health-care centres: a decision-makingguide. Geneva, World Health Organization, 2007.http://www.who.int/water_sanitation_health/medicalwaste/hcwdmguide/en/
73 Performance specication for sharps containers. Geneva, World Health Organization, 2007.
http://www.who.int/immunization_standards/vaccine_quality/who_pqs_e10_sb01.pdf
74 Corey K et al. Pilot study of postexposure prophylaxis for hepatitis C virus in healthcare workers. Infection Control and Hospital Epidemiology, 2009, 30(10):1000–1005.

7/26/2019 Phleb Final Screen Ready
http://slidepdf.com/reader/full/phleb-final-screen-ready 80/127
PART V ANNEXES

7/26/2019 Phleb Final Screen Ready
http://slidepdf.com/reader/full/phleb-final-screen-ready 81/127

7/26/2019 Phleb Final Screen Ready
http://slidepdf.com/reader/full/phleb-final-screen-ready 82/127 Annex A: Methods and evidence base 65
Annex A: Methods and evidence base
A1 Consultaon with experts and scope of recommendaons
In April 2008, the WHO Injection Safety programme – which is part of the Departmentof Essential Health Technologies (EHT) at WHO Headquarters in Geneva – convened aconsultation on best practices for phlebotomy and blood collection. The consultation includedspecial categories such as arterial blood sampling, capillary blood sampling and paediatric bloodcollection.
A working group was convened, comprising international experts and colleagues from WHOdepartments involved in infection control and safety of health-care practices.
The specic objectives of the consultation were to:
• review the rst draft of this document, which had been developed in response to clinicalquestions and a suggested scope developed by SIGN in consultation with other WHO
experts and the Centres for Disease Control and Prevention;
• identify critical steps in phlebotomy procedure as a basis for making recommendations.
The focus of the consultation was primarily on the needs of developing and transitionalcountries, in which injection safety programmes are not yet well developed or in which qualitysystems are lacking. The consultation identied the need for guidelines on best phlebotomypractices in policy and organizational issues, and in technical and scientic aspects of bloodcollection.
Recommendaons of the working group Content of guidelines
Guidelines should include informaon on the importance of:
• safe pracces in phlebotomy;
• an uninterrupted supply of single-use devices in situaons where safety-
engineered devices are unaordable;
• training in phlebotomy, to avoid adverse eects to the paent and the
health worker, and blood samples of poor quality.
Evidence base
Recommendaons should be evidence based.
Consistency and exibility
Recommendaons should be designed to:
• promote a consistent approach to ensuring phlebotomy safety and
quality of blood drawn;
• be suciently exible to allow for variaons in device selecon and
training curricula.

7/26/2019 Phleb Final Screen Ready
http://slidepdf.com/reader/full/phleb-final-screen-ready 83/12766 WHO guidelines on drawing blood: best practices in phlebotomy
A2 Evidence base
An initial literature search was conducted by the guideline writer – Professor Mehtar (chairof the working group) – using PubMed, MedLine, the WHO library database and regionaldatabases. Particular efforts were made to identify systematic literature reviews and evidencethat related specically to phlebotomy practices in developing countries.
The panel reviewed the draft guidelines and the evidence retrieved, and reached consensus onall but one of the recommendations. It found that further evidence was needed to determine theeffect of “alcohol alone” versus “any skin disinfectant followed by alcohol for skin preparation” before blood collection for the purpose of blood transfusion. The panel commissioned asystematic review with evidence tables based on GRADE1 from the Cochrane group. The overallnding from the review, which is given in Annex J (1), was as follows:
In conclusion there is currently no evidence of a difference in either bloodcontamination or bacteraemia when donor skin is cleansed pre-venepuncture witha one-step alcohol based process or a two-step alcohol plus antiseptic process. Thislack of evidence for a difference however results from a complete absence of researchand therefore a real difference cannot be discounted. Until better evidence emerges,decisions about which mode of pre-blood donation skin cleansing to use are likely to be
driven by convenience and cost.
This conclusion was circulated to the guideline development group, with a request for advice onthe best recommendation to incorporate into the guideline. Additional infection control experts(see list of additional reviewers) were consulted by e-mail, in line with the WHO guidelinedevelopment procedure which notes that, when evidence is lacking, a recommendation should be based on expert opinion as well as on convenience and cost. Consensus was reached by askingthe experts to vote on the nal recommendation.
The group was able to make a recommendation on best practice for skin disinfection in bloodtransfusion (see Section 4.2.1). Due to lack of evidence, the recommendation was based onexpert opinion.
A3 Peer review and technical eding
Following the internal and external review and revision, an advanced draft of the document wassent to Dr Mary Catlin and Dr Michael Borg for a thorough peer review. The guideline was thensubmitted to the guideline development group and to additional experts who contributed tothe development of the recommendation on skin disinfection before blood donation. The expertgroup amended the guidelines in light of the comments received and agreed.
The technical editing of this document was undertaken by Dr Hilary Cadman, under thetechnical guidance of Dr Selma Khamassi.
A4 Implementaon and evaluaon plans
The nal phlebotomy guidelines will be translated into all United Nations languages, andprinted for distribution in all six WHO Regional Ofces and in many different countries. It will also be made available through the WHO Injection Safety Website. A CD-ROM containingthe phlebotomy document, posters illustrating each of the practices described and a trainingpackage will be produced and translated. The document will also be adapted to local needs insome countries, although key steps and recommendations will be maintained.
1 The Grading of Recommendations Assessment, Development and Evaluation (GRADE) Working Group is an informal
collaboration that has developed a common, sensible and transparent approach to grading quality of evidence and strength
of recommendations (http://www.gradeworkinggroup.org).

7/26/2019 Phleb Final Screen Ready
http://slidepdf.com/reader/full/phleb-final-screen-ready 84/127 Annex A: Methods and evidence base 67
Upon request, the WHO Injection Safety programme will provide technical support for adaptingand implementing the guideline at regional and country levels.
The feasibility of recommended practices and the impact of the guideline on phlebotomypractices will be evaluated by the WHO Injection Safety programme, in collaboration with WHORegional Ofces. Feasibility and impact will be evaluated using the revised injection safetyassessment tool C, developed by the WHO Injection Safety programme (2).
A5 Review and updang of the recommendaons
The recommendations in this document are expected to remain valid for ve years; that is, until2014. The WHO Injection Safety programme will initiate a review of these recommendations atthat time.
A6 Monitoring and evaluaon of the implementaon
The indicators listed in Chapter 9 should be used to monitor and evaluate the implementation of
these guidelines.

7/26/2019 Phleb Final Screen Ready
http://slidepdf.com/reader/full/phleb-final-screen-ready 85/127

7/26/2019 Phleb Final Screen Ready
http://slidepdf.com/reader/full/phleb-final-screen-ready 86/127 Annex B: Infection prevention and control, safety equipment and best practice 69
Annex B: Infecon prevenon and control,
safety equipment and best pracce
Table B.1 Recommendations for infection prevention and control, safety equipment and best practice
Item Best practice Rationale
Personal protection and hygiene
Hand hygienea Before and after each patient contact, aswell as between procedures on the samepatient
Reduces risk of cross-contaminationbetween patients
Glovesa A pair of well-tting, clean, disposablelatex or latex-free gloves per patient orper procedure
Reduces the health-care worker’spotential exposure to blood and reducesthe patient’s risk of cross-contaminationbetween patients
Masks, visors or
goggles
Not indicated
Apron/gown or cover Not indicated
Safe blood-sampling equipment
Tourniquet Clean elastic tourniquet reprocessedbetween patients
Contamination with nosocomial bacteriahas been documented on tourniquets
DO NOT use latex gloves as a tourniquetif patients have an history of latexallergy
Some patients may have latex allergy
Sharps containers Puncture and leak-proof containers, thatare sealed after use
Keep container visible and within arms’reach
Prevents needle-stick injury to patients,health workers and the community at
large
Skin preparation Inspect skin, clean if visibly dirty
Apply 70% alcohol with single-use swabor clean cotton-wool ball
Prevents insertion-site infection andcontamination of the blood collected
Cotton wool that is pre-torn with barehands is contaminated and bacteria canmultiply over time
Do not leave containers of cottonsaturated alcohol and cotton; dampencotton immediately before use withoutcontaminating the primary container
For blood donation, a one-stepcombination of 2% chlorhexidinegluconate in 70% isopropyl alcohol isrecommended; allow to air dry
Reduces contamination of the bloodcollected
Blood sampling
Drawing venous blood Closed vacuum extraction tubes withsingle-use needle and needle holder
Reduces exposure to blood andlikelihood of contamination
If needleholders must be reused due tocost, they should be removed with onehand; some safety boxes have slots forthis purpose
Winged needles with needle cover
Safety syringes with retractable needles
Safer for health workers and patients –reduces exposure to blood and sharpsinjuries

7/26/2019 Phleb Final Screen Ready
http://slidepdf.com/reader/full/phleb-final-screen-ready 87/12770 WHO guidelines on drawing blood: best practices in phlebotomy
Table B.1 continued
Item Best practice Rationale
Blood sampling
Small quantities ofcapillary blood
Single-use lancet
Retractable lancet
Lancet platform or glucometer is
dedicated to one patient during hospitalstay, or platform or device is cleanedof all visible dirt and disinfected withalcohol between uses
Hypodermic needles should be used withcare as they may enter deeper than isdesirable; they should never be used forheel-pricks
Hepatitis infections have beentransmitted to patients when lancetplatforms or glucometers were used onseveral patients without reprocessing(i.e. without cleaning and disinfection)
Blood-samplingsystem
Blood-sampling tubes or containers(single use)
Vacuum-extraction sampling reducesexposure to blood
Blood-drawing system Sterile blood collection bag (single ormultiple bag systems) with integratedneedle and needle protection
Blood collected in these systems shouldbe stored and transported according to
blood-bank procedures and the product(i.e. warm or cold stored) 150–500 mlsterile bag or bags for blood (medical orblood donation)
Reduces bacterial contamination
Protects the health worker and patient
Platelets may be stored at roomtemperature
Some sterile blood bags may havea diversion pouch to separate therst 10 ml or so of blood to reducecontamination
Transportation oflaboratory samples
Closed system that keeps samplesupright and snugly tted in stackabletrays or racks
Clearly labelled blood sample containers
(Some samples – such as coldagglutinins – may need to betransported in a warm transportationsystem)
Closed system keeps blood samplescontained in case of breakage or spillage
Clearly labelled sample containers withtracking system allows samples to betraced
Request forms A legible completed form mustaccompany blood sample to laboratory
Form is stored with samples but in aseparate compartment of the laboratorytransport system
Provides accurate information on testsrequired and patient identication
Some facilities use a plastic bag withan outer pouch that keeps the paperwith the specimen but protects it fromcontamination
Specimen storage andblood sampling area
Storage in a cool, separate area;temperature regulated to around 25o C
Keeps samples secure and away fromthe general public
Patient information Verbal explanation and consent(information leaet)
Helps to ensure patient cooperation andrespect of patient rights
a Source for information on hand hygiene and gloves: (3, 4).

7/26/2019 Phleb Final Screen Ready
http://slidepdf.com/reader/full/phleb-final-screen-ready 88/127 Annex C: Devices available for drawing blood 71
Annex C: Devices available for drawing blood
The information given in this appendix is based on advice from the Centers for Disease Controland Prevention ( 5 ).
Table C.1 Devices for drawing bloodType of device Advantages Disadvantages
Conventional devices
Hypodermic single-use needle andsyringe
Widely available
Least expensive
Comes in wide range of needlelengths and gauges
Does not require special training
Can be used for blood drawing inpaediatric population
For patient with small or difcultveins, blood drawing can be easier
than an evacuated tube systemIf heparinized, can be used forarterial blood drawing
Requires blood transfer, creatingadditional risk for needle-stickinjuries or blood splashing
Difcult to draw large or multipleblood samples
A smaller syringe and paediatriclaboratory tube should be used forpaediatric patients
Vacuum-tube systems Safer than using hypodermicneedle and syringe
Eliminates blood transfer
Allows numerous blood samplesto be collected through singlevenepuncture
Requires user to be skilled in itsuse
Reuse of needle holder (tubeholder) creates risk for needle-stick injuries during disassembly
Mixing components from differentmanufactures can create aproblem during use
A smaller tube with a reducedvacuum should be used forpaediatric patients
Higher cost
Winged steel needles (buttery) Good for blood drawing frompaediatric population or patientwith small or difcult veins
Allows better precision thanhypodermic needle or evacuatedtube needle
Because of the air in the tubing,rst tube must be collectedwithout additive or discarded
Difference in winged steel needlesfor evacuated system tubes andwinged infusion set can createconfusion
Higher cost
Safety-engineered devices
Passive
Auto-disable (AD) syringes
NOT recommended for blood
drawing
Not recommended for phlebotomy
Designed to prevent reuse, does
not reduce the risks of needle-sticks
During probing, safety mechanismcan be activated, requiring new
venepunctureRequires blood transfer, creatingrisk of needle-stick injuries
Difcult to draw large or multipleblood samples
Does NOT offer needle-stickprevention
Air in the syringe can affect testresults
Requires additional training
Lancets Retractable; prevent needle-stickinjuries

7/26/2019 Phleb Final Screen Ready
http://slidepdf.com/reader/full/phleb-final-screen-ready 89/12772 WHO guidelines on drawing blood: best practices in phlebotomy
Table C.1 continued
Type of device Advantages Disadvantages
Safety-engineered devices
Active
Manually retractable syringes Safety mechanism retracts theneedle into the syringe, reducingthe hazard of needle-stick
exposure and the possibility ofreuse
Safety mechanism cannot beactivated when syringe is full ofblood and during blood transfer
Requires health worker to use it asrecommended
Requires blood transfer, creatingrisk of needle-stick injuries
Difcult to draw large or multipleblood samples
High cost
Self re-sheathing needles andsyringes
Sleeve forwarded over the needleprovides guard around the usedneedle, reducing the risk ofneedle-stick injury; also preventsreuse
Needle cannot be covered whensyringe is full of blood or duringblood transfer
Requires user’s compliance
Additional training
High cost
Winged steel needles with passiveor active safety mechanism
Needle-locking mechanism helpsto reduce the risk of needle-stickinjury and prevents reuse
If syringe is used for blooddrawing, allows for safer transferof blood
If used in connection with vacuumtubes, because of the air intubing, the rst tube is eitherwithout additive or discarded
Requires additional training
High cost
Manually retractable evacuatedtube systems
Safer than using hypodermicneedle and syringe because doesnot require blood transfer
Allows numerous blood samplesto be collected through singlevenepuncture
Safety mechanism prevents reuse
and helps to reduce the risk ofneedle-stick injuries
Requires skill in its use
Reuse of needle (or tube) holderscreates risk of needle-stick injuriesduring disassembly
Components from differentmanufacturers may beincompatible
Smaller volume (1–5 ml) tubewith lower vacuum should be usedfor paediatric patients to reducehaemolysis
Requires additional training
High cost

7/26/2019 Phleb Final Screen Ready
http://slidepdf.com/reader/full/phleb-final-screen-ready 90/127 Annex D: Managing occupational exposure to hepatitis B, hepatitis C and HIV 73
Annex D: Managing occupaonal exposure to
hepas B, hepas C and HIV
Health workers may occasionally be accidentally exposed to blood and other body uids thatare potentially infected with HIV, hepatitis virus or other bloodborne pathogens. Occupationalexposure may occur through direct contact from splashes into the eyes or mouth, or throughinjury with a used needle or sharp instrument. Post-exposure prophylaxis (PEP) can help toprevent the transmission of pathogens after a potential exposure (6).
This annex describes the steps in managing exposure to blood or other uids that are potentiallyinfected with hepatitis B virus (HBV); hepatitis C virus (HCV) or HIV.
Step 1 – Provide immediate rst-aid care to the exposure site
Provide immediate rst-aid care as follows.
• Wash wounds and skin with soap and water. Do not use alcohol or strong disinfectants.
• Let the wound bleed freely.
• Do not put on a dressing.
• Flush eyes, the nose, the mouth and mucous membranes with water for at least 10 minutes.
Step 2 – Determine the risk associated with the exposure
Determine the risk associated with the exposure by considering:
• the type of uid; for example, blood, visibly bloody uid, other potentially infectious uid,
or tissue and concentration of virus;• the type of exposure; for example, there is a higher risk associated with percutaneous injury
with a large, hollow-bore needle, a deep puncture, visible blood on the device, a needleused in an artery or vein, and exposure to a large volume of blood or semen, and less riskassociated with exposure of mucous membranes or nonintact skin, or exposure to a small volume of blood, semen or a less infectious uid (e.g. cerebrospinal uid).
Step 3 – Evaluate the source of the potenal exposure
To evaluate the source of the potential exposure:
• assess the risk of infection, using available information;• test the source person whenever possible, and only with his or her informed consent; but
• do not test discarded needles or syringes for virus contamination.

7/26/2019 Phleb Final Screen Ready
http://slidepdf.com/reader/full/phleb-final-screen-ready 91/12774 WHO guidelines on drawing blood: best practices in phlebotomy
Step 4 – Manage individuals exposed to HBV and HIV
There is no PEP regimen recommended for HCV; however, there are specic steps that can betaken to reduce the risk of infection for those exposed to HBV and HIV, as described below.
Post-exposure prophylaxis for HBV
A person’s response to exposure to HBV depends on his or her immune status, as determined bythe history of hepatitis B vaccination and vaccine response if tested 1–2 months after vaccination(see Table D.1), and whether the exposure poses a risk of infection. HBV PEP is safe for women who are pregnant or breastfeeding.
Table D.1 Recommendations for HBV post-exposure prophylaxis, according to immune status
HBV immune status Post-exposure prophylaxis
Unvaccinated HBV vaccination and HBIg
Previously vaccinated, known responder
(anti-hepatitis B surface antigen positive)
None
Previously vaccinated, known nonresponder HBV vaccination and HBIg
Antibody response unknown Test; if antibody response is < 10 IU/ml, give HBVvaccination and HBIg
HBIg, hepatitis B immunogobulin; HBV, hepatitis B virus.
Source: CDC (7 ).
Post-exposure prophylaxis for HIV
Check the current national guidelines. This section is based on the WHO/ILO Guidelines on post exposure prophylaxis prophylaxis (PEP) to prevent human immunodeciency virus
(HIV) infection (6). In addition to rst-aid care and evaluation of exposure and risk, PEP forHIV includes counselling, HIV testing based on informed consent, and – depending on therisk assessment – the provision of a short course (28 days) of antiretroviral (ARV) drugs, withfollow-up and support.
The recommendation for HIV PEP is based on an evaluation of the risk of infection described instep 2.
If the source person is identied, it is important to obtain information on that person’sserostatus and, if positive, an evaluation of the clinical status and treatment history.
Tesng and counselling
If testing is available, the exposed person should be offered the chance to be tested for HIV andreceive appropriate counselling. The person should always have the choice to refuse testing.Perform HIV-antibody testing at baseline, and at 6–12 weeks and 6 months after exposure. If theperson develops HIV antibodies, he or she should be referred for treatment, care and support.
Whenever possible, the source patient should also be tested, with his or her informed consent.
Anretroviral drugs for post-exposure prophylaxis
ARV drugs should be started as soon as possible, and certainly within 72 hours of exposure.The drugs should be taken continuously for 28 days. Health workers should not wait for tests
results before taking or administering PEP. If the test results show that the source person isnegative, the prophylaxis can be stopped. Counselling should include provision of informationon the importance of adhering to treatment, and information on HIV prevention in generaland in the workplace. The person should be advised to use condoms, and not to donate blood

7/26/2019 Phleb Final Screen Ready
http://slidepdf.com/reader/full/phleb-final-screen-ready 92/127 Annex D: Managing occupational exposure to hepatitis B, hepatitis C and HIV 75
or organs for up to 6 months after exposure. Women of childbearing age should be advised touse contraception, and alternatives to breastfeeding should be discussed with women currentlyfeeding their infants, because there is a high risk of transmitting HIV to the infant if the mother becomes infected during breastfeeding.
Based on WHO recommendations, a two-drug PEP regimen should be used (see Table D.2),unless there is suspicion or evidence of drug resistance. The standard regimen consists of two
nucleotide reverse transcriptase inhibitors (NRTIs). When there is suspicion that the virus could be resistant to one or more of the drugs included in the standard PEP regimen, a third drug – aprotease inhibitor – should be added to the two chosen NRTIs (see Table D.2). In this situation,it is best to consult an HIV expert.
Table D.2 Recommended two and three-drug post-exposure prophylaxis regimens
Two-drug regimens
Preferred regimens 1. ZDV + 3TC
2. d4T + 3TC
Alternative regimen 3. TDF + 3TC
Three-drug regimens
Preferred regimen 1. ZDV + 3TC + LPV/r
Alternative regimens 2. ZDV + 3TC plus SQV/r or ATV/r or FPV/r
3. TDF + 3TC plus SQV/r or ATV/r or FPV/r
4. TDF + FTC plus SQV/r or ATV/r or FPV/r
5. (d4T) + 3TC plus SQV/r or ATV/r or FPV/r
3TC, lamivudine; ATV/r, atazanavir/ritonavir; d4T, stavudine; FPV/r, Fosamprenavir/ritonavir; FTC, emtricitabine; LPV/r, lopinavir/ritonavir; SQV/r,
siquinavir/rotinavir; TDF, tenofovir; ZDV, zidovudine.
Women of childbearing age should not be prescribed medications such as the combinationdidanosine plus stavudine. They should be offered a pregnancy test before starting the PEPregimen. Lactating women should be aware that ARVs are excreted in breast milk, and that the
virus itself can be transmitted through breastfeeding. When and where feasible, alternativesoptions to breastfeeding should be discussed with the mother.
Follow-up
Follow-up visits should aim to support the person’s adherence to PEP, prevent or treat adverseeffects of the medicines, and detect seroconversion, if it occurs.
Advise those who have been exposed to take precautions to prevent secondary transmissionduring the follow-up period. Such precautions include:
• avoiding pregnancy and seeking safe alternatives to breastfeeding;
• avoiding donating blood, tissue or sperm;• using condoms during sexual intercourse, until the test at 6 months conrms that the
exposed person remains seronegative.
PEP for HIV and hepatitis B is not indicated:
• if the exposed person is already HIV-positive from a previous exposure;
• in the context of chronic exposure (e.g. repeated exposure to HIV from unprotected sexualintercourse with a known HIV-positive partner); or
• if the exposure poses no risk of transmission; for example, in the case of
– exposure of intact skin to potentially infectious body uids;
– exposure to body uids that are not known to transmit HIV or HBV (faeces, saliva, urineor sweat); or

7/26/2019 Phleb Final Screen Ready
http://slidepdf.com/reader/full/phleb-final-screen-ready 93/12776 WHO guidelines on drawing blood: best practices in phlebotomy
– exposure to body uids from a person known to be HIV-negative, unless the sourceperson is identied as being at high risk of having been recently infected and is currently within the window period for seroconversion.
Step 5 – Report the incident
After the incident, refer the exposed person to a trained service provider who can givecounselling, evaluate the risk of transmission of bloodborne pathogens having occurred, anddecide on the need to prescribe ARV drugs or hepatitis B vaccine to prevent infection with HIVor HBV, respectively.
Both the incident report and the evaluation of the risk of exposure should lead to quality controland evaluation of the safety of working conditions.
Take correctional measures to prevent exposure to HIV and other bloodborne pathogens.

7/26/2019 Phleb Final Screen Ready
http://slidepdf.com/reader/full/phleb-final-screen-ready 94/127 Annex E: Training course content for phlebotomists 77
Annex E: Training course content for
phlebotomists
Before undertaking phlebotomy, health workers should be trained in, and demonstrateprociency for, the blood collection procedures on the patient population that will be withintheir scope of practice.
Training should cover paediatric, neonatal and intensive care, and blood transfusion, asappropriate.
Competence in phlebotomy practices should be an essential part of the nal evaluation of thosetraining as health workers.
The outcome of the course should be safety of patients, adequacy of the laboratory specimens,and safety of health workers and the community.
Course contents
• Anatomy of the phlebotomy sites from which the worker is authorized to access blood.
• Infection prevention and control:
– elements of standard precautions relevant to venepuncture (hand hygiene, wearingnon-sterile gloves);
– use of antiseptics – skin disinfection;
– cleaning and disinfection of materials used on more than one patient, includingtourniquets, scissors and specimen carriers;
– disposal of used equipment, especially sharps.• Protection of the patient:
– patient identication, including children and confused patients;
– awareness of the institution’s rule to halt and seek help after a dened number ofunsuccessful draws;
– informed consent and patient rights;
– managing supplies for patients in isolation;
– awareness of contraindications to blood draws including drawing on the same side asa mastectomy, through infected or scarred tissues, and through in-dwelling vascular
devices (per institutional policy).• Protection of the health worker:
– immunization with hepatitis B;
– awareness of high risk devices and practices;
– ability to state who and when to contact for support in the event of exposure to bloodand body uids;
– awareness of the benets of PEP and the need to have source patients tested and HIVPEP started, preferably within hours;
– avoidance of two-handed needle recapping, disassembly of devices, removal of needles
prior to injecting blood into tube;– placement and use of sharps container within arm’s reach;
– appropriate use of personal protective equipment, including gloves.

7/26/2019 Phleb Final Screen Ready
http://slidepdf.com/reader/full/phleb-final-screen-ready 95/12778 WHO guidelines on drawing blood: best practices in phlebotomy
• Types of equipment available for blood sampling, and procurement and use of equipment.
• Practice taking blood samples, including blood sampling and simulated blood sampling(capillary blood, arterial blood, venous blood from adults and children according toresponsibilities.
• Practice on articial arms and clinical skills development.
• Special techniques:
– capillary puncture
▪ heel and nger-pricks
▪ lancets
▪ capillary tubes (lter paper, capillary blood tubes, rapid test strips, etc.)
– venous blood
▪ large volume (blood letting – aware that this must be done under direct physicianorder and management)
▪ winged needles
▪ evacuated tubes
▪ blood cultures.
• Adverse events and management.
• Occupational exposure and management:
– the country’s relevant occupational health regulations, including PEP for prevention ofHIV and hepatitis B;
– the procedure for, and benets of, reporting occupational exposure to blood;
– rst aid after exposure (see management);
– PEP (importance of timely response);– surveillance and use of data for prevention of occupational exposure.
• Waste management, including disposal of waste and sharps, and procedures for spillageand breakage.
• Laboratory practices, including type of samples, forms, labelling and transportation.
• Standards of practice.
• Sustainability of training programme.
• Career path.
• Skill-based incentives.

7/26/2019 Phleb Final Screen Ready
http://slidepdf.com/reader/full/phleb-final-screen-ready 96/127 Annex F: Explaining the procedure to a patient 79
Annex F: Explaining the procedure to a paent
Introducon:
Hello, I am ________________ I work at this health-care facility.
What is your name? (Health-care worker checks rst and last name against order for tests andthe patient’s name band if present).
I am trained to take blood for laboratory tests (or medical reasons) and I have experience intaking blood.
I will introduce a small needle into your vein and gently draw some blood for ________ tests.(Tell the patient the specic tests to be drawn).
Then I will label them with your name and contact details and send them off for tests to thelaboratory. The results will be returned to Dr ________ (mention the name of the clinician who ordered the tests).
Do you have any questions? Did you understand what I explained to you? Are you willing to betested?
Please sit down and make yourself comfortable.
Now, I will ask you a few questions so that both of us feel comfortable about the procedure.
• Have you ever had blood taken before?
• (If yes) How did it feel? How long ago was that?
• Are you scared of needles?
• Are you allergic to anything? (Ask specically about latex, povidone iodine, tape.)
• Have you ever fainted when your blood was drawn?
• Have you eaten or drunk anything in the past two hours?
• How are you feeling at the moment?
Shall we start? If you feel unwell or uncomfortable, please let me know at once.

7/26/2019 Phleb Final Screen Ready
http://slidepdf.com/reader/full/phleb-final-screen-ready 97/127

7/26/2019 Phleb Final Screen Ready
http://slidepdf.com/reader/full/phleb-final-screen-ready 98/127 Annex G: Disassembly of needle from syringe or other devices 81
Annex G: Disassembly of needle from syringe or
other devices
Safe methods of removing the needle from the syringe or other devices are necessary to protect
health workers from injury.
This procedure must be carried out close to a sharps container, and the needle must bediscarded immediately.
NEVER disassemble an exposed, used needle with your bare hands.
If the needle has to be disassembled from the barrel or syringe, re-sheath using a one-handscoop technique, then remove the needle using a removal device. Both of these procedures areexplained below.
One-hand scoop technique
1. Leave the needle cap on the surface and guide the tip of the used needle tip into it usingonly one hand. Clean the surface with disinfectant afterward to avoid leaving blood.
2. Place the needle cap against a rm upright surface with its opening towards thephlebotomist, and place the used needle tip into it.
3. Lift the needle and syringe vertically and, once the tip is covered, use the other hand to xthe cap into place.
Use of a removal device
• Needle pliers – Hold the needle with pliers or artery forceps. Dislodge the needle byunscrewing or pulling it off. Discard immediately into a sharps container.
• Needle guard (mushroom) – Place the cap in the device. Using one hand, insert the needletip into the cap vertically and turn rmly to x the needle in the cap. Lift the syringe or barrel and removed the covered needle. Discard immediately.

7/26/2019 Phleb Final Screen Ready
http://slidepdf.com/reader/full/phleb-final-screen-ready 99/127

7/26/2019 Phleb Final Screen Ready
http://slidepdf.com/reader/full/phleb-final-screen-ready 100/127 Annex H: Blood spillage 83
Annex H: Blood spillage
Blood spillage may occur because a laboratory sample breaks in the phlebotomy area or duringtransportation, or because there is excessive bleeding during the procedure. In this situation,clean up the spillage and record the incident, using the following procedure.
1. Wear a pair of non-sterile gloves.
2. Use tongs or a pan and brush to sweep up as much of the broken glass (or container) aspossible. Do not pick up pieces with your hands.
3. Discard the broken glass in a sharps container. If this is not possible due to the size of the broken glass, wrap the glass or container in several layers of paper and discard it carefullyin a separate container. Do not place it in the regular waste container.
4. Use disposable paper towels to absorb as much of the body uids as possible.
5. Wipe the area with water and detergent until it is visibly clean.
6. Saturate the area again with sodium hypochlorite 0.5% (10 000 ppm available chlorine).
This is a 1:10 dilution of 5.25% sodium hypochlorite bleach, which should be prepareddaily.
7. Rinse off the tongs, brush and pan, under running water and place to dry.
8. Remove gloves and discard them.
9. Wash hands carefully with soap and water, and dry thoroughly with single-use towels.
10. Record the incident in the incident book if a specimen was lost, or persons were exposed to blood and body uids.

7/26/2019 Phleb Final Screen Ready
http://slidepdf.com/reader/full/phleb-final-screen-ready 101/127
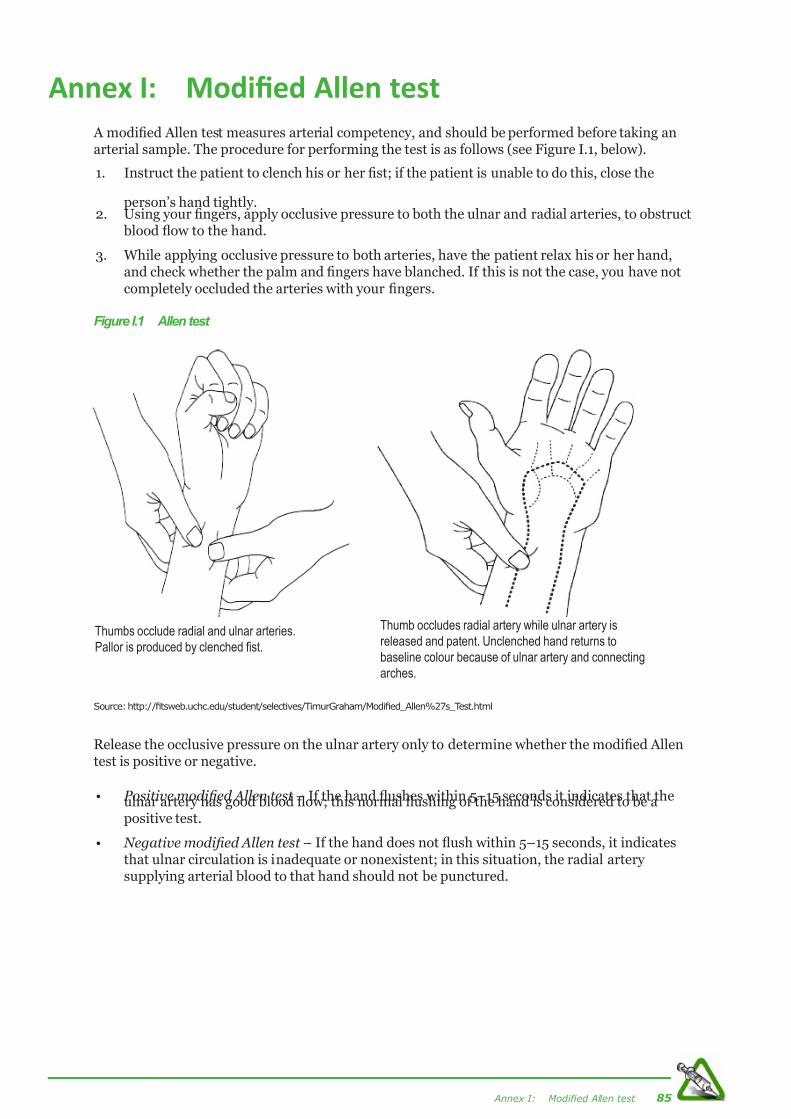
7/26/2019 Phleb Final Screen Ready
http://slidepdf.com/reader/full/phleb-final-screen-ready 102/127 Annex I: Modifed Allen test 85
Annex I: Modied Allen test
A modied Allen test measures arterial competency, and should be performed before taking anarterial sample. The procedure for performing the test is as follows (see Figure I.1, below).
1. Instruct the patient to clench his or her st; if the patient is unable to do this, close the
person’s hand tightly.2. Using your ngers, apply occlusive pressure to both the ulnar and radial arteries, to obstruct
blood ow to the hand.
3. While applying occlusive pressure to both arteries, have the patient relax his or her hand,and check whether the palm and ngers have blanched. If this is not the case, you have notcompletely occluded the arteries with your ngers.
Figure I.1 Allen test
Source: http://tsweb.uchc.edu/student/selectives/TimurGraham/Modied_Allen%27s_Test.html
Release the occlusive pressure on the ulnar artery only to determine whether the modied Allentest is positive or negative.
• Positive modied Allen test – If the hand ushes within 5–15 seconds it indicates that theulnar artery has good blood ow; this normal ushing of the hand is considered to be apositive test.
• Negative modied Allen test – If the hand does not ush within 5–15 seconds, it indicatesthat ulnar circulation is inadequate or nonexistent; in this situation, the radial arterysupplying arterial blood to that hand should not be punctured.
Thumbs occlude radial and ulnar arteries.
Pallor is produced by clenched st.
Thumb occludes radial artery while ulnar artery is
released and patent. Unclenched hand returns to
baseline colour because of ulnar artery and connecting
arches.

7/26/2019 Phleb Final Screen Ready
http://slidepdf.com/reader/full/phleb-final-screen-ready 103/127

7/26/2019 Phleb Final Screen Ready
http://slidepdf.com/reader/full/phleb-final-screen-ready 104/127 Annex J: Cochrane review 87
Annex J: Cochrane review
1 / 15
Skin preparation with alcohol versus alcohol followed by any antiseptic forpreventing bacteraemia or contamination of blood for transfusion.
Review informationAuthors
Joan Webster1, Sally EM Bell-Syer2, Ruth Foxlee2
1Centre for Clinical Nursing, Royal Brisbane and Women's Hospital, Herston, Australia2Department of Health Sciences, University of York, York, UK
Citation example: Webster J, Bell-Syer SEM, Foxlee R. Skin preparation with alcohol versus alcohol followed byany antiseptic for preventing bacteraemia or contamination of blood for transfusion.. Cochrane Database of Systematic Reviews , Issue . Art. No.: . DOI: .
Contact person
Joan Webster
Nursing Director, ResearchCentre for Clinical NursingRoyal Brisbane and Women's HospitalLevel 2, Building 34Butterfield StreetHerstonQLD4029Australia
E-mail: [email protected]
Dates
Assessed as Up-to-date:10 March 2009Date of Search: 10 March 2009
Next Stage Expected: 4 April 2011Protocol First Published: Not specifiedReview First Published: Not specifiedLast Citation Issue: Not specified
What's new
Date Event Description
History
Date Event Description
AbstractBackground
Blood for transfusion may become contaminated at any point between collection and transfusion and may resultin bacteraemia (the presence of bacteria in the blood), severe illness or even death for the blood recipient. Donorarm skin is one potential source of blood contamination, so it is usual to cleanse the skin with an antisepticbefore blood donation. One-step and two-step alcohol based antiseptic regimens are both commonly advocatedbut there is uncertainty as to which is most effective.
Objectives
To assess the effects of cleansing the skin of blood donors with alcohol in a one-step compared with alcohol in atwo-step procedure to prevent contamination of collected blood or bacteraemia in the recipient.
Search strategy
We searched the Cochrane Wounds Group Specialised Register (March 10 2009); The Cochrane Central Registerof Controlled Trials (CENTRAL) The Cochrane Library 2009, Issue 1; Ovid MEDLINE - (1950 to February Week 42009); Ovid EMBASE - (1980 to 2009 Week 9); and EBSCO CINAHL - (1982 to February Week 4 2009). We alsosearched the reference lists of key papers.
Selection criteria
All randomised trials (RCTs) comparing alcohol based donor skin cleansing in a one-step versus a two-step

7/26/2019 Phleb Final Screen Ready
http://slidepdf.com/reader/full/phleb-final-screen-ready 105/12788 WHO guidelines on drawing blood: best practices in phlebotomy
Skin preparation with alcohol versus alcohol followed by any antiseptic for preventing bacteraemia or contamination of ...
2 / 15
process that includes alcohol and any other antiseptic for pre-venepuncture skin cleansing were considered.Quasi randomised trials were to have been considered in the absence of RCTs.
Data collection and analysis
Two review authors independently assessed studies for inclusion.
Main results
No studies (RCTs or quasi RCTs) met the inclusion criteria.
Authors' conclusions
We did not identify any eligible studies for inclusion in this review. It is therefore unclear whether a two-step,alcohol followed by antiseptic skin cleansing process prior to blood donation confers any reduction in the risk of blood contamination or bacteraemia in blood recipients, or conversely whether a one-step process increases riskabove that associated with a two-step process.
Plain language summaryAlcohol, with or without an antiseptic, for preparing the skin before blood collection, to preventbacteraemia or contamination of blood for transfusion.
When blood is collected from blood donors for transfusion it may become contaminated during collection,storage or transfusion. Blood contamination can cause bacteraemia (the presence of bacteria in the blood),
severe illness or even death in the blood recipient. When blood is being taken from donors, the skin on the armof the donor is one potential source of contamination, so it is usual to cleanse the arm with an antiseptic first,and both one-step and two-step alcohol based regimens are commonly used, however there is uncertainty aboutwhich regimen is the most effective for reducing the microbial load (the number of microscopic bacterialorganisms) on the donor arm. We looked for studies that compared the use of alcohol alone versus the use of alcohol followed by another antiseptic to clean the arm before the needle is inserted to draw blood, but we didnot find any relevant studies. It is currently unclear whether donor skin cleansing with a one-step alcohol basedregimen reduces the risk of blood contamination compared with a two-step alcohol based regimen during blooddonation.
BackgroundComplications associated with the infusion of blood and blood-related products have reduced in recent years,due to considerable advances in detecting transfusion-related viral pathogens, such as human immunodeficiencyvirus (HIV) and hepatitis C and B virus (HCV and HBV). In contrast, bacteraemia, resulting from bacterial
contamination of blood products continues to be an ongoing problem (Sandler 2003; Wagner 2004). Exogenouscontamination of donor blood may occur at any point during collection, storage and transfusion (McDonald 2001). One of the sources of contamination is thought to be the donor's skin, as a result of inadequate skin cleansing(de Korte 2006; McDonald 2006).
Description of the condition
Bacteraemia, or the presence of bacteria in the blood, is a potentially fatal condition. It is associated with highrates of morbidity (Hakim 2007; Sligl 2006). Microorganisms may enter the blood stream through almost anyorgan (for example the lungs following pneumonia), through a surgical site, or via an implanted device such asan intravenous catheter. Prognosis is related to the virulence of the infective organism, severity of the sepsis atdiagnosis and the underlying health of the patient (Herchline 1997). Although the aetiology of bacteraemia isoften difficult to identify, transfusion-transmitted infection is a rare cause. The incidence of bacterialtransmission through donated blood is estimated at between 1 per 100,000 and 1 per 1,000,000 units forpacked red blood cells, and between 1 per 900 and 1 per 100,000 units for platelets (Walther-Wenke 2008).Fatalities are associated with 1 in 8,000,000 red cell units and 1 in 50,000 to 500,000 white cell units (Wagner
2004). The reason for higher rates in platelet transfusion is thought to be because frozen platelets are thawedand stored at room temperature before infusion and if they are not used immediately there is an opportunity forany organisms that may be present to multiply before the product is transfused. Further reduction of infectionrates depends on ensuring that blood for transfusion is free of contaminants. One way of achieving this isthrough careful preparation and cleansing of the donor's skin at the collection site.
Description of the intervention
There is no standard method for cleansing the site on the blood donor's skin from which the blood will be taken(generally the cubital fossa, or the inner aspect of the elbow). However, alcohol, followed by an application of povidone iodine has been traditionally used (Shahar 1990; Kiyoyama 2009). Consequently, the interventions of interest for this review are skin cleansing with alcohol (usually 70% isopropyl alcohol) for skin preparation in aone-step process, compared with a two-step process involving alcohol followed by povidone iodine or otherantiseptic solution. Antiseptics are antimicrobial substances that are applied to living tissue or skin to reduce thepossibility of infection, sepsis or putrefaction. They should generally be distinguished from antibiotics that
destroy bacteria within the body, and from disinfectants, which destroy microorganisms found on non-livingobjects. Alcohol is widely used prior to venepuncture and is available from a number of manufacturers as easy-to-use disinfection wipes. Isopropyl alcohol is a flammable, colourless liquid; also known as 2-propanol (MSDS

7/26/2019 Phleb Final Screen Ready
http://slidepdf.com/reader/full/phleb-final-screen-ready 106/127 Annex J: Cochrane review 89
Skin preparation with alcohol versus alcohol followed by any antiseptic for preventing bacteraemia or contamination of ...
3 / 15
2006).
How the intervention might work
Alcohol kills most bacteria and fungi by acting on lipid and protein components of the cell. It is less effectiveagainst viruses (Adams 2007). Isopropyl alcohol has some advantages over other products because it requires ashorter contact time to achieve antisepsis. For example some two-step procedures take up to two minutes toperform, which is considered too long for some blood bank services (McDonald 2006). Antiseptics are toxic toliving tissues as well as bacterial cells, some antiseptics are true germicides, capable of destroying microbes(bacteriocidal), whilst others are bacteriostatic and only prevent or inhibit their growth (Morgan 1993).
Why it is important to do this review
Although a range of antiseptics has been used to cleanse the skin of the donor arm, a two-step process,including alcohol and iodine is widely used (Shahar 1990; Kiyoyama 2009). The effectiveness of this regimen, andother forms of cleansing has been evaluated in a number of studies by measuring the microbial load on thedonor arm (Cid 2003; Follea 1997; Goldman 1997; McDonald 2001; Wong 2004) and any contamination of platelet concentrates de Korte 2006; Lee 2002) however it remains unclear whether isopropyl alcohol alone is aseffective as alcohol plus povidone iodine (or any other antiseptic) in preventing the clinical consequences of contaminated blood. This review question was brought to us by the World Health Organisation (WHO) and ascoping search did not identify any existing systematic review which had previously addressed this question.
ObjectivesTo assess the effects of cleansing the donor arm with alcohol in a one-step regimen compared with a two-stepregimen including alcohol followed by any other antiseptic to prevent donor blood contamination or recipientbacteraemia.
MethodsCriteria for considering studies for this review
Types of studies
All randomised controlled trials (RCTs) comparing a one-step alcohol regimen with any two-step regimen thatincludes alcohol followed by another antiseptic for pre-venepuncture skin cleansing were considered. Clusterrandomised trials and crossover trials were also eligible for inclusion. Quasi randomised trials were to have beenconsidered in the absence of RCTs.
Types of par ticipants
Studies enrolling people of any age and in any setting, having venepuncture and blood collection were eligible,irrespective of whether the venepuncture was for the purpose of blood donation. Studies should also includefollow up from the recipients of the donated blood in order to measure outcomes occurring in the recipient.
Types of interventions
Studies which compared one-step donor skin cleansing with alcohol (any concentration or application method)with a two-step method which involved alcohol (any strength or application method) followed by any otherantiseptic (any concentration or application method) were eligible.
Types of outcome measures
At least one of the primary outcomes was to have been reported for the study to be considered for inclusion inthe review.
Primary outcomes
Bacteraemia in the blood recipient (the presence of bacteria in the blood stream) as measured by bloodculture.Blood product contamination (blood products include whole blood, platelets, red blood cells or any otherproduct derived from the blood collection) at any time between collection and transfusion as detected mostcommonly by blood culture.
Proxy outcome measures, such as skin contamination or skin colonisation, were not considered for severalreasons. Namely, any antiseptic will reduce levels of microflora on the skin and swabbing skin for bacteria isreally a 'sampling procedure' which is subject to inconsistencies in sampling. In addition, a positive skin culturedoes not automatically mean that the blood collected for transfusion will be positive for bacteria (in the same waythat a positive skin culture before surgery does not mean the person will develop a surgical site infection).
Secondary outcomes
Death of the blood recipient, attributed to the transfusion.Any adverse effects in the blood recipient associated with the transfusion. This may include sepsis (a groupingof signs such as fever, chills, or hypotension), septic shock (severe disturbances of temperature, respiration,heart rate or white blood cell count) or multiple organ dysfunction syndrome (altered organ function in aseverely ill patient that requires medical intervention to prevent death).

7/26/2019 Phleb Final Screen Ready
http://slidepdf.com/reader/full/phleb-final-screen-ready 107/12790 WHO guidelines on drawing blood: best practices in phlebotomy
Skin preparation with alcohol versus alcohol followed by any antiseptic for preventing bacteraemia or contamination of ...
4 / 15
Search methods for identif ication of studies
Electronic searches
We searched the following databases:
Cochrane Wounds Group Specialised Register (Searched March 10 2009);The Cochrane Central Register of Controlled Trials (CENTRAL) -The Cochrane Library 2009, Issue 1;
Ovid MEDLINE - 1950 to February Week 4 2009;Ovid EMBASE - 1980 to 2009 Week 9;EBSCO CINAHL - 1982 to February Week 4 2009.
The Cochrane Central Register of Controlled Trials (CENTRAL) was searched using the following strategy:
#1 MeSH descriptor Blood Specimen Collection explode all trees#2 MeSH descriptor Blood Transfusion explode all trees#3 MeSH descriptor Blood Donors explode all trees#4 (blood NEXT collection*) or (blood NEXT donor*) or (blood NEXT donation*):ti,ab,kw#5 (collection NEAR/1 blood) or (donation NEAR/1 blood):ti,ab,kw#6 ven*puncture NEXT site*:ti,ab,kw#7 (#1 OR #2 OR #3 OR #4 OR #5 OR #6)#8 MeSH descriptor Antisepsis explode all trees#9 MeSH descriptor Anti-Infective Agents, Local explode all trees#10 MeSH descriptor Iodine Compounds explode all trees#11 MeSH descriptor Povidone-Iodine explode all trees#12 MeSH descriptor Alcohols explode all trees#13 MeSH descriptor Disinfectants explode all trees#14 MeSH descriptor Disinfection explode all trees#15 skin NEXT preparation:ti,ab,kw#16 disinfect*:ti,ab,kw#17 (“alcohol” or “alcohols” or iodine or povidone-iodine or chlorhexidine):ti,ab,kw#18 (#8 OR #9 OR #10 OR #11 OR #12 OR #13 OR #14 OR #15 OR #16 OR #17)#19 (#7 AND #18)
The search strategies for Ovid MEDLINE, Ovid EMBASE and EBSCO CINAHL can be found in Appendix 2, Appendix3 and Appendix 4 respectively. The Ovid MEDLINE search was combined with the Cochrane Highly SensitiveSearch Strategy for identifying randomised trials in MEDLINE: sensitivity- and precision-maximizing version(2008 revision) (Lefebvre 2008). The Ovid EMBASE and EBSCO CINAHL searches were combined with the trialfilters developed by the Scottish Intercollegiate Guidelines Network (SIGN 2008). There was no restriction on thebasis of date or language of publication.
Searching other resources
Reference lists of articles retrieved in full were searched.
Data collection and analysis
Selection of studies
Titles and abstracts identified through the search process were independently reviewed by two review authors.Full reports of all potentially relevant studies were retrieved for further assessment of eligibility based on theinclusion criteria. Differences of opinion were settled by consensus or referral to a third review author. There wasno blinding to study authorship when we did these assessments.
Data extraction and management
We had planned to extract the following data, where available (to be extracted by one review author and checkedby a second review author):
details of the trial/study (first author, year of publication, journal, publication status, period);setting and country of study;source of funding;inclusion and exclusion criteria;baseline characteristics of participants (age, sex);aspects of morbidity of the blood recipients, e.g. predictors of susceptibility to bacteraemia;number of participants in each arm of the trial;description of intervention (type, duration);description of control intervention (type, duration);details and duration of follow up;primary and secondary outcomes (by group);design / methodological quality data as per risk of bias criteria;
unit of randomisation (where relevant);unit of analysis;results and primary statistical analysis.

7/26/2019 Phleb Final Screen Ready
http://slidepdf.com/reader/full/phleb-final-screen-ready 108/127 Annex J: Cochrane review 91
Skin preparation with alcohol versus alcohol followed by any antiseptic for preventing bacteraemia or contamination of ...
5 / 15
Assessment of risk of bias in included studies
Two review authors were to independently assess study risk of bias using the Cochrane Collaboration tool (Higgins 2008a).This tool addresses six specific domains, namely sequence generation, allocation concealment,blinding, incomplete outcome data, selective outcome reporting and other issues (e.g. co-interventions)(seeAppendix 1 for details of criteria on which the judgements were to have been based). Blinding and completenessof outcome data would have been assessed for each outcome separately and we had planned to complete a risk
of bias table for each eligible study.We planned to contact investigators of included studies to resolve any ambiguities. We also planned to includedata from duplicate publications only once, but to retrieve all publications pertaining to a single study to enablefull data extraction and risk of bias quality assessment.
For any eligible study, we planned to present assessment of risk of bias using a 'risk of bias summary figure',which presents the judgments in a cross-tabulation of study by entry. This display of internal validity indicatesthe weight the reader may give the results of each study.
Measures of treatment effect
For individual trials, effect measures for categorical outcomes (e.g. rates of bacteraemia) would have includedrelative risk (RR) with its 95% confidence interval (CI). For continuous outcomes, we planned to use the meandifference (MD) or, if the scale of measurement differed across trials, standardized mean difference (SMD), eachwith its 95% CI. For any meta-analyses (see below), for categorical outcomes the typical estimates of RR with their95% CI would have been calculated; and for continuous outcomes the weighted mean difference (WMD) or asummary estimate for SMD, each with its 95% CI, would have been calculated.
We planned to analyse data using The Cochrane Collaboration's Review Manager 5 software.
Dealing with missing data
If outcome data had remained missing despite our attempts to obtain complete outcome data from authors, wewould have performed an available-case analysis, based on the numbers of patients for whom outcome datawere known. If standard deviations were missing, we would have imputed them from other studies or, wherepossible, computed them from standard errors using the formula SD = SE x √¯N , where these were available (Higgins 2008b).
Assessment of heterogeneity
Heterogeneity would have been assessed visually and by using the chi-squared statistic with significance being
set at p < 0.10. In addition, the degree of heterogeneity would have been investigated by calculating the I2
statistic (Deeks 2008). If evidence of significant heterogeneity had been identified (I2 >50%), we would haveexplored potential causes and a random-effects approach to the analysis would have been used if a meta-analysis had been appropriate.
Assessment of repor ting biases
Reporting bias would have been assessed using guidelines in the Cochrane Handbook for Systematic Reviews of Interventions (Sterne 2008).
Data sy nthesis
Where appropriate, results of comparable trials would have been pooled and the pooled estimate together withits 95% CI would have been reported. We planned to conduct a narrative review of eligible studies if statisticalsynthesis of data from more than one study was not possible or considered not appropriate.
Subgroup analysis and investigation of heterogeneity
We planned to analyse potential sources of heterogeneity using the following subgroup analysis: concealment of allocation (adequate versus not reported).
Sensitiv ity analy sis
We planned to undertake a sensitivity analysis to explore the effect of excluding studies where concealment of allocation was unclear
ResultsDescription of studies
We did not find any randomised or quasi-randomised controlled trials that met the inclusion criteria.
Results of the search
Our initial search identified 457 citations of which 19 were considered potentially relevant. Full copies of thesepapers were obtained and reviewed independently by two review authors, however, none met the inclusion
criteria.Included studies

7/26/2019 Phleb Final Screen Ready
http://slidepdf.com/reader/full/phleb-final-screen-ready 109/12792 WHO guidelines on drawing blood: best practices in phlebotomy
Skin preparation with alcohol versus alcohol followed by any antiseptic for preventing bacteraemia or contamination of ...
6 / 15
No studies were included.
Excluded studies
The Table: Characteristics of excluded studies contains reasons for excluding 19 potentially eligible studies. Insummary, two citations were for unsystematic literature reviews (Blajchman 2004; Wendel 2002) eight trials didnot compare the eligible interventions (Calfee 2002; Choudhuri 1990; Little 1999; Mimoz 1999; Schifman 1993;Sutton 1999; Suwanpimolkul 2008; Trautner 2002). Eight studies were not randomised or quasi randomised
controlled trials (Kiyoyama 2009; de Korte 2006; Goldman 1997; Lee 2002; McDonald 2006; Pleasant 1994Shahar 1990; Wong 2004). One study examined techniques for quantifying bacterial reduction (Follea 1997).
Risk of bias in included studies
No studies were included.
Effects of interventions
We did not identify any eligible randomised or quasi randomised controlled trials, nor were we able to identifyany ongoing trials.
DiscussionWe have been unable to identify any trials addressing the effectiveness of alcohol alone compared with alcoholfollowed by any other antiseptic to prevent bacteraemia from transfused blood or blood products. This may bebecause infusion related bacteraemia is a relatively rare event and very large trials would be needed to
investigate the effect of donor-arm cleansing. Sepsis rates for platelet transfusions are around 1:50,000 and forred cell transfusions around 1:500,000 (Sandler 2003). Therefore mounting a trial large enough to detectdifferences in clinical outcomes, based on products used for arm cleansing, would be prohibitively expensive andlengthy.
Because of this, surrogate measures, such as contamination of stored blood have been used to evaluateantisepsis efficacy. However, again, we found no trials that compared alcohol alone with alcohol followed by anyother antiseptic for cleansing the donor skin. A number of studies used the surrogate outcome of post-cleansingskin microbial load at the venepuncture site however we excluded such studies a priori on the grounds that thisis a surrogate outcome of unproven validity; it is not known how skin contamination relates to blood recipientoutcomes. Moreover none of these trials compared a one-step with a two-step cleansing process (de Korte 2006;Follea 1997; Goldman 1997).
Whilst we did identify two studies that compared the effects of the eligible interventions they were otherwiseineligible for important methodological reasons and did not meet our pre-specified study design eligibilitycriteria. The first compared blood culture contamination following pre-venepuncture cleansing with 70% alcoholfor one minute followed by povidone iodine solution for an additional minute with brief swabbing of the skinthree to five times with 70% alcohol. Patients who were suspected of having bacteraemia had two blood samplestaken; once using the two-step method and once with the standard method. Unfortunately it appeared from thereport that the order in which the methods were used was not randomised and samples may have been takenfrom the same or a closely adjacent site with an unreported time lapse between sampling. Of the 181 culturestested in each group, eight (4.4%) were positive in the two-step group compared with six (3.3%) in the one-steppreparation group (no statistically significant difference) (Shahar 1990). The second study potentially suffersfrom important selection bias in that the treatment groups were in different settings as well as receiving differentmodes of skin cleansing and compared blood culture contamination rates between patients in whom blood hadbeen drawn in the emergency department and who received a one-step 70% alcohol cleansing with inpatientswho received a two-step 70% alcohol followed by povidone iodine procedure. Although there was a statisticallysignificant difference in positive culture rates in favour of the one step process (189 (6.6%) positive cultures inthe one-step group versus 248 (8.9%) in the two step, alcohol plus iodine group (p = 0.0015) (Kiyoyama 2009)this study was not eligible for inclusion in the review due to the inherent risk of selection bias (inpatients and
emergency department patients may well be at different levels of risk of positive blood culture). Thus whilst theauthors presented additional data to suggest that baseline positive blood culture rates were similar betweeninpatients and emergency department patients the risk of selection bias remains and this study was excluded (Kiyoyama 2009).
In conclusion there is currently no evidence of a difference in either blood contamination or bacteraemia whendonor skin is cleansed pre-venepuncture with a one-step alcohol based process or a two-step alcohol plusantiseptic process. This lack of evidence for a difference however results from a complete absence of researchand therefore a real difference cannot be discounted. Until better evidence emerges, decisions about which modeof pre-blood donation skin cleansing to use are likely to be driven by convenience and cost. It is also importantto note that arm cleansing is only one of the points at which blood contamination may occur. Careful collectionand storage of blood and blood products, and systematic surveillance to detect bacterial contamination can allcontribute to the safety of patients requiring blood transfusions. Eliminating all bacteria from stored blood maynot be possible. So, following relevant clinical guidelines (for example UK BTS Guidelines 2005) for collection andfor detecting bacterial contamination in stored blood, both at the time of collection and at the time of issue, maybe the most effective way of reducing infusion related bacteraemia (Yomtovian 2006).
Summary of main results

7/26/2019 Phleb Final Screen Ready
http://slidepdf.com/reader/full/phleb-final-screen-ready 110/127 Annex J: Cochrane review 93
Skin preparation with alcohol versus alcohol followed by any antiseptic for preventing bacteraemia or contamination of ...
7 / 15
We did not identify any eligible studies for inclusion in this review. It is therefore unclear whether a two-step,alcohol followed by antiseptic skin cleansing process prior to blood donation confers any reduction in the risk of blood contamination or bacteraemia in blood recipients (or conversely whether a one-step process increases riskabove that associated with a two-step process).
Potential biases in the review process
Biases in the review process were minimised as far as possible by adhering to the guidance provided by theCochrane Handbook ( Higgins 2008). We believe that publication bias is unlikely in this case; whilst no trials metthe inclusion criteria , this is probably due to the difficulty and expense associated with mounting a trial largeenough to answer the question.
Authors' conclusionsImplications for practice
We did not find any eligible randomised or quasi randomised controlled trials. Until further research emerges,decisions about which mode of pre-blood donation skin cleansing to use are likely to be driven by convenienceand cost. It is also important to note that arm cleansing is only one of the points at which blood contaminationmay occur.
Implications for research
Cleansing the donor skin before taking blood for transfusion is important, but conducting a trial to compare the
effects of using specific antiseptics on bacteraemia rates would be logistically difficult given the relatively rareevent rate. It may be possible to estimate the effects of disinfecting with alcohol alone versus alcohol plus otherantiseptics on blood contamination rates but this would still require very large sample sizes to detect clinicallyimportant differences. Alternatively, high quality observational studies may provide additional information toguide practice. A future comprehensive evidence synthesis that summarised the evidence for all competingalternative approaches to pre-blood donation skin cleansing would be worthwhile.
AcknowledgementsThe authors would like to acknowledge the peer referees: Martin Bland, Julie Bruce, Mike Clarke, Jo Dumville,Carmel Hughes, Susan O'Meara, Ian Roberts and David Tovey. Nicky Cullum provided editorial input throughoutthe review process and checked the search results.
Contributions of authors Joan Webster: designed the review, checked the search results and all papers retrieved in full, wrote the review
draft, responded to the peer referee feedback, made an intellectual contribution to the review and approved thefinal review prior to submission. Guarantor of the review
Sally Bell-Syer: coordinated the review, edited the review draft, responded to the peer referee feedback, made anintellectual contribution to the review and approved the final review prior to submission.
Ruth Foxlee: designed the search strategy, conducted the literature searches and retrieved papers. Edited thesearch methods section and responded to the peer referee feedback and approved the final review prior tosubmission.
Declarations of interestnone known
Dif ferences between protocol and reviewNil
Published notesThis rapid review was undertaken at the request of the World Health Organisation (WHO). This organisationframed the review question but they did not provide funding or influence its publication.
Characteristics of studiesCharacteristics of included studies
Footnotes
Characteristics of excluded studies
Blajchman 2004
Reason for exclusion Narrative, non-systematic literature review
Calfee 2002

7/26/2019 Phleb Final Screen Ready
http://slidepdf.com/reader/full/phleb-final-screen-ready 111/12794 WHO guidelines on drawing blood: best practices in phlebotomy
Skin preparation with alcohol versus alcohol followed by any antiseptic for preventing bacteraemia or contamination of ...
8 / 15
Reason for exclusion None of the four study arms involved a two-step skin preparation process.
Choudhur i 1990
Reason for exclusion Comparison of two one-step processes; alcohol swab compared with iodineswab.
de Kor te 2006
Reason for exclusion Single arm study evaluating a double-swab isopropyl alcohol disinfectionprocess.
Follea 1997
Reason for exclusion Examined techniques for quantifying bacterial reduction by comparing a three-step process with no skin disinfection.
Goldman 1997
Reason for exclusion Abstract only available and it was unclear how patients where allocated togroups. Though this was not likely to have been randomised or quasi-randomised because one group was treated in a particular way on the basisthat they were allergic to iodine. Also there was no one-step, alcohol-only skinpreparation group.
Kiyoyama 2009
Reason for exclusion Not a randomised or quasi-randomised controlled trial. Two independentgroups were considered; one group from an inpatient ward was treated withisopropyl alcohol + povidone-iodine and the other from an emergencydepartment was treated with isopropyl alcohol alone.
Lee 2002
Reason for exclusion Not a randomised or quasi-randomised controlled trial. Comparison of twotwo-step processes in consecutive time periods. Cetrimide/ chlorhexidinesolution + isopropyl alcohol compared with povidone-iodine + isopropylalcohol.
Little 1999
Reason for exclusion Povidone-iodine was compared with iodine tincture, i.e. not a comparison of aone-step with a two-step skin preparation.
McDonald 2006
Reason for exclusion An uncontrolled before and after evaluation of a two-step process involvingisopropyl alcohol + tincture of iodine.
Mimoz 1999
Reason for exclusion Povidone-iodine compared with chlorhexidine, i.e. not a comparison of a one-step with a two-step skin preparation.
Pleasant 1994
Reason for exclusion Only available in abstract form; no information to suggest this was arandomised controlled trial; attempts to contact the authors were
unsuccessful.
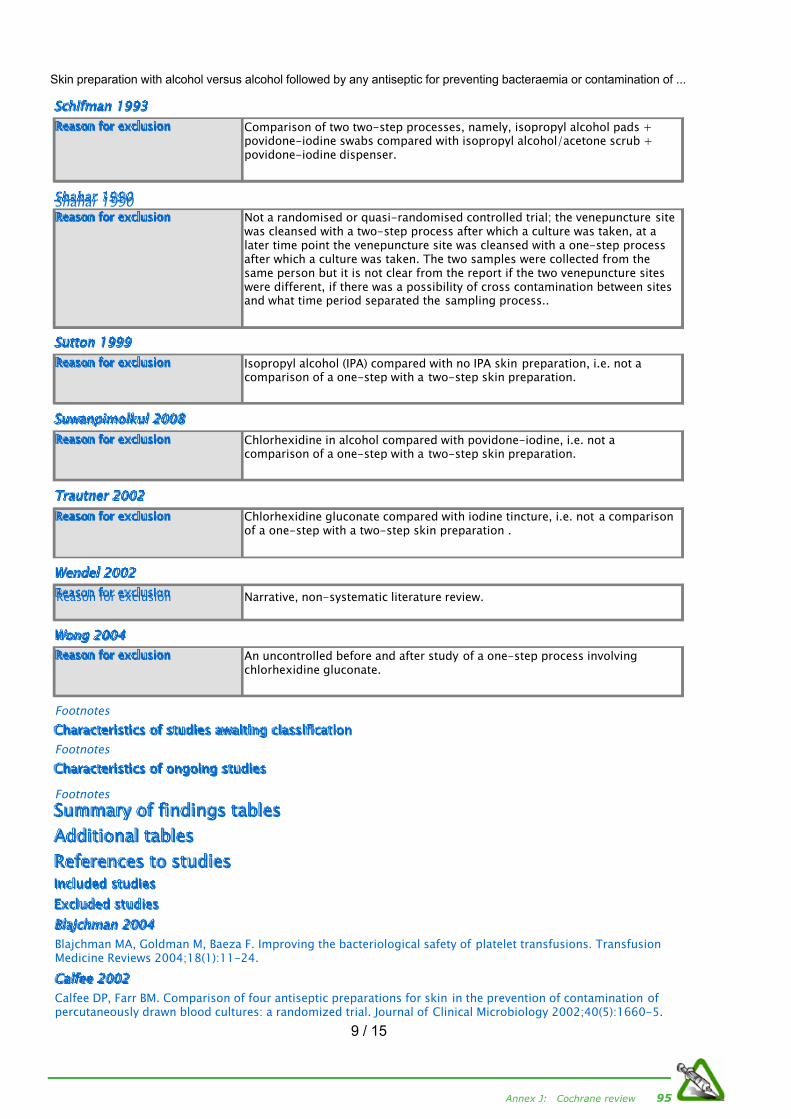
7/26/2019 Phleb Final Screen Ready
http://slidepdf.com/reader/full/phleb-final-screen-ready 112/127 Annex J: Cochrane review 95
Skin preparation with alcohol versus alcohol followed by any antiseptic for preventing bacteraemia or contamination of ...
9 / 15
Schif man 1993
Reason for exclusion Comparison of two two-step processes, namely, isopropyl alcohol pads +povidone-iodine swabs compared with isopropyl alcohol/acetone scrub +povidone-iodine dispenser.
Shahar 1990 Reason for exclusion Not a randomised or quasi-randomised controlled trial; the venepuncture site
was cleansed with a two-step process after which a culture was taken, at alater time point the venepuncture site was cleansed with a one-step processafter which a culture was taken. The two samples were collected from thesame person but it is not clear from the report if the two venepuncture siteswere different, if there was a possibility of cross contamination between sitesand what time period separated the sampling process..
Sutton 1999
Reason for exclusion Isopropyl alcohol (IPA) compared with no IPA skin preparation, i.e. not acomparison of a one-step with a two-step skin preparation.
Suwanpimolkul 2008
Reason for exclusion Chlorhexidine in alcohol compared with povidone-iodine, i.e. not acomparison of a one-step with a two-step skin preparation.
Trautner 2002
Reason for exclusion Chlorhexidine gluconate compared with iodine tincture, i.e. not a comparisonof a one-step with a two-step skin preparation .
Wendel 2002
Reason for exclusion Narrative, non-systematic literature review.
Wong 2004
Reason for exclusion An uncontrolled before and after study of a one-step process involvingchlorhexidine gluconate.
Footnotes
Characteristics of studies awaiting classification
Footnotes
Characteristics of ongoing studies
Footnotes
Summary of findings tables
Additional tables
References to studiesIncluded studies
Excluded studies
Blajchman 2004
Blajchman MA, Goldman M, Baeza F. Improving the bacteriological safety of platelet transfusions. TransfusionMedicine Reviews 2004;18(1):11-24.
Calfee 2002
Calfee DP, Farr BM. Comparison of four antiseptic preparations for skin in the prevention of contamination of percutaneously drawn blood cultures: a randomized trial. Journal of Clinical Microbiology 2002;40(5):1660-5.

7/26/2019 Phleb Final Screen Ready
http://slidepdf.com/reader/full/phleb-final-screen-ready 113/12796 WHO guidelines on drawing blood: best practices in phlebotomy
Skin preparation with alcohol versus alcohol followed by any antiseptic for preventing bacteraemia or contamination of ...
10 / 15
Choudhur i 1990
Choudhuri M, McQueen R, Inoue S, Gordon RC. Efficiency of skin sterilization for a venipuncture with the use of commercially available alcohol or iodine pads. American Journal of Infection Control 1990;18(2):82-5.
de Kor te 2006
de Korte D, Curvers J, de Kort WL, Hoekstra T, van der Poel CL, Beckers EA, et al. Effects of skin disinfection
method, deviation bag, and bacterial screening on clinical safety of platelet transfusions in the Netherlands.Transfusion 2006;46(3):476-85.
Follea 1997
Folléa G, Saint-Laurent P, Bigey F, Gayet S, Bientz M, Cazenave JP. Quantitative bacteriological evaluation of amethod for skin disinfection in blood donors. Transfusion Clinique et Biologique 1997;4(6):523-31.
Goldman 1997
Goldman M, Roy G, Fréchette N, Décary F, Massicotte L, Delage G. Evaluation of donor skin disinfection methods.Transfusion 1997;37(3):309-12.
Kiyoyama 2009
Kiyoyama T, Tokuda Y, Shiiki S, Hachiman T, Shimasaki T, Endo K. Isopropyl alcohol compared with isopropylalcohol plus povidone-iodine as skin preparation for prevention of blood culture contamination. Journal of Clinical Microbiology 2009;47(1):54-8.
Lee 2002
Lee CK, Ho PL, Chan NK, Mak A, Hong J, Lin CK. Impact of donor arm skin disinfection on the bacterialcontamination rate of platelet concentrates. Vox Sanguinis 2002;83(3):204-8.
Little 1999
Little JR, Murray PR, Traynor PS, Spitznagel E. A randomized trial of povidone-iodine compared with iodinetincture for venipuncture site disinfection: effects on rates of blood culture contamination. American Journal of Medicine 1999;107(2):119-25.
McDonald 2006
McDonald CP. Bacterial risk reduction by improved donor arm disinfection, diversion and bacterial screening.Transfusion Medicine 2006;16(6):381-96.
Mimoz 1999
Mimoz O, Karim A, Mercat A, Cosseron M, Falissard B, Parker F, et al. Chlorhexidine compared with povidone-iodine as skin preparation before blood culture. A randomized, controlled trial. Annals of Internal Medicine1999;131(11):834-7.
Pleasant 1994
Pleasant H, Marini J, Stehling L. Evaluation of three skin preps for use prior to phlebotomy. Tranfusion1994;34(Supp):14S.
Schifman 1993
Schifman RB, Pindur A. The effect of skin disinfection materials on reducing blood culture contamination.American Journal of Clinical Pathology 1993;99(5):536-8.
Shahar 1990
Shahar E, Wohl-Gottesman BS, Shenkman L. Contamination of blood cultures during venepuncture: fact or myth?
Postgraduate Medical Journal 1990;66(782):1053-8.
Sutton 1999
Sutton CD, White SA, Edwards R, Lewis MH. A prospective controlled trial of the efficacy of isopropyl alcoholwipes before venesection in surgical patients. Annals of the Royal Collegeof Surgeons of England1999;81(3):183-6.
Suwanpimolkul 2008
Suwanpimolkul G, Pongkumpai M, Suankratay C. A randomized trial of 2% chlorhexidine tincture compared with10% aqueous povidone-iodine for venipuncture site disinfection: Effects on blood culture contamination rates.The Journal of Infection 2008;56(5):354-9.
Trautner 2002
Trautner BW, Clarridge JE, Darouiche RO. Skin antisepsis kits containing alcohol and chlorhexidine gluconate or
tincture of iodine are associated with low rates of blood culture contamination. Infection Control and HospitalEpidemiology 2002;23(7):397-401.

7/26/2019 Phleb Final Screen Ready
http://slidepdf.com/reader/full/phleb-final-screen-ready 114/127 Annex J: Cochrane review 97
Skin preparation with alcohol versus alcohol followed by any antiseptic for preventing bacteraemia or contamination of ...
11 / 15
Wendel 2002
Wendel S. Chemoprophylaxis of transfusion-transmitted agents in labile blood components. Revista da SociedadeBrasileira de Medicina Tropical 2002;35(4):275-81.
Wong 2004
Wong P-Y, Colville VL, White V, Walker HM, Morris RA. Validation and assessment of a blood-donor arm
disinfectant containing chlorhexidine and alcohol. Transfusion 2004;44(8):1238-42.Studies awaiting classif ication
Ongoing studies
Other referencesAdditional references
Adams 2007
Adams D, Elliot TS. Skin antiseptics used prior to intravascular catheter insertion. British Journal of Nursing2007;16(5):278-80.
Cid 2003
Cid J, Ortín X, Ardanuy C, Contreras E, Elies E, Martín-Vega C. Bacterial persistence on blood donors' arms after
phlebotomy site preparation: analysis of risk factors. Haematologica 2003;88(7):839-40.Deeks 2008
Deeks, JJ , Higgins JPT, Altman DG on behalf of the Cochrane Statistical Methods Group and the Cochrane BiasMethods Group (Editors). Chapter 9: Analysing data and undertaking meta-analyses. In: Higgins JPT, Green S(editors), Cochrane Handbook for Systematic Reviews of Interventions Version 5.0.0 (updated February 2008).TheCochrane Collaboration, 2008. Available from www.cochrane-handbook.org.
Hakim 2007
Hakim H, Mylotte JM, Faden H. Morbidity and mortality of Staphylococcal bacteremia in children. Americal Journalof Infection Control 2007;35(2):102-5.
Herchline 1997
Herchline T, Gros S. Improving clinical outcome in bacteremia. Journal of Evaluation in Clinical Practice1997;4(3):191-5.
Higgins 2008
Higgins JPT, Green S (editors) . Cochrane Handbook for Systematic Reviews of Interventions Version 5.0.1 (updated September 2008 ) . The Cochrane Collaboration. Available from www.cochrane-handbook.org , 2008 .
Higgins 2008a
Higgins JPT, Altman DG on behalf of the Cochrane Statistical Methods Group and the Cochrane Bias MethodsGroup (Editors). Chapter 8: Assessing risk of bias in included studies. In: Higgins JPT, Green S (editors), CochraneHandbook for Systematic Reviews of Interventions Version 5.0.0 (updated February 2008).The CochraneCollaboration, 2008. Available from www.cochrane-handbook.org.
Higgins 2008b
Higgins JPT, Deeks JJ, Altman DG on behalf of the Cochrane Statistical Methods Group and the Cochrane BiasMethods Group (Editors). Chapter 16: Special topics in statistics. Higgins JPT, Green S (editors), CochraneHandbook for Systematic Reviews of Interventions Version 5.0.0 (updated February 2008).The CochraneCollaboration, 2008. Available from www.cochrane-handbook.org.
Lefebv re 2008
Lefebvre C, Manheimer E, Glanville J. Chapter 6: Searching for studies. In: Higgins JPT, Green S (editors). CochraneHandbook for Systematic Reviews of Interventions Version 5.0.0 (updated February 2008). The CochraneCollaboration, 2008. Available from www.cochrane-handbook.org.
McDonald 2001
McDonald CP, Lowe P, Roy A, Robbins S, Hartley S, Harrison JF, et al. Evaluation of donor arm disinfectiontechniques. Vox Sanguinis 2001;80(3):135-41.
Morgan 1993
Morgan D . Is there still a role for antiseptics? . Journal of Tissue Viability 1993 ; 3 : 80-4 .
MSDS 2006
Material Safety Data Sheet (MSDS). Safety data for 2-propanol. http://msds.chem.ox.ac.uk/PR/2-propanol.html2006.
7/26/2019 Phleb Final Screen Ready
http://slidepdf.com/reader/full/phleb-final-screen-ready 115/12798 WHO guidelines on drawing blood: best practices in phlebotomy
Skin preparation with alcohol versus alcohol followed by any antiseptic for preventing bacteraemia or contamination of ...
12 / 15
Sandler 2003
Sandler SG, Yu H, Rassai N. Risks of blood transfusion and their prevention. Clinical Advances in Hematology andOncology 2003;1(5):307-13.
SIGN 2008
Scottish Intercollegiate Guidelines Network (SIGN). Search filters.
http://www.sign.ac.uk/methodology/filters.html#random accessed 2 June 2008).
Sligl 2006
Sligl W, Taylor G, Brindley PG. Five years of nosocomial Gram-negative bacteremia in a general intensive careunit: epidemiology, antimicrobial susceptibility patterns, and outcomes. International Journal of InfectiousDiseases 2006;10(4):320-5.
Ster ne 2008
Sterne JAC, Egger M, Moher D on behalf of the Cochrane Bias Methods Group (Editors). Chapter 10: Addressingreporting biases. In: Higgins JPT, Green S (editors), Cochrane Handbook for Systematic Reviews of InterventionsVersion 5.0.0 (updated February 2008).The Cochrane Collaboration, 2008. Available from www.cochrane-handbook.org.
UK BT S Guidelines 2005
Virge James (Editor). Collection of a blood donation. In: Guidelines for the Blood Transfusion Services in theUnited Kingdom. 7th edition. London: TSO (The Stationery Office), 2005:33-39.
Wagner 2004
Wagner SJ. Transfusion-transmitted bacterial infection: risks, sources and interventions. Vox Sanguinis2004;86(3):157-63.
Walther-Wenke 2008
Walther-Wenke G. Incidence of bacterial transmission and transfusion reactions by blood components. ClinicalChemistry and Laboratory Medicine 2008;46(7):919-25.
Yomtovian 2006
Yomtovian RA, Palavecino EL, Dysktra AH, Downes KA, Morrissey AM, Bajaksouzian S, et al. Evolution of surveillance methods for detection of bacterial contamination of platelets in a university hospital, 1991 through2004. Transfusion 2006;46(5):719-30.
Other published versions of this review
Classification pending references
Data and analyses
Figures
Sources of supportInternal sources
Department of Health Sciences, University of York, UK
External sources
No sources of support provided
Feedback
Appendices1 Criteria for a judgment of 'yes' f or the sources of bias
1. Was the allocation sequence randomly generated?
Yes, low risk of biasA random (unpredictable) assignment sequence.Examples of adequate methods of sequence generation are computer-generated random sequence, coin toss (forstudies with two groups), rolling a dice (for studies with two or more groups), drawing of balls of differentcolours, dealing previously shuffled cards.
No, high risk of bias- Quasi-randomised approach: Examples of inadequate methods are: alternation, birth date, social
insurance/security number, date in which they are invited to participate in the study, and hospital registrationnumber- Non-random approaches: Allocation by judgement of the clinician; by preference of the participant; based on

7/26/2019 Phleb Final Screen Ready
http://slidepdf.com/reader/full/phleb-final-screen-ready 116/127 Annex J: Cochrane review 99
Skin preparation with alcohol versus alcohol followed by any antiseptic for preventing bacteraemia or contamination of ...
13 / 15
the results of a laboratory test or a series of tests; by availability of the intervention.
UnclearInsufficient information about the sequence generation process to permit judgement
2. Was the treatment allocation adequately concealed?
Yes, low risk of bias
Assignment must be generated independently by a person not responsible for determining the eligibility of theparticipants. This person has no information about the persons included in the trial and has no influence on theassignment sequence or on the decision about whether the person is eligible to enter the trial. Examples of adequate methods of allocation concealment are: Central allocation, including telephone, web-based, andpharmacy controlled,randomisation; sequentially numbered drug containers of identical appearance; sequentiallynumbered, opaque, sealed envelopes.
No, high risk of biasExamples of inadequate methods of allocation concealment are: alternate medical record numbers, unsealedenvelopes; date of birth; case record number; alternation or rotation; an open list of random numbers anyinformation in the study that indicated that investigators or participants could influence the intervention group.
UnclearRandomisation stated but no information on method of allocation used is available.
3. Blinding was knowledge of the allocated interventions adequately prevented during the study?
Was the participant blinded to the intervention?
Yes, low risk of biasThe treatment and control groups are indistinguishable for the participants or if the participant was described asblinded and the method of blinding was described.
No, high risk of bias- Blinding of study participants attempted, but likely that the blinding could have been broken; participantswere not blinded, and the nonblinding of others likely to introduce bias.
Unclear
Was the care provider blinded to the intervention?
Yes, low risk of biasThe treatment and control groups are indistinguishable for the care/treatment providers or if the care providerwas described as blinded and the method of blinding was described.
No, high risk of biasBlinding of care/treatment providers attempted, but likely that the blinding could have been broken;care/treatment providers were not blinded, and the nonblinding of others likely to introduce bias.
Unclear
Was the outcome assessor blinded to the intervention?
Yes, low risk of biasAdequacy of blinding should be assessed for the primary outcomes. The outcome assessor was described asblinded and the method of blinding was described.
No, high risk of biasNo blinding or incomplete blinding, and the outcome or outcome measurement is likely to be influenced by lackof blinding
Unclear
4. Were incomplete outcome data adequately addressed?
Was the drop-out rate described and acceptable?
The number of participants who were included in the study but did not complete the observation period or werenot included in the analysis must be described and reasons given.
Yes, low risk of biasIf the percentage of withdrawals and drop-outs does not exceed 20% for short-term follow-up and 30% for long-term follow-up and does not lead to substantial bias. (N.B. these percentages are arbitrary, not supported byliterature);No missing outcome data;Reasons for missing outcome data unlikely to be related to true outcome (for survival data, censoring unlikely tobe introducing bias);Missing outcome data balanced in numbers across intervention groups, with similar reasons for missing data
across groups;Missing data have been imputed using appropriate methods.
No, hi h risk of bias

7/26/2019 Phleb Final Screen Ready
http://slidepdf.com/reader/full/phleb-final-screen-ready 117/127100 WHO guidelines on drawing blood: best practices in phlebotomy
Skin preparation with alcohol versus alcohol followed by any antiseptic for preventing bacteraemia or contamination of ...
14 / 15
Reason for missing outcome data likely to be related to true outcome, with either imbalance in numbers orreasons for missing data across intervention groups;
Unclear
Were all randomised participants analysed in the group to which they were allocated? (ITT analysis)
Yes, low risk of bias
Specifically reported by authors that ITT was undertaken and this was confirmed on study assessment, or notstated but evident from study assessment that all randomised participants are reported/analysed in the groupthey were allocated to for the most important time point of outcome measurement (minus missing values)irrespective of non-compliance and co-interventions.
No, high risk of biasLack of ITT confirmed on study assessment (patients who were randomised were not included in the analysisbecause they did not receive the study intervention, they withdrew from the study or were not included becauseof protocol violation) regardless of whether ITT reported or not
‘As-treated’ analysis done with substantial departure of the intervention received from that assigned atrandomisation; potentially inappropriate application of simple imputation.
UnclearDescribed as ITT analysis, but unable to confirm on study assessment, or not reported and unable to confirm bystudy assessment.
5. Are reports of the study free of suggestion of selective outcome reporting?
Yes, low risk of biasIf all the results from all pre-specified outcomes have been adequately reported in the published report of thetrial. This information is either obtained by comparing the protocol and the final trial report, or in the absence of the protocol, assessing that the published report includes enough information to make this judgment.Alternatively a judgement could be made if the trial report lists the outcomes of interest in the methods of thetrial and then reports all these outcomes in the results section of the trial report.
No, high risk of biasNot all of the study’s pre-specified primary outcomes have been reported;One or more primary outcomes is reported using measurements, analysis methods or subsets of the data (e.g.sub scales) that were not prespecified;One or more reported primary outcomes were not pre-specified (unless clear justification for their reporting isprovided, such as an unexpected adverse effect);
One or more outcomes of interest in the review are reported incompletely so that they cannot be entered in ameta-analysis;The study report fails to include results for a key outcome that would be expected to have been reported for sucha study.
Unclear
6. Other sources of potential bias:
Were co-interventions avoided or similar?
There were no co-interventions or there were co-interventions but they were similar between the treatment andcontrol groups.
Was the compliance acceptable in all groups?
The review author determines if the compliance with the interventions is acceptable, based on the reportedintensity, duration, number and frequency of sessions for both the treatment intervention and control
intervention(s). For example, ultrasound treatment is usually administered over several sessions; therefore it isnecessary to assess how many sessions each participant attended or if participants completed the course of anoral drug therapy. For single-session interventions (for example: surgery), this item is irrelevant.
2 Ovid MEDLINE search strategy
1 exp Blood Specimen Collection/2 exp Blood Transfusion/3 exp Blood Donors/4 (blood collection$ or blood donor$ or blood donation$).ti,ab.5 ((collect$ adj1 blood) or (donat$ adj1 blood)).ti,ab.6 ven?puncture site$.ti,ab.7 or/1-68 exp Antisepsis/9 exp Anti-Infective Agents, Local/
10 exp Iodine Compounds/11 exp Povidone-Iodine/12 exp Alcohols/

7/26/2019 Phleb Final Screen Ready
http://slidepdf.com/reader/full/phleb-final-screen-ready 118/127 Annex J: Cochrane review 101
Skin preparation with alcohol versus alcohol followed by any antiseptic for preventing bacteraemia or contamination of ...
15 / 15
13 exp Disinfectants/14 exp Disinfection/15 skin preparation.ti,ab.16 disinfect$.ti,ab.17 (alcohol$1 or iodine or povidone-iodine or chlorhexidine).ti,ab.18 or/8-1719 7 and 18
3 Ovid EMBASE search strategy
1 exp Blood Sampling/2 exp Blood Transfusion/3 exp Blood Donor/4 (blood collection$ or blood donor$ or blood donation$).ti,ab.5 ((collect$ adj1 blood) or (donat$ adj1 blood)).ti,ab.6 exp Vein Puncture/7 ven?puncture site$.ti,ab.8 or/1-79 exp Antisepsis/10 exp Topical Antiinfective Agent/11 exp Iodine/12 exp Povidone Iodine/
13 exp Chlorhexidine/14 exp Alcohol/15 exp Disinfectant Agent/16 exp Disinfection/17 skin preparation.ti,ab.18 disinfect$.ti,ab.19 (alcohol$1 or iodine or povidone-iodine or chlorhexidine).ti,ab.20 or/9-1921 8 and 20
4 EBSCO CINAHL search strategy
S19 S9 and S18S18 S10 or S11 or S12 or S13 or S14 or S15 or S16 or S17S17 TI ( alcohol or alcohols or iodine or povidone-iodine or chlorhexidine ) or AB ( alcohol or alcohols or iodineor povidone-iodine or chlorhexidine )S16 TI disinfect* or AB disinfect*S15 TI skin preparation or AB skin preparationS14 (MH "Disinfectants")S13 (MH "Alcohols+")S12 (MH "Povidone-Iodine")S11 (MH "Iodine")S10 (MH "Antiinfective Agents, Local+")S9 S1 or S2 or S3 or S4 or S5 or S6 or S7 or S8S8 TI venepuncture site* or AB venepuncture site*S7 (MH "Venipuncture+")S6 TI blood donation* or AB blood donation*S5 TI blood donor* or AB blood donor*S4 TI blood collection* or AB blood collection*S3 (MH "Blood Donors")
S2 (MH "Blood Transfusion+")S1 (MH "Blood Specimen Collection+")

7/26/2019 Phleb Final Screen Ready
http://slidepdf.com/reader/full/phleb-final-screen-ready 119/127
7/26/2019 Phleb Final Screen Ready
http://slidepdf.com/reader/full/phleb-final-screen-ready 120/127 Annex references 103
Annex references
1 Webster J, Bell-Syer S, Foxlee R. Skin preparation with alcohol versus alcohol followed by any antiseptic for preventing bacteraemia or contamination of blood for transfusion.Cochrane Database of Systematic Reviews, 2009, Issue 3. Art. No.: CD007948. DOI:10.1002/14651858.CD007948.
http://mrw.interscience.wiley.com/cochrane/clsysrev/articles/CD007948/frame.html
2 Revised injection safety assessment tool (tool C revised). Geneva, World HealthOrganization, 2008.http://www.who.int/injection_safety/en
3 Sacar S et al. Poor hospital infection control practice in hand hygiene, glove utilization, andusage of tourniquets. American Journal of Infection Control , 2006, 34(9):606–609.
4 WHO guidelines on hand hygiene in healthcare. Geneva, World Health Organization, 2009.http://whqlibdoc.who.int/publications/2009/9789241597906_eng.pdf
5 Centers for Disease Control and Prevention. Transmission of hepatitis B virus among persons
undergoing blood glucose monitoring in long-term care facilities – Mississippi, NorthCarolina and Los Angeles County, California, 2003–2004. Morbidity and Mortality Weekly Report , 2004, 54:220–223.
6 Guidelines on post exposure prophylaxis prophylaxis (PEP) to prevent humanimmunodeciency virus (HIV) infection. Geneva, World Health Organization andInternational Labour Organization, 2008.http://www.who.int/hiv/pub/guidelines/PEP/en/index.html
7 Centres for Diseases Control and Prevention. Treatment guidelines: hepatitis B. Morbidityand Mortality Weekly Report , 2006, 55(TT-11).http://www.cdc.gov/STD/treatment/2006/hepatitis-b.htm
8 Joint ILO/WHO guidelines on health services and HIV/AIDS: Fact sheet No. 4. Geneva,International Labour Organization, 2005.

7/26/2019 Phleb Final Screen Ready
http://slidepdf.com/reader/full/phleb-final-screen-ready 121/127

7/26/2019 Phleb Final Screen Ready
http://slidepdf.com/reader/full/phleb-final-screen-ready 122/127Glossary 105
Glossary
Acquired immunodeciency syndrome (AIDS)
Morbidity resulting from infection with the human immunodeciency virus.
Administrave controls to reduce exposure
A method of minimizing patient or employee exposures through enforcement of policies andprocedures, modication of work assignment, training in specic work practices, and otheradministrative measures designed to reduce the exposure.
Alcohol-based hand rub
An alcohol-containing preparation (liquid, gel or foam) designed for application to the handsto reduce the growth of microorganisms. Such preparations may contain one or more types ofalcohol with excipient (a relatively inert substance used as a carrier for the active ingredients of a
medication), or other active ingredients and humectants.
Ansepc handwashing
Washing hands with water and soap or other detergents containing an antiseptic agent.Recommended when carrying out an aseptic technique.
Ansepcs
Antimicrobial substances applied to living tissue or skin to prevent infection. They differ fromantibiotics, which destroy bacteria within the body, and from disinfectants, which are used onnonliving objects. Some antiseptics are true germicides, capable of destroying microbes whereasothers are bacteriostatic and only prevent or inhibit their growth.
Asepc technique
The manner of conducting procedures to prevent microbial contamination. An aseptic technique
alters the method of hand hygiene, PPE worn, the location and physicial characteristics wherea procedure is conducted, the use of skin antisepsis and disinfectants in the environment, themanner of opening of packages and the use of sterile supplies.
Auto-disable (AD) syringe
A syringe designed to prevent reuse by locking or disabling after giving a single injection, Severaltypes of AD syringes are commercially available.
Biohazard (biological hazard)
A risk to the health of humans caused by exposure to harmful bacteria, viruses or otherdangerous biological agents, or by a material produced by such an organism.
Bloodborne pathogens
Pathogenic microorganisms in human blood that are transmitted through exposure to bloodor blood products, and cause disease in humans. Common pathogens of occupational concerninclude hepatitis B virus, hepatitis C virus and human immunodeciency virus.
Capillary blood collecon
Blood collected from capillaries, the smallest of a body’s blood vessels, measuring 5–10 μm indiameter, which connect arterioles and venules. Blood collected by this method is usually by heelor nger-prick.
Cross-contaminaon
The act of spreading microbes (bacteria and viruses) from one surface to another. Since bloodborne viruses can live on objects and surfaces for up to a week, and other pathogensfor months or more, microbes could be spread when surfaces are not disinfected correctly orequipment is not cleaned and sterilized between patients.

7/26/2019 Phleb Final Screen Ready
http://slidepdf.com/reader/full/phleb-final-screen-ready 123/127106 WHO guidelines on drawing blood: best practices in phlebotomy
Disinfecon
Killing of infectious agents outside the body by direct exposure to chemical or physical agents.Disinfection is necessary only for diseases spread by indirect contact.
Disposal
Intentional burial, deposit, discharge, dumping, placing or release of any waste material intoor on any air, land or water. In the context of this document, disposal refers to the storage andsubsequent destruction of injection or blood sampling equipment to avoid reuse or injury.
Engineering controls
Methods of isolating or removing hazards from the workplace. Examples include sharps disposalcontainers and safer medical devices (e.g. sharps with engineered sharps-injury protectionsand needleless systems), laser scalpels and ventilation, including the use of ventilated biologicalcabinets (laboratory fume hoods). In the context of sharps injury prevention, engineeringcontrols means control that isolates or removes the bloodborne pathogens from the workplace.
Finger-prick
A method of capillary sampling. In medicine, some blood tests are conducted on venous blood
obtained by nger-prick. There are ways of opening a small wound that produces no more thana few drops of blood. The procedure can be painful, but can also be quicker and less distressingthan venepuncture.
Hand hygiene
Any type of hand cleansing.
Handwashing
Washing hands with soap and water, and drying thoroughly afterwards with single-use towels.
Hepas B infecon
Hepatitis caused by hepatitis B virus (HBV) and transmitted by exposure to blood or bloodproducts, or during sexual intercourse. It causes acute and chronic hepatitis. Chronic hepatitis Bcan cause liver disease, cirrhosis and liver cancer.
Hepas C infecon
Hepatitis caused by a hepatitis C virus (HCV) and transmitted by exposure to blood or bloodproducts. Hepatitis C is usually chronic and can cause cirrhosis and primary liver cancer.
Hierarchy of controls
A concept developed in occupational health industrial hygiene to emphasize prevention. Thehierarchy, in order of priority for their efcacy in controlling exposure to hazards and preventinginjury or illness resulting from exposure hazards, is as follows:
• elimination of the hazard;
• engineering controls;
• administrative controls;
• work practice controls; and
• use of personal protective equipment.
See also Annex 4 of Joint ILO/WHO guidelines on health services and HIV/AIDS (Annexreference 8) for the application of the hierarchy of controls to the hazard of bloodborne pathogenexposure and needle-stick injuries.

7/26/2019 Phleb Final Screen Ready
http://slidepdf.com/reader/full/phleb-final-screen-ready 124/127Glossary 107
Human immunodeciency virus (HIV)
A virus mainly transmitted during sexual intercourse or through exposure to blood or bloodproducts. HIV causes acquired immunodeciency syndrome (AIDS).
Infecon control
A health-care organization’s program, including policies and procedures, for the surveillance,prevention and control of health-care associated infections. Such a program includes all patientcare and patient care support departments and services. Examples of infection control measuresinclude immunization, hand hygiene, antimicrobial stewardship, review of facility constructions,supervision of disinfection and sterilization, surveillance, use of protective clothing andisolation.
Injecon
Percutaneous introduction of a medicinal substance, uid or nutrient into the body. This may be accomplished most commonly by a needle and syringe, but also by jet injectors, transdermalpatches, micro-needles and other newer devices. The injections are commonly classied by thetarget tissue (e.g. intradermal, subcutaneous, intramuscular, intravenous, intraosseous, intra-arterial, peritoneal).
Intradermal injecon
A shallow injection given between the layers of the skin, creating a “weal” on the skin.
Intramuscular injecon
An injection given into the body of a muscle.
Intravenous injecon
An injection given into a vein.
Intravascular
Within a blood vessel.
Jet injector
A needle-free device that allows the injection of a substance through the skin under highpressure.
Lancet
A blood-sampling device to obtain a capillary sample of blood for testing. It is most commonlyused by people with diabetes during blood glucose monitoring. The depth of skin penetrationcan be adjusted by selecting lancets of different lengths.
Needle-sck
Penetrating stab wound caused by a needle.
Occupaonal exposure
Exposure to materials that results from the performance of an employee’s duties.

7/26/2019 Phleb Final Screen Ready
http://slidepdf.com/reader/full/phleb-final-screen-ready 125/127108 WHO guidelines on drawing blood: best practices in phlebotomy
Other potenally infecous materials
Body uids that are potentially infectious for HIV, HBV and HBC including:
• semen, vaginal secretions, cerebrospinal uid, synovial uid, pleural uid, pericardial uid,peritoneal uid, amniotic uid, saliva in dental procedures, any body uid that is visiblycontaminated with blood, and all body uids in situations where it is difcult or impossibleto differentiate between body uids;
• any unxed tissue or organ (other than intact skin) from a human (living or dead);
• cell or tissue cultures, or organ cultures containing HIV;
• culture medium or other solutions containing HIV, HBV or HCV;
• blood, organs or other tissues from experimental animals infected with HIV, HBV or HCV.
Parenteral
Piercing mucous membranes or the skin barrier through subcutaneous, intramuscular,intravenous or arterial routes; for example, through injections, needle-stick, cuts or abrasions.
Pathogen
A microorganism capable of causing disease.
Personal protecve equipment
Specialized equipment worn by an employee to protect against a dened hazard. Suchequipment includes gloves, lab coats, gowns, aprons, shoe covers, goggles, glasses with sideshields, masks, respirators and resuscitation bags. The purpose of personal protective equipmentis to prevent hazardous materials from reaching the workers’ skin, mucous membranes orpersonal clothing. The equipment must create an effective barrier between the exposed workerand the hazard.
Phlebotomy
The act of drawing or removing blood from the circulatory system through an incision orpuncture to obtain a sample for analysis and diagnosis.
Post-exposure care and prophylaxis for HIV
Preventive interventions offered to manage the specic aspects of exposure to HIV, and preventHIV infection in exposed individuals. The services include counselling, risk assessment, HIVtesting (based on informed consent), rst care and, when needed, the provision of short-term(28 days) antiretroviral drugs, with follow-up and support.
Post-exposure prophylaxis (PEP)
A medical response given to prevent the transmission of bloodborne pathogens after potentialexposure. It is available for HIV and hepatitis B.
Quality control
A management function whereby control of the quality of raw materials, assemblies, producedmaterials and components; services related to production; and management, productionand inspection processes is exercised for the purpose of preventing undetected production ofdefective material or the rendering of faulty services.
Recapping
The act of replacing a protective sheath on a needle. Recapping needles using two-handedmethods increases the risk of needle-stick injuries and is not recommended. However, wheresuch action is unavoidable, the one-hand scoop technique reduces the risk of needle-sticks.

7/26/2019 Phleb Final Screen Ready
http://slidepdf.com/reader/full/phleb-final-screen-ready 126/127Glossary 109
Safe injecon
An injection that does no harm to the recipient, does not expose the health worker to any riskand does not result in waste that puts the community at risk.
Sharp
Any object that can penetrate the skin; sharps include needles, scalpels, broken glass, brokencapillary tubes and exposed ends of dental wires.
Sharps container
A puncture-resistant, rigid, leak-resistant container designed to hold used sharps safely duringcollection, disposal and destruction. Sometimes referred to as a “sharps box” or “safety box”.
Sharps injury
An exposure event occurring when any sharp penetrates the skin.
Sharps protecon device
A sharp or needle device used for withdrawing body uids, accessing a vein or artery, oradministering medications or other uids. The device has a built-in safety feature or mechanism
that effectively reduces the risk of an exposure incident.
Single-use syringe
A sterile syringe intended for the aspiration of uids or for the injection of uids immediatelyafter lling (ISO 7886-1).
Solid sharp
A sharp that does not have a lumen through which material can ow; for example, a sutureneedle, scalpel or lancet.
Standard precauons
A set of practices designed to prevent the spread of infection between health workers andpatients from contact with infectious agents in recognized and unrecognized sources of infection.Such precautions are recommended for use with all patients, regardless of patient diagnoses orpresumed infectious status. Key elements include hand hygiene, cleaning of the environment,reprocessing of equipment between patients, use of personal protective equipment, placementof patients with known infection or colonization into isolation, laundry management, injectionsafety, preventing exposure to bloodborne pathogens, waste management and respiratoryhygiene.
Sterile
Free from living microorganisms.
Subcutaneous injecon
An injection delivered under the skin.
Syringe with reuse prevenon feature
A sterile single-use hypodermic syringe of a design such that it can be rendered unusable afteruse (ISO 7886-4).
Work pracce controls
Techniques that reduce the likelihood of exposure by changing the way a task is performed.

7/26/2019 Phleb Final Screen Ready
http://slidepdf.com/reader/full/phleb-final-screen-ready 127/127