pedagogy - amazon simple storage services3.amazonaws.com/.../handout...teachertraining.pdf · ......
TRANSCRIPT
TRAINING FOR PRIMARY SCHOOL TEACHERS IN CRISIS CONTEXTS
PEDAGOGY
MODULE 3PARTICIPANT
HANDBOOK

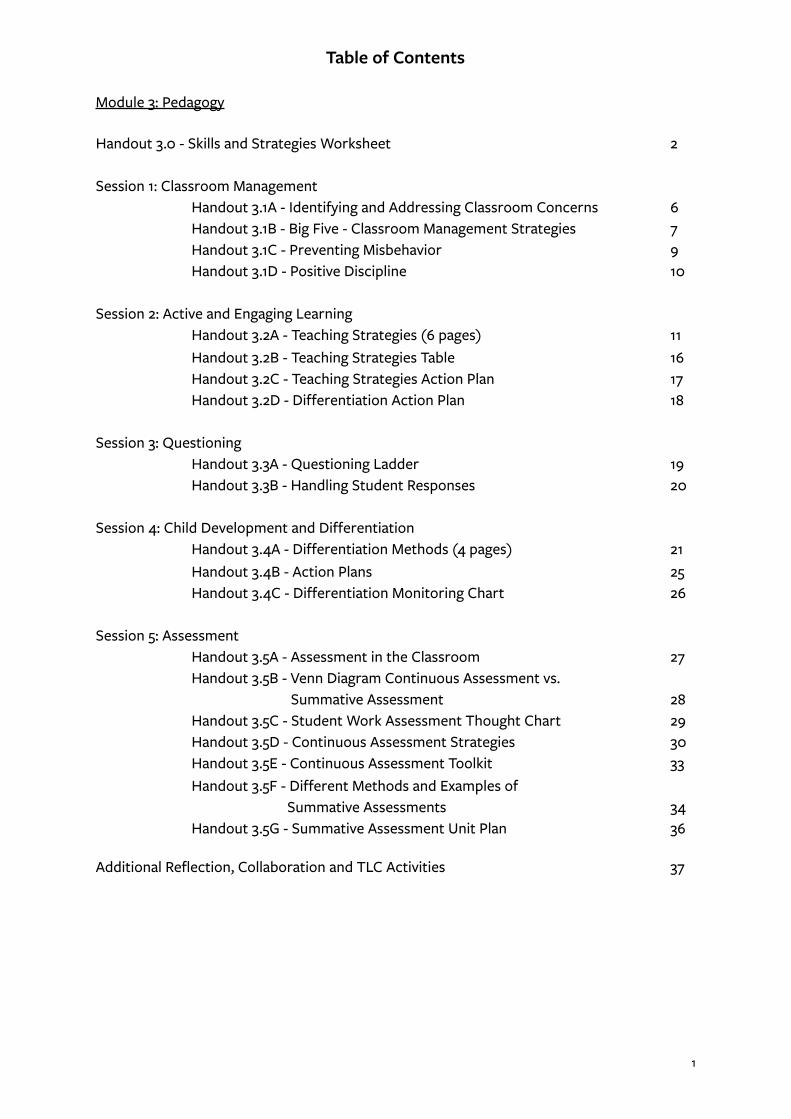
Table of Contents
Module 3: Pedagogy
Handout 3.0 - Skills and Strategies Worksheet 2
Session 1: Classroom Management Handout 3.1A - Identifying and Addressing Classroom Concerns 6 Handout 3.1B - Big Five - Classroom Management Strategies 7 Handout 3.1C - Preventing Misbehavior 9 Handout 3.1D - Positive Discipline 10
Session 2: Active and Engaging Learning Handout 3.2A - Teaching Strategies (6 pages) 11 Handout 3.2B - Teaching Strategies Table 16 Handout 3.2C - Teaching Strategies Action Plan 17 Handout 3.2D - Differentiation Action Plan 18
Session 3: Questioning Handout 3.3A - Questioning Ladder 19 Handout 3.3B - Handling Student Responses 20
Session 4: Child Development and Differentiation Handout 3.4A - Differentiation Methods (4 pages) 21 Handout 3.4B - Action Plans 25 Handout 3.4C - Differentiation Monitoring Chart 26
Session 5: Assessment Handout 3.5A - Assessment in the Classroom 27
Handout 3.5B - Venn Diagram Continuous Assessment vs. Summative Assessment 28 Handout 3.5C - Student Work Assessment Thought Chart 29
Handout 3.5D - Continuous Assessment Strategies 30 Handout 3.5E - Continuous Assessment Toolkit 33
Handout 3.5F - Different Methods and Examples of Summative Assessments 34
Handout 3.5G - Summative Assessment Unit Plan 36
Additional Reflection, Collaboration and TLC Activities 37
1

Handout 3.0 - Skills and Strategies Worksheet
2
MODULE 3: PedagogySTEP 1: SELF-EVALUATION Review the skills & strategies you can bring to your classroom that you learned in this module. For each session you will choose one skill or strategy you would like to develop and write it below. It is important to be honest with yourself and open to learning new things about yourself.
Complete the rating for each category:
1. Today: how well do you currently use the skill?
2. Goal: how well would you like to use the skill in the next week?
3. Action: what will you do in the next week to use or practice the skill?
4. Practice: how well did you use the skill when you practiced it in your classroom? (to be completed AFTER you have practiced the skill in your classroom)
Skill/ Strategy Today Goal Action: How will I achieve my goal? Practice
Example: I will use open questions in my lessons to promote critical thinking
● When I create my lesson plans this week I will write down the key questions for the lesson in the plan.
● I will use ‘think-pair-share’ at least once in every lesson.
To rate yourself, think of yourself as a water cup, by shading the amount of water it contains:
Currently do not have this skill. Need to learn or develop.
I use this skill a little. Need to develop more.
Have an average amount of this skill.
I use this skill in the best way possible.

3
1.
2.
3.
4.
5.
6.
4
STEP 2: PLAN Choose 1-2 of the skills/strategies from the sessions that you would like to develop. Write an action plan of the steps you will take to achieve your goal.
Area for Growth: ____________________________________
Action Plan: __________________________________________________________________________________________
__________________________________________________________________________________________
__________________________________________________________________________________________
__________________________________________________________________________________________
__________________________________________________________________________________________
__________________________________________________________________________________________

STEP 3: REFLECTION & COLLABORATION
Instructions: Step 3 can be completed individually or in a group (TLC). Answer the questions below independently and discuss your answers in a group if you feel comfortable. Discussion can be used to identify common challenges and create possible solutions or share resources.
Reflect on how you used a new skill or strategy from the goals that you listed above in your classroom. 1. What did you do to try a new skill or strategy? 2. What successes and challenges did you have in the classroom?
Learn 3. Brainstorm possible solutions. Consider previously learned concepts.
Plan 4. What will you do again? 5. What will you change or do differently? Share your plan with a peer for feedback.
Take action in the classroom.
5

Handout 3.1A - Identifying and Addressing Classroom Concerns
Directions: Please write down at least 3 of the issues you are having in your classroom in Column A of the table. We will be working together to address these issues in Column B at the end of the session. Column A Column B
Challenges How will I address these problems?
6

Handout 3.1B - Big 5 - Classroom Management Strategies
Big 5 Principles
The Big 5: Methods to Prevent Misbehavior Already do
Would like to
do
Would not like to
do
Clear Expectations
● Make a list of class rules with your students ● Give clear instructions before each activity
that includes a simple explanation of the activity, its purpose, timing, and materials needed
● Explain purpose behind expectations ● Check for student understanding of instructions
before starting activity
What do you already do in your classroom?
Routines
● Establish routines to help students experience a structured and predictable environment, be consistent about them and make them predictable.Examples of routines and procedures:
○ Starting class ○ Ending class ○ Clean up ○ Passing out and turning in papers
and materials ○ Getting students’ attention ○ Grouping students
● Student jobs in the classroom--like homework collector--to create a sense of ownership
What do you already do in your classroom?
7
8
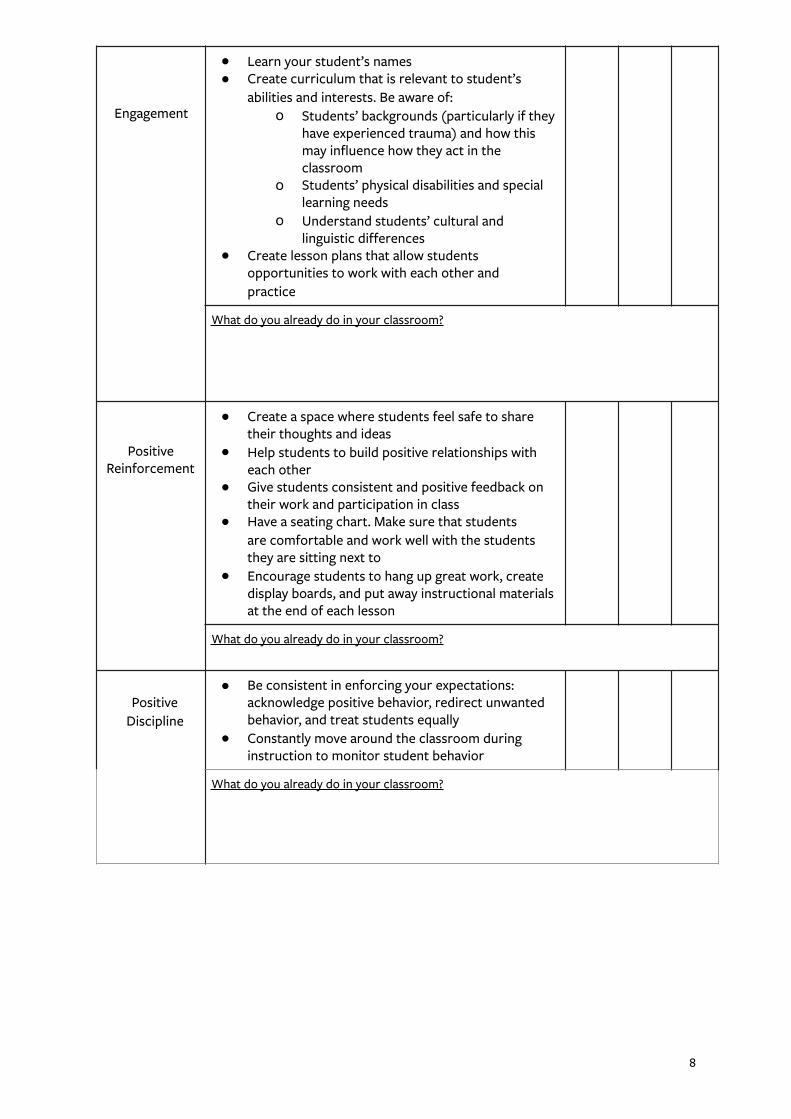
Engagement
● Learn your student’s names ● Create curriculum that is relevant to student’s
abilities and interests. Be aware of: o Students’ backgrounds (particularly if they
have experienced trauma) and how this may influence how they act in the classroom
o Students’ physical disabilities and special learning needs
o Understand students’ cultural and linguistic differences
● Create lesson plans that allow students opportunities to work with each other and practice
What do you already do in your classroom?
Positive Reinforcement
● Create a space where students feel safe to share their thoughts and ideas
● Help students to build positive relationships with each other
● Give students consistent and positive feedback on their work and participation in class
● Have a seating chart. Make sure that students are comfortable and work well with the students they are sitting next to
● Encourage students to hang up great work, create display boards, and put away instructional materials at the end of each lesson
What do you already do in your classroom?
Positive Discipline
● Be consistent in enforcing your expectations: acknowledge positive behavior, redirect unwanted behavior, and treat students equally
● Constantly move around the classroom during instruction to monitor student behavior
What do you already do in your classroom?

Handout 3.1C - Preventing Misbehavior
1. You just released students to work by themselves on an activity. A student in the back of the room is looking around and talking to other students. When you ask him what he is doing he does not know what to say.
What can a teacher do to prevent this from happening?
2. Students have just arrived to start the day. They are excited and full of energy and they are all talking to one another. The volume in the classroom is increasing and you want to start class and get students’ attention.
What can a teacher do to focus the students’ attention and get ready to start the lesson?
3. You planned an activity, and you think it will work really well. You explain the activity, but as the activity starts you notice that it is not going the way you planned it, students are not properly doing the work and not understanding the material.
What can a teacher do to prevent this from happening?
4. You have been lecturing for the last 20 minutes. While you are writing on the board, students are whispering and throwing objects at each other.
What can a teacher do to prevent this from happening?
9

Handout 3.1D - Positive Discipline
Stop and Think When a student’s actions interrupt instruction, ask yourself the following questions before you take action:
Action Steps 1. Is the student really doing something wrong?
NO: Redirect your stress away from the students and the class. YES: Move to next step.
2. Are your expectations fair?
NO: Reconsider your expectations. YES: Move to next step.
3. Did your student know they were misbehaving?
NO: Behavior was an accident. Re-explain expectations.
YES: The student misbehaved. Move to next step.
4. Redirecting Unwanted Behavior:
● Re-explain expectations ● Positive Narration: The teacher calls out positive behavior to remind all students what they
should be doing. ● Proximity: The teacher should always be moving around the room while teaching. This limits
unwanted behavior. When a teacher moves closer to a student that is not on task, the student will usually stop the unwanted behavior and pay attention again.
● Sudden Silence: The teacher stops talking and waits for the unwanted behavior to stop before continuing with the lesson.
● Tone or Volume of Voice: A teacher can change the tone or volume of their voice in order to regain the attention of the class. The teacher should never yell at students.
● Physical Cues: The teacher can use various nonverbal cues to regain the students’ attention such as hand signals, snapping, and turning the lights on and off.
If the student continues to misbehave after you have attempted to re-direct the unwanted behavior, move to next step.
10
5. Issuing a Consequence:
➢ Be private when possible. ➢ Explain to student why their behavior is unacceptable. ➢ Issue consequence. Make sure the consequence is appropriate for the misbehavior. ➢ If student argues, restate the consequence in a calm voice.

Handout 3.2A - Teaching Strategies
Strategy 1: Concept Maps
Purpose: Allows students to understand a new topic, generate different ways to solve a problem, organize ideas and identify links and themes, be excited by a new concept or idea. Example steps:
1. Write a topic or question in a circle in the center of the board. Ask students to do the same on their page.
2. Ask students to come up with as many ideas about this topic or question as they can. Add all of their ideas to the diagram (see model below). Use think-pair-share to do this.
3. Ask students if they can see any themes or links between all of the different ideas. Add these to the diagram using connecting lines or circles.
Outcome: See example below.
Task: Practice this teaching strategy with your group. To start, use the example of water (see above). As you get more confident, come up with a question or topic of your own.
You have 30 minutes to practice, and then one person will need to demonstrate this strategy to the group.
Good Luck!
11

Strategy 2: Role-play
Purpose: Allows students to actively and creatively engage with a topic, to deepen their understanding of a topic, and to practice new skills. Example steps:
1. Divide students into small groups. Clearly explain the task and give each group a scenario and each student a role.
2. Give students several minutes to create and practice their role-play. Give them clear timings.
3. Ask the small groups to then perform their role-play for the rest of the class. While they perform the class should have a question to think about, for example, ‘What is the message of the role-play?’ ‘What did the group do well?’
Outcome: In small groups, students will perform a short play in front of their peers to reflect something they have been learning in school.
Task: Practice this teaching strategy with your group.
Role-play 1: Ask participants to practice their counting skills by creating a role play about buying and selling at the market. Two participants should be stallholders and two participants the customers.
Role-play 2: If you are confident, now ask participants to create a role-play to show how to deal with a school bully. One person should be the bully, one person the victim, and two people should be bystanders.
You have 30 minutes to practice, and then one person will need to demonstrate this strategy to the group.
Good Luck!
Strategy 3: Storytelling "Tell me a fact and I'll learn. Tell me the truth and I'll believe. But tell me a story and it will live
in my heart forever." Indian Proverb Purpose: Students enjoy listening to stories and they stimulate thinking and interest. They also allow students to develop communication skills, deepen their understanding of a topic, and incorporate their culture into the classroom. Example steps:
1. Find stories that relate to the topic you teach or the cultures of your students. 2. Ask questions before, during and after the story to help them analyze and learn from
the story. 3. Read the story in a loud and expressive voice. 4. Ask the students to sketch the story, or to act out actions, while your read it. Read
the story through twice. 5. Give students a chance to write their own stories too.
Outcome: Students will have engaged in the ideas of the story and will demonstrate their understanding.
12

Task: Practice this teaching strategy with your group.
Tell your class that today they will hear a story called ‘The Mouse and the Lion’. Before you read the story ask the group these questions: What do you think the story is about? Where do you think the story is set? What adjectives would you use to describe a lion? What adjectives would you use to describe a mouse?
Read the story below with expression and excitement, and carry out the actions while you read.
Once when a Lion was asleep (yawn), a little Mouse began running up and down upon him (mime running) . This soon wakened the Lion, who placed his huge paw upon him and opened his big jaws to swallow him (open your mouth wide like the lion).
"Pardon, O King!" cried the little Mouse, "Forgive me this time. I shall never repeat it and I shall never forget your kindness. And who knows, but I may be able to do you a good turn one of these days?" The Lion was so tickled at the idea of the Mouse being able to help him, that he lifted up his paw and let him go (laugh). Sometime later a few hunters captured the Lion and tied him to a tree while they went in search of a wagon to carry him on.
Just then the little Mouse happened to pass by, and seeing the sad plight in which the Lion was, ran up to him and soon gnawed away the ropes that bound the King of the Beasts (mime chewing the rope). "Was I not right?" said the little Mouse, very happy to help the Lion (smile).
Use think pair share to ask the students the following questions.
1. What was the mouse doing when the lion woke up? 2. How do you think the mouse felt at that moment? Why? 3. How did the lion feel? Why? 4. How was the mouse able to repay the lion’s kindness?
5. What is the moral of this story? You have 30 minutes to practice, and then one person will need to demonstrate this strategy to the group.
Good Luck!
Strategy 4: Games Purpose: Games are engaging and exciting for students. They are also a useful way to practice and revise topics, they encourage positive competition, and they develop communication skills. Example 1 – To practice body parts and listening skills
1. Tell the students that for this game they have to listen to your instructions very carefully. When you say ‘Teacher says…’ they have to follow your instructions and carry out the action. If you don't say “teacher says ..’ they must not copy you. For example, if you say “Teacher says touch your nose” each student must touch their nose. If you just say “Touch your nose” they must not.
2. Start the game by asking all students to stand up. Give the following commands one after another. “Teacher says touch your toes”
13

“Teacher says touch your shoulders” “Teacher says touch your elbows” “Teacher says touch your knees” “Teacher says touch your head” “Touch your eyes” (if any students touch their eyes, they have to sit down for the rest of the game, they are out of the competition)
3. Keep going in this way, naming other body parts. 4. Give out a reward for all students who are still ‘in’ by the end of the game. 5. Put the students into small groups to practice playing the game themselves. They
must take it in turns to be ‘teacher’.
Example 2 – To practice verbs 1. Ask students to write down a verb on a small piece of paper. They then put the piece
of paper into your bowl/hat. 2. Select a student to come and take the piece of paper out of the bowl and to act out
the verb. 3. Ask the class to put their hand up if they can work out what the verb is. 4. Put the class into small groups and ask them to play the game themselves.
Outcome: Students will become increasingly confident through practicing the skill in this fun way. They will be able to play the games themselves in their groups.
Task: Practice one of the games with your group following the steps above. If you are feeling confident, practice other learning games that you know.
You have 30 minutes to practice, and then one person will need to demonstrate this strategy to the group.
Good Luck!
Strategy 5: Visual demonstrations Purpose: Stimulates interest and engagement with a topic, brings topics to life, appeals to a wide range of students. Example 1 - Math - Counting
1. Bring 10 students to the front of the class. They will be your ‘counters’ to show the class how to add and subtract.
2. Say to the class, ‘If I have 10 students, and I take away 2 students, how many students are left? Physically move two students away from the group of 10 – ask the class to count how many are left.
3. Model another example. 6. Put students into small groups and ask them to practice doing this themselves.
Outcome: Students will have been introduced to a new idea in a very visual way. This will help them when they practice the skill themselves. If you have more equipment and props you can be very creative with your demonstrations.
Task: Practice this teaching strategy with your group. If you feel confident, come up with your own examples.
14

You have 30 minutes to practice, and then one person will need to demonstrate this strategy to the group.
Good Luck!
Strategy 6: Group discussion Purpose: Allows students to actively and creatively engage with a topic; deepen their understanding of a topic; develops communication and team building skills. Example steps:
1) Clearly tell students the behavior expectations (e.g. respect for each other, listening) and give them individual roles (e.g. spokesperson, organizer, peacekeeper, recorder of what’s said).
2) Explain the task clearly and have it written on the board as well. Tell the pupils what they have to do and what the outcome of their group work should look like.
3) Give students time to carry out their group discussion. 4) Bring the whole class back together to share their ideas. For example, take one idea
from each group, or ask each group to tell you about the most interesting thing they learned. Try to make the final session an exchange of ideas rather than you telling them what they have missed.
5) Summarize the work of the groups in a way that makes them feel proud of what they have done. You can also ask them to tell you how well they thought they worked in a group.
Outcome: Students will have worked together as a team to share and develop their ideas to tackle a problem.
Task: Practice this teaching strategy with your group. Use the discussion questions below. Make sure you give each participant a role in the group work.
1) Why do we need to listen to each other? 2) Why is it good to work in groups? 3) When do you use addition in your everyday life? Which group can come up with the
most ideas? 4) Why are trees so important for our environment?
Other examples of group work: Group work is not only useful for discussion - you can use group work to complete other activities. For example, in a group write a song to help you remember the solar system. In a group create a play to show how to deal with bullying. In a group, solve this math problem. In a group, hold a debate about the best way to look after the environment.
You have 30 minutes to practice, and then one person will need to demonstrate this strategy to the group.
Good Luck!
15
Handout 3.2B - Teaching Strategies Table
Teaching Strategy What are the key points? What are the strengths?
Concept Maps
Demonstrations
Storytelling
Role-play
Games
Group Discussion
16

Handout 3.2C - Teaching Strategies Action Plan
Name of strategy:
Name of topic:
How will you use this activity?
What are the challenges and how will you overcome these?
Name of strategy:
Name of topic:
How will you use this activity?
What are the challenges and how will you overcome these?
Name of strategy:
Name of topic:
How will you use this activity?
What are the challenges and how will you overcome these?
17

Handout 3.2D - Differentiation Action Plan
Step 1: How will you group your students?
Step 2: What expectations will you set for student behavior?
Step 3: How will you make sure that the instructions are clear?
Step 4: How will students show you the work that they have completed?
18
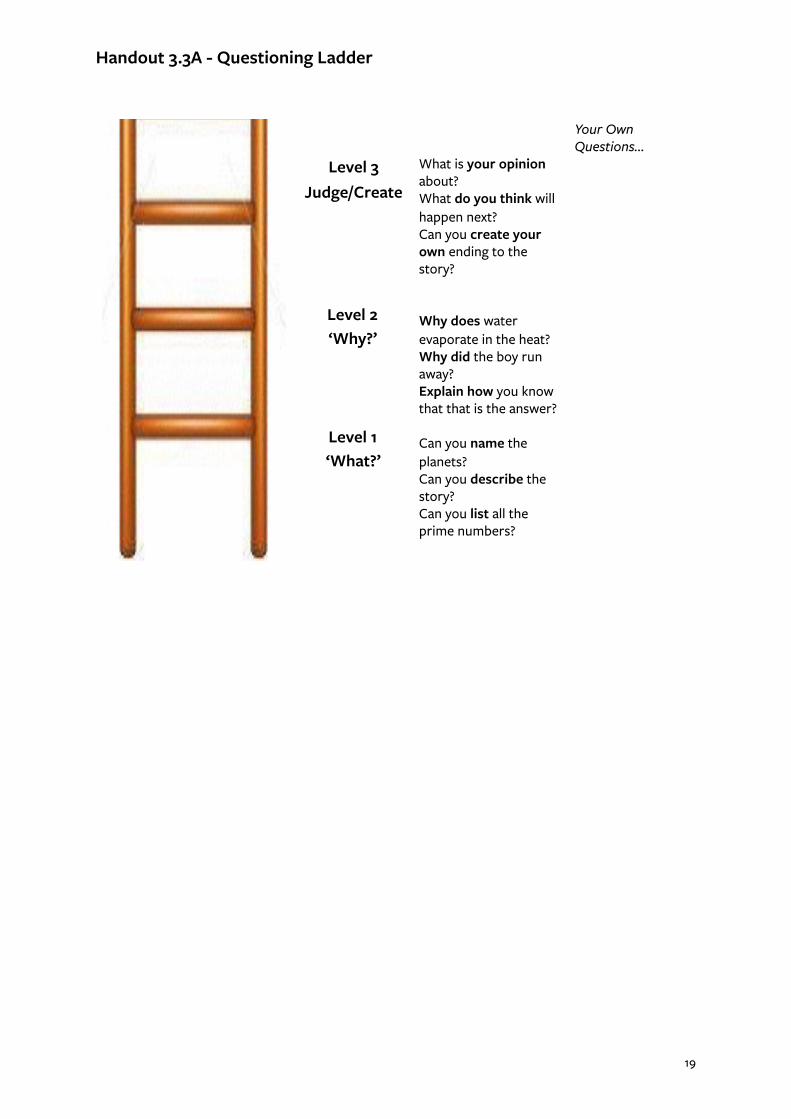
Handout 3.3A - Questioning Ladder
Level 3 Judge/Create
Level 2‘Why?’
Level 1 ‘What?’
What is your opinion about? What do you think will happen next? Can you create your own ending to the story?
Why does water evaporate in the heat? Why did the boy run away? Explain how you know that that is the answer?
Can you name the planets? Can you describe the story? Can you list all the prime numbers?
Your Own Questions…
19

Handout 3.3B - Handling Student Responses
★ Include all students ★ Be positive ★ Be constructive
Handling Student Responses:
Follow Up Questions: 1. How and Why: Ask the students to explain how they arrived at the answer. 2. Give an Example: Ask the students to offer an example. 3. Another Way: Ask the students to solve the same problem using a different set of
skills. 4. Ask for a Better Word: Encourage students to use a different word to practice
vocabulary.
Practice: 1. Teacher: If you divide 13 apples equally into two groups, how many apples are left over at
the end? Student: You will have 5 apples in each group. Correct Answer: 2 groups of 6 apples, 1 left over apple. 2. Teacher: What is the area of a rectangle that is 5 meters long and 3 meters wide? Student: The area is 15. Correct Answer: The area is 15 square meters long. 3. Teacher: What are some differences between a dolphin and a shark? Student: A dolphin is a mammal and a shark is a fish. Correct Answer: A dolphin is a mammal and a shark is a fish. Dolphins need air to breath.
Sharks can breath through their gills underwater.
20
Praise student by explaining why they gave a great answer. E.g. "I really liked how Aya phrased that answer with a complete sentence." Ask a follow up question.
Student gives the right answer to the question.
Give hint, show a visual, ask other student for help. Ask for correct answer from another student and have the original student repeat it.
Student gives the wrong answer or responds, "I
don't know."

Handout 3.4A - Differentiation Methods
Importance: When teachers make an effort to teach to each of the ability levels in the class, students are more likely to stay engaged and master new materials and skills. High ability students need a challenge so that they do not get bored and become disengaged. Lower ability students need extra support so they don’t fall behind and become discouraged.
METHOD 1: SUPPORT AND CHALLENGE
Ability Level Adaptations
High ● Provide students with extension or challenge activities ● Use students as peer mentors ● Mini lessons by interest
Medium ● Provide students with an extension activity if they finish early
Low ● Provide several examples ● Provide step by step instructions ● Vocabulary support in student’s first language ● Use student as a mentor ● Mini lessons to catch students up with their peers
21

Importance: When teachers make an effort to teach to each of the learning styles students are more likely to stay actively engaged and master new materials and skills. You can try and include a range of activities in the lesson so that all students are engaged OR you can give different students different types of work.
METHOD 2: LEARNING STYLE
Types of Learners Presentation Style
Activities
Visuals, wall displays, posters
Flash cards, graphic organizers, cycles, flow charts, mind maps, story boards (oversized comic strip), student illustrations, organize with colors
Audio tapes, videos, story telling, music, rhyming
Group work, debates, interviews, presentations
Physical representations, hand motions
Competitions, board games, role plays, intersperse activities that require students to sit quietly with activities that allow students to move around and be active
Guided notes, graphic organizers, manipulatives
Note taking, manipulatives, practice, writing assignments
Kinesthetic (Movement)
Visual (See)
Tactile (Do)
Auditory (Hear)
22

METHOD 3: GROUPING
METHODS DESCRIPTION REMEMBER
By ability The teacher organizes the groups by ability. Students of high ability work together, of medium ability work together and so on. With this method you can give the groups appropriate work for their ability, and they can challenge and support each other.
Students may be upset if they are always in the low group- it can damage their self esteem. Use different group strategies so that students do not pick up on the way they have been grouped. Make sure that students can change group if they make progress.
Mixed ability The teacher mixes up groups by ability. This way able students can help less able students. This can be motivating for all students. The teacher can plan the groups (putting together students they believe will work well together) or put groups together at random (to promote diversity, tolerance and inclusion).
In this example all students will complete the same work. You will need to set clear expectations that all students work hard and contribute. Be careful that your groups encourage participation and do not increase any tensions.
Large class sizes - divide the class
Sometimes, with large, diverse classes, the teacher will divide the class into 2 or 3 groups based on ability. They will then teach the groups separately. For example one group may be studying complex sentences, while another is working on the parts of a sentence.
This is very effective with large, diverse classes but the teacher must have excellent class control and organisation. While teaching one group the other students must have work to be completing until it is their turn.
23
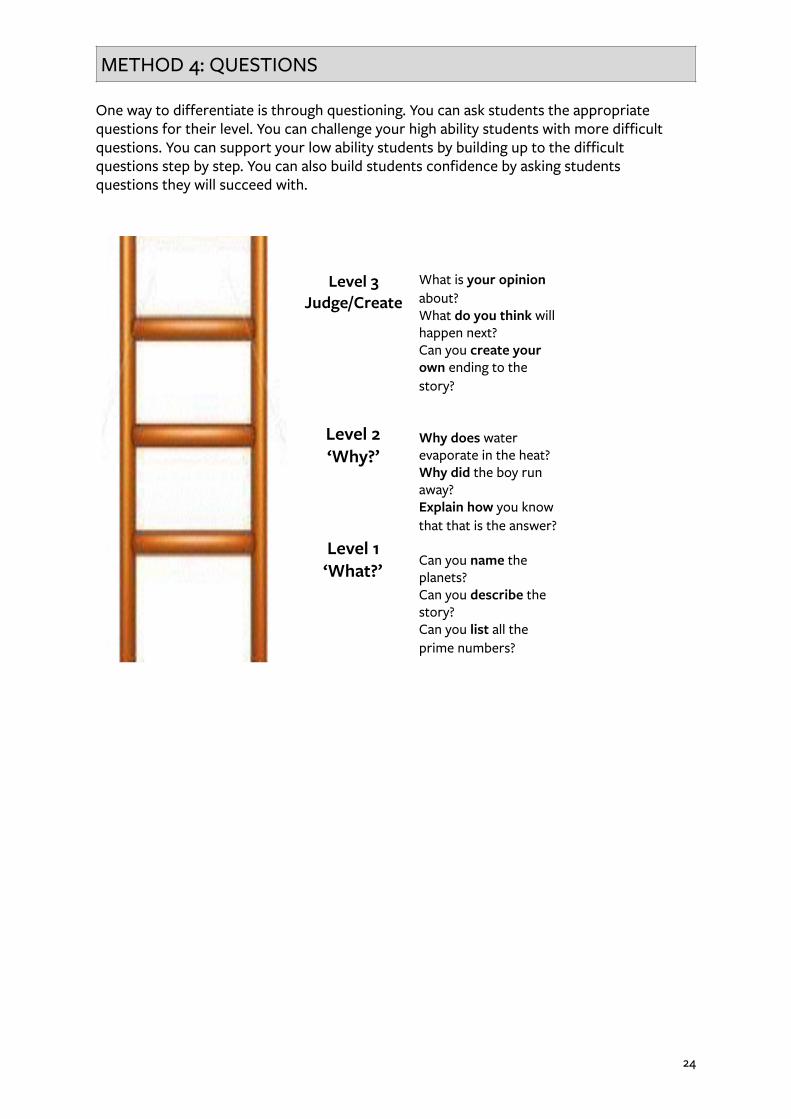
One way to differentiate is through questioning. You can ask students the appropriate questions for their level. You can challenge your high ability students with more difficult questions. You can support your low ability students by building up to the difficult questions step by step. You can also build students confidence by asking students questions they will succeed with.
METHOD 4: QUESTIONS
Level 3 Judge/Create
Level 2 ‘Why?’
Level 1 ‘What?’
What is your opinion about? What do you think will happen next? Can you create your own ending to the story?
Why does water evaporate in the heat? Why did the boy run away? Explain how you know that that is the answer?
Can you name the planets? Can you describe the story? Can you list all the prime numbers?
24
Handout 3.4B - Action Plans
Differentiation Method _________________________
How will you use this in your class?
Differentiation Method _________________________
How will you use this in your class?
Differentiation Method _________________________
How will you use this in your class?
Differentiation Method _________________________
How will you use this in your class?
25

Handout 3.4C - Differentiation Monitoring Chart
Which of my students? Name of Students
Need to be challenged
Make good peer mentors
Need more support
Need more confidence
Visual learners
Kinaesthetic learners
Auditory learners
Work well together
26
Handout 3.5A - Assessment in the Classroom
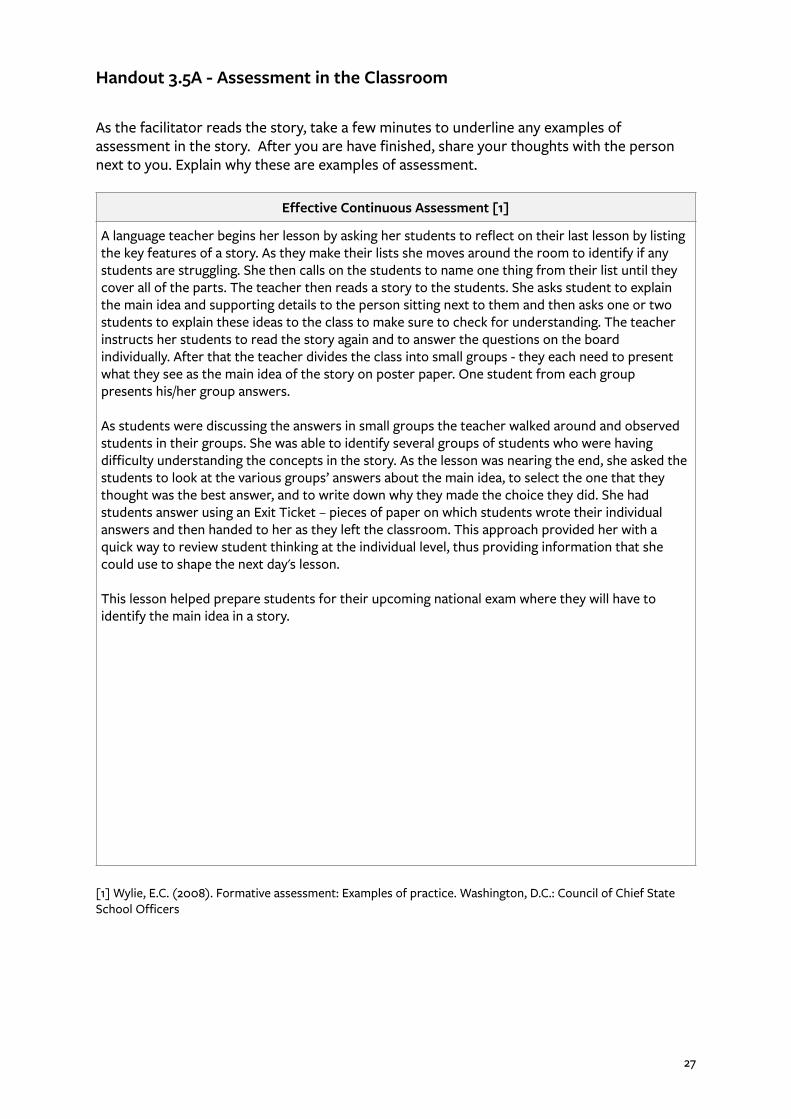
As the facilitator reads the story, take a few minutes to underline any examples of assessment in the story. After you are have finished, share your thoughts with the person next to you. Explain why these are examples of assessment.
[1] Wylie, E.C. (2008). Formative assessment: Examples of practice. Washington, D.C.: Council of Chief State School Officers
Effective Continuous Assessment [1]
A language teacher begins her lesson by asking her students to reflect on their last lesson by listing the key features of a story. As they make their lists she moves around the room to identify if any students are struggling. She then calls on the students to name one thing from their list until they cover all of the parts. The teacher then reads a story to the students. She asks student to explain the main idea and supporting details to the person sitting next to them and then asks one or two students to explain these ideas to the class to make sure to check for understanding. The teacher instructs her students to read the story again and to answer the questions on the board individually. After that the teacher divides the class into small groups - they each need to present what they see as the main idea of the story on poster paper. One student from each group presents his/her group answers.
As students were discussing the answers in small groups the teacher walked around and observed students in their groups. She was able to identify several groups of students who were having difficulty understanding the concepts in the story. As the lesson was nearing the end, she asked the students to look at the various groups’ answers about the main idea, to select the one that they thought was the best answer, and to write down why they made the choice they did. She had students answer using an Exit Ticket – pieces of paper on which students wrote their individual answers and then handed to her as they left the classroom. This approach provided her with a quick way to review student thinking at the individual level, thus providing information that she could use to shape the next day's lesson.
This lesson helped prepare students for their upcoming national exam where they will have to identify the main idea in a story.
27
Handout 3.5B - Venn Diagram Continuous Assessment vs. Summative Assessment
Directions: Complete the Venn diagram with your partner by filling in traits that are unique to continuous assessment and traits that are unique to summative assessment in the outer circles while filling in traits that are similar to both in the middle section.
28

Handout 3.5C - Student Work Assessment Thought Chart
Using the student work that you brought with you or the ‘Overview of Active and Engaging Teaching Strategies’ worksheet from the beginning of the session complete the following thought chart.
1. Describe the assignment you are reviewing. How can you use it to assess this student’s understanding and learning?
2.What does this assignment tell you about the student who is writing it? What are his/her strengths and weaknesses?
3.How would you change instruction to help this student? How might you challenge them if they understand the material and how might you alter instruction to help them if they are struggling with the material?
4.Do you think this was a strong tool for assessing student understanding? Why or why not? What could you do to make it better?
29
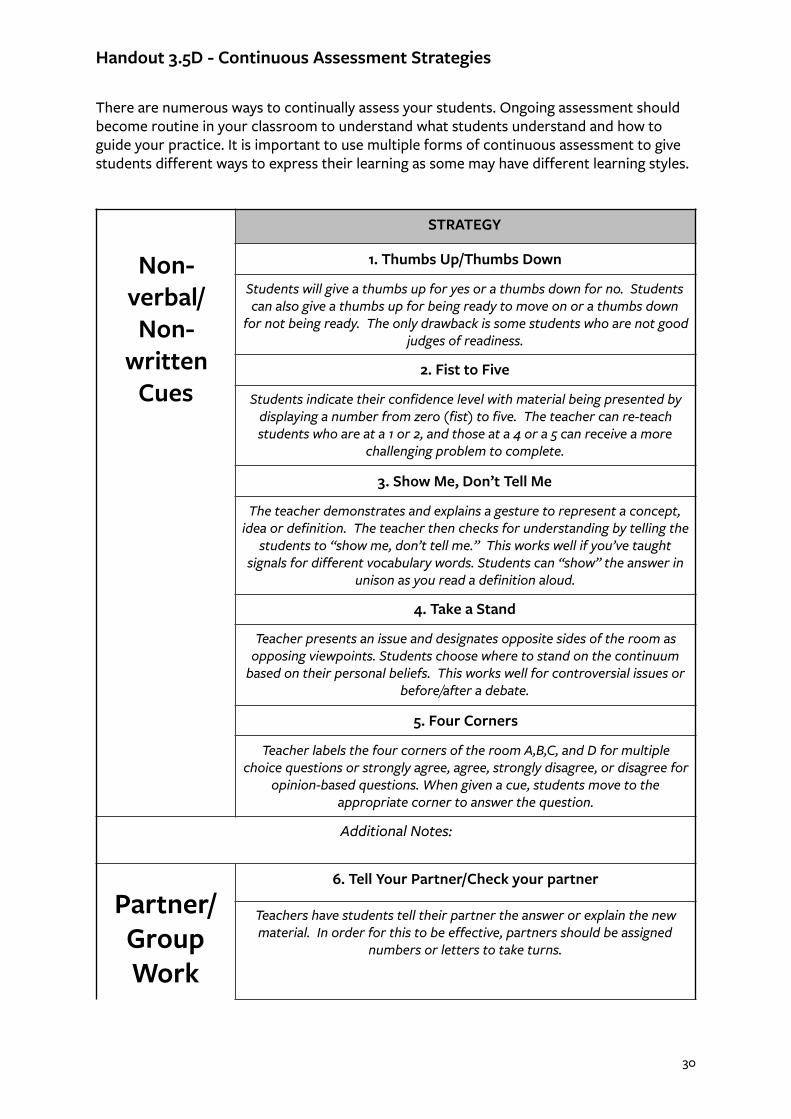
Handout 3.5D - Continuous Assessment Strategies
There are numerous ways to continually assess your students. Ongoing assessment should become routine in your classroom to understand what students understand and how to guide your practice. It is important to use multiple forms of continuous assessment to give students different ways to express their learning as some may have different learning styles.
Non-verbal/ Non-
written Cues
STRATEGY
1. Thumbs Up/Thumbs Down
Students will give a thumbs up for yes or a thumbs down for no. Students can also give a thumbs up for being ready to move on or a thumbs down
for not being ready. The only drawback is some students who are not good judges of readiness.
2. Fist to Five
Students indicate their confidence level with material being presented by displaying a number from zero (fist) to five. The teacher can re-teach students who are at a 1 or 2, and those at a 4 or a 5 can receive a more
challenging problem to complete.
3. Show Me, Don’t Tell Me
The teacher demonstrates and explains a gesture to represent a concept, idea or definition. The teacher then checks for understanding by telling the
students to “show me, don’t tell me.” This works well if you’ve taught signals for different vocabulary words. Students can “show” the answer in
unison as you read a definition aloud.
4. Take a Stand
Teacher presents an issue and designates opposite sides of the room as opposing viewpoints. Students choose where to stand on the continuum
based on their personal beliefs. This works well for controversial issues or before/after a debate.
5. Four Corners
Teacher labels the four corners of the room A,B,C, and D for multiple choice questions or strongly agree, agree, strongly disagree, or disagree for
opinion-based questions. When given a cue, students move to the appropriate corner to answer the question.
Additional Notes:
Partner/Group Work
6. Tell Your Partner/Check your partner
Teachers have students tell their partner the answer or explain the new material. In order for this to be effective, partners should be assigned
numbers or letters to take turns.
30
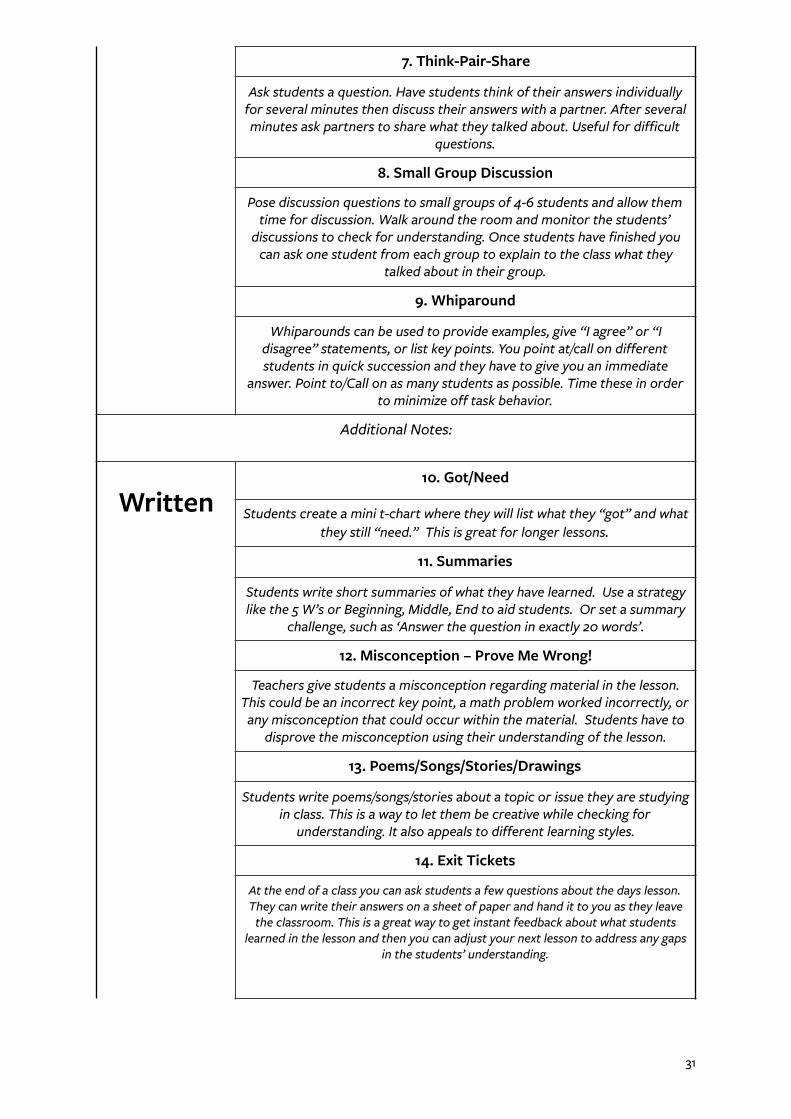
7. Think-Pair-Share
Ask students a question. Have students think of their answers individually for several minutes then discuss their answers with a partner. After several minutes ask partners to share what they talked about. Useful for difficult
questions.
8. Small Group Discussion
Pose discussion questions to small groups of 4-6 students and allow them time for discussion. Walk around the room and monitor the students’
discussions to check for understanding. Once students have finished you can ask one student from each group to explain to the class what they
talked about in their group.
9. Whiparound
Whiparounds can be used to provide examples, give “I agree” or “I disagree” statements, or list key points. You point at/call on different students in quick succession and they have to give you an immediate
answer. Point to/Call on as many students as possible. Time these in order to minimize off task behavior.
Additional Notes:
Written
10. Got/Need
Students create a mini t-chart where they will list what they “got” and what they still “need.” This is great for longer lessons.
11. Summaries
Students write short summaries of what they have learned. Use a strategy like the 5 W’s or Beginning, Middle, End to aid students. Or set a summary
challenge, such as ‘Answer the question in exactly 20 words’.
12. Misconception – Prove Me Wrong!
Teachers give students a misconception regarding material in the lesson. This could be an incorrect key point, a math problem worked incorrectly, or any misconception that could occur within the material. Students have to
disprove the misconception using their understanding of the lesson.
13. Poems/Songs/Stories/Drawings
Students write poems/songs/stories about a topic or issue they are studying in class. This is a way to let them be creative while checking for
understanding. It also appeals to different learning styles.
14. Exit Tickets
At the end of a class you can ask students a few questions about the days lesson. They can write their answers on a sheet of paper and hand it to you as they leave
the classroom. This is a great way to get instant feedback about what students learned in the lesson and then you can adjust your next lesson to address any gaps
in the students’ understanding.
31

15. Quick-Write
This can be a great way to start or conclude class. Give students a prompt that addresses the content you have been teaching and give them 510
minutes to write down all of their ideas.
16. Quick List Competition
Given a topic and a limited amount of time, students create a single column or double (T-chart) column list. The group with the most number of items or most unique item may get a prize such as extra points on an assignment.
Additional Notes:
Verbal
17. Presentation
Giving students the opportunity to present or give speeches to their classmates is a good way to check for students’ understanding as well as let the students teach or
reinforce concepts to other students.
18. Debate
You can allow groups of students to debate each other by teaching them different sides of an argument or concept and having them use the
information they have learned to hold a debate.
19. Role-play/Skits
Giving students the chance to act out a scene from a story or create their own skit based on a concept, historical event, or story is a creative and fun way for students to show what they understand and for you to assess their
learning.
32

Handout 3.5E - Continuous Assessment Toolkit
Directions: Fill out the chart below to describe at least 3 continuous assessments that you can use in your classroom on a regular basis.
(1) What assessment will you use and how will you use it next week and on a regular basis? Why did you choose this assessment? Assessment name__________________
(2) Explain how you will use this assessment to guide classroom practice. What will you do if your assessment shows students do not understand the content? Who can you go to for support after class if this does not go as planned?
33

Handout 3.5F - Different Methods and Examples of Summative Assessments
Multiple Choice – Multiple choice is one of the most commonly used assessments. Students will be given multiple options (3-5) with one answer being the correct answer.
Multiple choice (History)
Kenya gained independence from the British in…
a) 1954 b) 1957 c) 1963 d) 1965
Think about the topics you teach. Create your own example for each type of assessment...
True or False – True or false questions can be used in all subjects and they are a quick and easy way to assess students understanding. True or false questions are composed of a question or a statement and then the students are asked to identify whether or not the question or statement is true or false.
True or False (Math)
True or False?
True or False?
True or False?
Matching – Matching consists of concepts, themes, or people in one column with definitions and explanatory information in the other. Students must match one concept, theme, or person from one column with the correct number in the opposite column.
Matching (Math)
Prime Number a_ Fraction _b_ Even Number _d_ Improper Fraction _c_
a) 1 b) 2/3 c) 10/8 d) 10
Identification (IDs) – Identifications (IDs) can be a quick way to see how well students understand concepts, ideas, themes, or important people they have been learning about in class. An ID consists of giving the student a term and having him/her define it and explain its significance. Answers to IDs should not be longer than 4 sentences, they are also meant to help students be efficient in their writing.
Identifications (Language Arts)
For each of the following parts of speech provide a definition, its function in speech and an example. Each answer should be no more than 2-3 sentences.
● Adjective ● Noun ● Verb ● Pronoun
34

Short Answer – Short answer questions are a great way to assess students’ learning. Students will be given a question or a prompt that is focused on a specific aspect of the content and asked to answer it in a brief written answer. Answers can range in length from 2-3 sentences to 1-2 paragraphs. This allows students to showcase detailed knowledge of the content without writing a full essay.
Short Answer (Science)
In a paragraph explain the
differences between a gas and a liquid
and describe how a liquid becomes a gas.
Essay – Essay writing may give you the best picture about what students truly understand about the unit you have just completed. Essays are short papers that students can write in class to address a question or prompt. These are the most time consuming to grade, but they often can give you the clearest picture of what students understand. This is a skill that needs to build up to; students must be taught how to write an essay. Short answers are often a good for improving essay writing.
Essay (World History)
In an essay defend, refute, or qualify the following statement: The collapse of the Soviet Union should be blamed entirely on Mikhail Gorbachev.
35

Handout 3.5G - Summative Assessment Unit Plan
Directions: Answer the following questions about your summative assessment for the unit and create summative assessment questions you can use at the end of the unit.
What will you be assessing in your next summative assessment?
How many questions will your next summative assessment be?
What methods of summative assessment will you include? Why?
Using any summative assessment method you just read about, compose 10-12 questions you can use on your next summative assessment.
1. 2. 3.
4. 5. 6.
7. 8. 9.
10 11. 12.
36
Additional Reflection, Collaboration and TLC Activities
37
Here are additional ways to build on your skills within this module through an individual journal reflection or in a discussion with a supportive group of collaborative teachers (TLC)
Reflection & Collaboration Activity #1 - PEER OBSERVATION
In this module you have learned many skills that you can implement in the classroom. Now you have finished the modules, you still need to keep learning and developing your practice. One way to do this is to learn by observing the teachers around you.
1. Choose one area that you want to develop (Classroom management, Instruction, or Assessment).
2. Ask a colleague if they would mind you observing their lesson. While observing focus on how the teacher addresses this issue.
3. After the observation, in groups or by yourself reflect on the following questions: a. What were some important skills/ideas that I saw during the observation? b. What new questions arose? c. What are 1-2 concrete ideas I took away that I can use in my classroom, how
am I going to use them and where can I find support to use them?
Reflection & Collaboration Activity #2 - TRIUMPHS AND CHALLENGES
When you try new strategies in the classroom, things don’t always go to plan. Often it will take several attempts before the new strategy works exactly as you would like it to. It’s really important to reflect on the challenges that arise so that you can think of creative ways to overcome them. It is also really important to share and celebrate the triumphs when things go to plan, even if it is something small.
In groups or individually please reflect on the following. 1) What new strategies did you try in your classroom this week? 2) What didn’t work? What challenges did you face? 3) What might you do differently next time to overcome this? (If you are in a group, come
up with solutions together). 4) What worked well? What successes did you have this week? (if in a group, remember
to praise and celebrate each other’s success stories).

38
Reflection & Collaboration Activity #3 - CREATING A POSITIVE CLASSROOM ENVIRONMENT
If possible collect some materials from your headteacher or local community that you can use to create posters and charts for your classroom. Come together in your TLC and spend time together creating these materials. Think about the type of displays that would be most useful - keywords for the topic you are studying? A timeline for history? An important diagram for science? Or maybe a chart with everyone’s name on so that they feel at home in their classroom? Remember when you work together you are often more creative and you can share your skills and knowledge. If you have time, you could have a competition to see who has the best decorated classroom.
Reflection & Collaboration Activity #4 - ASSESSING STUDENT WORK
When you meet in your TLC everyone should bring some of their student’s work with them. Work together to use the thought chart below to analyze some examples of work.
1. Describe the assignment you are reviewing. How can you use it to assess the student’s understanding and learning?
2. What does this assignment tell you about the student who is writing it? What are his/her strengths and weaknesses?
2. How would you change instruction to help this student? How might you challenge them if they understand the material and how might you alter instruction to help them if they are struggling with the material?
3. So you think this was a strong tool for assessing student understanding? Why or why not? What could you do to make it better?