owner’s instruction
TRANSCRIPT

OWNER’S INSTRUCTION
READ AND SAVE THESE INSTRUCTIONS
Coffee/cappuccino maker
BCO60

DESCRIPTION OF THE APPLIANCE
A Removable safety cap with safety valveB Water tankC Steam knobD Steam tubeE Power cableF Removable drip trayG Boiler outletH Recessed warming plateI Espresso/Cappuccino ON/OFF switchJ 5/10 coffee switchK ON/OFF drip coffee switchL ON/OFF drip coffee pilot lampM 5/10 coffee pilot lampN Espresso/Cappuccino ON/OFF pilot lampO Drip coffee machine filter holder
P Drip coffee machine water reservoir coverQ Drip coffee machine water levelR Flow regulator with selection for type of
coffeeS Carafe for drip coffeeT FilterU Filter holderV Measuring spoonW Adaptor (if supplied)X Espresso carafe with lidY Cappuccino nozzle
A
C
B
E
R
D
F
GH
X Y
W
VLM
K
OP
N
IJ
Q
S
T
U

�����@@
@@@��
���ÀÀ
ÀÀÀ
�����
QQQQQ
¢¢¢¢¢
��������������
QQQQQQQQQQQQQQ
¢¢¢¢¢¢¢¢¢¢¢¢¢¢
�������������
QQQQQQQQQQQQQ
¢¢¢¢¢¢¢¢¢¢¢¢¢
�������
QQQQQQQ
¢¢¢¢¢¢¢
���������������
QQQQQQQQQQQQQQQ
¢¢¢¢¢¢¢¢¢¢¢¢¢¢¢
�����������
QQQQQQQQQQQ
¢¢¢¢¢¢¢¢¢¢¢
�������
QQQQQQQ
¢¢¢¢¢¢¢
��������������
QQQQQQQQQQQQQQ
¢¢¢¢¢¢¢¢¢¢¢¢¢¢
�������������
QQQQQQQQQQQQQ
¢¢¢¢¢¢¢¢¢¢¢¢¢
�������������
QQQQQQQQQQQQQ
¢¢¢¢¢¢¢¢¢¢¢¢¢
��������������
QQQQQQQQQQQQQQ
¢¢¢¢¢¢¢¢¢¢¢¢¢¢
����������
QQQQQQQQQQ
¢¢¢¢¢¢¢¢¢¢
��������������
QQQQQQQQQQQQQQ
¢¢¢¢¢¢¢¢¢¢¢¢¢¢
�������������
QQQQQQQQQQQQQ
¢¢¢¢¢¢¢¢¢¢¢¢¢
�������
QQQQQQQ
¢¢¢¢¢¢¢
���
@@@
���
ÀÀÀ
1 2 3
4 5 6
7 8 9
10 11 12

2345678910
13 14 15
16 17 18
19 20 21
22 23

5
SHORT CORD INSTRUCTIONS- A short power cord is provided to reduce risks resulting from becoming entangled in or tripping
over a longer cord.- Longer, detachable power supply cords or extension cords are available and may be used if
care is exercised in their use.- If an extension cord is used, the marked electrical rating should be at least as great as the
electrical rating of the appliance. If the appliance is provided with 3- wire, grounding type cord,the extension should be a GROUNDING TYPE 3 - WIRE CORD. The longer cord should bearranged so that it will not drape over the counter-top or table top where it can be pulled on bychildren or tripped over.
- Your product is equipped with a polarized alternating current line plug (a plug having one bladewider than the other). This plug will fit into the power outlet only one way. This is a safetyfeature. If you are unable to insert the plug fully into the outlet, try reversing the plug. If the plugshould still fail to fit, contact your electrician to replace your obsolete outlet. Do not defeat thesafety purpose of the polarized plug.
IMPORTANT SAFEGUARDS
When using electrical appliances, basic safety precautions should always be followed, including thefollowing:• Read all instructions.• Do not touch hot surfaces. Use handles and knobs.• To protect against fire, electrical shock and personal injury, do not immerse cord, plug or
appliance in water or other liquid.• Close supervision is necessary when any appliance is used by or near children.• Unplug from the outlet when not in use and before cleaning. Allow to cool before fitting or
taking off parts, and before cleaning the appliance.• Do not operate with a damaged cord or plug, or after the appliance malfunctions, or has been
damaged in any manner. Return the appliance to the nearest authorized service facility forexamination, repair or adjustment.
• The use of accessory attachments or spare parts not recommended by the appliancemanufacturer may result in fire, electrical shock or personal injury.
• Do not use outdoors.• Do not let the cord hang over the edge of the table or counter, or touch hot surfaces.• Do not place on or near a hot gas or electrical burner, or in a heated oven.• Always attach plug to appliance first, then plug cord into the wall outlet. To disconnect, turn any
control to “off”, then remove plug from wall outlet.• Do not use the appliance for other than the intended use.• DO NOT unscrew or remove boiler cap while the machine is in operation. Wait until brewing
cycle is completed and all water and steam has been used up.• Appliances with Glass Containers:A. The container is designed for use with this appliance. It must never be used on a range top.B. Do not set a hot container on a wet or cold surface.C. Do not use a cracked container or a container having a loose or weakened handle.D. Do not clean container with cleansers, steel wool pads, or other abrasive material.
SAVE THESE INSTRUCTIONS

INTRODUCTIONDear customer,You are now the proud owner of a fine DeLonghi Coffee Maker, you can enjoy traditional coffee, orexperience the taste of delicious espresso or cappuccino at the end of a perfect meal with family orfriends. All this is possible with one compact unit. The enclosed material has been carefully prepared, to familiarize you completely with the operation ofthis machine.Please read all instructions fully before attempting to operate this appliance.
BECOME FAMILIARBefore using your DeLonghi coffee maker for the first time, it is important that you become familiar with allof its parts. Do this by means of a practice run. DO NOT PLUG IN.Unscrew the reservoir cap of the espresso/cappuccino maker, turn the steam control knob on and off,place the filter in the filter holder, and position it in the boiler outlet. For the automatic drip coffee maker,raise the water reservoir cover, remove the filter holder and replace. Become familiar with your appliance.
USE OF THE MACHINETHIS MACHINE IS FOR HOUSEHOLD USE ONLY
This appliance is provided with a safety cap which prevents the cap itself from opening accidentallywhen the machine is operating under pressure. To unscrew this cap, you must let out all the internalpressure by rotating the steam knob and turning the flow regulator to the LIGHT setting.Before useBefore using the machine for the first time, wash all accessories (filter-holder, measuring spoon, filter,carafe, adaptor, cappuccino nozzle) with detergent and warm water, then rinse thoroughly. Theinternal circuit should then be washed as follows:
Filling the water tank• Unscrew the water tank cap by turning counter-clockwise.• Use the glass carafe (fig. 1) to fill the water tank (fig. 2). Always switch the machine off and remove
the plug from the socket before filling the water tank.
Do not overfill the water tank. The espresso carafe is marked with water levels for2 cups (minimum) and 4 cups (maximum) (see table, page 11).Important: When making cappuccino, add extra water to the steam level shownon the carafe for two cups and to the bottom of the metal band for four cups.Care should be taken to ensure that the correct quantity of water is placed in thetank, as the machine always uses all the water.
• Close the water tank cap securely by turning clockwise.
Pre-wash Espresso Coffee Machine• Plug the appliance into the wall socket (remember the safety instructions).• Fit the filter to the filter-holder (fig. 3).• To fit the filter-holder to the machine, place the filter-holder underneath the boiler nozzle (fig. 4); push
the filter-holder upwards and, at the same time, turn it to the right.The handle of the filter-holder does not have to be straight when it is attached to the machine. Whatis important is that it is inserted securely.
• Place the carafe under the filter-holder. Ensure that the spout is aligned with the hole in the carafe lid (fig. 5).• Turn the flow regulator towards the “LIGHT” position.• Press the “Espresso/Cappuccino ON/OFF” switch. The pilot lamp will light (fig. 6).• Check that the steam knob is in the closed position.
The water is heated in about 2 minutes, and will then begin to flow from the filter holder nozzle.When all the water has been delivered, press the “Espresso/Cappuccino ON/OFF” switch to turnthe machine off.
6

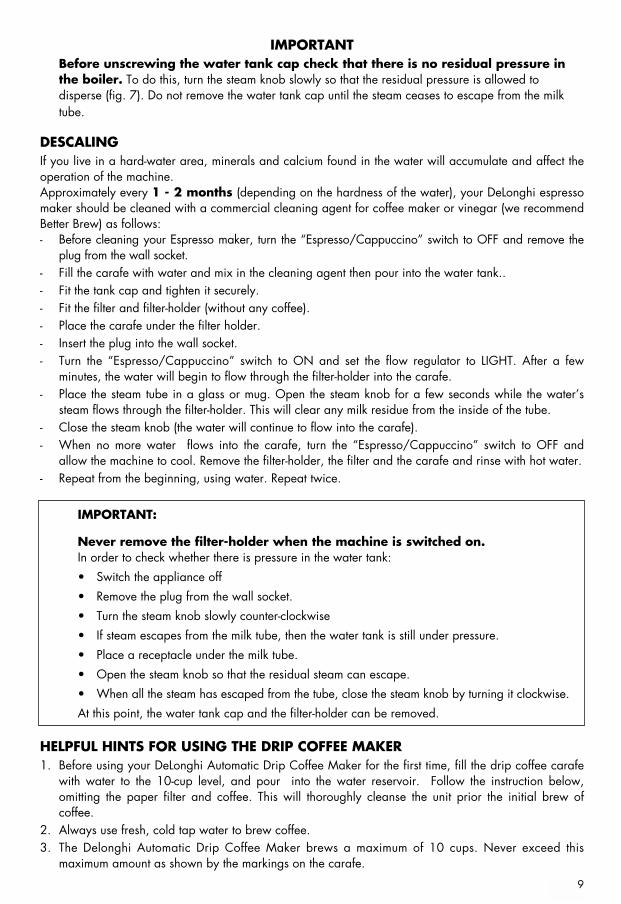
IMPORTANTBefore unscrewing the water tank cap check that there is no residual pressurein the boiler. To do this, turn the steam knob slowly so that the residual pressure is allowed todisperse. (fig. 7). Do not remove the water tank cap until the steam ceases to escape from themilk tube. To ensure perfect pre-washing, repeat this procedure several times.The machine is now ready for use.
HOW TO MAKE A PERFECT ESPRESSO COFFEEFor best results, we recommend the use of coarse-ground coffee.
Espresso coffee is served in “demitasse” cups (2 - 21/2 oz.). • Unscrew the water tank cap by turning it counter-clockwise.• Pour the desired quantity of water into the water tank using the glass carafe. Follow the instructions
in the paragraph “Filling the water tank” (see table, page 11).• Close the water tank cap carefully by turning it clockwise.• Place the desired quantity of coffee in the filter (fig. 8). Spread the coffee evenly and press down
lightly with the bottom of the measuring spoon. Special marks on the inside of the filter show theappropriate levels for 2 and 4 cups of coffee.
• Remove any excess coffee from the edge of the filter (fig. 9).• Position the filter-holder underneath the boiler nozzle. Attach to the machine by pushing it upwards
and, at the same time, turning to the right (fig. 4) as far as it will go.The carafe should be placed under the filter-holder in such a way that the nozzle is aligned with thehole in the lid of the carafe (fig. 5).
• Position the flow regulator according to the type of coffee desired: from “LIGHT” to “STRONG” (fig. 10).• Press the”Espresso/Cappuccino ON/OFF” switch. The pilot lamp will light.• Check that the steam knob is in the “closed” position.
The coffee will start to flow from the filter holder nozzle after about 2 minutes (fig. 11). Wait until allthe water in the water tank is delivered.
• Set the “Espresso/Cappuccino ON/OFF” switch to OFF.
IMPORTANTBefore unscrewing the water tank cap check that there is no residual pressurein the boiler. To do this, turn the steam knob slowly so that the residual pressure is allowed todisperse (fig. 7). Do not remove the water tank cap until the steam ceases to escape from the milktube.
• To remove the used coffee grounds, turn the filter-holder face-down and knock the grounds out (fig.12). Alternatively, hold the filter-holder and the filter underneath a running tap for a few moments,then allow to drain.
Warning: Metal parts may become very hot
Installing the cup adaptor (if supplied)The carafe can be used to brew 2 or 4 cups of espresso.If you prefer to brew 2 cups only, fit the adaptor to the lower section of the filter-holder (fig. 13) andplace the cups directly underneath the nozzles. In this way, the coffee will flow directly into the cups.
CAPPUCCINO STEP-BY-STEP: HOW TO MAKE A REAL ITALIAN CAPPUCCINOHere’s what you need• Ground coffee• Fresh milk (should be chilled before use)• A teaspoon - Note: Cappuccino is served in 4 oz. or 5 oz. cups.• Sugar or sweetener
7

8
STEP-BY-STEP INSTRUCTIONS• Prepare the machine as described in the paragraph “how to make a perfect espresso coffee”.
Remember, if you want 2 cappuccinos, fill the carafe up to the “ “ mark. If youwant 4 cappuccinos, fill to the bottom of the metal band.
• Place the carafe or the cups under the filter-holder.• Use a deep metal container, of small diameter if possible. Fill the container to about 1/3 so that the
milk does not boil over when heated.• Turn the “Espresso/Cappuccino” switch to ON.• When the coffee starts to flow, set the flow regulator to , place the milk container underneath the
steam tube then immerse the cappuccino nozzle in the milk and turn the steam knob graduallycounterclockwise until steam is produced (fig. 14).
• From time to time, move the container downwards so that the tip of the tube skims the surface of themilk. In this way, the milk will become frothy (fig. 15).
• When the milk is frothed, close the steam knob by turning it clockwise. Set the lever to the type ofcoffee desired. The brewing of the coffee will resume.
• Wait until all the coffee has been delivered, then set the ON/OFF switch to “OFF”.• The frothy milk can now be spooned onto your coffee. Add hot milk to fill the cup. Your cappuccino
is ready. Add sugar to taste and, if you like, sprinkle with a little chocolate powder or cinnamon.• After making the cappuccino, the appliance must be carefully cleaned.
However before carrying out any cleaning or maintenance operations, checkwhether there is pressure in the water tank by turning the steam knob slowlycounter-clockwise. Never remove the milk container when the steam knob is open; this could causeburns.
• Once the residual pressure has been released from the water tank, your coffee machine can becleaned as follows:
• Unscrew the cappuccino nozzle by turning to the left (fig. 16).• Clean the cappuccino nozzle carefully in hot water (fig. 16).• Clean the steam tube and replace the cappuccino nozzle.• From time to time, use a pin to clean the holes in the cappuccino nozzle (fig. 17).• Remove the coffee grounds from the filter.
Clean the steam nozzle immediately after use, as dried milk can be extremelydifficult to remove.
USING STEAM TO HEAT LIQUIDS(To prepare tea, hot chocolate, etc.)
• Unscrew the water tank cap by turning counter-clockwise.• Fill the carafe up to the level marked “2” and pour the water into the water tank.• Replace the cap.• Set the flow regulator to “ “. Check that the steam knob is closed.• Plug the machine into the power socket and switch on.• Place the receptacle containing the liquid underneath the steam tube.• Wait for a few minutes, then turn the steam knob to the open position and allow the steam to heat
the liquid.• When the liquid has reached the desired temperature, turn the steam knob back to the closed
position and switch the appliance off.
IMPORTANTBefore unscrewing the water tank cap check that there is no residual pressure inthe boiler. To do this, turn the steam knob slowly so that the residual pressure is allowed todisperse (fig. 7). Do not remove the water tank cap until the steam ceases to escape from the milktube.
DESCALINGIf you live in a hard-water area, minerals and calcium found in the water will accumulate and affect theoperation of the machine.Approximately every 1 - 2 months (depending on the hardness of the water), your DeLonghi espressomaker should be cleaned with a commercial cleaning agent for coffee maker or vinegar (we recommendBetter Brew) as follows:- Before cleaning your Espresso maker, turn the “Espresso/Cappuccino” switch to OFF and remove the
plug from the wall socket.- Fill the carafe with water and mix in the cleaning agent then pour into the water tank..- Fit the tank cap and tighten it securely.- Fit the filter and filter-holder (without any coffee).- Place the carafe under the filter holder.- Insert the plug into the wall socket.- Turn the “Espresso/Cappuccino” switch to ON and set the flow regulator to LIGHT. After a few
minutes, the water will begin to flow through the filter-holder into the carafe.- Place the steam tube in a glass or mug. Open the steam knob for a few seconds while the water’s
steam flows through the filter-holder. This will clear any milk residue from the inside of the tube.- Close the steam knob (the water will continue to flow into the carafe).- When no more water flows into the carafe, turn the “Espresso/Cappuccino” switch to OFF and
allow the machine to cool. Remove the filter-holder, the filter and the carafe and rinse with hot water.- Repeat from the beginning, using water. Repeat twice.
IMPORTANT:
Never remove the filter-holder when the machine is switched on.In order to check whether there is pressure in the water tank:
• Switch the appliance off
• Remove the plug from the wall socket.
• Turn the steam knob slowly counter-clockwise
• If steam escapes from the milk tube, then the water tank is still under pressure.
• Place a receptacle under the milk tube.
• Open the steam knob so that the residual steam can escape.
• When all the steam has escaped from the tube, close the steam knob by turning it clockwise.
At this point, the water tank cap and the filter-holder can be removed.
HELPFUL HINTS FOR USING THE DRIP COFFEE MAKER1. Before using your DeLonghi Automatic Drip Coffee Maker for the first time, fill the drip coffee carafe
with water to the 10-cup level, and pour into the water reservoir. Follow the instruction below,omitting the paper filter and coffee. This will thoroughly cleanse the unit prior the initial brew ofcoffee.
2. Always use fresh, cold tap water to brew coffee.3. The Delonghi Automatic Drip Coffee Maker brews a maximum of 10 cups. Never exceed this
maximum amount as shown by the markings on the carafe.
9

4. Use a fine drip grind coffee - that is recommended for automatic drip coffee makers.5. The warming plate heats up when the drip coffee maker is switched ON. Avoid touching it, and
never allow the power cord to come into contact with it.6. The amount of freshly brewed coffee delivered after the brewing process will always be slightly less
than the amount of water poured into the reservoir. This is due to the absorption of some water bythe ground coffee. Therefore put in a little more water to begin with.
HOW TO MAKE COFFEE1. Remove the carafe from the recessed warming plate. Grasp the handle, lift it up, slide the carafe
straight out. Open the lid, and fill the carafe with cold water to the desired level (fig. 18).2. Open the drip coffee reservoir cover, and pour the water into the reservoir. Close the lid of the
carafe and place carafe on warming plate.3. Swing out the filter holder as per fig. 19.4. Place paper filter into the filter holder (fig. 20). We recommend # 4 cone style filters.5. Measure coffee into the filter, using the handy measuring spoon provided (fig. 21). Measure slightly
less than one level spoon of ground coffee for every cup of water measured into the reservoir.Personal tastes differ. Experiment with varying amounts of coffee, until the desired strength isreached. Replace filter holder.
6. Plug the coffee maker.7. Push the ON/OFF drip coffee switch to the ON position (fig. 22). The red light indicates that the
machine is operating.8. The carafe rests on a warming plate that will keep your coffee at serving temperature. Turn switch to
the OFF position if carafe is empty.At the end of the brewing cycle, the coffee maker will create some steam and startpuffing. This is normal and to be expected.
KEEPING THE COFFEE HOTThe coffee is kept warm on a warming plate which begins to heat up when the drip coffeemaker isswitched on and will keep the coffee hot until the coffeemaker is switched off.
BREWING SMALL AMOUNT OF COFFEEIf you wish only 5 coffees, the 5/10 coffee switch must be released before switching on the appliance(fig. 23). Set in this position (light off), hot water flows slower through the ground coffee in order toreach an optimum brewing result. With the 5/10 coffee switch depressed the appliance will work atnormal speed.
DRIP-INTERRUPTION FEATUREThis special feature is for the person who can’t wait for all of the coffee to be brewed, especially whenmaking 8-10 cups. When carafe is half-filled, remove the carafe and serve. Replace carafe. The flow ofcoffee into carafe will resume.To prevent coffee from overflowing from the filter holder during the brewing cycle, the carafe should beimmediately returned to the warming plate after pouring.
SIMULTANEOUS USE OF THE DELONGHI COFFEE MAKER
CAUTION: If you plan to prepare coffee and espresso at the same time, make sure that you startpreparing the drip coffee first.
Always be present when the espresso/cappuccino part of the machine is in the ON position and makesure that it is turned OFF immediately after preparing espresso or cappuccino.
10

SERVICE AND REPAIRDo not attempt to repair your DeLonghi appliance. Should the appliance malfunction, contact yournearest authorized service facility, or contact DeLonghi American Inc., Carlstadt, NJ 07072. Anyattempt to open the housing or to repair the machines, will void the warranty.
CLEANING AND MAINTENANCE• Before carrying out any cleaning or maintenance operations, switch the machine off, remove the
plug from the socket and leave the machine to cool.• Do not use solvents, detergents or abrasive products to clean the machine. A soft damp cloth is sufficient.• Clean the filter-holder, filter and drip tray regularly.• Do not wash the machine - remember that it is an electrical appliance.
11
Refer to the instructions when making coffee or cappuccino.
2
4
4
2
4
2
2
4
ou
ou
IF YOU WANT
4 CUPS OFCOFFEE
4 CUPS OFCAPPUCCINO
2 CUPS OFCOFFEE
2 CUPS OFCAPPUCCINO
USE WATER MILK COFFEE
LEVEL 2
LEVEL 1

12
COFFEE RECIPES
VIENNESE COFFEEDelicious Viennese coffee is easy to make.Prepare strong coffee and cover it with a verythick layer of whipped cream.
MOCHAMocha coffee shows how well coffee andchocolate blend together. Mix a cup of coffeewith a cup of hot chocolate. Do not let it boil.Sweeten to taste.
AMERICAN COFFEEFor each person, place the following in a shaker:one quarter of a glass of sweetened concentratedmilk, half a cup of strong coffee, a tablespoon ofcrème de cacao and crushed ice. Shake andserve.
IRISH COFFEEFor each person, place the following in a largeglass: 30g. (1 oz.) of caster sugar, two fingers ofwhisky, half a cup of hot, black coffee and aspoonful of fresh cream. Drink without stirring.
CAFÉ AU CHOCOLATMelt in a small pan three small bars of chocolatewith half a glass of water. Mix with half a litre ofstrong coffee. Add 100 g. (3.5 oz.) of sugar,three tablespoons of fresh cream and a pinch ofcinnamon. Serve chilled.
CAFÉ ROYALHold a spoonful of rum over a hot, well-sweetenedcup of coffee. Set the rum alight and, whileflaming, pour it into the cup.
COFFEE ICE LIÉGEOISBring to the boil half a litre of milk containing halfa vanilla pod. Mix this with a half litre of coffeesweetened with 300 g. (10.5 oz.) of sugar, andadd 1/4 litre of fresh cream. Place the mixture inan ice cream maker, if available, and freeze untilhalf frozen. Whisk with an electric mixer andleave in the freezing compartment until hard. Beatthe mixture again on removing from therefrigerator. Serve in dishes or tall glasses andtop with a spoonful of whipped cream.
ICED YOGURTFor each person, whisk a container of plainyogurt until creamy. Mix in 50 g. (1.5 oz.) ofsugar, a teaspoon of cream and half a cup ofvery strong coffee. Pour into large glasses andchill in the refrigerator.
GRANITAFor each person, place one cup of very strong,cold, sweet coffee in a shaker. Shake well with aquarter of a cup of crushed ice. Pour the coffeeinto a glass and mix in a tablespoon of whippedcream. Serve immediately while cold.
WINTER COFFEEFor each person, place the yolk of an egg and 30g. (1 oz.) of sugar in a whisky glass and mix untilfrothy. Stir in a cup of hot coffee and a liqueurglass of rum. Serve while still frothy.
TROPICAL NECTARPlace a scoop of coffee ice cream and ateaspoonful of Angustura in half a glass of icedcoffee. Cover with heavy cream.
ICED COFFEE OPÉRAFor each person, use a blender to mix half a glassof cold coffee with one or two tablespoons ofvanilla ice cream.
ITALIAN TIPPLEFor each person, mix half a cup of very strongcoffee, a spoonful of sweetened concentratedmilk, half an egg yolk, half a glass of Vermouth,the rind of a lemon, a little cinnamon and crushedice. Mix in a shaker or blender and serve at once.
CAFÉ FRAPPÉFor each person, mix in a shaker two tablespoonsof sweetened concentrated milk, a small cup ofstrong coffee, a pinch of powdered vanilla and alittle crushed ice.
BRAZILIAN COFFEEFor each person, mix in a shaker two tablespoonsof rum, a glass of black coffee, 50 g. (1.5 oz.) oficing sugar, a pinch of vanilla sugar, a spoonfulof fresh cream, the rind of a lemon and crushedice.
13
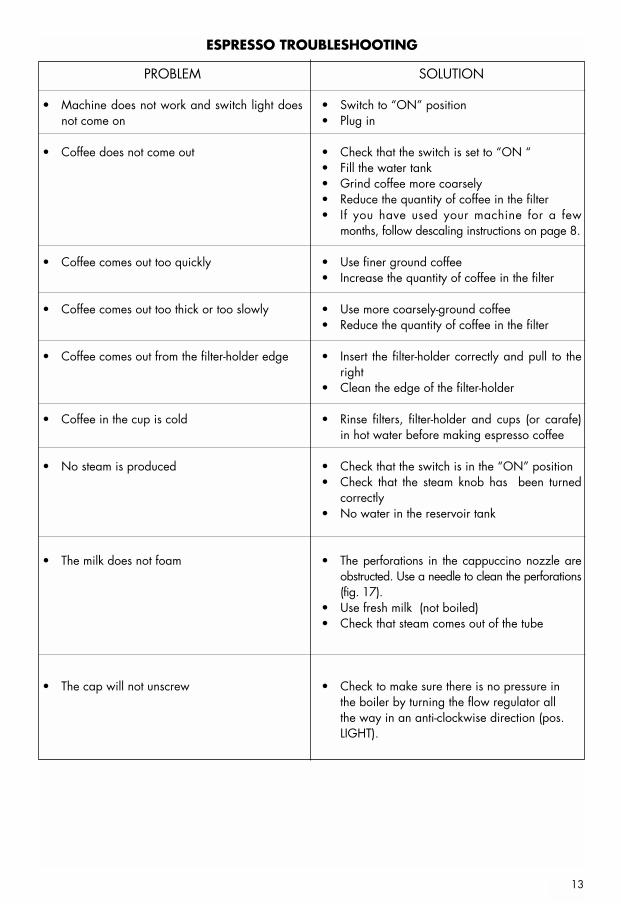
• Switch to “ON” position• Plug in
• Check that the switch is set to “ON “• Fill the water tank• Grind coffee more coarsely• Reduce the quantity of coffee in the filter• If you have used your machine for a few
months, follow descaling instructions on page 8.
• Use finer ground coffee• Increase the quantity of coffee in the filter
• Use more coarsely-ground coffee• Reduce the quantity of coffee in the filter
• Insert the filter-holder correctly and pull to theright
• Clean the edge of the filter-holder
• Rinse filters, filter-holder and cups (or carafe)in hot water before making espresso coffee
• Check that the switch is in the “ON” position• Check that the steam knob has been turned
correctly• No water in the reservoir tank
• The perforations in the cappuccino nozzle areobstructed. Use a needle to clean the perforations(fig. 17).
• Use fresh milk (not boiled)• Check that steam comes out of the tube
• Check to make sure there is no pressure in the boiler by turning the flow regulator allthe way in an anti-clockwise direction (pos.LIGHT).
ESPRESSO TROUBLESHOOTING
PROBLEM SOLUTION
• Machine does not work and switch light doesnot come on
• Coffee does not come out
• Coffee comes out too quickly
• Coffee comes out too thick or too slowly
• Coffee comes out from the filter-holder edge
• Coffee in the cup is cold
• No steam is produced
• The milk does not foam
• The cap will not unscrew

14
Limited WarrantyWhat Does This Warranty Cover? We warrant each Espresso Coffee Machine to be free from defects inmaterial and workmanship. Our obligation under this warranty is limited to replacement or repair, free of charge atour factory or authorized service centers, of any defective part or parts there of other than parts damaged in transit,which shall be returned to us, transportation prepaid. This warranty shall apply only if the Espresso Coffee Machineis used in accordance with the factory directions which accompany it.How Long Does The Coverage Last? This warranty runs for one year from the date of delivery and appliesonly to the original purchaser.What Does This Warranty Not Cover? This warranty does not cover defects or damage of the EspressoCoffee Machine which result from repairs or alterations to the machine outside our factory or authorized servicecenters, nor shall it apply to any Espresso Coffee Machine which has been subject to abuse, misuse, negligence oraccidents. Also, consequential and incidental damages resulting from the use of this product or arising out of anybreach of contract or breach of this warranty are not recoverable under this warranty. Some states do not allow theexclusion or limitation of incidental or consequential damages, so the above limitation may not apply to you.How Do You Get Service? If repairs become necessary or spare parts are needed, please write to:
DeLonghi America Inc.625, Washington Avenue
Carlstadt N.J. 07072or call Service Tel. No. 800-322-3848
The above warranty is in lieu of all other express warranties and representations; All implied warranties are limitedto the applicable warranty period set forth above. This limitation does apply if you enter into an extended warrantywith DeLonghi. Some states do not allow limitations on how long an implied warranty lasts, so the above exclusionsconnection with the sale or use of its Espresso Coffee Machine.How Does State Law Apply? This warranty gives you specific legal rights, and you may also have other rightswhich vary from state to state.

15