operational verification - vmware validated design 5 · the vmware validated design operational...
TRANSCRIPT

Operational Verification
5 MAR 2019VMware Validated Design 5.0VMware Validated Design for Software-Defined Data Center 5.0

You can find the most up-to-date technical documentation on the VMware website at:
https://docs.vmware.com/
If you have comments about this documentation, submit your feedback to
VMware, Inc.3401 Hillview Ave.Palo Alto, CA 94304www.vmware.com
Copyright © 2016-2019 VMware, Inc. All rights reserved. Copyright and trademark information.
Operational Verification
VMware, Inc. 2

Contents
About VMware Validated Design Operational Verification 5
1 Operational Verification of the Virtual Infrastructure Layer 7Authenticate to vCenter Server Using Local System Account 8
Authenticate to vCenter Server Using Active Directory Service Account 9
Place an ESXi Host into Maintenance Mode 10
Ping NSX VTEP Interfaces with Jumbo Frames 11
Verify NSX Controllers Are Connected to ESXi Hosts 12
Verify Virtual Machines on VXLAN Communicate While Residing on Separate Hosts 13
Verify That the Virtual Machines in VXLAN Communicate with the Virtual Machines in VLAN 14
Test Host to Host Communication Using VXLAN Logical Switch 16
2 Operational Verification of the Operations Management Layer 18Verification of vRealize Suite Lifecycle Manager 18
Authenticate to vRealize Suite Lifecycle Manager Using Local Service Account 19
Authenticate to vRealize Suite Lifecycle Manager Using the Local Root Account and Verify the Status of Services 20
Verify Status of vCenter Data Collection 20
Verify Connectivity and Authentication to My VMware and the VMware Marketplace 21
Verification of vRealize Operations Manager 23
Authenticate to vRealize Operations Manager Using Local System Account and Verify Cluster Status24
Verify Collection Status of vCenter Adapter 25
Verify Collection Status of vSAN Adapter 26
Verify Collection Status of vRealize Log Insight Adapter 27
Verify Collection Status of vRealize Business for Cloud Adapter 28
Verify Collection Status of vRealize Automation Adapter 29
Verify Collection Status of SRM Adapter 30
Verify Collection Status of Storage Devices Adapter 31
Verify Collection Status of NSX for vSphere Adapter 32
Verification of vRealize Log Insight 33
Authenticate to vRealize Log Insight Using Local System Account and Verify Cluster Status 34
Verify Agent Status for vRealize Operations Manager Virtual Appliances 35
Verify Agent Status for vRealize Automation Virtual Appliances 36
Verify Agent Status for Embedded vRealize Orchestrator 36
Verify Agent Status for vRealize Automation Windows Systems 37
Verify Agent Status for Microsoft SQL Server 38
Verify Agent Status for Site Recovery Manager Server 39
VMware, Inc. 3

Verification of vSphere Update Manager Download Service 40
Run the vSphere Update Manager Download Service Cron Job 40
3 Operational Verification of the Cloud Management Layer 42Authenticate to vRealize Automation Using Local System Account 43
Authenticate to vRealize Automation Using Active Directory Admin Account 43
Verify vRealize Automation Components Are Highly Available 44
Verify Integration of vRealize Automation with vSphere Infrastructure 46
Verify Integration of vRealize Automation with vRealize Orchestrator and NSX for vSphere 47
Verify Integration of vRealize Automation with vRealize Business for Cloud 48
Verify Integration of vRealize Automation with vRealize Operations Manager 49
4 Operational Verification of the Business Continuity Layer 51Verify Pairing of Site Recovery Manager Across Regions 51
Verify Pairing of vSphere Replication Across Regions 52
Perform Test Recovery of Operations Management Recovery Plan 53
Perform Test Recovery of Cloud Management Recovery Plan 55
Verify Status and Configuration of vSphere Storage APIs for Data Protection Based Backup Solution57
5 Post-Upgrade Verification 58Version Verification of the Virtual Infrastructure Layer 58
Verify the Version of Platform Service Controller 59
Verify the Version of vCenter Server 59
Verify the Version of ESXi Host 60
Verify the Version of NSX for vSphere 60
Version Verification of the Operations Management Layer 61
Verify the Version of vRealize Suite Lifecycle Manager 62
Verify the Version of vRealize Operations Manager 62
Verify the Version of vRealize Log Insight 62
Verify the Version of vSphere Update Manager Download Service 63
Version Verification of the Cloud Management Layer 64
Verify the Version of vRealize Automation Appliance Nodes 64
Verify the Version of vRealize Automation Windows Nodes 64
Verify the Version of vRealize Business for Cloud Nodes 65
Version Verification of the Business Continuity Layer 66
Verify the Version of Site Recovery Manager 66
Verify the Version of vSphere Replication 67
6 SDDC Startup and Shutdown 68Shutdown Order of the Management Virtual Machines 68
Startup Order of the Management Virtual Machines 71
Operational Verification
VMware, Inc. 4

About VMware Validated Design Operational Verification
The VMware Validated Design Operational Verification document provides step-by-step instructions for verifying that the management components in the Software-Defined Data Center (SDDC) that are deployed according to the VMware Validated Design are operating as expected.
Operational verification is defined as a validation that a system or a component is operational and functioning within expected parameters. Operational verification is performed in the following scenarios:
n Initial deployment of a component or system
n Upgrading or patching of a component or system
n Recovering a component or system from a failure scenario
n Generic maintenance of a component or system
Intended AudienceThe VMware Validated Design Operational Verification document is intended for cloud architects, infrastructure administrators, cloud administrators, and cloud operators who are familiar with and want to use VMware software to manage an SDDC that meets the requirements for capacity, scalability, backup and restore, and extensibility for disaster recovery support.
Required SoftwareThe VMware Validated Design Operational Verification document is compliant and validated with certain product versions. See VMware Validated Design Release Notes for more information about supported product versions.
Before You Apply This GuidanceThe sequence of the documentation of VMware Validated Design follows the stages for implementing and maintaining an SDDC. See Documentation Map for VMware Validated Design.
To use VMware Validated Design Operational Verification, you must be acquainted with the following guidance:
n Introducing VMware Validated Designs
n Optionally VMware Validated Design Architecture and Design
n VMware Validated Design Planning and Preparation
VMware, Inc. 5

n VMware Validated Design Deployment of Region A
n VMware Validated Design Deployment of Region B
n VMware Validated Design Upgrade
Operational Verification
VMware, Inc. 6

Operational Verification of the Virtual Infrastructure Layer 1Perform operational verification steps and validate the operational state of the virtual infrastructure layer following initial installation or any type of outage affecting an individual component or system.
Operational verification of the virtual infrastructure layer involves the following management components:
n ESXi hosts
n vCenter Servers
n Platform Services Controllers
n NSX Managers
n Edge Services Gateways
n Authenticate to vCenter Server Using Local System Account
Verify that you can authenticate to vCenter Server using the [email protected] system account.
n Authenticate to vCenter Server Using Active Directory Service Account
Verify that you can authenticate to vCenter Server using a service account configured in Active Directory.
n Place an ESXi Host into Maintenance Mode
Verify that when placing an ESXi host into maintenance mode all virtual machines running on the host are evacuated and the host enters maintenance mode without further user interaction.
n Ping NSX VTEP Interfaces with Jumbo Frames
Verify that ESXi hosts can ping all other VTEP interfaces using the vmkping command.
n Verify NSX Controllers Are Connected to ESXi Hosts
Verify that the NSX controllers are communicating with ESXi hosts without having any issues.
n Verify Virtual Machines on VXLAN Communicate While Residing on Separate Hosts
Verify that virtual machine communication is operational, and virtual machines residing on different ESXi hosts can communicate with each other.
n Verify That the Virtual Machines in VXLAN Communicate with the Virtual Machines in VLAN
Verify that the virtual machines in the VXLAN network can communicate with the virtual machines in the VLAN network, by using the ping command.
VMware, Inc. 7

n Test Host to Host Communication Using VXLAN Logical Switch
Test host-to-host communication with a ping monitor. A ping test checks if two hosts in a network can reach each other using VXLAN standard.
Authenticate to vCenter Server Using Local System AccountVerify that you can authenticate to vCenter Server using the [email protected] system account.
Authenticating with a local system account verifies that the vCenter Server and the external Platform Services Controller are configured correctly and that there are no communication issues between systems.
Expected Outcome
You can successfully authenticate using the [email protected] system account and you have visibility of all vCenter Servers and their inventories with administrative access.
Procedure
1 Log in to vCenter Server by using the vSphere Client.
a Open a Web browser and go to https://sfo01m01vc01.sfo01.rainpole.local/ui.
b Log in using the following credentials.
Setting Value
User name [email protected]
Password vsphere_admin_password
2 From the Home menu, select Hosts and Clusters.
3 In the Navigator pane, verify that all four vCenter Server instances are present in the list.
This operation validates that the Enhanced Linked Mode is intact and active for all vCenter Server instances.
What to do next
If you encounter issues while performing this procedure, use the following troubleshooting tips:
Troubleshooting Tips
n Ensure that NTP is configured correctly on all vCenter Server and Platform Services Controller virtual appliances.
n Ensure that all vCenter Server and Platform Services Controller virtual appliances are configured with the correct DNS settings.
n Ensure that DNS is configured with forward and reverse lookup records for all vCenter Server and Platform Services Controller virtual appliances and the Virtual IP (VIP) of the Platform Services Controller load balancer.
n Ensure that there is a network connectivity between all vCenter Server and Platform Services Controller virtual appliances.
n Ensure that all the services on the vCenter Server and Platform Services Controller virtual appliances are running.
Operational Verification
VMware, Inc. 8

Authenticate to vCenter Server Using Active Directory Service AccountVerify that you can authenticate to vCenter Server using a service account configured in Active Directory.
Authenticating with a service account configured in Active Directory verifies that the Platform Services Controllers are configured with the Active Directory Domain as an identity source and that permissions within vCenter Server are correctly assigned.
Expected Outcome
You can successfully authenticate using a service account and have visibility of all vCenter Servers and their inventories with the appropriate user access.
Procedure
1 Log into vCenter Server by using the vSphere Web Client.
a Open a Web browser and go to https://sfo01m01vc01.sfo01.rainpole.local/ui.
b Log in using the following credentials.
Setting Value
User name [email protected]
Password svc-nsxmanager_password
2 From the Home menu, select Hosts and Clusters.
3 In the Navigator pane, verify that all four vCenter Server instances are present in the list.
This operation validates that the Enhanced Linked Mode is intact and active for all vCenter Server instances.
What to do next
If you encounter issues while performing this procedure, use the following troubleshooting tips:
Troubleshooting Tips
n Ensure that NTP is configured correctly on all vCenter Server and Platform Services Controller virtual appliances.
n Ensure that all vCenter Server and Platform Services Controller virtual appliances are configured with the correct DNS settings.
n Ensure that DNS is configured with forward and reverse lookup records for all vCenter Server and Platform Services Controller virtual appliances and the Virtual IP (VIP) of the Platform Services Controller load balancer.
n Ensure that there is a network connectivity between all vCenter Server and Platform Services Controller virtual appliances.
n Ensure that all the services on the vCenter Server and Platform Services Controller virtual appliances are running.
n Ensure that all Platform Services Controllers have successfully joined the active directory domain.
Operational Verification
VMware, Inc. 9
Place an ESXi Host into Maintenance ModeVerify that when placing an ESXi host into maintenance mode all virtual machines running on the host are evacuated and the host enters maintenance mode without further user interaction.
Placing each ESXi host into maintenance mode ensures that network connectivity between ESXi hosts is operational and that vMotion is configured correctly.
Expected Outcome
All virtual machines running on the ESXi host are migrated with vMotion to another ESXi host in the cluster. When vMotion completes, the ESXi host enters maintenance mode.
Procedure
1 Log in to vCenter Server by using the vSphere Client.
a Open a Web browser and go to https://sfo01m01vc01.sfo01.rainpole.local/ui.
b Log in using the following credentials.
Setting Value
User name [email protected]
Password vsphere_admin_password
2 Navigate to the ESXi host.
a From the Home menu, select Hosts and Clusters.
b In the Navigator pane, expand the sfo01m01vc01.sfo01.rainpole.local>sfo01-m01dc>sfo01-m01-mgmt01 inventory tree.
c Click the sfo01m01esx01.sfo01.rainpole.local ESXi host.
3 Put the ESXi host into maintenance mode.
a Right-click the ESXi host and select Maintenance Mode > Enter Maintenance Mode.
b In the Enter Maintenance Mode dialog box, leave the default option Ensure accessibility for vSAN data migration, and click OK.
Virtual machines are migrated to different hosts when the host enters maintenance mode.
The host remains in maintenance mode until you select Exit Maintenance Mode.
4 Right-click the ESXi host and select Maintenance Mode > Exit Maintenance Mode.
5 Repeat the procedure for the remaining ESXi hosts from all the vCenter Servers.
What to do next
If you encounter issues while performing this procedure, use the following troubleshooting tips:
Operational Verification
VMware, Inc. 10

Troubleshooting Tips
n Ensure that the ESXi host has a VMkernel port configured for vMotion and a static IP address is assigned.
n Ensure that there is a network connectivity between ESXi hosts by running the vmkping command.
Ping NSX VTEP Interfaces with Jumbo FramesVerify that ESXi hosts can ping all other VTEP interfaces using the vmkping command.
Successful vmkping ensures that the hosts VTEPs can communicate with each other using jumbo frames and that the vxlan is functioning.
Expected Outcome
Successful vmkping between the two VTEP interfaces.
Procedure
1 Log in to vCenter Server by using the vSphere Client.
a Open a Web browser and go to https://sfo01m01vc01.sfo01.rainpole.local/ui.
b Log in using the following credentials.
Setting Value
User name [email protected]
Password vsphere_admin_password
2 From the Home menu, select Networking and Security.
3 Click Installation and Upgrade, and click the Host Preparation tab.
4 Select 172.16.11.65 from the NSX Manager drop-down menu.
5 In the Hosts table, under the vmkNIC column, click View Details for sfo01m01esx01.sfo01.rainpole.local and sfo01m01esx04.sfo01.rainpole.local hosts.
6 Note the vmk4 IP address of sfo01m01esx01.sfo01.rainpole.local and sfo01m01esx04.sfo01.rainpole.local hosts.
7 Log in to the ESXi host by using Secure Shell (SSH) client.
a Open an SSH connection to the sfo01m01esx01.sfo01.rainpole.local host.
b Log in using the following credentials.
Setting Value
User name root
Password esxi_root_password
Operational Verification
VMware, Inc. 11

8 Verify that the ESXi hosts can ping other VTEPs by running the following command.
vmkping -I vmk4 -S vxlan -s 8800 -d 172.16.14.210
Note In the syntax vmkping -I <VTEP-VMK> -S vxlan -s 8800 -d <Remote-VTEP-IP>, the address 172.16.14.210 is the remote VTEP IP address of sfo01m01esx04.sfo01.rainpole.local host.
9 Repeat the procedure on the sfo01m01esx04.sfo01.rainpole.local host with destination IP as the VTEP address of sfo01m01esx01.sfo01.rainpole.local host.
10 Repeat the procedure for the remaining ESXi hosts from all the vCenter servers.
What to do next
If you encounter issues while performing this procedure, use the following troubleshooting tips:
Troubleshooting Tips
n Ensure that VTEPs have a valid IP address.
n Ensure that the jumbo frame setting is enabled on switch ports and Switched Virtual Interfaces (SVIs).
Verify NSX Controllers Are Connected to ESXi HostsVerify that the NSX controllers are communicating with ESXi hosts without having any issues.
Ensures that the NSX controllers can communicate with the ESXi hosts.
Expected Outcome
The NSX Controllers are connected to the ESXi hosts when the command outputs ESTABLISHED for the NSX Controller IP addresses connected to the netcpa-worker process.
Procedure
1 Log in to the ESXi host by using Secure Shell (SSH) client.
a Open an SSH connection to the sfo01m01esx01.sfo01.rainpole.local host.
b Log in using the following credentials.
Setting Value
User name root
Password esxi_root_user_password
2 Run the following command.
esxcli network ip connection list | grep 1234
3 Verify that NSX controllers IP addresses are connected to the netcpa-worker process with a state of ESTABLISHED.
4 Repeat the procedure for the remaining ESXi hosts.
Operational Verification
VMware, Inc. 12

What to do next
If you encounter issues while performing this procedure, use the following troubleshooting tips:
Troubleshooting Tips
n Ensure that the NSX controllers are deployed.
n Ensure that the Status of NSX controllers is showing as Connected.
n Ensure that the NSX controllers can ping the ESXi hosts management network IP.
n Restart the netcpa agent on the ESXi host using /etc/init.d/netcpad restart command.
Verify Virtual Machines on VXLAN Communicate While Residing on Separate HostsVerify that virtual machine communication is operational, and virtual machines residing on different ESXi hosts can communicate with each other.
Ensures that the virtual network interfaces are up on the hosts and can carry traffic, and that the physical network has correctly configured Internet Group Management Protocol (IGMP) for hybrid replication mode.
Expected Outcome
Virtual machines on the same VXLAN can communicate with each other while residing on separate hosts.
Procedure
1 Log in to vCenter Server by using the vSphere Client.
a Open a Web browser and go to https://sfo01m01vc01.sfo01.rainpole.local/ui.
b Log in using the following credentials.
Setting Value
User name [email protected]
Password vsphere_admin_password
2 From the Home menu, select Hosts and Clusters.
3 Expand sfo01m01vc01.sfo01.rainpole.local>sfo01-m01dc>sfo01-m01-mgmt01.
4 Select the sfo01vrli01a virtual appliance and click Launch Web Console.
5 Press ALT+F1 and switch to the command prompt.
6 Log in to the vRealize Log Insight appliance using the following credentials.
Setting Value
User name root
Password vrli_root_password
Operational Verification
VMware, Inc. 13

7 Run the ping command and verify the communication to other virtual machines in the VXLAN network.
Command Remarks
ping sfo01vrli01b.sfo01.rainpole.local ping from sfo01vrli01a to sfo01vrli01b
ping vrops01svr01b.rainpole.local ping from sfo01vrli01a to vrops01svr01b
Note This test assumes that appliances are running on separate hosts.
What to do next
If you encounter issues while performing this procedure, use the following troubleshooting tips:
Troubleshooting Tips
n Move the VMs to the same host, and if the ping is successful, move back to separate hosts.
n Change transport zone and virtual wires to unicast, and if the ping is successful, Internet Group Management Protocol (IGMP) is not correctly configured on the physical network.
Verify That the Virtual Machines in VXLAN Communicate with the Virtual Machines in VLANVerify that the virtual machines in the VXLAN network can communicate with the virtual machines in the VLAN network, by using the ping command.
Validate that routing is configured correctly both in NSX and in the physical network, by obtaining a successful ping response.
Expected Outcome
You obtain a successful ping response between the virtual machines in VXLAN and the virtual machines in VLAN and the reverse.
Procedure
1 Log in to vCenter Server by using the vSphere Client.
a Open a Web browser and go to https://sfo01m01vc01.sfo01.rainpole.local/ui.
b Log in using the following credentials.
Setting Value
User name [email protected]
Password vsphere_admin_password
2 In the Hosts and clusters inventory, expand the sfo01m01vc01.sfo01.rainpole.local tree and expand the sfo01-m01dc data center.
3 Expand the sfo01-m01-mgmt01 cluster.
Operational Verification
VMware, Inc. 14

4 On the vRealize Log Insight appliances, verify the communication to the other virtual machines in the VLAN network by running the ping command.
a Right-click the sfo01vrli01a appliance and select Launch remote console.
b Switch to the command prompt by pressing ALT+F1.
c Log in by using the following credentials.
Setting Value
User name root
Password vrli_root_password
d Run the following commands.
Command Description
ping rainpole.local ping from sfo01vrli01a to rainpole.local (Active Directory)
ping sfo01m01psc01.sfo01.rainpole.local ping from sfo01vrli01a to sfo01m01psc01
ping sfo01m01vc01.sfo01.rainpole.local ping from sfo01vrli01a to sfo01m01vc01
5 On the Platform Services Controller appliances, verify the communication to the other virtual machines in the VXLAN network by running the ping command.
a Right-click the sfo01m01psc01 appliance and select Launch remote console.
b Switch to the command prompt by pressing ALT+F1.
c Log in by using the following credentials.
Setting Value
User name root
Password psc_root_password
d Run the following commands.
Command Description
ping sfo01vrli01a.sfo01.rainpole.local ping from sfo01m01psc01 to sfo01vrli01a
ping vrops01svr01a.rainpole.local ping from sfo01m01psc01 to vrops01svr01a
ping vra01svr01a.rainpole.local ping from sfo01m01psc01 to vra01svr01a
What to do next
If you encounter issues while performing this procedure, use the following troubleshooting tips:
Operational Verification
VMware, Inc. 15

Troubleshooting Tips
n Open an SSH connection to the Distributed Logical Router and verify that the routes are being exchanged by running the show ip route command.
n Open an SSH connection to the Equal-Cost Multi-Path (ECMP) edges and verify that the BGP status is Established between the UDLR and the Top of Rack switches. Verify that the routes are being exchanged, by running the show ip bgp neighbors and the show ip route commands.
n Open an SSH connection to the Top of Rack switch and verify that the BGP status is Established to the ECMP edges, and that the routes are being exchanged.
Test Host to Host Communication Using VXLAN Logical SwitchTest host-to-host communication with a ping monitor. A ping test checks if two hosts in a network can reach each other using VXLAN standard.
Ensures that hosts VTEPs can communicate with each other using jumbo frames and that VXLAN is functioning.
Expected Outcome
The ping command between the two hosts is successful using VXLAN standard.
Procedure
1 Log in to vCenter Server by using the vSphere Client.
a Open a Web browser and go to https://sfo01m01vc01.sfo01.rainpole.local/ui.
b Log in using the following credentials.
Setting Value
User name [email protected]
Password vsphere_admin_password
2 Create a logical switch and test the logical network in Region A.
a From the Home menu, select Networking and Security.
b Click Logical Switches and select 172.16.11.65 from the NSX Manager drop-down menu.
c Click + ADD.
d In the New Logical Switch dialog box, enter the following settings, and click Add.
Setting Value
Name mgmt01-logical-switch
Transport Zone Mgmt Universal Transport Zone
Replication Mode Hybrid
MAC Learning Disabled
Operational Verification
VMware, Inc. 16
3 Use a ping monitor to test the connectivity.
a On the Logical Switches page, click universalwire-x for mgmt01-logical-switch.
b On the mgmt01-logical-switch page, click the Monitor tab and click Hosts-Ping.
c Under Test Parameters, enter the following parameters for the ping and click Start Test.
Ping Test Parameter Value
Source host sfo01m01esx04.sfo01.rainpole.local
Destination host sfo01m01esx01.sfo01.rainpole.local
Size of test packet VXLAN standard
Note VXLAN standard packet size is 1550 bytes without fragmentation. With this test, NSX checks connectivity and verifies that the infrastructure is prepared for the VXLAN traffic.
When the ping test finishes, verify that the Results pane displays no error messages.
4 Test the connectivity in Region B.
a From the Home menu, select Networking and Security.
b Click Logical Switches and select 172.17.11.65 from the NSX Manager drop-down menu.
c Click universalwire-x for mgmt01-logical-switch, click the Monitor tab, and click Hosts-Ping.
d Under Test Parameters, enter the following parameters for the ping and click Start Test.
Ping Test Parameter Value
Source host lax01m01esx04.lax01.rainpole.local
Destination host lax01m01esx01.lax01.rainpole.local
Size of test packet VXLAN standard
When the ping test finishes, verify that the Results pane displays no error messages.
5 After the VXLAN connectivity tests finish, remove the mgmt01-logical-switch logical switch.
a From the Home menu, select Networking and Security.
b Click Logical Switches and select 172.16.11.65 from the NSX Manager drop-down menu.
c Select mgmt01-logical-switch and click Delete.
d Repeat this step and remove the logical switch in Region B.
What to do next
If you encounter issues while performing this procedure, use the following troubleshooting tips:
Troubleshooting Tips
n Ensure that VTEPs have a valid IP address.
n Ensure that jumbo frame setting is enabled on switch ports and Switched Virtual Interfaces (SVIs).
Operational Verification
VMware, Inc. 17

Operational Verification of the Operations Management Layer 2Perform operational verification steps and validate the operational state of the operations management layer following initial installation or any type of outage affecting an individual component or system.
Operational verification of the operations management layer involves the following management components:
n vRealize Suite Lifecycle Manager
n vRealize Operations Manager
n vRealize Log Insight
n vSphere Update Manager Download Service
n Verification of vRealize Suite Lifecycle Manager
Verify the authentication and service health of vRealize Suite Lifecycle Manager. Verify the communication of vRealize Suite Lifecycle Manager to all necessary vCenter Servers and to the My VMware software repository.
n Verification of vRealize Operations Manager
Verify the authentication and cluster status and verify that vRealize Operations Manager is collecting data metrics through the adapters of the management packs for vRealize Operations Manager.
n Verification of vRealize Log Insight
Verify the authentication and cluster status and verify that all vRealize Log Insight agents are listed and have an active status.
n Verification of vSphere Update Manager Download Service
Verify that vSphere Update Manager Download Service can connect to the VMware Internet service and successfully checks for updates.
Verification of vRealize Suite Lifecycle ManagerVerify the authentication and service health of vRealize Suite Lifecycle Manager. Verify the communication of vRealize Suite Lifecycle Manager to all necessary vCenter Servers and to the My VMware software repository.
n Authenticate to vRealize Suite Lifecycle Manager Using Local Service Account
Verify that you can authenticate to vRealize Suite Lifecycle Manager using the built-in admin account.
VMware, Inc. 18

n Authenticate to vRealize Suite Lifecycle Manager Using the Local Root Account and Verify the Status of Services
Verify that you can authenticate to the vRealize Suite Lifecycle Manager appliance using the local root account and also verify that the vRealize Suite Lifecycle Manager services are running.
n Verify Status of vCenter Data Collection
Verify that vRealize Suite Lifecycle Manager can communicate to the vCenter Servers in the environments and can collect data from those servers.
n Verify Connectivity and Authentication to My VMware and the VMware Marketplace
Verify that you can connect and authenticate to My VMware to access licenses and product files, and verify that you can download the content from marketplace.
Authenticate to vRealize Suite Lifecycle Manager Using Local Service AccountVerify that you can authenticate to vRealize Suite Lifecycle Manager using the built-in admin account.
Performing authentication using the built-in admin account verifies that vRealize Suite Lifecycle Manager is online and accessible.
Expected Outcome
Successful authentication to the vRealize Suite Lifecycle Manager using the admin account.
Procedure
1 Log in to vRealize Suite Lifecycle Manager user interface.
a Open a Web browser and go to https://vrslcm01svr01a.rainpole.local/vrlcm.
b Log in using the following credentials.
Setting Value
User name admin@localhost
Password vrslcm_admin_password
2 Browse the interface and verify that you can access each page and all menu items.
What to do next
If you encounter issues while performing this procedure, use the following troubleshooting tips:
Troubleshooting Tips
n Ensure that the vRealize Suite Lifecycle Manager appliance is powered on and the correct login credentials are used.
n Ensure that all the vRealize Suite Lifecycle Manager services are running.
n Ensure that the vRealize Suite Lifecycle Manager appliance is configured to use the correct NTP server, and that the time is correctly synchronized.
Operational Verification
VMware, Inc. 19

Authenticate to vRealize Suite Lifecycle Manager Using the Local Root Account and Verify the Status of ServicesVerify that you can authenticate to the vRealize Suite Lifecycle Manager appliance using the local root account and also verify that the vRealize Suite Lifecycle Manager services are running.
Performing authentication using the built-in root account verifies that vRealize Suite Lifecycle Manager is online and accessible.
Expected Outcome
Successful authentication using the root account and services up and running.
Procedure
1 Log in to vRealize Suite Lifecycle Manager by using Secure Shell (SSH) client.
a Open an SSH connection to the vrslcm01svr01a.rainpole.local virtual machine.
b Log in using the following credentials.
Setting Value
User name root
Password vrslcm_root_password
2 Run the following commands and verify the status of the vRealize Suite Lifecycle Manager services.
Command Expected Outcome
systemctl status vlcm-xserver.service active (running)
systemctl status vlcm-server.service active (running)
systemctl status vlcm-fileserver.service active (running)
What to do next
If you encounter issues while performing this procedure, use the following troubleshooting tips:
Troubleshooting Tips
n Ensure that the vRealize Suite Lifecycle Manager appliance is powered on and the correct credentials are being used.
n If any service is not active and running, run the following command to restart the service: systemctl restart vlcm-servicename.service.
Verify Status of vCenter Data CollectionVerify that vRealize Suite Lifecycle Manager can communicate to the vCenter Servers in the environments and can collect data from those servers.
Performing data collection on the vCenter Servers is essential for vRealize Suite Lifecycle Manager.
Operational Verification
VMware, Inc. 20

Expected Outcome
Successful data collection from each vCenter Server in each environment.
Procedure
1 Log in to vRealize Suite Lifecycle Manager user interface.
a Open a Web browser and go to https://vrslcm01svr01a.rainpole.local/vrlcm.
b Log in using the following credentials.
Setting Value
User name admin@localhost
Password vrslcm_admin_password
2 Navigate to the Data Centers page and click the Manage vCenter Servers tab.
3 For each vCenter Server Hostname, click the Refresh Data Collection icon.
A successful collection start shows a green vCenter data collection triggered successfully notification banner.
4 Navigate to the Requests page and verify that there is a request with the following attributes for each vCenter.
Request Types Request Info Request States
vCenter Server Inventory Collection vCenter Name:vcenter_FQDN COMPLETED
What to do next
If you encounter issues while performing this procedure, use the following troubleshooting tips:
Troubleshooting Tips
n Ensure that the correct Host Name is listed for each vCenter Server.
n Ensure that the correct User Name and Password for each vCenter Server is being used.
n Ensure that the correct vCenter Server Type is selected for each vCenter Server.
n Ensure that the vRealize Suite Lifecycle Manager appliance can successfully ping each vCenter Server host name.
Verify Connectivity and Authentication to My VMware and the VMware MarketplaceVerify that you can connect and authenticate to My VMware to access licenses and product files, and verify that you can download the content from marketplace.
Communication with My VMware is essential to access licensing and software for deployments from vRealize Suite Lifecycle Manager.
Operational Verification
VMware, Inc. 21

Expected Outcome
n Successful authentication to My VMware and download of application files.
n Successful download of the content from VMware Marketplace.
Procedure
1 Log in to vRealize Suite Lifecycle Manager user interface.
a Open a Web browser and go to https://vrslcm01svr01a.rainpole.local/vrlcm.
b Log in using the following credentials.
Setting Value
User name admin@localhost
Password vrslcm_admin_password
2 Navigate to the Settings page and click the My VMware tab.
3 Authenticate to My VMware to access licenses, download Product Binaries and Marketplace content.
a Log in using the following credentials.
Setting Value
Username my_vmware_username
Password my_vmware_password
b (Optional) Configure the Proxy Settings for vRealize Suite Lifecycle Manager.
Setting Value
Proxy Server proxy_server_fqdn
Proxy Port proxy_server_port
Proxy username proxy_server_username
Proxy Password proxy_server_password
c Click Submit.
A successful authentication populates the My VMware Products table, and if this table is already populated, a successful submission does not show an update. An unsuccessful authentication displays a red error banner near the top of the window.
4 In the My VMware Products table, locate a product without Download Status and click the Download action icon.
The Download Status changes to Submitted.
Operational Verification
VMware, Inc. 22

5 Navigate to the Requests page, and monitor the download of product files.
Request Types Request Info Request States
Download from My VMware Product:product_name_version COMPLETED
Tip Click the state of the request and monitor the download details.
Successful downloads change the state of the request from INITIATED to INPROGRESS and then to COMPLETED.
6 Navigate to the Marketplace page, locate a content to download, and click Download.
7 In the Download Content window, click Continue.
8 Navigate to the Requests page, and monitor the download of Marketplace content.
Request Types Request Info Request States
Download apps from MarketPlace marketplace_content_name COMPLETED
What to do next
If you encounter issues while performing this procedure, use the following troubleshooting tips:
Troubleshooting Tips
n Ensure that correct My VMware credentials are being used.
n Ensure that the correct proxy settings are configured, if necessary.
n Ensure that the vRealize Suite Lifecycle Manager has access to the Internet.
n Ensure that the correct licensing is available for the products being downloaded.
Verification of vRealize Operations ManagerVerify the authentication and cluster status and verify that vRealize Operations Manager is collecting data metrics through the adapters of the management packs for vRealize Operations Manager.
n Authenticate to vRealize Operations Manager Using Local System Account and Verify Cluster Status
Verify that you can authenticate to vRealize Operations Manager using the built-in admin account and verify the cluster status.
n Verify Collection Status of vCenter Adapter
Verify that vRealize Operations Manager is collecting data metrics through the vCenter Adapter of the VMware vSphere Management Pack for vRealize Operations Manager.
n Verify Collection Status of vSAN Adapter
Verify that vRealize Operations Manager is collecting data metrics through the vSAN Adapter of the VMware vSAN Management Pack for vRealize Operations Manager.
Operational Verification
VMware, Inc. 23

n Verify Collection Status of vRealize Log Insight Adapter
Verify that vRealize Operations Manager is integrated with vRealize Log Insight through the vRealize Log Insight Adapter of the VMware vRealize Log Insight Management Pack for vRealize Operations Manager.
n Verify Collection Status of vRealize Business for Cloud Adapter
Verify that vRealize Operations Manager is collecting data metrics through the vRealize Business for Cloud Adapter of the VMware vRealize Business for Cloud Management Pack for vRealize Operations Manager.
n Verify Collection Status of vRealize Automation Adapter
Verify that vRealize Operations Manager is collecting data metrics through the vRealize Automation Adapter of the VMware vRealize Automation Management Pack for vRealize Operations Manager.
n Verify Collection Status of SRM Adapter
Verify that vRealize Operations Manager is collecting data metrics through the SRM Adapter of the VMware SRM Management Pack for vRealize Operations Manager.
n Verify Collection Status of Storage Devices Adapter
Verify that vRealize Operations Manager is collecting data metrics through the Storage Devices Adapter of the VMware Storage Devices Management Pack for vRealize Operations Manager.
n Verify Collection Status of NSX for vSphere Adapter
Verify that vRealize Operations Manager is collecting data metrics through the NSX-vSphere Adapter of the VMware NSX-vSphere Management Pack for vRealize Operations Manager.
Authenticate to vRealize Operations Manager Using Local System Account and Verify Cluster StatusVerify that you can authenticate to vRealize Operations Manager using the built-in admin account and verify the cluster status.
Performing authentication using the built-in admin account verifies that vRealize Operations Manager is online and accessible.
Expected Outcome
You can successfully authenticate to the vRealize Operations Manager using the built-in admin account and verify the status of the cluster.
Operational Verification
VMware, Inc. 24

Procedure
1 Log in to vRealize Operations Manager by using the operations interface.
a Open a Web browser and go to https://vrops01svr01.rainpole.local.
b Log in using the following credentials.
Setting Value
User name admin
Password vrops_admin_password
2 Verify that the vRealize Operations Manager cluster is online, and all data nodes are running.
a On the main navigation bar, click Administration.
b In the left pane of vRealize Operations Manager, click Management > Cluster Management.
c Verify the cluster status and high availability mode.
Setting Value
Cluster Status Online
High Availability Enabled
What to do next
If you encounter issues while performing this procedure, use the following troubleshooting tips:
Troubleshooting Tips
n Ensure that each of the vRealize Operations Manager appliance is powered on.
n Ensure that there is a network connectivity to the vRealize Operations Manager appliances and that the host names are resolvable in DNS.
n Ensure that there is a network connectivity between the vRealize Operations Manager nodes.
n Ensure that you have supplied the correct login credentials.
Verify Collection Status of vCenter AdapterVerify that vRealize Operations Manager is collecting data metrics through the vCenter Adapter of the VMware vSphere Management Pack for vRealize Operations Manager.
Validating the status of data collection between vRealize Operations Manager and vCenter Server ensures that the vCenter adapter is correctly configured, the provided service account has correct privileges and that dashboards are populated.
Expected Outcome
The vCenter Adapter has a Collection State of Collecting and a Collection Status of Data receiving.
Operational Verification
VMware, Inc. 25

Procedure
1 Log in to vRealize Operations Manager by using the operations interface.
a Open a Web browser and go to https://vrops01svr01.rainpole.local.
b Log in using the following credentials.
Setting Value
User name admin
Password vrops_admin_password
2 On the main navigation bar, click Administration.
3 In the left pane of vRealize Operations Manager, click Solutions.
4 On the Solutions page, in the solutions table select the VMware vSphere solution.
5 Under Configured Adapter Instances, verify that the Collection State is Collecting and the Collection Status is Data receiving for all vCenter Adapter instances.
What to do next
If you encounter issues while performing this procedure, use the following troubleshooting tips:
Troubleshooting Tips
n Ensure that the vCenter Adapter is configured with the correct target vCenter Server.
n Ensure that there is a network connectivity between the vRealize Operations Manager and the vCenter Server.
n Ensure that the service account credentials are correct.
Verify Collection Status of vSAN AdapterVerify that vRealize Operations Manager is collecting data metrics through the vSAN Adapter of the VMware vSAN Management Pack for vRealize Operations Manager.
Validating the status of data collection between vRealize Operations Manager and vCenter Server ensures that the vSAN Adapter is correctly configured, the provided service account has correct privileges and that dashboards are populated.
Expected Outcome
The vSAN Adapter has a Collection State of Collecting and a Collection Status of Data receiving.
Operational Verification
VMware, Inc. 26

Procedure
1 Log in to vRealize Operations Manager by using the operations interface.
a Open a Web browser and go to https://vrops01svr01.rainpole.local.
b Log in using the following credentials.
Setting Value
User name admin
Password vrops_admin_password
2 On the main navigation bar, click Administration.
3 In the left pane of vRealize Operations Manager, click Solutions.
4 On the Solutions page, in the solutions table select the VMware vSAN solution.
5 Under Configured Adapter Instances, verify that the Collection State is Collecting and the Collection Status is Data receiving for all vSAN Adapter instances.
What to do next
If you encounter issues while performing this procedure, use the following troubleshooting tips:
Troubleshooting Tips
n Ensure that the vSAN Adapter is configured with the correct target vCenter Server.
n Ensure that there is a network connectivity between the vRealize Operations Manager and the vCenter Server.
n Ensure that the service account credentials are correct.
Verify Collection Status of vRealize Log Insight AdapterVerify that vRealize Operations Manager is integrated with vRealize Log Insight through the vRealize Log Insight Adapter of the VMware vRealize Log Insight Management Pack for vRealize Operations Manager.
Validating the status of data collection between vRealize Operations Manager and vRealize Log Insight ensures that the vRealize Log Insight Adapter is configured correctly.
Expected Outcome
The vRealize Log Insight Adapter has a Collection State of Collecting and a Collection Status of Data receiving.
Operational Verification
VMware, Inc. 27

Procedure
1 Log in to vRealize Operations Manager by using the operations interface.
a Open a Web browser and go to https://vrops01svr01.rainpole.local.
b Log in using the following credentials.
Setting Value
User name admin
Password vrops_admin_password
2 On the main navigation bar, click Administration.
3 In the left pane of vRealize Operations Manager, click Solutions.
4 On the Solutions page, in the solutions table, select the VMware vRealize Log Insight solution.
5 Under Configured Adapter Instances, verify that the Collection State is Collecting and the Collection Status is Data receiving for the vRealize Log Insight Adapter instance.
What to do next
If you encounter issues while performing this procedure, use the following troubleshooting tips:
Troubleshooting Tips
n Ensure that the vRealize Log Insight Adapter is configured with the correct target vRealize Log Insight cluster.
n Ensure that there is a network connectivity between the vRealize Operations Manager and the vRealize Log Insight.
Verify Collection Status of vRealize Business for Cloud AdapterVerify that vRealize Operations Manager is collecting data metrics through the vRealize Business for Cloud Adapter of the VMware vRealize Business for Cloud Management Pack for vRealize Operations Manager.
Validating the status of data collection between vRealize Operations Manager and vRealize Business for Cloud ensures that the vRealize Business for Cloud Adapter is configured correctly.
Expected Outcome
The vRealize Business for Cloud Adapter has a Collection State of Collecting and a Collection Status of Data receiving.
Operational Verification
VMware, Inc. 28

Procedure
1 Log in to vRealize Operations Manager by using the operations interface.
a Open a Web browser and go to https://vrops01svr01.rainpole.local.
b Log in using the following credentials.
Setting Value
User name admin
Password vrops_admin_password
2 On the main navigation bar, click Administration.
3 In the left pane of vRealize Operations Manager, click Solutions.
4 On the Solutions page, in the solutions table select the VMware vRealize Business for Cloud solution.
5 Under Configured Adapter Instances, verify that the Collection State is Collecting and the Collection Status is Data receiving for the vRealize Business for Cloud Adapter.
What to do next
If you encounter issues while performing this procedure, use the following troubleshooting tips:
Troubleshooting Tips
n Ensure that the vRealize Business for Cloud Adapter is configured with the correct target vRealize Business for Cloud Server.
n Ensure that there is a network connectivity between the vRealize Operations Manager and the vRealize Business for Cloud Server.
Verify Collection Status of vRealize Automation AdapterVerify that vRealize Operations Manager is collecting data metrics through the vRealize Automation Adapter of the VMware vRealize Automation Management Pack for vRealize Operations Manager.
Validating the status of data collection between vRealize Operations Manager and vRealize Automation ensures that the vRealize Automation Adapter is configured correctly, the provided service account has correct privileges and that dashboards are populated.
Expected Outcome
The vRealize Automation Adapter has a Collection State of Collecting and a Collection Status of Data receiving.
Operational Verification
VMware, Inc. 29

Procedure
1 Log in to vRealize Operations Manager by using the operations interface.
a Open a Web browser and go to https://vrops01svr01.rainpole.local.
b Log in using the following credentials.
Setting Value
User name admin
Password vrops_admin_password
2 On the main navigation bar, click Administration.
3 In the left pane of vRealize Operations Manager, click Solutions.
4 On the Solutions page, in the solutions table select the VMware vRealize Automation solution.
5 Under Configured Adapter Instances, verify that the Collection State is Collecting and the Collection Status is Data receiving for the vRealize Automation Adapter instance.
What to do next
If you encounter issues while performing this procedure, use the following troubleshooting tips:
Troubleshooting Tips
n Ensure that the vRealize Automation Adapter is configured with the correct target vRealize Automation cluster.
n Ensure that there is a network connectivity between the vRealize Operations Manager and the vRealize Automation.
n Ensure that the service account credentials are correct.
Verify Collection Status of SRM AdapterVerify that vRealize Operations Manager is collecting data metrics through the SRM Adapter of the VMware SRM Management Pack for vRealize Operations Manager.
Validating the status of data collection between vRealize Operations Manager and Site Recovery Manager server ensures that the SRM Adapter is configured correctly, the provided service account has correct privileges and that dashboards are populated.
Expected Outcome
The SRM Adapter has a Collection State of Collecting and a Collection Status of Data receiving.
Operational Verification
VMware, Inc. 30

Procedure
1 Log in to vRealize Operations Manager by using the operations interface.
a Open a Web browser and go to https://vrops01svr01.rainpole.local.
b Log in using the following credentials.
Setting Value
User name admin
Password vrops_admin_password
2 On the main navigation bar, click Administration.
3 In the left pane of vRealize Operations Manager, click Solutions.
4 On the Solutions page, in the solutions table select the Srm Adapter solution.
5 Under Configured Adapter Instances, verify that the Collection State is Collecting and the Collection Status is Data receiving for the SRM Adapter instance.
What to do next
If you encounter issues while performing this procedure, use the following troubleshooting tips:
Troubleshooting Tips
n Ensure that the SRM Adapter is configured with the correct target Site Recovery Manager instance.
n Ensure that there is a network connectivity between the vRealize Operations Manager and the Site Recovery Manager Server.
n Ensure that the service account credentials are correct.
Verify Collection Status of Storage Devices AdapterVerify that vRealize Operations Manager is collecting data metrics through the Storage Devices Adapter of the VMware Storage Devices Management Pack for vRealize Operations Manager.
Validating the status of data collection between vRealize Operations Manager and vCenter Server ensures that the Storage Devices Adapter is configured correctly, the provided service account has correct privileges and that dashboards are populated.
Expected Outcome
The Storage Devices Adapter has a Collection State of Collecting and a Collection Status of Data receiving.
Operational Verification
VMware, Inc. 31
Procedure
1 Log in to vRealize Operations Manager by using the operations interface.
a Open a Web browser and go to https://vrops01svr01.rainpole.local.
b Log in using the following credentials.
Setting Value
User name admin
Password vrops_admin_password
2 On the main navigation bar, click Administration.
3 In the left pane of vRealize Operations Manager, click Solutions.
4 On the Solutions page, in the solutions table select the Management Pack for Storage Devices solution.
5 Under Configured Adapter Instances, verify that the Collection State is Collecting and the Collection Status is Data receiving for all Storage Devices Adapter instances.
What to do next
If you encounter issues while performing this procedure, use the following troubleshooting tips:
Troubleshooting Tips
n Ensure that the Storage Devices Adapter is configured with the correct target vCenter Server.
n Ensure that there is a network connectivity between the vRealize Operations Manager and the vCenter Server.
n Ensure that the service account credentials are correct.
Verify Collection Status of NSX for vSphere AdapterVerify that vRealize Operations Manager is collecting data metrics through the NSX-vSphere Adapter of the VMware NSX-vSphere Management Pack for vRealize Operations Manager.
Validating the data collection status between vRealize Operations Manager and vCenter Server ensures the NSX-vSphere Adapter and the Network Devices Adapter are configured correctly, the service account has correct privileges and dashboards are populated.
Expected Outcome
The NSX-vSphere Adapter instances and the Network Devices Adapter have Collection State of Collecting and Collection Status of Data receiving.
Operational Verification
VMware, Inc. 32
Procedure
1 Log in to vRealize Operations Manager by using the operations interface.
a Open a Web browser and go to https://vrops01svr01.rainpole.local.
b Log in using the following credentials.
Setting Value
User name admin
Password vrops_admin_password
2 On the main navigation bar, click Administration.
3 In the left pane of vRealize Operations Manager, click Solutions.
4 On the Solutions page, in the solutions table select the Management Pack for NSX-vSphere solution.
5 Under Configured Adapter Instances, verify that the Collection State is Collecting and the Collection Status is Data receiving for all NSX-vSphere Adapter instances and the Network Devices Adapter instance.
What to do next
If you encounter issues while performing this procedure, use the following troubleshooting tips:
Troubleshooting Tips
n Ensure that the NSX-vSphere Adapter is configured with the correct target vCenter Server and the NSX Manager.
n Ensure that there is a network connectivity between the vRealize Operations Manager and the NSX Manager.
n Ensure that the Network Devices Adapter is configured with the correct network settings.
n Ensure that the service account credentials are correct.
Verification of vRealize Log InsightVerify the authentication and cluster status and verify that all vRealize Log Insight agents are listed and have an active status.
n Authenticate to vRealize Log Insight Using Local System Account and Verify Cluster Status
Verify that you can authenticate to vRealize Log Insight using the built-in admin account.
n Verify Agent Status for vRealize Operations Manager Virtual Appliances
Verify that vRealize Operations Manager is sending syslog data to the vRealize Log Insight cluster.
n Verify Agent Status for vRealize Automation Virtual Appliances
Verify that vRealize Automation virtual appliances are sending syslog data to the vRealize Log Insight cluster.
n Verify Agent Status for Embedded vRealize Orchestrator
Verify that vRealize Orchestrator is sending syslog data to the vRealize Log Insight cluster.
Operational Verification
VMware, Inc. 33

n Verify Agent Status for vRealize Automation Windows Systems
Verify that vRealize Automation Windows systems are sending syslog data to the vRealize Log Insight cluster.
n Verify Agent Status for Microsoft SQL Server
Verify that Microsoft SQL server used for the vRealize Automation database is sending syslog data to the vRealize Log Insight cluster.
n Verify Agent Status for Site Recovery Manager Server
Verify that Site Recovery Manager server is sending syslog data to the vRealize Log Insight cluster.
Authenticate to vRealize Log Insight Using Local System Account and Verify Cluster StatusVerify that you can authenticate to vRealize Log Insight using the built-in admin account.
Performing authentication using the built-in admin account validates that vRealize Log Insight is online and accessible.
Expected Outcome
You can successfully authenticate to vRealize Log Insight using the built-in admin account and verify the status of the cluster.
Procedure
1 Log in to the vRealize Log Insight user interface.
a Open a Web browser and go to https://sfo01vrli01.sfo01.rainpole.local.
b Log in using the following credentials.
Setting Value
User name admin
Password vrli_admin_password
2 Verify the status of vRealize Log Insight cluster nodes.
a Click the configuration drop-down menu , and click Administration.
b Under Management in the navigator pane, click Cluster.
c Verify that the status of each cluster node is Connected and the status of Integrated Load Balancer is Available.
3 Repeat the procedure and validate for the lax01vrli01.lax01.rainpole.local vRealize Log Insight cluster.
What to do next
If you encounter issues while performing this procedure, use the following troubleshooting tips:
Operational Verification
VMware, Inc. 34

Troubleshooting Tips
n Ensure that the vRealize Log Insight appliances are powered on.
n Ensure that there is a network connectivity to the vRealize Log Insight appliances and that the host names are resolvable in DNS.
n Ensure that there is a network connectivity between the vRealize Log Insight nodes.
n Ensure that you have supplied the correct login credentials.
Verify Agent Status for vRealize Operations Manager Virtual AppliancesVerify that vRealize Operations Manager is sending syslog data to the vRealize Log Insight cluster.
Validating agent communication between the vRealize Operations Manager virtual appliances and the vRealize Log Insight cluster ensures that the agent is configured correctly and that there is a network connectivity between the two solutions.
Expected Outcome
Each vRealize Operations Manager virtual appliance is listed in the vRealize Log Insight agent list and has an Active status.
Procedure
1 Log in to the vRealize Log Insight user interface.
a Open a Web browser and go to https://sfo01vrli01.sfo01.rainpole.local.
b Log in using the following credentials.
Setting Value
User name admin
Password vrli_admin_password
2 Click the configuration drop-down menu , and click Administration.
3 Under Management, click Agents.
4 From the All Agents drop-down menu, select vROPs - Appliance Agent Group.
5 Verify that each vRealize Operations Manager virtual appliance is listed and shows status as Active.
6 Repeat this procedure and validate for the lax01vrli01.lax01.rainpole.local vRealize Log Insight cluster.
What to do next
If you encounter issues while performing this procedure, use the following troubleshooting tips:
Troubleshooting Tips
n Ensure that the vRealize Log Insight agent service is running on the vRealize Operations Manager virtual appliance.
n Ensure that there is a network connectivity between vRealize Log Insight and vRealize Operations Manager.
n Ensure that the configuration file liagent.ini is configured correctly on the vRealize Operations Manager virtual appliance.
Operational Verification
VMware, Inc. 35

Verify Agent Status for vRealize Automation Virtual AppliancesVerify that vRealize Automation virtual appliances are sending syslog data to the vRealize Log Insight cluster.
Validating agent communication between the vRealize Automation virtual appliances and the vRealize Log Insight cluster ensures that the agent is configured correctly and that there is a network connectivity between the two solutions.
Expected Outcome
Each vRealize Automation virtual appliance is listed in the vRealize Log Insight agent list and has an Active status.
Procedure
1 Log in to the vRealize Log Insight user interface.
a Open a Web browser and go to https://sfo01vrli01.sfo01.rainpole.local.
b Log in using the following credentials.
Setting Value
User name admin
Password vrli_admin_password
2 Click the configuration drop-down menu , and click Administration.
3 Under Management, click Agents.
4 From the All Agents drop-down menu, select vRA - Appliance Agent Group.
5 Verify that each vRealize Automation virtual appliance is listed and shows status as Active.
6 Repeat this procedure and validate for the lax01vrli01.lax01.rainpole.local vRealize Log Insight cluster.
What to do next
If you encounter issues while performing this procedure, use the following troubleshooting tips:
Troubleshooting Tips
n Ensure that the vRealize Log Insight agent service is running on the vRealize Automation virtual appliance.
n Ensure that there is a network connectivity between vRealize Log Insight and vRealize Automation.
n Ensure that the configuration file liagent.ini is configured correctly on the vRealize Automation virtual appliance.
Verify Agent Status for Embedded vRealize OrchestratorVerify that vRealize Orchestrator is sending syslog data to the vRealize Log Insight cluster.
Validating agent communication between the embedded vRealize Orchestrator and the vRealize Log Insight cluster ensures that the agent is configured correctly and that there is a network connectivity between the two solutions.
Operational Verification
VMware, Inc. 36

Expected Outcome
Each embedded vRealize Orchestrator virtual appliance is listed in the vRealize Log Insight agent list and has an Active status.
Procedure
1 Log in to the vRealize Log Insight user interface.
a Open a Web browser and go to https://sfo01vrli01.sfo01.rainpole.local.
b Log in using the following credentials.
Setting Value
User name admin
Password vrli_admin_password
2 Click the configuration drop-down menu , and click Administration.
3 Under Management, click Agents.
4 From the All Agents drop-down menu, select vRO - Appliance Agent Group.
5 Verify that each embedded vRealize Orchestrator virtual appliance is listed and shows status as Active.
6 Repeat this procedure and validate for the lax01vrli01.lax01.rainpole.local vRealize Log Insight cluster.
What to do next
If you encounter issues while performing this procedure, use the following troubleshooting tips:
Troubleshooting Tips
n Ensure that the vRealize Log Insight agent service is running on the vRealize Automation virtual appliance.
n Ensure that there is a network connectivity between vRealize Log Insight and vRealize Automation.
n Ensure that the configuration file liagent.ini is configured correctly on the vRealize Automation virtual appliance.
Verify Agent Status for vRealize Automation Windows SystemsVerify that vRealize Automation Windows systems are sending syslog data to the vRealize Log Insight cluster.
Validating agent communication between the vRealize Automation Windows Systems and the vRealize Log Insight cluster ensures that the agent is configured correctly and that there is a network connectivity between the two solutions.
Expected Outcome
Each vRealize Automation Windows System is listed in the vRealize Log Insight agent list and has an Active status.
Operational Verification
VMware, Inc. 37

Procedure
1 Log in to the vRealize Log Insight user interface.
a Open a Web browser and go to https://sfo01vrli01.sfo01.rainpole.local.
b Log in using the following credentials.
Setting Value
User name admin
Password vrli_admin_password
2 Click the configuration drop-down menu and click Administration.
3 Under Management, click Agents.
4 From the All Agents drop-down menu, select vRA - Windows Agent Group.
5 Verify that each vRealize Automation Windows System is listed and shows status as Active.
6 Repeat this procedure and validate for the lax01vrli01.lax01.rainpole.local vRealize Log Insight cluster.
What to do next
If you encounter issues while performing this procedure, use the following troubleshooting tips:
Troubleshooting Tips
n Ensure that the vRealize Log Insight agent service is running on the vRealize Automation windows virtual machine.
n Ensure that there is a network connectivity between vRealize Log Insight and vRealize Automation.
Verify Agent Status for Microsoft SQL ServerVerify that Microsoft SQL server used for the vRealize Automation database is sending syslog data to the vRealize Log Insight cluster.
Validating agent communication between the Microsoft SQL Server and the vRealize Log Insight cluster ensures that the agent is configured correctly and that there is a network connectivity between vRealize Log Insight and vRealize Automation.
Expected Outcome
The Microsoft SQL Server is listed in the vRealize Log Insight agent list and has an Active status.
Operational Verification
VMware, Inc. 38

Procedure
1 Log in to the vRealize Log Insight user interface.
a Open a Web browser and go to https://sfo01vrli01.sfo01.rainpole.local.
b Log in using the following credentials.
Setting Value
User name admin
Password vrli_admin_password
2 Click the configuration drop-down menu icon and select Administration.
3 Under Management, click Agents.
4 From the All Agents drop-down menu, select vRA - SQL Agent Group.
5 Verify that the Microsoft SQL Server is listed and shows status as Active.
6 Repeat this procedure and validate for the lax01vrli01.lax01.rainpole.local vRealize Log Insight cluster.
What to do next
If you encounter issues while performing this procedure, use the following troubleshooting tips:
Troubleshooting Tips
n Ensure that the vRealize Log Insight agent service is running on the Microsoft SQL Server virtual machine.
n Ensure that there is a network connectivity between vRealize Log Insight and vRealize Automation.
Verify Agent Status for Site Recovery Manager ServerVerify that Site Recovery Manager server is sending syslog data to the vRealize Log Insight cluster.
Validating agent communication between the Site Recovery Manager server and the vRealize Log Insight cluster ensures that the agent is configured correctly and that there is a network connectivity between the two solutions.
Expected Outcome
The Site Recovery Manager server is listed in the vRealize Log Insight agent list and has an Active status.
Operational Verification
VMware, Inc. 39

Procedure
1 Log in to the vRealize Log Insight user interface.
a Open a Web browser and go to https://sfo01vrli01.sfo01.rainpole.local.
b Log in using the following credentials.
Setting Value
User name admin
Password vrli_admin_password
2 Click the configuration drop-down menu icon and select Administration.
3 Under Management, click Agents.
4 From the All Agents drop-down menu, select SRM - Agent Group.
5 Verify that the Site Recovery Manager server is listed and shows status as Active.
6 Repeat this procedure and validate for the lax01vrli01.lax01.rainpole.local vRealize Log Insight cluster.
What to do next
If you encounter issues while performing this procedure, use the following troubleshooting tips:
Troubleshooting Tips
n Ensure that the vRealize Log Insight agent service is running on the Site Recovery Manager virtual machine.
n Ensure that there is a network connectivity between vRealize Log Insight and Site Recovery Manager.
Verification of vSphere Update Manager Download ServiceVerify that vSphere Update Manager Download Service can connect to the VMware Internet service and successfully checks for updates.
n Run the vSphere Update Manager Download Service Cron Job
Verify that the vSphere Update Manager Download Service cron job runs and checks for updates to download.
Run the vSphere Update Manager Download Service Cron JobVerify that the vSphere Update Manager Download Service cron job runs and checks for updates to download.
Validating that you can run the cron job ensures that the deployment configuration is correct and that the vSphere Update Manager Download Service (UMDS) virtual machine has a network connectivity to the VMware Internet service.
Operational Verification
VMware, Inc. 40

Expected Outcome
The vSphere Update Manager Download Service connects to the VMware Internet service and checks for new updates to download.
Procedure
1 Log in to the vSphere Update Manager Download Service using a Secure Shell (SSH) client.
a Open an SSH connection to sfo01umds01.sfo01.rainpole.local.
b Log in using the following credentials.
Setting Value
User name svc-umds
Password svc-umds_password
2 Verify the cron job checks for updates.
a Run the following command.
sudo /etc/cron.daily/umds-download
When prompted for the password of the svc-umds user, enter svc-umds_password.
b Verify that vSphere Update Manager Download Service connects to the VMware Internet service and checks for updates. Details for the new updates are displayed in the console.
3 Repeat this procedure and validate for the lax01umds01.lax01.rainpole.local vSphere Update Manager Download Service instance.
What to do next
If you encounter issues while performing this procedure, use the following troubleshooting tips:
Troubleshooting Tips
n Ensure that there is a network connectivity from vSphere Update Manager Download Service virtual machine to the Internet.
Operational Verification
VMware, Inc. 41

Operational Verification of the Cloud Management Layer 3Perform operational verification steps and validate the operational state of the cloud management layer following initial installation or any type of outage affecting an individual component or system.
Operational verification of the cloud management layer involves the following management components:
n vRealize Automation
n vRealize Business for Cloud
n Authenticate to vRealize Automation Using Local System Account
Verify that you can authenticate to vRealize Automation portal using the [email protected] system account.
n Authenticate to vRealize Automation Using Active Directory Admin Account
Verify that you can authenticate to vRealize Automation portal using the [email protected] Active Directory account within the rainpole tenant.
n Verify vRealize Automation Components Are Highly Available
Verify that you can continue to operate the vRealize Automation stack even as individual stack components become unavailable.
n Verify Integration of vRealize Automation with vSphere Infrastructure
Verify that you can provision virtual machines using vRealize Automation blueprints into the vCenter for which a vSphere endpoint was created during the initial deployment and configuration.
n Verify Integration of vRealize Automation with vRealize Orchestrator and NSX for vSphere
Verify that you can provision NSX objects using the vRealize Automation multi-tiered blueprint provisioning.
n Verify Integration of vRealize Automation with vRealize Business for Cloud
Verify that in the vRealize Automation portal you can access the menu for vRealize Business for Cloud and that you can view costing reports.
n Verify Integration of vRealize Automation with vRealize Operations Manager
Verify that you can use the reclamation menu in vRealize Automation to identify virtual machines that have not been powered on for a defined period as reported by the vRealize Operations Manager.
VMware, Inc. 42

Authenticate to vRealize Automation Using Local System AccountVerify that you can authenticate to vRealize Automation portal using the [email protected] system account.
Performing authentication using the local system account verifies that the vRealize Automation authentication operation is functional.
Expected Outcome
You can successfully authenticate using the [email protected] system account and have visibility of all the tenants.
Procedure
1 Log in to the vRealize Automation portal.
a Open a Web browser and go to https://vra01svr01.rainpole.local/vcac.
b Log in using the following credentials.
Setting Value
User name administrator
Password deployment_admin_password
Domain vsphere.local
2 On the Tenants page, verify that you can see the tenants listed.
What to do next
If you encounter issues while performing this procedure, use the following troubleshooting tips:
Troubleshooting Tips
n Ensure that the correct login credentials are used.
n Ensure that all the vRealize Automation services are running.
n Ensure that all the vRealize Automation virtual machines are configured to use the same NTP server and they are time synchronized.
Authenticate to vRealize Automation Using Active Directory Admin AccountVerify that you can authenticate to vRealize Automation portal using the [email protected] Active Directory account within the rainpole tenant.
Performing authentication using a tenant admin account configured in Active Directory verifies that the tenant is correctly configured and that the embedded vRealize Identity Manager (vIDM) can authenticate against the Active Directory for this tenant.
Operational Verification
VMware, Inc. 43
Expected Outcome
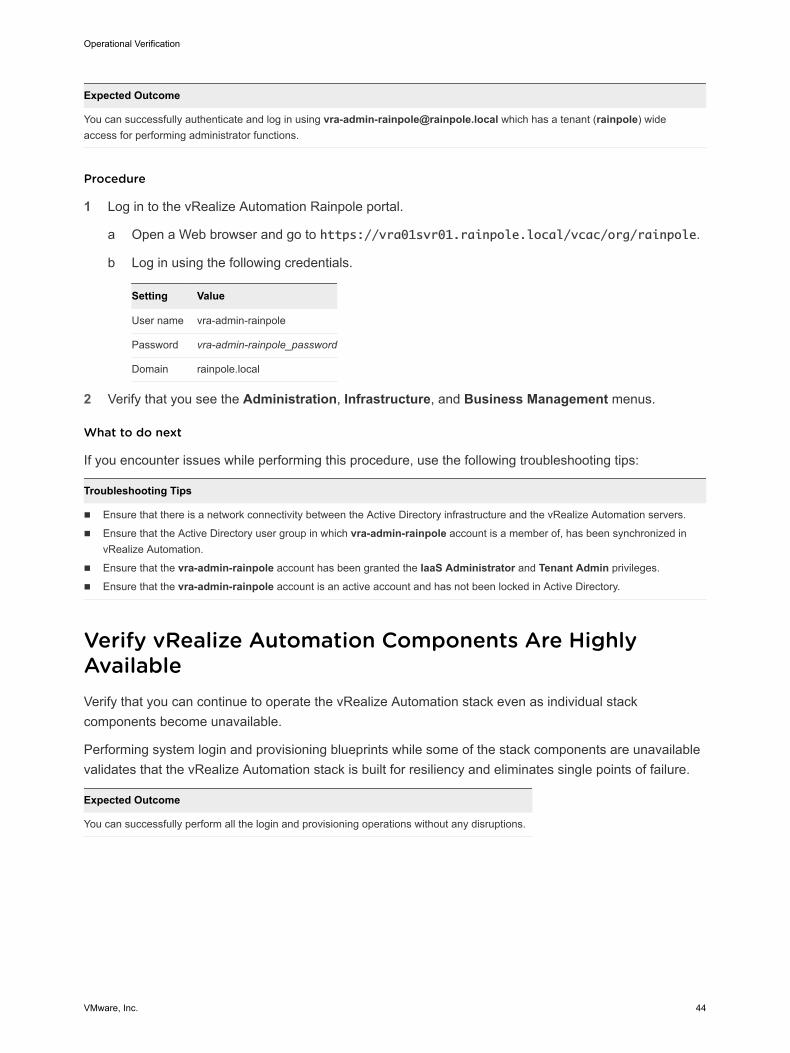
You can successfully authenticate and log in using [email protected] which has a tenant (rainpole) wide access for performing administrator functions.
Procedure
1 Log in to the vRealize Automation Rainpole portal.
a Open a Web browser and go to https://vra01svr01.rainpole.local/vcac/org/rainpole.
b Log in using the following credentials.
Setting Value
User name vra-admin-rainpole
Password vra-admin-rainpole_password
Domain rainpole.local
2 Verify that you see the Administration, Infrastructure, and Business Management menus.
What to do next
If you encounter issues while performing this procedure, use the following troubleshooting tips:
Troubleshooting Tips
n Ensure that there is a network connectivity between the Active Directory infrastructure and the vRealize Automation servers.
n Ensure that the Active Directory user group in which vra-admin-rainpole account is a member of, has been synchronized in vRealize Automation.
n Ensure that the vra-admin-rainpole account has been granted the IaaS Administrator and Tenant Admin privileges.
n Ensure that the vra-admin-rainpole account is an active account and has not been locked in Active Directory.
Verify vRealize Automation Components Are Highly AvailableVerify that you can continue to operate the vRealize Automation stack even as individual stack components become unavailable.
Performing system login and provisioning blueprints while some of the stack components are unavailable validates that the vRealize Automation stack is built for resiliency and eliminates single points of failure.
Expected Outcome
You can successfully perform all the login and provisioning operations without any disruptions.
Operational Verification
VMware, Inc. 44

Procedure
1 Log in to vCenter Server by using the vSphere Client.
a Open a Web browser and go to https://sfo01m01vc01.sfo01.rainpole.local/ui.
b Log in using the following credentials.
Setting Value
User name [email protected]
Password vsphere_admin_password
2 Shut down the secondary node of vRealize Automation.
a From the Home menu, select VMs and Templates.
b In the Navigator pane, expand sfo01m01vc01.sfo01.rainpole.local>sfo01-m01dc>sfo01-m01-mgmt01.
c Right-click vra01svr01b, select Power > Shut Down Guest OS, and click Yes in the confirmation box.
3 Log in to the vRealize Automation Rainpole portal.
a Open a Web browser and go to https://vra01svr01.rainpole.local/vcac/org/rainpole.
b Log in using the following credentials.
Setting Value
User name vra-admin-rainpole
Password vra-admin-rainpole_password
Domain rainpole.local
4 Request a single-machine blueprint item from the service catalog of vRealize Automation.
a In the Infrastructure Service Portal, click the Catalog tab.
b Locate the Windows Server 2012 R2 - SFO Prod single-machine blueprint and click Request.
c Click Submit and request a virtual machine provisioning.
5 Verify the request finishes successfully.
a Click the Deployments tab and select the deployment that you submitted.
b Click History and wait several minutes for the request to complete.
Click the Refresh icon every few minutes, until a Successful message appears.
c Under Status, verify that the virtual machine successfully provisioned.
6 Repeat the procedure and validate for the other nodes of vRealize Automation by shutting down either primary or secondary node.
Operational Verification
VMware, Inc. 45

What to do next
If you encounter issues while performing this procedure, use the following troubleshooting tips:
Troubleshooting Tips
n Ensure that automatic failover of Manager Service is enabled.
Note This feature is available after vRA 7.3.
n Ensure that the load balancer is operational and the application profiles, pools, service monitoring, and virtual servers pertaining to vRealize Automation are configured correctly.
n Ensure that vRealize Automation appliance clustering is configured correctly.
n Ensure that at least one component in each layer of the stack is up and running.
n Ensure that all the service monitoring URLs are functional.
Verify Integration of vRealize Automation with vSphere InfrastructureVerify that you can provision virtual machines using vRealize Automation blueprints into the vCenter for which a vSphere endpoint was created during the initial deployment and configuration.
Validating the ability to provision virtual machines into the vSphere infrastructure verifies the integration between vRealize Automation and vSphere infrastructure that consists of one or more vCenter servers.
Expected Outcome
You can perform the data collection on vSphere endpoints and you can provision and destroy virtual machines in the vCenter that represent the vSphere endpoints.
Procedure
1 Log in to the vRealize Automation Rainpole portal.
a Open a Web browser and go to https://vra01svr01.rainpole.local/vcac/org/rainpole.
b Log in using the following credentials.
Setting Value
User name vra-admin-rainpole
Password vra-admin-rainpole_password
Domain rainpole.local
2 Verify virtual machine provisioning.
a On the Infrastructure Service Portal, click the Catalog tab.
b Select Windows Server 2012 R2 - SFO Prod and click Request.
c Click Submit and request a virtual machine provisioning.
Operational Verification
VMware, Inc. 46

d Select the deployment that you submitted, click History, and wait several minutes for the request to complete.
e Under Status, verify that the virtual machine successfully provisioned.
3 Verify the destroy operation for a virtual machine.
a On the Infrastructure Service Portal, click the Infrastructure tab.
b Click Managed Machines, point to the virtual machine, click Destroy and click OK.
c Verify that the virtual machine is removed from the list.
4 Repeat the verification procedure using the Windows Server 2012 R2 - LAX Prod single-machine blueprint for Region B vCenter Server.
What to do next
If you encounter issues while performing this procedure, use the following troubleshooting tips:
Troubleshooting Tips
n Ensure that there is a network connectivity between vRealize Automation servers and the vCenter Servers.
n Ensure that the correct credentials are used for the endpoints.
n Ensure that data collection is successful.
Verify Integration of vRealize Automation with vRealize Orchestrator and NSX for vSphereVerify that you can provision NSX objects using the vRealize Automation multi-tiered blueprint provisioning.
Provisioning load balancers or edge gateways NSX objects within a vRealize Automation blueprint verifies the integration with the NSX infrastructure, and verifies the embedded vRealize Orchestrator which facilitates the communication between vRealize Automation and NSX.
Expected Outcome
You can successfully add NSX endpoints, perform the data collection on these endpoints, and provision NSX objects from within vRealize Automation when an appropriately configured multi-tiered blueprint is provisioned.
Operational Verification
VMware, Inc. 47

Procedure
1 Log in to the vRealize Automation Rainpole portal.
a Open a Web browser and go to https://vra01svr01.rainpole.local/vcac/org/rainpole.
b Log in using the following credentials.
Setting Value
User name vra-admin-rainpole
Password vra-admin-rainpole_password
Domain rainpole.local
2 Verify the data collection of vRealize Orchestrator endpoint.
a On the Infrastructure Service Portal, click Infrastructure > Endpoints > Endpoints.
b Select the vRealize Orchestrator endpoint, click Actions > Data Collection, and click Start.
c Wait until the data collection is successful.
d Click the Refresh button and verify that the Status shows Data collection succeeded with date and time details.
3 Verify the provisioning of NSX objects using multi-tiered blueprint.
a On the Infrastructure Service Portal, click the Catalog tab.
b Select the service catalog which has NSX components like load balancers or edge gateways, click Request, and click Submit.
c Click the Requests tab and verify that the Status column for the NSX multi-tiered blueprint provisioning is Successful.
What to do next
If you encounter issues while performing this procedure, use the following troubleshooting tips:
Troubleshooting Tips
n Ensure that there is a network connectivity between vRealize Automation servers and the NSX infrastructure.
n Ensure that the correct credentials are used for the NSX endpoints.
n Ensure that data collection is successful.
n Ensure that the blueprints are configured correctly.
Verify Integration of vRealize Automation with vRealize Business for CloudVerify that in the vRealize Automation portal you can access the menu for vRealize Business for Cloud and that you can view costing reports.
Operational Verification
VMware, Inc. 48
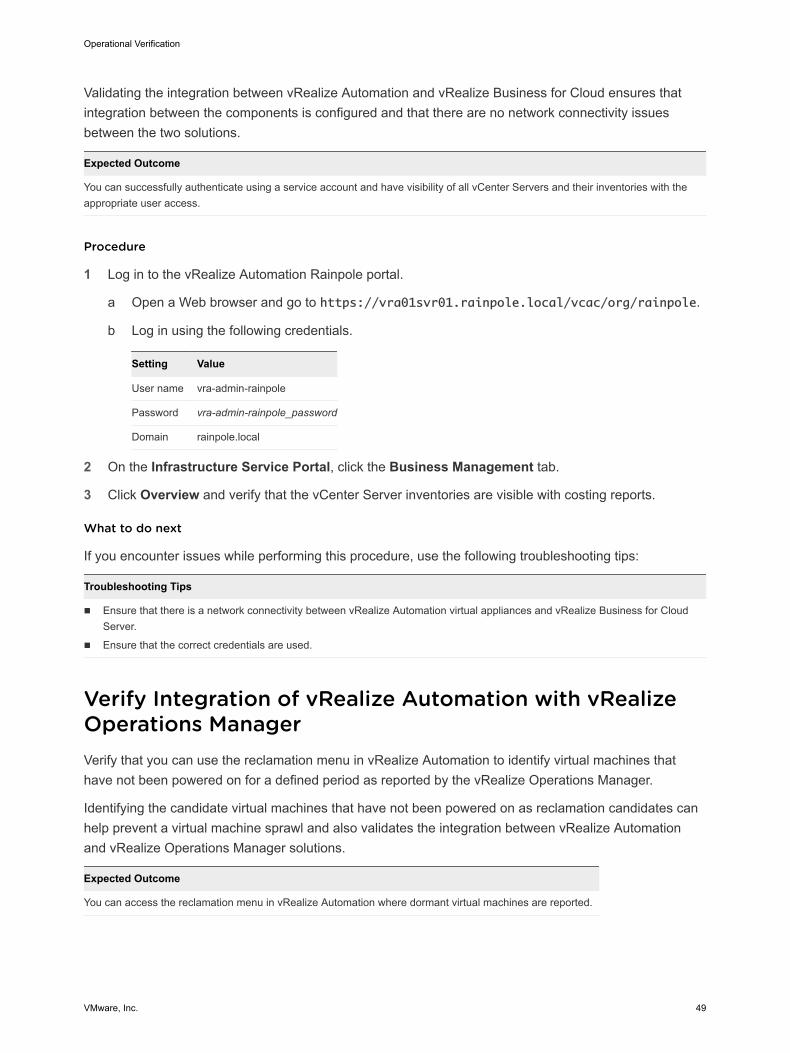
Validating the integration between vRealize Automation and vRealize Business for Cloud ensures that integration between the components is configured and that there are no network connectivity issues between the two solutions.
Expected Outcome
You can successfully authenticate using a service account and have visibility of all vCenter Servers and their inventories with the appropriate user access.
Procedure
1 Log in to the vRealize Automation Rainpole portal.
a Open a Web browser and go to https://vra01svr01.rainpole.local/vcac/org/rainpole.
b Log in using the following credentials.
Setting Value
User name vra-admin-rainpole
Password vra-admin-rainpole_password
Domain rainpole.local
2 On the Infrastructure Service Portal, click the Business Management tab.
3 Click Overview and verify that the vCenter Server inventories are visible with costing reports.
What to do next
If you encounter issues while performing this procedure, use the following troubleshooting tips:
Troubleshooting Tips
n Ensure that there is a network connectivity between vRealize Automation virtual appliances and vRealize Business for Cloud Server.
n Ensure that the correct credentials are used.
Verify Integration of vRealize Automation with vRealize Operations ManagerVerify that you can use the reclamation menu in vRealize Automation to identify virtual machines that have not been powered on for a defined period as reported by the vRealize Operations Manager.
Identifying the candidate virtual machines that have not been powered on as reclamation candidates can help prevent a virtual machine sprawl and also validates the integration between vRealize Automation and vRealize Operations Manager solutions.
Expected Outcome
You can access the reclamation menu in vRealize Automation where dormant virtual machines are reported.
Operational Verification
VMware, Inc. 49

Procedure
1 Log in to the vRealize Automation Rainpole portal.
a Open a Web browser and go to https://vra01svr01.rainpole.local/vcac/org/rainpole.
b Log in using the following credentials.
Setting Value
User name vra-admin-rainpole
Password vra-admin-rainpole_password
Domain rainpole.local
2 On the Infrastructure Service Portal, click the Administration tab.
3 Click Reclamation > Metrics Provider in the left pane.
4 On the Metrics Provider page, click Test Connection and verify that the connection is successful.
What to do next
If you encounter issues while performing this procedure, use the following troubleshooting tips:
Troubleshooting Tips
n Ensure that there is a network connectivity between vRealize Automation servers and vRealize Operations Manager servers.
n Ensure that the correct credentials are used.
Operational Verification
VMware, Inc. 50

Operational Verification of the Business Continuity Layer 4Perform operational verification steps and validate the operational state of the business continuity layer following initial installation or any type of outage affecting an individual component or system.
Operational verification of the business continuity layer involves the following management components:
n Site Recovery Manager
n vSphere Replication
n Verify Pairing of Site Recovery Manager Across Regions
Verify that the Site Recovery Manager instances are paired and connected across both regions.
n Verify Pairing of vSphere Replication Across Regions
Verify that the vSphere Replication instances are paired across the regions.
n Perform Test Recovery of Operations Management Recovery Plan
Verify the recovery plan for the operations management layer.
n Perform Test Recovery of Cloud Management Recovery Plan
Verify the recovery plan for the cloud management layer.
n Verify Status and Configuration of vSphere Storage APIs for Data Protection Based Backup Solution
Verify the operational status of the vSphere Storage APIs for Data Protection (VADP) based backup solution after you perform a software maintenance operation.
Verify Pairing of Site Recovery Manager Across RegionsVerify that the Site Recovery Manager instances are paired and connected across both regions.
Verifying that Site Recovery Manager instances are paired validates that the network communication between regions is operational and that the service account has the correct privileges.
Expected Outcome
You can successfully authenticate to vCenter Server and verify that the regions are paired and connected.
VMware, Inc. 51

Procedure
1 Log in to vCenter Server by using the vSphere Client.
a Open a Web browser and go to https://sfo01m01vc01.sfo01.rainpole.local/ui.
b Log in using the following credentials.
Setting Value
User name [email protected]
Password vsphere_admin_password
2 From the Home menu, select Site Recovery.
3 Click Open Site Recovery for the sfo01m01vc01.sfo01.rainpole.local site.
A new Site Recovery page opens for the sfo01m01vc01.sfo01.rainpole.local site.
4 If you are logging in for the first time, enter the following credentials and click Login.
Setting Value
User name [email protected]
Password vsphere_admin_password
5 On the Site Recovery page, click View Details, click Name under Site Recovery Manager to expand the tree, and verify the following details.
Settings Site Paired Site
vCenter Server sfo01m01vc01.sfo01.rainpole.local lax01m01vc01.lax01.rainpole.local
Server 172.16.11.124:9086 172.17.11.124:9086
Version srm_version srm_version
Logged in as VSPHERE.LOCAL\Administrator VSPHERE.LOCAL\Administrator
Remote SRM connection Connected Connected
What to do next
If you encounter issues while performing this procedure, use the following troubleshooting tips:
Troubleshooting Tips
n Ensure that there is a network connectivity between all vCenter Servers and Site Recovery Manager Servers.
Verify Pairing of vSphere Replication Across RegionsVerify that the vSphere Replication instances are paired across the regions.
Verifying that vSphere Replication instances are paired validates that the network communication between regions is operational and that the service account has the correct privileges.
Operational Verification
VMware, Inc. 52

Expected Outcome
You can successfully authenticate to vCenter Server and verify that the regions are connected and paired.
Procedure
1 Log in to vCenter Server by using the vSphere Client.
a Open a Web browser and go to https://sfo01m01vc01.sfo01.rainpole.local/ui.
b Log in using the following credentials.
Setting Value
User name [email protected]
Password vsphere_admin_password
2 From the Home menu, select Site Recovery.
3 Click Open Site Recovery for the sfo01m01vc01.sfo01.rainpole.local site.
A new Site Recovery page opens for the sfo01m01vc01.sfo01.rainpole.local site.
4 If you are logging in for the first time, enter the following credentials and click Login.
Setting Value
User name [email protected]
Password vsphere_admin_password
5 On the Site Recovery page, click View Details, click Name under vSphere Replication to expand the tree, and verify the following details.
Settings Site Paired Site
Server 172.16.11.123:8043 172.17.11.123:8043
Version vr_version vr_version
Remote VR connection Connected Connected
What to do next
If you encounter issues while performing this procedure, use the following troubleshooting tips:
Troubleshooting Tips
n Ensure that there is a network connectivity between all vCenter Servers and vSphere Replication instances.
Perform Test Recovery of Operations Management Recovery PlanVerify the recovery plan for the operations management layer.
Operational Verification
VMware, Inc. 53

Performing a test recovery of the operations management recovery plan ensures that the virtual machines are being replicated correctly and the power on order is accurate with the correct timeout values and dependencies. Site Recovery Manager runs the analytic cluster nodes and the vRealize Suite Lifecycle Manager on an isolated test network using a temporary snapshot of replicated data while performing test recovery.
Expected Outcome
You can successfully complete the test recovery scenario for the operations management recovery plan.
Procedure
1 Log in to the Management vCenter Server by using the vSphere Client.
a Open a Web browser and go to https://sfo01m01vc01.sfo01.rainpole.local/ui.
b Log in using the following credentials.
Setting Value
User name [email protected]
Password vsphere_admin_password
2 From the Home menu, select Site Recovery.
3 Click Open Site Recovery for the sfo01m01vc01.sfo01.rainpole.local site.
A new Site Recovery page opens for the sfo01m01vc01.sfo01.rainpole.local site.
4 If you are logging in for the first time, enter the following credentials and click Login.
Setting Value
User name [email protected]
Password vsphere_admin_password
5 On the Site Recovery page, click the number link next to Recovery Plans.
6 On the Recovery Plans page, click the SDDC Operations Management RP recovery plan.
7 On the SDDC Operations Management RP page, click the Test Recovery Plan icon to run a test recovery.
a On the Confirmation options page of the Test wizard, leave the Replicate recent changes to recovery site check box selected and click Next.
b On the Ready to complete page, click Finish to start the test recovery.
c Click the Recovery Steps tab and follow the progress of the test recovery.
Operational Verification
VMware, Inc. 54

8 After the test recovery completes, click the Cleanup Recovery Plan icon to clean up all the created test VMs.
a On the Confirmation options page of the Cleanup wizard, click Next.
b On the Ready to complete page, click Finish to start the clean-up process.
Note If the protected vRealize Operations Manager and vRealize Suite Lifecycle Manager virtual machines are located in Region B, log in to the lax01m01vc01.lax01.rainpole.local vCenter Server and follow the procedure.
What to do next
If you encounter issues while performing this procedure, use the following troubleshooting tips:
Troubleshooting Tips
n Ensure that there is a network connectivity between all vCenter Servers and vSphere Replication instances.
n Ensure that there is a network connectivity between all vCenter Servers and Site Recovery Manager Servers.
n Ensure that the replication is occurring for all the protected VMs.
Perform Test Recovery of Cloud Management Recovery PlanVerify the recovery plan for the cloud management layer.
Performing a test recovery of the cloud management recovery plan ensures that the virtual machines are being replicated correctly and the power on order is accurate with the correct timeout values and dependencies. Site Recovery Manager runs the vRealize Automation and vRealize Business for Cloud nodes on an isolated test network using a temporary snapshot of replicated data while performing test recovery.
Expected Outcome
You can successfully complete the test recovery scenario for the cloud management recovery plan.
Procedure
1 Log in to the Management vCenter Server by using the vSphere Client.
a Open a Web browser and go to https://sfo01m01vc01.sfo01.rainpole.local/ui.
b Log in using the following credentials.
Setting Value
User name [email protected]
Password vsphere_admin_password
2 From the Home menu, select Site Recovery.
Operational Verification
VMware, Inc. 55
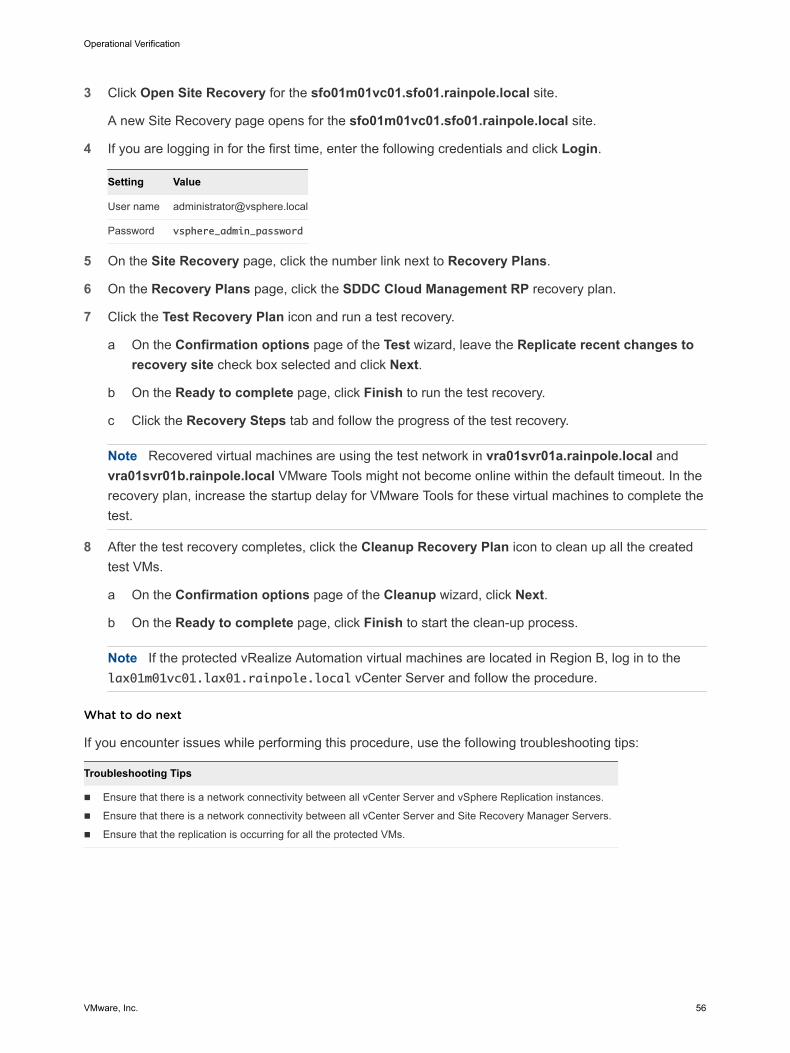
3 Click Open Site Recovery for the sfo01m01vc01.sfo01.rainpole.local site.
A new Site Recovery page opens for the sfo01m01vc01.sfo01.rainpole.local site.
4 If you are logging in for the first time, enter the following credentials and click Login.
Setting Value
User name [email protected]
Password vsphere_admin_password
5 On the Site Recovery page, click the number link next to Recovery Plans.
6 On the Recovery Plans page, click the SDDC Cloud Management RP recovery plan.
7 Click the Test Recovery Plan icon and run a test recovery.
a On the Confirmation options page of the Test wizard, leave the Replicate recent changes to recovery site check box selected and click Next.
b On the Ready to complete page, click Finish to run the test recovery.
c Click the Recovery Steps tab and follow the progress of the test recovery.
Note Recovered virtual machines are using the test network in vra01svr01a.rainpole.local and vra01svr01b.rainpole.local VMware Tools might not become online within the default timeout. In the recovery plan, increase the startup delay for VMware Tools for these virtual machines to complete the test.
8 After the test recovery completes, click the Cleanup Recovery Plan icon to clean up all the created test VMs.
a On the Confirmation options page of the Cleanup wizard, click Next.
b On the Ready to complete page, click Finish to start the clean-up process.
Note If the protected vRealize Automation virtual machines are located in Region B, log in to the lax01m01vc01.lax01.rainpole.local vCenter Server and follow the procedure.
What to do next
If you encounter issues while performing this procedure, use the following troubleshooting tips:
Troubleshooting Tips
n Ensure that there is a network connectivity between all vCenter Server and vSphere Replication instances.
n Ensure that there is a network connectivity between all vCenter Server and Site Recovery Manager Servers.
n Ensure that the replication is occurring for all the protected VMs.
Operational Verification
VMware, Inc. 56

Verify Status and Configuration of vSphere Storage APIs for Data Protection Based Backup SolutionVerify the operational status of the vSphere Storage APIs for Data Protection (VADP) based backup solution after you perform a software maintenance operation.
Verifying the operational status of vSphere Storage APIs for Data Protection (VADP) based backup solution validates the correct configuration.
Expected Outcome
You can confirm that a backup of the Management cluster has occurred in the past 24 hours.
Procedure
u Verify that the VADP-based backup solution is registered with the Management vCenter Server.
u Verify that all the services are correctly running on the storage solution.
u Verify that any proxies that have been deployed from the VADP-based backup solution are registered and running.
u Verify that sufficient space has been allocated for the Management cluster applications.
Note Consult the sizing guide for an estimate on the initial deployment size of the validated design.
u Verify that the VADP-based backup solution has successfully taken backups of the Management cluster in the past 24 hours.
Operational Verification
VMware, Inc. 57

Post-Upgrade Verification 5After an upgrade of the Software Defined Data Center, perform a post-upgrade verification to ensure that each SDDC component has been upgraded successfully.
n Version Verification of the Virtual Infrastructure Layer
After an upgrade of the virtual infrastructure layer, perform a post-upgrade verification to ensure that each component has been upgraded successfully.
n Version Verification of the Operations Management Layer
After an upgrade of the operations management layer, perform a post-upgrade verification to ensure that each component has been upgraded successfully.
n Version Verification of the Cloud Management Layer
After an upgrade of the cloud management layer, perform a post-upgrade verification to ensure that each component has been upgraded successfully.
n Version Verification of the Business Continuity Layer
After an upgrade of the business continuity layer, perform a post-upgrade verification to ensure that each component has been upgraded successfully.
Version Verification of the Virtual Infrastructure LayerAfter an upgrade of the virtual infrastructure layer, perform a post-upgrade verification to ensure that each component has been upgraded successfully.
n Verify the Version of Platform Service Controller
Verify the version of the Platform Services Controllers after performing an upgrade operation in the Software-Defined Data Center.
n Verify the Version of vCenter Server
Verify the version of the vCenter Server instances after performing an upgrade operation in the Software-Defined Data Center.
n Verify the Version of ESXi Host
Verify the version of the ESXi hosts after performing an upgrade operation in the Software-Defined Data Center.
n Verify the Version of NSX for vSphere
Verify the version of NSX Manager, NSX Controller, NSX Edge appliances, and NSX for vSphere Installation Bundles after performing an upgrade operation in the Software-Defined Data Center.
VMware, Inc. 58

Verify the Version of Platform Service ControllerVerify the version of the Platform Services Controllers after performing an upgrade operation in the Software-Defined Data Center.
Procedure
1 Log in to the management interface of the Platform Services Controller virtual appliance.
a Open a Web browser and go to https://sfo01m01psc01.sfo01.rainpole.local:5480.
b Log in using the following credentials.
Setting Value
User name root
Password mgmtpsc_root_password
2 Verify the version of the Platform Services Controller.
a In the Navigator, click Update.
b On the Update page, under Current version details, verify that Version shows the expected version number.
3 Repeat this procedure for the remaining Platform Services Controller instances.
Verify the Version of vCenter ServerVerify the version of the vCenter Server instances after performing an upgrade operation in the Software-Defined Data Center.
Procedure
1 Log in to the management interface of the vCenter Server Appliance.
a Open a Web browser and go to https://sfo01m01vc01.sfo01.rainpole.local:5480.
b Log in using the following credentials.
Setting Value
User name root
Password mgmtvc_root_password
2 Verify the version of the vCenter Server instance.
a In the Navigator, click Update.
b On the Update page, under Current version details, verify that Version shows the expected version number.
3 Repeat this procedure for the remaining vCenter Server instances.
Operational Verification
VMware, Inc. 59

Verify the Version of ESXi HostVerify the version of the ESXi hosts after performing an upgrade operation in the Software-Defined Data Center.
Procedure
1 Log in to the Management vCenter Server by using the vSphere Client.
a Open a Web browser and go to https://sfo01m01vc01.sfo01.rainpole.local/ui.
b Log in using the following credentials.
Setting Value
User name [email protected]
Password vsphere_admin_password
2 Navigate to the ESXi host.
a From the Home menu, select Hosts and Clusters.
b In the Navigator, expand sfo01m01vc01.sfo01.rainpole.local>sfo01-m01dc>sfo01-m01-mgmt01.
c Click the sfo01m01esx01.sfo01.rainpole.local host.
3 On the Summary tab, verify that the Hypervisor shows the expected version number for the ESXi host.
4 Repeat this procedure for all remaining ESXi hosts across all vCenter Server instances.
Verify the Version of NSX for vSphereVerify the version of NSX Manager, NSX Controller, NSX Edge appliances, and NSX for vSphere Installation Bundles after performing an upgrade operation in the Software-Defined Data Center.
Procedure
1 Log in to the Management vCenter Server by using the vSphere Client.
a Open a Web browser and go to https://sfo01m01vc01.sfo01.rainpole.local/ui.
b Log in using the following credentials.
Setting Value
User name [email protected]
Password vsphere_admin_password
2 From the Home menu, select Networking and Security.
Operational Verification
VMware, Inc. 60

3 Verify the version of NSX Manager and NSX Controller nodes.
a In the Navigator pane, click Installation and Upgrade.
b On the Management tab, under NSX Managers, verify that the Version column has the expected version number for each NSX Manager.
c Under NSX Controller nodes, verify that the Software Version column has the expected version number for each NSX Controller.
4 Verify the version of NSX Edge appliances.
a In the Navigator pane, click NSX Edges.
b From the NSX Manager drop-down menu, select the 172.16.11.65 NSX Manager.
c Verify the Version column has the expected version number for each NSX Edge.
5 Verify the version of NSX for vSphere Installation Bundles.
a In the Navigator pane, click Installation and Upgrade.
b Click the Host Preparation tab, and from the NSX Manager drop-down menu, select the 172.16.11.65 NSX Manager.
c In the Hosts table, verify that the NSX Installation column has the expected version number for each of the hosts.
6 Repeat this procedure for the remaining NSX Managers, NSX Edge appliances, and NSX for vSphere Installation Bundles for ESXi hosts.
Version Verification of the Operations Management LayerAfter an upgrade of the operations management layer, perform a post-upgrade verification to ensure that each component has been upgraded successfully.
n Verify the Version of vRealize Suite Lifecycle Manager
Verify the version of vRealize Suite Lifecycle Manager after performing an upgrade operation in the Software-Defined Data Center.
n Verify the Version of vRealize Operations Manager
Verify the version of the analytics and remote collector nodes of vRealize Operations Manager after performing an upgrade operation in the Software-Defined Data Center.
n Verify the Version of vRealize Log Insight
Verify the version of vRealize Log Insight nodes after performing an upgrade operation in the Software-Defined Data Center.
n Verify the Version of vSphere Update Manager Download Service
Verify the version of vSphere Update Manager Download Service (UMDS) after performing an upgrade operation in the Software-Defined Data Center.
Operational Verification
VMware, Inc. 61
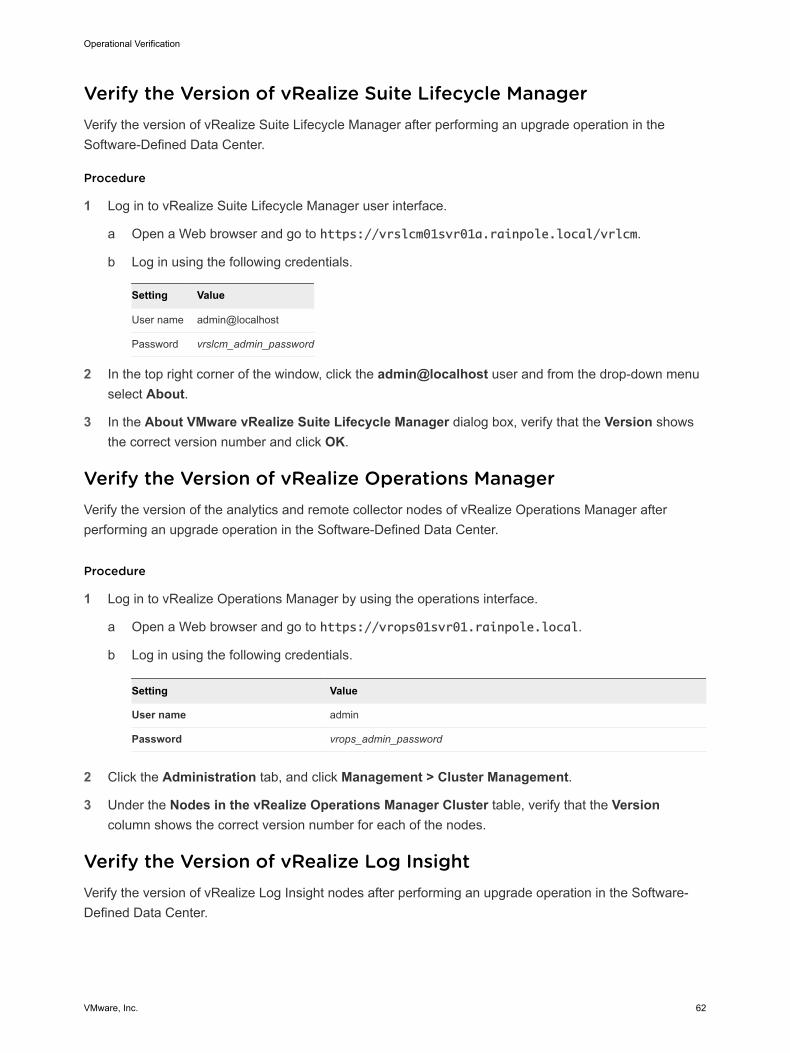
Verify the Version of vRealize Suite Lifecycle ManagerVerify the version of vRealize Suite Lifecycle Manager after performing an upgrade operation in the Software-Defined Data Center.
Procedure
1 Log in to vRealize Suite Lifecycle Manager user interface.
a Open a Web browser and go to https://vrslcm01svr01a.rainpole.local/vrlcm.
b Log in using the following credentials.
Setting Value
User name admin@localhost
Password vrslcm_admin_password
2 In the top right corner of the window, click the admin@localhost user and from the drop-down menu select About.
3 In the About VMware vRealize Suite Lifecycle Manager dialog box, verify that the Version shows the correct version number and click OK.
Verify the Version of vRealize Operations ManagerVerify the version of the analytics and remote collector nodes of vRealize Operations Manager after performing an upgrade operation in the Software-Defined Data Center.
Procedure
1 Log in to vRealize Operations Manager by using the operations interface.
a Open a Web browser and go to https://vrops01svr01.rainpole.local.
b Log in using the following credentials.
Setting Value
User name admin
Password vrops_admin_password
2 Click the Administration tab, and click Management > Cluster Management.
3 Under the Nodes in the vRealize Operations Manager Cluster table, verify that the Version column shows the correct version number for each of the nodes.
Verify the Version of vRealize Log InsightVerify the version of vRealize Log Insight nodes after performing an upgrade operation in the Software-Defined Data Center.
Operational Verification
VMware, Inc. 62

Procedure
1 Log in to the vRealize Log Insight user interface.
a Open a Web browser and go to https://sfo01vrli01.sfo01.rainpole.local.
b Log in using the following credentials.
Setting Value
User name admin
Password vrli_admin_password
2 Click the configuration drop-down menu , and click Administration.
3 Verify the version of the vRealize Log Insight cluster nodes.
a In the Navigator, under Management, click Cluster.
b In the Nodes table, verify that the Version column shows the correct version number for each of the nodes.
4 Repeat this procedure and validate for the lax01vrli01.lax01.rainpole.local vRealize Log Insight instance.
Verify the Version of vSphere Update Manager Download ServiceVerify the version of vSphere Update Manager Download Service (UMDS) after performing an upgrade operation in the Software-Defined Data Center.
Procedure
1 Log in to the UMDS virtual appliance by using a Secure Shell (SSH) client.
a Open an SSH connection to sfo01umds01.sfo01.rainpole.local.
b Log in using the following credentials.
Setting Value
User name svc-umds
Password svc-umds_password
2 Run the following command and verify the version of vSphere Update Manager Download Service.
cat /var/lib/vmware-umds/version.txt
3 Run the following command and verify the version of Nginx.
nginx -v
4 Repeat this procedure and validate for the lax01umds01.lax01.rainpole.local vSphere Update Manager Download Service instance.
Operational Verification
VMware, Inc. 63

Version Verification of the Cloud Management LayerAfter an upgrade of the cloud management layer, perform a post-upgrade verification to ensure that each component has been upgraded successfully.
n Verify the Version of vRealize Automation Appliance Nodes
Verify the version of the vRealize Automation appliance nodes after performing an upgrade operation in the Software-Defined Data Center.
n Verify the Version of vRealize Automation Windows Nodes
Verify the version of the vRealize Automation windows nodes after performing an upgrade operation in the Software-Defined Data Center.
n Verify the Version of vRealize Business for Cloud Nodes
Verify the version of the vRealize Business for Cloud instances after performing an upgrade operation in the Software-Defined Data Center.
Verify the Version of vRealize Automation Appliance NodesVerify the version of the vRealize Automation appliance nodes after performing an upgrade operation in the Software-Defined Data Center.
Procedure
1 Log in to the first vRealize Automation appliance.
a Open a Web browser and go to https://vra01svr01a.rainpole.local:5480
b Log in using the following credentials.
Settings Value
User name root
Password vra_appA_root_password
2 Click the Update tab and click the Status tab.
3 Verify that Appliance Version shows the correct version number.
4 Repeat this procedure for the vra01svr01b.rainpole.local and vra01svr01c.rainpole.local vRealize Automation appliances.
Verify the Version of vRealize Automation Windows NodesVerify the version of the vRealize Automation windows nodes after performing an upgrade operation in the Software-Defined Data Center.
Operational Verification
VMware, Inc. 64

Procedure
1 Log in to the Windows virtual machines of the vRealize Automation component.
a Open a Remote Desktop Protocol (RDP) connection to each of the following vRealize Automation virtual machines.
vRealize Automation Component FQDN Program Names for Version Validation
IaaS Web Server n vra01iws01a.rainpole.local
n vra01iws01b.rainpole.local
n VMware vCloud Automation Center Management Agent
n VMware vCloud Automation Center Servern VMware vCloud Automation Center WAPI
IaaS Manager Service and DEM Orchestrator
n vra01ims01a.rainpole.local
n vra01ims01b.rainpole.local
n VMware vCloud Automation Center DEM-Orchestrator - DEM-ORCHESTRATOR-xx
n VMware vCloud Automation Center Management Agent
n VMware vCloud Automation Center Server
vRealize Automation DEM Worker
n vra01dem01a.rainpole.local
n vra01dem01b.rainpole.local
n VMware vCloud Automation Center DEM-Worker - DEM-WORKER-xx
n VMware vCloud Automation Center DEM-Worker - DEM-WORKER-yy
n VMware vCloud Automation Center DEM-Worker - DEM-WORKER-zz
n VMware vCloud Automation Center Management Agent
vRealize Automation Proxy Agents
n sfo01ias01a.sfo01.rainpole.local
n sfo01ias01b.sfo01.rainpole.local
n lax01ias01a.lax01.rainpole.local
n lax01ias01b.lax01.rainpole.local
n VMware vCloud Automation Center Agents - VSPHERE-AGENT-xx
n VMware vCloud Automation Center Management Agent
b Log in using the following credentials.
Setting Value
User name Rainpole\svc-vra
Password svc-vra-user-password
2 From the Windows Start menu, select Control Panel > Programs > Programs and Features and verify that the Version column shows the correct version number for the program names as per the table.
Verify the Version of vRealize Business for Cloud NodesVerify the version of the vRealize Business for Cloud instances after performing an upgrade operation in the Software-Defined Data Center.
Operational Verification
VMware, Inc. 65

Procedure
1 Log in to the vRealize Business Server appliance management console.
a Open a Web browser and go to https://vrb01svr01.rainpole.local:5480.
b Log in using the following credentials.
Setting Value
User name root
Password vrb_server_root_password
2 Click the Update tab and click the Status tab.
3 Verify that the Appliance Version parameter shows the correct version number.
4 Repeat this procedure for the sfo01vrbc01.sfo01.rainpole.local and lax01vrbc01.lax01.rainpole.local vRealize Business Collector nodes.
Version Verification of the Business Continuity LayerAfter an upgrade of the business continuity layer, perform a post-upgrade verification to ensure that each component has been upgraded successfully.
n Verify the Version of Site Recovery Manager
Verify the version of the Site Recovery Manager instances after performing an upgrade operation in the Software-Defined Data Center.
n Verify the Version of vSphere Replication
Verify the version of the vSphere Replication instances after performing an upgrade operation in the Software-Defined Data Center.
Verify the Version of Site Recovery ManagerVerify the version of the Site Recovery Manager instances after performing an upgrade operation in the Software-Defined Data Center.
Procedure
1 Log in to the Site Recovery Manager virtual machine by using a Remote Desktop Protocol (RDP) client.
a Open an RDP connection to the sfo01m01srm01 virtual machine.
b Log in using the following credentials.
Settings Value
User name Windows administrator user
Password windows_administrator_password
2 From the Windows Start menu, select Control Panel > Programs > Programs and Features.
Operational Verification
VMware, Inc. 66

3 Verify that the Version column shows the correct version number for the following applications.
n VMware vCenter Site Recovery Manager
n VMware vCenter Site Recovery Manager Embedded Database
4 Repeat this procedure for the lax01m01srm01.lax01.rainpole.local Site Recovery Manager instance.
Verify the Version of vSphere ReplicationVerify the version of the vSphere Replication instances after performing an upgrade operation in the Software-Defined Data Center.
Procedure
1 Log in to the Virtual Appliance Management Interface of the vSphere Replication appliance.
a Open a Web browser and go to https://sfo01m01vrms01.sfo01.rainpole.local:5480.
b Log in using the following credentials.
Settings Value
User name root
Password vr_sfo_root_password
2 Click the Update tab and click the Status tab.
3 Verify that the Appliance Version parameter shows the correct version number.
4 Repeat this procedure for the lax01m01vrms01.lax01.rainpole.local vSphere Replication instance.
Operational Verification
VMware, Inc. 67

SDDC Startup and Shutdown 6When you perform patch, upgrade, recovery, or failover of the SDDC management applications, make sure that you start up and shut down the management virtual machines according to a predefined order.
n Shutdown Order of the Management Virtual Machines
Shut down the virtual machines of the SDDC management stack by following a strict order to avoid data loss and faults in the components.
n Startup Order of the Management Virtual Machines
Start up the virtual machines of the SDDC management stack by following a strict order to guarantee the faultless operation of and the integration between the components.
Shutdown Order of the Management Virtual MachinesShut down the virtual machines of the SDDC management stack by following a strict order to avoid data loss and faults in the components.
Before you begin:
n Verify that virtual machines are not running on snapshots.
n Ensure that verified backups of all management and tenant virtual machines are available.
n If a data protection (VADP) based backup solution is running on the management clusters, verify that the solution is properly shutdown following the vendor guidance.
n If the hosts in a vSAN cluster are to be shut down, appropriately shut down the tenant workloads in the shared edge and compute cluster.
Shutting down the ESXi hosts in the vSAN clusters:
n Refer to VMware Knowledge Base article 2142676 for information on preparing and shutting down ESXi hosts in vSAN clusters.
Shutting down the management virtual machines:
n Shut down the virtual machines of the SDDC management stack in the shutdown order provided in the following table.
VMware, Inc. 68

n Verify that the console of the virtual machine and its services are completely shut down before moving to the next virtual machine.
Note The vCenter Server instances, NSX load balancers for the Platform Services Controllers, the Platform Services Controllers, and the management clusters are the last virtual machines to be shut down.
Virtual Machine Name in Region A Virtual Machine Name in Region B Shutdown Order
vRealize Suite Lifecycle ManagerTotal Number of VMs (1)
- 1
vrslcm01svr01a - 1
vRealize Log InsightTotal Number of VMs (3)
vRealize Log InsightTotal Number of VMs (3)
2
sfo01vrli01c lax01vrli01c 1
sfo01vrli01b lax01vrli01b 1
sfo01vrli01a lax01vrli01a 2
vRealize Operations ManagerTotal Number of VMs (5)
vRealize Operations ManagerTotal Number of VMs (2)
2
sfo01vropsc01b lax01vropsc01b 1
sfo01vropsc01a lax01vropsc01a 1
vrops01svr01c - 2
vrops01svr01b - 3
vrops01svr01a - 4
vRealize Business for CloudTotal Number of VMs (2)
Realize Business for CloudTotal Number of VMs (1)
3
sfo01vrbc01 lax01vrbc01 1
vrb01svr01 - 2
vRealize AutomationTotal Number of VMs (12)
vRealize AutomationTotal Number of VMs (2)
4
vra01dem01b - 1
vra01dem01a - 1
sfo01ias01b lax01ias01b 1
sfo01ias01a lax01ias01a 1
vra01ims01b - 2
vra01ims01a - 2
vra01iws01b - 3
vra01iws01a - 4
vra01svr01c - 5
vra01svr01b - 5
Operational Verification
VMware, Inc. 69

Virtual Machine Name in Region A Virtual Machine Name in Region B Shutdown Order
vra01svr01a - 5
vra01mssql01 - 6
Site Recovery Manager and vSphere ReplicationTotal Number of VMs (2)
Site Recovery Manager and vSphere ReplicationTotal Number of VMs (2)
5
sfo01m01vrms01 lax01m01vrms01 1
sfo01m01srm01 lax01m01srm01 2
Update Manager Download Service (UMDS)Total Number of VMs (1)
Update Manager Download Service (UMDS)Total Number of VMs (1)
5
sfo01umds01 lax01umds01 1
Core StackTotal Number of VMs (26)
Core StackTotal Number of VMs (16)
6
sfo01m01lb01 (0,1) lax01m01lb01 (0,1) 1
sfo01m01udlr01 (0,1) - 1
sfo01m01esg01 lax01m01esg01 1
sfo01m01esg02 lax01m01esg02 1
sfo01w01udlr01 (0,1) - 1
sfo01w01dlr01 (0,1) lax01w01dlr01 (0,1) 1
sfo01w01esg01 lax01w01esg01 1
sfo01w01esg02 lax01w01esg02 1
sfo01m01nsx01 lax01m01nsx01 2
sfo01w01nsx01 lax01w01nsx01 2
sfo01m01nsxc01 - 3
sfo01m01nsxc02 - 3
sfo01m01nsxc03 - 3
sfo01w01nsxc01 - 3
sfo01w01nsxc02 - 3
sfo01w01nsxc03 - 3
sfo01m01vc01 lax01m01vc01 4
sfo01w01vc01 lax01w01vc01 4
sfo01psc01 (0,1) lax01psc01 (0,1) 5
sfo01w01psc01 lax01w01psc01 6
sfo01m01psc01 lax01m01psc01 6
Operational Verification
VMware, Inc. 70

Startup Order of the Management Virtual MachinesStart up the virtual machines of the SDDC management stack by following a strict order to guarantee the faultless operation of and the integration between the components.
Before you begin:
n Verify that external dependencies for the SDDC, such as Active Directory, DNS, NTP, SMTP, and FTP/SFTP are available.
Starting up the ESXi hosts in the vSAN clusters:
n If the vSAN clusters are shut down, refer to VMware Knowledge Base article 2142676 for information on starting up hosts and exiting maintenance mode.
Starting up the management virtual machines:
n Start up the virtual machines in the startup order provided in the following table.
n Verify that the console of the VM is available and all services of the VM are up, before proceeding with the next virtual machine.
n Refer to VMware Knowledge Base article 2142676 for information on verifying the health of the vSAN clusters before starting up tenant workloads.
n If a data protection (VADP) based backup solution is deployed on the management cluster, verify that the solution is properly started and operational, following the vendor guidance.
Virtual Machine in Region A Virtual Machine in Region B Startup Order
Core StackNumber of VMs (26)
Core StackNumber of VMs (16)
1
sfo01m01psc01 lax01m01psc01 1
sfo01w01psc01 lax01w01psc01 1
sfo01psc01 (0,1) lax01psc01 (0,1) 2
sfo01m01vc01 lax01m01vc01 3
sfo01w01vc01 lax01w01vc01 3
sfo01m01nsx01 lax01m01nsx01 4
sfo01w01nsx01 lax01w01nsx01 4
sfo01m01nsxc01 - 5
sfo01m01nsxc02 - 5
sfo01m01nsxc03 - 5
sfo01w01nsxc01 - 5
sfo01w01nsxc02 - 5
sfo01w01nsxc03 - 5
sfo01m01lb01 (0,1) lax01m01lb01 (0,1) 6
sfo01m01udlr01 (0,1) - 6
Operational Verification
VMware, Inc. 71

Virtual Machine in Region A Virtual Machine in Region B Startup Order
sfo01m01esg01 lax01m01esg01 6
sfo01m01esg02 lax01m01esg02 6
sfo01w01udlr01 (0,1) - 6
sfo01w01dlr01 (0,1) lax01w01dlr01(0,1) 6
sfo01w01esg01 lax01w01esg01 6
sfo01w01esg02 lax01w01esg02 6
Update Manager Download Service (UMDS)Total Number of VMs (1)
Update Manager Download Service (UMDS)Total Number of VMs (1)
2
sfo01umds01 lax01umds01 1
Site Recovery Manager and vSphere ReplicationTotal Number of VMs (2)
Site Recovery Manager and vSphere ReplicationTotal Number of VMs (2)
2
sfo01m01vrms01 lax01m01vrms01 1
sfo01m01srm01 lax01m01srm01 1
vRealize AutomationTotal Number of VMs (12)
vRealize AutomationTotal Number of VMs (2)
3
vra01mssql01 - 1
vra01svr01a - 2
vra01svr01b - 2
vra01svr01c - 2
vra01iws01a - 3
vra01iws01b - 4
vra01ims01a - 5
vra01ims01b - 6
sfo01ias01a lax01ias01a 7
sfo01ias01b lax01ias01b 7
vra01dem01a - 7
vra01dem01b - 7
vRealize Business for CloudTotal Number of VMs (2)
vRealize Business for CloudTotal Number of VMs (1)
4
vrb01svr01 - 1
sfo01vrbc01 lax01vrbc01 2
vRealize Operations Manager Total Number of VMs (5)
vRealize Operations ManagerTotal Number of VMs (2)
5
vrops01svr01a - 1
vrops01svr01b - 2
Operational Verification
VMware, Inc. 72

Virtual Machine in Region A Virtual Machine in Region B Startup Order
vrops01svr01c - 3
sfo01vropsc01a lax01vropsc01a 4
sfo01vropsc01b lax01vropsc01b 4
vRealize Log InsightTotal Number of VMs (3)
vRealize Log InsightTotal Number of VMs (3)
5
sfo01vrli01a lax01vrli01a 1
sfo01vrli01b lax01vrli01b 2
sfo01vrli01c lax01vrli01c 2
vRealize Suite Lifecycle ManagerTotal Number of VMs (1)
vRealize Suite Lifecycle ManagerTotal Number of VMs (0)
6
vrslcm01svr01a - 1
Operational Verification
VMware, Inc. 73