operation, cleaning, and maintenance manual · operation, cleaning, and maintenance manual 44 pro...
TRANSCRIPT
Issue Date: 8.1.17
Manual P/N 116113 rev. B
LISTED
2674 N. Service Road, Jordan Station Ontario, Canada L0R 1S0(905) 562-4195 Fax: (905) 562-4618 Toll-free: 1 (800) 263-5798
3765 Champion Boulevard Winston-Salem, NC 27105(336) 661-1556 Fax: (336) 661-1660 Toll-free: 1 (800) 858-4477
Printed in the USA
Operation, Cleaning, and Maintenance Manual
www.championindustries.com
44 PRO
For machines beginning with S/N RP17011002 and above
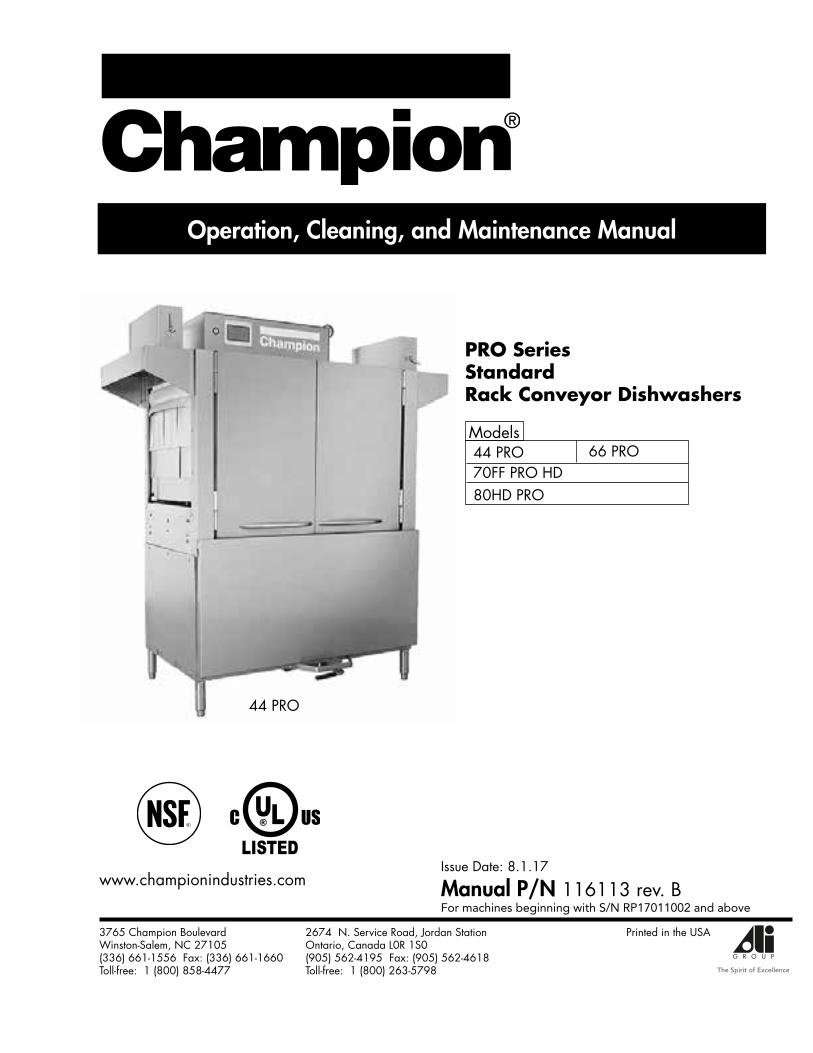
PRO Series Standard Rack Conveyor Dishwashers
44 PRO Models
66 PRO70FF PRO HD 80HD PRO

COPYRIGHT © 2017 All rights reserved Printed in the USA
ATTENTION
The model no., serial no., voltage, Hz and phase are needed to identify your
machine and to answer questions.
The machine data plate is located on the right front corner
of the lower panel
Please have this information ready if you call for service assistance.
National Service Department
In Canada: In the USA: Toll-free: (800) 263-5798 Toll-free: (800) 858-4477Tel: (905) 562-4195 Tel: (336) 661-1556 Fax: (905) 562-4618 Fax: (336) 661-1660 email: [email protected] email: [email protected]
The USGBC Member Logo is a trademark owned by the U.S. Green Building Council and is used by permission. The logo signifies only that Champion Industries is a USGBC member; USGBC does not review, certify or endorse the products or services offered by its
members.

Two ways to REGISTER YOUR PRODUCT and ACTIVATE YOUR WARRANTY.
• Use your mobile or computer to go to our website at www.championindustries.com and register your product there.
• Use the fax form on the next page.
Product Registration
4:34 PM 44%

PRODUCT REGISTRATION
BY FAX
IMPORTANT IMPORTANT
Model Serial #
Date of Installation:
Company Name:
Telephone #: ( ) ---Contact:
Address:
Address:
Telephone #:
Contact:
Installation Company:
(Street) Province Postal Code
FAILURE TO REGISTER YOUR PRODUCT MAY VOID YOUR WARRANTY
PRODUCT REGISTRATION CARD
(336) 661-1660 in the USA
1-(800) 204-0109 in Canada
COMPLETE THIS FORM AND FAX TO:
Product Registration

i
Revision History
Revision History
A revision might be a part number change, new instructions, or information that was not available at print time. We reserve the right to make changes to this manual without notice and without incurring any liability by making the changes. Dishwasher owners may request a revised manual, at no charge, by calling (800) 858-4477 in the USA or (800) 263-5798 in Canada.
Revision Revised Serial Number Description Date Pages Effectivity
2.2.17 All RP17011002 Released First Edition
6.15.17 10 All Revised 'Below Temp' feature.
8.1.17 IFC All Added USGBC
4-5 Added prewash assembly procedures

ii
Limited Warranty
LIMITED WARRANTYChampion Industries (herein referred to as “The Company”), 3765 Champion Blvd., Winston-Salem, North Carolina 27105, and 2674 N. Service Road, Jordan Station, Ontario, Canada, L0R 1S0, warrants machines, and parts, as set out below.
Warranty of Machines: The Company warrants all new machines of its manufacture bearing the name “Champion and installed within the United States and Canada to be free from defects in material and workmanship for a period of one (1) year after the date of installation or fifteen (15) months after the date of shipment by The Company, whichever occurs first. [See below for special provisions relating to glasswashers.] Warranty registration must be submitted to The Company within ten (10) days after installation either online on the Champion Industries website (http://www.championindustries.com, in the USA or http://www.championindustries.com/canada in Canada or by the fax form provided at the front of this manual. The Company will not assume any responsibility for extra costs for installation in any area where there are jurisdic-tional problems with local trades or unions.
If a defect in workmanship or material is found to exist within the warranty period, The Company, at its election, will either repair or replace the defective part or accept return of the machine for full credit; provided; however, as to glasswashers, The Company’s obligation with respect to labor associated with any repairs shall end (a) 120 days after shipment, or (b) 90 days after installation, whichever occurs first. In the event that The Company elects to repair, the labor and work to be performed in connection with the warranty shall be done during regular working hours by a Champion authorized service technician. Defective parts become the property of The Company. Use of replacement parts not authorized by The Company will relieve The Company of all further liability in connection with its warranty. In no event will The Company’s warranty obli-gation exceed The Company’s charge for the machine. The following are not covered by The Company’s warranty: a. Lighting of gas pilots or burners. b. Cleaning of gas lines. c. Replacement of fuses or resetting of overload breakers. d. Adjustment of thermostats. e. Adjustment of clutches. f. Opening or closing of utility supply valves or switching of electrical supply current. g. Cleaning of valves, strainers, screens, nozzles, or spray pipes. h. Performance of regular maintenance and cleaning as outlined in the operator’s guide. i. Damages resulting from water conditions, accidents, alterations, improper use, abuse, tampering, improper installation, or failure to follow maintenance and operation procedures. j. Wear on Pulper cutter blocks, pulse vanes, and auger brush.
Examples of the defects not covered by warranty include, but are not limited to: (1) Damage to the exterior or interior finish as a result of the above, (2) Use with utility service other than that designated on the rating plate, (3) Improper connection to utility service, (4) Inadequate or excessive water pressure, (5) Corrosion from chemicals dispensed in excess of recommended concentrations, (6) Failure of electrical components due to connection of chemical dispensing equipment installed by others, (7) Leaks or damage resulting from such leaks caused by the installer, including those at machine table connections or by connection of chemical dispensing equipment installed by others, (8) Failure to comply with local building codes, (9) Damage caused by labor dispute.
Warranty of Parts: The Company warrants all new machine parts produced or authorized by The Company to be free from defects in material and workmanship for a period of 90 days from date of invoice. If any defect in material and work-manship is found to exist within the warranty period The Company will replace the defective part without charge.
DISCLAIMER OF WARRANTIES AND LIMITATIONS OF LIABILITY. THE COMPANY’S WARRANTY IS ONLY TO THE EXTENT REFLECTED ABOVE. THE COMPANY’S MAKE NO OTHER WARRANTIES, EXPRESS OR IMPLIED, INCLUDING, BUT NOT LIMITED, TO ANY WARRANTY OF MERCHANTABILITY, OR FITNESS OF PURPOSE. THE COMPANY SHALL NOT BE LIABLE FOR INCIDENTAL OR CONSEQUENTIAL DAMAGES. THE REMEDIES SET OUT ABOVE ARE THE EXCLUSIVE REMEDIES FOR ANY DEFECTS FOUND TO EXIST IN THE COMPANY’S’ DISHWASHING MACHINES AND THE COMPANY’S PARTS, AND ALL OTHER REMEDIES ARE EXCLUDED, INCLUDING ANY LIABILITY FOR INCIDENTALS OR CONSEQUENTIAL DAMAGES. The Company does not authorize any other person, including persons who deal in Champion dishwashing machines to change this warranty or create any other obligation in connection with Champion dishwashing machines.

iii
Table of Contents
Revision History ................................................................................................................ i Limited Warranty ............................................................................................................. ii Model Descriptions .......................................................................................................... iv
Table of Contents
Operation ......................................................................................... 1 Set-up ....................................................................................................... 1 Sequence of Operation .............................................................................. 9 Control Panel Description.......................................................................... 10 Displays ................................................................................................. 11
Initial Fill ........................................................................ 11 Check Drain ................................................................... 11 Heating and Ready ......................................................... 12 Wash - Final Rinse........................................................... 13 Dwell ............................................................................. 14 Door Open .................................................................... 15 Table Full ....................................................................... 15 Conveyor Jam ................................................................ 16 Change Water ............................................................... 17
Cleaning ............................................................................................18 Intervals ............................................................................................. 18 Pump Suction Strainer .......................................................................... 19 Wash Arms ........................................................................................ 20 Rinse Arms ......................................................................................... 21 Exterior .............................................................................................. 21 Deliming ............................................................................................ 22
Maintenance .......................................................................................23 Maintenance Schedules ................................................................... 23 Troubleshooting Chart ...................................................................... 24

iv
Model Sizes
Minimum Operating Temperatures
Table 2
Table 1
Model Descriptions
44 PRO 44" Single Tank Rack Conveyor
66 PRO 44" Single Tank Rack Conveyor with 22" Prewash Tank
70FF PRO 44" Single Tank Rack Conveyor with 26" Front feed Prewash Tank
80HD PRO Heavy Duty 44" Single Tank Rack Conveyor with 36" Prewash Tank
MODEL PREWASH TANK WASH TANK FINAL RINSE
44 PRO — 44" 54 PRO — 54" N/A 160°F/71°C 180-195°F/82-91°C
66 PRO — 44" + 22" PW 70FF PRO — 44 + 26" PW 80HD PRO — 44" + 36" PW
Not to exceed 140°F/60°C 160°F/71°C 180-195°F/ 82-91°C

1
Operation
SET UP
CAUTION: There may be more than one power source.
FILL CHEMICAL SUPPLY CONTAINERS.
TURN WATER, ELECTRICAL AND STEAM SUPPLIES ON.
CLOSE DISHWASHER DRAIN(S).
SETUP
Fig. 1

2
Operation
Install the Wash Scrap Screens
INSTALL THE SCRAP SCREENS.
INSTALL THE SCRAP SCREENS.
INSTALL THE SCRAP BASKET.
INSTALL THE SCRAP BASKET.
2
2
1
1
Fig. 4
Fig. 2 Fig. 3
SETUP
Install the Prewash Scrap Screens
Fig. 5

3
Operation
Install the Wash Arms
SLIDE UPPER WASH ARM INTO TRACKS MAKING SURE IT ENGAGES THE WASH MANIFOLD. PUSH WASH ARM UP UNTIL THE LATCHES LOCK IT IN PLACE.1
SLIDE LOWER WASH ARM INTO TRACKS MAKING SURE IT ENGAGES THE WASH MANIFOLD. PUSH THE END OF THE WASH ARM DOWN TO LOCK IT IN PLACE.2
MANIFOLD
LATCH LATCH
MANIFOLD
Fig. 6
Fig. 7

4
Operation
Install the Prewash Arms
SLIDE UPPER WASH ARM INTO TRACKS MAKING SURE IT ENGAGES THE WASH MANIFOLD. PUSH WASH ARM UP UNTIL THE LATCHES LOCK IT IN PLACE.1
SETUP
Fig. 8 - 22" Prewash Tank
Fig.9 - 36" Prewash Tank

5
Operation
MAKE SURE THE CLEAN-OUT PLUGS AND O-RINGS ARE INSTALLED.
INSTALL THE SIDE WASH SPRAY PIPE(S). TURN TO LOCK IN PLACE.
2
3
Fig. 10
Fig. 11
22" Prewash Tank 36" Prewash Tank

6
Operation
Curtain Locations
Fig. 12
Wash
Long CurtainLong CurtainShort
Curtain
Curtain Size
Wash Prewash
Long CurtainLong Curtain
ShortCurtain
LONG 24" x 20-1/4" [610mm x 514mm] P/N 113720
ROD, 5/16" x 24-5/8" P/N 108250
SHORT 24" x 6-1/4" [610mm x 159mm] P/N 109723
ROD, 5/16" x 23-1/2" P/N 1113012

7
Operation
Curtain
Curtain Hook
Curtain Installation
CAUTION: Failure to properly install a curtain may adversely affect the operation of the machine.
LABELS ON THE FRONT OF THE MACHINE INDICATE THE CURTAIN LOCATIONS.
HANG THE CURTAINS ON THE HOOKS LOCATED ON EACH SIDE OF THE HOOD.
MAKE SURE THE CURTAIN SHORT FLAPS FACE THE LOAD END OF THE MACHINE.
Fig. 13

8
Operation
Operation - Loading Dish Racks
Fig. 14
REMOVE FOOD REMNANTS FROM THE WARES BEFORE LOADING THEM INTO DISH RACKS.
DO NOT OVERLOAD RACKS. SPACE WARES EVENLY IN THE DISH RACK.
LOAD PLATES IN A PEG RACK, BOWLS AND GLASSES IN A FLAT-BOTTOM RACK. LOAD SILVERWARE IN A SINGLE LAYER IN A FLAT-BOTTOM RACK. LOAD POTS, PANS AND UTENSILS UPSIDE DOWN IN A FLAT-BOTTOM RACK. LOAD BAKE SHEETS AND TRAYS LONG SIDE UP IN A SHEET PAN RACK

9
Operation
Sequence of Operation
1. Close the drain valve(s). Touch the Green Power button. The dishwasher will begin the automatic fill. The display screen will illuminate; a flashing faucet appears and FILLING displays in the status bar.
2. CHECK DRAIN: During the initial fill, if the machine does not fill within 5 minutes, the machine will stop filling and CHECK DRAIN will appear in the status bar. Check the machine drain to ensure it is closed. To reset: touch the Wrench symbol to go to the settings screen, touch 'Reset'. The machine will begin filling again. Touch 'MAIN' and return to the operation screen.
3. The incoming wash temperature displays in the Wash °F box. The final rinse temperature displays in the Rinse °F box during the final rinse, the final rinse temperature display is blank at all other times.
4. READY: The status bar indicates 'READY' when the machine is full of water. WAIT FOR THE WASH TEMPERATURE to read 160°F/71°C before inserting a dish rack into the machine.
5. Slide a dish rack into the machine until the wash pump(s) start. The conveyor will catch the rack and move it through the machine. The minimum wash temperature displayed must be 160°F/71°C when the rack is in the wash zone. The final rinse temperature displayed when the dish rack is in the final rinse zone must be 180-195°F/82-90°C. The dishwasher runs for 90 seconds for one rack, inserting additional racks continues the automatic operation until the last rack exits the machine. CAUTION: Take care as hot dish racks exit the machine.
6. DWELL: Dwell allows the operator to pause heavily soiled wares in the wash zone for 10 seconds. To activate DWELL: Slide a dish rack into the machine until the conveyor catches the rack, then immediately touch the 'DWELL' button on the Touch Panel/Display. The rack will pause in the wash zone for 10 seconds. Wait until dish rack has left the wash zone before inserting another rack. The dwell button must be touched for each rack that requires extra washing.
7. TABLE FULL: An optional table limit switch, (TLS), is available to stop the conveyor when too many dish racks are allowed to accumulate on the clean dish table. When this happens, 'TABLE FULL' appears in the status bar and the dishwasher pump(s), conveyor and final rinse stop. Remove dish racks from the unload table to reset the TLS, then insert a dish rack to restart the machine.
8. CONVEYOR JAM: If the conveyor jams, the pumps and conveyor stop and 'CONVEYOR JAM' appears in the status bar. Remove any dish racks in the machine and clear the jam. Insert a rack into the machine to restart normal operation.
9. DOOR OPEN: 'DOOR OPEN' appears in the status bar whenever a door is opened. The status bar displays 'READY' when the door is closed. Insert a dish rack to start the pumps and conveyor drive.
10. CHANGE WATER: The dishwasher should be drained and refilled with fresh water every two hours of continuous operation. 'Change Water' appears in the status bar to remind the operator to perform this function. The dishwasher should also be drained and cleaned every eight hours of continuous operation and at the end of the day, whichever occurs first.

10
Operation
Operation - Control Panel Description
Fig. 16
Wash °F Rinse °F Start
Stop 160 180
Settings Menu
Status Bar
Displays in °F or °C during the final rinse.
Displays in °F or °C when the machine is on.
Fill Symbol
FILLING
Start
Stop
The Start/Stop button changes from a
Green Start to a Red Stop.
Fig. 15
Power On Pushbutton
Touch Control Panel and Display

11
Operation
Displays
Wash °F Rinse °F Start
FILLING
124Fig. 17
Push the Green Power button ON. The display illuminates, the fill symbol flashes,and 'Filling' appears in the status bar.
The wash temperature displays. The rinse temperature display is blank; it only displays a temperature during the final rinse.2
INITIAL FILL —
CHECK DRAIN— If the machine does not fill within 10 minutes, the fill stops and 'CHECK DRAIN' appears in the status bar. Make sure the drain valves are closed.
Fig. 18Continued on next page.
Wash °F Rinse °F Start
CHECK DRAIN
124Wash °F Rinse °F Start
CHECK DRAIN
124
To reset the check drain: Touch the wrench symbol to access the maintenance menu.
1
1

12
CHECK DRAIN (continued)
Operation
The display indicates 'BELOW TEMP' when the tank is full of water but has not reached the preset temperature. The preset temperature is usually set to 165°F/74°C. 1
The display indicates 'READY' when the wash tank reaches the preset temperature.2
BELOW TEMP — READY
Fig. 20
Wash °F Rinse °F
BELOW TEMP
150Wash °F Rinse °F Start
READY
165
Touch 'FILL RESET' and then 'MAIN' to clear the 'CHECK DRAIN' message. The display will return to the 'FILLING' shown in Fig. 17.2
Fig. 19
MAINT
TEMPS MAIN
I/O
MANUALS FILL RESET
MAINT
TEMPS MAIN
I/O
MANUALS FILL RESET
DEFAULT SETTING: MACHINE WILL WASH WHEN 'START' IS PRESSED. OPTIONAL SETTING: THE MACHINE WILL NOT WASH UNTIL THE PRESET TEMPERATURE IS ACHIEVED.

13
Operation
Displays (continued)
Touch the Green 'Start' button when 'READY' appears in the status bar. The button will change to a Red 'Stop' button.1
Insert a dish rack into the machine, the pumps and conveyor will start automatically. The minimum wash temperature is 160°F/71°C.
The final rinse temperature is displayed when the dish rack enters the final rinse zone. The final rinse temperature must be between 180-195°F/82-90°C.
Slide the dish rack out of the machine. The machine will stop automatically and the display will return to 'READY' unless another dish rack is loaded into the machine.
2
3
4
WASH — FINAL RINSE
Fig. 21
Wash °F Rinse °F Start
READY
165 165Stop
Wash °F Rinse °F
DWELL
Wash °F Rinse °F
Stop 165 180
DWELL
Wash °F Rinse °F Start
READY
165

14
Operation
TO WASH MULTIPLE DISH RACKS USING THE 'DWELL' FEATURE:
Insert the first rack and touch the 'DWELL' button to begin.
Wait for the first rack to pause (10 secs. for 44 PRO, 15 secs. for 66 Pro) then insert another rack into the machine and immediately touch the 'DWELL' button.
Repeat this process until the last dish rack of heavily soiled wares is inserted into the machine. The dwell operation will stop after the last rack exits the machine.
1
2
3
Insert a dish rack of heavily soiled dishes into the machine. 'DWELL' appears on the display.
Immediately touch the 'DWELL' button when it appears. It will turn red when touched indicating dwell is activated. The conveyor will stop the rack for ten seconds when it is in the wash zone. The rack will then continue to the final rinse zone and exit the machine.
The DWELL function ends when the dish rack exits the machine.
1
2
3
DWELL — Ten second wash delay for a single dish rack.
Fig. 22
165Stop
Wash °F Rinse °F
DWELL
Wash °F Rinse °F
Stop
READY
165
DWELL — Wash delay for multiple dish racks.

15
Wash °F Rinse °F
Stop
TABLE FULL
160
TABLE FULL — The machine stops if too many dish racks have accumulated on the dishwasher unload table, tripping the table limit switch.
DOOR OPEN — The machine stops if a dishwasher door is opened.
Wash °F Rinse °F Start
DOOR OPEN
160Fig. 23
Operation
Displays - ALARMS
To clear the 'DOOR OPEN' alarm:
Close the door.
'READY' will appear in the status bar.
Insert a dish rack to restart the machine.
To clear the 'TABLE FULL' alarm:
Remove the dish racks on the unload table. Remove any dish racks inside the machine for reprocessing. Insert a dish rack to restart the machine.
Fig.24

16
Operation
ALARMS
To clear the 'CONVEYOR JAM' alarm:
Open the doors and remove any dish racks inside the machine. Inspect the conveyor pawl bar and drive blocks for foreign objects and remove. Close the doors and insert a rack into the machine to restart.
Fig. 25
CONVEYOR JAM — The machine stops if the conveyor is overloaded or an object interferes with the conveyor's movement.
Wash °F Rinse °F
Stop
CONVEYOR JAM
160

17
ALARMS
To clear the 'CHANGE WATER' alarm:
1. Touch the red 'STOP' display button. 2. Open the doors. 'DOOR OPEN' appears in the status bar.
3. Open the drain and allow the machine to drain completely.
4. Close the doors. The machine will begin to fill and heat automatically.
5. Touch the green 'START' button when 'READY' appears in the status bar.
6. Insert a dish rack to start the machine.
CHANGE WATER — This OPTIONAL alarm prompts the operator to drain the machine and refill with fresh water after an extended period of operation. The Change Water alarm does not stop the dishwasher.
Operation
Wash °F Rinse °F
Stop
CHANGE WATER
165Fig. 26

18
Cleaning
Daily or every 2 hours of operation
1. Turn power switch to OFF.2. Pull drain lever(s) to drain water. Remove scrap screens and scrap baskets.
Clean inside of the tanks and flush with clean water. Back flush the scrap screens until clean. DO NOT STRIKE SCREENS OR BASKETS AGAINST SOLID OBJECTS
3. Remove the spray arm assemblies. Remove the end cap from each spray arm.4. Flush the spray arms and nozzles to remove any debris. 5. Replace the end caps. Check the condition of the manifold O-ring. 6. Reinstall the spray arms.7. Remove and clean the curtains. Allow them to dry at the end of the day.8. Leave the doors open between operations, allowing the machine to dry.9. Make sure that the final rinse nozzles are clear of mineral deposits.10. Straighten a metal paper clip to clean the nozzles. 11. Check the temperature and pressure gauge readings during operation.12. Inspect the machine for signs of water leaks.13. Check the chemical supplies and refill as necessary.
Cleaning - Intervals
Cleaning your dishwasher is the best maintenance you can do. The cleaning intervals below are the minimum requirements for most dishwashers. You may need to clean your dishwasher more often when washing heavily soiled wares or during long periods of continuous operation.
At the End of the Day
1. Perform Steps 1-10 as listed above.
2. Remove the curtains and clean with fresh water. DO NOT USE STEEL WOOL TO CLEAN THE INTERIOR OF THE MACHINE.
3. Wipe the interior and exterior of the machine with a soft cloth and a mild detergent. DO NOT HOSE THE EXTERIOR OF THE MACHINE WITH WATER.
4. Reassemble the dishwasher and leave the doors open to allow overnight drying.
5. Contact the chemical supplier for deliming if required.

19
Cleaning
Cleaning
PUMP SUCTION STRAINER — The pump suction strainer is located in the bottom of the wash tank(s) and is the most neglected cleaning task.
CAUTION: Failure to clean the pump suction strainer significantly reduces wash results.
TO CLEAN THE PUMP SUCTION STRAINER:
Perform the cleaning procedures shown on the next pages before cleaning the strainer.
Refer to Fig. 27 below and note the location of the strainer on the tank wall. Pull the strainer straight up to remove.
Refer to Fig. 28 below and note the screen on the bottom of the strainer. Thoroughly clean this screen.
1
2
3
Pump Suction Strainer
Fig. 27 Fig. 28

20
Cleaning
Cleaning
WASH ARMS — The upper and lower wash arms should be removed and cleaned after eight hours of continuous operation and at the end of the day.
Rotate the wash arm end plugs 1/4 turn and pull out to remove.1
Inspect the wash arm O-ring. Damage significantly reduces wash performance.2
Flush the wash arms and inspect the wash arm nozzles to ensure they are clean.3
Inspect the wash manifold O-ring. Damage significantly reduces performance.4
Remove the Prewash sidewash pipe plugs and flush pipes clean (see Fig. 31).5
Wash end plug O-ring.
Fig. 29
Fig. 30
Wash manifold O-ring
Fig. 31

21
Cleaning
RINSE ARMS — The upper and lower rinse arm nozzles should be cleaned regularly to prevent scale build-up.
Rotate the rinse arm 1/4 turn and pull to remove from the rinse manifold.1
TO CLEAN THE RINSE ARMS:
Inspect the rinse arm O-rings and replace if damaged or worn.2
Use a straightened paper clip to clean the rinse arm nozzles.3
Remove the end plug and flush to remove any debris.4
Wash end plug
O-rings.
Fig. 32 Fig. 33
End plug and O-ring.
EXTERIOR —
CAUTION: NEVER HOSE THE EXTERIOR OF THE MACHINE WITH WATER.
Use a soft cloth and mild detergent.1
TO CLEAN THE MACHINE EXTERIOR:
Leave the doors open to aid in overnight drying.2

22
CAUTION: Deliming agents can cause chemical burns. Wear rubber gloves, eye protection and any other protective clothing as instructed by a qualified chemical supplier.
CAUTION:Follow all of the chemical supplier's instructions when deliming the dishwasher.
WARNING:Death or injury can result from toxic fumes when deliming agents come in contact with Chlorine Bleach or other chemicals that contain iodine, bromine, or fluorine.
USE EXTREME CAUTION WHEN HANDLING ANY DELIMING AGENT.
Deliming
Lime (scale) deposits on the surface of the dishwasher are caused by minerals in the water supply. The amount of scale in the machine depends on the geography of the region.
Deliming

23
Weekly1. Inspect all water lines for leaks and tighten at joints if required.
2. Clean any detergent residue from the exterior of the machine.
3. Check that the drain/overflow pipes seat tightly in their drains.
4. Clean any accumulated scale from the heating element.
5. Inspect the spray arms for any damage or missing parts.
6. Inspect the final rinse arms for missing parts.
7. Inspect the pawl bar and drive assembly for damage or missing parts.
8. Check that float switches move freely.
9. Check the idle pump actuator and the final rinse actuator for freedom of travel.
Maintenance
Maintenance
Monthly1. Inspect interior of machine for lime deposits and clean.
2. Check o-rings on spray arm piping connections.
3. Check that the drain/overflow o-rings are in place and in good condition.
4. Clean any accumulated scale from the heating element.
5. Inspect the spray arms o-rings and ensure all plugs are installed.
6. Inspect the final rinse arms for missing parts and are clean.
7. Inspect the pawl bar and drive assembly for damage or missing parts.
8. Check that float switches move freely.
9. Check the idle pump actuator and the final rinse actuator for freedom of travel.
10. Check the drive clutch and adjust as necessary.
11. Check the pump rotation and direction of rotation.
12. Check the operation of temperature gauges or displays.
13. Perform complete operation check.
Yearly1. Contact authorized service agent to perform complete maintenance
review of machine.
2. Correct any abnormal situations as recommended.

24
Condition Cause SolutionDishwasher will not run.
Low or no water.
Door not closed.Main power OFF.Dishwasher OFF.Dish rack not inserted.
Main water supply off.PRV setting incorrectSolenoid strainer clogged.Solenoid valve defective.
Close door completely.Check breaker on panel.Turn dishwasher ON. Insert dishrack into machine.
Open supply valve.Adjust the PRV settingClean strainer.Contact Service Agent.
Dishwasher conveyor stops for 10 seconds.
Conveyor jammed or tablelimit switch has stoppedconveyor.
DO not touch ‘DWELL’button when loading rack.
Poor wash results. Detergent not added to tank.Wares incorrectly loaded. in dishrack.
Clogged screens .Clogged spray arms.
Thermostat defective.
End plugs missing.
Water temperature low.
Check detergent suppy.
Reposition wares or reduce amount of wares.
Clean screens..Clean spray arms.
Contact Service Agent.
Check spray arms.
Check incoming water temperature.
Dishwasher conveyorwill not run.
‘DWELL’ feature in action.
Check conveyor for jamsRemove racks from loadend of table.
Before calling for service check the following conditions.
1. Dishwasher main power and water supply is on.
2. Machine has been assembled correctly.
3. Conveyor is clear of any obstructions.
4. Drains are closed.
5. Screens and pump intake screens are clear.
6. Doors are closed and secure.
Troubleshooting