operating instructions ranger counting scale · ohaus corporation 29 hanover road florham park, nj...
TRANSCRIPT

Ohaus Corporation29 Hanover RoadFlorham Park, NJ07932-0900
Operating InstructionsRanger Counting Scale
RangerClear
ScaleSelect CountWeight Sample
Size
10 Sample
APWCount

Ohaus Corporation, 29 Hanover Road, Florham Park, New Jersey, 07932, USA
Declaration of Conformity We, Ohaus Corporation, declare under our sole responsibility that the balance models listed belowmarked with “CE” - are in conformity with the directives and standards mentioned.Konformitätserkärung Wir, die Ohaus Corporation, erklären in alleiniger Verantwortung, dass die untenstehendenWaagentypen, gekennzeichnet mit “CE” - mit den genannten Richtlinien und Normen übereinstimmen.Déclaration de conformité Nous, Ohaus Corporation, déclarons sous notre seule responsabilité, que les types de balance ci-dessous cité - munis de la mention «CE» - sont conformes aux directives et aux normes mentionnées ci-après.Declaración de Conformidad Nosotros, Ohaus Corporation, declaramos bajo responsabilidad exclusiva que los modelos debalanzas indicados a continuación - con el distintivo ,CE’ - están conformes con las directivas y normas citadas.Dichiarazione di conformità Noi, Ohaus Corporation, U.S.A, dichiariamo sotto nostra unica responsabilità, che i tipi di bilancespecificati di seguito - contrassegnati con la marcatura “CE” - sono conformi alle direttive e norme citate.
Balance Type/Waagentyp/Type de balance/Tipo de balanza/Tipo di bilancia Ranger Scale
Marked with: Directive Standardgekennzeichnet mit: Richtlinie Norm
munis de la mention: Directive Norme con el distintivo: Directiva Norma contrassegnati con la Direttiva Norma marcatura:
EU 73/23/EEC Low Voltage EN61010-1:1993 + A2: 1995 Safety RegulationsEU 73/23/EEC Niederspannung EN61010-1:1993 + A2: 1995 SicherheitsbestimmungenEU 73/23/EEC Basse tension EN61010-1:1993 + A2: 1995 Consignes de sécuritéEU 73/23/EEC Baja tensión EN61010-1:1993 + A2: 1995 Disposiciones sobreseguridadEU 73/23/EEC Bassa tensione EN61010-1:1993 + A2: 1995 Prescrizioni di sicurezza
EU 89/336/EEC EN55011: 1991 (class B) Emissions; EN61000-3-2Electromagnetic compatibility EN50082-2:1995 Immunity; EN61000-3-3EU 89/336/EEC EN55011: 1991 (class B) Funkstörungen; EN61000-3-2elektromagnetische Verträglichkeit EN50082-2:1995 Immunität; EN61000-3-3EU 89/336/EEC EN55011: 1991 (class B) Emissions parasites; EN61000-3-2Compatibilité électromagnétique EN50082-2:1995 Immunité; EN61000-3-3EU 89/336/EEC EN55011: 1991 (class B) Radiointerferencias; EN61000-3-2Compatibilidad electromagnética EN50082-2:1995 Inmunidad; EN61000-3-3EU 89/336/EEC EN55011: 1991 (class B) Radiointerferenze; EN61000-3-2Compatibilità elettromagnetica EN50082-2:1995 Immunità; EN61000-3-3
Year ofattachment ofthe CE mark
Jahr der erstenEichung
Année de lapremèrevérification
Año de laprimeraverificación
annodellaprima verifica
ISO 9001 Registration for Ohaus Corporation. Ohaus Corporation, USA, was examined and evaluated in 1994 by the Bureau Veritas Quality International,BVQI, and was awarded ISO 9001 registration. This certifies that Ohaus Corporation, USA, has a quality system that conforms with the international standards for qualitymanagement and quality assurance (ISO 9000 series). Repeat audits are carried out by BVQI at intervals to check that the quality system is operated in the proper manner.
ISO 9001-Zertifikat für Ohaus Corporation. Die Firma Ohaus Corporation, USA, wurde 1994 durch das Bureau Veritas Quality International BVQI geprüft, underhielt das ISO 9001 Zertifikat. Dieses bescheinigt, dass Ohaus Corporation, USA über ein Qualitätssystem verfügt, welches den internationalen Normen fürQualitätsmanagement und Qualitátssicherung (ISO 9000er-Reihe) entspricht. Anlässlich von Wiederhol-Audits durch das BVQI wird periodisch überprüft, ob dasQualitätssystem zweckmässig gehandhabt wird.
Certificat ISO 9001 pour Ohaus Corporation. La société Ohaus Corporation, USA, a été contrôlée en 1994 par Bureau Veritas Quality International BVQI et aobtenu le certificat, degré ISO 9001. Celui-ci atteste que Ohaus Corporation, USA, dispose d’un système qualité correspondant aux normes internationales pour la gestionde la qualité et pour I’assurance qualité (degré ISO 9000). Des audits réguliers effectués par la BVQI vérifient si le système qualité est appliqué de facon appropriée.
Certificado ISO 9001 para Ohaus Corporation. La firma Ohaus Corporation, USA, ha sido inspeccionada por la Bureau Veritas Quality International (BVQI) yha obtenido el certificado ISO 9001. Esto acredita que Ohaus Corporation, USA, dispone de un sistema de calidad que cumple las normas internacionales para gestióny garantfa de calidad (ISO serie 9000). Con ocasión de las inspecciones de repetibilidad por parte de la BVQI, se comprueba periódicamente si el sistema de calidad semanipula de forma correcta.
Certificato ISO 9001 per la Ohaus Corporation. ll sistema di garanzia della qualità della Società Ohaus Corporation, USA è certificato ISO 9001 sin dal 1994 dalBureau Veritas Quality International BVQI, e così fomisce la dimostrazione che il suo sistema di Garanzia Qualità soddisfa i massimi requisiti. Verifiche periodiche del BVQIgarantiscono che il sistema qualità opera correttamente.
00
122 M
1) applies only to certified balances/scale
1) 1)EU 90/384 NAWI EN45501:1992 Non Automatic Weighing InstrumentsEU 90/384 FNSW EN45501:1992 Für nicht selbsttätige WaagenEU 90/384 BFNA EN45501:1992 Balances à fonctionnement non automatiqueEU 90/384 PBNA EN45501:1992 Para balanzas no automátäcasEU 90/384 BFNA EN45501:1992 Per bilance a funzionamento non automatics
NOTE: THIS EQUIPMENT HAS BEEN TESTED AND FOUND TO COMPLY WITH THE LIMITS FOR A CLASS ADIGITAL DEVICE, PURSUANT TO PART 15 OF THE FCC RULES.
THESE LIMITS ARE DESIGNED TO PROVIDE REASONABLE PROTECTION AGAINST HARMFUL INTERFER-ENCE WHEN THE EQUIPMENT IS OPERATED IN A COMMERCIAL ENVIRONMENT. THIS EQUIPMENT GEN-ERATES, USES, AND CAN RADIATE RADIO FREQUENCY ENERGY AND, IF NOT INSTALLED AND USED INACCORDANCE WITH THE INSTRUCTION MANUAL, MAY CAUSE HARMFUL INTERFERENCE TO RADIO COM-MUNICATIONS. OPERATION OF THIS EQUIPMENT IN A RESIDENTIAL AREA IS LIKELY TO CAUSE HARMFULINTERFERENCE IN WHICH CASE THE USER WILL BE REQUIRED TO CORRECT THE INTERFERENCE AT HISOWN EXPENSE.
THIS DIGITAL APPARATUS DOES NOT EXCEED THE CLASS A LIMITS FOR RADIO NOISE EMISSIONS FROMDIGITAL APPARATUS AS SET OUT IN THE INTERFERENCE-CAUSING EQUIPMENT STANDARD ENTITLED�DIGITAL APPARATUS�, ICES-003 OF THE DEPARTMENT OF COMMUNICATIONS.
CET APPAREIL NUMERIQUE RESPECTE LES LIMITES DE BRUITS RADIOELECTRIQUES APPLICABLES AUXAPPAREILS NUMERIQUES DE CLASSE A PRESCRITES DANS LA NORME SUR LE MATERIEL BROUILLEUR :�APPAREILS NUMERIQUES�, NMB-003 EDICTEE PAR LE MINISTRE DES COMMUNICATIONS.
Unauthorized changes or modifications to this equipment are not permitted.

4
Contents
OVERVIEW OF CONTROLS .................................................................................................................. 6
1. INTRODUCTION ................................................................................................................................ 8
1.1 Introduction ...................................................................................................................................... 8
1.2 Overview of the scale ......................................................................................................................... 8
2. INSTALLATION .................................................................................................................................. 9
2.1 Unpacking and checking the standard contents .................................................................................... 9
2.2 Safety considerations ......................................................................................................................... 9
2.3 Locating and leveling the scale ......................................................................................................... 10
2.4 Connecting power ........................................................................................................................... 10
2.5 Battery operation ........................................................................................................... .................. 11
2.6 Connecting communications ............................................................................................................ 11
2.7 Connecting a second scale for piece counting .................................................................................... 12
3. OPERATION .................................................................................................................................... 13
3.1 Menu structure .............................................................................................................. .................. 13
3.2 Switch functions .............................................................................................................................. 15
3.3 Menu operation .............................................................................................................. ................. 16
3.4 Turning on the scale and zeroing ...................................................................................................... 17
3.5 Basic weighing ............................................................................................................................... 17
3.6 Weighing with tare .......................................................................................................................... 18
3.7 Gross/Net/Tare recall operation ......................................................................................................... 18
3.8 Unit switch operation ....................................................................................................................... 19
3.9 Counting pieces into a container ....................................................................................................... 19
3.10 Counting pieces out of a container .................................................................................................... 20
3.11 Automatic reference optimization ....................................................................................................... 20
3.12 Adding mode .................................................................................................................................. 20
3.13 Piece counting with 2-scale systems ................................................................................................. 21
4. SETTING UP YOUR SCALE ............................................................................................................... 22
4.1 Overview ........................................................................................................................................ 22
4.2 Setup menu .................................................................................................................................... 22
4.3 Read menu ..................................................................................................................................... 23
Contents

5
Contents
4.4 RS232-1 / RS232-2 menus ............................................................................................................. 24
4.5 Lockout menu ................................................................................................................................. 25
4.6 Quit menu ...................................................................................................................................... 26
5. CALIBRATION AND SEALING ............................................................................................................ 27
5.1 Calibration masses .......................................................................................................................... 27
5.2 Calibration ...................................................................................................................................... 28
5.3 Unlocking the menus ....................................................................................................................... 28
5.4 Weights and measures sealing ......................................................................................................... 29
6. CARE AND MAINTENANCE ............................................................................................................... 30
6.1 Troubleshooting ............................................................................................................. ................. 30
6.2 RS232 Interface .............................................................................................................................. 31
6.3 Error codes list ................................................................................................................................ 33
6.4 Service information .......................................................................................................................... 33
6.5 Accessories .................................................................................................................................... 33
6.6 Specifications .................................................................................................................................. 33

6
RangerClear
ScaleSelect CountWeight Sample
Size
10 Sample
APWCount
1
Overview of controls
123
5
6
7
8
9 10a 11 12 13 14
15 16
24
Rear of scale
Displaykg %Pcs
Comtbz NET B/G
12 12
% Auto Opt0 50 100
17 18
1920
21
2223
Clear A P W Sca l eSe lec t
Coun tWeight
Sample 10
Sample Size
4
25 26 27 28 29 30
Function keys
10b

7
Scale
1 Keypad
2 Function keys
3 Display
4 Scale specifications
5 Weighing pan
6 Power cord
7 Power cord with AC Adapter (Scale with internal
battery optional)
8 Adjustable feet
Rear of scale
9 Jack for AC Adapter (battery)
10a Serial # label (Europe)
10b Serial # label (USA) under weighing platform
11 Hole for antitheft device
12 Spirt level
13 RS232 Interface (Optional)
14 RS232 Interface (Standard)
Display
15 Stability indicator
16 Active interface (for menu mode)
17 Active scale (in 2-scale syytems)
18 Weighing range display (for dual range scales)
19 Symbols for net/gross weight
20 Battery discharge status (optional battery)
21 Weighing unit
22 Number of user selected reference pieces
23 Weighing range bar graph
24 Center of zero
Function keys
25 Clear APW and return to weighing.
26 Average Piece Weight - one piece reference is
displayed for 3 seconds.
27 If two scales are connected, this button switches
the display between the host scale and the
remote scale. Tare, Zero and G/N/T buttons
functions are active for the scale being displayed.
28 Switching from Weighing to Counting Mode.
29 Ten pieces sample size/ 10 pieces on the scale.
30 Continuous press - scrolls through 5, 15, 20, 25,
30, 50 and 100 pieces - sample size.
Short press - take sample size as indicated on
the display.

8
Thank you for deciding to purchase a Ranger Counting Scale from Ohaus. Behind your instrument standsOHAUS, a leading manufacturer of precision Scales, Moisture Analyzers, Balances, and Indicators. An Aftermar-ket Department with trained instrument technicians is dedicated to provide you with the fastest service possiblein the event your instrument requires servicing. OHAUS also has a Customer Service Department to answer anyinquiries regarding applications and accessories.
To ensure you make full use of the possibilities offered by your new Ranger Counting Scale, please read themanual completely before installation and operation.
The Ranger Counting Scale offers a high level of operating convenience and useful functions to make accuratemeasurements.
The Ranger Counting Scale has the following features:
� Extremely rugged cast aluminum case and chemically resistant paint finish construction.� Weighing pan constructed of stainless-steel.� Fully programmable with front panel controls.� Ergonomic operating controls and a large, easily readable display.� Easy to follow menus for simplified operation.� Lockout feature prevents inadvertent changing of menu settings.� Back lit display.� Gross, Net, Tare operation.� Selectable graduations.� Auto zero operation.� Auto tare operation.� Piece counting.� Automatic reference optimization.� Piece counting with two scales.� Built-in leveling feet and level indicator.� Built-in functions for manual and, automatic timing of printing intervals.� Built-in RS232 communication interface (and optional additional channel).� Optional built-in battery operation .� Up to 30 hours continuous operation with optional battery.� Legal for trade operation.� Calibration with either kg or lb.� A variety of accessories includes interface communication cables, printer, and a security device.
Section 1 - Introduction 1.1 Introduction
1.2 Overview of the scale

9
In this section, you will learn how you unpack and install your new Ranger Counting Scale and prepare it foroperation. On completion of the steps described in this section, your Scale is ready for operation.
Remove packing material from the instrument.
Check the instrument for transport damage. Immediately inform yourOhaus dealer if you have complaints or parts are missing.
Store all parts of the packaging. This packaging guarantees the bestpossible protection for the transport of your instrument.
Open the package and remove the instrument and the accessories.Check the completeness of the delivery. The following accessories arepart of the standard equipment of your new scale.
� 1 Removable power cable (supplied only with battery operated
scales)
� 1 Set of operating instructions
� 1 Warranty card
2.1 Unpacking and checking contents
Your scale employs state of the art technology and meets the latestdemands regarding instrument safety. For safe and dependable opera-tion, please comply with the following instructions:
� The Scale must not be operated in a hazardous environment andonly under ambient conditions specified in these instructions.
� Only use approved accessories and peripherals.
� Do not tamper with the retaining screws for the load plate supportunderneath the weighing pan.
� It is not permitted to open the scale by removing screws in its base.
� The scale is a precision instrument, handle it carefully,
� Your scale is supplied with a 3-pin power cable with an equipmentgrounding conductor. Only extension cables which meet the relevantstandards and also have an equipment grounding conductor maybe used. Intentional disconnection of the equipment groundingconductor is prohibited.
2.2 Safety considerations
Section 2 - Installation

1 0
2.3 Locating and leveling the scale
2.4 Connecting power
The scale should always be used in an environment which is free fromexcessive air currents, corrosives, vibration, and temperature or humidityextremes. These factors will affect displayed weight readings.
DO NOT install the scale:
� Next to open windows or doors causing drafts or rapid temperaturechanges.
� Near air conditioning or heat vents.
� Near vibrating, rotating or reciprocating equipment.
� Near magnetic fields or equipment that generate magnetic fields.
� On an unlevel work surface.
� In confined areas, allow sufficient space around the instrument forease of operation and keep away from radiating heat sources.
� Adjust the leveling feet so that the scale is exactly horizontal and theair bubble in the indicator is centered.
NOTE: The instrument should be leveled each time its location ischanged.
Check to ensure the voltage printed on the scale label matches your localline voltage. If this is not the case, DO NOT connect the scale to thepower supply, but contact your responsible OHAUS dealer.
Connect the power cord from the scale to a suitable power source. If thescale is equipped with an optional internal battery, connect the AC cordsupplied to the rear of the scale.
Allow your scale to warm up for at least 30 minutes to enable it toadapt itself to the ambient conditions. If the scale has been stored in avery cold environment before installation, it may require several hours tostabilize.
The scale now performs a self-test, loads parameters, displays thesoftware version, capacity, and the normal weight display then appears.
RangerClear
ScaleSelect CountWeight Sample
Size
10 Sample
APWCount
RangerClear
ScaleSelect CountWeight Sample
Size
10 Sample
APWCount
RangerClear
ScaleSelect CountWeight Sample
Size
10 Sample
APWCount

1 1
2.5 Battery operation
The scale is equipped with one bi-directional RS232 interface for commu-nication with printers and computers. When the scale is connecteddirectly to a printer, displayed data can be output at any time by simplypressing the PRINT UNITS button or by using one of the RS232 Modeprint features. (A second optional RS232 interface is also available).
Connecting the scale to a computer or printer enables you to operate thescale from the computer, as well as receive data such as displayedweight, weighing mode, stability status, etc. and to have a permanentprinted record.
On the rear of the scale, a 9-pin male subminiature �D� connector isprovided for interfacing to other devices. Table below indicates pinconnections.
1 N/C2 Data Out (TXD)3 Data In (RXD)4 N/C5 GND6 N/C7 N/C8 N/C9 N/C
See Accessories listed in paragraph 6.5. Connect a suitable cable fromthe scale to the external device.
Review paragraph 6.2, RS232 Interface for additional information regard-ing formats and command table.
(See rear of balance)
1 2 3 4 5
6 7 8 9
2.6 Connecting communications
Scales with a built-in battery automatically switch to battery operation ifthere is a power failure or the power cord is removed. The battery symbolindicates the current discharge status of the battery (1 segment = 25%capacity). If the symbol flashes, the battery must be recharged.
A discharged battery requires at least 8 hours until it is recharged. Duringthe charging process, work with the scale can continue, but under theseconditions, a longer charging time is needed.
In normal use, the battery can operate the scale for up to 30 hoursindependent of the AC power line. The battery is protected againstovercharging and the scale can remain connected to the AC power line.
1 2
2.7 Connecting a second scale for piece counting
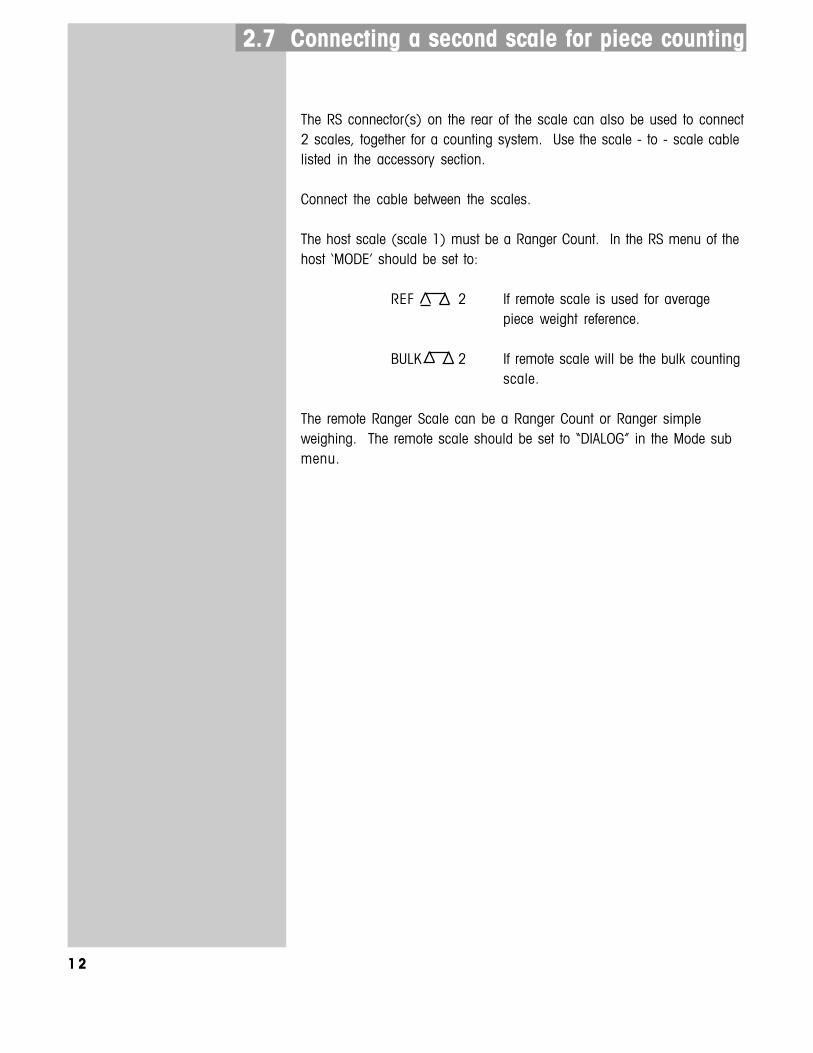
The RS connector(s) on the rear of the scale can also be used to connect2 scales, together for a counting system. Use the scale - to - scale cablelisted in the accessory section.
Connect the cable between the scales.
The host scale (scale 1) must be a Ranger Count. In the RS menu of thehost �MODE� should be set to:
REF 2 If remote scale is used for averagepiece weight reference.
BULK 2 If remote scale will be the bulk countingscale.
The remote Ranger Scale can be a Ranger Count or Ranger simpleweighing. The remote scale should be set to �DIALOG� in the Mode submenu.

1 3
Section 3 - Operation
CALIBRATION
Setupreset
YES, NOLFT
ON, OFF, CANquit
Cal Unkg, lbquit
Grad0.0005, 0.001,0.002, 0.005,0.0001,0.0002,quit
APPL ICStandFillquit
Bac ltON,OFFquit
Aut Opt ON,OFF
A-AddON,OFF
ListEnd set
Readreset
YES, NOAl
medhighlowquit
Unit 1Unit 1LB , Unit 1g, Unit 1kg,Unit 1 OZ
quitUnit 2
Unit 2LB , Unit 2g, Unit 2kg,Unit 2 OZ
quitAzt
0.5d, 1d, 3d, OFFquit
A-tOFF, ONquit
AotYES, NOquit
RzdOFF, ONquit
End rd
CALSpan
-0-(full capacity weight)-done-
Lin-0-(50% capacity weight)(100% capacity weight)-done-
EndCAL
The following table illustrates the first three menu�s in the Ranger Scale. The Main Menu contains 7 sub menus.The remaining menus appear on the next page.
3.1 Menu structure
SETUP READ
Can be viewed but not changed when LFT is ON.

1 4
LocCal
ON, OFFquit
SetupON, OFFquit
ReadON, OFFquit
RS232-1ON, OFFquit
RS232-2ON, OFFquit
LocsetON, OFFquit
Endlocquit
Store ?
rs232-1 Com 1
resetYES, NO
ModePrint, On Stb, Stbonly, Cont, Dialog,Disp 2, Ref 2, Bulk2quit
baud300,600,1200, 2400,4800, 9600, 19200,quit
Parity7 even, 7 no p,8 no p, 7 oddquit
Stop1, 2quit
HandshYES, NOquit
DefstrHeader
ON, OFFGross
ON, OFFNet
ON, OFFTare
ON, OFFPCS
ON, OFFAPW
ON, OFFREF CT
ON, OFF4 L INF
ON, OFFF Feed
ON, OFFLN For
Single, multi,End rs1
QUIT
3.1 Menu structure RS232-1 RS232-2 LOCKOUT
QuitStore ?
rs232-2 Com 2
resetYES, NO
ModePrint, On Stb, Stbonly, Cont, Dialog,Disp 2, Ref 2, Bulk2quit
baud300,600,1200, 2400,4800, 9600, 19200,quit
Parity7 even, 7 no p,8 no p, 7 oddquit
Stop1, 2quit
HandshYES, NOquit
DefstrHeader
ON, OFFGross
ON, OFFNet
ON, OFFTare
ON, OFFPCS
ON, OFFAPW
ON, OFFREF CT
ON, OFF4 L INF
ON, OFFF Feed
ON, OFFLN For
Single, multi,End rs2

1 5
3.2 Switch functionsThere are two sets of button switches located on the front panel of the scale. The six button switches locateddirectly under the display are used for counting functions. The four button switches located below the sixswitches provide basic scale operation and menu setups. Please read the following information before pressingany of these buttons.
Clear A P W Sca l eSe lec t
Coun tWeight
Sample 10
Sample Size
BUTTONS FUNCTION
Clear Short press -Average Piece Weight (APW) is cleared and scale returns to weighing mode.
APW Short press - Average Piece Weight - one piece reference weight is displayed for 3 seconds.
Scale Switches the display between scale 1 (host) and scale 2 (remote). If 2 scales are connected,Select the functions zero, G/N/T & tare will be executed on the scale that is currently on the host LCD.
Count Short press - Switches from weighing to counting mode.Weight
Sample 10 Short press - Takes average piece weight for a sample size of 10.
Sample Size Long press and hold - scrolls through 5, 15, 20, 25, 30, 50 and 100 pieces - sample size.Short press - sample number of pieces shown in display.
G/N/TMENU TARE
PRINTUNITS
BUTTONS PRIMARY FUNCTION SECONDARY FUNCTION
ON/ZERO Short press - Turns scale ON if OFF. When scale is ON, short press zeros the scale. OFF Long press - Turns scale OFF if ON.
PRINT Short press - Sends PRINT command. When in MENU MODE: short press = NO. UNITS Long press - Changes UNITS.
G/N/T Short presses - Gross/Net/Tare. When in MENU MODE: short press = YES.MENU No action for 5 secs., scale returns NET.
Long press - Enter MENU.
TARE Short press - enter TARE.
ON/ZEROOFF

1 6
In this section, you will learn how to work with the menu. The menu allows you to match your scale to yourspecific weighing needs. In the menu, you can change the settings of your scale and activate functions. TheMain Menu contains 7 sub menus. Each of the seven sub menus are described in detail in the followingsections.
3.3 Menu operation
How to enter the menusTo enter the menus, press and hold the G/N/T MENU button until CALappears. This is the first menu, CALIBRATION.
G/N/TMENU
How to enter an individual menuA short press on the G/N/T MENU button = YES and you can enter aspecific menu.
(Long press)
G/N/TMENU (Short press=YES)
CALIBRATION SETUP READ RS232-1 RS232-2 LOCKOUT QUIT
How to enter an individual menu itemWhen in any menu, a short press on the G/N/T MENU button = YES andyou can enter a specific menu item. To advance through a given menu,make short presses on the PRINT UNITS =NO button.
PRINTUNITS
PRINTUNITS
A short press on the PRINT UNITS button = NO. When in MENU MODEshort presses will advance to the next menu as shown above. WhenQUIT is reached, the next press on the PRINT UNITS button will return tothe CALIBRATION menu.
(Short press= NO)
How to select a specific menu
G/N/TMENU
1 7
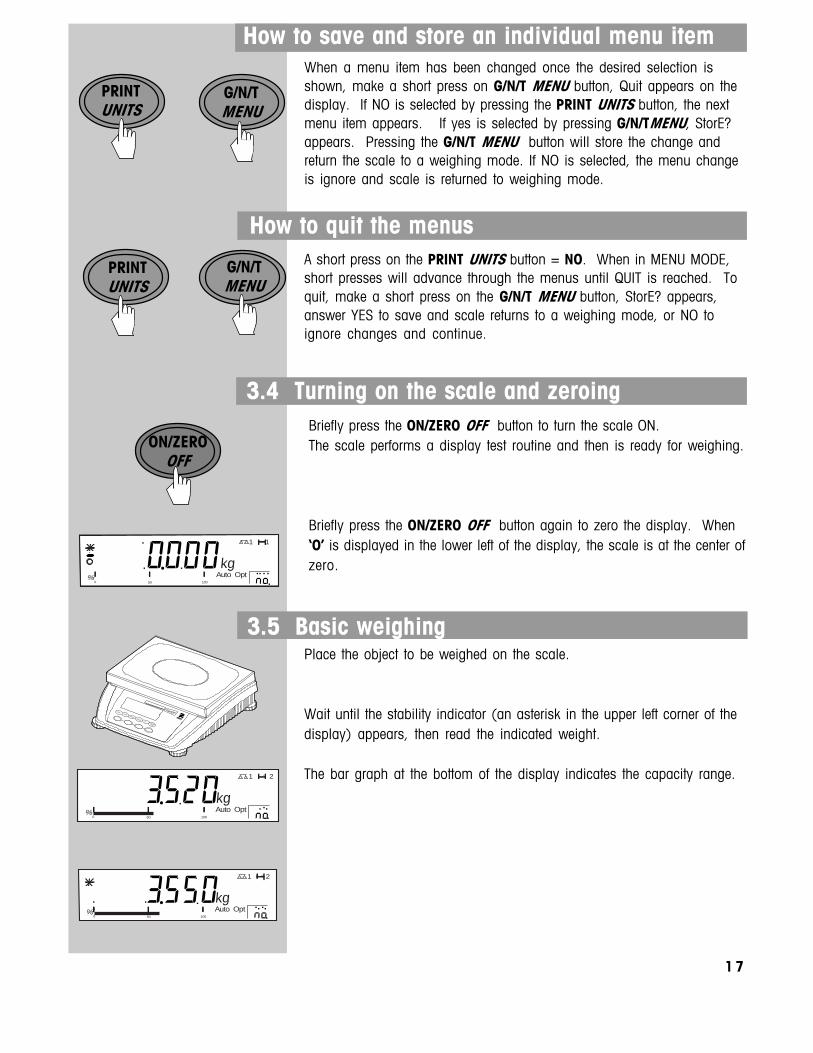
How to save and store an individual menu itemWhen a menu item has been changed once the desired selection isshown, make a short press on G/N/T MENU button, Quit appears on thedisplay. If NO is selected by pressing the PRINT UNITS button, the nextmenu item appears. If yes is selected by pressing G/N/TMENU, StorE?appears. Pressing the G/N/T MENU button will store the change andreturn the scale to a weighing mode. If NO is selected, the menu changeis ignore and scale is returned to weighing mode.
PRINTUNITS
A short press on the PRINT UNITS button = NO. When in MENU MODE,short presses will advance through the menus until QUIT is reached. Toquit, make a short press on the G/N/T MENU button, StorE? appears,answer YES to save and scale returns to a weighing mode, or NO toignore changes and continue.
How to quit the menus
G/N/TMENU
Briefly press the ON/ZERO OFF button to turn the scale ON.The scale performs a display test routine and then is ready for weighing.
Briefly press the ON/ZERO OFF button again to zero the display. When�O� is displayed in the lower left of the display, the scale is at the center ofzero.
3.4 Turning on the scale and zeroing
ON/ZEROOFF
3.5 Basic weighingPlace the object to be weighed on the scale.
Wait until the stability indicator (an asterisk in the upper left corner of thedisplay) appears, then read the indicated weight.
The bar graph at the bottom of the display indicates the capacity range.
kg
1 1
% Auto Opt0 50 100
kg
1 2
% Auto Opt0 50 100
kg
1 2
% Auto Opt0 50 100
G/N/TMENU
PRINTUNITS
Clear
SelectWeight
10
APW
SizeSample
Ranger

1 8
3.6 Weighing with tare
Place an empty weighing container or packaging on the scale.
Press the TARE button briefly to tare the scale. The zero display and NET(net weight) symbol appear. Items to be weighed can now be placed onthe platform. The weight of the tared item (container) is automaticallysubtracted and the weight of the item is displayed. If the container is alsoremoved, the scale will indicate a negative number which represented thetared weight. To clear this, press the TARE button.
NOTE: If the AUTO TARE (A-t) function has been activated in the READmenu, there is no need to press the TARE button
TARE
3.7 Gross/Net/Tare recall operationWhen a container has been placed on the scale and tared, its weight isstored in memory. Adding material to the container is shown as NETweight. The gross weight is a combination of the tared weight and thematerial. The G/N/T Menu button allows switching between GROSS, NETand TARE weights.
Repeately press (short presses) the G/N/T Menu button to cycle throughGross, Tare and Net readings. The sample illustrations indicate a tareweight of 0.020kg representing a container, a net weight of 1.000kgwhich would be the material in a container and a gross weight of1.020kg which is the total weight of the container and material. After 5seconds, display returns to net weighing.
NOTE: The display uses symbols for NET and Tare. NET=NET, T=Tare.Gross=B/G.
G/N/TMENU
kg NET
1 1
% Auto Opt0 50 100
kg T
1 1
% Auto Opt0 50 100
kg B/G
1 1
% Auto Opt0 50 100
kg NET
1 1
% Auto Opt0 50 100
RangerClear
SelectWeight
10
APW
SizeSample
RangerClear
SelectWeight
10
APW
SizeSample

1 9
3.8 Unit switch operation
When the Read menu Unit 1 and Unit 2 have been set to either g, kg, ozor lb, you may press and hold the PRINT UNITS button to select one ofthe preset units. See Read Menu for selecting units.
PRINTUNITS
3.9 Counting pieces into a containerRead this procedure entirely before counting pieces. Piece counting canbe further enhanced using menu selections in the Setup menu.
if you are using a weighing container, place the empty container on thepan and tare the scale with the TARE button.
Press the CLEAR button.
Place the desired number of sample pieces in the container. Increasedsample size results in better results.
� If you have placed 10 pieces in the container, short press theSAMPLE 10 button.
or� If you elect to use a higher number of samples, press and hold
the SAMPLE SIZE button. To scroll thru the choices NO, 5, 15,20, 25, 30, 50, 100 pieces, release button when desired samplesize is displayed.
Piece counting can be made considerably more accurate with theadditional function Automatic Reference Optimization (Section 3.11).
When the number of pieces is currently displayed, pressing the APWbutton (average piece weight), the average weight of one piece isdisplayed for 5 seconds and returns to number of pieces.
Pressing the Count Weight button displays the weight of the pieces.Pressing the Count weight button again returns to number of pieces.
If Add mode (Section 3.12) is activated, the minimum number of refer-ence pieces necessary with small components is ensured automatically.
TARE
Clear
Pcs
1 1
% Auto Opt0 50 100
kg
1 1
% Auto Opt0 50 100
lb
1 1
% Auto Opt0 50 100
A P W Coun tWeight
g Pc
1 1
% Auto Opt0 50 100
kg NET
1 1
% Auto Opt0 50 100
RangerClear
SelectWeight
10
APW
SizeSample

2 0
3.10 Counting pieces out of a container
Put container full of parts on scale and press the Tare button.
Count out pieces equal to the sample size and press the Sample Sizebutton.
Number of pieces removed from the container are displayed as a nega-tive number.
Auto optimization and ADD Mode are supported for �Counting Out�.
TARE
3.11 Automatic reference optimizationAutomatic reference optimization results in more accurate counting onpiece counting duties. This function can be activated or deactivated inthe Setup menu. The factory default setting is ON.
Automatic reference optimization requires no action on the part of theoperator. The Auto Opt symbol appears in the lower right hand side ofthe display when this function is active.
Operation:In order to optimize the calculated reference piece weight automatically, anumber of pieces less than or equal to the number of reference piecesalready on the pan are added to it. The message AUt OPt appears in thedisplay and automatic weight optimization is carried out. This processcan be repeated several times.
Pcs
1 1
% Auto Opt0 50 100
3.12 Add modeAdd mode ensures that the number of reference pieces used on piececounting applications is not too small, which could produce inaccurateresults. This function is activated in the Setup menu. The factory defaultsetting is OFF.
If you have activated add mode and the number of pieces placed on thepan is too small for accurate determination of the reference weight, youare prompted to place more pieces on the scale (e.g. 2 pieces).
Place the stipulated number of pieces on the pan. The scale then deter-mines the reference weight.
Pcs NET
1 1
% Auto Opt0 50 100
Sample Size
NET 1 1
% Auto Opt0 50 100

2 1
3.13 Piece counting with 2-scale systemsA second scale can be connected to your Ranger Counting Scale, e.g. aRanger 60kg weighing only model for counting large number of piecesthat would exceed the capacity of the Ranger Count.
Before using a second scale, the interconnecting communication cablemust be connected between the scales as described in paragraph 2.7.
Once the scales are connected, press the Scale Select button to togglebetween the two displays. This will confirm communication betweenthem.
If the ZERO, G/NT or TARE button functions are pressed on the host scale(Ranger Count) the command will be applied only to the scale indicatednext to the balance symbol 1 or 2 .
Place containers on both scales, as needed, and tare them.
Using the Scale Select switch, display the scale to be used for thereference weight. Add indicated number of sample pieces and press theSample Size button.
If the host scale (Ranger Count) is the reference scale, the display willautomatically switch to the bulk scale after the average piece weight iscalculated.
If the Remote scale is used for the reference weighing, the display mustbe changed manually with the Scale Select button.
AUTO OPTIMIZATIONADD MODEand COUNTING OUTare all supported in a 2 Ranger counting system.
2
kg
2
% Auto Opt0 50 100
2
Sca l eSe lec t
Sample Size

2 2
In this section, each of the menus are described as to the settings andapplication in the scale. Using the buttons previously described, you canconfigure your scale to specific weighing needs. The menus, allow youto change the settings and activate functions. Calibration menu iscovered separately in Section 5.
Section 4 - Setting up your scale
4.2 Setup menu
Function/Display Available Settings Application
Legal for trade
The Setup menu contains entries for LFT, calibration units, graduations,processing, back light, list and end set. See table below for details.Bold equals factory default settings.
OFFONCAN
Legal for trade applicationswhen set ON or CAN.
4.1 Overview
Resetres sp
Press G/N/T MENU =reset andkeep factory settings. PressPRINT UNITS =NO, advances tonext menu.
Graduation0.001, 0.002, 0.005, 0.0001,0.0002, 0.0005
This is the graduation size andavailable options vary with thecapacity of the scale.
Calibration unitKg, lb Either kg or lb can be selected
as the calibration unit.
ApplicationStand-Standard
FILL-Filling
Regular weighing.
Dispensing for fillingapplications.
Back LightOnOff
Back light can turned on or off.
OnOff
Auto optimizationAutomatically updates thesample weight.

2 3
4.2 Setup menu (Cont.)
Auto addONOFF
ListPrint Prints a setup list to the
RS232.
End of setup menu, whenselected by pressing G/N/TMENU button, displayadvances to READ MENU.
End SettingsEnd of setup menu.
4.3 Read menu
Function/Display Available Settings Application
Reset
Averaging level
Unit 1
Unit 2
The Read menu contains entries for reset, average level, unit 1, unit 2,auto zero, auto tare, auto power off, retain zero data and end. See tablebelow for details. Bold equals factory default settings.
reset rd
Low, Med, HighAveraging level.High=greater stability, Med=mid stabilty, Low=less stability,faster processing time.
This is the first weighing unit.g, kg, oz, lb
g, kg, oz, lb This is the alternate weighingunit.
Press G/N/T MENU =reset andkeep factory settings. PressPRINT UNITS =NO, advances tonext menu.
Calculates the minimum refer-ence sample for the mostaccurate counting.

2 4
Auto-Zero Tracking
Auto Tare
0.5d, 1d, 3d, OffSettings minimize temperatureand small disturbances on thezero reading.
OnOff
Enables automatic tare whenset to ON.
Auto Power Off When set ON, power is removedafter 5 minutes if battery pack ispresent and power cord is notplugged in.
Retain Zero Data
End Settings
Retains stored zero point whenscale is turned off.
End of Read menu, whenselected, display advances toRS232-1 menu.
YesNo
OnOff
End of read menu.
4.3 Read menu (Cont.)
4.4 RS232-1 / RS232-2 menus
Function/Display Available Settings Application
Reset
The RS232-1 menu provides the communication settings to port 1(standard). RS232-2 is Port 2 which is an option and has exactly thesame settings. Bold equals factory default settings.
res rs Press G/N/T MENU =reset andkeep factory settings. PressPRINT UNITS =NO, advancesto next menu.
Func t ion/Disp lay Available Settings Application
Com 1
Mode Selects mode of operation forRS232. Print, print on stability,stability only, continuous,dialog (interface), disp 2,reference 2, bulk 2.
Print, on stb, stb only, cont, dialog,disp 2, ref 2, bulk 2
Com 1

2 5
4.4 RS232-1 / RS232-2 menus (Cont.)
Function/Display Available Settings Application
Parity
Stop
Handshake
Default String
Various parity settings areavailable to accommodateexternal equipment require-ments.
Software communication.
Header, Gross, Net, Tare, PCS, APW,Ref CT, 4 L in f, F feed, LN for
Determines what is printed viaprint command. Selects a stringof data to be printed; header,gross, net, tare, pieces, averagepiece weight, reference count, 4line feed, form feed, multi orsingle string per line.
End SettingsEnd of RS232-1 menu, whenselected, display advances toRS232-2 menu.
7 Even, 7 No P, 8 No P, 7 Odd
End of RS232 menu.
Two stop settings (1 or 2) areavailable to accommodateexternal equipment require-ments.
12
YesNo
Com 1
Com 1
Com 1
Com 1
Com 1
4.5 Lockout menuThis menu allows software locking and unlocking the calibration, setup,read, RS232-1, RS232-2, menus. Locking is done for legal for tradeapplications. A switch underneath the scale unlocks the locked settings.Turning individual menu locks ON and OFF prevents accidental changesto menu parameters. The locks can be turned OFF to change the param-eters. However, once the Locset is set to ON, the menus can only beunocked by removing the scale bottom cover and using the Unlockswitch. See section on sealing.
Baud Rate300, 600, 1200, 2400, 4800,9600, 19200
Various baud rates are avail-able to match external equip-ment communication require-ments.
Com 1

2 6
Function/Display Available Settings Application
Calibration
Setup
Read
RS232-1
RS232-2
Lockset
OnOff
An ON setting locks out thecalibration menu.
OnOff
Locks/unlocks all of theLockout menu.
Endlock
OnOff
OnOff
An ON setting locks out thesetup menu.
OnOff
An ON setting locks out theread menu.
OnOff
An ON setting locks out theRS232-1 menu.
An ON setting locks out theRS232-2 menu.
When set on, locks all softwaresettings in this menu.
4.5 Lockout menu (Cont.)
Quit End of menus. - Yes,-prompts to store and then willgo to a weighing mode, No,returns to Calibration menu.
4.6 Quit menu

27
Section 5 - Calibration and sealing
For best results, calibrate at or near full capacity. Calibration unit can be set to either kg or lb. When the scale isused in Legal for trade applications, the calibration menu is locked out and is not accessable. This is to preventunauthorized personnel from changing calibration. Before beginning calibration, make sure masses are available. Ifyou begin calibration and realize calibration masses are not available, exit the menu with a short press of the ON/ZERO OFF button. The scale will retain previously stored calibration data. Calibration should be performed asnecessary to ensure accurate weighing. Masses required to perform the procedures should be in compliance with thespecification requirements of the scale being used.
Ranger Counting scales offer a choice of two calibration methods: Span Calibration, and Linearity Calibration.
Span - Span calibration ensures that the sale reads within specifications using two weight values: zero and a weightvalue close to 100% of the full capacity. Special software features enable you to span calibrate at a number oflesser values which varies with the model of the scale.
Linearity - Linearity calibration minimizes deviation between actual and displayed weights within the scale�s weigh-ing range. Three weight values are used: zero, a weight value at midpoint of the scale�s weighing range, and aweight value at or near the specified capacity.
Before beginning calibration, make sure masses are available. If you begincalibration and realize calibration masses are not available, exit the menu.The scale will retain previously stored calibration data. Calibration shouldbe performed as necessary to ensure accurate weighing.
5.1 Calibration masses

28
5.2 CalibrationNOTE: If the scale is sealed and is used for legal for trade, the seal must beremoved to gain access to the unlock switch located underneath the scale inorder to calibrate the scale. Refer to paragraph 5.3.
Access the menu by pressing and holding the G/N/T Menu button. Thecalibration menu by pressing G/N/T Menu again SPAN is displayed. Youhave a choice of calibrating the scale using span or linearity methods. Ifyou press the PRINT UNITS button, you can access linearity calibration.Span calibration requires two points zero and full span. Linearity requiresthree points. zero, mid-range and full span.
SpanPress G/N/T Menu button, -0- is displayed followed by mass value to beplaced on the platform. For example, a 3kg scale would normally require3kg for a span calibration. By pressing the PRINT UNITS button repeatedly,a lesser value mass can be used. For example, a 3kg scale offers 2kg,1.5kg, 1.2kg. 1kg, 0.9kg, 0.8kg and 0.7kg for full span.
Place the indicated mass on the platform and press the G/N/T MENU button.
If the calibration was successful, data is saved automatically. Removecalibration masses from platform.
LinearityWhen performing a linearity calibration, -0- is first displayed followed by thefirst mass and then a second mass.
5.3 Unlocking the menusLow Capacity ScaleIf it necessary to recalibrate a scale which has been set up for legal for tradeuse, or if the menu is locked, you will have to remove the seal at the bottomof the scale to gain access to the unlock switch.
To unlock the menus, turn the scale off.
On low capacity scales, remove the existing seal and four cover screws fromthe bottom of the scale. You will have to unscrew the feet to access thescrews.
Position the scale so the bottom is accessible.
NOTE: Do the next step carefully.
First, press and hold the unlock switch then, briefly press the ON/ZERO OFFswitch at the same time, release the unlock switch after the segment test isdisplayed. The menus are now unlocked and settings can be changed.LOW CAPACITY SCALE
UNLOCK SWITCH

29
5.4 Weights and measures sealingAfter a weights and measures official has tested and approved the scale, itmust be sealed by installing the security plate with the security screw.
Replace the bottom cover and secure with the cover screws.
Paper SealA paper seal may be placed over one of the screws at the back of the scaleunderneath one foot.
Replace the four feet and turn the scale over.
Lead Wire SealFor regions requiring a lead wire seal, there are 2 cross drilled screws atthe rear of the scale. The screws can be used in the location as supplied oras an alternate, one screw can be used to replace one of the counter-sunkscrews at the front of the scale. (Under the leveling feet on small sizeRanger Scales.)
High Capacity ScaleOn high capacity scales, remove the existing seal and six cover screws fromthe bottom of the scale. You will have to unscrew the feet to access thescrews.
Position the scale so the bottom is accessible.
NOTE: Do the next step carefully.
First, press and hold the unlock switch then, briefly press the ON/ZERO OFFswitch at the same time, release the unlock switch after the segment test isdisplayed. The menus are now unlocked and settings can be changed.
UNLOCK SWITCH
5.3 Unlocking the menus (Cont.)
SE
AL
LOW CAPACITY SCALE
HIGH CAPACITY SCALE
PAPER SEALLOCATION
PAPER SEALLOCATION
LEAD WIRE SEAL LOCATION
LEAD WIRE SEAL

3 0
Section 6 - Care and maintenance
6.1 Troubleshooting
To keep the scale operating properly, the housing should be kept clean and free from foreign material. If neces-sary, a cloth dampened with a mild detergent may be used.
SYMPTOM
Unit will not turn on.
Cannot zero scale, or will not zero
when turned on.
Center of Zero display erratic or does
not appear with no load on plat-
form.
Cannot display weight in desired
weighing unit.
RS232 not working.
Unable to calibrate unit.
REMEDY
Check power cord connections.
Check battery, charge battery.
Check functions of membrane
switch.
Remove load on scale to less than
entered zero.
Remove disturbances or reduce
motion.
Increase AZT level in readout menu.
Increase averaging level in readout
menu.
Enable desired unit in Setup menu.
Conversion to large (typically in g).
Verify communication parameters.
Check cable connections.
Use correct calibration mass.
Unlock the switch and recalibrate
the scale.
PROBABLE CAUSE(S)
Not plugged in or properly connected.
Battery operation -battery dead or not
fully charged.
Membrane switch failure.
Load on scale exceeds allowable
zero.
Scale platform motion or disturbances
exceed center of zero criteria.
Desired unit not set to ON in Setup
menu.
RS232 communication parameters set
up incorrectly.
Improper or loose cable connections.
Incorrect value for calibration mass.
Lockout menu CAL set to ON and
unlock switch is on the circuit board.

3 1
6.2 RS232 interface
Ranger Counting Scales are equipped with one bi-directional RS232 compatible interface for communicationwith printers and computers. A second optional interface is available. When the scale is connected directly to aprinter, displayed data can be output at any time by simply pressing PRINT UNITS button , or by using the AutoPrint feature.
Connecting the scale to a computer enables you to operate the scale from the computer, as well as receive datasuch as displayed weight, weighing mode, stability status, etc.
The following sections describe the hardware and software provided with the balance
Data output can be initiated in one of three ways: 1) By pressing PRINT; 2) Using the Auto Print feature; 3)Sending a print command (�P�) from a computer.
Output formats
On the rear of the balance, the 9-pin male subminiature �D� connector is provided for interfacing to other de-vices. On scales equipped, a second RS232 connector is available.
RS232 Hardware
1 2 3 4 5
6 7 8 9

3 2
All communication is accomplished using standard ASCII format. Characters shown in the following table areacknowledged by the scale. Invalid command response "ES" error indicates the scale has not recognized thecommand. Commands sent to the scale must be terminated with a carriage return (CR) or carriage return-lineline feed (CRLF). Data output by the scale is always terminated with a carriage return - line feed (CRLF). Theoutput format is illustrated in the table which follows.
RS232 commands
RS232 COMMAND TABLE
? Print current mode: g, Kg, lb, oz.
OS Print weight (stable or unstable) after P cmd.
1S Print stable weight after P cmd.
SA Print on stability. *Send final stable weight value.
CA Continuous Print. prints weight string w/o default string information
xxxxA Interval Print xxxx= Print Interval (1-3600 sec) (OA turns off interval printing)
P *Print display data (see OS and 1S)
Z Same as pressing Zero button.
T Same as pressing Tare button.
C Begin span calibration
L Begin linearity calibration.
XT Download Tare value in grams. Uses unit set as Unit 1.
SN Show serial number
H 1 (1-5) 1 to 5 headers are available with24 characters per line; enter H space, then text. See below.
CommandCharac te r Descr ip t ion
Creating header informationRanger Counting Scale contains provisions for entering a custom header using an external PC connected to theRS232 connector. The header can contain up to 5 lines wiith a maximum of 24 characters per line. This is veryuseful to identify printed reports.
Create the header as follows using the PC keyboard:
LINE # 1: H (space) 1 (space) �text 1st line�, then press Enter on PC keyboard.LINE # 2: H (space) 2 (space) �text 2nd line�, then press Enter on PC keyboard.LINE # 3: H (space) 3 (space) �text 3rd line�, then press Enter on PC keyboard.LINE # 4: H (space) 4 (space) �text 4th line�, then press Enter on PC keyboard.LINE # 5: H (space) 5 (space) �text 5th line�, then press Enter on PC keyboard.
Deleting a header line:Type: H (space) 1 (space) � �
Printing header without PC1. Disconnect the PC. - Connect to printer.2. In the RS232 menu, set the RESET to YES and DEFSTR-HEADER to ON.3. The header will print before each weighing data.
no text

3 3
Description Ohaus Part No.Ranger RS232 Cable to Printer 25 Pin (800500526 cable with 25-9 pin adapter) 800500523Ranger RS232 Cable to IBM PC 25 Pin (standard 9 pin serial extension cable with 9-25
pin adapter) 800500524Ranger RS232 Cable to IBM 9 Pin (standard 9 pin serial extension cable) 800500525Ranger RS232 Cable to Ranger - Dual Scale 800500526Printer AS142Ranger In-Use Cover Small 21203534Ranger In-Use Cover Large 21203535Ranger Security Device 76288-01Ranger Carrying Case Small 80850083Ranger Carrying Case Large 80850084Auxiliary Display 80850082
6.5 Accessories
The following list describes the various error codes and which can appear on the display and the suggestedremedy.
Error 1: Indicates an overload condition.Error 2: Indicates an underload condition.Error 3: Average piece weight too small.Error 4: Reference weight too small. The weight on the pan is too small to define a valid reference
weight for counting.Error 5: No valid reading from reference scale. When parts counting with a two scale sysytem,
communications lost.Error 6: Scale needs calibration.Error 9: Unstable weight reading when defining the reference weight.Error 53: EEPROM checksum error.-------: Busy (tare, zero, printing).--no--: Function not executed.
6.3 Error codes list
6.4 Service informationIf the Troubleshooting section does not resolve or describe your problem, you will need to contact an autho-rized Ohaus Service Agent. For Service assistance in the United States, please call Aftermarket, Ohaus Cor-poration toll-free at (800) 526-0659. An Ohaus Product Service Specialist will be available to help you.

3 4
6.6 Specifications
Ranger Count NTEP Version
Standard Models �NTEP* RD3RS RD6RS RD12LS RD30LS RD60LSDefault Capacity x Readability (lb) 6 x 0.0005 12 x 0.001 24 x 0.002 60 x 0.005 120 x 0.01
Default Capacity x Readability (kg) 3 x 0.0002 6 x 0.005 12 x 0.001 30 x 0.002 60 x 0.005
Default Capacity x Readability (g) 3000 x 0.2 6000 x 0.5 12000 x 1 3000 x 2 60000 x 5
Default Capacity x Readability (oz) 60 x 0.005 120 x 0.01 240 x 0.02 600 x 0.0 1200 x 0.1
NTEP Capacity x Readability (lb) 6 x 0.001 12 x 0.002 24 x 0.005 60 x 0.01 120 x 0.02
NTEP Capacity x Readability (kg) 3 x 0.0005 6 x 0.001 12 x 0.002 30 x 0.005 60 x 0.01
NTEP Capacity x Readability (g) 3000 x 0.5 6000 x 1 12000 x 2 30000 x 5 60000 x 10
NTEP Capacity x Readability (oz) 60 x 0.01 120 x 0.02 240 x 0.05 600 x 0.1 1200 x 0.2
Linearity (g) +/- 0.2 +/- 0.5 +/- 1.0 +/- 2.0 +/- 5.0
Order number: RD3RS-2E0 RD6RS-2E0 RD12LS-2E0 RD30LS-2E0 RD60LS-2E0Note NTEP for weighing only ............
General Specifications All ModelsPlatform size (w x d) (in/cm) 9.5 x 8 / 24 x 20 14 x 9.5 / 35 x 24
Scale dimensions (w x d x h) (in/cm) 10.5 x 13.2 x 4 / 26.5 x 33.5 x 10 14.2 x 14.6 x 4.5 / 36 x 37 x 11.5
Shipping dimensions (w x d x h) (in/cm) 16.5 x 19 x 10 / 42 x 48 x 25 20 x 20.5 x 10.5 / 52 x 53 x 27
Weight lb/kg) 11.5 / net (14 / 6.5 gross) 21 / 9.5 net (24 / 11 gross)
Weighing units g, kg, lb, oz
Display 0.63 inch / 16 mm digit height, (Backlit LCD)
Power Internal power supply / 40 hour rechargeable battery powered models available
Span Calibration 25% - 100% capacity
Linearity Calibration ( 3 point calibration) 0 – 50% - 100% capacity
Auto Zero Tracking 0.5d, 1d, 3d, OFF
Construction Stainless steel weighing pan / Painted cast-aluminum housing
Protection IP43
Operating temperature Standard models -10°C to 40C°
Storage temperature -20°C to 60°C
NOTE: Parts counting is not NTEP approvable.

3 5
Ranger Count OIML VersionModels 3 kg 6 kg 15 kg 35 kg 60 kgWEIGHING RANGE Range 1 Range 2 Range 1 Range 2 Range 1 Range 2 Range 1 Range 2 Range 1 Range 2
Default Cap. x Readability (kg) 1.5kg x0.5g 3kg x 1g 3kg x 1g 6kg x 2g 6 x 0.002 15 x 0.005 15 x 0.005 35 x 0.01 30 x 0.01 60 x 0.02
Default Cap. x Readability (g) 1500 x 0.5 3000 x 1 3000 x 1 6000 x 2 6000 x 2 15000 x 5 15000 x 5 35000 x 10 30000x 10 60000x20
Default Cap. x Readability (lb) 3 x 0.001 6 x 0.002 6 x 0.002 12 x 0.005 12 x 0.005 30 x 0.02 30 x 0.01 70 x 0.02 60 x 0.02 120 x0.05
Default Cap. x Readability (oz) 30 x 0.02 60 x 0.02 60 x 0.02 120 x 0.05 120 x 0.05 300 x 0.02 300 x 0.2 700 x 0.2 600 x 0.2 1200 x 0.5
General Specifications Small Platform Large Platform
Platform size (w x d) (cm) 24 x 20 35 x 24
Scale dimensions (w x d x h) (cm) 26.5 x 33.5 x 10 36 x 37 x 11.5
Shipping dimensions (w x d x h)(cm) 42 x 48 x 25 52 x 53 x 27
Weight (kg) 5 net (6.5 gross) 9.5 net (11 gross)
Weighing units g, kg, lb, oz
Display 0.63 inch / 16 mm digit height, (Backlit LCD)
Power Internal power supply / 40 hour rechargeable battery powered models available
Span Calibration 25% - 100% capacity
Linearity Calibration ( 3 points) 0 – 50% - 100% capacity
Auto Zero Tracking 0.5d, 1d, 3d, OFF
Construction Stainless steel weighing pan / Painted cast-aluminum housing
Protection IP43
Operating temperature Standard models -10°C to 40C°
Storage temperature -20°C to 60°C

LIMITED WARRANTYOhaus products are warranted against defects in materials and workmanship from the date of deliverythrough the duration of the warranty period. During the warranty period Ohaus will repair, or, at its option,replace any component(s) that proves to be defective at no charge, provided that the product is returned,freight prepaid, to Ohaus.
This warranty does not apply if the product has been damaged by accident or misuse, exposed to radioac-tive or corrosive materials, has foreign material penetrating to the inside of the product, or as a result ofservice or modification by other than Ohaus. In lieu of a properly returned warranty registration card, thewarranty period shall begin on the date of shipment to the authorized dealer. No other express or impliedwarranty is given by Ohaus Corporation. Ohaus Corporation shall not be liable for any consequential dam-ages.
As warranty legislation differs from state to state and country to country, please contact Ohaus or your localOhaus dealer for further details.


Ohaus Corporation29 Hanover Road,Florham Park, NJ 07932, USATel: (973) 377-9000,Fax: (973) 593-0359www.ohaus.com
With offices worldwide.P/N 21203629 © Ohaus Corporation 2000, all rights reserved.