operating instructio ns ionoson-basic · 3.3.6 (lp) diadynamic current ... • trophism improvement...
TRANSCRIPT

01750 GB
O P E R A T I N G I N S T R U C T I O N S
IONOSON-Basic
M A I N S - O P E R A T E D M O D E L
B A T T E R Y - O P E R A T E D M O D E L

Legal Notice
Distribution, reproduction and translation of the software and its documentation (or excerpts thereof) are
prohibited without the prior written consent of PHYSIOMED ELEKTROMEDIZIN AG.
PHYSIOMED ELEKTROMEDIZIN AG reserves the right to change the software and associated data as well
as the documentation without notice. All other rights reserved.
PHYSIOMED ELEKTROMEDIZIN AG
Hutweide 10
D-91220 Schnaittach/Laipersdorf (Germany)
Phone: +49 9126 2587-0
Fax: +49 9126 2587-25
E-Mail: [email protected]
Internet: http://www.physiomed.de
IONOSON-Basic is made in Germany in compliance with the quality requirements of EN ISO
13485:2003+AC:2007, EN ISO 9001:2008 and the applicable safety standards and regulations of the
Council Directive 93/42/EEC of 14 June 1993 concerning medical devices.
The compliance with the regulations mentioned here is indicated by the CE label on the instrument. The
declaration of conformity might be requested from the manufacturer at the address given above.
A conformity check acc. to Annex II, approved by the notified body 1275, was carried out.
Last updated December 10, 2010
Table of Contents
Chapter 1 Introduction. . . . . . . . . . . . . . . . . . . . . . . . . . . . . . . . . . 1
1.1 Conventions Used . . . . . . . . . . . . . . . . . . . . . . . . . . . . . . . . . 1
1.2 Instrument Symbols . . . . . . . . . . . . . . . . . . . . . . . . . . . . . . . . 1
1.3 Instrument Overview . . . . . . . . . . . . . . . . . . . . . . . . . . . . . . . 2
1.4 General Notes . . . . . . . . . . . . . . . . . . . . . . . . . . . . . . . . . . . 3
1.5 Instrument Description . . . . . . . . . . . . . . . . . . . . . . . . . . . . . . 3
1.6 Application . . . . . . . . . . . . . . . . . . . . . . . . . . . . . . . . . . . . 4
1.7 Contraindications . . . . . . . . . . . . . . . . . . . . . . . . . . . . . . . . . 4
Chapter 2 Controls and Indicators . . . . . . . . . . . . . . . . . . . . . . . . . . . 6
2.1 Display <1> . . . . . . . . . . . . . . . . . . . . . . . . . . . . . . . . . . . . 6
2.1.1 Symbols in the Display <1> . . . . . . . . . . . . . . . . . . . . . . . . . . . . 6
2.2 Data Selector <2> . . . . . . . . . . . . . . . . . . . . . . . . . . . . . . . . . 7
2.3 Intensity Control Channel 1 <3> and Channel 2 <4>. . . . . . . . . . . . . . . 7
2.3.1 Automatic Output Current Switch-off. . . . . . . . . . . . . . . . . . . . . . . 7
2.4 Patient Current Indicator <5> . . . . . . . . . . . . . . . . . . . . . . . . . . . 8
2.5 Output Indicator <6> . . . . . . . . . . . . . . . . . . . . . . . . . . . . . . . 8
2.6 Mains Module <7> . . . . . . . . . . . . . . . . . . . . . . . . . . . . . . . . 8
2.7 Power Switch <8> . . . . . . . . . . . . . . . . . . . . . . . . . . . . . . . . . 9
2.8 Patient Lead Connector <9> . . . . . . . . . . . . . . . . . . . . . . . . . . . 9
2.8.1 Patient Lead: Mode of Attachment . . . . . . . . . . . . . . . . . . . . . . . . 9
2.9 Ultrasound Lead Connector <10>. . . . . . . . . . . . . . . . . . . . . . . . . 9
2.10 Manual Release Key Socket <11> . . . . . . . . . . . . . . . . . . . . . . . . 10
Chapter 3 Overview of Current Modes . . . . . . . . . . . . . . . . . . . . . . . . 11
3.1 Settings for all Current Modes . . . . . . . . . . . . . . . . . . . . . . . . . 11
3.2 Dual Channel Operation. . . . . . . . . . . . . . . . . . . . . . . . . . . . . 11
3.2.1 Simultaneous and Alternating Stimulation . . . . . . . . . . . . . . . . . . . 12
3.3 Low-Frequency Current Modes . . . . . . . . . . . . . . . . . . . . . . . . . 15
3.3.1 (G) Galvanization . . . . . . . . . . . . . . . . . . . . . . . . . . . . . . . . 15
3.3.2 (GMC) Galvanization with Microcurrent . . . . . . . . . . . . . . . . . . . . 16
3.3.3 (DF) Diadynamic Current Diphasé Fixe . . . . . . . . . . . . . . . . . . . . . 17
3.3.4 (MF) Diadynamic Current Monophasé Fixe . . . . . . . . . . . . . . . . . . . 18
3.3.5 (CP) Diadynamic Current Modulé en Courtes Périodes . . . . . . . . . . . . . 18
PHYSIOMED ELEKTROMEDIZIN AG Table of Contents
IONOSON-Basic i

3.3.6 (LP) Diadynamic Current Modulé en Longues Périodes . . . . . . . . . . . . . 19
3.3.7 (UR) Ultra Stimulation Current. . . . . . . . . . . . . . . . . . . . . . . . . . 20
3.3.8 (HV) High-Voltage Current . . . . . . . . . . . . . . . . . . . . . . . . . . . 21
3.3.9 (TENS) Transcutaneous Electric Nerve Stimulation. . . . . . . . . . . . . . . . 23
3.3.10 (MENS) Electric Nerve Stimulation with Microcurrent . . . . . . . . . . . . . . 24
3.3.11 (IG30) Pulse Galvanization 30 . . . . . . . . . . . . . . . . . . . . . . . . . . 25
3.3.12 (IG50) Pulse Galvanization 50 . . . . . . . . . . . . . . . . . . . . . . . . . . 26
3.3.13 (FM) Frequency-Modulated Current . . . . . . . . . . . . . . . . . . . . . . . 27
3.3.14 (STOCH) Stochastic Current . . . . . . . . . . . . . . . . . . . . . . . . . . . 29
3.3.15 (FaS) Faradic Surge Current . . . . . . . . . . . . . . . . . . . . . . . . . . . 30
3.3.16 (T/R) Pulses with Adjustable Parameters . . . . . . . . . . . . . . . . . . . . . 32
3.4 Medium Frequency Current Modes . . . . . . . . . . . . . . . . . . . . . . . 33
3.4.1 (IFM) Modulated Interference Current . . . . . . . . . . . . . . . . . . . . . 33
3.4.2 (AMF) Amplitude-Modulated Medium-Frequency Current . . . . . . . . . . . 34
3.4.3 (KOTS) Medium-Frequency Muscle Training. . . . . . . . . . . . . . . . . . . 36
Chapter 4 Operation of the instrument . . . . . . . . . . . . . . . . . . . . . . . 38
4.1 Mains and Battery Operation . . . . . . . . . . . . . . . . . . . . . . . . . . 38
4.1.1 Notes on Handling the Batteries. . . . . . . . . . . . . . . . . . . . . . . . . 38
4.1.2 Economy Mode . . . . . . . . . . . . . . . . . . . . . . . . . . . . . . . . . 39
4.2 Start-up of the Instrument. . . . . . . . . . . . . . . . . . . . . . . . . . . . 39
4.3 Function Check . . . . . . . . . . . . . . . . . . . . . . . . . . . . . . . . . 39
4.4 Monitoring Notes . . . . . . . . . . . . . . . . . . . . . . . . . . . . . . . . 39
4.5 Constant Current Operation . . . . . . . . . . . . . . . . . . . . . . . . . . 40
Chapter 5 Therapy with Stimulation Current . . . . . . . . . . . . . . . . . . . . 41
5.1 General Information . . . . . . . . . . . . . . . . . . . . . . . . . . . . . . . 41
5.2 Safety Precautions when Attaching Electrodes . . . . . . . . . . . . . . . . . 41
5.2.1 Modes of Attaching the Electrodes . . . . . . . . . . . . . . . . . . . . . . . 42
5.3 Safety Precautions for Stimulation Current Intensity . . . . . . . . . . . . . . 42
5.3.1 Recommended Intensities . . . . . . . . . . . . . . . . . . . . . . . . . . . . 42
5.4 Preparations and Attaching the Electrodes . . . . . . . . . . . . . . . . . . . 43
5.5 Therapy Using Low-Frequency Current Modes . . . . . . . . . . . . . . . . . 44
5.5.1 Monophase and Biphase Currents . . . . . . . . . . . . . . . . . . . . . . . 44
5.5.2 Iontophoresis . . . . . . . . . . . . . . . . . . . . . . . . . . . . . . . . . . 44
5.5.3 Pain Therapy, Hyperaemisation, Detonisation . . . . . . . . . . . . . . . . . . 46
Table of Contents PHYSIOMED ELEKTROMEDIZIN AG
ii IONOSON-Basic

5.5.4 Muscle Stimulation Using Low-Frequency Currents . . . . . . . . . . . . . . . 47
5.6 Therapy with Medium Frequency Current Modes. . . . . . . . . . . . . . . . 50
5.6.1 Treatment with IFM Current. . . . . . . . . . . . . . . . . . . . . . . . . . . 50
5.6.2 Pain Therapy, Hyperaemisation, Detonisation with AMF Current . . . . . . . . 51
5.6.3 Muscle Stimulation with Medium Frequency Stimulation Currents . . . . . . . 52
Chapter 6 Ultrasound Therapy . . . . . . . . . . . . . . . . . . . . . . . . . . . . . 55
Chapter 7 Simultaneous Therapy . . . . . . . . . . . . . . . . . . . . . . . . . . . 57
Chapter 8 Indications Menu . . . . . . . . . . . . . . . . . . . . . . . . . . . . . . 59
Chapter 9 Individual Programs . . . . . . . . . . . . . . . . . . . . . . . . . . . . . 61
9.1 Save Program . . . . . . . . . . . . . . . . . . . . . . . . . . . . . . . . . . 61
9.2 Call Program. . . . . . . . . . . . . . . . . . . . . . . . . . . . . . . . . . . 62
9.3 Delete Program . . . . . . . . . . . . . . . . . . . . . . . . . . . . . . . . . 62
Appendix A Annex . . . . . . . . . . . . . . . . . . . . . . . . . . . . . . . . . . . . . 64
A.1 Customer Service, Maintenance, Service . . . . . . . . . . . . . . . . . . . . 64
A.2 Cleaning and Disinfection . . . . . . . . . . . . . . . . . . . . . . . . . . . . 64
A.3 Service Life and Disposal. . . . . . . . . . . . . . . . . . . . . . . . . . . . . 64
A.4 Electromagnetic Compatibility. . . . . . . . . . . . . . . . . . . . . . . . . . 65
A.5 Training . . . . . . . . . . . . . . . . . . . . . . . . . . . . . . . . . . . . . 65
A.6 Connecting Additional Instruments . . . . . . . . . . . . . . . . . . . . . . . 65
A.6.1 Vacuum Application Unit . . . . . . . . . . . . . . . . . . . . . . . . . . . . 65
A.7 Basic Settings . . . . . . . . . . . . . . . . . . . . . . . . . . . . . . . . . . 66
A.8 Technical Data . . . . . . . . . . . . . . . . . . . . . . . . . . . . . . . . . . 67
Appendix B Scope of Delivery and Accessories . . . . . . . . . . . . . . . . . . . . 69
B.1 Scope of Delivery (Mains-Operated Model) . . . . . . . . . . . . . . . . . . . 69
B.2 Scope of Delivery (Battery-Operated Model) . . . . . . . . . . . . . . . . . . 70
B.3 Available Accessories . . . . . . . . . . . . . . . . . . . . . . . . . . . . . . 70
PHYSIOMED ELEKTROMEDIZIN AG Table of Contents
IONOSON-Basic iii

Appendix C Supplementary Documents . . . . . . . . . . . . . . . . . . . . . . . . 74
C.1 Manufacturer’s Recommendations . . . . . . . . . . . . . . . . . . . . . . . 74
Index . . . . . . . . . . . . . . . . . . . . . . . . . . . . . . . . . . . . . . 75
Table of Contents PHYSIOMED ELEKTROMEDIZIN AG
iv IONOSON-Basic

Chapter 1 Introduction
With IONOSON-Basic you have acquired a high-quality and extremely versatile combination therapy instru-
ment. The instrument will only show its true potential, however, if you are well informed about its func-
tions. For this reason, carefully read the Operating Instructions and familiarize yourself with the use of the
instrument.
1.1 Conventions Used
Please note the following typographical conventions in these Operating Instructions:
• Cross references and important terms used for the first time in this document are written in italics.
• Names of menus and symbols on the display are written in bold typeface.
Paragraphs that deserve special attention are highlighted in the following way:
Symbol Type Meaning
Tip Intended to give you some extra hints for more convenient operation
Note Provides background information for better understanding
Important Prevents misunderstandings that might lead to limited operation of the in-
strument or insufficient therapeutical results
Caution Alerts you in cases of possible damage to the instrument or risks of injury
1.2 Instrument Symbols
The meanings of the symbols placed on the instrument are as follows:
Symbol Meaning
CAUTION! Refer to the Operating Instructions and consider the physiological effects
of the parameters!
Application part Type BF, not connected to the protective conductor
Ensure environment-friendly disposal! Instruments must by any means be disposed
of separately from household garbage!
PHYSIOMED ELEKTROMEDIZIN AG 1 Introduction
IONOSON-Basic 1

1.3 Instrument Overview
Legend
1 Indicator 7 Mains Module
2 Data Selector 8 Power Switch
3 Intensity Control Channel 1 9 Patient Lead Connector
4 Intensity Control Channel 2 10 Ultrasound Lead Connector
5 Patient Current Indicator 11 Manual Release Key Socket
6 Output Indicator
1 Introduction PHYSIOMED ELEKTROMEDIZIN AG
2 IONOSON-Basic

1.4 General Notes
IONOSON-Basic may only be operated in dry rooms designed for medical purposes, in accordance with
DIN VDE 0100-710, User Class 1. These are rooms with patient beds, physical therapy rooms and practice
rooms. It complies with the technical specifications of VDE 0750/IEC 60601 and is assigned to class IIa ac-
cording to the Council Directive concerning Medical Devices.
The instrument may only be operated by qualified personnel who have undergone special training. You
must operate the instrument properly, i.e. in accordance with the Operating Instructions.
It is not intended for operation in explosion hazard zones or hydrotherapy rooms. Drastic temperature
changes should be avoided, since condensation could be caused within the instrument. Do not start up
the instrument until it is in temperature equilibrium with its environment!
Operating the instrument in the proximity (e.g. 1 m) of a short-wave or micro-wave therapy unit may
cause output irregularities and should be avoided for this reason. Simultaneous connection of the patient
to high-frequency surgical instrument should also be avoided.
Using the electrodes near the thorax can increase the risk of ventricular fibrillation.
The equipment must be connected to the power supply via an earth wire in order to avoid electrical surge
currents.
The replacement of the lithium battery by insufficiently trained personnel can be dangerous.
CAUTION
Technical changes to the equipment are not admissible and will inevitably lead to loss of ap-
proval as a medical device!
1.5 Instrument Description
IONOSON-Basic is a two-channel combination therapy instrument.
You can apply the whole range of current modes from low to medium frequency including modulated in-
terference current. Therapy modes may be accessed directly or, by a proposed treatment, via the indica-
tions menu (refer to Indications Menu on page 59). Moreover, the instrument enables you to store up to
25 individual treatment programs or current mode sequences (refer to Individual Programs on page 61).
Besides plate electrodes and adhesive electrodes, currents can also be applied using vacuum electrodes.
For this, an external vacuum application unit can be connected (refer to Vacuum Application Unit on page 65
).
Waterproof multifrequency transducers (2.5 and 5.0 cm) made of biocompatible titanium are supplied for
ultrasound electrotherapy in the treatment frequencies 1 and 3 MHz. The instrument can also be used for
simultaneous electrotherapy (stimulation current and ultrasound in a single treatment).
The instrument can be equipped with a rechargeable battery and can then be used as a mobile unit, e.g.
in situations where no connection to the mains is available.
PHYSIOMED ELEKTROMEDIZIN AG 1 Introduction
IONOSON-Basic 3

The function of IONOSON-Basic are controlled by a microprocessor. Essential components are permanently
controlled by the processor and thus faulty operation is prevented. After switching on, all instrument func-
tions are checked during an automatic self-test routine.
The instrument complies with all current safety standards. It meets the requirements of the EC directive
concerning medical devices (93/42/EEC) and is therefore CE-labelled.
1.6 Application
The IONOSON-Basic was designed for the following applications:
Stimulation current therapy
• Pain therapy (analgesia)
• Circulatory stimulation
• Mobilization and muscle stimulation
• Iontophoresis
Ultrasound therapy
• Punctual heat therapy in the area of joints, nerves, tendons and muscles
• Pain treatment in case of arthrosis and non-articular rheumatism
• Trophism improvement in case of posttraumatic conditions and ulcus cruris
• Supporting passive and active exercises
Simultaneous Therapy
• Simultaneous application of stimulation current and ultrasound
1.7 Contraindications
Contraindications to stimulation current therapy or simultaneous treatment:
• Highly inflammatory, fever-prone disorders
• Pregnancy
• Patients with cardiac pacemakers or other implanted stimulators
• Malignant tumours
• Skin lesions
• Implants containing metal parts within the area of treatment
Contraindications to ultrasound or simultaneous therapy:
• Fever-prone disorders and acute inflammatory processes
• Tuberculosis
• Gastric ulcers
• Vascular disorders of the extremities (thrombophlebitis, thrombosis, varicosis)
• Tumours
• Circulatory insufficiency, coronary diseases, cardiac arrhythmia
• Acute articular rheumatism
• Diabetes mellitus
• Septic inflammations
1 Introduction PHYSIOMED ELEKTROMEDIZIN AG
4 IONOSON-Basic

• Conditions following radiothorium treatments, X-ray therapy
• Conditions following laminectomy
• Skin lesions (infections, inflammatory processes, naevi)
• Tumescences at all stages (pre-/postoperative)
• Blood coagulation diseases
• In the area of the brain, spinal cord and eyes
PHYSIOMED ELEKTROMEDIZIN AG 1 Introduction
IONOSON-Basic 5

Chapter 2 Controls and Indicators
The design of IONOSON-Basic allows for easy operation, in combination with a variety of functions. Be-
cause of its small size, the instrument is very easy to transport. It has been designed for operation both in-
side and outside of therapy rooms, and is fed by rechargeable batteries for that reason (only battery oper-
ated model, refer to Mains and Battery Operation on page 38).
All controls and indicators are integrated into the housing, thus allowing for easy cleaning of the instru-
ment's surface and protecting it from dust.
The instrument's microprocessor monitors the safety-related components, prevents from erroneous opera-
tion and checks the instrument after switching it on.
2.1 Display <1>
In the Display <1>, all menu items including the therapy para-
meters of the instrument can be selected in different areas.
You can select the parameters using the Data Selector <2>.
2.1.1 Symbols in the Display <1>
In the Display <1> you find the following symbols:
Symbols in the Lower Status Bar
State of charge of the battery (refer to Mains and Battery Operation on page 38)
Emission of current via the Patient Lead Connector <9>
Emission of current via a connected vacuum application instrument (refer to Vacuum Applic-
ation Unit on page 65)
Commutation between CC mode and CV mode (refer to Constant Current Operation on
page 40)
Individual programs (refer to Individual Programs on page 61)
Quit menu and return to start screen
2 Controls and Indicators PHYSIOMED ELEKTROMEDIZIN AG
6 IONOSON-Basic

2.2 Data Selector <2>
The Data Selector <2> is used to select the therapy parameters and to
operate the instrument by means of the cursor. After switching on the in-
strument, the cursor is located at the current mode G of the Display <1>.
You can move the cursor to the other menu items by turning the selector
to the right or left. To select a menu, simply press the selector.
To select a parameter, move the cursor to the respective field by turning
the selector. After pressing the selector, the cursor will start flashing. You
will then be able to select the parameters by turning the selector and con-
firm the selected value by pressing the selector again (cursor stops flash-
ing). .
NOTICE
In the ultrasound menu the dose is also selected using the Data Selector <2> (refer to Ultra-
sound Therapy on page 55).
2.3 Intensity Control Channel 1 <3> and Channel 2 <4>
The Intensity Control Channel 1 <3> and Intensity Control Channel 2
<4> serve to set the intensity in the channels I and II in steps of 0.5 mA.
When turning up the intensity of the two intensity controls, the associated
therapy timer in the Display <1> will be started as well.
Convenient Reduction of Intensity
The intensity can automatically be turned down to 0.0 mA: To do so, press the Intensity
Control Channel 1 <3> or Intensity Control Channel 2 <4> until you hear a short signal.
Afterwards, the instrument will automatically reduce the intensity to zero.
2.3.1 Automatic Output Current Switch-off
IONOSON-Basic features an automatic output current switch-off, activated in case the current flow of the
electrodes is interrupted (electrode falls off, connector is disconnected from patient lead etc.). The mes-
sage CHECK ELECTRODES I or CHECK ELECTRODES II will appear in the lower status bar and the cur-
rent will be automatically turned down to a minimum basic current in the respective channel. The timer
stops the therapy time. After eliminating the error, you have to turn the Intensity Control Channel 1
<3> or Intensity Control Channel 2 <4> to the left by one position. The message will disappear and you
can increase the intensity again.
PHYSIOMED ELEKTROMEDIZIN AG 2 Controls and Indicators
IONOSON-Basic 7

2.4 Patient Current Indicator <5>
The diode at the left side of the symbol belongs to channel I, the diode at the
right to channel II. The flashing of the indicators depends on the resistance in
the two channels. In most cases the diodes start flashing exactly at the mo-
ment when the patient starts to have a clear sensation of the current in the
corresponding channel.
Important
If the indicator does not flash during treatment, you need to carry out a self-test routine and
observe whether or not the indicator flashes. If the indicator still does not flash during treat-
ment after the check, the accessories of the corresponding channel should be checked and
replaced if necessary!
2.5 Output Indicator <6>
The Output Indicator <6> tells you to be cautious when handling the electrodes.
CAUTION
When the Output Indicator <6> flashes, the Patient Lead Connect-
or <9> is under voltage!
Make sure you do not touch the electrodes when the current is turned
up!
2.6 Mains Module <7>
The Mains Module <7> with the mains switch, is located at the rear face of the in-
strument. With the mains switch, you can switch the mains voltage of the IONO-
SON-Basic on and off.
Important
For mains supply only use the mains cable provided by the manufac-
turer!
2 Controls and Indicators PHYSIOMED ELEKTROMEDIZIN AG
8 IONOSON-Basic

2.7 Power Switch <8>
If you look at the instrument from the front, the Power Switch <8> is on its
left side. By means of this switch, you can switch the instrument on and off.
After switching on, a selftest is automatically carried out by the instrument
(refer to Function Check on page 39).
2.8 Patient Lead Connector <9>
The Patient Lead Connector <9> on the rear face of the instrument serves to plug
in the patient lead. Plate electrodes, adhesive electrodes or other types of electrodes
are plugged into the patient lead. The Patient Lead Connector <9> also serves to
connect a PHYSIOVAC-Basic vacuum application instrument (refer to Vacuum Ap-
plication Unit on page 65).
2.8.1 Patient Lead: Mode of Attachment
The colours of the connectors facilitate easy and correct attachment of the electrodes to the two channels
and to their polarity:
• The colour of the inner channel symbolizes the colour of the electrode lead: red = channel I, blue =
channel II
• The colour of the outer channel symbolizes the colour of the connector: red = anode (+), blue = cath-
ode (-)
anode (+) channel I
cathode (-) channel I
anode (+) channel II
cathode (-) channel II
2.9 Ultrasound Lead Connector <10>
The ultrasonic transducer is connected via the Ultrasound Lead Connector <10>
on the right-hand side of the instrument. The ultrasonic transducer is automatically
calibrated when it is plugged in or after the initial selection of the ultrasound menu
after switching on the instrument (refer to Ultrasound Therapy on page 55).
The Ultrasound Lead Connector <10> is clearly marked with a blue ring to pre-
vent any danger of confusion with other sockets.
PHYSIOMED ELEKTROMEDIZIN AG 2 Controls and Indicators
IONOSON-Basic 9

Replacing the ultrasonic transducer during treatment will not affect the selected mode of treatment. The
dose, however, will automatically be turned down to zero and has to be increased again when continuing
the treatment.
Automatic Coupling Confirmation
Both transducer and instrument have an optical coupling confirmation, which guarantees
constant and efficient treatment. If the coupling to the tissue of the patient is not efficient
enough, the light at the transducer will start flashing. You can choose between counting only
the effective treatment time or running the timer independently of the coupling (refer to Ba-
sic Settings on page 66).
Ultrasonic Transducer
The ultrasonic transducers (2.5 or 5 cm2) work with the frequencies 1
MHz and 3 MHz. The transducers are automatically calibrated after
connecting or switching on the instrument.
The transducers are watertight and can be used for underwater treat-
ment.
Important
The transducer contains a fragile ceramic piezo-resonator. Avoid shocks to the surface and
take special care that the transducer is not dropped. Hard knocks can alter its physical charac-
teristics!
2.10 Manual Release Key Socket <11>
The Manual Release Key Socket <11> at the front of the instrument serves to
connect the manual release key for intentional exercises or for a therapy pause. The
use of a manual release key may be appropriate when applying the current modes
FaS, T/R and KOTS.
The manual release key can be used as a therapy pause button for all other current modes. When pressing
the release key, the current is switched off immediately.
NOTICE
You can turn up the current only after setting the Intensity Control Channel 1 <3> or In-
tensity Control Channel 2 <4>. The therapy time is interrupted as long as the instrument is
standing by.
2 Controls and Indicators PHYSIOMED ELEKTROMEDIZIN AG
10 IONOSON-Basic

Chapter 3 Overview of Current Modes
NOTICE
All current modes of the instrument are emitted in the constant current mode unless other-
wise specified (refer to Constant Current Operation on page 40). Only in simultaneous treat-
ment (refer to Simultaneous Therapy on page 57) the instrument is automatically switched to
a mixed mode consisting of constant current and constant voltage mode to avoid unpleasant
current sensations when the contact between skin and transducer is interrupted.
3.1 Settings for all Current Modes
The following settings are valid for all current modes:
Duration of therapy stated in minutes and seconds: The therapy duration of the re-
spective channel is preselected with the therapy timer.
Click on the corresponding function of the timer using the Data Selector <2> (the
symbol flashes) and turn the Data Selector <2> to the right or left (possible val-
ues: 1.00 ... 60 min). The respective timer is started when increasing the intensity with
the Intensity Control Channel 1 <3> or the Intensity Control Channel 2 <4>.
If the intensity in a channel is turned down to zero, the timer assigned to the channel
stops. When the therapy time is over, you hear a beep. The intensity of the respective
channel is turned down slowly. During a treatment, the timer automatically sets the
therapy time used last.
Current intensity set: This field displays the intensity of the respective channel in mA
(milliampere) or µA (microampere; only for GMC and MENS current modes).
The bar graph below illustrates the maximum level of intensity you can set. The sign
next to the intensity displayed indicates the polarity of the electrode with the red con-
nector.
3.2 Dual Channel Operation
Most current modes can be applied in dual channel operation. The following current modes support dual
channel operation:
• (UR) Ultra Stimulation Current on page 20
• (HV) High-Voltage Current on page 21
• (TENS) Transcutaneous Electric Nerve Stimulation on page 23
• (IG30) Pulse Galvanization 30 on page 25
• (IG50) Pulse Galvanization 50 on page 26
• (FaS) Faradic Surge Current on page 30
PHYSIOMED ELEKTROMEDIZIN AG 3 Overview of Current Modes
IONOSON-Basic 11

• (FM) Frequency-Modulated Current on page 27
• (STOCH) Stochastic Current on page 29
• (T/R) Pulses with Adjustable Parameters on page 32
• (IFM) Modulated Interference Current on page 33
• (KOTS) Medium-Frequency Muscle Training on page 36
3.2.1 Simultaneous and Alternating Stimulation
In current mode FaS and KOTS you can increase and fade the currents in channel 1 and 2 either simultan-
eously or alternating. Three different modes of coordination are possible (simultaneous, directly altern-
ating and alternating with pauses):
Automatic triggering: Channels 1 und 2 stimulate simultaneously with identical para-
meters.
Manual control ( ): Pressing the manual release key causes simultaneous stimula-
tion in both channels until release.
Manual triggering ( ): Pressing the manual release key causes simultaneous
stimulation in both channels with the length set in T.
Automatic triggering: Channels 1 and 2 provide alternating stimulation in immediate
succession. This is followed by a surge cycle consisting of:
• Increase in channel 1 with the length selected for T
• No pause
• Increase in channel 2 with the length selected for T
• Pause with the length set for R
Manual control ( ): First pressing of manual push button causes stimulation in
channel 1 until release, second pressing causes stimulation in channel 2 until release.
Manual triggering ( ): First pressing of manual push button causes stimulation
in channel 1 with the length set in T. The corresponding pulse in channel 2 follows
automatically without a pause.
Automatic triggering: Channels 1 and 2 provide alternating stimulation, with pauses
defined between increases in channel 1 and 2.
Manual control ( ): First pressing of manual push button causes stimulation in
channel 1 until release, second pressing causes stimulation in channel 2 until release.
Manual triggering ( ): First pressing of manual push button causes stimulation
in channel 1 with the length set in T, second pressing causes stimulation in channel 2
with the length set in T.
How to Make a Treatment with a Preselected Pulse Duration and Pause
(1) In the Display <1>, select a suitable current mode e.g. KOTS.
(2) With the Data Selector <2>, click on the symbol in channel I. The following window opens:
3 Overview of Current Modes PHYSIOMED ELEKTROMEDIZIN AG
12 IONOSON-Basic

Selection window for channel I
(3) With the Data Selector <2>, click first on the symbol R, set the pulse pause (1- 60 s) by turning and
confirm by pressing.
(4) Now use the Data Selector <2> to click on the symbol T, set the pulse duration (1- 60 s or manual
release key) by turning and confirm by pressing it.
(5) Now use the Data Selector <2> to click on the symbol to return to the start menu.
(6) The pulse duration and pulse pause selected are now displayed next to the pulse symbol.
(7) With the Data Selector <2>, click on the symbol in channel II. The following window opens:
Selection window for channel II
(8) First use the Data Selector <2> to click on the R symbol, turn to the left until the desired symbol
(simultaneous or alternating stimulation) appears and press to confirm.
(9) Now use the Data Selector <2> to click on the symbol to return to the start menu.
The selected symbol now appear next to the pulse symbol in channel II.
NOTICE
During a pulse pause only turn the intensity slightly to avoid unpleasant muscle reac-
tions.
How to Control the Pulse Currents with the Manual Release Key
(1) In the Display <1>, select a suitable current mode e.g. KOTS.
(2) With the Data Selector <2> click on the symbol in channel I. The following window opens:
Selection window for channel I
(3) With the Data Selector <2> first click on the R symbol, rotate to the left until one of the manual
control symbols appears and press to confirm. The symbols have the following meaning:
• : The duration of increase is determined by pressing the manual release key, the pause by
releasing the manual release key.
PHYSIOMED ELEKTROMEDIZIN AG 3 Overview of Current Modes
IONOSON-Basic 13

• : Pressing the key triggers a single pulse of the preset increase duration T.
(4) Now use the Data Selector <2> to click on the symbol to return to the start menu.
The manual release key symbol is now displayed next to the pulse symbol .
Important
If you use the manual release key, you can only turn the intensity up in both channels if
you press the manual release key (security blocking)!
(5) With the Data Selector <2> click on the symbol in channel II. The following window opens:
Selection window for channel II
(6) First use the Data Selector <2> to click on the R symbol, turn to the left until the desired symbol
(simultaneous or alternating stimulation) appears and press to confirm.
(7) Now use the Data Selector <2> to click on the symbol to return to the start menu.
The respective symbol for simultaneous or alternating simulation now appears next to the pulse sym-
bol of channel II.
How to Control the Pulse Currents Manually with Preselected Pulse Duration
(1) In the Display <1>, select a suitable current mode e.g. KOTS.
(2) With the Data Selector <2> click on the symbol in channel I. The following window opens:
Selection window for channel I
(3) First use the Data Selector <2> to click on the symbol R, turn to the right until the until the manual
release key symbol appears and press to confirm.
(4) Now use the Data Selector <2> to click on the symbol to return to the start menu.
The manual release key symbol is now displayed next to the pulse symbol .
Important
If you use the manual release key, you can only turn the intensity up in both channels if
you press the manual release key (security blocking)!
(5) Now use the Data Selector <2> to click on the symbol T, set the pulse duration by turning and con-
firm by pressing it.
(6) With the Data Selector <2> click on the symbol in channel II. The following window opens:
3 Overview of Current Modes PHYSIOMED ELEKTROMEDIZIN AG
14 IONOSON-Basic

Selection window for channel II
(7) First use the Data Selector <2> to click on the R symbol, turn to the left until the desired symbol
(simultaneous or alternating stimulation) appears and press to confirm.
(8) Now use the Data Selector <2> to click on the symbol to return to the start menu.
The respective symbol for simultaneous or alternating simulation now appears next to the pulse sym-
bol of channel II.
CAUTION
During a pulse pause only turn the intensity slightly to avoid unpleasant muscle reac-
tions.
3.3 Low-Frequency Current Modes
3.3.1 (G) Galvanization
Definition Direct current without any interruption or break, or as a variation medium-frequency in-
terrupted direct current (8 kHz; duty cycle 95%).
Applications• Iontophoresis (refer to Iontophoresis on page 44)
• Basic therapy for paralysis and atrophy treatment
• Evoking hyperaemia
Current Mode G Menu
PHYSIOMED ELEKTROMEDIZIN AG 3 Overview of Current Modes
IONOSON-Basic 15

Current Mode G: Direct Current Current Mode G: Medium-Frequency Interrupted Direct
Current
Parameters for Current Mode G
Polarity switch to switch the polarity of the two electrodes; the sign in the intensity dis-
play changes accordingly.
Switching from galvanic current to medium-frequency interrupted direct current.
3.3.2 (GMC) Galvanization with Microcurrent
Definition Direct current at microampere level without any interruption or break, or as a variation
medium-frequency interrupted direct current (8 kHz; duty cycle 95%)
Applications• Fine iontophoresis (refer to Iontophoresis on page 44)
• Trophic enhancement
• Pain treatment
Menu for Current Mode GMC
Current Mode GMC: Direct Current Current Mode GMC: Medium-Frequency Interrupted Direct
Current
3 Overview of Current Modes PHYSIOMED ELEKTROMEDIZIN AG
16 IONOSON-Basic

Parameters for Current Mode GMC
Intensity display in microampere (1,000 µA = 1 mA)
Polarity switch to switch the polarity of the two electrodes; the sign in the in-
tensity display changes accordingly.
Switching from galvanic current to medium-frequency interrupted direct
current.
NOTICE
The maximum intensity of current mode GMC is so small that it is hardly perceptible. Its en-
ergy is not sufficient to light Patient Current Indicator <5> and Output Indicator <6>. The
diodes therefore remain dark.
3.3.3 (DF) Diadynamic Current Diphasé Fixe
Definition Diadynamic current diphasé fixe acc. to Bernard
Application• Classic current for analgesia in case of neuralgia and chronic pains, sympathetic
blockade
Menu for Current Mode DF
Current Mode DF
Parameters for Current Type DF
Polarity switch to switch the polarity of the two electrodes; the sign in the intensity dis-
play changes accordingly.
Pulse shape Sinusoidal half-waves
PHYSIOMED ELEKTROMEDIZIN AG 3 Overview of Current Modes
IONOSON-Basic 17

Simulation fre-
quency
100 Hz
Pulse time 10 ms
Release time 0 ms
3.3.4 (MF) Diadynamic Current Monophasé Fixe
Definition Diadynamic current monophasé fixe acc. to Bernard
Application• Pain treatment
Menu for Current Mode MF
Current Mode MF
Parameters for Current Mode MF
Polarity switch to switch the polarity of the two electrodes; the sign in the intensity dis-
play changes accordingly.
Pulse shape Sinusoidal half-waves
Simulation fre-
quency
50 Hz
Pulse time 10 ms
Release time 10 ms
3 Overview of Current Modes PHYSIOMED ELEKTROMEDIZIN AG
18 IONOSON-Basic

3.3.5 (CP) Diadynamic Current Modulé en Courtes Périodes
Definition Diadynamic current modulé en courtes périodes according to Bernard
Application• Pain treatment
• Resorption enhancement
Menu for Current Mode CP
Current Mode CP
Parameters for Current Mode CP
Polarity switch to switch the polarity of the two electrodes; the sign in the intensity dis-
play changes accordingly.
Pulse shape Sinusoidal half-waves
Simulation fre-
quency
50 / 100 Hz
Pulse time 10 ms
Release time 0 or 10 ms; changing in the rhythm of 1 s
3.3.6 (LP) Diadynamic Current Modulé en Longues Périodes
Definition Diadynamic current modulé en longues périodes according to Bernard
Application• Analgesia with chronic states
• Resorption enhancement
PHYSIOMED ELEKTROMEDIZIN AG 3 Overview of Current Modes
IONOSON-Basic 19

Menu for Current Mode LP
Current Mode LP
Parameters for Current Mode LP
Polarity switch to switch the polarity of the two electrodes; the sign in the intensity dis-
play changes accordingly.
Pulse shape Sinusoidal half-waves; MF basic current with second MF current alternately every 5 and
10 s.
Simulation fre-
quency
50 / 100 Hz
Pulse time 10 ms
Release time 0 / 10 ms alternating in the rhythm of 5 s.
3.3.7 (UR) Ultra Stimulation Current
Definition Ultra stimulation current acc. to Träbert
Application• Pains caused by hypertonic muscles, arthrosis and osteochondrosis
3 Overview of Current Modes PHYSIOMED ELEKTROMEDIZIN AG
20 IONOSON-Basic

Menu for Current Mode UR
Current Mode UR: Monophase Current Mode UR: Biphase
Parameters for Current Mode UR
Polarity switch to switch the polarity of the two electrodes; the sign in the intensity dis-
play changes accordingly.
Switching from monophase to biphase pulse emission.
Pulse shape Square pulse
Stimulation fre-
quency
approx. 143 Hz
Pulse time 2 ms
Release time 5 ms
3.3.8 (HV) High-Voltage Current
Definition High-voltage current
Application• Pain treatment of various kinds at minimum skin exposure
• Circulatory stimulation
• Detonisation
PHYSIOMED ELEKTROMEDIZIN AG 3 Overview of Current Modes
IONOSON-Basic 21

Menu for Current Mode HV
Current Mode HV: monophase Current Mode HV: biphase
Parameters for Current Mode HV
Polarity switch to switch the polarity of the two electrodes (the sign in the intensity dis-
play changes accordingly); can be adjusted separately for both channels.
Switching from monophase to biphase pulse emission.
Pulse time Ti (80 - 500 µs)
Burst frequency (1 - 10 Hz)
Frequency bands 1 - 150 Hz, 70 - 150 Hz or Selective frequency 1- 200 Hz (classical:
197 Hz)
Pulse shape Twin Pulses
How to Set the Pulse Time
(1) Click on the Ti symbol using the Data Selector <2>. The symbol starts flashing.
(2) Turn the Data Selector <2>, to adjust the desired pulse time and confirm by pressing it.
NOTICE
You can only extend the pulse time Ti if the intensity in both channels is zero. If you ex-
tend the pulse time, the current is experienced by the patient as more intense.
How to Adjust the Selective Frequency
(1) Click on the symbol by means of the Data Selector <2>. The symbol starts flashing.
(2) Turn the Data Selector <2> to the right until the SELECTIVE symbol is displayed.
(3) Turn the Data Selector <2> and turn it to the right by one position.
3 Overview of Current Modes PHYSIOMED ELEKTROMEDIZIN AG
22 IONOSON-Basic

(4) Press the Data Selector <2>. The arrow symbol starts flashing.
(5) Press the Data Selector <2> and adjust the desired frequency (the desired frequency is displayed
next to the f symbol) and press it for confirmation.
NOTICE
With the burst function (burst frequency between 1 and 10 Hz) activated simultan-
eously, you can only choose a selective frequency between 70 and 200 Hz or the fre-
quency band 70 - 150 Hz. The frequency band 1 - 150 Hz is not available.
3.3.9 (TENS) Transcutaneous Electric Nerve Stimulation
Definition Transcutaneous electric nerve stimulation
Application• Pain therapy for chronic neuralgia and myalgia
Menu for Current Mode TENS
Current Mode TENS: monophase Current Mode TENS: biphase
Parameters for Current Mode TENS
Polarity switch to switch the polarity of the two electrodes (the sign in the intensity dis-
play changes accordingly); can be adjusted separately for both channels.
Switching from monophase to biphase pulse emission.
Pulse time Ti (80 - 500 µs)
Burst frequency (1 - 10 Hz)
Frequency bands 1 - 150 Hz, 70 - 150 Hz or selective frequency 1- 200 Hz
Pulse shape Square pulse
PHYSIOMED ELEKTROMEDIZIN AG 3 Overview of Current Modes
IONOSON-Basic 23

How to Adjust the Pulse Time
(1) Click on the Ti symbol using the Data Selector <2>. The symbol starts flashing.
(2) Turn the Data Selector <2>, to adjust the desired pulse time and confirm by pressing it.
NOTICE
You can only extend the pulse time Ti if the intensity in both channels is zero. If you ex-
tend the pulse time, the current is experienced by the patient as more intense.
How to Adjust the Selective Frequency
(1) Click on the symbol by means of the Data Selector <2>. The symbol starts flashing.
(2) Turn the Data Selector <2> to the right until the SELECTIVE symbol is displayed.
(3) Turn the Data Selector <2> and turn it to the right by one position.
(4) Press the Data Selector <2>. The arrow symbol starts flashing.
(5) Press the Data Selector <2> and adjust the desired frequency (the desired frequency is displayed
next to the f symbol) and press it for confirmation.
NOTICE
With the burst function (burst frequency between 1 and 10 Hz) activated simultan-
eously, you can only choose a selective frequency between 70 and 200 Hz or the fre-
quency band 70 - 150 Hz. The frequency band 1 - 150 Hz is not available.
3.3.10 (MENS) Electric Nerve Stimulation with Microcurrent
Definition Electric nerve stimulation with microcurrent
Application• Pain treatment (especially for chronic neuralgia and myalgia)
• Trophic enhancement
• Improvement of healing and regeneration
Menu for Current Mode MENS
3 Overview of Current Modes PHYSIOMED ELEKTROMEDIZIN AG
24 IONOSON-Basic

Current Mode MENS: monophase Current Mode MENS: biphase
Parameters for Current Mode MENS
Polarity switch to switch the polarity of the two electrodes; the sign in the intensity dis-
play changes accordingly.
Switching from monophase to biphase pulse emission.
Burst frequency (0.1 - 15.0 Hz)
Frequency bands 50 - 200 Hz, 50 - 300 Hz, 200- 300 Hz or selective frequency 10 Hz or
50 - 300 Hz
Pulse time 1.6 ... 50 ms
Pulse shape Square pulse
How to Adjust the Selective Frequency
(1) Click on the symbol by means of the Data Selector <2>. The symbol starts flashing.
(2) Turn the Data Selector <2> to the right until the SELECTIVE symbol is displayed.
(3) Turn the Data Selector <2> and turn it to the right by one position.
(4) Press the Data Selector <2>. The arrow symbol starts flashing.
(5) Press the Data Selector <2> and adjust the desired frequency (the desired frequency is displayed
next to the f symbol) and press it for confirmation.
NOTICE
If you select the selective frequency 10 Hz, you cannot use the burst function.
The maximum intensity of current mode GMC is so small that it is hardly perceptible. Its
energy is not sufficient to light Patient Current Indicator <5> and Output Indicator
<6>. The diodes therefore remain dark.
3.3.11 (IG30) Pulse Galvanization 30
Definition Pulse Galvanization with strongly stimulating pulse frequency; acc. to Prof. Jantsch
Application• Circulatory stimulation
• Analgesia
PHYSIOMED ELEKTROMEDIZIN AG 3 Overview of Current Modes
IONOSON-Basic 25

Menu for Current Mode IG30
Current Mode IG30: monophase Current Mode IG30: biphase
Parameters for Current Mode IG30
Polarity switch to switch the polarity of the two electrodes ( the sign in the intensity dis-
play changes accordingly); can be adjusted separately for both channels.
Switching from monophase to biphase pulse emission; can be adjusted separately for
both channels.
Pulse shape Triangle
Stimulation fre-
quency
approx. 12 Hz
Pulse time 30 ms
Release time 50 ms
3.3.12 (IG50) Pulse Galvanization 50
Definition Pulse Galvanization with strong shiver-inducing frequency acc. to Prof. Jantsch
Application• Circulatory stimulation
• Analgesia
• Relaxing muscle tension
• Haematoma reduction
3 Overview of Current Modes PHYSIOMED ELEKTROMEDIZIN AG
26 IONOSON-Basic

Menu for Current Mode IG50
Current Mode IG50: monophase Current Mode IG50: biphase
Parameters for Current Mode IG50
Polarity switch to switch the polarity of the two electrodes ( the sign in the intensity dis-
play changes accordingly); can be adjusted separately for both channels.
Switching from monophase to biphase pulse emission; can be adjusted separately for
both channels.
Pulse shape Triangle
Stimulation fre-
quency
approx. 8 Hz
Pulse time 1 ms
Release time 20 ms
Threshold time 50 ms
Threshold inter-
val
70 ms
3.3.13 (FM) Frequency-Modulated Current
Definition Shiver-inducing frequency with automatically altered stimulation cycles.
Application• Circulatory stimulation
• Relaxing muscle tensions
• Analgesia
• Sports physiotherapy with little sensitive strain
PHYSIOMED ELEKTROMEDIZIN AG 3 Overview of Current Modes
IONOSON-Basic 27

Menu for Current Mode FM
Current Mode FM: monophase Current Mode FM: biphase
Parameters for Current Type FM
Polarity switch to switch the polarity of the two electrodes ( the sign in the intensity dis-
play changes accordingly); can be adjusted separately for both channels.
Switching from monophase to biphase pulse emission; can be adjusted separately for
both channels.
Pulse shape (triangular pulse, square pulse); can be adjusted separately for both chan-
nels
Stimulation fre-
quency
7 - 14 Hz
Pulse time 1 ms
Release time 70 - 142 ms
How to Change the Pulse Shape
(1) With the Data Selector <2>, click on the symbol . The symbol starts flashing.
(2) Turn the Data Selector <2> to the right by one position to make the pulse shape change and press
it for confirmation.
NOTICE
You can only change the pulse shape from triangle to square if the intensity in both channels
is zero. Square pulses make the current mode more intense.
3 Overview of Current Modes PHYSIOMED ELEKTROMEDIZIN AG
28 IONOSON-Basic

3.3.14 (STOCH) Stochastic Current
Definition Stimulation current with random pulse triggering
Application• Circulatory stimulation
• Analgesia with minimal stimulus adaptation
Menu for Current Mode STOCH
Current Mode STOCH: monophase Current Mode STOCH: biphase
Parameters for Current Mode STOCH
Polarity switch to switch the polarity of the two electrodes (the sign in the intensity dis-
play changes accordingly); can be adjusted separately for both channels.
Switching from monophase to biphase pulse emission; can be adjusted separately for
both channels.
Pulse shape (triangular pulse, square pulse); can be adjusted separately for both chan-
nels
Stimulation fre-
quency
10 - 100 Hz (aleatory)
Pulse time 1 ms
Release time 10 - 100 ms (aleatory)
How to Change the Pulse Shape
(1) With the Data Selector <2>, click on the symbol . The symbol starts flashing.
(2) Turn the Data Selector <2> to the right by one position to make the pulse shape change and press
it for confirmation.
PHYSIOMED ELEKTROMEDIZIN AG 3 Overview of Current Modes
IONOSON-Basic 29

NOTICE
You can only change the pulse shape from triangle to square if the intensity in both
channels is zero. Square pulses make the current mode more intense.
3.3.15 (FaS) Faradic Surge Current
Definition Faradic surge current
Application• Treatment of muscle atrophies
• Intentional exercises according to Förster
• Electrogymnastics
• Muscle training in sports
• Coordination exercises
Menu for Current Mode FaS
Current Mode FaS: monophase Current Mode FaS: biphase
Parameters for Current Mode FaS
Polarity switch to switch the polarity of the two electrodes (the sign in the intensity dis-
play changes accordingly); can be adjusted separately for both channels.
Switching from monophase to biphase pulse emission; can be adjusted separately for
both channels.
Pulse duration T (1 - 60 s or continuously) and release time R (0 - 60 s or manual re-
lease key); can respectively be adjusted separately for both channels, refer to Dual
Channel Operation on page 11.
Ramp (Surge time) m1
- m4
for different slew rates; can respectively be adjusted separ-
3 Overview of Current Modes PHYSIOMED ELEKTROMEDIZIN AG
30 IONOSON-Basic
ately for both channels
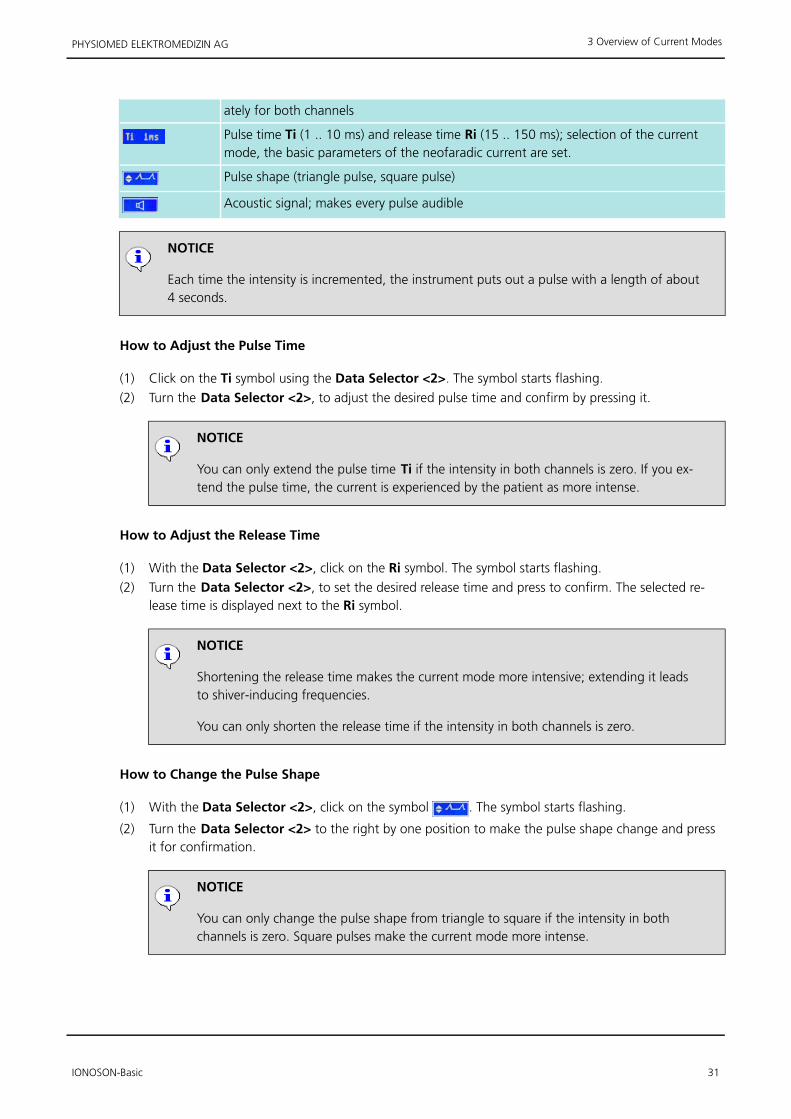
Pulse time Ti (1 .. 10 ms) and release time Ri (15 .. 150 ms); selection of the current
mode, the basic parameters of the neofaradic current are set.
Pulse shape (triangle pulse, square pulse)
Acoustic signal; makes every pulse audible
NOTICE
Each time the intensity is incremented, the instrument puts out a pulse with a length of about
4 seconds.
How to Adjust the Pulse Time
(1) Click on the Ti symbol using the Data Selector <2>. The symbol starts flashing.
(2) Turn the Data Selector <2>, to adjust the desired pulse time and confirm by pressing it.
NOTICE
You can only extend the pulse time Ti if the intensity in both channels is zero. If you ex-
tend the pulse time, the current is experienced by the patient as more intense.
How to Adjust the Release Time
(1) With the Data Selector <2>, click on the Ri symbol. The symbol starts flashing.
(2) Turn the Data Selector <2>, to set the desired release time and press to confirm. The selected re-
lease time is displayed next to the Ri symbol.
NOTICE
Shortening the release time makes the current mode more intensive; extending it leads
to shiver-inducing frequencies.
You can only shorten the release time if the intensity in both channels is zero.
How to Change the Pulse Shape
(1) With the Data Selector <2>, click on the symbol . The symbol starts flashing.
(2) Turn the Data Selector <2> to the right by one position to make the pulse shape change and press
it for confirmation.
NOTICE
You can only change the pulse shape from triangle to square if the intensity in both
channels is zero. Square pulses make the current mode more intense.
PHYSIOMED ELEKTROMEDIZIN AG 3 Overview of Current Modes
IONOSON-Basic 31

3.3.16 (T/R) Pulses with Adjustable Parameters
Definition Pulses with adjustable parameters
Application• Treatment of peripheral paralysis
• selective muscle stimulation
Menu for Current Mode T/R
Current Mode T/R: monophase Current Mode T/R: biphase
Parameters for Current Mode T/R
Polarity switch to switch the polarity of the two electrodes (the sign in the intensity dis-
play changes accordingly); can be adjusted separately for both channels.
Switching from monophase to biphase pulse emission; can be adjusted separately for
both channels.
Pulse shape (Square pulse r1, Triangle pulse d
1or d
2, exponential pulse e
1); can be adjus-
ted separately for both channels.
Pulse length (100 µs - 1 s)
Release time (5 ms - 7 s or manual release key to release a single pulse)
Acoustic signal; makes pulses audible
3 Overview of Current Modes PHYSIOMED ELEKTROMEDIZIN AG
32 IONOSON-Basic

3.4 Medium Frequency Current Modes
3.4.1 (IFM) Modulated Interference Current
Definition Medium frequency alternating current that features a outstanding compatibility and
significant depth effect.
Application• Pain therapy
• Circulatory stimulation
• Detonisation
Menu for Current Mode IFM
Current Mode IFM: Sinusoidal Waves
Parameters for Current Mode IFM
Vector function (on/off); varies the intensity of the two channels and thus
changes the effective field of the current
Frequency cycle (1 s / 30 s / 1 s; 1 s / 1 s / 1 s; 3 s / 3 s / 3 s; 6 s / 6 s / 6 s; 12 s
/ 12 s / 12 s; Time upper frequency / Changing time / Time lower frequency)
Basic frequency (2.0 - 9.5 kHz). A lower frequency enhances the stimulation
intensity, a higher frequency lowers it.
Frequency bands (1 - 25 Hz; 1- 50 Hz; 1 - 250 Hz; 100 - 250 Hz; program-
mable freely 1 - 250 Hz; or SELECTIVELY 1 - 250 Hz); the frequency currently
active is displayed in the frequency field next to the f symbol
Pulse shape Sinusoidal waves
PHYSIOMED ELEKTROMEDIZIN AG 3 Overview of Current Modes
IONOSON-Basic 33

NOTICE
You can only shorten the release time if the intensity in both channels is zero.
How to Program a Frequency Band
(1) Click on the symbol by means of the Data Selector <2>. The symbol starts flashing.
(2) Turn the Data Selector <2> to the right until the symbol <<F>> is displayed and press to confirm.
(3) Turn the Data Selector <2> to the right by one position until it reaches the lower barrier frequency
and press it.
(4) Turn the Data Selector <2> to set the desired frequency and press it to confirm.
(5) Turn the Data Selector <2> one position to the right to set the upper limit frequency and press to
confirm.
(6) Turn the Data Selector <2> to set the desired frequency and press it to confirm.
How to Adjust the Selective Frequency
(1) Click on the symbol by means of the Data Selector <2>. The symbol starts flashing.
(2) Turn the Data Selector <2> to the right until the SELECTIVE symbol is displayed.
(3) Turn the Data Selector <2> and turn it to the right by one position.
(4) Press the Data Selector <2>. The arrow symbol starts flashing.
(5) Press the Data Selector <2> and adjust the desired frequency (the desired frequency is displayed
next to the f symbol) and press it for confirmation.
3.4.2 (AMF) Amplitude-Modulated Medium-Frequency Current
Definition Amplitude-modulated medium-frequency current
Application• Pain therapy
• Circulatory stimulation
• Detonisation
Menu for Current Mode AMF
3 Overview of Current Modes PHYSIOMED ELEKTROMEDIZIN AG
34 IONOSON-Basic

Current Mode AMF: Sinusoidal Waves
Parameters for Current Mode AMF
Frequency cycle (1 s / 30 s / 1 s; 1 s / 1 s / 1 s; 3 s / 3 s / 3 s; 6 s / 6 s / 6 s; 12 s
/ 12 s / 12 s; Time upper frequency / Changing time / Time lower frequency)
Basic frequency (2.0 - 9.5 kHz). A lower frequency enhances the stimulation
intensity, a higher frequency lowers it.
Frequency bands (0 - 25 Hz; 0 - 50 Hz; 0 - 250 Hz; 100 - 250 Hz; free pro-
grammable 0 - 250 Hz; or fixed frequency SELECTIVE 0 - 250 Hz); the currently
active frequency is displayed to the right next to the symbol f.
Pulse shape Sinusoidal waves
Relation between Frequency Cycle and Frequency Band
You can only select a frequency cycle if you have selected or programmed a frequency band
using the MODE function. Before this, you cannot click the symbol Fcycl
!
For the frequency cycle to become active, a frequency band has to be selected!
Example for a Frequency Cycle
Let's suppose you have selected the frequency cycle 1 s / 30 s / 1 s and the frequency band 0
- 250 Hz:
First, the frequency is on the maximum value (250 Hz) for one second. Afterwards, the fre-
quency is diminishing continuously to zero for 30 seconds. This frequency persists for one
second. At last the frequency is increasing continuously, until the upper limit frequency (250
Hz) is reached after 30 seconds, and the cycle restarts.
How to Program a Frequency Band
(1) Click on the symbol by means of the Data Selector <2>. The symbol starts flashing.
(2) Turn the Data Selector <2> to the right until the symbol <<F>> is displayed and press to confirm.
(3) Turn the Data Selector <2> to the right by one position until it reaches the lower barrier frequency
and press it.
(4) Turn the Data Selector <2> to set the desired frequency and press it to confirm.
(5) Turn the Data Selector <2> one position to the right to set the upper limit frequency and press to
confirm.
(6) Turn the Data Selector <2> to set the desired frequency and press it to confirm.
PHYSIOMED ELEKTROMEDIZIN AG 3 Overview of Current Modes
IONOSON-Basic 35

How to Adjust a Selective Frequency
(1) Click on the symbol by means of the Data Selector <2>. The symbol starts flashing.
(2) Turn the Data Selector <2> to the right until the SELECTIVE symbol is displayed.
(3) Turn the Data Selector <2> and turn it to the right by one position.
(4) Press the Data Selector <2>. The arrow symbol starts flashing.
(5) Turn the Data Selector <2> to set the desired frequency and press it to confirm.
3.4.3 (KOTS) Medium-Frequency Muscle Training
Definition Medium-frequency alternating current for systematic stimulation of enervated muscu-
lature in the fields of rehabilitation and sport ("Russian Technique")
Application• Muscle Training
Menu for Current Mode KOTS
Current mode KOTS
Parameters for Current Mode KOTS
Pulse duration T (1 - 60 s or continuously) and pulse pause R (1 - 60 s or manual release
key); can respectively be adjusted separately for both channels, refer to Dual Channel
Operation on page 11.
Ramp (Surge time) m1
- m4
for different slew rates; can respectively be adjusted separ-
ately for both channels
Modulation frequency (1 - 95 Hz)
Pulse shape (sinusoidal wave, triangle pulse, square pulse)
Basic frequency (2.0 - 9.5 kHz). A lower basic frequency makes the current mode more
intensive, a higher makes it more mild.
3 Overview of Current Modes PHYSIOMED ELEKTROMEDIZIN AG
36 IONOSON-Basic

Acoustic signal; makes pulses audible
NOTICE
Each time the intensity is incremented, the instrument puts out a pulse with a length of about
4 seconds.
PHYSIOMED ELEKTROMEDIZIN AG 3 Overview of Current Modes
IONOSON-Basic 37

Chapter 4 Operation of the instrument
The operating steps not directly relating to the therapy are described in the following paragraphs.
4.1 Mains and Battery Operation
Two IONOSON-Basic models are available:
• for mains operation only
• for mains- or battery operation
With battery operation, the battery has to be fully charged before operating it for the first time.
How to Charge the Battery
(1) Insert the supplied mains connector cable into the Mains socket <7> on the rear side of the instru-
ment.
(2) Switch on the mains switch at the Mains socket <7> and the Power switch <8>.
(3) The batteries are charged. When the batteries are completely discharged, the charging procedure will
take approx. 12 hours. The charging status of the batteries is displayed in the lower status bar:
Instrument connected to mains; charging
Instrument not connected to mains; battery operation only
Battery fully charged
Important
In order to ensure a long battery life, the batteries must be charged completely when first
charged. The first charging procedure should not be interrupted!
If the unit is not used for a longer period of time, please fully charge the battery every three
months. This will help to avoid exhaustive discharge.
4.1.1 Notes on Handling the Batteries
If battery capacity is very low during operation, the 3-step warning system is activated:
(a) The charging status symbol flashes.
(b) An acoustic signal sounds every second and the charging status symbol flashes. The intensity is re-
duced prematurely.
(c) The instrument shuts down to avoid complete discharging of the batteries.
In this case, recharge the battery, as described in section How to Charge the Battery on page 38. While
the battery is being charge, you can continue using the instrument in mains operation.
4 Operation of the instrument PHYSIOMED ELEKTROMEDIZIN AG
38 IONOSON-Basic

4.1.2 Economy Mode
In the battery operation mode, the instrument automatically switches over to the economy mode in the
start menu to save power. The Display <1> is no longer illuminated.
Turning the Data Selector <2> will re-activate the illumination.
4.2 Start-up of the Instrument
Before you can perform the first treatment with the IONOSON-Basic, you have to start the instrument up
accordingly.
How to Start up the Instrument
(1) Make sure that the instrument is switched off (the switch on the Mains Module <7> as well as the
Power Switch <8> are on position 0).
(2) Firmly plug the supplied mains cable in the Mains Module <7> on the rear face and connect it with
the power socket. You get a safe connection using a three-pin plug with earth conductor resistance.
(3) Switch the switch at the Mains Module <7> on and charge the battery (refer to How to Charge the
Battery on page 38).
(4) Plug the patient lead in the Patient Lead Connector <9>.
(5) Switch on the instrument with the Power Switch <8>.
The instrument will conduct an automatic function check which tests all functions and start values.
An acoustic signal sounds.
The instrument is now ready. You are now in the initial menu.
CAUTION
Make sure you do not touch the electrodes when the current is turned up!
4.3 Function Check
If you are not sure if your IONOSON-Basic is working properly, you can perform a self-test.
How to Perform an Automatic Self-Test
(1) Use the Power Switch <8> to switch the instrument off and on again.
The instrument will execute an automatic function check which tests all functions and start values.
An acoustic signal sounds.
The instrument is ready now. You are now in the initial menu.
4.4 Monitoring Notes
If a problem is detected during the selftest or during operation, a corresponding message is displayed in
the Display <1>. A monitoring note will be shown, e.g. <MONITORING NOTE 10> Refer to Operating
Instructions!. These notes simplify localizing and eliminating problems. Operation of the instrument will
be interrupted and the stimulation current output is switched off.
PHYSIOMED ELEKTROMEDIZIN AG 4 Operation of the instrument
IONOSON-Basic 39

In case of a monitoring note, first perform a self-test once or several times (refer to Function Check on
page 39), and check if the problem still occurs afterwards.
Important
Inform your service partner if the monitoring note does not disappear even after several self
tests! Never perform a treatment when the proper function of the instrument is not assured!
List of Monitoring Notes
Monitoring Note Meaning
ET 101 – 106 Problem with stimulation current module during
selftest
ET 201 – 206 Problem with stimulation current module during op-
eration
US 101 – 104 Problem with ultrasound module during selftest
US 201 – 203 Problem with ultrasound module during operation
4.5 Constant Current Operation
The IONOSON-Basic can emit all current modes except G, GMC and MENS with constant current (CC) and
with constant voltage (CV). The constant current operation (CC) is preset. The respective operation type is
displayed in the lower status bar.
CAUTION
In CV operation, the safety shutdown of the electrodes (refer to Automatic Output Current
Switch-off on page 7) is disabled!
NOTICE
When switching off the instrument, the selection is set back from CV operation to CC opera-
tion.
All current modes can also be saved in CV operation.
How to Change from CC Operation to CV Operation
(1) Switch on the instrument.
(2) Choose the desired current mode on the start monitor (e.g. UR).
(3) Click on the symbol and turn the Data Selector <2> to the right by one position. The current
output is changed to constant voltage (CV).
4 Operation of the instrument PHYSIOMED ELEKTROMEDIZIN AG
40 IONOSON-Basic

Chapter 5 Therapy with Stimulation Current
In this chapter, you will find general information on the therapy with stimulation current and notes to ap-
ply electrodes. Furthermore, the properties and operating steps of different types of treatment with IONO-
SON-Basic are described.
Important
Always switch on the instrument BEFORE you attach electrodes to the patient!
Only switch off the instrument AFTER you have removed the electrodes from the patient!
5.1 General Information
With the IONOSON-Basic, you have the following options to access the stimulation current therapy:
• direct access via the stimulation current menu (refer to Therapy Using Low-Frequency Current Modes
on page 44 andTherapy with Medium Frequency Current Modes on page 50).
• access via the indication menu with its treatment proposals for a multitude of applications (refer to In-
dications Menu on page 59).
• access via individual programs (you have created) (refer to Individual Programs on page 61).
5.2 Safety Precautions when Attaching Electrodes
Please observe the following safety precautions when attaching electrodes:
• Never apply the electrodes to skin areas which have injuries, abrasions or inflammations!
• Always use the largest electrodes possible!
• Insert the leading edge of the plate electrodes as deeply as possible into the sponge bags so that they
are completely immersed in them, and can no longer touch the skin!
• Ensure that the electrodes are placed in position with the wider side of the sponge bags in contact
with the skin!
• Attach the electrodes so that their entire area lies on the patient's body, and cannot slip off!
• Regularly remove any deposits which may occur through body fat or water residue from the plate
electrodes and the metal contacts of the vacuum electrode. Use water and neutral soap to do so, or in
more persistent cases, surgical spirits
• Check the electrodes regularly and have any damaged parts repaired or replaced!
PHYSIOMED ELEKTROMEDIZIN AG 5 Therapy with Stimulation Current
IONOSON-Basic 41

5.2.1 Modes of Attaching the Electrodes
The following techniques to attach electrodes are common in stimulation current therapy:
Bipolar Here you apply two electrodes of equal size. This is the most common mode especially for
pain therapy and circulatory stimulation.
Monopolar Preferably used when treating small areas, e.g. nerve and muscle stimulation points, espe-
cially on the hands or in the face. This therapy mode includes using two electrodes of differ-
ent size, with the bigger (indifferent) one being fixed proximally in most cases. The size of
the indifferent electrode must be big enough not to stimulate any more (size = two to three
times). A punctiform electrode is mostly used as small (different) electrode.
5.3 Safety Precautions for Stimulation Current Intensity
Please observe the following safety precautions when adjusting the intensity of the stimulation current ap-
plied to the patient:
• Always bear in mind that the patient may display an altered sensitivity, and may therefore not be
properly aware of the current intensity.
• Be especially careful in measuring doses for blonde, light-skinned patients, and for thin-skinned pa-
tients.
• Explain to patients that if they experience unpleasant or even burning sensations under one of the
electrodes, they must point this out. Where available, give the patient the release button for interrupt-
ing the therapy.
• Pay particular attention when using current forms with a high galvanic component (G , DF , MF , CP ,
LP , UR , IG 30 , IG 50 , as well as T/R with pulse lengths above 50 ms and associated pauses below
200 ms) that the recommended intensity of 0.1 mA/cm2
of active electrode area is not exceeded!
• If you use electrodes of various different sizes during a treatment, the smaller of the two electrodes,
the so-called "active electrode", is always considered when measuring the intensity.
5.3.1 Recommended Intensities
The maximum intensity to be applied depends on the type and size of the electrodes. Please observe the
maximum intensities as specified in section Safety Precautions for Stimulation Current Intensity on page 42
!
Plate Electrodes
Type Size of the Plate Electrode
(Viscose Cover; in cm)
Effective Area
(cm2)
Maximum Intensity for Currents with
High Galvanic Component (mA)
EF 10 4.0 x 3.0 (5.5 x 5.0) 10 1
EF 50 8.0 x 6.0 (11.0 x 9.0) 50 5
EF 100 12.0 x 9.0 (14.0 x 12.0) 100 10
EF 200 17.0 x 11.0 (20.0 x 15.0) 200 20
Vacuum Electrodes
5 Therapy with Stimulation Current PHYSIOMED ELEKTROMEDIZIN AG
42 IONOSON-Basic

Type Diameter of the Electrode
(cm)
Effective Area
(cm2)
Maximum Intensity for Currents with
High Galvanic Component (mA)
0 3.0 7 0.7
1 6.0 20 2
2 9.0 40 4
5.4 Preparations and Attaching the Electrodes
To prepare the electrodes, proceed as follows:
(1) Prior to attaching the electrodes, make sure that the intensity in both channels is turned down to
zero.
(2) Plug the patient lead into the Patient Lead Connector <9>.
(3) Plug the plate electrodes or junction lead for other types of electrodes into the corresponding con-
nectors of the patient lead (refer to Patient Lead: Mode of Attachment on page 9). Make sure that
the polarity is correct!
CAUTION
Make sure you do not touch the electrodes when the current is turned up!
(4) Prior to attaching the electrodes, check whether the patient's skin shows scars or lesions. Always
avoid such areas!
(5) Select the size of the electrodes according to the area of treatment following the principle: Area of
electrodes as small as necessary but as large as possible. A larger electrode area usually makes
treatment for the patients more pleasant.
(6) Plug the plate electrodes into the well-moistened electrode covers and attach them to the patient. To
moisten viscose covers use tap water or sodium chloride solution (1%). Make sure that the whole
electrode area is fixed tightly to the skin with the padded side of the electrode cover.
If you use adhesive electrodes, attach them to the patient. Use only electrodes that stick well, i.e.
with the whole area!
CAUTION
Standards on safety of stimulation current instruments demand the following warning:
"Effective current densities above 2 mA/cm² require increased caution of the user with all
electrode areas."
This is a very restrictive limit. To prevent hazards, pay attention when using current forms
with a high galvanic component, that the recommended intensity of 0.1 mA/cm² active elec-
trode area is not exceeded! Current modes with high galvanic component are: G , DF , MF ,
CP , LP , UR , IG 30 , IG 50, as well as T/R with pulse lengths above 50 ms and associated
pauses below 200 ms.
If you use electrodes of various different sizes during a treatment, the smaller of the two elec-
trodes, the so-called "active electrode", is always decisive when measuring the intensity!
For additional information on type, size and application of the electrodes, see the supplied therapy booklet
PHYSIOMED ELEKTROMEDIZIN AG 5 Therapy with Stimulation Current
IONOSON-Basic 43

Introduction to stimulation current therapy (ref. no. 00625).
5.5 Therapy Using Low-Frequency Current Modes
5.5.1 Monophase and Biphase Currents
The majority of low-frequency current modes for pain therapy, circulatory stimulation, detonisation and
mobilization can be applied in their basic monophase as well as biphase mode. If this option exists, the fol-
lowing selection is displayed in the menu of the respective current mode:
Switching from monophase to biphase pulse emission
Monophase current modes resemble direct current, i.e. every electrode has a defined polarity:
• + = Anode (low-stimulation electrode), red connector
• - = Cathode (high-stimulation electrode), blue connector
Biphase current modes, however, have a continually alternating polarity, called Non-Polarity. The stimula-
tion intensity of both electrodes is identical.
Many current modes are preferably applied in biphase mode, as you can reduce the danger of burns even
at high doses. Biphase currents have a better tolerance, which has special significance for the treatment of
sensitive patients.
The following current modes allow you to switch between monophase and biphase pulse output:
• (UR) Ultra Stimulation Current on page 20
• (HV) High-Voltage Current on page 21
• (TENS) Transcutaneous Electric Nerve Stimulation on page 23
• (MENS) Electric Nerve Stimulation with Microcurrent on page 24
• (IG30) Pulse Galvanization 30 on page 25
• (IG50) Pulse Galvanization 50 on page 26
• (FaS) Faradic Surge Current on page 30
• (FM) Frequency-Modulated Current on page 27
• (STOCH) Stochastic Current on page 29
• (T/R) Pulses with Adjustable Parameters on page 32
5.5.2 Iontophoresis
The iontophoresis features the percutaneous diffusion of medicaments or therapeutic ointments into the
body when using galvanic current.
5 Therapy with Stimulation Current PHYSIOMED ELEKTROMEDIZIN AG
44 IONOSON-Basic

Current Mode G
The current modes designated for iontophoresis are G and GMC. You find a detailed overview about the
parameters adjustable under Parameters for Current Mode G on page 16 and Parameters for Current
Mode GMC on page 17.
It is important for the treatment to know the relation of ions of the respective medicament. Depending on
the combination of the active agent molecules and their separation in positive and negative particles we
speak of cations and anions. Ions migrate as follows:
• Cations to cathode
• Anions to anode
Thus, the particles are named after the pole to which they migrate. The electric charge of the active
agents in the medicaments is always named by the manufacturer.
The time of each treatment must always be chosen according to medicament and size of electrodes, one
treatment typically lasts 10 - 30 minutes.
NOTICE
The diffused quantity of the agent directly depends on the size of the electrodes, the therapy
time and the current intensity. During galvanisation the maximum current intensity is 0.1 mA
on 1 cm2
of active electrode area.
How to Perform an Iontophoresis
(1) Switch on the instrument.
(2) Use an alcoholic swab to remove cutaneous fat. Take care that there are no skin lesions in the area of
treatment. Preparing the skin with heat before the treatment will improve its receptiveness
(3) Apply the ointment, cover it with iontophoresis foil (ref. no. 00136) and apply the moistened viscose
cover with the electrodes inside.
(4) Fix the electrode to the point of treatment. Moisten the viscose cover of the opposite electrode suffi-
ciently with water and fix it as well.
(5) On the Display <1>, select current mode G or GMC. Mind correct polarity of the electrodes!
(6) Set the therapy time.
(7) If necessary, plug in the manual release key as therapy pause button in the Manual Release Key
PHYSIOMED ELEKTROMEDIZIN AG 5 Therapy with Stimulation Current
IONOSON-Basic 45

Socket <11> on the front of the instrument and hand the manual release key to the patient.
(8) Slowly turn up the intensity of channel I with the Intensity Control Channel I <3>. The therapy
time elapses.
CAUTION
Make sure you do not touch the electrodes when the current is turned up!
(9) After treatment, an acoustic signal will be issued. The intensity is turned down to zero automatically.
Remove the electrodes and rinse the viscose covers thoroughly.
5.5.3 Pain Therapy, Hyperaemisation, Detonisation
Treatment with stochastic current
The following current modes can be used for these modes of therapy: G, GMC, DF, MF, CP, LP, UR, HV,
TENS, MENS, IG 30, IG 50, FM and STOCH.
You find a detailed overview about the parameters adjustable under:
• Parameters for Current Mode G on page 16
• Parameters for Current Mode GMC on page 17
• Parameters for Current Type DF on page 17
• Parameters for Current Mode MF on page 18
• Parameters for Current Mode CP on page 19
• Parameters for Current Mode LP on page 20
• Parameters for Current Mode UR on page 21
• Parameters for Current Mode HV on page 22
• Parameters for Current Mode TENS on page 23
• Parameters for Current Mode MENS on page 25
• Parameters for Current Mode IG30 on page 26
• Parameters for Current Mode IG50 on page 27
• Parameters for Current Type FM on page 28
• Parameters for Current Mode STOCH on page 29
5 Therapy with Stimulation Current PHYSIOMED ELEKTROMEDIZIN AG
46 IONOSON-Basic

How to Perform a Treatment
(1) Switch on the instrument.
(2) Attach the electrodes to the respective stimulation points.
(3) From the Display <1>, select one of the above-mentioned current modes, e.g. STOCH.
(4) Select the parameters variable for the respective current mode (e.g. simulation frequency, biphase
pulse output, pulse shape, etc.).
(5) Set the therapy time.
(6) If necessary, plug in the manual release key as therapy pause button in the Manual Release Key
Socket <11> on the front of the instrument and hand the manual release key to the patient.
(7) Slowly turn up the intensity of channel I with the Intensity Control Channel I <3>. The therapy
time elapses.
CAUTION
Make sure you do not touch the electrodes when the current is turned up!
(8) After expiry of the timer, an acoustic signal will be issued. The intensity is turned down to zero auto-
matically. Remove the electrodes.
5.5.4 Muscle Stimulation Using Low-Frequency Currents
Current Mode T/R
The low-frequency current modes provided for muscle stimulation are FaS and T/R.
FaS is usually applied in case of faradic excitable nervo-muscular systems. If, however, while testing the
faradic excitability, t was noticed that the muscles can NOT be stimulated successfully any more, it is advis-
able to treat the beginning atrophy of the paralysed muscle with triangular pulses of the T/R. This way,
the denerved muscles can be retained until re-enervation by stimulation according to the principle of se-
lective muscle stimulation.
You find a detailed overview about the parameters adjustable under Parameters for Current Mode FaS on
page 30 and Parameters for Current Mode T/R on page 32.
PHYSIOMED ELEKTROMEDIZIN AG 5 Therapy with Stimulation Current
IONOSON-Basic 47

How to Perform a Treatment with Automatic Current Output
(1) Switch on the instrument.
(2) Attach the electrodes to the respective stimulation points. Position the patient to enable free move-
ment of the stimulation area.
(3) Depending on the indication, use the Display <1> to select one of the current modes: FaS or T/R.
(4) If necessary, select the biphase pulse emission.
(5) Activate the acoustic signal if desired.
(6) Set the pulse time T and the release time R. The release time R should be selected to give the nerve-
muscle-unit sufficient time for recreation.
(7) Select the ramp of the current rise (for FaS) or the mode of the pulse (for T/R).
(8) Set the therapy time.
(9) If necessary, plug in the manual release key as therapy pause button in the Manual Release Key
Socket <11> on the front of the instrument and hand the manual release key to the patient.
(10) Slowly turn up the intensity of the respective channel (Intensity Control Channel I <3> or Intens-
ity Control Channel II <4>). The therapy time elapses.
CAUTION
Make sure you do not touch the electrodes when the current is turned up!
(11) Signs of fatigue should make you stop the treatment (they may already occur after a few muscle con-
tractions)!
(12) After expiry of the timer, an acoustic signal will be issued. The intensity is turned down to zero auto-
matically. Remove the electrodes.
How to Perform a FaS Treatment with Manual Release Key
Treatment with a manual release key is advisable for individual therapy methods in the field of sports, for
intentional exercises according to Förster as well as for practising both co-ordination and nerve tracts. This
is the great advantage of working with the manual release key.
(1) Switch on the instrument.
(2) Plug the manual release key into the Manual Release Key Socket <11> at the front of the instru-
ment.
(3) Attach the electrodes to the respective stimulation points. Position the patient to enable free move-
ment of the stimulation area.
(4) Depending on the indication, use the Display <1> to select the current mode FaS.
(5) If necessary, select the biphase pulse emission.
(6) Activate the acoustic signal if desired.
(7) If necessary, set the stimulation intensity Ti, the stimulation frequency Ri or the pulse mode.
(8) With the Data Selector <2>, click the symbol in channel I. The following window opens:
Selection window for channel I
5 Therapy with Stimulation Current PHYSIOMED ELEKTROMEDIZIN AG
48 IONOSON-Basic

(9) With the Data Selector <2> first click on the R symbol, rotate to the left until one of the manual
control symbols appears and press to confirm. The symbols have the following meaning:
• : The duration of increase is determined by pressing the manual release key, the pause by
releasing the manual release key.
• : Pressing the key triggers a single pulse of the preset increase duration T.
(10) Set the therapy time.
(11) Slowly turn up the intensity with the manual release key pressed (Intensity Control Channel 1
<3> or Intensity Control Channel 2 <4>), until the muscle contraction is sufficient. The therapy
time elapses.
CAUTION
Make sure you do not touch the electrodes when the current is turned up!
When using the manual release key, release a pulse each time you turn up the intensity!
(12) Release the button. If the manual release key is pressed again, the current will slowly rise automatic-
ally and will keep the set intensity as long as the manual release key is pressed. After releasing the
button, the intensity will automatically be reduced slowly.
(13) Signs of fatigue should make you stop the treatment (they may already occur after a few muscle con-
tractions)!
(14) After expiry of the timer, an acoustic signal will be issued. The intensity is turned down to zero auto-
matically. Remove the electrodes.
NOTICE
If the intensity (Intensity Control Channel I <3> or Intensity Control Channel II <4>)
is turned up during the time of release, a corresponding message will appear in the
lower status bar. Slowly turn down the intensity of the respective channel then. The
message disappears as soon as the previously set value is reached again.
The intensity can only be turned up effectively when the manual release key is de-
pressed.
How to Perform a T/R Treatment with the Manual Release Key
(1) Switch on the instrument.
(2) Plug the manual release key into the Manual Release Key Socket <11> at the front of the instru-
ment.
(3) Attach the electrodes to the respective stimulation points. Position the patient to enable free move-
ment of the stimulation area.
(4) Depending on the indication, use the Display <1> to select the current mode T/R.
(5) If necessary, select the biphase pulse emission.
(6) Activate the acoustic signal if desired.
(7) If necessary, adjust the pulse time Ti.
(8) Use the Data Selector <2> to click on the Ri symbol, turn it to the right until the manual release key
symbol appears and press it to confirm.
(9) Set the therapy time.
(10) Slowly turn up the intensity with the manual release key pressed (Intensity Control Channel 1
PHYSIOMED ELEKTROMEDIZIN AG 5 Therapy with Stimulation Current
IONOSON-Basic 49

<3> or Intensity Control Channel 2 <4>), until the muscle contraction is sufficient. The therapy
time elapses.
CAUTION
Make sure you do not touch the electrodes when the current is turned up!
When using the manual release key, release a pulse each time you turn up the intensity!
During a pulse pause only turn the intensity slightly to avoid unpleasant muscle reac-
tions.
(11) Signs of fatigue should make you stop the treatment (they may already occur after a few muscle con-
tractions)!
(12) After expiry of the timer, an acoustic signal will be issued. The intensity is turned down to zero auto-
matically. Remove the electrodes.
NOTICE
If the intensity (Intensity Control Channel I <3> or Intensity Control Channel II <4>)
is turned up during the time of release, a corresponding message will appear in the
lower status bar. Slowly turn down the intensity of the respective channel then. The
message disappears as soon as the previously set value is reached again.
The intensity can only be turned up effectively when the manual release key is de-
pressed.
5.6 Therapy with Medium Frequency Current Modes
5.6.1 Treatment with IFM Current
Current Mode IFM
You find a detailed overview about the selectable parameters under (IFM) Modulated Interference Current
on page 33.
5 Therapy with Stimulation Current PHYSIOMED ELEKTROMEDIZIN AG
50 IONOSON-Basic

NOTICE
This current mode requires both channel I and II at the same time. You cannot select an addi-
tional current mode in channel II.
How to Perform a Treatment with IFM Current
(1) Switch on the instrument.
(2) Attach the electrodes to the stimulation points. Make sure that the four electrodes of the two chan-
nels are fixed crosswise.
(3) In the Display <1>, select the current mode IFM.
(4) If necessary, select the vector function DYNAMIC.
(5) Set the frequency cycle Fcycl
.
(6) Depending on the indication, select a frequency band or a fixed frequency.
(7) If necessary, alter the basic frequency Fbas
.
(8) Set the therapy time.
(9) If necessary, plug in the manual release key as therapy pause button in the Manual Release Key
Socket <11> on the front of the instrument and hand the manual release key to the patient.
(10) Slowly turn up the intensity of channel I with the Intensity Control Channel I <3>. The therapy
time elapses.
(11) Slowly turn up the intensity of channel II with Intensity Control Channel II <4>. Make sure that the
sensation of the current is the same for all electrodes.
CAUTION
Make sure you do not touch the electrodes when the current is turned up!
(12) After expiry of the timer, an acoustic signal will be issued. The intensity is turned down to zero auto-
matically. Remove the electrodes.
5.6.2 Pain Therapy, Hyperaemisation, Detonisation with AMF Current
Current Mode AMF
PHYSIOMED ELEKTROMEDIZIN AG 5 Therapy with Stimulation Current
IONOSON-Basic 51

You find a detailed overview about the parameters adjustable under (AMF) Amplitude-Modulated Medi-
um-Frequency Current on page 34.
NOTICE
This current mode can only be applied in channel I. You cannot set a second current mode in
channel II.
How to Perform a Therapy with AMF Current
(1) Switch on the instrument.
(2) Attach the electrodes to the respective stimulation points.
(3) In the Display <1>, select the current mode AMF.
(4) Depending on the indication, select a frequency band or a fixed frequency.
(5) Set the frequency cycle Fcycl
.
(6) If necessary, alter the basic frequency Fbas
.
(7) Set the therapy time.
(8) If necessary, plug in the manual release key as therapy pause button in the Manual Release Key
Socket <11> on the front of the instrument and hand the manual release key to the patient.
(9) Slowly turn up the intensity of channel I with the Intensity Control Channel I <3>. The therapy
time elapses.
CAUTION
Make sure you do not touch the electrodes when the current is turned up!
(10) After expiry of the timer, an acoustic signal will be issued. The intensity is turned down to zero auto-
matically. Remove the electrodes.
5.6.3 Muscle Stimulation with Medium Frequency Stimulation Currents
The current mode designated for treatment with medium frequency stimulation current is KOTS (Russian
Technique). This current mode is usually applied in case of faradic excitable nervo-muscular systems. You
find a detailed overview about the parameters adjustable under Parameters for Current Mode KOTS on
page 36.
Current Mode KOTS
5 Therapy with Stimulation Current PHYSIOMED ELEKTROMEDIZIN AG
52 IONOSON-Basic

How to Make a Treatment with Medium Frequency Stimulation Current KOTS
(1) Switch on the instrument.
(2) Attach the electrodes to the respective stimulation points. Position the patient to enable free move-
ment of the stimulation area.
(3) Select the current mode KOTS.
(4) Set the pulse time T and the release time R. The release time R should be selected to give the nerve-
muscle-unit sufficient time for recreation.
(5) Select the ramp of the current rise.
(6) Select the modulation frequency.
(7) If necessary, alter the basic frequency Fbas
.
(8) Activate the acoustic signal if desired.
(9) Set the therapy time.
(10) If necessary, plug in the manual release key as therapy pause button in the Manual Release Key
Socket <11> on the front of the instrument and hand the manual release key to the patient.
(11) Slowly turn up the intensity of the respective channel (Intensity Control Channel I <3> or Intens-
ity Control Channel II <4>). The therapy time elapses.
CAUTION
Make sure you do not touch the electrodes when the current is turned up!
(12) Signs of fatigue should make you stop the treatment (they may already occur after a few muscle con-
tractions)!
(13) After expiry of the timer, an acoustic signal will be issued. The intensity is turned down to zero auto-
matically. Remove the electrodes.
How to Control a Treatment with KOTS with the Manual Release Key
(1) Switch on the instrument.
(2) Plug the manual release key into the Manual Release Key Socket <11> at the front of the instru-
ment.
(3) Attach the electrodes to the respective stimulation points. Position the patient to enable free move-
ment of the stimulation area.
(4) Select the current mode KOTS.
(5) With the Data Selector <2> first click the R symbol, rotate to the left until one of the manual con-
trol symbols appears and press to confirm. The symbols have the following meaning::
• : The duration of increase is determined by pressing the manual release key, the pause by
releasing the manual release key.
• : Pressing the key triggers a single pulse of the preset increase duration T.
(6) With the Data Selector <2> click the symbol , to return to the KOTS menu. The manual re-
lease key symbol is displayed next to the pulse symbol.
Important
If you use the manual release key, you can only turn the intensity up in both channels if
you press the manual release key (security blocking)!
(7) Select the ramp of the current rise.
PHYSIOMED ELEKTROMEDIZIN AG 5 Therapy with Stimulation Current
IONOSON-Basic 53

(8) Select the modulation frequency.
(9) If necessary, alter the basic frequency Fbas
.
(10) Activate the acoustic signal if desired.
(11) Set the therapy time.
(12) Slowly turn up the intensity with the manual release key pressed (Intensity Control Channel 1
<3> or Intensity Control Channel 2 <4>), until the muscle contraction is sufficient. The therapy
time elapses.
CAUTION
Make sure you do not touch the electrodes when the current is turned up!
When using the manual release key, release a pulse each time you turn up the intensity!
(13) Release the button. If the manual release key is pressed again, the current will slowly rise automatic-
ally and will keep the set intensity as long as the manual release key is pressed. After releasing the
button, the intensity will automatically be reduced slowly.
(14) Signs of fatigue should make you stop the treatment (they may already occur after a few muscle con-
tractions)!
(15) After expiry of the timer, an acoustic signal will be issued. The intensity is turned down to zero auto-
matically. Remove the electrodes.
NOTICE
If the intensity (Intensity Control Channel I <3> or Intensity Control Channel II <4>)
is turned up during the time of release, a corresponding message will appear in the
lower status bar. Slowly turn down the intensity of the respective channel then. The
message disappears as soon as the previously set value is reached again.
NOTICE
You find a description of the simultaneous and respectively the alternating stimulation in both
channels under Dual Channel Operation on page 11 .
5 Therapy with Stimulation Current PHYSIOMED ELEKTROMEDIZIN AG
54 IONOSON-Basic

Chapter 6 Ultrasound Therapy
IONOSON-Basic offers you three possibilities to start ultrasound therapy:
• directly via the ultrasound menu
• via the indications menu (refer to Indications Menu on page 59)
• via an individual program (refer to Individual Programs on page 61)
Refer to the supplied therapy booklet Introduction to Ultrasound Therapy (ref. no. 00626) for more in-
formation on ultrasound therapy.
Ultrasound Menu
The symbols in the ultrasound menu have the following meaning:
Duration of treatment
Ultrasound dose in the selected unit W or W/cm2, also refer to Basic Settings on
page 66
Acoustic coupling control on/off
Ultrasound mode (pulsed ultrasound emission with duty cycles 1:10, 1:5, 1:3, 2:5 or
continuous ultrasound emission)
Ultrasound frequency (1 MHz or 3 MHz)
The selected parameters are displayed in the upper status bar.
Automatic Coupling Control
Both transducer and instrument have an optical coupling confirmation, which guarantees
constant and efficient treatment. If the coupling to the tissue of the patient is not efficient
enough, the light at the transducer will start flashing. You can choose between counting only
the effective treatment time or running the timer independently of the coupling (refer to Ba-
sic Settings on page 66).
How to Perform an Ultrasound Treatment
(1) Select the desired transducer and plug it into the Ultrasound Lead Connector <10>.
PHYSIOMED ELEKTROMEDIZIN AG 6 Ultrasound Therapy
IONOSON-Basic 55

(2) Apply some ultrasound gel on the area of treatment.
(3) Choose SONO in the Display <1> .
(4) Select the duration of the treatment.
(5) Increase the dose to the desired value with the Data Selector <2>.
NOTICE
To prevent from overdoses, ultrasound emission is switched from continuous to pulsed
mode with duty cycle 2:5 when a previously set threshold is exceeded (refer to Basic Set-
tings on page 66). The default for this threshold is 2 W/cm2.
NOTICE
For safety reasons, the following optional settings (basic settings) can be selected: The
ultrasound dose can only be increased after connection to ultrasound if the dose has
previously been set to zero.
(6) Select the treatment mode.
(7) Select the treatment frequency.
(8) Place the ultrasound transducer on the area to be treated. If coupling is sufficient, therapy time will
begin to elapse. Check that the coupling control is active by briefly lifting the transducer from the
treatment area.
After the treatment time has elapsed, the timer will automatically switch off.
Important
Make sure you constantly keep moving the transducer on the skin of the patient
(dynamic treatment)! Avoid using the transducer at one spot for a longer time (static
treatment); this form of treatment might lead to damages on the patient’s tissue! Make
sure that the ultrasound transducer never gets too hot (especially the oscillator unit
6 Ultrasound Therapy PHYSIOMED ELEKTROMEDIZIN AG
56 IONOSON-Basic

Chapter 7 Simultaneous Therapy
Simultaneous therapy means the treatment with ultrasound and stimulation current at the same time. The
ultrasonic transducer is one pole of the stimulation current circuit, a plate electrode the other one.
It is advisable to use a plate electrode of minimum size EF50 as neutral electrode. The neutral electrode is
plugged into the socket No.1 (anode of channel I) of the patient lead (refer to Patient Lead: Mode of At-
tachment on page 9).
Make sure that there is enough space between the plate electrode and the transducer. If there is too little
space, an error might be the result.
To ensure good contact for both stimulation and ultrasound therapy you must use a (electrically) conduct-
ive ultrasound gel.
Important
Make sure you constantly keep moving the transducer on the area of treatment (dynamic
treatment)! Avoid using the transducer at one spot for a longer time (static treatment); this
form of treatment might lead to damage to the tissue!
NOTICE
If the transducer is lifted during treatment, the stimulation current will automatically be re-
duced to zero; it ensures that both therapy modes - ultrasound and stimulation current - are
always applied simultaneously. As soon as the transducer is put on again the stimulation cur-
rent will also rise again automatically.
In simultaneous treatment, the instrument is automatically switched to a mixed mode of con-
stant current and constant voltage (refer to Constant Current Operation on page 40) to avoid
unpleasant current sensations when the contact between skin and transducer is interrupted.
How to Perform a Simultaneous Treatment
(1) Select the desired transducer and plug it into the Ultrasound Lead Connector <10>.
(2) Apply some ultrasound gel on the area of treatment.
(3) Select the desired current mode and set the parameters for stimulation current therapy.
(4) Select the symbol (3) for the ultrasound channel in the upper status bar and press the Data Selector
<2> .
The ultrasound therapy menu is displayed additionally.
PHYSIOMED ELEKTROMEDIZIN AG 7 Simultaneous Therapy
IONOSON-Basic 57

Simultaneous Therapy
You will find a description of the individual symbols in Ultrasound Therapy on page 55.
(5) Rotate the Data Selector <2> until you reach the SIM symbol. Now press the Data Selector <2>,
rotate it one position further and press it once again to confirm. A small rectangle is shown in the
upper left corner of the SIM symbol to indicate that simultaneous therapy is now activated.
(6) Set the parameters for ultrasound therapy as described in How to Perform an Ultrasound Treatment
on page 55.
(7) Place the ultrasound transducer on the area to be treated. If coupling is sufficient, therapy time will
begin to elapse. Check that the coupling control is active by briefly lifting the transducer from the
treatment area.
After the treatment time has elapsed, the timer switches off both the stimulation current and the ul-
trasound output automatically.
7 Simultaneous Therapy PHYSIOMED ELEKTROMEDIZIN AG
58 IONOSON-Basic

Chapter 8 Indications Menu
Apart from direct access to the individual current modes, the indications menu offers you another possibil-
ity to start the individual methods of treatment. With the indications menu, you may use proven stimula-
tion current or ultrasound treatments.
NOTICE
Indications that involve ultrasound treatment are marked with an additional (US).
How to Perform a Treatment via the Indications Menu
(1) Switch on the instrument.
(2) On the start screen, click on IND..
The indications menu is displayed:
Indications Menu
(3) Select the desired indication, e.g. Achillodynia.
You are shown the therapy proposals for the selected indication:
Indications Menu: Therapy Proposals
(4) Click on the symbol. The symbol starts flashing.
(5) turn the Data Selector <2> to the right and thus leaf through the information pages, e.g. with im-
ages how to place the electrodes.
PHYSIOMED ELEKTROMEDIZIN AG 8 Indications Menu
IONOSON-Basic 59

NOTICE
The page number is displayed on the right of the lower status bar. The left number iden-
tifies the page selected, the right number the total number of pages.
Indications Menu: Attaching the Electrodes
(6) Attach the electrodes to the respective stimulation points.
(7) Click on OK. The treatment parameters of the indication are displayed:
Indications Menu: Treatment
(8) If necessary, change the treatment parameters.
(9) If necessary, plug in the manual release key as therapy pause button in the Manual Release Key
Socket <11> on the front of the instrument and hand the manual release key to the patient.
(10) Slowly turn up the intensity of channel I with the Intensity Control Channel I <3>. The therapy
time elapses.
CAUTION
Make sure you do not touch the electrodes when the current is turned up!
(11) After expiry of the timer, an acoustic signal will be issued. The intensity is turned down to zero auto-
matically. Remove the electrodes.
8 Indications Menu PHYSIOMED ELEKTROMEDIZIN AG
60 IONOSON-Basic

Chapter 9 Individual Programs
You do not have to set frequently applied forms of therapy every time you want to use them – you can
simply save them as individual programs. Such a program is e.g. a certain current mode or an ultrasound
therapy with all parameters including treatment time. You may save individual programs and call them as
well as delete them. All in all, 25 different programs are available with every program disposing of three
subordinated treatments. In consequence, you may save a complete current sequence.
NOTICE
Apart from stimulation current you can also save parameters for ultrasound- or simultaneous
therapy with the help of individual programs.
Individual Programs
The individual symbols have the following meaning:
Symbol Meaning Symbol Meaning
Programs F1 - F25 Load program
Position 1 - 3 in the program selected Saving symbol (inactive!)
Charge state of battery Save program
Back to start menu Delete program
9.1 Save Program
You can save each current mode either as an individual program only for channel I, or for both channel I
and II.
How to Save a Program
(1) Select the desired current mode in one of the two channels.
(2) Set the desired therapy parameters.
(3) Click on the symbol (individual programs).
(4) Click on the program (F1 up to F25), where you want to save your settings.
The cursor jumps to the lower status bar.
PHYSIOMED ELEKTROMEDIZIN AG 9 Individual Programs
IONOSON-Basic 61

(5) Turn the Data Selector <2> to the right and click on the symbol (save program). The symbol
flashed and the cursor jumps to the first position of the selected program.
(6) Turn the Data Selector <2> to select the desired position and confirm by pressing it.
The current settings are saved.
Individual Program Saved
(7) Click on the symbol (back), to exit the menu.
The settings selected are saved on the respective program and can be reloaded at any point in time.
NOTICE
Doing so, you can save different current modes on individual positions of a program to create
a current sequence.
9.2 Call Program
You can call saved therapy modes at any point in time.
How to Call a Program
(1) On the start monitor, click on the INDIVID symbol. The memory menu is displayed.
(2) Click on the program you want to call. The cursor jumps to the lower status bar.
(3) Turn the Data Selector <2> to the right and click on the (call program). The first current mode
of the desired program is set.
The settings are adopted and the respective current mode is displayed with the saved parameters in
the Display <1>.
The position of the selected program is highlighted.
9.3 Delete Program
You can delete or overwrite programs no longer in use.
How to Delete a Program
(1) In the start menu, choose any current mode.
(2) Click on the symbol (individual programs).
(3) Click on the program you want to delete. The cursor jumps to the lower status bar.
9 Individual Programs PHYSIOMED ELEKTROMEDIZIN AG
62 IONOSON-Basic

(4) Turn the Data Selector <2> to the right and click on the symbol (delete program). The bin sym-
bol flashes and the cursor jumps to the first position of the selected program.
(5) Turn the Data Selector <2> to select the desired position and confirm by pressing it.
The position selected is deleted and thus free again.
Tip
You can just overwrite saved current modes on individual positions. Thus, you do not have to
delete the program.
PHYSIOMED ELEKTROMEDIZIN AG 9 Individual Programs
IONOSON-Basic 63

Appendix A Annex
A.1 Customer Service, Maintenance, Service
The manufacturer is responsible only for the original security relevant properties of the instrument. The in-
strument must be used generally in conformance with the user manual.
Maintenance measures on the instrument may be carried out only at the PHYSIOMED ELEKTROMEDIZIN
AG authorised locations. If the work is carried out by such locations, a certification should be obtained
from them about the type and extent of the work. possibly with information relating to the modifications
in the rated data or the work range. The certification must also contain the date of execution as well as
company name and signature. Failed components, which influence the safety of the instrument, must be
replaced with original parts. Circuit diagrams, parts lists and service instructions shall be made available to
qualified technical personnel of the user on request.
We recommend carrying out regular servicing of the instrument and accessories. The defined safety-rel-
evant inspections are given in our manufacturer's recommendations (see Manufacturer’s Recommenda-
tions on page 74).
A.2 Cleaning and Disinfection
Clean the instrument and the accessories regularly with a surface disinfectant, e.g. Dismozon®
pur. By any
means, switch off the instrument prior to this and pull the mains plug!
Use a soft sponge cloth for cleaning. Be careful that no liquid substances invade the instrument.
Clean and disinfect the sponge and sponge bags after every treatment, and then rinse them well with
fresh water, so that no residue remains on the material.
Regularly check your accessories and replace any sponges and sponge bags which are contaminated, dam-
aged or worn out through use, and which are no longer sufficiently thick.
A.3 Service Life and Disposal
Due to legislation, the service life of this medical product has a limit of 10 years.
The instrument has to be disposed in compliance with the legal obligations. Therefore, pay attention to
the applicable regulations for environment protection.
Please contribute to environment protection by not putting used instruments into your domestic waste.
Annex PHYSIOMED ELEKTROMEDIZIN AG
64 IONOSON-Basic

A.4 Electromagnetic Compatibility
Declaration in accordance with standard EN 60601-1-2: Electromagnetic compatibility
Medical electrical devices are subject to particular precautions regarding electromagnetic
compatibility and must be used in accordance with the instructions on electromagnetic com-
patibility contained in the accompanying documents.
Portable and mobile HF communication devices can affect medical electrical devices (see the
supplement on electromagnetic compatibility, technical description).
A.5 Training
After instructions and reading of the user manual, training on the instrument is not absolutely essential.
If however there is a need, continued training can be provided. Please contact the instrument's manufac-
turer (PHYSIOMED ELEKTROMEDIZIN AG).
A.6 Connecting Additional Instruments
A.6.1 Vacuum Application Unit
You can also attach vacuum electrodes instead of plate electrodes with viscose covers or adhesive elec-
trodes. Use the Patient Lead Connector <9> to establish a connection to a vacuum unit.
If the vacuum application unit is connected and switched on, the current is generally released automatic-
ally via the vacuum electrodes. As a note, a respective electrode symbol is displayed in the lower status
bar.
The following vacuum application devices can be operated together with IONOSON-Basic:
• PHYSIOVAC-Basic
Important
By any means, refer to the Operating Instructions PHYSIOVAC-Basic (ref. no. 00985)!
PHYSIOMED ELEKTROMEDIZIN AG Annex
IONOSON-Basic 65

A.7 Basic Settings
In the Basic Settings menu, you can adjust the following instrument parameters:
Symbol Meaning
Contrast of the Display <1>
Power threshold at which the instrument switches from continuous to pulsed power out-
put in continuous mode
Unit of displayed ultrasound dose, W or W/cm2
Linking of coupling control to timer:
• YES: Timer runs only when coupling is sufficient
• NO: Timer runs independently of coupling
Dose limit after ultrasound has coupled:
• YES: Disable dose increase after coupling - active
• NO: Disable dose increase after coupling - inactive
NOTICE
The software version is displayed in the upper status bar.
How to Change the Basic Settings
(1) Switch on the instrument.
(2) On the start screen, click on SETMENU.
You get to the Basic Settings menu.
Basic Settings
(3) Click on the symbol for the parameter you want to change (e.g. for the contrast ).
(4) Turn the Data Selector <2> until the parameter accepts the value desired.
(5) Click on the symbol.
You return to the start screen. The changed settings are immediately effective.
Annex PHYSIOMED ELEKTROMEDIZIN AG
66 IONOSON-Basic

A.8 Technical Data
General Technical Data
Protection class acc. to IEC 60601-1/ VDE 750 Teil1 I, type: BF
CE characterization acc. to Council Directive concerning medical devices
(93/42 EEC)
Class acc. to Council Directive concerning medical
devices
IIa
Mains supply 100 ... 240 VAC ± 10%
Mains frequency 50 ... 60 Hz
Power consumption 140 VA
Current consumption 0,4 A ... 1,1 A
Ambient temperature (operation) + 10 °C ... + 40 °C
Dimensions (W x H x D) 31.5 x 10.4 x 33.5 cm
Weight 2.8 kg (battery-operated model) or. 2.6 kg (mains
operated model)
Output Data - Stimulation Current
Current Mode Output Data
GMC , MENS 1,000 µA
G 25 mA / 500 Ohm
HV and TENS 140 mA / 500 Ohm
DF , MF , CP , LP , UR , IG30 , IG50 , FM , STOCH , FaS , T/R 75 mA / 500 Ohm
Medium frequency current modes (IFM, AMF and KOTS) 100 mA / 500 Ohm
Output Data - Ultrasound - Small Transducer
Ultrasound Frequency 1 MHz 3 MHz
Average power density 3 W/cm² 1 W/cm²
Effective output 5 W 2.5 W
Maximum output 7.5 W 2.5 W
ERA 2.5 cm² 2,5 cm²
BNR <= 6 <= 6
Bundle type Diverging Diverging
Output Data - Ultrasound - Large Transducer
Ultrasound Frequency 1 MHz 3 MHz
Average power density 3 W/cm² 1 W/cm²
Effective output 10 W 5 W
Maximum output 15 W 5 W
ERA 5 cm² 5 cm²
PHYSIOMED ELEKTROMEDIZIN AG Annex
IONOSON-Basic 67

Ultrasound Frequency 1 MHz 3 MHz
BNR <= 6 <= 6
Bundle type Diverging Diverging
Modulation
Continuous ultrasound cont.
Pulsed ultrasound: duty cycle (impulse/pause) 1:10; 1:5; 1:3; 2:5
Pulsed ultrasound: pulse frequency 100 Hz
Adjustable switching between continuous and
pulsed ultrasound (duty cycle 2:5)
0.5 W/cm² ... 2 W/cm²
Annex PHYSIOMED ELEKTROMEDIZIN AG
68 IONOSON-Basic

Appendix B Scope of Delivery and Accessories
Important
For safety reasons, the instrument is to be used exclusively with original accessories. The use
of other manufacturers' accessories is at the user's risk!
Important
Plate electrodes are subject to wear and tear. The degree of wearout depends on the current
mode, the frequency of use, and the intensity. The greater the galvanic component of the ap-
plication is, the quicker is the wearout of the electrodes.
Since poorly conducting electrodes can lead to skin impairment, we recommend checking the
electrodes regularly (at least once per quarter) using the Electrode test pen (ref. no. 00412).
Alternatively you can send the electrodes to our service department for an inspection, which
is liable to pay a service fee.
B.1 Scope of Delivery (Mains-Operated Model)
IONOSON-Basic as mains-operated model is supplied with the following accessories:
Art.-No. Designation Number
01115 Combination therapy instrument IONOSON-Basic (mains-operated model) 1
00776 Mains cable 1
00344 Manual release key 1
00181 Patient lead (4 connectors) with right angle plug 1
00655 Plate electrode EF50 (set of 4) 1
00180 Ultrasound gel 1 l 1
00038 /
00039
Ultrasound transducer 2.5 cm2
OR 5.0 cm2
1
00451 Velcro strap 6 x 80 cm 2
00453 Velcro strap 10 x 125 cm 2
00435 Viscose Cover EF50 4
00625 Introduction to stimulation current therapy (English) 1
00626 Introduction to ultrasound therapy (English) 1
01750 Operating Instructions (English) 1
PHYSIOMED ELEKTROMEDIZIN AG Scope of Delivery and Accessories
IONOSON-Basic 69

B.2 Scope of Delivery (Battery-Operated Model)
IONOSON-Basic as battery-operated model is supplied with the following accessories:
Ref. No. Designation Quantity
02004 Combination therapy instrument IONOSON-Basic (battery-operated model) 1
00776 Mains cable 1
00344 Manual release key 1
00181 Patient lead (4 connectors) with right angle plug 1
00655 Plate electrode EF50 (set of 4) 1
00576 Transportation Bag 1
00183 Ultrasound gel 250 ml 1
00038 /
00039
Ultrasound transducer 2.5 cm2
OR 5.0 cm2
1
00451 Velcro strap 6 x 80 cm 2
00453 Velcro strap 10 x 125 cm 2
00435 Viscose Cover EF50 4
00625 Introduction to stimulation current therapy (English) 1
00626 Introduction to ultrasound therapy (English) 1
01750 Operating Instructions (English) 1
B.3 Available Accessories
For IONOSON-Basic, the following additional accessories are available:
Art.-No. Designation
00465 Bergonie mask (set)
00460 Bow electrode (set)
00580 Connection cable for PHYSIOPADS adhesive electr. (pair, red/blue)
00139 Connection cable, 65 cm (electrotherapy/vacuum)
00140 Elastic rubber strap
00141 Elastic rubber strap
00794 Elastic velcro strap 5 x 60 cm
00451 Elastic velcro strap 6 x 80 cm
00453 Elastic velcro strap 10 x 125 cm
00412 Electrode test pen
00228 Extension for patient lead (blue)
00227 Extension for patient lead (red)
00143 Fastening button
Scope of Delivery and Accessories PHYSIOMED ELEKTROMEDIZIN AG
70 IONOSON-Basic

Art.-No. Designation
00184 Filling pump
00413 Glove electrode (pair)
00156 Grip handle for electrodes with pushbutton
00155 Grip handle for electrodes
00136 Iontophoresis foil 18 x 12 cm; 1000 items
00776 Mains cable
00775 Mains cable short
00344 Manual release key
00187 Patient Lead
00181 Patient Lead with right-angle plug
00106 Patient Lead with straight plug
00587 PHYSIOPADS Adhesive Electrode 5 x 5 cm; set of 4
00592 PHYSIOPADS Adhesive Electrode 5 x 5 cm; 10 sets of 4
00593 PHYSIOPADS Adhesive Electrode 5 x 5 cm; 50 sets of 4
00588 PHYSIOPADS Adhesive Electrode 5 x 9 cm; set of 4
00594 PHYSIOPADS Adhesive Electrode 5 x 9 cm; 10 sets of 4
00595 PHYSIOPADS Adhesive Electrode 5 x 9 cm; 50 sets of 4
00585 PHYSIOPADS Adhesive Electrode 8 x 13 cm; set of 2
00597 PHYSIOPADS Adhesive Electrode 8 x 13 cm, 50 sets of 2
00596 PHYSIOPADS Adhesive Electrode 8 x 13 cm; 10 sets of 2
00586 PHYSIOPADS Adhesive Electrode Ø 3.2 cm; set of 4
00590 PHYSIOPADS Adhesive Electrode Ø 3.2 cm; 10 sets of 4
00591 PHYSIOPADS Adhesive Electrode Ø 3.2 cm; 50 sets of 4
00530 Plate electrode EF10 / 3.5 x 3 cm (blue/blue)
00651 Plate electrode EF10 / 3.5 x 3 cm (blue/red)
00650 Plate electrode EF10 / 3.5 x 3 cm (red/blue)
00531 Plate electrode EF10 / 3.5 x 3 cm (red/red)
00652 Plate electrode EF10 / 3.5 x 3 cm (set of 4)
00532 Plate electrode EF50 / 8.5 x 6 cm (blue/blue)
00654 Plate electrode EF50 / 8.5 x 6 cm (blue/red)
00653 Plate electrode EF50 / 8.5 x 6 cm (red/blue)
00533 Plate electrode EF50 / 8.5 x 6 cm (red/red)
00655 Plate electrode EF50 / 8.5 x 6 cm (set of 4)
00483 Plate electrode EF 100 (1x red/1x blue) cable length 1,5 m
00534 Plate electrode EF100 / 12 x 9 cm (blue/blue)
00564 Plate electrode EF100 / 12 x 9 cm (blue/blue) 1,5 m
00657 Plate electrode EF100 / 12 x 9 cm (blue/red)
PHYSIOMED ELEKTROMEDIZIN AG Scope of Delivery and Accessories
IONOSON-Basic 71

Art.-No. Designation
00656 Plate electrode EF100 / 12 x 9 cm (red/blue)
00535 Plate electrode EF100 / 12 x 9 cm (red/red)
00565 Plate electrode EF100 / 12 x 9 cm (red/red) 1,5 m
00658 Plate electrode EF100 / 12 x 9 cm (set of 4)
00536 Plate electrode EF200 / 17.5 x 11 cm (blue/blue)
00566 Plate electrode EF200 (blue/blue) 1,5 m
00660 Plate electrode EF200 / 17.5 x 11 cm (blue/red)
00659 Plate electrode EF200 / 17.5 x 11 cm (red/blue)
00537 Plate electrode EF200 / 17.5 x 11 cm (red/red)
00480 Plate electrode EF200 (set of 2)
00661 Plate electrode EF200 / 17.5 x 11 cm (set of 4)
00499 Plate electrode EF 400 (blue/blue)
00498 Plate electrode EF 400 (red/red)
00497 Plate electrode EF 400 (set of 2)
00167 Power connection lead
00157 Punctiform electrode ball Ø 0.8 cm
00153 Punctiform electrode ball Ø 1.5 cm
00151 Punctiform electrode flat Ø 2.5 cm
00152 Punctiform electrode flat Ø 3.5 cm
00219 Rectal probe Ø 1.4 cm
00150 Set of punctiform electrodes incl. grip handle and viscose covers
00404 Sponge layer for glove electrode
00576 Transportation bag
01001 Trolley Universal
01003 Trolley Universal II
01005 Trolley Universal III
00183 Ultrasound gel
00182 Ultrasound gel
00038 Ultrasound transducer 1/3 MHz 2,5 cm2
00039 Ultrasound transducer 1/3 MHz 5 cm2
00188 Vaginal electrode Ø 2.5 cm
00149 Viscose cloth
00160 Viscose cover
00158 Viscose cover
00433 Viscose cover EF10 / 5 x 4 cm
00435 Viscose cover EF50 / 10 x 8 cm
00437 Viscose cover EF100 / 14 x 11 cm
Scope of Delivery and Accessories PHYSIOMED ELEKTROMEDIZIN AG
72 IONOSON-Basic

Art.-No. Designation
00439 Viscose cover EF200 / 20 x 14 cm
00464 Viscose sponge for bow electrode Ø 2.0 cm
00463 Viscose sponge for bow electrode Ø 4.5 cm
PHYSIOMED ELEKTROMEDIZIN AG Scope of Delivery and Accessories
IONOSON-Basic 73

Appendix C Supplementary Documents
C.1 Manufacturer’s Recommendations
Supplementary Documents PHYSIOMED ELEKTROMEDIZIN AG
74 IONOSON-Basic

Index
A
accessories
available 70
alternating stimulation 12
ambient temperature 67
AMF (current mode) 34
application 4
automatic switch-off
output current 7
B
basic settings 66
batteries
handling 38
battery operation 38
biphase
current modes 44
C
call
program 62
CC 40
CE characterization 67
cleaning 64
compatibility
electromagnetic 65
constant current 40
constant current operation 40
constant voltage 40
contraindications 4 , 4
contrast 66
controls 6
convenient reduction of intensity 7
CP (current mode) 19
current
frequency-modulated 27
stochastic 29
current consumption 67
current mode
AMF 34
CP 19
DF 17
FaS 30
FM 27
G 15
GMC 16
HV 21
IFM 33
IG30 25
IG50 26
KOTS 36
LP 19
MENS 24
MF 18
STOCH 29
T/R 32
TENS 23
UR 20
current modes
low-frequency 15
medium frequency 33
overview 11
current supply 8
customer service 64
CV 40
D
data selector 7
delete
program 62
detonisation 46
DF (current mode) 17
diadynamic current
diphasé fixe 17
modulé en courtes périodes 19
modulé en longues périodes 19
monophasé fixe 18
dimensions 67
disinfection 64
display 6
contrast 66
symbols 6
disposal 64
dual channel operation 11
E
economy operation 39
electrodes
modes of attachment 42
preparations and attaching 43
EMC 65
error codes 39
F
faradic 30
FaS (current mode) 30
FM (current mode) 27
frequency cycle 33 , 34
frequency-modulated current 27
function check 39
G
G (current mode) 15
galvanization 15 , 16
PHYSIOMED ELEKTROMEDIZIN AG Index
IONOSON-Basic 75

GMC (current mode) 16
H
high-voltage current 21
HV (current mode) 21
hyperaemisation 46
I
IFM (current mode) 33
IFM current
therapy 50
IG30 (current mode) 25
IG50 (current mode) 26
indications 4 , 59
indications menu 59
indicators 6
instrument description 3
instrument errors 39
instrument overview 2
instrument symbols 1
intensities
recommended 42
intensity control 7
introduction 1
iontophoresis 44
K
KOTS (current mode) 36
L
line fuses 67
low-frequency currents
muscle stimulation 47
LP (current mode) 19
M
mains connection 67
mains module 8
mains operation 38
mains switch 8
maintenance 64
manual release key socket 10
manufacturer’s recommendations 74
MENS (current mode) 24
micro current 24
microcurrent 16
mode of attachment
patient lead 9
monophase
current modes 44
MR (current mode) 18
muscle stimulation
using low-frequency currents 47
with medium frequency currents 52
N
nerve stimulation 23 , 24
notes
general 3
O
operation 38
output current
automatic switch-off 7
output indicator 8
overview
current modes 11
P
pain therapy 46
patient current indicator 8
patient lead
mode of attachment 9
patient lead connector 9
power data 67
power line frequency 67
power line input 67
power switch 9
Preparation
Electrodes 43
program
call 62
delete 62
save 61
programs
individual 61
protection class 67
pulse galvanisation 25
pulse galvanization 26
S
safety precautions
intensity 42
stimulation current intensity 42
when attaching electrodes 41
save
program 61
scope of delivery
battery operated 70
mains-operated model 69
service 64
service life 64
simultaneous stimulation 12
simultaneous therapy 57
start-up 39
Index PHYSIOMED ELEKTROMEDIZIN AG
76 IONOSON-Basic

stimulation
alternating 12
simultaneous 12
stimulation current therapy
medium frequency current modes 50
therapy using low-frequency current modes 44
stimulation currents
medium frequency 52
STOCH (current mode) 29
stochastic current 29
surge current
faradic 30
T
T/R (current mode)
current mode 32
technical data 67
TENS (current mode) 23
therapy
stimulation current 41
training 65
transcutaneous electric nerve stimulation 23
U
ultra stimulation current 20
ultrasound 57
UR (current mode) 20
V
vacuum application unit 65
W
weight 67
PHYSIOMED ELEKTROMEDIZIN AG Index
IONOSON-Basic 77