object-oriented programming in python goldwasser and letscher chapter 3 getting started with...
Post on 18-Dec-2015
228 views
TRANSCRIPT

Object-Oriented Programming in PythonGoldwasser and Letscher
Chapter 3Getting Started with Graphics
Terry ScottUniversity of Northern Colorado
2007 Prentice Hall

2
Introduction: Chapter 3 Topics
• The canvas.• Drawable objects.• Rotating, Scaling, and Flipping.• Cloning.• Case Study: Smiley Face.• Layers.• Animation.• Graphical User Interfaces (GUI).• Case Study: Flying Arrows.

3
Canvas Object• paper=Canvas() #paper is a Canvas object
– paper.setBackgroundColor(color) where color is a str such as 'skyBlue'.
– paper.setWidth(width) where width is an int.
– paper.setTitle(title) where title is a str.• Can do same thing with:
– paper=Canvas(width, height, color, title)
4
Canvas Object

5
Coordinate System
• Coordinate system– Origin at upper left corner– X increases to the right.– Y increases downward. This is backwards
from mathematics.

6
Circle Object
• point(x,y) – point with coordinates x and y
• sun=Circle() – paper.add(sun)– sun.setRadius(radius) where radius is an int.
Default radius is 10.– sun.setFillColor(color)– sun.move(x, y) where x and y are ints. Default
Circle center is 0 and 0.

7
Circle Object (continued)
sun=Circle(int radius, Point(int x, int y)) #can do #radius and center of circle when object #created.
paper.add(sun) #places sun on canvas

8
Drawable Objects
• Circle(radius, center_point)• Square(side_length, center_point)• Rectangle(width, length, center_point)• Polygon(point1, point2, point3, . . .)
– addPoint(point, index) index where to insert.– last Point connected to first point.
• Path(point1, point2, . . .) draws line from point to point.
• Text and Image Classes.

9
Drawable Objects

10
Colors and Depths
• Predefined colors: help(colors) will give the list of colors.
• New colors: a tuple (red, green, blue) where each color can range between 0 and 255. Bright blue would be (0,0,255).
• setDepth(int) method can be used on any object. The larger the int the further back. Nearer objects occlude further back objects.

11
Creating a Graphical Scene
>>> paper = Canvas()
>>> paper.setBackgroundColor('skyBlue')
>>> paper.setWidth(300)
>>> paper.setTitle('My World')
>>> sun = Circle()
>>> paper.add(sun)
>>> #sun has center at
>>> #coordinates 0, 0

12
Creating a Graphical Scence (continued)
>>> #move sun to correct spot
>>> sun.move(250, 50)
>>> sun.setRadius(30)
>>> sun.setFillColor('yellow')

13
Creating a Graphical Scence (continued)
>>> #make house
>>> façade = Square(60, Point(140, 130))
>>> façade.setFillColor('white')
>>> paper.add(façade)
>>> #make chimney
>>> chimney = Rectangle(15, 18, Point(155, 85))
>>> chimney.setFillColor('red')
>>> paper.add(chimney)

14
Creating a Graphical Scence (continued)
>>> #make tree
>>> tree = Polygon(Point(50,80), Point(30,140),
Point(70, 140))
>>> tree.setFillColor('darkGreen')
>>> paper.add(tree)

15
Creating a Graphical Scence (continued)
>>> smoke = Path(Point(155,70),Point(150,65),
Point(160,55),Point(155,50))
>>> paper.add(smoke)
>>> sunraySW = Path(Point(225,75),
Point(210,90))
>>> sunraySW.setBorderColor('yellow')
>>> sunraySW.setBorderWidth(6)
>>> paper.add(sunraySW)

16
Creating a Graphical Scence (continued)
>>> #make three other sun rays

17
Complete Code For House
from cs1graphics import *paper = Canvas(300,200, 'skyBlue', 'My World')
sun = Circle(30, Point(250,50))sun.setFillColor('yellow')paper.add(sun)
façade = Square(60, Point(140,130))façade.setFillColor('white')paper.add(façade)

18
Code For House (continued)
chimney = Rectangle(15, 28, Point(155,85))chimney.setFillColor('red')chimney.setBorderColor('red')paper.add(chimney)
tree = Polygon(Point(50,80), Point(30,140), Point(70,140))
tree.setFillColor('darkGreen')paper.add(tree)

19
Code For House (continued)
smoke = Path(Point(155,70),Point(150,65), Point(160,55), Point(155,50))
paper.add(smoke)
sunraySW = Path(Path(225,75), Point(210,90))sunraySW.setBorderColor('yellow')sunraySW.setBorderWidth(6)paper.add(sunraySW)
sunraySE = Path(Path(275,75), Point(290,90))sunraySE.setBorderColor('yellow')

20
Code For House (continued)
sunraySE.setBorderWidth(6)paper.add(sunraySE)
sunrayNE = Path(Path(275,25), Point(290,10))sunrayNE.setBorderColor('yellow')sunrayNE.setBorderWidth(6)paper.add(sunrayNE)
sunrayNW = Path(Path(275,75), Point(290,90))sunrayNW.setBorderColor('yellow')sunrayNW.setBorderWidth(6)paper.add(sunrayNW)

21
Code For House (continued)
grass = Rectangle(300,80, Point(150,160))grass.setFillColor('green')grass.setBorderColor('green')grass.setDepth(75)paper.add(grass)
window = Rectangle(15,20, Point(130,120))paper.add(window)window.setFillColor('black')window.setBorderColor('red')window.setBorderWidth(2)window.setDepth(30)

22
Code For House (continued)
roof = Polygon(Point(105,105), Point(175,105),
Point(170,85), Point(110,85))
roof.setFillColor('darkgray')
roof.setDepth(30)
chimney.setDepth(20)
paper.add(roof)

23
House Graphic Image Completed

24
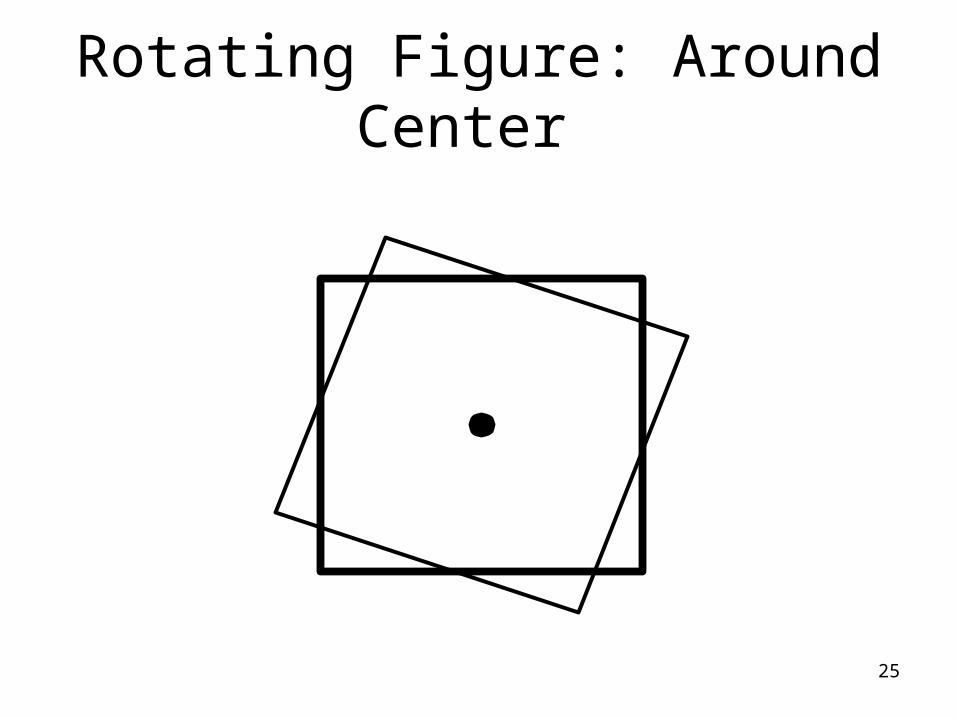
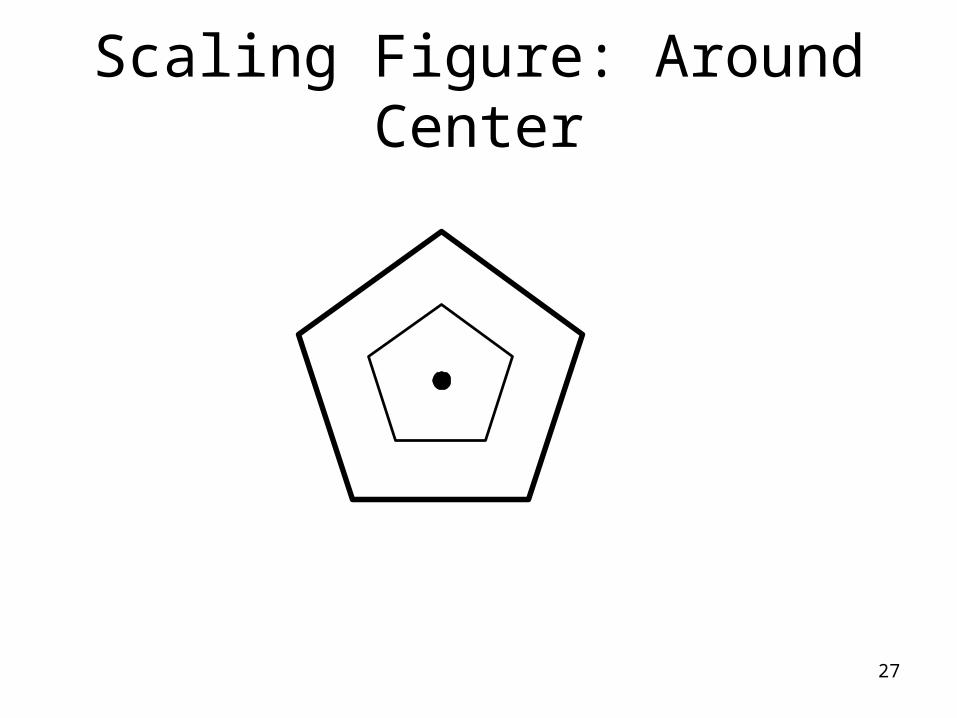
Rotating and Scaling
• rotate(degrees) #rotation around the center point • adjustReference(x, y) #changes point of rotation #by relative amounts x and y.
• scaling(factor) #changes size by factor. #Uses center point if not otherwise told.
• Can use adjustReference() to change point of scaling as well as rotation point.
25
Rotating Figure: Around Center

26
Rotating Square Around a Point Other than the Center
27
Scaling Figure: Around Center

28
Scaling Around a Point Other Than the Center

29
Flipping
• Flip arround an axis.
• Default is vertical axis.
• Top figure is default.
• Dark one is original.
• Bottom figure: flip(10)
• Axis 10 degrees from vertical.

30
Flipping and Cloning
• flip() - method performs a mirror image of object around vertical axis.
• flip(degrees) - method performs a flip around vertical axis that has been rotated in a clockwise manner in degrees.
• clone() – method that makes a copy of an object that then can be moved or resized.
>>> otherTree = tree.clone()>>> otherTree.move(170,30)>>> otherTree.scale(1.2)>>> paper.add(otherTree)

31
Cloning: Adding a Tree to Previous House Scene

32
Smiling Face Figure

33
Case Study: Smiley Face
from cs1graphics import *paper = Canvas()
head = Circle(75, Point(100,100))head.setFillColor('yellow')head.setDepth(60)paper.add(head)
mouth = Circle(40, Point(100,100))mouth.setFillColor('black')mouth.setBorderWidth(0)

34
Case Study: Smiley Face(continued)
mouth.setDepth(52)paper.add(mouth)
mouthCover = Circle(40, Point(100,100))mouthCover.setFillColor('yellow')mouthCover.setBorderWidth(0)mouthCover.setDepth(51)paper.add(mouthCover)

35
Case Study: Smiley Face(continued)
nose = Polygon(Point(100,90),Point(92,110), Point(108,110))
nose.setFillColor('Black')paper.add(nose)
leftEye = Circle(10, Point(70,80))leftEye.setFillColor('black')paper.add(leftEye)

36
Case Study: Smiley Face(continued)
rightEye = Circle(10, Point(130,80))rightEye.setFillColor('black')paper.add(rightEye)
leftEyebrow=Path(Point(60,65),Point(70,60), Point(80,65))
leftEyebrow.setBorderWidth(3)leftEyebrow.adjustReference(10,15)leftEyebrow.rotate(-15)paper.add(leftEyebrow)

37
Case Study: Smiley Face(continued)
rightEyebrow=leftEyebrow.clone()
rightEyebrow.flip()
rightEyebrow.moverotate(60,0)
paper.add(rightEyebrow)

38
Layers
• Layer() this serves as a kind of small canvas. Objects can be added to a layer.
• It is like a compound drawable object.
• It can be moved, resized, rotated, anything that can be done to a drawable object.
• Use the add() method for adding items to the layer.

39
Layers (include car on scene)
car = Layer()tire1 = Circle(10, POint(-20,-10))tire1.setFillColor('black')car.add(tire1)tire2 – Circle(10, PoInt(20, -10))tire2.setFillColor('black')car.add(tire2)body = Rectangle(70,30, Point(0,-25))body.setFillColor('blue')body.setDepth(60)car.add(body)

40
Results of Previous Code

41
Animation
• from time import sleep
• sleep(time_delay) where time_delay is the time delay in seconds.
• cs1graphics automatically updates the screen when ever a change is made.
• If many objects are drawn this may cause flicker. May see objects being drawn.

42
Animation (continued)
• Double buffering – draw objects in memory but not display. When completed, switch so that drawn objects are displayed. cs1graphics does this automatically.
• canvas_object.setAutoRefresh(False) will turn off the automatic refresh.
• canvas_object.refresh() will then manually flip between video memory pages.

43
Event and GUI Programming
• wait() is a method that can be used on any drawable object or the canvas.
• It forces the program to wait on an event.
• GUI pronounced gooey stands for Graphical User Interface.

44
Event and GUI Programming (continued)
• Items on the GUI are called widgets.
• Three widgets are:– TextBox – input for text– Button – text and clickable area– Text – allows text to be displayed.
• An example of code using TextBox, Button and Text widgets is shown on the next slide.

45
Widget Code
paper = Canvas()
nameInput = TextBox(150, 30, Point(100,10))
paper.add(nameInput)
submit = Button('Enter name', Point(100,80))
paper.add(submit)
submit.wait()
welcome = Text('Hello, ' + nameInput.getMessage()
welcome.move(100, 150)
paper.add(welcome)

46
Arrows

47
Case Study: Flying Arrows
from cs1graphics import from time import sleepscene = Canvas()scene.setBackgroundColor('skyBlue')grass = Rectangle(200,80, Point(100,160))grass.setFillColor('green')grass.setDepth(100)scene.add(grass)sun = Circle)(20, Point(50,30))sun.setFillColor('yellow')scene.add(sun)

48
Flying Arrows (continued)target = Layer()outside=Circle(30)outside.setFillColor('white')outside.setDepth(49)target.add(outside)middle = Circle(20)middle.setFillColor('blue')middle.setDepth(48)target.add(middle)inside = Circle(10)inside.setFillColor('red')target.add(inside)

49
Flying Arrows (continued)legs = Path(Point(-25,45), Point(0,0),Point(25,45)legs.setBorderWidth(2)target.add(legs)target.move(160,110)target.setDepth(75)scene.add(target)#prepare 3 arrows but do not yet add to scenearrow1 = Layer()tip = Polygon(Point(0,0), Point(-8,5), Point(-5,0),
Point(-8,5))tip.setFillColor('white')arrow1.add(tip)

50
Flying Arrows (continued)shaft = Path(Point(-30,0),Point(-5,0))shaft.setBorderWidth(2)shaft.setDepth(51)arrow1.add(shaft)fletching=Polygon(Point(-30,0),Point(-33,-3),
Point(-40,-3),Point(-36,0),Point(-38,3),Point(-36,3))
fletching.setFillColor('white')arrow1.add(fletching)arrow2 = arrow1.clone()arrow3 = arrow3.clone()target.wait() #wait indefinitely for user event on target

51
Flying Arrows (continued)
scene.add(arrow1)arrow1.rotate(-20)sleep(0.25)arrow1.move(41,-15)arrow1.rotate(7)sleep(0.25)arrow1.move(41,-5)arrow1.rotate(7)sleep(0.25)arrow1.move(41,5)arrow1.rotate(7)

52
Flying Arrows (continued)sleep(0.25)arrow1.move(41,17)arrow1.rotate(7)
target.wait() #wait for user event on targetscene.add(arrow2)arrow2.rotate(-40)sleep(0.25)arrow2.move(39,-22)arrow2.rotate(17)sleep(0.25)arrow2.move(39,-12)
53
Flying Arrows (continued)arrow2.rotate(17)sleep(0.25)arrow2.move(39,3)arrow2.rotate(17)sleep(0.25)arrow2.move(39,13)arrow2.rotate(17)
scene.add(arrow3)arrow3.rotate(-30)sleep(0.25)

54
Flying Arrows (continued)arrow3.move(37,-26)arrow3.rotate(10)sleep(0.25)arrow3.move(37,-11)arrow3.rotate(10)sleep(0.25)arrow3.move(37,6)arrow3.rotate(10)sleep(0.25)arrow3.move(37,21)arrow3.rotate(10)

55
Flying Arrows (continued)
dialogue.setMessage('Good shooting!')
scene.wait() #wait for user event anywhere on canvas
scene.close()