novell dns/dhcp services · novell® dns/dhcp services in netware® 6 integrates the domain name...
TRANSCRIPT

Novell
m
Manual 3/17/03103Novell Confidential front.fm last saved 9/2/03
w w w . n o v e l l . c o
DNS/DHCP Services
S e p t e m b e r 2 , 2 0 0 3A
D M I N I S T R A T I O N G U I D E
Manual 3/17/03103Novell Confidential front.fm last saved 9/2/03
Legal NoticesNovell, Inc. makes no representations or warranties with respect to the contents or use of this documentation, and specifically disclaims any express or implied warranties of merchantability or fitness for any particular purpose. Further, Novell, Inc. reserves the right to revise this publication and to make changes to its content, at any time, without obligation to notify any person or entity of such revisions or changes.
Further, Novell, Inc. makes no representations or warranties with respect to any software, and specifically disclaims any express or implied warranties of merchantability or fitness for any particular purpose. Further, Novell, Inc. reserves the right to make changes to any and all parts of Novell software, at any time, without any obligation to notify any person or entity of such changes.
This product may require export authorization from the U.S. Department of Commerce prior to exporting from the U.S. or Canada.
Copyright © 1993-2002 Novell, Inc. All rights reserved. No part of this publication may be reproduced, photocopied, stored on a retrieval system, or transmitted without the express written consent of the publisher.
U.S. Patent No. 5,157,663; 5,349,642; 5,455,932; 5,553,139; 5,553,143; 5,572,528; 5,594,863; 5,608,903;5,633,931; 5,652,859; 5,671,414; 5,677,851; 5,692,129; 5,701,459; 5,717,912; 5,758,069; 5,758,344; 5,781,724;5,781,724; 5,781,733; 5,784,560; 5,787,439; 5,818,936; 5,828,882; 5,832,274; 5,832,275; 5,832,483; 5,832,487;5,850,565; 5,859,978; 5,870,561; 5,870,739; 5,873,079; 5,878,415; 5,878,434; 5,884,304; 5,893,116; 5,893,118;5,903,650; 5,903,720; 5,905,860; 5,910,803; 5,913,025; 5,913,209; 5,915,253; 5,925,108; 5,933,503; 5,933,826;5,946,002; 5,946,467; 5,950,198; 5,956,718; 5,956,745; 5,964,872; 5,974,474; 5,983,223; 5,983,234; 5,987,471;5,991,771; 5,991,810; 6,002,398; 6,014,667; 6,015,132; 6,016,499; 6,029,247; 6,047,289; 6,052,724; 6,061,743; 6,065,017; 6,094,672; 6,098,090; 6,105,062; 6,105,132; 6,115,039; 6,119,122; 6,144,959; 6,151,688; 6,157,925; 6,167,393; 6,173,289; 6,192,365; 6,216,123; 6,219,652; 6,229,809. Patents Pending.
Novell, Inc.1800 South Novell PlaceProvo, Utah 84606U.S.A.
www.novell.com
Novell DNS/DHCP Management Utility Administration GuideSeptember 2, 2003
Online Documentation: To access the online documentation for this and other Novell products, and to get updates, see www.novell.com/documentation.

Manual 3/17/03103Novell Confidential front.fm last saved 9/2/03
Novell TrademarksNetWare is a registered trademark of Novell, Inc. in the United States and other countries.NetWare Core Protocol and NCP are trademarks of Novell, Inc. Novell is a registered trademark of Novell, Inc. in the United States and other countries. Novell eDirectory is a trademark of Novell, Inc.
Third-Party TrademarksAll third-party trademarks are the property of their respective owners.

Manual 3/17/03103Novell Confidential front.fm last saved 9/2/03

Manual 3/17/03103Novell Confidential dhcp_enuTOC.fm last saved 9/2/03
Contents
About This Guide 9Conventions . . . . . . . . . . . . . . . . . . . . . . . . . . . . . . . . . . . . . . . . . . . . . . . . . . . . . . . . 9
Documentation Conventions . . . . . . . . . . . . . . . . . . . . . . . . . . . . . . . . . . . . . . . . . . . . . . 9Trademark Conventions . . . . . . . . . . . . . . . . . . . . . . . . . . . . . . . . . . . . . . . . . . . . . . . . 9
1 Understanding 11Overview of DNS/DHCP Services . . . . . . . . . . . . . . . . . . . . . . . . . . . . . . . . . . . . . . . . . . . . 11DNS. . . . . . . . . . . . . . . . . . . . . . . . . . . . . . . . . . . . . . . . . . . . . . . . . . . . . . . . . . . . 11Understanding DNS . . . . . . . . . . . . . . . . . . . . . . . . . . . . . . . . . . . . . . . . . . . . . . . . . . . 13DNS Hierarchy . . . . . . . . . . . . . . . . . . . . . . . . . . . . . . . . . . . . . . . . . . . . . . . . . . . . . . 13
Domains and Subdomains . . . . . . . . . . . . . . . . . . . . . . . . . . . . . . . . . . . . . . . . . . . . . . 14Domain Names . . . . . . . . . . . . . . . . . . . . . . . . . . . . . . . . . . . . . . . . . . . . . . . . . . . . 15Domain Delegation . . . . . . . . . . . . . . . . . . . . . . . . . . . . . . . . . . . . . . . . . . . . . . . . . . 15IN-ADDR.ARPA Domain . . . . . . . . . . . . . . . . . . . . . . . . . . . . . . . . . . . . . . . . . . . . . . . 16
DNS Name Service . . . . . . . . . . . . . . . . . . . . . . . . . . . . . . . . . . . . . . . . . . . . . . . . . . . . 16Name Servers. . . . . . . . . . . . . . . . . . . . . . . . . . . . . . . . . . . . . . . . . . . . . . . . . . . . . 16Resource Records . . . . . . . . . . . . . . . . . . . . . . . . . . . . . . . . . . . . . . . . . . . . . . . . . . 17
Traditional DNS. . . . . . . . . . . . . . . . . . . . . . . . . . . . . . . . . . . . . . . . . . . . . . . . . . . . . . 18DNS within eDirectory . . . . . . . . . . . . . . . . . . . . . . . . . . . . . . . . . . . . . . . . . . . . . . . . . . 20
DNS Master File . . . . . . . . . . . . . . . . . . . . . . . . . . . . . . . . . . . . . . . . . . . . . . . . . . . 22eDirectory Objects for DNS. . . . . . . . . . . . . . . . . . . . . . . . . . . . . . . . . . . . . . . . . . . . . . . . 22
DNS Server Object . . . . . . . . . . . . . . . . . . . . . . . . . . . . . . . . . . . . . . . . . . . . . . . . . . 23DNS Zone Object . . . . . . . . . . . . . . . . . . . . . . . . . . . . . . . . . . . . . . . . . . . . . . . . . . . 23DNS Resource Record Set Object . . . . . . . . . . . . . . . . . . . . . . . . . . . . . . . . . . . . . . . . . . 23DNS Resource Records . . . . . . . . . . . . . . . . . . . . . . . . . . . . . . . . . . . . . . . . . . . . . . . 23
Dynamic DNS. . . . . . . . . . . . . . . . . . . . . . . . . . . . . . . . . . . . . . . . . . . . . . . . . . . . . . . 24DHCP . . . . . . . . . . . . . . . . . . . . . . . . . . . . . . . . . . . . . . . . . . . . . . . . . . . . . . . . . . . 24Understanding DHCP. . . . . . . . . . . . . . . . . . . . . . . . . . . . . . . . . . . . . . . . . . . . . . . . . . . 26eDirectory Objects for DHCP . . . . . . . . . . . . . . . . . . . . . . . . . . . . . . . . . . . . . . . . . . . . . . . 27
DHCP Server Object . . . . . . . . . . . . . . . . . . . . . . . . . . . . . . . . . . . . . . . . . . . . . . . . . 27Address Range Object . . . . . . . . . . . . . . . . . . . . . . . . . . . . . . . . . . . . . . . . . . . . . . . . 27Subnet Pool Object . . . . . . . . . . . . . . . . . . . . . . . . . . . . . . . . . . . . . . . . . . . . . . . . . . 28Subnet Object . . . . . . . . . . . . . . . . . . . . . . . . . . . . . . . . . . . . . . . . . . . . . . . . . . . . . 28IP Address Object . . . . . . . . . . . . . . . . . . . . . . . . . . . . . . . . . . . . . . . . . . . . . . . . . . . 28
Understanding the eDirectory Schema Extension . . . . . . . . . . . . . . . . . . . . . . . . . . . . . . . . . . . . 28DNS/DHCP Global eDirectory Objects . . . . . . . . . . . . . . . . . . . . . . . . . . . . . . . . . . . . . . . . . . 29IP Address Allocation . . . . . . . . . . . . . . . . . . . . . . . . . . . . . . . . . . . . . . . . . . . . . . . . . . . 29
Dynamic BOOTP Allocation. . . . . . . . . . . . . . . . . . . . . . . . . . . . . . . . . . . . . . . . . . . . . . 29Dynamic DHCP Allocation . . . . . . . . . . . . . . . . . . . . . . . . . . . . . . . . . . . . . . . . . . . . . . 30Manual Allocation . . . . . . . . . . . . . . . . . . . . . . . . . . . . . . . . . . . . . . . . . . . . . . . . . . . 30Lease Options. . . . . . . . . . . . . . . . . . . . . . . . . . . . . . . . . . . . . . . . . . . . . . . . . . . . . 30
Managing the Database . . . . . . . . . . . . . . . . . . . . . . . . . . . . . . . . . . . . . . . . . . . . . . . . . 30DHCP Options . . . . . . . . . . . . . . . . . . . . . . . . . . . . . . . . . . . . . . . . . . . . . . . . . . . . . . 32
Assigning Options. . . . . . . . . . . . . . . . . . . . . . . . . . . . . . . . . . . . . . . . . . . . . . . . . . . 32DHCP Options for eDirectory . . . . . . . . . . . . . . . . . . . . . . . . . . . . . . . . . . . . . . . . . . . . . 33NetWare/IP Options. . . . . . . . . . . . . . . . . . . . . . . . . . . . . . . . . . . . . . . . . . . . . . . . . . 33
Compatibility with BOOTP . . . . . . . . . . . . . . . . . . . . . . . . . . . . . . . . . . . . . . . . . . . . . . . . 34Using a BOOTP Relay Agent . . . . . . . . . . . . . . . . . . . . . . . . . . . . . . . . . . . . . . . . . . . . . . . 34
Virtual LAN Environments. . . . . . . . . . . . . . . . . . . . . . . . . . . . . . . . . . . . . . . . . . . . . . . 35SNMP Event Generation . . . . . . . . . . . . . . . . . . . . . . . . . . . . . . . . . . . . . . . . . . . . . . . . . 35DHCP Auditing . . . . . . . . . . . . . . . . . . . . . . . . . . . . . . . . . . . . . . . . . . . . . . . . . . . . . . 36
Contents 5
Novell Confidential dhcp_enuTOC.fm last saved 9/2/03 Manual Version: 3/17/03103
Console and Debug Logs . . . . . . . . . . . . . . . . . . . . . . . . . . . . . . . . . . . . . . . . . . . . . . . 36Understanding the DNS/DHCP Management Utility. . . . . . . . . . . . . . . . . . . . . . . . . . . . . . . . . . . . 37Overview of Interface Interaction . . . . . . . . . . . . . . . . . . . . . . . . . . . . . . . . . . . . . . . . . . . . . 37
The DNS/DHCP Management Utility Interface . . . . . . . . . . . . . . . . . . . . . . . . . . . . . . . . . . . . 37Taskbar . . . . . . . . . . . . . . . . . . . . . . . . . . . . . . . . . . . . . . . . . . . . . . . . . . . . . . . . 39Roles and Tasks . . . . . . . . . . . . . . . . . . . . . . . . . . . . . . . . . . . . . . . . . . . . . . . . . . . . 39Object Creation Rules . . . . . . . . . . . . . . . . . . . . . . . . . . . . . . . . . . . . . . . . . . . . . . . . . 40
2 Planning 53eDirectory Considerations . . . . . . . . . . . . . . . . . . . . . . . . . . . . . . . . . . . . . . . . . . . . . . . . . 53Planning a DNS Strategy . . . . . . . . . . . . . . . . . . . . . . . . . . . . . . . . . . . . . . . . . . . . . . . . . 54
Planning Zones . . . . . . . . . . . . . . . . . . . . . . . . . . . . . . . . . . . . . . . . . . . . . . . . . . . . 54Novell DNS Server as a Primary Name Server . . . . . . . . . . . . . . . . . . . . . . . . . . . . . . . . . . . . 54Novell DNS Server as a Secondary Name Server (to a Non-Novell Master) . . . . . . . . . . . . . . . . . . . . . 54
Configuring a DNS Server to Forward Requests . . . . . . . . . . . . . . . . . . . . . . . . . . . . . . . . . . . . . 55Forwarding Requests for Unknown Addresses . . . . . . . . . . . . . . . . . . . . . . . . . . . . . . . . . . . . 55Restricting Forwarding . . . . . . . . . . . . . . . . . . . . . . . . . . . . . . . . . . . . . . . . . . . . . . . . . 55
Setting Up the IN-ADDR.ARPA Zone . . . . . . . . . . . . . . . . . . . . . . . . . . . . . . . . . . . . . . . . . . . 55Registering Your DNS Server with Root Servers . . . . . . . . . . . . . . . . . . . . . . . . . . . . . . . . . . . . . 55Planning a DHCP Strategy . . . . . . . . . . . . . . . . . . . . . . . . . . . . . . . . . . . . . . . . . . . . . . . . 56Network Topology . . . . . . . . . . . . . . . . . . . . . . . . . . . . . . . . . . . . . . . . . . . . . . . . . . . . . 56
Migrating from Another DHCP Solution . . . . . . . . . . . . . . . . . . . . . . . . . . . . . . . . . . . . . . . . 56Initiating the DHCP Service . . . . . . . . . . . . . . . . . . . . . . . . . . . . . . . . . . . . . . . . . . . . . . 56
eDirectory Implementation. . . . . . . . . . . . . . . . . . . . . . . . . . . . . . . . . . . . . . . . . . . . . . . . . 57Lease Considerations . . . . . . . . . . . . . . . . . . . . . . . . . . . . . . . . . . . . . . . . . . . . . . . . . . . 57
Considering the Length of Leases . . . . . . . . . . . . . . . . . . . . . . . . . . . . . . . . . . . . . . . . . . . 58Controlling Client Access to Leases . . . . . . . . . . . . . . . . . . . . . . . . . . . . . . . . . . . . . . . . . . 59
IP Address Availability . . . . . . . . . . . . . . . . . . . . . . . . . . . . . . . . . . . . . . . . . . . . . . . . . . . 60Identifying Your Addresses . . . . . . . . . . . . . . . . . . . . . . . . . . . . . . . . . . . . . . . . . . . . . . 60Subnetting Your Addresses . . . . . . . . . . . . . . . . . . . . . . . . . . . . . . . . . . . . . . . . . . . . . . 60Assigning Addresses Manually . . . . . . . . . . . . . . . . . . . . . . . . . . . . . . . . . . . . . . . . . . . . 60Representing Addresses in eDirectory. . . . . . . . . . . . . . . . . . . . . . . . . . . . . . . . . . . . . . . . . 60Restricting Address Assignment to Clients . . . . . . . . . . . . . . . . . . . . . . . . . . . . . . . . . . . . . . 60
Hostnames . . . . . . . . . . . . . . . . . . . . . . . . . . . . . . . . . . . . . . . . . . . . . . . . . . . . . . . . 61
3 Installing 63Before You Start . . . . . . . . . . . . . . . . . . . . . . . . . . . . . . . . . . . . . . . . . . . . . . . . . . . . . . 63Installing the DNS/DHCP Management Utility. . . . . . . . . . . . . . . . . . . . . . . . . . . . . . . . . . . . . . . 63
Prerequisites . . . . . . . . . . . . . . . . . . . . . . . . . . . . . . . . . . . . . . . . . . . . . . . . . . . . . . 63Recommended Settings . . . . . . . . . . . . . . . . . . . . . . . . . . . . . . . . . . . . . . . . . . . . . . . . 64Launching the DNS/DHCP Management Utility . . . . . . . . . . . . . . . . . . . . . . . . . . . . . . . . . . . . 64
eDirectory Rights Required to Manage the DNS/DHCP Configuration . . . . . . . . . . . . . . . . . . . . . . . . . . 64
4 Configuring DNS 67Scope Settings . . . . . . . . . . . . . . . . . . . . . . . . . . . . . . . . . . . . . . . . . . . . . . . . . . . . . . 67DNS Prerequisites. . . . . . . . . . . . . . . . . . . . . . . . . . . . . . . . . . . . . . . . . . . . . . . . . . . . . 68Configuring Clients to Use DNS . . . . . . . . . . . . . . . . . . . . . . . . . . . . . . . . . . . . . . . . . . . . . . 68DNS Server Management . . . . . . . . . . . . . . . . . . . . . . . . . . . . . . . . . . . . . . . . . . . . . . . . . 68
Creating a DNS Server Object . . . . . . . . . . . . . . . . . . . . . . . . . . . . . . . . . . . . . . . . . . . . . 69Viewing or Modifying a DNS Server Object . . . . . . . . . . . . . . . . . . . . . . . . . . . . . . . . . . . . . . 69Deleting a DNS Server. . . . . . . . . . . . . . . . . . . . . . . . . . . . . . . . . . . . . . . . . . . . . . . . . 70Starting/Stopping the DNS Server . . . . . . . . . . . . . . . . . . . . . . . . . . . . . . . . . . . . . . . . . . . 70Configuring DNS Auditing . . . . . . . . . . . . . . . . . . . . . . . . . . . . . . . . . . . . . . . . . . . . . . . 70Viewing or Saving the DNS Audit Trail Log . . . . . . . . . . . . . . . . . . . . . . . . . . . . . . . . . . . . . . 71Viewing or Saving the DNS Event Log. . . . . . . . . . . . . . . . . . . . . . . . . . . . . . . . . . . . . . . . . 72
Zone Management . . . . . . . . . . . . . . . . . . . . . . . . . . . . . . . . . . . . . . . . . . . . . . . . . . . . 72
6 Novell DNS/DHCP Management Utility Administration Guide
Manual 3/17/03103Novell Confidential dhcp_enuTOC.fm last saved 9/2/03
Creating a Zone Object . . . . . . . . . . . . . . . . . . . . . . . . . . . . . . . . . . . . . . . . . . . . . . . . 73Creating an IN-ADDR.ARPA Object . . . . . . . . . . . . . . . . . . . . . . . . . . . . . . . . . . . . . . . . . 73Viewing or Modifying a Zone Object . . . . . . . . . . . . . . . . . . . . . . . . . . . . . . . . . . . . . . . . . 74Deleting a Zone Object . . . . . . . . . . . . . . . . . . . . . . . . . . . . . . . . . . . . . . . . . . . . . . . . 75
Resource Record Management . . . . . . . . . . . . . . . . . . . . . . . . . . . . . . . . . . . . . . . . . . . . . 76Creating Resource Records . . . . . . . . . . . . . . . . . . . . . . . . . . . . . . . . . . . . . . . . . . . . . 76Viewing or Modifying Resource Records . . . . . . . . . . . . . . . . . . . . . . . . . . . . . . . . . . . . . . . 76Deleting Resource Records. . . . . . . . . . . . . . . . . . . . . . . . . . . . . . . . . . . . . . . . . . . . . . 77
Configuring DNS Features . . . . . . . . . . . . . . . . . . . . . . . . . . . . . . . . . . . . . . . . . . . . . . . . 78Configuring an eDirectory Server to Forward Queries to Root Name Servers . . . . . . . . . . . . . . . . . . . . 78Configuring a Cache-Only Server . . . . . . . . . . . . . . . . . . . . . . . . . . . . . . . . . . . . . . . . . . . 78Configuring to Support Child Zones. . . . . . . . . . . . . . . . . . . . . . . . . . . . . . . . . . . . . . . . . . 78
Configuring Special Features. . . . . . . . . . . . . . . . . . . . . . . . . . . . . . . . . . . . . . . . . . . . . . . 78Configuring a DNS Server to be Authoritative for Multiple Zones. . . . . . . . . . . . . . . . . . . . . . . . . . . 79Configuring a Multi-Homed Server . . . . . . . . . . . . . . . . . . . . . . . . . . . . . . . . . . . . . . . . . . 79Configuring Dynamic DNS . . . . . . . . . . . . . . . . . . . . . . . . . . . . . . . . . . . . . . . . . . . . . . 79
Loading the DNS Server . . . . . . . . . . . . . . . . . . . . . . . . . . . . . . . . . . . . . . . . . . . . . . . . . 79NAMED Command Line Options . . . . . . . . . . . . . . . . . . . . . . . . . . . . . . . . . . . . . . . . . . . . . 80
5 Configuring DHCP 81Scope Settings . . . . . . . . . . . . . . . . . . . . . . . . . . . . . . . . . . . . . . . . . . . . . . . . . . . . . . 81DHCP Prerequisites . . . . . . . . . . . . . . . . . . . . . . . . . . . . . . . . . . . . . . . . . . . . . . . . . . . 82Configuring Clients to Use DHCP . . . . . . . . . . . . . . . . . . . . . . . . . . . . . . . . . . . . . . . . . . . . 82Global DHCP Configuration . . . . . . . . . . . . . . . . . . . . . . . . . . . . . . . . . . . . . . . . . . . . . . . 82
Setting Global DHCP Preferences . . . . . . . . . . . . . . . . . . . . . . . . . . . . . . . . . . . . . . . . . . 83Setting Global DHCP Defaults . . . . . . . . . . . . . . . . . . . . . . . . . . . . . . . . . . . . . . . . . . . . 83Configuring DHCP Options . . . . . . . . . . . . . . . . . . . . . . . . . . . . . . . . . . . . . . . . . . . . . . 84Import DHCP Configuration . . . . . . . . . . . . . . . . . . . . . . . . . . . . . . . . . . . . . . . . . . . . . . 84Export DHCP Configuration. . . . . . . . . . . . . . . . . . . . . . . . . . . . . . . . . . . . . . . . . . . . . . 85
DHCP Server Management. . . . . . . . . . . . . . . . . . . . . . . . . . . . . . . . . . . . . . . . . . . . . . . . 85Creating a DHCP Server . . . . . . . . . . . . . . . . . . . . . . . . . . . . . . . . . . . . . . . . . . . . . . . 86Viewing or Modifying a DHCP Server . . . . . . . . . . . . . . . . . . . . . . . . . . . . . . . . . . . . . . . . . 86Deleting a DHCP Server . . . . . . . . . . . . . . . . . . . . . . . . . . . . . . . . . . . . . . . . . . . . . . . 87Starting or Stopping a DHCP Server . . . . . . . . . . . . . . . . . . . . . . . . . . . . . . . . . . . . . . . . . 87Configuring DHCP Auditing . . . . . . . . . . . . . . . . . . . . . . . . . . . . . . . . . . . . . . . . . . . . . . 87Viewing or Saving the DHCP Audit Trail Log . . . . . . . . . . . . . . . . . . . . . . . . . . . . . . . . . . . . . 88Viewing or Saving the DHCP Event Log . . . . . . . . . . . . . . . . . . . . . . . . . . . . . . . . . . . . . . . 88
Subnet Pool Management . . . . . . . . . . . . . . . . . . . . . . . . . . . . . . . . . . . . . . . . . . . . . . . . 89Creating a Subnet Pool object . . . . . . . . . . . . . . . . . . . . . . . . . . . . . . . . . . . . . . . . . . . . 89Viewing or Modifying a Subnet Pool Object. . . . . . . . . . . . . . . . . . . . . . . . . . . . . . . . . . . . . . 90Deleting a Subnet Pool Object . . . . . . . . . . . . . . . . . . . . . . . . . . . . . . . . . . . . . . . . . . . . 90
Subnet Management . . . . . . . . . . . . . . . . . . . . . . . . . . . . . . . . . . . . . . . . . . . . . . . . . . . 90Creating a Subnet object . . . . . . . . . . . . . . . . . . . . . . . . . . . . . . . . . . . . . . . . . . . . . . . 91Viewing or Modifying a Subnet Object . . . . . . . . . . . . . . . . . . . . . . . . . . . . . . . . . . . . . . . . 91Deleting a Subnet Object . . . . . . . . . . . . . . . . . . . . . . . . . . . . . . . . . . . . . . . . . . . . . . . 92
Address Range Management . . . . . . . . . . . . . . . . . . . . . . . . . . . . . . . . . . . . . . . . . . . . . . 92Creating a Subnet Address Range Object . . . . . . . . . . . . . . . . . . . . . . . . . . . . . . . . . . . . . . 92Viewing or Modifying a Subnet Address Range Object . . . . . . . . . . . . . . . . . . . . . . . . . . . . . . . . 93Deleting a Subnet Address Range Object . . . . . . . . . . . . . . . . . . . . . . . . . . . . . . . . . . . . . . 94
IP Address Management . . . . . . . . . . . . . . . . . . . . . . . . . . . . . . . . . . . . . . . . . . . . . . . . . 94Creating an IP Address object . . . . . . . . . . . . . . . . . . . . . . . . . . . . . . . . . . . . . . . . . . . . 94Viewing or Modifying an IP Address Object. . . . . . . . . . . . . . . . . . . . . . . . . . . . . . . . . . . . . . 95Deleting an IP Address Object . . . . . . . . . . . . . . . . . . . . . . . . . . . . . . . . . . . . . . . . . . . . 96
Configuring Multiple Logical Networks . . . . . . . . . . . . . . . . . . . . . . . . . . . . . . . . . . . . . . . . . . 96Loading the DHCP Server . . . . . . . . . . . . . . . . . . . . . . . . . . . . . . . . . . . . . . . . . . . . . . . . 96DHCPSRVR Command Line Options . . . . . . . . . . . . . . . . . . . . . . . . . . . . . . . . . . . . . . . . . . 97
Contents 7
Novell Confidential dhcp_enuTOC.fm last saved 9/2/03 Manual Version: 3/17/03103
6 Optimizing 99Optimizing DNS Performance . . . . . . . . . . . . . . . . . . . . . . . . . . . . . . . . . . . . . . . . . . . . . . . 99Optimizing DHCP Performance . . . . . . . . . . . . . . . . . . . . . . . . . . . . . . . . . . . . . . . . . . . . . . 99
7 Managing 101Using the DNS/DHCP Management Utility . . . . . . . . . . . . . . . . . . . . . . . . . . . . . . . . . . . . . . . 101Managing DNS . . . . . . . . . . . . . . . . . . . . . . . . . . . . . . . . . . . . . . . . . . . . . . . . . . . . . 101Managing DHCP . . . . . . . . . . . . . . . . . . . . . . . . . . . . . . . . . . . . . . . . . . . . . . . . . . . . 101
Events and Alerts . . . . . . . . . . . . . . . . . . . . . . . . . . . . . . . . . . . . . . . . . . . . . . . . . . 102Auditing Server Activity . . . . . . . . . . . . . . . . . . . . . . . . . . . . . . . . . . . . . . . . . . . . . . . . . 102
8 Troubleshooting 103DNS . . . . . . . . . . . . . . . . . . . . . . . . . . . . . . . . . . . . . . . . . . . . . . . . . . . . . . . . . . . 103
Troubleshooting Checkpoints . . . . . . . . . . . . . . . . . . . . . . . . . . . . . . . . . . . . . . . . . . . . 103Common Configuration Problems . . . . . . . . . . . . . . . . . . . . . . . . . . . . . . . . . . . . . . . . . . 104Common Operational Problems . . . . . . . . . . . . . . . . . . . . . . . . . . . . . . . . . . . . . . . . . . . 104Troubleshooting Windows 95 TCP/IP Problems. . . . . . . . . . . . . . . . . . . . . . . . . . . . . . . . . . . 107Using the "-F" Command Line Option for DNIPINST.NLM . . . . . . . . . . . . . . . . . . . . . . . . . . . . . 111Server Access to DNS/DHCP Locator Object Not Required. . . . . . . . . . . . . . . . . . . . . . . . . . . . . 111
DHCP . . . . . . . . . . . . . . . . . . . . . . . . . . . . . . . . . . . . . . . . . . . . . . . . . . . . . . . . . . 112Troubleshooting Checkpoints . . . . . . . . . . . . . . . . . . . . . . . . . . . . . . . . . . . . . . . . . . . . 112Common Operational Problems . . . . . . . . . . . . . . . . . . . . . . . . . . . . . . . . . . . . . . . . . . . 113Releasing and Renewing DHCP Addresses. . . . . . . . . . . . . . . . . . . . . . . . . . . . . . . . . . . . . 114
8 Novell DNS/DHCP Management Utility Administration Guide

Manual (99a) 3/17/03103Novell Confidential preface.fm last saved 9/2/03
About This Guide
This document describes the concepts of the Domain Naming System (DNS) and the Dynamic Host Configuration Protocol (DHCP), the setup and configuration of these functions, and how to use Novell DNS/DHCP Services in NetWare® 6.
The audience for this document is network administrators. This documentation is not intended for users of the network.
Conventions
Documentation ConventionsIn Novell documentation, a greater-than symbol (>) is used to separate actions within a step and items in a cross-reference path.
Trademark ConventionsIn this documentation, a trademark symbol (®, TM, etc.) denotes a Novell trademark. An asterisk (*) denotes a third-party trademark.
About This Guide 9

Novell Confidential preface.fm last saved 9/2/03 Manual Version: 3/17/03103
10 Novell DNS/DHCP Management Utility Administration Guide
Manual (99a) 3/17/03103Novell Confidential u_understanding.fm last saved 9/2/03
1 Understanding
This chapter describes the eDirectoryTM schema extension, the Domain Name System (DNS), and the Dynamic Host Control Protocol (DHCP) server, and it explains their eDirectory-related functions. This chapter also provides information about the DNS/DHCP Management Utility.
Overview of DNS/DHCP ServicesNovell® DNS/DHCP Services in NetWare® 6 integrates the Domain Name System (DNS) and Dynamic Host Configuration Protocol (DHCP) into the eDirectory database. Integrating these services into eDirectory provides centralized administration and enterprise-wide management of network (IP) addresses, configuration, and hostnames.
The DNS/DHCP Management Utility provides a Web interface to manage the objects created to support DNS and DHCP. The DNS/DHCP Management Utility functions as a Web-based utility and runs in a browser window. It does not require a Novell client or any installed component as a prerequisite. It shares a common interface with other utilities that are based on the eDirectory Management (iManager) framework, and is thus tightly integrated with NetWare 6.NOTE: In this document, the term host refers to a network device that requires an IP address and might have a hostname.
For more overview information, see:
“DNS” on page 11
“DHCP” on page 25
“Understanding the DNS/DHCP Management Utility” on page 37
DNSThe DNS software in Novell DNS/DHCP Services integrates DNS information into the eDirectory database. Previously, DNS used Btrieve* as its database for configuration information. Integrating DNS with eDirectory moves all the information currently held in Btrieve files into eDirectory.
Integrating DNS with eDirectory greatly simplifies network administration by enabling you to enter all configuration information into one distributed database. Furthermore, the DNS configuration information is replicated just like any other data in eDirectory.
Integrating DNS with eDirectory also enables an update interaction between DNS and DHCP through the Dynamic DNS (DDNS) feature. When a host is assigned an IP address by DHCP, the DNS information can be automatically updated to associate the hostname with the new address when the DDNS feature is active.
By integrating DNS into eDirectory, Novell has shifted the concept of a primary or secondary zone away from the server to the zone itself. Once you have configured the zone, the data is available
Understanding 11
Novell Confidential u_understanding.fm last saved 9/2/03 Manual Version: 3/17/03103
to any of the Novell DNS servers you choose to make authoritative for the zone. The Novell DNS server takes advantage of the peer-to-peer nature of eDirectory by replicating the DNS data.
Novell DNS/DHCP Services interoperates with other DNS servers. The Novell DNS server can act as either a master DNS server or a secondary DNS server in relation to non-Novell DNS servers. The Novell DNS server can act as the master DNS server and transfer data to non-Novell secondary servers. Alternatively, one Novell DNS server can act as a secondary DNS server and transfer data from a non-Novell master server. All Novell DNS servers can then access the data through eDirectory replication.
Novell DNS/DHCP Services provides the following DNS features:
All DNS configuration is done in eDirectory, facilitating enterprise-wide management.
A Novell DNS server can be a secondary name server to another zone (DNS data loaded into eDirectory through a zone transfer), or it can be a primary name server (on which you configure DNS data using the DNS/DHCP Management Utility).
DNS data can be read in from a BIND Master file to populate eDirectory for convenient upgrades from BIND implementations of DNS.
DNS data can be exported from eDirectory into BIND Master file format.
Root server information is stored in eDirectory and shared by all eDirectory-based DNS servers.
Zone transfers are made to and from eDirectory through Novell servers and include interoperability with non-eDirectory-based DNS.
A Novell DNS server can be authoritative for multiple domains.
Novell DNS servers maintain a cache of data from eDirectory so they can quickly respond to queries.
A Novell DNS server can act as a caching or forwarding server instead of an authoritative server for zones.
Novell DNS/DHCP Services supports multihoming.
Novell DNS/DHCP Services software supports round-robin processing of responses to queries with multiple Address records (A records) for a domain name.
The DNS/DHCP management utility works with DNS and DHCP servers that are based on ISC BIND Version 4.9.6 and ISC DHCP Version 2. It supports the standards of the Internet Request For Comments (RFCs) in the following list:
RFC 819—Domain Naming Convention for Internet User Applications
RFC 920—Domain Requirements
RFC 974—Mail Routing and Domain System
RFC 1032—Domain Administrator's Guide
RFC 1033—Domain Administrator's Operations Guide
RFC 1034—Domain Names - Concepts and Facilities
RFC 1035—Domain Names - Implementation and Specification
RFC 1036—Standard Interchange of USENET Messages
RFC 1101—DNS Encoding of Network Names and other Types
RFC 1122—Requirements for Internet Hosts - Communications Layers
12 Novell DNS/DHCP Management Utility Administration Guide
Manual 3/17/03103Novell Confidential u_understanding.fm last saved 9/2/03
RFC 1123—Requirements for Internet Hosts - Application and Support
RFC 1183—New DNS RR Definitions
RFC 1535—A Security Problem and Proposed Correction with Widely Deployed DNS Software
RFC 1536—Common DNS Implementation Errors and Suggested Fixes
RFC 1537—Common DNS Data File Configuration Errors
RFC 1591—Domain Name System Structure and Delegation
RFC 1597—Address Allocation for Private Internets
RFC 1627—Network 10 Considered Harmful (Some Practices Shouldn't Be Codified)
RFC 1713—Tools for DNS Debugging
RFC 1884—IP Version 6 Addressing Architecture
RFC 1886—DNS Extensions to Support IP Version 6
RFC 1912—Common DNS Operations and Configurations Errors
RFC 2010—Operations Criteria for Root Name Servers
RFC 2052—A DNS RR for Specifying the Location of Services (DNS SRV)
Understanding DNSThe Domain Name System (DNS) is a distributed database system that provides hostname-to-IP resource mapping (usually the IP address) and other information for computers on an internetwork. Any computer on the Internet can use a DNS server to locate any other computer on the Internet.
DNS is made up of two distinct components, the hierarchy and the name service. The DNS hierarchy specifies the structure, naming conventions, and delegation of authority in the DNS service. The DNS name service provides the actual name-to-address mapping mechanism.
For more information, see:
“DNS Hierarchy” on page 13
“DNS Name Service” on page 16
“Traditional DNS” on page 19
“DNS within eDirectory” on page 20
DNS HierarchyDNS uses a hierarchy to manage its distributed database system. The DNS hierarchy, also called the domain name space, is an inverted tree structure, much like eDirectory.
The DNS tree has a single domain at the top of the structure called the root domain. A period or dot (.) is the designation for the root domain. Below the root domain are the top-level domains that divide the DNS hierarchy into segments.
Listed below are the top-level DNS domains and the types of organizations that use them. Below the top-level domains, the domain name space is further divided into subdomains representing individual organizations.
Understanding 13

Novell Confidential u_understanding.fm last saved 9/2/03 Manual Version: 3/17/03103
Table 1 Top-Level DNS Domains
Additional top-level domains organize domain name space geographically. For example, the top-level domain for France is fr. Figure 1, “DNS Hierarchy,” on page 14 illustrates the DNS hierarchy.
Figure 1 DNS Hierarchy
Domains and SubdomainsA domain is a label of the DNS tree. Each node on the DNS tree represents a domain. Domains under the top-level domains represent individual organizations or entities. These domains can be further divided into subdomains to ease administration of an organization's host computers.
For example, Company A creates a domain called companya.com under the .com top-level domain. Company A has separate LANs for its locations in Chicago, Washington, and Providence. Therefore, the network administrator for Company A decides to create a separate subdomain for each division, as shown in Figure 2, “Domains and Subdomains,” on page 15.
Any domain in a subtree is considered part of all domains above it. Therefore, chicago.companya.com is part of the companya.com domain, and both are part of the .com domain.
Domain Used by
.com Commercial organizations, as in novell.com
.edu Educational organizations, as in ucla.edu
.gov Governmental agencies, as in whitehouse.gov
.mil Military organizations, as in army.mil
.org Nonprofit organizations, as in redcross.org
.net Networking entities, as in nsf.net
.int International organizations, as in nato.int
“ • ”
root
miledu govcom
novell ucla whitehouse army redcross nsf fr
net intorg
14 Novell DNS/DHCP Management Utility Administration Guide

Manual 3/17/03103Novell Confidential u_understanding.fm last saved 9/2/03
Figure 2 Domains and Subdomains
Domain NamesThe domain name represents an entity's position within the structure of the DNS hierarchy. A domain name is simply a list of all domains in the path from the local domain to the root. Each label in the domain name is delimited by a period. For example, the domain name for the Providence domain within Company A is providence.companya.com, as shown in Figure 2, “Domains and Subdomains,” on page 15 and the list below.
Note that the domain names in the figure end in a period, representing the root domain. Domain names that end in a period for root are called fully qualified domain names (FQDNs).
Each computer that uses DNS is given a DNS hostname that represents the computer's position within the DNS hierarchy. Therefore, the hostname for host1 in Figure 2 on page 15 is host1.washington.companya.com.
Domain DelegationDomain delegation gives an organization authority for a domain. Having authority for a domain means that the organization's network administrator is responsible for maintaining the DNS database of hostname and address information for that domain.
A group of domains and subdomains for which an organization has authority is called a zone. All host information for a zone is maintained in a single, authoritative database.
For example, the companya.com. domain is delegated to Company A, creating the companya.com. zone. There are three subdomains within the companya.com. domain:
chicago.companya.com.
washington.companya.com.
“ • ”
root
Company A(companya.com)
washington(washington.companya.com)
host1(host1.washington.companya.com)
providence(providence.companya.com)
chicago(chicago.companya.com)
com
Understanding 15
16 N
Novell Confidential u_understanding.fm last saved 9/2/03 Manual Version: 3/17/03103
providence.companya.com.
The Company A administrator maintains all host information for the zone in a single database and also has authority to create and delegate subdomains.
For example, Company A's Chicago location has its own network administrator. The companya.com administrator delegates the chicago.companya.com zone to the Chicago location and no longer has authority over it. Company A now has two zones: companya.com and chicago.companya.com.
companya.com, which has authority over companya.com, washington.companya.com, and providence.companya.com zones
chicago.companya.com, which has authority over the chicago.companya.com zone
IN-ADDR.ARPA DomainThe IN-ADDR.ARPA domain (or zone) provides mapping of IP addresses to names within a zone, enabling a client (or resolver) to request a hostname by providing an IP address. Some security-based applications require this function, also known as reverse-lookup.
The file that stores the IN-ADDR.ARPA data is made up of Pointer records and additional name server records, including Start of Authority (SOA) records, similar to other DNS zone files. Within the IN-ADDR.ARPA zone file, IP addresses are listed in reverse order, and ’in-addr.arpa’ is appended to the address. A query for a host with an IP address of 1.2.3.4 would require a PTR query with the target address of 4.3.2.1.in-addr.arpa.
DNS Name ServiceDNS uses the name service component to provide the actual name-to-IP address mapping that enables computers to locate each other on an internetwork. The name service uses a client-server mechanism in which clients query name servers for host address information.
Name ServersDNS name servers maintain a database of information about hosts in a specific zone. Each DNS zone must include a name server containing authoritative
ovell DNS/DHCP Management Utility Administration Guide

Manual 3/17/03103Novell Confidential u_understanding.fm last saved 9/2/03
information about all hosts within the zones it supports. A DNS name server can be either a primary name server or a secondary name server.
In addition to local host information, name servers maintain information about how to contact other name servers. Name servers in an internetwork are able to contact each other and retrieve host information. If a name server does not have information about a particular domain, the name server relays the request to other name servers up or down the domain hierarchy until it receives an authoritative answer for the client's query.
Primary Name Servers
One DNS name server in each administrative zone maintains an authoritative database of hostname and address information for an entire domain. This name server is the primary name server, and the domain administrator updates it with hostnames and addresses as changes occur.
All name servers maintain information about how to contact name servers that are at higher or lower levels within the DNS hierarchy. The process of maintaining information about name servers in higher-level domains is called linking to the existing DNS hierarchy. The administrator also enters information into the database about name servers in lower-level domains when creating a subdomain.
Secondary Name Servers
Secondary name servers have read-only copies of the primary name server's DNS database. Secondary name servers provide redundancy and load balancing for a domain.
Periodically, and when a secondary name server starts up, the secondary name server contacts the primary name server and requests a complete copy of the primary name server's DNS database. This process is called a zone transfer.
If necessary, a primary name server can also function as a secondary name server for another zone.
Resource RecordsResource records (RRs) contain the host information maintained by the name servers and make up the DNS database. Different types of records contain different types of host information. For example, an Address record provides the name-to-address mapping for a given host, while a Start of Authority (SOA) record specifies the start of authority for a given zone.
A DNS zone must contain several types of resource records for DNS to function properly. Other RRs can be present, but the following records are required for standard DNS:
Name server (NS)—Binds a domain name with a hostname for a specific name server
The DNS zone must contain NS records for each primary and secondary name server in the zone. The DNS zone must contain NS records to link the zone to higher- and lower-level zones within the DNS hierarchy.
Start of Authority (SOA)—Indicates the start of authority for the zone.
The name server must contain one SOA record specifying its zone of authority.
Canonical name (CNAME)—Specifies the canonical or primary name for the owner. The owner name is an alias.
Address (A)—Provides the IP address for the zone.
For example, the name server for a zone must contain the following:
Understanding 17
Novell Confidential u_understanding.fm last saved 9/2/03 Manual Version: 3/17/03103
An SOA record identifying its zone of authority
An NS record for the primary name server within the zone
An NS record for each secondary name server within the zone
An A record that maps each name server specified in the NS records to an IP address
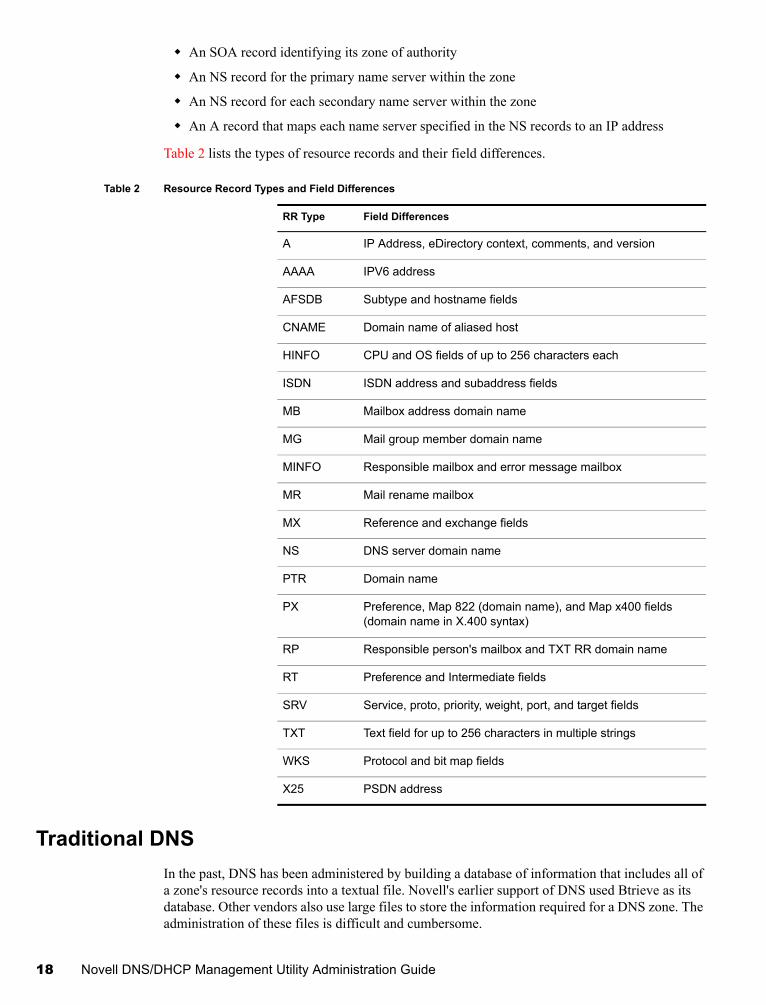
Table 2 lists the types of resource records and their field differences.
Table 2 Resource Record Types and Field Differences
Traditional DNSIn the past, DNS has been administered by building a database of information that includes all of a zone's resource records into a textual file. Novell's earlier support of DNS used Btrieve as its database. Other vendors also use large files to store the information required for a DNS zone. The administration of these files is difficult and cumbersome.
RR Type Field Differences
A IP Address, eDirectory context, comments, and version
AAAA IPV6 address
AFSDB Subtype and hostname fields
CNAME Domain name of aliased host
HINFO CPU and OS fields of up to 256 characters each
ISDN ISDN address and subaddress fields
MB Mailbox address domain name
MG Mail group member domain name
MINFO Responsible mailbox and error message mailbox
MR Mail rename mailbox
MX Reference and exchange fields
NS DNS server domain name
PTR Domain name
PX Preference, Map 822 (domain name), and Map x400 fields (domain name in X.400 syntax)
RP Responsible person's mailbox and TXT RR domain name
RT Preference and Intermediate fields
SRV Service, proto, priority, weight, port, and target fields
TXT Text field for up to 256 characters in multiple strings
WKS Protocol and bit map fields
X25 PSDN address
18 Novell DNS/DHCP Management Utility Administration Guide

Manual 3/17/03103Novell Confidential u_understanding.fm last saved 9/2/03
Figure 3, “Traditional DNS Structure,” on page 19 represents a traditional DNS strategy. A zone, such as novell.com, uses a master DNS server to handle queries about the entities within it. A DNS server might support more than one zone, and it would probably have at least one secondary server for backup (redundancy) or load-sharing purposes. The master DNS server provides DNS name service for two zones: novell.com and other.com. The secondary DNS server provides backup support for the novell.com zone, and the other secondary DNS server provides backup support for the other.com zone.
Additionally, each name server maintains separate copies of the zone data for primary and secondary support. When changes occur, all of these files require updating with zone transfers, which greatly increases network bandwidth use.
Figure 3 Traditional DNS Structure
The file storing the RRs for a zone might have hundreds or thousands of entries for different types of resources, such as users' addresses, hosts, name servers, mail servers, and pointers to other resources.
When a client initiates a request to resolve a domain name to an IP address (perhaps by using an Internet browser or by sending e-mail), the client sends a query to the name server specified in the client's configuration. The name server that receives the query searches its authoritative zone information for the desired record. If the record cannot be found, the name server will forward the query up the hierarchy to the name server above it for resolution.
When updates are made to the master name server, the entire contents of the database file must be copied to any secondary name servers.
SOAANSMXCNAMEAAAA . . .
Resource Records
Replica: other.com
SOAANSMXCNAMEAAAA . . .
Resource Records
Replica: other.com
SOAANSMXCNAMEAAAA . . .
Resource Records
Replica: novell.com
SOAANSMXCNAMEAAAA . . .
Resource Records
Replica: novell.com
SOAANSMXCNAMEAAAA . . .
Resource Records
Zone: novell.com
MasterDNS Server
SecondaryDNS Server 1(novell.com)
SOAANSMXCNAMEAAAA . . .
Resource Records
Zone: other.com
SecondaryDNS Server 2(other.com)
Understanding 19

Novell Confidential u_understanding.fm last saved 9/2/03 Manual Version: 3/17/03103
DNS within eDirectoryNovell has integrated DNS into eDirectory by extending the eDirectory schema and creating new eDirectory objects to represent zones, RRSets, and DNS name servers. Integrating these new objects into eDirectory simplifies the administration of DNS, enabling centralized administration and configuration.
A Zone object is an eDirectory container object that holds RRSet objects, which are leaf objects. A DNS Server object is a leaf object. For detailed information about these objects, see “eDirectory Objects for DNS” on page 22.
By integrating DNS into eDirectory, Novell has shifted away from the traditional concept of primary or secondary DNS name servers to the concept of a primary or secondary zone.
In traditional DNS, all configuration changes are made on a single primary name server. When changes have been made, the secondary name servers request transfers of the changes from the primary name server. This process is called a zone transfer. The master-slave approach has several disadvantages, the most significant being that all changes must be made at the primary server.
Using the primary and secondary zone concept, Novell's approach allows changes from anywhere in the network through eDirectory, which is not dependent on one server. Zone data is stored within eDirectory and is replicated just like any other data in the eDirectory tree.
Novell's DNS supports the traditional primary-secondary DNS name server approach to moving DNS data in and out of eDirectory. Although all Novell servers can recognize DNS data after the data is placed in the directory through eDirectory replication, only one server is required for a zone transfer. The server assigned to perform this function in a secondary zone is called the Zone In DNS transfer.
In a secondary zone, the Zone In server is responsible for requesting a zone transfer of data from the external primary name server. The Zone In server determines which data has changed for a zone and then makes updates to eDirectory so that other servers are aware of the changes.
The Designated DNS (DDNS) server is a server identified by the network administrator to perform certain tasks for a primary zone. The DDNS server for a primary zone is the only server in that zone that receives DNS updates from a NetWare 6 DHCP server to perform Dynamic DNS (DDNS) updates. These updates cause additions and deletions of resource records and updates to the zone's serial number.
Figure 4 illustrates a Novell server as the primary DNS name server and primary and secondary zones within eDirectory. In this example, there are two primary zones. Any of the Novell DNS servers assigned to a zone are able to respond to queries for the zone. For each zone, one server is designated by the administrator to act as the DDNS server. In this example, Server1 is the Designated DNS server for Zone 1 and Server3 is the Zone In server for the secondary zone called Foreign Zone. Server 2 provides DNS services for Zone 1 and Zone 2, but does not perform DDNS updates or zone transfers. Server 3 occasionally requests zone transfers from the foreign server and places the modified zone data into eDirectory, where any of the Novell servers can respond to queries for it.
20 Novell DNS/DHCP Management Utility Administration Guide

Manual 3/17/03103Novell Confidential u_understanding.fm last saved 9/2/03
Figure 4 Novell Server As a Primary DNS Server
Figure 5 shows a representation of eDirectory objects within a DNS zone.
Figure 5 DNS Zone
DNS Server(non-Novell)
NovellDNS Server 1
NDS
Zone 1ForeignZone
Zone 2
NovellDNS Server 2
NovellDNS Server 3
DNS ServerDNS Zone
RRSet(host)
RRSet(mail server)
RRSet(printer)
RRSet(host2)
(Locality)=Chicago
chicago.company.com
Understanding 21

Novell Confidential u_understanding.fm last saved 9/2/03 Manual Version: 3/17/03103
DNS Master FileA DNS master file contains resource records that describe a zone. When you use the DNS/DHCP Management Utility to build a zone, the DNS objects and their attributes translate into resource records for that zone.
You can use the DNS/DHCP Management Utility to import a DNS master file if it conforms to IETF RFCs 1035, 1036, and 1183 and is in BIND master file format. A sample DNS master file is shown in the following example.
$ORIGIN sjf.novell.com. @ soa sjfns.sjf.novell.com. Smith.novell.com ( 1996091454 3600 300 604800 86400 ) ns sjfns.sjf.novell.com. ns ns.novell.com. mx 5 sjf-mx.idz.sjf.novell.com. $ORIGIN sjf.novell.com.sjfns a 123.45.67.89bsmith a 123.45.68.103; End of file
eDirectory Objects for DNSThe following new eDirectory objects support DNS:
DNS Name Server object
DNS Zone object
DNS Resource Record Set object
DNS Resource Record object
Figure 6 shows an example of a tree of DNS objects.
Figure 6 eDirectory Objects for DNS
Novell
San Jose (SJF)
DNS Server
AdminRRSetObjects
novell_com NS NS2 MX MXN
novell_com.sjf.novell
DNS ZoneObject
22 Novell DNS/DHCP Management Utility Administration Guide

Manual 3/17/03103Novell Confidential u_understanding.fm last saved 9/2/03
DNS Server ObjectThe DNS Server object (or Service object) is different from the NetWare Core ProtocolTM (NCPTM) Server object. A DNS Server object can be contained in an Organization (O), Organizational Unit (OU), Country (C), or Locality (L). The DNS Server object contains DNS server configuration parameters, including the following:
Zone List
DNS Server IP Address
Domain Name of the DNS Server
DNS Server Options
Forwarding List
No Forwarding List
DNS Zone ObjectThe DNS Zone object is a container object that contains all the data for a single DNS zone. A Zone object is the first level of the DNS zone description. A Zone object can be contained under an Organization (O), Organizational Unit (OU), a Country (C), or a Locality (L).
Multiple DNS domains can be represented within eDirectory by using separate, independent DNS Zone objects. A network administrator can support multiple DNS domains on a single NetWare server by creating multiple DNS Zone objects and assigning the server to serve those zones.
The DNS Zone object contains data that correlates to a DNS Start of Authority (SOA) resource record (RR), a member list of all eDirectory-based DNS servers that serve the zone, and Dynamic DNS (DDNS) server information.
The DNS name space hierarchy is not represented within the eDirectory hierarchy. A zone and its child zone might appear as peers within the eDirectory hierarchy, even though they have a parent-child relationship within the DNS hierarchy.
DNS Resource Record Set ObjectThe DNS Resource Record Set (RRSet) object is an eDirectory leaf object contained within a DNS Zone object. An RRSet object represents an individual domain name within a DNS zone. Its required attributes are a DNS domain name, a DNS address class, and a Time-to-Live (TTL) record.
Each domain name within a DNS zone object has an RRSet object. Each RRSet object has one or more resource records beneath it containing additional information about the domain, including a description of the object and version information.
DNS Resource RecordsA DNS resource record (RR) is an attribute of an RRSet that contains the resource records type and data of a single RR. RRs are configured beneath their respective RRSet objects. Resource records describe their associated RRset object.
The most common resource records are Address (A) records, which map a domain name to an IP address, and Pointer (PTR) records, which map an IP address to a domain name within an IN-ADDR.ARPA zone.
Understanding 23

Novell Confidential u_understanding.fm last saved 9/2/03 Manual Version: 3/17/03103
Dynamic DNSThe Dynamic DNS (DDNS) feature of Novell DNS/DHCP Services provides a way to update DNS with accurate Address (A) records and Pointer (PTR) records for address assignments made by a DHCP server. Address (A) records map a domain name to an IP address. A Pointer (PTR) record specifies a domain name that points to some location in the domain name space.These resource records are required so that both name-to-address and address-to-name DNS resolutions can be made. DDNS eliminates the need for further error-prone configuration of DNS for each host address change.
Enable DDNS by configuring a subnet address range with the Always Update parameter set to on. You must also specify a zone reference in the Subnet object so that the DHCP server can determine which zone to update.
When DDNS is active, the DHCP server updates the DDNS server for the zone, adding or deleting the corresponding Address and Pointer records. The DHCP server also notifies the DDNS server when leases expire, causing the A and PTR records to be deleted. If a lease is renewed, no action occurs because none is necessary.
Only subnet address ranges whose assignment type is either Dynamic DHCP or Dynamic BOOTP and DHCP can use the Dynamic DNS update feature. For a DDNS update to occur, the Always Update parameter of the range must be enabled and a DNS zone must be specified to link the Zone object to the subnet. When these conditions are met, the DHCP server initiates a dynamic DNS update when assigning an address to a client.
When the DHCP server grants a lease to a client that is subject to DDNS updates, the server updates its database and eDirectory to store the transaction. The DHCP server also contacts the DNS server and submits a request for a DNS update.
For DDNS updates, the DNS server requires the fully qualified domain name (FQDN) and the IP address of the client. The DHCP server knows the IP address, but it must assemble the FQDN from the hostname and the subnet's domain name.
The DNS server usually maintains two resource records for each client. One maps FQDNs to IP addresses using A records. The other maps the IP address to the FQDN using PTR records. When DDNS is enabled and a client receives an address from the DHCP server, the DNS server updates both of these records.
When a client loses or ends its lease and is subject to DDNS updates, the DNS server receives the DDNS update request and deletes the PTR and A records associated with the client.
DHCPA NetWare 6 DHCP server automatically assigns IP addresses and other configuration information to clients upon request or when the clients are restarted. Automatic assignment of configuration information reduces the amount of work required to configure and manage a large IP network.
Furthermore, integrating DHCP with eDirectory enables you to enter all configuration information into one distributed database. This greatly simplifies network administration and provides for the replication of DHCP configuration information.
DHCP provides for both static and dynamic configuration of IP clients. Static configuration enables you to assign a specific IP address and configuration to a client with a specific machine or MAC address. When DHCP assigns IP addresses dynamically, IP clients are assigned an IP address that is chosen from a range of available addresses. You can use dynamic address
24 Novell DNS/DHCP Management Utility Administration Guide

Manual 3/17/03103Novell Confidential u_understanding.fm last saved 9/2/03
assignment when you are not concerned about which IP address a particular client uses. Each IP client that requests an address assignment can also use the other DHCP configuration parameters.
DHCP can limit the amount of time a DHCP client can use an IP address. This is known as the lease time. You can use the lease time to allow a large number of clients to use a limited number of IP addresses.
DHCP is based on BOOTP and maintains some backward compatibility. Novell DHCP servers can be configured to respond to requests from BOOTP clients.
Novell DNS/DHCP Services provides the following DHCP features:
All DHCP configuration is done in eDirectory, facilitating enterprise-wide management.
DHCP options can be set at three levels:
Enterprise level
Subnet level
Specific client level
The configuration utility has import/export functions that support the following:
Populating eDirectory from an existing Novell DHCP Server 2.0 DHCPTAB file or from a BOOTPTAB file (for Novell BOOTP)
Saving configuration information out of eDirectory
You can configure the level of SNMP event trap generation using the DNS/DHCP Management Utility for all events, major events only, or no events.
Client assignment policy options (to support mobile clients that move around the network) include:
Allow Duplicate
Delete Duplicate
No Duplicate
You can use the DNS/DHCP Management Utility to maintain a hardware exclusion list to deny service to unwanted devices by their MAC addresses.
The DHCP software updates eDirectory to record all address assignments to LAN clients.
You can use Dynamic DNS (DDNS) to update DNS with information about addresses assigned and rescinded.
The DHCP software enables the server to cache addresses and other configuration information from eDirectory for quick response.
The DHCP software has one DHCP server NetWare Loadable ModuleTM (NLMTM) file that supports both LAN and remote access clients.
You can configure the DHCP server to ping an address to verify that no other device is using it before assigning the address to a client.
Provides fault tolerance as follows:
A server can survive a temporary local eDirectory service outage and recover automatically.
DHCP configuration is replicated like other eDirectory data.
Understanding 25

Novell Confidential u_understanding.fm last saved 9/2/03 Manual Version: 3/17/03103
DHCP auditing can help diagnose problems. Each incidence of address deletion, addition, and rejection is recorded.
Novell DNS/DHCP Services supports the features that were previously provided by Novell DHCP Server 2.0 and supports the standards of the RFCs in the following list:
RFC 2131—Dynamic Host Configuration Protocol
RFC 2132—DHCP Options and BOOTP Vendor Extensions
RFC 2241—DHCP Options and Novell Directory Services
RFC 2242—NetWare/IP Domain Name and Information
Novell DNS/DHCP Services also supports the BOOTP standards of the RFCs in the following list:
RFC 1497—BOOTP Vendor Information Extensions
RFC 1534—Interoperation Between DHCP and BOOTP
RFC 1542—Clarifications and Extensions for the Bootstrap Protocol
See “DHCP Options” on page 32 for a list of all supported DHCP options.
Understanding DHCPThe Dynamic Host Configuration Protocol (DHCP) uses a client-server structure to provide configuration parameters to hosts. DHCP consists of a protocol for providing host-specific configuration parameters from a DHCP server (or collection of DHCP servers) to a host and a mechanism to allocate network addresses to a host. NOTE: In this document, the term host refers to a network device that requires an IP address and might have a hostname.
When the DHCP server is loaded, it reads its configuration information from eDirectory and stores the information in its cache. As the DHCP server assigns addresses to clients, it updates eDirectory, adding IP address objects or modifying their eDirectory status information. The DHCP server can be configured to maintain an audit log of this activity. For information about maintaining an audit log of DHCP server activity, see “Configuring DHCP Auditing” on page 87.
The network administrator can use the DNS/DHCP Management Utility to view objects to see how addresses have been assigned.
For more information, see:
“IP Address Allocation” on page 30
“Managing the Database” on page 31
“DHCP Options” on page 32
“Dynamic DNS” on page 24
“Compatibility with BOOTP” on page 34
“Using a BOOTP Relay Agent” on page 35
“SNMP Event Generation” on page 36
“DHCP Auditing” on page 36
26 Novell DNS/DHCP Management Utility Administration Guide

Manual 3/17/03103Novell Confidential u_understanding.fm last saved 9/2/03
eDirectory Objects for DHCPThe following new eDirectory objects support DHCP:
DHCPServer object
Address Range object
Subnet Pool object
Subnet object
IPAddress object
Figure 7 on page 27 shows a basic configuration of the DHCP objects. This structure might be used for a small to medium size network.
Figure 7 eDirectory Objects for DHCP
DHCP Server ObjectThe DHCP Server object represents the DHCP server and contains a multivalued attribute listing of the subnet ranges the DHCP server is servicing. The DHCP server also contains all server-specific configuration and policy information. A DHCP Server object can be contained in an O, OU, C, or L.
Address Range ObjectThe Address Range object is primarily used to denote a range of addresses to create a pool of addresses for dynamic address assignment or to identify a range of addresses to be excluded from
(O)=NOVELL
(OU) = Organizational Unit(O) = Organization
DHCP Server
(OU)=SAN JOSE
IP Address(1.2.3.1)
IP Address(1.2.3.2)
Subnet AddressRange
(1.2.3.10-254)1ST_FLOOR_CLIENTS
Subnet Attr: Bldg8_1ST_FLOOR
Subnet Attr: Bldg8_2ND_FLOOR
IP Address(1.2.4.1)
Subnet AddressRange
(1.2.4.100-254)2ND_FLOOR_CLIENTS
IP Address(1.2.4.2)
Subnet (1.2.3.0)SUBNET_A
Subnet (1.2.4.0)SUBNET_B
Subnet Pool:Subnet ASubnet B
Understanding 27

Novell Confidential u_understanding.fm last saved 9/2/03 Manual Version: 3/17/03103
address assignment. Optionally, the Address Range object stores the start of a hostname that can be assigned to clients when addresses are assigned.
You can use multiple Address Range objects under a Subnet object. You can also specify different range types, such as a range for dynamic address assignment, a range for BOOTP clients, or a range to be excluded from the subnet.
Subnet Pool ObjectThe Subnet Pool object provides support for multiple subnets through a DHCP or BOOTP forwarder by identifying a pool of subnets for remote LAN address assignments. A Subnet Pool object can be contained in an O, OU, C, or L.
DHCP servers are not required to be on the local subnet to which they assign addresses. If desired, they can be deployed centrally and service remote subnets. Initial DHCP/BOOTP Discover requests, however, are not sent to a DHCP server unless a DHCP/BOOTP forwarder that is on the same computer as the client has been configured to forward the addresses.
The Subnet Pool object contains a list of subnet object references and comments.
Subnet ObjectThe Subnet object represents a subnet and is the most fundamental DHCP object. The Subnet object can be contained in an Organization (O), an Organizational Unit (OU), a Country (C), or a Locality (L). The Subnet object acts as a container object for the IP Address and Address Range objects. A Subnet object's specific DHCP options and configuration parameters apply to the entire subnet and override global options.
IP Address ObjectThe IP Address object represents a single IP address. The IP Address object must include an address number and an assignment type. The address can be assigned manually, automatically, or dynamically, or it can be excluded from DHCP address assignment.
You must use the DNS/DHCP Management Utility to configure IP Address objects that are manually assigned or excluded from assignment. For dynamically or automatically assigned client addresses, DHCP creates an IP Address object under the subnet where the address is assigned.
An IP address can be assigned to a client based on the client's MAC address. These IP Address objects can also receive specific DHCP options.
When configuring an individual IP Address object, you can provide specific options that override global options or those set at the subnet level. When you create or modify an IP Address object manually, you can also create the necessary DNS resource records.
Understanding the eDirectory Schema ExtensionThe eDirectory schema extension defines additional objects needed for DNS and DHCP.
For more information, see:
“DNS/DHCP Global eDirectory Objects” on page 29
“eDirectory Objects for DNS” on page 22
“eDirectory Objects for DHCP” on page 27
28 Novell DNS/DHCP Management Utility Administration Guide
Manual 3/17/03103Novell Confidential u_understanding.fm last saved 9/2/03
DNS/DHCP Global eDirectory ObjectsWhen you select Novell DNS/DHCP Services during NetWare 6 installation, the eDirectory schema is extended to enable the creation of DNS and DHCP objects, and the following objects are created:
DNS/DHCP Locator object
DNS/DHCP Group object
RootSrvrInfo Zone
Only one copy of these objects exists in an eDirectory tree. The DNS servers, DHCP servers, and DNS/DHCP Management Utility must have access to these objects.
The DNS/DHCP Group object is a standard eDirectory group object. The DNS and DHCP servers gain the rights to DNS and DHCP data within the tree through the Group object. When the DNS/DHCP Management Utility is used to create DNS and DHCP servers, the servers have the rights required to access data.
The DNS/DHCP Locator object contains global defaults, DHCP options, and lists of all DNS and DHCP servers, subnets, and zones in the tree. The DNS/DHCP Management Utility can display these objects without having to search the tree by using the Locator object. The Locator object is basically hidden by the DNS/DHCP Management Utility.
The RootSrvrInfo Zone is a Zone object, an eDirectory container object that contains resource record sets for the DNS root servers. The resource record sets contain Address records and Name Server records that provide pointers for DNS queries to the root servers. The RootSrvrInfo Zone object is the equivalent of the BIND db.root file.
IP Address AllocationAllocation of IP addresses, either temporary or permanent, is one of the two primary services provided by DHCP. The client requests an IP address, and the DHCP server (or collection of DHCP servers) provides an address and guarantees not to give that address to another client within a specified time. Additionally, the server tries to return the same address to the client each time the client requests an address. The period of time over which an IP address is allocated to a client is called a lease.
DHCP supports three methods of IP address allocation:
Dynamic BOOTP allocation
Dynamic DHCP allocation
Manual (or static) allocation
A network can use one or more of these methods. The network administrator decides which methods to use.
Dynamic BOOTP AllocationDynamic BOOTP enables a DHCP server to assign permanent addresses to BOOTP clients from a pool of addresses. No manual configuration of the client is required prior to address allocation.
Understanding 29

Novell Confidential u_understanding.fm last saved 9/2/03 Manual Version: 3/17/03103
Dynamic DHCP AllocationDynamic DHCP allocation is the only method enabling automatic reuse of addresses no longer required by a client. Dynamic DHCP allocation is useful for assigning an address to a client that will be connected temporarily to the network or for sharing a limited number of IP addresses among a group of clients that do not require permanently assigned IP addresses.
Dynamic DHCP allocation is also useful for assigning an IP address to a new client installed on a network on which IP addresses are scarce and must be reclaimed when older hosts are removed. An additional benefit to dynamic DHCP allocation is that when a client's lease is renewed, the DHCP server refreshes the client's configuration.
Manual AllocationUse Manual or static allocation to assign addresses to DHCP or BOOTP clients using the DNS/DHCP Management Utility. A specific IP address is assigned to the client based on an identifier such as the client's hardware or MAC address.
Manual allocation of DHCP eliminates the error-prone method of manually configuring hosts with IP addresses in networks for which IP address management without DHCP is desired. Manual allocation can be permanent or set to expire at a future time. When you manually allocate addresses, you can also create corresponding DNS Resource Records, thereby eliminating another error-prone activity.
Lease OptionsA client acquires a lease for a fixed period of time. The length of the lease could be a number of hours or days, or it could be for an indefinite period.
After a lease for an IP address has been granted, a client can issue a request to extend its lease. The client can also issue a message to the server to release the address back to the server when the address is no longer required.
If a network has a scarcity of IP addresses and must reassign them, the DHCP server will reassign an address when the lease has expired. The server uses configuration information to choose addresses to reuse. For example, the server might choose the least recently assigned address for reassignment. After receiving an address assignment, the host determines whether the address is in use by another host before accepting the address. IMPORTANT: Address duplication sometimes occurs with Windows 95 clients. If a Windows 95 client receives a response indicating that the assigned address is in use by another device, a message indicates the IP address conflict. However, the client does not send a DHCPDECLINE message as required by RFC 1534, section 4.4.1.
To minimize the chance of address duplication, the DHCP server can be configured to ping an address to test its validity before assigning it to a host. If the server receives a response from another device (indicating ownership of the address), the current address assignment is withdrawn so that another address can be assigned to the host.
Managing the DatabaseThe Lease Time attribute of the Subnet object enables a dynamic DHCP client to specify a lease time for the entire subnet. Lease expiration time can be modified for each manual IP address allocation.
30 Novell DNS/DHCP Management Utility Administration Guide
Manual 3/17/03103Novell Confidential u_understanding.fm last saved 9/2/03
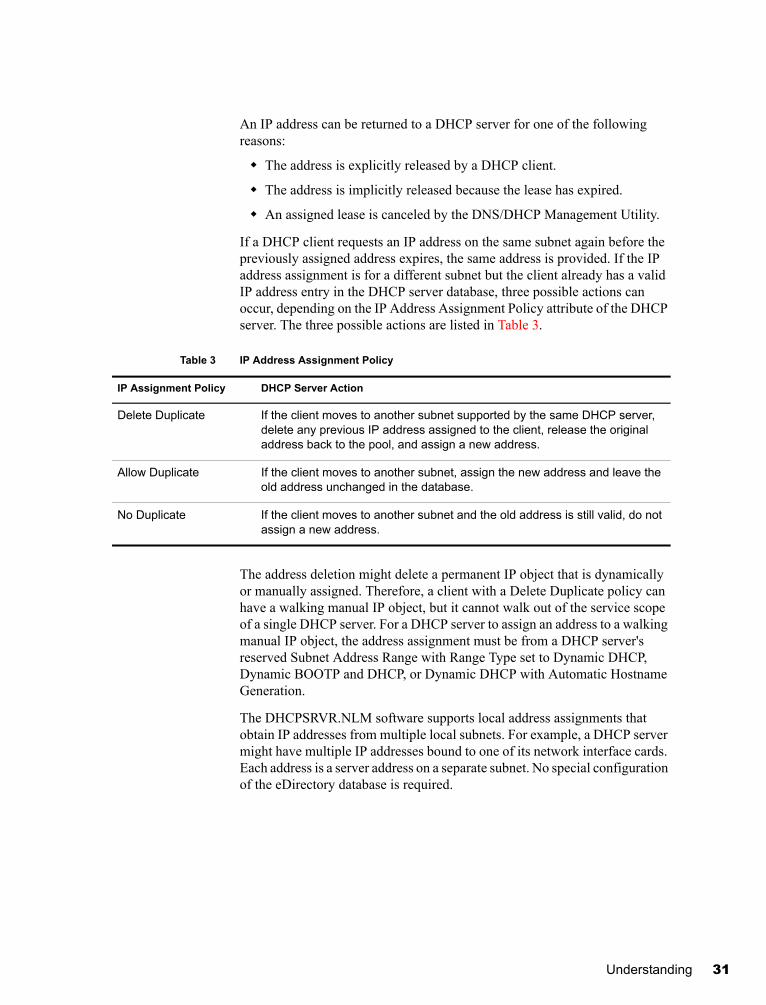
An IP address can be returned to a DHCP server for one of the following reasons:
The address is explicitly released by a DHCP client.
The address is implicitly released because the lease has expired.
An assigned lease is canceled by the DNS/DHCP Management Utility.
If a DHCP client requests an IP address on the same subnet again before the previously assigned address expires, the same address is provided. If the IP address assignment is for a different subnet but the client already has a valid IP address entry in the DHCP server database, three possible actions can occur, depending on the IP Address Assignment Policy attribute of the DHCP server. The three possible actions are listed in Table 3.
Table 3 IP Address Assignment Policy
The address deletion might delete a permanent IP object that is dynamically or manually assigned. Therefore, a client with a Delete Duplicate policy can have a walking manual IP object, but it cannot walk out of the service scope of a single DHCP server. For a DHCP server to assign an address to a walking manual IP object, the address assignment must be from a DHCP server's reserved Subnet Address Range with Range Type set to Dynamic DHCP, Dynamic BOOTP and DHCP, or Dynamic DHCP with Automatic Hostname Generation.
The DHCPSRVR.NLM software supports local address assignments that obtain IP addresses from multiple local subnets. For example, a DHCP server might have multiple IP addresses bound to one of its network interface cards. Each address is a server address on a separate subnet. No special configuration of the eDirectory database is required.
IP Assignment Policy DHCP Server Action
Delete Duplicate If the client moves to another subnet supported by the same DHCP server, delete any previous IP address assigned to the client, release the original address back to the pool, and assign a new address.
Allow Duplicate If the client moves to another subnet, assign the new address and leave the old address unchanged in the database.
No Duplicate If the client moves to another subnet and the old address is still valid, do not assign a new address.
Understanding 31

Novell Confidential u_understanding.fm last saved 9/2/03 Manual Version: 3/17/03103
The DHCPSRVR.NLM software also supports remote address assignments that obtain IP addresses from multiple remote subnets. This feature requires all such subnets to be identified with a Subnet Pool object.
DHCP OptionsNovell DNS/DHCP Services supports vendor options, DHCP options, and BOOTP parameters as defined in Internet RFC 2132 with a few exceptions. Novell DNS/DHCP Services supports new options defined for NetWare over TCP/IP and existing NetWare/IP options. NOTE: The following options are not supported in this release of Novell DNS/DHCP Services: 56, 57, 60, 66, and 67. Although options 66 and 67 are not supported, the equivalent BOOTP parameter function is provided.
Assigning OptionsDHCP and BOOTP options can be assigned at three levels:
Globally
At the subnet level
IP address level
The DHCP server's options inheritance rules specify that options assigned at the lowest level override options set at a higher level. For example, options have been assigned at all three levels for the client on the subnet, as shown in Table 4.
Table 4 Example of DHCP Options Assignment
Table 5 lists the effective options for the client with the IP address referred to in the preceding table.
Table 5 Client's Effective Options
Level Option Value
Global 1, Subnet Mask 255.255.0.0
3, Router 132.57.3.8
4, Time Server 129.23.120.5
Subnet 1, Subnet Mask 255.254.0.0
5, Name Server 10.73.57.251
7, Log Server 10.73.58.2
13, Boot File Size 1024
IP Address 7, Log Server Null
13, Boot File Size 256
Option Value
1, Subnet Mask 255.254.0.0
32 Novell DNS/DHCP Management Utility Administration Guide

Manual 3/17/03103Novell Confidential u_understanding.fm last saved 9/2/03
DHCP Options for eDirectoryNovell has defined three DHCP options for eDirectory. These options eliminate the need to provide this information each time users log in.
Option 85 provides the IP address of one or more eDirectory servers for the client to contact for access to the eDirectory database. Option 86 provides the name of the eDirectory tree the client will be contacting. Option 87 provides the eDirectory context the client should use.
For more detailed information about using these options in NetWare 6, refer to Internet RFC 2241, DHCP Options for Novell Directory Services.
NetWare/IP OptionsNovell uses option codes 62 and 63 in the DHCP packet for NetWare/IP. Option 62 contains the NetWare/IP domain name.
Option 63, the IPX Compatibility option, contains general configuration information such as the primary DSS, preferred DSS, and the nearest servers. Option 63 provides additional information in the form of sub-options, listed in Table 6.
Table 6 IPX Compatibility Suboptions
3, Router 132.57.3.8
4, Time Server 129.23.120.5
5, Name Server 10.73.57.251
7, Log Server Null
13, Boot File Size 256
Suboption Codes
Meaning
5 If the value of this field is 1, the client should perform a NetWare Nearest Server Query to find out its nearest NetWare/IP server.
6 Provides a list of up to five addresses of NetWare Domain SAP/RIP servers.
7 Provides a list of up to five addresses of the nearest NetWare/IP servers.
8 Indicates the number of times a NetWare/IP client should attempt to communicate with a given DSS server at startup.
9 Indicates the amount of delay in seconds between each NetWare/IP client attempt to communicate with a given DSS server at start-up.
10 If the value is 1, the NetWare/IP client should support NetWare/IP Version 1.1 compatibility.
Option Value
Understanding 33

Novell Confidential u_understanding.fm last saved 9/2/03 Manual Version: 3/17/03103
Refer to Internet RFC 2242, NetWare/IP Domain Name and Information, for more detailed information about using these NetWare/IP options.
Compatibility with BOOTPDHCP is based on the Bootstrap Protocol (BOOTP) and maintains some backward compatibility. BOOTP was designed for manual configuration of the host information in a server database. Novell has extended support for BOOTP to provide Dynamic BOOTP support. A pool of addresses can be set up for BOOTP address assignment so that each BOOTP address does not have to be configured separately.
From the clients' point of view, DHCP is an extension of BOOTP, enabling existing BOOTP clients to interoperate with DHCP servers without requiring any change to the clients' initialization software. Some new, additional options optimize DHCP client-server interaction.
There are two primary differences between DHCP and BOOTP. DHCP defines methods through which clients receive IP addresses for a specified period of time, enabling serial reassignment of addresses to different clients. There is no concept of a lease time in BOOTP; address assignments (even in Dynamic BOOTP) are permanent. Additionally, DHCP provides a method for a client to acquire all the IP configuration parameters it requires to operate.
If multiple servers service a single subnet, only one server, the principal server can be designated as an automatic BOOTP server.
Another difference between the two protocols is a change in terminology to clarify the meaning of the Vendor Extension field in BOOTP messages. With DHCP, this field is called the Option field.
Using a BOOTP Relay AgentA BOOTP relay agent (also known as a forwarder) is an Internet host that passes DHCP messages between DHCP clients and DHCP servers in a subnet environment. The forwarder usually resides on an IP router; however, any Novell server on a subnet can run the BOOTPFWD.NLM. The DHCP service in Novell DNS/DHCP Services provides relay agent functions as specified in the BOOTP protocol specification (Internet RFC 951).
When a client starts up, it sends a UDP broadcast message, called a Discover packet, to address 0xFFFFFFFF over port 67 requesting an address.
11 Identifies the Primary Domain SAP/RIP Service server (DSS) for this NetWare/IP domain.
12 Identifies network number of the virtual IPX network created by the IPX Compatibility feature.
13 The IPX Stale Time suboption specifies the minimum interval in minutes that must expire before hosts try to refresh their Migration Agent addressing information.
14 Specifies the addresses of one or more Migration Agent servers for the IP nodes to use for communicating with IPX Nodes.
Suboption Codes
Meaning
34 Novell DNS/DHCP Management Utility Administration Guide

Manual 3/17/03103Novell Confidential u_understanding.fm last saved 9/2/03
The forwarder has an IP address on the network and acts like a DHCP server, listening for Discover packets from clients on its LAN that are meant for a DHCP server. The forwarder must be configured with the destination address of the actual DHCP server on a different LAN segment that will provide DHCP service.
The DHCP server must be configured to serve the subnet on which the forwarder is located. The DHCP server must have a subnet address range to provide service.
After receiving a Discover packet from a client, the forwarder reformats the packet and sends it to the DHCP server. The DHCP server responds to the forwarder with an Offer packet containing an address for the client.
When the forwarder receives the Offer packet from the DHCP server, the forwarder contacts the client and provides the IP address and lease information. NOTE: The BOOTP protocol, unlike DHCP, does not provide a mechanism for a client to accept only a single offer of an IP address; therefore, the DNS/DHCP Management Utility allows only the server that is specified as the default server in a Subnet object to be assigned to any address ranges that include BOOTP addresses. If you want to assign other servers to the address ranges, you should change the address range type so that it doesn't include BOOTP. If the range type includes BOOTP, you will not be allowed to change the DHCP server assigned to the range.
Virtual LAN EnvironmentsIn environments using a virtual LAN (VLAN), multiple subnets might be defined on one physical subnet. For example, one physical subnet might contain several Class C addresses to form a larger address range than allowed for a Class C address. To accommodate a VLAN environment, a Subnet Pool object must be configured on the DHCP server to bind the multiple subnets together.
If a forwarder forwards client requests from a physical subnet with multiple subnet bindings and these subnets are bound to a single subnet pool, the collection of addresses available in configured subnet address ranges are available to all clients (DHCP or BOOTP) on that physical subnet. This is the primary use of the subnet pool.
Clients that are on the same subnet as the DHCP server do not have to be configured for the subnet pool if the server is bound to all local subnet addresses, or if the server has an address on each local subnet.
SNMP Event GenerationYou can use the DNS/DHCP Management Utility to set up SNMP event generation in the case of critical, major, warning, or minor events. The default setting is Major, which causes the server to log all major and critical events.
Critical events are those that cannot or should not be ignored by the network administrator. Major events denote a significant change in the state of the server processing. Warning and Minor events are logged for maintenance and diagnosis only. Warning and Minor events should not be turned on unless a problem has developed.
All Critical and some Major events are logged on the local server console.
The following warning events can be logged or trapped for SNMP event generation:
An eDirectory update to the subnet failed, causing degraded operation (incomplete transactions are logged to a local file named DHCPLOG.LOG).
SNMP recovered from an internal fault and the error code was logged.
Understanding 35

Novell Confidential u_understanding.fm last saved 9/2/03 Manual Version: 3/17/03103
A subnet was not configured and addresses are not available, causing degraded operation.
The following minor events are logged and/or trapped for SNMP event generation:
A Decline was generated against an IP address.
All logged file transactions have been reprocessed (operational).
Major events are logged or trapped for SNMP event generation. For example, when the DHCPSRVR NLM is loaded and the server is operational and ready for LAN-based clients.
The following events are logged or trapped for SNMP event generation:
The logger cannot open the recovery log file or is having difficulty opening it. (The server is inoperative.)
The main thread cannot process lease expiration. (The server is inoperative.)
DHCP AuditingAuditing can be used to perform an analysis of historical data and to help diagnose operational difficulties. Auditing uses a Btrieve database to store and manage data enabling meaningful trend analysis.
When auditing is enabled, every incidence of address deletion, addition, and rejection is recorded in the audit log. The beginning and end of each session is marked to help make sense of the audit log. The beginning session contains records defining the session in terms of addresses already assigned.
Additionally, other major events or alert situations that cause SNMP traps are also audited. Other incoming DHCP requests are also logged, including honored renewal requests and those rejected or dropped.
Console and Debug LogsThe following types of console log entries are generated by both DNS and DHCP:
Load success or failure
Unload results normal or abnormal
Major SNMP events
For each NetWareAlert message generated, an entry is provided in the /SYSTEM/SYS$LOG file.
The DHCP server provides a foreground screen log of every packet received and each reply generated to maintain continuity with the DHCP 2.0 server. The screen provides a useful real-time indication of DHCP 3.0 server operations.
The DHCP server has a debug log feature (primarily used by Novell technical support and engineering groups) that records the exchange of DHCP messages to a screen log or the DHCPSRVR.LOG file (in ASCII text) in the server's \ETC\DHCP directory. When loading the DHCPSRVR, the administrator can use one of three flags to activate the debug log feature.Table 7, “Debug Log - Use of Flags,” on page 37 explains the use of the flags.
36 Novell DNS/DHCP Management Utility Administration Guide
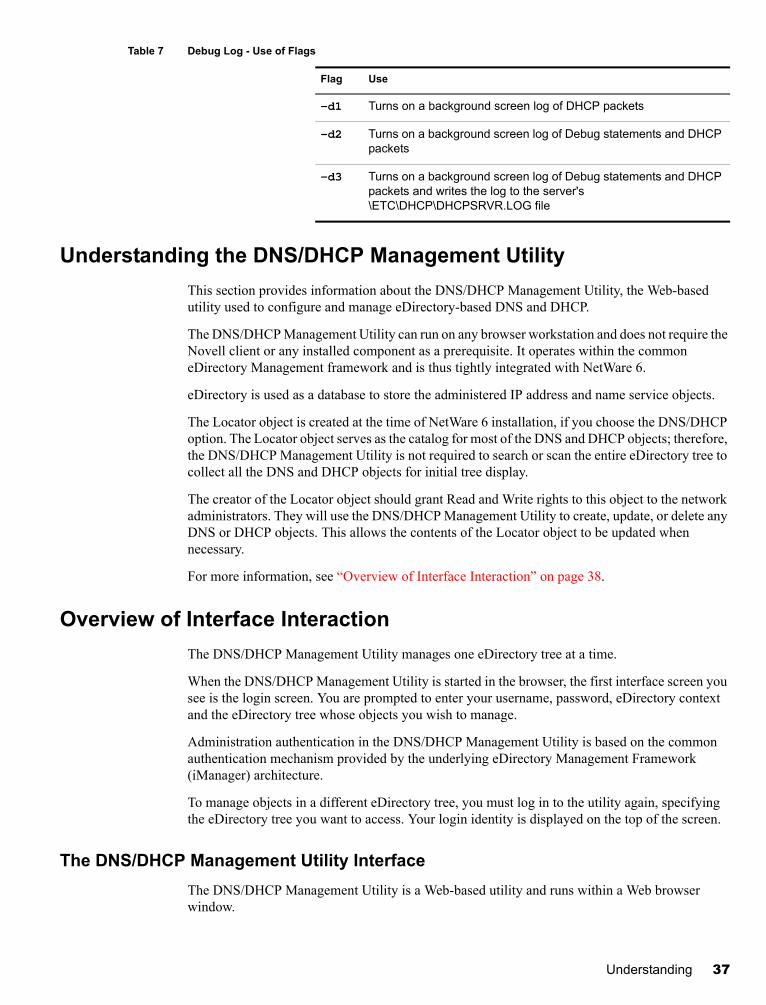
Manual 3/17/03103Novell Confidential u_understanding.fm last saved 9/2/03
Table 7 Debug Log - Use of Flags
Understanding the DNS/DHCP Management UtilityThis section provides information about the DNS/DHCP Management Utility, the Web-based utility used to configure and manage eDirectory-based DNS and DHCP.
The DNS/DHCP Management Utility can run on any browser workstation and does not require the Novell client or any installed component as a prerequisite. It operates within the common eDirectory Management framework and is thus tightly integrated with NetWare 6.
eDirectory is used as a database to store the administered IP address and name service objects.
The Locator object is created at the time of NetWare 6 installation, if you choose the DNS/DHCP option. The Locator object serves as the catalog for most of the DNS and DHCP objects; therefore, the DNS/DHCP Management Utility is not required to search or scan the entire eDirectory tree to collect all the DNS and DHCP objects for initial tree display.
The creator of the Locator object should grant Read and Write rights to this object to the network administrators. They will use the DNS/DHCP Management Utility to create, update, or delete any DNS or DHCP objects. This allows the contents of the Locator object to be updated when necessary.
For more information, see “Overview of Interface Interaction” on page 38.
Overview of Interface InteractionThe DNS/DHCP Management Utility manages one eDirectory tree at a time.
When the DNS/DHCP Management Utility is started in the browser, the first interface screen you see is the login screen. You are prompted to enter your username, password, eDirectory context and the eDirectory tree whose objects you wish to manage.
Administration authentication in the DNS/DHCP Management Utility is based on the common authentication mechanism provided by the underlying eDirectory Management Framework (iManager) architecture.
To manage objects in a different eDirectory tree, you must log in to the utility again, specifying the eDirectory tree you want to access. Your login identity is displayed on the top of the screen.
The DNS/DHCP Management Utility InterfaceThe DNS/DHCP Management Utility is a Web-based utility and runs within a Web browser window.
Flag Use
-d1 Turns on a background screen log of DHCP packets
-d2 Turns on a background screen log of Debug statements and DHCP packets
-d3 Turns on a background screen log of Debug statements and DHCP packets and writes the log to the server's \ETC\DHCP\DHCPSRVR.LOG file
Understanding 37
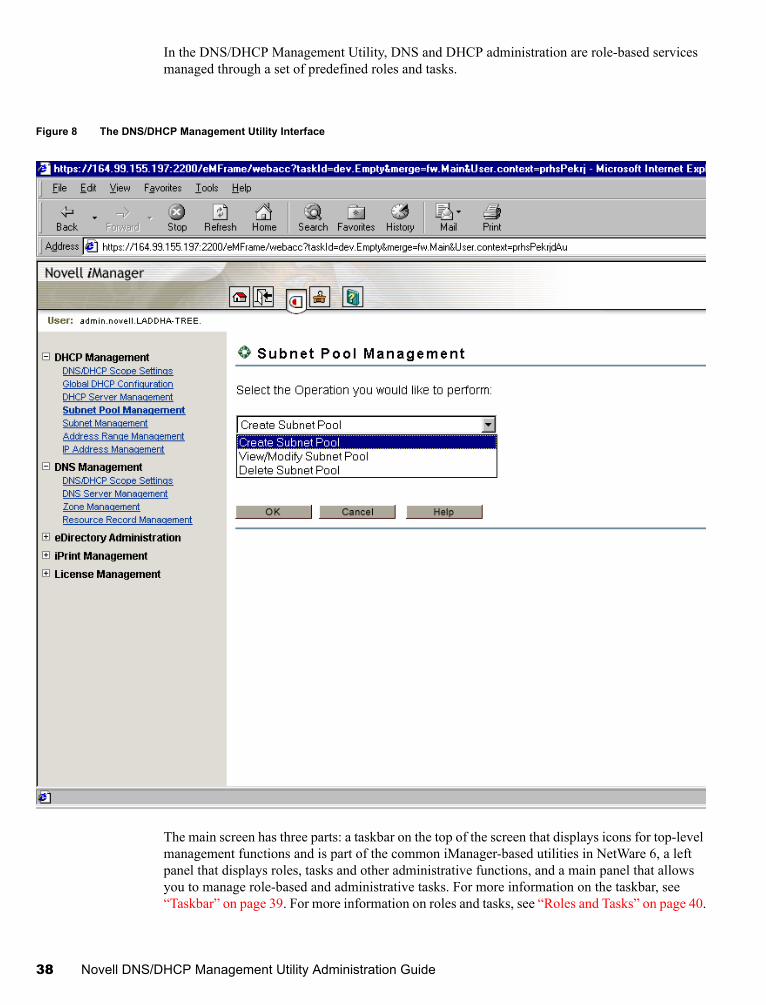
Novell Confidential u_understanding.fm last saved 9/2/03 Manual Version: 3/17/03103
In the DNS/DHCP Management Utility, DNS and DHCP administration are role-based services managed through a set of predefined roles and tasks.
Figure 8 The DNS/DHCP Management Utility Interface
The main screen has three parts: a taskbar on the top of the screen that displays icons for top-level management functions and is part of the common iManager-based utilities in NetWare 6, a left panel that displays roles, tasks and other administrative functions, and a main panel that allows you to manage role-based and administrative tasks. For more information on the taskbar, see “Taskbar” on page 39. For more information on roles and tasks, see “Roles and Tasks” on page 40.
38 Novell DNS/DHCP Management Utility Administration Guide
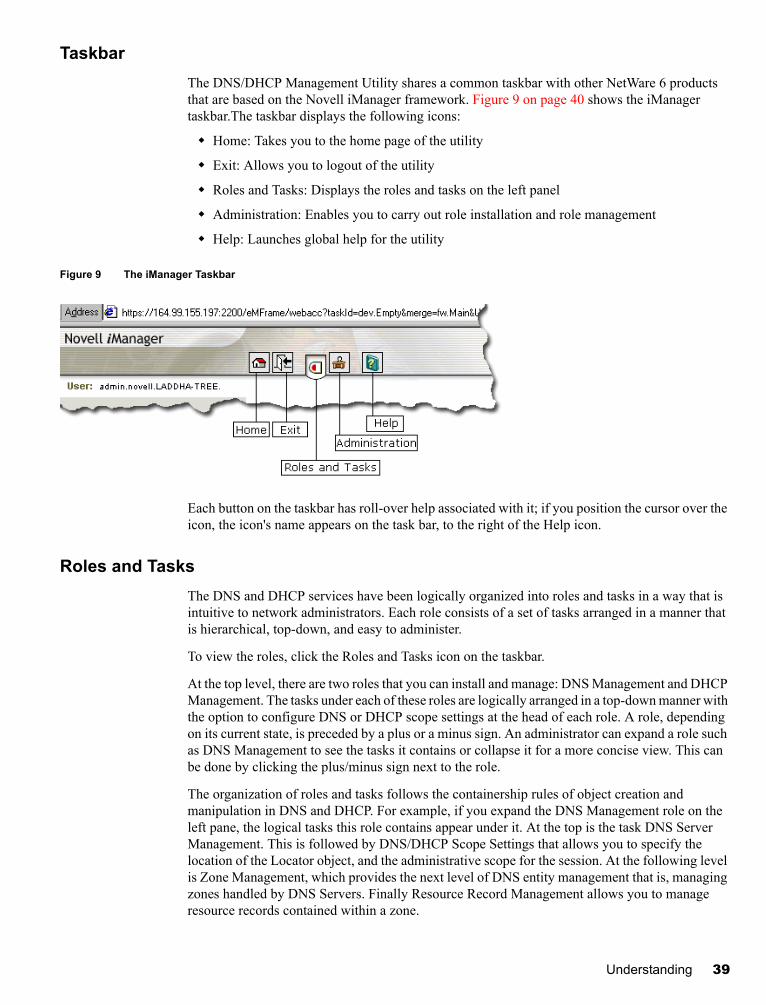
Manual 3/17/03103Novell Confidential u_understanding.fm last saved 9/2/03
TaskbarThe DNS/DHCP Management Utility shares a common taskbar with other NetWare 6 products that are based on the Novell iManager framework. Figure 9 on page 40 shows the iManager taskbar.The taskbar displays the following icons:
Home: Takes you to the home page of the utility
Exit: Allows you to logout of the utility
Roles and Tasks: Displays the roles and tasks on the left panel
Administration: Enables you to carry out role installation and role management
Help: Launches global help for the utility
Figure 9 The iManager Taskbar
Each button on the taskbar has roll-over help associated with it; if you position the cursor over the icon, the icon's name appears on the task bar, to the right of the Help icon.
Roles and TasksThe DNS and DHCP services have been logically organized into roles and tasks in a way that is intuitive to network administrators. Each role consists of a set of tasks arranged in a manner that is hierarchical, top-down, and easy to administer.
To view the roles, click the Roles and Tasks icon on the taskbar.
At the top level, there are two roles that you can install and manage: DNS Management and DHCP Management. The tasks under each of these roles are logically arranged in a top-down manner with the option to configure DNS or DHCP scope settings at the head of each role. A role, depending on its current state, is preceded by a plus or a minus sign. An administrator can expand a role such as DNS Management to see the tasks it contains or collapse it for a more concise view. This can be done by clicking the plus/minus sign next to the role.
The organization of roles and tasks follows the containership rules of object creation and manipulation in DNS and DHCP. For example, if you expand the DNS Management role on the left pane, the logical tasks this role contains appear under it. At the top is the task DNS Server Management. This is followed by DNS/DHCP Scope Settings that allows you to specify the location of the Locator object, and the administrative scope for the session. At the following level is Zone Management, which provides the next level of DNS entity management that is, managing zones handled by DNS Servers. Finally Resource Record Management allows you to manage resource records contained within a zone.
Understanding 39

Novell Confidential u_understanding.fm last saved 9/2/03 Manual Version: 3/17/03103
Each task is associated with a set of operations that appear in a drop-down menu on the main panel when you click on the task.
For example, to create a new DNS zone, click DNS Management > Zone Management. This launches the Zone Management window on the main panel of the screen. Select Create Zone from the drop-down menu and click OK. This opens the Create New Zone window where you can proceed with the task of creating a new zone.
You can select either one, more than one, or all objects for deletion with the multi-select delete feature provided in the DNS/DHCP Management Utility. IMPORTANT: For improved performance, configure the DNS/DHCP scope settings before you start using the Novell iManager browser-based DNS/DHCP management utility.
Object Creation RulesThere are certain rules that govern the creation and manipulation of objects in the DNS/DHCP object hierarchy.
Subnet and Subnet Pool objects can be created under O, OU, L, or C objects. Subnet Address Range and IP Address objects must be created beneath the Subnet container object. However, because of the IP address of an IP Address object, the subnet address range and IP Address objects can be contained within a subnet address range's address block. The DNS Zone object, DNS Server object, and DHCP Server object can be created in the context of an O, OU, L, or C.
All DNS and DHCP objects are created as NDS objects and are subject to NetWare Administrator convention.
Some objects, such as DHCP server, DNS server, DNS zone, Subnet, and Subnet Pool, can be created in any context.
After a new DNS or DHCP object has been created, the DNS/DHCP Management Utility grants the objects Read and Write rights to the Locator object.
For fast and efficient searching, the distinguished names of newly created zones, DNS servers, subnets, and DHCP servers are added to the corresponding attribute of the Locator object. Renaming or deleting these objects is automatically performed by eDirectory because of the built-in feature for eDirectorydistinguished names.
40 Novell DNS/DHCP Management Utility Administration Guide

Manual 3/17/03103Novell Confidential u_understanding.fm last saved 9/2/03
Understanding 41

Novell Confidential u_understanding.fm last saved 9/2/03 Manual Version: 3/17/03103
42 Novell DNS/DHCP Management Utility Administration Guide

Manual 3/17/03103Novell Confidential u_understanding.fm last saved 9/2/03
Understanding 43

Novell Confidential u_understanding.fm last saved 9/2/03 Manual Version: 3/17/03103
44 Novell DNS/DHCP Management Utility Administration Guide

Manual 3/17/03103Novell Confidential u_understanding.fm last saved 9/2/03
Understanding 45

Novell Confidential u_understanding.fm last saved 9/2/03 Manual Version: 3/17/03103
46 Novell DNS/DHCP Management Utility Administration Guide

Manual 3/17/03103Novell Confidential u_understanding.fm last saved 9/2/03
Understanding 47

Novell Confidential u_understanding.fm last saved 9/2/03 Manual Version: 3/17/03103
48 Novell DNS/DHCP Management Utility Administration Guide

Manual 3/17/03103Novell Confidential u_understanding.fm last saved 9/2/03
Understanding 49

Novell Confidential u_understanding.fm last saved 9/2/03 Manual Version: 3/17/03103
50 Novell DNS/DHCP Management Utility Administration Guide

Manual 3/17/03103Novell Confidential u_understanding.fm last saved 9/2/03
Understanding 51

Novell Confidential u_understanding.fm last saved 9/2/03 Manual Version: 3/17/03103
52 Novell DNS/DHCP Management Utility Administration Guide

Manual (99a) 3/17/03103Novell Confidential p_planning.fm last saved 9/2/03
2 Planning
This chapter provides a summary of issues for you to consider as you plan and design your implementation of and maximize the DNS and DHCP capabilities of the Novell® DNS/DHCP Services software.
eDirectory ConsiderationsConsider the following eDirectory issues to maintain optimal performance when providing DNS and DHCP services on your NetWare® network:
Where to locate the DNS/DHCP Group and Locator objects
Where to locate DNS and DHCP servers
What replication strategy to employ
How to provide fault tolerance
We recommend the following:
Place the DNS/DHCP Group, the DNS/DHCP Locator, and the RootServerInfo Zone objects in a separate partition that is accessible from and replicated to all points of the network where NetWare 6 DNS/DHCP servers are located. This is because all NetWare 6 DNS/DHCP servers and the DNS/DHCP Management Utility require access to these objects.
Plan to create an Organizational Unit (OU) container object near the top of your eDirectory tree. The location of this container object should be easily and widely accessible. Locate the DNS/DHCP Group and Locator objects and the RootServerInfo Zone object under the container object
Plan to create an Administrator Group object under this container also. An administrator group should have Read and Write rights to all DNS/DHCP Locator object attributes except the global data and options fields. Members of this group can use the DNS/DHCP Management Utility to create and modify DNS and DHCP objects.IMPORTANT: A network administrator can access only his or her administrative domain, which might not include the DNS/DHCP Locator object. By creating an administrative group, you enable administrators who are group members to use the DNS/DHCP Management Utility.
Plan to locate your DNS and DHCP servers at locations where they are geographically close to the hosts that require their services. Plan to have one DHCP server in each partition of your network to minimize any WAN communications problems caused by normal load, configuration changes, or replication.
Replicate the partition containing the DNS/DHCP Group and Locator objects to all parts of the network that use DNS/DHCP services to ensure access in the event of system unavailability or hardware problems.
When planning your DNS replication strategy, consider that replication is employed for load balancing when you provide multiple name servers within the DNS zone
Planning 53
Novell Confidential p_planning.fm last saved 9/2/03 Manual Version: 3/17/03103
Well-planned replication is the best way to provide fault tolerance for DNS/DHCP services.
Planning a DNS StrategyPlan to install and operate a primary name server and at least one secondary name server. Secondary name servers provide load balancing and robustness to your DNS implementation.
When you configure your zone, the primary name server is considered authoritative for the zone, meaning that it contains the most up-to-date information about the zone and all the hosts within it.
A secondary name server receives its zone data from the primary name server. When it starts up and at periodic intervals, the secondary name server queries the primary name server to determine whether the information it contains has been changed. If the zone information in the secondary name server is older than the zone information in the primary name server, a zone transfer occurs and the secondary name server receives the zone information from the primary name server.
Planning ZonesIf you are running a primary name server and providing DNS service for a zone, the size or geography of your network might require creating subzones within the zone.
Keep the zone data as a separate partition and replicate the partition to all places on your network where you have a name server for the zone. Doing so enables independent replication of the zone data and also provides a degree of fault tolerance in the case of server down time.
Novell DNS Server as a Primary Name ServerYou must install the Novell DNS server as a primary name server to have authoritative control over your zone and to take advantage of Dynamic DNS (DDNS), the dynamic updating of DNS by DHCP.
When operating the Novell DNS server as a primary name server, you use the DNS/DHCP Management Utility to make configuration changes. When you operate a primary name server, the zone data can receive dynamic updates from DHCP servers. Non-Novell secondary name servers can transfer data in from the Novell primary name server.
Novell DNS Server as a Secondary Name Server (to a Non-Novell Master)If you plan to operate secondary DNS servers using Novell DNS/DHCP Services software to a non-Novell master name server, one Novell secondary name server must be specified as the Dynamic DNS (DDNS) or zone in server. The DDNS server receives zone transfer information from the non-Novell master server and provides updates to eDirectoryTM. Other Novell secondary name servers can then access the information within eDirectory.
Reasons for operating a Novell secondary name server to a non-Novell master name server include:
You are using a master DNS server and do not want to designate it as a primary name server because of the responsibility it entails.
This approach is easy to implement in your existing DNS model.
You want to install more secondary name servers to provide better load balancing.
You want to gradually make the transition to operating a primary name server.
54 Novell DNS/DHCP Management Utility Administration Guide
Manual 3/17/03103Novell Confidential p_planning.fm last saved 9/2/03
Configuring a DNS Server to Forward RequestsIf a name server cannot answer a query, it must query a remote server. You can configure primary or secondary name servers to act as forwarders. When you designate a server to be a forwarder, all off-site queries are first sent to the forwarder.
Forwarders that handle the off-site queries develop a robust cache of information. The forwarder probably can answer any given query with information from its cache, eliminating the need to make an outside query to a remote server.
When you decide to make a server a forwarder, configure the other servers in your zone to direct their queries through the forwarder. When a forwarder receives a query, it checks its cache for the information. If the information is unavailable, the forwarder issues a query to the root server.
For more information, see:
“Forwarding Requests for Unknown Addresses” on page 55
“Restricting Forwarding” on page 55
Forwarding Requests for Unknown AddressesWhen you configure your name servers, you provide information about where to forward requests that the servers cannot answer. If you are configuring to use forwarders, you provide the names and IP addresses of servers above your location in your domain. Configure your other name servers to issue queries to the forwarders for queries they cannot answer.
Even if you are using forwarders, a name server that does not receive a timely response from its forwarder eventually attempts to query a root server directly.
Restricting ForwardingIf you have a primary name server with subdomains below it and the primary name server is not aware of the subdomains, the name server sends queries to external name servers.
You can configure your primary name server to not forward queries for specified internal subdomains to external name servers. Instead, the primary name server sends a negative response to any queries for the internal subdomains.
Setting Up the IN-ADDR.ARPA ZoneJust as the data in your name server provides mapping of names to Internet addresses, the IN-ADDR.ARPA zone provides mapping of addresses to names. However, in the structure of the IN-ADDR.ARPA zone, the IP address appears in reverse. For example, an IP address of 100.20.30.4 in the san-jose. novell.com domain would be 4.30.20.100.in-addr.arpa in the IN-ADDR.ARPA subdomain.
Registering Your DNS Server with Root ServersIf you plan to operate a primary DNS name server, you must register your name server with your parent domain. Not all your name servers need to be registered, but we recommend registering one-third to one-half of your name servers (up to a maximum of 10) with the parent domain. These servers are queried by servers outside your domain. The remaining name servers are queried only by hosts within your domain that are configured to query them.
Planning 55

Novell Confidential p_planning.fm last saved 9/2/03 Manual Version: 3/17/03103
If you provide DNS service for other domains and provide an authoritative name server for those domains, you must also register those domains.
To register a domain (and subdomain), you must contact the network administrators of the parent domain (com, for example) and the in-addr.arpa domain. Provide the administrators with the name of the domain name server and the name of the domain and any subdomains for which it is authoritative. If you are setting up a new domain, you also need to provide the IP address of any server you want to register.
InterNIC is the organization that registers domain names for the ROOT, com, org, net, edu, and gov domains. To obtain the form for domain registration from InterNIC, contact them at http://rs.internic.net. You can also obtain the form for in-addr.arpa domain registration from the same location.
Detailed information about the registration process is available from the InterNIC web site. You can also use the InterNIC web site to research domain names to ensure that the name you want is not already registered and to obtain additional information and help.
Planning a DHCP StrategyThis section provides information to help you plan your DHCP strategy. When planning your implementation of DHCP, consider the following issues:
Your existing network topology, that is, how you set up your routers and subnets, provides a basic configuration for the distribution of DHCP resources such as Subnet objects, Subnet Address Range objects, and IP Address objects.
Your existing eDirectory implementation should be incorporated into your planning. Place the Locator object near the top of your eDirectory tree where it can be easily accessed by all servers.
The length of time you set for your leases affects traffic on the network.
Network TopologyYour existing network topology provides a basic configuration for the distribution of DHCP resources. There are two paths, however, depending on whether you are migrating from an existing DHCP solution or you are installing and configuring DHCP for the first time.
For more information, see:
“Migrating from Another DHCP Solution” on page 56
“Initiating the DHCP Service” on page 56
Migrating from Another DHCP SolutionYou can import your existing Novell DHCP 2.0 database or BOOTP-based configuration files using the DNS/DHCP Management Utility. The import function enables you to specify the context into which you import the data.
Initiating the DHCP ServiceIf you are planning to use DHCP for the first time, you must gather a significant amount of information. You need to make a list of all hosts to be served by the DHCP server. You must
56 Novell DNS/DHCP Management Utility Administration Guide

Manual 3/17/03103Novell Confidential p_planning.fm last saved 9/2/03
include all devices that use network addresses in every segment of your network. You must also compile lists of IP address assignments.
Organize your lists of hosts and IP addresses by geographic location. For example, if your network is spread over a WAN, make a list for each location to help you organize the distribution of DHCP resources.
You must have a list of all permanently assigned network addresses. You might also want to make a list of devices that are to be denied IP addresses and those hosts that are to receive strict limitations on leases.
After you gather the necessary information, you need to create the necessary objects to represent this information. This is done by creating subnet address ranges for contiguous network addresses and other, more specific information. You will probably have a separate subnet address range for each LAN segment of your network. You will also create objects of subnets and DHCP servers.
eDirectory ImplementationPlan to create an Organizational Unit (OU), Country (C), or Locality (L) container object near the top of your eDirectory tree. Plan to locate the DNS/DHCP Group and Locator objects under the container object.
The DNS/DHCP Locator object must be easily accessible to all DHCP servers on the network. Plan to have multiple routes for DHCP servers to access the DNS/DHCP Group object.
Create Subnet objects to represent each LAN segment. Then create one or more Subnet Address Range objects to represent all your contiguous strings of IP addresses.
Place the NetWare Core ProtocolTM (NCPTM) servers that will provide DCHP service near the data to be updated and close to a writable partition. For fast access and availability, a DHCP server should be on the same LAN as or geographically close to the writable partitions the DHCP server uses.
When a DHCP server makes or modifies address assignments, the database is updated. The partition where this database is stored should have at least two writable replicas. Only one replica might be unsafe because of fault tolerance considerations, but three might be too costly in terms of eDirectory performance.
Lease ConsiderationsMany factors must be considered when you decide how long to set your client leases. Consider the following:
Your site's and clients' usage patterns
Your network's goals
Availability of servers
Availability of network (IP) addresses
Another important consideration is that clients attempt to renew their leases half-way through the lease duration. The longer the lease, the longer it takes for client configuration changes to be registered with the DHCP server. It also takes longer for the server to realize that a previously assigned address is no longer in use.
Planning 57

Novell Confidential p_planning.fm last saved 9/2/03 Manual Version: 3/17/03103
Another issue to consider concerns outages and access to the DHCP server. If a client loses access to its DHCP server before renewing its lease, it must stop using the network after the lease expires. If a client is turned on and connected to the network at the time of the outage, however, the lease does not expire.
The longest lease provided by a DHCP server determines the length of time you might have to wait before configuration changes can be propagated within a network. This length of time could mean manually restarting every client or waiting the amount of time required for all leases to be renewed before the changes take effect. If your site policy is to turn workstation power off at the end of the day, clients could acquire configuration changes at least once per day. NOTE: All lease considerations refer to DHCP clients or devices only. For clients or devices that use BOOTP, you must bring down the device and restart it to acquire any new configuration changes.
For more information, see:
“Considering the Length of Leases” on page 58
“Controlling Client Access to Leases” on page 59
Considering the Length of LeasesWhen considering the length of leases, ask these questions:
Will the default of three days work well in your environment?
The default of three days provides a good balance between a long-lease and a short-lease duration.
Do you have more users than IP addresses?
If you have more users than IP addresses, keep leases short to allow access to more users. A short lease could be 15 to 30 minutes, two to four hours, or even a matter of days.
If your site's usage pattern shows that all clients request an address every day and you have half as many addresses as users, lease times in hours or minutes would provide access to more users.
Do you provide support for remote access?
If your site has mobile users or provides remote access to clients, plan to provide service for these clients on a specific subnet. Providing support, including special options the clients might require, makes network administration of the clients easier.
Do you support a minimum lease time?
If your site's usage pattern indicates that your users typically use an address for only one or two hours, that should be your minimum lease time.
How many clients do you plan to support?
Shorter leases support more clients, but shorter leases also increase the load on the DHCP server and network bandwidth. A lease of two hours is long enough to serve most users, and the network load should be negligible. A lease of one hour or less might increase network load to a point that requires attention.
How fast are your communications connections between your clients and the DHCP server?
By locating a DHCP server in close proximity to its users, the network load should be negligible over LAN connections. If a DHCP server must communicate over WAN links to provide service to clients, slowdowns and time-outs might occur.
How long does your typical server outage last?
58 Novell DNS/DHCP Management Utility Administration Guide
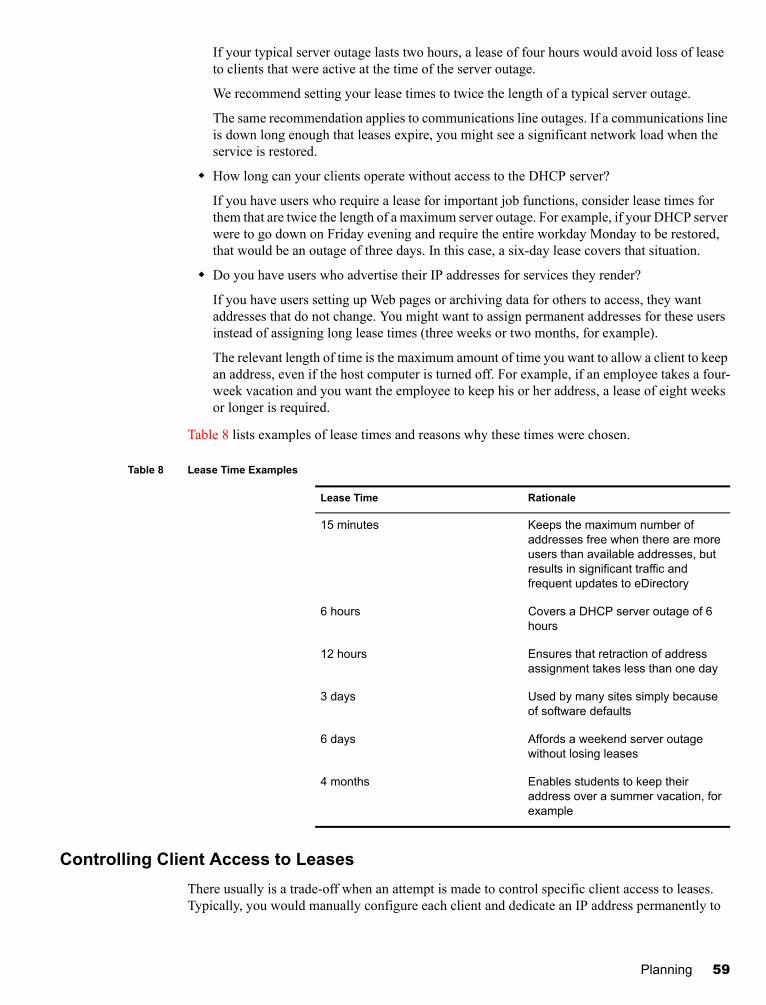
Manual 3/17/03103Novell Confidential p_planning.fm last saved 9/2/03
If your typical server outage lasts two hours, a lease of four hours would avoid loss of lease to clients that were active at the time of the server outage.
We recommend setting your lease times to twice the length of a typical server outage.
The same recommendation applies to communications line outages. If a communications line is down long enough that leases expire, you might see a significant network load when the service is restored.
How long can your clients operate without access to the DHCP server?
If you have users who require a lease for important job functions, consider lease times for them that are twice the length of a maximum server outage. For example, if your DHCP server were to go down on Friday evening and require the entire workday Monday to be restored, that would be an outage of three days. In this case, a six-day lease covers that situation.
Do you have users who advertise their IP addresses for services they render?
If you have users setting up Web pages or archiving data for others to access, they want addresses that do not change. You might want to assign permanent addresses for these users instead of assigning long lease times (three weeks or two months, for example).
The relevant length of time is the maximum amount of time you want to allow a client to keep an address, even if the host computer is turned off. For example, if an employee takes a four-week vacation and you want the employee to keep his or her address, a lease of eight weeks or longer is required.
Table 8 lists examples of lease times and reasons why these times were chosen.
Table 8 Lease Time Examples
Controlling Client Access to LeasesThere usually is a trade-off when an attempt is made to control specific client access to leases. Typically, you would manually configure each client and dedicate an IP address permanently to
Lease Time Rationale
15 minutes Keeps the maximum number of addresses free when there are more users than available addresses, but results in significant traffic and frequent updates to eDirectory
6 hours Covers a DHCP server outage of 6 hours
12 hours Ensures that retraction of address assignment takes less than one day
3 days Used by many sites simply because of software defaults
6 days Affords a weekend server outage without losing leases
4 months Enables students to keep their address over a summer vacation, for example
Planning 59

Novell Confidential p_planning.fm last saved 9/2/03 Manual Version: 3/17/03103
each client. Novell's DHCP server, however, provides control based on the client's hardware address.
IP Address AvailabilityThis section describes how to identify your IP addresses, how to subnet your addresses, what to do with addresses assigned by other sources, and how to restrict address assignments to clients.
Identifying Your AddressesIf you have been using a previous version of Novell DHCP, another vendor's product, or another method of tracking your IP address information, information about your addresses should be close at hand. We recommend verifying the accuracy of your IP address records by performing a site audit to prevent communication problems.
If you are unsure of the range of your IP addresses, we recommend contacting your Internet Service Provider (ISP) or checking other records you have on file.
Subnetting Your AddressesOne of the more difficult configuration tasks concerns configuring your routers if you have multiple subnets. Each might require one or more subnets, depending on your router configuration. Create a Subnet object for each LAN segment that requires dynamic IP address assignment.
Assigning Addresses ManuallyYour site might have devices, such as servers and printers, that have addresses assigned by means other than DHCP. Assign addresses to these devices manually.
You also must provide these devices with any specific configuration information they might require. If you want to provide configuration using DHCP, the device must be capable of acting as a DHCP client. You can assign a static address to a device and still provide configuration information using DHCP.
To ensure that the assigned addresses are not used by DHCP, use the DNS/DHCP Management Utility to exclude the addresses from assignment. You can use the utility to exclude single addresses or entire ranges from address assignment.
Representing Addresses in eDirectoryIP addresses are represented by IP Address objects under Subnet container objects. Novell DNS/DHCP Services stores address information and attributes of these objects, such as hostnames, hardware addresses, the time when an address lease will expire, and fully qualified domain names (FQDNs), in eDirectory. You can view this information using the DNS/DHCP Management Utility.
Restricting Address Assignment to ClientsBy using static address assignment, you can ensure that a device, capable of acting as a BOOTP or DHCP client, receives the same address from the DHCP server each time it is started. You can also explicitly exclude an address assignment to a device based on the device's hardware address.
60 Novell DNS/DHCP Management Utility Administration Guide
Manual 3/17/03103Novell Confidential p_planning.fm last saved 9/2/03
This is done by setting DHCP Global Preferences. To invoke the DHCP Global Preferences window, click DHCP Global Configuration > DHCP Global Preferences.
HostnamesEvery host on your network that uses the Internet or that can be reached from the Internet should have a name. Each resource record has a hostname field.
Some simple rules are required for hostnames for conformance to accepted Internet standards. Hostnames are called labels and can have alphabetic and numeric characters. A hyphen is allowed if it separates two character strings. Labels might not be all numbers, but they can have a leading digit. Labels must begin and end only with a letter or digit.
Planning 61

Novell Confidential p_planning.fm last saved 9/2/03 Manual Version: 3/17/03103
62 Novell DNS/DHCP Management Utility Administration Guide
Manual (99a) 3/17/03103Novell Confidential i_installing.fm last saved 9/2/03
3 Installing
This chapter explains how to install the DNS/DHCP Management Utility.
Before You StartIMPORTANT: Before you can use the DNS/DHCP Management Utility, the eDirectoryTM schema must be extended to create the DNS/DHCP Group and Locator objects and to create the RootSrvrInfo zone. The eDirectory schema is extended when you activate Novell® DNS/DHCP Services from the Customize Server window during the NetWare® 6 installation.
The DNS/DHCP Management Utility provides the following management functions from the browser workstation:
Importing and exporting configuration to and from eDirectory
Creating, updating, reading, or browsing configuration information
Viewing DNS and DHCP server status, events, and alerts
After the software installation, existing DNS information is converted to master file format and can be imported to the server where NetWare 6 has been installed. You must use the DNS/DHCP Management Utility to import any existing DHCP information. If you have no existing configuration information to import, you must use the DNS/DHCP Management Utility to create the necessary objects to support your network. If you have imported configuration information, use the DNS/DHCP Management Utility to create the DNS and DHCP server objects prior to operation.
Installing the DNS/DHCP Management Utility
Prerequisites
Hardware Requirements
Pentium II processor. Pentium III recommended.
SVGA display
256 MB of RAM (minimum)
50 MB DOS partition (minimum); 1 GB recommended
50 MB of available disk space (minimum); 1 GB recommended
SYS volume of size 2 GB (minimum); 4 GB default
Software Requirements
Novell NetWare® 6
Installing 63

Novell Confidential i_installing.fm last saved 9/2/03 Manual Version: 3/17/03103
Novell iManager
Internet Explorer 5.5 SP2 or Internet Explorer 6.0
Recommended SettingsThe recommended settings for the Novell iManager browser-based DNS/DHCP management utility are as follows:
Launching the DNS/DHCP Management Utility To launch the DNS/DHCP Management Utility, complete the following steps:
1 Open Internet Explorer from any machine running Windows 95/98/NT/2000.
2 Type the following URL in the address bar of the Internet Explorer window:
https:\\xxx.xxx.xxx.xxx:2200\eMFrame\iManager.html
where xxx.xxx.xxx.xxx is the IP Address of the NetWare machine.
3 To log in to the DNS/DHCP Management Utility, enter the following details:
- username- eDirectory context- password- eDirectory tree
4 Click the Roles and Tasks icon in the taskbar.
The DNS/DHCP Management Utility roles appear in the left pane.
To manage DNS services, click DNS Management and choose from the available options.
To manage DHCP services, click DHCP Management and choose from the available options.
eDirectory Rights Required to Manage the DNS/DHCP Configuration
To manage Novell® DNS/DHCP Services, administrators must have sufficient eDirectoryTM rights for the operation they are performing.
Administrators who will add new objects and modify existing objects must have Add rights to the appropriate eDirectory container object. Administrators who create new configuration objects and modify existing objects must have the following rights:
Display Settings Font Size Browser Text Size
1024 * 768 Small Largest to Smallest
DNS/DHCP Objects Object Rights All Property Rights
Locator object Browse Supervisor
Group object Browse Supervisor
Existing objects Supervisor Supervisor
64 Novell DNS/DHCP Management Utility Administration Guide
Manual 3/17/03103Novell Confidential i_installing.fm last saved 9/2/03
Administrators who manage a given set of DHCP subnets or DNS zones must have rights to create or delete IP addresses, ranges of addresses, or resource record sets. Administrators who perform these tasks must have the following rights:
Administrators or users who need to view DNS/DHCP configuration must have the following rights:
DNS/DHCP Objects Object Rights All Property Rights
Locator object Browse Read
Group object Browse Read
Existing objects Browse, Create, Delete Supervisor
DNS/DHCP Objects Object Rights All Property Rights
Locator object Browse Read
Group object Browse Read
Existing objects Browse Read
Installing 65

Novell Confidential i_installing.fm last saved 9/2/03 Manual Version: 3/17/03103
66 Novell DNS/DHCP Management Utility Administration Guide

Manual (99a) 3/17/03103Novell Confidential d_dnsmgt.fm last saved 9/2/03
4 Configuring DNS
This chapter provides information about configuring DNS and importing and exporting database information.
“Scope Settings” on page 67
“DNS Prerequisites” on page 68
“DNS Server Management” on page 68
“Zone Management” on page 72
“Resource Record Management” on page 76
“Configuring DNS Features” on page 78
“Configuring Special Features” on page 78
“Loading the DNS Server” on page 79
“NAMED Command Line Options” on page 80
Scope SettingsFor better performance results with the DNS/DHCP Management Utility, particularly in a distributed DNS/DHCP setup, you should configure the DNS/DHCP Scope Settings for the session before you proceed with other administrative tasks.
If you do not configure the DNS/DHCP Scope Settings for the session, you will receive a warning before every task you attempt to perform that the Scope Settings are not set. However, you can still proceed with the task.
Setting the scope of the DNS/DHCP services involves two specifications for the session: the eDirectoryTM context of the Locator object and the administrative scope of the session. Specifying the eDirectory context of the Locator object at the start of the session significantly improves performance because it eliminates the need to search for the Locator object. Specifying the administrative scope of the session also improves performance significantly because it restricts the retrieval of DNS/DHCP objects for viewing to the scope you specify.
The DNS/DHCP Scope Settings you configure for a session last as long as the session lasts. If you start a new session, you have to configure the DNS/DHCP Scope Settings again.IMPORTANT: If you configure DNS/DHCP Scope Settings for a session for either DNS Management or DHCP Management, the settings apply across the session to both roles.
To configure DNS/DHCP Scope Settings, complete the following steps:
1 Click DNS Management or DHCP Management > DNS/DHCP Scope Settings to open the DNS/DHCP Scope Settings window.
2 Enter the eDirectory context of the DNS/DHCP Locator object.
Configuring DNS 67
Novell Confidential d_dnsmgt.fm last saved 9/2/03 Manual Version: 3/17/03103
3 Enter the eDirectory context of the container object that will provide the administrative scope of the current session.NOTE: If you enter only the eDirectory context of the DNS/DHCP Locator object and not the administrative scope of the current session, you can proceed with administrative tasks without inviting a warning message. However, performance is further optimized if you also define the administrative scope.
4 Click OK.
DNS PrerequisitesEnsure that you have completed the following steps prior to setting up DNS:
1. Install NetWare® 6 on the selected server or servers.
2. Install Novell® iManager.
3. Install Internet Explorer 5.5 SP2 or Internet Explorer 6.0.
Configuring Clients to Use DNSTo configure Windows NT or Windows 95 client workstations to use DNS, complete the following steps:
1 At the client desktop, click Start > Settings > Control Panel. Then double-click Network.
The Network window opens, listing the network components installed on the client workstation.
2 Select TCP/IP, then click Properties.
The TCP/IP Properties window is displayed.
3 Click the DNS Configuration tab.
4 Provide a hostname and domain name for each client.
5 Enter the IP address of DNS servers for this client in the search order of preference, then click OK.
The client can now send DNS queries to the DNS name server.
DNS Server ManagementThe DNS Server Management role consists of the following tasks:
“Creating a DNS Server Object” on page 69
“Viewing or Modifying a DNS Server Object” on page 69
“Deleting a DNS Server” on page 70
“Starting/Stopping the DNS Server” on page 70
“Configuring DNS Auditing” on page 70
“Viewing or Saving the DNS Audit Trail Log” on page 71
“Viewing or Saving the DNS Event Log” on page 72
68 Novell DNS/DHCP Management Utility Administration Guide
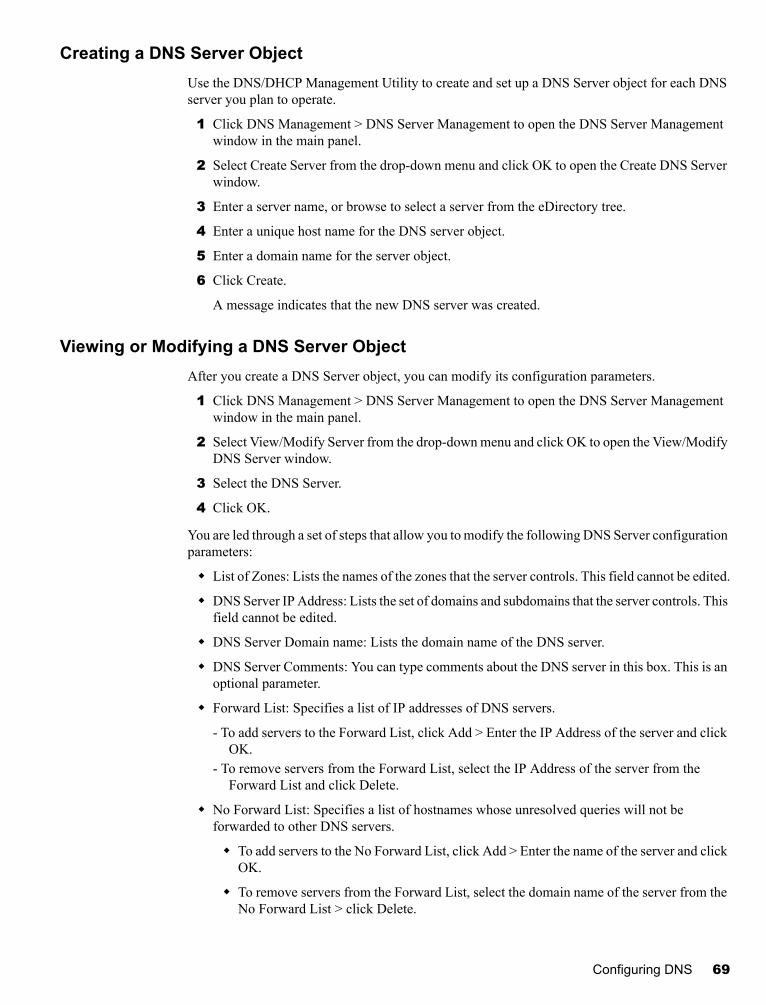
Manual 3/17/03103Novell Confidential d_dnsmgt.fm last saved 9/2/03
Creating a DNS Server ObjectUse the DNS/DHCP Management Utility to create and set up a DNS Server object for each DNS server you plan to operate.
1 Click DNS Management > DNS Server Management to open the DNS Server Management window in the main panel.
2 Select Create Server from the drop-down menu and click OK to open the Create DNS Server window.
3 Enter a server name, or browse to select a server from the eDirectory tree.
4 Enter a unique host name for the DNS server object.
5 Enter a domain name for the server object.
6 Click Create.
A message indicates that the new DNS server was created.
Viewing or Modifying a DNS Server ObjectAfter you create a DNS Server object, you can modify its configuration parameters.
1 Click DNS Management > DNS Server Management to open the DNS Server Management window in the main panel.
2 Select View/Modify Server from the drop-down menu and click OK to open the View/Modify DNS Server window.
3 Select the DNS Server.
4 Click OK.
You are led through a set of steps that allow you to modify the following DNS Server configuration parameters:
List of Zones: Lists the names of the zones that the server controls. This field cannot be edited.
DNS Server IP Address: Lists the set of domains and subdomains that the server controls. This field cannot be edited.
DNS Server Domain name: Lists the domain name of the DNS server.
DNS Server Comments: You can type comments about the DNS server in this box. This is an optional parameter.
Forward List: Specifies a list of IP addresses of DNS servers.
- To add servers to the Forward List, click Add > Enter the IP Address of the server and click OK.
- To remove servers from the Forward List, select the IP Address of the server from the Forward List and click Delete.
No Forward List: Specifies a list of hostnames whose unresolved queries will not be forwarded to other DNS servers.
To add servers to the No Forward List, click Add > Enter the name of the server and click OK.
To remove servers from the Forward List, select the domain name of the server from the No Forward List > click Delete.
Configuring DNS 69

Novell Confidential d_dnsmgt.fm last saved 9/2/03 Manual Version: 3/17/03103
Events Log: Specifies the degree of event data the server is to collect. Major or critical events denote a significant change in the state of server processing. To configure the event log, choose from the following options:
None: Turns off event logging (default)
Major Events: Logs only critical events
All: Logs both major and minor events
Audit Log: Check Enable Audit Trail Log to log audit trails and events.
Deleting a DNS Server1 Click DHCP Management > DHCP Server Management to open the DNS Server
Management window in the main panel.
2 Select Delete Server from the drop-down menu and click OK to open the Delete DNS Server window.
To remove all the DNS servers in the list, check the top-level check box and click Delete.
To remove one or more DNS servers, check the check box next to it and click Delete.
Starting/Stopping the DNS ServerThe DNS server must be loaded before you can start or stop server activity.
1 Click DNS Management > DNS Server Management to open the DNS Server Management window in the main panel.
2 Select Start/Stop Server from the drop-down menu and click OK to open the DNS Server Start/Stop Services window.
3 Select the DNS server.
4 Click OK.
5 Depending on the state of the DNS Server module, any one of the following will now appear:
Failure notification message: This appears if the DNS Server module (NAMED.NLM) is not loaded. In order to start the server, load the DNS Server module through the system console.
Start button: If the DNS Server module is loaded but is in STOP mode, click to start the DNS server.
Stop button: If the DNS Server module is loaded but is in START mode, click to stop the DNS server.
NOTE: To use the Start/Stop DNS service, NAMED.NLM must be loaded.
Configuring DNS AuditingTo configure a DNS server to audit activities, complete the following steps:
1 Click DNS Management > DNS Server Management to open the DNS Server Management window in the main panel.
2 Select View/Modify Server from the drop-down menu and click OK to open the View/Modify DNS Server window.
70 Novell DNS/DHCP Management Utility Administration Guide

Manual 3/17/03103Novell Confidential d_dnsmgt.fm last saved 9/2/03
3 Select the DNS Server.
4 Click OK.
5 Click Next > Next and select Major Events or All under Event Log.
6 Check the Enable Audit Trail Log check box.
7 Click OK.
Viewing or Saving the DNS Audit Trail Log1 Click DNS Management > DNS Server Management to open the DNS Server Management
window in the main panel.
2 Select Audit Trail Log from the drop-down menu and click OK to open the DNS Server Audit Trail Log window
3 Select the server from the Select DNS Server drop-down menu.
4 If you want to filter the Audit Period, modify the Starting Date and Ending Date in the appropriate fields.
The following date format is accepted:
mm-dd-yyyy
5 Click OK.
This opens the DNS Audit Trail Log table, which lists the following data:
Entry Time: Date and time the event occurred.
Type: Type of event.
IP Address: IP Address at which the event occurred.
Domain Name: Domain Name at which the event occurred.
6 To define a view filter on the Audit Trail Log, click the Display Options button.
You can now filter events on the following parameters:
Start Date: to set a start date for monitoring the DNS audit trail.
End Date: to set an end date for monitoring the DNS audit trail.
Agent Ready: The SNMP (Simple Network Mail Protocol) agent is ready to receive or transmit requests.
Query Received: The DNS server acknowledges the receipt of a query by making an entry in the log file.
Query Forwarded: The DNS server forwards a query to a client or another DNS server.
Response Received: The DNS server responds to a query from a client or another DNS server.
To Save the DNS Audit Trail Log
1 Click Next on the DNS Audit Trail Log window.
2 Click Download File > Save the Audit Trail Log file on your local machine.
Configuring DNS 71

Novell Confidential d_dnsmgt.fm last saved 9/2/03 Manual Version: 3/17/03103
Viewing or Saving the DNS Event Log1 Click DNS Management > DNS Server Management to open the DNS Server Management
window in the main panel.
2 Select Event Log from the drop-down menu and click OK to open the DNS Event Log window.
3 Select the server from the Select DNS Server drop-down menu.
4 If you want to filter the Audit Period, modify the Starting Date and Ending Date in the appropriate fields.
The following date format is accepted:
mm-dd-yyyy
5 Click OK.
This opens the DNS Event Log table, which lists the following data:
Entry Time: Date and time the event occurred.
Severity: Severity of the event - critical, major, warning, and informational.
State: State of the server - operational, degraded, and inoperative.
Description: Description of the event that occurred.
6 To define a view filter on the DNS Event Log, click the Display Options button.
You can now filter events on the following parameters:
Start and end date settings regulate the time recorded by the event logger.
Severity options define which event levels are recorded: critical, major, warning, and informational.
State settings define the condition of events recorded: operational, degraded, and inoperative.
To Save the DNS Event Log
1 Click Next on the DNS Event Log window.
2 Click Download File > Save the Event Log file on your local machine.
Zone ManagementThe DNS Zone object is an eDirectory container object that comprises Resource Record Set (RRSet) objects and resource records. A DNS zone can be a primary zone, a secondary zone, a primary IN-ADDR.ARPA (reverse) zone, or a secondary IN-ADDR.ARPA zone. See the following sections:
“Creating a Primary Zone” on page 73
“Creating a Secondary Zone” on page 73
“Creating a Primary IN-ADDR.ARPA Zone” on page 73
“Creating a Secondary IN-ADDR.ARPA Zone:” on page 74
“Viewing or Modifying a Zone Object” on page 74
“Deleting a Zone Object” on page 75
72 Novell DNS/DHCP Management Utility Administration Guide

Manual 3/17/03103Novell Confidential d_dnsmgt.fm last saved 9/2/03
Creating a Zone ObjectCreating a Primary Zone
1 Click DNS Management > Zone Management to open the Zone Management window in the main panel.
2 Select Create Zone from the drop-down menu and click OK to open the Create DNS Zone window.
3 Choose Create New Zone.
4 Enter the eDirectory context for the zone or browse to select it.
5 Enter a name for the zone object.
6 Under Zone Type, choose Primary (default).
7 Select a DNS server from the Assign Authoritative DNS Server drop-down menu.
or
Enter a unique host name in the Name Server Host Name box and, optionally, select a domain from the Domain drop-down menu.
8 Click Create.
A message indicates that the new primary zone has been created.
Creating a Secondary Zone
1 Click DNS Management > Zone Management to open the Zone Management window in the main panel.
2 Select Create Zone from the drop-down menu and click OK to open the Create DNS Zone window.
3 Choose Create New Zone.
4 Enter the eDirectory context for the zone or browse to select it.
5 Enter a name for the zone object.
6 Under Zone Type, choose Secondary.
7 Enter the IP address of the DNS server that will provide zone out transfers for this secondary zone.
8 Select a DNS server from the Assign Authoritative DNS Server drop-down menu. This is an optional parameter.
or
Enter a unique host name in the Name Server Host Name box and, optionally, select a domain from the Domain drop-down menu.
9 Click Create.
A message indicates that the new secondary zone has been created.
Creating an IN-ADDR.ARPA ObjectCreating a Primary IN-ADDR.ARPA Zone
1 Click DNS Management > Zone Management to open the Zone Management window in the main panel.
Configuring DNS 73
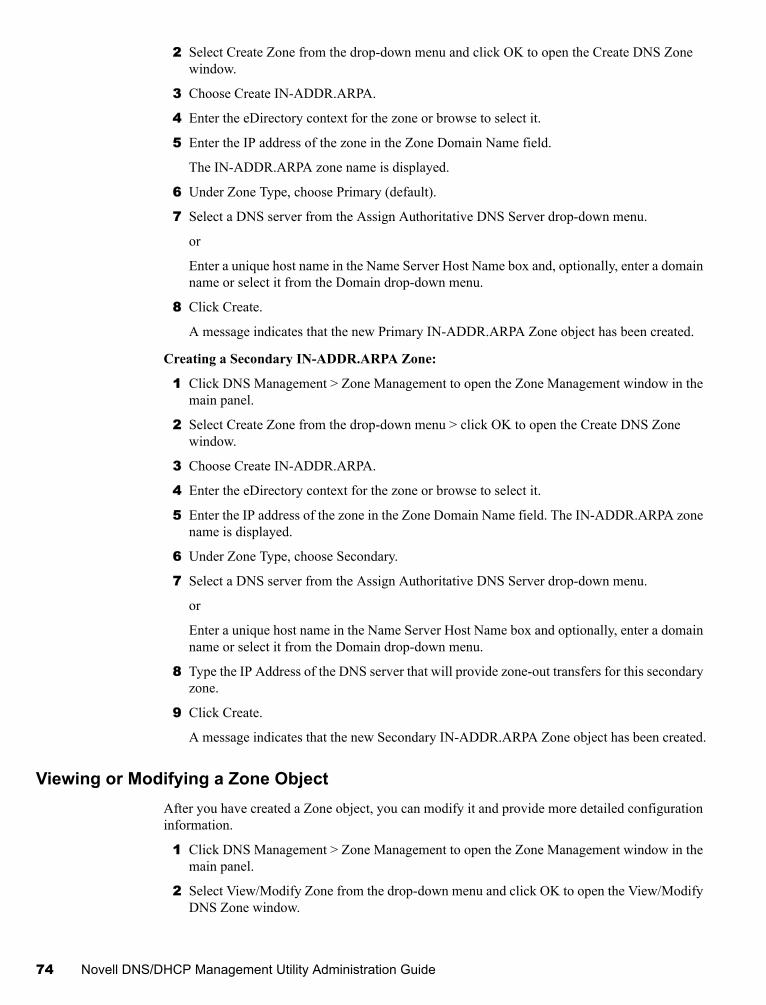
Novell Confidential d_dnsmgt.fm last saved 9/2/03 Manual Version: 3/17/03103
2 Select Create Zone from the drop-down menu and click OK to open the Create DNS Zone window.
3 Choose Create IN-ADDR.ARPA.
4 Enter the eDirectory context for the zone or browse to select it.
5 Enter the IP address of the zone in the Zone Domain Name field.
The IN-ADDR.ARPA zone name is displayed.
6 Under Zone Type, choose Primary (default).
7 Select a DNS server from the Assign Authoritative DNS Server drop-down menu.
or
Enter a unique host name in the Name Server Host Name box and, optionally, enter a domain name or select it from the Domain drop-down menu.
8 Click Create.
A message indicates that the new Primary IN-ADDR.ARPA Zone object has been created.
Creating a Secondary IN-ADDR.ARPA Zone:
1 Click DNS Management > Zone Management to open the Zone Management window in the main panel.
2 Select Create Zone from the drop-down menu > click OK to open the Create DNS Zone window.
3 Choose Create IN-ADDR.ARPA.
4 Enter the eDirectory context for the zone or browse to select it.
5 Enter the IP address of the zone in the Zone Domain Name field. The IN-ADDR.ARPA zone name is displayed.
6 Under Zone Type, choose Secondary.
7 Select a DNS server from the Assign Authoritative DNS Server drop-down menu.
or
Enter a unique host name in the Name Server Host Name box and optionally, enter a domain name or select it from the Domain drop-down menu.
8 Type the IP Address of the DNS server that will provide zone-out transfers for this secondary zone.
9 Click Create.
A message indicates that the new Secondary IN-ADDR.ARPA Zone object has been created.
Viewing or Modifying a Zone ObjectAfter you have created a Zone object, you can modify it and provide more detailed configuration information.
1 Click DNS Management > Zone Management to open the Zone Management window in the main panel.
2 Select View/Modify Zone from the drop-down menu and click OK to open the View/Modify DNS Zone window.
74 Novell DNS/DHCP Management Utility Administration Guide
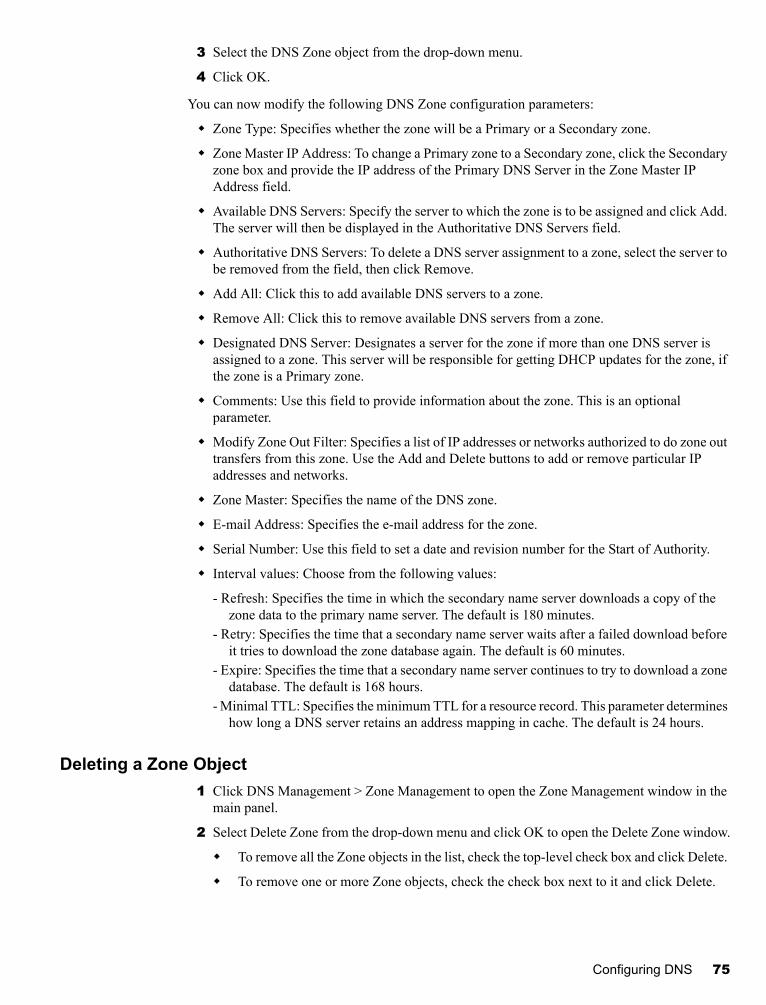
Manual 3/17/03103Novell Confidential d_dnsmgt.fm last saved 9/2/03
3 Select the DNS Zone object from the drop-down menu.
4 Click OK.
You can now modify the following DNS Zone configuration parameters:
Zone Type: Specifies whether the zone will be a Primary or a Secondary zone.
Zone Master IP Address: To change a Primary zone to a Secondary zone, click the Secondary zone box and provide the IP address of the Primary DNS Server in the Zone Master IP Address field.
Available DNS Servers: Specify the server to which the zone is to be assigned and click Add. The server will then be displayed in the Authoritative DNS Servers field.
Authoritative DNS Servers: To delete a DNS server assignment to a zone, select the server to be removed from the field, then click Remove.
Add All: Click this to add available DNS servers to a zone.
Remove All: Click this to remove available DNS servers from a zone.
Designated DNS Server: Designates a server for the zone if more than one DNS server is assigned to a zone. This server will be responsible for getting DHCP updates for the zone, if the zone is a Primary zone.
Comments: Use this field to provide information about the zone. This is an optional parameter.
Modify Zone Out Filter: Specifies a list of IP addresses or networks authorized to do zone out transfers from this zone. Use the Add and Delete buttons to add or remove particular IP addresses and networks.
Zone Master: Specifies the name of the DNS zone.
E-mail Address: Specifies the e-mail address for the zone.
Serial Number: Use this field to set a date and revision number for the Start of Authority.
Interval values: Choose from the following values:
- Refresh: Specifies the time in which the secondary name server downloads a copy of the zone data to the primary name server. The default is 180 minutes.
- Retry: Specifies the time that a secondary name server waits after a failed download before it tries to download the zone database again. The default is 60 minutes.
- Expire: Specifies the time that a secondary name server continues to try to download a zone database. The default is 168 hours.
- Minimal TTL: Specifies the minimum TTL for a resource record. This parameter determines how long a DNS server retains an address mapping in cache. The default is 24 hours.
Deleting a Zone Object1 Click DNS Management > Zone Management to open the Zone Management window in the
main panel.
2 Select Delete Zone from the drop-down menu and click OK to open the Delete Zone window.
To remove all the Zone objects in the list, check the top-level check box and click Delete.
To remove one or more Zone objects, check the check box next to it and click Delete.
Configuring DNS 75

Novell Confidential d_dnsmgt.fm last saved 9/2/03 Manual Version: 3/17/03103
Resource Record ManagementAn RRSet object represents an individual domain name within a DNS zone. Each RRSet object has one or more resource records beneath it containing additional information about the domain.
The most common resource records are Address (A) records, which map a domain name to an IP address, and Pointer (PTR) records, which map an IP address to a domain name within an IN-ADDR.ARPA zone.
The Resource Record Management role consists of the following tasks:
“Creating Resource Records” on page 76
“Viewing or Modifying Resource Records” on page 76
“Deleting Resource Records” on page 77
Creating Resource RecordsA resource record is a piece of information about a domain name. Each resource record contains information about a particular piece of data within the domain.
To create a new resource record, complete the following steps:
1 Click DNS Management > Resource Record Management to open the Resource Record Management window in the main panel.
2 Select Create Resource Record from the drop-down menu and click OK to open the Create Resource Record window.
3 Select the domain where the resource record is to be created. This causes the Object Locator icon to appear next to the Select Host Name field.
To bind the domain with a host name, go to Step 4. Otherwise, go to Step 5.
4 Type the host name you wish to bind the domain to or click the Object Locator icon to search for a host name.
5 Click OK to specify the Resource Record type.
6 Choose the Resource Record Type (RR Type) from the available options under the Others drop-down menu and enter appropriate Resource Record data corresponding to the type chosen.
7 Click Create.
For more information on Resource Record Types, see Table 2, “Resource Record Types and Field Differences,” on page 18.NOTE: Start of Authority (SOA) is defined as part of a Zone object's attributes. A Pointer (PTR) record is created automatically when any new A resource record or IPv6 (AAAA) resource record is created if the IN-ADDR.ARPA zone exists.
Viewing or Modifying Resource RecordsTo modify a resource record, complete the following steps:
1 Click DNS Management > Resource Record Management to open the Resource Record Management window in the main panel.
76 Novell DNS/DHCP Management Utility Administration Guide

Manual 3/17/03103Novell Confidential d_dnsmgt.fm last saved 9/2/03
2 Select View/Modify Resource Record from the drop-down menu and click OK to open the View/Modify RRSet - Resource Record window.
3 From the Select Domain drop-down menu, select the domain that contains the host or RRSet.
4 Enter or search to select the values for the following fields: Host Name, Resource Record, and Resource Record Type.
To use the search feature to select these values, do the following:
Click the Object Selector icon to open the Object Selector window.
Select the Resource Record type from the drop-down menu, select the number of search results you want per page, click Search and then the host name.
This automatically fills in the Host Name, Resource Record, and Resource Record Type fields.
5 Click Next to modify the resource record data.
You can now modify the Resource Record Data for all but the following types of Resource Records:
- A (or IPv4)- AAAA (or IPv6)- PTR
6 Click Done to save the changes.
Deleting Resource RecordsYou can delete one, more than one, or all resource records and RRSets, using the multi-select deletion feature in the DNS/DHCP Management Utility.
1 Click DNS Management > Resource Record Management to open the Resource Record Management window in the main panel.
2 Select Delete Resource Record from the drop-down menu and click OK to open the Delete RRSet - Resource Record window.
3 From the Select Domain drop-down menu, select the domain that contains the host or RRSet.
4 You can delete either the entire RRSet or one or more resource records in the RRSet.
To delete one or more hosts or RRSets:
To search for RRSets by owner name, enter the name of the RRSet owner.
Select the RRSet option from the Search Type drop-down menu.
Click Search to list the available RRSets that match the specified owner name.
To delete all the RRSets listed, check the top-level check box and click Delete. To delete one or more RRSets, check the corresponding check boxes and click Delete.
5 To delete one or more resource records:
To search for resource record by owner name, enter the name of the Resource Record owner.
Select Resource record from the Search Type drop-down menu.
Select the resource record type from the RR Type drop-down menu.
Click Search to list the available resource records that match the specified owner name.
Configuring DNS 77
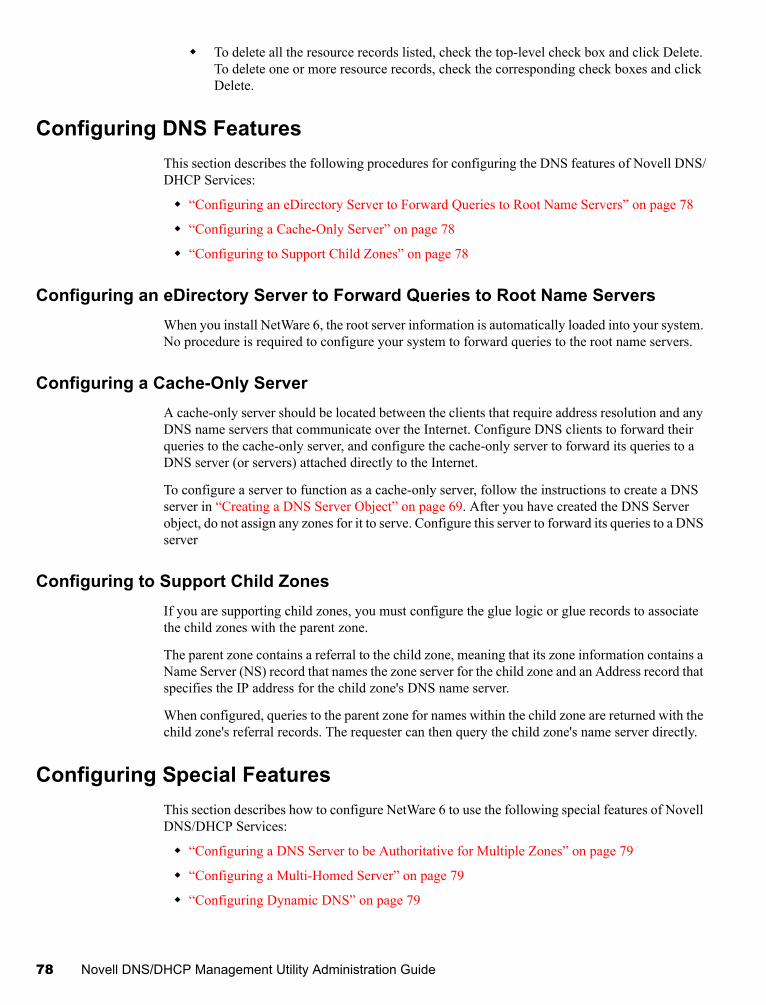
Novell Confidential d_dnsmgt.fm last saved 9/2/03 Manual Version: 3/17/03103
To delete all the resource records listed, check the top-level check box and click Delete. To delete one or more resource records, check the corresponding check boxes and click Delete.
Configuring DNS FeaturesThis section describes the following procedures for configuring the DNS features of Novell DNS/DHCP Services:
“Configuring an eDirectory Server to Forward Queries to Root Name Servers” on page 78
“Configuring a Cache-Only Server” on page 78
“Configuring to Support Child Zones” on page 78
Configuring an eDirectory Server to Forward Queries to Root Name ServersWhen you install NetWare 6, the root server information is automatically loaded into your system. No procedure is required to configure your system to forward queries to the root name servers.
Configuring a Cache-Only ServerA cache-only server should be located between the clients that require address resolution and any DNS name servers that communicate over the Internet. Configure DNS clients to forward their queries to the cache-only server, and configure the cache-only server to forward its queries to a DNS server (or servers) attached directly to the Internet.
To configure a server to function as a cache-only server, follow the instructions to create a DNS server in “Creating a DNS Server Object” on page 69. After you have created the DNS Server object, do not assign any zones for it to serve. Configure this server to forward its queries to a DNS server
Configuring to Support Child ZonesIf you are supporting child zones, you must configure the glue logic or glue records to associate the child zones with the parent zone.
The parent zone contains a referral to the child zone, meaning that its zone information contains a Name Server (NS) record that names the zone server for the child zone and an Address record that specifies the IP address for the child zone's DNS name server.
When configured, queries to the parent zone for names within the child zone are returned with the child zone's referral records. The requester can then query the child zone's name server directly.
Configuring Special FeaturesThis section describes how to configure NetWare 6 to use the following special features of Novell DNS/DHCP Services:
“Configuring a DNS Server to be Authoritative for Multiple Zones” on page 79
“Configuring a Multi-Homed Server” on page 79
“Configuring Dynamic DNS” on page 79
78 Novell DNS/DHCP Management Utility Administration Guide
Manual 3/17/03103Novell Confidential d_dnsmgt.fm last saved 9/2/03
Configuring a DNS Server to be Authoritative for Multiple ZonesA NetWare 6 DNS server can be authoritative for multiple zones. There is no limit to the number of zones a NetWare 6 server can support other than those mentioned in “Optimizing DNS Performance” on page 99. Those limitations have to do with the total number of objects.
When you configure a zone, the Assign Authoritative DNS Server field in the Create New Zone task is the one that specifies the DNS server that will support the zone.
Configuring a Multi-Homed ServerA multi-homed server is a server with more than one IP address. In an Internet environment, a multi-homed server is a single server connected to multiple data links, which may be on different networks.
When using a DNS server with more than one IP address, you must use an address that is bound to the server, and that address must match the address used in the NS and A resource records for the zone. NOTE: An NS resource record specifies a domain name for an authoritative name server for the specified class and domain.
Configuring Dynamic DNSDynamic DNS (DDNS) provides automatic updating of DNS with Address and Pointer records for addresses and hostnames assigned using the DDNS feature. To use DDNS, the following configuration must already exist:
The DNS Zone object to receive DHCP updates must already be created.
Subnet Address Range objects that will use DDNS must be set to range type Dynamic BOOTP and DHCP or Dynamic DHCP.
To activate the DDNS feature, complete the following steps:
1 Select the Subnet object of the Subnet Address Range on which you want to activate DDNS and specify a zone in the DNS Zone for Dynamic Update.
2 Select the desired Subnet Address Range and ensure that the range type is set to Dynamic BOOTP and DHCP or Dynamic DHCP.
3 Set the DNS update option to Always Update.
4 Click Save.
Loading the DNS ServerAfter you have created and set up a DNS Server object and a DNS Zone object, enter the following command at the DNS server console:
LOAD NAMED
After NAMED.NLM is loaded, the DNS server can respond to queries for the zone. For more detailed information about NAMED.NLM command line options, see “NAMED Command Line Options” on page 80.
Configuring DNS 79

Novell Confidential d_dnsmgt.fm last saved 9/2/03 Manual Version: 3/17/03103
After NAMED.NLM is loaded, you can use the DNS/DHCP Management Utility to start and stop the DNS Server. For more information on starting and stopping the DNS server, see “Starting/Stopping the DNS Server” on page 70.
NAMED Command Line OptionsTo start a DNS server, enter the following command at the server console prompt:
LOAD NAMED
The command line parameters listed in the following table are also supported.
Table 9 NAMED Command Line Options
You can issue the LOAD NAMED command repeatedly to invoke different command line options. The NAMED.NLM software is loaded only on the first instance.
Parameter Function
-a Turns on auto-detect of new zones (default setting)
-b Turns off auto-detect of new zones
-f <scrpt.txt> [context] Creates multiple zones using a text file in BIND bootfile format; specifying context enables zones to be created anywhere in the eDirectory tree
-h Displays help information
-l Enables a DNS server to log in as an administrator to acquire rights required to create and delete zones from the command line
-m <file.dat> [context] Imports file.dat and creates a new primary zone; specifying context enables zones to be created anywhere in the eDirectory tree
-q Disables verbose mode for debug messages (default setting)
-r <zone name> Deletes and removes an existing zone from the zone database
-rp <characters> Replaces listed characters with a dash (-) in host names for which resource records are dynamically created
-s [zone name] Prints status information; zone name is optional
-u <file.dat> Imports file.dat and updates the contents of a previously created zone
-v Enables verbose mode for debug messages
-zi <zone name> Forces named zone for zone-in transfer
80 Novell DNS/DHCP Management Utility Administration Guide
Manual (99a) 3/17/03103Novell Confidential d_dhcpmgt.fm last saved 9/2/03
5 Configuring DHCP
This chapter provides information about configuring DHCP and importing and exporting database information.
“Scope Settings” on page 81
“DHCP Prerequisites” on page 82
“Configuring Clients to Use DHCP” on page 82
“Global DHCP Configuration” on page 82
“DHCP Server Management” on page 85
“Subnet Pool Management” on page 89
“Subnet Management” on page 90
“Address Range Management” on page 92
“IP Address Management” on page 94
“Configuring Multiple Logical Networks” on page 96
“Loading the DHCP Server” on page 96
“DHCPSRVR Command Line Options” on page 97
Scope SettingsFor better performance results with the DNS/DHCP Management Utility, particularly in a distributed DNS/DHCP set-up, you should configure the DNS/DHCP Scope Settings for the session before you proceed with other administrative tasks.
If you do not configure the DNS/DHCP Scope Settings for the session, you will receive a warning before every task you attempt to perform that the Scope Settings are not set. However, you can still proceed with the task.
Setting the scope of the DNS/DHCP services involves two specifications for the session: the eDirectory context of the Locator object and the administrative scope of the session. Specifying the eDirectory context of the Locator object at the start of the session significantly improves performance because it eliminates the need to search for the Locator object. Specifying the administrative scope of the session also improves performance significantly because it restricts the retrieval of DNS/DHCP objects for viewing to the scope you specify.
The DNS/DHCP Scope Settings you configure for a session last as long as the session lasts. If you start a new session, you have to configure the DNS/DHCP Scope Settings again.IMPORTANT: If you configure DNS/DHCP Scope Settings for a session for either DNS Management or DHCP Management, the settings apply across the session to both roles.
To configure DNS/DHCP Scope Settings, complete the following steps:
Configuring DHCP 81

Novell Confidential d_dhcpmgt.fm last saved 9/2/03 Manual Version: 3/17/03103
1 Click DNS Management or DHCP Management > DNS/DHCP Scope Settings to open the DNS/DHCP Scope Settings window.
2 Enter the eDirectory context of the DNS/DHCP Locator object.
3 Enter the eDirectory context of the container object that will provide the administrative scope of the current session.NOTE: If you enter only the eDirectory context of the DNS/DHCP Locator object and not the administrative scope of the current session, you can proceed with administrative tasks without inviting a warning message. However, performance is further optimized if you also define the administrative scope.
4 Click OK.
DHCP PrerequisitesEnsure that you have completed the following steps prior to setting up DHCP:
1. Install NetWare 6 on the selected server or servers.
2. Install Novell iManager.
3. Install Internet Explorer 5.5 SP2 or Internet Explorer 6.0.
Configuring Clients to Use DHCPTo configure Windows 95 and Windows NT* client workstations to use DHCP, complete the following steps:
1 At the client desktop, click Start > Settings > Control Panel, and then double-click Network.
The Network window is displayed, listing the network components installed on the client workstation.
2 Click TCP/IP > Properties.
The TCP/IP Properties window opens.
3 Select Obtain an IP Address Automatically and click OK.
The next time the client starts up, it will send a request to the DHCP server for an IP address. IMPORTANT: Any client configuration settings override the configuration received from a DHCP server. The only exception is the hostname parameter set on the DNS Configuration tab of the TCP/IP Properties window.
Global DHCP ConfigurationDHCP (and BOOTP) options can be assigned at three levels:
Globally
At the subnet level
At the IP address level
The DHCP server's options inheritance rules specify that options assigned at the lowest level override options set at a higher level.
Global DHCP Configuration is a DHCP Management role that consists of the following tasks:
“Setting Global DHCP Preferences” on page 83
82 Novell DNS/DHCP Management Utility Administration Guide
Manual 3/17/03103Novell Confidential d_dhcpmgt.fm last saved 9/2/03
“Setting Global DHCP Defaults” on page 83
“Configuring DHCP Options” on page 84
“Import DHCP Configuration” on page 84
“Export DHCP Configuration” on page 85
Setting Global DHCP PreferencesTo define a global DHCP option:
1 Click DHCP Management > Global DHCP Configuration to open the Global DHCP Configuration window in the main panel.
2 Select View/Set Global Preferences from the drop-down menu and click OK to open the Global DHCP Preferences window.
3 Click Modify to open the DHCP Options window.
4 The DHCP Options you can configure globally are listed in the Available DHCP Options list box. To configure an option, complete the following steps:
Select it from the Available DHCP Options list box and click Add.
Enter the required supporting information as prompted.
5 Click Done to close the DHCP Options window.
The global DHCP Option you added or configured now appears in the Global DHCP Options list.
Setting Global DHCP DefaultsTo define a global DHCP default:
1 Click DHCP Management > Global DHCP Configuration to open the Global DHCP Configuration window in the main panel.
2 Select View/Set Global Preferences from the drop-down menu and click OK to open the Global DHCP Preferences window.
3 Click Next to open the Excluded Hardware Addresses list in the Global DHCP Defaults window.
This list contains the MAC addresses of clients that should not receive IP addresses from DHCP servers. These exclusions apply to all DHCP servers in the eDirectory tree.
Click Add > Enter the MAC Address of the client > Specify the hardware type.
Click OK.
The MAC address is added to the Excluded Hardware Addresses list. This assignment applies to all DHCP servers in the eDirectory tree.
4 Click Next to open the Included Hardware Addresses list in the Global DHCP Defaults window.
This list contains the MAC addresses of clients that will receive IP addresses from DHCP servers.
Click Add > Enter the MAC Address of the client > Specify the hardware type.
Click OK.
Configuring DHCP 83

Novell Confidential d_dhcpmgt.fm last saved 9/2/03 Manual Version: 3/17/03103
The MAC address is added to the Pooled (Included) Hardware Addresses list. This assignment applies to all DHCP servers in the eDirectory tree.
IMPORTANT: The Excluded and Included Hardware Addresses lists are mutually exclusive. You should configure only one of these lists and ensure that the other list is empty.
Configuring DHCP OptionsThe DHCP Options Table provides a list of parameters that can be defined for use on the network. After an option is defined, you can assign a value to the option using Global DHCP Options.
To View a DHCP Option
1 Click DHCP Management > Global DHCP Configuration to open the Global DHCP Configuration window in the main panel.
2 Select View/Set Global Preferences from the drop-down menu and click OK to open the Global DHCP Preferences window.
3 Click Next > Next > Next to open the DHCP Options Table window that lists both the system-defined and user-defined DHCP options.
4 Click Done to return to the home page.
To Add a DHCP Option
1 Click DHCP Management > Global DHCP Configuration to open the Global DHCP Configuration window in the main panel.
2 Select View/Set Global Preferences from the drop-down menu and click OK to open the Global DHCP Preferences window.
3 Click Next > Next > Next to open the DHCP Options Table window that lists both the system-defined and user-defined DHCP options.
4 Click Add, select the DHCP option code, select the data syntax, add the description of the new option, and click OK.
To Delete a DHCP Option
1 Click DHCP Management > Global DHCP Configuration to open the Global DHCP Configuration window in the main panel.
2 Select View/Set Global Preferences from the drop-down menu and click OK to open the Global DHCP Preferences window.
3 Click Next > Next > Next to open the DHCP Options Table window that lists both the system-defined and user-defined DHCP options.
4 Select the option code and click Delete.
Import DHCP ConfigurationThis feature enables you to copy DHCP 2.0 and 3.0 user files into the eDirectory database.
1 Click DHCP Management > Global DHCP Configuration to open the Global DHCP Configuration window in the main panel.
2 Select Import DHCP Configuration from the drop-down menu and click OK to open the Global DHCP Preferences window.
84 Novell DNS/DHCP Management Utility Administration Guide

Manual 3/17/03103Novell Confidential d_dhcpmgt.fm last saved 9/2/03
3 Enter the eDirectory context or browse to select it.
4 Enter the name of the DHCP Configuration File or browse to select it.
5 Click OK. The DHCP Subnet configuration information is displayed.
To add an available DHCP Subnet to the list of selected subnets, click Add.
To include all available DHCP Subnets to the list of selected subnets, click Add All.
To delete a subnet from the list of selected subnets, click Remove.
To delete all subnets from the list of selected subnets, click Remove All.
Export DHCP ConfigurationThis allows you to copy the eDirectory database to a text file. The text file enables you to import DHCP subnet configuration data to other applications. You can also import the file back into the eDirectory database by using the DNS/DHCP Management Utility.
1 Click DHCP Management > Global DHCP Configuration to open the Global DHCP Configuration window in the main panel.
2 Select Export DHCP Configuration from the drop-down menu and click OK to open the Global DHCP Preferences window.
3 Add or remove DHCP subnet information:
To add an available DHCP subnet to the list of selected subnets, click Add.
To include all available DHCP subnets in the list of selected subnets, click Add All.
To delete a subnet from the list of selected subnets, click Remove.
To delete all selected DHCP subnets, click Remove All.
4 Click Download File and save the file when prompted.
5 Click Done to export the file.
DHCP Server ManagementThe DHCP Server Management role consists of the following tasks:
“Creating a DHCP Server” on page 86
“Viewing or Modifying a DHCP Server” on page 86
“Deleting a DHCP Server” on page 87
“Starting or Stopping a DHCP Server” on page 87
“Configuring DHCP Auditing” on page 87
“Viewing or Saving the DHCP Audit Trail Log” on page 88
“Viewing or Saving the DHCP Event Log” on page 88
“Loading the DHCP Server” on page 96
Configuring DHCP 85

Novell Confidential d_dhcpmgt.fm last saved 9/2/03 Manual Version: 3/17/03103
Creating a DHCP ServerYou use the DNS/DHCP Management Utility to create and set up a DHCP Server object. A DHCP Server object can be created or located under any of the following objects:
Organization (O)
Organization Unit (OU)
Country (C)
Locality (L)
To create and set up a DHCP server object, complete the following steps:
1 Click DHCP Management > DHCP Server Management to open the DHCP Server Management window in the main panel.
2 Select Create Server from the drop-down menu and click OK to open the Create DHCP Server window.
3 Enter the name of the server or browse to select it.
4 Click Create.
A message indicates that the new DHCP Server Object has been created.
Viewing or Modifying a DHCP Server1 Click DHCP Management > DHCP Server Management to open the DHCP Server
Management window in the main panel.
2 Select View/Modify Server from the drop-down menu and click OK to open the View/Modify DHCP Server window.
3 Select the DHCP Server object from the drop-down menu.
4 Click OK.
You are led through a set of steps by which you can modify the following parameters:
Subnet Address Range Serviced by the Server: This displays information about the range of addresses that can be dynamically assigned by the server.
Subnet Serviced by the Server: This displays information about the subnet to which the server can assign addresses.
Comments: You can type comments about the DHCP server in this box. This is an optional parameter.
Set SNMP Traps Option: SNMP traps control DHCP server event trapping. Choose from the following options:
- None: Turns off SNMP traps- Major Events: Traps only critical events (default)- All: Traps both major and minor events
Management applications such as Novell ManageWise® software help you monitor traps.
Audit Trail and Alerts Option: Auditing allows you to analyze historical data and diagnose operational difficulties. Choose from the following options:
- None: Disables auditing- Major Events: Audits only major events such as SNMP traps (default)
86 Novell DNS/DHCP Management Utility Administration Guide
Manual 3/17/03103Novell Confidential d_dhcpmgt.fm last saved 9/2/03
- All: Audits all events
Enable Audit Trail Log: Check this to log audit trails and events.
Mobile User Option: The DHCP server can be configured to support mobile users such as laptop users. Choose from the following options:
- No Mobile Users Allowed: Disables support for mobile users- Allow Mobile Users but Delete Previously Assigned Address: Deletes previously
assigned addresses while granting an address to a mobile user (default)- Allow Mobile Users but Do Not Delete Previously Assigned Address: Caches
previously assigned addresses while granting an address to a mobile user
Ping Address: Check this to ping an address to ensure that the address is not in use before it is assigned. Note that enabling ping increases traffic on the network.
Deleting a DHCP Server1 Click DHCP Management > DHCP Server Management to open the DHCP Server
Management window in the main panel.
2 Select Delete Server from the drop-down menu and click OK to open the Delete DHCP Server window.
To remove all the DHCP servers in the list, check the top-level check box and click Delete.
To remove one or more DHCP servers, check the check box next to it and click Delete.
Starting or Stopping a DHCP Server1 Click DHCP Management > DHCP Server Management to open the DHCP Server
Management window in the main panel.
2 Select Start/Stop Server from the drop-down menu and click OK to open the DHCP Server Start/Stop Services window.
3 Select the server from the Select DHCP Server drop-down menu.
4 Click OK.
5 Depending on the state of the DHCP Server module, any one of the following will now appear:
Failure notification message: This appears if the DHCP Server module (DHCPSRVR.NLM) is not loaded. In order to start the server, load the DHCP Server module through the system console.
Start button: If the DHCP Server module is loaded but is in STOP mode, click to start the DHCP server.
Stop button: If the DHCP Server module is loaded but is in START mode, click to stop the DHCP server.
NOTE: To use the Start/Stop DHCP service, DHCPSRVR.NLM must be loaded.
Configuring DHCP AuditingTo configure a DHCP server for auditing, use the Audit Trail and Alerts Option:
1 Click DHCP Management > DHCPServer Management > View/Modify Server.
Configuring DHCP 87
Novell Confidential d_dhcpmgt.fm last saved 9/2/03 Manual Version: 3/17/03103
2 Select the DHCP server and click OK > Next
3 Check the Enable Audit Trail Log check box and click OK.
Viewing or Saving the DHCP Audit Trail Log1 Click DHCP Management > DHCP Server Management to open the DHCP Server
Management window in the main panel.
2 Select Audit Trail Log from the drop-down menu and click OK to open the DHCP Server Audit Trail Log window.
3 Select the server from the Select DNS Server drop-down menu.
4 If you want to filter the Audit Period, modify the Starting Date and Ending Date in the appropriate fields.
The following date format is accepted:
mm-dd-yyyy
5 Click OK.
This opens the DHCP Audit Trail Log table that lists the following data:
Entry Time
IP Address
Type
Status
Host name
Hardware Address
Client ID
Lease Type
6 To define a view filter on the DHCPAudit Trail Log, click the Display Options button.
You can now filter events on the following parameters:
Start Date: to set a start date for monitoring the DHCP audit trail.
End Date: to set an end date for monitoring the DHCP audit trail.
Transaction Type: manual, dynamic, automatic, exclusion, unauthorized or IPCP, and Fix Host Dynamic.
7 Click Next on the DHCP Audit Trail Log window.
8 Click Download File > Save the Audit Trail Log file on your local machine.
Viewing or Saving the DHCP Event Log1 Click DHCP Management > DHCP Server Management to open the DHCP Server
Management window in the main panel.
2 Select Event Log from the drop-down menu and click OK to open the DHCP Event Log window.
3 Select the server from the Select DHCP Server drop-down menu.
88 Novell DNS/DHCP Management Utility Administration Guide
Manual 3/17/03103Novell Confidential d_dhcpmgt.fm last saved 9/2/03
4 If you want to filter the Audit Period, modify the Starting Date and Ending Date in the appropriate fields.
The following date format is accepted:
mm-dd-yyyy
5 Click OK.
This opens the DHCP Event Log table that lists the following data:
Entry Time: Date and Time the event occurred.
Severity: Severity of the event (critical, major, warning and informational).
State: State of the server (operational, degraded, and inoperative).
Description: Description of the event that occurred.
6 To define a view filter on the DHCP Events Log, click the Display Options button.
You can now filter events on the following parameters:
Start Date: to set a start date for monitoring the DHCP Event Log.
End Date: to set an end date for monitoring the DHCP Event Log.
Severity defines the severity level of the event: critical, major, warning, and informational.
State settings define the condition of events recorded: operational, degraded, and inoperative.
To Save the DHCP Event Log
1 Click Next on the DHCP Event Log window.
2 Click Download File > Save the Event Log file on your local machine.
Subnet Pool ManagementThe Subnet Pool object provides support for multiple subnets through a DHCP or BOOTP forwarder by identifying a pool of subnets for remote LAN address assignments.
The Subnet Pool Management role consists of the following tasks:
“Deleting a Subnet Pool Object” on page 90
“Viewing or Modifying a Subnet Pool Object” on page 90
“Deleting a Subnet Pool Object” on page 90
Creating a Subnet Pool object1 Click DHCP Management > Subnet Pool Management to open the Subnet Pool Management
window in the main panel.
2 Select Create Subnet Pool from the drop-down menu and click OK to open the Create Subnet Pool window.
3 Enter a unique subnet pool name in the Subnet Pool Name field.
4 Enter the eDirectory context where the subnet pool record will be placed.
5 Click OK.
Configuring DHCP 89

Novell Confidential d_dhcpmgt.fm last saved 9/2/03 Manual Version: 3/17/03103
A message indicates that the new subnet pool object has been created.
Viewing or Modifying a Subnet Pool Object1 Click DHCP Management > Subnet Pool Management to open the Subnet Pool Management
window in the main panel.
2 Select View/Modify Subnet Pool from the drop-down menu and click OK to open the View/Modify Subnet Pool window.
3 Select the Subnet object.
4 Click OK.
You can modify the Subnet Type configuration parameter. You can add a subnet to a subnet pool or remove a subnet from the pool.
To add a subnet to a subnet pool, complete the following steps:
Click Add.
Select the subnet.
Click OK.
To remove a subnet from a subnet pool, complete the following steps:
Select the subnet.
Click Delete.
Deleting a Subnet Pool Object1 Click DHCP Management > Subnet Pool Management to open the Subnet Pool Management
window in the main panel.
2 Select Delete Subnet Pool from the drop-down menu and click OK to open the Delete Subnet Pool window.
To remove all the Subnet Pool objects in the list, check the top-level check box and click Delete.
To remove one or more Subnet Pool objects, check the check box next to it and click Delete.
Subnet ManagementYou use the DNS/DHCP Management Utility to create and set up a DHCP Subnet object for each of the subnets to which you will assign addresses.
A Subnet object's specific DHCP options and configuration parameters apply to the entire subnet and override global options.
The Subnet Management role consists of the following tasks:
“Creating a Subnet object” on page 91
“Viewing or Modifying a Subnet Object” on page 91
“Deleting a Subnet Object” on page 92
90 Novell DNS/DHCP Management Utility Administration Guide

Manual 3/17/03103Novell Confidential d_dhcpmgt.fm last saved 9/2/03
Creating a Subnet object1 Click DHCP Management > Subnet Management to open the Subnet Management window in
the main panel.
2 Select Create Subnet from the drop-down menu and click OK to open the Create Subnet window.
3 Enter a unique subnet name.
4 Select the eDirectory context where the new subnet record will be stored.
5 Enter a subnet address, a subnet mask, and the name of a default DHCP server in the fields provided.
The default DHCP server field designates the principal DHCP server for a subnet. This server is assigned all address ranges created under the subnet, unless a different server is specified when the range is created. The default server is the only server that responds to BOOTP requests for the subnet.
6 Click Create.
A message indicates that the new subnet has been created.
IP address objects are simultaneously created to exclude routing and broadcast addresses.
Viewing or Modifying a Subnet Object1 Click DHCP Management > Subnet Management to open the Subnet Management window in
the main panel.
2 Select View/Modify Subnet from the drop-down menu and click OK to open the View/Modify Subnet window.
3 Select the Subnet object from the drop-down menu.
4 Click OK.
You are led through a set of steps by which you can modify the following parameters:
DNS Zone for Dynamic Update: Specifies the DNS zone where dynamic updating will occur. The specified DNS zone is then notified of any changes to the subnet.
Domain Name: Specifies the domain name that will be combined with the hostname received from the client computer. This name will be given to DNS during dynamic DNS update. The domain name must be part of the zone specified for dynamic DNS.
Subnet Pool Preference: Specifies the subnet pool to be used by the subnet. This parameter setting is optional. Subnet pools enable the DHCP server to assign addresses to multiple logical networks on a single physical network. A subnet pool groups logical networks.
Default DHCP Server: Specifies a default DHCP server that will assign address ranges for the subnet. This server is also the only server that will respond to BOOTP requests for the subnet.
Comments: Provides an area for comment information about the subnet. This is an optional parameter.
Lease Type: Specifies the length of time for an address assignment. A lease type can be permanent or timed. Permanent leases never expire; the client is assigned an IP address for an indefinite period. Timed leases are defined in days, hours, and minutes. Timed leases expire, unless the client renews the lease.
Configuring DHCP 91

Novell Confidential d_dhcpmgt.fm last saved 9/2/03 Manual Version: 3/17/03103
Set Boot Parameter Options: Check this to specify the Server Address, Server Name, and Boot File Name for the BOOTP service. This information, provided at boot time, includes the address and name of a server the client can contact for a boot image, as well as a boot filename.
Other DHCP Options: To configure an option, complete the following steps:
Click Modify to open the DHCP options page that lists the available DHCP Options.
Select the DHCP option and provide the necessary DHCP information.
Click Add.
To remove a DHCP option:
Check the Select column of the DHCP option you want to remove and click Delete.
Deleting a Subnet Object1 Click DHCP Management > Subnet Management to open the Subnet Management window in
the main panel.
2 Select Delete Subnet from the drop-down menu and click OK to open the Create Subnet window.
To remove all the Subnet objects in the list, check the top-level check box and click Delete.
To remove one or more Subnet objects, check the check box next to it and click Delete.
Address Range ManagementYou use the DNS/DHCP Management Utility to create and set up Subnet Address Range objects for each pool of addresses you want to be dynamically assigned by DHCP. Optionally, the Address Range object stores the start of a hostname that can be assigned to clients when addresses are assigned.
The Address Range Management role consists of the following tasks:
“Creating a Subnet Address Range Object” on page 92
“Viewing or Modifying a Subnet Address Range Object” on page 93
“Deleting a Subnet Address Range Object” on page 94
Creating a Subnet Address Range Object1 Click DHCP Management > Address Range Management to open the Address Range
Management window in the main panel.
2 Select Create Address Range from the drop-down menu and click OK to open the Create Subnet Address Range window.
3 Select the subnet within which the address range is to be created.
4 In the Address Range Name field, type the name of the subnet address range.
5 Click Add and then select the subnet address range from the list of address ranges displayed in the Subnet Address Range window. This automatically fills the Start Address and End Address fields that specify the lower and upper limits of the range.
92 Novell DNS/DHCP Management Utility Administration Guide

Manual 3/17/03103Novell Confidential d_dhcpmgt.fm last saved 9/2/03
6 Click Create.
A message indicates that the new subnet address range has been created.
Viewing or Modifying a Subnet Address Range Object1 Click DHCP Management > Address Range Management to open the Address Range
Management window in the main panel.
2 Select View/Modify Address Range from the drop-down menu and click OK to open the View/Modify Subnet Address Range window.
3 From the Select Subnet drop-down menu, select the subnet that contains the address range to be modified.
4 From the Select Address Range drop-down menu, select the address range to be modified.
5 Click OK.
You are led through a set of steps by which you can modify the following address range parameters:
Range Type: indicates the range of addresses used by the DHCP server in response to requests from clients.
From the Select Range Type drop-down menu, choose one of the following:
Dynamic DHCP: A range of addresses used by the DHCP server to assign addresses to clients making only DHCP requests. If the Dynamic DHCP range type is assigned, the DNS Update Option parameter can be enabled. If Always Update is selected, the DHCP server will update DNS as dynamic addresses are assigned and released.
Dynamic BOOTP: A range of addresses used by the DHCP server to assign addresses to clients making only BOOTP requests.
Dynamic BOOTP and DHCP: A range of addresses used by the DHCP server to assign addresses to clients making either DHCP or BOOTP requests. If the Dynamic BOOTP and DHCP range type is assigned, the DNS Update Option parameter can be enabled. If Always Update is selected, the DHCP server will update DNS as dynamic addresses are assigned and released.
Dynamic DHCP with Automatic Host Name Generation: A range of addresses used by the DHCP server to assign addresses to clients making only DHCP requests. Hostnames for this pool will be generated and entered into the DNS system. Hostnames are provided to clients as a DHCP option. If you choose this option, ensure that you create the corresponding IN-ADDR.ARPA zone.
Excluded: A range of addresses that is excluded by the DHCP server while assigning IP addresses.
If the Dynamic DHCP with Automatic Host Name Generation range type is assigned, the Auto Host Name Starts With parameter can be set. This parameter appends a unique integer to the hostname, generating a unique hostname for each client.
Additionally, the name of the DHCP Server can be specified by selecting it from the DHCP Server drop-down menu.
Comments: Type your comments about the Subnet Address Range in this box. This is an optional parameter.
Configuring DHCP 93
Novell Confidential d_dhcpmgt.fm last saved 9/2/03 Manual Version: 3/17/03103
Deleting a Subnet Address Range Object1 Click DHCP Management > Address Range Management to open the Address Range
Management window in the main panel.
2 Select Delete Address Range from the drop-down menu and click OK to open the Delete Subnet Address Range window.
Select the subnet that contains the address range.
To delete all the address ranges in the subnet, check the top-level check box and click Delete.
To delete one or more Address Range objects, check the check box next to it and click Delete.
IP Address ManagementYou use the DNS/DHCP Management Utility to create and set up any IP Address objects to be assigned to specific devices or to be excluded from dynamic assignment. Create an IP Address object for each such device or address. Assigning a specific address to a client requires you to specify the client's media-access control (MAC) address or Client ID.
If you have set up subnets and subnet address ranges, you are not required to set up individual IP addresses unless you want to perform manual address assignment or exclude addresses from assignment.
The IP Address Management role consists of the following tasks:
“Creating an IP Address object” on page 94
“Viewing or Modifying an IP Address Object” on page 95
“Deleting an IP Address Object” on page 96
Creating an IP Address object1 Click DHCP Management > IP Address Management to open the IP Address Management
window in the main panel.
2 Select Create IP Address from the drop-down menu and click OK to open the Create IP Address window.
3 From the drop-down menu, select the subnet for which the IP address will be created.
4 Enter the IP address.
5 Choose an assignment type for the IP address object. Assignment types for an IP Address object are Dynamic, Manual, and Exclusion. If the IP address is dynamically assigned by the DHCP server, it will be automatically displayed.
Valid types that can be created manually are Manual and Exclusion. A manual assignment type must have either a MAC Type or a Client Identifier for the IP address object to be created.
Client Identifier uniquely identifies the client.
MAC Type specifies the MAC address type.
MAC Address specifies the hardware address of the NIC (Network Interface Card).
6 Click Create.
94 Novell DNS/DHCP Management Utility Administration Guide

Manual 3/17/03103Novell Confidential d_dhcpmgt.fm last saved 9/2/03
A message is displayed indicating that the new IP Address object has been created.
Viewing or Modifying an IP Address Object1 Click DHCP Management > IP Address Management to open the IP Address Management
window in the main panel.
2 Select View/Modify IP Address from the drop-down menu and click OK to open the View/Modify IP Address window.
3 Select the subnet that contains the IP address to be modified.
4 Select the IP Address.
5 Click OK.
You are led through a set of steps by which you can modify the following IP Address object parameters:
Assignment Type: Specifies Exclusion or Manual IP address assignment types.
- Exclusion: Address objects are created to identify IP addresses to be excluded from DHCP server address assignment. An Excluded assignment type designates that the IP address will not be used.
- Manual: Address objects are created to identify an IP address to be assigned to a device. A client identifier or MAC address must be configured for the manual address so that the DHCP server can identify the appropriate client. Manual assignment types specify client identifiers, MAC types, MAC addresses, or hostname parameters.
Client Identifier: Uniquely identifies the client.
MAC Type: Specifies the MAC address type.
- 15, Frame Relay- 16, Asynchronous Transfer Mode (ATM)- 17, HDLC- 18, Fibre Channel- 19, Asynchronous Transfer Mode (ATM)- 20, Serial Line- 21, Asynchronous Transfer Mode (ATM)
MAC Address: Specifies the hardware address of the NIC (Network Interface Card).
Host Name: Specifies the name of the host server.
Associated eDirectory Object: Use this field to select another object in the eDirectory database to maintain a reference to. For example, identify a user who typically uses the device associated with this address.
Comments: You can type comments about the address object in this box. This is an optional parameter.
Lease Expiration Option: A lease type can be permanent or timed. Permanent leases never expire; the client is assigned an IP address for an indefinite period. Timed leases are defined in days, hours, and minutes. Timed leases expire, unless the client renews the lease.
Last Used: Displays when the IP address was last used.
Configuring DHCP 95

Novell Confidential d_dhcpmgt.fm last saved 9/2/03 Manual Version: 3/17/03103
Other DHCP Options: Use this to add, delete, update, or specify default DHCP options for a manually assigned address type. Default is used to display DHCP options inherited from global preferences and the Subnet object that the address object is under.
Deleting an IP Address Object1 Click DHCP Management > IP Address Management to open the IP Address Management
window in the main panel.
2 Select Delete IP Address from the drop-down menu and click OK to open the Delete IP Address window.
Select the subnet that contains the IP address.
To remove all the IP Address objects in the list, check the top-level check box and click Delete.
To remove one or more IP Address objects, check the check box next to it and click Delete.
Configuring Multiple Logical NetworksWhen you configure multiple logical networks, also known as virtual local area networks (VLANs), you associate each individual LAN or Subnet object with a Subnet Pool object. The Subnet object you associate with the Subnet Pool object can be created prior to creating the Subnet Pool object, or an existing subnet can be modified.
To configure multiple logical networks or VLANs, complete the following steps:
1 Create a Subnet Pool object.
For more information see “Creating a Subnet Pool object” on page 89.
2 Select a Subnet object or create and configure a new Subnet object.
3 Click Subnet Pool Management > Modify Subnet Pool and add the subnet to the subnet pool with which to associate the subnet object.
4 Click OK.
5 Repeat Steps 2 through 4 for each subnet you want to associate with the Subnet Pool object.
Loading the DHCP ServerTo load a DHCP Server object, complete the following steps:
1 Create a DHCP Server object. For more information, see “Deleting a DHCP Server” on page 87.
2 Create a Subnet object, and assign a default DHCP server to it. For more information, see “Creating a Subnet object” on page 91.
3 Enter the following command at the DHCP server console:
LOAD DHCPSRVR
After you load DHCPSRVR.NLM, the DHCP server can respond to client requests and assign IP addresses. For information about other command line options, see “DHCPSRVR Command Line Options” on page 97.
96 Novell DNS/DHCP Management Utility Administration Guide

Manual 3/17/03103Novell Confidential d_dhcpmgt.fm last saved 9/2/03
After DHCPSRVR.NLM is loaded, you can use the DNS/DHCP Management Utility to start and stop the DHCP Server. For more information on starting and stopping the DHCP server, see “Starting or Stopping a DHCP Server” on page 87.
DHCPSRVR Command Line OptionsTo start a DHCP server, enter the following command at the server console prompt:
LOAD DHCPSRVR
The command line parameters listed in the following table are also supported.
Table 10 DHCPSRVR Command Line Options
Parameter Function
-d1 Turns on a background screen log of DHCP packets
-d2 Turns on a background screen log of Debug statements and DHCP packets
-d3 Turns on a background screen log of Debug statements and DHCP packets and writes the log to the server's \ETC\DHCPSRVR.LOG file
-h Displays command line syntax
-py Specifies the global polling interval in y minutes
-s Forces the server to read from and write to the master replica
Configuring DHCP 97

Novell Confidential d_dhcpmgt.fm last saved 9/2/03 Manual Version: 3/17/03103
98 Novell DNS/DHCP Management Utility Administration Guide

Manual (99a) 3/17/03103Novell Confidential o_optimize.fm last saved 9/2/03
6 Optimizing
You can optimize the performance of Novell® DNS/DHCP Services software by using state-of-the-art servers. We highly recommend that you use a server with a 200 MHz (or higher) Pentium* processor with 64 MB of memory. If your network configuration is large, more memory might provide improved performance.
For optimum performance, the designated server should be the most powerful server available. The designated server is the only server in a given tree that performs Dynamic DNS updates and zone transfers of secondary zone information.
The I/O subsystem of the servers can also be an issue for server performance. If you use the DNS and DHCP functions of NetWare® 6, you will increase the number of eDirectoryTM objects and thereby increase the disk space requirements of your SYS: volume.
Because the DNS and DHCP servers cache the required eDirectory data from disk into system memory, access to this information is not slowed.
Optimizing DNS PerformanceAlthough there is no limit to the size of a zone when you configure DNS, we recommend that you limit the size of any zone to no more than 5,000 objects. If you have a zone with more than 5,000 objects, dividing the objects between two zones will improve performance.
Optimizing DHCP PerformanceAlthough there is no limit to the size or number of subnets when you configure DHCP, we recommend that you limit the number of objects within a single subnet to no more than 2,048. A Novell DHCP server can support several large subnets in a DHCP-only configuration. However, the higher the number of IP Address objects supported, the greater the impact on DHCP server run-time performance.
Optimizing 99

Novell Confidential o_optimize.fm last saved 9/2/03 Manual Version: 3/17/03103
100 Novell DNS/DHCP Management Utility Administration Guide

Manual (99a) 3/17/03103Novell Confidential m_managing.fm last saved 9/2/03
7 Managing
This chapter provides information about using the DNS/DHCP Management Utility to perform management tasks.
Using the DNS/DHCP Management UtilityYou must have sufficient rights to use the DNS/DHCP Management Utility. All network administrators must have Read and Write rights to the container where the DNS/DHCP Locator and Group objects are located.
Administrators also must have Read and Write rights to the specific containers they manage. For example, if your company has offices in Chicago, Washington, and Providence, all administrators would need Read and Write rights to the container storing the Locator and Group objects. However, the administrator in Chicago would need Read and Write rights only to the Chicago part of the tree for the following objects:
DNS and DHCP server objects
DNS Zone object
Subnet container object
Subnet Pool object
It might be convenient to create an eDirectoryTM group object for administrators and grant that object the necessary rights.
Managing DNSManaging DNS is managing primary and secondary zones. When beginning a configuration, it might be better to import the data, especially if you have a large zone. Doing so reduces the chance of error.
If you are using Dynamic DNS (DDNS), when a client receives an address assignment from the DHCP server, a request is made to update eDirectory. The only way to override DDNS is by using the DNS/DHCP Management Utility.
After you have installed and configured your zones, you must still use the DNS/DHCP Management Utility to assign a DNS server to service the zones.
Managing DHCPAfter configuring your DHCP servers and beginning to provide DHCP services, you can also perform auditing or generate SNMP traps.
Managing 101

Novell Confidential m_managing.fm last saved 9/2/03 Manual Version: 3/17/03103
Deciding which DHCP options to use depends on your implementation. See “DHCP Options” on page 32 for information about available DHCP and BOOTP options.
Managing DDNS is complicated because each Subnet Address Range type requires a different configuration. Each type's configuration requirements are described later in this chapter.
It is important to understand the difference between static (or manual) and dynamic address assignments. If you are using static address assignments, you must use the DNS/DHCP Management Utility to assign permanent IP addresses to the clients in your tree. If you are using dynamic address assignments, the DHCP server assigns the address to a client when it starts.
You can deny address assignments to clients based on hardware address-based exclusion.
Events and AlertsYou can configure the DNS and DHCP servers to maintain a history of server activity in the events log. Events are activities that are considered significant, such as loading or unloading the server or problems the server encounters. The events logged depend on the parameters set on the server.
You can configure DNS and DHCP servers to log major events, all events, or none (the default).
Event logs can be saved for future reference. When you are logging events, it is important to pay attention to the event log size. Event logs grow rapidly, especially if you are experiencing or researching problems. Event logs should be maintained or purged regularly to control the amount of disk space used. You can launch the CSAUDIT management utility by typing CSAUDIT at the server console.
See “Viewing or Saving the DNS Event Log” on page 72 for information about viewing and saving the DNS event logs.
See “Viewing or Saving the DHCP Event Log” on page 88 for information about viewing and saving the DHCP event logs.
Auditing Server ActivityThe audit trail log records a history of activity logged by DNS and DHCP servers. You can use the Audit Trail log to diagnose network trends. A DNS audit trail would include a history of DNS queries and the hosts requesting them. A DHCP audit trail would include a history of address assignments, including which host had an address during a given period of time and a list of addresses that had already been in use when pinged.
See “Configuring DNS Auditing” on page 70 for information about configuring a DNS server for auditing. See “Configuring DHCP Auditing” on page 87 for information about configuring a DHCP server for auditing.
102 Novell DNS/DHCP Management Utility Administration Guide
Manual (99a) 3/17/03103Novell Confidential t_troubleshoot.fm last saved 9/2/03
8 Troubleshooting
This chapter contains troubleshooting information for DNS and DHCP.
DNSThis section provides the following troubleshooting information for DNS:
“Troubleshooting Checkpoints” on page 103
“Common Configuration Problems” on page 104
“Common Operational Problems” on page 104
“Troubleshooting Windows 95 TCP/IP Problems” on page 107
“Using the "-F" Command Line Option for DNIPINST.NLM” on page 111
“Server Access to DNS/DHCP Locator Object Not Required” on page 111
Troubleshooting CheckpointsIf you experience problems related to DNS or TCP/IP, you can use the following steps to begin troubleshooting.
1. Run the WINIPCFG utility to determine your IP address, then ping your address from a functioning client.
If you do not receive a response, your client's TCP/IP stack is not functioning. One of the following problems might be the cause:
The client's TCP/IP stack might be incorrectly configured.
The client did not receive an IP address from DHCP properly.
The IP address is already in use by another client.
2. Ping an IP address on your local network.
If this approach fails, one of the following conditions might be the cause:
The client you pinged is not operational.
The LAN is experiencing problems.
Your client's TCP/IP stack is experiencing problems.
3. Ping an address on a different network or on the internet.
If this approach fails but the preceding steps were successful, the problem is probably related to your router or your client's default router. If you are using DHCP, the default router configured for the DHCP server for each client is probably incorrectly configured.
Troubleshooting 103

Novell Confidential t_troubleshoot.fm last saved 9/2/03 Manual Version: 3/17/03103
4. Verify name resolution within your network. Ping a domain name within your company's network.
If this approach fails, the default DNS server configured for your TCP/IP stack is invalid, or the DNS server is not functioning. If you are using DHCP, the DNS server that is configured on the DHCP server is not properly configured.
5. Verify name resolution through the internet. Ping a host on the internet, such as novell.com.
If this approach fails, your company's DNS server (that forwards DNS requests to the Internet) is not functioning, or the Internet DNS server to which your DNS server forwards requests is not functioning.
In addition to using ping to troubleshoot DNS configuration problems, you can also use the NSLOOKUP utility at your server. For information on using this utility, see NSLOOKUP in Utilities Reference.
Common Configuration ProblemsIf you experience problems with DNS, check the following configuration problems.
1. Check the consistency of glue records that are shared between parent and child zones. Make sure that Name Server (NS) and Address (A) records within the parent zone match those in the child zone.
2. Keep the IP addresses of the root name servers configured in the RootServerInfo zone updated. Changes to this information are not automatically propagated through a domain; you must enter them manually. The most recent update of root name server information is available through FTP at ftp://rs.internic.net/domain/named.root.
3. Verify consistency between Pointer records in the IN-ADDR.ARPA domain and other domains.
4. If you change the IP address of a name server, ensure that the parent zone reflects that change.
5. Verify that you have configured a name server to correctly serve every zone.
6. Verify that zone transfers are occurring properly. Ensure that the secondary name server can identify the primary name server.
7. If you cannot access a particular host, verify that PTR records exist. When you create a zone, always select Yes when prompted to create a companion zone. If you created a companion zone, verify that the IP address and hostname are correct.
Common Operational ProblemsInternet RFC 1912 provides information about common operational errors found in both the operation of DNS servers and the data the DNS servers contain. The following list describes the most common operational errors that occur.
Problem—Hosts cannot access a particular system. You changed the IP address for this system recently, but the secondary name server has not yet been updated.
Cause—The Start of Authority (SOA) record's serial number was not properly incremented. Without the serial number increment, the secondary name server does not recognize when a change has been made. This is usually not a problem with eDirectoryTM-based DNS because the serial number is incremented automatically. With UNIX systems, failure to increment the serial number is the most common cause of DNS errors. The secondary server does not
104 Novell DNS/DHCP Management Utility Administration Guide
Manual 3/17/03103Novell Confidential t_troubleshoot.fm last saved 9/2/03
automatically test for changes in the SOA record. Any changes in the SOA record must be accompanied by a change in the SOA record serial number.
Solution—Do not change the SOA record serial number manually with eDirectory-based DNS. If the primary server is not eDirectory-based, you might need to change the serial number manually for the secondary server to recognize that a change has occurred.
Problem—You cannot access a particular host.
Cause 1—When you created a new zone, the PTR records were not created or the PTR records have been deleted or changed.
Solution 1—When you configure a zone, always select Yes when prompted to create a companion zone. If you created a companion zone, verify that the IP address and hostname are correct. Checkers can easily catch neglected PTRs. For further information, refer to RFCs 1537 and 1713.
Cause 2—The host is down or is unreachable.
Solution 2—Use PING to locate the connectivity problem. If the problem exists in your domain, make the necessary repairs to restore connectivity.
Cause 3—The name server for that domain is not configured with information for the host.
Solution 3—Configure the name server for that domain with information for the host.
Problem—You cannot access a host in a different domain using its domain name, but you can access it using its IP address.
Cause—The IP address or CNAME alias entry of the host's primary or secondary name server was changed, but the parent domain was not informed of the change. The address information in the glue record maintained by the parent domain has become invalid. Another possible cause is that the original address information in the glue record for the local zone is invalid or missing.
Solution—When you configure a new zone, always enter the IP address when prompted. Verify that all parent zones have the same address information.
Problem—Nonlocal hosts cannot find the primary domain server for a subdomain and, therefore, cannot access hosts in that subdomain.
Cause—The IP address of a subdomain's primary server does not match the hostname and IP address configured in the parent domain for the subdomain's primary server.
Solution—Verify that the hostname and IP address for the subdomain's primary server configured in the parent domain is valid and matches the information configured in the subdomain.
Problem—A particular host cannot access other hosts.
Cause—The resolv.cfg file (or equivalent) of the host does not contain the correct domain name or name server address.
Solution—Enter the correct domain name or name server address in the hosts's resolv.cfg file (or equivalent).
Problem—Hosts cannot access an entire external domain.
Cause 1—The root name server information is invalid; therefore, the root servers are unreachable. For non-eDirectory systems running DNS, changes to this information are not automatically propagated through a domain; you must enter the changes manually.
Troubleshooting 105
Novell Confidential t_troubleshoot.fm last saved 9/2/03 Manual Version: 3/17/03103
Solution 1—Verify that the IP addresses of the root name servers configured in the RootServerInfo zone are correct. The most recent update of root name server information is available through FTP at ftp://rs.internic.net/domain/named.root.
Cause 2—The hostname or IP address was not resolved because the delegation to the zone is incorrect.
Solution 2—Configure the correct hostname or IP address information for the zone in eDirectory.
Cause 3—The hostname or IP address was resolved to the wrong value.
Solution 3—Change the hostname or IP address information for the zone to the correct value in eDirectory.
Cause 4—The name server information of the primary name server of the domain is incorrect or missing in the root name servers.
Solution 4—Verify that the domain is properly registered with the INTERNIC, the organization that configures the name server information of the domain.
Cause 5—The name server for the domain is down or is unreachable.
Solution 5—Use PING to locate the connectivity problem. If the problem exists in your domain, make the necessary repairs to restore connectivity.
Cause 6—The root name server for the domain is down or is unreachable.
Solution 6—Use PING to locate the connectivity problem. If the problem exists in your domain, make the necessary repairs to restore connectivity.
Cause 7—You do not have sufficient rights to access the zone.
Solution 7—Contact the network administrator for the zone and obtain sufficient rights to access the zone.
Problem: After you create or modify a Resource Record object, the change is not reflected in the server cache and the zone transfer fails.
Cause 1: The Zone SOA serial number is not automatically updated after the modification is made.
Solution 1: After you modify the Resource Record, change the Zone SOA serial number manually.
Cause 2: The server cache is not atomically refreshed after modifications are made.
Solution 2: Unload the NAMED.NLM module and reload it to refresh the DNS server settings.
Problem: The client is not assigned an IP address.
Cause: The DHCP Server object is not properly configured.
Solution: Make sure you have created the DHCP Server object, at least one Subnet object, and one Subnet Address Range object. Verify that when you load the DHCP Server module, DHCPSRVR.NLM, a message from the NetWare® system console indicates that the IP database is loaded.
106 Novell DNS/DHCP Management Utility Administration Guide

Manual 3/17/03103Novell Confidential t_troubleshoot.fm last saved 9/2/03
Troubleshooting Windows 95 TCP/IP ProblemsThis section provides assistance for those troubleshooting TCP/IP problems on Windows 95* clients. You should have a basic understanding of TCP/IP and how it is configured for Windows 95.
Using WINIPCFG
The WINIPCFG utility displays a client's current TCP/IP configuration. To execute this utility, click Start > Run, enter winipcfg, and click Enter.
If the client's IP address was statically assigned and configured, the information that was entered under TCP/IP Protocols in the control panel's Network settings is displayed.
If the client was configured to obtain an address using DHCP, the information displayed was received from the DHCP server that assigned the IP address.
WINIPCFG provides the following information about the client:
Network adapter address
Assigned IP address
Subnet mask
Default gateway (default router)
Hostname
DNS Server
If the client has obtained an address from a DHCP server, click More Info to identify the DHCP server, when the lease began, and when it expires. Four additional buttons provide the following functions:
Renew—Sends a DHCPREQUEST to the DHCP server, updates the lease, and updates any assigned values such as a default gateway or DNS server.
Release—Sends a DHCPRELEASE to the DHCP server indicating that the client is giving up its IP address and that the server is free to assign that address to another client.
Renew All—Sends a DHCPREQUEST to all network interfaces to which the Windows 95 client is configured.
Release All—Sends a DHCPRELEASE to all network interfaces to which the Windows 95 client is configured.
If you want another IP address to be assigned to the client, select RELEASE, then select RENEW.
Using PING
PING is the most basic utility available to test, verify, and troubleshoot TCP/IP connectivity within a network. PING sends an ICMP packet to a specific host with a small amount of data and expects that host to respond with the same data packet. If you receive a response, both TCP/IP and connectivity between the two hosts are operational. If you do not receive a response, one of the following conditions exists:
The host is not up.
A router between the connections is not up.
The client's TCP/IP stack is not functioning.
Troubleshooting 107

Novell Confidential t_troubleshoot.fm last saved 9/2/03 Manual Version: 3/17/03103
To run PING, from a DOS prompt enter the command followed by a hostname or IP address, such as the following:
C:\> ping www.novell.com >
If TCP/IP is operational and connectivity exists between the hosts, you will receive the following type of response:
Pinging www.novell.com [137.65.2.5] with 32 bytes of data:Reply from 137.65.2.5: bytes=32 time=27ms TTL=59Reply from 137.65.2.5: bytes=32 time=22ms TTL=59Reply from 137.65.2.5: bytes=32 time=31ms TTL=59
If you use the IP address of the host, you will receive the same type of reply.
Using the host's domain name is a good way to determine the host's IP address, and doing so also causes the client to request DNS name resolution before sending the ICMP packet. This approach is an excellent way to determine if DNS name resolution is working. If it is not working, you will receive a message such as the following:
Unable to resolve www.novell.com.
If DNS name resolution is not working, one of the following conditions might be the cause:
The DNS server or DNS domain name is not configured properly on the client.
If using DHCP, the DNS server and/or domain name are not properly configured on the DHCP server.
The DNS server to which you send DNS name resolution requests is not functioning.
The PING command has the following syntax:
ping [-t] [-a] [-n count] [-l size] [-f] [-i TTL] [-v TOS] [-r count] [-s count] [[-j host] | [-k host-list]] [-w timeout] destination list
Table 11, “PING Options,” on page 108 explains the use of the PING options.
Table 11 PING Options
Option Meaning
-t Ping specified host until interrupted
-a Resolve addresses to hostnames
-n count Number of echo requests to send
-l size Send buffer size
-f Set Don't Fragment flag in packet
-i TTL Time-To-Live value
-v TOS Type of service
-r count Record route for count hops
-s count Time stamp for count hops
-j host-list Loose source route along host-list
108 Novell DNS/DHCP Management Utility Administration Guide
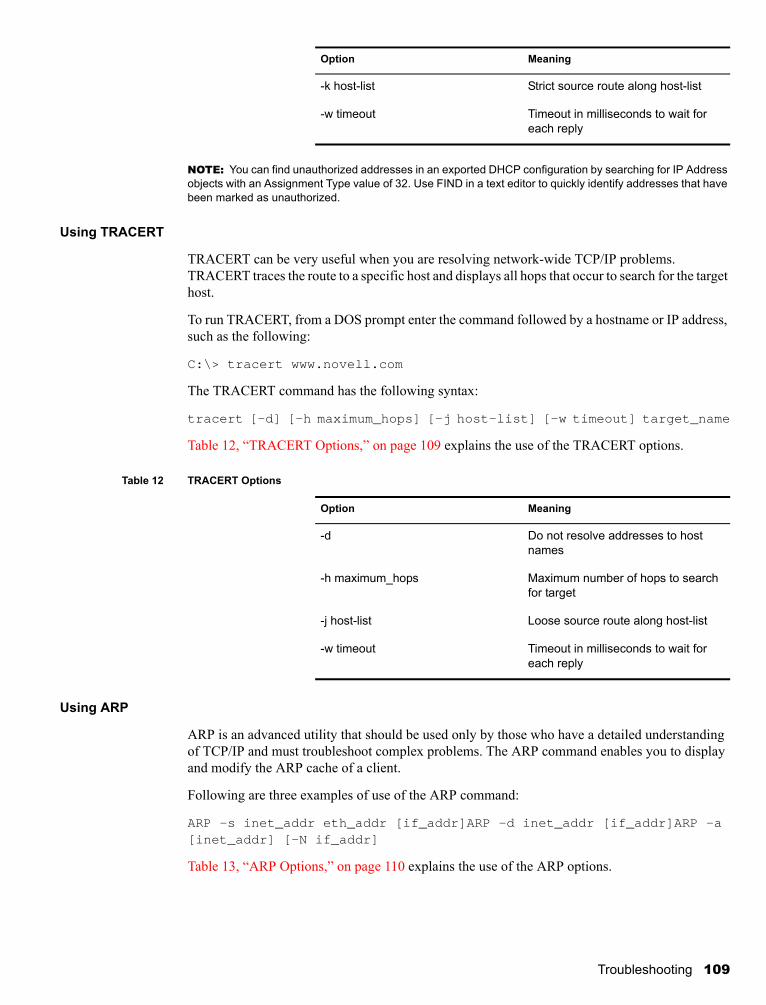
Manual 3/17/03103Novell Confidential t_troubleshoot.fm last saved 9/2/03
NOTE: You can find unauthorized addresses in an exported DHCP configuration by searching for IP Address objects with an Assignment Type value of 32. Use FIND in a text editor to quickly identify addresses that have been marked as unauthorized.
Using TRACERT
TRACERT can be very useful when you are resolving network-wide TCP/IP problems. TRACERT traces the route to a specific host and displays all hops that occur to search for the target host.
To run TRACERT, from a DOS prompt enter the command followed by a hostname or IP address, such as the following:
C:\> tracert www.novell.com
The TRACERT command has the following syntax:
tracert [-d] [-h maximum_hops] [-j host-list] [-w timeout] target_name
Table 12, “TRACERT Options,” on page 109 explains the use of the TRACERT options.
Table 12 TRACERT Options
Using ARP
ARP is an advanced utility that should be used only by those who have a detailed understanding of TCP/IP and must troubleshoot complex problems. The ARP command enables you to display and modify the ARP cache of a client.
Following are three examples of use of the ARP command:
ARP -s inet_addr eth_addr [if_addr]ARP -d inet_addr [if_addr]ARP -a [inet_addr] [-N if_addr]
Table 13, “ARP Options,” on page 110 explains the use of the ARP options.
-k host-list Strict source route along host-list
-w timeout Timeout in milliseconds to wait for each reply
Option Meaning
-d Do not resolve addresses to host names
-h maximum_hops Maximum number of hops to search for target
-j host-list Loose source route along host-list
-w timeout Timeout in milliseconds to wait for each reply
Option Meaning
Troubleshooting 109

Novell Confidential t_troubleshoot.fm last saved 9/2/03 Manual Version: 3/17/03103
Table 13 ARP Options
Using NETSTAT
NETSTAT is an advanced utility that should be used only by those who have a detailed understanding of TCP/IP and must troubleshoot very complex problems. NETSTAT displays protocol statistics and current TCP/IP network connections.
The NETSTAT command has the following syntax:
NETSTAT [-a] [-e] [-n] [-s] [-p proto] [-r] [interval]
Table 14, “NETSTAT Options,” on page 110 explains the use of the NETSTAT options.
Table 14 NETSTAT Options
Option Meaning
-a Displays current ARP entries by interrogating the current protocol data. If inet_addr is specified, the IP and physical addresses for the specified host are displayed.
-g Displays current ARP entries by interrogating the current protocol data. If inet_addr is specified, the IP and physical addresses for the specified host are displayed.
inet_addr Specifies an Internet address.
-N if_addr Displays the ARP entries for the network interface specified by if_addr.
-d Deletes the host specified by inet_addr.
-s Adds the host and associates the internet address inet_addr with the physical address eth_addr. The physical address is given as six hexadecimal bytes separated by hyphens. The entry is permanent.
eth_addr Specifies a physical address.
if_addr If present, specifies the Internet address of the interface whose address translation table should be modified. If not present, the first applicable interface is used.
Option Meaning
-a Displays all connections and listening ports, but not those of the server side.
-e Displays Ethernet statistics. This might be combined with the -s option.
-n Displays addresses and port numbers in numerical form.
-p proto Shows connections for the protocol specified by proto (either TCP or UDP). If used with the -s option to display per protocol statistics, proto can be TCP, UDP, or IP.
-r Displays the contents of the routing table.
-s Displays per protocol statistics. By default, statistics are shown for TCP, UDP, and IP. The -p option can be used to specify a subset of the default.
110 Novell DNS/DHCP Management Utility Administration Guide

Manual 3/17/03103Novell Confidential t_troubleshoot.fm last saved 9/2/03
If you suspect that a LAN card is malfunctioning, use the -e option while troubleshooting. The -e option displays Ethernet statistics, including discards and errors.
The -a option provides a detailed display of the active TCP connections of the port number and network host communicating with that port. This information is useful when you are attempting to relate TCP port numbers of the various servers with which the client is communicating.
Using the "-F" Command Line Option for DNIPINST.NLMDNIPINST.NLM is a backup method of extending the schema and creating the DNS/DHCP Locator and Group objects and the RootSrvrInfo zone. DNIPINST.NLM can be used if problems occurred during the NetWare® 6 installation process. Most administrators will not need to use this NLM.
You can use the "-F" command line option in the DNIPINST.NLM to re-create the DNS/DHCP configuration objects if the initial attempt to set up Novell® DNS/DHCP Services fails during the configuration object creation stage.
When a failure occurs during the object creation phase, we recommend that you delete the DNS-DHCP (DNS/DHCP Locator), DNSDHCP-GROUP (DNS/DHCP Group), and the RootSrvrInfo objects (if they have been created), then use DNIPINST.NLM with the "-F" flag. When the "-F" command line option is specified, an initial console message confirms the action and the eDirectory login window appears. After a successful login, the object eDirectory context query window is displayed. You can enter the data and create the objects. If a schema extension error occurs, execute DNIPINST.NLM in the regular mode.
Server Access to DNS/DHCP Locator Object Not RequiredThe requirement that the DNS and DHCP servers always have access to the DNS/DHCP Locator object has been relaxed.
The DHCP server can load without having access to the DNS/DHCP Locator object. However, the first time the server loads it requires access to the DNS/DHCP Locator object to obtain a copy of any global configuration from the object. The DHCP server saves a copy of the global configuration in SYS:\ETC\DHCP\DHCPLOC.TAB.
In subsequent loads, the DHCP server will try to obtain the global configuration information from the DNS/DHCP Locator object. If the information is not available, the DHCP server will read the information from the last saved copy of SYS:\ETC\DHCP\DHCPLOC.TAB. Each time the DHCP server loads and the DNS/DHCP Locator object is available, the DHCP server updates the DHCPLOC.TAB file.
The DNS server also does not require access to the DNS/DHCP Locator object. It has been enhanced to require access to the DNS/DHCP Locator object only if the NAMED command line arguments are specified to create zones in eDirectory. The DNS server no longer requires access to the RootSrvrInfo zone stored in eDirectory. The DNS server now first tries to find the RootSrvrInfo zone in eDirectory, but if it is not available, the DNS server uses the copy of the information found in SYS:\ETC\DNS\ROOTSRVR.DAT.
interval Redisplays selected statistics, pausing interval seconds between each display. Press Ctrl+C to stop redisplaying statistics. If omitted, NETSTAT prints the current configuration information once.
Option Meaning
Troubleshooting 111

Novell Confidential t_troubleshoot.fm last saved 9/2/03 Manual Version: 3/17/03103
DHCPThis section provides the following troubleshooting information for DHCP:
“Troubleshooting Checkpoints” on page 112
“Common Operational Problems” on page 113
“Releasing and Renewing DHCP Addresses” on page 114
Troubleshooting Checkpoints1. Verify that IP hosts with DHCP-assigned parameters operate the same as when you manually
configured them.
If an IP host does not operate the same as when it was manually configured, verify that the parameters assigned by DHCP are the same as those when the host was manually configured.
If a node is intermittently inoperable, verify that the node is not using the same IP address as another IP host. If a duplicate IP address exists, verify that there is only one DHCP server for the subnet. Also verify that the IP addresses assigned by the DHCP server are not being used by manual nodes.
2. Verify that all DHCP hosts can obtain a DHCP lease when required.
If DHCP hosts cannot obtain a DHCP lease when required, verify that enough leases exist to accommodate all hosts that use DHCP. If there are too few leases, obtain more IP addresses and configure more leases or reduce the lease time to a few hours. This ensures that more leases are made available to other clients that are waiting to use the IP addresses.
If a Windows 95 client cannot acquire a lease and responds with the messageUnable to obtain an IP network address the client requires a longer timeout. This problem might occur when the client and DHCP server are separated by one or more routers. To increase the timeout for Windows 95 clients, obtain a patch from Microsoft. The patch is dated 2/12/96 and includes a file named VDHCP.386. The patch itself is named DCHCPUPD.EXE.
3. Verify that the number of leases available for clients does not decrease when you are using mobile clients.
If the number of leases available for clients decreases when you are using mobile clients, verify that the mobile clients' lease is released when the client connects from a remote office or that the mobile client can use the same lease and the same IP address at the new location.
If the remote office is on a subnet different from that of the local office and the subnet is serviced by a different DHCP server, verify that the lease is released by the first server within a reasonable amount of time after the mobile client moves to the remote office. If the lease is not released quickly enough, reduce the lease time.
If the remote office is on a subnet different from that of the local office and the subnet is serviced by the same DHCP server, verify that the IPAssignmentPolicy attribute of the DHCP server object in eDirectory is set to DELETE_DUPLICATE. This ensures that only one lease is in use at a time because the original lease is deleted when the mobile client requests a new lease.
If the remote office is on the same subnet as that of the local office, the mobile client should use the same IP address. If the mobile client does not use the same IP address, verify that there is only one DHCP server for the subnet.
112 Novell DNS/DHCP Management Utility Administration Guide

Manual 3/17/03103Novell Confidential t_troubleshoot.fm last saved 9/2/03
Common Operational ProblemsThe following list describes the most common operational errors that occur.
Problem—A node is intermittently inoperable.
Cause—An unauthorized DHCP server has been configured by someone attempting to control or disrupt your network. The unauthorized DHCP server is assigning IP addresses and other configuration parameters that have already been assigned to other nodes by an authorized DHCP server. The result is that nodes are assigned duplicate IP addresses or incorrect configuration parameters. Incorrect configuration parameters can interfere with a node's ability to communicate to the network in any number of ways. Incorrect parameters can even be used to cause a node to connect to a server that is controlled by an unauthorized user, thereby allowing the unauthorized user to take control of the client.
Solution—Find the unauthorized DHCP server and disable it or disconnect it from the network.
Problem—A Windows 95 client cannot acquire a lease and responds with the message Unable to obtain an IP network address
Cause—The Windows 95 DHCP client has a two-second timeout for the time between when it accepts an offer of an IP address in a message sent to the server and the time it expects an acknowledgment of that acceptance in a reply from the server. Other clients, such as Windows NT*, have a four-second timeout.
Solution—Obtain the DCHCPUPD.EXE patch from Microsoft that changes the timeout on Windows 95 clients from two seconds to four seconds. The patch is dated 2/12/96 and includes a file named VDHCP.386.
Problem—The use of mobile clients causes fewer leases to be available.
Cause 1—The mobile clients' lease is not released when the mobile client moves to a remote office. This can occur when the remote office is on a subnet different from that of the local office and the remote subnet is serviced by a different DHCP server.
Solution 1— Determine the lease time assigned to this client. If the lease is not released quickly enough, reduce the lease time. Otherwise, have the client manually release the old IP address before it leaves the local office.
Cause 2—The mobile client uses two leases at the same time because it cannot use the same lease and the same IP address at the new location.
Solution 2—Use one of the following solutions:
If the remote office is on a subnet different from that of the local office and the subnet is serviced by the same DHCP server, verify that the IPAssignmentPolicy attribute of the DHCP server object in eDirectory is set to DELETE_DUPLICATE. This ensures that only one lease is in use at a time because the original lease is deleted when the mobile client requests a new lease.
If the remote office is on the same subnet as that of the local office, the client should use the same IP address. If the client does not use the same IP address, verify that there is only one DHCP server for the subnet.
Problem—Clients work properly when manually configured, but some functions do not work when using DHCP.
Cause—One or more global client parameters were not configured properly in DHCP.
Solution—Verify that all parameters assigned by DHCP are properly configured.
Troubleshooting 113

Novell Confidential t_troubleshoot.fm last saved 9/2/03 Manual Version: 3/17/03103
Problem—At a site with a limited number of leases, many clients cannot obtain a lease. The leases are not being efficiently shared by all clients that must use them.
Cause—Clients are not releasing the leases when they are finished using them because the lease time is too long.
Solution—Reduce the lease time to a few hours so that leases can be made available to other clients that are waiting to use the IP addresses. Otherwise, you might need to purchase more IP addresses and configure more or larger address ranges to make more IP addresses available.
Problem—It is difficult to identify and manage network resources when using dynamic DHCP assignments.
Cause—The IP addresses of the clients might change if you use DHCP continually over a period of time and the lease period is set to a reasonably low value.
Solution—Use static DHCP assignments when you want to use a specific IP address assigned to the client for identification and management.
Problem—DHCPSRVR.NLM is loaded and the trace screen has been activated with the -d flag, but there is no evidence of interaction between the server and clients, and clients are not receiving IP address assignments.
Cause—The server is not physically linked to the client's communications media or the server did not bind its IP protocol to the interface card, which shares physical media access with the client.
Solution—Check the server's physical connections. Load INETCFG to ensure that proper binding exists.
Problem—DHCPSRVR.NLM is loaded and the trace screen shows client packets being received, but the server is not responding and the REQUEST packets are dropped.
Cause—The server's configuration for its local interfaces does not match the configuration within the Directory for the same server.
Solution—Load INETCFG and check to see if the server has a legal IP address on each local subnet it serves. Also check that each local subnet is properly configured using the DNS/DHCP Management Utility.
Releasing and Renewing DHCP AddressesWhen a host is powered on, it is leased an IP address for a period of time, depending on the configuration settings of the subnet from which the address is assigned. If the machine is moved to another network while the original IP address lease is still valid, the user must release the lease. Other situations might also require that a lease be released, such as the use of a laptop computer in different locations of a given network.
Windows 95
To manually release and renew a DHCP-assigned IP address in Windows 95, complete the following steps:
1 Select Start, then Run.
2 Type winipcfg and press Enter.
The IP Configuration dialog box is displayed.
3 Click Release All.
114 Novell DNS/DHCP Management Utility Administration Guide

Manual 3/17/03103Novell Confidential t_troubleshoot.fm last saved 9/2/03
The IP Address, Subnet Mask, and Default Gateway fields should display no addresses.
4 Click Renew All.
New addresses should appear in the IP Address, Subnet Mask, and Default Gateway fields.
5 Click OK to close WINIPCFG.
Windows NT
To manually release and renew a DHCP-assigned IP address in Windows NT, complete the following steps:
1 Select Start > Programs > MS-DOS Command Prompt.
2 From the DOS prompt, execute the command
ipconfig /release
A message is displayed indicating that the assigned IP address has been successfully released.
3 From the DOS prompt, execute the command
ipconfig /renew
A message is displayed indicating the new IP address that has been assigned.
To review DHCP settings,
4 From the DOS prompt, execute the following command to review DHCP settings:
inconfig /all
Troubleshooting 115

Novell Confidential t_troubleshoot.fm last saved 9/2/03 Manual Version: 3/17/03103
116 Novell DNS/DHCP Management Utility Administration Guide