northwest territories water smart … ws program - guide for community... · support of the...
TRANSCRIPT

NORTHWEST TERRITORIESWATER SMART® PROGRAMGUIDE FOR COMMUNITY LEADERS
JUNE 2016 EDITION

Published by the Lifesaving Society. Second Printing, June 2016.
Copyright 2016 by the Royal Life Saving Society Canada. Reproduction, by any
means, of materials contained in this book is prohibited unless authorized by the
publisher. Requests should be directed to the Alberta and Northwest Territories office
(see back cover for address).
The Lifesaving Society is Canada’s lifeguarding expert. The Society works to prevent
drowning and water-related injury through its training programs, Water Smart®
public education initiatives, water-incident research, aquatic safety management
services, and lifesaving sport.
Annually, 1,200,000 Canadians participate in the Society’s swimming, lifesaving,
lifeguard, and leadership training programs. The Society sets the standard for aquatic
safety in Canada and certifies Canada’s National Lifeguards.
The Society is an independent, charitable organization educating Canadian lifesavers
since the first Lifesaving Society Bronze Medallion Award was earned in 1896.
The Society represents Canada internationally as an active member of the royal
Life Saving Society and the International Life Saving Federation. The Society is
the Canadian governing body for lifesaving sport - a sport recognized by the
International Olympic Committee and the Commonwealth Games Federation.
® Water Smart, Swim for Life, Swim to Survive, and Lifesaving Society are registered trademarks of the
Royal Life Saving Society Canada. Trademarks other than those owned by the Lifesaving Society used in
this document belong to their registered owners.
NORTHWEST TERRITORIES WATER SMART PROGRAMACTIVITY GUIDE WITH LESSON PLANS

iLIFESAVING SOCIETY NORTHWEST TERRITORIES WATER SMART PROGRAM
About the LifesavingSaving lives for over 100 years
The Lifesaving Society is a full service provider
of programs, products, and services designed
to prevent drowning. The Society saves lives
and prevents water-related injuries through its
training programs, Water Smart® public education,
drowning research, aquatic safety management and
lifesaving sport. The Society is a national volunteer
organization and registered charity composed of
ten provincial/territorial branches, tens of thousands
of individual members, and over 4,000 affiliated
swimming pools, waterfronts, schools, and clubs.
The Society has been teaching swimming, water
safety and water rescue in Canada since 1896.
Established in England (1891) as the Swimmers’
Lifesaving Society, it became The Royal Lifesaving
Society in 1904. Today, it is known simply as the
Lifesaving Society. The Lifesaving Society is a
leader and partner in the delivery of water safety
education throughout Canada and around the
world.
Teaching Canadians to save themselves and rescue others
Annually 1,200,000 Canadians participate in the
Lifesaving Society’s swimming, lifesaving, lifeguard,
first aid, and leadership programs. Each year, the
Society certifies thousands of instructors who
provide the leadership for its training programs.
Over 30,000 Canadians earn the Society’s Bronze
Medallion each year. As Canada’s lifeguarding
experts, the Lifesaving Society sets the standard for
lifeguard training and certifies Canada’s National
Lifeguards.
Making Canadians Water Smart
The Lifesaving Society focuses Water Smart
drowning prevention efforts on people most at risk
- like men fishing in small boats - or on those who
can make a significant difference, such as parents
of young children. The Society delivers Water Smart
messages through its swim program, through the
media and community action. The Society’s Swim to
Survive® Program provides the essential minimum
skills required to survive an unexpected fall into
deep water.
Drowning Research
The Lifesaving Society conducts research into fatal
and non-fatal drowning, aquatic injury and rescue
interventions. Ongoing research and analysis
supports the Society’s evidence-based water rescue
training and Water Smart drowning prevention
education.
Setting the Standard
The Lifesaving Society establishes aquatic safety
standards and consults on aquatic safety issues for
the aquatic industry, governments and the judiciary.
The Society offers a suite of services to help aquatic
facility operators maintain and improve safe pool
and waterfront operations. The Society performs
aquatic safety audits and serves as experts in legal
cases involving aquatic safety.

iiLIFESAVING SOCIETY NORTHWEST TERRITORIES WATER SMART PROGRAM
The Lifesaving Society Alberta and Northwest Territories gratefully acknowledge the support of the Government of Northwest Territories and Transport Canada.
The Society would also like to thank all of the communities and community leaders
that have participated in the Northwest Territories Water Smart® program and have
provided the Society with their valuable input since 2011.
Through the collective efforts of our community partners and champions, together we work towards a sustainable Northwest Territories Water Smart Program to help make the Northwest Territories a safer place to live, work and play.
Acknowledgement
iiiLIFESAVING SOCIETY NORTHWEST TERRITORIES WATER SMART PROGRAM
Contents
About the Lifesaving Society ..................................................................
Acknowledgement...................................................................................
Program Introduction ............................................................................
How to Use this Guide ...........................................................................
Northwest Territories Water Smart Program At-a-Glance.........................
Water Smart Experience
Sharing Knowledge and Experience of Traditional Activities.............
Lifejacket Safety .............................................................................
Ice Safety .......................................................................................
Boating Safety ................................................................................
Waterfront and Boat Launch Safety..................................................
Swim to Survive
Swim to Survive At-a-Glance...........................................................
Teaching Swim to Survive.................................................................
Swim to Survive Screening .............................................................
Swim to Survive: Roll into Deep Water ...........................................
Swim to Survive: Tread Water .........................................................
Swim to Survive: Swim 50 Metres ..................................................
Swim to Survive Standard.................................................................
i
ii
iv
v
1
2
4
6
9
13
16
17
18
20
22
24
26

ivLIFESAVING SOCIETY NORTHWEST TERRITORIES WATER SMART PROGRAM
Program IntroductionThe Northwest Territories Water Smart® Program (WS Program) was established
in partnership with the Government of Northwest Territories within their Drowning
Prevention Action Plan, which is an initiative under the Healthy Choices Framework.
The Drowning Prevention Action Plan includes a commitment to establish and build a
capacity for delivering and maintaining a sustainable Water Smart® Program in each
community of the Northwest Territories. Drowning research has clearly demonstrated
that drowning can be predicted and prevented. The WS Program is a key step in the
prevention of water related injuries.
The WS Program focuses on using standardized messaging to build awareness and
provide educational opportunities to members of your community who live, work or
play in, on or around water and ice. Standardized messaging from the WS Program
provides a framework for Water Smart education that may be implemented within
existing or new initiatives.
Topics of focus include promoting behavioral change for safe boating, wearing of
lifejackets, learning Swim to Survive® skills, and establishing safe waterfronts. The
WS Program uses storytelling and experience sharing by community members and
elders for topics which may include traditional knowledge or activities.
vLIFESAVING SOCIETY NORTHWEST TERRITORIES WATER SMART PROGRAM
How to Use This GuideThe Northwest Territories Water Smart Program Guide consists of topic specific modules. Leaders review modules and choose which are to be delivered based on the focus and needs of the education and training taking place. Leaders may be any community member (champion) who wishes to participate in offering education in their community. Formal instructor certification is not a requirement. Educational events (community activations) may be as simple as targeted messaging using posters or rack cards to wet and active water sessions with participants.
Once module(s) have been chosen, leaders should plan the WS Program and make sure that there is an appropriate location for delivery and that all required materials/resources are available. WS Program activities can be delivered year round at both indoor and outdoor locations.
Each module will provide leaders with the purpose of the module, recommended delivery time and sample activities to meet the purpose of the module. Each activity may reference resources found in the Lifesaving Society Water Smart Toolkit (USB key).
The leader should be familiar with the module and content prior to presenting it to the participants. When delivering a WS Program, safety and supervision of all participants is required. Leaders should have a safety plan in place.
Anyone can participate in the activities and sessions. However, it is important to be aware of participant swimming ability when in-water activities take place. Leaders are responsible for creating a safe learning environment. It is important that you can always see participants while teaching, especially while participants are in the water.
Resources
Please refer to the Water Smart® Toolkit key for more information and public
education materials. If you would like to order safety materials such as rack cards,
posters, banners or brochures to be given out to members of your community,
please contact the Lifesaving Society at 780-415-1755 or go to www.lifesaving.org.
Please feel free to contact us with any questions, concerns or feedback.

1LIFESAVING SOCIETY NORTHWEST TERRITORIES WATER SMART PROGRAM
At-a-Glance
Items
Notes
The Northwest Territories Water Smart Program is intended to assist community leaders to share knowledge about drowning and water related injury prevention. Participants will then adapt safe behaviors while participating in activities that take place in, on or around water and ice.
Northwest Territories Water Smart Program
• Leaders are encouraged to be familiar with the module content before presenting it to participants.
• The leader may present the material in a classroom setting, outside, at a swimming pool, a local waterfront or anywhere that is convenient for the leader and participants.
• The leader can use the modules as guidelines and create their own activities.
• The leader can print off material from the Water Smart Toolkit and hand out to participants.
Water Smart ExperienceSharing Knowledge and Experience of Traditional Activities
Share experiences and beliefs about water and traditional activities that take place in, on or around water through storytelling. Participants will share their beliefs, experiences and stories about being safe around water.
Lifejacket Safety
Participants will share experiences using lifejackets. Participant’s experiences and beliefs will be used to support learning to put on a lifejacket and understanding why it is important to wear a lifejacket that fits properly.
Ice Safety
Participants will share experiences and beliefs about ice. Participant’s experiences and beliefs will be used to reinforce when it’s safe to participate in activities on ice and what to do in an emergency.
Boating Safety
Participants will share boating experiences for motorized boats, canoes and kayaks. Participant’s beliefs and experiences will be used to reinforce safe boating behaviour and build an understanding of what equipment is required for safe boating in motorized boats, canoes and kayaks.
Waterfront and Boat Launch Safety
Participants share experiences with waterfronts. Participant’s experiences and beliefs will be used to support identification of waterfront hazards, setting up a safe swim area and identifying a safe boat launch.
Swim to Survive®
Participants will learn the essential skills needed to survive an unexpected fall into deep water. This is an important first step to being safe around water. The physical literacy skills learned in Swim to Survive will support lifelong participation in daily living and recreational activity in, on or around water.

Purpose
2LIFESAVING SOCIETY NORTHWEST TERRITORIES WATER SMART PROGRAM
References:Lifejacket Fitting Video (Video file of the NWT Water Smart Program Folder).
NWT Waterfront Safety Guide (NWT Water Smart Program folder).
Caregiver Supervision brochure (NWT Water Smart Program folder).
Activities
Notes
• This session is approximately 1 hour long but you may take longer if needed.
• If available have a guest speaker share their beliefs and experiences about traditional activities that take place around water or ice including hunting, fishing and transportation. If a guest speaker is not available have a group discussion with participants.
Activity #1: Guest Speaker
Ask a guest speaker such as a parent, elder, or teacher to share their knowledge and
experiences with traditional activities that take place in, on or around water.
Allow time for participants to ask questions. The sample questions below can be used to
promote discussion. Have the guest speaker and participants respond.
• Do you know how to swim?
○ How did you learn to swim?
○ Do you wish you had learned to swim?
• What is your fondest memory of traditional activities around the water?
• Have you have a bad experience with water?
○ What happened?
• Do you know someone who drowned or was injured in, on or around water or ice?
• Why is water safety important to you/the community?
• Why is water safety important for participation in traditional activities?
• How do you stay safe when participating in traditional activities in, on or around
water and ice?
• Do you wear a lifejacket?
○ Why?
○ Why not?
Activity #2: Group Discussion
There are many traditional activities that involve water. Some of these activities may include
fishing, daily living, recreation, travel, boating, hunting and canoeing. Use the following
questions to guide your discussion.
1. Ask participants if they can think of any other traditional activities that take place in,
on or around water that have not been named above.
Share experiences and beliefs about water and traditional activities that take place in, on and around water through storytelling. Participants will share their beliefs, experiences and stories about being safe around water.
Sharing Knowledge and Experience of Traditional Activities
| Module 1

ItemsNotes
3LIFESAVING SOCIETY NORTHWEST TERRITORIES WATER SMART PROGRAM
| Module 1
Sharing Knowledge and Experience of Traditional Activities
2. Why is it important to be safe when travelling, living or playing near the water?
○ To prevent getting hurt or drowning.
3. Have any of the participants experienced the tragedy of knowing someone who has
drowned?
4. What can you do to be safe while participating in activities in, on or around the water?
○ There are many ways that you can be safe while participating in activities in, on or
around water. Some of these include:
� Wearing a proper-fitting lifejacket while boating, kayaking or canoeing. (See
references)
� Checking the weather conditions before participating in water or ice related
activities.
� Weak or non-swimmers should wear a lifejacket while swimming.
� Check the waters current and depth before going swimming in lakes or rivers (See
references).
� Bring a buddy or adult supervisor while participating in activities in, on and around
water (See references – Caregiver Brochure).
� Know how to call for and get help in the case of an emergency.

Purpose
References:
4LIFESAVING SOCIETY NORTHWEST TERRITORIES WATER SMART PROGRAM
Activities
Notes
• This session is approximately 1 hour long but you may take longer if needed. This session can be done as a wet or dry session. If dry Activity 3 will not be done.
• Leaders should have an additional aid that may be passed to or reached out to participants needing assistance while completing water activities. Possible aids include: lifejackets, paddles, ropes.
• Have lifejackets in a variety of sizes available for this session.
• Lifejackets should be approved by Transport Canada, Canadian Coast Guard or Fisheries and Oceans Canada.
Activity #1: Choose it. Use it.
Discuss why it is important to wear a lifejacket and who should wear them. Answers should
include:
• It is important to wear a lifejacket to be safe and stay on top of the water.
• Anybody who is not a strong swimmer who is in, on or near water. Everybody in a
boat (motorized and non-motorized).
Activity #2: Finding the Right Lifejacket for You – Dry Activity
Lifejackets only work if they fit properly and are worn correctly. Refer to the “Lifejacket Fitting
Video” and “Lifejacket Safety Tips” video located in the Lifejacket Safety Folder.
Note: If equipment to show the video is not available during the presentation leaders should
demonstrate how to pick a lifejacket that fits and put it on correctly.
Perform the following steps to make sure your lifejacket fits you correctly.
1. Find a lifejacket that fits your size and weight. The size of the lifejacket and weight
restrictions can be found on the tag located inside the lifejacket.
2. Put the lifejacket on.
3. Zip up the zipper and tighten the straps of the lifejacket so that it fits you snugly.
4. If the lifejacket fits you properly, the top of it will be at or under your chin.
5. If the lifejacket is too big, it will ride past your chin. If this happens, you need to put
on a smaller lifejacket and repeat steps 3 and 4.
6. Test that the lifejacket is comfortable and sits correctly, top stays at or below chin
while in the water. Use another flotation device and adult for supervision.
7. If the lifejacket is comfortable and does not ride up past your chin, then your lifejacket
fits you correctly. If the lifejacket is not comfortable or rides up past your chin you will
need to repeat steps 1-6.
Participants will share experiences using lifejackets. Participant’s experiences and beliefs will be used to support learning to put on a lifejacket and understanding why it is important to wear a lifejacket that fits properly.
Lifejacket Safety | Module 2
Lifejacket Safety folder in the Water Smart® Toolkit
Lifejacket Fitting Video and “Lifejacket Safety Tips” video (Water Smart® Toolkit – Lifejacket Safety Folder).
Lifejacket Safety Flash Card (Water Smart® Toolkit).

ItemsNotes
5LIFESAVING SOCIETY NORTHWEST TERRITORIES WATER SMART PROGRAM
Notes
Lifejacket Safety | Module 2
=Participant
=Leader
Activity #3: Non-Fitting Lifejackets – Wet Activity.
Experience the difference between a lifejacket that fits and one that doesn’t (See references).
• The leader should have a lifejacket on if doing activity by the water.
• Participants will choose and put on lifejackets, from a pile, until they find one that
fits.
When participants find a lifejacket that fits, have them get the water to see how it feels. Do
they feel secure? Do they feel safe?
Next, have them try on a lifejacket that does not fit and get into the water. During this time,
the leader must be within arm’s reach of weak or non-swimmers.
• Participants should experience lifejackets that are too big and too small if possible.
Ask the participants how it feels to swim with a lifejacket that does not fit. Do they feel safe?
Talk about the difference of how it feels to wear a lifejacket that does and does not fit.
Group Arrangement for Activity #3

Purpose
References:
6LIFESAVING SOCIETY NORTHWEST TERRITORIES WATER SMART PROGRAM
Activities
Notes
• This session is approximately 1 hour long but you may take longer if needed.
• Reaching aids could include: ladders, paddles, towels, tree branches, etc.
• Throwing aids with a line could include: ropes, lifejackets attached to rope, throw bags, etc.
Activity #1: Group Discussion
As a group the following questions and answers about the importance of being safe while on
ice.
• At what thickness is it safe to go on the ice?
○ It is safe to go on the ice if it is at least 4 inches or 10 cm deep.
• What types of activities do you or the people in your community participate in that
take place on ice?
○ There could be a variety of answers including ice fishing, playing hockey and
snowmobiling.
• Why is it important to be safe when participating in activities on or around ice? What
are some ways to be safe around ice?
○ It is important to be safe when participating in activities on or around ice to
prevent a fall into the ice. You can be safe on or around ice by measuring the
depth of ice the ice before going on to it (See references), avoid slushy ice or ice
that in near moving water and evaluate the ice before you go onto it.
Activity #2: Watch Ice Safety Video
Watch the Cold Water Survival video located in the Ice Safety folder of the Water Smart Toolkit.
Note: If equipment to show the video is not available during the presentation leaders should
lead a discussion presenting the information from the video to participants.
Participants will share experiences and beliefs about ice. Participant’s experiences and beliefs
will be used to reinforce when it’s safe to participate in activities on ice and what to do in an
emergency.
Ice Safety| Module 3
Cold Water Survival video (Cold Water and Ice Safety folder of the Water Smart Toolkit).
Ice Thickness Card Flash Card (Cold Water & Ice Safety folder of the Water Smart Toolkit).
Ice Safety Flash Card (Water Smart Toolkit).

ItemsNotes
7LIFESAVING SOCIETY NORTHWEST TERRITORIES WATER SMART PROGRAM
Notes
Activity #3: Ice Self Rescue
The leader will demonstrate the steps to perform a self-rescue after falling through ice.
Participants then practice self-rescue skills.
Ice Rescue Steps:
1. Call for help.
2. Have anyone on or near the weak ice slowly lay down.
3. Kick and slowly ease your way out of the water towards land.
4. Once out of the water crawl or roll away from the broken ice.
5. If a rescuer arrives, they should use a long reaching aid, like a rope, stick or ladder to
give the person who has fallen through the ice to grab on to.
6. Get dry and warm. Get into dry clothes and use a blanket to help warm up.
Activity #4: Ice Rescue
The leader will demonstrate the steps to perform an ice rescue. Participants then practice
performing ice rescues on land, in the water or both (See references).
On Land:
Have the group split into partners of two; one set of partners line up on one side, lying on their
stomachs (victims); the other set of partners will stand in line 15 feet away from their partner
(rescuer).
1. The rescuer will throw an aid attached to a line or reach out with a reaching aid to
the victim.
2. Once the aid is grabbed by the victim, the victim will crawl on their stomachs to the
rescuer using the aid to assist them.
3. Rescuers should lie down while the victim is using the aid to get out of the water to
prevent them from being pulled off balance or into the water.
Have participants switch roles and repeat the rescue.
Ice Safety | Module 3

ItemsNotes
8LIFESAVING SOCIETY NORTHWEST TERRITORIES WATER SMART PROGRAM
| Module 3
Ice Safety
In Water:
Have the group split into partners.
One partner will go waist deep into the water (victim). The other will stay out of the water
(rescuer).
1. The rescuer stands at the edge of the water with a throwing aid attached to a line or
with a reaching aid.
2. The rescuer will throw or reach their aid out to the victim.
3. Once the victim grabs the aid, the rescuer should lie down and pull them in.
Group Arrangement for Activity #3.

Purpose
9LIFESAVING SOCIETY NORTHWEST TERRITORIES WATER SMART PROGRAM
References:Pleasure Craft Operators Card video (BOAT folder in the Water Smart Toolkit).
Safe Boating Checklist (Water Smart Toolkit).
Float Plan video (BOAT folder in the Water Smart Toolkit).
Video file (Boat Safety folder of the Water smart Toolkit).
Activities
Notes
• This session is approximately 30 minutes long but you may take longer if needed.
• As per the Competency of Operators or Pleasure Craft Regulations proof of competency (E.g. PCO Card) is not required in the waters of Northwest Territories. The Society recommends that all boaters complete a boating safety course which may include earning a PCO card.
• Motorized boats must not be used for the swamped boat activity because of the risk of a fuel spill.
• In motorized boats the weight of the motor must be accounted for when evaluating remaining load capacity.
Activity #1: Group Discussion
As a group, discuss the following questions about safe boating.
• What are some reasons why people use boats in your community (motorized, canoe
or kayak)?
○ There may be a variety of answers including fishing, hunting, transportation or for
leisure/spiritual purposes.
• What is your fondest memory while boating (motorized, canoe or kayak)?
• How can you prepare for safe boating?
○ Always have a plan, take a boating safety course before operating a boat, prepare
your boat with safety equipment before you leave and go through the boating
checklist to make sure you have everything that you need to have a safe boating
experience.
• Who is responsible for safety in a boat?
○ The person operating a boat is responsible for passenger safety. Passengers in a
boat should contribute to the safe boating experience.
• How can you make your boat easier to handle and prevent it from tipping?
○ You can make sure your boat is easier to handle and prevent your boat from being
unstable by doing the following:
� Avoid over-packing the boat by bringing only essential items.
� Secure heavier items in the middle of the boat and as low as possible.
� Keep the load within the boat’s rated capacity. All boats should have an
information plate containing information such as capacity.
Participants will share boating experiences for motorized boats, canoes and kayaks. Participant’s
beliefs and experiences will be used to reinforce safe boating behaviour and build an
understanding of what equipment is required for safe boating in motorized boats, canoes and
kayaks.
Boating Safety| Module 4

ItemsNotes
10LIFESAVING SOCIETY NORTHWEST TERRITORIES WATER SMART PROGRAM
| Module 4
Boating Safety
Activity #2: Boating Checklist
What should you do to prepare for and what should you bring when going boating (motorized,
canoe or kayak)?
• The following checklist provides a list of things that should be done before going
boating and of items that should be brought with you. Can you think of anything
else?
Boating Checklist: (See references)
• Before Leaving:
○ Take a boating safety course
○ Check the weather conditions
○ Check water conditions
○ Plan your route
○ Complete a float plan
○ Tell someone where you are going and what time you plan to be back. Give this
person a copy of your float plan
• Equipment to Bring:
○ First aid kit
○ Buoyant heaving line
○ Bailing bucket (should be attached to boat)
○ Oars or paddles (even in a motorized boat)
○ Whistle
○ Flashlight
○ Lifejacket for each person to put on before getting into the boat.
○ Throw rope
○ Fire extinguisher (if boat is motorized)
○ Extra fuel (if boat is motorized)
○ Fresh drinking water
○ Warm clothing
ItemsNotes
11LIFESAVING SOCIETY NORTHWEST TERRITORIES WATER SMART PROGRAM
Notes
Boating Safety | Module 4
○ Compass
• Optional Items
○ Small water-proof bag to carry items that you do not want to get wet.
○ SPOT GPS locator or other means of emergency communications
Activity #3: Emergency Situations
Participants will discuss what to do if an emergency situation occurs while boating.
Falling into Cold Water
If you experience a fall into cold water, follow these steps to save energy and prevent
hypothermia.
1. Make sure you wear your lifejacket at all times while boating.
2. Call for help.
3. Get yourself out of the water as soon as possible by either getting back into the boat
or crawl onto a safe floating object.
4. If you are unable to get out of the water, float on your back and bend your knees up
to your chest and wrap your arms around your knees to save energy and body heat. If
there is a group of people who have fallen into the water, huddle together to increase
your body temperature.
Swamped Boat
If your boat takes on water and becomes swamped follow these steps to remove water from
your boat.
1. Use the bailing bucket to calmly scoop water out of the boat.
2. Locate the source of the water in the boat.
3. If there is a leak in the boat or the boat is overloaded and too low in the water return
to shore.
For the activity, you will need access to:
• Two canoes, kayaks or other non-motorized water craft
• Bailing buckets

ItemsNotes
12LIFESAVING SOCIETY NORTHWEST TERRITORIES WATER SMART PROGRAM
• A swimming pool or waterfront
Bail out race.
Leader set-up for the activity:
1. Set the canoe/kayak in shallow water
2. Fill the canoe/kayak up with water
3. Divide the participants into two groups
4. Give each participant a bailing bucket
5. When the leader says “Go”, the two teams will race each other to bail the water out
of their canoe the fastest.
Fire on Board (Motorized boats)
Fires can start on boats if fuel is spilled on the boat or if the motor overheats. Knowing what to
do during a fire emergency while on a boat is important to your safety and the safety of other
passengers. Follow these steps in case of a fire emergency while boating.
1. Make sure that everyone is wearing a lifejacket.
2. Turn off the boats engine.
3. Remove the safety pin from the fire extinguisher and point it at the base of the fire.
4. Squeeze the handle and aim the fire extinguisher at the fire until it is completely out.
5. If the motor was what caught fire, use the oars to paddle to safety.
Activity #4: Canoe & Kayak Safety
Participants will watch the Canoe/Kayaking Videos in the Water Smart Toolkit which contain
additional information specific to canoe and kayak safety.
Get access to a computer, television, laptop, tablet or other device and watch the Float Plan,
Packing a Canoe and Righting a Canoe videos located in the Boat Safety folder of the Water
Smart Toolkit.
Note: If equipment to show the videos is not available during the presentation leaders should
lead a discussion presenting the information from the videos to participants.
| Module 4
Boat Safety

Purpose
13LIFESAVING SOCIETY NORTHWEST TERRITORIES WATER SMART PROGRAM
References: Waterfront Safety Guide
Activities
Notes
• This session is approximately 1 hour long but you may take longer if needed
• Leader will need to have equipment ready ahead of time before the group does an activity.
Activity #1: Group Discussion
As a group, discuss the following questions about safe waterfront and boat launches.
• What personal experiences have you had with waterfronts?
○ In your community?
○ In other communities?
• What are the different types of waterfronts?
○ Identifying your waterfront and establishing its purpose is the first step in creating
a safer waterfront for your community. There are three main types of waterfronts.
� River- A river is moving water that flows in a channel, constantly changing
due to weather or seasonal temperatures. Rivers can change the landscape, by
eroding the soil and rocks along the riverbed.
� Lake- A lake is a relatively large body of fresh water that can vary in depths.
Strong winds can cause currents and small shore waves.
� Ocean- An ocean is a large body of salt water that surrounds the coastline.
Oceans have currents, waves, and tides. Because the tides come in and go out,
the shoreline also changes.
• What are some hazards that are located at waterfronts?
○ Many things can affect the safety of a waterfront. Identifying and controlling
hazards can improve the safety of your waterfront. Conditions can change so it is
important to assess for hazards every time you visit the waterfront. Some Hazards
that are located at waterfronts include:
� Cold Water- 21C° is considered cold water, which can put you at risk for
hypothermia.
� Underwater Objects- Remember to use an appropriate feet first entry when
entering water.
Participants share experiences with waterfronts. Participant’s experiences and beliefs will be used to support identification of waterfront hazards, setting up a safe swim area and identifying a safe boat launch.
Waterfront & Boat Launch Safety
| Module 5
ItemsNotes
14LIFESAVING SOCIETY NORTHWEST TERRITORIES WATER SMART PROGRAM
Notes
� Varying depths and sudden drop offs- Always check the water depth and
identify the location of drop offs.
� Currents- Be aware of currents.
� Waves- Waves can change with the weather.
� Changing Tides- Be aware of the shoreline as it changes.
� Rapids and Waterfalls- Avoid swimming in rapids and near water falls, clearly
mark where swimming is not allowed.
• What types of signs are required at waterfronts and boat launches?
○ There are two types of signs that should be posted at waterfronts and boat
launches:
� Primary Signage - These types of signs contain general warnings and should
be located in an area that allows the best opportunity to capture the attention
of community members before they enter the waterfront area.
� Secondary Signage- These types of signs contain more specific information
pertaining to an area of the waterfront. Secondary signage should be located
near the area of concern, and should include symbols and graphics to
overcome language and comprehension barriers. Secondary signage may be
used to reinforce primary signage.
Activity #2: Waterfront Activity
The leader and participants will go to their local river, lake, ocean (or other body of water) and
help set-up a safe swimming area.
Equipment Needed for Activity #2:
• Rope
• Empty plastic bottles (to be the buoys)
• Stick (3-5 feet long)
• No Swimming Signs, No Diving Signs, No Motor Boats Signs, and other.
| Module 5
Waterfront & Boat Launch Safety

ItemsNotes
15LIFESAVING SOCIETY NORTHWEST TERRITORIES WATER SMART PROGRAM
Notes
Steps to setting up a safe swim area:
1. Gather the required equipment and lead the group of participants to a local
Waterfront.
2. Use the hazard list from Activity #2 and identify any hazards at the waterfront.
3. Using the equipment, set up a safe swimming area that decreases the hazards that
the participants identified. This includes posting signs and setting up a safe swim
area with buoys.
For more information on how to set up a safe waterfront and boat launch refer to the
Waterfront Safety Guide located in the NWT Water Smart Program folder of the Water Smart
Toolkit.)
| Module 5
Waterfront & Boat Launch Safety

16LIFESAVING SOCIETY NORTHWEST TERRITORIES WATER SMART PROGRAM
At-a-Glance
Items
Notes
• Swim to Survive takes about 3.25 hours to complete but you may take longer if needed.
• Swim to Survive sessions do not have all to be completed on the same day.
• The leader must have all the equipment prepared before participants do an activity.
• Always make sure to be safe when you are teaching the participants on land and in the water. It is important that you can always see participants while you are teaching on land and in the water.
Swim to Survive
Participants will learn three essential swim skills needed to survive an unexpected fall into
deep water.
1. Roll into water
2. Tread water for one minute
3. Swim 50 metres
4. Do all 3 skills together
Sessions
1. Participants will learn about the Swim to Survive program and complete skill screening.
2. Participants will learn to get their head above the surface and orient themselves after an
unexpected fall into deep water.
3. Participants will learn to support themselves at the surface for 1 minute, by any means.
4. Participants will be able to swim to a point of safety after a fall into water.
5. Participants will complete the Swim to Survive Standard by performing a roll into deep
water, treading water for 1 minute and swimming 50 metres in sequence.
Participants will learn the essential skills needed to survive an unexpected fall into deep water. This is an important first step to being safe around water. The physical literacy skills learned in Swim to Survive will support lifelong participation in daily living and recreational activity in, on and around water.

Purpose
Items
Notes
References:
17LIFESAVING SOCIETY NORTHWEST TERRITORIES WATER SMART PROGRAM
Teaching Swim to Survive
Leaders will understand safety information and strategies for success while teaching Swim to Survive.
Being safe while teaching skills
Participant safety is important. Participants in the Swim to Survive® Program may be non-
swimmers or swimmers with minimal skill. Leaders must never leave participants unattended.
When teaching a skill, leaders must introduce participants to skills on land, then move into
shallow water and only introduce participants to deep water if they are in a lifejacket or if they
are strong swimmers.
For participant safety it is recommended that Swim to Survive sessions are completed in
numerical order. This progression of skill development will allow leaders to identify participants
who will require assistance (e.g. lifejacket or direct support) to complete the activities safely.
Strategies for being safe
The following points are strategies for safe and successful lessons:
• Keep the participants active. The cause of many behaviour problems is boredom.
• Keep yourself close to those participants who might misbehave. They are more likely
to behave when they know you are there.
• Participants should know what they are expected to do and what the consequences
are if expectations are not followed.
• Give the participants choices to what they will do when possible.
• You can change, add or subtract activities to fit the needs of the participants in your
group. Do activities that your participants will enjoy.

Purpose
18LIFESAVING SOCIETY NORTHWEST TERRITORIES WATER SMART PROGRAM
References:Swim to the Survive video (Swim to Survive Program folder of the Water Smart Toolkit).
Swim to Survive Slide Show (Swim to Survive Program folder of the Water Smart Toolkit).
Screening Flash Card (Swim to Survive Program folder of the Water Smart Toolkit).
Activities
Notes
• This session is approximately 30 minutes long but you may take longer if needed
• Leaders will be in the water with an aid during this session.
• Rolls should be practiced on land before attempting them in the water. Activity #1: Video
Participants will watch the Swim to Survive video located in the Swim to Survive Program
folder of the Water Smart Toolkit.
Note: If equipment to watch the video is not available leaders should demonstrate the Swim to
Survive standard to participants.
Activity #2: Slide Show
The leader will go through the Swim to Survive slide show that is located in the Swim to
Survive Program file of the Swim to Survive folder in the Water Smart Toolkit. This slide show
will teach that participants about the Swim to Survive program.
Note: If equipment to present the slide show is not available leaders should discuss the Swim
to Survive program with participants.
Activity #3: Group Discussion
As a group discuss the following terms and questions.
• Non-swimmer:
○ A non-swimmer is someone who has little or no swimming skill. They may be
quite afraid of the water and be hesitant to go in the water. Some non-swimmers
are quite unaware of the dangers, and be willing to try something that is well
beyond their skill level.
• Weak Swimmer:
○ A weak swimmer is someone who has limited swimming skills and may be self-
taught. Some may be cautious in their approach to learning something new,
especially in deep water. Others will lack confidence which will improve as their
skill level increases.
Participants will learn about the Swim to Survive program and complete skill screening.
Screening| Session 1
ItemsNotes
19LIFESAVING SOCIETY NORTHWEST TERRITORIES WATER SMART PROGRAM
• Swimmer:
○ A swimmer is someone whose skills range from a basic ability to being able to
swim a recognizable stroke. These individuals may or may not be comfortable
trying something new in the water. Some may be over-confident and willing to
take greater risks beyond their skill.
• Who has had swimming lessons before?
• Who likes to swim in the deep water?
• Who can swim for a long distance?
Activity #4: Screening Activity:
The leader will divide participants into groups based on their responses to the questions in
Activity #2. The leader will then determine if the participant is a non-swimmer, weak swimmer
or swimmer. (See references)
1. Divide the group based on their responses to the questions asked in Activity #2:
○ Non-swimmer: May not have had lessons, will not like deep water, and may be
able to propel themselves up to 5 meters.
○ Weak Swimmer: May not have had lessons, may like deep water, and may be able
to swim up to 10 metres.
○ Swimmer: Probably has had lessons, is somewhat comfortable in deep water, and
will be able to swim at least 15 meters.
2. Have the groups go one at a time and do the following activity for their appropriate
swimming ability.
○ Non-swimmer: Have students show you what they can do in shallow water.
○ Weak Swimmer: Have students show you how they would swim 10-25 metres in
shallow water. With their PFD on, get into deep water - do floats and treading
water.
○ Swimmer: Leader demonstrates the Swim to Survive standard. Have the
participants do part or the entire standard with their PFD on and then without a
PFD.
| Session 1
Screening
Purpose
20LIFESAVING SOCIETY NORTHWEST TERRITORIES WATER SMART PROGRAM
References:
Swim to Survive Activity Guide (Swim to Survive folder of the Water Smart Toolkit).
Roll flash card (Flash Card file of the Swim to Survive folder in the Water Smart Toolkit).
Activities
Notes
• This session is approximately 30 minutes long but you may take longer if needed
• Leaders will be in the water with an aid during this module.
• Rolls should be practiced on land before attempting them in the water.
• In water that is less than 2.5 m deep somersaults or log rolls done completely in the water will be substituted for participant safety.
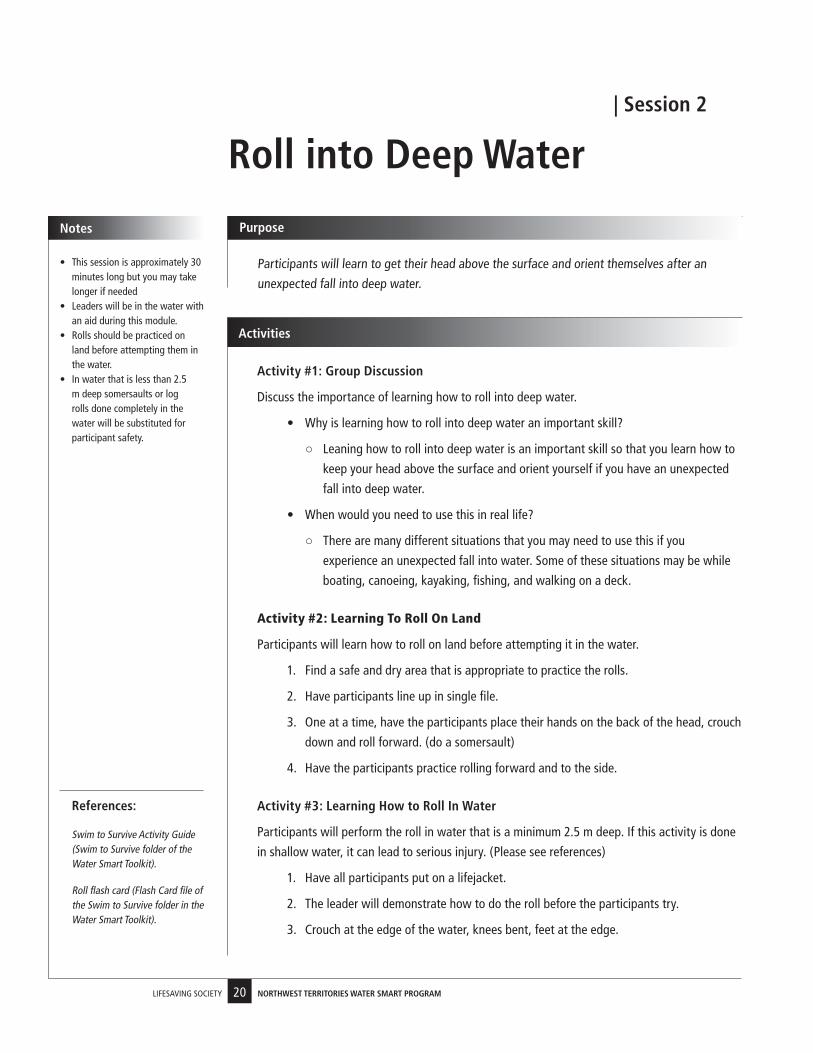
Activity #1: Group Discussion
Discuss the importance of learning how to roll into deep water.
• Why is learning how to roll into deep water an important skill?
○ Leaning how to roll into deep water is an important skill so that you learn how to
keep your head above the surface and orient yourself if you have an unexpected
fall into deep water.
• When would you need to use this in real life?
○ There are many different situations that you may need to use this if you
experience an unexpected fall into water. Some of these situations may be while
boating, canoeing, kayaking, fishing, and walking on a deck.
Activity #2: Learning To Roll On Land
Participants will learn how to roll on land before attempting it in the water.
1. Find a safe and dry area that is appropriate to practice the rolls.
2. Have participants line up in single file.
3. One at a time, have the participants place their hands on the back of the head, crouch
down and roll forward. (do a somersault)
4. Have the participants practice rolling forward and to the side.
Activity #3: Learning How to Roll In Water
Participants will perform the roll in water that is a minimum 2.5 m deep. If this activity is done
in shallow water, it can lead to serious injury. (Please see references)
1. Have all participants put on a lifejacket.
2. The leader will demonstrate how to do the roll before the participants try.
3. Crouch at the edge of the water, knees bent, feet at the edge.
Participants will learn to get their head above the surface and orient themselves after an
unexpected fall into deep water.
Roll into Deep Water| Session 2

ItemsNotes
21LIFESAVING SOCIETY NORTHWEST TERRITORIES WATER SMART PROGRAM
4. Cover back of head with hands, tuck chin to chest, with elbows close to body.
5. Take a deep breath and hold.
6. Roll out and away from the edge into the water.
7. Surface, lift head to take a breath, return to edge.
8. When swimmers are comfortable in deep water, attempt the entry without PFDs.
Group Arrangement for Activity #3
| Session 2
Roll into Deep Water

Purpose
22LIFESAVING SOCIETY NORTHWEST TERRITORIES WATER SMART PROGRAM
References:
Swim to Survive Activity Guide (Swim to Survive folder of the Water Smart Toolkit).
Surface Support flash card (Flash card file of the Swim to Survive folder of the Water Smart Toolkit).
Activities
Notes
• This session is approximately 45 minutes long but you may take longer if needed
• Leaders will be in the water with an aid during this module.
Participants will learn to support themselves at the surface for 1 minute, by any means.
Tread Water | Session 3
Activity #1: Group Discussion
As a group, discuss the importance of learning how to do a surface support.
• Why is it important to learn how to do a surface support?
○ It is important to learn how to do a surface support so that you are able to tread
water if you have an unexpected fall into deep water. Treading water is a survival
skill that allows the swimmer to keep their mouth and nose above the surface
while gaining control of their breathing and looking for the nearest point of safety.
Activity #2: Leader Demonstration
The Leader will demonstrate how to do a surface support on dry land.
1. Using a broad, flat sculling action - sweep hands and arms back and just below
the surface, the hands are at a slight angle and slightly cupped. The continuous
downward pressure of this sculling action provides lift to support the body at the
surface.
2. For kicking action, position body as if sitting in a chair, experiment to see what kick
works the best.
3. Have the participants sit in a chair and practice the arm motion and kicking motion
until they are comfortable with the movement. (See references)
Activity #3: Participants Practice Treading Water
Participants will practice the surface support in the water. First with a lifejacket, then
depending on the participants swimming ability and comfort level, they will attempt a surface
support for 1 minute without a lifejacket.
1. Have participants put on lifejackets.
2. Enter shallow water first and then move into deep water.
3. Use a broad, flat sculling action - sweep hands and arms back and forth just below

ItemsNotes
23LIFESAVING SOCIETY NORTHWEST TERRITORIES WATER SMART PROGRAM
the surface; the hands are at a slight angle and slightly cupped.
4. Have participants experiment with which kicking motion work best for them. This skill
should be completed in water deep enough that participants feet are not touching the
bottom while in the sitting position.
5. Once participants are comfortable, have them attempt without a lifejacket.
Activity #4: How Long Can You Tread Water?
Participants will be challenged to tread water for longer than 1 minute. Set a time limit of 2-5
minutes
• Non-swimmer: Have them do this activity using any means of support with PFDs on.
• Weak Swimmer: Have them do this activity using any means of support with or
without PFDs.
• Swimmer: Have them do this activity using arms or legs, with or without PFDs for 3-5
minutes.
| Session 3
Tread Water
Group Arrangement for Activities #3 and #4.

Purpose
24LIFESAVING SOCIETY NORTHWEST TERRITORIES WATER SMART PROGRAM
References:
•Swimflashcard(FlashCardfileof the Swim to Survive folder in the Water Smart Toolkit).
Swim to Survive Activity Guide (Swim to Survive folder of the Water smart Toolkit).
Activities
Notes
• This session is approximately 45 minutes long but you may take longer if needed
• Leaders will be in the water with an aid during this module
Activity #1: Group Discussion
As a group discuss the following questions about the skill of swimming 50 m.
• Why do you think it is important to learn how to swim 50 m?
○ It is important to learn how to swim 50 m to be able to swim to a point of safety if
you have an unexpected fall into water.
• What is your favorite way to swim?
• Do you have a favorite stroke?
Activity #2: 50 Metre Swim
Participants will practice swimming 50 metres. Always practice a new skill in shallow water or
in PFDs before moving to deeper water. (See references)
Weak or non-swimmers will need time to explore swimming skills and using their lifejacket
before attempting to swim in deep water.
Plan safety routines that keep students from bumping into each other.
Always let the student decide when they want to remove the PFD to attempt the swim without
it.
1. Participants put on PFDs.
2. Enter waist-deep water.
3. Encourage students to put their face in water, practicing breath holding and
controlled exhalation.
4. Move to submerging the face and/or body and opening the eyes underwater.
5. Attempt floats on front and/or back.
6. Try streamlined glides with kicking on front or back using any form of kick (flutter,
whip, scissor).
Participants will be able to swim to a point of safety after a fall into water.
Swim 50 Metres| Session 4

ItemsNotes
25LIFESAVING SOCIETY NORTHWEST TERRITORIES WATER SMART PROGRAM
7. Next try propelling themselves forward using any arm stroke. Arms may recover
below the surface (e.g., sidestroke, dog paddle, breaststroke) or above the surface
(e.g., front crawl, back crawl).
8. Add breathing using a regular pattern (stress blowing out underwater with mouth
and/or nose).
9. When ready, encourage the student to try without a PFD.
| Session 4
Swim 50 Metres

Purpose
26LIFESAVING SOCIETY NORTHWEST TERRITORIES WATER SMART PROGRAM
References:
Swim to Survive Activity Guide
Swim to Survive Certificate (Swim to Survive Program file of the Swim to Survive folder in the Water Smart Toolkit).
Challenge flash card (Flash Card file of the Swim to Survive folder in the Water Smart Toolkit).
Activities
Notes
• This session is approximately 45 minutes long but you may take longer if needed
• Leaders will be in the water with an aid during this module.
• Print off the Swim to Survive Certificate and give it to the participants. (see references) Activity #1: Swim to Survive Standard
Participants will attempt to achieve the Swim to Survive standard by completing the roll into
deep water, tread water for 1 minute and then swim 50 metres in a sequence.
• Non-swimmer: Attempts the standard with their PFD on.
• Weak Swimmer: Attempts the standard with or without their PFD on.
• Swimmer: Attempts the standard without their PFD on.
Activity #2: Swim to Survive Relay
Have students participate in a relay race that involves elements of the Swim to Survive skill
sequence.
• Non-swimmer: Does part of the Swim to Survive skill sequence with their PFD on.
• Weak Swimmer: Does part of the Swim to Survive skill sequence with or without their
PFD on.
• Swimmer: Does part of the Swim to Survive skill sequence without their PFD on.
Activity #3: Obstacle Course
Create an obstacle course that involves elements of the Swim to Survive skill sequence. You can
include a mix of skills that add a fitness or fun factor to the obstacle course.
• Non-swimmer: Does the Swim to Survive skill sequence with their PFD on.
• Weak Swimmer: Does the Swim to Survive skill sequence with or without their PFD
on.
• Swimmer: Does the Swim to Survive skill sequence without their PFD on.
Participants will complete the Swim to Survive Standard by performing a roll into deep water,
treading water for 1 minute and swimming 50 metres in sequence.
Swim to Survive Standard| Session 5

ItemsNotes
27LIFESAVING SOCIETY NORTHWEST TERRITORIES WATER SMART PROGRAM
Activity #4: Swim to Survive Challenge Item
Try the Canadian Swim to Survive Standard using clothes such as t-shirts, shorts, long sleeve
shirts or pants - avoid jeans and sweat shirts unless the individual is capable of handling a
challenge as they are the hardest to swim in. Variations: do any part or combinations of the
three skills of the whole Standard.
• Non-swimmer: Attempts the standard with their PFD on.
• Weak Swimmer: Attempts the standard with or without their PFD on.
• Swimmer: Attempts the standard without their PFD on.
Everyone Gets Recognized
In Swim to Survive everyone gets rewarded for their participation. With the Swim to Survive
certificate, each student’s efforts are recognized whether they achieved the Canadian Swim to
Survive Standard, performed the Standard while wearing a lifejacket, or had simply practiced
these lifesaving skills. (See references)
Swim to Survive Standard| Session 5

Publications of the Lifesaving Society are available from any Branch offi ce. Inquiries from outside Canada should be directed to the National Offi ce.
Alberta and Northwest Territories Branch13123 - 156 Street Edmonton, Alberta T5V 1V2Telephone: (780) 415-1755Fax: (780) 427-9334E-mail: [email protected]: www.lifesaving.org
British Columbia & Yukon Branch112 - 3989 Henning DriveBurnaby, British Columbia V5C 6N5Telephone: (604) 299-5450Fax: (604) 299-5795E-mail: [email protected]: www.lifesaving.bc.ca
Manitoba Branch#100 - 383 Provencher Boulevard Winnipeg, Manitoba R2H 0G9Telephone: (204) 956-2124Fax: (204) 944-8546E-mail: [email protected]: www.lifesaving.mb.ca
National Offi ce287 McArthur AvenueOttawa, Ontario K1L 6P3Telephone: (613) 746-5694Fax: (613) 746-9929E-mail: [email protected]: www.lifesaving.ca
New Brunswick Branch55 Whiting Road, Unit 34Fredericton, New Brunswick E3B 5Y5Telephone: (506) 455-5762Fax: (506) 450-7946E-mail: [email protected]: www.lifesavingnb.ca
Newfoundland & Labrador BranchP.O. Box 8065, Station “A”St. John’s, Newfoundland A1B 3M9Telephone: (709) 576-1953Fax: (709) 738-1475E-mail: [email protected]: www.lifesavingnl.ca
Nova Scotia Branch5516 Spring Garden Road, 4th FloorHalifax, Nova Scotia B3J 1G6Telephone: (902) 425-5450Fax: (902) 425-5606E-mail: [email protected]: www.lifesavingsociety.ns.ca
Ontario Branch400 Consumers RoadToronto, Ontario M2J 1P8Telephone: (416) 490-8844Fax: (416) 490-8766E-mail: [email protected]: www.lifesavingsociety.com
Prince Edward Island BranchP.O. Box 2411Charlottetown, Prince Edward Island C1A 8C1Telephone: (902) 368-7757Fax: (902) 368-1593E-mail: [email protected]: www.lifesavingsocietypei.ca
Quebec Branch4545 Pierre de Coubertin AvenueMontreal, Quebec H1V 0B2Telephone: (514) 252-3100 or 1-800-265-3093Fax: (514) 254-6232E-mail: [email protected]: www.sauvetage.qc.ca
Saskatchewan Branch2224 Smith StreetRegina, Saskatchewan S4P 2P4Telephone: (306) 780-9255Fax: (306) 780-9498E-mail: [email protected]: www.lifesavingsociety.sk.ca
