new individual provider enrollment instructions 12 13 16€¦ · new individual provider enrollment...
TRANSCRIPT

Add TitleNew Individual Home Help
Provider Enrollment Instructions

Checklist
***You must complete the application within 30 days of starting it***
For anyone who wants to become a new Home Help provider:
❑ Have paper and a writing utensil nearby
❑ Create a MILogin user ID and password
❑ Gain access to CHAMPS
❑ Fill out the Provider Enrollment Application
❑ Track your Application
❑ Application Approved
Call the Provider Support Helpline if you need assistance:
1-800-979-4662

Register for MILogin and CHAMPS
MILogin is a website that allows a user to enter one ID and password in order to access multiple applications.
CHAMPS (Community Health Automated Medicaid Processing System) is the program where providers enroll, update enrollment information, and report services performed.

Open your web browser (e.g. Internet Explorer, Google Chrome, Mozilla Firefox, etc.)
Enter https://milogintp.Michigan.gov into the search bar
Click Sign Up

Complete all required fields
Check the ‘I agree’ box
Click Next

Create the user ID and password following the listed guidelines
Select the preferred password recovery method(s)
Click Create Account

Your MILogin account has now been created successfully
Click the Login button to return to the login screen

Enter your User ID and Password you just created
Click Login
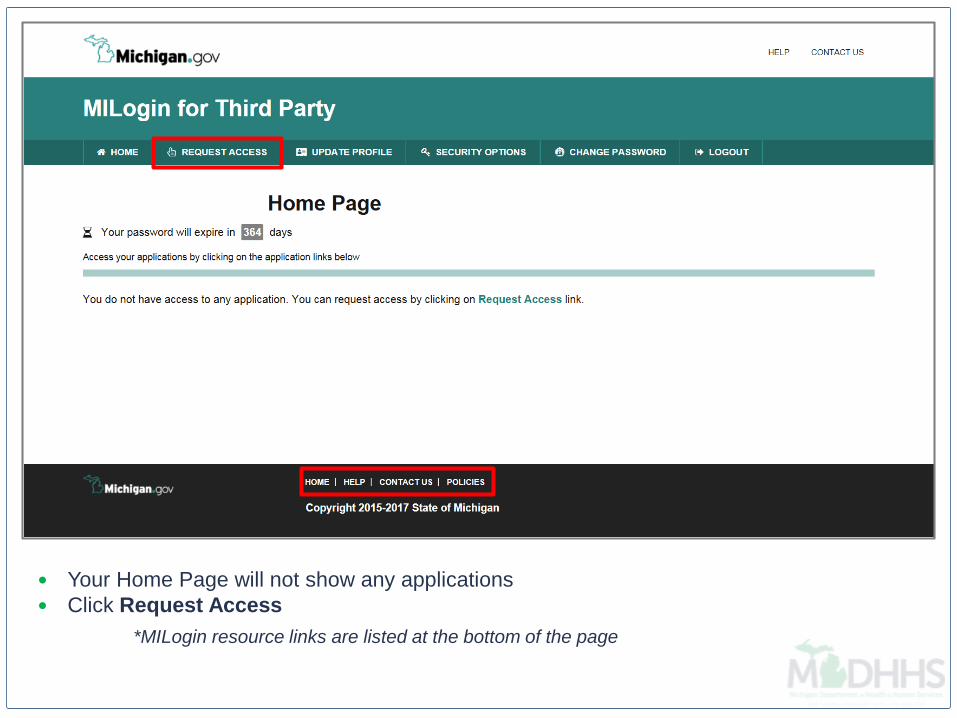
Your Home Page will not show any applications
Click Request Access
*MILogin resource links are listed at the bottom of the page

Type CHAMPS in the search box
Click the search/magnifying button

Click on CHAMPS
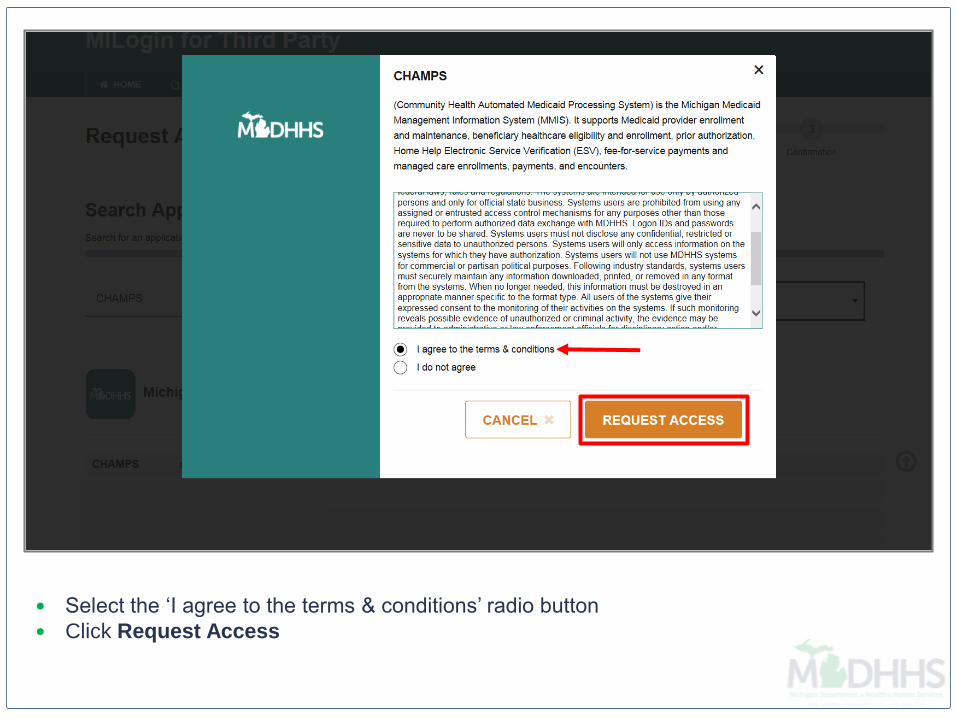
Select the ‘I agree to the terms & conditions’ radio button
Click Request Access

Verify all information is correct
Click Submit
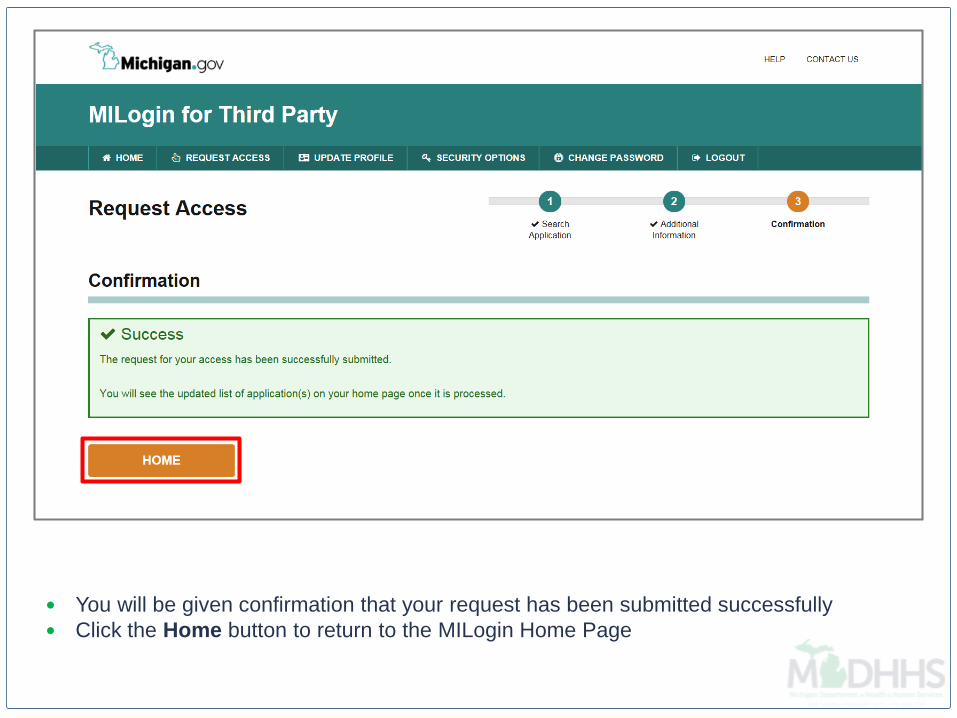
You will be given confirmation that your request has been submitted successfully
Click the Home button to return to the MILogin Home Page

You will be directed back to your MILogin Home Page. You will need to log out completely
and log back in for CHAMPS to appear.
Click the CHAMPS hyperlink.

Click ‘Acknowledge/Agree’ button to accept the Terms & Conditions to get into CHAMPS

Click on New Enrollment.

Click Atypical (non-medical) provider.
Individual will automatically be chosen.
Click Submit.

Enter the required information: First Name, Last Name, SSN, Date of Birth, Email, Address,
and Zip Code.
Click Validate Address.
Confirm Atypical Individual/Sole Proprietor is listed for Applicant Type.
Click Finish.

Write down the Application ID number for future reference.
Click OK.

Click Step 2: Add Locations.

Click Add.

Enter the required information, indicated by an asterik (*): Address, Zip Code, Phone
Number and Office Hours.
Click Validate Address.
For Office Hours-use the drop-down arrow to chose the correct times. Make sure to
select the hours you are open or choose “Closed”.
Click OK.
Please Note: Location Type will always be Primary Practice Location.
Use your personal residential address for Primary Practice Location.
When the Zip Code is added, and Validate Address is selected, the State, City/Town, and
County will automatically fill in.

Click Primary Practice Location. Please Note: You are still in Step 2: Add Locations.

Click Add Address.

In the Type of Address drop-down menu, select Correspondence.
Please note: Fill in the address where you would like to receive your Home Help mail.
If the address is the same as the one entered previously, select Copy This Location
Address next to Location Address.
Click OK.

Notice the Correspondence and Location now have addresses.
Click Add Address one more time to add a Pay To address.

From the Type of Address drop-down menu, select Pay To.
If the address is the same as the one entered previously, select Copy This Location
Address next to the Location Address.
Click OK.

Notice the Correspondence, Location, and Pay To address types all have addresses.
Click Save.
Click Close on the next two screens to go back to the list of steps. (Not shown).

Click Step 3: Add Specialties.

Click Add.

In the Provider Type drop-down menu, select Atypical Individual.
In the Specialty drop-down menu, select Home Help Individual.
Click OK.

Click Close.

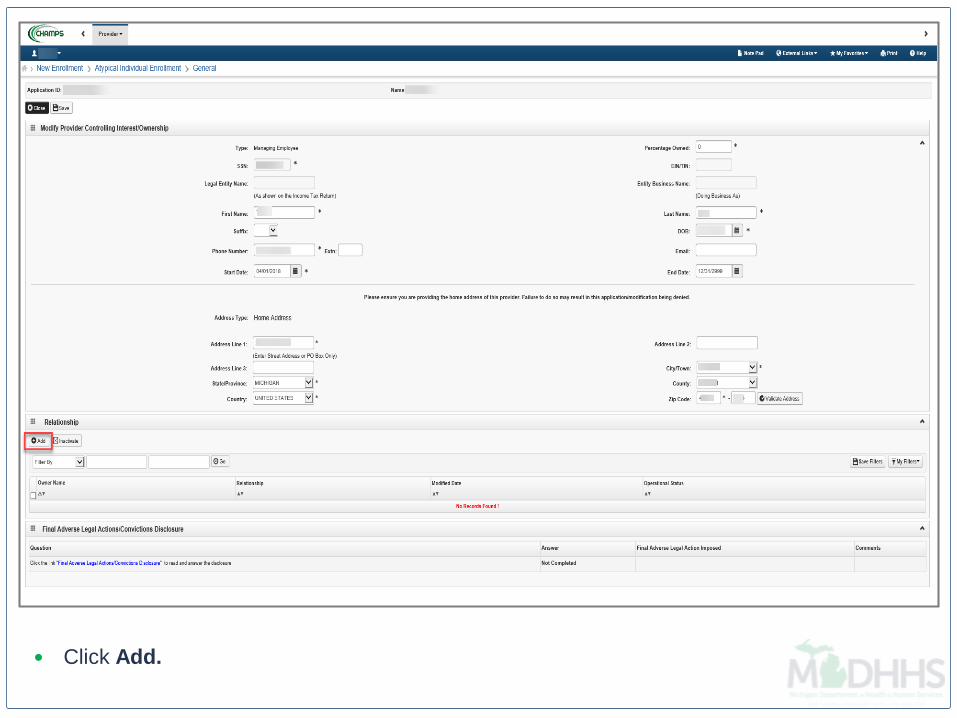
Click Step 8: Add Provider Controlling Interest/Ownership Details.Please Note: Step 4-7 are optional and are not required for Home Help Providers not associated to an Agency.

Click Add.

In the Type drop-down menu, select Managing Employee. The Managing Employee can
be the same as the Owner.
Enter the required information: SSN, Percentage Owned, First Name, Last Name, DOB,
Phone Number, Start Date, Address, Zip Code.
Click Validate Address.
Click OK.
Please Note: Type the number zero (0) in the Percentage Owned box.
Start Date is always the date you are filling out the application.
When the Zip Code is added, and Validate Address is selected, the State, City/Town, and
County will automatically fill in
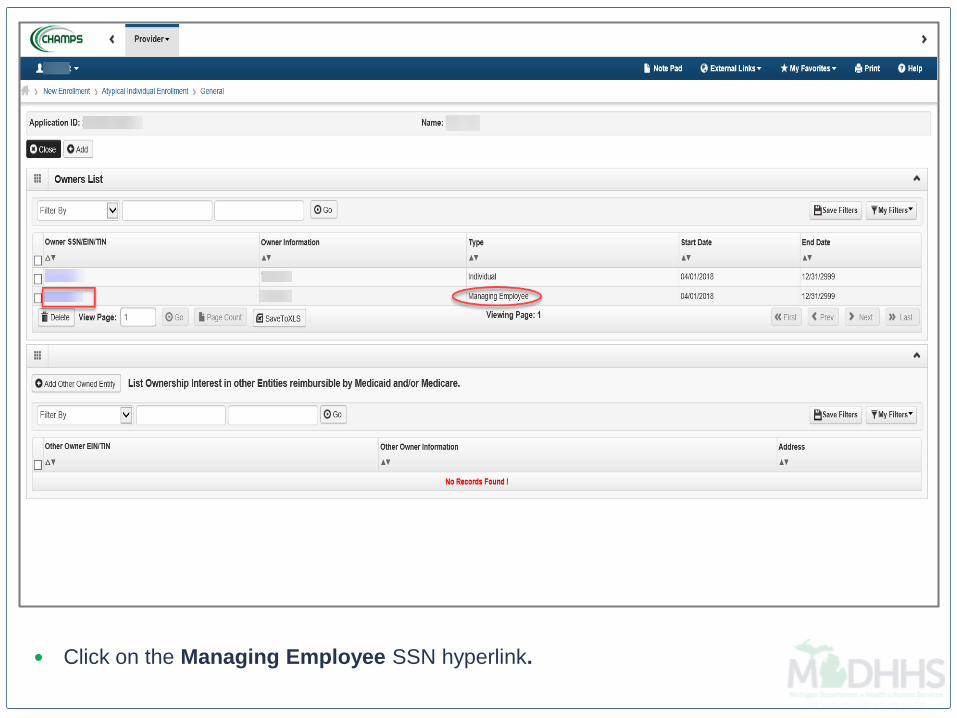
Click on the Managing Employee SSN hyperlink.
Click Add.

Select your name under the Owner Name drop-down menu.
Select Self in the Relationship drop-down menu.
Click OK.
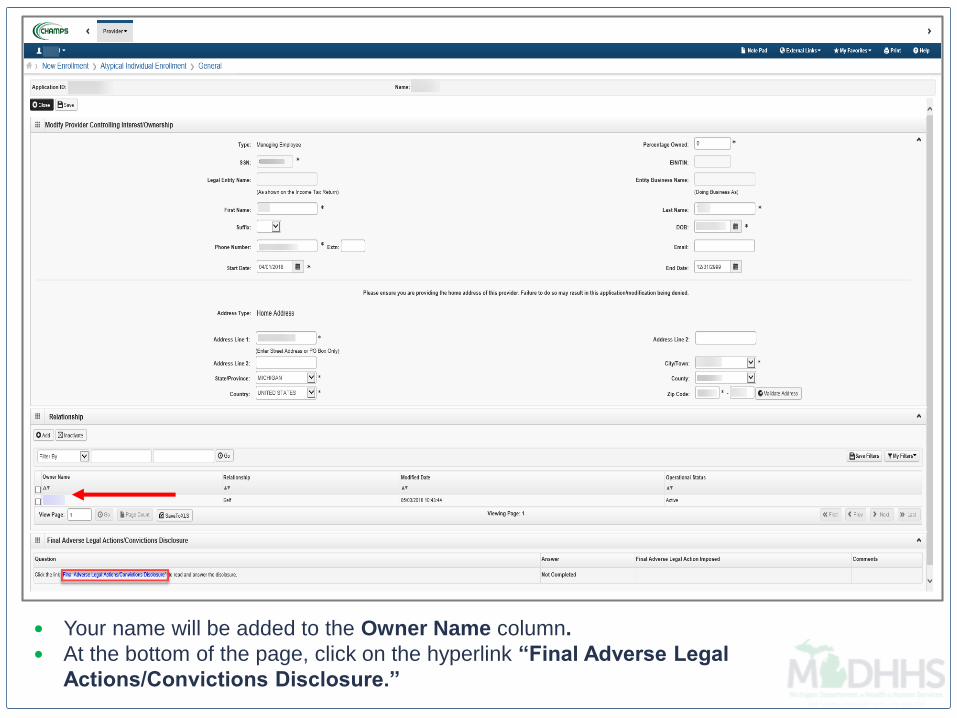
Your name will be added to the Owner Name column.
At the bottom of the page, click on the hyperlink “Final Adverse Legal
Actions/Convictions Disclosure.”

Read the Final Adverse Legal Actions/Convictions statement.
Answer the questions at the bottom by choosing yes or no and comment if necessary.
Click OK.

Click Save.
Click Close.

Click on the Individual SSN hyperlink.

Click Add.

Select your name under the Owner Name drop-down menu.
Select Self in the Relationship drop-down menu.
Click OK.

Your name will be added to the Owner Name column.
At the bottom of the page, click on the words “Final Adverse Legal Actions/Convictions
Disclosure.”

Read the Final Adverse Legal Actions/Convictions statement.
Answer the questions at the bottom by choosing yes or no and comment if necessary.
Click OK.

Click Save.
Click Close on the next two screens to go back to the list of steps. (Not shown).

Click Step 13: Complete Enrollment Checklist.

Answer all of the Provider Checklist questions by choosing Yes or No from each drop-
down menu in the Answer column. If an answer is required, choose Yes and put the
answer in Comments.
Click Save.
Click Close.Please Note: The County Name, Worker Name and Clients Name will need to be included in the comments box
on the appropriate question

Click Step 14: Submit Enrollment Application for Approval.

Click Next. By clicking the Next button, you “agree that the information submitted as part
of the application is correct (Private and Confidential)”.

Read the Terms and Conditions Atypical Enrollment statement.
Check the box at the bottom indicating you have read and agree to the terms.
Click Submit Application.

If you have not taken note of your Application Number, please do so for tracking
purposes.
Click Close and close out of the application.

Tracking Your Application
How to Track the Status of Your Application

Enter your User ID and Password you just created
Click Login

You will be directed back to your MILogin Home Page
Click the CHAMPS hyperlink

Click Acknowledge/Agree button to accept the Terms & Conditions to get into CHAMPS

If you would like to check the status of your application, you can do so from the CHAMPS
homepage:
On the homepage, click the Track Application hyperlink.

Enter your Application ID.
Click Next.

Enter your Social Security Number, Date of Birth and Home Zip Code.
Click Submit.

A text box at the top will confirm the status of your application. If you do not see this
statement, you have not completed and submitted the application to the state for review.
Please complete all required steps to submit.

Application Approved
Once the Application is Approved:
Providers will receive an approval letter. The approval letter
will go to the Correspondence Address you provided.
You will be able to access CHAMPS to submit your
Electronic Service Verification (ESV) Log.
To learn how to record your services, see the Electronic
Service Verification (ESV) Log Instructions at:
https://www.michigan.gov/documents/mdch/ESV_Instruction
s_476176_7.pdf
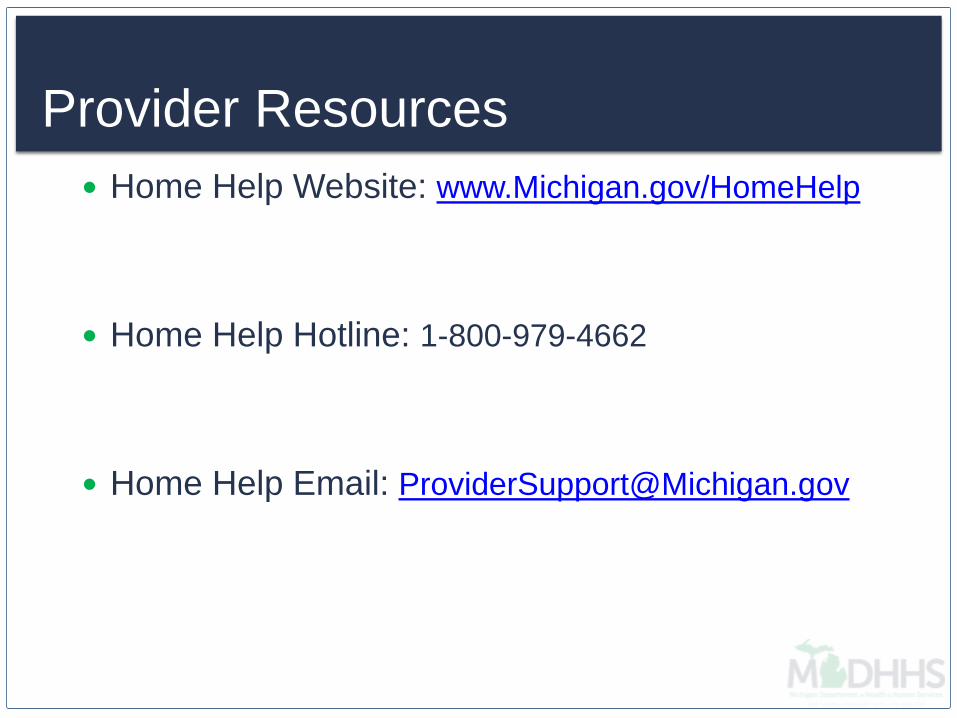
Provider Resources
Home Help Website: www.Michigan.gov/HomeHelp
Home Help Hotline: 1-800-979-4662
Home Help Email: [email protected]