nethserver documentation - read the docs certificate management 51 15.1 default behavior. . . . . ....
TRANSCRIPT

NethServer DocumentationRelease 7
Nethesis
February 08, 2017

Rules and conventions
1 Introduction 31.1 Target audience . . . . . . . . . . . . . . . . . . . . . . . . . . . . . . . . . . . . . . . . . . . . . . 31.2 Get involved . . . . . . . . . . . . . . . . . . . . . . . . . . . . . . . . . . . . . . . . . . . . . . . 3
2 Development process 52.1 Issues . . . . . . . . . . . . . . . . . . . . . . . . . . . . . . . . . . . . . . . . . . . . . . . . . . . 52.2 RPM Version numbering rules . . . . . . . . . . . . . . . . . . . . . . . . . . . . . . . . . . . . . . 72.3 Commit message style guide . . . . . . . . . . . . . . . . . . . . . . . . . . . . . . . . . . . . . . . 72.4 Documentation . . . . . . . . . . . . . . . . . . . . . . . . . . . . . . . . . . . . . . . . . . . . . . 82.5 New packages . . . . . . . . . . . . . . . . . . . . . . . . . . . . . . . . . . . . . . . . . . . . . . 8
3 RPM package rules 93.1 Naming and events conventions . . . . . . . . . . . . . . . . . . . . . . . . . . . . . . . . . . . . . 93.2 Install/Update process . . . . . . . . . . . . . . . . . . . . . . . . . . . . . . . . . . . . . . . . . . 93.3 Uninstall process . . . . . . . . . . . . . . . . . . . . . . . . . . . . . . . . . . . . . . . . . . . . . 103.4 Service packages . . . . . . . . . . . . . . . . . . . . . . . . . . . . . . . . . . . . . . . . . . . . . 10
4 Internationalization 134.1 gettext . . . . . . . . . . . . . . . . . . . . . . . . . . . . . . . . . . . . . . . . . . . . . . . . . . 134.2 Server Manager . . . . . . . . . . . . . . . . . . . . . . . . . . . . . . . . . . . . . . . . . . . . . . 14
5 Databases 155.1 Overview . . . . . . . . . . . . . . . . . . . . . . . . . . . . . . . . . . . . . . . . . . . . . . . . . 155.2 Simple entries . . . . . . . . . . . . . . . . . . . . . . . . . . . . . . . . . . . . . . . . . . . . . . 155.3 Complex entries . . . . . . . . . . . . . . . . . . . . . . . . . . . . . . . . . . . . . . . . . . . . . 155.4 Access from the command line . . . . . . . . . . . . . . . . . . . . . . . . . . . . . . . . . . . . . 155.5 Access via the Perl API . . . . . . . . . . . . . . . . . . . . . . . . . . . . . . . . . . . . . . . . . 165.6 Database initialization . . . . . . . . . . . . . . . . . . . . . . . . . . . . . . . . . . . . . . . . . . 165.7 Evaluation order . . . . . . . . . . . . . . . . . . . . . . . . . . . . . . . . . . . . . . . . . . . . . 185.8 Best practices . . . . . . . . . . . . . . . . . . . . . . . . . . . . . . . . . . . . . . . . . . . . . . . 185.9 List of available database . . . . . . . . . . . . . . . . . . . . . . . . . . . . . . . . . . . . . . . . . 19
6 Templates 216.1 Design of the template system . . . . . . . . . . . . . . . . . . . . . . . . . . . . . . . . . . . . . . 216.2 The Text::Template module . . . . . . . . . . . . . . . . . . . . . . . . . . . . . . . . . . . . . . . 216.3 Template expansion . . . . . . . . . . . . . . . . . . . . . . . . . . . . . . . . . . . . . . . . . . . 256.4 Template permissions and ownership: templates.metadata . . . . . . . . . . . . . . . . . . . . . . . 256.5 Perl API: processTemplate . . . . . . . . . . . . . . . . . . . . . . . . . . . . . . . . . . . . . . . . 26
i
7 Actions and events 277.1 Actions . . . . . . . . . . . . . . . . . . . . . . . . . . . . . . . . . . . . . . . . . . . . . . . . . . 277.2 Events . . . . . . . . . . . . . . . . . . . . . . . . . . . . . . . . . . . . . . . . . . . . . . . . . . 28
8 Services 338.1 Control a service . . . . . . . . . . . . . . . . . . . . . . . . . . . . . . . . . . . . . . . . . . . . . 338.2 Access network service . . . . . . . . . . . . . . . . . . . . . . . . . . . . . . . . . . . . . . . . . 338.3 Add a new service . . . . . . . . . . . . . . . . . . . . . . . . . . . . . . . . . . . . . . . . . . . . 348.4 Add a new network service . . . . . . . . . . . . . . . . . . . . . . . . . . . . . . . . . . . . . . . 35
9 Filesystems options 37
10 DNS 3910.1 Hosts . . . . . . . . . . . . . . . . . . . . . . . . . . . . . . . . . . . . . . . . . . . . . . . . . . . 3910.2 DNS server . . . . . . . . . . . . . . . . . . . . . . . . . . . . . . . . . . . . . . . . . . . . . . . . 40
11 DHCP 4111.1 IP reservation . . . . . . . . . . . . . . . . . . . . . . . . . . . . . . . . . . . . . . . . . . . . . . . 42
12 Log retention and rotation 43
13 Auto-generated random URL 45
14 Migration from NethService/SME Server 4714.1 Coding conventions . . . . . . . . . . . . . . . . . . . . . . . . . . . . . . . . . . . . . . . . . . . 4714.2 Packages . . . . . . . . . . . . . . . . . . . . . . . . . . . . . . . . . . . . . . . . . . . . . . . . . 48
15 Certificate Management 5115.1 Default behavior . . . . . . . . . . . . . . . . . . . . . . . . . . . . . . . . . . . . . . . . . . . . . 51
16 Yum plugin 5316.1 Caching . . . . . . . . . . . . . . . . . . . . . . . . . . . . . . . . . . . . . . . . . . . . . . . . . . 53
17 Backup 5517.1 Log format . . . . . . . . . . . . . . . . . . . . . . . . . . . . . . . . . . . . . . . . . . . . . . . . 5517.2 Notifications . . . . . . . . . . . . . . . . . . . . . . . . . . . . . . . . . . . . . . . . . . . . . . . 5617.3 Configuration backup . . . . . . . . . . . . . . . . . . . . . . . . . . . . . . . . . . . . . . . . . . 5617.4 Data backup . . . . . . . . . . . . . . . . . . . . . . . . . . . . . . . . . . . . . . . . . . . . . . . 57
18 Samba 6118.1 Ibay profiles . . . . . . . . . . . . . . . . . . . . . . . . . . . . . . . . . . . . . . . . . . . . . . . 6118.2 Accounts database . . . . . . . . . . . . . . . . . . . . . . . . . . . . . . . . . . . . . . . . . . . . 6218.3 Active Directory domain member . . . . . . . . . . . . . . . . . . . . . . . . . . . . . . . . . . . . 6318.4 Changing hostname . . . . . . . . . . . . . . . . . . . . . . . . . . . . . . . . . . . . . . . . . . . 66
19 Web interface 6719.1 Nethgui framework . . . . . . . . . . . . . . . . . . . . . . . . . . . . . . . . . . . . . . . . . . . . 67
20 Creating web UI module 6920.1 Web UI structure . . . . . . . . . . . . . . . . . . . . . . . . . . . . . . . . . . . . . . . . . . . . . 6920.2 Writing the code . . . . . . . . . . . . . . . . . . . . . . . . . . . . . . . . . . . . . . . . . . . . . 7020.3 More examples . . . . . . . . . . . . . . . . . . . . . . . . . . . . . . . . . . . . . . . . . . . . . . 71
21 Dashboard 7321.1 SystemStatus tab . . . . . . . . . . . . . . . . . . . . . . . . . . . . . . . . . . . . . . . . . . . . . 7321.2 Services tab . . . . . . . . . . . . . . . . . . . . . . . . . . . . . . . . . . . . . . . . . . . . . . . . 74
ii
21.3 Applications tab . . . . . . . . . . . . . . . . . . . . . . . . . . . . . . . . . . . . . . . . . . . . . 7421.4 Extending the dashboard . . . . . . . . . . . . . . . . . . . . . . . . . . . . . . . . . . . . . . . . . 74
22 Creating inline help pages 7722.1 Editing rules . . . . . . . . . . . . . . . . . . . . . . . . . . . . . . . . . . . . . . . . . . . . . . . 7722.2 Creating help for plugin modules . . . . . . . . . . . . . . . . . . . . . . . . . . . . . . . . . . . . 7822.3 Building docs inside RPMS . . . . . . . . . . . . . . . . . . . . . . . . . . . . . . . . . . . . . . . 7822.4 RST editors . . . . . . . . . . . . . . . . . . . . . . . . . . . . . . . . . . . . . . . . . . . . . . . . 78
23 TODO API 8123.1 Translations . . . . . . . . . . . . . . . . . . . . . . . . . . . . . . . . . . . . . . . . . . . . . . . 81
24 Building RPMs 8324.1 Configuring the environment . . . . . . . . . . . . . . . . . . . . . . . . . . . . . . . . . . . . . . . 8324.2 Running the scripts . . . . . . . . . . . . . . . . . . . . . . . . . . . . . . . . . . . . . . . . . . . . 8324.3 Development and Release builds . . . . . . . . . . . . . . . . . . . . . . . . . . . . . . . . . . . . . 8424.4 Signing RPMs . . . . . . . . . . . . . . . . . . . . . . . . . . . . . . . . . . . . . . . . . . . . . . 8424.5 Creating a release tag . . . . . . . . . . . . . . . . . . . . . . . . . . . . . . . . . . . . . . . . . . . 85
25 Building ISO 87
26 Repositories 8926.1 Third party repositories . . . . . . . . . . . . . . . . . . . . . . . . . . . . . . . . . . . . . . . . . 89
27 Package groups 9127.1 Generate comps file . . . . . . . . . . . . . . . . . . . . . . . . . . . . . . . . . . . . . . . . . . . 91
28 FTP 9328.1 Virtual users . . . . . . . . . . . . . . . . . . . . . . . . . . . . . . . . . . . . . . . . . . . . . . . 9328.2 System users . . . . . . . . . . . . . . . . . . . . . . . . . . . . . . . . . . . . . . . . . . . . . . . 94
29 UPS 9529.1 Configuration . . . . . . . . . . . . . . . . . . . . . . . . . . . . . . . . . . . . . . . . . . . . . . . 9529.2 Master node . . . . . . . . . . . . . . . . . . . . . . . . . . . . . . . . . . . . . . . . . . . . . . . 9529.3 Slave node . . . . . . . . . . . . . . . . . . . . . . . . . . . . . . . . . . . . . . . . . . . . . . . . 9529.4 Collectd-nut . . . . . . . . . . . . . . . . . . . . . . . . . . . . . . . . . . . . . . . . . . . . . . . 96
30 TFTP 9730.1 Properties: . . . . . . . . . . . . . . . . . . . . . . . . . . . . . . . . . . . . . . . . . . . . . . . . 9730.2 Test TFTP . . . . . . . . . . . . . . . . . . . . . . . . . . . . . . . . . . . . . . . . . . . . . . . . 9730.3 Configure a PXE server . . . . . . . . . . . . . . . . . . . . . . . . . . . . . . . . . . . . . . . . . 98
31 Webmail (Roundcube) 10131.1 Database . . . . . . . . . . . . . . . . . . . . . . . . . . . . . . . . . . . . . . . . . . . . . . . . . 101
32 Collectd 10332.1 Ping plugin . . . . . . . . . . . . . . . . . . . . . . . . . . . . . . . . . . . . . . . . . . . . . . . . 10332.2 Web interfaces . . . . . . . . . . . . . . . . . . . . . . . . . . . . . . . . . . . . . . . . . . . . . . 10432.3 Cleanup . . . . . . . . . . . . . . . . . . . . . . . . . . . . . . . . . . . . . . . . . . . . . . . . . . 10432.4 Interesting plugins . . . . . . . . . . . . . . . . . . . . . . . . . . . . . . . . . . . . . . . . . . . . 10432.5 Database . . . . . . . . . . . . . . . . . . . . . . . . . . . . . . . . . . . . . . . . . . . . . . . . . 104
33 Phone Home 10533.1 Overview . . . . . . . . . . . . . . . . . . . . . . . . . . . . . . . . . . . . . . . . . . . . . . . . . 10533.2 Configuration . . . . . . . . . . . . . . . . . . . . . . . . . . . . . . . . . . . . . . . . . . . . . . . 105
iii
34 Web antivirus 10734.1 Debug . . . . . . . . . . . . . . . . . . . . . . . . . . . . . . . . . . . . . . . . . . . . . . . . . . . 10734.2 Database . . . . . . . . . . . . . . . . . . . . . . . . . . . . . . . . . . . . . . . . . . . . . . . . . 10734.3 Log files . . . . . . . . . . . . . . . . . . . . . . . . . . . . . . . . . . . . . . . . . . . . . . . . . 107
35 Web content filter 10935.1 Blacklists . . . . . . . . . . . . . . . . . . . . . . . . . . . . . . . . . . . . . . . . . . . . . . . . . 10935.2 Databases . . . . . . . . . . . . . . . . . . . . . . . . . . . . . . . . . . . . . . . . . . . . . . . . . 10935.3 Block page . . . . . . . . . . . . . . . . . . . . . . . . . . . . . . . . . . . . . . . . . . . . . . . . 11235.4 Log files . . . . . . . . . . . . . . . . . . . . . . . . . . . . . . . . . . . . . . . . . . . . . . . . . 112
36 WebVirtMgr 11336.1 Database . . . . . . . . . . . . . . . . . . . . . . . . . . . . . . . . . . . . . . . . . . . . . . . . . 113
37 Disk analyzer (Duc) 11537.1 Overview . . . . . . . . . . . . . . . . . . . . . . . . . . . . . . . . . . . . . . . . . . . . . . . . . 115
38 SNMP 11738.1 Database . . . . . . . . . . . . . . . . . . . . . . . . . . . . . . . . . . . . . . . . . . . . . . . . . 117
39 Tomcat 7 119
40 PostgreSQL 12140.1 Access policy . . . . . . . . . . . . . . . . . . . . . . . . . . . . . . . . . . . . . . . . . . . . . . . 12140.2 Backup . . . . . . . . . . . . . . . . . . . . . . . . . . . . . . . . . . . . . . . . . . . . . . . . . . 121
41 UnixODBC 12341.1 /etc/odbc.ini . . . . . . . . . . . . . . . . . . . . . . . . . . . . . . . . . . . . . . . . . . . . . . . 12341.2 /etc/odbcinst.ini . . . . . . . . . . . . . . . . . . . . . . . . . . . . . . . . . . . . . . . . . . . . . 12341.3 Usage . . . . . . . . . . . . . . . . . . . . . . . . . . . . . . . . . . . . . . . . . . . . . . . . . . . 124
42 VPN 12542.1 Certificates . . . . . . . . . . . . . . . . . . . . . . . . . . . . . . . . . . . . . . . . . . . . . . . . 12542.2 Events . . . . . . . . . . . . . . . . . . . . . . . . . . . . . . . . . . . . . . . . . . . . . . . . . . 12642.3 Accounts . . . . . . . . . . . . . . . . . . . . . . . . . . . . . . . . . . . . . . . . . . . . . . . . . 12642.4 Clients (OpenVPN) . . . . . . . . . . . . . . . . . . . . . . . . . . . . . . . . . . . . . . . . . . . 12742.5 OpenVPN . . . . . . . . . . . . . . . . . . . . . . . . . . . . . . . . . . . . . . . . . . . . . . . . 12842.6 IPsec . . . . . . . . . . . . . . . . . . . . . . . . . . . . . . . . . . . . . . . . . . . . . . . . . . . 129
43 Unbound 13343.1 Database . . . . . . . . . . . . . . . . . . . . . . . . . . . . . . . . . . . . . . . . . . . . . . . . . 133
44 Ntopng 13544.1 Events . . . . . . . . . . . . . . . . . . . . . . . . . . . . . . . . . . . . . . . . . . . . . . . . . . 13544.2 Templates . . . . . . . . . . . . . . . . . . . . . . . . . . . . . . . . . . . . . . . . . . . . . . . . . 13544.3 Database Reference . . . . . . . . . . . . . . . . . . . . . . . . . . . . . . . . . . . . . . . . . . . 13544.4 Configuration DB . . . . . . . . . . . . . . . . . . . . . . . . . . . . . . . . . . . . . . . . . . . . 13544.5 Links . . . . . . . . . . . . . . . . . . . . . . . . . . . . . . . . . . . . . . . . . . . . . . . . . . . 136
45 Samba-audit 137
46 Redis 139
47 Memcached 141
48 SMARTD 143
iv
49 CUPS 14549.1 Configuration . . . . . . . . . . . . . . . . . . . . . . . . . . . . . . . . . . . . . . . . . . . . . . . 14549.2 Printer discovery . . . . . . . . . . . . . . . . . . . . . . . . . . . . . . . . . . . . . . . . . . . . . 14549.3 Old Windows clients . . . . . . . . . . . . . . . . . . . . . . . . . . . . . . . . . . . . . . . . . . . 14549.4 Configuration DB . . . . . . . . . . . . . . . . . . . . . . . . . . . . . . . . . . . . . . . . . . . . 145
50 Clamd 147
51 c-icap 14951.1 Options . . . . . . . . . . . . . . . . . . . . . . . . . . . . . . . . . . . . . . . . . . . . . . . . . . 149
52 IAX modem 15152.1 Multiple IAX modems . . . . . . . . . . . . . . . . . . . . . . . . . . . . . . . . . . . . . . . . . . 151
53 MySQL 15353.1 Loading data . . . . . . . . . . . . . . . . . . . . . . . . . . . . . . . . . . . . . . . . . . . . . . . 153
54 nethserver-avahi 155
55 nethserver-base 15755.1 Network . . . . . . . . . . . . . . . . . . . . . . . . . . . . . . . . . . . . . . . . . . . . . . . . . 15755.2 Password policy . . . . . . . . . . . . . . . . . . . . . . . . . . . . . . . . . . . . . . . . . . . . . 160
56 nethserver-dc 16356.1 nethserver-dc-save event . . . . . . . . . . . . . . . . . . . . . . . . . . . . . . . . . . . . . . . . . 16356.2 Manual Join . . . . . . . . . . . . . . . . . . . . . . . . . . . . . . . . . . . . . . . . . . . . . . . 16356.3 Factory reset . . . . . . . . . . . . . . . . . . . . . . . . . . . . . . . . . . . . . . . . . . . . . . . 16456.4 Changing the IP address of DC . . . . . . . . . . . . . . . . . . . . . . . . . . . . . . . . . . . . . 164
57 nethserver-directory 16757.1 Schema and base DN . . . . . . . . . . . . . . . . . . . . . . . . . . . . . . . . . . . . . . . . . . . 16757.2 User account states . . . . . . . . . . . . . . . . . . . . . . . . . . . . . . . . . . . . . . . . . . . . 16857.3 Logging . . . . . . . . . . . . . . . . . . . . . . . . . . . . . . . . . . . . . . . . . . . . . . . . . . 16857.4 Service accounts . . . . . . . . . . . . . . . . . . . . . . . . . . . . . . . . . . . . . . . . . . . . . 16857.5 User accounts . . . . . . . . . . . . . . . . . . . . . . . . . . . . . . . . . . . . . . . . . . . . . . . 16957.6 Anonymous access . . . . . . . . . . . . . . . . . . . . . . . . . . . . . . . . . . . . . . . . . . . . 16957.7 Administrative access . . . . . . . . . . . . . . . . . . . . . . . . . . . . . . . . . . . . . . . . . . 16957.8 Inspect OpenLDAP ACLs . . . . . . . . . . . . . . . . . . . . . . . . . . . . . . . . . . . . . . . . 169
58 nethserver-ejabberd 17158.1 Configuration . . . . . . . . . . . . . . . . . . . . . . . . . . . . . . . . . . . . . . . . . . . . . . . 171
59 nethserver-firewall-base 17359.1 Roles and zones . . . . . . . . . . . . . . . . . . . . . . . . . . . . . . . . . . . . . . . . . . . . . 17359.2 General configuration . . . . . . . . . . . . . . . . . . . . . . . . . . . . . . . . . . . . . . . . . . 17459.3 Events . . . . . . . . . . . . . . . . . . . . . . . . . . . . . . . . . . . . . . . . . . . . . . . . . . 17559.4 Policy . . . . . . . . . . . . . . . . . . . . . . . . . . . . . . . . . . . . . . . . . . . . . . . . . . . 17559.5 IP/MAC binding . . . . . . . . . . . . . . . . . . . . . . . . . . . . . . . . . . . . . . . . . . . . . 17559.6 Rules . . . . . . . . . . . . . . . . . . . . . . . . . . . . . . . . . . . . . . . . . . . . . . . . . . . 17559.7 Firewall objects . . . . . . . . . . . . . . . . . . . . . . . . . . . . . . . . . . . . . . . . . . . . . . 17759.8 Port forwarding . . . . . . . . . . . . . . . . . . . . . . . . . . . . . . . . . . . . . . . . . . . . . . 17959.9 NAT 1:1 . . . . . . . . . . . . . . . . . . . . . . . . . . . . . . . . . . . . . . . . . . . . . . . . . 17959.10 Traffic shaping . . . . . . . . . . . . . . . . . . . . . . . . . . . . . . . . . . . . . . . . . . . . . . 18059.11 Multi WAN . . . . . . . . . . . . . . . . . . . . . . . . . . . . . . . . . . . . . . . . . . . . . . . . 18159.12 Static routes . . . . . . . . . . . . . . . . . . . . . . . . . . . . . . . . . . . . . . . . . . . . . . . 183
v
60 nethserver-getmail 18560.1 Database . . . . . . . . . . . . . . . . . . . . . . . . . . . . . . . . . . . . . . . . . . . . . . . . . 18560.2 Virus check . . . . . . . . . . . . . . . . . . . . . . . . . . . . . . . . . . . . . . . . . . . . . . . . 186
61 nethserver-httpd 18761.1 Templates . . . . . . . . . . . . . . . . . . . . . . . . . . . . . . . . . . . . . . . . . . . . . . . . . 18761.2 Web applications . . . . . . . . . . . . . . . . . . . . . . . . . . . . . . . . . . . . . . . . . . . . . 18761.3 Configuration database . . . . . . . . . . . . . . . . . . . . . . . . . . . . . . . . . . . . . . . . . . 18861.4 Events . . . . . . . . . . . . . . . . . . . . . . . . . . . . . . . . . . . . . . . . . . . . . . . . . . 188
62 nethserver-httpd-admin 18962.1 smwingsd daemon . . . . . . . . . . . . . . . . . . . . . . . . . . . . . . . . . . . . . . . . . . . . 18962.2 Customization . . . . . . . . . . . . . . . . . . . . . . . . . . . . . . . . . . . . . . . . . . . . . . 19062.3 Database example . . . . . . . . . . . . . . . . . . . . . . . . . . . . . . . . . . . . . . . . . . . . 191
63 nethserver-hylafax 19363.1 Modem configuration . . . . . . . . . . . . . . . . . . . . . . . . . . . . . . . . . . . . . . . . . . 19363.2 Accounting (FaxAccounting) . . . . . . . . . . . . . . . . . . . . . . . . . . . . . . . . . . . . . . 19363.3 Incoming fax (FaxDispatch) . . . . . . . . . . . . . . . . . . . . . . . . . . . . . . . . . . . . . . . 19363.4 Outgoing fax (FaxNotify) . . . . . . . . . . . . . . . . . . . . . . . . . . . . . . . . . . . . . . . . 19463.5 Custom scripts . . . . . . . . . . . . . . . . . . . . . . . . . . . . . . . . . . . . . . . . . . . . . . 19463.6 Authentication . . . . . . . . . . . . . . . . . . . . . . . . . . . . . . . . . . . . . . . . . . . . . . 19463.7 Internationalization . . . . . . . . . . . . . . . . . . . . . . . . . . . . . . . . . . . . . . . . . . . . 19463.8 Client configuration . . . . . . . . . . . . . . . . . . . . . . . . . . . . . . . . . . . . . . . . . . . 19463.9 Configuration DB . . . . . . . . . . . . . . . . . . . . . . . . . . . . . . . . . . . . . . . . . . . . 195
64 nethserver-lightsquid 19764.1 Database . . . . . . . . . . . . . . . . . . . . . . . . . . . . . . . . . . . . . . . . . . . . . . . . . 197
65 nethserver-mail-common 19965.1 Features . . . . . . . . . . . . . . . . . . . . . . . . . . . . . . . . . . . . . . . . . . . . . . . . . . 19965.2 Configuration database . . . . . . . . . . . . . . . . . . . . . . . . . . . . . . . . . . . . . . . . . . 19965.3 Testing Postfix . . . . . . . . . . . . . . . . . . . . . . . . . . . . . . . . . . . . . . . . . . . . . . 200
66 nethserver-mail-filter 20166.1 Features . . . . . . . . . . . . . . . . . . . . . . . . . . . . . . . . . . . . . . . . . . . . . . . . . . 20166.2 Configuration database . . . . . . . . . . . . . . . . . . . . . . . . . . . . . . . . . . . . . . . . . . 20166.3 RBL server list . . . . . . . . . . . . . . . . . . . . . . . . . . . . . . . . . . . . . . . . . . . . . . 202
67 nethserver-mail-server 20367.1 Features . . . . . . . . . . . . . . . . . . . . . . . . . . . . . . . . . . . . . . . . . . . . . . . . . . 20367.2 Configuration database . . . . . . . . . . . . . . . . . . . . . . . . . . . . . . . . . . . . . . . . . . 20367.3 Domains database . . . . . . . . . . . . . . . . . . . . . . . . . . . . . . . . . . . . . . . . . . . . 20467.4 Accounts database . . . . . . . . . . . . . . . . . . . . . . . . . . . . . . . . . . . . . . . . . . . . 20567.5 Mail quota . . . . . . . . . . . . . . . . . . . . . . . . . . . . . . . . . . . . . . . . . . . . . . . . 20567.6 Disabled users . . . . . . . . . . . . . . . . . . . . . . . . . . . . . . . . . . . . . . . . . . . . . . 20667.7 Testing Dovecot with Mutt . . . . . . . . . . . . . . . . . . . . . . . . . . . . . . . . . . . . . . . . 20667.8 Set special ACL on mailboxes . . . . . . . . . . . . . . . . . . . . . . . . . . . . . . . . . . . . . . 206
68 nethserver-nextcloud 20768.1 Admin user . . . . . . . . . . . . . . . . . . . . . . . . . . . . . . . . . . . . . . . . . . . . . . . . 20768.2 Backup . . . . . . . . . . . . . . . . . . . . . . . . . . . . . . . . . . . . . . . . . . . . . . . . . . 207
69 nethserver-ntp 20969.1 How it works . . . . . . . . . . . . . . . . . . . . . . . . . . . . . . . . . . . . . . . . . . . . . . . 209
vi

70 nethserver-squid 21170.1 Configuration . . . . . . . . . . . . . . . . . . . . . . . . . . . . . . . . . . . . . . . . . . . . . . . 21170.2 Transparent mode . . . . . . . . . . . . . . . . . . . . . . . . . . . . . . . . . . . . . . . . . . . . 21270.3 Authenticated mode . . . . . . . . . . . . . . . . . . . . . . . . . . . . . . . . . . . . . . . . . . . 21270.4 Bypasses . . . . . . . . . . . . . . . . . . . . . . . . . . . . . . . . . . . . . . . . . . . . . . . . . 21370.5 Cache . . . . . . . . . . . . . . . . . . . . . . . . . . . . . . . . . . . . . . . . . . . . . . . . . . . 21370.6 WPAD . . . . . . . . . . . . . . . . . . . . . . . . . . . . . . . . . . . . . . . . . . . . . . . . . . 21370.7 Miscellaneous options . . . . . . . . . . . . . . . . . . . . . . . . . . . . . . . . . . . . . . . . . . 213
71 nethserver-sssd 21571.1 Events . . . . . . . . . . . . . . . . . . . . . . . . . . . . . . . . . . . . . . . . . . . . . . . . . . 21571.2 System users and groups . . . . . . . . . . . . . . . . . . . . . . . . . . . . . . . . . . . . . . . . . 21771.3 NethServer::SSSD . . . . . . . . . . . . . . . . . . . . . . . . . . . . . . . . . . . . . . . . . . . . 21871.4 Join Active Directory . . . . . . . . . . . . . . . . . . . . . . . . . . . . . . . . . . . . . . . . . . . 21871.5 Leave and Re-Join Active Directory . . . . . . . . . . . . . . . . . . . . . . . . . . . . . . . . . . . 21871.6 Change the FQDN . . . . . . . . . . . . . . . . . . . . . . . . . . . . . . . . . . . . . . . . . . . . 21971.7 Account import scripts . . . . . . . . . . . . . . . . . . . . . . . . . . . . . . . . . . . . . . . . . . 220
72 nethserver-suricata 22172.1 Manually enable/disable Suricata . . . . . . . . . . . . . . . . . . . . . . . . . . . . . . . . . . . . 22172.2 Policies . . . . . . . . . . . . . . . . . . . . . . . . . . . . . . . . . . . . . . . . . . . . . . . . . . 22172.3 Troubleshooting . . . . . . . . . . . . . . . . . . . . . . . . . . . . . . . . . . . . . . . . . . . . . 222
73 nethserver-virtualhosts 22373.1 Database . . . . . . . . . . . . . . . . . . . . . . . . . . . . . . . . . . . . . . . . . . . . . . . . . 22373.2 UI plugins . . . . . . . . . . . . . . . . . . . . . . . . . . . . . . . . . . . . . . . . . . . . . . . . 223
74 nethserver-webtop4 22574.1 Database . . . . . . . . . . . . . . . . . . . . . . . . . . . . . . . . . . . . . . . . . . . . . . . . . 22574.2 Troubleshooting . . . . . . . . . . . . . . . . . . . . . . . . . . . . . . . . . . . . . . . . . . . . . 22574.3 Known problems . . . . . . . . . . . . . . . . . . . . . . . . . . . . . . . . . . . . . . . . . . . . . 226
75 License Headers 22775.1 PHP, Javascript, CSS . . . . . . . . . . . . . . . . . . . . . . . . . . . . . . . . . . . . . . . . . . . 22775.2 Perl, Python and BASH . . . . . . . . . . . . . . . . . . . . . . . . . . . . . . . . . . . . . . . . . 227
76 Rebranding Administrator Manual 22976.1 Environment . . . . . . . . . . . . . . . . . . . . . . . . . . . . . . . . . . . . . . . . . . . . . . . 22976.2 Contents . . . . . . . . . . . . . . . . . . . . . . . . . . . . . . . . . . . . . . . . . . . . . . . . . 22976.3 Product name and version . . . . . . . . . . . . . . . . . . . . . . . . . . . . . . . . . . . . . . . . 23076.4 Theme . . . . . . . . . . . . . . . . . . . . . . . . . . . . . . . . . . . . . . . . . . . . . . . . . . 23076.5 Artworks . . . . . . . . . . . . . . . . . . . . . . . . . . . . . . . . . . . . . . . . . . . . . . . . . 230
77 License 231
78 Indices and tables 233
vii

viii

NethServer Documentation, Release 7
Official site: http://www.nethserver.org
Rules and conventions 1

NethServer Documentation, Release 7
2 Rules and conventions

CHAPTER 1
Introduction
NethServer is an Open Source operating system for the Linux enthusiast, designed for small offices and mediumenterprises. It’s simple, secure and flexible.
NethServer is ready to deliver your messages, to protect your network with the built-in firewall, share your files andmuch more, everything on the same system.
1.1 Target audience
This manual is intended for developers who are interested about NethServer internals. Reading this manual you shouldbe able to learn how to extend, enpower and debug the NethServer platform.
1.2 Get involved
The NethServer project welcomes anyone who would like to become involved in the project. This is a brief list ofthings to do (in a sparse order):
• Writing documentation
• Bug reporting, bug triaging, QA testing
• Translating the web interface
• Developing / coding in Perl, PHP, Python, Bash
Note: This manual is a work in progress. If you can’t find some information please check also our wiki:http://wiki.nethserver.org and always feel free to ask on http://community.nethserver.org
3

NethServer Documentation, Release 7
4 Chapter 1. Introduction
CHAPTER 2
Development process
2.1 Issues
An issue is a formal description of a known problem, or wished feature, inside a tracker. There are two types of issues:
Bug describes a defect of the software; it must lead to a resolution of the problem. For example, a process crashingunder certain conditions.
Enhancement describe an improvement of the current code or an entire new feature. For example, remove harmlesswarning of a running process or designing a new UI panel.
Bugs and enhancements will always produce some code changes inside a one or more git repositories.
Each repository is associated to one or more RPM packages. Changes to the code produce new releases of RPMpackages.
2.1.1 Do I need to open a new issue?
Yes, if what you’re talking about will produce some code. By the way, it’s perfectly reasonable to not fill issues foroccasional small fixes, like typos in translations.
Issues are not a TODO list. Issues track the status changes of a job, the output of the job will be a new RPMimplementing the issue itself. If you are exploring some esoteric paths for new feature or hunting something like anheisenbug , please write a draft wiki page with your thoughts, then create a new issue only when you’re ready to writea formal description and produce some output object.
A process for a new feature, can be something like this:
• Open a new topic on http://community.nethserver.org and discuss it.
• Open the issue on GitHub https://github.com/NethServer/dev/issues/new.
If the feature is very complex, a dedicated wiki page could be written on http://wiki.nethserver.org/.
• Create a wiki page with notes and thoughts (team contributions are welcome!).
• When the wiki page is pretty “stable” and the whole thing is well outlined, a team member will create one ormore new issues.
• If the wiki page is a feature design document, the feature can simply point to the wiki page.
• The wiki page should become a technical documentation of the feature, or a changelog for a new release.
At any point in time, make sure the issue status reflects actual work.
5

NethServer Documentation, Release 7
2.1.2 Writing issues
How to write a bug report:
• Apply the bug label
• Point to the right software component with the associated version
• Describe the error, and how to reproduce it
• Describe the expected behavior
• If possible, suggest a fix or workaround
• If possible, add a piece of system output (log, command, etc)
• Text presentation matters: it makes the whole report more readable and understandable
How to write a feature or enhancement:
• Everybody should understand what you’re talking about: describe the feature with simple words using examples
• If possible, add links to external documentation
• Text presentation matters: it makes the whole report more readable and understandable
More information:
• https://developer.mozilla.org/en-US/docs/Mozilla/QA/Bug_writing_guidelines
• http://fedoraproject.org/wiki/Bugs_and_feature_requests
• http://fedoraproject.org/wiki/How_to_file_a_bug_report
2.1.3 Issue tracker
The NethServer project is hosted on GitHub and is constituted by many git repositories. We set one of them to be theissue tracker:
https://github.com/NethServer/dev
Issues created on dev help coordinating the development process, determining who is in charge of what.
Developer
The Developer.
• Sets the Assignee to himself.
• Bundle his commits as one or more GitHub pull requests, reporting the issue number reference on them (seealso Commit message style guide).
• For enhancements, writes the test case (for bugs the procedure to reproduce the problem should be already set).
• Writes and updates the Documentation associated with the code.
• Finally, clears the Assignee.
If the issue is not valid, he can close it adding one of the labels invalid, duplicate, wontfix.
6 Chapter 2. Development process

NethServer Documentation, Release 7
QA team member (testing)
The QA team member.
• Takes an unassigned issue with label testing and sets the Assignee field to herself.
• Tests the package, following the test case documentation written by the Developer.
• When test finishes she removes the testing label and clears Assignee field. If the test is successful, she sets theverified label, otherwise she alerts the Developer and the Packager to plan a new process iteration.
Packager
The Packager coordinates the Developer and QA member work. After the Developer opens one or more pull requests:
• Selects issues with open pull requests
• Reviews the pull request code and merges it
• Builds and uploads the RPMs to the testing repository and sets the testing label (see Building RPMs)
After the QA member has completed the testing phase:
• Takes an unassigned issue with label verified
• Commits a release tag (see ‘Building RPMs‘_).
• Re-builds the tagged RPM.
• Uploads the RPM to updates (or base) repository.
• Pushes the release tag and commit to SCM
• Closes the issue, specifying the list of released RPMs
When the package is CLOSED, all related documentation must be in place.
2.2 RPM Version numbering rules
NethServer releases bring the version number of the underlying CentOS. For example NethServer 7 beta1 isbased on CentOS 7.
Packages have a version number in the form X.Y.Z-N (Eg. nethserver-myservice-1.0.3-1.ns7.rpm):
• X: major release, breaks retro-compatibility
• Y: minor release, new features - big enhancements
• Z: bug fixes - small enhancements
• N: spec modifications inside the current release - hotfixes
2.3 Commit message style guide
Individual commits should contain a cohesive set of changes to the code. These seven rules summarize how should begood commit message.
1. Separate subject from body with a blank line
2. Limit the subject line to 50 characters
2.2. RPM Version numbering rules 7
NethServer Documentation, Release 7
3. Capitalize the subject line
4. Do not end the subject line with a period
5. Use the imperative mood in the subject line
6. Wrap the body at 72 characters
7. Use the body to explain what and why vs. how
2.4 Documentation
The developer must take care to write all documentation on:
• wiki page during development
• Developer Manual and/or README.rst before release
• Administrator Manual before release
• Inline help before release
Packages should be inside testing or nethforge-testing repositories until all documentation is completed.
2.5 New packages
Before creating a new package, make sure it’s a good idea. Often a simple documentation page is enough, and itrequires much less effort. When trying new things, just take care to write down on a public temporary document(maybe a wiki page) all steps and comments. If the feature collects many requests, it’s time to think about a newpackage. Otherwise, the temporary document can be moved to a manual page.
When creating a new package, make sure the following requirements are met:
• Announce it on http://community.nethserver.org
• Create an issue describing the package
• Create a personal repository on GitHub
• Add a GPL license and copyright notice in the COPYING file
• Add a README.rst file, with developer documentation
• If needed, create a pull request for the NethServer/comps or NethServer/nethforge-comps repository, to list thepackage in the Software center page.
• Build the package and push it to testing or nethforge-testing repository
See also Building RPMs.
8 Chapter 2. Development process
CHAPTER 3
RPM package rules
3.1 Naming and events conventions
Each package name MUST be composed of
• a prefix, corresponding to the product name: nethserver-, neth-, ....
• the feature/function/daemon/software: base, directory, httpd-admin ...
Each package MUST contain:
• <packagename>-update event, raised each time the package is installed/updated and when the sys-tem is re-configured (for instance, after another package has been uninstalled)
The update event should:
• configure the package on first install
• take care of upgrading current installation in case of package update
Note: You should not add code in %post and %pre sections of the spec file. All the logic must be inside the -updateevent.
Each package MAY contain:
• <packagename>-save event, raised by the console or the web interface to adjust the package configurationafter some DB value has changed;
• <packagename>-conf action, to execute package-specific configuration commands. This action MUST beinvoked during the <packagename>-update event.
For example, given a package named nethserver-dnsmasq:
• update event: nethserver-dnmasq-update
• save event: nethserver-dnmasq-save
• configuration action: nethserver-dnmasq-conf
3.2 Install/Update process
Just after a package transaction (install/update), the NethServer yum plugin will:
• execute all nethserver-update-<package>: events of installed/updated packages in the current transaction
9
NethServer Documentation, Release 7
• execute runlevel-adjust event to start/stop all configured services
• execute firewall-adjust event to open/close firewall ports
In case of manual installation , the update, firewall-adjust and runlevel-adjust events must be fired manually using thesignal-event command.
3.3 Uninstall process
After a package is removed, the NethServer yum plugin will:
• execute all nethserver-update-package event of installed packages
• execute runlevel-adjust event to start/stop all configured services
• execute firewall-adjust event to open/close firewall ports
3.4 Service packages
A service package is an RPM which is responsible for a system service configuration and management. The packagemust follow all rules listed above plus some more conventions.
3.4.1 Configuration DB default
Mandatory:
• type: service
• status: the current service status, can be enabled or disabled
Optional:
• TCPPort: a tcp listening port
• UDPPort: a udp listening port
• TCPPorts: a list of tcp listen ports. Eg: 123,678
• UDPPorts: a list of udp listen ports. Eg: 123,678
For example, the package nethserver-puppet managing the service puppet will contain:
• /etc/e-smith/db/configuration/defaults/puppet/type
• /etc/e-smith/db/configuration/defaults/puppet/status
Beside this, each packge MUST always declare its own set of keys and properties inside default databases.
3.4.2 Events and actions
nethserver-base package provides two generic events:
• runlevel-adjust: enable/disable the service using chkconfig command and start/stop the service
• firewall-adjust: read TCPPort(s) and UDPPort(s) props and open the specified ports in the firewallconfiguration
10 Chapter 3. RPM package rules

NethServer Documentation, Release 7
Both events are handled by the system, so there is no need to link these events into the package.
Further documentation: perldoc /usr/share/perl5/vendor_perl/NethServer/Service.pm
3.4.3 Orphan services
During runlevel-adjust event, the system will stop any orphan service. A orphan service is a running service notcontrolled by any nethserver-package. A service is an orphan if there is a service record in configuration db, and thereis no db defaults (in /etc/e-smith/db/configuration/defaults).
3.4. Service packages 11

NethServer Documentation, Release 7
12 Chapter 3. RPM package rules

CHAPTER 4
Internationalization
These are the coding conventions for NethServer i18n. Each package repository should respect them.
• The developer prepares the translation source strings when he writes the code.
• Each translation catalog must be mapped to a resource on Transifex.
• Whenever new strings are added or existing ones are changed, source catalogs must be pushed into Transifexwith Transifex client:
tx push -s
To configure the Transifex client execute the txinit.sh script on the repository root. The script can be executed multipletimes, if new catalogs are added to the repository.
Currently both gettext and Server Manager specific format is supported for language catalogs.
4.1 gettext
The xgettext command can be used to extract strings from the source code. The resulting .pot file must be namedlocale/<rpmname>.pot.
4.1.1 gettext example
In this example we will translate a new TODO message for the web interface.
Steps to setup translation for a new todo:
1. Be sure gettext is installed in your system
2. Add the todo script to the git repository
3. Create locale directory inside the git repository root:
mkdir locale/
4. Extract the strings (from a Python source code):
PACKAGE=$(basename `pwd`)xgettext --msgid-bugs-address "[email protected]" --package-version "1.0.0" \--package-name "$PACKAGE" --foreign-user -d "$PACKAGE" -o "locale/${PACKAGE}.pot" \-L Python root/etc/nethserver/todos.d/*
5. Run the txinit.sh script and commit newly created files into git.
13

NethServer Documentation, Release 7
6. Upload the new .pot resource to Transifex (special permissions are needed):
tx push -s
4.2 Server Manager
All source language catalog files are placed in root/usr/share/nethesis/NethServer/Language/en.We assume en is en-US.
The catalog format is a common PHP file where the array variable $L is assigned some keys:
<?php
$L['string_id_1'] = 'This is an example';$L['string_id_2'] = 'What is a PHP array catalog?';
1. Omit ending sequence ?>.
2. Use UTF-8 encoding.
Given a module with name “Test”, the source language file will be root/usr/share/nethesis/NethServer/Language/en/NethServer_Module_Test.php.
When the Server Manager is running in debug mode, missing translation labels can be found in/var/log/messages. To enable the debug,
• Unlock index_dev.php controller:
touch /usr/share/nethesis/nethserver-manager/debug
• Prepend index_dev.php on URLs path, eg: https://<ipaddress>/index_dev.php/en/<module>.
14 Chapter 4. Internationalization

CHAPTER 5
Databases
5.1 Overview
All user-editable configuration parameters on NethServer are stored in plain text database.
These values are used to generate the system configuration files, such as those found in the /etc/ directory. Theconfiguration databases may be modified by various programs on the system, including the web interface or scriptsrun from the command line by a system administrator.
Each entry in the database is either a simple key/value pair or a key and a collection of related property/value pairs.
5.2 Simple entries
Simple configuration database entries take the form of a key/value pair:
[root@nsrv -]# config show SystemNameSystemName=myserver
5.3 Complex entries
More complex entries consist of a key, a type, and a collection of property/value pairs:
[root@nsrv -]# config show sysconfigsysconfig=configuration
Copyright=ProductName=NethServerRegistration=noneRelease=4Version=6.4
Use complex entries whenever possible
5.4 Access from the command line
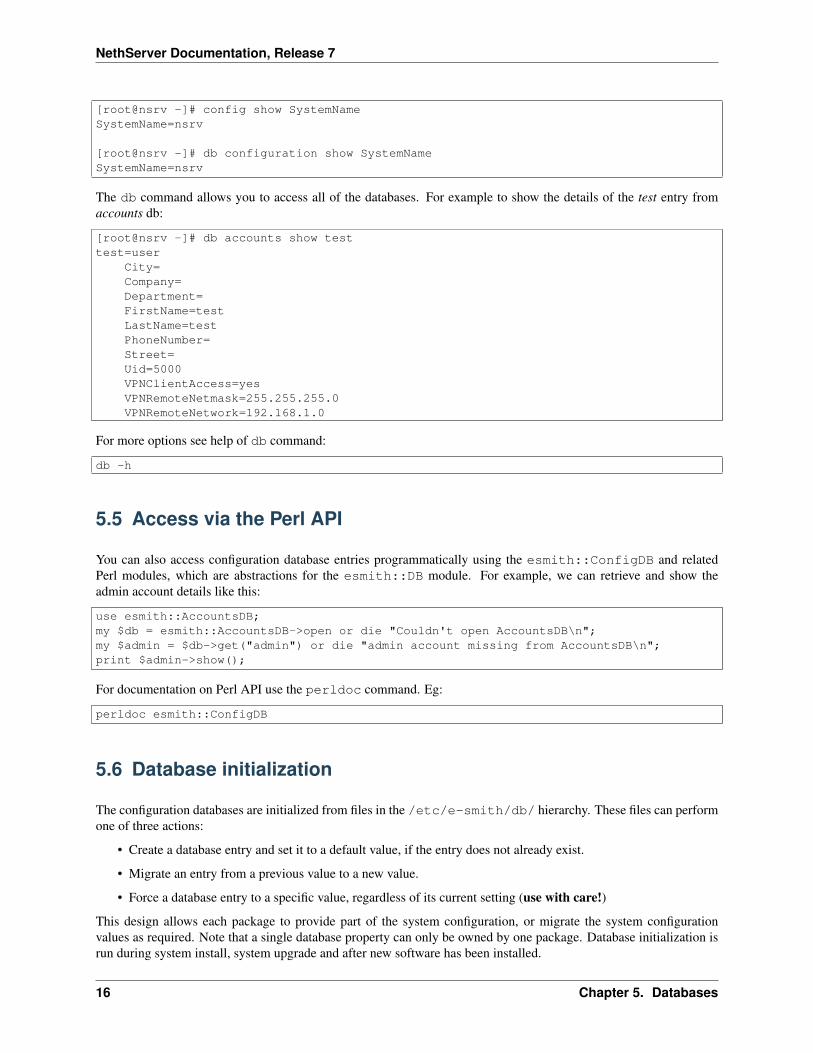
You can access database entries from the command line using the config command, as shown above, or the dbcommand. The config command provides a shorthand for accessing the configuration database. The followingcommands are equivalent:
15
NethServer Documentation, Release 7
[root@nsrv -]# config show SystemNameSystemName=nsrv
[root@nsrv -]# db configuration show SystemNameSystemName=nsrv
The db command allows you to access all of the databases. For example to show the details of the test entry fromaccounts db:
[root@nsrv -]# db accounts show testtest=user
City=Company=Department=FirstName=testLastName=testPhoneNumber=Street=Uid=5000VPNClientAccess=yesVPNRemoteNetmask=255.255.255.0VPNRemoteNetwork=192.168.1.0
For more options see help of db command:
db -h
5.5 Access via the Perl API
You can also access configuration database entries programmatically using the esmith::ConfigDB and relatedPerl modules, which are abstractions for the esmith::DB module. For example, we can retrieve and show theadmin account details like this:
use esmith::AccountsDB;my $db = esmith::AccountsDB->open or die "Couldn't open AccountsDB\n";my $admin = $db->get("admin") or die "admin account missing from AccountsDB\n";print $admin->show();
For documentation on Perl API use the perldoc command. Eg:
perldoc esmith::ConfigDB
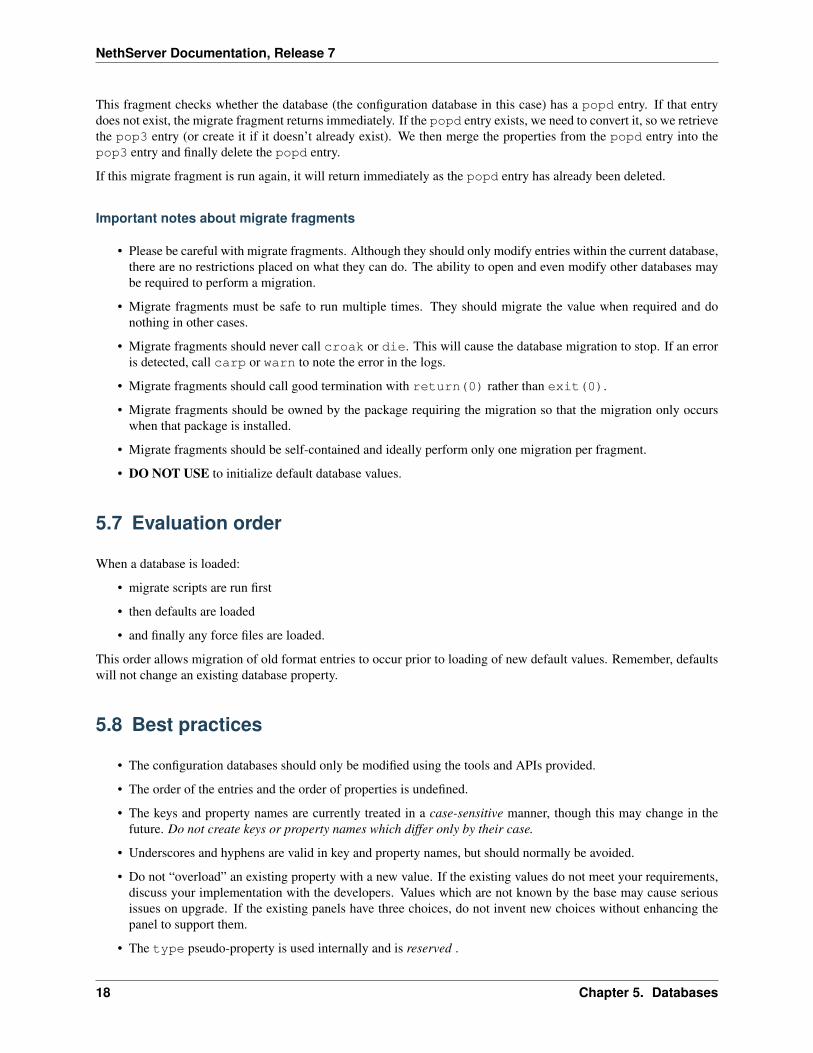
5.6 Database initialization
The configuration databases are initialized from files in the /etc/e-smith/db/ hierarchy. These files can performone of three actions:
• Create a database entry and set it to a default value, if the entry does not already exist.
• Migrate an entry from a previous value to a new value.
• Force a database entry to a specific value, regardless of its current setting (use with care!)
This design allows each package to provide part of the system configuration, or migrate the system configurationvalues as required. Note that a single database property can only be owned by one package. Database initialization isrun during system install, system upgrade and after new software has been installed.
16 Chapter 5. Databases

NethServer Documentation, Release 7
If you examine the /etc/e-smith/db/configuration/ directory you will see three subdirectories:defaults/, force/ and migrate/ to match the three options above. A similar structure exists for each of theother databases. A new database can be created by populating a new directory tree under the /etc/e-smith/db/directory.
Configuration databases can also be initialized using a special /usr/libexec/nethserver/initialize-<dbname>-databasescript, where dbname is the database name. For example: /usr/libexec/nethserver/initialize-mycustomdb-database.
5.6.1 Defaults files
Defaults files are simple text files. If the corresponding database key/property already exists, it is skipped. Otherwise,the key/property is created and the value loaded. For example, this file:
[root@nsrv -]# cat /etc/e-smith/db/configuration/defaults/sshd/statusenabled
It would create the sshd database entry if it doesn’t already exist, create the status property for that entry, again ifit doesn’t already exist, and finally set the status property to enabled.
Forcing database initialization
Simply call the action: /etc/e-smith/events/actions/initialize-default-databases
5.6.2 Force files
Force files are just like defaults files, except they overwrite the existing value. So, this file:
[root@nsrv -]# cat /etc/e-smith/db/configuration/force/sysconfig/Version6
It would create the Version property of the sysconfig entry and unconditionally set its value to 6.
Warning: Do not use force fragments if not really necessary!
5.6.3 Migrate fragments
Migrate fragments are small pieces of Perl text which can be used to perform more complex migrations than is possiblewith defaults and force files. They would normally be used to replace database keys or properties with new names, orto adjust policy settings during an upgrade.
Each fragment is passed a reference to the current database in the $DB variable. This variable is an in-stance of the appropriate esmith::DB subclass, e.g. esmith::AccountsDB when the accounts database mi-grate fragments are being executed. This means that you can use the methods of that subclass, for exampleesmith::AccountsDB->users().
Here is an example of a migrate fragment, which replaces the outdated popd entry with the new name pop3:
{my $popd = $DB->get("popd") or return;my $pop3 = $DB->get("pop3") || $DB->new_record("pop3", { type => "service" });$pop3->merge_props($popd->props);$popd->delete;
}
5.6. Database initialization 17
NethServer Documentation, Release 7
This fragment checks whether the database (the configuration database in this case) has a popd entry. If that entrydoes not exist, the migrate fragment returns immediately. If the popd entry exists, we need to convert it, so we retrievethe pop3 entry (or create it if it doesn’t already exist). We then merge the properties from the popd entry into thepop3 entry and finally delete the popd entry.
If this migrate fragment is run again, it will return immediately as the popd entry has already been deleted.
Important notes about migrate fragments
• Please be careful with migrate fragments. Although they should only modify entries within the current database,there are no restrictions placed on what they can do. The ability to open and even modify other databases maybe required to perform a migration.
• Migrate fragments must be safe to run multiple times. They should migrate the value when required and donothing in other cases.
• Migrate fragments should never call croak or die. This will cause the database migration to stop. If an erroris detected, call carp or warn to note the error in the logs.
• Migrate fragments should call good termination with return(0) rather than exit(0).
• Migrate fragments should be owned by the package requiring the migration so that the migration only occurswhen that package is installed.
• Migrate fragments should be self-contained and ideally perform only one migration per fragment.
• DO NOT USE to initialize default database values.
5.7 Evaluation order
When a database is loaded:
• migrate scripts are run first
• then defaults are loaded
• and finally any force files are loaded.
This order allows migration of old format entries to occur prior to loading of new default values. Remember, defaultswill not change an existing database property.
5.8 Best practices
• The configuration databases should only be modified using the tools and APIs provided.
• The order of the entries and the order of properties is undefined.
• The keys and property names are currently treated in a case-sensitive manner, though this may change in thefuture. Do not create keys or property names which differ only by their case.
• Underscores and hyphens are valid in key and property names, but should normally be avoided.
• Do not “overload” an existing property with a new value. If the existing values do not meet your requirements,discuss your implementation with the developers. Values which are not known by the base may cause seriousissues on upgrade. If the existing panels have three choices, do not invent new choices without enhancing thepanel to support them.
• The type pseudo-property is used internally and is reserved .
18 Chapter 5. Databases

NethServer Documentation, Release 7
• By convention, database keys are lower case, and property names are stored in mixed case. The type, statusand access properties are exceptions to this convention.
• The storage location and internals of the databases is subject to change.
• The configuration databases are currently stored as pipe-delimited flat text files in the/var/lib/nethserver/db/ directory.
5.8.1 Namespace issues
All entries in a single database share the same namespace. Users, groups, information bays, printers, and other entriesin the accounts database currently all share one namespace. This means that you cannot have a user with the samename as an information bay, group or other entry in the accounts database.
However, it would be possible to have a host named fredfrog as well as a user named fredfrog as they are stored inseparate databases and thus different namespaces.
5.9 List of available database
5.9.1 Table of databases
The following table summarizes
• the database name
• the perl module that manages it and
• the package that provides it
Databases provides by the base system:
Name Perl module Package Descriptionconfiguration esmith::ConfigDB nethserver-basehosts esmith::HostsDB nethserver-hostsnetworks esmith::NetworksDB nethserver-basedomains esmith::DomainsDB nethserver-mail-common
Each modules can define its own new databases. Some relevant databases are:
Name Perl module Package Descriptionaccounts esmith::AccountsDB nethserver-directorydomains esmith::DomainsDB nethserver-mail-common
5.9. List of available database 19

NethServer Documentation, Release 7
20 Chapter 5. Databases
CHAPTER 6
Templates
6.1 Design of the template system
Every piece of software has its own configuration format, and writing parsers for each one is a complex, time-consuming and error-prone process. The template system software avoids the whole issue by using templates whichgenerate the correct configuration.
Configuration files are over-written when templates are expanded. In a few specific cases, the existing configurationfile is parsed and rewritten in-place. This is done where the configuration file (e.g. /etc/fstab) is also automati-cally updated by some other process.
Templates are stored under /etc/e-smith/templates/ in a directory hierarchy whichmatches the standard filesystem. For example, the template for /etc/inittab is stored in the/etc/e-smith/templates/etc/inittab/ directory. Each template is stored as a directory of tem-plate fragments and processed by the Perl Text::Template module.
The template fragments are concatenated together in ASCIIbetical order (US-ASCII sort order) and the complete fileis parsed to generate the appropriate configuration files for the service. The use of fragments is part of NethServermodular and extensible architecture; it allows third-party modules to add fragments to the configuration where neces-sary.
6.2 The Text::Template module
The Text::Template module allows arbitary Perl code to be embedded in a template file by surrounding it incurly braces ({ and }). The code inside the braces is interpreted and its return value replaces the section between, andincluding, the braces. For instance:
The answer is { 40 + 2 }
becomes:
The answer is 42
Variables can be passed in from the program which is expanding the template, hence:
{$OUT = ';'for my $item ( qw(bread milk bananas) ){
$OUT .= "\* $item\n";
21

NethServer Documentation, Release 7
}}
would expand to:
Shopping list
* bread
* milk
* bananas
The template system uses this mechanism to automatically pass in global configuration variables from the configura-tion database which can then be used to fill out the configuration files.
For example, the /etc/hosts template could be fairly simple and composed of two fragments:
[root@test hosts]$ ls /etc/e-smith/templates/etc/hosts10localhost 20hostname
Fragments can have static content. For example:
127.0.0.1 localhost
The second is more complex and relies on values from the configuration database:
{$OUT .= "$LocalIP\t";$OUT .= " ${SystemName}.${DomainName}";$OUT .= " ${SystemName}";
}
Note that the whole fragment is enclosed in braces. Within those braces is a section of Perl code.
When this template is expanded, it results in the following configuration file:
# ================= DO NOT MODIFY THIS FILE =================## Manual changes will be lost when this file is regenerated.## Please read the developer's guide, which is available# at https://dev.nethesis.it/projects/nethserver/wiki/NethServer# original work from http://www.contribs.org/development/## Copyright (C) 2015 Nethesis S.r.l.# http://www.nethesis.it - [email protected]#127.0.0.1 localhost192.168.10.1 nsrv.nethesis.it nsrv
The header block comes “for free” as part of the template system, courtesy of an optional file template-begin,which is always processed as the first fragment. If it isn’t provided, the text shown with # comments is in-cluded. If target configuration file do not support line comment beginning with #, please provide a custom or emptytemplate-begin.
The other lines are provided by the two fragments shown above. Note the use of the configuration database variables:$LocalIP, $SystemName and $DomainName. All simple entries in the configuration database are provided asglobal variables to the templates.
Note that all of the template fragments are concatenated together before evaluation, so it is possible to set values infragments which are used in later fragments. This is a very useful model for reducing the code in individual templatefragments.
22 Chapter 6. Templates
NethServer Documentation, Release 7
The complex entries in the configuration database are also provided as global variables to the templates. However,they are provided as Perl hashes instead of simple scalars. For example, here is how you might configure the NetworkTime Protocol (NTP) server /etc/ntp.conf file:
server { $ntpd{NTPServer} }driftfile /etc/ntp/driftauthenticate no
The NTPServer setting is stored in the ntpd configuration database record, and so can be accessed via the hash accessor$ntpd{NTPServer}.
6.2.1 template-begin and template-end
Each template directory can contain two optional files template-begin and template-end . The template-begin file is always processed as the first file of the template, and the template-end file is always processed as the lastfile.
If the directory does not contain a template-begin file, the contents of/etc/e-smith/templates-default/template-begin is used automatically.
If the directory does not contain a template-end , nothing is appended to the template output. It is mostly usedto provide the closing block for configuration files written in languages such as HTML and PHP, through a link to anentry in the templates-default/ directory.
6.2.2 /etc/e-smith/templates-default
The /etc/e-smith/templates-default directory contains a set of template-begin and template-endfiles for various languages. For example, if your template generates a perl script, you would linktemplate-begin to /etc/e-smith/templates-default/template-begin-perl and automaticallyget the #!/usr/bin/perl -w line and a comment containing the contents of the default template-begin file.
Note: You may also need a templates.metadata configuration file if your generated file needs to be executable.
6.2.3 Template fragment ordering
Template fragments are assembled in ASCII-betical order, with two exceptions: template-begin always comes first,and template-end always comes last. Template fragments are often named to start with a two digit number to make theordering obvious, but this is not required.
6.2.4 Templates for user home directories: templates-user
Most of the templates on the system map to single, fixed output files, such as /etc/hosts. However, templates arealso used to generate configuration files such as mail delivery instructions for users. These templates are stored in the/etc/e-smith/template-user/ tree.
As these templates have a variable output filename, they are expanded using small pieces of Perl code in action scripts.
6.2. The Text::Template module 23
NethServer Documentation, Release 7
6.2.5 Local site overrides: templates-custom and templates-user-custom
It is possible that the standard templates are not correct for a particular installation, and so the local system administra-tor can override the existing templates by placing files in the templates-custom tree. This is a parallel tree to thenormal templates hierarchy, and is normally empty. There is also a template-user-custom tree for overridingentries in the templates-user tree.
If a templates-custom entry exists for a template, it is merged with the standard templates directory during templateexpansion, using the following rules:
• If a fragment of the same name exists in both templates and templates-custom, the one from templates-customis used, and the one from the standard templates tree is ignored.
• If the fragments in templates-custom have different names from those in templates, they are merged into thetemplate as if they were in the templates directory.
• If the templates-custom entry is a file, rather than a directory, it completely overrides the standard template.
To make this concrete, let’s assume we have the following template structure in/etc/e-smith/templates/etc/book.conf:
10intro30chapter340chapter480synopsis
and in /etc/e-smith/templates-custom/etc/book.conf:
30chapter350chapter5
The resulting template would be processed in this order:
• template-begin from /etc/e-smith/templates-default
• 10intro from /etc/e-smith/templates/etc/book.conf
• 30chapter3 from /etc/e-smith/templates-custom/etc/book.conf
• 40chapter4 from /etc/e-smith/templates/etc/book.conf
• 50chapter5 from /etc/e-smith/templates-custom/etc/book.conf
• 80synopsis from /etc/e-smith/templates/etc/book.conf
• template-end (empty), nominally from /etc/e-smith/templates-default
How to resolve conflicts with standard templates
It is possible that the standard templates may specify behaviour which is not appropriate for your application. In manycases the templates will be driven by configuration database settings which allow their behaviour to be customized,which should be the first thing to check.
In many cases, your application only needs to extend the behaviour of the template by adding one or more fragments.This should be your second option and can be achieved by simply adding your fragment in the correct place in the listof fragments.
In rare cases the standard template specifies a behaviour which conflicts with your application. In these cases, youshould do all of the following:
• Create a templates-custom directory to match the existing one in the templates hierachy.
24 Chapter 6. Templates
NethServer Documentation, Release 7
• Copy the conflicting fragment, and only that fragment, to the templates-custom directory. The fragment shouldhave the same name in both directories. At this point you have not changed the behaviour of the system as thetemplates-custom entry will be preferred, but will behave identically.
• Modify the copy in templates-custom to suit your required behaviour.
• Inform the NethServer team about the problem. Please attach your modified template (or even better, a patchfile) and provide details of why you think that the standard template should be changed.
6.2.6 The expansion of templates
To expand your custom templates to their destination you have to use the following command:
expand-template <template destination>
where template destination has to be changed with the true path to the configuration file.
For Example you want to add something to the samba configuration, then you have to build a custom template fragmentunder /etc/e-smith/template-custom/etc/samba/smb.conf/ directory and execute the command:
expand-template /etc/samba/smb.conf
6.2.7 Subdirectory templates
It is also possible to split templates into further subdirectories. This can be very useful for evaluating the samefragments in a loop, for example for each virtual domain in httpd.conf or each ibay in smb.conf.
Two examples of this can be found in /etc/e-smith/templates/etc/httpd/conf/httpd.conf/80VirtualHostswhich loops over the /etc/e-smith/templates/etc/httpd/conf/httpd.conf/VirtualHosts/directory, and /etc/e-smith/templates/etc/smb.conf/90ibays which performs a similar loop overthe /etc/e-smith/templates/etc/smb.conf/ibays/ directory.
6.3 Template expansion
The system is designed to ensure consistent and reliable operation, without requiring command-line access. Wheneveran event is signalled, the relevant templates for that event are expanded and the services are notified of the configurationchanges.
Requesting expansion of a template in an event is a simple matter of creating an empty file under thetemplates2expand hierarchy for that event.
See events manual chapter for further information.
6.4 Template permissions and ownership: templates.metadata
Templates are normally expanded to be owned by root and are not executable, which is a reasonable default formost configuration files. However, templates may need to generate configuration files which are owned by a dif-ferent user, or which need to be executable or have other special permissions. This can be done by creating atemplates.metadata file which defines the additional attributes for the expansion.
6.3. Template expansion 25
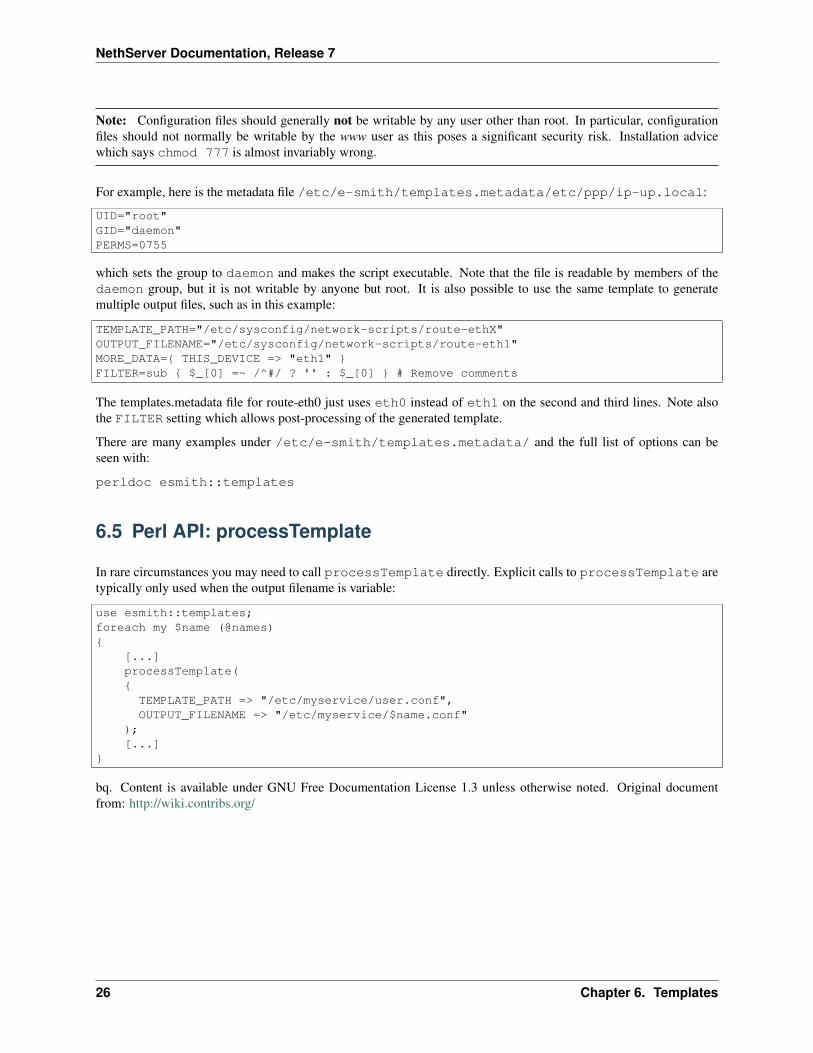
NethServer Documentation, Release 7
Note: Configuration files should generally not be writable by any user other than root. In particular, configurationfiles should not normally be writable by the www user as this poses a significant security risk. Installation advicewhich says chmod 777 is almost invariably wrong.
For example, here is the metadata file /etc/e-smith/templates.metadata/etc/ppp/ip-up.local:
UID="root"GID="daemon"PERMS=0755
which sets the group to daemon and makes the script executable. Note that the file is readable by members of thedaemon group, but it is not writable by anyone but root. It is also possible to use the same template to generatemultiple output files, such as in this example:
TEMPLATE_PATH="/etc/sysconfig/network-scripts/route-ethX"OUTPUT_FILENAME="/etc/sysconfig/network-scripts/route-eth1"MORE_DATA={ THIS_DEVICE => "eth1" }FILTER=sub { $_[0] =~ /^#/ ? '' : $_[0] } # Remove comments
The templates.metadata file for route-eth0 just uses eth0 instead of eth1 on the second and third lines. Note alsothe FILTER setting which allows post-processing of the generated template.
There are many examples under /etc/e-smith/templates.metadata/ and the full list of options can beseen with:
perldoc esmith::templates
6.5 Perl API: processTemplate
In rare circumstances you may need to call processTemplate directly. Explicit calls to processTemplate aretypically only used when the output filename is variable:
use esmith::templates;foreach my $name (@names){
[...]processTemplate({
TEMPLATE_PATH => "/etc/myservice/user.conf",OUTPUT_FILENAME => "/etc/myservice/$name.conf"
);[...]
}
bq. Content is available under GNU Free Documentation License 1.3 unless otherwise noted. Original documentfrom: http://wiki.contribs.org/
26 Chapter 6. Templates

CHAPTER 7
Actions and events
7.1 Actions
An action is a program, frequently written in a scripting language, which performs a single task. It is typically anencapsulation of a task usually done by a system administrator, such as editing a configuration file or reconfiguring aservice. Actions are not called directly; they are always called by signalling an event.
The actions are stored in the /etc/e-smith/events/actions/ directory. These actions are then linkedinto the relevant events as the same action may need to be performed in more than one event. To cre-ate a new action called myaction you simply create a program to perform the action myaction and save it as/etc/e-smith/events/actions/myaction . Actions can be written in any programming language, al-though additional platform support is provided for Perl code.
An example action script is:
#!/bin/bash/usr/sbin/lokkit --update
7.1.1 Action script parameters
Action scripts are always called with at least one parameter; the name of the current event. Many action scripts canbe called with a single additional parameter. This parameter is usually a configuration database key, for example theusername being modified. Action scripts rarely require more than two parameters. The details should be stored in theconfiguration database(s) and only the key should be passed to the action scripts. All configuration details must bestored in the configuration databases and the database key passed as the parameter to the action. This allows otherscripts to be added to the event.
Since the system passes the name of the current event as the first parameter, it is often beneficial to write action scriptswhich are polymorphic based on the event name. For example, the code to create a user and the code to modify anexisting user may be only slightly different and may well benefit from being in a single script. Example:
use strict;my $event = $ARGV[0];my $myarg = $ARGV[1];
exit 0;
Note: Whenever possible, avoid to call events from within action scripts.
27

NethServer Documentation, Release 7
7.1.2 Action code libraries
To promote code reusability and components abstraction some Perl mod-ules are available under /usr/share/perl5/vendor_perl/NethServer/ and/usr/share/perl5/vendor_perl/esmith/. For instance,
NethServer::Password
Secret generation and persistent storage, under /var/lib/nethserver/secrets/.
NethServer::Service Service manager agnostic API. No matter if a service is managed by systemd, Upstart or SysVinit script: use this API to gain control over it.
NethServer::Directory Access to LDAP, service accounts and ACL management, low-level user and group manage-ment.
NethServer::MailServer Obtain accounts and mail addresses relations. Manage IMAP ACLs.
esmith::templates Template processing and expansion.
esmith::events Event execution and tracking.
For more informations about a specific module, refer its perldoc documentation.
7.2 Events
Events are a mechanism which allows the system to trigger a set of actions in response to actual events that happen onthe system. When one of the users interfaces modifies the configuration databases, it must signal an event to regeneratethe various server application configuration files according to the new configuration.
Note: The user interface must never modify configuration files directly. Neither should to the administrator fromcommand line.
Each event is associated with a list of actions which should be performed when the event occurs and is de-fined as a subdirectory of /etc/e-smith/events/ containing symbolic links to the appropriate actions,loosely modelled after the ‘’System V init’‘mechanism for starting servers. For example, if you examine the/etc/e-smith/events/interface-update directory:
[root@nsrv actions]# ll /etc/e-smith/events/interface-update/total 8lrwxrwxrwx. 1 root root 34 Feb 6 11:19 S04interface-config-adjust -> ../actions/interface-config-adjustlrwxrwxrwx. 1 root root 33 Feb 6 11:19 S25interface-config-reset -> ../actions/interface-config-resetlrwxrwxrwx. 1 root root 33 Feb 6 11:19 S30interface-config-write -> ../actions/interface-config-writelrwxrwxrwx. 1 root root 35 Feb 6 11:19 S70interface-config-restart -> ../actions/interface-config-restartlrwxrwxrwx. 1 root root 36 Feb 6 11:19 S75interface-config-hostname -> ../actions/interface-config-hostnamedrwxr-xr-x. 2 root root 4096 Feb 6 11:20 services2adjustdrwxr-xr-x. 3 root root 4096 Dec 18 11:17 templates2expand
The symbolic links are given prefixes such as S15, S85, etc. to specify the order in which the actions should beexecuted in a similar manner to the System V init mechanism. You can change the actions performed by an eventby changing the links in the event directory. You can also create a new event by creating another subdirectory of/etc/e-smith/events/.
7.2.1 Implicit actions
Most events contain two common tasks: expanding various templates and adjusting (e.g. restarting) the relevantservices. For this reason, two implicit actions are included in all events. These implicit actions mean that additional
28 Chapter 7. Actions and events

NethServer Documentation, Release 7
code does not need to be written to perform these common tasks. The implicit actions are represented by entries in theservices2adjust/ and templates2expand/ subdirectories.
services2adjust
The services2adjust/ directory contains links mapping a specific service to the action to perform on that service.For example, if signalling the event in question requires that the ntpd service is restarted, you simply include the linkntpd -> restart in the services2adjust directory. The implicit action services2adjust would then restart thentpd service. As an example, the services2adjust/ directory for the nethserver-httpd-update event isshown below:
# ls> l /etc/e-smith/events/nethserver-httpd-update/services2adjust/total 0lrwxrwxrwx. 1 root root 7 Oct 2 09:05 httpd -> restart
templates2expand
The templates2expand/ directory contains a list of the configuration files which need to be regenerated fromtheir templates. This list consists of a collection of empty files with the same file name as the configuration fileto be expanded and in a heirarchy mirroring their location on the system. For example, to expand templates forthe /etc/samba/smb.conf configuration file, simply include the empty file etc/samba/smb.conf in thetemplates2expand/ directory of the relevant event.
Order of implicit actions
The implicit actions are implemented by inserting the action script generic_template_expand early in the listof actions to be run in an event and the adjust-services action near the end of the list. You should normally linkyour action scripts in the range S10 to S80 so that they occur after templates2expand and before services2adjust.
Note: The generic_template_expand action is currently run at S05 and adjust-services is run at S90.
7.2.2 Signalling events
The signal-event program takes an event name as an argument, and executes all of the actions in that event,providing the event name as the first parameter and directing all output to the system log. It works by listing theentries in the event directory and executing them in sequence. So for example, the command:
signal-event interface-update
will perform all the actions associated with the interface-update event, which is defined by the contents of the/etc/e-smith/events/interface-update/ directory.
Events with arguments
So far we have described the following general principle throughout the system; changes are made by altering thedatabase values, then signalling events. The actions triggered by each event typically regenerate entire configurationfiles, taking into account the latest configuration information.
However, some changes are best made incrementally. For example, consider the user-create event. One of its actionsupdates the LDAP directory, which it could do by deleting all of the users and recreating them based on the updated
7.2. Events 29
NethServer Documentation, Release 7
accounts database. However, this is inefficient and would lose any additional LDAP attributes which may havebeen stored. It would be better to simply add the new user incrementally, using the default LDAP schema.
But how is the action code to know which user was just added? The new username is passed as an argument to the user-create event. This way the action programs triggered by the user-create event have a choice. They can either ignorethe username argument and regenerate their output based on the updated list of accounts, or they can pay attentionto the username argument, retrieve the rest of the information about the new user from the accounts database, andperform the incremental work to add the user.
Note: Action scripts should normally take at most two arguments. The first is always the event name. The secondoptional argument is a key into one of the databases. Events are not function calls.
Events are not currently serialized. In most cases overlapping events will not cause issues, but caution should beexercised when events are signalled from programs.
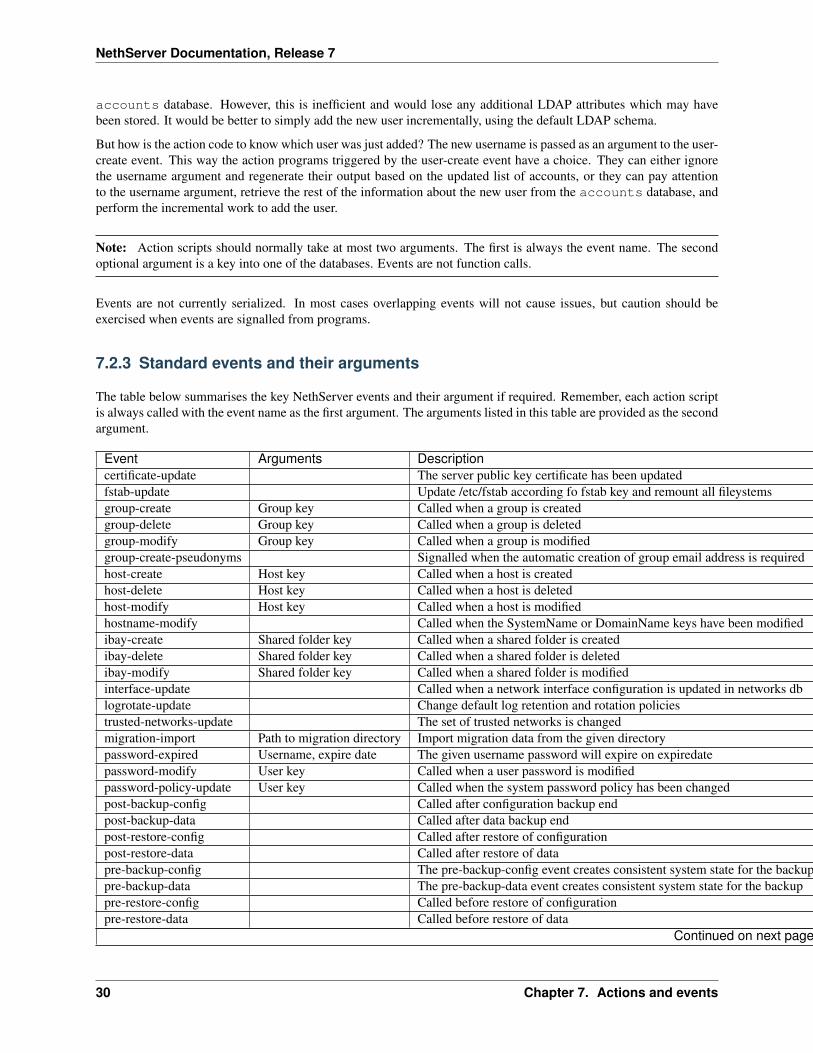
7.2.3 Standard events and their arguments
The table below summarises the key NethServer events and their argument if required. Remember, each action scriptis always called with the event name as the first argument. The arguments listed in this table are provided as the secondargument.
Event Arguments Descriptioncertificate-update The server public key certificate has been updatedfstab-update Update /etc/fstab according fo fstab key and remount all fileystemsgroup-create Group key Called when a group is createdgroup-delete Group key Called when a group is deletedgroup-modify Group key Called when a group is modifiedgroup-create-pseudonyms Signalled when the automatic creation of group email address is requiredhost-create Host key Called when a host is createdhost-delete Host key Called when a host is deletedhost-modify Host key Called when a host is modifiedhostname-modify Called when the SystemName or DomainName keys have been modifiedibay-create Shared folder key Called when a shared folder is createdibay-delete Shared folder key Called when a shared folder is deletedibay-modify Shared folder key Called when a shared folder is modifiedinterface-update Called when a network interface configuration is updated in networks dblogrotate-update Change default log retention and rotation policiestrusted-networks-update The set of trusted networks is changedmigration-import Path to migration directory Import migration data from the given directorypassword-expired Username, expire date The given username password will expire on expiredatepassword-modify User key Called when a user password is modifiedpassword-policy-update User key Called when the system password policy has been changedpost-backup-config Called after configuration backup endpost-backup-data Called after data backup endpost-restore-config Called after restore of configurationpost-restore-data Called after restore of datapre-backup-config The pre-backup-config event creates consistent system state for the backuppre-backup-data The pre-backup-data event creates consistent system state for the backuppre-restore-config Called before restore of configurationpre-restore-data Called before restore of data
Continued on next page
30 Chapter 7. Actions and events

NethServer Documentation, Release 7
Table 7.1 – continued from previous pageEvent Arguments Descriptionpseudonym-create Pseudonym key Called when a pseudonym is createdpseudonym-delete Pseudonym key Called when a pseudonym is deletedpseudonym-modify Pseudonym key Called when a pseudonym is modifieduser-create User key Called when a user is createduser-delete User key Called when a user is deleteduser-modify User key Called when a user is modifieduser-create-pseudonyms User key Called when the automatic creation of user’s email address(es) is requireduser-lock User key Called when a user account is lockeduser-unlock User key Called when a user account is unlockedsystem-initialization Initialize all system after installation
Handling deletions
When adding a user, the user is created in the accounts database, and various actions, such as creating the Linuxaccount, are performed in the user-create event. However, when deleting a user, we want to maintain theaccounts database entry for as long as possible, in case there is information which the actions in the user-deleteevent might need in order to cleanly delete the users. The system convention for handling deletions is:
• Change the type of the entry to mark it as being in the process of being deleted e.g. a’‘user’‘entry becomesa’‘user-deleted’‘entry.
• Signal the relevant deletion event - e.g.’‘user-delete’‘
• Remove the entry from the database, but only if the event succeeds. With this approach, the action scripts candecide whether to ignore the’‘user-deleted” entries when performing their tasks.
7.2.4 Event logs
Warning: Output of event logs will be soon refactored!
All events, and all actions run by the event, are logged to the messages system log. Here is an example action log,which has been formatted onto multiple lines to enhance readability:
Feb 2 13:22:33 gsxdev1 esmith::event[4525]:S65sshd-conf=action|Event|remoteaccess-update|Action|S65sshd-conf|Start|1138846952 730480|End|1138846953 66768|Elapsed|0.336288
From this single log, we can see the action script name, which event it was called in, when it started, ended and howlong it took (0.34 seconds). Now, let’s add an action script which always fails and signal the event again:
Feb 2 16:11:54 gsxdev1 esmith::event[4787]:S99false=action|Event|remoteaccess-update|Action|S99false|Start|1138857114 58910|End|1138857114 81920|Elapsed|0.02301|Status|256
7.2. Events 31
NethServer Documentation, Release 7
Note that this log has a new field Status, which is added if the action script returns a false (non-zero) exit status.Suppressing the Status field when it is zero (success) makes it much easier to find failed actions in the logs.
Warning: If an action script fails, the entire event fails. The other actions scripts in the event are run, but thewhole event is marked as having failed.
7.2.5 System validators
System validators provide an extensible UI-independent data validation layer.
On one hand UI implements fast grammar and/or syntax checks on input data. On the other, the system validatorsperforms in-depth system consistency checks.
Design
Validators have a behaviour very similar to events.
• A validator is a directory inside /etc/e-smith/validators.
• Each validator directory has a descriptive name, eg. user-name for a validator which validate a new user name.
• A validator is composed by an arbitrary number of actions saved inside/etc/e-smith/validators/actions directory and linked inside validator directory.
• A success validation occurs when all scripts return 0 (success validation) or at least one script returns 2 (sufficientvalid condition).
A validator action are always called with a single parameter which is the value to be validated. Actions must returnone of these exit values:
• 0: successful validation
• 1: validation failed
• 2: sufficient validation
• other value: specific error state
When a script returns 2 (sufficient validation) no further script will be processed.
Inside nethserver-devtools package there is validator_actions() function which help creating links to actionsjust like event_actions function. See perldoc esmith::Build::CreateLinks for details.
Invoking a validator:
validate <validator-name> <value-to-validate>
Eg:
validate user-name goofy</pre>
h2. Implementation
See #303.
32 Chapter 7. Actions and events

CHAPTER 8
Services
A service is a software which usually runs in background. The system will ensure service status accordingly to itsconfiguration. A service in configuration database is something like this:
httpd=servicestatus=enabledaccess=publicTCPPorts=80,443
Where httpd is the service name and status tells the system if the service should be enabled or disabled.
When the status property is switched between enabled/disabled state, the change will be reflected into runlevel con-figuration using chkconfig command. If both Upstart and SysV scripts are present, Upstart has the precedence andSysV script is disabled. For example see httpd-admin service.
This is what runlevel-adjust event and action do for all configured services. There is also another action calledadjust-services which does the same thing for services registered on a single event.
A service without a record in the configuration database is ignored and can be manually manged using chkconfigand service commands. See Add a new service.
8.1 Control a service
Enable a service:
config setprop myservice status enabledsignal-event runlevel-adjust
Disable a service:
config setprop myservice status disabledsignal-event runlevel-adjust
Where myservice is the service name to be enabled or disabled.
8.2 Access network service
A network service is a service running on the server which expose UDP or TCP ports. Ports can be listed in followingproperties:
• TCPPort: a single TCP port
33

NethServer Documentation, Release 7
• TCPPorts: a comma separated list of TCP ports
• UDPPort: a single UDP port
• UDPPorts: a comma separated list of UDP ports
If both TCPPort and TCPPorts properties are set, TCPPorts has the precedence. If both UDPPort and TCPPortsproperties are set, UDPPorts has the precedence.
A service can be accessible from public or private LAN. This configuration is saved on access property. The propertycan have one of the following values:
• none: the service is accessible only from localhost, no port is open
• private: the service is accessible only from green interfaces
• public: the service is accessible from green and red interfaces, but no blue and orange
Example of a service with UDP port 1122 open to the Internet:
config setprop myservice status enabled UDPPort 1122 access public
Example of a service with TCP ports 1122 an 2233 open to local network:
config setprop myservice status enabled TCPPorts 1122,2233 access private
The ports are opened only if the status property is set to enabled.
8.2.1 Custom access
Each network service can have one or both of following properties:
• AllowHosts: listed hosts can always access the service
• DenyHosts: listed hosts can never access the service
Both properties can be a list of IPs or CIDR networks and are honored only if access is seto to private or public
8.3 Add a new service
Any software can configure the init system using the standard chkconfig command. This approach always workfor third-party software.
On the other hand, if the service must be controlled by NethServer, create a new record inside configuration database:
config set myservice service status enabled
Where myservice is the name of the new service.
Make sure also there are defaults values inside the directory /etc/e-smith/db/configuration/defaults:if the key is present inside the configuration database, but not inside defaults, the service will be stopped. Given theabove example, create these files:
mkdir -p /etc/e-smith/db/configuration/defaults/myserviceecho "service" > /etc/e-smith/db/configuration/defaults/myservice/typeecho "enabled" > /etc/e-smith/db/configuration/defaults/myservice/status
Signal the new service to the system:
signal-event runlevel-adjust
34 Chapter 8. Services

NethServer Documentation, Release 7
8.4 Add a new network service
If a service not controlled by NethServer needs one or more open ports, use the TCPPort(s) or UDPPort(s) prop todeclare the port(s) and signal the firewall to open it:
config set fw_myservice service status enabled TCPPort 12345 access privatesignal-event firewall-adjust
Otherwise, if the service is controlled by NethServer, you can add the properties directly to the service key. For theservice myservice on above example:
config set myservice service status enabled TCPPort 12345 access privatesignal-event firewall-adjust
See nethserver-firewall-base.
8.4. Add a new network service 35

NethServer Documentation, Release 7
36 Chapter 8. Services

CHAPTER 9
Filesystems options
Some programs may need special filesystem options to work correctly. For example, Samba needs acl and user_xattrto enable fully compatibility with Windows systems.
NethServer add a special fstab key inside the configuration e-smith db. Each prop of fstab is in the formmountpoint=options.
For example:
fstab=configuration/=defaults,acl/boot=defaults
The entries are not mandatory, if a filesystem hasn’t an associated property, no modification will be done.
After each modification to fstab properties, the fstab-update event must be fired. The fstab-update event will expandthe /etc/fstab file and then remount all filesystems except for types: swap proc sysfs devpts.
Example:
config setprop fstab / defaults,aclsignal-event fstab-update
37

NethServer Documentation, Release 7
38 Chapter 9. Filesystems options

CHAPTER 10
DNS
The system will resolve host and domain names using DNS queries to external DNS servers. The configuration issaved inside the dns key from nethserver-base package.
Properties:
• NameServers: comma separated IP list of external DNS
• role: can be set to none or resolver. If role is set to none the server will always use external DNS. Forresolver role see DNS server.
Example:
dns=configurationNameServers=8.8.8.8,208.67.222.222role=none
10.1 Hosts
The system can handle local DNS records. When the server performs a DNS lookup, first it will search inside localDNS records. If no local record is found, an external DNS query will be done.
Note: Local DNS record will always override records from external DNS servers.
DNS records are called hosts and are saved inside the hosts database. Each entry is saved inside the /etc/hostsfile.
There are three types of records:
• local: hosts inside the internal network
• remote: hosts outside the internal network
• self: alias for the server itself
Records of type local and remote can have following properties:
• IpAddress: address of the host
• Description: optional description
• MacAddress: mac address of the host. Used only for DHCP reservation. See IP reservation.
For hosts inside local network, the record key doesn’t have the domain part. Example:
39

NethServer Documentation, Release 7
host1=localDescription=Internal network host #1IpAddress=192.168.1.23
For hosts outside local network, the record key must have the domain part. Example:
external.otherdomain.tld=remoteDescription=Other domain hostIpAddress=8.9.10.11
Records of type self can have following properties:
• Description: optional description
Example:
vhost1.domain.tld=selfDescription=Virtual Host #1
10.2 DNS server
The system uses dnsmasq as DNS and DHCP server and it directly resolves all hosts inside its domain. All othernames will be queried to external DNS servers.
The server will forward reverse lookups to upstream DNS servers, only if upstream DNS servers are inside a privatenetwork (eg. network address is 192.168.x.x).
The option bind-interfaces is always enabled, as consequence (from dnsmasq man):
This option has been patched to always use SO_BINDTODEVICE socket option when binding to inter-faces. As consequence, dnsmasq WILL NOT ANSWER to any DNS Queries that come to the socketwith the correct destination IP address, but originally on different interface. This behavior differs fromthe original dnsmasq upstream version and is used for security reasons.
Properties:
• CacheSize: entry to be cached by server, default is 4000
• dhcp-boot: directly pass parameters to dhcp-boot option
• except-interface: comma-separated list of interfaces. Do not listen to listed interfaces, useful to avoidconflicts with libvirt
• tftp-status: can be enabled or disabled. If enabled, enable the TFTP server for BOOTP (port 67)
• access: default is private, do NOT set to public
Database example:
dnsmasq=serviceAllowHosts=CacheSize=4000DenyHosts=TCPPort=53UDPPorts=53,67access=privatedhcp-boot=pxelinux.0,myserver.mydomain.com,192.168.1.1except-interface=virbr0,tunspotstatus=enabledtftp-status=enabled
40 Chapter 10. DNS

CHAPTER 11
DHCP
Warning: This page is outdated since nethserver-dnmasq-1.3.0 release
The system can act as DHCP server for the local network. Machines which are configured by DHCP have their namesautomatically included in the DNS server.
The DHCP can be enabled only on green and blue interfaces (see Roles and zones). Configuration is saved inside thedhcp database.
Each record of range type is associated to an ethernet interface and can have following properties:
• status: can be enabled or disabled
• DhcpRangeStart: first IP address of DHCP range
• DhcpRangeEnd: last IP address of DHCP range
• DhcpLeaseTime: seconds of lease time. Default is 86400
• DhcpGatewayIp: (optional) set a custom gateway ip. If not set, the gateway is the ip address of associatedinterface (record key)
The key of the record is the name of the associated interface. Example:
eth0=rangeDhcpGatewayIp=DhcpLeaseTime=86400DhcpRangeEnd=192.168.1.100DhcpRangeStart=192.168.5.200status=enabled
Hosts inside the blue network can always access the local DNS server.
Note: If a record is a related to an interface without a role, the record is automatically deleted.
The gateway for clients will be:
• if set, the value of property DhcpGatewayIp
• otherwise if the server has a red interface, the gateway is the IP address of the interface where the DHCP isenabled (eg. IP of the blue interface for clients in the guest’s network)
• otherwise if the server has only a green interface, the gateway of the green interface will be used
41
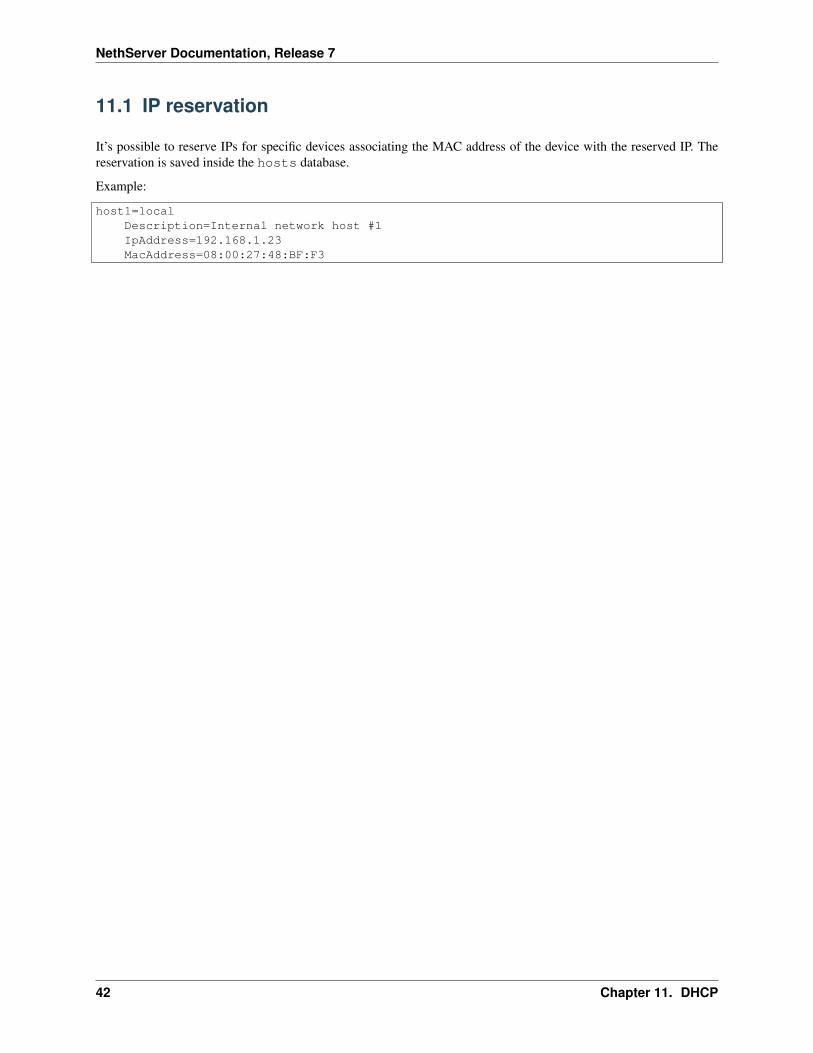
NethServer Documentation, Release 7
11.1 IP reservation
It’s possible to reserve IPs for specific devices associating the MAC address of the device with the reserved IP. Thereservation is saved inside the hosts database.
Example:
host1=localDescription=Internal network host #1IpAddress=192.168.1.23MacAddress=08:00:27:48:BF:F3
42 Chapter 11. DHCP

CHAPTER 12
Log retention and rotation
By default logs are rotated weekly and kept for 4 weeks. Some packages come with different defaults, but the majoritydo not specify a custom rotate value.
Logrotate db property:
• Rotate: rotation frequency, can be daily, weekly, monthly. Default is weekly
• Times: rotate log files Times number of times (days, weeks or months) before being removes, default is 4
• Compression: can be enabled or disabled. Defaults is disabled
Example:
logrotate=configurationCompression=disabledRotate=weeklyTimes=4
Keep logs for 6 months, rotate once a week:
config setprop logrotate Rotate weeklyconfig setprop logrotate Times 24signal-event logrotate-update
43

NethServer Documentation, Release 7
44 Chapter 12. Log retention and rotation

CHAPTER 13
Auto-generated random URL
Sometimes you need to install web applications which don’t have built-in authentication. A good solution can be anauto-generated random URL known only to some special users. It’s also a best practice to restrict access to thoseapplications using Apache allow and deny rules.
This feature is implemented in nethserver-lib using genRandomHash function. The function will generate a SHA1random hash
Example from [[nethserver-collectd-web]]:
my $alias = $collectd->prop('alias') || "";
# initialize alias if neededif ($alias eq "") {
$alias = esmith::util::genRandomHash();$confdb->set_prop('collectd-web','alias',$alias);
}
Random alias should be generated inside an action, like <package_name>-conf. The action must be executedbefore template-expand in a position before 05. Example from createlinks:
my $event = "nethserver-samba-audit-update";
event_actions($event, qw(initialize-default-databases 00nethserver-samba-audit-conf 02
));
45

NethServer Documentation, Release 7
46 Chapter 13. Auto-generated random URL
CHAPTER 14
Migration from NethService/SME Server
Migration is the process to convert a SME Server (or NethService) machine into a NethServer.
1. In the old host, create a full backup archive and move it to the new NethServer host.
2. In the new server, install all packages that cover the same features of the old one.
3. Explode the full backup archive on some directory (for instance /var/lib/migration)
4. Signal the event:
signal-event migration-import /var/lib/migration
This step will require some time.
5. Search for any ERROR string in /var/log/messages
14.1 Coding conventions
Most modules have already a migration action which handles the step automatically.
A migration action:
• must be named as <packagename>-migrate
• must be linked into migration-import event
• must migrate old properties values to new ones
• can copy original data files to the new location
• must take care to apply the imported configuration, possibly using the <packagename>-update event
During migration some properties will not be imported:
• UDPPort, TCPPort, UDPPorts, TCPPorts: all network ports will be reset to new defaults
• DNS forwarder, green IP address, default gateway: these properties are filled up in bootstrap-console
All e-smith databases are moved in /var/lib/nethserver/db directory.
14.1.1 Code snippets
A simple migrate action in perl.
47

NethServer Documentation, Release 7
#!/usr/bin/perluse esmith::DB::db;use esmith::event;use strict;my $event = shift;my $sourceDir = shift;my $esmithDbDir = 'home/e-smith/db';my $errors = 0;if {
die;}my $srcConfigDb = esmith::DB::db]>open\_ro(join('', $sourceDir, $esmithDbDir,'configuration')) || die("Could not open source configuration database in $sourceDir");my $dstConfigDb = esmith::DB::db->open || die;my $service = ‘ejabberd’;my $old = $srcConfigDb->get($service);my $new = $dstConfigDb->get || $dstConfigDb->new_record($service);$new->merge_props($old->props);# Apply configurationif( ! esmith::event::event_signal('nethserver-ejabberd-update')) {exit(1);
}exit 0;
Remember to change the service name and add a license header.
Add the migrate action to createlinks:
#-----------------------------------# actions for migration-import event#-----------------------------------$event ="migration-import";event_actions($event, '<packagename>-migrate' => 60);
14.2 Packages
Each packages with special migration notes is listed below.
14.2.1 nethserver-base
Properties not migrated:
• PasswordSet
• UnsavedChanges
• bootstrap-console
• dns
• sysconfig
• SystemMode
• green network configuration
• ActiveAccounts (moved to nethserver-directory, calculated on-the-fly)
48 Chapter 14. Migration from NethService/SME Server
NethServer Documentation, Release 7
14.2.2 nethserver-backup
No migration is possible. The backup must be reconfigured.
14.2.3 nethserver-directory
Home directories: user’s home directoriy migrates into /var/lib/nethserver/home, admin’s homedirectory migrates into /var/lib/nethserver/migration/admin, and a symlink is created in/root/admin-migration-<TIMESTAMP>.
14.2.4 nethserver-hylafax
After migration check the configuration of incoming fax notification.
14.2.5 nethserver-httpd
The ibay-virtualhost relation has been designed differently from SME/NethService. An automatic migration is notalways possible; the resulting configuration must be checked manually.
The global-pw-remote’ case is currently not implemented in NethServer and is mapped as global-pw. The reasonis we do not want make distinctions between internal/external connections.
14.2.6 nethserver-mail-server
During pseudonyms migration,
• pseudonyms pointing to admin and shared accounts are mapped to postmaster, as any other account notexisting in destination AccountsDB. Thus the resulting configuration requires post-migration supervision.
• recursive pseudonyms (pointing to another pseudonym) are flattened and a relation with a user or group accountrecord is established.
Index of shared mailboxes is not migrated. Each user must re-share its own mail directory. Toworkaround this problem copy the original index file (/etc/dovecot/sharedmailbox/dict.db) tothe new location (/var/lib/nethserver/vmail/shared-mailboxes.db) and restart dovecot. Seehttp://wiki2.dovecot.org/SharedMailboxes/Shared for more information.
Forbidden “\” in folder names
The dovecot plugin listplugin (http://wiki2.dovecot.org/Plugins/Listescape) is enabled, and uses backslash “\” as es-cape character. If original folder names contains “\”, run the following command after post-migration mail synchro-nization, to rename them:
find /var/lib/nethserver/vmail/ -type d -regex '.*\\.*' -prune | (while read -r SRC; do echo mv -iv "$SRC" "${SRC//\\/\\5c}"; done )
14.2.7 nethserver-mail-filter
No wildcards expansions are supported by nethserver-mail-filter UI interface; only full mail addresses or domainnames. The migration action must map email addresses in the form *domain.tld to domain names, and log awarning whenever another form of wildcard expansion is used.
Also recipient blacklists are not implemented and bayes DB is not migrated
14.2. Packages 49

NethServer Documentation, Release 7
50 Chapter 14. Migration from NethService/SME Server

CHAPTER 15
Certificate Management
nethserver-base provides a set of templates that output PEM-formatted certificate parts:
• certificate/key RSA private key
• certificate/crt public certificate
• certificate/pem both key+crt parts
Configuration is inside the configuration database. Example:
pki=configurationKeyFile=CrtFile=ChainFile=CertificateDuration=365CommonName=
A certificate consumer daemon should expand those templates to its own certificate paths, by installing the properconfiguration under /etc/e-smith/templates.metadata.
For instance nethserver-httpd adds the following template configuration:
• /etc/e-smith/templates.metadata/etc/pki/tls/private/localhost.key
TEMPLATE_PATH="certificate/key"OUTPUT_FILENAME="/etc/pki/tls/private/localhost.key"PERMS=0600UID="root"GID="root"
• /etc/e-smith/templates.metadata/etc/pki/tls/certs/localhost.crt
TEMPLATE_PATH="certificate/crt"OUTPUT_FILENAME="/etc/pki/tls/certs/localhost.crt"PERMS=0600UID="root"GID="root"
Set OUTPUT_FILENAME, PERMS, UID and GID values according to daemon configuration.
15.1 Default behavior
By default, CrtFile and KeyFile properties have empty values. In this case, nethserver-base generates aself-signed certificate during nethserver-base-update event.
51

NethServer Documentation, Release 7
Default SELinux-aware certificate locations are:
• /etc/pki/tls/private/NSRV.key: private key
• /etc/pki/tls/certs/NSRV.crt: CA certificate
A daily cron job checks certificate validity. If expired, the self-signed certificate is re-generated andcertificate-update event is signaled.
Default certificate duration is set to 365 days. To change it:
db configuration setprop pki CertificateDuration 3650
The certificate Common Name is set to system FQDN. To override this value type:
db configuration setprop pki CommonName custom.cn
52 Chapter 15. Certificate Management
CHAPTER 16
Yum plugin
The nethserver-yum package contains the nethserver_events which extends the post-RPM transactionhook. It executes the *-update event of each nethserver-* package involved in the transaction, preserving theorder of RPM dependencies.
Signalling update events after RPM cleaning up assures that any old event handler and template fragments havebeen removed.
The configuration file is /etc/yum/pluginconf.d/nethserver.conf. Available options are:
• enabled: 1 (default) or 0, enable or disable the plugin
• verbose: 1 or 0 (default), enable or disable debugging messages
16.1 Caching
When NethServer is behind a proxy server you can force to bypass an intermediate caching by adding this option tothe yum.conf file, under the main section:
http_caching=none
Be aware that yum.conf is a template and not using the cache can raise load on remote repository servers, use withcare!
53

NethServer Documentation, Release 7
54 Chapter 16. Yum plugin

CHAPTER 17
Backup
NethServer has two kinds of backup:
• configuration backup (nethserver-backup-config)
• data backup (nethserver-backup-data)
Configuration backup contains only system configuration files (passwd, config databases, etc). It’s scheduled to beexecuted every night and will create a new archive only if any file is changed in the last 24 hours.
Backup libraries use conf.d directory behavior (see perldoc NethServer::Backup). When a backup is started,the system will search for all files in /etc/backup-config.d directory. This directory can contain .include and.exclude files. Each file contain a list of file to include/exclude into/from the backup.
Example file /etc/backup-config.d/nethserver-base.include
/etc/e-smith/templates-custom/etc/e-smith/templates-user-custom/etc/ssh/etc/sudoers/etc/passwd/etc/shadow/etc/group/etc/gshadow
Exclusions are evaluated after all inclusions.
All libraries are inside the nethserver-backup-config package.
17.1 Log format
Backup and restore actions will log all steps in a file using a parsable format. Each log line has the following format:
<DATE_HOUR> - <TAG> - <MESSAGE> - <EXIT_STATUS>
Fields:
• DATE_HOUR: date in ISO 8601 format (%Y-%m-%d) and time in 24 hour notation (%H:%M:%S)
• TAG: can be START, STEP, SUCCESS or ERROR
• MESSAGE: log message
• EXIT_STATUS: (optional) the exit status of the process
55

NethServer Documentation, Release 7
17.2 Notifications
Both nethserver-backup-config and nethserver-backup-data comes with two property to configure notification:
• notify: enable or disable notification. Possible values:
– always: send notification regardless of backup exit status
– never: do not send any notification regardless of backup exit status
– error: send notification only if an error occurs
• notifyTo: notification mail destination address (default is: admin‘‘localhost)
17.3 Configuration backup
The nethserver-backup-config package implements the backup of configuration and relies on thebackup-config key inside the configuration database.
Properties: * status : enable or disable the automatic backup, can be enabled or disabled. Default isenabled. * reinstall: enable or disable the reinstallation of RPMs during the restore process. Can be enabledor disabled. Default is enabled.
17.3.1 Backup
The main command is /sbin/e-smith/backup-config which starts the backup process (if enabled). Thebackup process has 3 steps:
• pre-backup-config event: used to prepare data, for example a LDAP dump of users
• backup-config-execute action: actually execute the backup if any file is changed in the last 24 hours. Thebackup file is saved in /var/lib/nethserver/backup/backup-config.tar.xz (see perldocNethServer::BackupConfig)
• post-backup-config event: used to post-process the backup file, for example to copy the backup to a remoteserver or encrypting the archive
The configuration backup runs every night and it creates a new backup only if:
• destination file does not exist
• or new files are added or removed to/from the backup set
• or content of any file inside the set is changed
This package does not provide any default action in the pre-backup-config and post-backup-config events. But youcan create a script inside the post-backup-config event to copy the configuration backup to a remote machine using,for example, the SSH protocol.
Logs:
• /var/log/backup-config.log: parsable log
17.3.2 Restore
The main command is /sbin/e-smith/restore-config which starts the restore process:
• pre-restore-config event: used to prepare the system, for example stop a running service
56 Chapter 17. Backup

NethServer Documentation, Release 7
• restore-config-execute action: search for a backup file in the well-known directory (see above) and restore it
• post-restore-config event: used to apply restored configuration, for example reinstall packages and load theLDAP dump
This package does not provide any action in the pre-restore-config event.
Logs:
• /var/log/restore-config.log: parsable log
17.3.3 Customization
Add custom include/exclude inside following files:
• /etc/backup-config.d/custom.include
• /etc/backup-config.d/custom.exclude
17.4 Data backup
The‘nethserver-backup-data package‘‘ requires nethserver-backup-config. This module implements a tra-ditional incremental/full backup. It uses the key backup-data inside configuration database.
Properties:
• status : enable or disable the automatic backup, can be enabled or disabled. Default is enabled.Regardless of this property, the backup is always executed if started manually
• BackupTime: time of the scheduled backup. Must be in the form ‘‘hh:mm.Default is 1:00
• VFSType : set the backup medium, can be usb, cifs or nfs.
• SMBShare: contains the Samba share name
• SMBHost : host name of the SMB server
• SMBLogin : login user for the SMB server
• SMBPassword : password for the SMB server
• USBLabel : contains the filesystem label
• NFSHost : host name of the NFS server
• NFShare : contains the NFS share name
• Program : program used to perfrom the backup. Backup and restore processes will look for an action calledrespectively backup-data-<Program> and restore-data-<Program>. Default is: duplicity
• Type : can be full or incremental. If full, a full backup will be executed every time. Ifincremental, a full backup will be executed once a week at FullDay, all other backups will be incre-mental
• FullDay : number of day of the week when a full backup will be executed. Can be a number from 0 (Sunday)to 6 (Saturday). Defaults is 0.
• Mount : directory where the share (or usb drive) will be mounted. Defaults is /mnt/backup
• LogFile : output of the backup process. Default is /var/log/last-backup.log
• VolSize : size of chunks in MB, if supported by Program. Default is 250
17.4. Data backup 57
NethServer Documentation, Release 7
• CleanupOlderThan : time to retain backups, accept duplicity syntax (eg. 7D, 1M). Default is: never (keepall backups)
Supported VFSType:
• cifs : save the backup on a remote SMB server. Authentication is mandatory.
• nfs : save the backup on a remote NFS server. No authentication supported.
• usb : save the backup on a USB device. The device must have a writable filesystem with a custom label. Whenthe backup is started, the system will search for an USB device with the filesystem label saved in USBLabel.
17.4.1 Backup
The main command is /sbin/e-smith/backup-data which starts the backup process (if enabled). The backupis composed of three parts:
• pre-backup-data event: prepare the system and mount the destination share
• /etc/e-smith/events/actions/backup-data-<program> action: execute the backup. This actions must implementfull/incremental logic. The backup is directly saved on the mounted share (or usb device).
• post-backup-data: umount share and cleanup. Actions in this event can also implement retention policies (cur-rently not implemented).
Logs:
• /var/log/backup-data.log: parsable log
• /var/log/last-backup.log: backup program output
17.4.2 Indexing
In the pre-backup-data event the disk analyzer (Duc) make an indexing of filesystem, useful to create the graphicaltree.
The name of the actions is /etc/e-smith/events/actions/nethserver-restore-data-duc-indexand it compose the JSON file to create the navigable graphic tree.
17.4.3 Customization
Add custom include/exclude inside following files:
• /etc/backup-data.d/custom.include
• /etc/backup-data.d/custom.exclude
Retention policy
All backups can be deleted after a certain amount of time. Cleanup process takes place in post-backup-data event. SeeCleanupOlderThan property.
A log of cleanup action is saved in /var/log/last-cleanup.log.
58 Chapter 17. Backup

NethServer Documentation, Release 7
Duplicity
The default program used for backup is duplicity using the globbing file list feature. Encryption is disabled andduplicity cache is stored in /var/lib/nethserver/backup/duplicity/ directory. We plan to supportall duplicity features in the near future.
See http://duplicity.nongnu.org/ for more information.
Listing backup sets
To list current backup sets:
1. Mount the backup directory
2. Query duplicity status
3. Umount the backup directory
Just execute:
/etc/e-smith/events/actions/mount-`config getprop backup-data VFSType`duplicity collection-status --no-encryption --archive-dir /var/lib/nethserver/backup/duplicity/ file:///mnt/backup/`config get SystemName`/etc/e-smith/events/actions/umount-`config getprop backup-data VFSType`
17.4.4 Restore command line
The main command is /sbin/e-smith/restore-data which starts the restore process:
• pre-restore-data event: used to prepare the system (Eg. mysql stop)
• restore-data-<program> action: search for a backup in the configuration database and restore it
• post-restore-data event: used to inform programs about new available data (eg. mysql restart)
17.4.5 Restore grahic interface
After the selection of the paths to restore, the main command called is/usr/libexec/nethserver/nethserver-restore-data-help that reads the list of paths to re-store and creates a executable command to restore the directories. If the second option of restore was selected(Restored file without overwrite the existing files), after the restore in a temp directory, the script moves the restoreddirectories in the correct paths.
Logs:
• /var/log/restore-data.log: parsable log
• /var/log/restore.log: process output
17.4. Data backup 59

NethServer Documentation, Release 7
60 Chapter 17. Backup
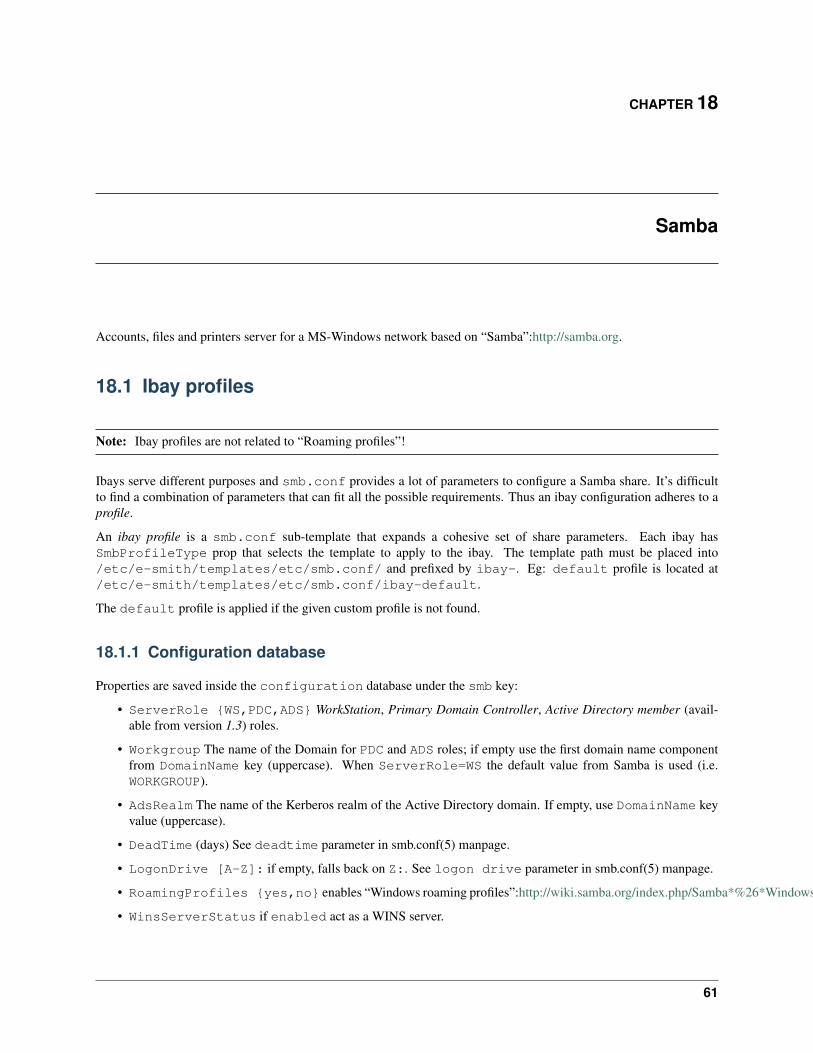
CHAPTER 18
Samba
Accounts, files and printers server for a MS-Windows network based on “Samba”:http://samba.org.
18.1 Ibay profiles
Note: Ibay profiles are not related to “Roaming profiles”!
Ibays serve different purposes and smb.conf provides a lot of parameters to configure a Samba share. It’s difficultto find a combination of parameters that can fit all the possible requirements. Thus an ibay configuration adheres to aprofile.
An ibay profile is a smb.conf sub-template that expands a cohesive set of share parameters. Each ibay hasSmbProfileType prop that selects the template to apply to the ibay. The template path must be placed into/etc/e-smith/templates/etc/smb.conf/ and prefixed by ibay-. Eg: default profile is located at/etc/e-smith/templates/etc/smb.conf/ibay-default.
The default profile is applied if the given custom profile is not found.
18.1.1 Configuration database
Properties are saved inside the configuration database under the smb key:
• ServerRole {WS,PDC,ADS} WorkStation, Primary Domain Controller, Active Directory member (avail-able from version 1.3) roles.
• Workgroup The name of the Domain for PDC and ADS roles; if empty use the first domain name componentfrom DomainName key (uppercase). When ServerRole=WS the default value from Samba is used (i.e.WORKGROUP).
• AdsRealm The name of the Kerberos realm of the Active Directory domain. If empty, use DomainName keyvalue (uppercase).
• DeadTime (days) See deadtime parameter in smb.conf(5) manpage.
• LogonDrive [A-Z]: if empty, falls back on Z:. See logon drive parameter in smb.conf(5) manpage.
• RoamingProfiles {yes,no} enables “Windows roaming profiles”:http://wiki.samba.org/index.php/Samba*%26*Windows*Profiles.
• WinsServerStatus if enabled act as a WINS server.
61

NethServer Documentation, Release 7
• WinsServerIP ipaddress if WinsServerStatus is disabled, nmbd will register with the given WINSserver. See wins server, remote announce, remote browse sync parameters in smb.conf(5)manpage.
• UseCups {enabled,disabled} Use cups as printing server.
• UseClientDriver {yes,no} See use client driver parameter in smb.conf(5) manpage.
• NetbiosAliasList See netbios aliases parameter in smb.conf(5) manpage.
Example:
smb=service...Workgroup=AdsRealm=ServerRole=WSDeadTime=10080LogonDrive=RoamingProfiles=noWinsServerStatus=disabledWinsServerIP=UseCups=enabledUseClientDriver=yesNetbiosAliasList=
18.2 Accounts database
Only records with type ibay.
Properties:
• SmbStatus if enabled, activates ibay sharing through SMB protocol
• SmbProfileType select the profile template to apply to the share (optional). The template path must beplaced into /etc/e-smith/templates/etc/smb.conf/ and prefixed by ibay-. Eg: defaultprofile is located at /etc/e-smith/templates/etc/smb.conf/ibay-default.
• SmbRecycleBinStatus: enable or disable the recycle bin; when a file is deleted it is moved inside therecycle bin.
• SmbShareBrowseable: controls the visibility of the shared folder, default is enabled.
Example:
iba1=ibayAclRead=domadmins,adminAclWrite=domadmins,adminDescription=testGroupAccess=rwHttpStatus=disabledOtherAccess=rOwningGroup=localsSmbGuestAccessType=noneSmbRecycleBinStatus=disabledSmbShareBrowseable=enabledSmbStatus=enabled
62 Chapter 18. Samba

NethServer Documentation, Release 7
18.3 Active Directory domain member
The Active Directory member role integrates AD users and groups into the system, through the winbind nsswitchmodule and provides some configuration hooks that other packages (i.e. [[nethserver-mail-server]]) can use to authen-ticate themselves through the “Kerberos protocol”:http://en.wikipedia.org/wiki/Kerberos*(protocol).
18.3.1 Join the AD domain
This is the environment where I tested the AD join
• NethServer 6.x host name nsrv2.ads1.tld
• Windows Sever 2008 R2 Standard host name w2k8-ad.ads1.tld domain NSRV1 realm ADS1.TLD IPaddress 192.168.88.1
• Windows XP Professional 5.1 (2600) SP2 Thunderbird 10 ESR client
Example: Server-manager graphical interface procedure (provided that ‘‘nethserver-hosts‘‘ and ‘‘nethserver-ntp‘‘ packages are installed)
• Point your browser to the server-manager URL, here https://nsrv2.ads1.tld:980
• Authenticate as admin
• In DNS & DHCP > DNS > Configure set 192.168.88.1 as primary DNS server
• Set pool.ntp.org as timesource on AD. I followed the instructions about “Windows Time Ser-vice”:http://support.ntp.org/bin/view/Support/WindowsTimeService, from support.ntp.org. It seems that aftersetting the external time source, AD works as NTP server as well.
• Back on server-manager, in Date and Time set pool.ntp.org, or the AD itself, 192.168.88.1, asNTP server
• In Windows Network select Active Directory member role and fill required fields
Example: Command line procedure
• Login as root into nsrv2.
• AD must be the DNS server: it contains SRV records necessary to the LDAP/Kerberos infrastructure. Set theAD controller as DNS name server:
rpm -q nethserver-hosts || yum install nethserver-hostsconfig setprop dns NameServers 192.168.88.1signal-event nethserver-hosts-update
• AD Kerberos usually requires that the difference between machine clocks is less than 5 minutes; -unfortunatelyupstream ntpd still does not support MSNTP authentication, thus we must configure both AD and NethServerto synchronize with an external time source: pool.ntp.org.
For NethServer type:
rpm -q nethserver-ntp || yum install nethserver-ntpconfig setprop ntpd status enabled NTPServer pool.ntp.orgsignal-event nethserver-ntp-save
• To set pool.ntp.org as timesource on AD I followed the instructions about “Windows Time Ser-vice”:http://support.ntp.org/bin/view/Support/WindowsTimeService, from support.ntp.org.
• Now you’re ready to join AD domain. If you’re on a tty, nethserver-samba-adsjoin event will ask foradministrator‘s password interactively, otherwise it will read the given file contents (/tmp/dummy here).
18.3. Active Directory domain member 63
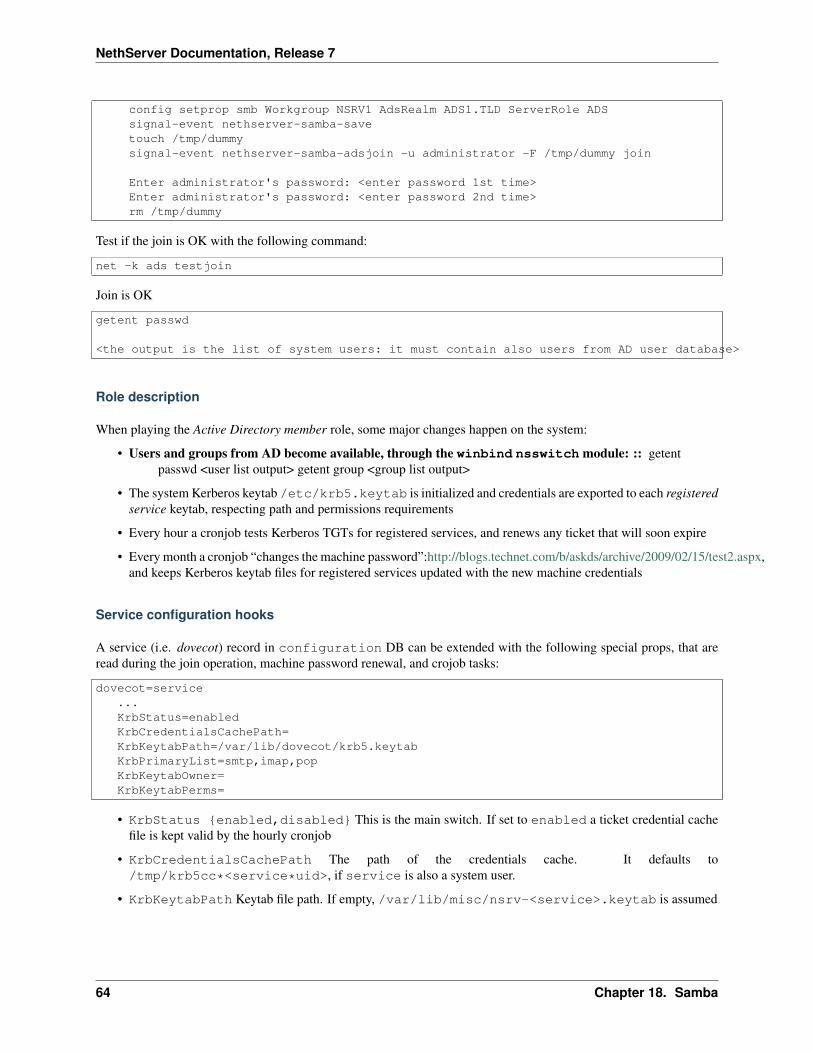
NethServer Documentation, Release 7
config setprop smb Workgroup NSRV1 AdsRealm ADS1.TLD ServerRole ADSsignal-event nethserver-samba-savetouch /tmp/dummysignal-event nethserver-samba-adsjoin -u administrator -F /tmp/dummy join
Enter administrator's password: <enter password 1st time>Enter administrator's password: <enter password 2nd time>rm /tmp/dummy
Test if the join is OK with the following command:
net -k ads testjoin
Join is OK
getent passwd
<the output is the list of system users: it must contain also users from AD user database>
Role description
When playing the Active Directory member role, some major changes happen on the system:
• Users and groups from AD become available, through the winbind nsswitch module: :: getentpasswd <user list output> getent group <group list output>
• The system Kerberos keytab /etc/krb5.keytab is initialized and credentials are exported to each registeredservice keytab, respecting path and permissions requirements
• Every hour a cronjob tests Kerberos TGTs for registered services, and renews any ticket that will soon expire
• Every month a cronjob “changes the machine password”:http://blogs.technet.com/b/askds/archive/2009/02/15/test2.aspx,and keeps Kerberos keytab files for registered services updated with the new machine credentials
Service configuration hooks
A service (i.e. dovecot) record in configuration DB can be extended with the following special props, that areread during the join operation, machine password renewal, and crojob tasks:
dovecot=service...KrbStatus=enabledKrbCredentialsCachePath=KrbKeytabPath=/var/lib/dovecot/krb5.keytabKrbPrimaryList=smtp,imap,popKrbKeytabOwner=KrbKeytabPerms=
• KrbStatus {enabled,disabled} This is the main switch. If set to enabled a ticket credential cachefile is kept valid by the hourly cronjob
• KrbCredentialsCachePath The path of the credentials cache. It defaults to/tmp/krb5cc*<service*uid>, if service is also a system user.
• KrbKeytabPath Keytab file path. If empty, /var/lib/misc/nsrv-<service>.keytab is assumed
64 Chapter 18. Samba

NethServer Documentation, Release 7
• KrbPrimaryList <comma separated words list> Defines the keytab contents. In Kerberos jar-gon a “primary” is the first part of the “principal”:http://web.mit.edu/kerberos/krb5-1.5/krb5-1.5.4/doc/krb5-user/What-is-a-Kerberos-Principal*003f.html string, before the slash (/) character. Any primary in this list isexported to the keytab.
• KrbKeytabOwner The unix file owner. Default is the service name. This is applied to both the credentialscache file and the keytab file.
• KrbKeytabPerms The unix bit permissions in octal form. Default is 0400. This is applied to both thecredentials cache file and the keytab file.
The implementation is provided by source:nethserver-samba|root/usr/libexec/nethserver/smbads
Troubleshooting
# CHECK clock difference between NethServer and AD DC less than 5 minutes # CHECK NethServer uses only DCas DNS
Samba join status
Commands:
• net ads info
• net ads testjoin
Does NSS/Winbind list AD users?
Use:
getent passwd
Does Dovecot see AD users?
Use:
doveadm user \*
Can I obtain Kerberos TGT?
• Using keytab:
kinit -t /etc/krb5.keytab -k '<SERVERNAME>$'
• If keytab does not work, providing the secret machine password, stored in secrets.tdb, without the trailingNULL character:
tdbdump /var/lib/samba/private/secrets.tdb | grep -A 1 SECRETS/MACHINE*PASSWORDkinit '<SERVERNAME>$'
18.3. Active Directory domain member 65
NethServer Documentation, Release 7
18.4 Changing hostname
A new machine SID is generated when the server is in WS role and hostname changes. The SID is stored insecrets.tdb and in a new LDAP entry. When PDC role is then selected, one of the following scenarios applies:
• if the domain (workgroup) was not previously created , a new sambaDomain entry is generated with the sameSID of the new hostname;
• if the workgroup was previously created, the old domain entry (and SID) is retained. In this scenario new useraccounts retain the old workgroup SID.
In other words, a new SID seems to be generated from hostname only. This differs from the official Samba documen-tation.
“Security identifiers (SIDs)” section in “Updating Samba-3”:http://www.samba.org/samba/docs/man/Samba-Guide/upgrades.html states about SIDs:
The SID is generated in a nondeterminative manner. This means that each time it is generated for aparticular combination of machine name (hostname) and domain name (workgroup), it will be different.
66 Chapter 18. Samba

CHAPTER 19
Web interface
The web interface is the main configuration method for NethServer. The main goal is to hide the system configurationcomplexity behind a simple and clear interface.
It runs on a special httpd instance and is accessible at: https://your_server:980 orhttps://your_server/server-manager (if nethserver-httpd module is installed).
19.1 Nethgui framework
Nethgui framework is provided with a set of components and basic classes to quickly build a modern web user inter-face. Its main goals are:
• provide a simplified API for coding, localizing and realizing the web user interface and behaviour forproject:NethServer based products.
• perform user authentication and authorization;
• offer test facilities to help module testing and debugging.
Key features:
• Object-oriented and embeddable
• Plugin support
• REST-aimed architecture
• Almost no external dependencies
• User roles
• AJAX driven HTML5 Widget library
• Unobtrusive JavaScript code
• Compatible with console-based and mobile browsers
NethServer Web User Interface is built upon Nethgui framework.
67

NethServer Documentation, Release 7
68 Chapter 19. Web interface

CHAPTER 20
Creating web UI module
In this page you can find a working example of a simple UI for a new module, but, first a little of theory.
20.1 Web UI structure
All code is organized in three main directories:
• /usr/share/nethesis/Nethgui: framework libraries (can be used for other projects)
• /usr/share/nethesis/NethServer: actual implementation of modules UI
• /usr/share/nethesis/nethserver-manager: web root directory
Nethgui is a MVC framework that aims to abstract the developer from the backend and frontend. This means that youdon’t have to deal with reading and writing properties from DB, neither care about HTML, CSS and JavaScript on theclient side. You just write the controller. Of course, if you want, you can play with all three layers but it shouldn’t benecessary in the most of cases.
Each module is composed by 4 parts:
• Controller: /usr/share/nethesis/NethServer/Module/.php
• View: /usr/share/nethesis/NethServer/Template/.php
• Translation: /usr/share/nethesis/NethServer/Language//NethServer\_Module*.php
• Inline help : /usr/share/nethesis/NethServer/Help/NethServer_Module*\ .html
If needed, a module can add extra resources:
• Specific authorization (JSON format): /usr/share/nethesis/NethServer/Authorization/.json- See Nethgui:Authorization
• Custom CSS: /usr/share/nethesis/NethServer/Css/.css - See Including CSS
• Custom JavaScript: /usr/share/nethesis/NethServer/Js/.js - See Including JS
• Unit tests: /usr/share/nethesis/NethServer/Test/Unit/NethServer/Module/.php - SeeNethgui unit test
• Utility libraries: /usr/share/nethesis/NethServer/Tool/.php
69
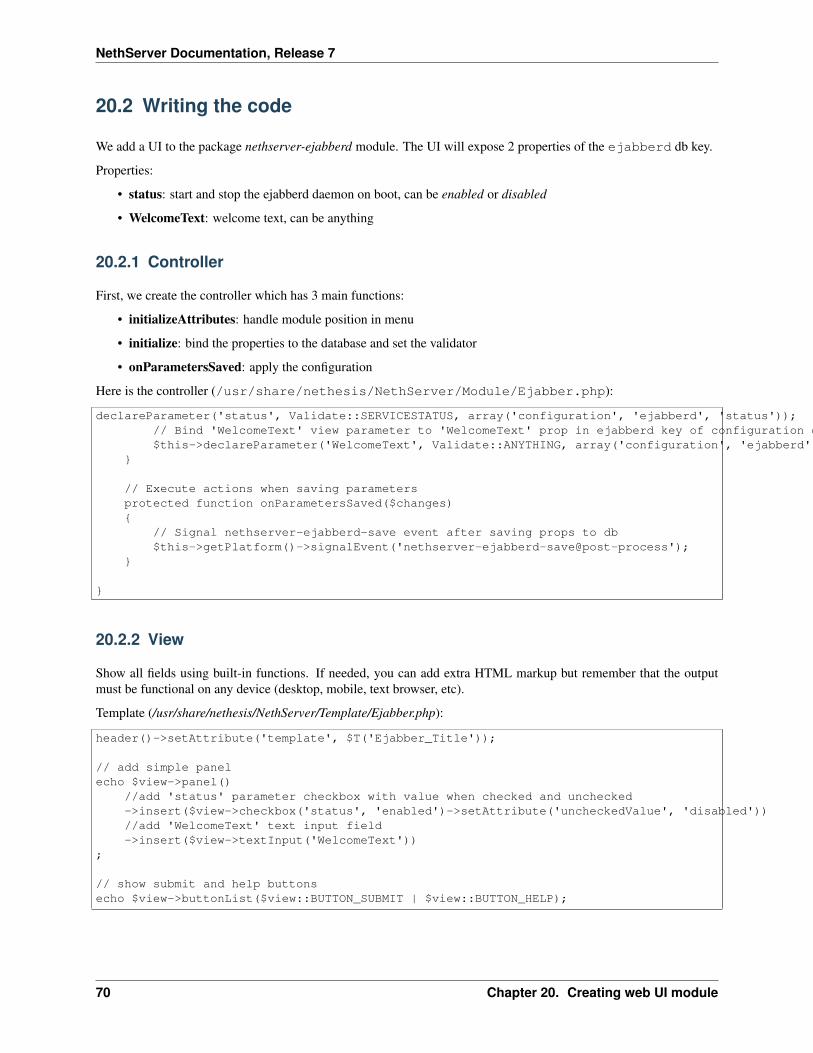
NethServer Documentation, Release 7
20.2 Writing the code
We add a UI to the package nethserver-ejabberd module. The UI will expose 2 properties of the ejabberd db key.
Properties:
• status: start and stop the ejabberd daemon on boot, can be enabled or disabled
• WelcomeText: welcome text, can be anything
20.2.1 Controller
First, we create the controller which has 3 main functions:
• initializeAttributes: handle module position in menu
• initialize: bind the properties to the database and set the validator
• onParametersSaved: apply the configuration
Here is the controller (/usr/share/nethesis/NethServer/Module/Ejabber.php):
declareParameter('status', Validate::SERVICESTATUS, array('configuration', 'ejabberd', 'status'));// Bind 'WelcomeText' view parameter to 'WelcomeText' prop in ejabberd key of configuration db$this->declareParameter('WelcomeText', Validate::ANYTHING, array('configuration', 'ejabberd', 'WelcomeText'));
}
// Execute actions when saving parametersprotected function onParametersSaved($changes){
// Signal nethserver-ejabberd-save event after saving props to db$this->getPlatform()->signalEvent('nethserver-ejabberd-save@post-process');
}
}
20.2.2 View
Show all fields using built-in functions. If needed, you can add extra HTML markup but remember that the outputmust be functional on any device (desktop, mobile, text browser, etc).
Template (/usr/share/nethesis/NethServer/Template/Ejabber.php):
header()->setAttribute('template', $T('Ejabber_Title'));
// add simple panelecho $view->panel()
//add 'status' parameter checkbox with value when checked and unchecked->insert($view->checkbox('status', 'enabled')->setAttribute('uncheckedValue', 'disabled'))//add 'WelcomeText' text input field->insert($view->textInput('WelcomeText'))
;
// show submit and help buttonsecho $view->buttonList($view::BUTTON_SUBMIT | $view::BUTTON_HELP);
70 Chapter 20. Creating web UI module

NethServer Documentation, Release 7
20.2.3 Translation
Translation files, are simple PHP files containing an associative array. All module lan-guage files are placed in /usr/share/nethesis/NethServer/Language/<lang>.Given a module with name “Test”, the english language file will be/usr/share/nethesis/NethServer/Language/en/NethServer_Module_Test.php.
Warning messages about missing translations can be found in /var/log/messages af-ter Nethgui debug is enabled. To enable the debug, use index_dev.php on urls, eg:https://<ipaddress>/index_dev.php/en/<module>.
English translation (/usr/share/nethesis/NethServer/Language/en/NethServer_Module_Ejabber.php):
<?php
$L['Ejabber_Title'] = 'Chat server';$L['status_label'] = 'Enable Ejabber chat server';$L['WelcomeText'] = 'Welcome!';
20.2.4 Inline help
Help pages are RST documents compiled into xHTML pages at package build time.
===========Chat server===========
Ejabber is a chat server that implements the Jabber/XMPP protocol Jabber / XMPP, it support TLS on standard XMPP ports (5222 or 5223).
The chat server uses system users to login.
20.3 More examples
More examples can be found here or browsing the existing modules.
20.3. More examples 71

NethServer Documentation, Release 7
72 Chapter 20. Creating web UI module

CHAPTER 21
Dashboard
The dashboard module is the landing page of NethServer Web UI. It aims to give an overview of system status.Dashboard is fully pluggable and extensible: each NethServer module can add it’s own tab or even a widget inside theSystem status or Applications tab.
There are three default tabs:
• System status
• Services
• Applications
The dashboard module heavily uses Javascript but works correctly even on smartphones.
21.1 SystemStatus tab
It’s the main tab composed by three main submodules:
• System release: show the system release
• Resource usage:
– system load
– cpu number
– uptime
– physical memory usage statistics
– virtual memory (swap) usage statistics
– root partition usage statistics
• Network
– configuration of each assigned netwok interface (IP address, netmask, etc.)
– real-time statistics of received and transmitted data
– host name, domain name, default gateway
This tab can be extended using plugins.
73
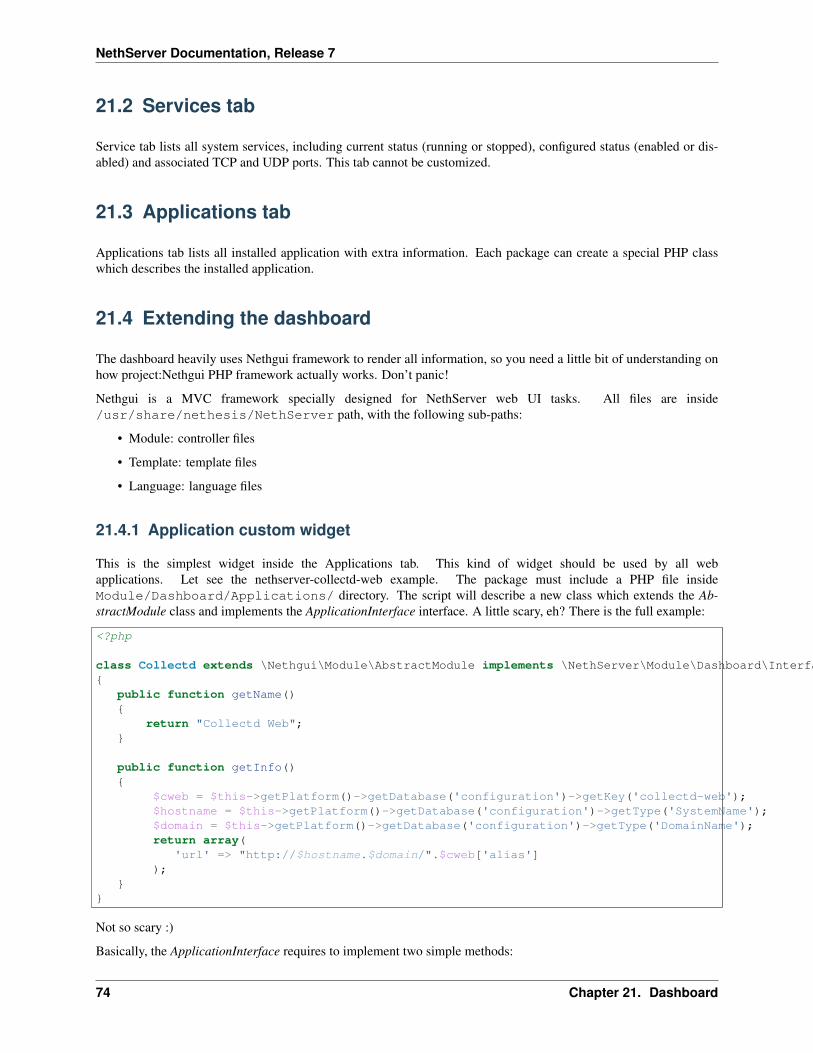
NethServer Documentation, Release 7
21.2 Services tab
Service tab lists all system services, including current status (running or stopped), configured status (enabled or dis-abled) and associated TCP and UDP ports. This tab cannot be customized.
21.3 Applications tab
Applications tab lists all installed application with extra information. Each package can create a special PHP classwhich describes the installed application.
21.4 Extending the dashboard
The dashboard heavily uses Nethgui framework to render all information, so you need a little bit of understanding onhow project:Nethgui PHP framework actually works. Don’t panic!
Nethgui is a MVC framework specially designed for NethServer web UI tasks. All files are inside/usr/share/nethesis/NethServer path, with the following sub-paths:
• Module: controller files
• Template: template files
• Language: language files
21.4.1 Application custom widget
This is the simplest widget inside the Applications tab. This kind of widget should be used by all webapplications. Let see the nethserver-collectd-web example. The package must include a PHP file insideModule/Dashboard/Applications/ directory. The script will describe a new class which extends the Ab-stractModule class and implements the ApplicationInterface interface. A little scary, eh? There is the full example:
<?php
class Collectd extends \Nethgui\Module\AbstractModule implements \NethServer\Module\Dashboard\Interfaces\ApplicationInterface{
public function getName(){
return "Collectd Web";}
public function getInfo(){
$cweb = $this->getPlatform()->getDatabase('configuration')->getKey('collectd-web');$hostname = $this->getPlatform()->getDatabase('configuration')->getType('SystemName');$domain = $this->getPlatform()->getDatabase('configuration')->getType('DomainName');return array(
'url' => "http://$hostname.$domain/".$cweb['alias']);
}}
Not so scary :)
Basically, the ApplicationInterface requires to implement two simple methods:
74 Chapter 21. Dashboard

NethServer Documentation, Release 7
• getName(): return the name of the application. The name is used to alphabetically sort all the applications insidethe Application tab.
• getInfo(): return an arbitrary associative array. All <key,value> pairs will be printed inside a little auto-generatedwidget. If the array contains a key starting with ‘url’ string, the value of the key will be wrapped inside an <ahref=’’> HTML tag.
We can now analyze the above getInfo function implementation. First we read the collectd-web key from theconfiguration db. All properties are then accessible as an associative array. Then we read the value of the specialkeys SystemName and DomainName. Finally we fill the return array with the url where the web application will beaccessible.
21.4.2 System status custom widget
Let’s take a SystemRelease class which add a widget inside the SystemStatus tab:
• Controller: Module/Dashboard/SystemStatus/SystemRelease.php
• Template: Template/Dashboard/SystemStatus/SystemRelease.php
• English translation: Language/en/NethServer_Module_Dashboard_SystemStatus_SystemRelease.php
• Italian translation: Language/it/NethServer_Module_Dashboard_SystemStatus_SystemRelease.php
Translation files are simple PHP associative arrays. The language files in the examples are self-explanatory.
You can find all examples inside the nethserver-ui-examples repository.
Controller
First of all, let’s introduce few keys concepts about HTTP request handling in Nethgui. When the browser open anURL, for example /SystemRelease, the system will search for a module named SystemRelease. If the requestcontains some query parameters, the server side module will invoke two functions process() and prepareView(), if noquery is specified only the function prepareView will be invoked.
The process will handle the query and prepare all data for the prepareView function. For example, here is the processimplementation of a simple SystemRelease module:
<?php...public function process(){
$this->release = $this->readRelease();}
Simple. The process will invoke a private method readRelease which reads a file, and save the result on a privateattribute. All data are now available and we have to send them back using the prepareView function:
<?php...public function prepareView(\Nethgui\View\ViewInterface $view){
//if no query is specified, make sure to initialize the dataif (!$this->release) {
$this->release = $this->readRelease();}$view['release'] = $this->release;
}
21.4. Extending the dashboard 75
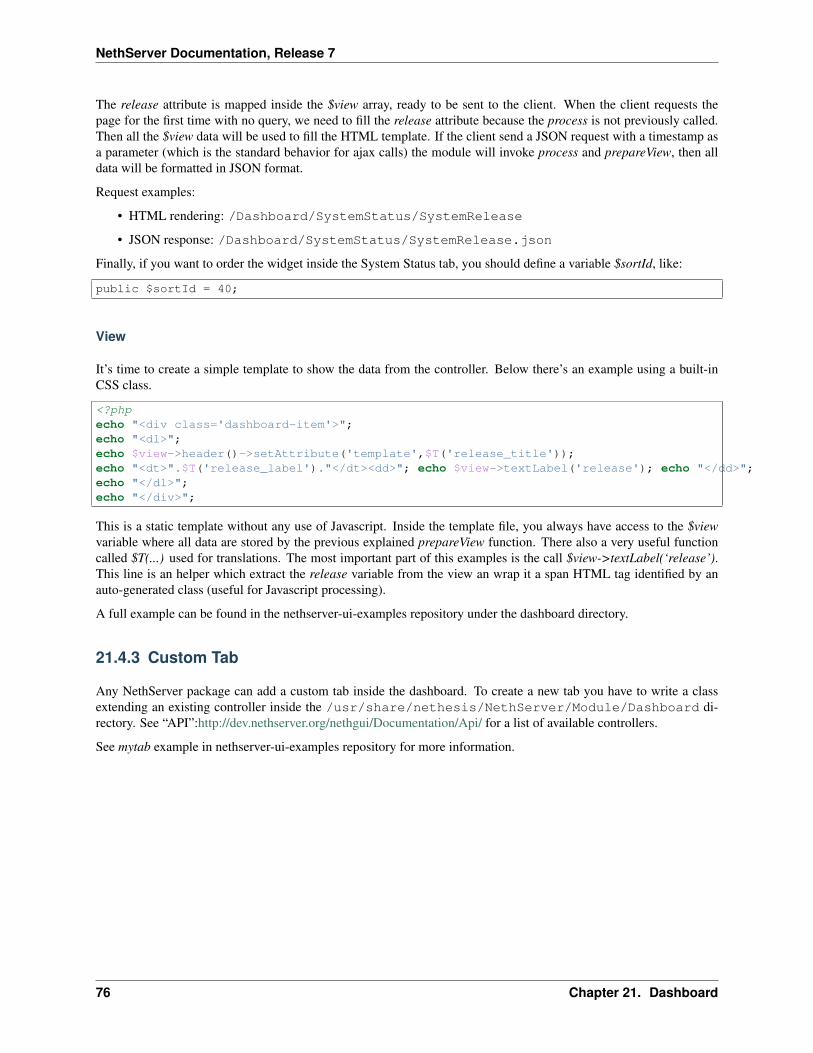
NethServer Documentation, Release 7
The release attribute is mapped inside the $view array, ready to be sent to the client. When the client requests thepage for the first time with no query, we need to fill the release attribute because the process is not previously called.Then all the $view data will be used to fill the HTML template. If the client send a JSON request with a timestamp asa parameter (which is the standard behavior for ajax calls) the module will invoke process and prepareView, then alldata will be formatted in JSON format.
Request examples:
• HTML rendering: /Dashboard/SystemStatus/SystemRelease
• JSON response: /Dashboard/SystemStatus/SystemRelease.json
Finally, if you want to order the widget inside the System Status tab, you should define a variable $sortId, like:
public $sortId = 40;
View
It’s time to create a simple template to show the data from the controller. Below there’s an example using a built-inCSS class.
<?phpecho "<div class='dashboard-item'>";echo "<dl>";echo $view->header()->setAttribute('template',$T('release_title'));echo "<dt>".$T('release_label')."</dt><dd>"; echo $view->textLabel('release'); echo "</dd>";echo "</dl>";echo "</div>";
This is a static template without any use of Javascript. Inside the template file, you always have access to the $viewvariable where all data are stored by the previous explained prepareView function. There also a very useful functioncalled $T(...) used for translations. The most important part of this examples is the call $view->textLabel(‘release’).This line is an helper which extract the release variable from the view an wrap it a span HTML tag identified by anauto-generated class (useful for Javascript processing).
A full example can be found in the nethserver-ui-examples repository under the dashboard directory.
21.4.3 Custom Tab
Any NethServer package can add a custom tab inside the dashboard. To create a new tab you have to write a classextending an existing controller inside the /usr/share/nethesis/NethServer/Module/Dashboard di-rectory. See “API”:http://dev.nethserver.org/nethgui/Documentation/Api/ for a list of available controllers.
See mytab example in nethserver-ui-examples repository for more information.
76 Chapter 21. Dashboard
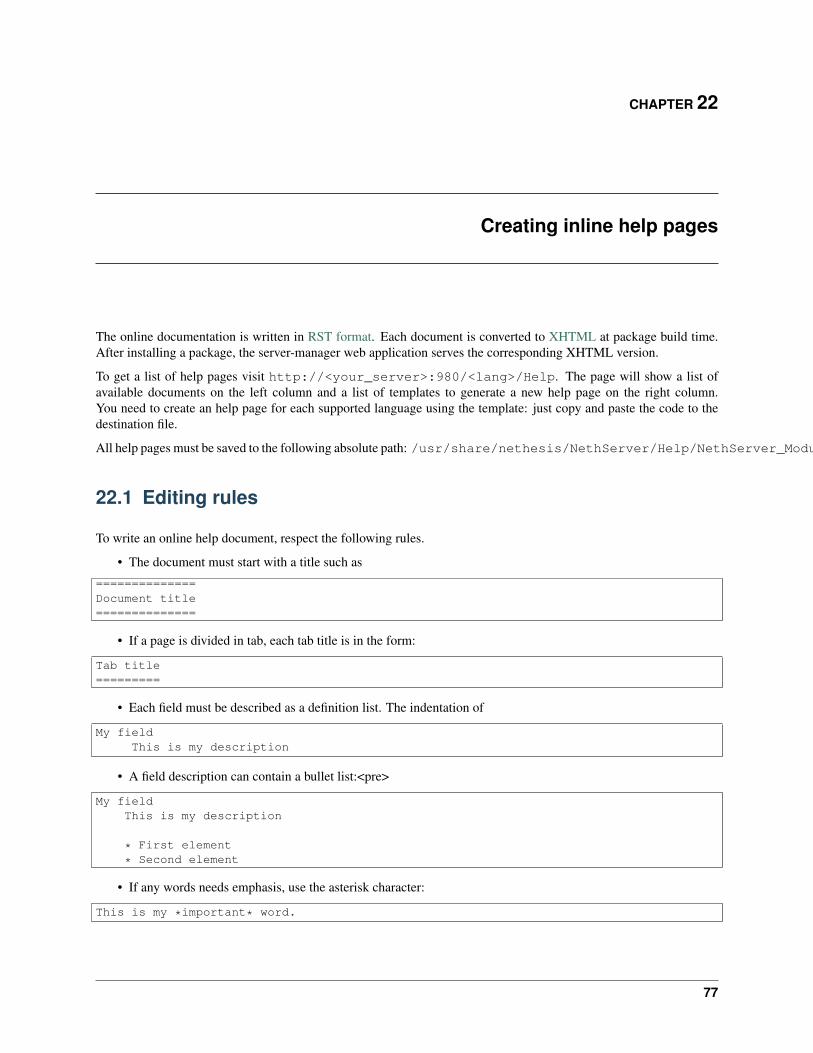
CHAPTER 22
Creating inline help pages
The online documentation is written in RST format. Each document is converted to XHTML at package build time.After installing a package, the server-manager web application serves the corresponding XHTML version.
To get a list of help pages visit http://<your_server>:980/<lang>/Help. The page will show a list ofavailable documents on the left column and a list of templates to generate a new help page on the right column.You need to create an help page for each supported language using the template: just copy and paste the code to thedestination file.
All help pages must be saved to the following absolute path: /usr/share/nethesis/NethServer/Help/NethServer_Module_<name>.rst
22.1 Editing rules
To write an online help document, respect the following rules.
• The document must start with a title such as
==============Document title==============
• If a page is divided in tab, each tab title is in the form:
Tab title=========
• Each field must be described as a definition list. The indentation of
My fieldThis is my description
• A field description can contain a bullet list:<pre>
My fieldThis is my description
* First element
* Second element
• If any words needs emphasis, use the asterisk character:
This is my *important* word.
77
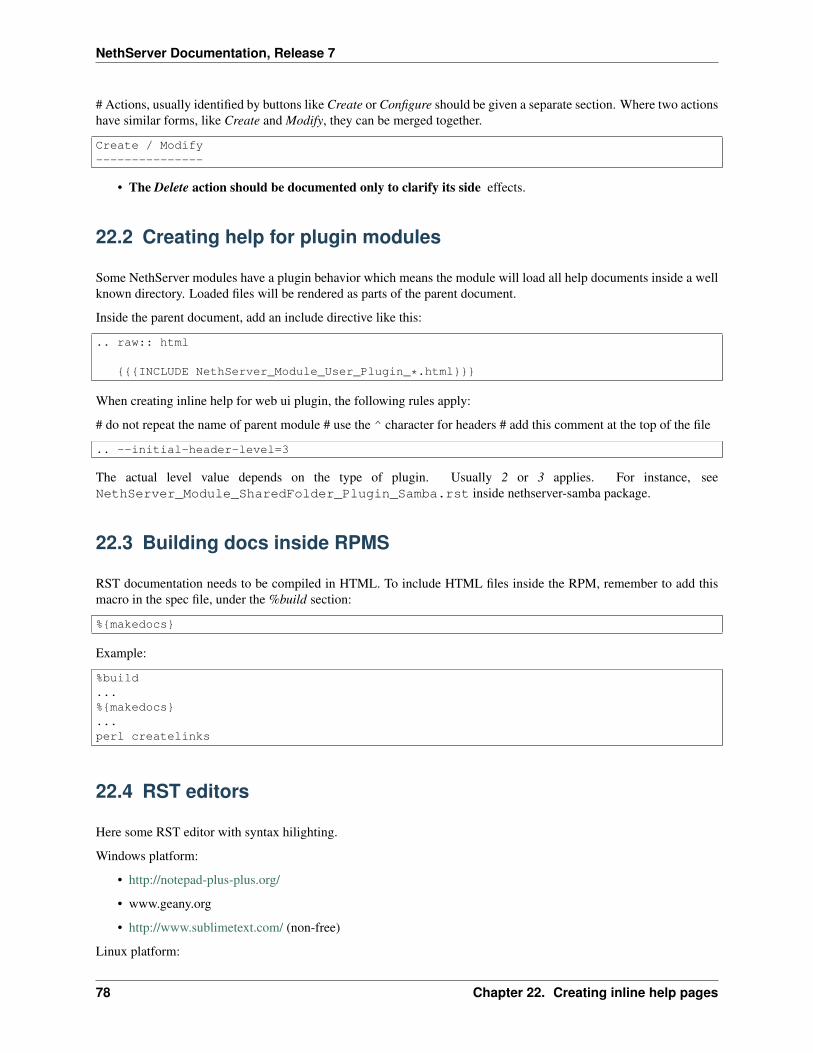
NethServer Documentation, Release 7
# Actions, usually identified by buttons like Create or Configure should be given a separate section. Where two actionshave similar forms, like Create and Modify, they can be merged together.
Create / Modify---------------
• The Delete action should be documented only to clarify its side effects.
22.2 Creating help for plugin modules
Some NethServer modules have a plugin behavior which means the module will load all help documents inside a wellknown directory. Loaded files will be rendered as parts of the parent document.
Inside the parent document, add an include directive like this:
.. raw:: html
{{{INCLUDE NethServer_Module_User_Plugin_*.html}}}
When creating inline help for web ui plugin, the following rules apply:
# do not repeat the name of parent module # use the ^ character for headers # add this comment at the top of the file
.. --initial-header-level=3
The actual level value depends on the type of plugin. Usually 2 or 3 applies. For instance, seeNethServer_Module_SharedFolder_Plugin_Samba.rst inside nethserver-samba package.
22.3 Building docs inside RPMS
RST documentation needs to be compiled in HTML. To include HTML files inside the RPM, remember to add thismacro in the spec file, under the %build section:
%{makedocs}
Example:
%build...%{makedocs}...perl createlinks
22.4 RST editors
Here some RST editor with syntax hilighting.
Windows platform:
• http://notepad-plus-plus.org/
• www.geany.org
• http://www.sublimetext.com/ (non-free)
Linux platform:
78 Chapter 22. Creating inline help pages

NethServer Documentation, Release 7
• vim (of course!)
• gedit
Web:
• http://rst.ninjs.org/
• https://notex.ch/
22.4. RST editors 79

NethServer Documentation, Release 7
80 Chapter 22. Creating inline help pages

CHAPTER 23
TODO API
The TODO API is specific for the Server Manager web application. It is designed to execute a list of checks andpossibly report the outcome to the admin user.
An RPM can install one or more executable scripts under /etc/nethserver/todos.d/.
• The script must print the results formatted according to JSON 1 and the following schema:
{"text": "free text","icon": "info-circle","action": {
"url": "/User","label": "Link label"
}}
icon and action keys are optional. The only required key is text. The url value is actually an absolutepath to the Server Manager module. Future versions may support real URLs.
• If the script exit code is non-zero, or if the output is not correctly JSON-encoded, an error message is sent to thesystem log.
• The script must be aware of locale settings, as its output is displayed on the user’s browser 2.
The executable helper /usr/libexec/nethserver/admin-todos is responsible for the invocation of scripts,validation of output and error reporting. It is executed by the AdminTodo UI module.
The AdminTodo known callers are:
• Dashboard
• Software center
• Network
• Backup (configuration)
23.1 Translations
A TODO script must be locale-aware. Use the gettext library for code internationalization (i18n) and followguidelines from Internationalization.
1 JSON (JavaScript Object Notation) is a lightweight data-interchange format. http://json.org/2 GNU gettext utilities http://www.gnu.org/software/gettext/
81

NethServer Documentation, Release 7
References
82 Chapter 23. TODO API

CHAPTER 24
Building RPMs
To build NethServer RPMs a few helper scripts are provided by the nethserver-mock package along with theMock 1 configuration files pointing to NethServer YUM repositories.
24.1 Configuring the environment
On NethServer, install nethserver-mock package, by typing:
yum install nethserver-mock
On Fedora, and other RPM-based distros run the command:
yum localinstall <URL>
The build process uses Mock and must be run as a non privileged user, member of the mock system group. Add youruser to the mock group:
usermod -a -G mock <username>
24.2 Running the scripts
The make-rpms command eases building of the NethServer RPMs by hiding the complexity of other commands. Itis designed to work inside the git repository directory of NethServer packages, but should fit other environments, too.
Start by cloning the git repository and move inside it. For instance
git clone https://github.com/nethesis/nethserver-mail-server.gitcd nethserver-mail-server
To build the RPM just type
make-rpms nethserver-mail-server.spec
The command writes the results into the current directory, assuming every change to the source code has been com-mited. If everything goes well they consist of:
• source RPM
• binary/noarch RPMs
1 Mock is a tool for building packages. http://fedoraproject.org/wiki/Projects/Mock
83

NethServer Documentation, Release 7
• mock log files
To clean up the git repository directory, git clean may help:
git clean -x -n
Substitute -n with -f to actually remove the files!
Note: The make-rpms command is sensible to dist and mockcfg environment variables. If they are missing thedefault values are shown by invoking it without arguments.
For example:
dist=ns7 mockcfg=nethserver-7-x86_64 make-rpms *.spec
The make-rpms command in turn relies on other scripts
make-srpm Builds the .src.rpm file.
prep-sources Extracts and/or fetches the source tarballs.
The first Source tag in the .spec file is assumed refer to the local git repository. If an absolute URL is specified,only the last part is considered. Other SourceN tags must conform to the Fedora RPM guidelines 2. The externalsources are actually fetched by the spectool command.
If the file SHA1SUM exists in the same directory of the .spec file the tarballs are checked against it.
24.3 Development and Release builds
During the development, a package can be rebuilt frequently: incrementing build numbers and unique release identi-fiers are useful during this stage to help the whole process.
When make-rpms is invoked, it checks the git log history and tags to decide what kind of build is required: devel-opment or release.
Release builds produce a traditional RPM file name, i.e.:
nethserver-mail-server-1.8.4-1.ns6.noarch.rpm
Development builds produces a marked RPM, i.e:
nethserver-mail-server-1.8.3-1.6gite86697e.ns6.noarch.rpm
Other differences in development from release are
• the %changelog section in .spec is replaced by the git log history since the last tag
• the number of commits since the last tag, and the latest git commit hash are extracted from git describeand prepended to the %dist macro.
24.4 Signing RPMs
The command sign-rpms is a wrapper around rpm --resign command. Its advantage is it can read a passwordfor the GPG signature from the filesystem. Sample invocation:
2 Referencing Source http://fedoraproject.org/wiki/Packaging:SourceURL
84 Chapter 24. Building RPMs

NethServer Documentation, Release 7
sign-rpms -f ~/.secret -k ABCDABCD
24.5 Creating a release tag
The release-tag command executes the following workflow:
• Reads the git log history and fetches related issues from the issue tracker web site.
• Update the %changelog section in the spec file.
• Commit changes to the spec file.
• Tag the commit (with GPG signature).
This is the help output:
release-tag -hUsage: release-tag [-h] [-k KEYID] [-T <x.y.z>] [<file>.spec]
For instance:
release-tag -k ABCDABCD -T 1.8.5 nethserver-mail-server.spec
Replace ABCDABCD with your signing GPG key. The $EDITOR program (or git core.editor) is opened auto-matically to adjust the commit message. The same text is used as tag annotation. Usage of -k option is optional.
The .spec argument is optional: if not provided the first .spec file in the current directory is processed.
References
24.5. Creating a release tag 85

NethServer Documentation, Release 7
86 Chapter 24. Building RPMs
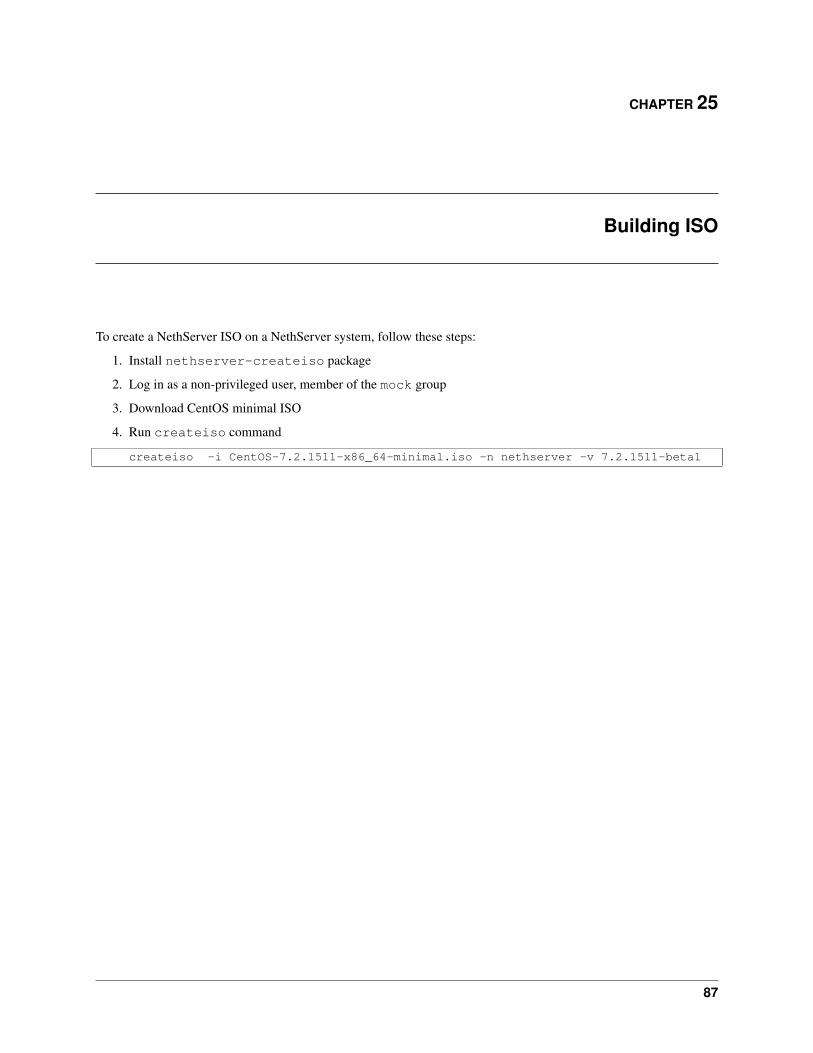
CHAPTER 25
Building ISO
To create a NethServer ISO on a NethServer system, follow these steps:
1. Install nethserver-createiso package
2. Log in as a non-privileged user, member of the mock group
3. Download CentOS minimal ISO
4. Run createiso command
createiso -i CentOS-7.2.1511-x86_64-minimal.iso -n nethserver -v 7.2.1511-beta1
87

NethServer Documentation, Release 7
88 Chapter 25. Building ISO

CHAPTER 26
Repositories
Main repositories are:
• nethserver-base: it contains packages and dependencies from core modules. It is updated when a new milestoneis released. Enabled by default.
• nethserver-updates: it contains updated packages. If needed, these updates can be applied without requiringmanual intervention. Enabled by default.
• nethforge: communty provided modules for NethServer. Enabled by default.
• nethserver-testing: contains packages under QA process. Disabled by default.
• base: base packages from CentOS. Enabled by default.
• updates: updated packages from CentOS. Enabled by default.
• centos-sclo-rh and centos-sclo-sclo: SCL repositories. Both enabled by default.
• extras: extra RPMs. Enabled by default.
A standard installation should have following enabled repositories:
• base
• updates
• nethserver-base
• nethserver-updates
• nethforge
• centos-sclo-rh
• centos-sclo-sclo
• extras
Packages published in above repositories should always allow a non-disruptive automatic update.
To reset repository configuration, execute:
eorepo base updates nethserver-{base,updates} centos-sclo-{rh,sclo} epel nethforge extras
26.1 Third party repositories
It’s possible to install third party repositories, using standard CentOS methods.
89

NethServer Documentation, Release 7
The best practice is to enable third party repositories only when needed.
90 Chapter 26. Repositories

CHAPTER 27
Package groups
The composition of package groups is documented on https://github.com/NethServer/comps/blob/master/README.
27.1 Generate comps file
Checkout the comps git repository, enter the directory and execute:
$ make
For instance, see how nethserver-groups.xml is generated from nethserver-groups.xml.in.
For further information on how to modify *.xml.in files, see Fedora Project Wiki:https://fedoraproject.org/wiki/How_to_use_and_edit_comps.xml_for_package_groups .
91

NethServer Documentation, Release 7
92 Chapter 27. Package groups

CHAPTER 28
FTP
The FTP module uses the vsftpd daemon. It is accessible only from local network and it is disabled by default.It supports both virtual and system users, but not at the same time. All virtual home directories are created inside/var/lib/nethserver/ftp.
The daemon will run as ftp user with passive mode enabled.
28.1 Virtual users
Virtual users are enabled by default.
28.1.1 Add a new user
Create a record inside the accounts db and activate changes:
db accounts set <user> ftp status enabled Password <pass> Chroot enabledsignal-event nethserver-vsftpd-save
The event will generate /etc/vsftpd/ftpusers.db (Berkeley db) containing all user credentials. The db isused for pam authentication (see: /etc/pam.d/vsftpd-virtual).
Properties:
• status: can be enabled or disabled. If enabled, the user can access the ftp server
• Password: the user password in clear text, can not be blank
• Chroot: can be enabled or disabled. If enabled, the user will be chrooted to/var/lib/nethserver/ftp/<user> directory. If disabled the user is not chrooted. ATTENTION:non-chrooted users can explore the entire file system
• ChrootDir: set a custom ChrootDir, it may be used to chroot a user inside a shared folder
28.1.2 Chroot a user inside a shared folder
Use these commands:
db accounts set <user> ftp status enabled Password <pass> Chroot enabled ChrootDir /var/lib/nethserver/ibay/<share_name>signal-event nethserver-vsftpd-save
Where share_name is the name of the share, user the username and pass the password of the user.
93
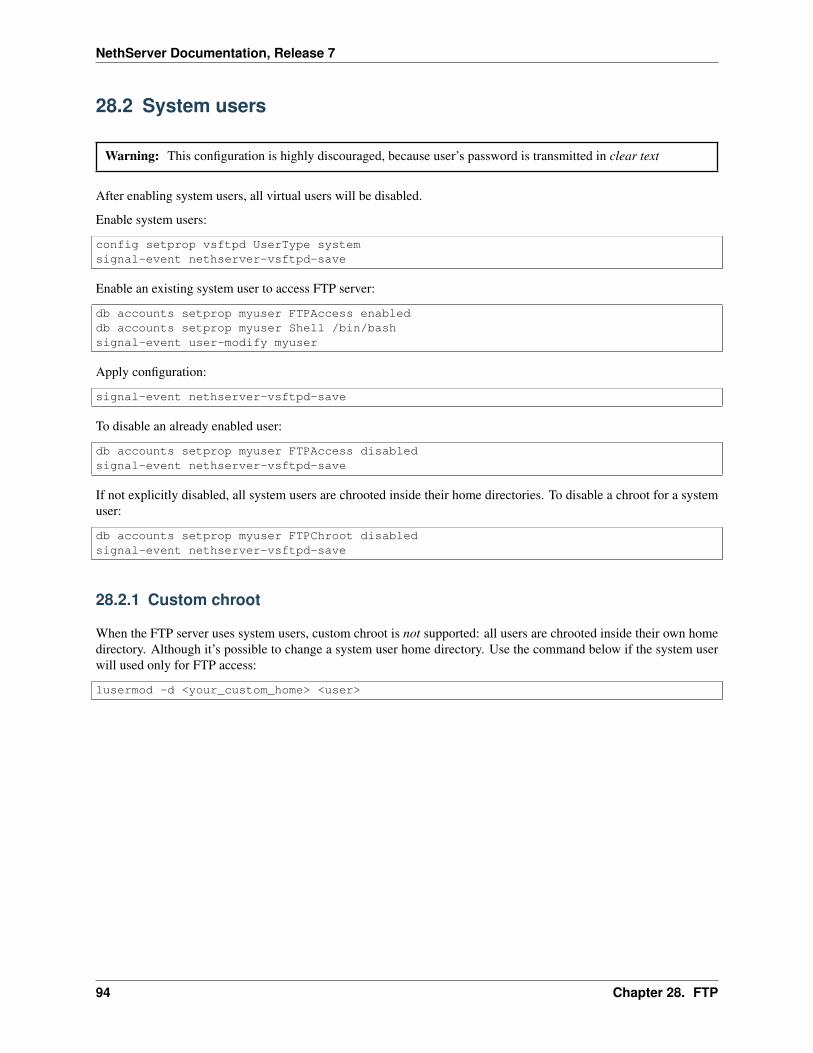
NethServer Documentation, Release 7
28.2 System users
Warning: This configuration is highly discouraged, because user’s password is transmitted in clear text
After enabling system users, all virtual users will be disabled.
Enable system users:
config setprop vsftpd UserType systemsignal-event nethserver-vsftpd-save
Enable an existing system user to access FTP server:
db accounts setprop myuser FTPAccess enableddb accounts setprop myuser Shell /bin/bashsignal-event user-modify myuser
Apply configuration:
signal-event nethserver-vsftpd-save
To disable an already enabled user:
db accounts setprop myuser FTPAccess disabledsignal-event nethserver-vsftpd-save
If not explicitly disabled, all system users are chrooted inside their home directories. To disable a chroot for a systemuser:
db accounts setprop myuser FTPChroot disabledsignal-event nethserver-vsftpd-save
28.2.1 Custom chroot
When the FTP server uses system users, custom chroot is not supported: all users are chrooted inside their own homedirectory. Although it’s possible to change a system user home directory. Use the command below if the system userwill used only for FTP access:
lusermod -d <your_custom_home> <user>
94 Chapter 28. FTP

CHAPTER 29
UPS
The nethserver-nut package provides: * Network UPS Tool (NUT) configuration * web UI for simple configuration *optional collectd support
29.1 Configuration
The package provides two configuration modes:
• Master: a master node is a machine directly connected to the UPS port
• Slave: a slave node is a machine connected to the master via tcp
If you need stand-alone mode, just configure the machine as master.
29.2 Master node
A master node receives events from UPS, sends events to slaves and takes decisions (eg. power off the machine).
DB properties:
• Mode: master
• Device: UPS port, can be a device like /dev/ttyS0 or auto if the UPS is USB
• Model: UPS driver name selected from /usr/share/driver.list
• Description: UPS model description like “APC - Smart-UPS USB (**)” (used only on web UI)
• Password: chosen password to communicate between master and slaves
• Ups: ups name, default is UPS
• User: upsmon user name, default is upsmon
• Notify: if enabled notifications about UPS events are sent to the admin user, default is disabled
The password is generated during first installation from the nethserver-nut-conf action.
29.3 Slave node
A slave node receives events from a master and takes decisions (eg. power off the machine).
95
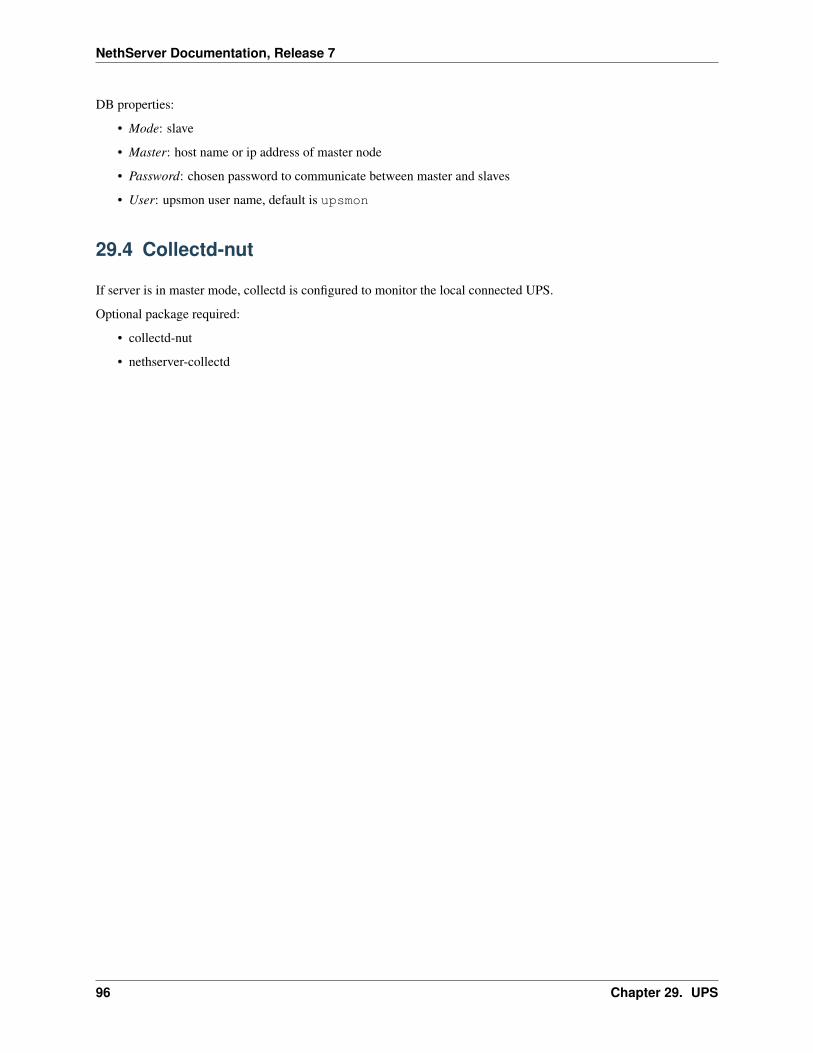
NethServer Documentation, Release 7
DB properties:
• Mode: slave
• Master: host name or ip address of master node
• Password: chosen password to communicate between master and slaves
• User: upsmon user name, default is upsmon
29.4 Collectd-nut
If server is in master mode, collectd is configured to monitor the local connected UPS.
Optional package required:
• collectd-nut
• nethserver-collectd
96 Chapter 29. UPS

CHAPTER 30
TFTP
TFTP module contains configuration fragments that enables dnsmasq built-in TFTP server.
TFTP server han no authentication or encription support.
When installed tftp is disabled by default and need to be enabled with:
config setprop tftp status enabledsignal-event nethserver-tftp-save
The package also add directory /var/lib/tftpboot that is the root of tftp server.
Enabling TFTP adds 5 new configuration options to /etc/dnsmasq.conf. Here variables explanation accordingwith dnsmasq documentation
• enable-tftp: enable tftp server
• tftp-secure: allow only files owned by the user dnsmasq is running as will be send over the net
• dhcp-boot= ...: Set the boot filename for netboot/PXE. You will only need this is you want to bootmachines over the network and you will need a TFTP server; driven by db prop
• tftp-root=/var/lib/tftpboot: Set the root directory for files available via FTP.
• dhcp-option=66, LOCAL_IP: set local ip as default tftp server for machines that receive dhcp from thisserver
30.1 Properties:
• status: can be enabled or disabled. If enabled, TFTP server is configured and port 69 UDP isopened.
• UDPPort: UDP port used. Only 69 is allowed.
• access: define if access is public, private or none.
• dhcp-boot: Set the boot filename for PXE. Ths is needed for booting machines over the network. Empty bydefault.
• type: only service is allowed.
30.2 Test TFTP
Testing is very simple:
97

NethServer Documentation, Release 7
Install package and enable TFTP server:
yum install nethserver-tftpconfig setprop tftp status enabledsignal-event nethserver-tftp-save
Create a file to share, owned by nobody user:
echo "test" > /var/lib/tftpboot/foobarchown nobody:nobody /var/lib/tftpboot/foobar
From another machine, install tftp and get file (on Fedora):
yum install tftp
Always from the other machine, allow incoming UDP connection from our TFTP server. Loading TFTP conntrackmodule should be enough:
modprobe nf_conntrack_tftp
Connect to TFTP server:
tftp TFTP_SERVER_HOST
...and get the file:
tftp> get foobar
30.3 Configure a PXE server
Those instructions set up a PXE server for CentOS Install and configure syslinux and nethserver-tftp:
yum install syslinuxcp /usr/share/syslinux/{pxelinux.0,menu.c32,memdisk,mboot.c32,chain.c32} /var/lib/tftpboot/config setprop tftp dhcp-boot pxelinux.0signal-event nethserver-tftp-savemkdir /var/lib/tftpboot/pxelinux.cfg
Create the file /var/lib/tftpboot/pxelinux.cfg/default with the following content:
default menu.c32prompt 0timeout 300
MENU TITLE PXE Menu
LABEL CentOSkernel CentOS/vmlinuzappend initrd=CentOS/initrd.img
Create a CentOS directory:
Create a CentOS directory:
mkdir -p /var/lib/tftpboot/CentOS
Copy inside the directory vmlinuz and initrd.img files. These files can be found inside the ISO or browsing theyum os mirror.
98 Chapter 30. TFTP

NethServer Documentation, Release 7
Change files owner to nobody:
chown -R nobody /var/lib/tftpboot/*
30.3. Configure a PXE server 99

NethServer Documentation, Release 7
100 Chapter 30. TFTP
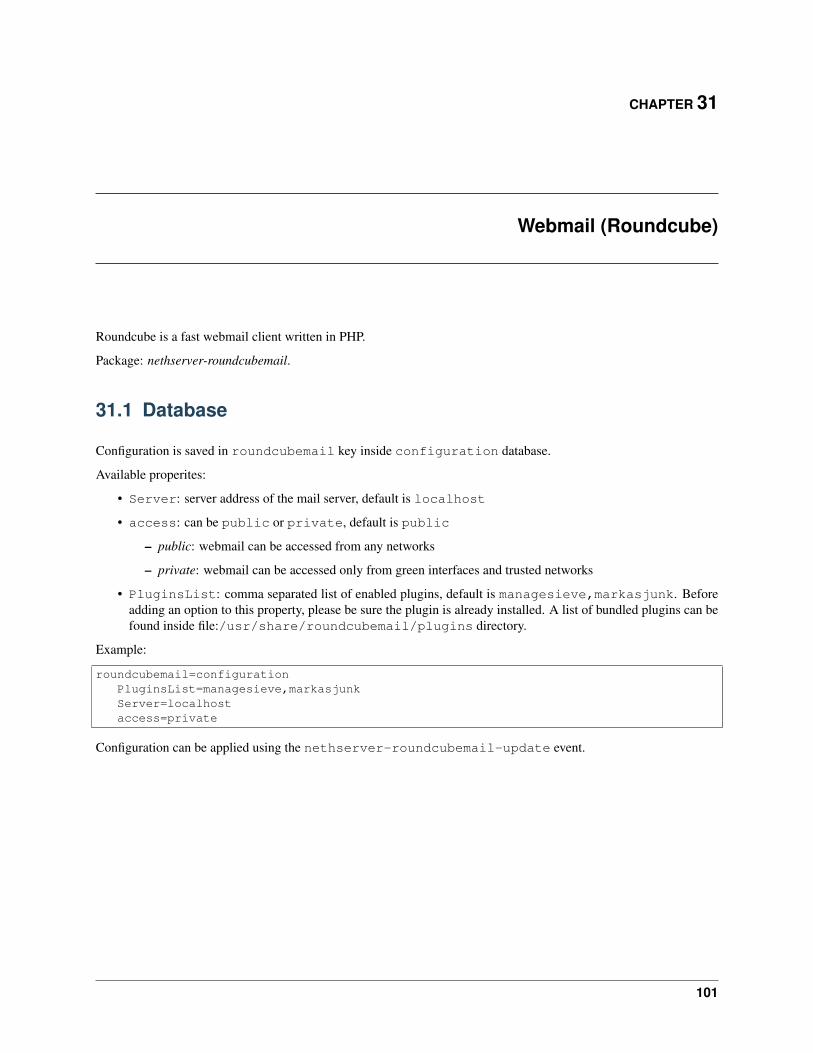
CHAPTER 31
Webmail (Roundcube)
Roundcube is a fast webmail client written in PHP.
Package: nethserver-roundcubemail.
31.1 Database
Configuration is saved in roundcubemail key inside configuration database.
Available properites:
• Server: server address of the mail server, default is localhost
• access: can be public or private, default is public
– public: webmail can be accessed from any networks
– private: webmail can be accessed only from green interfaces and trusted networks
• PluginsList: comma separated list of enabled plugins, default is managesieve,markasjunk. Beforeadding an option to this property, please be sure the plugin is already installed. A list of bundled plugins can befound inside file:/usr/share/roundcubemail/plugins directory.
Example:
roundcubemail=configurationPluginsList=managesieve,markasjunkServer=localhostaccess=private
Configuration can be applied using the nethserver-roundcubemail-update event.
101

NethServer Documentation, Release 7
102 Chapter 31. Webmail (Roundcube)
CHAPTER 32
Collectd
This package automatically configure basic collectd plugins and it’s part of nethserver-statistics yum pack-age group.
This package will install a base collectd configuration. Default enabled modules:
• cpu
• load
• processes
• memory
• swap
• uptime
• df
• disk
• interface
• network
• rrdtool
• ping
No configuration is needed, collectd is enabled by default when installed.
32.1 Ping plugin
The ping plugin sends an ICMP packet every 5 seconds to: * upstream DNS * every checkip of enabled provider (seeMulti WAN)
Additional hosts must be added to the PingHosts property:
config setprop collectd PingHosts www.nethesis.it,www.nethserver.orgsignal-event nethserver-collectd-update
103

NethServer Documentation, Release 7
32.2 Web interfaces
To view graphs of collected data, there are two different web UI: nethserver-collectd-web and nethserver-cgp. Wheninstalled, both interfaces create a random URL for accessing the interface.
32.3 Cleanup
Every day a cronjob (/etc/cron.daily/collectd_cleanup) takes care to clean up all RRD files not updatedduring the last day.
32.4 Interesting plugins
The following can be manually installed:
• collectd-nut
• collectd-sensors
32.5 Database
Configuration is saved inside the configuration database. Example:
collectd=servicePingHosts=status=enabled
104 Chapter 32. Collectd
CHAPTER 33
Phone Home
This tool is used to tracks all NethServer’s installations around the world.
• Use API to get and set installation
• Visualize the installations in Google Maps with nice markers
33.1 Overview
This tool is composed by two parts: server and client and the data are stored and read through REST APIs. TheREST APIs can be found in index.php file. To send data to REST APIs check out the phone-home file inroot/etc/cron.weekly.
33.2 Configuration
After the repository clonig, you must set the correct placeholders in certain files.
33.2.1 Server
config.php
Line 2 change __dbhost__, __dbuser__, __dbpass__, __dbname__ with your own credentials:
$GLOBALS['$dbhost'] = "__dbhost__";$GLOBALS['$dbuser'] = "__dbuser__";$GLOBALS['$dbpass'] = "__dbpass__";$GLOBALS['$dbname'] = "__dbname__";
widget_map.html
Line 53 change __serverip__ with the server ip used to host REST APIs:
// ip server with apivar server_ip = '__serverip__';
105

NethServer Documentation, Release 7
Create table in your database
After setting up your own credentials, simply run (MySQL syntax):
CREATE DATABASE phonehome;GRANT ALL ON phonehome.* TO user IDENTIFIED BY 'password';
CREATE TABLE IF NOT EXISTS phone_home_tb (uuid VARCHAR(40) PRIMARY KEY,release_tag VARCHAR(10) NOT NULL,ip VARCHAR(16) NOT NULL,country_code VARCHAR(5),country_name VARCHAR(40),country_location_lat VARCHAR(40),country_location_lng VARCHAR(40),reg_date TIMESTAMP
)
33.2.2 Client
phone-home
Create a file named phone-home in /etc/sysconfig and set the correct infos:
SERVER_IP=__serverip__PROXY_SERVER=__proxyserver__PROXY_USER=__proxyuser__PROXY_PASS=__proxypass__PROXY_PORT=__proxyport__
the variables PROXY_SERVER, PROXY_USER, PROXY_PASS, PROXY_PORT are not mandatory.
106 Chapter 33. Phone Home
CHAPTER 34
Web antivirus
Web antivirus is composed by two components:
• c-icap server: ICAP server for Squid
• squidclamav: ClamAv anti-virus engine for Squid
The nethserver-squidclamav package enables ClamAV inside the c-icap server
34.1 Debug
Enable debug to /var/log/c-icap/server.log:
config setprop c-icap DebugLevel 1signal-event nethserver-c-icap-update
34.2 Database
Configuration is kept inside the configuration database.
Examples:
squidclamav=configurationstatus=enabled
c-icap=serviceDebugLevel=0TemplateDefaultLanguage=enstatus=disabled
The TemplateDefaultLanguage select the language for ICAP block page, but the block page is actually imple-mented in nethserver-squidguard. See Block page.
34.3 Log files
Blocked page logs:
• Squidclamav: /var/log/c-icap/server.log
107

NethServer Documentation, Release 7
108 Chapter 34. Web antivirus
CHAPTER 35
Web content filter
The nethserver-squidguard package configures the web content filter based on SquidGuard url-rewriter.
The configuration is based on profiles. Each profile is composed by:
• a user, group of users, host or group of hosts accessing the web page
• a filter which includes allowed and denied sites
• a time frame within the filter is active
The system comes with a default profile which is applied to any host/user who doesn’t fit on a specific profile.
35.1 Blacklists
Blacklists are updated every night using the script: /etc/cron.daily/update-squidguard-blacklistsThe script will download and merge all blacklists listed in /etc/squid/blacklists. This actions can takeseveral minutes.
35.2 Databases
The package uses the squidguard key inside the configuration database, also it creates a newcontentfilter database for profiles and filters configuration.
35.2.1 Common configuration
Properties for squidguard key:
• BlockedFileTypes: comma separated list of blocked file extensions
• CustomListURL: URL to download a custom blacklist. The blacklist must follow SquidGuard standard
• DomainBlacklist: comma separated domain list, this domains are always blocked
• DomainWhitelist: comma separated domain list, this domains are always allowed
• Expressions: if enabled, allow regular expression on blacklists categories. Can be enabled or disabled,default is disabled
• IdleChildren: minimum number of idle processes. Default is 5
109
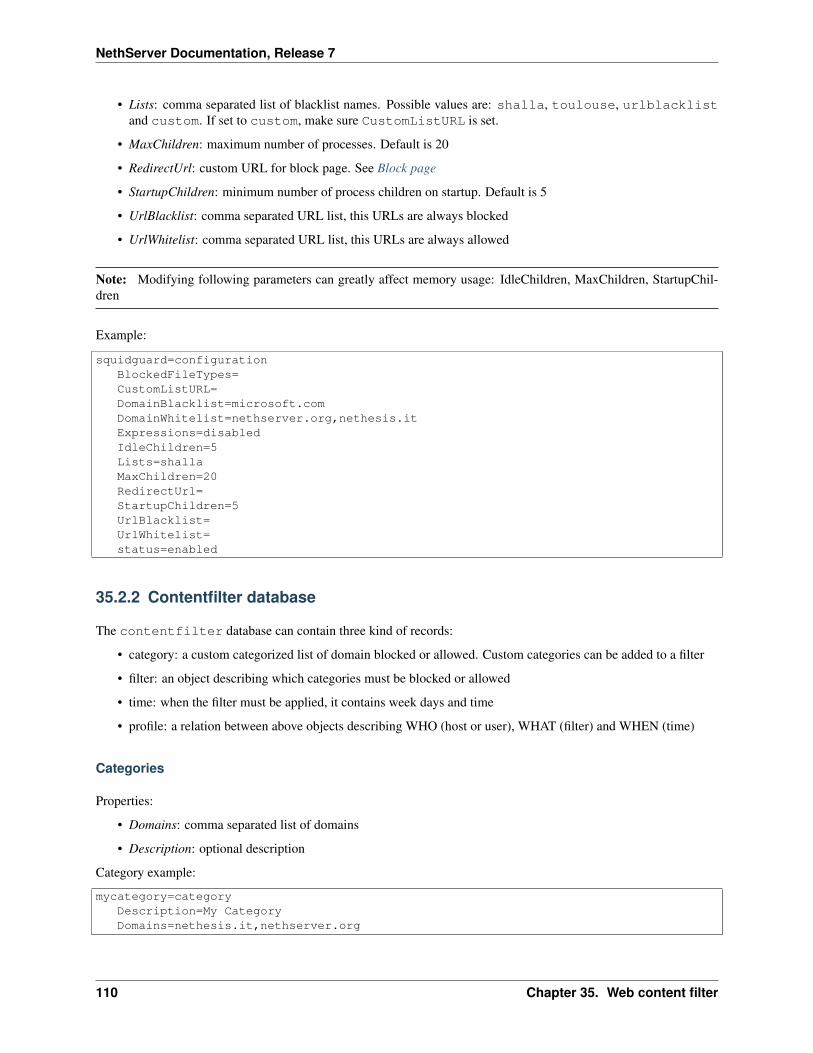
NethServer Documentation, Release 7
• Lists: comma separated list of blacklist names. Possible values are: shalla, toulouse, urlblacklistand custom. If set to custom, make sure CustomListURL is set.
• MaxChildren: maximum number of processes. Default is 20
• RedirectUrl: custom URL for block page. See Block page
• StartupChildren: minimum number of process children on startup. Default is 5
• UrlBlacklist: comma separated URL list, this URLs are always blocked
• UrlWhitelist: comma separated URL list, this URLs are always allowed
Note: Modifying following parameters can greatly affect memory usage: IdleChildren, MaxChildren, StartupChil-dren
Example:
squidguard=configurationBlockedFileTypes=CustomListURL=DomainBlacklist=microsoft.comDomainWhitelist=nethserver.org,nethesis.itExpressions=disabledIdleChildren=5Lists=shallaMaxChildren=20RedirectUrl=StartupChildren=5UrlBlacklist=UrlWhitelist=status=enabled
35.2.2 Contentfilter database
The contentfilter database can contain three kind of records:
• category: a custom categorized list of domain blocked or allowed. Custom categories can be added to a filter
• filter: an object describing which categories must be blocked or allowed
• time: when the filter must be applied, it contains week days and time
• profile: a relation between above objects describing WHO (host or user), WHAT (filter) and WHEN (time)
Categories
Properties:
• Domains: comma separated list of domains
• Description: optional description
Category example:
mycategory=categoryDescription=My CategoryDomains=nethesis.it,nethserver.org
110 Chapter 35. Web content filter

NethServer Documentation, Release 7
Filters
Properties:
• BlackList: enable or disable the global blacklist (DomainBlacklist and UrlBlacklist). Can beenabled or disabled
• BlockAll: can be enabled or disabled. If disabled, all listed categories in Categories are blocked andall other sites are allowed. If enabled, all listed categories in Categories are allowed and all other sites areblocked
• BlockFileTypes: enable or disable the global file extension list (BlockedFileTypes). Can be enabled ordisabled
• BlockIpAccess: if enabled, sites can be accessed only using a domain name (not an IP address). Can beenabled or disabled
• BlockBuiltinRules: if enabled, the custom/builtinDB is loaded. The DB contents are the result of templateexpansions. Can be enabled or disabled.
• Categories: comma separated list of categories blocked or allowed. If a category is not present inside theSquidGuard db (/var/squidGuard/Blacklists), the category will be excluded from configuration fileto avoid SquidGuard panic-mode
• Description: optional description
• WhiteList: enable or disable the global whitelist (DomainWhitelist and UrlWhitelist). Can beenabled or disabled
• Removable: can be yes or no. If set to no the record can’t be removed from web interface
Filter example:
myfilter=filterBlackList=enabledBlockAll=disabledBlockFileTypes=disabledBlockIpAccess=disabledBlockBuiltinRules=disabledCategories=aggressive,alcohol,weapons,warezDescription=Default filterWhiteList=enabled
Times
Properties:
• Days: comma separated list of week days. Valid values are:
– m: Monday
– t: Tuesday
– w: Wednesday
– h: Thursday
– f : Friday
– a: Saturday
– s: Sunday
• Description: optional description
35.2. Databases 111
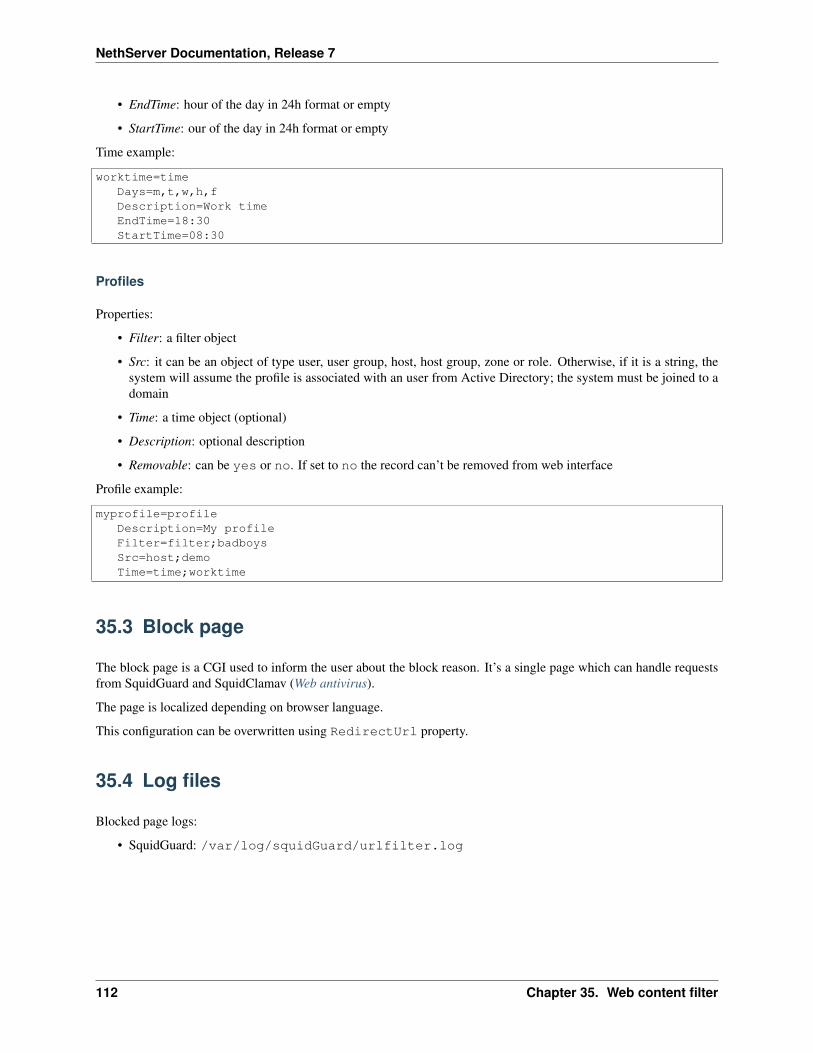
NethServer Documentation, Release 7
• EndTime: hour of the day in 24h format or empty
• StartTime: our of the day in 24h format or empty
Time example:
worktime=timeDays=m,t,w,h,fDescription=Work timeEndTime=18:30StartTime=08:30
Profiles
Properties:
• Filter: a filter object
• Src: it can be an object of type user, user group, host, host group, zone or role. Otherwise, if it is a string, thesystem will assume the profile is associated with an user from Active Directory; the system must be joined to adomain
• Time: a time object (optional)
• Description: optional description
• Removable: can be yes or no. If set to no the record can’t be removed from web interface
Profile example:
myprofile=profileDescription=My profileFilter=filter;badboysSrc=host;demoTime=time;worktime
35.3 Block page
The block page is a CGI used to inform the user about the block reason. It’s a single page which can handle requestsfrom SquidGuard and SquidClamav (Web antivirus).
The page is localized depending on browser language.
This configuration can be overwritten using RedirectUrl property.
35.4 Log files
Blocked page logs:
• SquidGuard: /var/log/squidGuard/urlfilter.log
112 Chapter 35. Web content filter

CHAPTER 36
WebVirtMgr
WebVirtMgr is a simple web interface for libvirt administration, the main package is nethserver-webvirtmgr.
By default there is a local socket connection named localhost, it’s a simply record in SQLite database, the db nameis webvirtmgr.sqlite3 that can be found in /usr/lib/python2.6/site-packages/webvirtmgr/.
The webvirtmgr service is handled using upstart, meanwhile webvirtmgr-console is handled by traditional init.d.
36.1 Database
Configuration is stored inside webvirtmgr and webvirtmgr-console keys in configuration database.
Properties of webvirtmgr:
• TCPPort: listen TCP port, default is 8000
• User: login user, default is admin
• Password: password for User, automatically generated during first configuration
• status: default is disabled
• access: default is private, do not change for security reasons
Properties of webvirtmgr-console:
• status: default is disabled
• access: default is private, do not change for security reasons
113

NethServer Documentation, Release 7
114 Chapter 36. WebVirtMgr

CHAPTER 37
Disk analyzer (Duc)
Official site: https://github.com/zevv/duc
This tool is used to visualize disk usage in a simply and nice graph.
Features: * Indexing filesystem very fast * Interact with graph with click and double click to navigate in the directoriestree.
37.1 Overview
This tool is composed by two parts: duc indexer and duc viewer. The first one is launched every day and it indexesthe / directory and it creates a file that is loaded by duc viewer to show graph.
In the graph are showed only directories over certain size, in particularly this size is 10MB as you can see in file/etc/e-smith/events/actions/nethserver-duc-index.
115

NethServer Documentation, Release 7
116 Chapter 37. Disk analyzer (Duc)

CHAPTER 38
SNMP
Simple SNMP server.
Package: nethserver-net-snmp.
38.1 Database
Configuration is saved in snmpd key inside configuration database.
Available properties:
• Community: name of the SNMP community, default is public
• SysLocation: name of the server location, default is Unknown
• SysContact: name and mail address of the system administrator, default is Root <root@localhost>.
Example:
snmpd=serviceCommunity=publicSysLocation=UnknownSysContact=Root <root@localhost>status=enabledaccess=privateUDPPort=61
Query example:
snmpwalk -mALL -v2c -cpublic localhost
Configuration can be applied using the nethserver-net-snmp-save event.
117

NethServer Documentation, Release 7
118 Chapter 38. SNMP

CHAPTER 39
Tomcat 7
Tomcat 7 package comes from EPEL.
Features:
• it listens on default port 8080
• Java 1.7 is set as default runtime
• the manager is not installed by default
Applications must be installed inside the /var/lib/tomcat/webapps/webtop directory.
119

NethServer Documentation, Release 7
120 Chapter 39. Tomcat 7

CHAPTER 40
PostgreSQL
PostgreSQL is a database server and it listens on standard port 5432.
40.1 Access policy
From localhost:
• the postgres user can access without password
• all other users must use password authentication
Form any other network:
• all users must use password authentication
Example for accessing with postgres user:
su - postgrespsql
40.2 Backup
Backup and restore is not implemented system-wide: every application should provide its own scripts.
Backup actions must be linked inside the pre-backup-data event. Example of backup action:
#!/bin/bash
su - postgres -c "pg_dump myapp > /var/lib/nethserver/myapp/myapp.sql"
Restore actions must be linked inside the post-restore-data event. Example of restore action:
#!/bin/bash
if [ -f /var/lib/nethserver/myapp/myapp.sql ]; thendrop_sql=`mktemp`chown postgres:postgres $drop_sql# drop all existing connections to the db and block new onesecho "UPDATE pg_database SET datallowconn = 'false' WHERE datname = 'myapp';" >> $drop_sqlecho "SELECT pg_terminate_backend(procpid) FROM pg_stat_activity WHERE datname = 'myapp';" >> $drop_sql# drop the db, then recreate itecho "DROP DATABASE myapp;" >> $drop_sql
121

NethServer Documentation, Release 7
password=`perl -e "use NethServer::Password; print NethServer::Password::store('myapp');"`echo "CREATE database myapp; CREATE USER sonicle WITH PASSWORD '$password'; GRANT ALL PRIVILEGES ON DATABASE myapp to myuser;" >> $drop_sql# allow new connections to dbecho "UPDATE pg_database SET datallowconn = 'true' WHERE datname = 'myapp';" >> $drop_sqlsu - postgres -c "psql < $drop_sql"su - postgres -c "psql myapp < /var/lib/nethserver/myapp/myapp.sql"rm -f $drop_sql
fi
122 Chapter 40. PostgreSQL

CHAPTER 41
UnixODBC
This package contains templates that generates ODBC configuration.
41.1 /etc/odbc.ini
The template that generates this file scan all configuration db searching for a key that has type=odbc (or ODBC forbackward compatibility with SMEserver) and generates a section in /etc/odbc.ini. For example, this is ODBC objectis used for asterisk cdr database:
# config show odbc-asteriskcdrodbc-asteriskcdr=odbc
Database=asteriskcdrdbDescription=ODBC on asteriskcdrdbDriver=MySQLPort=3306Server=localhost
this object generates the /etc/odbc.ini section:
[odbc-asteriskcdr]Server = localhostDatabase = asteriskcdrdbDriver = MySQLPort = 3306Description = ODBC on asteriskcdrdb
41.2 /etc/odbcinst.ini
This templates contains configuration for ODBC drivers. By default there are only MySQL and PostgreSQL driverconfigurated. The nethserver-unixODBC package requires those to be installed to:
# rpm -q --requires nethserver-unixODBC...mysql-connector-odbcpostgresql-odbc...
123

NethServer Documentation, Release 7
41.3 Usage
Creation of a new ODBC driver is as simply as launching:
config set <new ODBC object name> odbc Description <description> Driver <MySQL|PostgreSQL> Server <server hostname> Database <database name> Port <database port>signal-event nethserver-unixODBC-update
124 Chapter 41. UnixODBC

CHAPTER 42
VPN
VPN implementation is splitted into various packages:
• nethserver-vpn: general package containing common code for various VPN types, including certificate manage-ment
• nethserver-openvpn: OpenVPN implementation
• nethserver-ipsec: IPsec implementation
All VPN networks are consider as trusted networks. Allowed traffic:
• Local network to VPN
• VPN to local network
• VPN to firewall
42.1 Certificates
All certificates are signed using NethServer default RSA key (/etc/pki/tls/private/NSRV.key).
42.1.1 CA environment
CA configuration is stored inside /var/lib/nethserver/ directory, all certificates are stored inside/var/lib/nethserver/certs. The nethserver-openvpn-conf action creates:
• serial, certindex.attr and /certindex: database of valid and revocated certificates
• crlnumber and /etc/openvpn/certs/crl.pem: certificate revocation list
• dh1024.pem: key for TLS negotation
42.1.2 Certificate creation
Certificates in PEM format can be created using the command:
/usr/libexec/nethserver/pki-vpn-gencert <commonName>
The commonName parameter is an unique name stored inside the certificate. The command will generate key,crt and csr file. Each generated certificate is referred with a numeric id and saved inside certindex database.OpenSSL will also create a certificated called as with the generated id (eg. 02.pem).
125

NethServer Documentation, Release 7
42.1.3 Certificate revocation
Certificate revocation is done via the command:
/usr/libexec/nethserver/pki-vpn-revoke [-d] <commonName>
The commonName parameter is an unique name stored inside the certificate. If ‘-d’ option is enabled, also deletecrt, csr, pem and key files
42.1.4 Certificate renew
All certificates will expire after X days, where X is the value of CertificateDuration property inside pki key.Renew is done via the command:
/usr/libexec/nethserver/pki-vpn-renew <commonName>
The commonName parameter is an unique name stored inside the certificate.
42.2 Events
• nethserver-vpn-create: fired when a new account is created, takes the account name as argument
• nethserver-vpn-delete: fired when a new account is deleted, takes the account name as argument
• nethserver-vpn-modify: fired when a new account is modified, takes the account name as argument
• nethserver-vpn-save: fired when a +client+ is created, modified or deleted
42.3 Accounts
Accounts are used to identify clients connecting to the server itself. There are two types of account:
• user account: system user with VPNClientAccess set to yes
• vpn-only account: simple account with only vpn access
Each account can be used in a roadwarrior connection (host to net). If a net to net tunnel (OpenVPN only) is needed,VPNRemoteNetwork and VPNRemoteNetmask properties must be set to inform the server about remote routes.When a new account is created, a certificate with same name is generated inside /var/lib/nethserver/certsdirectory.
Properties:
• VPNRemoteNetwork: remote network
• VPNRemoteNetmask: remote netmask
42.3.1 Database reference
Database: accounts
<name>=vpnVPNRemoteNetwork=VPNRemoteNetmask=
126 Chapter 42. VPN

NethServer Documentation, Release 7
<name>=user...VPNRemoteNetwork=VPNRemoteNetmask=VPNClientAccess=yes
42.4 Clients (OpenVPN)
OpenVPN clients are used to connect the server with other network, typically to create a net 2 net tunnel.
Common properties:
• AuthMode: default value is certificate. Possible values:
– certificate: use x509 certificate. Certificates, including CA and private key, are saved in/var/lib/nethserver/certs/clients directory in a PEM file named key.pem
– password: use username and password
– password-certificate: use username, password and a valid x509 certificate
– psk: use a pre-shared key
• User: username used for authentication, if AuthMode is password or password-certificate
• Password: password used for authentication, if AuthMode is password or password-certificate
• Psk: pre-shared key user for authentication, if AuthMode is psk. Pre-shared key is saved/var/lib/nethserver/certs/clients/<name>.key
• RemoteHost: remote server hostname or ip address
• RemotePort: remote host port
• VPNType: VPN type, can be openvpn or ipsec
• VPNRemoteNetwork: remote network (behind remote firewall), used for a net to net tunnel
• VPNRemoteNetmask: remote netmask, used for a net to net tunnel
• Compression: can be enabled or disabled, default is enabled. Enable/disable adaptive LZO com-pression.
42.4.1 Database reference
Database: vpn
t1=tunnelMode=routedAuthMode=certificateCrt=Psk=Password=RemoteHost=1.2.3.4RemotePort=1234User=VPNType=openvpnVPNRemoteNetmask=255.255.255.0VPNRemoteNetwork=192.168.4.0Compression=enabled
42.4. Clients (OpenVPN) 127

NethServer Documentation, Release 7
42.5 OpenVPN
Client configuration is generated using /usr/libexec/nethserver/openvpn-local-client command.The file will contain the CA certificate inside the <ca>.
Example:
/usr/libexec/nethserver/openvpn-local-client myuser
The OpenVPN server listens on a management socket: /var/spool/openvpn/host-to-net. It’s possible toretrieve server status and execute commands using the socket.
Available scripts:
• /usr/libexec/nethserver/openvpn-status: retrieve status of connected clients and return resultin JSON format
• /usr/libexec/nethserver/openvpn-kill: kill a connected client, exits 0 on success, 1 otherwise
Example with netcat:
>INFO:OpenVPN Management Interface Version 1 -- type 'help' for more infostatusOpenVPN CLIENT LISTUpdated,Thu Jan 23 09:22:24 2014Common Name,Real Address,Bytes Received,Bytes Sent,Connected SinceROUTING TABLEVirtual Address,Common Name,Real Address,Last RefGLOBAL STATSMax bcast/mcast queue length,0END
See more on management option: http://openvpn.net/index.php/open-source/documentation/miscellaneous/79-management-interface.html
42.5.1 Log files
Host to net status: /var/log/openvpn/host-to-net-status.log. Server and client output:/var/log/messages.
42.5.2 Configuration database
Properties:
• status: enable or disabled OpenVPN server _and_ cleints, can be enabled or disabled, default isenabled
• ServerStatus: enable or disabled the OpenVPN server, can be enabled or disabled, default isdisabled
• AuthMode: authentication mode, can be password, certificate or password-certificate. De-fault is password
• UDPPort: server listen port, default is 1194
• Mode: network mode, can be routed or bridged. Default is routed.
• ClientToClient: can be enabled or disabled, default is disabled. When enabled, traffic betweenVPN clients is allowed
128 Chapter 42. VPN

NethServer Documentation, Release 7
• Compression: can be enabled or disabled, default is disabled. When enabled, adaptive LZO com-pression is used
• Remote: comma-separated list of IPs or host names, it’s used as multiple remote option inside client configu-ration generation script
If mode is bridged:
• BridgeEndIP: first client IP pool, must be inside the LAN range and outside DHCP range
• BridgeStartIP: last client IP pool, must be inside the LAN range and outside DHCP range
• BridgeName: name of the bridge, default is br0
• TapInterface: name of bridged tap interface, default is tap0
If mode is routed:
• Network: network of VPN clients, eg. 192.168.6.0
• Netmask: netmask of VPN clients, eg. 255.255.255.0
• RouteToVPN: can be enabled or disabled, default is disabled. When enabled, all traffic from clientwill be routed via VPN tunnel
Reference
Example:
openvpn=serviceServerStatus=enabledAuthMode=passwordBridgeEndIP=192.168.1.122BridgeName=br0BridgeStartIP=192.168.1.121ClientToClient=disabledMode=routedNetmask=255.255.255.0Network=192.168.6.0RouteToVPN=disabledTapInterfaces=tap0UDPPort=1194access=publicstatus=enabled
42.6 IPsec
This packages implements:
• a common layer for IPsec daemons
• roadwarrior clients with L2TP and PPP
• tunnel connections (net2net)
42.6.1 L2TP
Properties:
42.6. IPsec 129
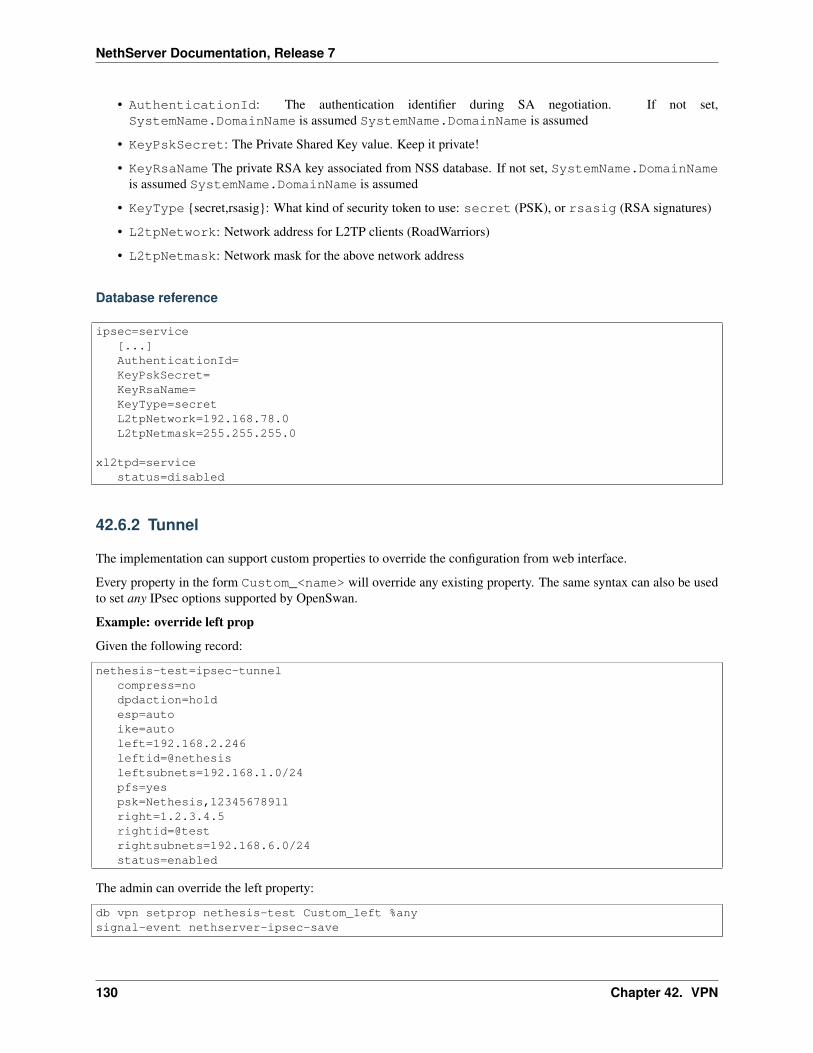
NethServer Documentation, Release 7
• AuthenticationId: The authentication identifier during SA negotiation. If not set,SystemName.DomainName is assumed SystemName.DomainName is assumed
• KeyPskSecret: The Private Shared Key value. Keep it private!
• KeyRsaName The private RSA key associated from NSS database. If not set, SystemName.DomainNameis assumed SystemName.DomainName is assumed
• KeyType {secret,rsasig}: What kind of security token to use: secret (PSK), or rsasig (RSA signatures)
• L2tpNetwork: Network address for L2TP clients (RoadWarriors)
• L2tpNetmask: Network mask for the above network address
Database reference
ipsec=service[...]AuthenticationId=KeyPskSecret=KeyRsaName=KeyType=secretL2tpNetwork=192.168.78.0L2tpNetmask=255.255.255.0
xl2tpd=servicestatus=disabled
42.6.2 Tunnel
The implementation can support custom properties to override the configuration from web interface.
Every property in the form Custom_<name> will override any existing property. The same syntax can also be usedto set any IPsec options supported by OpenSwan.
Example: override left prop
Given the following record:
nethesis-test=ipsec-tunnelcompress=nodpdaction=holdesp=autoike=autoleft=192.168.2.246leftid=@nethesisleftsubnets=192.168.1.0/24pfs=yespsk=Nethesis,12345678911right=1.2.3.4.5rightid=@testrightsubnets=192.168.6.0/24status=enabled
The admin can override the left property:
db vpn setprop nethesis-test Custom_left %anysignal-event nethserver-ipsec-save
130 Chapter 42. VPN

NethServer Documentation, Release 7
Example: set new option
Set aggressive mode:
db vpn setprop nethesis-test Custom_aggrmode yessignal-event nethserver-ipsec-save
42.6. IPsec 131

NethServer Documentation, Release 7
132 Chapter 42. VPN
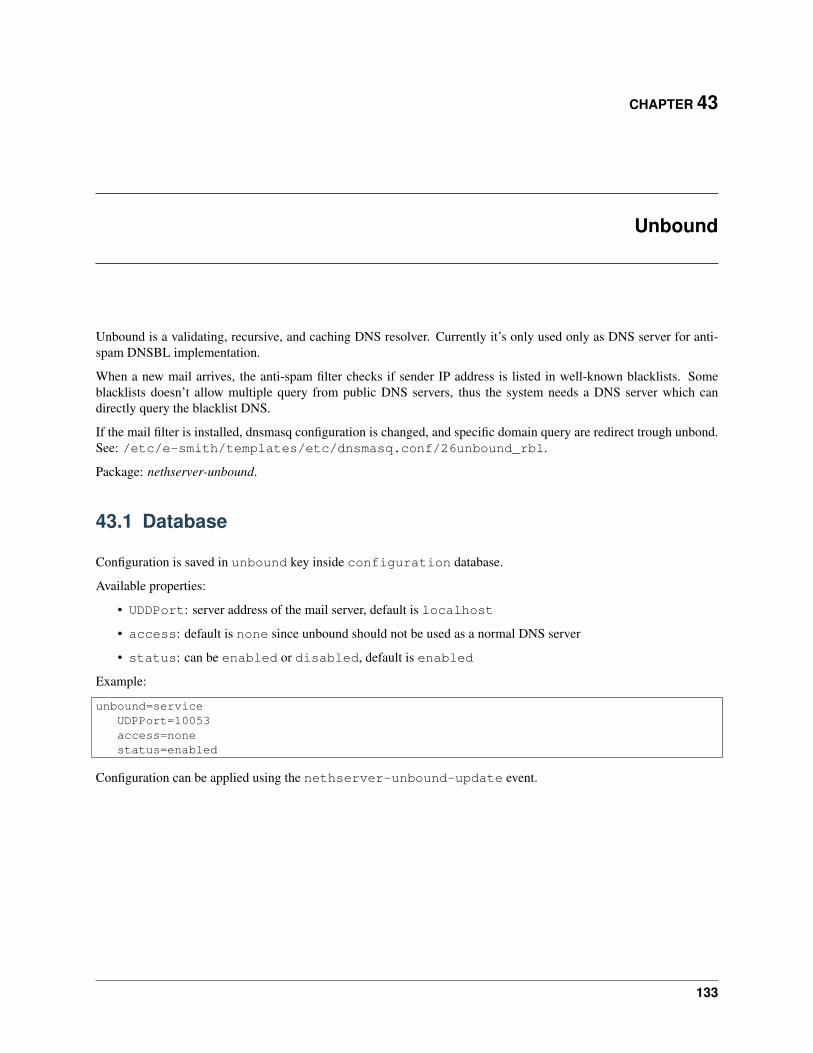
CHAPTER 43
Unbound
Unbound is a validating, recursive, and caching DNS resolver. Currently it’s only used only as DNS server for anti-spam DNSBL implementation.
When a new mail arrives, the anti-spam filter checks if sender IP address is listed in well-known blacklists. Someblacklists doesn’t allow multiple query from public DNS servers, thus the system needs a DNS server which candirectly query the blacklist DNS.
If the mail filter is installed, dnsmasq configuration is changed, and specific domain query are redirect trough unbond.See: /etc/e-smith/templates/etc/dnsmasq.conf/26unbound_rbl.
Package: nethserver-unbound.
43.1 Database
Configuration is saved in unbound key inside configuration database.
Available properties:
• UDDPort: server address of the mail server, default is localhost
• access: default is none since unbound should not be used as a normal DNS server
• status: can be enabled or disabled, default is enabled
Example:
unbound=serviceUDPPort=10053access=nonestatus=enabled
Configuration can be applied using the nethserver-unbound-update event.
133

NethServer Documentation, Release 7
134 Chapter 43. Unbound

CHAPTER 44
Ntopng
Configure the bandwidth monitor Ntopng daemon, change listen port and admin password.
After installation, ntopng is disabled by default. The user must access the web UI, choose an admin password andenable the service. Ntopng web interface is then accessible from the port specified in the web UI (default is 3000 withpublic access).
Ntopng uses free databases for geolocation. Databases are not part of nethserver-ntopng package, but a monthly cronscript downloads all compressed packages and unpack them inside ntopng directories. If you wish to force databasedownload, just execute:
/etc/cron.monthly/ntop-update-geodb
44.1 Events
nethserver-ntopng-update, standard event triggered on package installation/update and after modification inweb UI.
44.2 Templates
• /etc/ntopng/ntopng.conf: daemon configuation
• /var/tmp/ntopng-users.conf: user database
44.3 Database Reference
The admin password is saved in clear text inside the configuration db: this allows users to easily change the passwordand retrieve the current one.
44.4 Configuration DB
ntopng=servicePassword=giacomoInterfaces=eth0,eth1TCPPort=3001
135

NethServer Documentation, Release 7
access=publicstatus=enabled
44.5 Links
• Official site: http://www.ntop.org/products/ntop/
• Geoip free databases: http://dev.maxmind.com/geoip/geoip2/geolite2/
136 Chapter 44. Ntopng

CHAPTER 45
Samba-audit
Package: nethserver-samba-audit
Samba Audit tracks and show in a simple web GUI all Samba operations made on an i-bay.
The package configure Samba standard audit and save the log on a special file. Every night a script parses the log fileand puts all data into a MySQL database. The database can be explored using a simple web interface.
After installation, a new enable/disable option is shown inside the i-bay module. The web GUI can be accessed directlyfrom the Dashboard using auto-created random URL. The GUI is accessible only from local networks.
From the GUI the user can:
• filter log by username, date, i-bay name, path or ip
• remove old logs
• force parsing of log file
Database example
test=ibay...SmbAuditStatus=enabled...
137

NethServer Documentation, Release 7
138 Chapter 45. Samba-audit

CHAPTER 46
Redis
Package: nethserver-redis
Start and stop Redis server.
This package is used by old release of nethserver-ntopng < 1.3.0.
Events:
• nethserver-redis-update, standard event triggered on package installation/update.
Configuration DB
redis=serviceTCPPort=6379access=private
Links:
• Official site: http://redis.io/
139

NethServer Documentation, Release 7
140 Chapter 46. Redis

CHAPTER 47
Memcached
Basic configuration for memcached service. Memcached is not accessible from other hosts. Actually is used only forSOGo.
Database example:
memcached=servicestatus=enabled
141

NethServer Documentation, Release 7
142 Chapter 47. Memcached

CHAPTER 48
SMARTD
Configure smartd daemon to start at boot. smartd is a daemon that monitors the Self-Monitoring, Analysis and Re-porting Technology (SMART)
Database:
smartd=servicestatus=enabled
143

NethServer Documentation, Release 7
144 Chapter 48. SMARTD

CHAPTER 49
CUPS
CUPS is the printer server. It converts the page descriptions produced by your application (put a paragraph here, drawa line there, and so forth) into something your printer can understand and then sends the information to the printer forprinting.
49.1 Configuration
Use the web configuration tool http://server:631
You’ll need to create 2 printers:
• Raw printer for use with Samba and Windows hosts
• A PPD defined printer to user via IPP and Linux hosts
You already have a PDF printer configured and ready to use. All files printed via PDF Printer are saved in the userhome directory, inside the directory called “Desktop”. You can download the files using samba.
49.2 Printer discovery
CUPS uses avahi to discover network-attached printer. If you wish to use this features, just install the optional packagenethserver-avahi. See avahi-section.
49.3 Old Windows clients
If you have Windows NT/2000 client, you should use this option which enable “use client driver” in smb.conf:
config setprop smb UseClientDriver yes
49.4 Configuration DB
Reference:
cups=serviceTCPPort=631UDPPort=631
145

NethServer Documentation, Release 7
access=privatestatus=enabled
Links
• Offical CUPS web site: http://www.cups.org/
• Offical AVAHI web site: http://avahi.org/
146 Chapter 49. CUPS

CHAPTER 50
Clamd
Integration of clamav antivirus for email and filesystem checks.
The package containts basic clamd configuration templates.
Configuration database:
clamd=service...CountryCode=it
147

NethServer Documentation, Release 7
148 Chapter 50. Clamd

CHAPTER 51
c-icap
“c-icap is an implementation of an ICAP server. It can be used with HTTP proxies that support the ICAP protocol toimplement content adaptation and filtering services.”
This package configure the c-icap server, we also compile c-icap rpm:
• https://github.com/nethserver/c-icap
• https://github.com/nethserver/nethserver-c-icap
51.1 Options
Enable debug to /var/log/c-icap/server.log:
config setprop c-icap DebugLevel 1signal-event nethserver-c-icap-update
DB example:
c-icap=serviceDebugLevel=0TemplateDefaultLanguage=enstatus=enabled
149

NethServer Documentation, Release 7
150 Chapter 51. c-icap
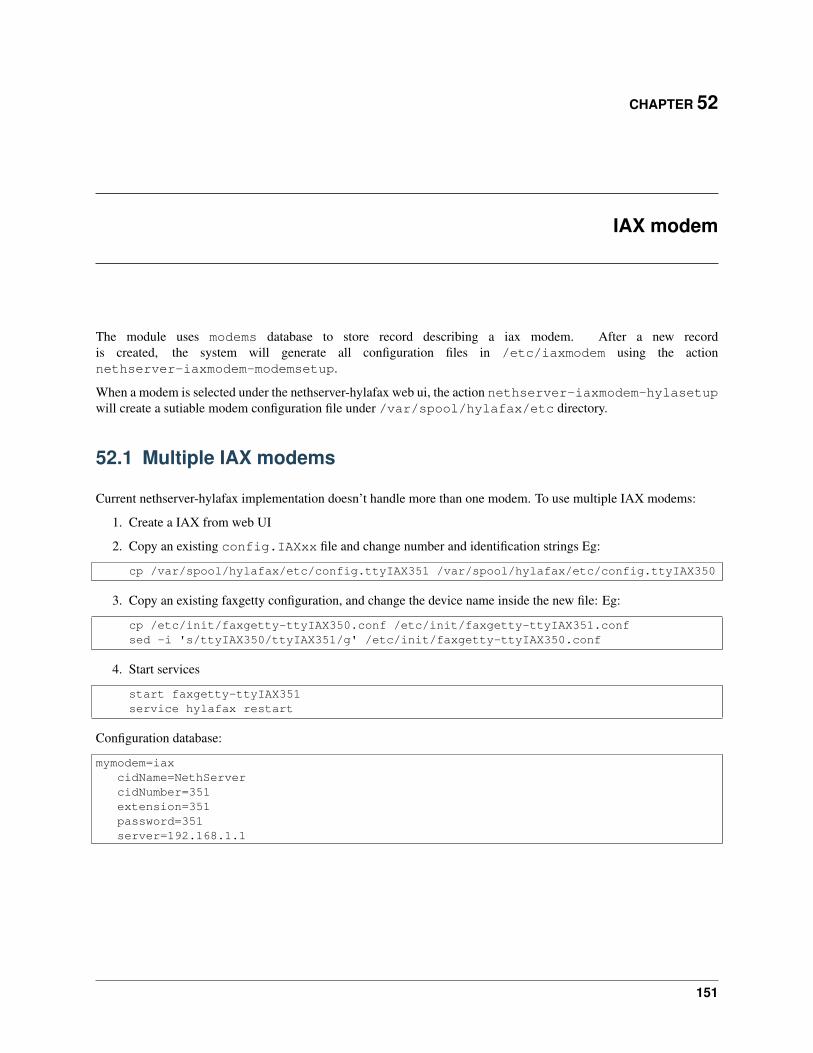
CHAPTER 52
IAX modem
The module uses modems database to store record describing a iax modem. After a new recordis created, the system will generate all configuration files in /etc/iaxmodem using the actionnethserver-iaxmodem-modemsetup.
When a modem is selected under the nethserver-hylafax web ui, the action nethserver-iaxmodem-hylasetupwill create a sutiable modem configuration file under /var/spool/hylafax/etc directory.
52.1 Multiple IAX modems
Current nethserver-hylafax implementation doesn’t handle more than one modem. To use multiple IAX modems:
1. Create a IAX from web UI
2. Copy an existing config.IAXxx file and change number and identification strings Eg:
cp /var/spool/hylafax/etc/config.ttyIAX351 /var/spool/hylafax/etc/config.ttyIAX350
3. Copy an existing faxgetty configuration, and change the device name inside the new file: Eg:
cp /etc/init/faxgetty-ttyIAX350.conf /etc/init/faxgetty-ttyIAX351.confsed -i 's/ttyIAX350/ttyIAX351/g' /etc/init/faxgetty-ttyIAX350.conf
4. Start services
start faxgetty-ttyIAX351service hylafax restart
Configuration database:
mymodem=iaxcidName=NethServercidNumber=351extension=351password=351server=192.168.1.1
151

NethServer Documentation, Release 7
152 Chapter 52. IAX modem
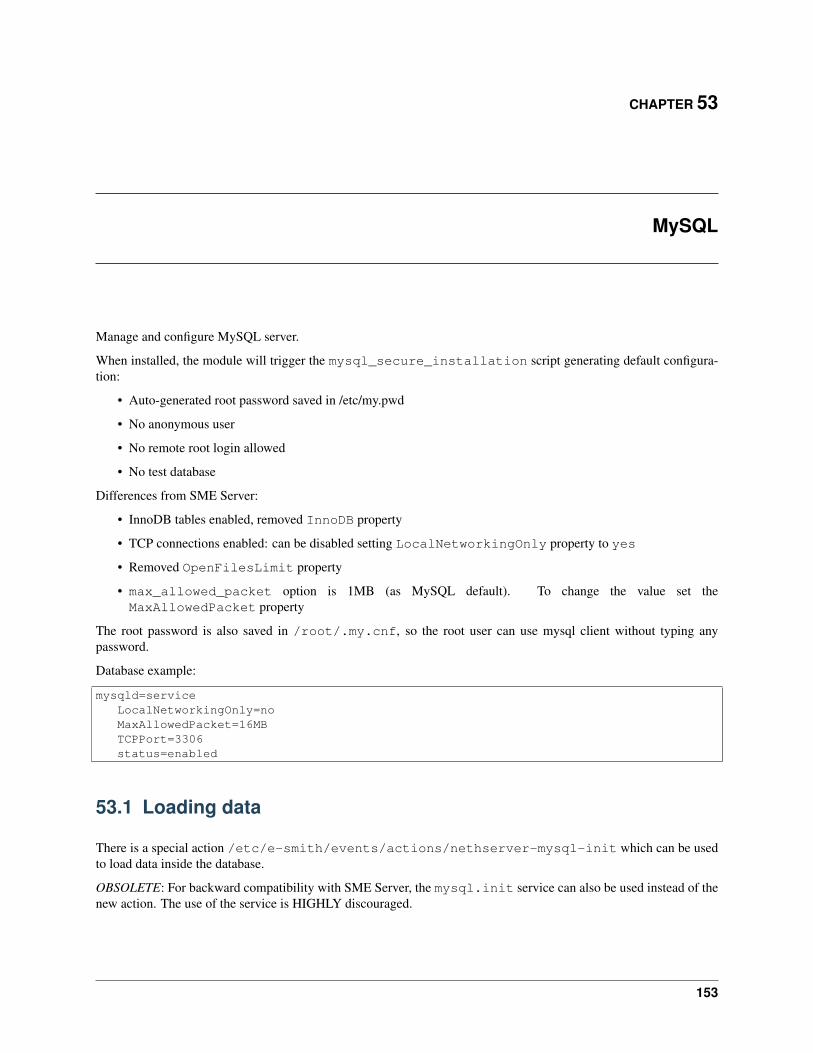
CHAPTER 53
MySQL
Manage and configure MySQL server.
When installed, the module will trigger the mysql_secure_installation script generating default configura-tion:
• Auto-generated root password saved in /etc/my.pwd
• No anonymous user
• No remote root login allowed
• No test database
Differences from SME Server:
• InnoDB tables enabled, removed InnoDB property
• TCP connections enabled: can be disabled setting LocalNetworkingOnly property to yes
• Removed OpenFilesLimit property
• max_allowed_packet option is 1MB (as MySQL default). To change the value set theMaxAllowedPacket property
The root password is also saved in /root/.my.cnf, so the root user can use mysql client without typing anypassword.
Database example:
mysqld=serviceLocalNetworkingOnly=noMaxAllowedPacket=16MBTCPPort=3306status=enabled
53.1 Loading data
There is a special action /etc/e-smith/events/actions/nethserver-mysql-init which can be usedto load data inside the database.
OBSOLETE: For backward compatibility with SME Server, the mysql.init service can also be used instead of thenew action. The use of the service is HIGHLY discouraged.
153

NethServer Documentation, Release 7
When launched, the script will search for links in /etc/e-smith/sql/init directory. If a link point to a file with.sql extension, the content of the file will be loaded using the mysql command. Otherwise if the file is executable itwill be simply executed. If no error occurs, the link will be removed.
Given ad simple /tmp/test.sql script, you can load it using this commands:
ln -s /tmp/test.sql /etc/e-smith/sql/init/temp.sqlservice mysql.init start
154 Chapter 53. MySQL
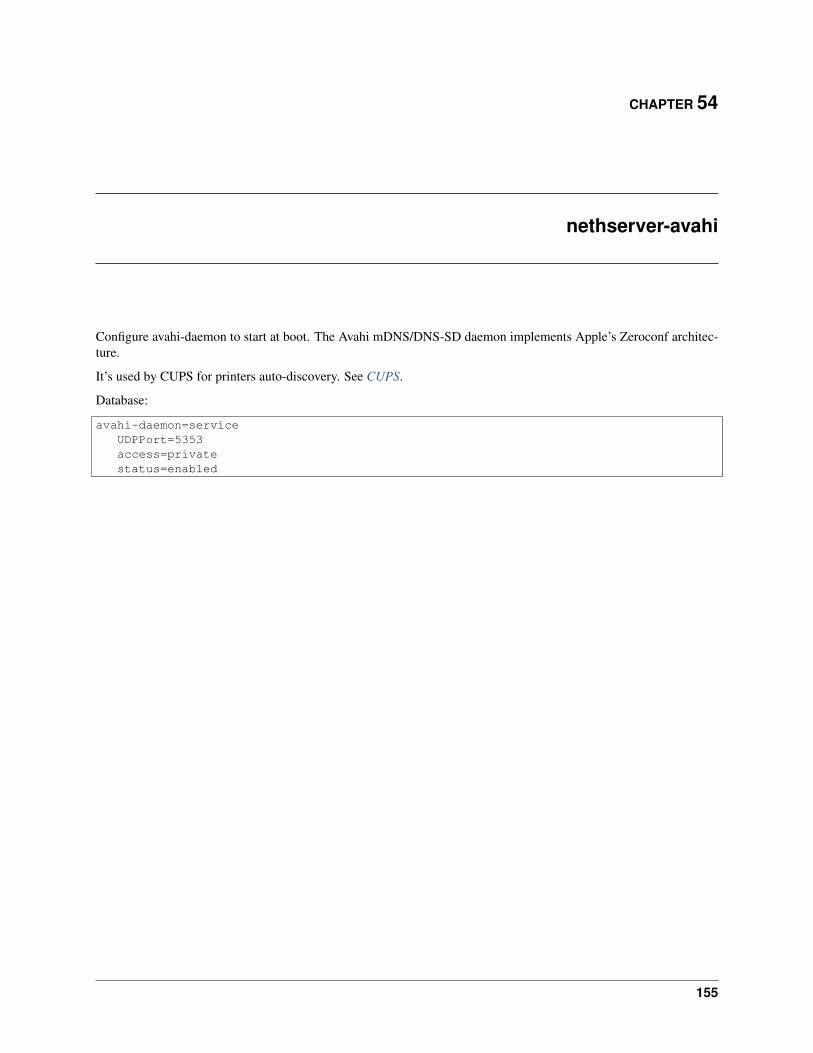
CHAPTER 54
nethserver-avahi
Configure avahi-daemon to start at boot. The Avahi mDNS/DNS-SD daemon implements Apple’s Zeroconf architec-ture.
It’s used by CUPS for printers auto-discovery. See CUPS.
Database:
avahi-daemon=serviceUDPPort=5353access=privatestatus=enabled
155

NethServer Documentation, Release 7
156 Chapter 54. nethserver-avahi

CHAPTER 55
nethserver-base
This package implements all core configuration.
55.1 Network
Network configuration is saved inside the NetworksDB (/var/lib/nethserver/db/networks).
Example of a database containing an interface:
eth0=ethernetbootproto=nonedevice=eth0gateway=192.168.1.254ipaddr=192.168.1.1netmask=255.255.255.0onboot=yesrole=green
Each entry describes a network interface according to CentOS/RHEL specification for network-scripts files:
<device_name> = typerole = <role><param> = <value>
The type variable is the type of interface. Valid values are:
• ethernet
• bond
• bridge
• alias
• ipsec
• xdsl
The <device_name> variable is the name for the device.
The role property is a mandatory parameter which describes the interface role. Valid values are:
• green
• orange
• blue
157

NethServer Documentation, Release 7
• red
If the role property is empty, the interface is not used by the system.
There are also 3 special roles:
• bridged: interface is part of a bridge
• slave: interface is part of a bond
• alias: interface is an alias of another interface
• xdsl-disabled: xdsl disabled interface
See also Roles and zones for the meaning of each color.
All <param>/<value> are all valid CentOS network parameter for the specified interface. All parameters must belowercase. Example:
• ippaddr
• dhcp_hostname
• netmask
• slave
• ...
All parameters will be mapped 1-to-1 to the configuration file
Example
One green ethernet:
db networks set eth0 ethernet role green ipaddr 192.168.1.4 netmask 255.255.255.0 network 192.168.1.0 onboot yes bootproto static
File content:
green=ethernet|bootproto|static|device|green|ipaddr|192.168.1.4|netmask|255.255.255.0|network|192.168.1.0|onboot|yes|role|green
55.1.1 Bond options
Any property starting with BondOpt prefix is used as bonding options.
Example:
bond0=bondBondOptMode=0BondOptMiimon=80bootproto=nonegateway=192.168.1.100ipaddr=192.168.1.2netmask=255.255.255.0role=green
55.1.2 Templates
The network database can be manipulated using the esmith::NetworksDB perl module. For more information use:
perldoc esmith::NetworksDB
158 Chapter 55. nethserver-base
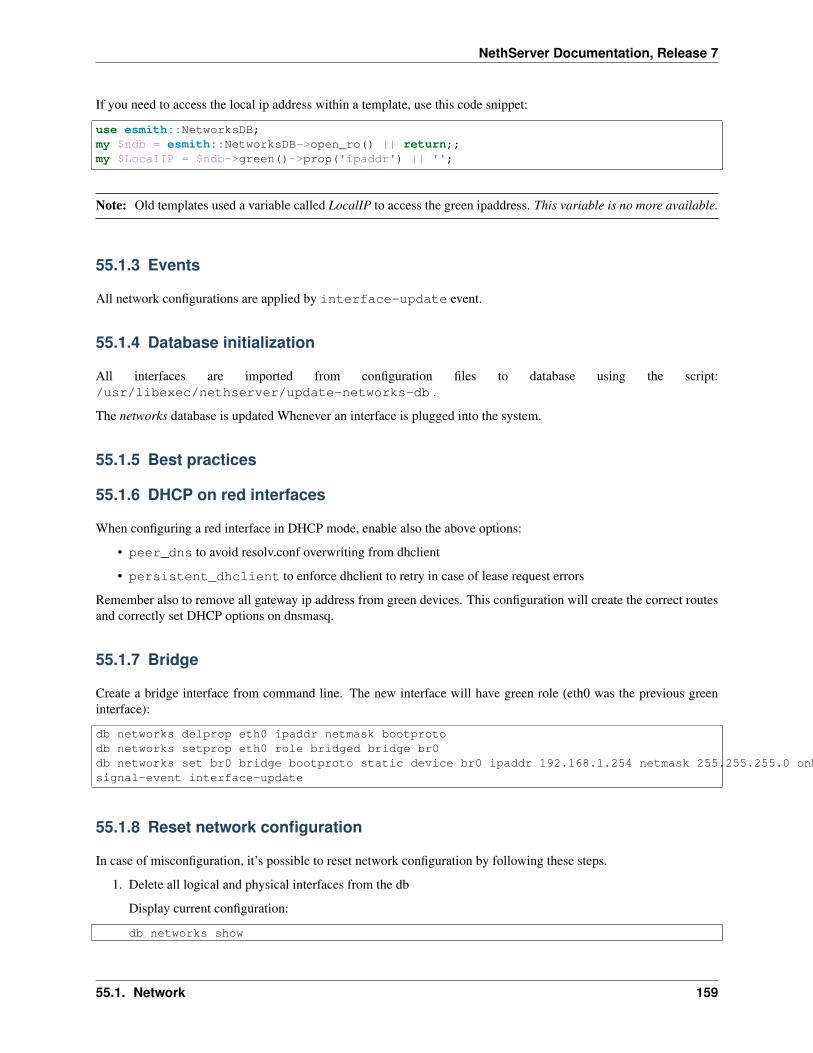
NethServer Documentation, Release 7
If you need to access the local ip address within a template, use this code snippet:
use esmith::NetworksDB;my $ndb = esmith::NetworksDB->open_ro() || return;;my $LocalIP = $ndb->green()->prop('ipaddr') || '';
Note: Old templates used a variable called LocalIP to access the green ipaddress. This variable is no more available.
55.1.3 Events
All network configurations are applied by interface-update event.
55.1.4 Database initialization
All interfaces are imported from configuration files to database using the script:/usr/libexec/nethserver/update-networks-db .
The networks database is updated Whenever an interface is plugged into the system.
55.1.5 Best practices
55.1.6 DHCP on red interfaces
When configuring a red interface in DHCP mode, enable also the above options:
• peer_dns to avoid resolv.conf overwriting from dhclient
• persistent_dhclient to enforce dhclient to retry in case of lease request errors
Remember also to remove all gateway ip address from green devices. This configuration will create the correct routesand correctly set DHCP options on dnsmasq.
55.1.7 Bridge
Create a bridge interface from command line. The new interface will have green role (eth0 was the previous greeninterface):
db networks delprop eth0 ipaddr netmask bootprotodb networks setprop eth0 role bridged bridge br0db networks set br0 bridge bootproto static device br0 ipaddr 192.168.1.254 netmask 255.255.255.0 onboot yes role greensignal-event interface-update
55.1.8 Reset network configuration
In case of misconfiguration, it’s possible to reset network configuration by following these steps.
1. Delete all logical and physical interfaces from the db
Display current configuration:
db networks show
55.1. Network 159

NethServer Documentation, Release 7
Delete all interfaces:
db network delete eth0
Repeat the operation for all interfaces including bridges, bonds and vlans.
2. Disable interfaces
Physical interfaces:
ifconfig eth0 down
In case of a bridge:
ifconfig br0 downbrctl delbr br0
In case of a bond (eth0 is enslaved to bond0):
ifenslave -d bond0 eth0rmmod bonding
3. Remove configuration files
Network configuration files are inside the /etc/sysconfig/network-scripts/ directory in the form:/etc/sysconfig/network-scripts/ifcfg-<devicename>. Where devicename is the name ofthe interface like eth0, br0, bond0.
Delete the files:
rm -f /etc/sysconfig/network-scripts/ifcfg-eth0
Repeat the operation for all interfaces including bridges, bonds and vlans.
4. Restart the network
After restarting the network you should see only the loopback interface:
service network restart
Use ifconfig command to check the network status.
5. Manually reconfigure the network
Choose an IP to assign to an interface, for example 192.168.1.100:
ifconfig eth0 192.168.1.100
Then reconfigure the system:
signal-event system-init
The interface will have the chosen IP address.
6. Open the web interface and reconfigure accordingly to your needs
55.2 Password policy
The system can handle global or per-user policies. All policies are enforced by PAM and saved underpasswordstrength inside the configuration database.
Available properties are:
160 Chapter 55. nethserver-base
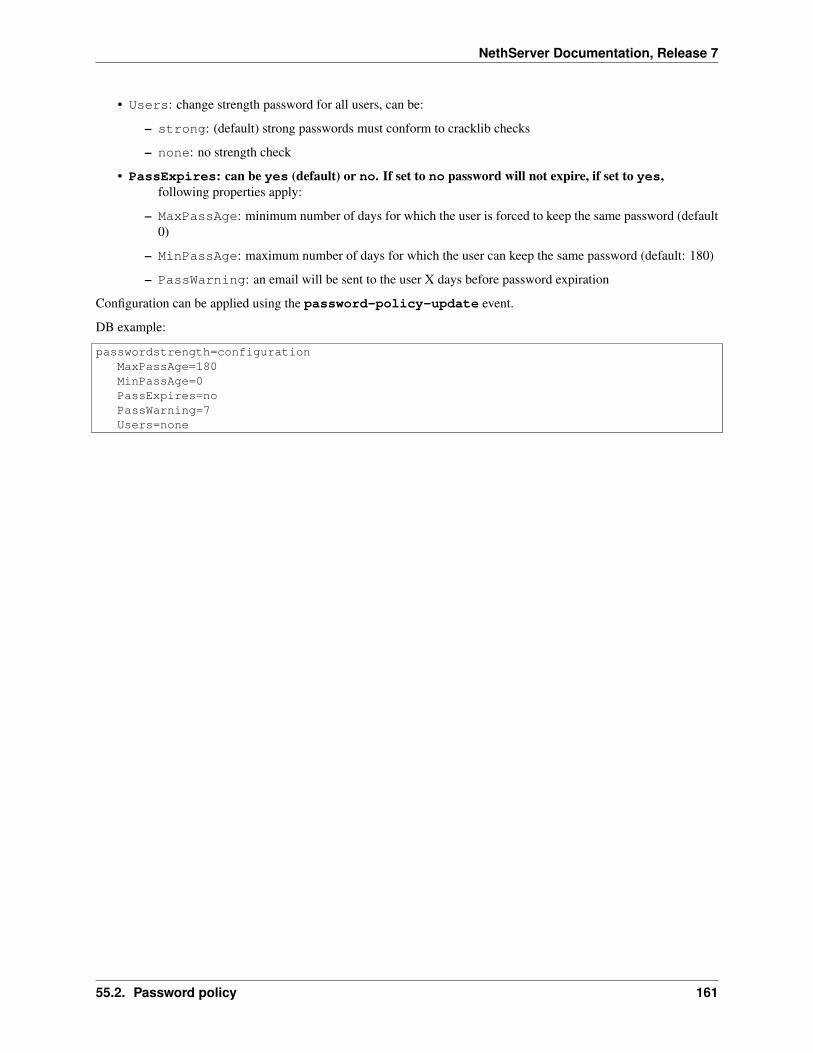
NethServer Documentation, Release 7
• Users: change strength password for all users, can be:
– strong: (default) strong passwords must conform to cracklib checks
– none: no strength check
• PassExpires: can be yes (default) or no. If set to no password will not expire, if set to yes,following properties apply:
– MaxPassAge: minimum number of days for which the user is forced to keep the same password (default0)
– MinPassAge: maximum number of days for which the user can keep the same password (default: 180)
– PassWarning: an email will be sent to the user X days before password expiration
Configuration can be applied using the password-policy-update event.
DB example:
passwordstrength=configurationMaxPassAge=180MinPassAge=0PassExpires=noPassWarning=7Users=none
55.2. Password policy 161

NethServer Documentation, Release 7
162 Chapter 55. nethserver-base
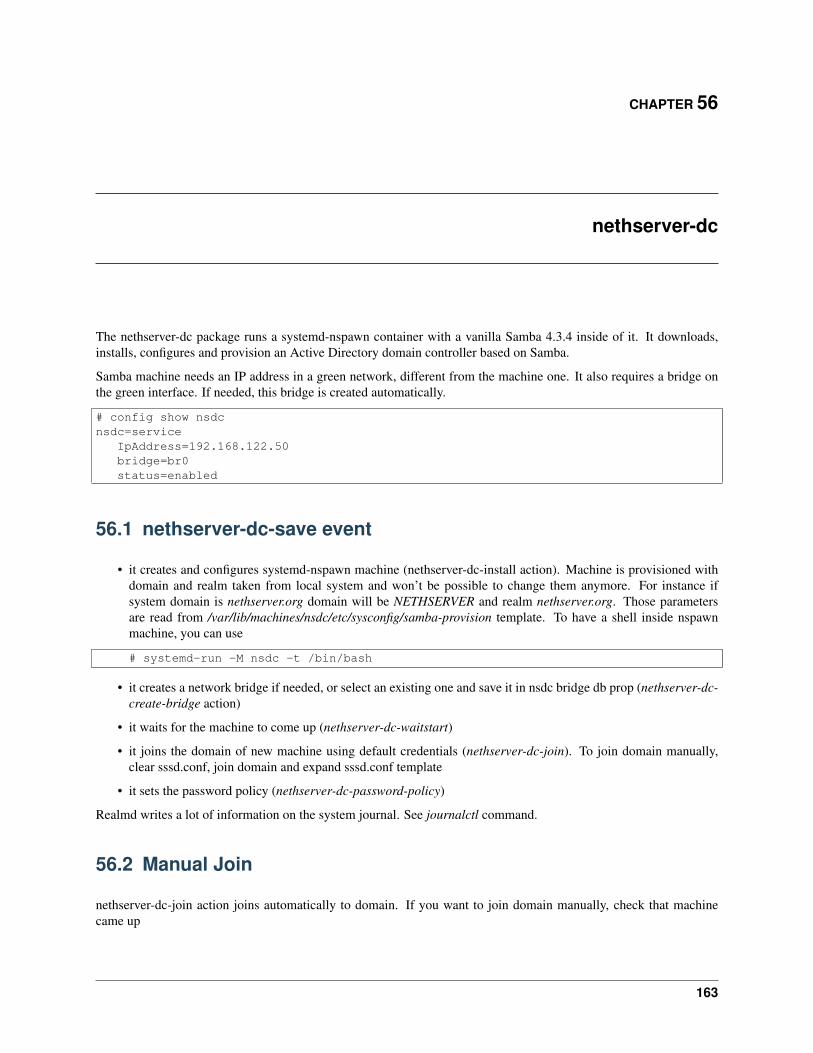
CHAPTER 56
nethserver-dc
The nethserver-dc package runs a systemd-nspawn container with a vanilla Samba 4.3.4 inside of it. It downloads,installs, configures and provision an Active Directory domain controller based on Samba.
Samba machine needs an IP address in a green network, different from the machine one. It also requires a bridge onthe green interface. If needed, this bridge is created automatically.
# config show nsdcnsdc=service
IpAddress=192.168.122.50bridge=br0status=enabled
56.1 nethserver-dc-save event
• it creates and configures systemd-nspawn machine (nethserver-dc-install action). Machine is provisioned withdomain and realm taken from local system and won’t be possible to change them anymore. For instance ifsystem domain is nethserver.org domain will be NETHSERVER and realm nethserver.org. Those parametersare read from /var/lib/machines/nsdc/etc/sysconfig/samba-provision template. To have a shell inside nspawnmachine, you can use
# systemd-run -M nsdc -t /bin/bash
• it creates a network bridge if needed, or select an existing one and save it in nsdc bridge db prop (nethserver-dc-create-bridge action)
• it waits for the machine to come up (nethserver-dc-waitstart)
• it joins the domain of new machine using default credentials (nethserver-dc-join). To join domain manually,clear sssd.conf, join domain and expand sssd.conf template
• it sets the password policy (nethserver-dc-password-policy)
Realmd writes a lot of information on the system journal. See journalctl command.
56.2 Manual Join
nethserver-dc-join action joins automatically to domain. If you want to join domain manually, check that machinecame up
163

NethServer Documentation, Release 7
# host -t SRV _ldap._tcp.`config get DomainName`_ldap._tcp.nethsever.org has SRV record 0 100 389 nsdc-vm8.nethsever.org.
then clear sssd.conf, join domain and expand sssd.conf template
# > /etc/sssd/sssd.conf# realm join `config get DomainName`# expand-template /etc/sssd/sssd.conf
Then provide the default administrator password:
Nethesis,1234
If everything goes well
# getent passwd administrator@`config get DomainName`[email protected]:*:261600500:261600513:Administrator:/home/[email protected]:/bin/bash
Once domain is joined, you can manage users from interface. From command line, you can use net command
# net ads info
56.3 Factory reset
The “Start DC” procedure from the UI is designed for a single run. If it fails, reinstalling the whole server can beavoided with some bash commands.
The following steps are required to clean up the DC state and prepare it for a new provisioning run.
realm leavesystemctl stop nsdc sssdsystemctl disable nsdc sssdrm -vf /var/lib/machines/nsdc/etc/samba/smb.conffind /var/lib/machines/nsdc/var/lib/samba/ -type f | xargs -- rm -vfconfig setprop sssd Provider none status disabled AdDns ''> /etc/sssd/sssd.confsignal-event nethserver-dnsmasq-saveconfig setprop nsdc status disabled IpAddress ''
56.4 Changing the IP address of DC
Warning: Before applying this procedure, read carefully the official Samba wiki page.
Example, change the network address (“122” becomes “101”):
• domain dpnet.nethesis.it, realm DPNET.NETHESIS.IT
• bridge is br0
• current host IP: 192.168.122.7
• current gateway IP: 192.168.122.1
• current nsdc container IP: 192.168.122.77
• new host IP: 192.168.101.7
164 Chapter 56. nethserver-dc
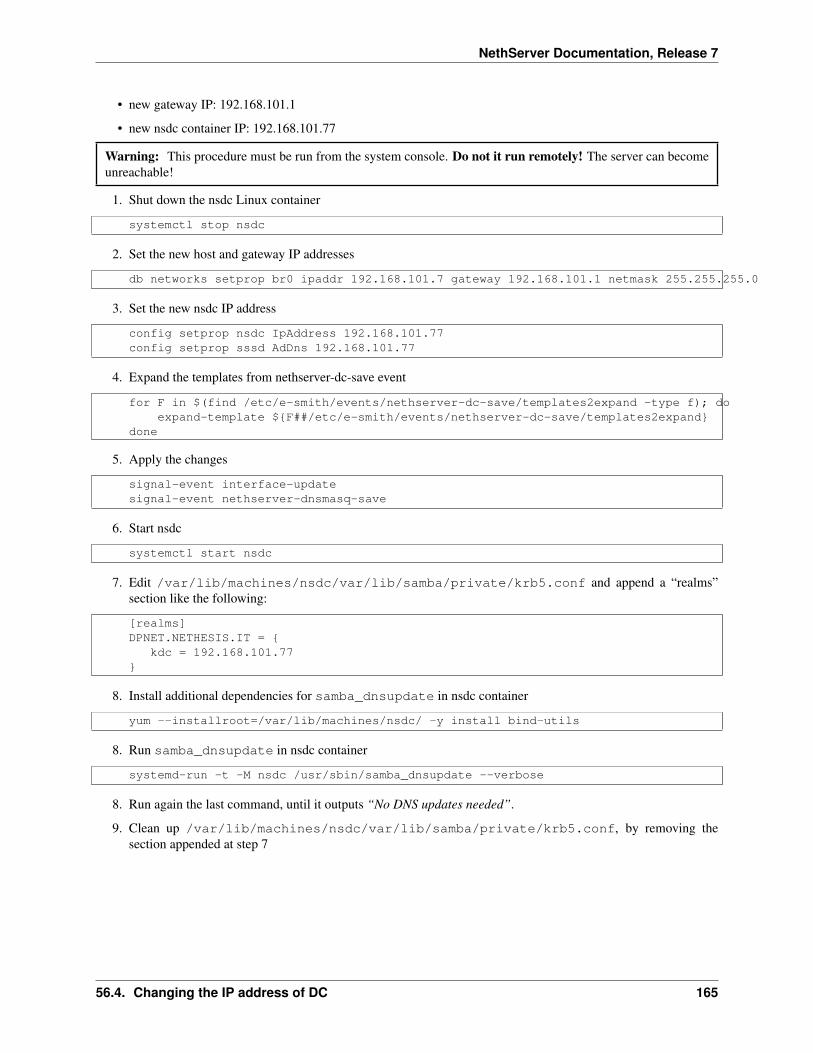
NethServer Documentation, Release 7
• new gateway IP: 192.168.101.1
• new nsdc container IP: 192.168.101.77
Warning: This procedure must be run from the system console. Do not it run remotely! The server can becomeunreachable!
1. Shut down the nsdc Linux container
systemctl stop nsdc
2. Set the new host and gateway IP addresses
db networks setprop br0 ipaddr 192.168.101.7 gateway 192.168.101.1 netmask 255.255.255.0
3. Set the new nsdc IP address
config setprop nsdc IpAddress 192.168.101.77config setprop sssd AdDns 192.168.101.77
4. Expand the templates from nethserver-dc-save event
for F in $(find /etc/e-smith/events/nethserver-dc-save/templates2expand -type f); doexpand-template ${F##/etc/e-smith/events/nethserver-dc-save/templates2expand}
done
5. Apply the changes
signal-event interface-updatesignal-event nethserver-dnsmasq-save
6. Start nsdc
systemctl start nsdc
7. Edit /var/lib/machines/nsdc/var/lib/samba/private/krb5.conf and append a “realms”section like the following:
[realms]DPNET.NETHESIS.IT = {
kdc = 192.168.101.77}
8. Install additional dependencies for samba_dnsupdate in nsdc container
yum --installroot=/var/lib/machines/nsdc/ -y install bind-utils
8. Run samba_dnsupdate in nsdc container
systemd-run -t -M nsdc /usr/sbin/samba_dnsupdate --verbose
8. Run again the last command, until it outputs “No DNS updates needed”.
9. Clean up /var/lib/machines/nsdc/var/lib/samba/private/krb5.conf, by removing thesection appended at step 7
56.4. Changing the IP address of DC 165

NethServer Documentation, Release 7
166 Chapter 56. nethserver-dc
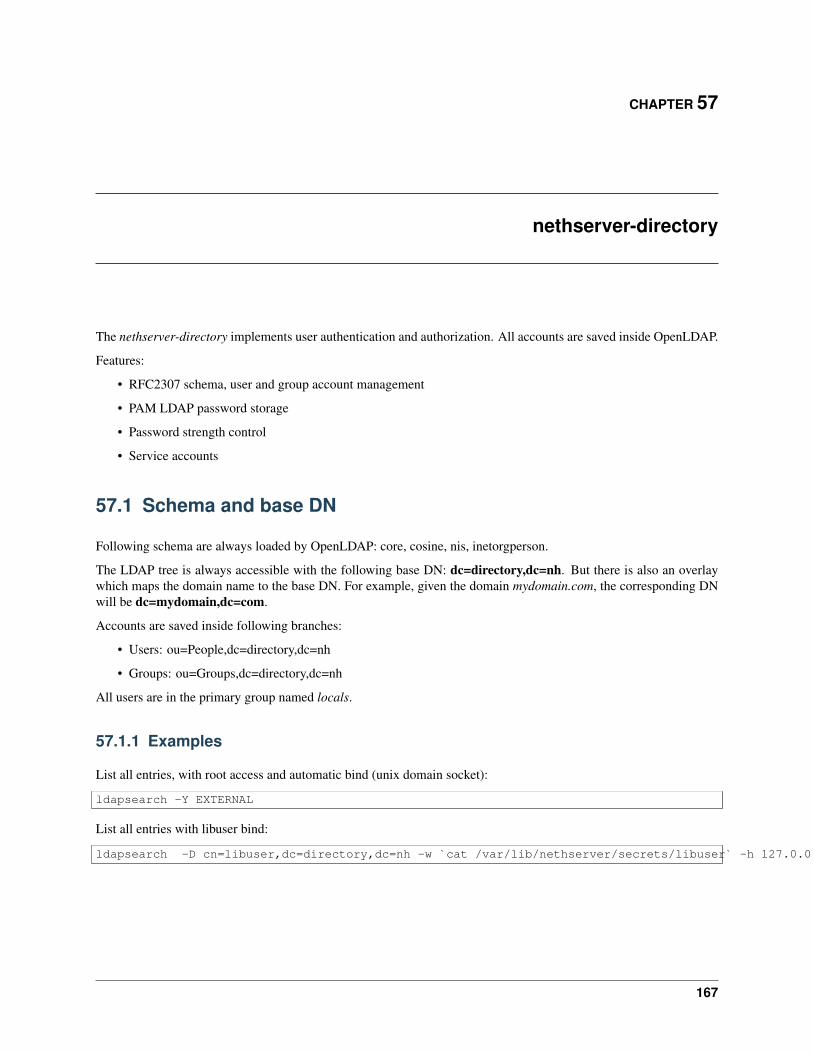
CHAPTER 57
nethserver-directory
The nethserver-directory implements user authentication and authorization. All accounts are saved inside OpenLDAP.
Features:
• RFC2307 schema, user and group account management
• PAM LDAP password storage
• Password strength control
• Service accounts
57.1 Schema and base DN
Following schema are always loaded by OpenLDAP: core, cosine, nis, inetorgperson.
The LDAP tree is always accessible with the following base DN: dc=directory,dc=nh. But there is also an overlaywhich maps the domain name to the base DN. For example, given the domain mydomain.com, the corresponding DNwill be dc=mydomain,dc=com.
Accounts are saved inside following branches:
• Users: ou=People,dc=directory,dc=nh
• Groups: ou=Groups,dc=directory,dc=nh
All users are in the primary group named locals.
57.1.1 Examples
List all entries, with root access and automatic bind (unix domain socket):
ldapsearch -Y EXTERNAL
List all entries with libuser bind:
ldapsearch -D cn=libuser,dc=directory,dc=nh -w `cat /var/lib/nethserver/secrets/libuser` -h 127.0.0.1
167
NethServer Documentation, Release 7
57.2 User account states
Account management is done via libuser which exports some tools (luseradd, luserdel, etc) to create/modify/deleteusers, groups and set passwords.
The process of user/group creations is:
• invoke the create event which uses libuser to add the record inside LDAP
• invoke the group even if the user must be members of additional groups
• invoke the password policy event to change user password expiration
• invoke the password change event to set a password
57.3 Logging
OpenLDAP doesn’t output any log with standard configuration. When logging is enabled, all logs are saved inside/var/log/slapd. But its verbosity can be changed at run time by issuing this command:
# ldapmodify -Y EXTERNAL <<EOFdn: cn=configchangetype: modifyreplace: olcLogLevelolcLogLevel: 256EOF
The command above changes the OpenLDAP config DB and set the log verbosity to trace “connec-tions/operations/results” (256). Check the debugging levels table from OpenLDAP site for more details:http://www.openldap.org/doc/admin24/slapdconf2.html#olcLogLevel%3A%20%3Clevel%3E.
57.4 Service accounts
The following service accounts are configured by the nethserver-directory-dit-setup action:
• cn=libuser,dc=directory,dc=nh. Granted read and write access from 127.0.0.1.
• cn=ldapservice,dc=directory,dc=nh. Granted read only access to non-sensitive attributes, fromlocalhost, or from any other IP address with TLS.
The developer can use the NethServe::Directory Perl module to handle additional service accounts with ad-hocpermissions, if the existing ldapservice, libuser accounts and anonymous binds do not fit his requirements.
A service account is composed by three parts:
• a LDAP user
• a password
• an ACL to access LDAP fields
Perl code snippet to create a service account with read access:
use NethServer::Directory;...NethServer::Directory->new()->configServiceAccount('myservice', NethServer::Directory::FIELDS_READ) || die("Failed to register myservice account")
Perl code snippet to use created password:
168 Chapter 57. nethserver-directory

NethServer Documentation, Release 7
use NethServer::Password;my $pwd = NethServer::Password::store('myservice');
57.5 User accounts
Authenticated binds are granted to TLS protected connections, or connections from 127.0.0.1. User DN are in theform:
uid=<username>,ou=People,dc=directory,dc=nh
57.6 Anonymous access
Some LDAP clients and/or legacy environments may require anonymous bind to the LDAP accounts database. Cur-rently anonymous access is granted to non-sensitive fields.
Configuration for client:
• Host: ip address of the server
• Port: 389
• Base DN: dc=directory,dc=nh
57.7 Administrative access
An existing DN (i.e. administrator) can be granted full administrative privileges on the wholedc=directory,dc=nh tree. By default, the designated user is defined in config DB, under the admins key.
‘ ldapmodify -Y EXTERNAL <<EOF dn: olcDatabase={2}hdb,cn=config changetype:modify replace: olcRootDN olcRootDN: uid=administrator,ou=People,dc=directory,dc=nhEOF ‘
57.8 Inspect OpenLDAP ACLs
Service accounts require OpenLDAP ACLs tuning. To inspect the current ACLs type:
ldapsearch -LLL -Y EXTERNAL -b cn=config -s one 'objectClass=olcDatabaseConfig' olcAccess 2>/dev/null
If output appears to be base64-encoded type:
ldapsearch -LLL -Y EXTERNAL -b cn=config -s one 'objectClass=olcDatabaseConfig' olcAccess 2>/dev/null | perl -MMIME::Base64 -MEncode=decode -n -00 -e 's/\n +//g;s/(?<=:: )(\S+)/decode("UTF-8",decode_base64($1))/eg;print'
57.5. User accounts 169

NethServer Documentation, Release 7
170 Chapter 57. nethserver-directory
CHAPTER 58
nethserver-ejabberd
The chat function is implemented using ejabberd jabber server. Enabled features are:
• ldap based roster
• ssl
• admin group
If you want to give admin permissions to an existing user, just add the user to the special group jabberadmins.The jabberadmins must be created manually.
When used with AD backend, following limitations apply:
• the shared roster doesn’t support groups
• the shared roster displays the list of user names (not full names)
58.1 Configuration
Properties:
• WebAdmin: enable ejabberd built-in web interfac. Can be enabled or disabled, default is disabled
• WelcomeSubject: subject to be shown in the welcome message, default value is empty
• WelcomeText: welcome message, default value is empty
• XMPPAccess: enable TLS access if value is tls, which is the default value. If empty, TLS is disabled.
When enabled, web-based adminsitration interface listens on 5280 port. You need a user inside jabberadmins groupto login.
Default access to server ports is set to public on following ports: 5280, 5222, 5223.
171

NethServer Documentation, Release 7
172 Chapter 58. nethserver-ejabberd

CHAPTER 59
nethserver-firewall-base
NethServer can work into two basic modes:
• server mode: the system will be a standard host inside the network offering services like e-mail or file server.
• gateway mode: the system is the gateway and firewall of the local network
The system has an abstraction layer for firewall base functions, like opening ports for running services. Actually twoimplementations are available:
• server mode: standard lokkit (default on CentOS)
• gateway mode: advanced Shorewall configuration
The gateway functionality is built around three modules:
• nethserver-base: high-level abstraction of the firewall
• nethserver-firewall-base: Shorewall-based implementation
• nethserver-lsm: link status monitor for multi-wan configurations
59.1 Roles and zones
Each network interface has a role which maps to a firewall zone. The firewall has the following built-in zones, orderedfrom the most to the least privileged:
• green: local network, it’s considered almost trusted. Hosts in this network can access any other zone. Hostsconnected via VPN can be considered in green zone.
• blue: guest network. Hosts in this network can access orange and red zones, can’t access green zone
• orange: DMZ network. Hosts in this network can access red zone, can’t access green and blue zones
• red: external/internet networks. Hosts in this network can access only firewall zone
• a: (not implemented yet) traffic from/to this zone must be explicitly allowed
There is also a special firewall zone which represents the firewall itself. The firewall can access any other zone.
Each network interface with a configured role is a firewall zone. Roles are mapped to Shorewall zone as:
• green -> loc
• red -> net
• blue -> blue
• orange -> orang (in Shorewall, a zone name can’t be longer than 5 chars)
173
NethServer Documentation, Release 7
• firewall -> FW
Custom zone names are directly mapped to Shorewall respecting the limit of 5 chars.
Red interfaces can be configured with static IP address or using DHCP. All other interfaces can be configured onlywith static IP addresses.
59.2 General configuration
Properties of firewall key inside configuration db:
• event: event to call when firewall-adjust event is fired
• tc: traffic shape mode (see below)
• ExternalPing: if enabled, allow ping responses on external interface
• WanMode: multi-wan mode. Default is balance, can be:
– balance: traffic is balanced among red interfaces in weighted mode
– backup: traffic is routed via wan interface with maximum weight, all other interfaces are used as fallback
• nfq: if enabled, traffic from external networks will be passed to NFQ and scanned with Snort. See ips.
• Policy: can be permissive or strict. See above.
• MACValidation: if enabled, the firewall will check the traffic against a list of known MAC addresses (see:IP/MAC binding)
• MACValidationPolicy: can be accept or drop. Default is drop. See man shorewall.conf forall valid values
• InterfaceRoleList: list of network interface roles configurable from web interface. Default is:green,red,blue,orange
• CheckIP: comma-separeted list of IP monitored by LSM, to check if a provider is up or down
• MaxNumberPacketLoss: number of maximum consecutive packets lost, over this threshold the provider isconsidered down
• MaxPercentPacketLoss: percentage of maximum packet lost, over this threshold the provider is consid-ered down
• PingInterval: seconds between ICMP packets sent by LSM, default is 5
• NotifyWan: can be enabled or disabled, if enabled a mail is sent every time a provider changes itsown state
• NotifyWanFrom: sender address for mails sent if NotifyWAN is set to enabled
• NotifyWanTo: recipient address for mails sent if NotifyWAN is set to enabled
Example
firewall=configurationevent=nethserver-firewall-base-savetc=Simplenfq=disabledWanMode=balancePolicy=permissive
174 Chapter 59. nethserver-firewall-base
NethServer Documentation, Release 7
59.3 Events
The main event for firewall configuration is firewall-adjust. The event contains a single action which fires the eventnamed in the property event inside the firewall key into the configuration database.
Other events:
• lokkit-save: base firewall implementation using lokkit
• nethserver-firewall-base-save: firewall implementation using Shorewall
• wan-uplink-update: fired when the status of an external interface changes
The wan-uplink-event event takes at least two parameters:
• provider name: name of the provider involved
• action: can be up or down, describing the new provider status
Example:
signal-event wan-uplink-update down myisp
59.4 Policy
For every network packet traveling between firewall zones, the system will evaluate a list of rules to allow/block thespecific traffic. Policies are default firewall rules which will be applied only if no other rule matches the ongoingtraffic.
Firewall implements two standard policies:
• Permissive: will enable all traffic from green (loc) zone to red (net) zone.
• Strict: will block all traffic from green (loc) zone to red (net) zone. Permitted traffic should be explicitly allowed.
The firewall configures 4 default zones with built-in policies (see above). In the schema below, traffic is permittedfrom left to right and blocked from right to left:
GREEN -> BLUE -> ORANGE -> RED
To override a policy, you should create a firewall rule between zones.
59.5 IP/MAC binding
When MACValidation option is enabled, the firewall analyzes all the traffic based on a well-known list of IPsassociated to MAC addresses. If the host generating the traffic is not inside the list, MACValidationPolicy willbe applied. The list of IP/MAC association is created from DHCP reservations.
Thus, enabling MACValidation and leaving MACValidationPolicy set to drop, will block all traffic from hosts withouta DHCP reservation.
59.6 Rules
Firewall rules can allow or deny traffic matching certain conditions. Rules are saved inside the fwrules database asrecords of type rule.
Each rule record has the following fields:
59.3. Events 175
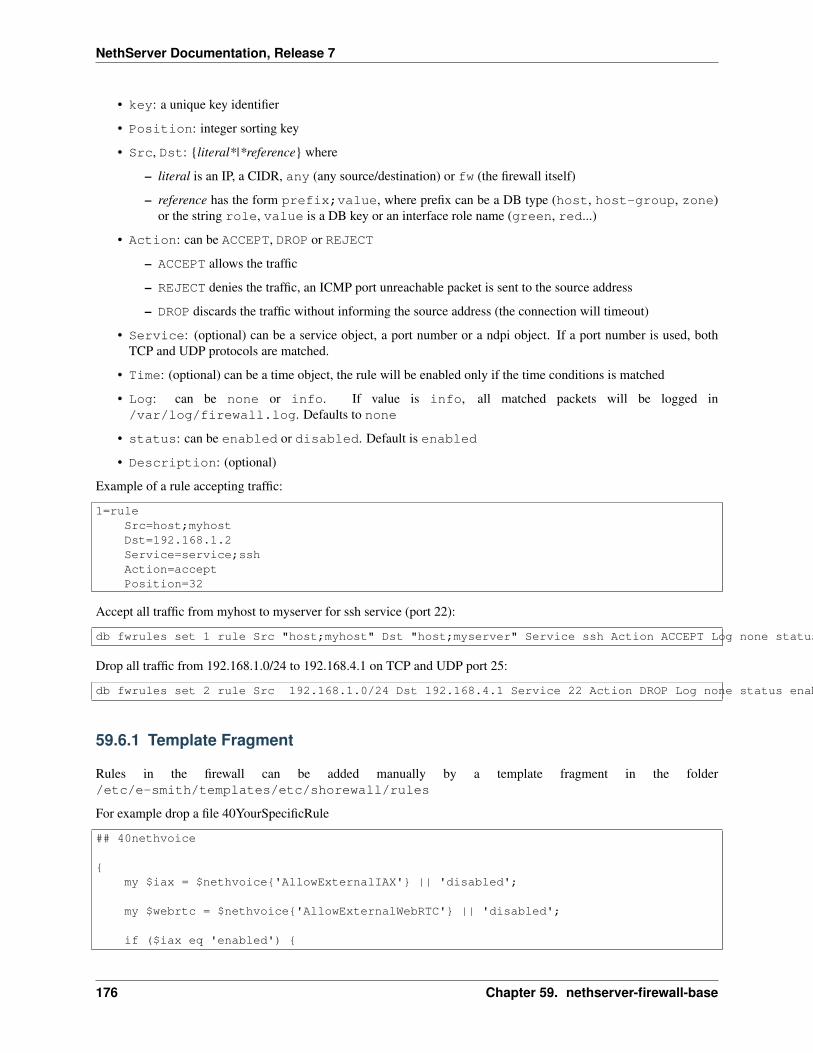
NethServer Documentation, Release 7
• key: a unique key identifier
• Position: integer sorting key
• Src, Dst: {literal*|*reference} where
– literal is an IP, a CIDR, any (any source/destination) or fw (the firewall itself)
– reference has the form prefix;value, where prefix can be a DB type (host, host-group, zone)or the string role, value is a DB key or an interface role name (green, red...)
• Action: can be ACCEPT, DROP or REJECT
– ACCEPT allows the traffic
– REJECT denies the traffic, an ICMP port unreachable packet is sent to the source address
– DROP discards the traffic without informing the source address (the connection will timeout)
• Service: (optional) can be a service object, a port number or a ndpi object. If a port number is used, bothTCP and UDP protocols are matched.
• Time: (optional) can be a time object, the rule will be enabled only if the time conditions is matched
• Log: can be none or info. If value is info, all matched packets will be logged in/var/log/firewall.log. Defaults to none
• status: can be enabled or disabled. Default is enabled
• Description: (optional)
Example of a rule accepting traffic:
1=ruleSrc=host;myhostDst=192.168.1.2Service=service;sshAction=acceptPosition=32
Accept all traffic from myhost to myserver for ssh service (port 22):
db fwrules set 1 rule Src "host;myhost" Dst "host;myserver" Service ssh Action ACCEPT Log none status enabled Position 8765
Drop all traffic from 192.168.1.0/24 to 192.168.4.1 on TCP and UDP port 25:
db fwrules set 2 rule Src 192.168.1.0/24 Dst 192.168.4.1 Service 22 Action DROP Log none status enabled Position 5469
59.6.1 Template Fragment
Rules in the firewall can be added manually by a template fragment in the folder/etc/e-smith/templates/etc/shorewall/rules
For example drop a file 40YourSpecificRule
## 40nethvoice
{my $iax = $nethvoice{'AllowExternalIAX'} || 'disabled';
my $webrtc = $nethvoice{'AllowExternalWebRTC'} || 'disabled';
if ($iax eq 'enabled') {
176 Chapter 59. nethserver-firewall-base
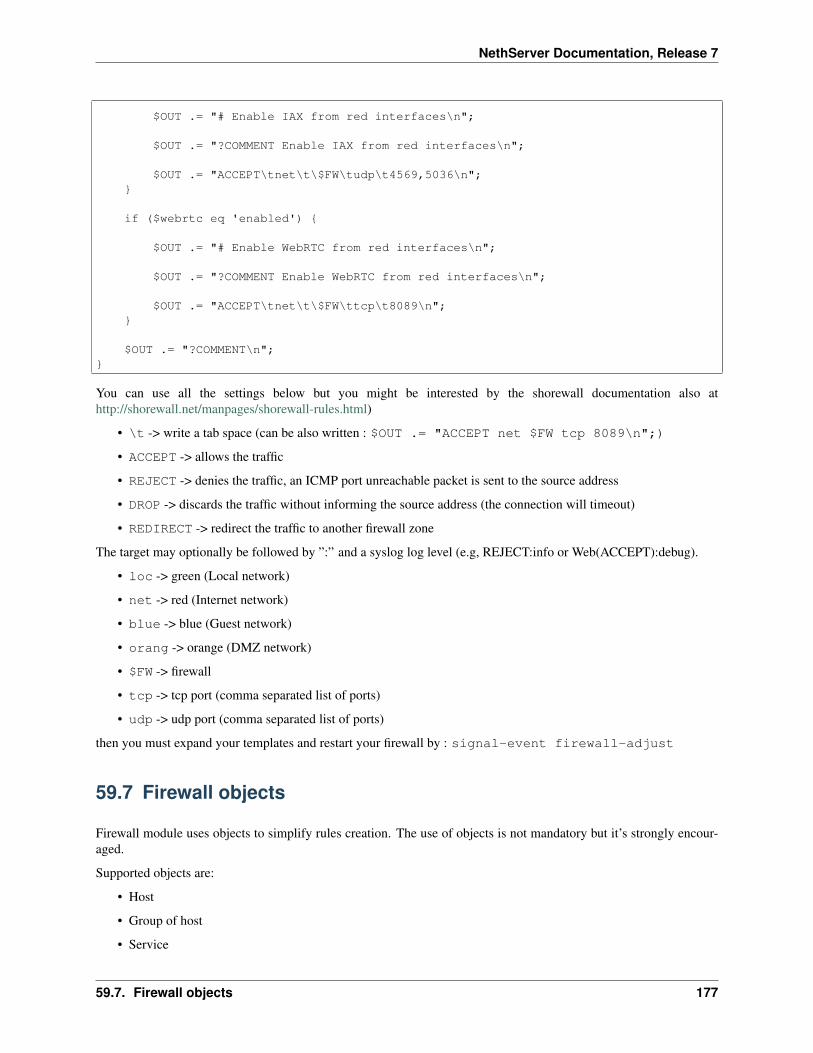
NethServer Documentation, Release 7
$OUT .= "# Enable IAX from red interfaces\n";
$OUT .= "?COMMENT Enable IAX from red interfaces\n";
$OUT .= "ACCEPT\tnet\t\$FW\tudp\t4569,5036\n";}
if ($webrtc eq 'enabled') {
$OUT .= "# Enable WebRTC from red interfaces\n";
$OUT .= "?COMMENT Enable WebRTC from red interfaces\n";
$OUT .= "ACCEPT\tnet\t\$FW\ttcp\t8089\n";}
$OUT .= "?COMMENT\n";}
You can use all the settings below but you might be interested by the shorewall documentation also athttp://shorewall.net/manpages/shorewall-rules.html)
• \t -> write a tab space (can be also written : $OUT .= "ACCEPT net $FW tcp 8089\n";)
• ACCEPT -> allows the traffic
• REJECT -> denies the traffic, an ICMP port unreachable packet is sent to the source address
• DROP -> discards the traffic without informing the source address (the connection will timeout)
• REDIRECT -> redirect the traffic to another firewall zone
The target may optionally be followed by ”:” and a syslog log level (e.g, REJECT:info or Web(ACCEPT):debug).
• loc -> green (Local network)
• net -> red (Internet network)
• blue -> blue (Guest network)
• orang -> orange (DMZ network)
• $FW -> firewall
• tcp -> tcp port (comma separated list of ports)
• udp -> udp port (comma separated list of ports)
then you must expand your templates and restart your firewall by : signal-event firewall-adjust
59.7 Firewall objects
Firewall module uses objects to simplify rules creation. The use of objects is not mandatory but it’s strongly encour-aged.
Supported objects are:
• Host
• Group of host
• Service
59.7. Firewall objects 177

NethServer Documentation, Release 7
• CIDR
• Ip range
• Zone
• Time
A host is an already defined entry inside the hosts db, or a new key of type host:
name=hostIpAddress=IPDescription=
A host-group is a group of hosts inside the hosts db. Hosts in a host-group should always be reachable usingthe same interface. For example: a group of host inside the LAN or on the Internet. A host-group db entry can besomething like:
name=host-groupMembers=host1,host2
A CIDR is a group of hosts defined as a CIDR network. It’s saved inside the hosts db:
mycidr=cidrAddress=192.168.100.0/24Description=
A IP range is a group of hosts defined as a range of IP. It’s saved inside the hosts db:
myrange=iprangeDescription=End=192.168.100.20Start=192.168.100.10
A zone represents a network zone which can be associated to an interface or a set of IP address. A zone entry innetworks database can be something like:
name=zoneNetwork=CIDRInterface=eth0
A configured network interface is automatically a zone.
A service can have a protocol and one or more ports. A service entry in fwservices database can be somethinglike:
name=fwserviceProtocol=TCP/UDP/TCPUDP/ICMPPorts=port/port range
A service can also be a refence in the format ndpi;<protocol> where protocol is a supported protocol fromnDPI kernel module. To see a list of supported protocols:
db NethServer::Database::Ndpi keys
A time condition is a time record entry in fwtimes database. All times are saved in local time and converted toUTC on template expansion.
Database example:
db fwtimes setprop officehours WeekDays 'Mon,Tue,Wed,Thu' TimeStart '09:00' TimeStop '18:00'
178 Chapter 59. nethserver-firewall-base

NethServer Documentation, Release 7
59.7.1 Rules based on mac address
It’s possible to create rules based on MAC address only using a template-custom. For example to block internet accessto a host on local network using its MAC address:
mkdir -p /etc/e-smith/templates-custom/etc/shorewall/rulesecho "DROP loc:~xx-xx-xx-xx-xx-xx net" > /etc/e-smith/templates-custom/etc/shorewall/rules/90mymac
Where xx-xx-xx-xx-xx-xx is the MAC address to block.
See man shorewall-rules for more information.
59.8 Port forwarding
All port-forwards are saved inside the portforward db.
Each record has:
• key: auto-increment id
• type: pf
• protocol: tcp/udp
• src: can be a port number or a range in the form xxxx:yyyy
• dst: can be a port number, if empty the value of src is used
• dstHost: destination host, can be an IP address or a hos firewall object
• allow: allowed ip address or network, see SOURCE at http://www.shorewall.net/4.2/manpages/shorewall-rules.html
• status: enabled/disabled
• oriDst: original destination ip, for example alias for a wan interface. If empty, the port forward is valid forall red interface
• description: optional description
59.9 NAT 1:1
All NAT one-to-one configurations are stored in networks db.
Each value is a new attribute for an existing alias key and the name of attribute is FwObjectNat that contains thereference of an associated host:
eth1:0=aliasFwObjectNat=host;host_nameipaddr=11.11.11.11netmask=255.255.255.0role=alias
During template-expanding phase, the associated host is mapping with referenced IP and added in shorewall natconfiguration. The file is /etc/shorewall/nat.
More information are available here: http://shorewall.net/NAT.htm
59.8. Port forwarding 179

NethServer Documentation, Release 7
59.10 Traffic shaping
Traffic shaping is implemented using the Shorewall simple traffic shaping. See:http://www.shorewall.net/simple_traffic_shaping.html
The feature is controlled by tc property in firewall key from configuration db. Possible values are:
• Simple: default
• No: disabled
See TC_ENABLED at http://shorewall.net/manpages/shorewall.conf.html .
The firewall needs to know how much inbound and outbound bandwidth has a red interface. The bandwidth value(expressed in kbit) is stored inside FwInBandwidth and FwOutBandwidth properties, wich are parts of thenetwork interface record inside the networks db.
Example:
enp0s20f2=ethernetFwInBandwidth=30000FwOutBandwidth=24000bootproto=nonegateway=1.2.3.4ipaddr=1.2.3.5netmask=255.255.255.0role=red
All traffic shaping rules are saved inside the fwrules database with the same format. Valid actions for traffic shapingrules are:
• priority;high: set the priority to high (actually the value is normalized to 2 - medium)
• priority;low: set the priority to low
• provider;<name>: force the traffic to the provider specified by name
Assumptions and limitations
1. All nDPI traffic is marked in forward chain. When a nDPI protocol is found, the whole connection is marke.
2. Priority rules are in post chain and can use nDPI markers. If a priority rule uses a role (interface) as source, therule can’t be added to postrouting chain since the packet is already natted: Shorewall will move the rule on topof forwarding chain.
3. nDPI rules can’t block the http/https traffic if web proxy is enabled in transparent mode.
4. All nDPI markers are read from /proc/net/xt_ndpi/proto and shifted by 8 bits.
5. Divert rules can’t be used with nDPI, because an established TCP connection can’t be moved between providers.
6. Prerouting table is reserved by Shorewall for handlind the multi wan scenario.
59.10.1 Divert rules
A divert rule is used to force traffic to a specific provider.
For example, this rules will route all traffic to port 22 via the provider named myadsl:
1=ruleSrc=192.168.1.0/24Dst=0.0.0.0/0Service=fwservice;ssh
180 Chapter 59. nethserver-firewall-base

NethServer Documentation, Release 7
Action=provider;myadslstatus=enabledPosition=2Description=
Properties:
• key: numeric id
• Src: can be a ‘any’, role (execpt red), zone (not interface), host object, ip address, ip range or CIDR
• Dst: can be a zone (not interface), host object, ip address, ip range or CIDR
• Action: provider object, in the form of “provider;<name>”
• Service: (optional) can be a service object
• status: can be enabled or disabled. Default is enabled
• Position: integer sorting key
• Description: (optional)
A rule is ignored during template expansion if:
• the source is red role
• the destination is a role which is not red
• source, destination and service are all set to any
• the provider doesn’t exists
• destination is set to any
59.11 Multi WAN
NethServer firewall can handle 15 red (WAN) interfaces. Implementation uses Shorewall with LSM (Link StatusMonitor). The LSM daemon takes care of monitoring WAN connections (interface) using ICMP traffic and it informsShorewall about interface up/down events. Each interface can be checked using multiple IPs (see checkip propertybelow). At least one IP must be reachable to mark the WAN connection as usable. If no IP is specified (recommendedoption), the system will uses well-known default IPs (Google DNS and OpenDNS).
For each configured provider, LSM will send ping to a configured IP (checkip). When a provider status changes, thesystem will signal a wan-uplink-update event.
Inside the event, the action nethserver-shorewall-wan-update invokes:
• shorewall enable <interface> when a red interface is usable
• shorewall disable <interface> then a red interface is not usable
When an interface is disabled, all associated routes will be deleted.
When a new TCP connection is started, a route is selected and all successive packets will always be routed via sameinterface. If the used interfaces goes down, the connection is closed.
Actually two behaviors are implemented: balanced and active-backup.
59.11. Multi WAN 181

NethServer Documentation, Release 7
59.11.1 Balanced
All red interfaces are simultaneously used accordingly to the configured weight (see below).
Example:
Given a connection A with weight 2, and connection B with weight 1, the firewall will route a double number ofconnections via A over B.
59.11.2 Active-backup
Red interfaces are ordered using the configured weight: higher the weight, higher the route priority. The interface withmaximum weight will be the active connection, all other interfaces will be used if the active one goes down.
Example
Given 3 wan connections:
• A with weight 3
• B with weight 2
• C with weight 1
All traffic is routed via A. On failure of A, all traffic is routed via B. When B goes down, C is used. Whenever Acomes backup, all traffic is again routed through it.
59.11.3 Providers
Providers are an abstraction over red interfaces (see man shorewall-providers). All providers must have aweight which is used to select the route for packets.
A provider record inside the networks database has following properties:
• key: name of provider
• interface: associated red interface, it’s mandatory
• weight: weight of connection expressed with an integer number, it’s mandatory
• Description: (optional) custom description
Example:
myisp=providerinterface=eth1weight=5Description=my fast provider
59.11.4 Multi WAN example
1. Configure two interfaces as red, for example eth1 and eth2
db networks setprop eth1 role reddb networks setprop eth2 role redsignal-event interface-update
2. Create two providers:
182 Chapter 59. nethserver-firewall-base
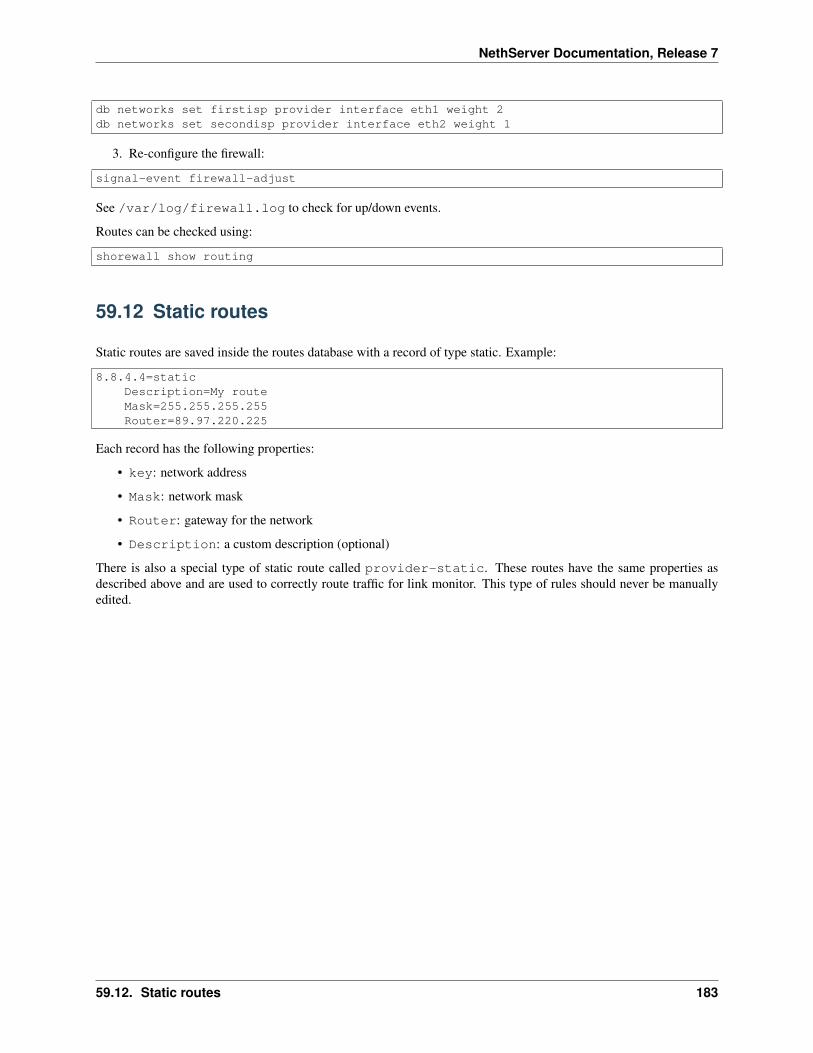
NethServer Documentation, Release 7
db networks set firstisp provider interface eth1 weight 2db networks set secondisp provider interface eth2 weight 1
3. Re-configure the firewall:
signal-event firewall-adjust
See /var/log/firewall.log to check for up/down events.
Routes can be checked using:
shorewall show routing
59.12 Static routes
Static routes are saved inside the routes database with a record of type static. Example:
8.8.4.4=staticDescription=My routeMask=255.255.255.255Router=89.97.220.225
Each record has the following properties:
• key: network address
• Mask: network mask
• Router: gateway for the network
• Description: a custom description (optional)
There is also a special type of static route called provider-static. These routes have the same properties asdescribed above and are used to correctly route traffic for link monitor. This type of rules should never be manuallyedited.
59.12. Static routes 183

NethServer Documentation, Release 7
184 Chapter 59. nethserver-firewall-base
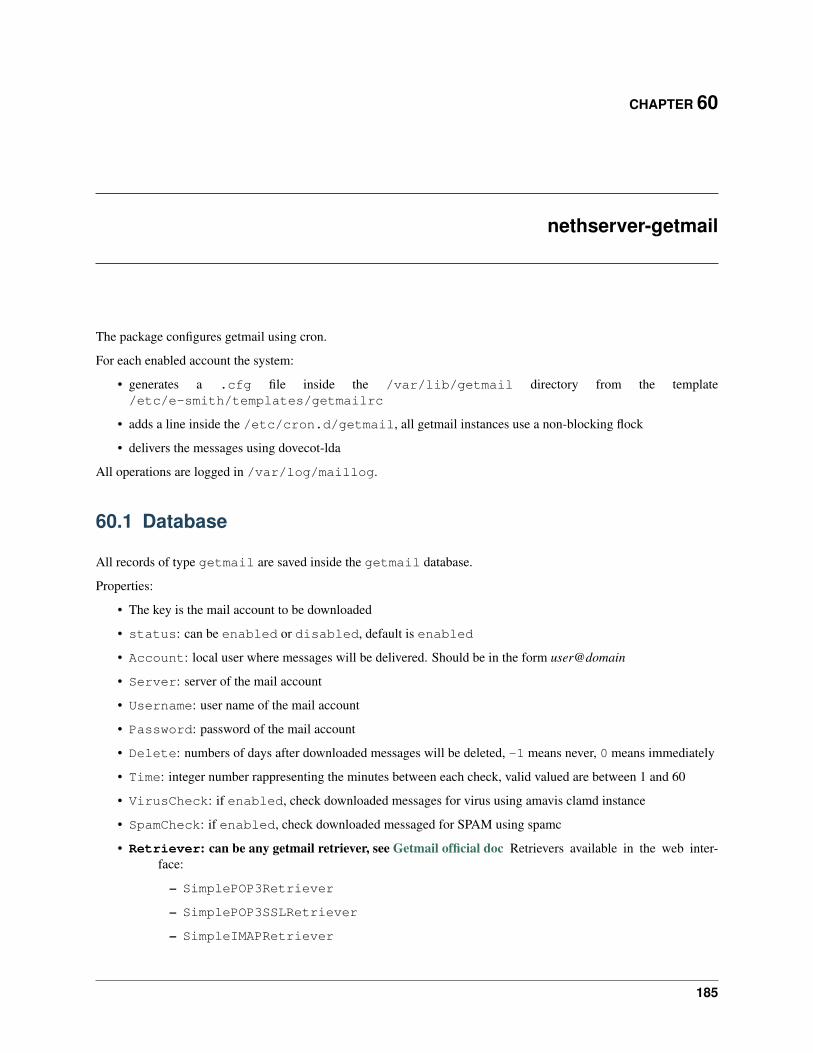
CHAPTER 60
nethserver-getmail
The package configures getmail using cron.
For each enabled account the system:
• generates a .cfg file inside the /var/lib/getmail directory from the template/etc/e-smith/templates/getmailrc
• adds a line inside the /etc/cron.d/getmail, all getmail instances use a non-blocking flock
• delivers the messages using dovecot-lda
All operations are logged in /var/log/maillog.
60.1 Database
All records of type getmail are saved inside the getmail database.
Properties:
• The key is the mail account to be downloaded
• status: can be enabled or disabled, default is enabled
• Account: local user where messages will be delivered. Should be in the form user@domain
• Server: server of the mail account
• Username: user name of the mail account
• Password: password of the mail account
• Delete: numbers of days after downloaded messages will be deleted, -1 means never, 0 means immediately
• Time: integer number rappresenting the minutes between each check, valid valued are between 1 and 60
• VirusCheck: if enabled, check downloaded messages for virus using amavis clamd instance
• SpamCheck: if enabled, check downloaded messaged for SPAM using spamc
• Retriever: can be any getmail retriever, see Getmail official doc Retrievers available in the web inter-face:
– SimplePOP3Retriever
– SimplePOP3SSLRetriever
– SimpleIMAPRetriever
185

NethServer Documentation, Release 7
– SimpleIMAPSSLRetriever
Example:
db getmail set [email protected] getmail Account [email protected] status enabled Password Nethesis,1234 Server localhost Username [email protected] Retriever SimplePOP3Retriever Delete enabled Time 30 VirusCheck enabled SpamCheck enabled
60.2 Virus check
If a virus is found inside a received mail, the message is dropped.
Example of log in /var/log/maillog:
Jul 26 22:31:52 test getmail: msg 4/12 (702 bytes) msgid 000008bb5785fb1d from <[email protected]> dropped by filter Filter_classifier clamdscan (allow_root_commands="True", arguments="('-c', '/etc/clamd.d/amavisd.conf', '--stdout', '--no-summary', '--infected', '-')", command="clamdscan", exitcodes_drop="('1',)", exitcodes_keep="('0',)", group="None", ignore_stderr="False", path="/usr/bin/clamdscan", unixfrom="False", user="None")
186 Chapter 60. nethserver-getmail

CHAPTER 61
nethserver-httpd
NethServer tries to remain compliant with the upstream configuration for httpd.
In Apache 2.4 every global option is inherit by all virtual hosts, except for the Rewrite directives.
In a clean installation the only defined virtual host is the one on port 443. When nethserver-virtualhosts is installed, the package adds a new default virtual host. This virtual host includes the/etc/httpd/conf.d/default-virtualhost.inc file to mimic the upstram behavior.
See also “Certificate management” and “Virtualhosts” section for further information.
61.1 Templates
Available templates under /etc/e-smith/templates/ directory:
• etc/httpd/conf.d/default-virtualhost.inc: common configuration included inside default vir-tual host on port 80
• etc/httpd/conf.d/nethserver.conf: default httpd configuration, includesconf.d/default-virtualhost.inc. Normally a package shoudn’t add a fragment to it.
• httpd/vhost: everything inside will be included in default-virtualhost.inc. DO NOT USE, it’shere only for backward compatibility
61.2 Web applications
Every package which needs to change the Apache configuration:
• should add a static (or template-generated) file inside /etc/httpd/conf.d/ directory
• must include all Rewrite options inside a fragment for default-virtualhost.inc
61.2.1 Example
Package named nethserver-mywebapp which requires a rewrite rule from http to https. The web applicationmust be accessible under http://<server_address>/mywebapp.
Static file /etc/httpd/conf.d/mywebapp.conf:
187

NethServer Documentation, Release 7
Alias /mywebapp /usr/share/mywebapp<Directory "/usr/share/mywebapp">
AllowOverride NoneOptions NoneRequire all granted
</Directory>
Rewrite rule fragment /etc/e-smith/templates/etc/httpd/conf.d/default-virtualhost.inc/30mywebapp:
## 30mywebapp#
RewriteEngine onRewriteRule ^/mywebapp(/.*)?$ https://%\{SERVER_NAME\}/mywebapp$1 [L,R=301]
Inside the createlinks file, the configuration should be applied during the update event:
my $event = "nethserver-mywebapp-update";event_templates($event,
'/etc/httpd/conf.d/default-virtualhost.inc',);
event_services($event,'httpd' => 'reload',
);
61.3 Configuration database
httpd=serviceSSLCipherSuite=DEFAULT:!EXP:!SSLv2:!DES:!IDEA:!SEED:+3DESTCPPorts=80,443access=green,redstatus=enabled
61.4 Events
signal-event nethserver-httpd-updatesignal-event nethserver-httpd-save
188 Chapter 61. nethserver-httpd
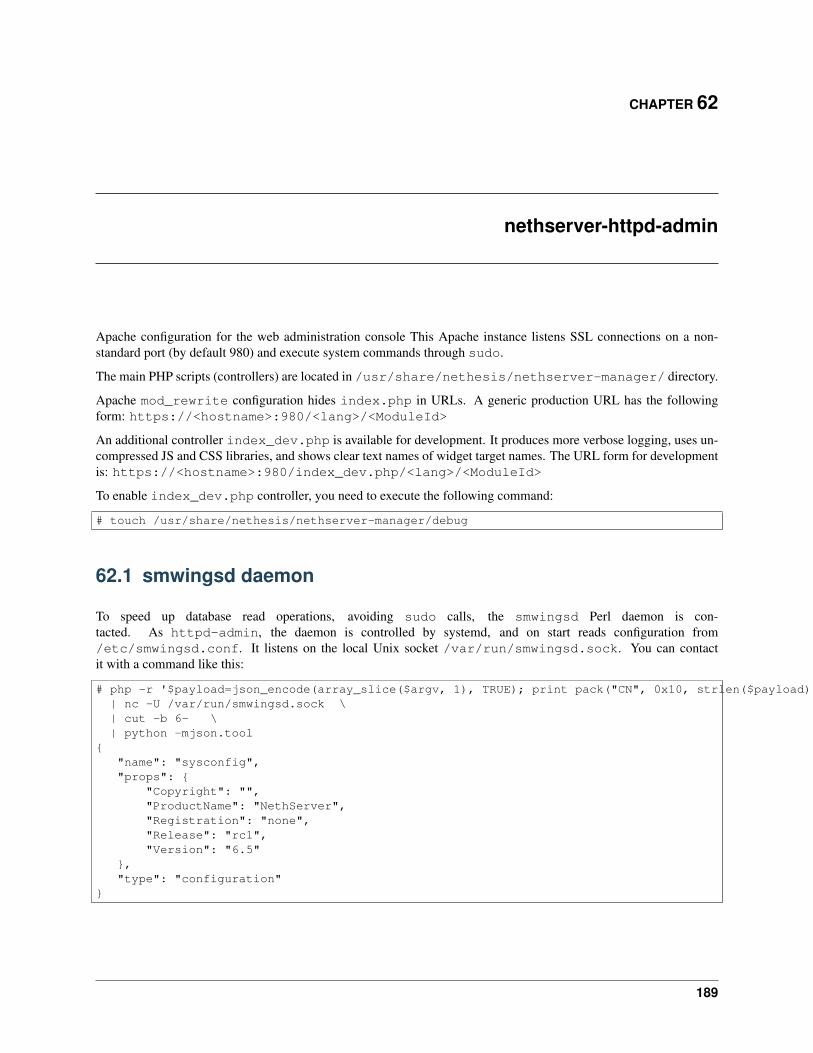
CHAPTER 62
nethserver-httpd-admin
Apache configuration for the web administration console This Apache instance listens SSL connections on a non-standard port (by default 980) and execute system commands through sudo.
The main PHP scripts (controllers) are located in /usr/share/nethesis/nethserver-manager/ directory.
Apache mod_rewrite configuration hides index.php in URLs. A generic production URL has the followingform: https://<hostname>:980/<lang>/<ModuleId>
An additional controller index_dev.php is available for development. It produces more verbose logging, uses un-compressed JS and CSS libraries, and shows clear text names of widget target names. The URL form for developmentis: https://<hostname>:980/index_dev.php/<lang>/<ModuleId>
To enable index_dev.php controller, you need to execute the following command:
# touch /usr/share/nethesis/nethserver-manager/debug
62.1 smwingsd daemon
To speed up database read operations, avoiding sudo calls, the smwingsd Perl daemon is con-tacted. As httpd-admin, the daemon is controlled by systemd, and on start reads configuration from/etc/smwingsd.conf. It listens on the local Unix socket /var/run/smwingsd.sock. You can contactit with a command like this:
# php -r '$payload=json_encode(array_slice($argv, 1), TRUE); print pack("CN", 0x10, strlen($payload)) . $payload;' configuration getjson sysconfig \| nc -U /var/run/smwingsd.sock \| cut -b 6- \| python -mjson.tool
{"name": "sysconfig","props": {
"Copyright": "","ProductName": "NethServer","Registration": "none","Release": "rc1","Version": "6.5"
},"type": "configuration"
}
189

NethServer Documentation, Release 7
62.2 Customization
You can customize some parts of the NethServer web interface:
• logo
• favicon
• colors
• top bar background image
• menu bar background image
62.2.1 Top bar and menu bar
The page ships two different themes:
• light-polygons (default): includes background only for top bar
• color-polygons: includes backgrounds for top and menu bars
Enable color-polygons:
config setprop httpd-admin headerBackground color-polygons/toolbar.pngconfig setprop httpd-admin menuBackground color-polygons/sidebar.png
Enable light-poligons:
config setprop httpd-admin headerBackground light-polygons/toolbar.pngconfig setprop httpd-admin menuBackground ''
Custom themes
• Choose a name for the theme, like mytheme
• Create a directory named mytheme inside the /usr/share/nethesis/nethserver-manager/imagesdirectory
mkdir -p /usr/share/nethesis/nethserver-manager/images/mytheme
• Copy the top bar background inside the new directory and name it toolbar.png
• Copy the menu bar background inside the new directory and name it sidebar.png
• Set the new backgrounds
config setprop httpd-admin headerBackground mytheme/toolbar.pngconfig setprop httpd-admin menuBackground mytheme/sidebar.png
62.2.2 Colors
Simple configuration database entries for a theme green and red:
config setprop httpd-admin colors "green,red,#1d247c"
Reload the interface, colors should be applied respectively on: top header, left menu, text headers (also in tables andlinks on left menu)
190 Chapter 62. nethserver-httpd-admin
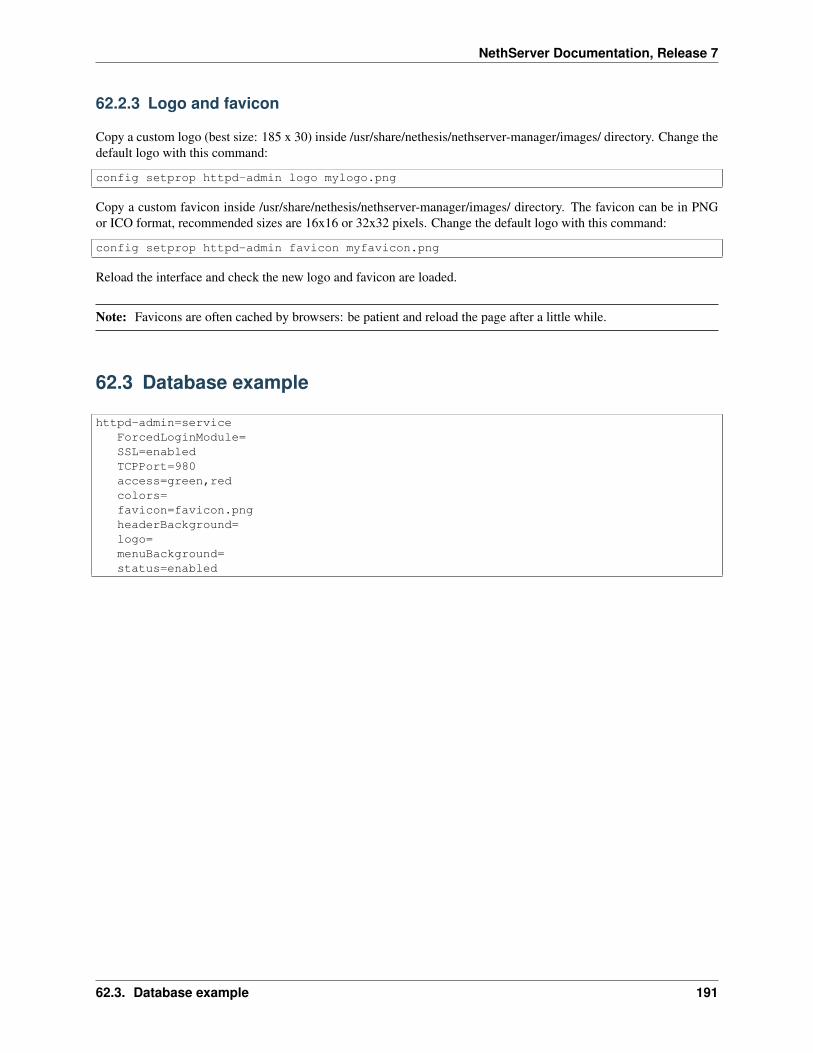
NethServer Documentation, Release 7
62.2.3 Logo and favicon
Copy a custom logo (best size: 185 x 30) inside /usr/share/nethesis/nethserver-manager/images/ directory. Change thedefault logo with this command:
config setprop httpd-admin logo mylogo.png
Copy a custom favicon inside /usr/share/nethesis/nethserver-manager/images/ directory. The favicon can be in PNGor ICO format, recommended sizes are 16x16 or 32x32 pixels. Change the default logo with this command:
config setprop httpd-admin favicon myfavicon.png
Reload the interface and check the new logo and favicon are loaded.
Note: Favicons are often cached by browsers: be patient and reload the page after a little while.
62.3 Database example
httpd-admin=serviceForcedLoginModule=SSL=enabledTCPPort=980access=green,redcolors=favicon=favicon.pngheaderBackground=logo=menuBackground=status=enabled
62.3. Database example 191

NethServer Documentation, Release 7
192 Chapter 62. nethserver-httpd-admin

CHAPTER 63
nethserver-hylafax
Hylafax is a fax server for receiving and sending faxes.
Key features:
• Modem automatic configuration
• Virtual modem
• Ingoing/outgoing fax configuration
• Extensible accounting system
• Mail2Fax
• Mail server integration
63.1 Modem configuration
Hylafax+ uses a tool called faxaddmodem which guides the user throw modem configuration. We developed asimple non-interactive wrapper called neth-addmodem.
The script reads basic information, like the fax device name, from the SME db and use these data to setup the modem.
63.2 Accounting (FaxAccounting)
Every time a fax is received or sent, Hylafax will execute the /var/spool/hylafax/etc/FaxAccountingscript. FaxAccounting runs all executable scripts inside the directory/var/spool/hylafax/etc/accounting in alphabetical order.
The default configuration will execute the script 00savefiles which saves all submitted and received faxes to/var/lib/nethserver/fax/docs
63.3 Incoming fax (FaxDispatch)
Hylafax requires a mail address where incoming faxes will be sent. If SendTo prop is not set, all faxes will beforwarded to root mailbox.
193

NethServer Documentation, Release 7
When a fax is received, Hylafax will execute the /var/spool/hylafax/etc/FaxDispatch script. FaxDis-patch runs all executable scripts inside the directory /var/spool/hylafax/etc/dispatch in alphabeticalorder.
The default configuration will execute the script 90print. If hylafax prop PrintReceived is enabled, all faxesare printed into the PrinterName printer.
63.4 Outgoing fax (FaxNotify)
When a fax is sent, Hylafax will execute the /var/spool/hylafax/etc/FaxNotify script. FaxNotify runsall executable scripts inside the directory /var/spool/hylafax/etc/notify in alphabetical order.
63.5 Custom scripts
When adding a custom script not handled by an RPM, please add the script in a directory inside/var/lib/nethserver/fax/ and link it to the final destination. In fact the /var/spool/hylafax/etc/directory is not (actually) in the backup.
So, for example, if you wish to add a 90test script to accounting, save the files in the/var/spool/hylafax/etc/accounting directory and link to the Hylafax configuration directory:
ln -s /var/lib/nethserver/fax/accounting/90test /var/spool/hylafax/etc/accounting/90test
63.6 Authentication
Clients are authenticated using reverse dns queries: all ip resolved with the same domain as server itself are auto-matically authenticated. If reverse dns query, client can authenticate using user name and password of a user insidefaxmaster group.
Clients should always use username, despite of authentication method used.
63.7 Internationalization
Notification on incoming and outgoing faxes can be localized using the Lang property. Default value is en_US.
63.8 Client configuration
The only tested client is YajHFC (see http://www.yajhfc.de/). Current configuration works only with LAN clients.
Configuration:
• Insert server ip (or hostname) and username
• Leave blank the password field
• Disable passive mode
194 Chapter 63. nethserver-hylafax

NethServer Documentation, Release 7
63.9 Configuration DB
Example:
hylafax=configurationAreaNumber=ClientShowReceived=disabledCountryCode=39DateFormat=DMYDebug=disabledDispatchFileType=psFaxDevice=ttyS0FaxName=faxFaxNumber=InternationalPrefix=00Lang=it_ITLongDistance=0Mail2Fax=disabledMode=bothNotifyFileType=tifNotifyMaster=alwaysPBXPrefix=PaperSize=A4PrintReceived=disabledPrinterDriver=ljet4PrinterName=Resolution=196RingsBeforeAnswer=1SambaFax=disabledSambaFaxName=SambaFaxSendReport=disabledSendTo=aa``test.tldSummaryReport=disabledWaitDialTone=enabled
hylafax-hfaxd=serviceTCPPort=4559status=enabledaccess=private
hylafax-faxq=servicestatus=enabled
63.9. Configuration DB 195

NethServer Documentation, Release 7
196 Chapter 63. nethserver-hylafax
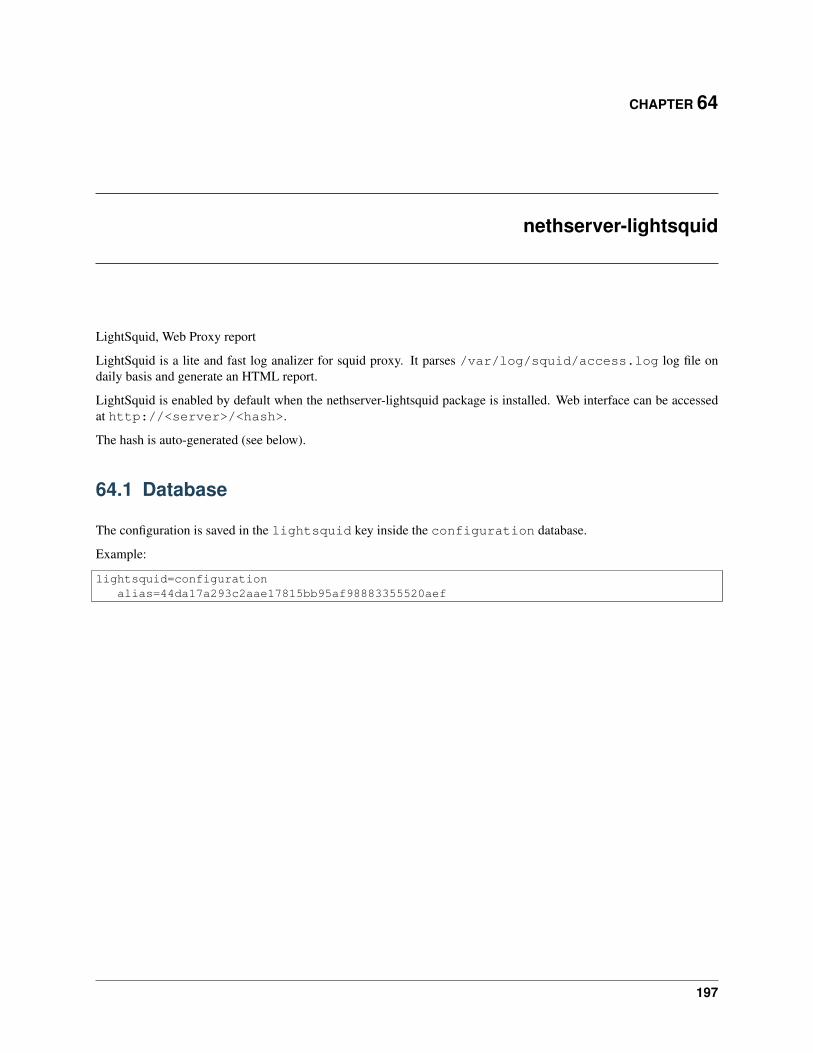
CHAPTER 64
nethserver-lightsquid
LightSquid, Web Proxy report
LightSquid is a lite and fast log analizer for squid proxy. It parses /var/log/squid/access.log log file ondaily basis and generate an HTML report.
LightSquid is enabled by default when the nethserver-lightsquid package is installed. Web interface can be accessedat http://<server>/<hash>.
The hash is auto-generated (see below).
64.1 Database
The configuration is saved in the lightsquid key inside the configuration database.
Example:
lightsquid=configurationalias=44da17a293c2aae17815bb95af98883355520aef
197

NethServer Documentation, Release 7
198 Chapter 64. nethserver-lightsquid
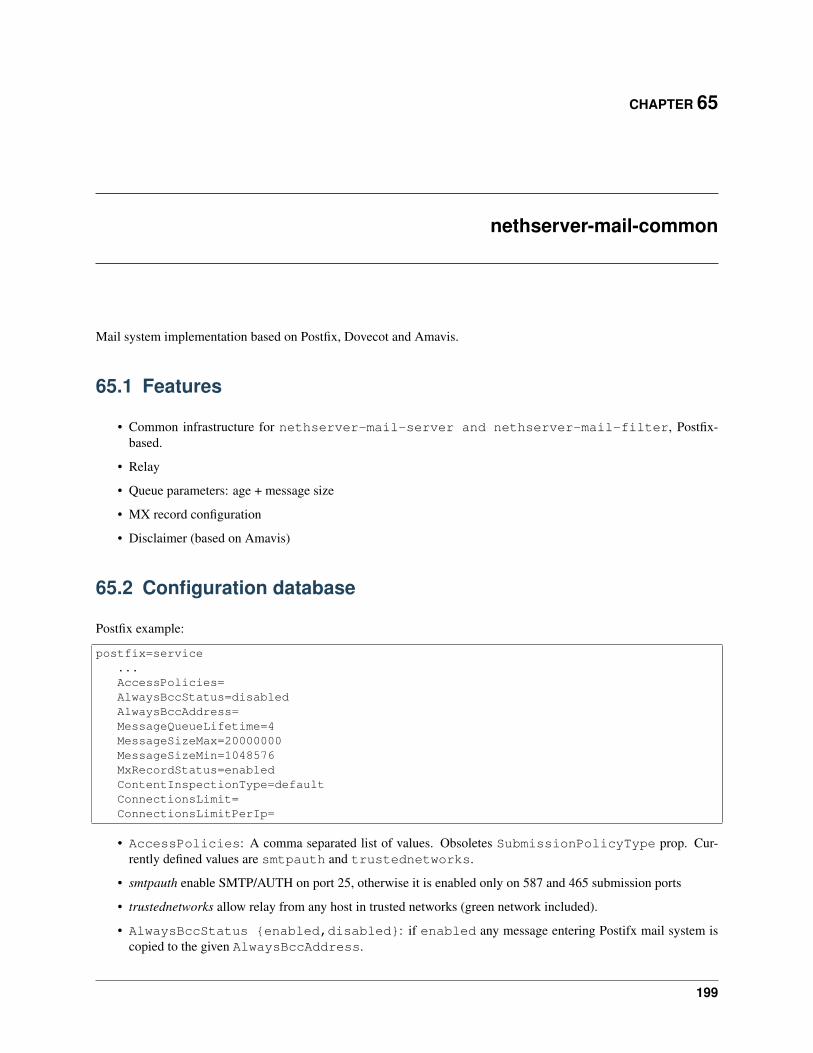
CHAPTER 65
nethserver-mail-common
Mail system implementation based on Postfix, Dovecot and Amavis.
65.1 Features
• Common infrastructure for nethserver-mail-server and nethserver-mail-filter, Postfix-based.
• Relay
• Queue parameters: age + message size
• MX record configuration
• Disclaimer (based on Amavis)
65.2 Configuration database
Postfix example:
postfix=service...AccessPolicies=AlwaysBccStatus=disabledAlwaysBccAddress=MessageQueueLifetime=4MessageSizeMax=20000000MessageSizeMin=1048576MxRecordStatus=enabledContentInspectionType=defaultConnectionsLimit=ConnectionsLimitPerIp=
• AccessPolicies: A comma separated list of values. Obsoletes SubmissionPolicyType prop. Cur-rently defined values are smtpauth and trustednetworks.
• smtpauth enable SMTP/AUTH on port 25, otherwise it is enabled only on 587 and 465 submission ports
• trustednetworks allow relay from any host in trusted networks (green network included).
• AlwaysBccStatus {enabled,disabled}: if enabled any message entering Postifx mail system iscopied to the given AlwaysBccAddress.
199

NethServer Documentation, Release 7
• AlwaysBccAddress: an email address that always receives a message copy (controlled byAlwaysBccStatus).
• MxRecordStatus {enabled,disabled}: if enabled add smtp, imap, pop and pop3 aliases into/etc/hosts and configure smtp as MX record value.
• ContentInspectionType {default,amavisd-after-queue}:
• default, apply the default content inspection type, depending on what packages are installed (i.e. nethserver-mail-filter)
• amavisd-after-queue, process messages through amavisd-new. nethserver-mail-commonuses amavis to append disclaimers to submitted messages
65.3 Testing Postfix
Install nethserver-mail-dev package:
yum install nethserver-mail-dev
Create or modify an existing domain record. Then set TransportType prop to SmtpSink:
db domains setprop test.tld TransportType SmtpSinksignal-event domain-modify test.tld
Start the smtp-sink server:
/usr/sbin/smtp-sink -L -c -u postfix unix:/var/spool/postfix/smtp-sink 128
Execute smtptest command (see command help for details):
/sbin/e-smith/smtptest --from sender``example.com --to rcpt1``test.it --addr 10.1.1.4 --ehlo testhelo.test.it --subject 'Test message'
Execute “smtp-source”:http://linux.die.net/man/1/smtp-source command (from postfix package):
smtp-source -c -l 32000 -m 50 -N -f sender``yourdomain.tld -t test``test.it -S TEST-SMTP-SOURCE -s 5 <HOST-IP-ADDRESS>
200 Chapter 65. nethserver-mail-common
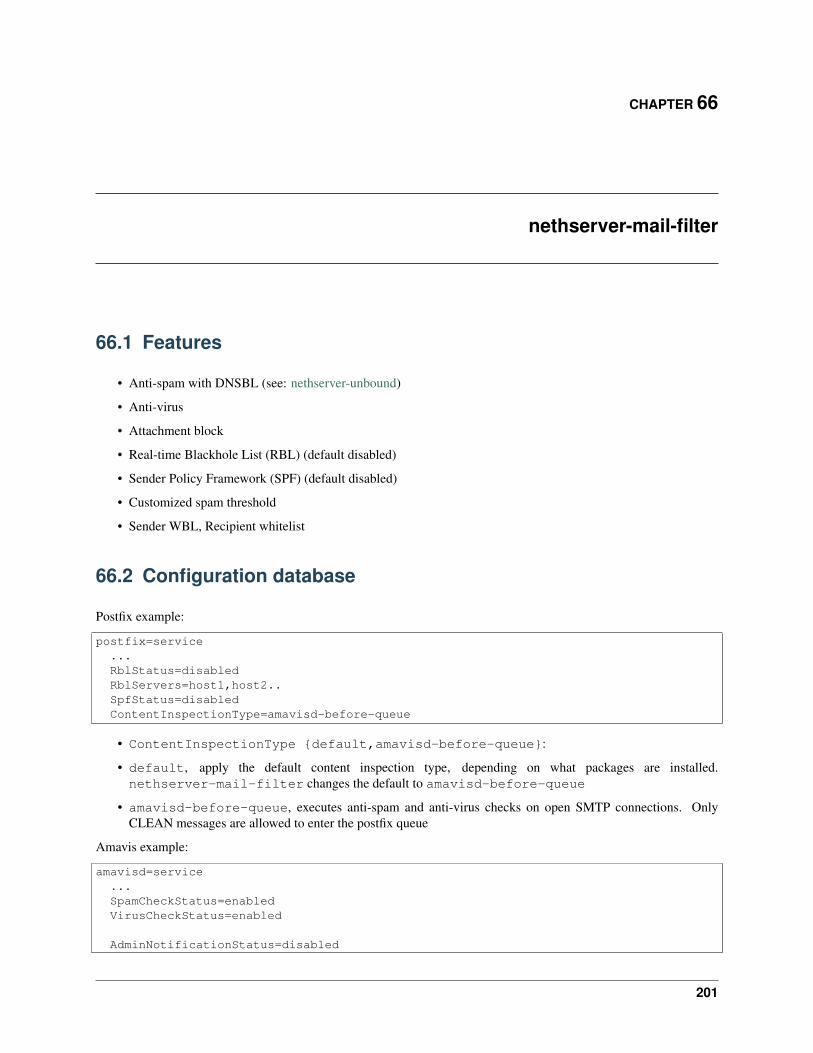
CHAPTER 66
nethserver-mail-filter
66.1 Features
• Anti-spam with DNSBL (see: nethserver-unbound)
• Anti-virus
• Attachment block
• Real-time Blackhole List (RBL) (default disabled)
• Sender Policy Framework (SPF) (default disabled)
• Customized spam threshold
• Sender WBL, Recipient whitelist
66.2 Configuration database
Postfix example:
postfix=service...RblStatus=disabledRblServers=host1,host2..SpfStatus=disabledContentInspectionType=amavisd-before-queue
• ContentInspectionType {default,amavisd-before-queue}:
• default, apply the default content inspection type, depending on what packages are installed.nethserver-mail-filter changes the default to amavisd-before-queue
• amavisd-before-queue, executes anti-spam and anti-virus checks on open SMTP connections. OnlyCLEAN messages are allowed to enter the postfix queue
Amavis example:
amavisd=service...SpamCheckStatus=enabledVirusCheckStatus=enabled
AdminNotificationStatus=disabled
201
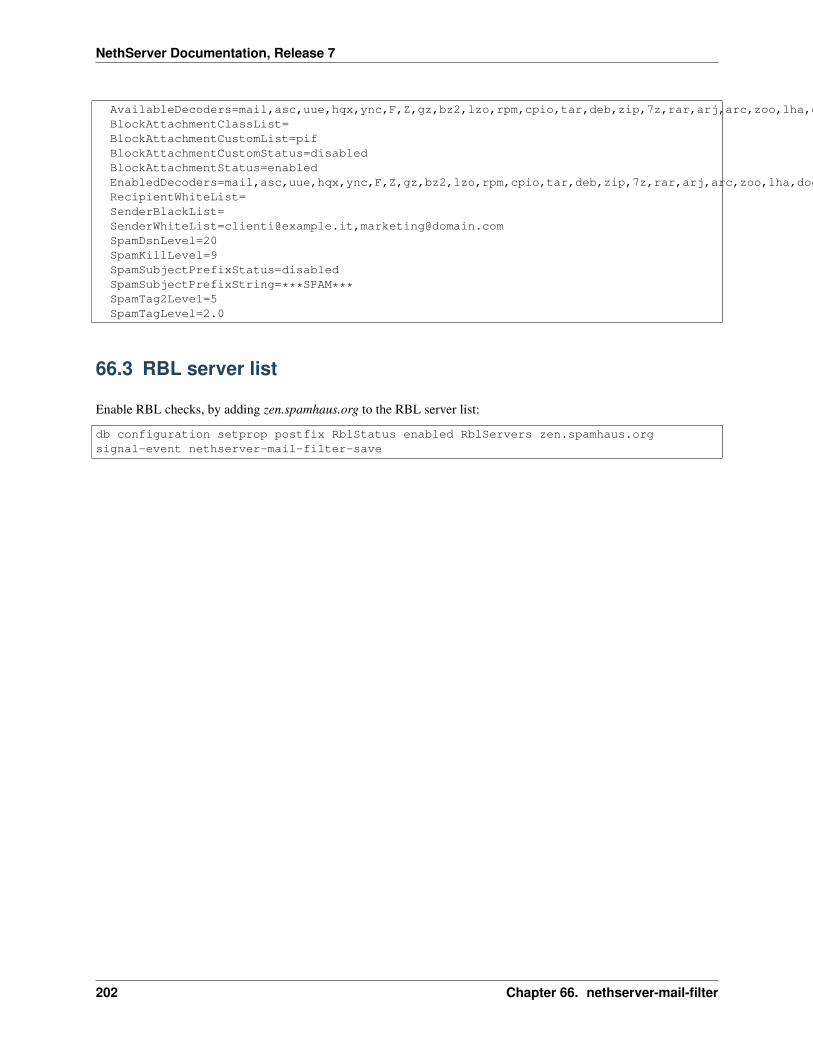
NethServer Documentation, Release 7
AvailableDecoders=mail,asc,uue,hqx,ync,F,Z,gz,bz2,lzo,rpm,cpio,tar,deb,zip,7z,rar,arj,arc,zoo,lha,doc,cab,tnef,exeBlockAttachmentClassList=BlockAttachmentCustomList=pifBlockAttachmentCustomStatus=disabledBlockAttachmentStatus=enabledEnabledDecoders=mail,asc,uue,hqx,ync,F,Z,gz,bz2,lzo,rpm,cpio,tar,deb,zip,7z,rar,arj,arc,zoo,lha,doc,cab,tnef,exeRecipientWhiteList=SenderBlackList=SenderWhiteList=clienti@example.it,[email protected]=20SpamKillLevel=9SpamSubjectPrefixStatus=disabledSpamSubjectPrefixString=***SPAM***SpamTag2Level=5SpamTagLevel=2.0
66.3 RBL server list
Enable RBL checks, by adding zen.spamhaus.org to the RBL server list:
db configuration setprop postfix RblStatus enabled RblServers zen.spamhaus.orgsignal-event nethserver-mail-filter-save
202 Chapter 66. nethserver-mail-filter
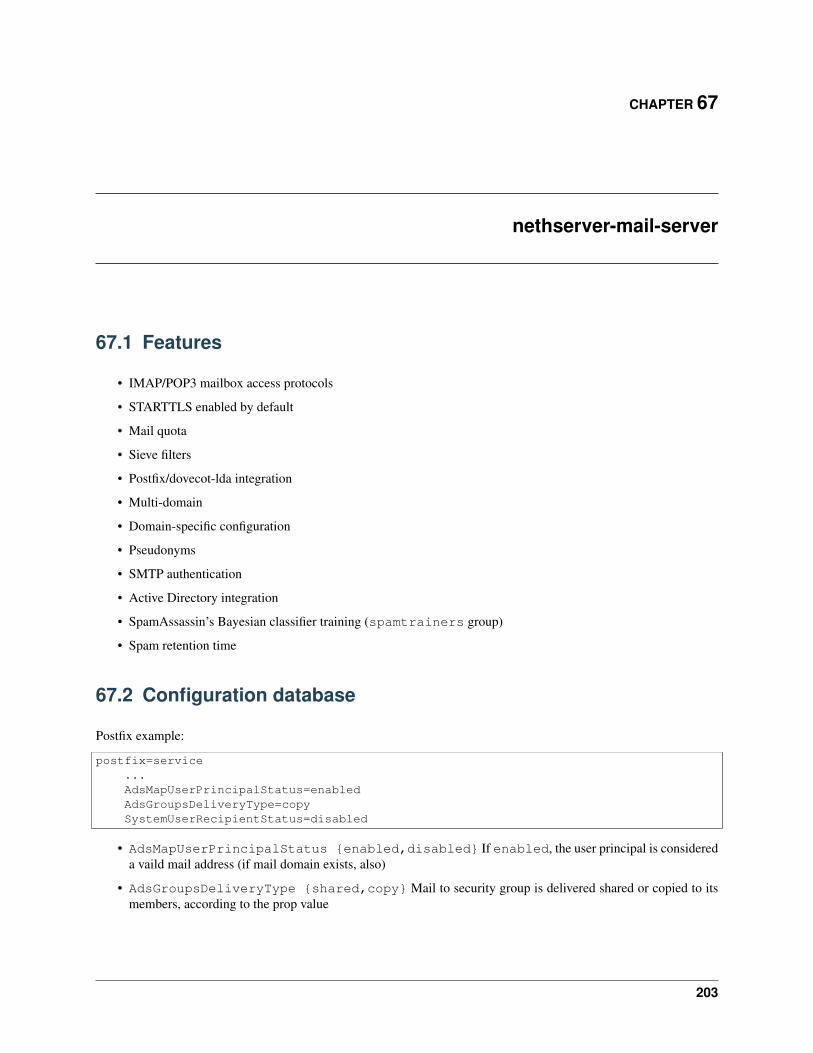
CHAPTER 67
nethserver-mail-server
67.1 Features
• IMAP/POP3 mailbox access protocols
• STARTTLS enabled by default
• Mail quota
• Sieve filters
• Postfix/dovecot-lda integration
• Multi-domain
• Domain-specific configuration
• Pseudonyms
• SMTP authentication
• Active Directory integration
• SpamAssassin’s Bayesian classifier training (spamtrainers group)
• Spam retention time
67.2 Configuration database
Postfix example:
postfix=service...AdsMapUserPrincipalStatus=enabledAdsGroupsDeliveryType=copySystemUserRecipientStatus=disabled
• AdsMapUserPrincipalStatus {enabled,disabled} If enabled, the user principal is considereda vaild mail address (if mail domain exists, also)
• AdsGroupsDeliveryType {shared,copy} Mail to security group is delivered shared or copied to itsmembers, according to the prop value
203

NethServer Documentation, Release 7
• SystemUserRecipientStatus {enabled,disabled} enabled, accept from any net-work the recipient addresses formed by user account names and domain part localhost,localhost.<domainname> and FQDN hostname.
Dovecot example:
dovecot=service...ImapStatus=enabledPopStatus=disabledTlsSecurity=optionalMaxProcesses=400MaxUserConnectionsPerIp=12SharedMailboxesStatus=disabledLmtpInetListenerStatus=disabledQuotaStatus=enabledQuotaDefaultSize=20QuotaUiFunction=SpamFolder=Junk
Properties:
• TlsSecurity {optional,required} controls dovecot disable_plaintext_auth parameter: ifset to required clear-text authentication methods are disabled, while optional enables them.
• QuotaUiFunction If set the sliders in server-manager apply the given increments, expressed in units of100MB.
67.3 Domains database
Record of type domain:
internal.tld=domain...TransportType=none
mycompany.com=domain...TransportType=RelayRelayHost=10.1.1.4RelayPort=25DisclaimerStatus=disabled
test.tld=domain...TransportType=SmtpSink
example.com=domain...TransportType=LocalDeliveryUnknownRecipientsActionType=deliverUnknownRecipientsActionDeliverMailbox=jdoeAlwaysBccStatus=enabledAlwaysBccAddress=admin``there.org
other.net=domain...TransportType=Relay
204 Chapter 67. nethserver-mail-server

NethServer Documentation, Release 7
RelayHost=mail.other.netRelayPort=25
67.4 Accounts database
Groups:
employees=group...MailStatus=enabledMailDeliveryType=shared
administrators=group...MailStatus=enabledMailDeliveryType=copy
faxservice=group...MailStatus=disabledMailDeliveryType={any}
User:
jdoe=userFirstName=JohnLastName=Doe...MailStatus=enabledMailQuotaType=customMailQuotaCustom=15MailForwardStatus=disabledMailForwardAddress=MailForwardKeepMessageCopy=no
and his pseudonyms: ::
john.doe``example.com=pseudonymAccount=jdoeControlledBy=systemAccess=public
doe``=pseudonymAccount=jdoeControlledBy=operatorsAccess=private
67.5 Mail quota
The default mail quota is configured in dovecot.conf. Custom user mail quota is set by thedovecot-postlogin script, by reading /etc/dovecot/user-quota (which is a template). If a custommail quota is set the UI interface does not show the updated value until the user performs an IMAP login.
67.4. Accounts database 205
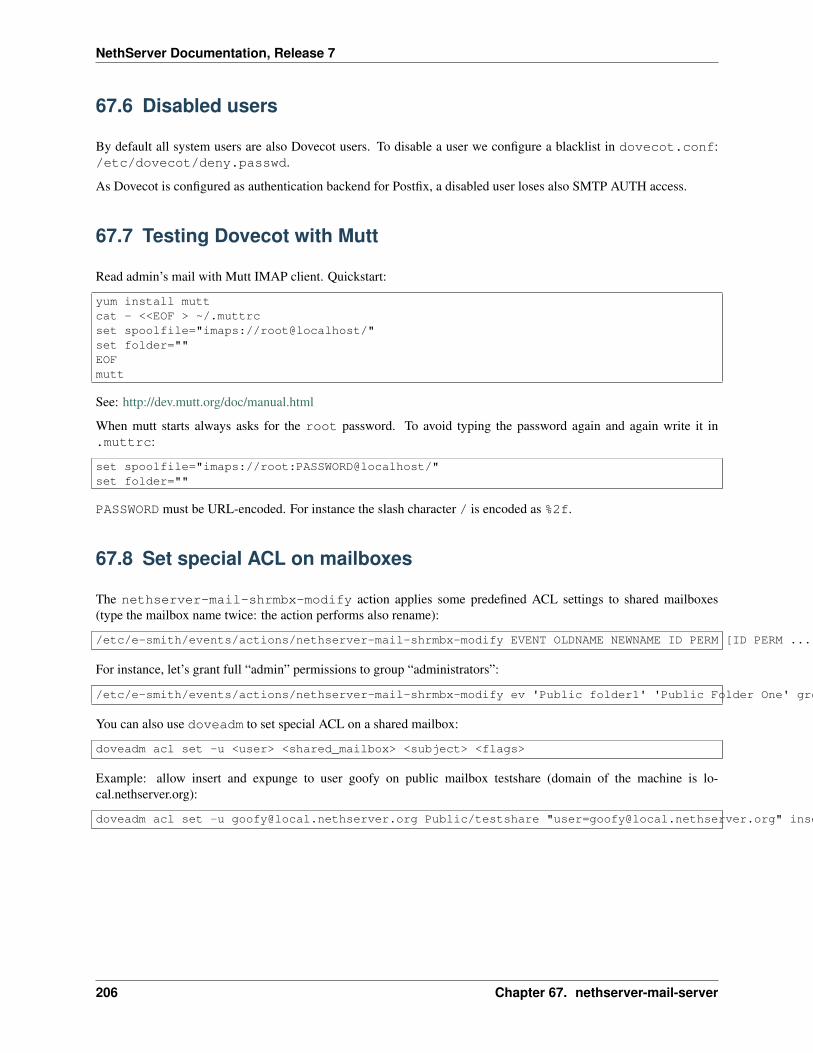
NethServer Documentation, Release 7
67.6 Disabled users
By default all system users are also Dovecot users. To disable a user we configure a blacklist in dovecot.conf:/etc/dovecot/deny.passwd.
As Dovecot is configured as authentication backend for Postfix, a disabled user loses also SMTP AUTH access.
67.7 Testing Dovecot with Mutt
Read admin’s mail with Mutt IMAP client. Quickstart:
yum install muttcat - <<EOF > ~/.muttrcset spoolfile="imaps://root@localhost/"set folder=""EOFmutt
See: http://dev.mutt.org/doc/manual.html
When mutt starts always asks for the root password. To avoid typing the password again and again write it in.muttrc:
set spoolfile="imaps://root:PASSWORD@localhost/"set folder=""
PASSWORD must be URL-encoded. For instance the slash character / is encoded as %2f.
67.8 Set special ACL on mailboxes
The nethserver-mail-shrmbx-modify action applies some predefined ACL settings to shared mailboxes(type the mailbox name twice: the action performs also rename):
/etc/e-smith/events/actions/nethserver-mail-shrmbx-modify EVENT OLDNAME NEWNAME ID PERM [ID PERM ...]
For instance, let’s grant full “admin” permissions to group “administrators”:
/etc/e-smith/events/actions/nethserver-mail-shrmbx-modify ev 'Public folder1' 'Public Folder One' group=administrators@$(hostname -d) ADMIN
You can also use doveadm to set special ACL on a shared mailbox:
doveadm acl set -u <user> <shared_mailbox> <subject> <flags>
Example: allow insert and expunge to user goofy on public mailbox testshare (domain of the machine is lo-cal.nethserver.org):
doveadm acl set -u [email protected] Public/testshare "[email protected]" insert expunge
206 Chapter 67. nethserver-mail-server

CHAPTER 68
nethserver-nextcloud
This package can be installed before or after any user provider like nethserver-dc and nethserver-directory.
If nethserver-dc or nethserver-directory are installed, the nethserver-nextcloud-save event will automatically enable alllocal users.
The package does the following:
• create nextcloud mysql database
• create default database credentials: user nextcloud and password stored in/var/lib/nethserver/secrets/nextcloud
• add trusted domains to use with web access
• create default credentials for web login: user “admin” and password “Nethesis,1234”
• set english as the default language
• set the user data directory as /var/lib/nethserver/nextcloud
The configuration is stored inside the configuration db, under the nextcloud key.
Properties:
• TrustedDomains: list of trusted domains added to Nextcloud config file
68.1 Admin user
After installation the application is accesible using the following credentials:
• User: admin
• Password: Nethesis,1234
Please, remember to change the default password after the first login!
68.2 Backup
The ownCloud backup includes the configuration file and all data of the users:
/var/lib/nethserver/nextcloud/var/www/html/nextcloud/config/config.php
The database is automatically saved by nethserver-mysql.
207

NethServer Documentation, Release 7
208 Chapter 68. nethserver-nextcloud
CHAPTER 69
nethserver-ntp
Manage server date and time, ntp server for lan clients.
69.1 How it works
When the time and date are modified, some services must be restarted. Each package must subscribeservice2adjust interface. Note that there’s no need to restart rsyslog on date and time changing. Rsyslogdaemon is smart enough to read new time setting on the fly.
Date and time can be set manually or automatically via a ntp server.
The current time zone is accessible from the configuration database, but the value is read and written using systemdcommands.
69.1.1 Events
• nethserver-ntp-update, standard event triggered on package installation/update.
• nethserver-ntp-save, standard event triggered on UI module SAVE action
69.1.2 Actions
• nethserver-ntp-localtime, create a lint to the zoneinfo file from /usr/share/zoneinfo to/etc/localtime according to TimeZone key in _configuration_ database.
• nethserver-ntp-clock-adjust, adjust the system date and hardware clock when NTP is disabled.Requires the event name and timestamp arguments. When NTP is enabled, restarts the ntp daemon.
69.1.3 Database
Example:
chronyd=serviceNTPServer=pool.ntp.orgaccess=private
209
NethServer Documentation, Release 7
69.1.4 Daemon status
Run following command command:
chronyc sourcestats
Sample output:
210 Number of sources = 1Name/IP Address NP NR Span Frequency Freq Skew Offset Std Dev==============================================================================yourntp.server.com 41 20 43m +0.001 0.172 +58ns 227us
210 Chapter 69. nethserver-ntp
CHAPTER 70
nethserver-squid
This package configure the well-known Squid web proxy.
Squid rpms are from upstream.
70.1 Configuration
All properties are saved in the squid key under the configuration database.
Properties:
• BlueMode: change Squid operation mode on blue networks. It has same values and defaults of GreenMode
• DiskCache: disabled by default, if enabled it actives the disk caching system for squid
• DiskCacheSize: maximum value of squid cache on disk
• GreenMode: change Squid operation mode on green networks. Can be: manual, authenticated,transparent, transparent_ssl. Default is: manual
• KrbPrimaryList: name for Kerberos keytab (used for Active Directory integration)
• KrbStatus: if set to enabled a ticket credential cache file is kept valid by the hourly cron job (used for ActiveDirectory integration)
• MaxObjSize: objects larger than this setting will not be saved on disk. If speed is more desirable than savingbandwidth, this should be set to a low value
• MemCacheSize: value of squid cache on memory
• MinObjSize: can be left at 0 to cache everything, but may be raised if small objects are not desired in the cache.
• NoCache: comma separated list of domains which will be not cached
• ParentProxy: in the form host:port, if omitted port is default to 3128. Default is empty
• PortBlock: if enabled, block port 80 and 443. Default is: disabled
• SafePorts: comma separated list of ports thath can be accessed through the proxy. Listed ports will be added tothe default list of safe and ssl ports
70.1.1 Database example
Example:
211
NethServer Documentation, Release 7
squid=serviceBlueMode=manualDiskCache=disabledDiskCacheSize=100GreenMode=transparentKrbPrimaryList=HTTPKrbStatus=enabledMaxObjSize=4096MemCacheSize=256MinObjSize=1NoCache=www.nethserver.orgParentProxy=PortBlock=disabledTCPPorts=3128,3129,3130access=privatestatus=enabled
70.2 Transparent mode
When the proxy is enabled in transparent mode, all traffic destined to the port 80 is redirect to the Squid (port 3129).This configuration requires Shorewall.
70.2.1 SSL peek and splice
If the proxy is enabled in transparent SSL mode, also all traffic destined to port 443 is redirected to Squid (port 3130).The daemon does not inspect SSL traffic, but visited sites can be processed using the web filter.
Known bugs
You could find this kind of errors inside /var/log/squid/cache.log
2016/12/09 09:44:18 kid1| SECURITY ALERT: on URL: avatars0.githubusercontent.com:4432016/12/09 09:44:18 kid1| SECURITY ALERT: Host header forgery detected on local=151.101.60.133:443 remote=192.168.5.22:40950 FD 166 flags=33 (local IP does not match any domain IP)
In this case, when accessing github, the avatars won’t be displayed by the browser, and you can find a “Timeout error”for the not loaded images.
This kind of errors can’t be fixed. See official documentation for workarounds:
• http://wiki.squid-cache.org/KnowledgeBase/HostHeaderForgery2
• http://lists.squid-cache.org/pipermail/squid-users/2016-September/012344.html
70.3 Authenticated mode
Authentication schema depends on system configuration:
• standard authentication for system users is done over LDAP
• if Samba AD is installed, clients can use Kerberos (SPNEGO/GSSAPI)
212 Chapter 70. nethserver-squid

NethServer Documentation, Release 7
70.4 Bypasses
Bypass rules are saved inside the fwrules databases. A bypass can be of two types:
• bypass-src: listed origin host are bypassed
• bypass-dst: listed target host are bypassed
Properties: * Host: a host object, like a remote or local host * status: can be enabled or disabled * Description:optional description
Bypass example:
boss=bypass-srcDescription=Boss without proxyHost=host;bosspcstatus=enabled
70.5 Cache
There is an event called nethserver-squid-clear-cache that empties the cache.
70.6 WPAD
WPAD is located at /var/www/html/wpad.dat. The web server is configured to allow the download only fromtrusted and blue networks, but be aware that you need to manually open the httpd port for blue networks (see Customaccess).
The WPAD returns:
• DIRECT, if squid is disabled or the requesting client is inside a network where the proxy is configured intransparent mode
• IP of corresponding network interface, if the requesting client is inside a network where the proxy is configuredin manual or authenticated mode
• proxy.<domain>, if the server is joined to Active Directory and the requesting client is inside a network wherethe proxy is configured in manual or authenticated mode
Also WPAD file includes all source and destination bypasses.
70.7 Miscellaneous options
The following options are always enabled:
• buffered logs
• SNMP support on port 3401
70.4. Bypasses 213

NethServer Documentation, Release 7
214 Chapter 70. nethserver-squid

CHAPTER 71
nethserver-sssd
This package implements authentication and user management layers. Supported authentication providers are:
• OpenLDAP with POSIX attributes
• Samba or Windows Active Directory
It includes the following parts:
• SSSD configuration
• events for users and groups management
• web interface for user management
• password expiration notification (not yet implemented)
• system validators for users and groups
• SSSD perl library to ease the implementation of e-smith templates
The implementation can work in two modes:
• read-and-write: if nethserver-dc or nethserver-directory are installed, the system will provide all user manage-ment features like creation, modification and deletion of users and groups
• read-only: if users and groups are read from a remote source, the system will be able to consume them onlyusing passwd database
71.1 Events
Defined events are:
71.1.1 user-create
The event creates the user record inside the account provider database.
Parameters:
• username: must be unique
• name: full name of the user
• shell: default to /usr/libexec/openssh/sftp-server, if set to /bin/bash the user will be able to access the serverusing SSH
215
NethServer Documentation, Release 7
71.1.2 user-modify
The event changes the full name inside the account provider databases
Parameters:
• username
• name: full name of the user
• shell: default to /usr/libexec/openssh/sftp-server, if set to /bin/bash the user will be able to access the serverusing SSH
Note: shell option can’t be changed for AD users
71.1.3 user-delete
The event deleted the user and remove it from all groups. Also all data inside the user’s home will deleted.
Parameters:
• username
71.1.4 user-lock
The event locks the user preventing the access. All new users are in locked state.
Parameters:
• username
71.1.5 user-unlock
The event unlocks the user preventing the access. This event should be called after the invoking password-modifyevent for the user.
Parameters:
• username
71.1.6 group-create
The event creates the group record inside the account provider database.
Parameters:
• groupname: must be unique
• members: a list of users member of this group
71.1.7 group-modify
The event changes the members of a group inside the account provider database.
Parameters:
• groupname: must be unique
216 Chapter 71. nethserver-sssd

NethServer Documentation, Release 7
• members: a list of users member of this group
71.1.8 group-delete
This event deletes a group record from the the account provider database.
Parameters:
• groupname
71.1.9 password-policy-update
This event configures password expiration of a single user or of all users.
Parameters
• username (optional)
• passexpires: it can be yes or no. If user is set and value is yes, the user password will expires after a predefinednumber of days (see passwordstrength{MaxPassAge})
The duration of a password can be passwordstrength{MaxPassAge}
71.2 System users and groups
SSSD can access all users and groups from an account provider, but the Server Manager hides system users and groups.
The following users will not be accessible from the Server Manager:
• all users listed inside /etc/nethserver/system-users
• all users in /etc/passwd
The following groups will not be accessible from the web interface:
• all groups listed inside /etc/nethserver/system-groups
• all groups in /etc/group
The users and groups lists are retrieved by the following UI helpers:
• /usr/libexec/nethserver/list-users
• /usr/libexec/nethserver/list-groups
The number of entries returned by the server is limited. For instance, AD has a 1000 entries search results cap.
To retrieve the members of a group and the membership of a specific user:
• /usr/libexec/nethserver/list-group-members
• /usr/libexec/nethserver/list-user-membership
The Dashboard account counters are provided by:
• /usr/libexec/nethserver/count-accounts
All those helpers support the -A flag, to include hidden entries, and the -s flag to return entries without @domainsuffix.
71.2. System users and groups 217

NethServer Documentation, Release 7
71.3 NethServer::SSSD
NethServer::SSSD is the Perl library module to retrieve current LDAP configuration. It supports both Active Directoryand OpenLDAP providers.
Template example:
{use NethServer::SSSD;my $sssd = NethServer::SSSD->new();
$OUT .= "{ldap_uri, [".$sssd->ldapURI()."]}\n";
if ($sssd->isAD()) {$OUT .= "{ldap_uids, [\"sAMAccountName\"]}.\n";
}
}
All functions are documented using perldoc
perldoc NethServer::SSSD
This command prints out the current settings, by querying NethServer::SSSD methods. It requires the packageopenldap-clients
/usr/sbin/account-provider-test dump
Check the bind credentials are OK
/usr/sbin/account-provider-test
71.4 Join Active Directory
The Active Directory join operation is run by realmd. After the AD has been joined sucessfully the system keytab fileis initialized as long as individual service keytabs, as defined on the respective service record (see Service configurationhooks).
71.5 Leave and Re-Join Active Directory
To leave a remote AD go to the Accounts provider page. For local AD provider, this is the manual leave procedure
signal-event nethserver-sssd-leave
If the machine password or system keytab get corrputed, joining again the DC can fix them:
realm join -U administrator $(hostname -d)
...at prompt, type the administrator (or admin) password, then:
signal-event nethserver-sssd-save
If you leave and do not want to re-join, disable the sssd service permanently:
218 Chapter 71. nethserver-sssd
NethServer Documentation, Release 7
config setprop sssd status disabled Provider nonesignal-event nethserver-sssd-savesignal-event nethserver-sssd-leavesignal-event nethserver-dnsmasq-save
71.6 Change the FQDN
Once we are bound to an account provider the FQDN cannot be changed any more. However, this procedure can beuseful in early server configuration to fix a wrong FQDN. Please note that any existing account setting must be fixedmanually. The procedure to do it is currently undefined.
For local account providers:
1. Execute the leave procedure explained above
2. Go to page System name and change the domain suffix in the FQDN field.
3. Re-join as explained above
For remote account providers the procedure is similar. Use the Accounts provider page to leave/join the domain.
71.6.1 Service configuration hooks
A service (i.e. dovecot) record in configuration DB can be extended with the following special props, that areread during the join operation, machine password renewal, and crojob tasks:
dovecot=service...KrbStatus=enabledKrbCredentialsCachePath=KrbKeytabPath=/var/lib/dovecot/krb5.keytabKrbPrimaryList=smtp,imap,popKrbKeytabOwner=KrbKeytabPerms=
• KrbKeytabPath Keytab file path. If empty, /var/lib/misc/nsrv-<service>.keytab is assumed
• KrbPrimaryList <comma separated words list> Defines the keytab contents. In Kerberosjargon a “primary” is the first part of the ‘principal string<http://web.mit.edu/kerberos/krb5-1.5/krb5-1.5.4/doc/krb5-user/What-is-a-Kerberos-Principal*003f.html>‘_, before the slash (/) character. Any pri-mary in this list is exported to the keytab.
• KrbKeytabOwner The unix file owner. Default is the service name. This is applied to both the credentialscache file and the keytab file.
• KrbKeytabPerms The unix bit permissions in octal form. Default is 0400. This is applied to both thecredentials cache file and the keytab file.
The implementation is provided by /usr/libexec/nethserver/smbads.
Individual services can link themselves to nethserver-sssd-initkeytabs action in the respective -updateevent.
The following props are no longer honoured since ns7:
• KrbStatus {enabled,disabled} This is the main switch. If set to enabled a ticket credential cachefile is kept valid by the hourly cronjob
71.6. Change the FQDN 219

NethServer Documentation, Release 7
• KrbCredentialsCachePath The path of the credentials cache. It defaults to/tmp/krb5cc*<service*uid>, if service is also a system user.
71.7 Account import scripts
There are some perl scripts under the documentation scripts/ directory.
rpm -qd nethserver-sssd
71.7.1 import_users
It is possible to create user accounts from a TSV (Tab Separated Values) file with the following format:
username <TAB> fullName <TAB> password <NEWLINE>
Sample invocation:
import_users users.tsv
Alternative separator character:
import_users users.csv ','
71.7.2 import_emails
It is possible to create mail aliases from a TSV (Tab Separated Values) file with the following format:
username <TAB> emailaddress <NEWLINE>
See import_users section for a sample script invocation.
220 Chapter 71. nethserver-sssd

CHAPTER 72
nethserver-suricata
The IPS (Intrusion Prevention System) module configures Suricata using the netfilter queue (NFQUEUE). NFQUEUEis an iptables and ip6tables target which delegate the decision on packets to a userspace software.
All traffic will be analyzed by Suricata itself.
Suricata rules are managed by Pulledpork.
72.1 Manually enable/disable Suricata
Suricata will analyze network traffic only if nfqueue property inside the firewall key is set to enabled. Theweb interface will take care of this by assuring both firewall{nfqueue} and suricata{status} are set toenabled (or disabled).
Enabling:
config setprop firewall nfqueue enabledconfig setprop suricata status enabledsignal-event firewall-adjustsignal-event nethserver-suricata-save
Disabling:
config setprop firewall nfqueue disabledconfig setprop suricata status disabledsignal-event firewall-adjustsignal-event nethserver-suricata-save
72.2 Policies
The package implements 4 policies. A policy is a set of rules which will change Suricata behavior. Available policiesare:
• Connectivity: You run a lot of real time applications (VOIP, financial transactions, etc), and don’t want to runany rules that could affect the current performance of your gateway. Rules in this category make Suricata happy,additionally this category focuses on the high profile most likely to affect the largest number of people type ofvulnerabilities.
• Balanced: You are normal, you run normal stuff and you want normal security protections. This is the bestpolicy to start from if you are new, old, or just plain average. If you don’t have any special requirements forsuper high speeds or super secure networks start here.
221

NethServer Documentation, Release 7
• Security: You don’t care about dropping your bosses email, everything in your environment is tightly regulatedand you don’t tolerate people stepping outside of your security policy. This policy hates on IM, P2P, vulnera-bilities, malware, web apps that cause productivity loss, remote access, and just about anything not related togetting work done. If you run your network with an iron fist start here.
• Expert: no policy is applied. All rules must be manually selected by the administrator (see pulledpork docu-mentation).
Changing the current policy to security:
config setprop pulledpork Policy securitysignal-event nethserver-pulledpork-save
72.3 Troubleshooting
When troubleshooting network traffic, just remember that Suricata will intercept all the traffic.
To temporary disable Suricata use:
config setprop firewall nfqueue disabledsignal-event firewall-adjust
To re-enable Suricata:
config setprop firewall nfqueue enabledsignal-event firewall-adjust
222 Chapter 72. nethserver-suricata
CHAPTER 73
nethserver-virtualhosts
73.1 Database
A new vhost database is defined by this module. It contains records of type vhost, similar to:
vh1=vhostAccess=privateDescription=description_textForceSslStatus=enabledFtpPassword=ftp_password_valueFtpStatus=enabledPasswordStatus=enabledPasswordValue=http_password_valueServerNames=www.nethserver.org,www.example.comSslCertificate=/etc/pki/tls/certs/NSRV.crtstatus=enabled
73.2 UI plugins
The Modify action can be extended to display additional tabs, by adding a controller and the respective template underModifyPlugin/ directories.
See the Samba User plugin on NethServer 6.x as an example
223

NethServer Documentation, Release 7
224 Chapter 73. nethserver-virtualhosts

CHAPTER 74
nethserver-webtop4
WebTop 4 is a full-featured groupware written in Java.
It’s composed by three parts:
• Java web application running on Tomcat 7
• PHP implementation of Active Sync protocol
• PostgreSQL database
Access to web application is forced in SSL mode.
74.1 Database
Configuration is saved in webtop key inside configuration database.
Available properties:
• PublicUrl: public URL used to publish resources for the cloud. If not set, default ishttp://<FQDN>/webtop
• ActiveSync: if set to enabled, it enables /Microsoft-Server-ActiveSync url. Default is enabled
Example:
webtop=configurationActiveSync=enabledPublicUrl=
Configuration can be applied using the nethserver-webtop4-update event.
74.2 Troubleshooting
In case of errors, see following logs:
• Tomcat: /var/log/tomcat/catalina.out
• Active Sync: /var/log/z-push/z-push-error.log
To inspect z-push status use:
php /usr/share/webtop/z-push/z-push-admin.php
225

NethServer Documentation, Release 7
74.3 Known problems
When PostgreSQL is restarted, WebTop can loss the database connection. If a blank page is displayed, restart Tomcatwith the following command:
systemctl restart tomcat
226 Chapter 74. nethserver-webtop4

CHAPTER 75
License Headers
Always add a COPYING in the documentation directory of your package, containing the full GPLv3 license.
Change the Copyright line according to your needs.
75.1 PHP, Javascript, CSS
/** Copyright (C) 2017 Nethesis S.r.l.
* http://www.nethesis.it - [email protected]
** This script is part of NethServer.
** NethServer is free software: you can redistribute it and/or modify
* it under the terms of the GNU General Public License as published by
* the Free Software Foundation, either version 3 of the License,
* or any later version.
** NethServer is distributed in the hope that it will be useful,
* but WITHOUT ANY WARRANTY; without even the implied warranty of
* MERCHANTABILITY or FITNESS FOR A PARTICULAR PURPOSE. See the
* GNU General Public License for more details.
** You should have received a copy of the GNU General Public License
* along with NethServer. If not, see COPYING.
*/
75.2 Perl, Python and BASH
## Copyright (C) 2017 Nethesis S.r.l.# http://www.nethesis.it - [email protected]## This script is part of NethServer.## NethServer is free software: you can redistribute it and/or modify# it under the terms of the GNU General Public License as published by# the Free Software Foundation, either version 3 of the License,# or any later version.
227

NethServer Documentation, Release 7
## NethServer is distributed in the hope that it will be useful,# but WITHOUT ANY WARRANTY; without even the implied warranty of# MERCHANTABILITY or FITNESS FOR A PARTICULAR PURPOSE. See the# GNU General Public License for more details.## You should have received a copy of the GNU General Public License# along with NethServer. If not, see COPYING.#
228 Chapter 75. License Headers

CHAPTER 76
Rebranding Administrator Manual
It’s possible to create a custom version of the Administrator Manual.
76.1 Environment
1. Clone the documentation repository
2. Create a directory inside the main administrator-manual/<lang> directory. Example for a new re-branding called NethService and available only in Italian:
mkdir administrator-manual/it/nethservice
3. Enter the directory, and create the structure:
cd nethservicemkdir _templates _static _build _themes
4. Copy the makefile and configuration from parent directory:
cp ../Makefile ../conf.py .
76.2 Contents
First, create a custom index.rst with required chapters. Example:
My section-------------
.. toctree:::maxdepth: 2
installationnewchapter
To add a chapter, create new rst file inside the current directory. Example for newchapter.rst:
===========New chapter===========
This is a new chapter.
229

NethServer Documentation, Release 7
If you wish to reuse existing chapters, create links to the parent directory. Example:
ln -s ../installation.rst installation.rst
76.3 Product name and version
Edit the conf.py by setting product name and version. Feel free to customize anything you need but make sure toedit at least following variables:
• project
• release
Create a rst_prolog file with the macro for product name and download site. Content of rst_prolog file:
.. |product| replace:: NethService
.. |download_site| replace:: http://www.nethesis.it
76.4 Theme
Choose and existing Sphinx theme or copy a new theme inside the _themes directory. If you want to use a customtheme, remember to set following variables inside conf.py:
html_theme_path = ['_themes']html_theme = 'mynewshinytheme'
76.5 Artworks
If you wish to add custom artworks like logo and favicon, edit these variables inside conf.py:
html_static_path = ['_static']html_logo = '_static/logo.png'html_favicon = '_static/favicon.ico
230 Chapter 76. Rebranding Administrator Manual
CHAPTER 77
License
This documentation is distributed under the terms of Creative Commons - Attribution-NonCommercial-ShareAlike
4.0 International (CC BY-NC-SA 4.0) license. You are free to:
• Share — copy and redistribute the material in any medium or format
• Adapt — remix, transform, and build upon the material
The licensor cannot revoke these freedoms as long as you follow the license terms.
Under the following terms:
• Attribution — You must give appropriate credit, provide a link to the license, and indicate if changes weremade. You may do so in any reasonable manner, but not in any way that suggests the licensor endorses you oryour use.
• NonCommercial — You may not use the material for commercial purposes.
• ShareAlike — If you remix, transform, or build upon the material, you must distribute your contributions underthe same license as the original.
No additional restrictions — You may not apply legal terms or technological measures that legally restrict others fromdoing anything the license permits.
This is a human-readable summary of (and not a substitute for) the full license available at:http://creativecommons.org/licenses/by-nc-sa/4.0/
Architecture documentation is from SME Server project and is licensed under GNU Free Documentation License 1.3(http://www.gnu.org/copyleft/fdl.html). See http://wiki.contribs.org/ for original documentation.
231

NethServer Documentation, Release 7
232 Chapter 77. License

CHAPTER 78
Indices and tables
• genindex
• search
233

NethServer Documentation, Release 7
234 Chapter 78. Indices and tables
Index
AAPI
TODO, 79
BBuild
ISO, 85RPM, 82
Ccollectd, 103
Ddnsmasq, 97
Hhost-group, 178
Ii18n, 11Internationalization, 11ISO
Build, 85
Llibuser, 168libvirt, 113
MMock, 82
Ooverlay, 167
RRPM
Build, 82Sign, 84
Sservice, 33Sign
RPM, 84SNMP, 117status, 33
TTFTP, 97TODO
API, 79
235