nch software wavepad
TRANSCRIPT
NCH Software
WavePad
This user guide has been created for use with
WavePad Version 16.xx
©NCH Software
Technical SupportIf you have difficulties using WavePad please read the applicable topic before requesting support. If your problem is not covered in this user guide please view the up-to-date WavePad Online Technical Support at www.nch.com.au/wavepad/support.html.
If that does not solve your problem, you can contact us using the technical support contacts listed on that page.
Software SuggestionsIf you have any suggestions for improvements to WavePad, or suggestions for other related software that you might need, please post it on our Suggestions page at
www.nch.com.au/suggestions/index.html. Many of our software projects have been undertaken after suggestions from users like you. You get a free upgrade if we follow your suggestion.
WavePad
ContentsOverview......................................................................................................................................... 3General Audio Concepts................................................................................................................ 4Main List ......................................................................................................................................... 6Record Control Window.................................................................................................................. 8Wave Display.................................................................................................................................. 10Editing Window............................................................................................................................... 11Editing Window: File Menu............................................................................................................. 13Editing Window: Edit Menu............................................................................................................. 14Editing Window: Effects Menu........................................................................................................ 15Transferring Files............................................................................................................................ 17
EffectsAmplify............................................................................................................................................ 18
Normalize........................................................................................................................................ 19Compressor.................................................................................................................................... 20Equalizer......................................................................................................................................... 23Envelope......................................................................................................................................... 26Stereo Pan...................................................................................................................................... 27Echo............................................................................................................................................... 28Pitch Shifter .................................................................................................................................... 29Reverb............................................................................................................................................ 30Phaser ............................................................................................................................................ 31Flanger........................................................................................................................................... 32Vibrato ............................................................................................................................................ 33Tremolo.......................................................................................................................................... 34Doppler........................................................................................................................................... 35Wah-Wah........................................................................................................................................ 36Chorus............................................................................................................................................ 37Distortion......................................................................................................................................... 38AM Radio Effect.............................................................................................................................. 39Telephone Effect............................................................................................................................. 40Reverse .......................................................................................................................................... 41Fading............................................................................................................................................ 42Speed and Pitch Changing............................................................................................................. 44Reduce Vocals................................................................................................................................ 45Voice Change................................................................................................................................. 46
Audio CleanupNoise Reduction............................................................................................................................. 47
Click/Pop Removal......................................................................................................................... 48High-Pass Filter.............................................................................................................................. 49Low-Pass Filter ............................................................................................................................... 50Automatic Gain Control .................................................................................................................. 51
1
DC Offset Correction...................................................................................................................... 52
NCH Sound LibraryNCH Sound Library ........................................................................................................................ 53
Screen ReferencesColor Picker Dialog......................................................................................................................... 54
Select Stream................................................................................................................................. 55Format Settings.............................................................................................................................. 56FTP Settings ................................................................................................................................... 57Wavepad Options ~ Record........................................................................................................... 58Wavepad Options ~ Sort................................................................................................................ 59Wavepad Options ~ Send .............................................................................................................. 60Wavepad Options ~ Other.............................................................................................................. 61
2

OverviewWavePad OverviewWavePad is a sound editor program for Windows, Android, Mac OS X and iOS. It lets you record and edit voice and other audio recordings. You can cut, copy and paste parts of recording and, if required, add effects like echo, amplification and more.Pocket WavePad is designed to be very easy and intuitive to use. Within minutes you will be able to record a file, edit it, and apply effects that will result in a high quality field recording. Features● Supports a number of file formats including wav (multiple codecs) and aiff● A wide range of editing capabilities including cut, copy, paste, delete, insert, trim and others● Effects including amplify, normalize, echo and more● Supports sample rates from 8000 to 44100z and 8, 16, 24 or 32 bits● Ability to work with multiple files● Player includes scrub/cue control for precise editing● Recorder supports autotrim and voice activated recordingWavePad is just one component of the NCH Software suite of audio, video and business software. If you have not done so already, please visit www.nchsoftware.com/android to download other applications.
3
General Audio ConceptsAn Introduction to SoundThis is a general introduction to key audio concepts for those who have not worked with sound before. If you class yourself as an "audiophile", or if you have some other past experience learning about sound, you can skip this page.SoundThe starting point for everything WavePad does is sound. Sound is vibrating air travelling very fast like a wave. It is created by a vibrating object (e.g. our vocal cords, a guitar string or a speaker) and can be detected by an ear or a microphone. A microphone converts these vibrations into alternating electronic voltage which the computer's sound card can turn into the data used by WavePad.FrequencyOne way to analyse sound is by looking at the speed it vibrates as it travels through the air. The number of times this vibration happens per second is called the "frequency" of the sound, and is measured in Hertz (Hz) or kiloHertz (kHz).It is quite often the case that sounds will not consist of a single wave vibrating at a certain frequency through the air, often they will contain multiple waves vibrating at different speeds and different volume levels.The human ear is said to be able to hear sounds ranging from about 20Hz (20 vibrations per second) up to 20,000Hz (20,000 vibrations per second). In reality, most of us only hear to about 15,000Hz, but audio enthusiasts often claim they can hear sounds up to the 20,000Hz mark. The frequencies of a person's voice can range between 300Hz and 3000Hz.Loudness, Volume, Amplitude, Level and GainThe terms loudness, volume, amplitude and level mean roughly the same thing. The more volume a sound is given the more power has been used to create it and the louder it sounds.When adjusting the volume level of a sound (for example when using the Amplify Effect of WavePad), the "Gain" value signifies the amount of increase or decrease in the level. This value can be represented in percent or in a scale called the "decibel" or "dB" scale (read on!).The human ear can hear a remarkable broad range of sounds from very low to very high power. The ear does not perceive differences in power in direct proportion to power but in a logarithmic way. To more closely match the way we hear loudness sound engineers use the decibel scale (dB). To give you a feel for how this works, reducing the volume level of a sound by 6dB means you are dropping the amplitude by 1/2 or the power by 1/4. Conversely, a 6db increase in the level corresponds to doubling the amplitude. A 20dB drop means 1/10 of the amplitude (or 1/100 of the power). The smallest unit of loudness change a person will notice is around + / - 3dB.Audio Recording and ComputersIn order to store and reproduce audio on your computer, the audio signal from the microphone is converted by your sound card into a series of numbers in quick succession. You can think of these numbers as representing the pressure on the surface of the microphone at different points over time. This process of converting audio into a series a numbers is called "sampling".Sample RateThe sample rate is the number of times that the amplitude is converted to a number per second. For example, at CD quality recording, your computer stores 44100 numbers per second each representing the amplitude at the specific point in time.It can be shown that the maximum possible frequency that can be carried in a sampled sound is exactly half of the sample rate. In reality it is a little less. So for example, a recording made with a 44100 sampling rate will carry frequencies up to 20000Hz.A quick guide to sample rates follows6000 - Very low quality voice
4
8000 - Telephone quality voice11025 - Reasonable quality voice - eg. dictation22050 - Good quality voice, Reasonable quality music - eg. multimedia CD.44100 - CD Quality.Higher sample rates including 48000, 88200, 96000 and even 192000 are sometimes used but many sound engineers point out that they do not offer any real audible quality improvement (aside from adding a bit more redundancy to the system).Tip: Always record and work with audio in the Sample Rate that you will use in the end, because every time you convert you lose a little quality. For example - if you are making a CD use 44100. If it is for telephone use 8000.8,16,24,32 bitsYou might have seen terms like "8 bits" or "16 bits" when looking at sound files but are not sure what they mean. The number of bits, like in the sample rate, is an indicator of the quality or resolution of the sound inside the file. The more bits the better resolution. WavePad uses 32 bits internally for optimal audio quality. However 16 bits is usually more than adequate for saving.Audio File Compression and CodecsOne of the problems with high quality audio is that you can end up with very large-sized audio files. In order to avoid this, you can use what is known as "compression" to reduce the size of your files. The systems used to implement compression in audio files are called "codecs".There are a number of different codecs around, including MPEG Layer-3/MP3, Ogg Vorbis (both good for music) and GSM (good for telephone or voice). Most codecs are designed for a specific function, usually to store either music or voice.You can select the compression codec to use when using the File -> Save As option in WavePad. You should note that almost all compression codecs are lossy, however - this means you lose audio quality every time you save the file. For this reason it is important that you do not save audio in a compressed form until it is really needed. For example, if you need to save a file when you want to do further work on it, save it in an uncompressed form like 44100 Hz, 16 bit PCM format Wave.Audio File Compression must not be confused with Audio Dynamic Range Compression. File Compression is all about reducing file size whereas Dynamic Range Compression is about volume control. For more about Dynamic Range Compression see Effects.Editing and EffectsEditing means deleting or inserting audio. Effects are processes that change the audio in some way (e.g. add echo or make it softer).See the WavePad Edit and Effects menu. Each effect is fully explained on the page Effects.
5
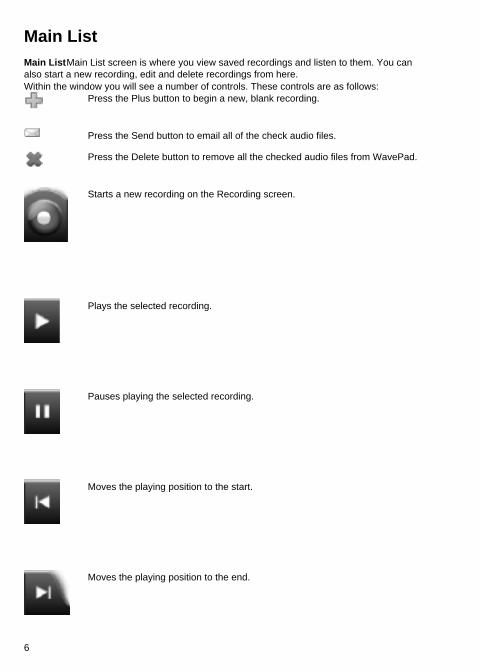
Main ListMain ListMain List screen is where you view saved recordings and listen to them. You can also start a new recording, edit and delete recordings from here. Within the window you will see a number of controls. These controls are as follows:
Press the Plus button to begin a new, blank recording.
Press the Send button to email all of the check audio files.
Press the Delete button to remove all the checked audio files from WavePad.
Starts a new recording on the Recording screen.
Plays the selected recording.
Pauses playing the selected recording.
Moves the playing position to the start.
Moves the playing position to the end.
6

The bar on the right bottom shows the timestamp and state of recording: paused (blue) or playing (green). Shows information about current recording if gets pressed.
Opens "Settings" window.
Opens "Help" window.
7
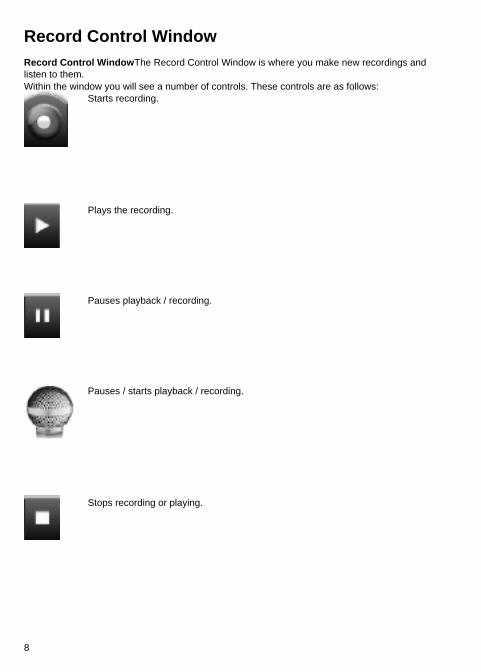
Record Control WindowRecord Control WindowThe Record Control Window is where you make new recordings and listen to them.Within the window you will see a number of controls. These controls are as follows:
Starts recording.
Plays the recording.
Pauses playback / recording.
Pauses / starts playback / recording.
Stops recording or playing.
8
Restarts recording.
Closes recording window, and places newly created recording in the main list or on the editing screen.
Closes recording window, cancels recording.
The bar on the right bottom shows the timestamp and state of recording: paused (blue), playing (green), waiting (orange) and recording (red). Shows information about current recording if gets pressed.
Opens "Settings" window.
Opens "Help" window.
9
Wave DisplayWave display + up / - down This combines the left and right channels into one waveform.Wave display left channel up / right channel down Displays the left channel on the upper side of the center line and the right channel on the lower side of the center line.Wave display separate channels Show different channels separately.
10

Editing WindowEditing ScreenThe Editing Screen is where you edit and apply effects to recordings.The editing screen displays the recording's audio waveform. You can manually navigate to any portion of the audio and either play your audio or record again. Note that performing either action will either play or record the audio from the position of the cursor in the wave window.Within the window you will see a number of controls. These controls are as follows:Opens the File menu.
Learn more about the File menu options.
Edit tools. Learn more about the Edit tools options. Effects tools. Learn more about the Effects tools options.
Starts the recording at the cursor point, or replaces current selection with new recording.
Plays the recording or selection.
Pauses playing or recording.
Moves the cursor to the start of selection. Long press moves the cursor to the start of recording while clearing the selection.
Moves the cursor to the end of selection. Long press moves the cursor to the end of recording while clearing the selection.
11
The bar on the right bottom shows the timestamp and state of recording: paused (blue) or playing (green). Shows information about recording if gets pressed.
Opens "Settings" window.
Opens "Help" window.
12
Editing Window: File MenuFile menuTo access the File menu, press the File button at the top of the editing window:
The menu has following options:
SaveSelecting Save will save the current recording with the current name.Save AsSelecting Save As will allow you to save the recording with a different name or in a different format.Save Selection AsSelecting Save Selection As will allow you to save the current selection to a new file with a different name or format.Discard ChangesSelecting Discard Changes will discard changes in the recording and return back to its previous saved state.RenameSelecting Rename allows you to input a new name for the current recording.DeleteSelecting Delete allows you to delete recording permanently.SendSelecting Send allows you to send the current recording via e-mail or FTP.PropertiesSelect the Properties option to see recording properties such as duration, format, size and more.Save as RingtoneSelecting Save as Ringtone will save the current recording to the Ringtones folder of your device. It will be automatically added on the list of Ringtones on your phone's settings if supported.Save as NotificationSelecting Save as Notification will save the current recording to the Notifications folder of your device. It will be automatically added on the list of Notifications on your phone's settings if supported.
13
Editing Window: Edit MenuEdit menuTo access Edit menu, use the Edit tab at the top of the editing window:The menu has following options:UndoUse Undo to restore the recording to its state before the previous edit function. This is useful if you want to try an effect or to undo a mistake.Note: You can undo up to 32 previous actions.CutTo 'cut' is to delete the selected region but to keep a copy on the clipboard so it can be 'pasted' somewhere else. This is useful when moving parts of the audio around in the recording.CopyUse Copy to make a copy of the selected region on the clipboard so you can paste it in another location. This is useful if you want to duplicate a part of the audio and insert it in another recording.Paste Paste can only be used after you have used the Cut or Copy functions (above).The paste function replaces the current selected region (or inserts at the timeline marker if there is no selection). To replace a selection select "Edit / Paste". To insert click on the position and select "Edit / Paste".DeleteThis is similar to the cut function, but a copy is not made on the clipboard.Select AllUse Select All to select the entire recording before editing or applying an effect.Insert silenceInsert a silence into the current position of the audio. Auto TrimAuto Trim removes the silence at the beginning and the end of the selected region without you needing to find the exact position where recording starts.This feature will not be useful in an environment with high background noise, as WavePad will be unable to differentiate between the background sounds and your voice.To use this feature select "Edit / Trim / Auto Trim"TrimTo 'trim' is to cut off the beginning and the end of the file so only the selected region remains. This is useful when you have just recorded a file but there is silence or noise before the start or after the end.Select the part of the file you want to keep and then press trim.Trim StartTo delete everything before the current position select "Edit / Trim / Trim Start"Trim EndTo delete everything after the current position select "Edit / Trim / Trim End"Making a SelectionMany of the functions apply to the selected region. To select a region, press the white button within waveform and drag.To select the entire recording choose Select All from the Edit menu.
14
Editing Window: Effects MenuEffects MenuTo access the Effects menu, press the Effects tab at the top of the editing window:The menu has following options:Auto Gain (Automatic Gain Control)Normal recordings can have the volume of the recording too high in parts and too soft in parts. Automatic Gain Control reduces the too loud parts and increases the too soft parts. This is sometimes a better alternative to normalization.NormalizeTo 'normalize' is to adjust the volume so that the loudest peak is equal to (or a percentage of) the maximum signal that can be used in digital audio. Usually you normalize recordings to 100% as the last stage in production to make it the loudest possible without distortion.AmplifyTo 'amplify' is to increase the loudness or volume of the selected region. To make a part of the recording softer or louder, select it and then use the menu "Effects / Amplify".Compressor (Dynamic Range Compressor)A Dynamic Range Compressor limits the volume levels of a sound recording so that it stays within a certain loudness range.An example of where it is used is in TV broadcasting, where it ensures that the volume levels of ads are perceived as being louder than the television program itself (without any change in the actual broadcast volume).It also has a use for recording audio from one medium to another, where the two mediums are not capable of handling the same range of volume levels (e.g. A CD can handle a much greater range than a cassette tape).To apply this effect, select a region then use the menu "Effects / Compressor" to bring up the Dynamic Range Compressor settings.The Threshold setting works by detecting when the sound recording volume exceeds a defined decibel level. It then gradually attenuates the sound to bring it down below the dB level, and does it in such a way that the listener will not be aware the attenuation is occurring.The Limit setting defines at what maximum decibel level the sound recording will be allowed to rise up to. So if, for example, the Limit was set to 0dB, then you will never hear the volume level of the recording get louder than 0dB. The Limit setting has similarities to the Threshold setting, but the main difference is that the Threshold does allow sounds to go above the defined decibel level (for a short time), whereas the Limit does not.You will find that the minimum Limit volume you can set is the same as the maximum Threshold value. This basically means that, in any situation, the sound will start to attenuate at the threshold level, but will never be heard louder than the limit.The Ratio setting limits the amount the volume level of the recording increases at any one time. If, for example, you wanted the volume levels of a recording to only increase by at most 1/4 of the amount they would normally increase, then this would correspond to a Ratio of 4:1. So if the recording volume level increased by 8dB, then you would only hear a 2dB volume increase.The buttons for General Voice Level and TV / Radio Advertisement are preset settings appropriate for these types of recordings.High Pass (High-Pass Filter)A high-pass filter (sometimes called a low cut filter) removes all low frequencies below a specified Hz. This is useful if you want to make your recording sound 'clearer' or less 'muddy'. It is very usual to use a high-pass filter of about 300Hz on all voice recordings to improve intelligibility.
15
EchoAn echo is a repeat of the sound after a short time (usually 400 - 1000ms). It sounds a bit like the person is in a large stadium or is shouting between two mountains.To add echo select the region and use the menu "Effects / Echo", then specify the duration and amplitude of the echo. The duration is the length of time after which the sound repeats - usually this is between 400 and 1000ms. The amplitude can be between 1 - 99% (99 being a very loud echo).ReverseThis effect reverses the selection in the same way playing a record or tape backwards would.ReverbReverb is an effect that applies many small refractions of the sound at a set time interval. It usually occurs when someone is speaking in a room, hall, etc. More reverb is called wet, less reverb is called dry.Fade (Fade In, Fade Out, Fade Out and Trim)To fade in or out the recording use the menu "Effects / Fade / Fade In" or "Effects / Fade / Fade Out".The Fade Out and Trim option is a combined function which fades out over the selection then marks the end of the selection as the end of the recording. This is frequently used at the end of music tracks.Silence SelectionThis function silences the selected region. This function can be useful to remove breaths or clicks from a voice recording without changing the timing of the words.
16
Transferring FilesTransferring FilesFiles can be transferred from device to your computer by iTunes, FTP or Email means.FTPSend recording directly to an FTP (File Transfer Protocol) server. Note that you must have your own directory on this server. You do not need to host your own server - almost all ISP web hosting services offer FTP access which is suitable and very affordable, and the server can be located anywhere in the world. NCH Software provides a list of recommended FTP hosting services here.EmailIf you select this option, the recipient will be sent the recording as a file attached to an email.
17
Effects - AmplifyAmplifyTo 'amplify' is to increase the loudness or volume of the selected region. To make a part of the recording softer or louder, select it and then use the menu Effects -> Amplify. The volume is entered in percent (100 being no change, 50 being -6dB softer or 200 being +6dB louder).
18
Effects - NormalizeNormalizeTo 'normalize' is to adjust the volume so that the loudest peak is equal to (or a percentage of) the maximum signal that can be used in digital audio. Usually you normalize files to 100% as the last stage in production to make it the loudest possible without distortion. Another reason to normalize is to have multiple tracks sound equally loud, or to have equal average loudness.The 'Peak' normalization method finds the sample of the greatest magnitude within the file. Normalization is then done with this value as the peak. With the Normalize Peak Level set to 100% (0dB), the whole file will be amplified so that the peak reaches 0dB.The 'Average Loudness (RMS)' normalization method normalizes according to the file's average loudness, or volume. Multiple files normalized to the same peak level using this method will have equal average loudness. The 'Normalize Peak Level' for this method should be set much lower than for the Peak method, because the average loudness will always be lower than the peak sample.The 'Peak Loudness (RMS)' normalization method attempts to normalize according to how loud the loudest part of the file will sound. This is the best method to use to make multiple tracks sound equally loud. As with Average Loudness, the 'Normalize Peak Level' for this method should be set lower than for the Peak method, because the peak loudness is lower than the peak sample. The actual algorithm used takes the RMS of each 50ms window in the file, ranks the windows from loudest to quietest, and then takes the 95th percentile of these as the 'peak'. Note that no adjustment is made for humans' differing perception of different frequencies.The Perceived Loudness (dBA) normalization method uses A-weighted decibels which is an expression of the relative loudness of sounds in air as perceived by the human ear. Normalization is made because the human ear is less sensitive at low audio frequencies, especially below 1000 Hz, than at high audio frequencies.The Integrated Loudness (EBU) normalization method uses the R-128, an international standard for loudness normalisation and maximum level of audio signals. Several platforms use this such as Spotify (-14dB), YouTube (-14dB), Apple Music (-16dB), Facebook (-18dB), and TV / Radio (-23dB). See EBU R-128 for more details.
19
Effects - CompressorDynamic Range CompressorA dynamic range compressor limits the volume levels of a sound recording so that it stays within a certain loudness range.An example of where it is used is in TV broadcasting, where it ensures that the volume levels of ads are perceived as being louder than the television program itself (without any change in the actual broadcast volume).It also has a use for recording audio from one medium to another, where the two mediums are not capable of handling the same range of volume levels (e.g. A CD can handle a much greater range than a cassette tape).The Dynamic Range Compressor dialog has two tabs: "Simple" and "Graphic". Changing settings on the Simple tab will also change the graph on the Graphic tab, but not vice versa as the graph allows more control. There is also an "Advanced Compressor Settings" dialog for adjusting more advanced features.
The Simple TabThe "Simple" tab of the Dynamic Range Compressor dialog contains settings called "Limiter", "Compressor", and "Noise Gate". While these sound like three different things, they are more accurately viewed as three different ways of using the dynamic range compressor.
The "Limiter" defines the maximum decibel level that the sound recording will be allowed to rise up to. So if, for example, the Limiter Threshold was set to -2dB, then you would never hear the volume level of the recording get louder than -2dB. Any signal over the limiter threshold would be clipped, which would probably cause distortion. Note that setting the Limiter Threshold to 0dB effectively turns the limiter off, because 0dB represents the loudest signal possible in a digital recording.The "Compressor" reduces the volume of any sound which exceeds its "Threshold" setting. When a signal exceeds the threshold, the compressor gradually attenuates the sound to bring it down below the dB level, and does it in such a way that the listener will not be aware the attenuation is occurring. The compressor differs from the limiter in that the compressor does allow sounds to go above its threshold (for a short time), whereas the limiter does not.The "Ratio" setting defines the ratio of the reduction in volume of sounds which exceed the compressor threshold. For example, if the ratio is 4:1 and the volume exceeds the threshold by 4dB, then the volume will be reduced to only exceed the threshold by 1dB. Note that a ratio of 1:1 means that there will be no change in volume; it effectively turns the compressor off.The "Noise Gate" works similarly to the Compressor, except that is reduces the volume of sound below its Threshold. This can be useful for reducing or removing softer background noise from a recording.You will find that the maximum Compressor Threshold you can set is the same as the current Limiter Threshold value. This basically means that, in any situation, the sound will start to attenuate at the Compressor Threshold, but will never be heard louder than the Limiter Threshold. Similarly, the maximum Noise Gate Threshold you can set is the same as the current Compressor Threshold.
The Graphic Tab
20
The "Graphic" tab of the Dynamic Range Compressor dialog shows a graph which represents the relationship between input and output volumes. The horizontal axis shows input volumes in dB from -60dB to 0dB. The vertical axis shows output volumes on the same scale. The graph will be changed by changes to settings on the Simple tab, but changes to the graph will not be reflected on the Simple tab, because it is possible to represent a wider variety of settings on the graph than is possible in the controls on the Simple tab. When the dynamic range compressor is applied it will use the settings from the Graphic tab.To change the graph, click and drag the black vertex markers, or click anywhere else to create a new vertex. To remove a vertex, right-click on it.
Advanced Compressor SettingsClicking on the "Advanced" button in the Dynamic Range Compressor dialog will open the Advanced Compressor Settings dialog. In it are controls for the following properties of the compressor:
-Input Level Sensing - Peak or RMS: -This controls how the compressor determines the audio level. "Peak" sensing looks at the highest point in the window of audio which it examines. It will almost always give a higher reading than "RMS" sensing, which uses an average, or Root Mean Square of the window to determine the audio level. RMS sensing more closely corresponds to the audio level which a human listener would perceive. -Compressor Response: - -Attack: -The time (between 0 and 1000 milliseconds) that it will take to apply the gain adjustment. The total gain adjustment required will be gradually introduced over this period. -Release: -The time (between 0 and 5000 milliseconds) that it will take to remove the gain adjustment once gain adjustment is no longer needed. This is the opposite of attack. -WindowLength: -The length (between 10 and 50 milliseconds) of the window to use when calculating the current audio level. A shorter window responds to level changes more rapidly, but anything less than 50ms will start to respond inconsistently to bass, since 50ms (20Hz) is the wavelength of the lowest human-audible sound. -LookAhead: -How far ahead (between 0 and 100 milliseconds) to look at the input level when determining the output gain adjustment. This can cause the compressor to start responding to a change in volume before it happens. If this value is the same as the attack time, then the full gain adjustment could be made by the time the louder signal is reached. -Side-Chain Equalizer: -This determines how strongly the compressor should weight different audio frequencies when determining the input level. For example, to compress only when there is a loud bass sound, turn the Bass level up and/or reduce the MidRange and High levels. -Auto Makeup Gain: -When this option is selected compressor automatically makes up the gain lost in the compression process. Select this option if you want to amplify the compressor output to the original audio level.
Dynamic Range Compressor PresetsThe following presets have been defined for your convenience. A preset will change the settings of the dynamic range compressor, after which you can make further adjustments if necessary. The presets are: -Default:
21
-Pressing the "Default" button will cause the compressor to have no effect. It sets the output levels to be exactly the same as the input levels, and also resets the advanced settings to their defaults. -Fast Compressor: -This compression preset will cause any spikes over -20dB to be rapidly reduced, but will not cause distortion. It uses peak input level sensing and a fast attack, which will reduce the volume of transient sounds (such as a snare drum hit), but may also change their characteristic sound. Compare this with the Smooth Compressor preset below. -Smooth Compressor: -This preset reduces the volume more gradually when the signal climbs above -20dB. The slow attack time will mean that transients (such as snare drum hits) will not be changed, or if they are then they will be uniformly reduced, thus their characteristic sound will not be significantly altered. -Heavy Compressor: -This preset uses a lot of compression whenever the average volume climbs over -30dB, resulting in a very uniform dynamic range. This can be useful for making the quieter parts of music with a large dynamic range (such as classical music) easier to hear in noisier environments, such as in a car or a restaurant. -Hard Limit: -This preset does not allow any sounds to exceed -12dB. This may cause distortion due to clipping in some tracks. -Soft Limit: -This limit allows short spikes over -6dB, but will prevent longer durations of audio over this threshold. -Noise Gate: -This will remove soft sounds from a track. This can be useful for removing the crackle of a record player during silences, or background noises in a dictation.
22
Effects - EqualizerEqualizerAn equalizer changes the frequency response of a signal so it has different tonal qualities. After you select Effects menu -> Equalizer you will see a dialog containing three different Equalizer representations. Use the tabs at the top to select between the Visual Equalizer, Graphic and Parametric Equalizer views.Visual Equalizer Tap on any point to create a new band point. To remove a band point long press on it. To assist you with shaping the Equalizer graph in the way you want, there is a preset list that displays the most common sorts of filters used in the Equalizer graph. You can choose any preset filter from the list and then manipulate the filter to achieve the effect you desire. The list of filters to choose from and how you can shape them are explained below. Note that all fields where a frequency value is entered can have a maximum value of 20000 (Hertz). Graphic Equalizer The Graphic Equalizer uses discrete sliders to set the gain or attenuation of a signal at a particular frequency. You can select how many sliders you would like to manipulate by entering a value between 3 and 20 in the box at the top of the display. When you change the number of sliders you would like to utilize, the frequencies are automatically allocated to best span the audible frequency range from 20Hz to 20kHz. Selecting presets allows you to easily configure common filters such as low pass or high pass. Note that when you change the Graphic Equalizer, the Visual and Parametric Equalizer views are not changed, as the changes in the three views are not compatible. Parametric Equalizer The Parametric Equalizer is similar to the Graphic Equalizer, but with more control. Here you can adjust the frequency and bandwidth of the individual sliders by tapping on the frequency or Q values below each slider. Frequency must be set between 20Hz and 20,000 Hz. The Q parameter must be set between 0.05 and 20. A higher Q causes the gain or attenuation peak at the frequency to be much sharper, and therefore less likely to impact adjacent frequency content, while a lower Q applies the modification more smoothly across the frequency spectrum. -Band Pass Filter -Keeps only those frequencies in the audio between a certain range. -Start Frequency -The lower cutoff frequency value, in Hertz. -End Frequency -The upper cutoff frequency value, in Hertz. -Slope Length -The width of the slope extending from the lower and upper cutoff points, in Hertz. -Amplitude -The degree that the frequencies outside the cutoff range are suppressed. 6dB means the volume is reduced to one-half, 12dB means the volume is reduced to one-quarter. Maximum value is 60dB. -Band Stop/Cut Filter -Keeps all frequencies in the audio except those between a certain range. -Start Frequency -The lower stop frequency, in Hertz. -End Frequency -The upper stop frequency, in Hertz. -Slope Length
23

-The width of the slope extending from the lower and upper stop points, in Hertz. -Rejection -The degree that the frequencies inside the stop range are suppressed. 6dB means the volume is reduced to one-half, 12dB means the volume is reduced to one-quarter. Maximum value is 60dB. -High Pass Filter -Keeps only those frequencies in the audio above a certain value. -Pass Frequency -The point at which all frequencies above are to be kept, in Hertz. -Slope Length -The width of the slope extending from the pass frequency, in Hertz. -Low Pass Filter -Keeps only those frequencies in the audio below a certain value. -Pass Frequency -The point at which all frequencies below are to be kept, in Hertz. -Slope Length -The width of the slope extending from the pass frequency, in Hertz. -Notch Filter -Attenuates the frequencies in the specified range to very low levels and passes all other frequencies unaltered. There is no slope - frequencies are either attenuated or not. -Start Frequency -The lower cutoff frequency value, in Hertz. -End Frequency -The upper cutoff frequency value, in Hertz. -Boost Filter -Either attenuates or boosts frequencies in the specified range and passes all others unaltered. -Start Frequency -The lower boost/cut frequency value, in Hertz. -End Frequency -The upper boost/cut frequency value, in Hertz. -Slope Length -The width of the slope extending from the lower and upper boost/cut points, in Hertz. -Amplitude -The degree that the frequencies inside the boost/cut range are either boosted or cut. 6dB means the volume is boosted to twice the original amount, and 12dB means the volume is is boosted to four times the original amount. 20dB. -High Pass Shelf Filter -Attenuates signals of frequencies below the cut frequency and passes all others unaltered. -Start Frequency -The lower cut frequency value, in Hertz. -Slope -The width of the slope extending from the lower and upper cut points, in Hertz. -Rejection -The degree that the frequencies inside the cut range are cut. 6dB means the volume is attenuated to about half the original level, and 12dB means the volume is attenuated to about a quarter of the original level. -Low Pass Shelf Filter -Attenuates signals of frequencies above the cut frequency and passes all others unaltered. -Start Frequency
24

-The lower cut frequency value, in Hertz. -Slope -The width of the slope extending from the lower and upper cut points, in Hertz. -Rejection -The degree that the frequencies inside the cut range are cut. 6dB means the volume is attenuated to about half the original level, and 12dB means the volume is attenuated to about a quarter of the original level.If you are using the equalizer simply to drop lower frequencies, you should always try the High Pass filter first (Effects menu -> High Pass Filter), because it is better and faster for very low frequencies.
25

Effects - EnvelopeEnvelopeThe 'envelope' is the change in volume of the selected region over time. This can be used to make fine adjustments to the volume over time or even more crude changes like fade in or fade out.Select the region you want to change the volume over and use the Tools tab -> Envelope. Tap and drag on any point to adjust its volume (long press removes the point). Tap the Set Flat button to reset the volume and remove extra volume points.
26
Effects - Stereo PanStereo PanThe stereo pan effect allows you to change how loud the sound is that comes out the left or right speaker. For example if you had a stereo recording with all the sound coming out of only one speaker, you could use the pan effect to "center" the sound yourself. You can also make a centered sound change move one from speaker to the other as the sound file plays.Select the region you want to change the pan for and choose Effects -> Stereo Pan. Click on a point and move it upwards for an increase in volume on the left speaker, or move it downwards for an increase in volume on the right speaker.Please note the stereo pan effect only works on stereo files. If your file is not stereo you must first convert it to stereo by choosing Edit -> Convert Channels -> Stereo.
27

Effects - EchoEchoAn echo is a repeat of the sound after a short time (usually 400 - 1000ms). It sounds a bit like the person is in a large stadium or is shouting between two mountains.To add echo select the region and use the menu Effects -> Echo then specify the duration and amplitude of the echo. The duration is the length of time after which the sound repeats - usually this is between 400 and 1000ms. The amplitude can be between 1 - 99% (99 being a very loud echo).
28
Effects - Pitch ShifterPitch ShifterPitch Shifter is a sound effect that raises or lowers the pitch of audio signals. You can adjust pitch shifter speed by dragging the slider in the settings.
29
Effects - ReverbReverbReverb is many small reflections of the sound that come after a set time. It usually occurs when someone is speaking in a room, hall, etc. More reverb is called wet, no reverb is called dry. When you select the reverb effect, you will see a dialog with two tabs.
Simple The first tab of the reverb effect allows you to adjust the reverb level and time. The reverb level is the amplitude - 99 is very wet, 0 is dry. The time can be between 100 and 800ms - 200ms sounds like a small room or 800ms a large hall. If you add too much reverb it can sound like the person is in a pipe or in the bathroom.The Simple tab also includes preset options to choose from, depending on how large the space being simulated is. Click the play button at the bottom of the tab to preview the reverb effect on your audio.Room Design The second tab of the reverb effect allows you to specify the dimensions of a room, the position of the source and listener, and the room absorption with preset options for the materials that make up the walls, floor and ceiling of the room. Click the play button at the bottom of the tab to preview the reverb settings on your audio.
30
Effects - PhaserPhaserThe phaser sound effect is created by mixing a slightly delayed signal with the original. You can set the delay in ms (default 5ms) and the wet dry gain in percent. 100% is wet. 0% is off/dry.
31
Effects - FlangerFlangerA Flanger sound effect is similar to the phaser except that the delay is slowly modulated over time. You specify the starting delay time (default 5ms), the frequency of modulation in times per second (default 0.5Hz which is 2 seconds) the depth of modulation (default 70%) and the wet dry gain (100% for wet, 0% for dry, default 60%).
32
Effects - VibratoVibratoThe vibrato sound effect is a pulsating of the pitch at a depth and frequency specified by the user. The higher the Frequency (Hz) set, the more often the pulses will be heard, and the higher the Depth (semitones), the wider the fluctuation in pitch will be.
33
Effects - TremoloTremoloThe tremolo sound effect is similar to the vibrato effect, except that the amplitude pulsates rather than the pitch. The higher the Frequency (Hz) set, the more often the pulsation will be heard, and the higher the Depth (%), the deeper the fluctuation in volume.
34
Effects - DopplerDopplerThe doppler effect simulates the sound of a passing vehicle, which has a high pitch while approaching, shifting to a low pitch when traveling away from the listener. Specify the Velocity (in km/h) of the passing source; a higher velocity will result in a higher starting pitch and lower ending pitch. Adjust the Listener Horizontal and Vertical Positions to indicate the listener's horizontal and/or vertical position to the passing source; play around with the values to achieve different combinations of pitch.
35
Effects - Wah-WahWah-WahAs the name suggests, the effect modulates a specified frequency band within the sample, which results in the characteristic "Wah wah" sound. The effect is a bandpass filter with its center frequency (not to be confused with the center frequency parameter, below) alternating between a min frequency and max frequency (specified by the center frequency and depth parameters) and from max frequency to min frequency. The frequency of alternating direction is represented as a triangular wave with a frequency specified by the wah frequency parameter.
Resonance: also known as Q or emphasis, this parameter controls the resonant peak of the bandpass filter. This value determines the sharpness of the wah-wah effect. Higher values produce more resonant/peaky tones.Depth: this parameter determines the frequency range swept by the bandpass filter. Its range is specified as a percentage of the range (0 to center frequency). If the value of the percentage of the range (0, center frequency) is specified as X, the min and max frequencies are (center frequency - X) and (center frequency + X).Center Frequency: This parameter is the center frequency of the bandpass filter sweep, and is used to determine the min and max frequencies as mentioned above.Wah Frequency: This is the frequency of alternating the direction of the sweep, or the frequency of the wah-wah sound. It is the frequency of the triangular wave described above.
36
Effects - ChorusChorusThe chorus sound effect is used to make one voice or one instrument sound like 3 voices or instruments by playing the original with variably delayed and slightly pitch changed copies of the original.Note: Chorus is a very useful way to make a mono source sound more stereo. You should convert your file to stereo first before using Chorus.
37
Effects - DistortionDistortionWhile normally we do everything to reduce distortion, sometimes you want to add it. It is popular for use with guitars. The distortion is measured between 0.0 (off) and 1.0 (clipping). You also specify the level where it kicks in in dB.For a more consistent sound, you should apply Dynamic Range Compression first before you add distortion.
38
Effects - AM Radio EffectAM RadioThis simulates an AM Radio. We have made it accurately simulate a 'good' AM radio. To make it worse, apply the effect twice. For a really bad sound, paste mix some soft white noise (use the Tone Generator tool) to simulate bad reception.
39
Effects - Telephone EffectTelephoneThis simulates the audio down a telephone line. It simulates a 'good' telephone line. To make it worse apply the effect twice and paste mix soft white noise.
40
Effects - ReverseReverseThis effect reverses the selection in the same way playing a record or tape backwards would.
41
Effects - FadingFade InTo fade in use the menu Effects -> Fade In.
Fade OutTo fade out use the menu Effects -> Fade Out.
Fade Out and TrimThe fade out and trim option is a combined function which fades out over the selection then marks the end of the selection as the end of the file. This is frequently used at the end of music tracks.
CrossFadeThe CrossFade tool allows you to mix together voice and music in a variety of different ways. You can, for example:● Fade out a music track while fading in another track,● fade out a music track and cue in a voice track at full volume (or vice versa), or● overlay the end of one voice track with the start of another track.To use the tool, first select the region of audio you want to perform the crossfade on. If you want to crossfade between two files, you must combine the two files together first into one file. Next, go to Effects menu -> CrossFade. A window will appear, showing a graph and a number of data fields.The graph is divided into two sections, the top section shows the fading in part of the audio, the bottom shows the fading out. The area that the crossfade is to be performed on is highlighted in blue, and surrounded by markers showing the start and end of the crossfade region. There is a one second portion of the waveform on either side of the highlighted section, which is there to provide a better view of the crossfade.If you hover your mouse over any part of the graph, you can see what parts of the graph correspond to what time in the audio waveform.The data fields work as follows: -Start and End Selected Positions -Tells you the start and end times of the audio you selected in the waveform. Note: These times do NOT correspond to the start and end times you see in the graph window! Read on! -Gap Time -This says how long the crossfade region will be, in milliseconds. This time may be be modified when the crossfade is performed, if the fade in and fade out times are larger than this value. Note: If this time is shorter than the audio you selected then the middle of the selected audio will be lost as a result of the crossfade. -Fade In Time -The length of time to fade in the end of the selected audio. For example, if you select 5000ms of audio and a Fade In Time of 1000ms, then the last 1000ms of your selection will fade in over the last 1000ms of the crossfade. -Fade Out Time -The length of time to fade out the beginning of the selected audio. -Fade Type -The shape of the transition over time of the fade in or out. You can select from Linear, Logarithmic, Expoential or Sinusoidal fade types. ● Linear - Volume change will occur evenly over time.● Exponential - Volume change will start slowly to begin with and then rapidly become faster
towards the end.
42

● Sinusoidal - Volume change will start slowly, then increase rapidly, then slow down again towards the end.
● Logarithmic - Volume change will start rapidly and slow down towards the end.So with the above information in mind, the crossfade will work as follows:1. A Fade-Out buffer will be created with a length of the Gap Time. At the start of the buffer
will be the start of your audio selection, fading out over the Fade Out Time.2. A Fade-In buffer will be created with a length of the Gap Time. At the end of the buffer will
be the end of your audio selection, fading in over the Fade In Time.3. The Fade-In and Fade-Out buffers will be mixed together, and replace your audio selection.
43
Effects - Speed and Pitch ChangingSimple Speed and Pitch ChangeThis plays the recording faster or slower which in turn increases or decreases the pitch too. This function is useful to correct slow or fast tapes.
Speed ChangeNormal speed changes (i.e. "Simple Speed and Pitch Change" above) changes the pitch in proportion to the speed. If you want to change the speed but keep the pitch the same use this function. Speed can change the duration of the audio. The time duration (in seconds) can also be adjusted using this effect.
Pitch ChangeThis changes the pitch of the recording without changing the speed (i.e. the converse of the above). Change of semitones can also be adjusted using this effect
Pitch Speed ProfileThis allows you to specify how much to change pitch, speed, or pitch and speed at any point in the file, using a graph.
44
Effects - Reduce VocalsReduce VocalsIf you want to reduce the vocals from a music track you can use this effect. This effect will attempt to identify the voice in the left-to-right spectrum of a stereo recording and remove it. The recording must be stereo (from an original stereo source like a CD - simply converting a file to stereo will not work). It will also remove any instruments near the voice in the stereo spectrum.
Perform Only Simple Channel Subtraction - This option works best if the vocals are recorded in the center of the stereo recording with instruments spatially separated. If the stereo is simply a mono copied to the left and right channels, the lack of spatial separation will result in silence rather than a relative reduction in vocals.Note: it is impossible to remove the vocals perfectly without the original mix track. You will notice some instruments might be removed too and some vocal remain. The effect will also not work on some files which have previously encoded in a highly compressed form like mp3 (because this remove some stereo depth).
45

Effects - Voice ChangeVoice ChangeThe Voice Changer allows vocal distortion by changing pitch, semitones, cents, and timbre, by modulating tone, and adding whisper/noise to the voice.
46
Audio Cleanup - Noise ReductionThere are two ways of reducing noise. The slow but accurate "Spectral Subtraction" method - usually used where noise is really a problem - and the fast "Multiband Noise Gates" method - usually just automatically on batch voice recording jobs.Sometimes using both (spectral always must be first) then multiband gates works very well. -Spectral Subtraction - -Automatic Method -This approach will automatically estimate what is noise and what is not. It usually works well on voice and is nice and easy to use; just select the region and apply the effect. -Manual Method -To use this you must: 1. Select a short part of 'noise only'. Usually this is from a gap in the audio.2. Select Effects -> CleanUp -> Noise Reduction -> "Grab noise sample from selected area
for spectral subtraction".3. Select the entire file.4. Select Effects -> CleanUp -> Noise Reduction -> "Spectral subtraction based on noise
sample". -Multi-Band Noise Gate -Multi-Band Noise Gate removes all the audio data below a given threshold in the audio file. A good noise threshold for most audio files is usually between -30dB and -20dB.Noise GateA noise gate is a filter which controls the volume of an audio signal. Any part of your audio which is below the Threshold will be attenuated by the amount you specify. -Threshold -Audio falling below this threshold will be attenuated. -Hold -The period of time (in milliseconds) to wait before applying the attenuation. -Release -The period of time (in milliseconds) taken to fully apply the attenuation. -Attack -The period of time (in milliseconds) taken to fully remove the attenuation. -Attenuation -The amount to attenuate the audio signal when it falls below the threshold.Noise Removal WizardAn easy-to-use noise removal wizard can be found on the Tools tab. The wizard guides you through choosing the best parameters based on noise type description, then applies the noise reduction. To use the wizard, tap the Noise Removal button on the Tools tab.
47
Audio Cleanup - Click/Pop RemovalAuto Click/Pop RemovalThis tool allows you to apply a repair of a single click/pop artifact. To use it properly, you must zoom right in to the artifact and select a small region around it. Then select Tools menu -> Auto Click/Pop Removal. The repair will be performed straight away.
Parametric Click/Pop RemovalThis tool is designed to remove click and pop sounds from recordings. It is ideal for those who have recorded music onto their computer from LP records and want to repair any defects caused by dust and scratches on the vinyl.To use the tool, click Tools menu -> Parametric Click/Pop Removal. In the window that appears, you can configure settings for the following fields: -Click Sensitivity -This is the degree of aggressiveness (as a percentage) that will be applied by the tool when searching for click and pop artifacts. If you don't know what to enter, you can start by leaving it at 50%. The more a piece of audio is damaged, the higher you may have to set it. Moderately damaged audio can require settings of 60% - 80%. Be careful though - if you set it too high, the tool will start thinking parts of the audio are actually clicks/pops. If you set it too low of course, the tool will think some clicks/pops are part of the audio. Try experimenting to find the right value, and note that the level you apply to one file may be different to the level you apply in another file. -Maximum Click Length -This is the maximum length that a click lasts in your audio, in milliseconds. As a general guide, use 450ms if you don't know what to enter. 350ms is appropriate for audio with only small amounts of defects, whereas 550ms or 650ms is appropriate for audio with lots of defects.
48

Audio Cleanup - High-Pass FilterHigh-Pass FilterA high-pass filter (sometimes called a low cut filter) removes all low frequencies below a specified Hz. This is useful if you want to make your recording sound 'clearer' or less 'muddy'. It is very usual to use a high-pass filter of about 250Hz on all voice recordings to improve intelligibility.
49
Audio Cleanup - Low-Pass FilterLow-Pass FilterA low-pass filter removes all high frequencies above a specified Hz. This is useful if you want to make your recording sound 'clearer'. It is very usual to use a low-pass filter of about 1600Hz on all voice recordings to improve intelligibility.
50
Audio Cleanup - Automatic Gain ControlAutomatic Gain ControlAutomatically adjusts the amplitude to compensate for variations at the input, in order maintain an suitable amplitude at the output. Changes the level of the file up and down over periods of time (time frame: 5 seconds)De-esser is applied to avoid the AGC increasing "S" sounds and making them too loud (default for voice: 2200Hz).High-Pass filter is applied to avoid low frequency bass making the AGC reduce volume (default for voice 450Hz).Other features which can be used with AGC:● Normalization – changes the level of the whole file equally (time frame: whole file duration)● Dynamic Range Compressor – instantaneous regulation of volume so softer sounds are
increased and louder sounds are decreased (time frame: 100ms)
51
Audio Cleanup - DC Offset CorrectionDC Offset CorrectionOften when you record audio using bad electronics the recording has a constant 'DC' level throughout the file. Because the ear cannot hear this you will not notice it until you attempt to edit in other audio when you can hear horrible clicks. If you think this is the problem you can run DC Offset Correction over the entire recording before you begin to edit. Another (and possibly better) way to deal with this problem is to run a high pass filter (say at 50Hz) over the recording.
52
NCH Sound Library - NCH Sound LibraryThe NCH Sound Library is a collection of thousands of royalty-free sound effects that can be added to your project. Once you have opened the library, you'll see the following:
Folder Tree On the left hand side, each folder represents a category of sounds. Expand a folder to either see its subfolders or a list of sounds it contains. Sound List On the right hand side, all the sounds in the currently selected category are listed. This will be empty until a category is selected. Preview Sound Select a sound in the list then tap the Play button to hear it. When you have finished, tap Stop . Download Select a sound in the list then tap the Download button to download the sound (if it hasn't already been downloaded).
53
Screen References - Color Picker DialogColor Picker Dialog The color picker is divided into multiple parts, with several ways available to choose a color: Visually Adjusting Color
The top half of the dialog consists of 2 colored boxes, one that lets you pick any point in a 256 x 256 square and the other that works as a long slider. Which colors are displayed in these two boxes depends on which radio button is selected (see below), but in all cases the position of the slider will change the colors available in the square box. Which ever point is selected in that square box is the selected color.
Adjusting by RGB or HSV Underneath the square colored box, there is a series of 6 options (1 each for hue, saturation, value, red, green, and blue) that each contains a radio button, a slider, and an up-down number control. If one of the 3 HSV radio buttons is selected, that value will be represented by the visual slider (see above) while the other two values will be the axes of the square color box. The controls work the same way if one of the RGB radio buttons is selected. You can also adjust these values with the sliders provided next to the labels, as well as the up/down controls next to the sliders. Any adjustment of these values will update the visual controls, and any adjustment of those visual controls will update these values.
Selected Color The selected color is displayed to the right of the RGB and HSV controls. The box is split diagonally, with the upper left section labeled New (the color you are creating), and the bottom right section labeled Current (the color that already exists, and will continue to be selected if you Cancel the dialog). Beneath that is the Hex Value of the selected color (you can also enter any valid hex value there to update the selected color). There is an eyedropper button to the right of the selected color that will allow you to set the selected color by sampling anywhere on the desktop.
User-defined Color Palette At the bottom of the dialog you will find a series of 12 colored rectangles alongside a button titled Set to Swatch. These comprise the user-defined color palette, and allow you create and save (these will persist even when WavePad is closed) your own custom colors. To set a swatch's color, first select that swatch by clicking it. Then choose your desired color, and finally click the Set to Swatch button. You can then load any of the saved colors by simply clicking on that swatch.
54

Screen References - Select StreamSelect an audio stream Audio Stream: Select an audio stream from the fileDon't ask me again Suppress the popup dialog to select audio stream
55
Screen References - Format SettingsThis is the dialog used to select an audio format for a file you are saving or importing. File Name: Enter a valid file name for the audio file.WAV/GSM Select this to set the WAV/GSM format. - Best (lowest) size.MP3 Select this to set the MP3 format.AIFF Select this to set the AIFF format.WAV/PCM Select this to set the WAV/PCM format. - Highest quality.Sample Rate: The sampling rate measured in kilo-hertz. Select 11, 22, or 44.1 kHz.Sample Size: The size of each sample measured in bits. Select 8, 16, 24, or 32 bits.Bit Rate: The number of kilobits per second. Select 16, 32, 4, or 128 kbps.Default Settings Restore the format settings to their default values.
56

Screen References - FTP SettingsProvide the FTP server address, e.g. ftp.nchsoftware.comProvide the port to use when connecting to the FTP server. The default is 21 for standard FTP and 990 for implicit SSL connections.Provide the username to use when logging into the FTP server.Provide the password to use when logging into the FTP server.Remember PasswordCheck if you want WavePad to remember your FTP account password.Select the kind of connection to use. Some FTP servers require a secure connection.Set the directory on the FTP server to upload to.
57

Screen References - Wavepad Options ~ RecordThe Record tab of the Options dialog is used to specify the recording options for Wavepad. You can set the record levels and the start/end tones here. . Record LevelsTrackbar for adjusting the strength of the microphone when recording.Trackbar for adjusting the strength of sound in the microphone before the recording starts.Reset SettingsUse this to reset the recording levels and sound tones to their default settings.
58
Screen References - Wavepad Options ~ SortThe Sort tab of the Options dialog is used to specify how the items in the list are sorted. Sort ByCreation Date / TimeUse this to sort the main list by the created date / time of the recordings.NameUse this to sort the main list by the name of the recordings.DurationUse this to sort the main list by the duration of the recordings.ReverseSort In Reverse OrderUse this to sort the main list in reverse order of whatever is selected in the 'Sort By' option.
59
Screen References - Wavepad Options ~ SendThe Send tab of the Options dialog has the settings for emailing the recordings. Email SettingsProvide the email address to send to.FTP SettingsProvide the FTP server address, e.g. ftp.nchsoftware.comProvide the port to use when connecting to the FTP server. The default is 21 for standard FTP and 990 for implicit SSL connections.Provide the username to use when logging into the FTP server.Provide the password to use when logging into the FTP server.Remember PasswordCheck if you want WavePad to remember your FTP account password.Select the kind of connection to use. Some FTP servers require a secure connection.Set the directory on the FTP server to upload to.Test FTP SettingsPress this button to test the FTP settings you entered above.
60
Screen References - Wavepad Options ~ OtherThe Other tab of the Options dialog has some additional settings for the automatic naming of new recordings. Auto NamingSpecify the default name of a new recording. It will be followed by a number.SampleTap this to view a sample of what a new recording name will look like.Reset NumberTap this to reset the numbering used with the default names of new recordings.
61