multi-video i/o, text overlay/capture/record - … i/o, text overlay/capture/record ... support...
TRANSCRIPT

Multi-Video I/O, Text Overlay/Capture/Record
Model 2246 | Rev.M | August 08

Table of ContentsTable of Contents ............................................................................................................................................. ii Limited Warranty .............................................................................................................................................. 5 Special Handling Instructions ........................................................................................................................... 6 System Requirements ....................................................................................................................................... 7
Normal Operation ......................................................................................................................................... 7 Software Development ................................................................................................................................. 7
Introduction ....................................................................................................................................................... 8 Functional Overview ........................................................................................................................................ 9
Video outputs ................................................................................................................................................ 9 Host communication ................................................................................................................................... 11 Signal terminations ..................................................................................................................................... 11
Software .......................................................................................................................................................... 12 Board ........................................................................................................................................................... 12 Input ............................................................................................................................................................ 12
Composite 0 ............................................................................................................................................ 13 Composite 1 ............................................................................................................................................ 13 SVideo 0 ................................................................................................................................................. 13 SVideo 1 ................................................................................................................................................. 13 DV ........................................................................................................................................................... 13 SDI .......................................................................................................................................................... 13 HDSDI .................................................................................................................................................... 13 HDSDI2 .................................................................................................................................................. 13
Output ......................................................................................................................................................... 13 DVI Settings ............................................................................................................................................... 14
1280x1024 .............................................................................................................................................. 14 720x480 .................................................................................................................................................. 14 720x576 .................................................................................................................................................. 14 1600x1200 .............................................................................................................................................. 14 1920x1080 .............................................................................................................................................. 14 DVI Test Pattern ..................................................................................................................................... 14
Levels .......................................................................................................................................................... 14 Brightness ............................................................................................................................................... 14 Saturation ................................................................................................................................................ 14 Contrast ................................................................................................................................................... 14 Hue .......................................................................................................................................................... 14
MPEG Settings ........................................................................................................................................... 15 Bitrate ..................................................................................................................................................... 15 MPEG 1 .................................................................................................................................................. 15 MPEG 2 .................................................................................................................................................. 15 MPEG 4 .................................................................................................................................................. 15
Run Settings ................................................................................................................................................ 15 Mute audio .............................................................................................................................................. 15 Display video .......................................................................................................................................... 15
Record Settings ........................................................................................................................................... 15
2

Video Only .............................................................................................................................................. 15 Audio Only ............................................................................................................................................. 15 Both Video and Audio ............................................................................................................................ 15
Streaming .................................................................................................................................................... 16 Start ......................................................................................................................................................... 16 Stop ......................................................................................................................................................... 16
Record ......................................................................................................................................................... 16 Start ......................................................................................................................................................... 16 Pause ....................................................................................................................................................... 16 Resume ................................................................................................................................................... 16 Stop ......................................................................................................................................................... 17 Mb ........................................................................................................................................................... 17 Manual .................................................................................................................................................... 17 Length ..................................................................................................................................................... 17
Playback Video ........................................................................................................................................... 17 Filename ................................................................................................................................................. 17 Select File ............................................................................................................................................... 17 Delete File ............................................................................................................................................... 17 Start ......................................................................................................................................................... 17 Pause ....................................................................................................................................................... 18 Slow ........................................................................................................................................................ 18 FFWD ..................................................................................................................................................... 18 Refresh .................................................................................................................................................... 18 Stop ......................................................................................................................................................... 18 Slider Control .......................................................................................................................................... 18
Display Picture ............................................................................................................................................ 18 Filename ................................................................................................................................................. 18 Select File ............................................................................................................................................... 18 Delete File ............................................................................................................................................... 18 Show ....................................................................................................................................................... 19 Stop ......................................................................................................................................................... 19 Duration .................................................................................................................................................. 19
Take Snapshot ............................................................................................................................................. 19 Take ........................................................................................................................................................ 19 Freeze ...................................................................................................................................................... 19 Merge ...................................................................................................................................................... 19
Captions ...................................................................................................................................................... 20 Add Text ................................................................................................................................................. 20 Line 1 ...................................................................................................................................................... 20 Line 2 ...................................................................................................................................................... 20 Line 2 Check Box ................................................................................................................................... 20 Add Image .............................................................................................................................................. 21 X ............................................................................................................................................................. 21 Y ............................................................................................................................................................. 21 TxtColor .................................................................................................................................................. 21 BackColor ............................................................................................................................................... 21 Transparent ............................................................................................................................................. 21 Font ......................................................................................................................................................... 21 MPEG ..................................................................................................................................................... 21 Still .......................................................................................................................................................... 21 Monitor ................................................................................................................................................... 21 Clear ........................................................................................................................................................ 21 List .......................................................................................................................................................... 22 Test ......................................................................................................................................................... 22 Test2 ....................................................................................................................................................... 22
Audio Settings ............................................................................................................................................ 22
3
Line In ..................................................................................................................................................... 22 Mic In ...................................................................................................................................................... 22 Mic In with Boost ................................................................................................................................... 22
Video Positioning and Clipping .................................................................................................................. 22 SetVidPos ............................................................................................................................................... 22 ClipMPEG .............................................................................................................................................. 23 ClipDVI .................................................................................................................................................. 23
Video Pos .................................................................................................................................................... 23 X ............................................................................................................................................................. 23 Y ............................................................................................................................................................. 23 W ............................................................................................................................................................. 23 H ............................................................................................................................................................. 23
Video Clip ................................................................................................................................................... 23 L .............................................................................................................................................................. 23 T .............................................................................................................................................................. 23 R .............................................................................................................................................................. 23 B .............................................................................................................................................................. 23
Miscellaneous ............................................................................................................................................. 24 SwapWindow ......................................................................................................................................... 24 Aspect Ratio ........................................................................................................................................... 24 Get Video Lock ...................................................................................................................................... 24 Enum Inputs ........................................................................................................................................... 24 About ..................................................................................................................................................... 25 Exit ......................................................................................................................................................... 25
Settings ....................................................................................................................................................... 25 TLV320.INI ............................................................................................................................................ 25 DEC_NC.INI .......................................................................................................................................... 25 DEC_NS.INI ........................................................................................................................................... 25 DEC_PC.INI ........................................................................................................................................... 25 DEC_PS.INI ........................................................................................................................................... 25 ENC_NC.INI ......................................................................................................................................... 25 ENC_NS.INI – ....................................................................................................................................... 25 ENC_PC.INI ........................................................................................................................................... 25 ENC_PS.INI ........................................................................................................................................... 25
2246 Power On Sequence ............................................................................................................................... 26 2246 Standby Power ....................................................................................................................................... 27 Appendix A - Specifications ........................................................................................................................... 28 Appendix B - Connectors ............................................................................................................................... 32
Power (J1) Standby Power (J9) * .......................................................................................................... 32 USB 2.0 (J2) ............................................................................................................................................... 33 USB Link Indicators (J6) ............................................................................................................................ 33 Digital Video - SD/HD-SDI Input (J18) ..................................................................................................... 33 Digital Video - SD/HD-SDI Output (J17) .................................................................................................. 33 Analog Video I/O (J5) ................................................................................................................................ 33 Digital Video Interface Output – DVI (J7) ................................................................................................ 34 Digital Video Interface Output – DVI (J3) ................................................................................................ 34 Audio Input (J4) .......................................................................................................................................... 34 GPIO (J8) .................................................................................................................................................... 35
Appendix C - Software Installation ................................................................................................................ 37 Appendix D - Driver (Re-) Installation .......................................................................................................... 41 Appendix E – Technical Notes ....................................................................................................................... 42
4

Limited Warranty
Sensoray Company, Incorporated (Sensoray) warrants the hardware to be free from defects inmaterial and workmanship and perform to applicable published Sensoray specifications for twoyears from the date of shipment to purchaser. Sensoray will, at its option, repair or replaceequipment that proves to be defective during the warranty period. This warranty includes partsand labor.
The warranty provided herein does not cover equipment subjected to abuse, misuse, accident,alteration, neglect, or unauthorized repair or installation. Sensoray shall have the right of finaldetermination as to the existence and cause of defect.
As for items repaired or replaced under warranty, the warranty shall continue in effect for theremainder of the original warranty period, or for ninety days following date of shipment bySensoray of the repaired or replaced part, whichever period is longer.
A Return Material Authorization (RMA) number must be obtained from the factory and clearlymarked on the outside of the package before any equipment will be accepted for warranty work.Sensoray will pay the shipping costs of returning to the owner parts that are covered by warranty.A restocking charge of 25% of the product purchase price, or $105, whichever is less, will becharged for returning a product to stock.
Sensoray believes that the information in this manual is accurate. The document has beencarefully reviewed for technical accuracy. In the event that technical or typographical errors exist,Sensoray reserves the right to make changes to subsequent editions of this document withoutprior notice to holders of this edition. The reader should consult Sensoray if errors are suspected.In no event shall Sensoray be liable for any damages arising out of or related to this document orthe information contained in it.
EXCEPT AS SPECIFIED HEREIN, SENSORAY MAKES NO WARRANTIES, EXPRESSOR IMPLIED, AND SPECIFICALLY DISCLAIMS ANY WARRANTY OFMERCHANTABILITY OR FITNESS FOR A PARTICULAR PURPOSE. CUSTOMER’SRIGHT TO RECOVER DAMAGES CAUSED BY FAULT OR NEGLIGENCE ON THEPART OF SENSORAY SHALL BE LIMITED TO THE AMOUNT THERETOFOREPAID BY THE CUSTOMER. SENSORAY WILL NOT BE LIABLE FOR DAMAGESRESULTING FROM LOSS OF DATA, PROFITS, USE OF PRODUCTS, ORINCIDENTAL OR CONSEQUENTIAL DAMAGES, EVEN IF ADVISED OF THEPOSSIBILITY THEROF.
Third party brands, names and trademarks are the property of their respective owners.
5
Special Handling Instructions
The circuit board contains CMOS circuitry that is sensitive to Electrostatic Discharge (ESD).
Special care should be taken in handling, transporting, and installing circuit board to prevent ESDdamage to the board. In particular:
Do not remove the circuit board from its protective anti-static bag until you are ready toinstall the board into the enclosure.
Handle the circuit board only at grounded, ESD protected stations.
Remove power from the equipment before installing or removing the circuit board.
6
System Requirements
Normal Operation Minimum processor: Pentium III 600 MHz. A Pentium IV 2 GHz or faster is
recommended.
Operating system: Windows 2000, or Windows XP. Windows 98 or NT are not supported.
Minimum system RAM: 128 Mbytes. 256 Mbytes or more is recommended.
Video card: A high performance video card is highly recommended. The video card mustsupport Microsoft DirectX and should have at least 64MB of video ram
DirectX: Version 8.1 or more recent. If you do not already have DirectX installed on yoursystem (Windows XP installations include DirectX), you must obtain a DirectX runtimepackage from Microsoft. The exact version you need depends on your operating systemand can be downloaded directly from Microsoft’s web site at the following URL:http://www.microsoft.com/downloads/search.aspx?displaylang=en&categoryid=2
MPEG2 Decoder: Windows does not come with a default MPEG2 Decoder. For bestresults, use one of the supported decoders (Intervideo or FFDshow).
.NET 2003 MFC classes and runtime libraries.
ffdshow: http://ffdshow-tryout.sourceforge.net/
DivX Video Decoder(DivX Video Decoder can be downloaded at www.divx.com
Microsoft Windows Media Player 8.1 or later(Can be downloaded at www.microsoft.com/downloads)
Software Development Microsoft Visual Studio .NET
Microsoft Windows Server 2003 DDK (Driver Development Kits)
Microsoft DirectX SDK version 9.0
InterVideo WinDVD Creator 2(The setup is included in the CD InterVideoWCreator\ folder )
7

Introduction
Sensoray’s 2246 Video platform allows users to capture still images, or full motioncompressed video from a variety of analog and digital video sources into a hostcomputer. The 2246 is designed to work with HDTV formatted to the 1080i standardplus two analog video sources for real-time display and storage. HDTV from a serialdigital (SDI) source is scaled and formatted for high-resolution LCD displays. Scaleddata is simultaneously compressed to one of three MPEG or motion JPEG formatsfor efficient archiving. The 2246’s processor adds bit-map images and text to thedisplayed image. Snapshots from the HDTV stream may be displayed and archived.The 2246 also accepts two audio signals and synchronizes them to the MPEGstream
The 2246 is compatible with the following video standards:
Analog Composite and S-Video: NTSC-M, NTSC-Japan, PAL-B, PAL-D,PAL-G, PAL-H, PAL-I, PAL-M, PAL-N, SECAM;
Digital Video: SD-SDI, HD-SDI , SMPTE292M and SMPTE259M.
Digital Video (Output only): DVI-D
8

Functional Overview
Figure 1
Video inputs
Five types of video inputs are available including; Composite video (PAL and NTSC),S-video (PAL and NTSC), SD-SDI, and HD-SDI.
Video outputsFive types of video outputs are available including an SDI video stream containingthe bit-map image and text overlays. The interface to an LCD display is via a DVI portand the interface to the host computer is via a USB port. Composite video and S-video outputs are also provided.
9

Audio inputs
Any one of three audio sources may be embedded into the MPEG stream. A high-level microphone signal or stereo audio source is synchronized to the videostreaming during MPEG encoding. The audio stream embedded within the ancillarydata from the HDTV camera can be added to the MPEG stream in place of theanalog sources.
Audio output
Sensoray’s MPEG decoding software that runs on the host PC can decompress thevideo and audio.
The 2246 does not directly produce an analog output.
General purpose digital I/O
There are two electromechanical relays each of which has two form-C contacts.Eight opto-isolated inputs are available for general purpose inputs.
Video Selection
The input’s 5:1 multiplexer allows input selection between one SD/HD-SDI digitalvideo input, two composite analog inputs, and two sets of S-Video analog videoinputs. This makes it possible to connect up to five video sources to the frame andvideo capture.
Image processing
The 2246’s scan converter guarantees the DVI output is synchronized to LCDdisplays. Hence, 25 frame/second PAL sources will be displayed at the highest LCDrefresh rate. Real-time image down scaling of the HDTV stream prepares it forMPEG compression. A second video scaler is available for up or down scaling ofimages sent to the LCD display.
Captured images may be annotated with both text and bit-map image sent by thehost via the USB port. Annotated image streams can then be displayed andcompressed to MPEG or motion JPEG standards.
Once selected, the desired video source streams into the host PC via USB 2.0. Theapplication software allows the capture of color images and video streams intocomputer storage. The video stream is hardware compressed into MPEG-1,MPEG-2, or MPEG-4.
AGC, contrast, saturation is programmable via software control.
10

Software control
The 2246 Software SDK is a software development kit that has been developed toallow OEM’s to build their own applications for using the 2246 video capture boardwithout knowledge of the driver or DirectX
The 2246 SDK demo or sample application is a working windows application thatallows you to display in real-time multiple MPEG-1, MPEG-2, and MPEG-4 videostreams from the 2246 board. Additionally, it allows for Disk Space Management,manual and automated recording of the MPEG streams, selectable video inputsources, uncompressed frame capture, and playback.
The 2246SDK sample application is a simple MFC (Microsoft Foundation Classes)windows application. The source code for the application is included anddemonstrates the usage of the 2246SDK API (application program interface)functions.
Host communicationThe 2246’s USB interface makes it immune to changing computer bus standardssuch as the PCI bus. It is well suited for use with single-board computers that do nothave a PCI bus. Also, the 2246 may be remotely located and connected to a hostcomputer via its high-speed USB link.
Signal terminationsAn optional accessory board, model 2246TA, facilitates signal connections. It breaksout the high-density connectors into commonly used connectors such as BNC’s,audio jacks, DVI connector, and the high speed serial digital interface. See theConnectors section below.
11

SoftwareThe 2246 Demo application showcases the 2246’s capabilities.
The Demo application also has the capability to display live video from the 2264 or a1394/Firewire camera, or from a stored file.
Figure 2
BoardSet to Board 0 if only one 2246 installed. If multiple 2246 boards are installed,this will be a drop-down list box containing the ID of the board the Demoapplication will send it’s messages to.
InputThe video input groupbox allows he user to select the input video stream to beprocessed.
Once the video input has been selected from the drop down selection box, it can bemodified to interpret the input video source as PAL or NTSC. This is done using thePAL and NTSC radio buttons.
12

In addition, the SDI input selection can also be modified with the Colorbar check box.When this is done, (SDI selected with Colorbar checked), the 2246 will enable ahardware generated colorbar pattern that will flow from the input IC, through theprocessing elements, to the output.
Composite 0
Select NTSC or PAL composite video from ConnecterJ4 Pin - IN_CVBS0.
Composite 1
Select NTSC or PAL composite video from ConnecterJ4 Pin - IN_CVBS1.
SVideo 0
Select NTSC or PAL SVideo from connecter J4. Pins: IN_Y0 and IN_C0.
SVideo 1
Select NTSC or PAL SVideo from connecter J4. Pins: IN_Y1, and IN_C1.
DV
Display streaming video from an external video source connected to your hostcomputers 1394/Firewire port. (This input is unaffected by the PAL and NTSCradio buttons, and the Colorbar check box.)
SDI
Select the ECL or LVDS serial data input signals containing serial SDTVcomponent digital video conforming to SMPTE 259M.
HDSDI
Select the ECL or LVDS serial data input signals containing serial HDTVcomponent digital video conforming to SMPTE 292M with a frame rate of59.98Hz.
HDSDI2
Select the ECL or LVDS serial data input signals containing serial HDTVcomponent digital video conforming to SMPTE 292M with a frame rate of50Hz or 60 Hz.
OutputOnce the video input source has been selected, the 2246 will ‘echo’ the selectedanalog input source to both the composite output (J5 Pin OUT_CVBS), theSVideo output (J5 Pin OUT_Y and OUT_C), the DVI output (J3 and J7), and theSDI output (J17).
13

DVI SettingsThe DVI settings groupbox allows the user to control the 2246’s video scalinghardware. Depending on the input video selection, the video scaling hardware willadjust the frame rate and the horizontal and vertical sizes to match the selectedoutput resolution. This is done via multiple interpolation and decimation techniques.
1280x1024
Output DVI-D video formatted for 1280x1024 resolutions
720x480
Output DVI-D video formatted for 720x480 resolutions
720x576
Output DVI-D video formatted for 720x576 resolutions
1600x1200
Output DVI-D video formatted for 1600x1200 resolutions
1920x1080
Output DVI-D video formatted for 1920x1080 resolutions
DVI Test Pattern
Configure video scaling hardware to output a video test pattern for the DVI-Dport. This function is independent of the video inputs and outputs.
LevelsThe Levels groupbox allows the user to adjust the 2246 video processing functions.
Brightness
Adjusts the Brightness setting to a value between 0 and 255. A nominal value equals 128.
Saturation
Adjusts the Cr saturation and the Cb saturation setting to a value between 0and 255. A nominal value equals 128.
Contrast
Adjusts the Contrast setting to a value between 0 and 255. A nominal value equals 128.
Hue
Adjusts the Cr Hue and Cb Hue settings to a value between 0 and 255.
14

A nominal value equals 128.
MPEG SettingsThe Mpeg Settings groupbox allows the user to adjust the type and quality of thehardware MPEG encoder.
Bitrate
The Bitrate variable sets the target bitrate of the constant bitrate algorithm onthe hardware MPEG encoder. Only values greater than zero are supported.
MPEG 1
Selects the MPEG 1 encoding standard.
MPEG 2
Selects the MPEG 2 encoding standard.
MPEG 4
Selects the MPEG 4 encoding standard.
Run SettingsThe Run Settings groupbox allows the user select what audio/video componentsare output by the application when the Streaming/Start button is activated.
Mute audio
When checked, this option disables the input audio stream from the 2246from being played to the host PC’s speakers..
Display video
When checked, this option enables the host PC to display the incomingMPEG stream.
Record Settings
Video Only
When selected, this option removes the audio component from the outputMPEG stream saved to disk.
Audio Only
When selected, this option removes the video component from the outputMPEG stream saved to disk.
Both Video and Audio
When checked, this option records both the audio and video components, ofthe output MPEG stream, to disk.
15

StreamingThe controls in the Stream groupbox, allow the user to start and stop the MPEGAudio/Video stream from the 2246 to the host PC.
Selecting a new Input video selection will cancel the current incoming MPEGstream (Same a pressing Stop)
The Level setting may be changed without affecting the current MPEG stream.
The Text and Image Captioning option may be changed without affecting thecurrent MPEG stream.
Start
When pressed, this button initializes and starts an MPEG stream from the2246 to the host PC using the settings defined in the Input, Run, Record, andLevel’s groupboxes.
The stream is displayed in the application window in one of two locationsdepending on the SwapWindow button.
Stop
When pressed, this button stops the MPEG stream from the 2246 to the hostPC and clears the video display.
RecordThe controls in the Record groupbox, allow the user to start, pause, resume, andstop the recording of the current MPEG Audio/Video stream, from the 2246 to thehost PC, to a file.
Start
When pressed, this button begins saving the configured MPEG stream fromthe 2246 to the host PC’s file system. The default file is
\test.mpgIf this file already exists, an incrementing number, starting with 1, will beappended to the base name ‘test’.
Pause
When pressed, this button stops the MPEG stream from the 2246 from beingsaved to the file, while keeping file open and ready continue recording.
Resume
When pressed, this button resumes recording the MPEG stream from the2246 to the host PC’s current file.
Resume only functions after the Pause button has been pressed.
16

Stop
When pressed, this button stops recording the MPEG stream from the 2246to the host PC and then closes the file.
Mb
This field contains the maximum number of Megabytes to record/save to afile. When set to zero, the file size is only limited to by the disk size. When notzero, the action taken when the file size reaches this value depends on theBreak radio button setting.
Manual
When selected, this break setting forces recording to continue until stoppedby pressing the Record ‘Stop’ button. If ‘Mb’ is non-zero, when the file beingrecorded to reaches the size (in Megabytes) set by ‘Mb’, then the file isclosed, and recording continues to another file with a filename incrementnumber appended. This process continues until Record ‘Stop’ is pressed oruntil there is no more Disk space.
Length
When selected, this break setting forces recording to stop after the file size (inMegabytes) set by ‘Mb’ is reached. In addition, this setting demonstrates theHardware driver API’s ability to notify the calling program, when recording hasfinished. The calling Demo program showing a recoding finished dialog boxsignifies this.
Playback VideoThe controls in the Playback Video groupbox, allow the user to start, pause,slow, fast forward, and stop the playback of the .MPG or .AVI selected with theFilename input box or the Select File button.
Filename
This field contains the name of the file to be used by the Playback Videocontrols. It can be set by the Select File button or entered manually.
Select File
This button opens a file open Dialog box that assists the user in selectingan .MPG or .AVI file to be played.
Delete File
This button deletes the file specified by Select File.
Start
When pressed, this button begins displaying the audio/video stream in thedesignated file to the application window in one of two locations depending onthe WindowSwap button.
17

Pause
When pressed, this button stops the playback of the open files audio/videostream, while keeping the file open and ready to continue.
Slow
When pressed, this button modifies the playback rate of the files audio/videostream.
FFWD
When pressed, this button modifies the playback rate of the files audio/videostream.
Refresh
When pressed, this button updates the Slider Control with the current locationplayback location. A location at the far left indicates the start of thefile/playback. A location at the far right indicates the end of the file/playback.
Stop
When pressed, this button stops playback of the files audio/video stream.
Slider Control
This control displays how much of the files audio/video stream has beendisplayed when the Refresh button is pressed.
When the user clicks on this control and drag/slides it to a new position, theapplication will search for the corresponding playback time and beginplayback from this new location. Locations at the far left indicate the start,locations at the far right indicate the end, and locations in the middlerepresent a ratio from start to end times in the file/playback file.
Display Picture
Filename
This field contains the name of the file to be used by the Display Picturecontrols. It can be set by the Select File button or entered manually.
Select File
This button opens a file open Dialog box that assists the user in selecting a.JPG or .BMP file to be displayed.
Delete File
This button deletes the file specified by Select File.
18

Show
When pressed, this button overlays the current video window with theselected file for an amount of time set by the Duration control.
Stop
When pressed, this button will stop the file from being overlaid before the timeduration expires.
Duration
This control sets the time duration, in seconds, that the selected file will beoverlaid onto the current video window.
Take Snapshot
Take
When pressed, this button saves a video frame from the current video streamon the 2246 to the host PC’s file system in two formats. The default files are
\snapshot.jpg\snapshot.bmp
If these files already exist, an incrementing number, starting with 1, will beappended to the base name ‘snapshot’.
Freeze
This control sets the time duration, in milliseconds, that the captured imagewill be displayed on the 2246’s output video streams, before resuming normalvideo output.
The output file will be created after this time has expired.
Merge
The Merge drop down selection box allows the user to select how the twoframes of the still image taken from the 2246 are to be combined into a singleimage.
None
This selection outputs both frames of the image, one after the other
Duplicate
This selection duplicates each line of Frame 0 twice.
Merge
This selection interlaces Frame 0 and Frame 1 into a single image. Eachline of Frame 0 goes to even numbered lines and each line of Frame 1goes to odd numbered lines.
19

Interpolate
This selection uses only Frame 0. Each line of Frame 0 is spread acrossevery even numbered line of the output frame. Then, for each oddnumbered line, adding the pixels above and below the odd numbered lineand dividing the result by 2 calculate the intermediate lines pixels’.
Custom
This selection causes the application to call a user defined sub-routine tocombine the two captured frames into one image. The function prototypeis as follows:
int custmerge_fields( BYTE *newf, int size, BYTE *f0, int h0,BYTE *f1, int h1, int w, int *pRetW, int *pRetH);
The default behavior of custmerge_fields is the same as the Merge/Mergeselection.
CaptionsMulti-line text can be created by embedding a new line character (via theLine 2 Check Box see bellow), or by embedding character 30 decimal.The later can be done directly in the Line 1 and 2 input boxes by holdingdown the ‘Alt’ key and typing ‘030’ on the numeric keypad.
If a text or graphic already exists at the same X, Y location specified whenadding another text or graphic overlay, the old overlay is over written.
Add Text
When pressed, this button starts overlaying the text in the Line 1 box andoptionally the Line 2 box with the selected MPEG, Still frame capture, andDVI Monitor output streams, depending on the corresponding userselections.
Line 1
Text entered into this field is overlaid on the selected video and still framecaptures when ‘Add Text’ is pressed.
Line 2
Text entered into this field is overlaid on the selected video and still framecaptures as a second text line beneath the first text line when ‘Add Text’ ispressed and the Line 2 Check Box is selected.
Line 2 Check Box
This check box selects whether to display the text, entered in the Line 2input box, below the text in the Line 1 input box.Functionally, this concatenates Line 1 and Line 2 with a line feedcharacter (\n = 10 dec) before calling the add text API.
20
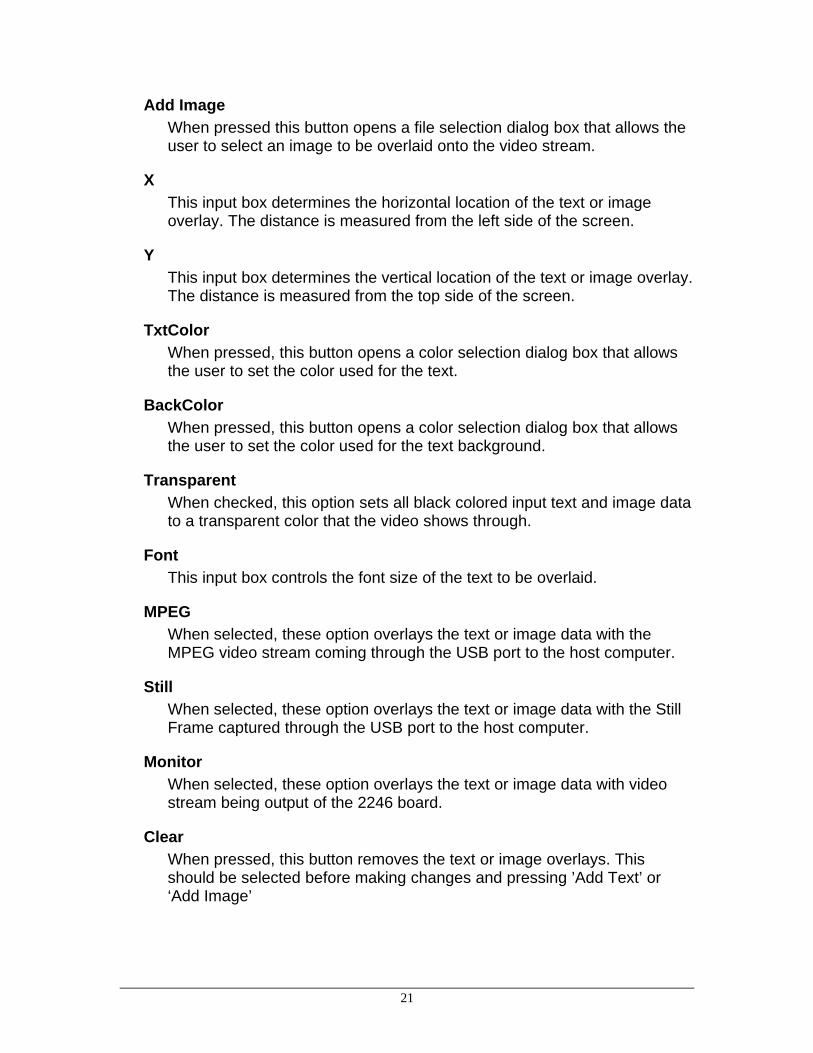
Add Image
When pressed this button opens a file selection dialog box that allows theuser to select an image to be overlaid onto the video stream.
X
This input box determines the horizontal location of the text or imageoverlay. The distance is measured from the left side of the screen.
Y
This input box determines the vertical location of the text or image overlay.The distance is measured from the top side of the screen.
TxtColor
When pressed, this button opens a color selection dialog box that allowsthe user to set the color used for the text.
BackColor
When pressed, this button opens a color selection dialog box that allowsthe user to set the color used for the text background.
Transparent
When checked, this option sets all black colored input text and image datato a transparent color that the video shows through.
Font
This input box controls the font size of the text to be overlaid.
MPEG
When selected, these option overlays the text or image data with theMPEG video stream coming through the USB port to the host computer.
Still
When selected, these option overlays the text or image data with the StillFrame captured through the USB port to the host computer.
Monitor
When selected, these option overlays the text or image data with videostream being output of the 2246 board.
Clear
When pressed, this button removes the text or image overlays. Thisshould be selected before making changes and pressing ’Add Text’ or‘Add Image’
21
List
When pressed, this button displays a dialog box containing the locationand content of all overlay windows..
Test
When pressed, this button adds a sample text overlay to each of theoverlay regions.
Test2
When pressed, this button continually generates and updates sample textand image overlays to each of the overlay regions. Pressing Test2 whileTest2 is running in the background will freeze the overlays.
Audio SettingsThe controls in the Audio Settings groupbox, allow the user to select which audioinput is selected and sent to the Host PC over the USB connection. These controlsare only selectable before data streaming is started.
Line In
When selected, the 2246 will sample the audio input on the Right and LeftLine inputs, and send the digital audio stream to the host PC formonitoring or recording purposes.
Mic In
When selected, the 2246 will sample the audio input on the Microphoneinput, and send the digital audio stream to the host PC for monitoring orrecording purposes.
Mic In with Boost
When selected, the 2246 will sample the audio input on the Microphoneinput with an amplification of 20 dB, and send the digital audio stream tothe host PC for monitoring or recording purposes.
Video Positioning and ClippingThe controls in the Video Pos (position) and Video Clip groupbox, allow the user toselect where the video is displayed within the video output window, and whether toclip the edges.
SetVidPos
Reads and applies the Video Pos. X, Y, W, H parameters and the VideoClip L, T, R, B parameters.
22
ClipMPEG
Reads the Video Clip L and R parameters and writes them to the 2246’sMPEG hardware Clip registers.
ClipDVI
Reads the Video Clip L and R parameters and writes them to the 2246’sDVI hardware Clip registers.
Video Pos
X
Sets the left most position of the displayed video, relative to the enclosingwindow handle’s position.
Y
Sets the top most position of the displayed video, relative to the enclosingwindow handle’s position.
W
Sets the horizontal Width (in pixels) of the displayed video.
H
Sets the horizontal Height (in pixels) of the displayed video.
Video Clip
L
Sets the number of pixels, at the video’s left most position, to be skippedwhen the video is displayed. (The video is stretched to fill the target sizeset by X, Y, W, and H).
T
Sets the number of pixels, at the video’s top most position, to be skippedwhen the video is displayed. (The video is stretched to fill the target sizeset by X, Y, W, and H).
R
Sets the number of pixels, at the video’s right most position, to be skippedwhen the video is displayed. (The video is stretched to fill the target sizeset by X, Y, W, and H).
B
Sets the number of pixels, at the video’s bottom most position, to beskipped when the video is displayed. (The video is stretched to fill thetarget size set by X, Y, W, and H).
23

Miscellaneous
SwapWindow
The SwapWindow button showcases the software API’s ability to move thevideo clipping window. When video is being displayed, the Demo applicationis actually displaying the video to two windows, but is clipping off one of them.By Pressing the SwapWindow button, the user is toggling the clipping regionfrom one video/window location to the other.
Aspect Ratio
When pressed, the application toggles whether the Video Mixing Renderertries to maintain the original aspect ratio or not.
This setting applied to the displayed video only, and will not affect therecorded video or snapshot images.
Get Video Lock
When pressed, the video status of the 2246’s current channel is requested. Ifthe 2246 is locked onto the video signal, a message box indicating ‘VideoLocked’ is displayed. Other wise a message box indicating ‘No Video Input’ isdisplayed.
Enum Inputs
When pressed, the each of the video inputs of the 2246 is checks to seewhether a video signal is present and locked. A list is built, and the results aredisplayed in the corresponding list box. See Figure 3.
Figure 3
‘Locked’ indicates a valid video signal is detected.
‘Disc’ indicates either an invalid video signal or a disconnected input.
‘Comp0’ through ‘HDSDI’ indicate the various video inputs of the 2246.
24

About
When pressed, the application displays a dialog box containing the currentversion of the Demo Application, the current version of the Middleware API,and the current version of the FPGA firmware..
Exit
When pressed, the application ends. This has the same function as pressingthe windows ‘X’ button in the upper right corner of the window.
SettingsThe controls in the Record groupbox, allow the user to start, pause, resume, andstop the recording of the current MPEG Audio/Video stream, from the 2246 to thehost PC, to a file.
TLV320.INI
This file, located in xxx, contains.
DEC_NC.INI
Input video NTSC Composite (default to Composite channel 0)
DEC_NS.INI
Input video NTSC S-Video (defaults to SVideo channel 0)
DEC_PC.INI
Input video PAL Composite (default to Composite channel 0)
DEC_PS.INI
Input video PAL S-Video (default to SVID channel 0)
ENC_NC.INI
Output Video NTSC Composite.
ENC_NS.INI –
Output Video NTSC SVideo.
ENC_PC.INI
Output Video PAL Composite.
ENC_PS.INI
Output Video PAL SVideo.
The 2246 software API loads the *.INI files when the application is initialized andwhen the video mode is changed. Since the input Channel in the ENC*.INI files is
25

hard coded, the API re-programs the video source register (0x02) after loading theENC*.INI file.
NOTE: Since the 2246 API uses the xx.INI files for programming the 2246, changesmade to DEC_NC.INI and ENC_NC.INI must be restored before running theapplication (calling the API).
2246 Power On SequenceThe 2246 contains on board LED’s that indicate power and status.
LED’s D11, D12, D15, D17, and D18 indicate the presence of board voltages 5v,3.3v, 1.2v, 2.5v, and 1.8v respectively.
After Power on, LED D16 will light up indicating that all power lines are OK.
Following power on, the 2246’s USB controller will start looking for a connectionto the host computer. LED’s D1, D2, D3, D4, D5, D19, D20 on the 2246 indicatethe status of the USB and the status of the Host computer’s Windows driver’s.Table-1 describes the LED sequence seen when Windows loads the 2246 USBdrivers.
MPEGUSB
SYNC
MPEGUSBERR
FPGAUSB
SYNC
FPGAUSBERR
MPEGUSB
LOAD
FPGAPROGLOAD
FPGAPROGLOAD
D1 D2 D3 D4 D5 D19 D20
- - - - - - - No Driver loaded. USB chips -Blank-
- - D3 - - - - Windows Load FPGA USB with USB ID 1
D1 - D3 - - - - Windows Load MPEG USB with USB ID 2
D1 - D3 - D5 - - MPEG ID Program lights D5
- - - - D5 - - Windows re-loading drivers for new USBID's
- - D3 - D5 - - FPGA/Control driver loaded
- - D3 - D5 D19 D20 FPGA initialization done and running
D1 - D3 - D5 D19 D20 MPEG/Streaming USB driver loaded
Table-1
Note:When Windows first sees the 2246 via the USB connection (either when the USBis plugged in for the first time or when the USB cable is moved to a new port),
26

Windows will prompt the user to install new drivers. See Driver Installationsection.
2246 Standby PowerWhen an optional 5v volt power source is connected to the Standby Powerjumper, the 2246 will provide minimal video forwarding from analog video input toanalog video output.
Analog video consists of all Composite and S-video signals.
27

Appendix A - SpecificationsVideo Inputs
HDTV 1920 x 1080 SDI
1080i 25/30 fps (25/29.97/30 fps)
Video formats supported
HDTV SMPTE 295M
HDTV SMPTE 274M
HDTV SMPTE 296M
SD-SDI SMPTE 259M
HD-SDI SMPTE 292M
SDTV SMPTE 125
SDTV ITU-R BT 601.5
SDI input specifications
Serial input data rate (max) 1.485 Gbps
Serial input voltage swing (max) 950 mVpp
Input impedance 75 Ohm, single ended
Composite
NTSC 720 x 480, 30 fps, +/- 1 Vpp
PAL 720 x 576, 25 fps, +/- 1 Vpp
S-Video 1.18 Vpp (when load - 75 Ohm)
Audio
Channels 2 stereo
Analog input voltage 1 Vpp
Input resistance 10 K Ohm, single ended
Video Outputs
DVI Output Specifications
DVI for LCD displays 60 Hz, 1280 x 1024 display supported at all input
28

DVI output voltage (max) 3.475 V
DVI output voltage swing 400~600 mVpp
ESD (HBM) 4,000 V
SDI Output Specifications
Serial output data rate (max) 1.485 Gbps
Serial output voltage swing (max) 880 mVpp
Output impedance 75 Ohm, single ended
Composite 1.25 Vpp (when load - 75 Ohm)
S-Video 1.18 Vpp (when load - 75 Ohm)
Termination impedance 75 Ohm
29

Additional specifications
Host Communication
USB 2.0 Control & compressed audio/video steam
Working speed 480 Mbits/s (SUB 2.0 high-speed)
Data output high voltage 2.4 V
ESD (HBM) 2,000 V
Digital I/O
Hard contact relay outputs 4 NO/NC contacts
Opto-isolated 8 sets
Image processing
Compression types MPEG-1 720 x 480/576 MPEG-2 720 x 480/576
MPEG-4 720 x 480/576 (480 NTSC, 576 PAL)
Scaling HDTV to D1 for MPEG compression
Ground
Digital GND and analog GND are connected on 2246 board
Four mounting holes are not connected to ground
Dimensions 6.5" x 5 "
Power requirements 5 V, 2.4 A
Standby Power requirements 3.3 V, 300 mA (optional)
Operating temperature 0ºC to 70ºC
30

The electrical interface for the 2246 audio channels is shown in Figure 4.
R182
4.99K,1%
C4747pF
R181
4.99K,1%
C4647pF
R179
4.99K,1%
C11510uF
U14
TLV320AIC23A
VD
D14
HP
VD
D8
MIC_BIAS17
MIC_IN18
RLINE_IN19
LLINE_IN20
AG
ND
15
HP
GN
D11
XTI/MCLK25
XTO26
CLKOUT2
DOUT6
BV
DD
1D
VD
D27
DG
ND
28
VMID16
DIN4
LRCIN5
LRCOUT7
BCLK3
RHPOUT10
LHPOUT9
RLINE_OUT13
LLINE_OUT12
SCLK24
SDIN23
MODE22
CS#21
C910.1uF
C454700pF
R178*
C691uF
T13
1
T12
1
R187
0
R180
4.99K,1%
R2810
C681uF
C6710uF
SUB-ADDRESS 0x1ASDASCL
J3
HEADER10M
13579
2468
10
R204100,1%
T11
1
T10
1
Figure 4
31

Appendix B - Connectors
Figure 5
Power (J1) Standby Power (J9) *
Pin Signal Pin Signal1 VCC5, 5 volts 1 VCC33, 3.3 volts2 GND 2 GND3 GND4 VCC5, 5 volts *Note: use of standby power is optional
32
J9
J1
J8
J3/J7
J4
J5
J18
J17
J2 J6

USB 2.0 (J2)
Pin Signal1 GND2 +Data3 -Data4 VCC
USB Link Indicators (J6)
Pin Signal1 USB MPEG Driver Loaded Status2 USB MPEG Channel Status3 USB FPGA/Control Channel Status4 VCC33 – (Output! For powering LED indicators)
Digital Video - SD/HD-SDI Input (J18)
Digital Video - SD/HD-SDI Output (J17)
Analog Video I/O (J5)
Pin Signal Pin Signal1 GND 2 IN_Y03 GND 4 IN_C05 GND 6 IN_CVBS07 GND 8 IN_Y19 GND 10 IN_C1
11 GND 12 IN_CVBS113 GND 14 NC15 GND 16 OUT_CVBS17 GND 18 OUT_Y19 GND 20 OUT_C
Notes:IN_Y0 / IN_C0 = Input channel 0 S-Video pairIN_CVBS0 = Input channel 0 Composite VideoIN_Y1 / IN_C1 = Input channel 1 S-Video pairIN_CVBS1 = Input channel 1 Composite VideoOUT_Y / OUT_C = Output S-Video pairOUT_CVBS = Output Composite Video
33

Digital Video Interface Output – DVI (J7)
Pin Signal Pin Signal1 VCC5 2 GND3 DVI_TX2+ 4 DVI_TX2-5 GND 6 GND7 DVI_TX1+ 8 DVI_TX1-9 GND 10 GND
11 DVI_TX0+ 12 DVI_TX0-13 GND 14 GND15 DVI_TXC+ 16 DVI_TXC-17 GND 18 GND19 GND 20 GND
Digital Video Interface Output – DVI (J3)
Standard DVI connector interface defined by DDWG DVI Revision 1.0
Audio Input (J4)
Pin Signal Pin Signal1 GND 2 L_LINE_IN3 GND 4 R_LINE_IN5 GND 6 NC7 GND 8 NC9 GND 10 MIC_IN
34

GPIO (J8)
Pin Signal Pin Signal1 INR0 2 IND03 INR1 4 IND15 INR2 6 IND27 INR3 8 IND39 INR4 10 IND4
11 INR5 12 IND513 INR6 14 IND615 INR7 16 IND717 NC 18 NC19 OUTNO0 20 OUTNC021 OUTC0 22 NC23 OUTNO1 24 OUTNC125 OUTC1 26 NC27 OUTNO2 28 OUTNC229 OUTC2 30 NC31 OUTNO3 32 OUTNC333 OUTC3 34 NC
Notes:
The opto-coupled inputs should be connected as shown in Figure 6. The value of R1 must becalculated to limit the current flowing through the LED to approximately 15mA. R1 may notnecessary if the internal resistor R3 limits the current enough.
35
INRx
INDx
R31K
2
1
3
4
8
76
5
16
15
14
13
12
11
10
9
OC2CNC7H001
Users Supply
R1
2246Users Gnd
S1
Figure 6

The output relays are configured as shown in Figure 7.
36
OUTCx
OUTNOx
CC0
QBR0
43 5
121
RE3TX2-5V
123
Q42N4401
D9 1N4002
VCC5
OUTNCx
2246
Figure 7
AROMAT RELAYSMODEL TX2-5V 2A CONTACTS

Appendix C - Software Installation1. Uninstall previous versions of the 2246 Application Demo.
To do this, go to "Control Panel -> Add or Remove Programs" and remove "2246".
2. Make sure the reference board is NOT connected to your computer when you installsoftware.
3. If not already installed, install the .NET Framework 1.1 on your computer.
To download the latest version of the .NET Framework 1.1, visit the following MicrosoftDeveloper Network (MSDN) Web site:
http://msdn.microsoft.com/netframework/downloads/updates/default.aspx
OR,
Run 'Windows Update' and select the '.Net Framework 1.1' option.
4. If not already installed, install DirectX Version 8.1 or greater.
The exact version you need depends on your operating system and can be downloadeddirectly from Microsoft’s web site at the following URL:http://www.microsoft.com/downloads/search.aspx?displaylang=en&categoryid=2
5. If not already installed, install FFDSHOW.FFDSHOW is a shareware project containing various audio and video codecs. It can bedownloaded from:http://ffdshow-tryout.sourceforge.net/
6. Run 2246API.exe file on the CD to install the 2246 demo program. (See Dialog box figures 1 - 7)Dialog figure 5 shows the default installation directory "C:\Program Files\Sensoray\2246"
7. After software installation is completed, connect USB cable to 2246 board and to USBport of the host computer.
The 2246 multiplexes two USB channels onto one physical USB cable and each channelrequires a boot driver and a functional driver. Thus, when the 2246 is detected by thecomputer for the first time, five drivers will need to be loaded.
o A USB Hub driver for multiplexing the USB channels
o A Initialization driver for Channel 1 - 'SENSORAY 2246 EZ LOADER 1' (Optional)
o A Initialization driver for Channel 2 - 'Sensoray 2246 EZLOADER 2' (Optional)
o A functional driver for Channel 1 - 'Sensoray 2246 Control'
o A functional driver for Channel 2 - 'Sensoray 2246 A/V Capture'
8. Power on the 2246
WARNING
Care must be taken to insure the user is ready to install all five drivers as they are askedfor. If the user cancels installation before finishing, an invalid default driver will be loaded.If this happens, the entire USB device must be re-installed to allow the Hardware Wizardto again cycle through all five drivers.
37

9. A "Found New Hardware Wizard" will appear. In response to "Can Windows connect to Windows Update to search for software?"Please select "No, not this time"
10. "Found New Hardware Wizard" next page.In response to "This wizard helps you install software for: Generic Hub on USB 2.0 Bus"Please select "Install the software automatically (Recommended)"
11. "Found New Hardware Wizard" next page.In response to "Completing the Found New Hardware Wizard""The wizard has finished installing the software for: Generic Hub on USB 2.0 Bus"Please select "Finish"
12. A "Found New Hardware Wizard" will appear.In response to "Can Windows connect to Windows Update to search for software?"Please select "No, not this time"
13. "Found New Hardware Wizard" next page.In response to "This wizard helps you install software for: USB Device"Please select "Install from a list or specific location (Advanced)"
14. "Found New Hardware Wizard" next page.In response to "Please choose your search and installation options."Please select "Search for the best driver in these locations."Please un-check "Search removable media (floppy, CD-ROM...)"Please check "Include this location in the search:"Please type or use the Browse button to select the 'Driver' sub-directory in the installationdirectory that was chosen to install the Demo software to.(The default is \Program Files\Sensoray\2246\Driver)
15. "Hardware Installation"In response to:"The software you are installing for this hardware:""SENSORAY 2246 EZ LOADER 1""has not passed Windows Logo testing to verify its compatibility with Windows XP"Please select "Continue Anyway"
16. "Found New Hardware Wizard" next page.In response to "Completing the Found New Hardware Wizard""The wizard has finished installing the software for: ""SENSORAY 2246 EZ LOADER 1"Please select "Finish"
17. A "Found New Hardware Wizard" will appear.In response to "Can Windows connect to Windows Update to search for software?"Please select "No, not this time"
18. "Found New Hardware Wizard" next page.In response to "This wizard helps you install software for: USB Device"Please select "Install from a list or specific location (Advanced)"
19. "Found New Hardware Wizard" next page.In response to "Please choose your search and installation options."Please select "Search for the best driver in these locations."Please un-check "Search removable media (floppy, CD-ROM...)"Please check "Include this location in the search:"Please type or use the Browse button to select the 'Driver' sub-directory in the installationdirectory that was chosen to install the Demo software to.(The default is \Program Files\Sensoray\2246\Driver)
38

20. "Hardware Installation"In response to:"The software you are installing for this hardware:""Sensoray 2246 EZLOADER 2""has not passed Windows Logo testing to verify its compatibility with Windows XP"Please select "Continue Anyway"
21. "Found New Hardware Wizard" next page.In response to "Completing the Found New Hardware Wizard""The wizard has finished installing the software for: ""Sensoray 2246 EZLOADER 2"Please select "Finish"
22. A "Found New Hardware Wizard" will appear.In response to "Can Windows connect to Windows Update to search for software?"Please select "No, not this time"
23. "Found New Hardware Wizard" next page.In response to "This wizard helps you install software for: USB Device"Please select "Install from a list or specific location (Advanced)"
24. "Found New Hardware Wizard" next page.In response to "Please choose your search and installation options."Please select "Search for the best driver in these locations."Please un-check "Search removable media (floppy, CD-ROM...)"Please check "Include this location in the search:"Please type or use the Browse button to select the 'Driver' sub-directory in the installationdirectory that was chosen to install the Demo software to.(The default is \Program Files\Sensoray\2246\Driver)
25. "Hardware Installation"In response to:"The software you are installing for this hardware:""Sensoray 2246 Control""has not passed Windows Logo testing to verify its compatibility with Windows XP"Please select "Continue Anyway"
26. "Found New Hardware Wizard" next page.In response to "Completing the Found New Hardware Wizard""The wizard has finished installing the software for: ""Sensoray 2246 Control"Please select "Finish"
27. A "Found New Hardware Wizard" will appear.In response to "Can Windows connect to Windows Update to search for software?"Please select "No, not this time"
28. "Found New Hardware Wizard" next page.In response to "This wizard helps you install software for: USB Device"Please select "Install from a list or specific location (Advanced)"
29. "Found New Hardware Wizard" next page.In response to "Please choose your search and installation options."Please select "Search for the best driver in these locations."Please un-check "Search removable media (floppy, CD-ROM...)"Please check "Include this location in the search:"Please type or use the Browse button to select the 'Driver' sub-directory in the installation
39
directory that was chosen to install the Demo software to.(The default is \Program Files\Sensoray\2246\Driver)
30. "Hardware Installation"In response to:"The software you are installing for this hardware:""Sensoray 2246 A/V Capture""has not passed Windows Logo testing to verify its compatibility with Windows XP"Please select "Continue Anyway"
31. "Found New Hardware Wizard" next page.In response to "Completing the Found New Hardware Wizard""The wizard has finished installing the software for: ""Sensoray 2246 A/V Capture"Please select "Finish"
32. To verify if the hardware is installed successfully, go to"Control Panel -> System -> Hardware -> Device Manager -> Sound, video and gamecontrollers" category. Devices called "Sensoray 2246 A/V Capture" and "Sensoray 2246 Control" will appear.(Only when 2246 is connected, powered on, and drivers loaded)
40

Appendix D - Driver (Re-) InstallationIf the USB controller is removed or changed, or if the 2246 USB Cable is moved to anotherUSB port the sequence for installing 2246 driver’s need to be followed.
Perform steps 8 – 31 of the software install to re-install the 2246 drivers.
41
Appendix E – Technical Notes
Please install SP4 for Win2000 or SP2 for WinXP
Make sure the video and audio cables are both plugged into the reference board beforecapturing in order to guarantee correct video and audio output.
In order to decrease the CPU usage for DivX preview, set the "play quality" to "MinimumQuality" in DivX Player. To do this:
1. Launch DivX player 2. Move mouse to the video window and right click the mouse button to bring up
the context menu 3. Select "Options" item to pop up the "Options" dialog 4. Set the "play quality" to "Minimum Quality" in the "Playback" page.
42