ms-dos setup guide - store automation and barcode …€¦ · · 2010-04-07toshiba pos terminal...
TRANSCRIPT

TOSHIBA POS Terminal
ST-B10 MS-DOS Setup Guide
First Edition : February 26, 2010

Table of Contents 1. Overview.....................................................................................................................2 2. Setup for MS-DOS 6.22 Environment.......................................................................3 2.1. Installation for Operating System (MS-DOS 6.22)................................................................ 3 2.2. Installation for VIA Network Driver ..................................................................................... 16 3. Using our peripherals with MS-DOS Environment ...............................................29 3.1. Platform............................................................................................................................. 30 3.2. Drawer............................................................................................................................... 30 3.3. Printer................................................................................................................................ 30 3.4. Line Indicator Unit (LIU)..................................................................................................... 30 3.5. MSR .................................................................................................................................. 30 3.6. Keyboard........................................................................................................................... 30 4. Notice and Limitation ..............................................................................................31 4.1. Notice................................................................................................................................ 31
4.1.1. About DOS ......................................................................................................................... 31 5.2. Limitation........................................................................................................................... 31
5.2.1. Limitation about DOS......................................................................................................... 31

MS-DOS Setup Guide for ST-B10 TOSHIBA TEC CORPORATION EAA-03049
1
Copyright © 2010 Toshiba TEC Corporation All rights reserved. It is prohibited to use or duplicate a part or whole of this document without the permission of Toshiba TEC Corporation. This document is subject to change without prior notice. Trademark Notification * Microsoft and MS-DOS are registered trademarks of Microsoft Corporation in the United States and/or
other countries. * All other product names mentioned in this document are trademarks or registered trademarks of their
respective owners.

MS-DOS Setup Guide for ST-B10 TOSHIBA TEC CORPORATION EAA-03049
2
1. Overview This document describes the procedures and notes for setting & installing the MS-DOS 6.22 to ST-B10. The outline of procedures to install MS-DOS on the ST-B10 is as follows:
MS-DOS Setup Procedure
1) Installation for Operating System 2) Installation for VIA Network Driver

MS-DOS Setup Guide for ST-B10 TOSHIBA TEC CORPORATION EAA-03049
3
2. Setup for MS-DOS 6.22 Environment 2.1. Installation for Operating System (MS-DOS 6.22)
This procedure is written with the situation that you have the FD of 'MS-DOS 6.22 Update'. Therefore, please use this information with customizing for your environment. First, you set floppy disk (MS-DOS 6.22 Disk1) and turn on the ST-B10. Then below message appears.
MS-DOS Setup Guide for ST-B10 TOSHIBA TEC CORPORATION EAA-03049
4
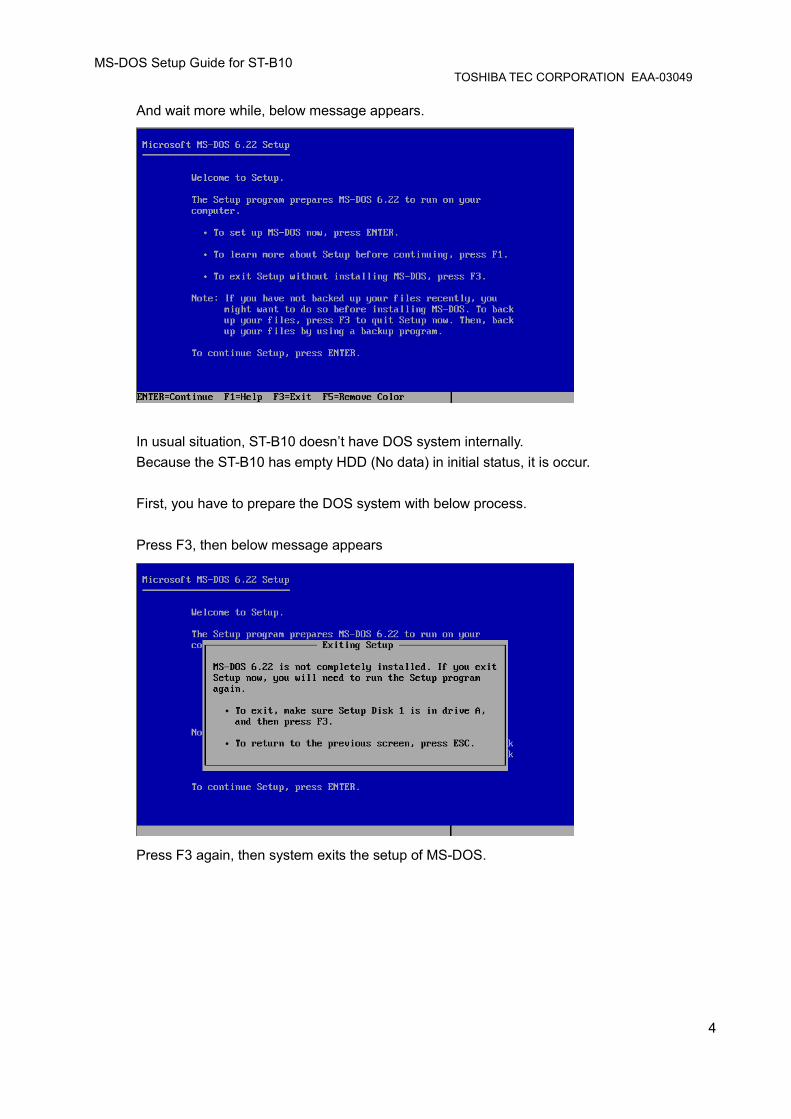
And wait more while, below message appears.
In usual situation, ST-B10 doesn’t have DOS system internally. Because the ST-B10 has empty HDD (No data) in initial status, it is occur. First, you have to prepare the DOS system with below process. Press F3, then below message appears
Press F3 again, then system exits the setup of MS-DOS.

MS-DOS Setup Guide for ST-B10 TOSHIBA TEC CORPORATION EAA-03049
5
After a while, below message appears.
Then, type ‘FDISK’ and press ‘Enter’. After a while, below message appears.
Press ‘1’ Key and press Enter.

MS-DOS Setup Guide for ST-B10 TOSHIBA TEC CORPORATION EAA-03049
6
After a while, below message appears.
Press ‘1’ Key and press Enter. After a while, below message appears.
Press ‘Y’ Key.

MS-DOS Setup Guide for ST-B10 TOSHIBA TEC CORPORATION EAA-03049
7
After a while, below message appears.
Press any Key, then ST-B10 reboots, and MS-DOS installer appears. Next, please go to the prompt message same as the above procedure.

MS-DOS Setup Guide for ST-B10 TOSHIBA TEC CORPORATION EAA-03049
8
Then, type ‘FORMAT C:’ and press ‘Enter’.
After a while, below message appears.
Type ‘Y’ and press ‘Enter’

MS-DOS Setup Guide for ST-B10 TOSHIBA TEC CORPORATION EAA-03049
9
After a while, below message appears.
After a while, below message appears.
Press ‘Enter’. (Use default setting)

MS-DOS Setup Guide for ST-B10 TOSHIBA TEC CORPORATION EAA-03049
10
After a while, below message appears.
Next, type ‘Setup /G’ and press ‘Enter’.

MS-DOS Setup Guide for ST-B10 TOSHIBA TEC CORPORATION EAA-03049
11
After a while, system starts the MS-DOS setup.
Press ‘Enter’. After a while, below message appears.
Confirm the contents, and press ‘Enter’.

MS-DOS Setup Guide for ST-B10 TOSHIBA TEC CORPORATION EAA-03049
12
After a while, below message appears.
Confirm the contents, and press ‘Enter’. After a while, below message appears.
Confirm the contents, and press ‘Y’.

MS-DOS Setup Guide for ST-B10 TOSHIBA TEC CORPORATION EAA-03049
13
MS-DOS installation process starts as below.

MS-DOS Setup Guide for ST-B10 TOSHIBA TEC CORPORATION EAA-03049
14
After a while, system request to change the next FD (floppy disk # 2) Please change the disk from #1 to #2. And press ‘Enter’.
After a while, system request to change the next FD (floppy disk # 3) Please change the disk from #2 to #3. And press ‘Enter’.
MS-DOS Setup Guide for ST-B10 TOSHIBA TEC CORPORATION EAA-03049
15
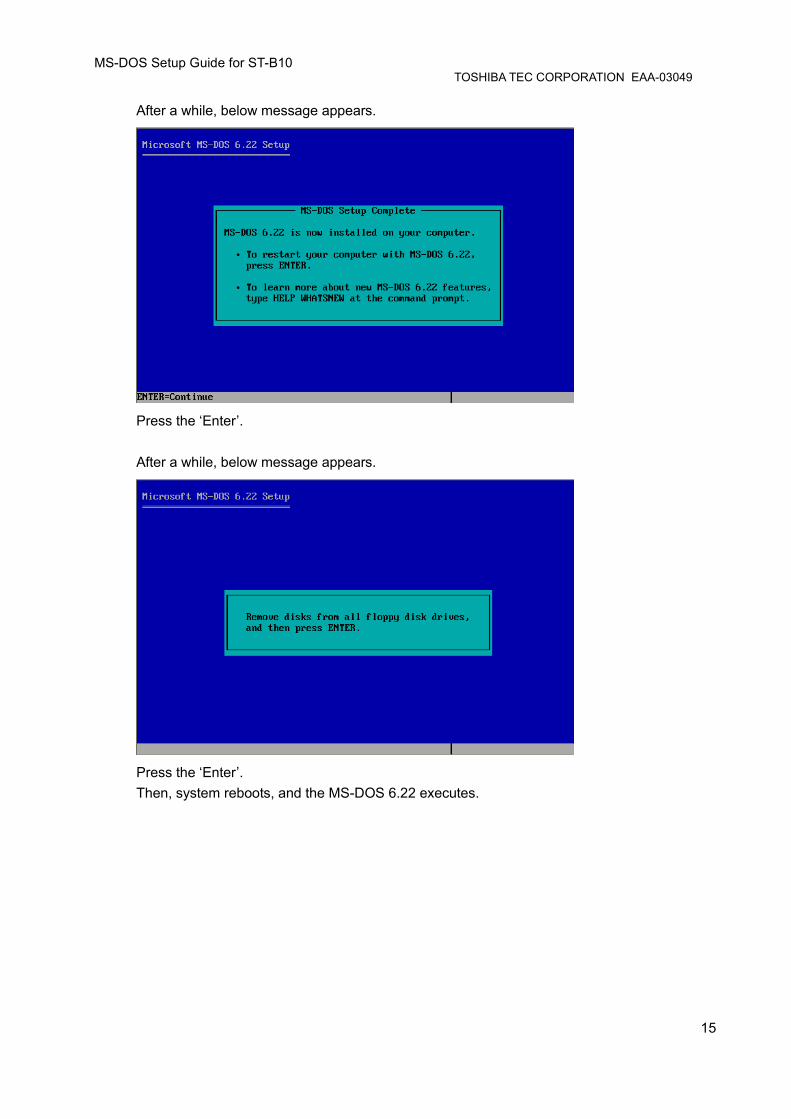
After a while, below message appears.
Press the ‘Enter’. After a while, below message appears.
Press the ‘Enter’. Then, system reboots, and the MS-DOS 6.22 executes.

MS-DOS Setup Guide for ST-B10 TOSHIBA TEC CORPORATION EAA-03049
16
2.2. Installation for VIA Network Driver
This document is mentioned with the following premise. - Here is the LAN Manager (by Microsoft) application. - Using LAN Manager with ST-B10. - Prepared the VIA Network driver with ST-B10.
Note) If you use other application for LAN management, please see the information provided by application vendor. First, setup the LAN Manager with ST-B10. Set the ‘LAN Manager Setup floppy disk’ to drive. And move floppy disk drive, then, type ‘setup.exe’ and press ‘Enter’.
After a while, below message appears.
Press the ‘Enter’.
MS-DOS Setup Guide for ST-B10 TOSHIBA TEC CORPORATION EAA-03049
17
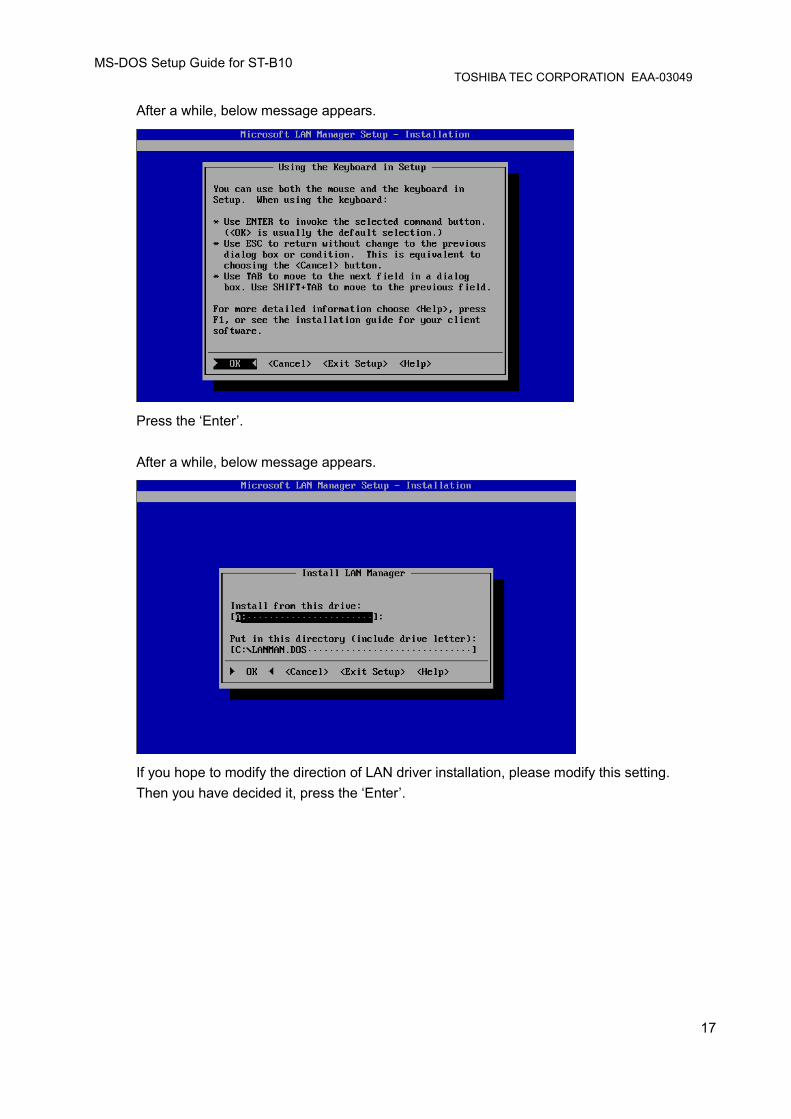
After a while, below message appears.
Press the ‘Enter’. After a while, below message appears.
If you hope to modify the direction of LAN driver installation, please modify this setting. Then you have decided it, press the ‘Enter’.

MS-DOS Setup Guide for ST-B10 TOSHIBA TEC CORPORATION EAA-03049
18
After a while, below message appears.
Press the ‘Enter’. (We recommend to selecting the ‘LAN Manager Enhanced’.) After a while, below message appears.

MS-DOS Setup Guide for ST-B10 TOSHIBA TEC CORPORATION EAA-03049
19
Then, change the floppy disk from ‘first FD’ to ‘second FD’ and press the ‘Enter’. After a while, below message appears.

MS-DOS Setup Guide for ST-B10 TOSHIBA TEC CORPORATION EAA-03049
20
After a while, below message appears.
Then, press the ‘TAB’, and select the ‘Other Driver’ menu as below.
And press the ‘Enter’.
MS-DOS Setup Guide for ST-B10 TOSHIBA TEC CORPORATION EAA-03049
21
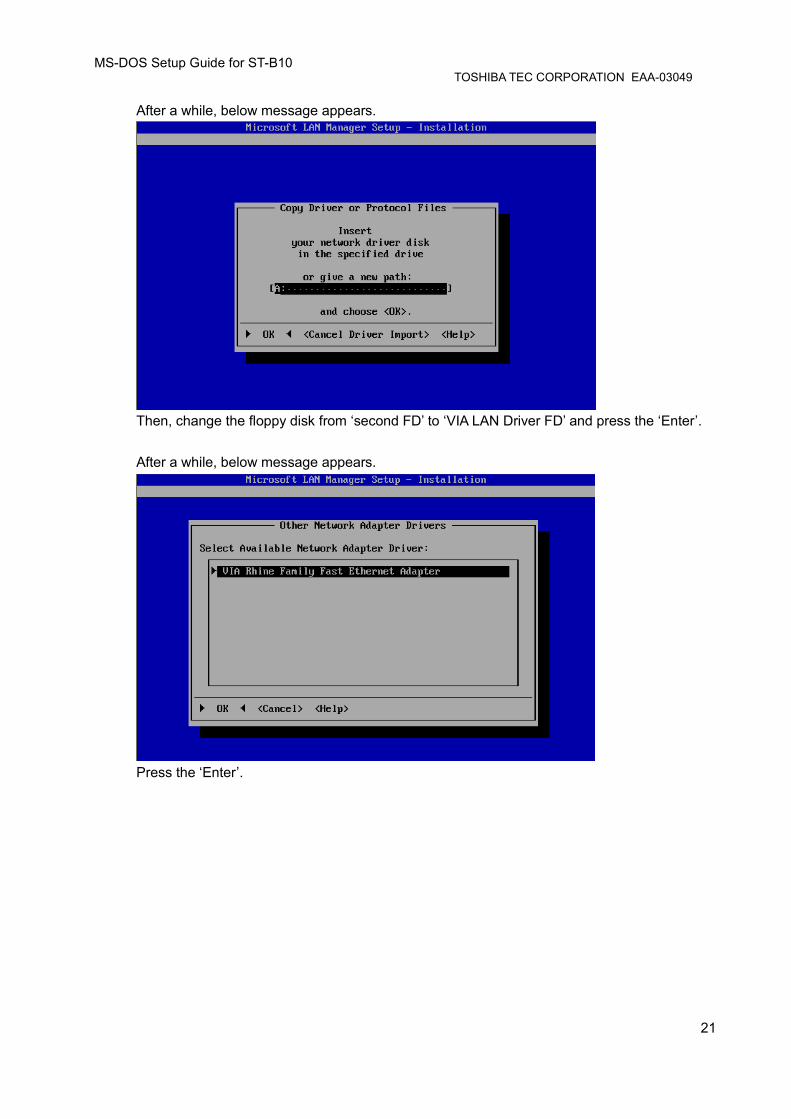
After a while, below message appears.
Then, change the floppy disk from ‘second FD’ to ‘VIA LAN Driver FD’ and press the ‘Enter’. After a while, below message appears.
Press the ‘Enter’.

MS-DOS Setup Guide for ST-B10 TOSHIBA TEC CORPORATION EAA-03049
22
After a while, below message appears.
After a while, below message appears.
Then, select the protocols you needed. (In this manual, we select all protocols) And press the ‘Enter’

MS-DOS Setup Guide for ST-B10 TOSHIBA TEC CORPORATION EAA-03049
23
After a while, below message appears.
Press the ‘Enter’ After a while, below message appears.
Set the parameter as your network environment.

MS-DOS Setup Guide for ST-B10 TOSHIBA TEC CORPORATION EAA-03049
24
If you choose the ‘Advanced…’ menu and you press the ‘Enter’, below message appears.
Set the parameter as your network environment. And press the ‘Enter’. If you don’t choose the ‘Advanced…’ menu and you press the ‘Enter’, below message appears.
Set the parameter as your network environment. And press the ‘Enter’.

MS-DOS Setup Guide for ST-B10 TOSHIBA TEC CORPORATION EAA-03049
25
After a while, below message appears.
Set the parameter as your network environment. And press the ‘Enter’. If you choose the ‘Yes’ and you press the ‘Enter’, below message appears.
Set the parameter as your network environment. And press the ‘Enter’.
MS-DOS Setup Guide for ST-B10 TOSHIBA TEC CORPORATION EAA-03049
26
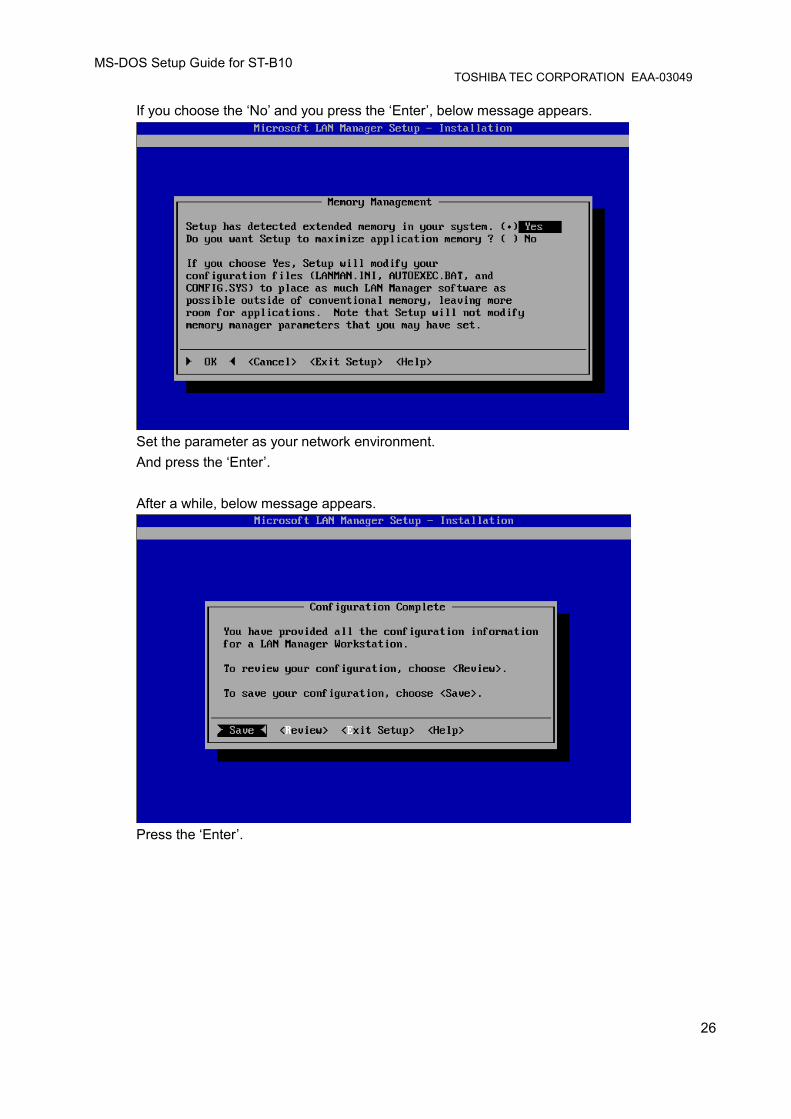
If you choose the ‘No’ and you press the ‘Enter’, below message appears.
Set the parameter as your network environment. And press the ‘Enter’. After a while, below message appears.
Press the ‘Enter’.

MS-DOS Setup Guide for ST-B10 TOSHIBA TEC CORPORATION EAA-03049
27
After a while, below message appears.
Then, re-change the floppy disk from ‘VIA LAN Driver FD’ to ‘second FD’ and press the ‘Enter’. After a while, below message appears.
Then, change the floppy disk from ‘second FD’ to ‘Third FD’ and press the ‘Enter’.

MS-DOS Setup Guide for ST-B10 TOSHIBA TEC CORPORATION EAA-03049
28
After a while, below message appears.
After a while, below message appears.
Press the ‘Enter’. Then, DOS prompt appears. Next, please shutdown your terminal, and power on the terminal. Then, Network driver is loaded on your terminal. So, type the ‘msd’ and press ‘Enter’, you can see the Network information in diagnostic program. You can see the setting of LAN as with PROTOCOL.ini file.

MS-DOS Setup Guide for ST-B10 TOSHIBA TEC CORPORATION EAA-03049
29
3. Using our peripherals with MS-DOS Environment Basically, you can use below devices with legacy access method of MS-DOS. These contents mentioned about using POS peripherals.
Port Device DOS Support RGB PA80BPNB / PA80BPNW
PA15BPNB / PA15BPNW TFTST-A20-2A1NK/F-QM-R TFTST-A20-5A1NK/F-QM-R TFTST-A20-2A2NK/F-QM-R TFTST-A20-5A2NK/F-QM-R TFTST-B20-2A2PK/F-QM-R TFTST-B20-5A2PK/F-QM-R
Can use(*1) LCD/Monitor
LVDS TFTST-A20-2L2NK/F-QM-R TFTST-A20-5L2NK/F-QM-R
Can use(*1)
PS2
PKBST-50-3-K-QM-R PKBST-50-3-QM-R
Can use Keyboard
USB PKBST-52-4M5-QM-R(FW-2, with MSR) PKBST-52-4-QM-R(FW-2, without MSR) PKBST-52-4M5-K-QM-R(CB, with MSR) PKBST-52-4-K-QM-R(CB, without MSR)
Can use(*2)
Drawer TTEC DRWST-51A-8MV(K)-QM-R DRWST-56EMV-QM-R 420R 48G2 BCT 420R 48IVO BCT
Can use
USB TRST-A10SC/F1-QM-R TRST-A10SC/F2-QM-R TRST-A15SC/F-QM-R TRST-A10SC/F1-CN-R TRST-A00-UF/C-QM-R TRST-A00-UF/C-CN-R
Cannot use Printer
RS232 TRST-A00-DF/C-QM-R TRST-A00-DF/C-CN-R
Can use
LIU RS232 LIUST-51-1AK/F-QM-R LIUST-A10 WD-1012000008 / WD-1012000018
Can use
RS232 MCRSTA10 Can use(*3) PS2 MCR of PKBST50(MCRST-50-3-QM-R) Can use
MCR
USB MCR of PKBST52 Cannot use Note) *1: Touch Panel & MCR cannot be used with TFTST-A20-*L*
(COM5 & COM6 cannot be used by DOS) Basically, Touch Panel & MCR cannot be used with TFTST-A20/B20 & PA. *2: Only keypad can be used for Key board, but Key code download tool cannot support DOS. If you want to tune the Key code of PKBST52, you have to prepare the Windows environment. *3: MCRST-A10 only can be used with TFTST-A(B)20-*A*.

MS-DOS Setup Guide for ST-B10 TOSHIBA TEC CORPORATION EAA-03049
30
3.1. Platform Platform device is mapped specify I/O memory in ST-B10. About detail of mapping address and access procedure, please see documents below. About H/W information: Product specification for TOSHIBA TEC POS Terminal (ST-B10)
3.2. Drawer Drawer device is mapped specify I/O memory in ST-B10. About detail of mapping address and access procedure, please see documents below. Port Information: Product specification for TOSHIBA TEC POS Terminal (ST-B10)
3.3. Printer About detail of command I/F and COM setting, please see documents below. TRST-A00-DF/C-QM-R: Product specification for TOSHIBA TEC POS Printer (TRST-A00) TRST-A00-DF/C-CN-R: Not available.
3.4. Line Indicator Unit (LIU) About detail of command I/F and COM setting, please see documents below. LIUST-51-1AK/F-QM-R:
Product specification for TOSHIBA TEC Line Indicator Unit (LIUST-51) LIUST-A10:
Product specification for TOSHIBA TEC Line Indicator Unit (LIUST-A10) WD-1012000008 / WD-1012000018:
User’s Manual of LED Customer Display (Model : WD-111)
3.5. MSR About detail of command I/F and COM setting, please see documents below. MCRST50(MCRST-50-3-QM-R):
Product specification for TOSHIBA TEC Magnetic Card Reader (MCRST50) MCRST-A10:
Product specification for TOSHIBA TEC Magnetic Card Reader (MCRSTA10) 3.6. Keyboard About detail of command I/F, please see documents below. PKBST-50: Product specification for TOSHIBA TEC POS Keyboard (PKBST-50) PKBST-52: Product specification for TOSHIBA TEC POS Keyboard (PKBST-52)

MS-DOS Setup Guide for ST-B10 TOSHIBA TEC CORPORATION EAA-03049
31
4. Notice and Limitation 4.1. Notice 4.1.1. About DOS This document is written for MS-DOS 6.22. If you use another DOS, you may have to adjust the difference of detail specification. 5.2. Limitation 5.2.1. Limitation about DOS As DOS user already has known, if he uses DOS, basically he has to perform the responsibility in himself in current situation. Of course, we can support as much as possible. But he has to know this limitation about responsibility.