mos: word expert mos 2013 - cap de trons | formador ... · pdf filemicrosoft word expert ......
TRANSCRIPT

MO
S 2013 Study Guide M
icrosoft Word Expert Exam
s 77-425 & 77-426
Advance your expert-level skills with Word 2013. And earn the credential that proves it! Demonstrate your expertise with Microsoft Word! Designed to help you practice and prepare for Microsoft Office Specialist (MOS): Word 2013 Expert certification, this official Study Guide delivers:
• In-depth preparation for each MOS objective• Detailed procedures to help build the skills measured by the exam• Hands-on tasks to practice what you’ve learned• Ready-made practice files
Sharpen the skills measured by these MOS exam objectives:• Manage and Share Documents• Design Advanced Documents• Create Advanced References• Create Custom Word Elements
Pierce
EXAMS 77-425 & 77-426
About MOSA Microsoft Office Specialist (MOS) certification validates your proficiency with Microsoft Office programs, demonstrating you can meet globally recognized performance standards.
About Word Expert certificationExpert-level candidates for the Microsoft Word 2013 exam should know and demonstrate the use of advanced and specialized features in Word 2013, including creating, managing, and dis-tributing professional documents across a range of scenarios and requirements.
See full details at: microsoft.com/learning/certification
Practice FilesAvailable at:http://aka.ms/mosWordExp2013/files
MOS: Word Expert
microsoft.com/mspress
Certification/Microsoft Word Expert
ISBN: 978-0-7356-6926-0
U.S.A. $24.99Canada $26.99
[Recommended ]
John Pierce
MOS 2013 Study Guide
Celebrating 30 years!
Microsoft Word Expert
EXAMS 77-425 & 77-426
spine = .40”

PUBLISHED BYMicrosoft PressA Division of Microsoft CorporationOne Microsoft WayRedmond, Washington 98052-6399
Copyright © 2013 by John Pierce
All rights reserved. No part of the contents of this book may be reproduced or transmitted in any form or by any means without the written permission of the publisher.
Library of Congress Control Number: 2013941819ISBN: 978-0-7356-6926-0
Printed and bound in the United States of America.
First Printing
Microsoft Press books are available through booksellers and distributors worldwide. If you need support related to this book, email Microsoft Press Book Support at [email protected]. Please tell us what you think of this book at http://www.microsoft.com/learning/booksurvey.
Microsoft and the trademarks listed at http://www.microsoft.com/en-us/legal/intellectualproperty/trademarks/en-us.aspx are trademarks of the Microsoft group of companies. All other marks are property of their respective owners.
The example companies, organizations, products, domain names, email addresses, logos, people, places, and events depicted herein are fictitious. No association with any real company, organization, product, domain name, email address, logo, person, place, or event is intended or should be inferred.
This book expresses the author’s views and opinions. The information contained in this book is provided without any express, statutory, or implied warranties. Neither the authors, Microsoft Corporation, nor its resellers, or distributors will be held liable for any damages caused or alleged to be caused either directly or indirectly by this book.
Acquisitions Editor: Rosemary CapertonEditorial Production: Online Training Solutions, Inc. (OTSI) Technical Reviewer: Rob Carr (OTSI) Copyeditor: Kathy Krause (OTSI) Indexer: Krista Wall (OTSI) Cover: Microsoft Press Brand Team
iii
What do you think of this book? We want to hear from you! Microsoft is interested in hearing your feedback so we can continually improve our books and learning resources for you. To participate in a brief online survey, please visit:
microsoft.com/learning/booksurvey
ContentsIntroduction . . . . . . . . . . . . . . . . . . . . . . . . . . . . . . . . . . . . . . . . . . . . . . . . . . . . . . . . . . . . . . .vii
Who this book is for . . . . . . . . . . . . . . . . . . . . . . . . . . . . . . . . . . . . . . . . . . . . . . . . . . . . . . viiHow this book is organized . . . . . . . . . . . . . . . . . . . . . . . . . . . . . . . . . . . . . . . . . . . . . . . .viiiDownload the practice files . . . . . . . . . . . . . . . . . . . . . . . . . . . . . . . . . . . . . . . . . . . . . . . .viii
Sidebar: Adapting exercise steps . . . . . . . . . . . . . . . . . . . . . . . . . . . . . . . . . . . . . . . xEbook edition . . . . . . . . . . . . . . . . . . . . . . . . . . . . . . . . . . . . . . . . . . . . . . . . . . . . . . . . . . . . .xiGet support and give feedback. . . . . . . . . . . . . . . . . . . . . . . . . . . . . . . . . . . . . . . . . . . . . .xi
Errata . . . . . . . . . . . . . . . . . . . . . . . . . . . . . . . . . . . . . . . . . . . . . . . . . . . . . . . . . . . . . . .xiWe want to hear from you . . . . . . . . . . . . . . . . . . . . . . . . . . . . . . . . . . . . . . . . . . . . xiiStay in touch . . . . . . . . . . . . . . . . . . . . . . . . . . . . . . . . . . . . . . . . . . . . . . . . . . . . . . . . xii
Taking a Microsoft Office Specialist exam . . . . . . . . . . . . . . . . . . . . . . . . . . . . . . . . . . . . . xiiiMicrosoft Office Specialist certification . . . . . . . . . . . . . . . . . . . . . . . . . . . . . . . . . . . . . .xiiiSelecting a certification path . . . . . . . . . . . . . . . . . . . . . . . . . . . . . . . . . . . . . . . . . . . . . . .xiiiTest-taking tips. . . . . . . . . . . . . . . . . . . . . . . . . . . . . . . . . . . . . . . . . . . . . . . . . . . . . . . . . . .xivCertification benefits. . . . . . . . . . . . . . . . . . . . . . . . . . . . . . . . . . . . . . . . . . . . . . . . . . . . . xviFor more information . . . . . . . . . . . . . . . . . . . . . . . . . . . . . . . . . . . . . . . . . . . . . . . . . . . . xvi
Exam 77-419 Microsoft Word 2013 ExpertPrerequisites . . . . . . . . . . . . . . . . . . . . . . . . . . . . . . . . . . . . . . . . . . . . . . . . . . . . . . . . . . . . . . 1
1 Manage and share documents 31.1 Manage multiple documents . . . . . . . . . . . . . . . . . . . . . . . . . . . . . . . . . . . . . . . . . . . . 4
Modifying existing templates . . . . . . . . . . . . . . . . . . . . . . . . . . . . . . . . . . . . . . . . . . 4Merging multiple documents . . . . . . . . . . . . . . . . . . . . . . . . . . . . . . . . . . . . . . . . . . 6Managing versions of documents. . . . . . . . . . . . . . . . . . . . . . . . . . . . . . . . . . . . . . 10Organizing styles . . . . . . . . . . . . . . . . . . . . . . . . . . . . . . . . . . . . . . . . . . . . . . . . . . . . 12Copying styles from template to template . . . . . . . . . . . . . . . . . . . . . . . . . . . . . . 14

iv Contents
Copying macros from document to document . . . . . . . . . . . . . . . . . . . . . . . . . . 15Linking to external data . . . . . . . . . . . . . . . . . . . . . . . . . . . . . . . . . . . . . . . . . . . . . . 15Moving building blocks between documents . . . . . . . . . . . . . . . . . . . . . . . . . . . 16Practice tasks . . . . . . . . . . . . . . . . . . . . . . . . . . . . . . . . . . . . . . . . . . . . . . . . . . . . . . . 17
1.2 Prepare documents for review. . . . . . . . . . . . . . . . . . . . . . . . . . . . . . . . . . . . . . . . . . 17Setting tracking options . . . . . . . . . . . . . . . . . . . . . . . . . . . . . . . . . . . . . . . . . . . . . . 17Restricting editing . . . . . . . . . . . . . . . . . . . . . . . . . . . . . . . . . . . . . . . . . . . . . . . . . . . 20Deleting document draft versions . . . . . . . . . . . . . . . . . . . . . . . . . . . . . . . . . . . . . 25Removing document metadata. . . . . . . . . . . . . . . . . . . . . . . . . . . . . . . . . . . . . . . . 25Marking documents as final. . . . . . . . . . . . . . . . . . . . . . . . . . . . . . . . . . . . . . . . . . . 27Protecting documents by using passwords. . . . . . . . . . . . . . . . . . . . . . . . . . . . . . 28Practice tasks . . . . . . . . . . . . . . . . . . . . . . . . . . . . . . . . . . . . . . . . . . . . . . . . . . . . . . . 29
1.3 Manage document changes. . . . . . . . . . . . . . . . . . . . . . . . . . . . . . . . . . . . . . . . . . . . 29Tracking changes . . . . . . . . . . . . . . . . . . . . . . . . . . . . . . . . . . . . . . . . . . . . . . . . . . . . 29Managing comments . . . . . . . . . . . . . . . . . . . . . . . . . . . . . . . . . . . . . . . . . . . . . . . . 31Using markup options. . . . . . . . . . . . . . . . . . . . . . . . . . . . . . . . . . . . . . . . . . . . . . . . 33Resolving multidocument style conflicts . . . . . . . . . . . . . . . . . . . . . . . . . . . . . . . . 34Changing how markup is displayed . . . . . . . . . . . . . . . . . . . . . . . . . . . . . . . . . . . . 36Practice tasks . . . . . . . . . . . . . . . . . . . . . . . . . . . . . . . . . . . . . . . . . . . . . . . . . . . . . . . 37
Objective review . . . . . . . . . . . . . . . . . . . . . . . . . . . . . . . . . . . . . . . . . . . . . . . . . . . . . . . . . 37
2 Design advanced documents 392.1 Apply advanced formatting . . . . . . . . . . . . . . . . . . . . . . . . . . . . . . . . . . . . . . . . . . . . 39
Using wildcards in find-and-replace searches. . . . . . . . . . . . . . . . . . . . . . . . . . . . 40Creating custom field formats . . . . . . . . . . . . . . . . . . . . . . . . . . . . . . . . . . . . . . . . . 42Using advanced layout options . . . . . . . . . . . . . . . . . . . . . . . . . . . . . . . . . . . . . . . . 45Working with document sections . . . . . . . . . . . . . . . . . . . . . . . . . . . . . . . . . . . . . . 53Setting character spacing options and advanced character attributes . . . . . . 55Linking text boxes . . . . . . . . . . . . . . . . . . . . . . . . . . . . . . . . . . . . . . . . . . . . . . . . . . . 57Practice tasks . . . . . . . . . . . . . . . . . . . . . . . . . . . . . . . . . . . . . . . . . . . . . . . . . . . . . . . 59
2.2 Apply advanced styles. . . . . . . . . . . . . . . . . . . . . . . . . . . . . . . . . . . . . . . . . . . . . . . . . 60Customizing settings for existing styles . . . . . . . . . . . . . . . . . . . . . . . . . . . . . . . . 60Creating custom styles . . . . . . . . . . . . . . . . . . . . . . . . . . . . . . . . . . . . . . . . . . . . . . . 62Creating character-specific styles . . . . . . . . . . . . . . . . . . . . . . . . . . . . . . . . . . . . . .64Assigning keyboard shortcuts to styles . . . . . . . . . . . . . . . . . . . . . . . . . . . . . . . . . 65Practice tasks . . . . . . . . . . . . . . . . . . . . . . . . . . . . . . . . . . . . . . . . . . . . . . . . . . . . . . . 67

Contents v
2.3 Apply advanced ordering and grouping . . . . . . . . . . . . . . . . . . . . . . . . . . . . . . . . . 67Creating and managing outlines. . . . . . . . . . . . . . . . . . . . . . . . . . . . . . . . . . . . . . . 67Creating master documents. . . . . . . . . . . . . . . . . . . . . . . . . . . . . . . . . . . . . . . . . . . 71Linking document elements . . . . . . . . . . . . . . . . . . . . . . . . . . . . . . . . . . . . . . . . . . 73Practice tasks . . . . . . . . . . . . . . . . . . . . . . . . . . . . . . . . . . . . . . . . . . . . . . . . . . . . . . . 75
Objective review . . . . . . . . . . . . . . . . . . . . . . . . . . . . . . . . . . . . . . . . . . . . . . . . . . . . . . . . . 75
3 Create advanced references 773.1 Create and manage indexes . . . . . . . . . . . . . . . . . . . . . . . . . . . . . . . . . . . . . . . . . . . . 77
Marking index entries . . . . . . . . . . . . . . . . . . . . . . . . . . . . . . . . . . . . . . . . . . . . . . . . 78Building indexes from automark files . . . . . . . . . . . . . . . . . . . . . . . . . . . . . . . . . . . 79Inserting indexes . . . . . . . . . . . . . . . . . . . . . . . . . . . . . . . . . . . . . . . . . . . . . . . . . . . .80Editing and updating indexes . . . . . . . . . . . . . . . . . . . . . . . . . . . . . . . . . . . . . . . . . 81Practice tasks . . . . . . . . . . . . . . . . . . . . . . . . . . . . . . . . . . . . . . . . . . . . . . . . . . . . . . . 83
3.2 Create and manage reference tables . . . . . . . . . . . . . . . . . . . . . . . . . . . . . . . . . . . . 83Creating and formatting tables of contents . . . . . . . . . . . . . . . . . . . . . . . . . . . . .84Creating tables of figures . . . . . . . . . . . . . . . . . . . . . . . . . . . . . . . . . . . . . . . . . . . . . 88Working with tables of authorities . . . . . . . . . . . . . . . . . . . . . . . . . . . . . . . . . . . . . 91Setting advanced reference options. . . . . . . . . . . . . . . . . . . . . . . . . . . . . . . . . . . . 95Inserting bibliographies . . . . . . . . . . . . . . . . . . . . . . . . . . . . . . . . . . . . . . . . . . . . . 102Practice tasks . . . . . . . . . . . . . . . . . . . . . . . . . . . . . . . . . . . . . . . . . . . . . . . . . . . . . .103
3.3 Manage forms, fields, and mail merge operations. . . . . . . . . . . . . . . . . . . . . . . . 103Designing forms. . . . . . . . . . . . . . . . . . . . . . . . . . . . . . . . . . . . . . . . . . . . . . . . . . . .104Working with control properties. . . . . . . . . . . . . . . . . . . . . . . . . . . . . . . . . . . . . .108Locking and unlocking forms . . . . . . . . . . . . . . . . . . . . . . . . . . . . . . . . . . . . . . . .112Working with legacy controls . . . . . . . . . . . . . . . . . . . . . . . . . . . . . . . . . . . . . . . .113Inserting and managing document fields . . . . . . . . . . . . . . . . . . . . . . . . . . . . . . 116Performing mail merge operations . . . . . . . . . . . . . . . . . . . . . . . . . . . . . . . . . . . 117Practice tasks . . . . . . . . . . . . . . . . . . . . . . . . . . . . . . . . . . . . . . . . . . . . . . . . . . . . . .132
Objective review . . . . . . . . . . . . . . . . . . . . . . . . . . . . . . . . . . . . . . . . . . . . . . . . . . . . . . . .133
4 Create custom Word elements 1354.1 Create and modify building blocks . . . . . . . . . . . . . . . . . . . . . . . . . . . . . . . . . . . . .136
Editing building block properties . . . . . . . . . . . . . . . . . . . . . . . . . . . . . . . . . . . . .136Creating custom building blocks. . . . . . . . . . . . . . . . . . . . . . . . . . . . . . . . . . . . . .138Deleting building blocks. . . . . . . . . . . . . . . . . . . . . . . . . . . . . . . . . . . . . . . . . . . . .139Practice tasks . . . . . . . . . . . . . . . . . . . . . . . . . . . . . . . . . . . . . . . . . . . . . . . . . . . . . .139

vi Contents
4.2 Create custom style sets and templates. . . . . . . . . . . . . . . . . . . . . . . . . . . . . . . . .139Creating custom theme elements. . . . . . . . . . . . . . . . . . . . . . . . . . . . . . . . . . . . .140Customizing templates . . . . . . . . . . . . . . . . . . . . . . . . . . . . . . . . . . . . . . . . . . . . . . 142Designing your own templates . . . . . . . . . . . . . . . . . . . . . . . . . . . . . . . . . . . . . . .144Creating and managing style sets. . . . . . . . . . . . . . . . . . . . . . . . . . . . . . . . . . . . .146Practice tasks . . . . . . . . . . . . . . . . . . . . . . . . . . . . . . . . . . . . . . . . . . . . . . . . . . . . . . 147
4.3 Prepare a document for internationalization and accessibility . . . . . . . . . . . . .148Configuring language options in documents . . . . . . . . . . . . . . . . . . . . . . . . . . .148Adding alt text to document elements . . . . . . . . . . . . . . . . . . . . . . . . . . . . . . . .150Creating documents for use with accessibility tools . . . . . . . . . . . . . . . . . . . . . 151Managing multiple options for the +Body and +Heading fonts. . . . . . . . . . . 155Implementing global content standards . . . . . . . . . . . . . . . . . . . . . . . . . . . . . . . 155Using a macro to modify tab order in a form. . . . . . . . . . . . . . . . . . . . . . . . . . .158Practice tasks . . . . . . . . . . . . . . . . . . . . . . . . . . . . . . . . . . . . . . . . . . . . . . . . . . . . . .162
Objective review . . . . . . . . . . . . . . . . . . . . . . . . . . . . . . . . . . . . . . . . . . . . . . . . . . . . . . . .162
Index. . . . . . . . . . . . . . . . . . . . . . . . . . . . . . . . . . . . . . . . . . . . . . . . . . . . . . . . . . . . . . . . . . . . 163
About the author . . . . . . . . . . . . . . . . . . . . . . . . . . . . . . . . . . . . . . . . . . . . . . . . . . . . . . . . . 173
Survey page. . . . . . . . . . . . . . . . . . . . . . . . . . . . . . . . . . . . . . . . . . . . . . . . . . . . . . . . . . . . . . 174
What do you think of this book? We want to hear from you! Microsoft is interested in hearing your feedback so we can continually improve our books and learning resources for you. To participate in a brief online survey, please visit:
microsoft.com/learning/booksurvey

vii
IntroductionThe Microsoft Office Specialist (MOS) certification program has been designed to vali-date your knowledge of and ability to use programs in the Microsoft Office 2013 suite of programs, Microsoft Office 365, and Microsoft SharePoint. This book has been designed to guide you in studying the types of tasks you are likely to be required to demonstrate in Exam 77-425: Microsoft Word 2013 Expert Part One and Exam 77-426: Microsoft Word 2013 Expert Part Two.
See Also For information about the tasks you are likely to be required to demonstrate in Exam 77-418: Microsoft Word 2013 Specialist, see MOS 2013 Study Guide for Microsoft Word by Joan Lambert (Microsoft Press, 2013).
Who this book is forMOS 2013 Study Guide for Microsoft Word Expert is designed for experienced computer users seeking Microsoft Office Specialist Expert certification in Word 2013. This certifica-tion requires that the candidate pass two exams. This book covers the objectives of both exams.
MOS exams for individual programs are practical rather than theoretical. You must dem-onstrate that you can complete certain tasks or projects rather than simply answering questions about program features. The successful MOS certification candidate will have at least six months of experience using all aspects of the application on a regular basis; for example, using Word at work or school to manage and share documents, apply page layout options and styles, create reference tables and indexes, and customize Word ele-ments such as building blocks.
As a certification candidate, you probably have a lot of experience with the program you want to become certified in. Many of the procedures described in this book will be famil-iar to you; others might not be. Read through each study section and ensure that you are familiar with not only the procedures included in the section, but also the concepts and tools discussed in the review information. In some cases, graphics depict the tools you will use to perform procedures related to the skill set. Study the graphics and ensure that you are familiar with all the options available for each tool.

viii Introduction
How this book is organizedThe exam coverage is divided into chapters representing broad skill sets that correlate to the functional groups covered by the exams, and each chapter is divided into sections addressing groups of related skills that correlate to the exam objectives. Each section includes review information, generic procedures, and practice tasks you can complete on your own while studying. When necessary, we provide practice files you can use to work through the practice tasks. You can practice the procedures in this book by using the practice files supplied or by using your own files. (If you use your own files, be aware that functionality in Word 2013 is limited in files saved for earlier versions of the program.)
The exam objectives are divided into four functional groups. The mapping of the exam objectives to the certification exams is shown in the following table.
Functional group Objectives covered by Exam 77-425
Objectives covered by Exam 77-426
1 Manage and Share Documents
1.2 Prepare Documents for Review
1.1 Manage Multiple Documents1.3 Manage Document Changes
2 Design Advanced Documents
2.1 Apply Advanced Formatting2.2 Apply Advanced Styles
2.3 Apply Advanced Ordering and Grouping
3 Create Advanced References
3.3 Manage Forms, Fields, and Mail Merge Operations
3.1 Create and Manage Indexes3.2 Create and Manage Reference Tables
4 Create Custom Word Elements
4.1 Create and Modify Building Blocks4.2 Create Custom Style Sets and Templates
4.3 Prepare a Document for Internationalization and Accessibility
Candidates must pass both exams to earn the Microsoft Office Specialist Expert certifica-tion in Word 2013.
Download the practice filesBefore you can complete the practice tasks in this book, you need to download the book’s practice files to your computer. These practice files can be downloaded from the following page:
http://aka.ms/mosWordExp2013/files
Important The Word 2013 program is not available from this website. You should purchase and install that program before using this book.

Introduction ix
If you would like to be able to refer to the completed versions of practice files at a later time, you can save the practice files that you modify while working through the practice tasks in this book. If you save your changes and later want to repeat the task, you can download the original practice files again.
The following table lists the practice files for this book.
Folder and chapter FilesMOSWordExpert2013\Objective11 Manage and share documents
WordExpert_1-1a.docxWordExpert_1-1b.docxWordExpert_1-1c.dotxWordExpert_1-1d.dotxWordExpert_1-1e.xlsxWordExpert_1-2.docxWordExpert_1-3a.docxWordExpert_1-3b.docx
MOSWordExpert2013\Objective22 Design advanced documents
WordExpert_2-1.docxWordExpert_2-2.docxWordExpert_2-3a.docxWordExpert_2-3b.docxWordExpert_2-3c.docxWordExpert_2-3d.docxWordExpert_2-3e.docx
MOSWordExpert2013\Objective33 Create advanced references
WordExpert_3-1a.docxWordExpert_3-1b.docxWordExpert_3-2a.docxWordExpert_3-2b.docxWordExpert_3-2c.docxWordExpert_3-2d.docxWordExpert_3-3a.docxWordExpert_3-3b.xlsxWordExpert_3-3c.docxWordExpert_3-3d.docx
MOSWordExpert2013\Objective44 Create custom Word elements
WordExpert_4-1.docxWordExpert_4-2.docxWordExpert_4-3a.docxWordExpert_4-3b.docxWordExpert_4-3c.docx
x Introduction
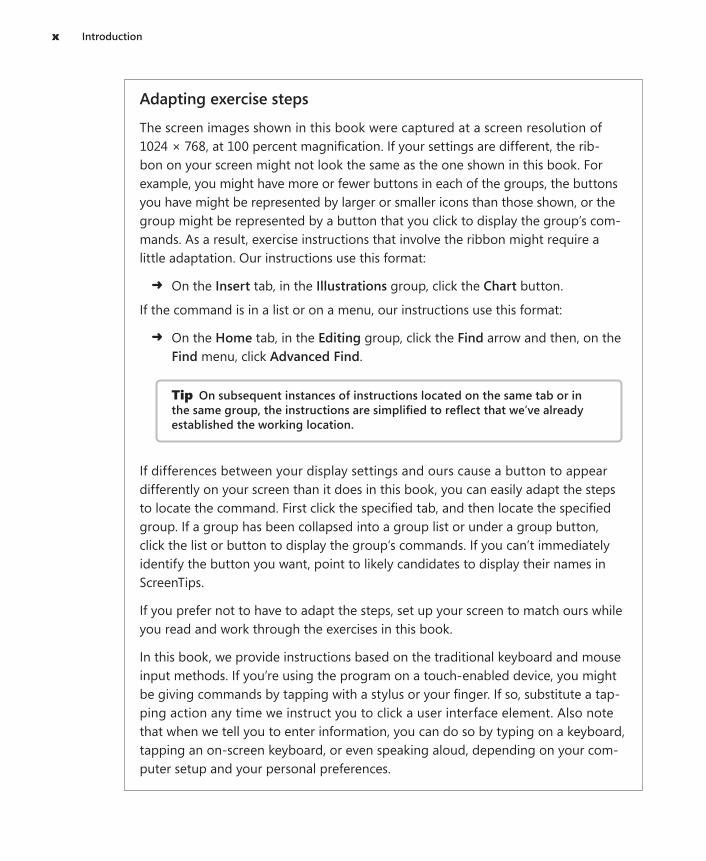
Adapting exercise steps
The screen images shown in this book were captured at a screen resolution of 1024 × 768, at 100 percent magnification. If your settings are different, the rib-bon on your screen might not look the same as the one shown in this book. For example, you might have more or fewer buttons in each of the groups, the buttons you have might be represented by larger or smaller icons than those shown, or the group might be represented by a button that you click to display the group’s com-mands. As a result, exercise instructions that involve the ribbon might require a little adaptation. Our instructions use this format:
➜ On the Insert tab, in the Illustrations group, click the Chart button.
If the command is in a list or on a menu, our instructions use this format:
➜ On the Home tab, in the Editing group, click the Find arrow and then, on the Find menu, click Advanced Find.
Tip On subsequent instances of instructions located on the same tab or in the same group, the instructions are simplified to reflect that we’ve already established the working location.
If differences between your display settings and ours cause a button to appear differently on your screen than it does in this book, you can easily adapt the steps to locate the command. First click the specified tab, and then locate the specified group. If a group has been collapsed into a group list or under a group button, click the list or button to display the group’s commands. If you can’t immediately identify the button you want, point to likely candidates to display their names in ScreenTips.
If you prefer not to have to adapt the steps, set up your screen to match ours while you read and work through the exercises in this book.
In this book, we provide instructions based on the traditional keyboard and mouse input methods. If you’re using the program on a touch-enabled device, you might be giving commands by tapping with a stylus or your finger. If so, substitute a tap-ping action any time we instruct you to click a user interface element. Also note that when we tell you to enter information, you can do so by typing on a keyboard, tapping an on-screen keyboard, or even speaking aloud, depending on your com-puter setup and your personal preferences.

Introduction xi
Get support and give feedbackThe following sections provide information about getting help with this book and contacting us to provide feedback or report errors.
ErrataWe’ve made every effort to ensure the accuracy of this book and its companion con-tent. Any errors that have been reported since this book was published are listed on our Microsoft Press site:
http://aka.ms/mosWordExp2013/errata
If you find an error that is not already listed, you can report it to us through the same page.
If you need additional support, email Microsoft Press Book Support at:
Please note that product support for Microsoft software is not offered through the preceding addresses.

xii Introduction
We want to hear from youAt Microsoft Press, your satisfaction is our top priority, and your feedback our most valuable asset. Please tell us what you think of this book at:
http://www.microsoft.com/learning/booksurvey
The survey is short, and we read every one of your comments and ideas. Thanks in advance for your input!
Stay in touchLet’s keep the conversation going! We’re on Twitter at:
http://twitter.com/MicrosoftPress

xiii
Taking a Microsoft Office Specialist exam
Desktop computing proficiency is increasingly important in today’s business world. When screening, hiring, and training employees, employers can feel reassured by relying on the objectivity and consistency of technology certification to ensure the competence of their workforce. As an employee or job seeker, you can use technology certification to prove that you already have the skills you need to succeed, saving current and future employ-ers the time and expense of training you.
Microsoft Office Specialist certificationMicrosoft Office Specialist certification is designed to assist employees in validating their skills with Office programs. The following certification paths are available:
l A Microsoft Office Specialist (MOS) is an individual who has demonstrated profi-ciency by passing a certification exam in one or more Office programs, including Microsoft Word, Excel, PowerPoint, Outlook, Access, OneNote, or SharePoint.
l A Microsoft Office Specialist Expert (MOS Expert) is an individual who has demon-strated that he or she has mastered the more advanced features of Word or Excel by passing the required certification exams.
Selecting a certification pathWhen deciding which certifications you would like to pursue, you should assess the following:
l The program and program version or versions with which you are familiar
l The length of time you have used the program and how frequently you use it
l Whether you have had formal or informal training in the use of that program
l Whether you use most or all of the available program features
l Whether you are considered a go-to resource by business associates, friends, and family members who have difficulty with the program
xiv Taking a Microsoft Office Specialist exam
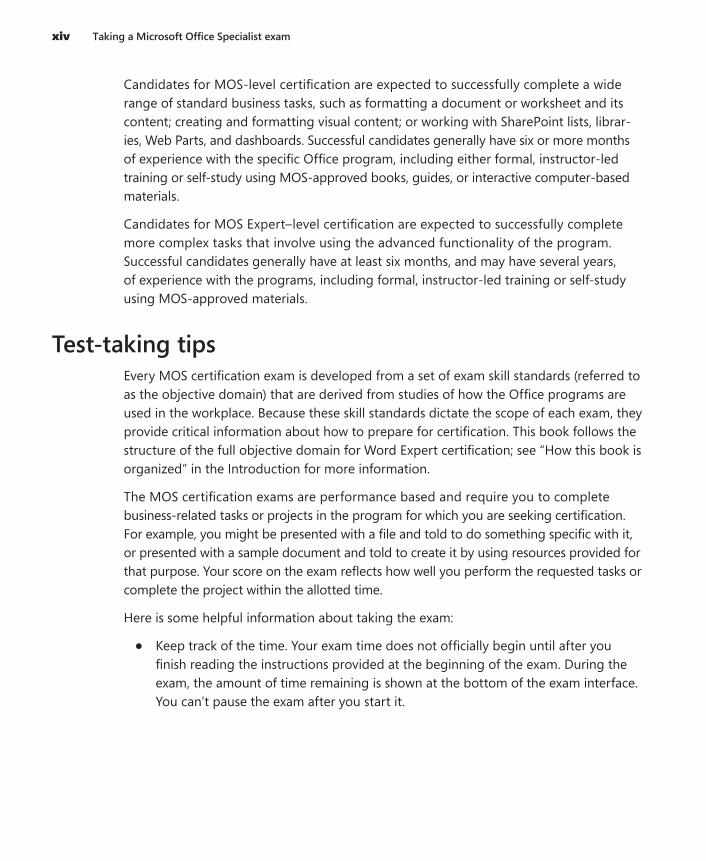
Candidates for MOS-level certification are expected to successfully complete a wide range of standard business tasks, such as formatting a document or worksheet and its content; creating and formatting visual content; or working with SharePoint lists, librar-ies, Web Parts, and dashboards. Successful candidates generally have six or more months of experience with the specific Office program, including either formal, instructor-led training or self-study using MOS-approved books, guides, or interactive computer-based materials.
Candidates for MOS Expert–level certification are expected to successfully complete more complex tasks that involve using the advanced functionality of the program. Successful candidates generally have at least six months, and may have several years, of experience with the programs, including formal, instructor-led training or self-study using MOS-approved materials.
Test-taking tipsEvery MOS certification exam is developed from a set of exam skill standards (referred to as the objective domain) that are derived from studies of how the Office programs are used in the workplace. Because these skill standards dictate the scope of each exam, they provide critical information about how to prepare for certification. This book follows the structure of the full objective domain for Word Expert certification; see “How this book is organized” in the Introduction for more information.
The MOS certification exams are performance based and require you to complete business-related tasks or projects in the program for which you are seeking certification. For example, you might be presented with a file and told to do something specific with it, or presented with a sample document and told to create it by using resources provided for that purpose. Your score on the exam reflects how well you perform the requested tasks or complete the project within the allotted time.
Here is some helpful information about taking the exam:
l Keep track of the time. Your exam time does not officially begin until after you finish reading the instructions provided at the beginning of the exam. During the exam, the amount of time remaining is shown at the bottom of the exam interface. You can’t pause the exam after you start it.

Taking a Microsoft Office Specialist exam xv
l Pace yourself. At the beginning of the exam, you will receive information about the questions or projects that are included in the exam. Some questions will require that you complete more than one task. Each project will require that you complete multiple tasks. During the exam, the amount of time remaining to complete the questions or project, and the number of completed and remaining questions if applicable, is shown at the bottom of the exam interface.
l Read the exam instructions carefully before beginning. Follow all the instructions provided completely and accurately.
l Enter requested information as it appears in the instructions, but without duplicat-ing the formatting unless you are specifically instructed to do so. For example, the text and values you are asked to enter might appear in the instructions in bold and underlined text, but you should enter the information without applying these formats.
l Close all dialog boxes before proceeding to the next exam question unless you are specifically instructed not to do so.
l Don’t close task panes before proceeding to the next exam question unless you are specifically instructed to do so.
l If you are asked to print a document, worksheet, chart, report, or slide, perform the task, but be aware that nothing will actually be printed.
l When performing tasks to complete a project-based exam, save your work frequently.
l Don’t worry about extra keystrokes or mouse clicks. Your work is scored based on its result, not on the method you use to achieve that result (unless a specific method is indicated in the instructions).
l If a computer problem occurs during the exam (for example, if the exam does not respond or the mouse no longer functions) or if a power outage occurs, contact a testing center administrator immediately. The administrator will restart the com-puter and return the exam to the point where the interruption occurred, with your score intact.
Strategy This book includes special tips for effectively studying for the Microsoft Office Specialist exams in Strategy paragraphs such as this one.

xvi Taking a Microsoft Office Specialist exam
Certification benefitsAt the conclusion of the exam, you will receive a score report, indicating whether you passed the exam. If your score meets or exceeds the passing standard (the minimum required score), you will be contacted by email by the Microsoft Certification Program team. The email message you receive will include your Microsoft Certification ID and links to online resources, including the Microsoft Certified Professional site. On this site, you can download or order a printed certificate, create a virtual business card, order an ID card, view and share your certification transcript, access the Logo Builder, and access other useful and interesting resources, including special offers from Microsoft and affili-ated companies.
Depending on the level of certification you achieve, you will qualify to display one of three logos on your business card and other personal promotional materials. These logos attest to the fact that you are proficient in the applications or cross-application skills neces-sary to achieve the certification.
Using the Logo Builder, you can create a personalized certification logo that includes the MOS logo and the specific programs in which you have achieved certification. If you achieve MOS certification in multiple programs, you can include multiple certifications in one logo.
For more informationTo learn more about the Microsoft Office Specialist exams and related courseware, visit:
http://www.microsoft.com/learning/en/us/mos-certification.aspx


77
3 Create advanced referencesThe skills tested in this section of the Microsoft Office Specialist Expert exams for Microsoft Word 2013 relate to creating advanced references, including indexes and tables of contents. Specifically, the following objectives are associated with this set of skills:
3.1 Create and manage indexes3.2 Create and manage reference tables3.3 Manage forms, fields, and mail merge operations
This chapter guides you in studying the mechanics of creating and managing different types of reference material you can include in a document, including indexes, tables of contents, and tables of authorities. Most of the tools you use for these tasks appear on the References tab. This chapter also explains how to design forms by using content con-trols such as text boxes and list boxes, how to use fields to display and manage informa-tion, and how to set up and run a mail merge operation.
Practice Files To complete the practice tasks in this chapter, you need the practice files contained in the MOSWordExpert2013\Objective3 practice file folder. For more information, see “Download the practice files” in this book’s Introduction.
3.1 Create and manage indexesTo create an index in a document, you need to complete two general steps: mark index entries (by inserting a type of field) in the document and set options for how Word gen erates the index. Word uses the entries and the options you specify to create the index, assigning page numbers to entries on the basis of their location throughout the document.

78 Chapter 3 Create advanced references
You can follow any of several approaches for marking index entries. You can select text in a document to use as an entry, insert an entry of your own where you want the index marker to appear, or insert index markers by using a list of terms set up in a separate file, which Word uses to scan the document you are indexing and insert index markers automatically.
An index entry must have at least one level, the main entry. Index entries can also include subentries and cross-references to other entries in the index. Entries can refer to a specific page or to a range of pages.
An example of a main entry is styles, which might include subentries such as applying, creating, and updating in template. The page reference for the main entry might span several pages in this example, with subentries covered on a single page or a span of fewer pages.
Marking index entriesWhen you insert entries manually, you work in the Mark Index Entry dialog box. If text is selected when you open the Mark Index Entry dialog box, that text appears in the Main Entry box. You can keep the Mark Index Entry dialog box open as you work on a document. Text that is selected when you click the dialog box to make it active replaces any text currently contained in the Main Entry box. You don’t need to select text to cre-ate a main entry, however. You can define a main entry yourself by placing the cursor where you want an index reference in the document and then entering the text in the Main Entry box.

3.1 Create and manage indexes 79
Tip You can apply formatting such as bold or italic to the text in the Main Entry, Subentry, and Cross-Reference boxes.
Subentries for a main entry must be entered manually. You can create a third-level entry by entering a colon (:) after the subentry and then the text of the third-level entry. In the Options area, you can create a cross-reference (a See reference) to other index entries as applicable.
Word uses a field to define index entries. An index field is identified by the characters XE and encloses all the information for an entry in curly braces. Index fields are displayed in hidden text. If the index fields are not displayed in your document, click Show/Hide ¶ (the paragraph icon) in the Paragraph group on the Home tab, or press Ctrl+Shift+8.
Here is an example of the information that an index field might contain:
{ XE “formatting:characters: font” \t See also styles” }
Entries that span a range of pages refer to bookmarks defined in the document. Select the paragraphs in the range you want to use, and then use the Bookmark dialog box to define the bookmark. In the Mark Index Entry dialog box, choose Page Range and then select the bookmark you defined for that range. Use the options provided for formatting the page number in bold or italic.
The Mark All button in the Mark Index Entry dialog box inserts an index field for each occurrence of the main entry in the document. For example, if the main entry is styles, clicking Mark All inserts an index field for each occurrence of the word styles in the document.
Building indexes from automark filesAnother method for building the list of entries for an index is to list main entries in a separate document (also referred to as an automark file or a concordance file) that Word uses to mark your document. The automark file can be saved as a Word document or in other formats, such as a text (.txt) file.
You can set up the entries in a single-level list, in which case Word searches for each term or phrase in the list and inserts a corresponding index field for each instance of the term or phrase it finds. For more flexibility, you can set up the list in a two-column table, with the terms you want to search for in the left column and the corresponding index entries in the right column. By using two columns, you can collect terms such as format, formatting, and formatted under the same main entry—list the terms separately in the left column and associate them with the same main entry in the table’s right

80 Chapter 3 Create advanced references
column. The entries in an automark file are case-sensitive. For example, if the auto-mark file includes the term text effects, Word won’t insert an index field for an instance of Text effects when it indexes the document.
Inserting indexesAfter you mark index entries, you use the Index dialog box to set up the index’s design and specify other options.
Word supports two index formats: indented and run-in. In a run-in index, main entries and subentries are formatted as follows:
Styles: applying, 211; creating, 209; updating in template, 212
In an indented index, the entries are listed in this format:
Styles applying, 211 creating, 209 updating in template, 212

3.1 Create and manage indexes 81
When the length of an index is a factor, you can use a run-in index to save space. When you select an option for the type of index, Word displays an example in the Print Preview area of the Index dialog box.
By default, Word creates a two-column index. You can choose the Auto setting or specify from one to four columns. If you are setting up an indented index, you can change the alignment of page numbers. Word previews this format when you select the option, and you can then select the type of tab leader you want to include (or select None from this list). The Formats list provides several options for styling the fonts, line spacing, and other formats Word applies to the index entries when you generate the index.
Tip If From Template is selected in the Formats list, you can modify the styles for index levels. Click Modify in the Index dialog box. In the Styles dialog box, select an index level, and then click Modify to open the Modify Style dialog box and make changes to the formatting attributes for that index level. For more information about modifying styles, see section 2.2, “Apply advanced styles.”
Editing and updating indexesIf you need to edit an index entry, you should edit the specific index field and not the in-dex that Word generates. Locate the field in the document, and then edit and format the text enclosed in quotation marks within the curly braces that define the field. To delete an index marker, select the field (including the braces) and press the Delete key.
After you make changes to index markers, use the Update Index command on the References tab to generate the index again.
Tip When you need to edit an index, use the Find And Replace dialog box to move from field to field. In the dialog box, click Special (click More if the Special button isn’t displayed), and then select Field. Click Find Next to move to the first field. To continue from field to field, click Find Next again, or close the dialog box and press Shift+F4.
➤ To mark index entries
1. On the References tab, in the Index group, click Mark Entry.
2. In the document, select the text for a main entry, and then click the Mark Index Entry dialog box to make it active.

82 Chapter 3 Create advanced references
Or
Position the cursor where you want a reference to appear in the document, and then enter the entry in the Main Entry box.
3. In the Subentry box, enter a subentry. To define a third-level entry, add a colon to the end of the subentry, and then enter the third-level entry.
4. In the Options area, do one of the following:
m Click Cross-reference, and then enter the text for the reference.
m Click Current page.
m Click Page range, and then select the bookmark for the range of pages the entry is related to. (See the next procedure for the steps you follow to create a bookmark.)
5. In the Page number format area, select bold and italic formatting as required.
6. Click Mark, or click Mark All to mark all instances of this entry in the document.
➤ Todefineabookmarkforapagerange
1. Select the paragraphs you want to include in the page range.
2. On the Insert tab, in the Links group, click Bookmark.
3. In the Bookmark dialog box, enter a name for the bookmark, and then click Add.
➤ Tomarkindexentriesbyusinganautomarkfile
1. Create the automark file by using a list or a two-column table.
2. On the References tab, in the Index group, click Insert Index.
3. In the Index dialog box, click AutoMark.
4. In the Open Index AutoMark File dialog box, select the file, and then click Open.
➤ To specify index formatting options and generate the index
1. In the document, place your cursor where you want the index to appear.
2. On the References tab, in the Index group, click Insert Index.
3. In the Index dialog box, set any of the following options:
m Select a type of index: indented or run-in.
m Specify the number of columns.
m Choose a language if you are using a language other than the default language on your system.

3.2 Create and manage reference tables 83
m If you are using an indented index, click Right align page numbers, and then select the style of tab leader you want to use.
m Select a format for the index, or keep From template selected.
4. Click OK.
➤ To edit and update an index
1. In the document, click Show/Hide ¶ if the index fields are not displayed.
2. Select the text in the field for the entry you want to edit, and then revise and format the entry.
3. Place the cursor in the index, and then, on the References tab, click Update Index.
Practice tasks
The practice files for these tasks are located in the MOSWordExpert2013\Objective3 practice file folder. Save the results of the tasks in the same folder.
l Open the WordExpert_3-1a document. Work through the file, adding index entries for terms such as formatting, styles, templates, and others. Add sub-entries for several main entries (such as styles, modifying), and define a page range by using a bookmark. Generate the index, and then edit a handful of entries by using the field tags. Update the index to reflect your changes.
l Create an automark file by using the terms from the previous practice task. Use the file to insert an index in the WordExpert_3-1b document.
3.2 Create and manage reference tablesResearch and scholarly documents, and also many types of legal and business docu-ments, include citations to sources that the authors of the documents referred to. The References tab provides tools that you can use to build a list of sources by using the infor-mation required by conventional authorities such as the Modern Language Association or the Chicago Manual of Style. You can manage these sources, insert the citations where you need them in a document, and when the citations are in place, create a bibliography or a list of works cited.
Word also provides mechanisms for creating and managing other types of references, including tables of contents, tables of figures, and footnotes and endnotes. This section describes how you create and update reference tables, citations, and notes.

84 Chapter 3 Create advanced references
Creating and formatting tables of contentsWord can use its built-in heading styles and other styles you specify to create a table of contents. With these styles in place in a document, you can use the Table Of Contents gallery on the References tab to insert a table of contents. The gallery provides two built-in formats: one uses the title Contents, and the second the more formal Table of Contents. The second option also inserts a page break.
The Manual Table option in the gallery inserts placeholders for a table of contents with three levels. Use this option if you want to build a table of contents from scratch.
A built-in table of contents that is tied to styles can easily be updated. You can edit the headings in the body of the document and then regenerate the table of contents. You don’t need to edit the headings in both locations.
The Table Of Contents dialog box (which Word displays if you click Custom Table Of Contents at the bottom of the gallery) provides a set of options for which levels of head-ings Word includes in the table of contents, and also formatting options.

3.2 Create and manage reference tables 85
By default, Word includes three levels of headings in a table of contents. You can display as few as one and as many as nine of the built-in heading styles. In the Formats list, you can select a built-in format or keep the default setting From Template. As in the Index dialog box, when From Template is selected, you can click the Modify button to open the Styles dialog box, where you can select one of the built-in table of contents (TOC) styles for modification.
The Options button in the Table Of Contents dialog box opens a dialog box in which you can designate other styles and specify additional options for elements that Word includes in the table of contents. The styles listed in the dialog box depend on the tem-plate applied to the document.

86 Chapter 3 Create advanced references
In the Table Of Contents Options dialog box, check marks indicate styles Word uses to create the table of contents and the level each style is associated with. You can include other styles in the table of contents by specifying a level in the TOC Level list. For exam-ple, to include sidebar headings as a fourth-level entry in a table of contents, enter 4 in the TOC Level list for the style Sidebar Heading.
By default, Word also uses outline levels to create a table of contents. You can assign an outline level to a style when you create or modify the style. For example, you might assign an outline level to a style you create for sidebar headings or captions so that you can view the content associated with these styles when you display a document in Outline view. When you insert a table of contents, however, you probably won’t want Word to include these styles. Clear the Outline Levels check box when that’s the case.
See Also For details about working with outlines, see section 2.3, “Apply advanced ordering and grouping.”
The Table Entry Fields check box in the Table Of Contents Options dialog box refers to headings or other elements of a document that have been manually marked to be in-cluded in the table of contents. You can create an entry by selecting the text, pressing Alt+Shift+O to open the Mark Table Of Contents Entry dialog box, setting the level, and then clicking Mark. To include the manual entries in the table of contents, you need to select this check box before you generate the table.

3.2 Create and manage reference tables 87
Tip You can use the Add Text tool in the Table Of Contents group on the References tab to change the style applied to headings in a document. The Add Text tool displays the command Do Not Show In Table Of Contents and a list of numbers that match the settings in the TOC Level list in the Table Of Contents dialog box (1, 2, and 3, by default). You can, for example, apply the Heading 1 style to a paragraph formatted as Heading 2 by selecting the paragraph and then clicking 1 on the Add Text menu. If you select Do Not Show In Table Of Contents, Word applies the Normal style to the heading.
➤ To insert a built-in table of contents
1. In the document, apply the built-in heading styles (Heading 1 through Heading 3) to the elements you want to include in the table of contents.
2. Place the cursor where you want the table of contents to appear.
3. On the References tab, click Table of Contents.
4. In the Table of Contents gallery, click Automatic Table 1 or Automatic Table 2.
➤ To build a table of contents from scratch
1. Place the cursor where you want the table of contents to appear.
2. On the References tab, click Table of Contents.
3. In the Table of Contents gallery, click Manual Table.
4. In the placeholders Word inserts, enter the headings for levels you want to include. To insert additional placeholders, copy and paste a blank placeholder.
➤ To create a custom table of contents
1. Place the cursor where you want the table of contents to appear.
2. On the References tab, click Table of Contents.
3. In the Table of Contents gallery, click Custom Table of Contents.
4. In the Table of Contents dialog box, set options for showing and aligning page numbers, and choose the tab leader character and a table of contents format.
5. To change which heading levels appear in the table of contents, specify the number in the Show Levels list.
6. To remove hyperlinks from the table of contents headings, clear the Use hyperlinks instead of page numbers check box.
7. Click OK to insert the table of contents.

88 Chapter 3 Create advanced references
➤ To set options for a table of contents
1. Place the cursor where you want the table of contents to appear.
2. On the References tab, click Table of Contents, and then click Custom Table of Contents.
3. In the Table of Contents dialog box, click Options.
4. In the Table of Contents Options dialog box, do any of the following:
m To include other styles in the table of contents, specify the level in the TOC Level box to the right of the style’s name.
m To exclude outline levels from the table of contents, clear the Outline levels check box.
m To exclude styled elements from the table of contents, clear the Styles check box, and then use outline levels or table entry fields.
m To include manually marked table entries, select the Table entry fields check box.
5. Click OK in the Table of Contents Options dialog box, and then click OK in the Table of Contents dialog box.
➤ To update a table of contents
1. Place the cursor in the table of contents.
2. On the References tab, in the Table of Contents group, click Update Table.
➤ To remove a table of contents
1. Place the cursor in the table of contents.
2. On the References tab, click Table of Contents, and then click Remove Table of Contents.
Creating tables of figuresAnother type of reference table is a table of figures. Word generates a table of figures from captions you associate with illustrations and other types of objects, such as tables, charts, or diagrams. You can add captions to a variety of elements in a document.
Inserting captionsThe first step in creating a table of figures is to insert captions. The Insert Caption com-mand in the Captions group opens a dialog box in which you enter a caption and define settings for how Word displays it.

3.2 Create and manage reference tables 89
In the Caption dialog box, use the Label list to select the type of object you are adding a caption to (a figure, in this example). The default choices are equation, figure, and table. You can define captions for other types of objects (charts, for example) by clicking New Label. (You can delete custom labels when you no longer need them, but you cannot delete the default labels.)
Click the Numbering button to display the Caption Numbering dialog box, and then use this dialog box to switch to a different numbering format or to include a chapter number with a caption’s label. Chapter headings must be defined by using one of Word’s built-in heading styles.
Tip If you insert a particular type of object repeatedly in a document and you want these objects to have a caption, click AutoCaption in the Caption dialog box. Select the type of object (Bitmap Image or Microsoft Excel Worksheet, for example) that you want Word to provide a caption for when you insert an object of this type. You can adjust the label that’s used with a particular type of object, where Word positions the caption by default, and how the captions are numbered.
Inserting tables of figuresThe steps and options for creating a table of figures are similar to those for a table of contents. The Table Of Figures dialog box previews how Word will display the table in a printed document and online. You can choose a built-in format or use the style de-fined in the current template. For the caption label, you can select None, Figure, Table, Equation, or a custom label you define by using the Caption dialog box.

90 Chapter 3 Create advanced references
By default, Word uses its built-in Caption style and the associated label to build the table of figures. Any element to which that style is applied and that is labeled as a figure is included. In the Table Of Figures Options dialog box, you can select a different style or use table entries you define manually. As you can with table of content styles, you can modify the style Word uses to display the table of figures by selecting From Template in the Formats list, clicking Modify in the Table Of Figures dialog box, and then using the Styles dialog box and the Modify Style dialog box to update the style’s attributes.
➤ To create a caption for a document element
1. Select the object you want to create a caption for.
2. On the References tab, in the Captions group, click Insert Caption.
3. In the Caption dialog box, in the Label list, select the type of object, and then enter the caption after the label in the Caption box.
4. In the Position list, select an option for where you want the caption to appear.
5. Click Numbering to open the Caption Numbering dialog box, and then adjust number formatting for the caption.
6. Click OK in the Caption Numbering dialog box, and then click OK in the Caption dialog box.

3.2 Create and manage reference tables 91
➤ To create a custom label
1. On the References tab, in the Captions group, click Insert Captions.
2. In the Caption dialog box, click New Label.
3. Enter a name for the label, and then click OK.
➤ Toinsertatableoffigures
1. Place the cursor where you want the table of figures to appear.
2. On the References tab, click Insert Table of Figures.
3. In the Table of Figures dialog box, set options for showing and aligning page numbers and choose the tab leader character and a table of figures format.
4. In the Caption label list, select the label you want to include with the captions.
5. To remove hyperlinks from the table of figure entries, clear the Use hyperlinks instead of page numbers check box.
6. Click OK to insert the table of figures.
➤ Tosetoptionsforatableoffigures
1. In the Table of Figures dialog box, click Options.
2. In the Table of Figures Options dialog box, do any of the following:
m To base the table on a different style, select Style, and then choose a style from the list.
m To include manually marked table entries, select Table entry fields.
3. Click OK in the Table of Figures Options dialog box, and then click OK in the Table of Figures dialog box to insert the table.
Working with tables of authoritiesA table of authorities is used in legal documents as a reference to the cases, statutes, rul-ings, regulations, and other citations included in a document. Word can generate a table of authorities on the basis of the citations you mark and define in a document. The table of authorities feature in Word provides several built-in categories that you use to classify citations, but you can modify this list or add categories of your own. Word also provides options for formatting a table of authorities and for how the table displays the citations.
Marking citationsTo start building a table of authorities, you mark entries by using the Mark Citation dialog box. Any text that you select before you open the dialog box (by clicking Mark

92 Chapter 3 Create advanced references
Citation in the Table Of Authorities group on the References tab) appears in the Selected Text box and the Short Citation box. You can edit the citation’s text in the Selected Text box or in the Short Citation box. To format the citation, right-click in the Selected Text box, and then choose Font.
Word provides seven named categories by default (cases, statutes, other authorities, rules, treatises, regulations, and constitutional provisions), along with unspecified cate-gories numbered 8 through 16. You can replace a named category or assign a name to a numbered category to modify what Word provides.

3.2 Create and manage reference tables 93
If you click Mark All in the Mark Citation dialog box, Word inserts a table of authorities field (identified by the characters TA) for each instance in the document that matches the text in the long and short forms you define. You can keep the Mark Citation dialog box open as you navigate through a document, to mark other citations. The Next Citation button moves to the next likely citation in the document—Word uses clues such as v. or dates in parentheses—for example, (2001)—to identify citations.
Formatting and inserting tables of authoritiesWhen you’re ready to build your table of authorities, you set options in the Table Of Authorities dialog box.
In the Table Of Authorities dialog box, you can set the following options:
l Category Select which category of authorities you want to include, or choose All. You cannot choose more than one option in this list.
l Use passim Keep this check box selected if you want to use the term passim to indicate that information the citation refers to is scattered throughout the source. Clear this check box to list specific pages for each citation.

94 Chapter 3 Create advanced references
l Keep original formatting Use this option to specify whether the citations listed in the table of authorities appear in the table as they are formatted in the document.
l Tab leader Choose the type of tab leader to use (which helps align page numbers), or choose None from this list.
l Formats Choose a style for the table of authorities, or use the styles and formatting that are defined in the current template.
To change formatting for the table of authorities entries and the table heading, use the From Template setting in the Formats list, and then click Modify to open the Styles dia-log box. Select the element you want to change, click Modify in the Style dialog box, and then revise the formatting in the Modify Style dialog box.
➤ To mark table of authorities citations
1. In the document, select the text for a citation.
2. On the References tab, in the Table of Authorities group, click Mark Citation.
3. In the Mark Citation dialog box, edit the text for the citation in the Selected text box.
4. Edit the short form for the citation in the Short citation box.
5. In the Category list, select a category for the citation.
6. Click Mark, or click Mark All, to insert a table of authorities reference for each instance of this citation as you have defined it in the Mark Citation dialog box.
7. Click Next Citation, and repeat steps 3 through 6.
➤ Todefineorreplaceacategoryforatableofauthorities
1. On the References tab, click Mark Citation.
2. In the Mark Citation dialog box, click Category.
3. In the Edit Category dialog box, select the category you want to change.
4. In the Replace with box, modify the category name.
5. Click Replace.
6. Make changes to other categories as necessary, and then click OK.
➤ To format and generate a table of authorities
1. Position the cursor where you want the table of authorities to appear in the document.
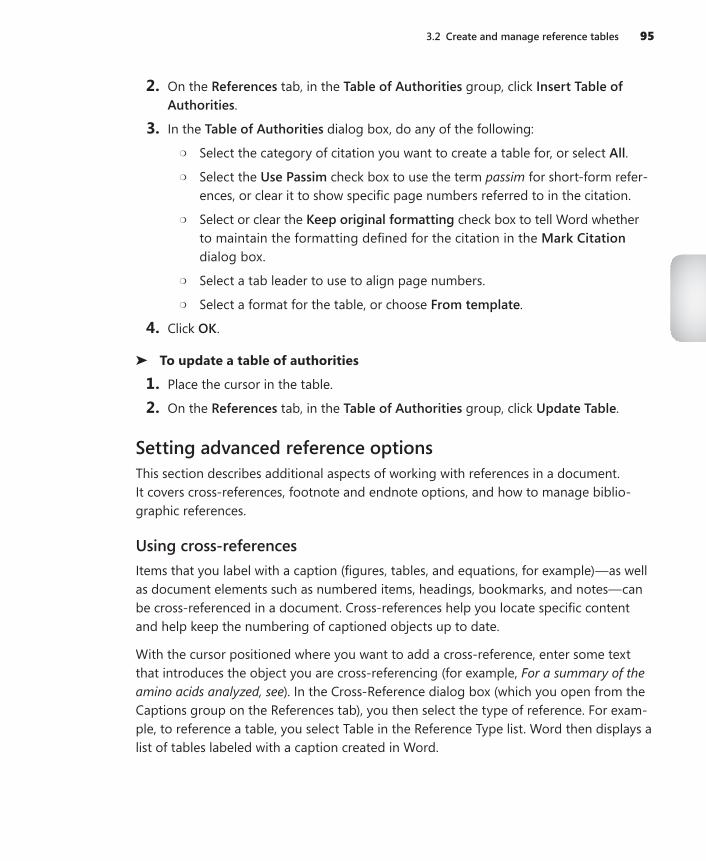
3.2 Create and manage reference tables 95
2. On the References tab, in the Table of Authorities group, click Insert Table of Authorities.
3. In the Table of Authorities dialog box, do any of the following:
m Select the category of citation you want to create a table for, or select All.
m Select the Use Passim check box to use the term passim for short-form refer-ences, or clear it to show specific page numbers referred to in the citation.
m Select or clear the Keep original formatting check box to tell Word whether to maintain the formatting defined for the citation in the Mark Citation dialog box.
m Select a tab leader to use to align page numbers.
m Select a format for the table, or choose From template.
4. Click OK.
➤ To update a table of authorities
1. Place the cursor in the table.
2. On the References tab, in the Table of Authorities group, click Update Table.
Setting advanced reference optionsThis section describes additional aspects of working with references in a document. It covers cross-references, footnote and endnote options, and how to manage biblio-graphic references.
Using cross-referencesItems that you label with a caption (figures, tables, and equations, for example)—as well as document elements such as numbered items, headings, bookmarks, and notes—can be cross-referenced in a document. Cross-references help you locate specific content and help keep the numbering of captioned objects up to date.
With the cursor positioned where you want to add a cross-reference, enter some text that introduces the object you are cross-referencing (for example, For a summary of the amino acids analyzed, see). In the Cross-Reference dialog box (which you open from the Captions group on the References tab), you then select the type of reference. For exam-ple, to reference a table, you select Table in the Reference Type list. Word then displays a list of tables labeled with a caption created in Word.

96 Chapter 3 Create advanced references
The Insert Reference To list provides options for how the reference appears—a page number, for example, or the text of a heading.
For some types of references (headings or bookmarks, for example), the Insert Reference To list includes two types of numbers: No Context and Full Context. These options are used with lists or outlines that use multiple levels. The Full Context option includes each element in a numbering scheme—for example, 4.1.1.a. The No Context alternative refers only to the last of the levels used.
The Include Above/Below check box provides the option to insert a positional cross-reference that uses the word above or below depending on where the item you are referring to is located in relation to the reference.
Keep the Insert As Hyperlink check box selected if you want to create a hyperlink from the cross-reference to the reference’s target. The hyperlinks you create in the Cross-Reference dialog box work in Word and in a browser, if you save a document as a webpage.

3.2 Create and manage reference tables 97
➤ To insert a cross-reference
1. Enter the text you want to use to introduce the item you are referencing.
2. On the References tab, in the Captions group, click Cross-reference.
3. In the Cross-reference dialog box, select the reference type.
4. In the Insert reference to list, select which option you want to use as the reference (page number, caption, or section heading, for example).
5. In the For which list, select the target for the cross-reference.
6. Click Insert.
Setting options for footnotes and endnotesThe use of notes (footnotes or endnotes) is required in many documents to provide at-tribution for sources of quotations, facts, and opinions. The References tab includes the Footnotes group. You use the Insert Footnote or Insert Endnote commands to add a note to your document. Footnotes appear at the bottom of a page, whereas endnotes appear at the end of a document or a section.
The settings for how footnotes and endnotes are displayed are controlled in the Footnote And Endnote dialog box, which Word displays when you click the dialog box launcher in the Footnotes group.

98 Chapter 3 Create advanced references
You can set options for where notes appear, for example, and the layout of footnotes (in columns or with the same layout as the current section). You can change the number format, specify a custom mark or symbol, specify the starting number, and designate whether numbering is continuous or restarts at each section or each page. You can apply the settings you make in this dialog box to the current section or to the whole document.
One other option you can set for notes is note continuation notification. In Draft view, you can open the Note pane and then enter the notice you want Word to display (for example, Continued on next page) when a note’s text spans multiple pages.
➤ To set options for footnotes and endnotes
1. On the References tab, in the Footnotes group, click the dialog box launcher.
2. In the Footnote and Endnote dialog box, do any of the following:
m In the Location area, select an option for positioning footnotes at the bottom of the page or below the text they refer to. For endnotes, specify whether the notes appear at the end of the document or the end of the current section.
m Click Convert to change footnotes to endnotes, endnotes to footnotes, or to swap footnotes with endnotes (which converts both at the same time).
m In the Footnote layout section, choose a column format or keep the default setting, which matches the column layout for the current section.
m In the Format section, select a numbering format, insert a specific symbol for a note (such as two asterisks), specify a starting number, and select whether numbering should be continuous or should restart at each section.
m In the Apply changes to area, select Whole document or This section.
3. Click Insert to add a note, or click Apply to apply your settings to the document.
➤ Todefineanotecontinuationnotice
1. On the View tab, in the Views group, click Draft.
2. On the References tab, click Show Notes.
3. In the Note pane, in the list box, select Footnote Continuation Notice (or Endnote Continuation Notice).
4. In the Note pane, enter the text you want to use, and then close the Note pane.

3.2 Create and manage reference tables 99
Adding source citations to documentsTo add and define bibliographic and other source citations for a document, you work with the commands in the Citations & Bibliography group on the References tab. Word provides built-in citation styles that conform to conventions defined by organiza-tions and in traditional style manuals. For example, the style list includes entries for the American Psychological Association’s style guide (APA Sixth Edition), the Modern Language Association’s style guide (MLA Seventh Edition), and the sixteenth edition of the Chicago Manual of Style. The style option you select determines what information you enter for a citation.
You can use the Insert Citation command to add a citation that’s already defined, to create a new source for a citation, or to enter a placeholder you return to later to fill in details for the source. Each citation you define is included in the gallery that appears when you click Insert Citation.
When you add a new source, you enter details in the Create Source dialog box. The fields in the Create Source dialog box depend on the bibliographic style you are using and the type of source you select. Word displays an example for each field when you select that field.
To create an entry with multiple authors, click Edit beside the Author field, and then use the Edit Name dialog box to add each author name required for the citation. Word cre-ates a tag name that identifies a particular source, using the author name you enter as the basis of the ID. You can add other information to the tag name (a year of publication, for example) to augment the information Word provides.

100 Chapter 3 Create advanced references
To make changes to a citation, click the arrow that appears on the citation’s content control when you select it. The menu that appears provides options that you can use to edit the citation, edit the details for the source that is cited, convert the citation to static text, and update the citations and bibliography in the document.
In the Edit Citation dialog box, you can add page references for the citation and choose to display the author, year, and title or suppress the display of one or more of these elements.
➤ To insert a citation
1. On the References tab, in the Citation & Bibliography group, choose the style of citation you want to use.
2. Position the cursor where you want the citation to appear, click Insert Citation, and then click Add New Source.
3. In the Create Source dialog box, select the type of source, and then fill in the fields that are shown.
4. If you need to enter additional details for the source, select the Show All Bibliography Fields check box if you need to enter additional details for the source.
5. Click OK.
➤ To use a citation placeholder
1. Position the cursor where you want the citation to appear, click Insert Citation, and then click Add New Placeholder.
2. In the Placeholder Name dialog box, keep the default title provided or enter a temporary name for the source.
3. To fill in the source details, right-click the placeholder and then click Edit Source.
4. In the Edit Source dialog box, select the type of source, and then fill in the fields required.

3.2 Create and manage reference tables 101
Managing sourcesWhen you define the details for a source in the Create Source dialog box, Word adds the reference to a master list of sources. To work with this list, you use Source Manager.
Tip Instead of providing details for each citation as you insert them, you can build a list of sources in Source Manager. Open Source Manager, and then use the Create Source dialog box (by clicking New in Source Manager) to provide the details for each source you need to cite. Then return to the document and place citations where you need them by using the entries in the Insert Citation gallery.
Source Manager shows two lists of sources: the master list and the list for the current document. You can copy sources from the master list when you need to cite them in the current document. (You can also copy a source in the list for the current document to the master list.) Use the other command buttons in Source Manager to edit source information or to delete a source. You cannot delete a cited source (indicated by a check mark) from the current list of sources.

102 Chapter 3 Create advanced references
Word stores the sources you define in a file named Sources.xml. To view this file, click the Browse button in Source Manager to display the Open Source List dialog box. You can copy this file and use it on another computer or share it with other users. To add sources from this file to Source Manager, display the Open Source List dialog box, se-lect Sources.xml, and then click OK. But be warned that if you have sources defined on this computer (or if another user does), that source list is replaced by those defined in the copy of Sources.xml you open.
➤ To manage sources for a document
1. On the References tab, in the Citation & Bibliography group, click Manage Sources.
2. In Source Manager, do any of the following:
m Select a source from either the Master List or Current List, and then click Copy to move the source from the selected list to the target list.
m Select a source, and then click Delete to remove it from a list.
m Select a source, and then click Edit to update or revise details for the source.
m Click New to open the Create Source dialog box and define a new source.
m To change the sort order for the source lists, select an option from the Sort list.
m To search for a particular source or set of sources, enter the search string in the Search box.
Inserting bibliographiesThe built-in options in the Bibliography gallery include Bibliography, References, and Works Cited. Choose the option for the type of reference list you need to include in the document. The Insert Bibliography command at the bottom of the gallery adds a simply formatted bibliography to the document.
Tip Bibliographies are a type of building block. You can change the formatting for the bibliography you insert, select it, and then save it to the Bibliography gallery to use in other documents. For details about working with building blocks, see section 4.1, “Create and modify building blocks.”
➤ To insert a bibliography, list of references, or list of works cited
1. Position the cursor where you want the references to appear.
2. On the References tab, in the Citation & Bibliography group, click Bibliography, and then choose the option you want from the gallery that appears.

3.3 Manage forms, fields, and mail merge operations 103
Practice tasks
The practice files for these tasks are located in the MOSWordExpert2013\Objective3 practice file folder. Save the results of the tasks in the same folder.
l Open the WordExpert_3-2a document. Insert one of the built-in tables of con-tents from the References tab. Remove that table of contents, and then insert a custom table of contents that shows four levels of headings and includes entries formatted with the Subtitle style.
l Open the WordExpert_3-2b document. Create captions for the tables and figures, insert a table of figures, and then insert cross-references to several of the elements in the file.
l Open the WordExpert_3-2c document, and do the following:
m Use the sources listed in the document to create a list of six or seven sources in Source Manager.
m Open the WordExpert_3-2d document, and insert citations to the sources you defined in the previous task. Insert several placeholders for citations as well.
m Open Source Manager, and edit information for three of the sources listed. Choose one or more of the entries for the placeholders you inserted, and then use the WordExpert_3-2c document to enter details for those placeholders.
l Insert a bibliography in the WordExpert_3-2d document.
3.3 Manage forms, fields, and mail merge operationsForms are more structured than many documents you create in Word. Forms are designed to collect information in particular formats and are often submitted to other people or systems for processing or approval. Expense reports, invoices, order forms, and registration forms are examples of the types of forms you might create in Word.
When you create a form, you use content controls such as text boxes, check boxes, and lists in addition to text, images, and other document elements. You can also include fields on a form.
This section describes how to create and manage forms and how to work with fields in a document. In addition, this section describes how to set up and run a mail merge opera-tion, a feature that relies on fields to insert information from a list of contacts.

104 Chapter 3 Create advanced references
Designing formsYou can create a form for a single document, but most forms are saved as a template so that they can be used more than once. Start with a blank template for a form you plan to design from scratch, or use one of the form templates that Word provides as a starting point.
See Also For more information about templates, see section 4.2, “Create custom style sets and templates.”
The information that users of a form are asked to provide can be captured in a content control such as a text box, list box, or check box. You use content controls to manage a form by specifying items for a list, for example, or by providing a defined set of options related to check boxes.

3.3 Manage forms, fields, and mail merge operations 105
The content controls you can add to a form are displayed in the Controls group on the Developer tab. (Word displays a ScreenTip that identifies each control.) When you add controls to a form, you should work in Design mode. In Design mode, Word displays the tags that identify the content controls, and you can more easily arrange and edit the content controls on the form. The following controls are available from the Controls group:
l Rich text Use this control for text fields in which you need to format text as bold or italic, for example, or if you need to include multiple paragraphs and add other content such as images and tables.
l Plain text Use the plain text control for simple text fields such as names, addresses, or job titles. The text added to a plain text control can be formatted only in limited ways, and the control can include only a single paragraph by default.
l Combo box In a combo box, users can select from a list of defined choices or en-ter their own information. If you select the Contents Cannot Be Edited property for a combo box control, users cannot add their own items to the list.
See Also For more information, see the “Locking controls” topic later in this section.
l Drop-down list In this control, users can select only from a list of defined options. You can use a drop-down list to display department names, meeting rooms, or product names (a list of specific items). A combo box is better suited for displaying a list of tasks, for example, so that users can select a task if it appears on the list or define one if it doesn’t.
l Building block Use a building block control when you want users of the form to choose a specific block of text or a building block from another of the galleries in Word. In a request for proposal form, for example, you might include a building block control from which users choose text entries from the Quick Parts gallery to indicate the length of time for which the proposal is valid.
See Also For more information about building blocks, see section 4.1, “Create and modify building blocks.”
l Picture Use this control to embed an image file in a document. You can use a picture control to display a logo, for example, or pictures of project personnel.
l Date picker This control inserts a calendar control that lets users select or enter a date.

106 Chapter 3 Create advanced references
l Check box Use the check box control to provide a set of options—product sizes, for example, or options that indicate which events a user plans to attend.
Tip When you are designing a form, you can also work with what Word refers to as “legacy controls,” which include a text box, check box, and dropdown list. For more information about working with legacy controls, see the “Working with legacy controls” topic later in this section.
You can also add one of many ActiveX controls to a form. For example, you can add a command button to a form and then assign a macro to the command button. To take full advantage of ActiveX controls on a form, you should know how to program the controls with Microsoft Visual Basic for Applications (VBA). For one example of how VBA can automate controls, see the “Using macros to modify tab order in forms” topic of section 4.3, “Prepare a document for internationalization and accessibility.”
Content controls include a simple text statement that tells users what to do with the control. For example, text controls display Click here to enter text, and the date-picker control prompts users to Click here to enter a date. You can customize this text so that it provides precise instructions and helps users work with a form more efficiently. Customizing the text in a control can also simplify a form.

3.3 Manage forms, fields, and mail merge operations 107
Tip To keep content controls aligned in a form, add the controls to a table. To group content controls, select the controls, and then click Group in the Controls group on the Developer tab. For example, you can group a set of check boxes so that they cannot be edited or deleted individually.
➤ To insert a text content control
1. Click where you want to insert the control.
2. In the Controls group on the Developer tab, click Rich Text Content Control or Plain Text Content Control.
➤ To insert a picture control
1. Click where you want to insert the control.
2. In the Controls group on the Developer tab, click Picture Content Control.
3. Click the icon in the control, and then use the Insert Pictures dialog box to locate and select the picture you want to display.
➤ To insert a combo box or a drop-down list
1. Click where you want to insert the control.
2. In the Controls group on the Developer tab, click Combo Box Content Control or Drop-Down List Content Control.
3. Select the content control, and then click Properties in the Controls group.
4. In the Drop-Down List Properties area, click Add, and then use the Add Choice dialog box to define the first item for the list. Repeat this step to define each item required in the list.
5. Select options for other properties, and then click OK.
➤ To insert a date picker
1. Click where you want to insert the date picker control.
2. In the Controls group on the Developer tab, click Date Picker Content Control.
➤ To insert a check box
1. Click where you want to insert the check box control.
2. In the Controls group on the Developer tab, click Check Box Content Control.

108 Chapter 3 Create advanced references
➤ To insert a building block
1. Click where you want to insert the control.
2. In the Controls group on the Developer tab, click Building Block Gallery Content Control.
3. Click the content control to select it, and then click Properties in the Controls group.
4. Click the gallery and the category for the building blocks that you want to make available in the building block control, and then click OK.
➤ To customize the text in a content control
1. In the Controls group, click Design Mode.
2. Select the content control you want to edit.
3. Edit the placeholder text, and apply any formatting.
4. In the Controls group, click Design Mode to exit Design mode.
Working with control propertiesEach control you add to a form has a set of properties. The most basic properties are Title and Tag. Properties also affect how the contents of a control are formatted, whether the control can be deleted, and whether its content can be edited. Other properties de-pend on the type of control you are working with. For example, for a plain text control, you can set an option to allow multiple paragraphs. Properties for the date-picker con-trol include the date format, the locale, and the calendar type.

3.3 Manage forms, fields, and mail merge operations 109

110 Chapter 3 Create advanced references
Word displays a control’s title to identify it. The Tag property helps you locate a control and can be used if you link your form to a data source. Tags enclose a control when you work in Design mode.
The property Remove Content Control When Contents Are Edited can be set when you use a control to provide information about filling out the form, for example, but the con-tent control is not needed when the form is completed and submitted. (This property is not available for the check box content control.)
The following sections provide more information on specific control properties.
Locking controlsTwo properties you can set for controls help you protect the design and content of your form. The first property, Content Control Cannot Be Deleted, prevents a user of a form from deleting that control. You should set this property on every control that is required in the form. You can also set a property that prevents users from editing the content of a control. This property is suitable for titles, for example, or other controls whose content should remain static, such as text controls that display standardized text. Many controls, however, require users to enter text, choose an option, or select from a list. For controls such as these, you should not set the option to prevent the content of a control from be-ing edited.
See Also For more information about locking a form, see the topic “Locking and unlocking forms” later in this section.
Formatting controlsIn the Content Control Properties dialog box, by selecting Use A Style To Format Text Typed Into The Empty Control, you can apply a style to the content in a control. You can choose a style from the Style list or create a style in the Create New Style From Formatting dialog box.
See Also For information about creating styles, see section 2.2, “Apply advanced styles.”
Building listsIf you are using a combo box or list box content control, the Content Control Properties dialog box includes fields that you use to define list items. In the dialog box, you specify the display name and value for each list item.

3.3 Manage forms, fields, and mail merge operations 111
By default, Word repeats the text you enter in the Display Name box in the Value box (or vice versa, if you enter a value first). You can change the value to a numerical value, for example, to match a sequence of choices.
➤ To lock a control
1. Select the content control, and then click Properties in the Controls group.
2. In the Content Control Properties dialog box, in the Locking area, select one or both of the options that apply:
m Content control cannot be deleted
m Contents cannot be edited
3. Click OK.
➤ To format a control
1. Select the content control, and then click Properties in the Controls group.
2. In the Content Control Properties dialog box, select the Use a style to format text typed into the empty control check box.

112 Chapter 3 Create advanced references
3. Choose a style from the Style list, or click New Style, and then define the attributes of the style in the Create New Style From Formatting dialog box.
4. Click OK in the Create New Style From Formatting dialog box, and then click OK in the Content Control Properties dialog box.
➤ Todefinealist
1. Select the content control, and then click Properties in the Controls group.
2. In the Drop-Down List Properties area, click Add, and then use the Add Choice dialog box to define the first item for the list. Repeat this step to define each item required in the list.
3. Select options for other properties, and then click OK.
Locking and unlocking formsAs you can with other types of documents, you can restrict the types of changes us-ers can make to a form. After you design a form and set properties for the controls it contains, use the Restrict Editing command on the Developer tab to display the Restrict Editing pane.
Select the option to limit formatting if you want to maintain the look and feel of the form. The Filling In Forms option in the Editing Restrictions list sets up the form so that

3.3 Manage forms, fields, and mail merge operations 113
users can edit controls as you designated, but they cannot change the design of the form or alter the text in titles or other labels.
Important The Filling In Forms option does not let you specify groups or individuals who can make changes to the document. It controls only how users can work with the form. For more information on restricting editing to groups or individuals, see the “Restricting editing” topic in section 1.2, “Prepare documents for review.”
When a user bases a new document on a form template you’ve designed, he or she can fill in the required fields but cannot perform other types of edits. If a user clicks Restrict Editing, the pane that Word displays describes this situation and presents the user with a Stop Protection button. To unlock the form and make changes other than filling in the form’s fields, a user must click Stop Protection and then provide a password if a pass-word is assigned to restrict the editing of the form.
Tip To specify users who can bypass editing restrictions and work with the form while protection is applied, click Restrict Permission at the bottom of the Restrict Editing pane. In the Select User dialog box, select the user accounts to which you want to grant this privilege.
➤ To lock a form
1. On the Developer tab, in the Protect group, click Restrict Editing.
2. In the Restrict Editing pane, select the Allow only this type of editing in the doc-ument check box in the Editing Restrictions area, and then choose Filling in Forms from the list.
3. Click Yes, Start Enforcing Protection.
4. In the Start Enforcing Protection dialog box, enter a password, and then enter the password again to confirm it.
5. Click OK in the Start Enforcing Protection dialog box.
Working with legacy controlsIn Word, you can work with three legacy controls, which are also referred to as form fields: a text box, a check box, and a drop-down list. You can add these fields to a form in addition to content controls and then set options for how users can interact and work with the fields. For each form field, Word provides an Options dialog box in which you

114 Chapter 3 Create advanced references
can specify settings for how the form field behaves. (Double-click the field to display the dialog box.)
The following settings are available:
l Text box In the Text Form FieldType list, you can choose the type of data the text field will contain (options include Regular Text, Number, and Date). The Type list also includes Calculation, which lets you define an expression that is evaluated when a user works with the form field.
Use the Default Text box to define the text (or number or date) you want the field to show by default. In the Maximum Length box, Unlimited is the default option, but you can specify a certain number of characters. For example, a product ID might include exactly nine characters, and you can specify that in the Maximum Length box. The Text Format list changes depending on the choice you make in the Type list. Currency formatting options, for example, are available when you select Number in the Type list.
Use the Run Macro On lists to select a macro that you want Word to run when a user enters or exits the field. Leave the Fill-In Enabled check box selected if you want users to be able to edit the contents of the field. Select Calculate On Exit if the form field is set up to calculate an expression.
l Check box For a check box form field, you can specify its size and whether it is se-lected or not selected by default. As you can with a text form field, you can specify a macro that runs when a user enters or exits the field.

3.3 Manage forms, fields, and mail merge operations 115
l Drop-down list Use the Options dialog box for a drop-down list form field to de-fine the items for the list. In the Run Macro On lists, choose a macro if you want to run one when a user enters or exits this field.
The Options dialog box for each type of form field includes the Add Help Text button. The Form Field Help Text dialog box contains two pages: Status Bar and Help Key (F1). You can select AutoText Entry and then choose an item from the list provided by Word, or select Type Your Own and then enter the help text you want to display to users on the status bar or in the Help window when a user presses F1.
Form fields do not become active unless you follow the steps outlined in the previous section (“Locking and unlocking a form”) to apply editing restrictions for the form. When editing restrictions are enforced, you cannot change the properties of a form field. You must stop protection (by entering the specified password) before you can make any adjustments.
To remove a form field, remove protection from the form if necessary, select the field, and then press Delete.
➤ Tobuildaformbyusingformfields
1. Click where you want to insert the field.
2. On the Developer tab, in the Controls group, click Legacy Tools, and then select the type of form field you want to add (text, check box, or drop-down list).
3. Double-click the field placeholder in the form to open the selected form field’s Options dialog box.
4. In the Form Field Options dialog box, set properties for the form field (for exam-ple, define the list items for a drop-down list form field, or specify the default value for a text form field).
5. Click Add Help Text, and then define the help text you want to appear on the status bar and in the Help window.
6. After you finish adding form fields and defining each field’s properties, click Restrict Editing on the Developer tab.
7. In the Restrict Editing pane, select the check box under Editing Restrictions, and then select Filling in forms from the list.
8. Click Yes, Start Enforcing Protection, and then enter the password you want to use to protect this form.

116 Chapter 3 Create advanced references
➤ Toremoveaformfield
1. With the form open, click Restrict Editing on the Developer tab.
2. In the Restrict Editing pane, click Stop Protection.
3. In the Unprotect Document dialog box, enter the password used to protect the form, and then click OK.
4. Select the form field you want to remove, and then press Delete.
Inserting and managing document fieldsAs described earlier in this chapter, Word uses fields to manage elements such as in-dexes, tables of contents, and tables of authorities. You can also insert fields on your own to display information automatically. When the information that a field displays changes, you can update the field so it’s current. (To update a field, select it and then press F9.)
See Also For details about formatting fields, see section 2.1, “Apply advanced formatting.”
The Field dialog box lists fields in categories such as Date And Time, Document Auto-mation, Document Information, Links And References, and User Information. You can display all fields or only the fields in a particular category. (Document properties such as Author, Keywords, and Title are listed in the Document Information category.)

3.3 Manage forms, fields, and mail merge operations 117
You can view the output of the field or the field code itself. The field code includes the field’s name (such as FileSize) and can also include properties and other switches that af-fect how the field’s data is formatted and what the field displays. For example, the field code {FILESIZE \* CardNumber \k \* MERGEFORMAT) shows a document’s file size as a cardinal number in kilobytes. The MERGEFORMAT switch indicates that the field’s format remains the same when it is updated.
Word provides keyboard shortcuts you can use to manage fields in a document, as shown in the following table.
Keyboard shortcut ActionCtrl+F9 Inserts a blank fieldAlt+F9 Switches the view between field codes and field output
for all fields in the documentShift+F9 Switches the view between field codes and field output
for selected fieldsF9 Updates selected fieldsF11 or Shift+F11 Moves to the next or previous fieldCtrl+F11 Locks a field and prevents it from being updatedCtrl+Shift+F11 Unlocks a field
See Also For a reference of field properties and options, see the Word Help system topic “Field codes in Word.”
➤ Toinsertafield
1. On the Insert tab, in the Text group, click Quick Parts, and then click Field.
2. In the Field dialog box, select the field you want to insert. Use the Categories list to view a subset of the fields.
3. In the Field properties area, select properties for formatting.
4. In the Field options area, select the options you want to use with the field.
5. To view the elements of the field code, click Field Codes.
6. Click Options to open the Field Options dialog box, and then select the switches you want to apply.
Performing mail merge operationsViewing the results of a successful mail merge operation can be very satisfying. After some preliminary work on your part—creating the document you want to send and

118 Chapter 3 Create advanced references
identifying information about the document’s recipients—Word takes over, merges the content and information you supply, and produces each document you need. You can incorporate additional options to control how Word produces the documents, and you aren’t limited to producing paper mailings—you can send a personal email message to each recipient in a group by using the mail merge features in Word.
Setting up and running a mail merge operation entails six steps (roughly moving left to right across the Mailings tab on the ribbon):
1. Open the document you want to use in the mail merge operation, or start with a blank document and add text, illustrations, and other content. You can enter the content of the document later in the process, but you must have at least a blank document open to enable the commands you need on the Mailings tab.
2. Click Start Mail Merge to display options for the type of mail merge operation you can run—Letters, E-Mail Messages, Envelopes, Labels, Directory, or Normal Word Document.
Tip A directory is like a catalog. It includes the same type of information about a group of items (for example, the name of each item, a description, and a price), but the information is distinct for each item.
3. Click Select Recipients, and then choose an option for the source of your recipi-ent list. You can use the Edit Recipient List command to display the recipient list to select a subset from the list or to update information. In the dialog box Word dis-plays, you can sort and filter the list to organize and find particular entries.
4. Use the commands in the Write & Insert Fields group to insert an address block, a greeting line, and other merge fields, which are placeholders that Word uses to display information contained in the recipient list when you run the mail merge operation.
5. Preview the results. You can find a particular recipient or move from record to rec-ord in the list. Word can also check for errors in advance and compile those errors in a separate document.
6. Click Finish & Merge. You can edit and save individual documents, print the docu-ments all at once, or send the document as an email message.
Tip The last option listed on the Start Mail Merge menu is Step By Step Mail Merge Wizard. The wizard opens a pane that leads you through the six mail merge steps.

3.3 Manage forms, fields, and mail merge operations 119
Building and managing recipient listsNames, addresses, and other information you want to include about recipients in your mail merge documents can come from a variety of sources. You can create an address list as a step in a mail merge operation or use a list that’s stored in a Microsoft Excel worksheet, a Microsoft Access database, your contacts list in Microsoft Outlook, or one of several other formats.
Tip To be of best use in a mail merge, the information in an external data source should be organized as you need to use it for recipient information. For example, if you are compiling an address list in Excel, it’s best to include a header row with column names that correspond to the fields Word uses for addresses in a mail merge operation.
The Type A New List option on the Select Recipients menu opens the New Address List dialog box, where you can compile a recipient list for the mail merge operation. After you build the list, Word saves it in .mdb format. You can select this list for other mail merge operations in the future.

120 Chapter 3 Create advanced references
Scroll to the right in this dialog box to view the group of fields available by default. You can use the Customize Columns button to open a dialog box in which you can define ad-ditional fields, delete fields you don’t need, rename fields, and change the order in which the fields appear. By defining a custom field, you expand the type of information you can insert and display in a mail merge operation. For example, you could create a field named Donation and enter the amount a recipient donated to your organization, or you could create a field named Auction Item and use it to describe what someone purchased at an auction. The amount of information you can store in a custom field is limited to 254 characters, including spaces.
In the New Address List dialog box, click a column heading to sort the list by that col-umn, or click the arrow beside a column heading to open a menu to sort and filter the list in other ways. You can filter for a particular value, filter for blank values to fill in miss-ing information, or use the Advanced option to open the Filter And Sort dialog box. On the Sort Records page in the Filter And Sort dialog box, you can specify as many as three fields to sort by. On the Filter Records page, you can set up a simple, single-field filter to find all records that equal (or do not equal) a particular value, for example, or you can define multifield filters by using the OR and AND operators. Use the OR operator when you want to view records that match any of the conditions you define. Use the AND op-erator to select records that match each condition you define.
The Comparison list on the Filter Records page includes the Less Than, Greater Than, Less Than Or Equal, Greater Than Or Equal, and other operators. You can use these operators to find records with specific numeric values in a custom field you create. For example, for a mail merge operation related to a fundraising campaign, you could create and popu-late a custom field named Pledge or Donation and then filter on the values for that field (pledges above $1,000, for example) to send a document only to those recipients.
If you select an Excel workbook or an Access database as the source of a recipient list, Word displays the Select Table dialog box. This dialog box lists each worksheet and named range in an Excel workbook or the tables and queries defined in an Access data-base. Select the worksheet, range, or database object you want to use. The First Row Of Data Contains Column Headers check box is selected by default. Clear this check box if the data source you select isn’t set up that way.
A Word document that contains nothing but a table is also a valid source of data for a recipient list. Set up a table with the column headings you want to use for fields in the mail merge, enter the recipient data in table rows, and then save the table as a separate document.

3.3 Manage forms, fields, and mail merge operations 121
If the information you want to use for the recipient list is stored in a server database (for example, a Microsoft SQL Server database), you can use the Data Connection wizard to create a connection. As you step through the wizard, you need to provide information such as the server name and the user name and password required to gain access to the server. Choosing the Other/Advanced option in the wizard leads you to the Data Link Properties dialog box. In this dialog box, you select a data source provider and specify the information and other initialization properties required to make a connection. You might need to obtain some of this information from a network or server administrator. Use the Help button in the Data Link Properties dialog box to obtain detailed informa-tion about each field.
If you maintain and manage a detailed contacts list in Outlook—including information such as company names, phone numbers, mailing addresses, and other details—you can make productive use of your contacts folder as the data source for a mail merge opera-tion. All the contacts in the folder you choose are selected for the operation by default. Clear the check box beside any contact that you don’t want to correspond with in the mail merge operation you are setting up.
Tip If you make changes to your Outlook contact list, click Refresh to update the list of recipients for the mail merge. Keep in mind that you cannot edit Outlook contact information while working in the Mail Merge Recipients dialog box.
➤ To create and manage an address list
1. On the Mailings tab, click Select Recipients, and then click Type New List.
2. In the New Address List dialog box, enter the information for the first recipient and then click New Entry.
3. Repeat step 2 to add all the recipients you need in this list.
4. To delete an entry, select the row, and then click Delete Entry.
5. To locate a specific recipient in the list, click Find. In the Find Entry dialog box, en-ter the text string you want Word to find. This might be a first name, a last name, a city name, or a value related to a different field. To search for this text in a specific field, click This Field and then choose the field you want to search. Click Find Next. Click Cancel when you locate the field you are looking for.
6. In the New Address List dialog box, click OK.
7. In the Save Address List dialog box, open the folder where you want to save this address list, and then click Save.

122 Chapter 3 Create advanced references
➤ To customize an address list
1. In the New Address List dialog box, click Customize Columns.
2. Do one or more of the following:
m To add a custom field, click Add, enter the name of the field in the Add Field dialog box, and then click OK.
m To change the order of the fields, select the field you want to move and then click Move Up or Move Down.
➤ To select an external data source
1. In the Start Mail Merge group, click Select Recipients, and then click Use Existing List.
2. In the Select Data Source dialog box, open the folder that contains the data source file you want to use.
3. If the type of file you need isn’t displayed, in the Files Of Type list, select that file format.
4. Select the data source file, and then click Open.
5. Depending on the type of data source you select, use the Select Table dialog box to choose the worksheet, cell range, or database object that contains the recipient information you want.
➤ To use an Outlook contact folder as a recipient list
1. In the Start Mail Merge group, click Select Recipients, and then click Choose From Outlook Contacts.
2. If prompted, choose the Outlook profile that is associated with the contacts folder you want to use.
3. In the Select Contacts dialog box, select the contacts folder, and then click OK.
4. In the Mail Merge Recipients dialog box, clear the check box beside the name of any contact you don’t want to include in this mail merge.
5. To refresh the list so that it shows recent changes made in Outlook, select Contacts in the Data Source area and then click Refresh.
Modifying recipient listsWhen you click Edit Recipient List in the Start Mail Merge group, Word displays the Mail Merge Recipients dialog box. To exclude a recipient from a mail merge operation, clear the check box beside the recipient’s name.

3.3 Manage forms, fields, and mail merge operations 123
Use the arrows beside a column name to sort or filter the list, or use the links listed in the Refine Recipient List area. For example, you might want to sort by city or by company for a mailing you are preparing for contacts at particular clients or in particular locales.
The Sort and Filter commands in the Refine Recipient List area open the Filter And Sort dialog box. (You can also open this dialog box by choosing Advanced from the menu that appears when you click the arrow next to a column heading.)
See Also For more information about using the Filter And Sort dialog box, see the “Building and managing recipient lists” topic earlier in this section.
The Find Duplicates command displays a dialog box that lists what Word determines are duplicate entries. Clear the check box for entries you don’t want to include. You can also locate a specific contact by searching in all fields or specific fields for values such as last name or company name.
For certain types of data sources (Excel workbooks and Access databases, for example, but not for Outlook contact lists), you can edit detailed information about recipients.
➤ To edit a recipient list
1. In the Start Mail Merge group, click Edit Recipient List.
2. In the Mail Merge Recipients dialog box, select the recipient list in the Data Source area, and then click Edit.
3. In the Edit Data Source dialog box, update the values for fields, or click New Entry to add a recipient record.
4. In the Edit Data Source dialog box, click OK. In the message box Word displays, click Yes to update the recipient list and save the changes to the original data source.
➤ Torefinearecipientlist
1. In the Start Mail Merge group, click Edit Recipient List. In the Mail Merge Recipients dialog box, do any of the following:
m Use the arrows beside column headings to sort the list by that field (in as-cending or descending order) or to filter the list by values in that field or for blank or nonblank fields.
m For more advanced sorts, in the Refine Recipient List area, click Sort to open the Filter and Sort dialog box. On the Sort Records tab, you can sort by up to three fields.

124 Chapter 3 Create advanced references
m To define an advanced filter, in the Refine Recipient List area, click Filter. On the Filter Records page of the Filter and Sort dialog box, select the field you want to filter by. Select a comparison operator, and then enter the text you want to use for the filter. In the far left column, you can also select the AND or OR operator and then add another field to the filter. Repeat this step to define other conditions for the filter.
m To check for duplicate recipients, click Find Duplicates. In the Find Duplicates dialog box, clear the check box beside the duplicate entries you don’t want to include.
m To locate a specific recipient, click Find Recipient. In the Find Entry dialog box, enter the text you want Word to search for. To search in a particular field, select This Field, and then select the field you want to use.
2. In the Mail Merge Recipients dialog box, click OK.
Adding merge fieldsMerge fields correspond to the columns of information in a recipient list. To add the information stored in a recipient list to a document, you insert merge fields where you want the information to appear. You can place the information at the start of the docu-ment to define an address block or a greeting and also within the body of the document, where you might include a company name, for example, or other information.
Word provides composite merge fields for an address block and a greeting line. The Address Block command in the Write & Insert Fields group inserts standard information such as title, first and last names, mailing address, city, state, country/region, and postal code. In the Insert Address Block dialog box, you can tailor the address block so that it fits the needs of the mail merge operation you have underway.

3.3 Manage forms, fields, and mail merge operations 125
The ways you can modify the standard address block include the following:
l Choose a format for recipient names (first name only, first and last names, first and last names with title, and others).
l Clear the check box for the Insert Company Name option if you don’t want to include that information. (The check box is selected by default.)
l Clear the check box for Insert Postal Address. For example, you might want only names to appear in the document and use address information for labels or en-velopes. You can also specify under what conditions you want the country/region name to appear in the address block.
The Greeting Line command presents similar kinds of options. You can alter the saluta-tion from Dear to To, for example, and specify how recipient names appear. Use the Greeting Line For Invalid Recipient Names list to choose a greeting that Word applies when information in the recipient list doesn’t match the format you choose for a name.
To insert individual merge fields, including any custom fields you define when building a recipient list, choose the fields from the Insert Merge Field list or use the Insert Merge Field dialog box. In the dialog box, select the Address Fields option to display an extended list of fields.
You can insert these fields at any place in the document that makes sense. For example, in the final paragraph of a letter, you might repeat the recipient’s first name for emphasis—“In closing, I want to thank you again, <<First_Name>>, for your support of Adventure Works.”

126 Chapter 3 Create advanced references
If the fields in an Excel worksheet or other data source you are using for recipient infor-mation don’t correspond one-to-one with the fields in Word, use the Match Fields com-mand in the Write & Insert Fields group to open a dialog box in which you can set up the field relationships you need. (You can also open this dialog box by clicking the Match Fields button in the Insert Address Block or Insert Greeting Line dialog box.)
If a field in your data source doesn’t match a field in Word, Word displays Not Matched. To match the fields in Word (listed at the left), select a field from the list to its right. Keep in mind that you cannot include any unmatched fields in the mail merge document. You can save the configuration of matching fields if you expect to use this data source for other mail merge operations on the computer you are using.
Tip You don’t need to complete a mail merge operation in one sitting. You can save a document you are preparing for a mail merge operation, and Word maintains the association with the data source for recipients and any merge fields you have inserted. When you open the document to begin work again, click Yes in the message box that Word displays to confirm that you want to open the document and run an SQL command.
➤ To insert an address block
1. In the document, place the cursor where you want the address block to appear.
2. In the Write & Insert Fields group, click Address Block.
3. In the Insert Address Block dialog box, do any of the following:
m Choose a format for recipient names, or clear the Insert Recipient’s Name In This Format option to exclude names from the address block.
m Specify whether you want to include a company name and postal address.
m Select an option for when to include the country/region name in the address block.
m Specify whether to format the address block using conventions for the desti-nation country or region.
4. Use the Preview area to check how your choices affect the display of addresses.
3.3 Manage forms, fields, and mail merge operations 127
➤ To insert a greeting line
1. In the document, place the cursor where you want the greeting line to appear.
2. In the Write & Insert Fields group, click Greeting Line.
3. In the Insert Greeting Line dialog box, do any of the following:
m Specify a format for the elements of the greeting line, including the salutation and name format.
m Choose a format for invalid recipient names.
4. Use the Preview area to view how your choices affect how the greeting line will appear.
➤ Toinsertamergefield
1. In the document, place the cursor where you want the merge field to appear.
2. In the Write & Insert Fields group, click Insert Merge Field, and then select the field you want to use, or open the Insert Merge Field dialog box, select the field, and then click Insert.
➤ Tomatchfields
1. In the Write and Insert Fields group, click Match Fields.
2. In the Match Fields dialog box, match the field names Word provides with field names in your recipient list.
3. Click OK.
Using mail merge rulesMail merge rules enable you to define conditional elements that can add flexibility and help customize records produced in a mail merge operation. The rules are listed on the Rules menu in the Write & Insert Fields group.
One helpful rule is the If Then Else rule. In the dialog box you use to set up this rule, you first specify an IF condition (for example, “If the Country field is equal to Canada”). In the Insert This Text box, enter the text you want Word to insert when the condition you de-fine is true. In the Otherwise Insert This Text box, enter the text you want Word to insert when the IF condition is false.
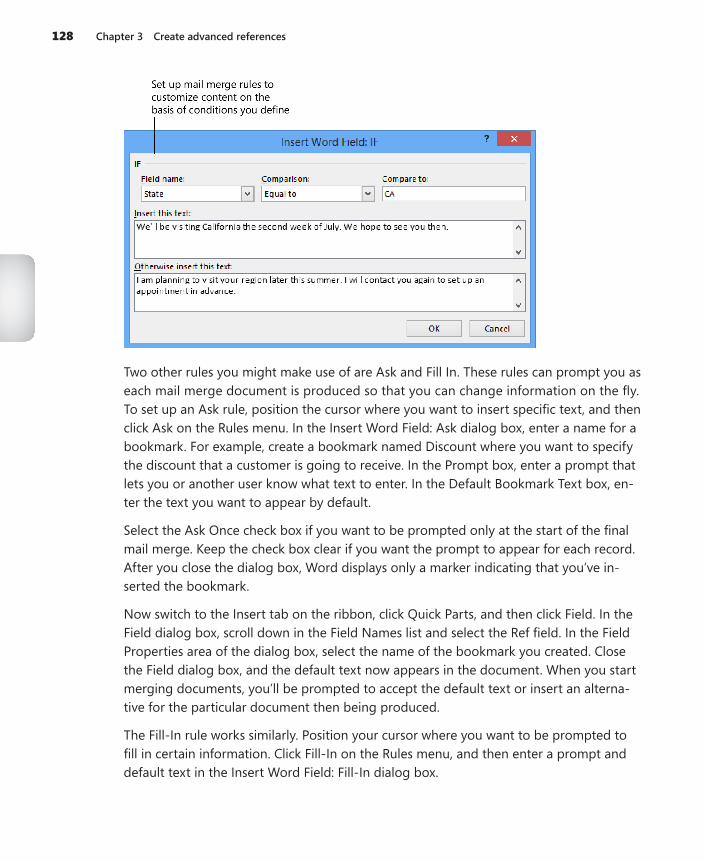
128 Chapter 3 Create advanced references
Two other rules you might make use of are Ask and Fill In. These rules can prompt you as each mail merge document is produced so that you can change information on the fly. To set up an Ask rule, position the cursor where you want to insert specific text, and then click Ask on the Rules menu. In the Insert Word Field: Ask dialog box, enter a name for a bookmark. For example, create a bookmark named Discount where you want to specify the discount that a customer is going to receive. In the Prompt box, enter a prompt that lets you or another user know what text to enter. In the Default Bookmark Text box, en-ter the text you want to appear by default.
Select the Ask Once check box if you want to be prompted only at the start of the final mail merge. Keep the check box clear if you want the prompt to appear for each record. After you close the dialog box, Word displays only a marker indicating that you’ve in-serted the bookmark.
Now switch to the Insert tab on the ribbon, click Quick Parts, and then click Field. In the Field dialog box, scroll down in the Field Names list and select the Ref field. In the Field Properties area of the dialog box, select the name of the bookmark you created. Close the Field dialog box, and the default text now appears in the document. When you start merging documents, you’ll be prompted to accept the default text or insert an alterna-tive for the particular document then being produced.
The Fill-In rule works similarly. Position your cursor where you want to be prompted to fill in certain information. Click Fill-In on the Rules menu, and then enter a prompt and default text in the Insert Word Field: Fill-In dialog box.

3.3 Manage forms, fields, and mail merge operations 129
To associate a specific value with a bookmark, use the Set Bookmark rule. In the dialog box Word displays, enter a name for the bookmark and then enter the value you want to associate with the bookmark. You can place the bookmark in multiple locations in the document (wherever the value you associate with it needs to appear). If you need to up-date the value later, you can edit the field’s value once rather than update every instance.
➤ TodefineanIfThenElsemergerule
1. In the Write & Insert Fields group, click Rules, and then click If Then Else.
2. In the Insert Word Field: If dialog box, select the field you want to use in an IF condition, select a comparison operator, and then enter the text or other value you want to match.
3. In the Insert This Text box, enter the text that you want Word to insert when the IF condition is true.
4. In the Otherwise Insert This Text box, enter the text that should appear when the condition you define is false.
Previewing mail merge resultsOn the Mailings tab, click Preview Results to display merge fields so that they show re-cipient records. Use the Find Recipient command to locate a specific recipient, or use the preview arrows to move from record to record in the recipient list.
Word can check for errors before you print documents or run your mail merge via email. The dialog box that Word displays provides three options: simulating the merge and re-porting errors in a new document, running the merge and pausing if Word encounters an error, and completing the merge and reporting errors in a separate document. The types of errors Word checks for include missing information in the recipient list.
Sending personal email messages to groups of recipientsAs long as you have a compatible email program (Outlook, for example), you can set up a mail merge operation to send an email message to a list of recipients. Each message is a single item addressed to a single recipient—the message isn’t sent to the group as a whole—and you can personalize each message as you might a mail merge document by using, for example, only a first name.
One key in sending email messages is that your data source should include a column labeled E-Mail Address in the header row. Set up the document with an address block, greeting line, and other merge fields as you would for a printed letter. You can then pre-view the results of each message you plan to send.

130 Chapter 3 Create advanced references
In the Merge To E-Mail dialog box, select the field you want to use for the message’s To line (most likely, E-Mail Address), enter a subject line, and then select a format for the message (Attachment, HTML, or Plain Text). In the Send Records area of the dialog box, you can specify whether to send the message to all recipients, the current recipient, or a subset of recipient records.
➤ To send a personal email message as a mail merge document
1. Create the document you want to send as an email message.
2. Select or build the recipient list, insert merge fields, and define merge rules as necessary.
3. On the Mailings tab, in the Finish group, click Finish & Merge, and then click Send Email Messages.
4. In the Merge to E-mail dialog box, select the field to use for the message’s To line.
5. Enter a subject line for the message, and then select a message format.
6. Select which recipient records you want to send the message to, and then click OK.
Setting up labels or envelopes for mail merge operationsThe Mailings tab provides a couple of ways to create and print labels and envelopes. You can use the Envelopes or Labels option on the Start Mail Merge menu to merge informa-tion from your recipient list to produce the envelopes or labels you need. You can use the Envelopes and Labels commands in the Create group (at the far left of the Mailings tab) to prepare and print these items without setting up a full mail merge operation.
When you are preparing to print labels or envelopes as part of a mail merge operation, start with a blank document. If you have a document open when you select either op-tion from the Start Mail Merge menu and then click OK in the Envelope Options or Label Options dialog box, Word displays a warning telling you that it must delete the contents of the open document and discard any changes before it can continue.
Depending on the options you select for envelopes or labels (envelope size, for example, or label vendor and product number), Word displays a document with an area in which you insert merge fields. Enter or select a recipient list, and then add the merge fields you want to include on the envelope or labels. You can use the Address Block command, for example, or add individual merge fields. You can also add merge rules. For example, you might add the Merge Record # rule as a way to determine how many labels or envelopes you print.

3.3 Manage forms, fields, and mail merge operations 131
With merge fields in place, you can preview the results and then use the Finish & Merge menu to print the labels or envelopes.
➤ To set up envelopes for mail merge
1. Create a blank document.
2. On the Start Mail Merge menu, click Envelopes.
3. In the Envelope Options dialog box, select the envelope size.
4. Change the font formatting for the addresses as needed.
5. On the Printing Options tab, check that the settings are correct for the printer you are using.
6. Click OK.
7. Click Select Recipients, and then choose an option for the recipient list you want to use.
8. Add merge fields to the envelope to create an address block.
9. Preview the results, and check for any errors.
10. Click Finish & Merge, and then click Print Documents.
➤ To set up labels for mail merge
1. Create a blank document.
2. On the Start Mail Merge menu, click Labels.
3. In the Label Options dialog box, select the type of printer you are using.
4. In the Label Information area, select the label vendor and then the product number for the label you are using.
5. Click OK.
6. Click Select Recipients, and then choose an option for the recipient list you want to use.
7. Add merge fields to the document to create an address block.
8. Preview the results, and check for any errors.
9. Click Finish & Merge, and then click Print Documents.

132 Chapter 3 Create advanced references
Practice tasks
The practice files for these tasks are located in the MOSWordExpert2013\Objective3 practice file folder. Save the results of the tasks in the same folder.
l Open the WordExpert_3-3a document, and do the following:
m Using the content controls available in Word 2013, add the content con-trols referred to in the document and set the properties for the content controls as specified. This practice task will result in an order form in which users select products, specify the quantity and color they want for each item, and then specify selection options for shipping, along with special instructions, if needed. When you are finished, save the form using the name Order form.
m Add a form field of each type to the form you created in the previous task (Order form).
m Protect the Order form document by using the Restrict Editing com-mand. Remove protection, and then delete one or more of the form fields you added in the previous step.
l Open a new blank document. Select the WordExpert_3-3b workbook to use as the recipient list, and then print a practice sheet of labels for a mail merge operation. You can experiment with different label sizes.
l Open the WordExpert_3-3c document, then do the following:
m Choose the option to use an existing list as the recipient list. Select the WordExpert_3-3b workbook.
m Use the Match Fields command so that the merge fields for addresses in Word match fields listed in the WordExpert_3-3b workbook.
m Edit the recipient list by adding an entry of your own and changing the values in some of the fields.
l Open the WordExpert_3-3d document, and then do the following:
m Choose the option to create an email message mail merge operation.
m Using the list of names on page 2 of the WordExpert_3-3d, create an address list in Word. Also, create a custom address list field named Position.
m Edit the recipient list, adding a contact of your own. Add your email address to the E-Mail Address field for a handful of recipients.

Objective review 133
m Insert an address block, and then insert the Position field in the high-lighted area of the document.
m Create an If Then Else merge rule for the Position field that inserts the text “I am interested in your writer position” for the records in which Position equals Writer. For other records, use the text “I am interested in your recently announced position.”
m Preview records, and then run the email merge operation.
Objective reviewBefore finishing this chapter, ensure that you have mastered the following skills:
3.1 Create and manage indexes3.2 Create and manage reference tables3.3 Manage forms, fields, and mail merge operations


163
Symbols* (asterisk), as wildcard character, 40@ (at sign), as wildcard character, 41\ (backslash), as wildcard character, 41[] (brackets), as wildcard characters, 41{ } (curly braces)
defining index fields, 81as wildcard characters, 41
! (exclamation point), as wildcard character, 41> (greater than), as wildcard character, 40< (less than), as wildcard character, 40? (question mark), as wildcard character, 40
Aabsolute positioning of objects, 52accepting changes, 30accessibility
alt text and, 151checking, 154headings in tables and, 151hyperlinks and, 152practices, 151styles and, 152tables and, 152watermarks in, 153white space, 153
Accessibility Checker, 153address blocks, 124, 125, 126address lists
connecting to external data, 121customizing, 122editing, 122, 123Excel workbook, building from, 120external data source, building from, 122filtering, 120, 123finding duplicates, 124managing, 121matching fields, 127Outlook contacts, building from, 121, 122sorting, 120, 123Word document, building from, 120
alt text (alternative text), 150, 151asterisk (*), as wildcard character, 40at sign (@), as wildcard character, 41audio, closed captions for, 153
authorities, tables of. See tables of authoritiesAutoCaption, 89automark file, building index from, 79, 82AutoRecover, 10, 11autosaved versions, 11
Bbackslash (\), as wildcard character, 41Backstage view, 25bibliographies, 102. See also source citationsBody style, font settings for, 155book fold, 47bookmarks
See also hyperlinkscreating, 73defining page ranges in indexes, 79, 82linking sections using, 74merge rules and, 128, 129navigating documents using, 73, 74
brackets ([]), as wildcard characters, 41breaks
column, 48page, 48section, 48, 54types, 53
building blockscategories, 137, 138content control for, inserting in forms, 105, 108creating custom, 138deleting, 139inserting, 139moving, 16naming, 137, 138overview, 136properties, 136, 137saving, 137, 138, 139ScreenTips for, 137templates and, 137, 145
Ccapitalizing data in fields, 44captions
automatically inserting, 89closed, for audio, 153
Index

captions (continued)custom, 91figures, inserting for, 88, 90navigating between, 95numbering, 89objects, inserting for, 89templates and, 145
case-sensitive searches, 40categories, assigning building blocks to, 137change tracking
accepting changes, 30, 31advanced options, 19, 20combining documents and, 8comments, displaying, 32comments, managing, 31comparing documents and, 6display options, 18, 20, 33locking with passwords, 30markup, displaying, 18, 30, 34, 36, 37markup options, 30moving to next comment, 33moving to previous comment, 33purpose, 29rejecting changes, 30, 31reviewer name, setting, 18viewing changes by specific reviewers, 34
character spacing, 55, 56character styles, 64, 65characters
See also wildcardskerning, 56locating, 40positioning, 56special, searching for, 40
charts. See tables of figurescheck box content control, 106, 107, 114checking
accessibility of documents, 154spelling, in different languages, 150
citations for bibliographies. See source citationscitations for tables of authorities
all matching instances, marking, 93building lists of, 83categories, editing, 94categories explained, 92marking, 91, 94navigating between, 93
closed captions for audio, 153colors, 140, 141columns
breaks, 48in indexes, 81page layout options, 47setting custom, 49
combining documents, 8, 9
combo box content control, 105, 107, 110, 112comments, 31, 32, 33comparing documents
overview, 6procedure, 9reviewing differences, 7settings, 7tracked changes in, 6views, 8word level vs. character level, 7
concordance file, building index from, 79conflicts in styles when working with multiple
documents, 34, 35, 36content controls
aligning, 107building block, 105, 108check box, 106, 107, 114combo box, 105, 107, 110, 112customizing placeholder text, 108date picker, 105, 107defining list items for, 110, 112drop-down list, 105, 107, 112, 115formatting, 110, 111forms, managing with, 104grouping, 107instructions to user, 106legacy, 106locking, 111picture, 107preventing deletion or editing of, 110properties, 108tags and, 110templates and, 145text box, 107types of, 105
continuation notifications, defining for footnotes and endnotes, 98
controls. See content controlsconverting numbered lists to outlines, 68cross-references in documents, 95, 96, 97cross-references in indexes, 78, 79, 82curly braces ({})
defining index fields, 81as wildcard characters, 41
customizingaddress lists, 122building blocks, 138captions, 91columns, 49field formats, 42keyboard shortcuts for styles, 65margins, 49paper sizes, 49placeholder text for content controls, 108ribbon list, 143
164 case-sensitive searches

styles, 62style sets, 147tables of contents, 87, 88tab order of form fields, 160templates, 142, 143, 144theme colors, 141theme fonts, 142
Ddata, linking to external, 15Date field, 43date picker content control, 105, 107deleting
building blocks, 139comments, 32, 33draft versions of documents, 25form fields, 116index entries, 81section breaks, 54styles, 14tables of contents, 88
designing templates, 144, 146destination formatting, 34, 35Developer tab, 143diagrams. See tables of figuresdisplaying
changes from a specific reviewer, 34change tracking, 18, 30, 34comments, 31document fields, 117document properties, 25headings in outline form, 68index fields, 79line numbers, 48macros, 15merge fields, 129styles, 12, 13
distributing documents, preparing for, 17Document Inspector, 25documents
accessibility. See accessibilityadvanced page layout options, 45autosaved versions, 11bibliographies. See source citationsclassifying through properties, 25columns, 49combining, 8, 9comments, 31, 32, 33comparing, 6, 7, 8, 9deleting draft versions, 25displaying revisions, 17editing restrictions, 20, 22, 24enabling information rights management, 24
encrypting, 28enforcing protection, 24formatting restrictions, 21, 24hyphenation, 48indentation, 50indexes. See indexesinserting breaks, 48inserting comments, 33language options, configuring, 148layers, 51line numbers, 48linking to external data, 15macros, copying between documents, 15managing changes. See tracking changesmanaging multiple, 4margins, 46marking as final, 27master. See master documentsmerging multiple, 6metadata, 25, 26moving building blocks between, 16multicolumn, 47page setup options, 46page size, 47, 49passwords, 28preparing for distribution, 17preparing for review, 17properties, 25recovering unsaved files, 11replying to comments, 33restoring autosaved versions, 11saving versions of, 10setting margins, 49setting tracking options, 18styles. See stylestables of authorities. See tables of authoritiestables of contents. See tables of contentstables of figures. See tables of figurestemplates. See templatesthemes. See themestracking changes. See tracking changesversions, managing, 10
.dotm file format, 6
.dotx file, 146
.dotx file format, 6drafts, deleting versions of, 25drop-down list content control, 105, 107, 112, 115
Eediting
address lists, 122, 123building block properties, 136, 137
editing 165

editing (continued)indexes, 81, 83languagues for, installing additional, 149restrictions. See editing restrictionssource citations, 100tables of contents, 84
editing restrictionscontrolling content changes, 20controlling document changes, 22on forms, 112granting exceptions, 23options, 24types of changes users can make, 22
encrypting documents vs. protecting with passwords, 28
endnotes. See footnotes and endnotesexclamation point (!), as wildcard character, 41exporting styles, 14external data, linking to, 15, 16
Ffield data, formatting, 45fields
See also indexes; mail merge operations; reference tables
capitalizing data in, 44described, 116displaying, 117formatting, 42index, 79inserting, 117keyboard shortcuts for, 117merge. See merge fieldsproperties, 43shading, 42switches. See switchesupdating, 116
figures. See tables of figuresfiles
See also documentsencrypting, 28linking to external, 15recovering unsaved versions, 11
final, marking documents as, 27fonts
settings for Body and Heading styles, 155themes and, 140, 142
footer, templates and, 144footnotes and endnotes, 97, 98formatting
comments, 33content controls, 111field data, 45
footnotes and endnotes, 98generated index formats, 80, 81index entries, 79, 81marks, searching for, 40options when copying content, 34restrictions in documents, 21tables of authorities, 94tables of contents, 84
form fieldsSee also content controls; fields; formsas legacy controls, 113building a form by using, 115check box, 114customizing tab order, 160deleting, 116described, 113drop-down list, 115editing restrictions, 115text box, 114
formsActiveX controls, adding to, 106content controls. See content controlsdescribed, 103designing, 104, 106editing permissions, 113editing restrictions, 112locking, 112, 113unlocking, 113
fundamental tasks in Word, not covered in this book, 1
Ggalleries, building blocks in, 136, 137generating
indexes, 80, 81, 82tables of authorities, 94tables of contents, 87tables of figures, 91
global content standards, 155, 156, 157grammar options, setting, 157greater than (>), as wildcard character, 40gutter, 46, 47
Hhanging indents, 50headers, 144headings
accessibility and, 151, 152in outlines, 67, 68promoting and demoting, 68
Heading style, font settings for, 155
166 editing restrictions

hyperlinksSee also bookmarksaccessibility and, 152creating, 74cross-references in documents, 96
hyphenation, 48
Iillustrations. See tables of figuresimages, 145, 150, 151importing styles, 14indentation, 50indented index format, 80, 83indexes
automark file, building index from, 79, 82column options, 81concordance file, building index from, 79cross-references, 78, 79, 82deleting entries, 81design options, 80editing, 81, 83field syntax, 79formatting entries, 79, 81formatting generated file, 80, 81, 82indented format, 80introduction, 77main entries, 78marking entries, 78modifying styles for levels, 81navigating from one field to the next, 81page ranges, 78page references, 78preset index formats, 80run-in format, 80, 81subentries, 78, 79third-level entries, 82updating, 81, 83XE characters in fields, 79
insertingaddress blocks, 126bibliographies, 102breaks, 48building blocks, 136, 137, 139captions for figures, 88comments, 33compiled indexes, 80, 82cross-references in documents, 97fields, 117index entries. See marking index entriesmerge fields, 125objects, 15placeholders for source citations, 100section breaks, 54
source citations, 99, 100switches in field codes, 45tables of authorities, 94tables of contents, 84, 87tables of figures, 89, 91
inspecting documents prior to review, 17, 25, 26installing editing languages, additional, 149IntelliSense, 159international audiences. See global content
standards
Kkeeping text only, when styles conflict, 35kerning, 56keyboard shortcuts
for alt text, 151for built-in styles, 65key requirements, 66for managing fields, 117for new styles, assigning, 65, 66for outlines, 69
Llanguages, 148, 149legacy controls, 113less than (<), as wildcard character, 40ligatures, 56, 57line numbers, 48line spacing, page layout options, 50lining style numbers, 56, 57linked styles, 63linking
See also hyperlinksto external data, 15, 16to files, 15text boxes, 57, 58
lockingSee also passwordschange tracking, 30content controls, 111forms, 112, 113
Mmacros
copying between documents, 15defined, 158example, 158including in templates, 6possible operations, 158
macros 167

macros (continued)recording, 158, 161setting up forms with, 161templates and, 145viewing, 15
mail mergesaddress blocks, inserting, 126address blocks, modifying, 125address blocks, standard, 124address lists. See address listschecking for errors, 129customizing, 120described, 118envelopes, setting up, 130, 131greeting lines, inserting, 127labels, setting up, 130, 131matching fields, 126, 127merge fields, inserting, 127previewing, 129procedure, 118rules, 127sending email by using, 129, 130
main entries, in indexes, 78margins, 46, 47, 49marking
citations, 91citations for tables of authorities, 94comments as done, 32documents as final, 27index entries. See marking index entries
marking index entries, 78, 79, 81, 82markup
See also change trackingcombining documents and, 8comparing documents and, 6displaying in documents, 17, 34, 36, 37removing with Document Inspector, 25tracked changes and, 33
master documents, 71, 72merge fields, 124, 125, 127merge rules, 127, 128, 129merging, 34, 35. See also mail merges; combining
documentsmetadata, 25, 26Microsoft Visual Basic for Applications (VBA),
158, 160mirror indents, setting, 50mirror margins, setting, 47multicolumn documents, 47multilevel lists
creating outline by using, 70defining custom, 67
multiple documentsmanaging, 4merging, 6resolving style conflicts, 34, 36
Nnavigating documents
using bookmarks, 73from comment to comment, 33using headings, 73
navigation, optimizing for accessibility, 151, 152, 153
newsletters, text boxes in, 57notes. See footnotes and endnotesnumber forms, in OpenType fonts, 56numbered lists, converting to outlines, 68numbering captions, 89numbers, spacing of in OpenType fonts, 56
Oobjects
alt text, adding to, 150anchoring, 52applying styles and formatting to, 52arranging on a page, 51, 53captions for, 89creating new, 15floating, and accessibility, 153inserting, 15, 16positioning, 51sizing, 52wrapping text around, 51, 52
old-style numbers, 56, 57OpenType fonts, settings, 56Outline view, 67, 68, 69, 70outlines, 67, 68, 70
Ppage breaks, 48page layout
See also templatesadvanced options, 45arranging objects, 53columns, 47, 49hyphenation, 48indentation, 50index formats, 80line numbers, 48margins, 46, 49objects. See objectspage setup options, 46page size, 47, 49
page ranges in indexes, 78, 79, 82page references
indexes, 78source citations, 100
168 mail merges

page size, 47, 49pages per sheet, margin settings, 47paragraph styles. See stylesparagraphs, 50, 51passwords
vs. encryption, 28for locking change tracking, 30for modifying documents, 28for opening documents, 28restricting editing, 24
pasting between documents, resolving style conflicts, 34, 35, 36
picture content control, 105, 107placeholder text, templates and, 145placeholders, inserting for source citations, 100prerequisite skills and experience for these exams,
1, 2procedures, defined, 158proofing tools, 149properties
building blocks, for, 136, 137classifying document information, 25displaying for fields, 43removing from documents, 25
protecting documentsencryption vs. passwords, 28enforcing security, 24granting exceptions, 23locking change tracking, 30removing document security, 24restricting document editing, 20
Qquestion mark (?), as wildcard character, 40
Rrecipient lists. See address listsrecommending styles, 13recording macros, 158, 161recovering versions of documents, 11reference tables, 83. See also bibilographies;
tables of authorities; tables of contents; tables of figures
rejecting changes, 30relative position of objects, 52renaming styles, 14replying to comments, 33restoring versions of documents, 11restricting
changes users can make to documents, 20changes users can make to forms, 112
editing in documents, 24formatting in documents, 21, 24styles in documents, 13types of changes users can make, 22
reviewingSee also commentsaccepting and rejecting changes, 30changes by reviewers, 34
revision marks. See change tracking; markuprun-in index format, 80, 81
Ssaving automatically, settings for, 10screen readers, 151, 152, 153ScreenTips, building block descriptions, 137searching, 40, 42section breaks, 48, 53, 54sections, 53, 54security. See protecting documentsshortcuts to linked files, 15. See also keyboard
shortcutssingle character, searching for, 40skills and knowledge assumed for these exams, 2sorting styles, 12source citations
building a list of sources, 101built-in styles for, 99editing, 100inserting, 99, 100managing, 101, 102multiple authors, 99placeholders, 100viewing list of sources, 102
source formatting, 34, 35spacing
between characters, 55, 56of numbers in OpenType fonts, 56between paragraphs, 50tabular, 56
special characters, searching for, 40spelling, checking in a different language, 148, 150string of characters, locating, 40style sets, 146, 147styles
accessibility and, 152assigning keyboard shortcuts to, 65, 66Automatically Update option, 62basic settings, 60basis of new, 63character-specific, 64, 65checking which is applied, 60conflicts in multiple documents, resolving, 34,
35, 36
styles 169

styles (continued)copying between templates, 14creating custom, 62, 63defining, 14, 65deleting, 14designing templates and, 144display options, 12, 13for following paragraphs, 63keyboard shortcuts for built-in styles, 65linked, 63modifying, 13, 61, 62organizing, 12overview, 140recommending, 13renaming, 14restricting in documents, 13reusing, 14sets. See style setssorting, 12types of, 63updating to match selection, 62
Styles galleryadding styles to, 61organizing styles, 12
Styles pane, 12, 13stylistic sets, in OpenType fonts, 57Sub procedures, writing in the Visual Basic
Editor, 161subdocuments
inserting into master documents, 72master documents and, 71
subentries, in indexes, 78, 79switches
for fields, 117formatting fields using, 43inserting in field codes, 45options for formatting field data, 44
Ttables
accessibility and, 152adding alt text to, 151templates and, 145
tables of authoritiescitation categories, 92, 93, 94defined, 91formatting, 94inserting, 94introduction, 91marking citations, 91, 94modifying styles, 94navigating between citations, 91passim, option to use, 93
setting options, 93updating, 95
tables of contentsbuilt-in formats, 84creating from built-in headings, 84creating manually, 84, 86, 87customizing, 87deleting, 88editing, 84formatting options, 84heading levels included by default, 85inserting, 87modifying styles, 85, 86, 87outline levels, excluding, 86setting options, 88templates and, 145updating, 88
tables of figurescaptions, inserting, 88defined, 88inserting, 89, 91modifying styles, 90setting options, 91
tabular spacing, 56, 57templates
See also page layoutbuilding blocks and, 16, 145captions in, 145components of, 4content controls in, 145copying styles between templates, 14customizing from template file, 142, 143customizing while working on document, 143, 144default storage locations, 4designing, 144, 146elements, 144forms, 104headers and footers, 144images and, 145macros, copying between templates, 15modifying existing, 4, 5modifying styles in, 62overview, 139page layout, 145purpose, 4recommending styles for, 13saving custom, 144saving keyboard shortcuts in, 66scope of possible modifications, 4styles and, 144tables and, 145tables of contents, 145testing changes to, 142updating to include modified styles, 5using Import/Export to copy styles, 14
170 Styles gallery

text boxesbreaking links between, 59linking, 57, 58purpose, 57style and formatting, 57
text content controlsform field settings, 114inserting in forms, 105, 107
text wrapping. See wrapping textthemes
colors, customizing, 141colors, displaying, 140defined, 140effect of applying, 140fonts in, 140, 142overview, 139preset options, 140
tracking changesaccepting changes, 30, 31advanced options, 19, 20combining documents and, 8comments, displaying, 32comparing documents and, 6displaying markup, 18, 20, 33, 36, 37locking the changes, 30managing comments, 31markup options, 30, 33moving to next comment, 33moving to previous comment, 33purpose, 29rejecting changes, 30, 31reviewer name, setting, 18viewing changes by specific reviewers, 34
Uunlocking forms, 112unsaved files, recovering, 11updating
fields, 116indexes, 81tables of authorities, 95tables of contents, 88
user authentication, 24
VVBA (Microsoft Visual Basic for Applications),
158, 160versions
autosaved documents, 11combining documents, 8comparing documents, 6deleting document drafts, 25managing, 10
Wwatermarks, accessibility and, 153wildcards
creating expressions, 41replacing patterns of text, 42syntax and examples, 40using when searching, 40, 42
works cited, list of. See source citationswrapping text, 48, 51, 52, 153
XXE, in index fields, 79
XE, in index fields 171