microsoft visual basic 2005 enrichment chapter visual studio tools for office
TRANSCRIPT

Microsoft Visual Basic 2005
ENRICHMENT CHAPTER
Visual Studio Tools for Office

E
Enrichment Chapter: Visual Studio Tools for Office 2
Objectives
►Use Visual Studio Tools in Microsoft Word
►Create a VSTO Word template
►Add a DateTimePicker object to an application
►Add a table to a Word document

E
Enrichment Chapter: Visual Studio Tools for Office 3
Objectives
►Add the Actions Pane Control
►Place a ComboBox object in applications
►Calculate payments using the Pmt Function
►Use Math Class methods in mathematical computations

E
Enrichment Chapter: Visual Studio Tools for Office 4
Chapter Project

E
Enrichment Chapter: Visual Studio Tools for Office 5
Chapter Project

E
Enrichment Chapter: Visual Studio Tools for Office 6
Programming an Office Document
► Visual Studio Tools for Office (VSTO, pronounced “visto”) helps you build a Word document or an Excel spreadsheet that contains VB code, allowing you to create automated, customized Office documents that combine the power of Visual Basic with the familiarity of Office
► Working with Office 2003/2007 documents in VSTO is similar to working with a Visual Basic Windows application
► When you create your first VSTO application, you indicate whether you intend to create a Word or Excel document, template, or add-in.
• A template is a special type of Office file that determines the basic structure for a document and can hold text, styles, macros, keyboard shortcuts, custom toolbars, AutoText entries, and other settings

E VSTO BackgroundVisual Studio Tools for Office ( VSTO ) was designed by Microsoft as a replacement for Visual Basic for Applications ( VBA ).
►VBA is a simple development environment that was integrated into all Office applications.
►VBA embedded code in every customized document which made it hard to fix bugs and update solutions because a bug would get replicated in documents across the enterprise.
VisualStudio.NET and the .NET Framework provided a way to address these problems.
►The .NET Framework provides a powerful platform that Office has always provided for developers, but also solves the problems plaguing VBA of embedded code by linking a document to a .NET assembly instead of embedding the .NET assembly in the document.
►The .NET Framework also presents a new security model.
VSTO 2005 SE ( second edition ) is needed in the VisualStudio 2005 environment to work with Office 2007 documents.
VSTO is fully integrated into VisualStudio 2008.
Enrichment Chapter: Visual Studio Tools for Office 7

E
Enrichment Chapter: Visual Studio Tools for Office 8
Creating a VSTO Project
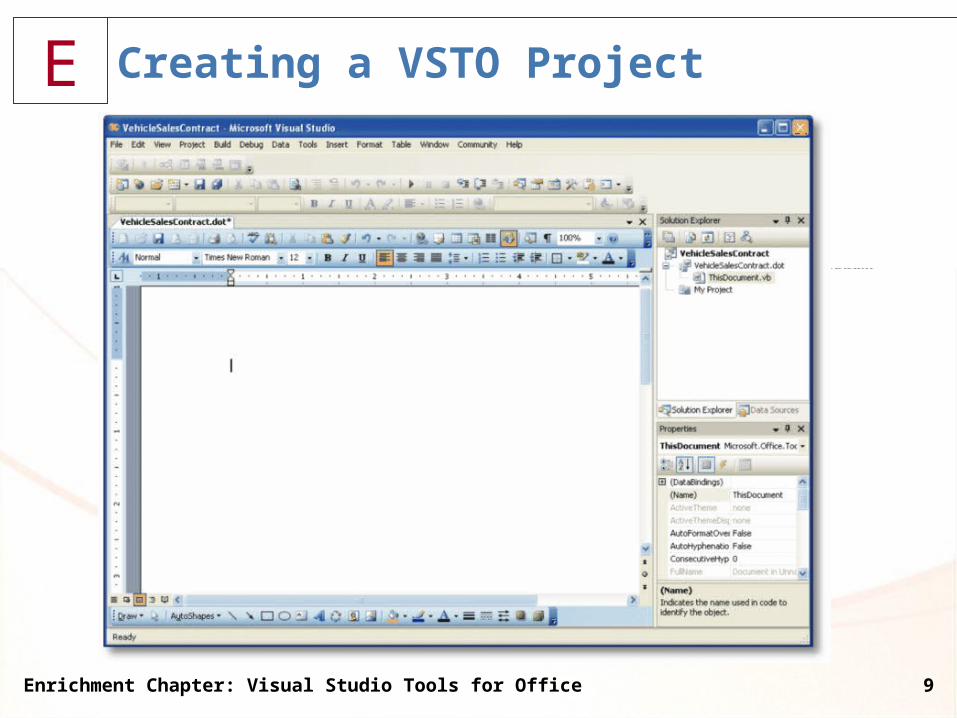
►In the New Project dialog box, click Office in the Project types list on the left side of the window.
►In the Templates section, click Word Template. In the Name text box, type VehicleSalesContract
►VSTO can place objects on a new or existing Word document. In this example, if necessary click the Create a new document option button. Click the OK button in the Wizard window
E
Enrichment Chapter: Visual Studio Tools for Office 9
Creating a VSTO Project

E
Enrichment Chapter: Visual Studio Tools for Office 10
Understanding VSTO Toolbars and Menus
Some menus, such as Tools and View, combine commands from VisualStudio and Office.
E
Enrichment Chapter: Visual Studio Tools for Office 11
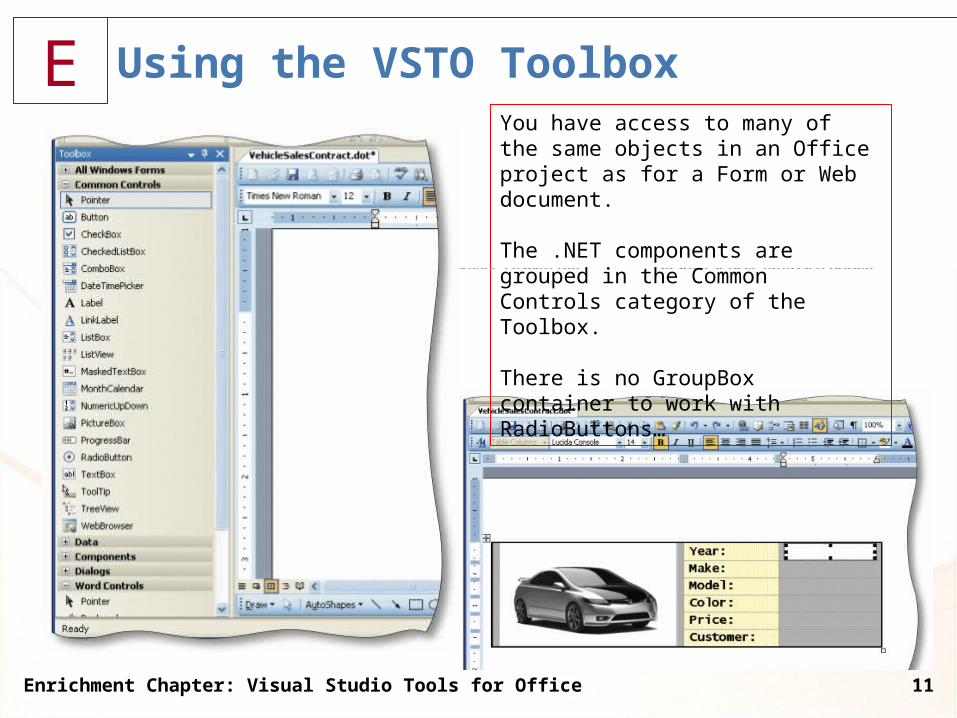
Using the VSTO ToolboxYou have access to many of the same objects in an Office project as for a Form or Web document.
The .NET components are grouped in the Common Controls category of the Toolbox.
There is no GroupBox container to work with RadioButtons…

E DateTimePicker
Using the DateTimePicker Control
The DateTimePicker control displays date and/or time information and acts as the interface through which users can modify date and time information.
The control's display consists of fields that are defined by the control's format string. When the DateTimePicker is dropped down, a MonthView calendar is displayed.
The control has two different modes:
►Dropdown Calendar mode (default) – enables the user to display a dropdown calendar that can be used to select a date.
►Time Format mode – enables the user to select a field in the date display (i.e. the month, day, year, etc.) and press the up/down arrow to the right of the control to set its value.
Enrichment Chapter: Visual Studio Tools for Office 12

E DataTimePicker
►DateTimePicker control in Dropdown Calendar Mode
Enrichment Chapter: Visual Studio Tools for Office 13
►DateTimePicker control in Time Format Mode
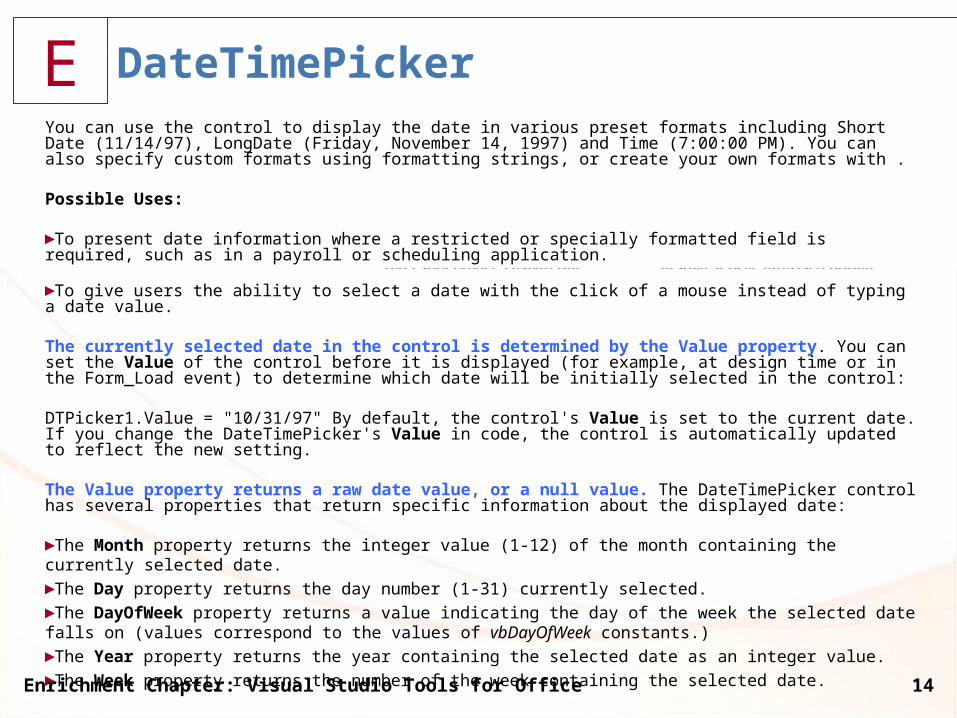
E DateTimePickerYou can use the control to display the date in various preset formats including Short Date (11/14/97), LongDate (Friday, November 14, 1997) and Time (7:00:00 PM). You can also specify custom formats using formatting strings, or create your own formats with .
Possible Uses:
►To present date information where a restricted or specially formatted field is required, such as in a payroll or scheduling application.
►To give users the ability to select a date with the click of a mouse instead of typing a date value.
The currently selected date in the control is determined by the Value property. You can set the Value of the control before it is displayed (for example, at design time or in the Form_Load event) to determine which date will be initially selected in the control:
DTPicker1.Value = "10/31/97" By default, the control's Value is set to the current date. If you change the DateTimePicker's Value in code, the control is automatically updated to reflect the new setting.
The Value property returns a raw date value, or a null value. The DateTimePicker control has several properties that return specific information about the displayed date:
►The Month property returns the integer value (1-12) of the month containing the currently selected date.►The Day property returns the day number (1-31) currently selected.►The DayOfWeek property returns a value indicating the day of the week the selected date falls on (values correspond to the values of vbDayOfWeek constants.)►The Year property returns the year containing the selected date as an integer value.►The Week property returns the number of the week containing the selected date.
Enrichment Chapter: Visual Studio Tools for Office 14

E
Enrichment Chapter: Visual Studio Tools for Office 15
Adding a DateTimePicker Object
►The DateTimePicker object allows the user to select one date from a calendar of dates or times
►Similar to Calendar Web Tool

E
Enrichment Chapter: Visual Studio Tools for Office 16
Adding a DateTimePicker Object

E
Enrichment Chapter: Visual Studio Tools for Office 17
Adding a Table to a Word Document
►Click the Insert Table button on the Word Standard toolbar
►Drag to select one row and three columns in the grid
►Release the mouse button to insert the table in the Word template
E
Enrichment Chapter: Visual Studio Tools for Office 18
Inserting a Picture and Additional Cells into the Table
► Click the leftmost cell in the table. Click Insert on the menu bar, point to Picture on the Insert menu, and then click From File. In the Insert Picture dialog box, locate the car.jpg image file where you saved it. Select the car.jpg image and then click the Insert button to place the image in the table [ Word picture versus VB PictureBox … ]
► The second and third columns contain one row. To add rows to these columns, first drag across the second and third columns to select them
► Click Table on the menu bar and then click Split Cells on the Table menu
► In the Split Cells dialog box, use the arrows to set the value in the Number of columns list to 2 and the value in the Number of rows list to 6. Click the OK button in the Split Cells dialog box. Click outside the table

E
Enrichment Chapter: Visual Studio Tools for Office 19
Inserting a Picture and Additional Cells in the Table

E
Enrichment Chapter: Visual Studio Tools for Office 20
Using AutoFormat to Format a Table
►Click anywhere in the table
►Click Table on the menu bar and then click Table AutoFormat.
►When the Table AutoFormat dialog box opens, click the Table Columns 1 table style.
►At the bottom of the dialog box, uncheck the Heading Rows, First Column, Last Row, and Last Column boxes in the Apply special formats to section
►Click the Apply Button

E
Enrichment Chapter: Visual Studio Tools for Office 21
Using AutoFormat to Format a Table

E
Enrichment Chapter: Visual Studio Tools for Office 22
Adding the Actions Pane Control
►The Actions Pane Control is a customizable task pane that appears in the Office application window
►Using VSTO, you can create a customized Actions Pane Control called the Document Actions task pane
►The ActionsPane object acts as a container for Visual Basic objects

E
Enrichment Chapter: Visual Studio Tools for Office 23
Adding the Actions Pane ControlProcedure 1 of 2
►Open the code window by clicking the View Code button on the Solution Explorer toolbar.
►Click inside the ThisDocument_Startup event
►Type me.ActionsPane.Controls.Add(New
DateTimePicker)
►Press the ENTER key and then delete the blank line
►Test the application by clicking the Start Debugging button on the Standard toolbar

E
Enrichment Chapter: Visual Studio Tools for Office 24
Adding the Actions Pane Control

E
Enrichment Chapter: Visual Studio Tools for Office 25
Adding the Actions Pane ControlProcedure 2 of 2
►Click Project on the menu bar
►click Add New Item to the Project
►Click Actions Pane Control
►Click the Add button in the Add New Item dialog box

E
Enrichment Chapter: Visual Studio Tools for Office 26
Adding the Actions Pane Control
► Drag a Label object from the Toolbox to the Actions Pane Control. Change the (Name) property of the Label object to lblCalculator.
► Change the Text property to Loan Calculator, and the Font property to Sans Serif, size 12
► To display the Actions Pane Control when the application runs, you must code a request to view the Document Actions task pane that is executed when the Word document opens.
► Click the ContractDocument.vb tab to open the code window for the Word template.
► Click in the ThisDocument_Startup event, type
me.ActionsPane.Controls.Add(New ActionsPaneControl1)
which opens the Actions Pane Control when the application begins
► Click the Start Debugging button on the Standard toolbar to execute the application. Microsoft Word opens with the Document Actions task pane on the right side of the window

E
Enrichment Chapter: Visual Studio Tools for Office 27
Adding the Actions Pane Control

E
Enrichment Chapter: Visual Studio Tools for Office 28
Using a ComboBox Object
The combo box is used to select a value for the number of months for a loan.
The user can also type in a value in the text field of the combo box rather than selecting one of the supplied values.

E
Enrichment Chapter: Visual Studio Tools for Office 29
Calculating Loan Payments with the Pmt Function

E
Enrichment Chapter: Visual Studio Tools for Office 30
Calculating Loan Payments with the Pmt Function
Calculate a monthly payment
Monthly Amount = $459.50
Total Paid = $22,055.78
Calculate a payment amount to yield a future value.
Payment Amount = $178.90
Total of payments =$21,468.00

E
Enrichment Chapter: Visual Studio Tools for Office 31
Calculating with the Math Class

E
Enrichment Chapter: Visual Studio Tools for Office 32
Calculating with the Math Class

E
Enrichment Chapter: Visual Studio Tools for Office 33
Program Design

E
Enrichment Chapter: Visual Studio Tools for Office 34
Program Design

E
Enrichment Chapter: Visual Studio Tools for Office 35
Design the Program Processing Objects
E
Enrichment Chapter: Visual Studio Tools for Office 36
Summary
►Use Visual Studio Tools in Microsoft Word
►Create a VSTO Word template
►Add a DateTimePicker object to an application
►Add a table to a Word document

E
Enrichment Chapter: Visual Studio Tools for Office 37
Summary
►Add the Actions Pane Control
►Place a ComboBox object in applications
►Calculate payments using the Pmt Function
►Use Math Class methods in mathematical computations

Microsoft Visual Basic 2005
ENRICHMENT CHAPTER
Visual Studio Tools for Office