microsoft powerpoint 2011 - eastman school of music · microsoft powerpoint 2011 . prepared by...
TRANSCRIPT

Microsoft PowerPoint 2011
Prepared by Computing Services at the Eastman School of Music – May 2011

2 © 2011 Eastman Computing Services
Table of Contents New Look in Microsoft Office 2011 ................................................................................................................................... 4
Standard Toolbar ........................................................................................................................................................... 4
Ribbon ............................................................................................................................................................................ 4
Appearance of Microsoft PowerPoint ............................................................................................................................... 5
Creating a New Presentation ............................................................................................................................................. 6
Opening a Presentation ..................................................................................................................................................... 6
Saving a Presentation ........................................................................................................................................................ 7
Home Tab – Styling your Presentation .............................................................................................................................. 8
Font Formatting ............................................................................................................................................................. 8
Copy/Paste Text ............................................................................................................................................................. 8
Cut/Paste Text ............................................................................................................................................................... 8
Working with Slides ....................................................................................................................................................... 9
Format Styling ................................................................................................................................................................ 9
Find & Replace ............................................................................................................................................................... 9
Headers & Footers ....................................................................................................................................................... 10
Symbols & Equations ................................................................................................................................................... 10
Links ............................................................................................................................................................................. 10
Pictures ........................................................................................................................................................................ 11
Shapes .......................................................................................................................................................................... 11
Media Clips .................................................................................................................................................................. 11
Themes Tab – Slide Layout .............................................................................................................................................. 12
Page Setup ................................................................................................................................................................... 12
Themes......................................................................................................................................................................... 12
Tables Tab ........................................................................................................................................................................ 13
Table Options ............................................................................................................................................................... 13
Charts Tab ........................................................................................................................................................................ 13
SmartArt Tab .................................................................................................................................................................... 13
Transitions Tab ................................................................................................................................................................. 14
Transitions ................................................................................................................................................................... 14
Animations Tab ................................................................................................................................................................ 15
Animations ................................................................................................................................................................... 15

3 © 2011 Eastman Computing Services
Slide Show Tab ................................................................................................................................................................. 16
Start Slide Show ........................................................................................................................................................... 16
Set Up ........................................................................................................................................................................... 16
Screens ......................................................................................................................................................................... 16
Review Tab ....................................................................................................................................................................... 17
Comments .................................................................................................................................................................... 17
Tracking Changes ............................................................................................................ Error! Bookmark not defined.
Format Picture Tab .......................................................................................................................................................... 18
Picture Formatting Tools ............................................................................................................................................. 18
Presentation Tips ............................................................................................................................................................. 19
Keep It Simple .............................................................................................................................................................. 19
Keep It Clear ................................................................................................................................................................. 19

4 © 2011 Eastman Computing Services
New Look in Microsoft Office 2011 Microsoft Office 2011 improves the interface that was introduced in Microsoft Office 2008 by redesigning the Standard Toolbar and Ribbon to help you more easily access the features you need to complete tasks.
Standard Toolbar The Standard Toolbar is now a part of the presentation when opening PowerPoint. It may be turned on or off, but cannot be detached from the presentation. To show/hide this toolbar, click View → Toolbars and check or uncheck Standard.
Ribbon Microsoft Office 2011 improves on the Ribbon interface (found in Microsoft Office 2008) by replacing and moving some of the menus and tools found in the Palette into task-driven tabs. The example below is comprised of nine tabs: Home, Themes, Tables, Charts, SmartArt, Transitions, Animations, Slide Show and Review.
Clicking on a tab will change the available commands on the Ribbon.
Items on the Ribbon are further organized by groups. In the example below, Slide Show is the active tab of the Ribbon and all the ways to start a PowerPoint presentation can be found in the Play Slide Show group in this tab.

5 © 2011 Eastman Computing Services
Appearance of Microsoft PowerPoint After opening Microsoft PowerPoint, you will be taken to a blank presentation and see the following screen.
The default view in Microsoft PowerPoint 2011 is Normal View, displaying the presentation in edit mode. The Presentation View can be changed by clicking the icons along the bottom of Microsoft PowerPoint.

6 © 2011 Eastman Computing Services
Creating a New Presentation To begin a new presentation, click on File New Blank Presentation. If you would like to select different templates, click on File and then Project Gallery.
Opening a Presentation To open an existing presentation, click on File Open. The Open window will appear. Select the location where you have saved the file, then click on the file name from the list and click the Open button. You can also click the Open button on the PowerPoint toolbar to display the Open window (shown at right).

7 © 2011 Eastman Computing Services
Saving a Presentation To save a presentation, click on File → Save. If this is a new presentation that you are saving for the first time, the Save As dialog box will open. Select the location where you would like the file to be saved, enter a file name and click the Save button. The default file format is the PowerPoint Presentation (.pptx) file format. This format ensures that all presentation formatting is saved and will be available the next time the file is opened. Note that .pptx files are unable to be opened with PowerPoint 2004. In this case, you can change a document to be saved in the PowerPoint 97-2004/older file format (.ppt). Note that .ppt file type removes certain types of formatting.
If you have previously saved the document, clicking Save will save changes to the existing file.
If you prefer to have your changes saved to a different file, click on File, then Save As.
In addition to saving as a .ppt and .pptx, PowerPoint 2011 has the ability to save directly to a PDF file. To save a PowerPoint presentation as a PDF, click on File, then Save As, and change the Format to PDF. Select the location where you would like the file to be saved, enter a File name and click Save. Note: Make sure you also save your presentation as a Presentation file as you won’t be able to edit the PDF document that you created from within Microsoft PowerPoint.
8 © 2011 Eastman Computing Services
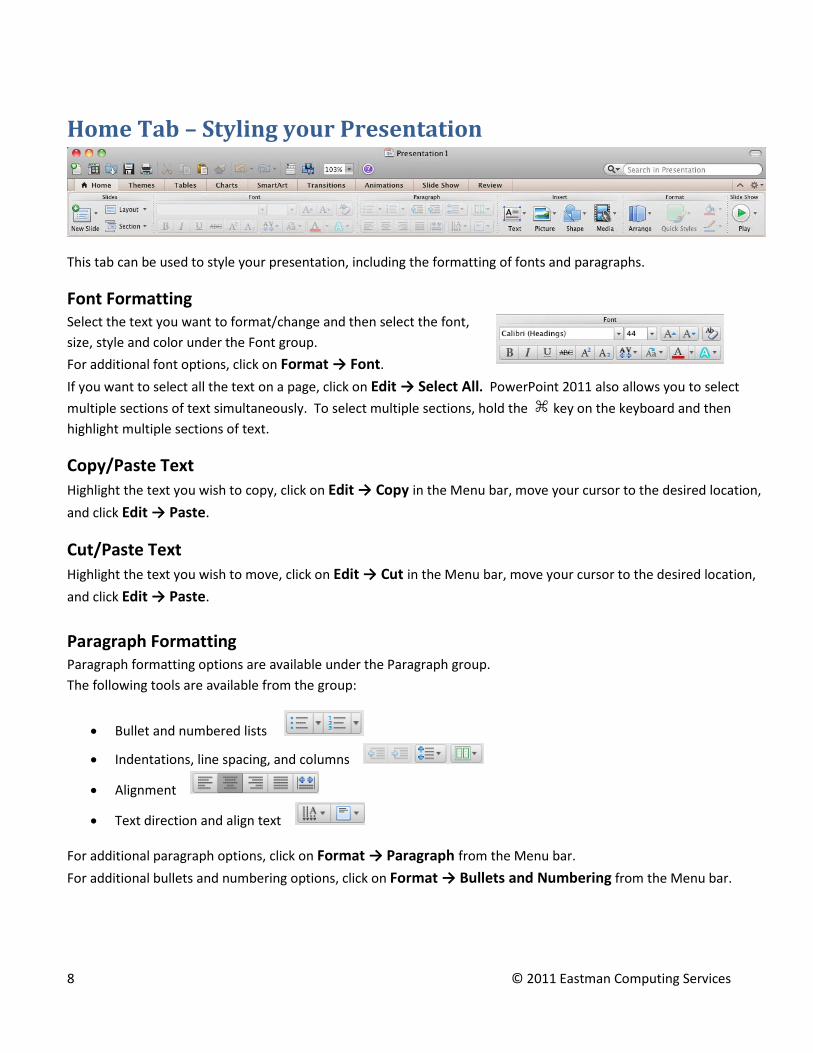
Home Tab – Styling your Presentation
This tab can be used to style your presentation, including the formatting of fonts and paragraphs.
Font Formatting Select the text you want to format/change and then select the font, size, style and color under the Font group. For additional font options, click on Format → Font. If you want to select all the text on a page, click on Edit → Select All. PowerPoint 2011 also allows you to select multiple sections of text simultaneously. To select multiple sections, hold the key on the keyboard and then highlight multiple sections of text.
Copy/Paste Text Highlight the text you wish to copy, click on Edit → Copy in the Menu bar, move your cursor to the desired location, and click Edit → Paste.
Cut/Paste Text Highlight the text you wish to move, click on Edit → Cut in the Menu bar, move your cursor to the desired location, and click Edit → Paste.
Paragraph Formatting Paragraph formatting options are available under the Paragraph group. The following tools are available from the group:
• Bullet and numbered lists
• Indentations, line spacing, and columns
• Alignment
• Text direction and align text
For additional paragraph options, click on Format → Paragraph from the Menu bar. For additional bullets and numbering options, click on Format → Bullets and Numbering from the Menu bar.

9 © 2011 Eastman Computing Services
Working with Slides When starting a new presentation, you will be provided with one slide.
To add an additional slide to your presentation, click New Slide under the Slides group.
To remove a slide, highlight the slide on the left and click on Edit → Delete Slide from the Menu bar.
To change the layout of a slide, click on Layout from the Slides group, and select the desired layout type.
Format Styling
The Format tab offers tools for styling the current shape or text by using pre-defined styles or customizing the fill, line, and effects individually.
Find & Replace In Office 2011, Microsoft incorporated Apple’s Spotlight feature in the Standard Toolbar to make finding words or phrases easily. By default, it will search the current slide. To find a word or phrase, just start typing into the Search field and press Enter. To perform an Advanced Search or Replace, click on the Magnify Glass icon and select Advanced Search or Replace.

10 © 2011 Eastman Computing Services
Headers & Footers To have a consistent footer on each slide of a presentation, click Text → Header & Footer from the Insert group and then select footer components that you want included.
Components include Date and time, Slide number, and customized text (Footer).
The option can also be set to show the footer on the title slider.
To have a consistent header and footer on each notes or handouts page of a presentation, click Text → Header & Footer from the Insert group, click the Notes and Handouts tab and then select the header and footer components that you want included.
Components include Date and time, customized text (Header), Page number, and customized text (Footer).
Symbols & Equations Symbols that are not found on the keyboard can be added to your Microsoft PowerPoint presentation by clicking on Text → Symbol Browser. Then you can either double-click the symbol or equation you want added or click and drag it into your presentation.
Links To create a link to a website or other locations within a PowerPoint presentation, you need to access the Hyperlinks menu.
To include a link to a website, select Text → Hyperlink from the Insert group. From here, enter the address of the URL for the link. This should be done in the Link to: box. In the Display: box, type how the text should be displayed.

11 © 2011 Eastman Computing Services
Pictures Place your cursor where you want the picture placed, click on Picture from the Insert group and select Picture from File. Navigate to the directory where the picture is located, click the file name and then click the Insert button. See the Format Picture Tab on how to edit it.
Shapes To insert a shape, go to the Insert group and click on Shape and select the shape you want from one of the categories listed.
Media Clips To insert a video clip, click Media → Movie from File under the Insert group.
To insert an audio clip, click Media → Audio from File under the Insert group. If you have a microphone connected or built into your computer, you can also select Record Audio to record your own audio.

12 © 2011 Eastman Computing Services
Themes Tab – Slide Layout
This tab can be used to set the slide layout options for a PowerPoint presentation.
Page Setup The Page Setup group contains the options to specify the slide size and orientation.
Click Slide Size and you’ll see pre-defined sizes listed:
1. Standard (4:3) 2. Widescreen (16:9) 3. Widescreen (16:10)
If you want to customize it further, click on Slide Show → Page Setup under the Page Setup group.
Themes To set a theme for your presentation, select the theme you wish to use under the Themes group. For additional themes, click on the More arrow under the Themes group. More themes will be shown as you continue to click the arrow.
The theme colors, fonts, and effects can be changed by using the options under the Theme Options group.

13 © 2011 Eastman Computing Services
Tables Tab
This tab can be used to add a table to your presentation. From here, you can edit table options or choose a pre-defined table style.
Table Options To create a table, click on the Table icon from the Table Options group and then select the number of cells you want. The example on the right has a table that is 8 cells high by 10 cells wide.
The maximum table size that can be selected from the slider is 8 cells high by 10 cells wide. If you need a larger table, in the Menu bar above, click on Insert → Table.
The Insert Table window will open up. From here, the number of columns and rows can be specified.
Charts Tab
This tab gives you the ability to add Charts to your presentation. From here, you can insert the Chart from a new or existing Excel workbook.
SmartArt Tab
This tab gives you the ability to add SmartArt graphics to your presentation. From here, you can insert the SmartArt graphic, edit it, or choose a graphic style.

14 © 2011 Eastman Computing Services
Transitions Tab
This tab can be used to add transitions to the slides within the presentation.
Transitions To set a transition between your slides, click on the Transitions tab, then highlight the slides you want the transition applied to and then select the transition under “Transition to This Slide” group. In the example to the right, the first and second slides have been selected and would have the same transition applied.
For addition transitions, click on the arrow to the right of the last transition.
A transition sound and the speed of it can be set by adjusting its options to the right.

15 © 2011 Eastman Computing Services
Animations Tab
This tab can be used to add animations to the slides within a presentation.
Animations To add animations for the objects on a slide, select the object and then select the animation you want to be applied. Click the arrow to view more animations.
Animations are grouped into three different categories in PowerPoint 2011:
• Entrance Effects
• Emphasis Effects
• Exit Effects
PowerPoint also gives you the option to setup a customized animation to specify exactly how you want an animation to appear. This option will allow you to add an effect and then specify when the effect should start, what direction it will use, and how long it will run.

16 © 2011 Eastman Computing Services
Slide Show Tab
Start Slide Show You can start the slideshow from the beginning of the presentation, from the current slide, or a customized slide show can be setup to allow slides to appear in a certain order throughout the show. This can be accessed from the Play Slide Show group.
Set Up The Set Up group provides options for setting up your slide show for different purposes, such as a presentation by a speaker, browsing by an individual, or automatically run at a kiosk. You can also add narrations and timing for slides to automatically advance.
Screens The Setting for Two Displays provides options for how you want the show to appear on the monitor, which screen the presentation should be displayed on if using two monitors (a laptop and projector) with the 2nd in extended display mode instead of mirrored mode, and the option to show the presentation in presenter view if using the two monitors option in extended display mode.
The presenter view can be useful as it will display the slide that is currently being presented along with the notes for that slide along the bottom, all of the slides in the presentation along the side, and a clock to show you how long you have been presenting for.

17 © 2011 Eastman Computing Services
Review Tab
This tab is used to review your presentation, including adding comments and comparing presentation files.
Comments To insert a comment in a presentation, highlight the text you want commented and then click on New under the Comments group. A comment box will appear to the right of your presentation where you can insert your comment.
To remove the comment, click on the comment box and then click the Delete under the Comments group.
Comparing Presentations This can be a valuable tool if you are sharing a PowerPoint presentation with someone else. If you have another version of the same PowerPoint and want to compare it with your current presentation, click on Compare, select the other presentation and click on Compare. It will display the changes they made and allow you to accept or reject them.
To accept the changes, click the Accept icon.
To remove the changes from the presentation, click the Reject icon. When you’re finished, click on End.

18 © 2011 Eastman Computing Services
Format Picture Tab
This tab can be used to make changes to pictures that are inserted into Microsoft PowerPoint presentations.
Picture Formatting Tools In the Adjust group, use these options to make changes to the properties of pictures, such as brightness, contrast, color, and cropping.
In the Picture Styles group, use these options to select a pre-defined style for your picture or manually set the picture shape, border, and effects.
In the Arrange group, use these options to position & align your picture, text wrapping, and rotate it.
In the Size group, use these options to adjust the height and width of your picture.

19 © 2011 Eastman Computing Services
Presentation Tips
Keep It Simple 1. Avoid using too many colors. 2. Use the same background/style throughout. 3. Find a font that is readable and stick with it. 4. Animation, slide transition and sound effects have their uses but may irritate your audience if they are over-used. 5. Resist the temptation to overcrowd your slides.
Keep It Clear 1. Aim for a maximum of 8 lines of text per slide. 2. Write concise bullet points - you can fill in the details when you speak. 3. Use diagrams where appropriate to illustrate concepts. 4. Transition information - Bullets appearing all at once on a slide may lead the audience to read ahead instead of listening to you.