measuring & recording vital signs clinical rotations
TRANSCRIPT

MEASURING & RECORDING VITAL SIGNS
Clinical Rotations

Blood PressureTemperature ----------------------------Pulse----------------------- Respirations
The Four Vital Signs

Objectives:
Students will: List the 4 major vital signs Describe the principles for measuring and
recording oral, rectal, axillary, tympanic and temporal temperatures
Convert Fahrenheit to Celsius Define- temperature, pulse, respirations,
blood pressure and apical pulse

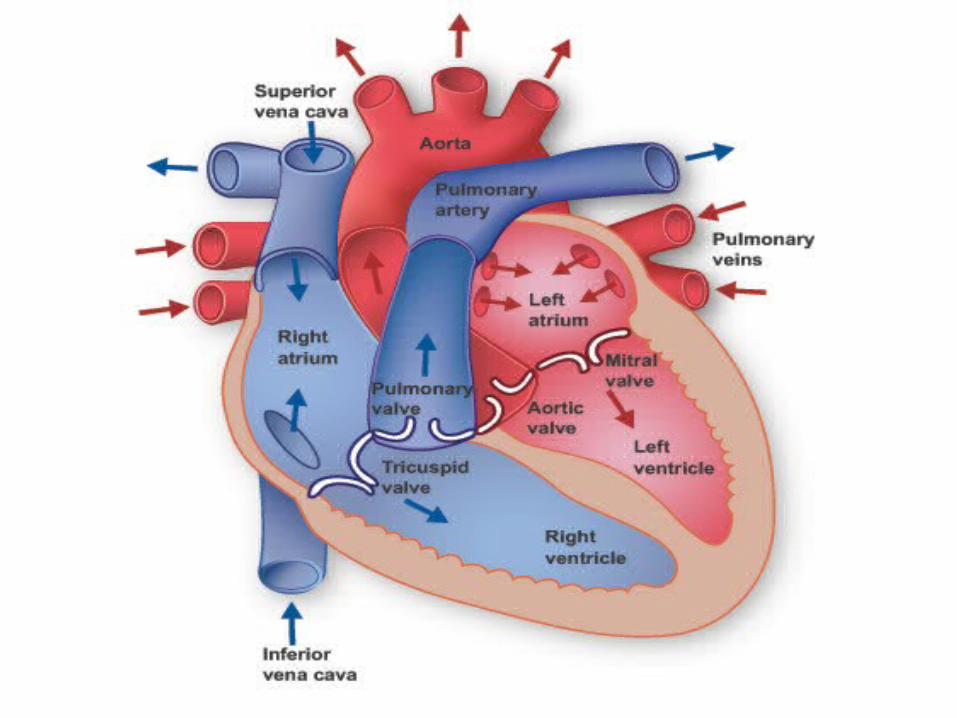
WHAT IS BLOOD PRESSURE?
When your heart beats, it pumps blood around your body to give it the energy and oxygen it needs
As the blood moves, it pushes against the sides of the blood vessels( arteries) –
The strength of the force exerted on your vessels is called your blood pressure

How is blood pressure it measured?
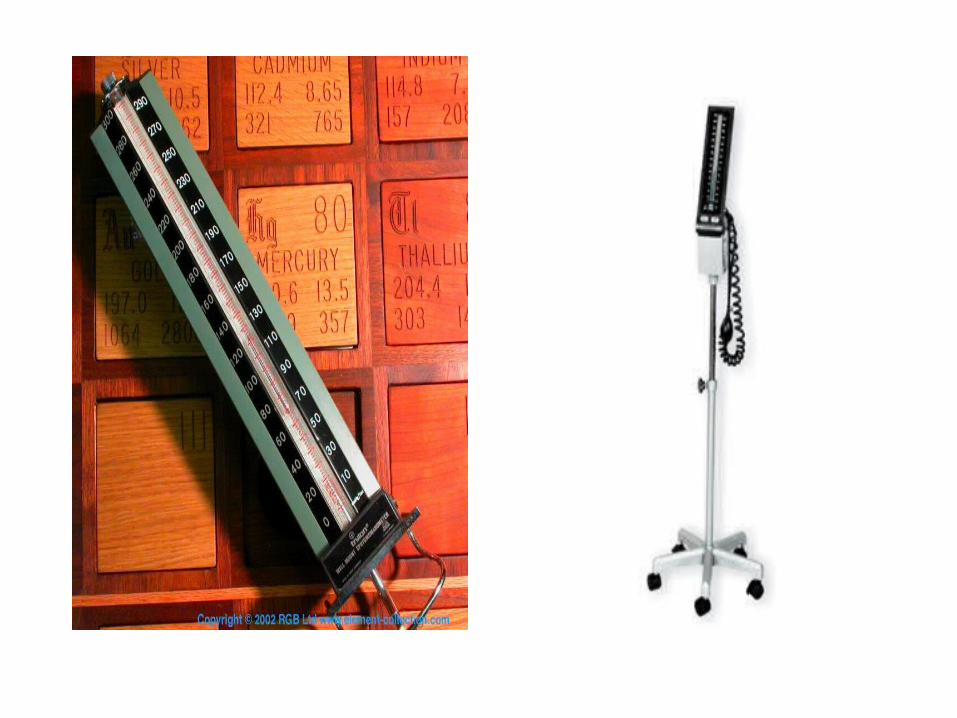
Measured in millimeters of mercury A blood pressure machine is called a sphygmomanometer
BP is read at two points: Systolic Diastolic

Systolic Blood Pressure
Blood pressure
Pressure that occurs in the walls of the arteries when the LEFT VENTRICLE OF THE HEART is contracting
Normal systolic reading is BELOW 120 mm or mercury Normal range is 100- 120 mm or
mercury Systolic is the FIRST sound heard

Diastolic Blood Pressure
The constant pressure in the walls of the arteries when the LEFT VENTRICLE is at rest (between contractions)
Normal diastolic reading is below 80mm or mercury
Normal range is 60-80 mm of mercury It is noted as the reading on the BP
gauge when the sound STOPS or becomes very FAINT

Recording Blood Pressure
Recorded in the form of a fraction Systolic is the top number Diastolic is the bottom number Example:
120/70

Pulse Pressure
The difference between the SYSTOLIC and the DIASTOLIC pressure
Important indicator of the health & tone of the arterial walls
Normal pulse pressure is: 30-50 mm of mercury
Example: what is the pulse pressure of 110/80

Answer:
The pulse pressure of 110/80 is:
30 mm of mercury

Abnormal Blood Pressure
Pre Hypertension Warning that high blood pressure is likely
to develop This condition can harden arteries, dislodge
plaque, and block vessels that nourish the heart
Indicated by pressure readings of: Systolic –120-139 mm of mercury Diastolic – 80-89 mm or mercury

Hypertension
Indicated when pressures are greater than 140 mm of mercury
COMMOM CAUSES: Stress Anxiety High salt intake Advanced age Thyroid disease Vascular disease such as arteriosclerosis

Hypotension
Indicated when BP is less than 90 mm of mercury
COMMOM CAUSES Occurs with heart failure Dehydration Depression Severe burns Hemorrhage Shock

Orthostatic or Postural Hypotension
Occurs when there is a sudden drop in BOTH the systolic & diastolic pressures
Occurs when an individual moves from a lying to a sitting or to a standing position
Blood vessels fail to compensate for the change in position
Individual experiences- may last a few seconds Lightheadedness Dizziness Blurred vision
Factor affecting BLOOD PRESSURE
Heartbeat Condition of the arterial system Elasticity of the arteries Volume of circulating blood Position

Factors which may Increase BP
Anxiety Nervousness Obesity Stimulant drugs Exercise Smoking Pain

Factors which can Decrease BP
Sleep Depressant drugs Shock Dehydration Hemorrhage Fasting

Sphygmomanometers
Aneroid Does not have a mercury column It has a round gauge Each line equals 2 mm of mercury Position at eye level Needle must start at 0 ZERO


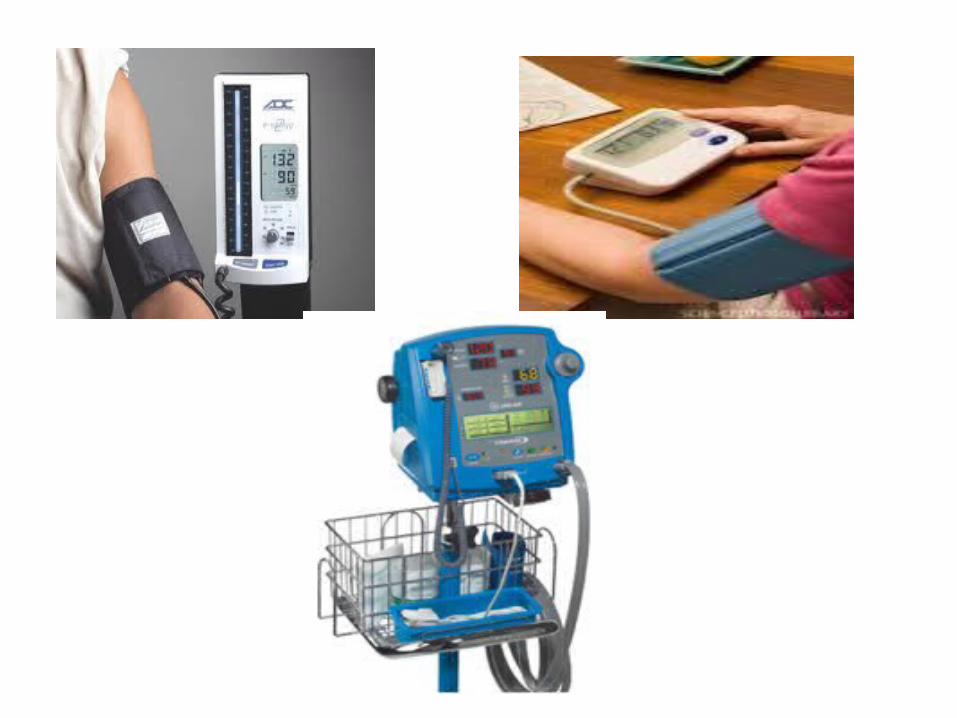
Electronic Sphygmomanometers
Used in most health care facilities
Record blood pressure automatically after cuff is placed on patient
Will show reading in a digital display

Factors to Follow When taking a BP
American Heart Association recommends: Patient should be quite for at least 5
minutes Take 2 separate readings Wait at least 30-60 seconds between
readings

Continued
Correct size and placement of the cuff Patient should be sitting or lying down Arm should be freely extended and free of
constricting clothes BP cuff must be deflated and free of any air BP cuff should be placed over directly over
the brachial artery Edge of cuff should sit 1” above the
antecubital space


How to take a Blood Pressure Person should be comfortably seated or
lying down Should have rested for 10-15 minutes
prior to the reading Arms that are paralyzed, injured, have an
IV or shunt should not be used**** never take BP the same side as a mastectomy
Infant blood pressures can be taken on the leg

Blood Pressure Procedure
Excess air should be squeezed out of the cuff
Cuff should be placed snugly on upper arm.
Gauge should be easily visualized Valve should be closed, but easily able
to be opened

Blood Pressure Procedure
Two techniques for obtaining the pressure
TECHNIQUE #1 Find radial pulse. Pump cuff till pulse no longer
palpated. Then pump another 30 mm Hg higher Place diaphragm of stethoscope on brachial
artery about ½ - 1 inch above the elbow Release the valve and listen for the two
measurements - slowly deflating the cuff.

Blood Pressure Procedure
TECHNIQUE #2 Find brachial artery and put diaphragm
over the site. Pump cuff to 120 mm Hg and listen for
the heart beat. If it is heard, pump another 30 mm Hg and listen again.
When the pulse is no longer heard, then pump another 30 mm Hg and slowly deflate, listening for the two measurements.

Reporting & Recording Reading If reading is uncertain, wait 30 seconds
to 1 minute before remeasuring Record the reading and report any
abnormalities If the B/P reading is outside of the
normal limits, retake it before reporting the value to a supervisor to be certain of accuracy

Blood Pressure Skills Lab
OBJECTIVE: Successful completion of Skills Check
list after demonstrating proficiency in this hands on lab experience
1. Students will have the opportunity to practice taking and recording BP as recommended by the AHA
2. Successful completion of the skills check list is required to pass this skills section of this lesson

Temperature Conversions
Fahrenheit to Celsius C=(F-32)/ 1.8
Celsius to Fahrenheit F=(C X 1.8) + 32
