maps, geocoding & location-based services
TRANSCRIPT

Maps, Geocoding and Location-
Based Services

Introduction
� Mobile phones portability led to services that let you
find, contextualize and map physical locations.
� Map-based Activities using Google Maps,
� Zoom-level, Centered location, Overlays
� Location-based services (LBS)� Location-based services (LBS)
� Services that let you find device’s current location
�GPS, Google’s cell-based location technology.
� Geocoder
� supports forward and reverse geocoding.

Using Location-Based Services
� Main Elements:
� LocationManager
� Provides hooks to the location-based services.
� LocationProviders
� represents location-finding technology� represents location-finding technology

Updating Locations in Emulator Location
Providers

Selecting a Location Provider
� Depending on the device, there may be several
technologies that Android can use
� Offer different capabilities
� power consumption, monetary cost, accuracy, altitude,
speed, heading informationspeed, heading information
� String providerName = LocationManager.GPS_PROVIDER;
LocationProvider gpsProvider;
gpsProvider =
locationManager.getProvider(providerName);

Finding the Available Providers
� LocationManager.GPS_PROVIDER
� LocationManager.NETWORK_PROVIDER
� To get a list of all/only enabled providers:
boolean enabledOnly = true;
List<String> providers = List<String> providers =
locationManager.getProviders(enabledOnly);

Finding Providers Based on
Requirement Criteria� Criteria criteria = new Criteria();
criteria.setAccuracy(Criteria.ACCURACY_COARSE);
criteria.setPowerRequirement(Criteria.POWER_LOW);
criteria.setAltitudeRequired(false);
criteria.setBearingRequired(false);criteria.setBearingRequired(false);
criteria.setSpeedRequired(false);
criteria.setCostAllowed(true);
� String bestProvider =
locationManager.getBestProvider(criteria, isEnabledOnly);

Finding Providers Based on
Requirement Criteria� If more than one => the one with the greatest accuracy
� If no Location Providers => requirements, the criteria are
loosened, in the following order, until a provider is found:
� Power use
� Accuracy� Accuracy
� Ability to return bearing, speed, and altitude
� Cost is never implicitly relaxed.
� If no provider is found, null is returned.
� List<String> matchingProviders =
locationManager.getProviders(criteria, isEnabledOnly);

Finding Your Location
� String serviceString = Context.LOCATION_SERVICE;
LocationManager locationManager;
locationManager =
(LocationManager)getSystemService(serviceString);
� To support access to the LBS hardware.
� <uses-permission android:name=“android.permission. � <uses-permission android:name=“android.permission.
ACCESS_FINE_LOCATION”/>
<uses-permission android:name=“android.permission.
ACCESS_COARSE_LOCATION”/>
� An application that has been granted fine permission will have
coarse permission granted implicitly.
� String provider = LocationManager.GPS_PROVIDER;
� Location location =
locationManager.getLastKnownLocation(provider);

Tracking Movement
� String provider = LocationManager.GPS_PROVIDER;
int t = 5000; // milliseconds
int distance = 5; // meters
� LocationListener myLocationListener = new
LocationListener() {LocationListener() {
public void onLocationChanged(Location location) {
// Update application based on new location. }
public void onProviderDisabled(String provider) {
// Update application if provider disabled. }
public void onProviderEnabled(String provider) {
// Update application if provider enabled. }

Tracking Movement
public void onStatusChanged(String provider, int status,
Bundle extras){
// Update application if provider hardware status
changed.
} };} };
locationManager.requestLocationUpdates(provider, t,
distance, myLocationListener);
� locationManager.removeUpdates(myLocationListener);
� Most GPS hardware incurs significant power cost.
� disable updates whenever possible, specifically when
location changes are used to update User Interface.

Using Proximity Alerts
� Proximity alerts let your applications set triggers that are
fired when a user moves within or beyond a set distance
from a geographic location.
� private static String TREASURE_PROXIMITY_ALERT =
“com.paad.treasurealert”;
private void setProximityAlert() {private void setProximityAlert() {
String locService = Context.LOCATION_SERVICE;
LocationManager locationManager;
locationManager =
(LocationManager)getSystemService(locService);
double lat = 73.147536;
double lng = 0.510638;
float radius = 100; // meters

Using Proximity Alerts
long expiration = -1; // do not expire
Intent intent = new Intent(TREASURE_PROXIMITY_ALERT);
PendingIntent proximityIntent =
PendingIntent.getBroadcast(this, -1, intent, 0);
locationManager.addProximityAlert(lat, lng, radius, expiration, locationManager.addProximityAlert(lat, lng, radius, expiration,
proximityIntent);}
� When the Location Manager detects that you have moved
either within or beyond the specified radius, the packaged
Intent will be fired with an extra keyed as
LocationManager.KEY_PROXIMITY_ENTERING set to true
or false accordingly.

Using Proximity Alerts
� public class ProximityIntentReceiver extends
BroadcastReceiver {
@Override
public void onReceive (Context context, Intent intent) {
String key = String key =
LocationManager.KEY_PROXIMITY_ENTERING;
Boolean entering = intent.getBooleanExtra(key, false);
[ ... perform proximity alert actions ... ]
} }
� IntentFilter filter = new
IntentFilter(TREASURE_PROXIMITY_ALERT);
� registerReceiver (new ProximityIntentReceiver(), filter);

Using Geocoder
� Forward Geocoding
� Finds the latitude and longitude of an address.
� Reverse Geocoding
� Finds the street address for a given latitude and longitude.
� Geocoder geocoder = new Geocoder ( � Geocoder geocoder = new Geocoder (
getApplicationContext(), Locale.getDefault());
� Geocoder lookups are performed synchronously
� they will block the calling thread.
� For slow data connections => AUR dialog
� Solution: move these lookups into a Service/background
thread.

Reverse Geocoding
� location = locationManager.getLastKnownLocation(
LocationManager.GPS_PROVIDER);
� double latitude = location.getLatitude();
� double longitude = location.getLongitude();
� Geocoder gc = new Geocoder(this, Locale.getDefault());� Geocoder gc = new Geocoder(this, Locale.getDefault());
� List<Address> addresses = null;
� try {
� addresses = gc.getFromLocation(latitude, longitude,
maxResults);
� } catch (IOException e) {}

Forward Geocoding
� List<Address> result =
geocoder.getFromLocationName(aStreetAddress, maxResults);
� Geocoder fwdGeocoder = new Geocoder(this, Locale.US);
String streetAddress = “160 Riverside Drive, New York, New
York”;
List<Address> locations = null;List<Address> locations = null;
try {
� locations = fwdGeocoder.getFromLocationName(streetAddress,
10);
� } catch (IOException e) {}

Forward Geocoding
� To restrict your search to within a geographical
bounding box:
List<Address> locations = null;
try {
locations = locations =
fwdGeocoder.getFromLocationName(streetAddress,
10, lowerLeftLatitude, lowerLeftLongitude,
upperRightLatitude, upperRightLongitude) );
} catch (IOException e) {}
� Used restrict the search to within the visible map

Introducing MapView and MapActivity
� MapView
� is the actual Map View (control).
� MapActivity
� handles the application life cycle and background service
management required for displaying mapsmanagement required for displaying maps
� You can only use a MapView within MapActivity-derived
Activities

Creating a Map-Based Activity
� Add the Android map library to your manifest
� <uses-library android:name=“com.google.android.maps”/>
� Google Maps downloads the map tiles on demand; as
a result, it implicitly requires permission to use the
Internet. Internet.
� <uses-permission
android:name=“android.permission.INTERNET”/>
� public class MyMapActivity extends MapActivity {
private MapView mapView;

Creating a Map-Based Activity
@Override
public void onCreate(Bundle icicle) {
super.onCreate(icicle);
setContentView(R.layout.map_layout);
mapView = (MapView)findViewById(R.id.map_view);mapView = (MapView)findViewById(R.id.map_view);
}
@Override
protected boolean isRouteDisplayed() {
// This method must return true if your Activity is
// displaying driving directions. Otherwise return false
return false; } }

Creating a Map-Based Activity
<?xml version=”1.0” encoding=”utf-8”?>
<LinearLayout
xmlns:android=”http://schemas.android.com/apk/res/android”
android:orientation=”vertical”
android:layout_width=”fill_parent”
android:layout_height=”fill_parent”>android:layout_height=”fill_parent”>
<com.google.android.maps.MapView
android:id=”@+id/map_view”
android:layout_width=”fill_parent”
android:layout_height=”fill_parent”
android:enabled=”true”
android:clickable=”true”
android:apiKey=“mymapapikey”/> </LinearLayout>

Map API Keys
� MapView gives you access to Google Maps data
� need to register with the Google Maps service and agree to
the applicable Terms of Service.
� Applies when the emulator or deploying to a device
� Registration Steps:� Registration Steps:
1. Registering the MD5 fingerprint of the certificate that you
will use to sign your application.
2. Agree to the terms of service
3. Get the Maps API Key that is associated with your
application's signer certificate.
4. Adding a reference to the API Key in each MapView.

Map API Keys
� Maps Service checks that the Maps API Key supplied by
the MapView:
� References a certificate/developer registered with the
service, and
� References a certificate that matches the certificate
with which the application (containing the MapView)
was signed.
� You can get a temporary Maps API Key based on your
debug certificate, but before you publish your application,
you must register for a new Key based on your release
certificate and update references in your MapViews.

Getting MD5 Fingerprint of the SDK
debug Certificate1. Locate the SDK debug certificate located in the default folder
� "C:\Documents and Settings\<username>\Local Settings\Application Data\Android".
� “C:\Documents and
Settings\<username>\.android\debug.keystore
� The filename of the debug keystore is debug.keystore.� The filename of the debug keystore is debug.keystore.
2. Use the Keytool.exe from the "C:\Program
Files\Java\<JDK_version_number>\bin" folder
3. From Command line, issue the command:
� keytool.exe -list -alias androiddebugkey -keystore "C:\.
..\debug.keystore" -storepass android -keypass android
4. Copy the MD5 certificate fingerprint
5. Use it to register at http://code.google.com/android/maps-
api-signup.html

Configuring and Using MapViews
� mapView.setSatellite(true);
� mapView.setStreetView(true);
� mapView.setTraffic(true);
� GeoPoint center = mapView.getMapCenter();
int latSpan = mapView.getLatitudeSpan();� int latSpan = mapView.getLatitudeSpan();
� int longSpan = mapView.getLongitudeSpan();

Zooming
� int y = 10;
int x = 10;
MapView.LayoutParams lp = new
MapView.LayoutParams(MapView.LayoutParams.
WRAP_CONTENT,MapView.LayoutParams. WRAP_CONTENT,MapView.LayoutParams.
WRAP_CONTENT, x, y,
MapView.LayoutParams.TOP_LEFT);
� View zoomControls = mapView.getZoomControls();
� mapView.addView(zoomControls, lp);
� mapView.displayZoomControls(true);

Using the Map Controller
� Used to pan and zoom a MapView.
� MapController mapController = myMapView.getController();
� Map locations are represented by GeoPoint objects
� contain latitude and longitude measured in microdegrees
� double lat = 37.422006*1E6;� double lat = 37.422006*1E6;
double lng = -122.084095*1E6;
GeoPoint point =new GeoPoint(lat.intValue(),lng.intValue());
� mapController.setCenter(point);
� mapController.animateTo(point);
� mapController.setZoom(1);
� 1 represents the furthest zoom, and 21 is the nearest
� zoomIn ()and zoomOut()

Creating and Using Overlays
� Overlay: A canvas with a transparent background to add
annotations and touch event handling to MapViews.
� You can add several Overlays onto a single map.
� public class MyOverlay extends Overlay {
@Override@Override
public void draw(Canvas canvas, MapView mapView,
boolean shadow) {
if (shadow == false) {
[ ... Draw annotations on main map layer ... ]
}
else {
[ ... Draw annotations on the shadow layer ... ] }}

Creating and Using Overlays
@Override
public boolean onTap(GeoPoint point, MapView
mapView) {
// Perform hit test to see if this overlay is handling the
clickclick
if ([... perform hit test ... ]) {
[ ... execute on tap functionality ... ]
return true;
}
// If not handled return false
return false; } }

Introducing Projections
� To add annotations based on physical locations, you need to
convert between geographical points and screen coordinates
using Projection class.
� A map’s Projection may change between subsequent calls to
draw, so it’s good practice to get a new instance each time.
� Projection projection = mapView.getProjection();
� Point myPoint = new Point();
� // To screen coordinates
� projection.toPixels(geoPoint, myPoint);
� // To GeoPoint location coordinates
� projection.fromPixels(myPoint.x, myPoint.y);

Drawing on the Overlay Canvas
public void draw(Canvas canvas, MapView mapView,
boolean shadow) {
Projection projection = mapView.getProjection();
Double lat = -31.960906*1E6;
Double lng = 115.844822*1E6;Double lng = 115.844822*1E6;
GeoPoint geoPoint = new GeoPoint(lat.intValue(),
lng.intValue());
if (shadow == false)
{
Point myPoint = new Point();
projection.toPixels(geoPoint, myPoint);

// Create and setup your paint brush
Paint paint = new Paint();
paint.setARGB(250, 255, 0, 0);
paint.setAntiAlias(true);
paint.setFakeBoldText(true);
// Create the circle
int rad = 5;int rad = 5;
RectF oval = new RectF(myPoint.x-rad, myPoint.y-rad,
myPoint.x+rad, myPoint.y+rad);
// Draw on the canvas
canvas.drawOval(oval, paint);
canvas.drawText(“Red Circle”, myPoint.x+rad, myPoint.y,
paint);
} }

Adding and Removing Overlays
� List<Overlay> overlays = mapView.getOverlays();
� MyOverlay myOverlay = new MyOverlay();
� overlays.add(myOverlay);
� mapView.postInvalidate();
Adding and removing items from the list is thread � Adding and removing items from the list is thread
safe and synchronized
� Iterating over the list should still be done within a
synchronization block synchronized on the List.

Introducing MyLocationOVerlay
� A special Overlay designed to show your current
location (flashing blue marker) and orientation
(compass) on a MapView.
� List<Overlay> overlays = mapView.getOverlays();
MyLocationOverlay myLocationOverlay = new MyLocationOverlay myLocationOverlay = new
MyLocationOverlay(this, mapView);
overlays.add(myLocationOverlay);
myLocationOverlay.enableCompass();
myLocationOverlay.enableMyLocation();

ItemizedOverlays and OverlayItems
� ItemizedOverlays provide a convenient shortcut, letting you
assign a marker image and associated text to a particular
geographical position.
� public class MyItemizedOverlay extends
ItemizedOverlay<OverlayItem>
{
public MyItemizedOverlay(Drawable defaultMarker) {
super(defaultMarker);
// Create each of the overlay items included in this layer.
populate(); //required
}

ItemizedOverlays and OverlayItems
@Override
protected OverlayItem createItem(int index) {
switch (index) {
case 1:
double lat = 37.422006*1E6;double lat = 37.422006*1E6;
double lng = -122.084095*1E6;
GeoPoint point = new GeoPoint(lat.intValue(),
lng.intValue());
OverlayItem oi;
oi = new OverlayItem(point, “Marker”, “Marker Text”);
return oi; } return null; }

ItemizedOverlays and OverlayItems
@Override
public int size() {
// Return the number of markers in the collection
return 1;
}}}}
� Use:
List<Overlay> overlays = mapView.getOverlays();
MyItemizedOverlay markers = new
MyItemizedOverlay(r.getDrawable(R.drawable.marker));
overlays.add(markers);
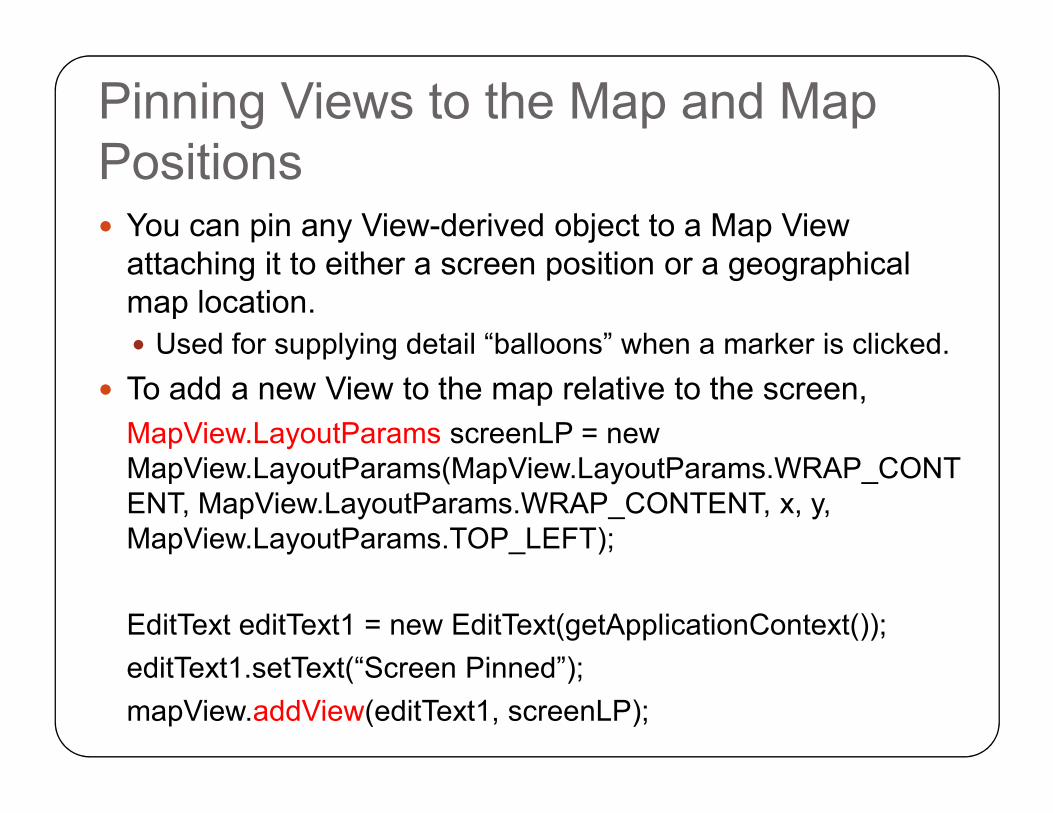
� You can pin any View-derived object to a Map View
attaching it to either a screen position or a geographical
map location.
� Used for supplying detail “balloons” when a marker is clicked.
� To add a new View to the map relative to the screen,
Pinning Views to the Map and Map
Positions
MapView.LayoutParams screenLP = new
MapView.LayoutParams(MapView.LayoutParams.WRAP_CONT
ENT, MapView.LayoutParams.WRAP_CONTENT, x, y,
MapView.LayoutParams.TOP_LEFT);
EditText editText1 = new EditText(getApplicationContext());
editText1.setText(“Screen Pinned”);
mapView.addView(editText1, screenLP);

� To pin a View relative to a physical map location:
double lat = 37.422134*1E6;
double lng = -122.084069*1E6;
GeoPoint geoPoint = new GeoPoint(lat.intValue(), lng.intValue());
MapView.LayoutParams geoLP = new
MapView.LayoutParams(MapView.LayoutParams.WRAP_CONT
ENT, MapView.LayoutParams.WRAP_CONTENT, geoPoint, ENT, MapView.LayoutParams.WRAP_CONTENT, geoPoint,
MapView.LayoutParams.TOP_LEFT);
EditText editText2 = new EditText(getApplicationContext());
editText2.setText(“Location Pinned”);
mapView.addView(editText2, geoLP);

Introducing the Sensor Manager

Introducing the Sensor Manager
� Used to manage the sensor hardware available on an
Android device.
String service_name = Context.SENSOR_SERVICE;
SensorManager sensorManager =
(SensorManager)getSystemService(service_name);
� SensorListener mySensorListener = new SensorListener() {
public void onSensorChanged(int sensor, float[] values) {
// TODO Deal with sensor value changes
}
public void onAccuracyChanged(int sensor, int accuracy) {
// TODO Auto-generated method stub
} };

Sensor Types
� SensorManager.SENSOR_ACCELEROMETER
� SensorManager.SENSOR_ORIENTATION
� SensorManager.SENSOR_LIGHT
� SensorManager.SENSOR_MAGNETIC_FIELD.
� SensorManager.SENSOR_PROXIMITY� SensorManager.SENSOR_PROXIMITY
� SensorManager.SENSOR_TEMPERATURE
� SensorManager.SENSOR_TRICORDER

Registering Sensor Listeners
� sensorManager.registerListener(mySensorListener,
SensorManager. SENSOR_ACCELEROMETER
SensorManager.SENSOR_DELAY_FASTEST);
� Update rates in descending order of responsiveness:� Update rates in descending order of responsiveness:
� SensorManager.SENSOR_DELAY_FASTEST
� SensorManager.SENSOR_DELAY_GAME
� SensorManager.SENSOR_DELAY_NORMAL
� SensorManager.SENSOR_DELAY_UI
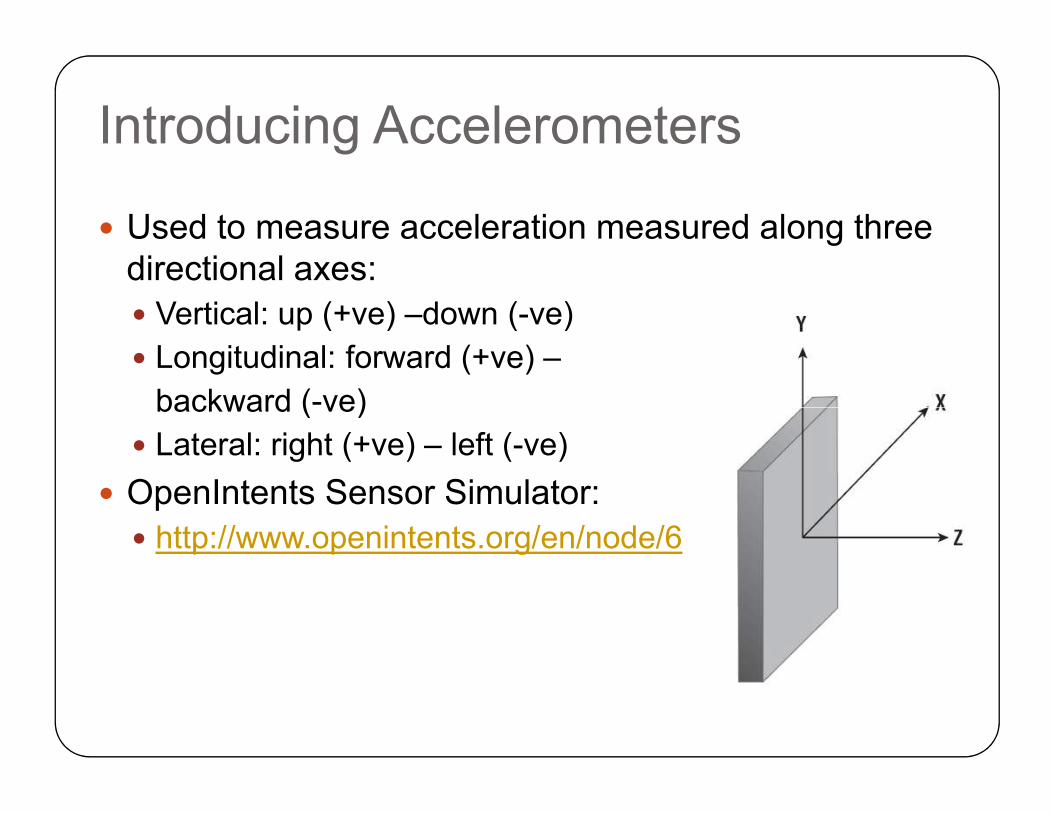
� Used to measure acceleration measured along three
directional axes:
� Vertical: up (+ve) –down (-ve)
� Longitudinal: forward (+ve) –
backward (-ve)
Introducing Accelerometers
backward (-ve)
� Lateral: right (+ve) – left (-ve)
� OpenIntents Sensor Simulator:
� http://www.openintents.org/en/node/6

Using Accelerometer
� public void onSensorChanged(int sensor, float[] values) {
if (sensor == SensorManager.SENSOR_ACCELEROMETER)
{
float xAxis = values[SensorManager.DATA_X];
float yAxis = values[SensorManager.DATA_Y];
float zAxis = values[SensorManager.DATA_Z];
float raw_xAxis = values[SensorManager.RAW_DATA_X];
float raw_yAxis = values[SensorManager.RAW_DATA_Y];
float raw_zAxis = values[SensorManager.RAW_DATA_Z];
// TODO apply the acceleration changes to your application.
}
}

Determining Your Orientation
� Create User Interfaces that adjust dynamically to suit the
orientation of your device.
� Measured along all 3 dimensions:
� Heading angle around Z-axis:
� North (0/360), EAST (90),
South (180), West (270)
� Pitch angle around Y-axis:
� on its back (0), upright (-90) , upside down (90),
face down (180/–180)
� Roll angle around X-axis: on its back (0), screen left (–90), screen right (90)