manual del usuario - aldi us · pdf filemanual del usuario english.....page 6 ... preparing...
TRANSCRIPT

DIGITAL WEATHER STATION
ESTACIÓN METEOROLÓGICA DIGITAL
User ManualManual del usuario
English.........Page 6 Español...Página 49
ID: #05007
myhansecontrol.c
om
MA
NUA
L
DEVELOPED IN GERMA
NY
User-friendlyManual

Dok.
/Rev
.-N
r. 9
3098
_201
5071
0_DE
_GB_
US
Contents
Overview ........................................................................................................... 3Use...................................................................................................................... 4Pack contents/device parts ............................................................................. 6General information ......................................................................................... 7
Reading and storing the user manual .............................................................. 7Explanation of symbols ........................................................................................ 7
Safety ................................................................................................................. 9Proper use............................................................................................................... 9Safety notes ............................................................................................................ 9Safe use of power adaptor .................................................................................12Battery notes .........................................................................................................14
Unpacking ........................................................................................................17About time signals...........................................................................................17Preparing the radio sensor for use ................................................................18
Inserting or replacing batteries ........................................................................18Using additional radio sensors .........................................................................18Installing the radio sensor .................................................................................19
Preparing the base unit for use .................................................................... 20Powering the base unit ......................................................................................20Searching for signals .......................................................................................... 22Manual settings ................................................................................................... 24Installing the base unit ...................................................................................... 26
Time functions ................................................................................................ 26Display (time functions) ..................................................................................... 26Alarms ................................................................................................................... 27Summer time ........................................................................................................ 29Time zone ..............................................................................................................30Time format ..........................................................................................................30
Weather data ................................................................................................... 30Display (weather data) .......................................................................................30Switching between radio sensors ....................................................................31Maximum and minimum values ....................................................................... 32Temperature and humidity trend .................................................................... 33Units of temperature .......................................................................................... 33
Air pressure ..................................................................................................... 33Display (air pressure) .......................................................................................... 33Current air pressure and air pressure trend .................................................. 34Maximum and minimum values ....................................................................... 34
Weather forecast ............................................................................................ 35Display (weather forecast) ................................................................................36Weather forecast symbols ................................................................................. 37Air pressure trend ...............................................................................................38
Moon phases ................................................................................................... 38Other functions ............................................................................................... 39
Display backlight .................................................................................................39USB charging port ...............................................................................................39Low battery warning ..........................................................................................39Resetting the weather station..........................................................................40
Cleaning ..........................................................................................................40Storage .............................................................................................................41Troubleshooting ............................................................................................. 42Technical data .................................................................................................44Disposal ...........................................................................................................46Warranty card ................................................................................................. 93Warranty conditions ....................................................................................... 94

3USA
A
SNOOZE LIGHT
SNOOZE LIGHT
SNOOZE LIGHT
SNOOZE LIGHT
21
21
3
3
4
4
16
16
5
5
15
15
8
8
6
6
14
14
7
7
13
13
9
9
10
10
11
11
12
12
A
B

4 USA
B
EU
US
GB
C
17
17
26
18 19 20
21
22
24
2325

5USA
D
27 28
28
29
29
30
30
31
31
32
32
33
33
27
WEATHER FORECAST OUTDOOR
WEATHER FORECAST PRESSURE
HISTORY
OUTDOOR
INDOOR
TIME&CALENDAR
MOON
MOON
DAY
DAY
DATE MONTH
INDOOR
PRESSUREHISTORY
WEATHER FORECAST OUTDOOR
WEATHER FORECAST PRESSURE
HISTORY
OUTDOOR
INDOOR
TIME&CALENDAR
MOON
MOON
DAY
DAY
DATE MONTH
INDOOR
PRESSUREHISTORY
A
B

USA6
Pack contents/device parts24 Power adaptor25 Batteries (AA x 2, AAA x 2)26 Hanging bracket27 Indoor weather28 Weather forecast29 Outdoor weather30 Air pressure31 Date and weekday32 Moon phase33 Clock and alarm
Note: The MODE button 4 has the same function as the SET button 5 in this weather station.
A = Horizontal versionB = Vertical version
1 Base unit2 Display3 SNOOZE/LIGHT button4 MODE button5 SET button6 MEM button7 CH button8 Hanging hole9 USB charging port10 DC input jack11 Battery compartment12 Foldout stand13 UP button14 ALM button15 DOWN button16 RCC button17 Radio sensor18 Display19 Signal indicator light20 Channel switch21 Battery compartment
door22 Battery compartment23 Output plug

[email protected] SALES SUPPORT USA 1 855 754 8297 7
General information USA
General informationReading and storing the user manual
This user manual accompanies the Digital Weather Station. It contains important information on handling and care. For
improved readability, the Digital Weather Station will be referred to only as the “weather station” below.Before using the weather station, read the user manual carefully. This particularly applies to the safety notes. Failure to follow the instructions in this user manual may result in severe injury or damage to the weather station.When abroad, you must also observe country-specific guidelines and laws.Store the user manual for future use. If you pass the weather station on to a third party, please be absolutely sure to include this user manual.
Explanation of symbolsThe following symbols and signal words are used in this user manual, on the weather station or on the packaging.

[email protected] AFTER SALES SUPPORTUSA 1 855 754 8297
General informationUSA
8
WARNING!This signal word/symbol designates a hazard with moderate risk, which may result in death or severe injury if not avoided.
CAUTION!
This signal word/symbol designates a hazard with low risk, which may result in minor or moderate injury if not avoided.
NOTE!
This signal word warns of possible damage to property.
This symbol provides you with useful additional information regarding assembly or operation.

[email protected] SALES SUPPORT USA 1 855 754 8297 9
Safety USA
SafetyProper useThe weather station is designed exclusively to show time and weather information. It is only intended for indoor private use and is not suitable for commercial applications.Only use the weather station as described in this user manual. Any other use is deemed improper and may result in damage to property or even personal injury. The weather station is not a toy for children.The manufacturer or vendor accepts no liability for damage caused by improper or incorrect use.
Safety notes
WARNING!Risk of suffocation!Do not allow children to play with the packaging wrapper. They may get caught in it when playing and suffocate.
WARNING!The weather station may be used by children from the age of 8 as well as by persons with reduced physical, sensory and mental capabilities or with a lack

[email protected] AFTER SALES SUPPORTUSA 1 855 754 8297
SafetyUSA
10
of experience and/or knowledge if they are being supervised or have been ins-tructed on how to safely use the device and have understood the resulting risks.
− The weather station and the power adaptor must be kept out of the reach of children below the age of 8.
− The weather station must not be cleaned by children unless they are at least 8 years of age and are being supervised.
− Children must be supervised when using the weather station.
CAUTION!
Risk of damage!If you do not use the weather station (base unit and radio sensor) properly, you could damage it.
− Do not use the weather station in a damp place (e. g. bathroom) and avoid dust, splashing or dripping water, heat sources, extreme temperatures and direct sunlight.

[email protected] SALES SUPPORT USA 1 855 754 8297 11
Safety USA
− Make sure the weather station stays away from magnetic fields (e. g. speakers).
− Make sure no foreign objects penetrate the housing of the weather station.
− Do not exert pressure on the display surface of the weather station, as this may cause the surface to break.
− Do not allow sharp or pointed objects to come in contact with the surface of the weather station.
− Keep the weather station from falling. Failure to do so may break the weather station.
− Do not place the weather station near any heat sources. Never place naked flames such as burning candles on or immediately next to the weather station.
− Under no circumstances should you open the housing of the weather station. There are no user-serviceable parts inside. Improper repairs may damage the weather station. Repairs should only be carried out
[email protected] AFTER SALES SUPPORTUSA 1 855 754 8297
SafetyUSA
12
by professional technicians. The only exception is the removal of the battery compartment door to replace the batteries.
− The radio sensor must be protected from direct exposure to moisture such as rain.
Safe use of power adaptor − Only use the power adaptor provided
with the weather station. − Only use the power adaptor in dry
and indoor areas. Do not let the power adaptor come into contact with water or other liquids.
− Connect the power adaptor only to an alternating current (AC) power supply. Make sure that the voltage corresponds with the voltage details on the device. The power adaptor must be operated using (100 ~ 240 V, 50/60 Hz) alternating current (AC).
− Only connect the power adaptor to a properly installed and easily accessible socket so that you can quickly pull the plug in an emergency.

[email protected] SALES SUPPORT USA 1 855 754 8297 13
Safety USA
− Fully unwind the power adaptor cord before connecting it. Make sure that the cord cannot get damaged by sharp edges or hot objects.
− Never cover the power adaptor. Ensure that sufficient ventilation is provided in order to prevent the power adaptor from overheating.
− Do not use the power adaptor if the housing or cord is defective or has other visible damages. In the event of damage, only have the power adaptor serviced by the manufacturer, its customer service team or a similarly qualified person to avoid risks.
− The power adaptor cord cannot be replaced. If the cord or the power adaptor is damaged, they must be thrown away and replaced by a power adaptor of the same model.
− Always remove the power adaptor from the power socket if:• you want to clean the weather station
or do not intend on using the weather station for a prolonged period of time

[email protected] AFTER SALES SUPPORTUSA 1 855 754 8297
SafetyUSA
14
• the weather station is not working properly
• during thunderstorms − Always pull the plug, not the cord when
you are removing the power adaptor from the power socket.
Battery notes
WARNING!
Health hazards!There is a high health hazard if children or animals swallow the batteries.
− Store the batteries so they are not accessible to children and animals. If you suspect a battery has been swallowed, seek immediate medical advice.
WARNING!Risk of explosion!Improper handling of batteries increases the risk of explosion.
− Store the batteries in a cool, dry place. Never expose the batteries to excessive

[email protected] SALES SUPPORT USA 1 855 754 8297 15
Safety USA
heat (e.g. direct sunlight) and never dispose of them in a fire.
− Only use batteries of the same type. − Ensure the correct polarity when
inserting the batteries. This is shown in the battery compartments. Incorrect installation may damage the weather station.
− Always use batteries of premium quality. Batteries of poor quality may leak and cause damage.
− Before inserting the batteries, make sure the contacts inside the battery compartment and on the battery itself are clean and intact. Clean them if necessary.
− Always replace all batteries in a battery compartment at the same time.
− Remove the batteries from the weather station if they are dead. Also remove the batteries if you do not intend on using the weather station for a prolonged period of time. Otherwise, the batteries may leak and cause damages.

[email protected] AFTER SALES SUPPORTUSA 1 855 754 8297
SafetyUSA
16
− If the batteries are leaking, remove them immediately to prevent damaging the weather station. Do not remove the batteries with your bare hands or allow the battery fluid to come into contact with skin, eyes or mucus membranes. Wear normal household rubber gloves to do so. If, however, your skin has come into contact with the battery fluid, wash your hands immediately and consult a physician if necessary.
− Batteries should only be installed or replaced by an adult.
− Keep the weather station away from children when the battery cover is removed.
− Remove the batteries before disposing of the weather station.

[email protected] SALES SUPPORT USA 1 855 754 8297 17
Unpacking USA
Unpacking1. Take the weather station out of the packaging and
check whether it or any individual parts exhibit damages. If this is the case, do not use the weather station. Contact the manufacturer using the service address specified on the warranty card.
2. Check to make sure that all contents have been received (see Fig. A, B and C).
About time signalsThe base unit of the weather station is a radio-controlled clock and can receive the time signals emitted through the signal transmitter in your country. If the base unit is located within the transmission range, it can receive the signals and synchronize with the broadcasted time and date several times a day. In case of a failure in signal reception, the base unit can continue to run accurately and attempt to look for time signals at the next designated time. If no signals can be found, the time and date can also be set manually.

[email protected] AFTER SALES SUPPORTUSA 1 855 754 8297
Preparing the radio sensor for useUSA
18
Preparing the radio sensor for useInserting or replacing batteries
Use of batteries − Do not use any rechargeable batteries,
as their voltage is low. This influences the measuring precision.
− Preferably use alkaline batteries which last longer, particularly with low outdoor temperature.
1. Remove the battery compartment door 21 on the back of the radio sensor 17 .
2. For battery replacement, remove the old batteries first. Insert 2 batteries 25 (size: AAA, provided) into the battery compartment 22 . Pay attention to the correct battery polarity (+ or -).
3. Close the battery compartment door. The radio sensor will detect the temperature and humidity of the surroundings and send the collected data to the base unit once a minute. Both the temperature (°C) and humidity (%) will be shown on the display 18 of the radio sensor. The signal indicator light 19 will blink once when the data have been sent.
Using additional radio sensorsThe weather station is supplied with one radio sensor. If necessary, you can operate it with up to three radio sensors. Additional sensors are available through

[email protected] SALES SUPPORT USA 1 855 754 8297 19
Preparing the radio sensor for use USA
the after sales support. The contact details are on the warranty card. The radio sensors can be located in different rooms or outdoors. Each sensor must have its own radio sensor number (1-3) allocated to it.To use additional radio sensors:
1. Remove the battery compartment door 21 on the back of the radio sensors.
2. Set a dedicated radio sensor number (1-3) for each radio sensor using the channel switch 20 . The selected radio sensor number (e.g. = radio sensor number 1) will show on the display 18 .
3. Close the battery compartment door.The base unit will receive the weather data from all available radio sensors (see chapter “Preparing the base unit for use”). In the event of interference from nearby equipment transmitting radio signals, you may change the radio sensor number to avoid the interference.
Installing the radio sensorNotes on installationTake note of the tips below to ensure the best possible signal receptions.
− Only install the radio sensor outdoors in a dry, shaded area (e.g. under a roof).

[email protected] AFTER SALES SUPPORTUSA 1 855 754 8297
Preparing the base unit for useUSA
20
− When installing on a wall, ensure that no electric cables, gas or water pipes are buried beneath the wall surface before drilling any holes.
− The maximum distance between the base unit and radio sensor should not be greater than 100 m (direct visible distance). Building materials, such as concrete walls, may reduce or prevent signal reception between the base unit and radio sensor.
− Do not place the base unit and radio sensor on the floor. This limits the transmission range.
− Electronic devices such as televisions and computers can disrupt the signal reception.
− At low temperature during winter, the performance of the radio sensor batteries may fall significantly. This reduces the transmission range.
1. Mount the hanging bracket 26 on a wall using the hanging or screw hole (nail or screw not provided).
2. Attach the radio sensor 17 to the hanging bracket (see Fig. C).
Preparing the base unit for usePowering the base unit
Power supplyThe base unit can be powered by batteries or an alternating current (AC) power supply using the power adaptor.

[email protected] SALES SUPPORT USA 1 855 754 8297 21
Preparing the base unit for use USA
Inserting or replacing batteries1. Open the battery compartment 11 on the back of
the base unit 1 .2. For battery replacement, remove the old batteries
first. Insert 2 batteries 25 (size: AA, provided) into the battery compartment. Pay attention to the correct battery polarity (+ or -).
3. Close the battery compartment. The display 2 will turn on and an alarm tone will sound once the batteries have been inserted. Wait for about 30 minutes. During this time the base unit gathers the weather data and receives the time sig-nals (see chapter “Searching for signals”).
AC power supply operation
CAUTION!
Risk of damage!If the weather station is connected to a power socket, it operates from the AC power supply even if batteries are inserted. Remove any batteries from the base unit as they may leak and damage the unit.
1. Connect the output plug 23 of the power adaptor 24 to the DC input jack 10 of the base unit 1 .
2. Connect the power adaptor to a socket. Only connect the power adaptor to an AC power supply (100 -240 V AC, 50/60 Hz).

[email protected] AFTER SALES SUPPORTUSA 1 855 754 8297
Preparing the base unit for useUSA
22
The display 2 will turn on and an alarm tone will sound once the power adaptor has been connected to a socket. Wait for about 30 minutes. During this time the base unit gathers the weather data and receives the time signals (see chapter “Searching for signals”).
Searching for signalsOnce the base unit has been powered, it will start searching for weather data and time signals:1. The base unit will first detect the air pressure for
about 20 seconds. During this time, the value of air pressure will blink in the air pressure display area 30 .
− Press the SET button 5 if you want to stop the detection.
2. The base unit will then search for weather data from all available radio sensors. During this time, the reception icon ( or ) 49 (see chapter “Weather data”) blinks in the outdoor weather display area 29 , indicating the base unit is searching for the weather data.
− When the weather data have been successfully received, the reception icon will turn off and the current weather data will show in the outdoor weather display area.
− When no weather data have been received, the reception icon will turn off and no outdoor weather data will be available.
− In case of an unsuccessful search for weather data,

[email protected] SALES SUPPORT USA 1 855 754 8297 23
Preparing the base unit for use USA
press and hold the CH button 7 to initiate a new search. However, this can only be carried out after the search for time signals has been completed.
3. Around 3 minutes after the base unit has been powered, it will search for time signals emitted through the signal transmitter in your country.During this time, the time signal icon ( ) 36 (see chapter “Time functions”) blinks in the clock and alarm display area 33 , indicating the base unit is searching for the time signals.
− When the time signals have been successfully received, the time signal icon ( ) will remain visible and the current date and a coordinated universal time will show in the clock and alarm display area. The base unit will continue to receive time signals every night (up to 3 times) and synchronize with the displayed time.
− During the search for time signals, all other setting functions (e.g. manual and alarm settings) will be disabled.
− When no time signals have been received after about 7 minutes, the time signal icon will turn off.
− In case of an unsuccessful search for the time signals, press and hold the RCC button 16 to initiate a new search. In order to ensure the best possible signal receptions, avoid placing the base unit in buildings with lots of concrete and metal structures, or near electronic equipment such as TVs, computers, power lines, radio transmitters, etc. If necessary, relocate the base unit.

[email protected] AFTER SALES SUPPORTUSA 1 855 754 8297
Preparing the base unit for useUSA
24
4. As the synchronized time is only a coordinated universal time, press the DOWN button 15 to select a time zone (indicated by the time zone icon 38 on the display, see chapter “Time functions”) that corresponds to your location.
− Time zone: P = Pacific, M = Mountain, C = Central, E = Eastern
Manual settingsThis operation allows you to manually set the date and time, select the time format, adjust the weather forecast and air pressure, etc. 1. Press the SET button 5 until the “year” (indicated by
“yr”) blinks on the display.2. Press the UP 13 or DOWN 15 button to set the year. 3. Press the SET button. The “month” will blink on the
display.4. Press the UP or DOWN button to set the month.5. Press the SET button. The “day” will blink on the
display.6. Press the UP or DOWN button to set the day.7. Press the SET button. The “hour time” will blink on the
display.8. Press the UP or DOWN button to set the hour time.9. Press the SET button. The “minute time” will blink on
the display.10. Press the UP or DOWN button to set the minute time.11. Press the SET button. The “time format” will blink on
the display.

[email protected] SALES SUPPORT USA 1 855 754 8297 25
Preparing the base unit for use USA
12. Press the UP or DOWN button to select a time format (12-hour or 24-hour).
13. Press the SET button. The “summer time” (default value: 0FF) will blink and the summer time icon ( ) 39 (see chapter “Time functions”) will show on the
display.14. Press UP or DOWN button to turn ON or OFF the
summer time. 15. Press the SET button. The graphical weather forecast
will blink on the display.16. Press the UP or DOWN button to select a weather
forecast condition according to the forecast on TV or internet. The weather station computes weather forecasts based on changes in air pressure. However, when using the weather station for the first time, it may take up to a few days of collecting sufficient information for more accurate forecasts. Manual setting of the weather forecast can slightly accelerate this process.
17. Press the SET button. The “air pressure” will blink on the display.
18. Press the UP or DOWN button to adjust the air pressure. If desired, enter the altitude-related or more accurate air pressure values of your location obtained from the internet or the local authorities.
19. Press the SET button. The manual settings are now complete.

[email protected] AFTER SALES SUPPORTUSA 1 855 754 8297
Time functionsUSA
26
The base unit will automatically exit manual settings when no buttons have been pressed for about 20 seconds.
Installing the base unitNotes on installation
− For best signal reception, install the base unit near a window.
− When installing on a wall, ensure that no electric cables, gas or water pipes are buried beneath the wall surface before drilling any holes.
Using the foldout stand1. Pull out the foldout stand 12 on the back of the base
unit. The stand has two locking positions.2. Place the base unit on a flat surface.
Hanging on a wall1. Fix a nail or screw (not provided) on the wall. 2. Slip the hanging hole 8 over the head of the nail or
screw.
Time functionsDisplay (time functions)The date and time information is displayed in the date and weekday area 31 and clock and alarm area 33 of the display.
[email protected] SALES SUPPORT USA 1 855 754 8297 27
Time functions USA
DAY
DAY DATE MONTH
34
33
35 36 37 38
3940
4141
4242
3131A B
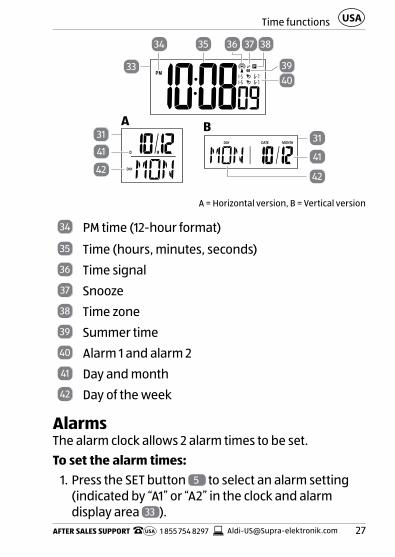
A = Horizontal version, B = Vertical version
34 PM time (12-hour format)35 Time (hours, minutes, seconds)36 Time signal37 Snooze38 Time zone39 Summer time 40 Alarm 1 and alarm 241 Day and month42 Day of the week
Alarms The alarm clock allows 2 alarm times to be set. To set the alarm times:
1. Press the SET button 5 to select an alarm setting (indicated by “A1” or “A2” in the clock and alarm display area 33 ).

[email protected] AFTER SALES SUPPORTUSA 1 855 754 8297
Time functionsUSA
28
2. Select the weekday or weekend alarm. To do so: Press the ALM button 14 once to select the weekday alarm (e.g. ). The alarm will sound from Monday to Friday. Press the ALM button a second time to select the weekend alarm (e.g. ). The alarm will sound during the weekend. Press the ALM button a third time to select both weekday and weekend alarms (e.g. ). The alarm will sound every day.
3. Press and hold the SET button until the “hour time” of the selected alarm setting blinks.
4. Press the UP 13 or DOWN 15 button to set the hour time.
5. Press the SET button. The “minute time” will blink on the display.
6. Press the UP or DOWN button to set the minute time.7. Press the SET button. The alarm time is now set.
The alarm will be automatically switched on with the alarm icon (e.g. ) showing on the display.
To briefly silence the alarm (Snooze function):1. Press the SNOOZE/LIGHT button 3 . The alarm will
sound again after the snooze period (5 minutes) is over. During the snooze period, the alarm icon ( or ) 40 and snooze icon ( Z Z ) 37 will blink.
2. To cancel the snooze function, press any button except the SNOOZE/LIGHT button.
[email protected] SALES SUPPORT USA 1 855 754 8297 29
Time functions USA
To turn off the alarm when it sounds:1. Press any button (except the SNOOZE/LIGHT button
3 ) on the base unit. The alarm will also stop without pressing any but-tons after 2 minutes. The alarm remains switched on and will sound again at the same time on the follo-wing day if the alarm setting is applicable.
To switch the alarms on or off:1. Press the ALM button 14 once to switch on Alarm 1.
The alarm 1 icon ( ) with the selected weekday or weekend alarm setting will show on the display.
2. Press the ALM button a second time to switch on Alarm 2. The alarm 2 icon ( ) with the selected weekday or weekend alarm setting will show on the display.
3. Press the ALM button a third time to switch on both Alarm 1 and Alarm 2. The alarm 1 ( ) and alarm 2 icons ( ) with the selected weekday or weekend alarm setting will show on the display.
4. Press the ALM button a fourth time to switch all alarms off.
Summer timeTo turn the summer time on or off, see chapter “Manual settings”. When summer time is turned on, the summer time icon ( ) 39 will show on the display.

[email protected] AFTER SALES SUPPORTUSA 1 855 754 8297
Weather dataUSA
30
Time zone1. Press the DOWN button 15 to change the time zone.
The corresponding time zone icon 38 will show on the display. Time zone: P = Pacific, M = Mountain, C = Central, E = Eastern.
Time formatTo change between 12 and 24-hour time formats, see chapter “Manual settings”. If 12-hour format is selected, the afternoon hours are identified with the PM time icon 34 .
Weather dataDisplay (weather data)The weather data are displayed in the indoor weather 27 and outdoor weather 29 areas of the display. The
indoor weather area shows the data recorded by the base unit and the outdoor weather area shows the data sent by the radio sensor.
OUTDOORCH
INDOOR
INDOORMAX MIN OUTDOORMAX MIN
CH
27 29
43
454647
4849505152
44A

[email protected] SALES SUPPORT USA 1 855 754 8297 31
Weather data USA
OUTDOORCH
INDOOR
INDOORMAX MIN OUTDOORMAX MIN
CH
27
43 45 46 4748 49
505152
44
29B
A = Horizontal version, B = Vertical version
43 MAX and MIN icons44 Temperature (°C/°F)45 Humidity (%)46 Dropping icon47 Low battery (radio sensor) 48 Radio sensor number49 Reception icon50 Sensor change icon51 Rising icon52 Low battery (base unit)
Switching between radio sensorsIf more than one radio sensor is used:
1. Press the CH button 7 once to switch to radio sensor 2. The radio sensor number 48 will change to “2” and the outdoor weather display area 29 will only show the data sent by radio sensor 2.

[email protected] AFTER SALES SUPPORTUSA 1 855 754 8297
Weather dataUSA
32
2. Press the CH button a second time to switch to radio sensor 3. The radio sensor number will change to “3” and the outdoor weather display area will only show the data sent by radio sensor 3.
3. Press the CH button a third time to activate the automatic sensor change function. The sensor change icon ( ) 50 will turn on and the outdoor weather display area will alternate between all radio sensors.
4. Press the CH button a fourth time to cancel the automatic sensor change function and switch to radio sensor 1. The radio sensor number will change to “1” and the outdoor weather display area will only show the data sent by radio sensor 1.
See chapter “Using additional radio sensors” if you want to assign numbers to radio sensors.
Maximum and minimum valuesTo display the highest and lowest values for the last 24 hours in relation to temperature and humidity:
1. Press the MEM button 6 once to display the maximum values.
2. Press the MEM button a second time to display the minimum values.
3. Press the MEM button a third time to display the current weather data.
The maximum or minimum value is indicated by the MAX or MIN icon 43 , respectively. The stored values will be deleted daily at 12:00 am.

[email protected] SALES SUPPORT USA 1 855 754 8297 33
Air pressure USA
Temperature and humidity trendFor the temperature and humidity values measured by the base unit and radio sensor, the trend is shown in the form of an arrow. A rising trend is indicated by a rising icon ( ) 51 . A falling trend is indicated by a dropping icon ( ) 46 .A change in trend is displayed when the temperature changes by 1 °C or more, or the humidity by 3 % or more within one hour.
Units of temperatureTo change the temperature unit (°C/°F) on the base unit, press and hold the MEM button 6 .
Air pressureDisplay (air pressure)The air pressure data are displayed in the air pressure area 30 of the display.
INHG
PRESSUREHISTORY
PRESSURE
HISTORY
30
53 54
55
A

[email protected] AFTER SALES SUPPORTUSA 1 855 754 8297
Air pressureUSA
34
INHG
PRESSUREHISTORY
PRESSURE
HISTORY
30
53 54
55B
A = Horizontal version, B = Vertical version
53 History54 Current air pressure55 MAX and MIN icons
Current air pressure and air pressure trendThe current air pressure is displayed in hPa in the current air pressure area 54 . The value can be manually changed (see chapter “Manual settings”).The trend of the air pressure within the last 12 hours is displayed in the form of a bar diagram in the history area 53 . The scale goes from -1 (1 hour ago) to -12 (12 hours ago).
Maximum and minimum valuesTo display the highest and lowest values for the last 12 hours in relation to air pressure:
[email protected] SALES SUPPORT USA 1 855 754 8297 35
Weather forecast USA
1. Press the MEM button 6 once to display the maximum value.
2. Press the MEM button a second time to display the minimum value.
3. Press the MEM button a third time to display the current air pressure value.
The maximum or minimum value is indicated by the MAX or MIN icon 55 , respectively.
Weather forecastThe weather station calculates weather forecasts for the next 12 hours based on the gathered weather data. The forecasts provide an approximate indicator of future weather development.
Initial operationUpon initial operation, the details regarding the weather forecast cannot yet be used for around 12 hours, as the weather station needs this time to gather and evaluate the weather data.

[email protected] AFTER SALES SUPPORTUSA 1 855 754 8297
Weather forecastUSA
36
Display (weather forecast)The weather forecast information is displayed in the weather forecast area 28 of the display.
WEATHER FORECAST
WEATHER FORECAST
28
56 57
A WEATHER FORECAST
WEATHER FORECAST
28
B
56 57
A = Horizontal version, B = Vertical version
56 Trend icons57 Weather forecast

[email protected] SALES SUPPORT USA 1 855 754 8297 37
Weather forecast USA
Weather forecast symbolsThe weather forecast symbols are displayed in the weather forecast area 57 .
Sunny Slightly cloudy
Cloudy Rainy
Thunderstorm Snow*
* Frost warning - When the radio sensor measures a temperature of between -3 °C and 1 °C, a risk of frost exists and the snowflake symbol ( ) will blink. If the temperature falls below -3 °C for a constant period of time, the snowflake symbol will remain visible on the display.

[email protected] AFTER SALES SUPPORTUSA 1 855 754 8297
Moon phasesUSA
38
Air pressure trendThe air pressure is also indicated by the trend icons ( and ) 56 . The upward icon indicates an improving weather condition. The downward icon indicates a deteriorating weather condition.
Moon phasesThe moon phases are displayed in the moon phase area 32 of the display and are automatically updated.
58
58
60
60
59
61
58 New moon59 Waxing moon60 Full moon61 Waning moon

[email protected] SALES SUPPORT USA 1 855 754 8297 39
Other functions USA
Other functionsDisplay backlightBattery operationPress the SNOOZE/LIGHT button 3 to briefly switch the backlight on.
AC power supply operationThe backlight is always switched on when the power adaptor 24 is used. Press the SNOOZE/LIGHT button once to dim the backlight. Press the button a second time to turn the backlight off. Press the button a third time to turn the backlight on again.
USB charging portThe USB charging port 9 (output: 5.0 V 1000 mA) can be used for charging external devices (such as mobile phones and mp3 players) through a USB cable (not provided). The external devices cannot be charged when the base unit is powered by batteries.
Low battery warningReset after battery changeThe base unit will lose all settings after a battery change. You may have to manually reset the base unit before using it again (see chapter “Manual settings”).
[email protected] AFTER SALES SUPPORTUSA 1 855 754 8297
CleaningUSA
40
There is a low battery icon for the base unit ( 52 ) and each radio sensor ( 47 , and corresponds to the displayed radio sensor number). When the low battery icon is displayed, replace the batteries in the respective device (see chapters “Inserting and replacing the batteries” and “Powering the base unit”).The low battery icon ( ) will also show on the display 18 of the radio sensor when the batteries are weak.
Resetting the weather stationIf incorrect values are being displayed, you should reset the weather station by removing and then re-inserting the batteries. If the power adaptor is used, pull the power adaptor out of the socket and then reconnect it.
CleaningNOTE!
Risk of damage!If you do not clean the weather station (base unit and radio sensor) properly, you could damage it.
− Do not use any aggressive cleaners, sharp or metallic cleaning utensils such as knives, hard putty knives and the like. They could damage the surfaces of the weather station.

[email protected] SALES SUPPORT USA 1 855 754 8297 41
Storage USA
− Make sure that no water penetrates the housing of the weather station.
1. Remove the power adaptor from the socket if you are using AC power supply for the base unit.
2. Clean the weather station with a damp cloth.3. Dry the weather station with a soft, dry cloth.
Storage
CAUTION!
Risk associated with leaking battery fluid and risk of damage!If you store the weather station for a prolonged period of time, and the batteries are still inserted, the batteries could leak and cause permanent damage. The battery acid (electrolyte) is corrosive.
− If you do not use the weather station for a prolonged period of time, store the batteries separately. Store the batteries so that they are not accessible to children.
− Do not remove leaking batteries with your bare hands. Wear normal

[email protected] AFTER SALES SUPPORTUSA 1 855 754 8297
TroubleshootingUSA
42
household rubber gloves to do so. Do not allow battery acid to come into contact with skin, eyes or mucus membranes. If, however, your skin has come into contact with battery fluid, wash your hands immediately and consult a physician if necessary.
− Wipe up the leaked battery acid with a damp cloth and dispose of it with your household waste.
1. Clean the weather station (see chapter “Cleaning”).2. Take the inserted batteries out of the battery
compartment and store them properly.3. Store the weather station in a clean, dry location.
TroubleshootingNOTE!
Risk of damage!Do not open the housing of the weather station. Liability and warranty claims are waived in the event of repairs performed by the user or incorrect operation.

[email protected] SALES SUPPORT USA 1 855 754 8297 43
Troubleshooting USA
Some problems may be caused by minor faults that you can fix yourself. To do so, follow the instructions in the following table. If it is still not possible to resolve the problem, contact after sales support. Do not repair the weather station yourself.
Problem Possible cause & solutionTime signals cannot be received.
− Check if the installation location is suitable for signal reception.
− Start the signal reception manually by pressing the RCC button on the base unit.
− Set the time manually.The base unit does not receive any signals from the radio sensor.
− Make sure no electrical appliances are near the radio sensor or base unit.
− Check if the batteries in the radio sensor are dead.
− Start the signal reception ma-nually. To do so, press and hold the CH button on the base unit.
− Move the base unit closer to the radio sensor or vice versa.
Incorrect values are being displayed.
− Reset the weather station (see chapter “Resetting the weather station”).

[email protected] AFTER SALES SUPPORTUSA 1 855 754 8297
Technical dataUSA
44
“HI” or “LO” is displayed instead of measured values for temperature or humidity.
− The values are above or below the measurement range.
Technical dataProduct name: Digital Weather StationModel: 92596Base unitInput: 5.0 V DC Batteries: 2 x AA (1.5 V) Measurement range of temperature:
32 °F to 104°F
Measurement range of relative humidity:
20 % to 95 %
Measurement range of air pressure:
800 - 1100 hPa
USB charging port: 5.0 V 1000 mARadio sensorBatteries: 2 x AAA (1.5 V)Measurement range of temperature:
5 °F to 140 °F
Measurement range of relative humidity:
20 % to 95 %

[email protected] SALES SUPPORT USA 1 855 754 8297 45
Technical data USA
Transmission frequency: 433 MHzRange: max. 328 feet (open space)Power adaptor (provided)Model: 6301-US-A or 6301-US-BInput: 100-240 V AC, 50 / 60 HzOutput: 5.0 V DC 1000 mA
This device complies with Part 15 of the FCC Rules. Operation is subject to the following two conditions:(1) this device may not cause harmful interference, and(2) this device must accept any interference received, including interference that may cause undesired operation.Caution: changes or modifications not expressly ap-proved by the party responsible for compliance could void the user’s authority to operate the equipment.
NOTE: This equipment has been tested and found to comply with the limits for a Class B digital device, pursu-ant to part 15 of the FCC Rules. These limits are designed to provide reasonable protection against harmful inter-ference in a residential installation.This equipment generates, uses and can radiate ra-dio frequency energy and, if not installed and used in accordance with the instructions, may cause harmful interference to radio communications. However, there is no guarantee that interference will not occur in a par-ticular installation. If this equipment does cause harm-ful interference to radio or television reception, which

[email protected] AFTER SALES SUPPORTUSA 1 855 754 8297
DisposalUSA
46
can be determined by turning the equipment off and on, the user is encouraged to try to correct the interfer-ence by one or more of the following measures:• Reorient or relocate the receiving antenna.• Increase the separation between the equipment and
receiver.• Connect the equipment into an outlet on a circuit dif-
ferent from that to which the receiver is connected.• Consult the dealer or an experienced radio/ TV
technician for help.
DisposalDisposing of the packaging
Sort the packaging before you dispose of it. Dispose of cardboard and carton as waste paper and wrappings via the recyclable
material collection service.
Disposing of old devicesOld devices must not be disposed of with household waste!
− Should the device no longer be capable of being used at some point in time, dispose of it in accor-dance with the regulations in force in your state or country.
− Please ensure your recycling information does apply to the local regulations and the EPA recommenda-tions (www.epa.gov).

[email protected] SALES SUPPORT USA 1 855 754 8297 47
Disposal USA
Batteries and storage batteries do not belong in the household waste! As a consumer, you are required by law to turn in all batteries and storage batteries, regardless whether they contain harmful substances* or not, at a collection point in your community/ borough or in a retail outlet so that they can be disposed of in an environmentally-friendly manner.* labelled with: Cd = cadmium, Hg = mercury, Pb = lead
[email protected] DE POSVENTA USA 1 855 754 8297 49
Contenido USA
ContenidoConjunto ...............................................................................................................................3Uso ........................................................................................................................................4Volumen de suministro/piezas del dispositivo ................................................................50Información general ...........................................................................................................51
Leer y guardar el manual del usuario ..................................................................................... 51Explicación de símbolos ............................................................................................................ 51
Seguridad .......................................................................................................................... 53Uso debido ................................................................................................................................. 53Indicaciones de seguridad ...................................................................................................... 53Uso seguro del adaptador de potencia ................................................................................. 56Avisos sobre las baterías .......................................................................................................... 58
Desembalaje ...................................................................................................................... 61Acerca de las señales horarias .......................................................................................... 61Preparación del sensor de radio para su uso ................................................................... 62
Inserción y extracción de las pilas .......................................................................................... 62Uso de sensores de radio adicionales .................................................................................... 63Instalación del sensor de radio ............................................................................................... 64
Preparación de la unidad base para su uso .....................................................................65Alimentación de la unidad base ............................................................................................. 65Búsqueda de señales ................................................................................................................67Configuración manual .............................................................................................................. 69Instalación de la unidad base .................................................................................................. 71
Funciones horarias ............................................................................................................ 72Display (funciones horarias) .....................................................................................................72Alarmas .......................................................................................................................................73Horario de verano ......................................................................................................................75Zona horaria................................................................................................................................75Formato de hora .........................................................................................................................75
Datos meteorológicos ........................................................................................................ 76Display (datos meteorológicos) ...............................................................................................76Cambio entre sensores de radio ..............................................................................................77Valores máximo y mínimo ....................................................................................................... 78Tendencia de la temperatura y humedad ............................................................................. 78Unidades de temperatura ....................................................................................................... 79
Presión del aire ..................................................................................................................79Display (presión del aire) ......................................................................................................... 79Presión del aire actual y tendencia de la presión del aire ..................................................80Valores máximo y mínimo .......................................................................................................80
Previsión meteorológica ................................................................................................... 81Display (previsión meteorológica) ...........................................................................................81Símbolos de previsión meteorológica ................................................................................... 82Tendencia de la presión del aire ............................................................................................. 83
Fases lunares .....................................................................................................................83Otras funciones ..................................................................................................................84
Retroiluminación del display .................................................................................................. 84Puerto de carga USB ................................................................................................................. 84Advertencia de pilas bajas ....................................................................................................... 85Reseteo de la estación meteorológica ................................................................................... 85
Limpieza .............................................................................................................................85Almacenamiento................................................................................................................86Resolución de problemas ..................................................................................................88Datos técnicos ....................................................................................................................89Eliminación ........................................................................................................................ 92Tarjeta de garantía ............................................................................................................ 93Condiciones de garantía ....................................................................................................96

[email protected] SERVICIO DE POSVENTAUSA 1 855 754 8297
Volumen de suministro/piezas del dispositivoUSA
50
Volumen de suministro/piezas del dispositivo
21 Tapa de comparti-mento de pilas
22 Compartimento de pilas
23 Enchufe de salida24 Adaptador de
potencia25 Pilas (AA x 2, AAA x 2)26 Soporte para colgar27 Ambiente interior28 Previsión
meteorológica29 Ambiente exterior30 Presión del aire31 Fecha y día de la
semana32 Fase lunar33 Reloj y alarma
Aviso: El botón MODE 4 tiene la misma función que el botón SET 5 en esta estación meteorológica.
A = Versión horizontalB = Versión vertical
1 Unidad base2 Display3 Botón SNOOZE/LIGHT4 Botón MODE5 Botón SET6 Botón MEM7 Botón CH8 Orificio para colgar9 Puerto de carga USB10 Jack de entrada CC11 Compartimento de
pilas12 Soporte desplegable13 Botón UP14 Botón ALM15 Botón DOWN16 Botón RCC17 Sensor de radio18 Display19 Luz indicadora de
señal20 Interruptor de
canales

[email protected] DE POSVENTA USA 1 855 754 8297 51
Información general USA
Información generalLeer y guardar el manual del usuario
Este manual del usuario viene con la estación meteorológica digital. Contiene información importante para su manejo y cuidado. En aras
de mejorar la legibilidad, la estación meteorológica digital se denominará en adelante únicamente “estación meteorológica”.Antes de usar la estación meteorológica, lea detenidamente el manual del usuario, sobre todo las indicaciones de seguridad. Si no sigue las instrucciones de este manual del usuario, se pueden provocar lesiones graves o daños en la estación meteorológica.Cuando esté en el extranjero, también debe respetar las pautas y leyes nacionales específicas.Guarde el manual del usuario para consultarlo en el futuro. Si cede la estación meteorológica a otra persona, asegúrese de incluir este manual del usuario.
Explicación de símbolosLos siguientes símbolos y términos de advertencia se emplean en este manual del usuario, en la estación meteorológica o en el embalaje.

[email protected] SERVICIO DE POSVENTAUSA 1 855 754 8297
Información generalUSA
52
¡ADVERTENCIA!Este término/símbolo de advertencia designa un peligro de riesgo moderado que puede provocar la muerte o lesiones severas si no se evita.
¡ATENCIÓN!
Este término/símbolo de advertencia designa un peligro de riesgo leve que puede provocar lesiones menores o moderadas si no se evita.
¡AVISO!
Este término de advertencia avisa de posibles daños materiales.
Este símbolo le proporciona información adicional útil sobre el montaje o el funcionamiento.

[email protected] DE POSVENTA USA 1 855 754 8297 53
Seguridad USA
SeguridadUso debidoLa estación meteorológica está diseñada exclusivamente para mostrar la hora y la información meteorológica. Está prevista solo para uso privado en interiores, y no es apta para aplicaciones comerciales.Utilice la estación meteorológica únicamente como se describe en este manual del usuario. Cualquier otra utilización se considerará inapropiada y puede provocar daños materiales o incluso lesiones personales. La estación meteorológica no es un juguete para niños.El fabricante o proveedor no asume ninguna responsabilidad por los daños derivados de un uso inapropiado o incorrecto.
Indicaciones de seguridad
¡ADVERTENCIA!¡Riesgo de asfixia!No deje que los niños jueguen con la lámina de embalaje. Pueden quedar atrapados al jugar y asfixiarse.
¡ADVERTENCIA!La estación meteorológica puede ser usada por niños mayores de 8 años y

[email protected] SERVICIO DE POSVENTAUSA 1 855 754 8297
SeguridadUSA
54
personas con problemas físicos, senso-riales o mentales, o quienes carezcan de experiencia y/o conocimientos, si están supervisados o han recibido instrucci-ones sobre cómo usar el dispositivo de forma segura, y han comprendido los riesgos asociados.
− La estación meteorológica y el ad-aptador de potencia deben quedar fuera del alcance de los niños menores de 8 años.
− La estación meteorológica no debe ser limpiada por niños a menos que tengan 8 años como mínimo y estén supervisados.
− Los niños deben estar vigilados cuando usen la estación meteorológica.
¡ATENCIÓN!
¡Riesgo de daños!Si no usa la estación meteorológica (unidad base y sensor de radio) correctamente, podría dañarla.
− No utilice la estación meteorológica en un lugar húmedo (p. ej. cuarto de baño)
[email protected] DE POSVENTA USA 1 855 754 8297 55
Seguridad USA
y evite el polvo, salpicaduras o goteo de agua, fuentes de calor, temperaturas extremas y la luz solar directa.
− Asegúrese de que la estación meteorológica esté alejada de campos magnéticos (p. ej. altavoces).
− Asegúrese de que no entren objetos extraños en la carcasa de la estación meteorológica.
− No ejerza presión sobre la superficie del display de la estación meteorológica, pues podría romperse.
− No permita que objetos afilados o puntiagudos entren en contacto con la superficie de la estación meteorológica.
− Evite que la estación meteorológica pueda caer. De lo contrario, podría romper la estación meteorológica.
− No coloque la estación meteorológica cerca de fuentes de calor. Nunca coloque llamas abiertas como velas prendidas encima o al lado de la estación meteorológica.
− En ningún caso debería abrir la carcasa de la estación meteorológica.

[email protected] SERVICIO DE POSVENTAUSA 1 855 754 8297
SeguridadUSA
56
Dentro no hay piezas que requieran mantenimiento por el usuario. Una reparación incorrecta puede dañar la estación meteorológica. Las reparaciones solo deberían ser llevadas a cabo por técnicos profesionales. La única excepción es la retirada de la tapa del compartimento de pilas para sustituir las pilas.
− El sensor de radio debe estar protegido de la exposición directa a la humedad, como la lluvia.
Uso seguro del adaptador de potencia − Utilice solo el adaptador de potencia
suministrado con la estación meteorológica.
− Emplee únicamente el adaptador de potencia en áreas interiores y secas. No deje que el adaptador de potencia entre en contacto con el agua ni demás líquidos.
− Conecte el adaptador de potencia solo a un suministro eléctrico de corriente alterna (CA). Asegúrese de que la tensión corresponde a los datos de
[email protected] DE POSVENTA USA 1 855 754 8297 57
Seguridad USA
tensión del dispositivo. El adaptador de potencia debe funcionar con corriente alterna (CA) a 100 ~ 240 V, 50/60 Hz.
− Conecte el adaptador de potencia solo a una toma de corriente accesible bien instalada de la que pueda extraer el enchufe rápidamente en caso de emergencia.
− Desenrolle del todo el cable del adaptador de potencia antes de conectarlo. Asegúrese de que el cable no pueda resultar dañado por bordes afilados u objetos calientes.
− Nunca cubra el adaptador de potencia. Asegure una ventilación suficiente para evitar que el adaptador de potencia se sobrecaliente.
− No emplee el adaptador de potencia si la carcasa o el cable están defectuosos o presentan otros daños visibles. En caso de daño, mande reparar el adaptador de potencia únicamente al fabricante, su equipo de servicio al cliente o una persona con una cualificación similar para evitar riesgos.

[email protected] SERVICIO DE POSVENTAUSA 1 855 754 8297
SeguridadUSA
58
− El cable del adaptador de potencia no se puede sustituir. Si el cable o el adaptador de potencia están dañados, se deben desechar y sustituir por un adaptador de potencia del mismo modelo.
− Retire siempre el adaptador de potencia de la toma de corriente si:• quiere limpiar la estación meteoroló-
gica o prevé no usar la estación mete-orológica durante mucho tiempo
• la estación meteorológica no funciona bien
• durante tormentas eléctricas − Tire siempre del enchufe, y no del cable,
cuando retire el adaptador de potencia de la toma de corriente.
Avisos sobre las baterías
¡ADVERTENCIA!
¡Riesgos para la salud!Existe un riesgo elevado para la salud en caso de que niños o animales ingieran las pilas.

[email protected] DE POSVENTA USA 1 855 754 8297 59
Seguridad USA
− Guarde las pilas de forma que queden fuera del alcance de niños y animales. Si sospecha que se ha ingerido una pila, busque asesoramiento médico de inmediato.
¡ADVERTENCIA!Riesgo de explosiónUna manipulación inapropiada de las pilas incrementa el riesgo de explosión.
− Almacene las pilas en un lugar fresco y seco. Nunca exponga las pilas a calor excesivo (p. ej. luz solar directa) ni las lance al fuego.
− Use pilas solo del mismo tipo. − Cerciórese de que la polaridad sea
correcta al insertar las pilas, tal como se muestra en el compartimento de pilas. Una instalación incorrecta puede dañar la estación meteorológica.
− Utilice siempre pilas de buena calidad. Las pilas de mala calidad pueden derramarse y causar daños.
− Antes de insertar las pilas, asegúrese de que los contactos en el interior del

[email protected] SERVICIO DE POSVENTAUSA 1 855 754 8297
SeguridadUSA
60
compartimento de las pilas y de las propias pilas estén limpios e intactos. Límpielos si fuera necesario.
− Sustituya siempre todas las pilas del compartimento de pilas a la vez.
− Retire las pilas de la estación meteorológica si ya están gastadas. Extraiga las pilas también si no prevé usar la estación meteorológica durante mucho tiempo. De lo contrario, las pilas se pueden derramar y causar daños.
− Si las pilas se derraman, retírelas de inmediato para evitar daños en la estación meteorológica. No saque las pilas con las manos desprotegidas ni permita que el líquido de las pilas entre en contacto con piel, ojos o membranas mucosas. Emplee guantes normales de goma para uso doméstico. No obstante, si el líquido de las pilas entra en contacto con la piel, lávese las manos de inmediato y consulte a un médico si fuera necesario.
− Las pilas deberían ser instaladas o sustituidas por un adulto únicamente.

[email protected] DE POSVENTA USA 1 855 754 8297 61
Desembalaje USA
− Mantenga la estación meteorológica alejada de los niños cuando quite la tapa de las pilas.
− Retire las pilas antes de eliminar la estación meteorológica.
Desembalaje1. Saque la estación meteorológica del embalaje y
compruebe si esta o las piezas presentan daños. De ser así, no use la estación meteorológica. Contacte con el fabricante a través de la dirección de servicio técnico especificada en la tarjeta de garantía.
2. Asegúrese de haber recibido todo el contenido (véase la fig. A, B y C).
Acerca de las señales horariasLa unidad base de la estación meteorológica es un reloj controlado por radio y puede recibir las señales horarias emitidas por un transmisor de señales de su país. Si la unidad base queda dentro del alcance de transmisión, puede recibir las señales y sincronizarse con la hora y la fecha emitidas varias veces al día. En caso de fallo en la recepción de la señal, la unidad base puede seguir funcionando bien e intentar buscar señales horarias en la próxima hora designada. Si no se localizan señales, la hora y la fecha también se pueden ajustar manualmente.

[email protected] SERVICIO DE POSVENTAUSA 1 855 754 8297
Preparación del sensor de radio para su usoUSA
62
Preparación del sensor de radio para su usoInserción y extracción de las pilas
Utilización de las pilas − No utilice pilas recargables, puesto que
su voltaje es bajo, lo que influye en la precisión de la medición.
− Emplee mejor pilas alcalinas que duren mucho, sobre todo cuando la tempera-tura exterior sea baja.
1. Retire la tapa del compartimento de pilas 21 en la parte trasera del sensor de radio 17 .
2. Para sustituir las pilas, retire primero las antiguas. Inserte 2 pilas 25 (tamaño: AAA, suministradas) en el compartimento de pilas 22 . Preste atención a la polaridad correcta de las pilas (+ o -).
3. Cierre la tapa del compartimento de pilas. El sensor de radio detectará la temperatura y humedad ambiental y enviará los datos recopilados a la unidad base cada minuto. Tanto la temperatura (°C) como la humedad (%) se mostrarán en el display 18 del sensor de radio. La luz indicadora de señal 19 parpadeará una vez cuando se envíen los datos.

[email protected] DE POSVENTA USA 1 855 754 8297 63
Preparación del sensor de radio para su uso USA
Uso de sensores de radio adicionalesLa estación meteorológica viene con un sensor de radio. En caso necesario, puede usarla con hasta tres sensores de radio. Los sensores adicionales están disponibles a través del servicio postventa. Los datos de contacto se encuentran en la tarjeta de garantía. Los sensores de radio se pueden ubicar en diferentes espacios interiores o exteriores. Cada sensor debe tener su propio número de sensor de radio (1 – 3) asignado.Para emplear sensores de radio adicionales:
1. Retire la tapa del compartimento de pilas 21 en la parte trasera de los sensores de radio.
2. Fije un número de sensor de radio exclusivo (1 – 3) para cada sensor de radio usando el interruptor de canales 20 . El número de sensor de radio seleccionado (p. ej.
= número de sensor de radio 1) se mostrará en el display 18 .
3. Cierre la tapa del compartimento de pilas.La unidad base recibirá los datos meteorológicos de to-dos los sensores de radio disponibles (véase el capítulo “Preparación de la unidad base para su uso”). En caso de interferencias de equipos cercanos que emi-tan señales de radio, puede cambiar el número de sen-sor de radio para evitar las interferencias.

[email protected] SERVICIO DE POSVENTAUSA 1 855 754 8297
Preparación del sensor de radio para su usoUSA
64
Instalación del sensor de radioAvisos sobre la instalaciónTome nota de los siguientes consejos para garantizar la mejor recepción posible de las señales.
− Instale el sensor de radio en exteriores únicamente en una zona seca y a la sombra (p. ej. bajo un tejado).
− Al instalarlo en una pared, asegúrese de que no haya cables eléctricos, tuberías de gas o conductos de agua bajo la superficie de la pared antes de perforar ningún agujero.
− La distancia máxima entre la unidad base y el sensor de radio no debería ser superior a 100 m (distancia de visibilidad directa). Los materiales de construcción, como las paredes de concreto, pueden reducir o impedir la recepción de señales entre la unidad base y el sensor de radio.
− No coloque la unidad base ni el sensor de radio sobre el piso, pues se limita el alcance de la transmisión.
− Los dispositivos electrónicos, como televisores y computadoras, pueden perturbar la recepción de señales.
− Con temperaturas bajas en invierno, el rendimiento de las pilas del sensor de radio puede disminuir mucho, lo que reduce el alcance de la transmisión.

[email protected] DE POSVENTA USA 1 855 754 8297 65
Preparación de la unidad base para su uso USA
1. Monte el soporte para colgar 26 en una pared usan-do el orificio para colgar o atornillar (clavo o tornillo no suministrados).
2. Enganche el sensor de radio 17 al soporte para col-gar (véase la fig. C).
Preparación de la unidad base para su usoAlimentación de la unidad base
Suministro eléctricoLa unidad base se puede alimentar con pilas o con un suministro eléctrico de corri-ente alterna (CA) a través del adaptador de potencia.
Inserción y extracción de las pilas1. Abra el compartimento de pilas 11 en la parte trase-
ra de la unidad base 1 .2. Para sustituir las pilas, retire primero las antiguas.
Inserte 2 pilas 25 (tamaño: AA, suministradas) en el compartimento de pilas. Preste atención a la polaridad correcta de las pilas (+ o -).
3. Cierre el compartimento de pilas. El display 2 se encenderá y sonará un tono de alarma una vez insertadas las pilas. Espere unos 30 minutos. En este tiempo, la unidad base recopila los

[email protected] SERVICIO DE POSVENTAUSA 1 855 754 8297
Preparación de la unidad base para su usoUSA
66
datos meteorológicos y recibe las señales horarias (véase el capítulo “Búsqueda de señales”).
Funcionamiento mediante suministro eléctrico CA
¡ATENCIÓN!
¡Riesgo de daños!Si la estación meteorológica está conectada a una toma de corriente, funciona con el suministro eléctrico CA aunque tenga pilas dentro. Retire las pilas de la unidad base, pues pueden derramarse y dañar la unidad.
1. Conecte el enchufe de salida 23 del adaptador de potencia 24 al jack de entrada de CC 10 de la unidad base 1 .
2. Conecte el adaptador de potencia a una toma de cor-riente. Conecte solo el adaptador de potencia a un suministro eléctrico CA (100 – 240 V CA, 50/60 Hz). El display 2 se encenderá y sonará un tono de alarma cuando el adaptador de potencia se conecte a la toma de corriente. Espere unos 30 minutos. En este tiempo, la unidad base recopila los datos me-teorológicos y recibe las señales horarias (véase el capítulo “Búsqueda de señales”).

[email protected] DE POSVENTA USA 1 855 754 8297 67
Preparación de la unidad base para su uso USA
Búsqueda de señalesUna vez encendida la unidad base, comenzará a buscar datos meteorológicos y señales horarias:1. La unidad base detectará primero la presión del
aire durante 20 segundos aprox. En este tiempo, el valor de la presión del aire parpadeará en el área del display para la presión del aire 30 .
− Presione el botón SET 5 si quiere detener la detección.
2. La unidad base buscará entonces los datos meteorológicos de todos los sensores de radio disponibles. En este tiempo, el icono de recepción ( o ) 49 (véase el capítulo “Datos meteorológicos”) parpadeará en el área del display para el ambiente exterior 29 , lo que indica que la unidad base está buscando datos meteorológicos.
− Una vez recibidos los datos meteorológicos, el icono de recepción se apagará y los datos meteorológicos actuales se mostrarán en el área del display para el ambiente exterior.
− Si no se hayan recibido datos meteorológicos, el ico-no de recepción se apagará y no habrá disponibles datos del ambiente exterior.
− Si no se localizan datos meteorológicos, mantenga presionado el botón CH 7 para iniciar otra búsqueda. No obstante, esta acción solo se puede ejecutar tras completar la búsqueda de señales horarias.
[email protected] SERVICIO DE POSVENTAUSA 1 855 754 8297
Preparación de la unidad base para su usoUSA
68
3. Unos 3 minutos después de encender la unidad base, esta buscará señales horarias emitidas a través del transmisor de señales en su país. En este tiempo, el icono de señal horaria ( ) 36 (véase el capítulo “Funciones horarias”) parpadeará en el área del display para el reloj y las alarmas 33 , lo que indica que la unidad base está buscando señales horarias.
− Una vez recibidas las señales horarias, el icono de señal horaria ( ) permanecerá visible, y la fecha actual y la hora universal coordinada se mostrarán en el área del display para el reloj y las alarmas. La unidad base seguirá recibiendo señales horarias cada noche (hasta 3 veces) y sincronizará con la hora mostrada.
− Durante la búsqueda de señales horarias, todas las demás funciones de configuración (p. ej. ajuste manual y de alarmas) se deshabilitarán.
− Si no se reciben señales horarias tras unos 7 minutos, el icono de señal horaria se apagará.
− Si no se localizan señales horarias, mantenga pre-sionado el botón RCC 16 para iniciar otra búsque-da. Para garantizar la mejor recepción posible de señales, evite colocar la unidad base en edificios con muchas estructuras de concreto y metal, o cerca de equipos electrónicos como TV, computadoras, líneas eléctricas, transmisores de radio, etc. En caso necesa-rio, reubique la unidad base.
4. Como la hora sincronizada es solo una hora universal coordinada, presione el botón DOWN 15 para seleccionar una zona horaria (indicada por

[email protected] DE POSVENTA USA 1 855 754 8297 69
Preparación de la unidad base para su uso USA
el icono de zona horaria 38 en el display; véase el capítulo “Funciones horarias”) que corresponde a su ubicación.
− Zona horaria: P = Pacífico, M = Montaña, C = Central, E = Este
Configuración manualEsta función le permite fijar manualmente la fecha y hora, seleccionar el formato horario, ajustar la previsión meteorológica y la presión del aire, etc. 1. Presione el botón SET 5 hasta que el “año” (indicado
por “yr”) parpadee en el display.2. Presione el botón UP 13 o DOWN 15 para fijar el año. 3. Presione el botón SET. El “mes” parpadeará en el
display.4. Presione el botón UP o DOWN para fijar el mes.5. Presione el botón SET. El “día” parpadeará en el
display.6. Presione el botón UP o DOWN para fijar el día.7. Presione el botón SET. La “hora” parpadeará en el
display.8. Presione el botón UP o DOWN para fijar la hora.9. Presione el botón SET. Los “minutos” parpadearán en
el display.10. Presione el botón UP o DOWN para fijar los minutos.11. Presione el botón SET. El “formato horario” parpade-
ará en el display.12. Presione el botón UP o DOWN para seleccionar un for-
mato horario (12 o 24 horas).

[email protected] SERVICIO DE POSVENTAUSA 1 855 754 8297
Preparación de la unidad base para su usoUSA
70
13. Presione el botón SET. El “horario de verano” (valor predeterminado: OFF) parpadeará y el icono del ho-rario de verano ( ) 39 (véase el capítulo “Funciones horarias”) se mostrará en el display.
14. Presione el botón UP o DOWN para activar (ON) o desactivar (OFF) el horario de verano.
15. Presione el botón SET. La previsión meteorológica gráfica parpadeará en el display.
16. Presione el botón UP o DOWN para seleccionar una situación meteorológica prevista conforme a la predicción en TV o Internet. La estación meteorológica calcula previsiones meteorológicas conforme a cambios en la presión del aire. Sin embargo, cuando use la estación meteorológica por primera vez, puede tardar algunos días en recopilar suficiente información y poder ofrecer predicciones más precisas. El ajuste manual de la previsión meteorológica puede acelerar un poco este proceso.
17. Presione el botón SET. La “presión del aire” parpade-ará en el display.
18. Presione el botón UP o DOWN para ajustar la presión del aire. Si lo desea, introduzca los valores de presión del aire más precisos o relativos a la altitud de su ubicación, obtenidos en Internet o por parte de autoridades locales.
19. Presione el botón SET. La configuración manual ya se ha completado.

[email protected] DE POSVENTA USA 1 855 754 8297 71
Preparación de la unidad base para su uso USA
La unidad base saldrá automáticamente de la configuración manual cuando no se presione ningún botón durante 20 segundos aprox.
Instalación de la unidad baseAvisos sobre la instalación
− Para optimizar la recepción de señales, instale la unidad base cerca de una ventana.
− Al instalarlo en una pared, asegúrese de que no haya cables eléctricos, tuberías de gas o conductos de agua bajo la superficie de la pared antes de perforar ningún agujero.
Uso del soporte desplegable1. Saque el soporte desplegable 12 en la parte
trasera de la unidad base. El soporte presenta dos posiciones de bloqueo.
2. Coloque la unidad base sobre una superficie plana.Fijación en una pared
1. Fije un clavo o tornillo (no suministrados) en la pared.
2. Meta el orificio para colgar 8 sobre la cabeza del clavo o tornillo.

[email protected] SERVICIO DE POSVENTAUSA 1 855 754 8297
Funciones horariasUSA
72
Funciones horariasDisplay (funciones horarias)La información sobre fecha y hora se muestra en el área para el día de la semana y la fecha 31 y el área para el reloj y la alarma 33 del display.
DAY
DAY DATE MONTH
34
33
35 36 37 38
3940
4141
4242
3131A B
A = versión horizontal, B = versión vertical
34 Hora PM (formato de 12 horas)35 Hora (horas, minutos, segundos)36 Señal horaria37 Repetición38 Zona horaria39 Horario de verano 40 Alarma 1 y alarma 241 Día y mes42 Día de la semana

[email protected] DE POSVENTA USA 1 855 754 8297 73
Funciones horarias USA
Alarmas El reloj despertador permite configurar 2 alarmas. Para ajustar las horas de alarma:
1. Presione el botón SET 5 para seleccionar un ajuste de alarma (indicado por “A1” o “A2” en el área del display para el reloj y las alarmas 33 ).
2. Seleccione una alarma para entre semana o el fin de semana. Para ello: Presione el botón ALM 14 una vez para seleccionar la alarma de entre semana (p. ej. ). La alarma sonará de lunes a viernes. Presione el botón ALM una segunda vez para seleccionar la alarma de fin de semana (p. ej. ). La alarma sonará durante el fin de semana. Presione el botón ALM una tercera vez para seleccionar la alarma tanto de entre semana como de fin de semana (p. ej. ). La alarma sonará cada día.
3. Mantenga presionado el botón SET hasta que parpadee la “hora” del ajuste de la alarma seleccionada.
4. Presione el botón UP 13 o DOWN 15 para ajustar la hora.
5. Presione el botón SET. Los “minutos” parpadearán en el display.
6. Presione el botón UP o DOWN para fijar los minutos.7. Presione el botón SET. La hora de la alarma ya está
ajustada. La alarma se activará automáticamente y el icono de alarma (p. ej. ) se muestre en el display.

[email protected] SERVICIO DE POSVENTAUSA 1 855 754 8297
Funciones horariasUSA
74
Para silenciar brevemente la alarma (función de repetición):
1. Presione el botón SNOOZE/LIGHT 3 . La alarma volverá a sonar tras una pausa de 5 minutos. Duran-te el período de repetición, el icono de alarma ( o
) 40 y el de repetición (Z Z) 37 parpadearán. 2. Para cancelar la función de repetición, presione cual-
quier botón excepto el de SNOOZE/LIGHT.
Para apagar la alarma cuando suena:1. Presione cualquier botón (excepto el de SNOOZE/
LIGHT 3 ) en la unidad base. La alarma se detendrá también sin presionar ningún botón tras 2 minutos. La alarma sigue activada y so-nará de nuevo a la misma hora al día siguiente si así corresponde con el ajuste de la alarma.
Para activar o desactivar las alarmas:1. Presione el botón ALM 14 una vez para activar la
alarma 1. El icono de la alarma 1 ( ) con el ajuste seleccionado para la alarma de entre semana o fin de semana se mostrará en el display.
2. Presione el botón ALM una segunda vez para activar la alarma 2. El icono de la alarma 2 ( ) con el ajuste seleccionado para la alarma de entre semana o fin de semana se mostrará en el display.
3. Presione el botón ALM una tercera vez para activar la alarma 1 y la 2. Los iconos de la alarma 1 ( ) y
[email protected] DE POSVENTA USA 1 855 754 8297 75
Funciones horarias USA
de la alarma 2 ( ) con el ajuste seleccionado para la alarma de entre semana o fin de semana se mostrarán en el display.
4. Presione el botón ALM una cuarta vez para desactivar todas las alarmas.
Horario de veranoPara activar o desactivar el horario de verano, consulte el capítulo “Configuración manual”. Cuando esté activado el horario de verano, el icono del horario de verano ( ) 39 se mostrará en el display.
Zona horaria1. Presione el botón DOWN 15 para cambiar la zona
horaria. El correspondiente icono de zona horaria 38 se mostrará en el display. Zona horaria: P = Pacífico, M = Montaña, C = Central, E = Este.
Formato de horaPara cambiar entre los formatos de 12 y 24 horas, consulte el capítulo “Configuración manual”. Si se selecciona el formato de 12 horas, las horas de la tarde se identifican con el icono horario PM 34 .

[email protected] SERVICIO DE POSVENTAUSA 1 855 754 8297
Datos meteorológicosUSA
76
Datos meteorológicosDisplay (datos meteorológicos)Los datos meteorológicos se muestran en las áreas del display para ambiente interior 27 y ambiente exterior 29 . El área para el ambiente interior presenta los
datos registrados por la unidad base, y el área para el ambiente exterior muestra los datos enviados por el sensor de radio.
OUTDOORCH
INDOOR
INDOORMAX MIN OUTDOORMAX MIN
CH
27 29
43
454647
4849505152
44A
OUTDOORCH
INDOOR
INDOORMAX MIN OUTDOORMAX MIN
CH
27
43 45 46 4748 49
505152
44
29B
A = versión horizontal, B = versión vertical
43 Iconos MAX y MIN44 Temperatura (°C/°F)

[email protected] DE POSVENTA USA 1 855 754 8297 77
Datos meteorológicos USA
45 Humedad (%)46 Icono descendente47 Pila baja (sensor de radio) 48 Número de sensor de radio49 Icono de recepción50 Icono de cambio de sensor51 Icono ascendente52 Pila baja (unidad base)
Cambio entre sensores de radioSi se usa más de un sensor de radio:
1. Presione el botón CH 7 una vez para pasar al sensor de radio 2. El número del sensor de radio 48 cambiará a “2” y el área del display para el ambiente exterior 29 solo mostrará los datos enviados por el sensor de radio 2.
2. Presione el botón CH una segunda vez para pasar al sensor de radio 3. El número del sensor de radio cambiará a “3” y el área del display para el ambiente exterior solo mostrará los datos enviados por el sensor de radio 3.
3. Presione el botón CH una tercera vez para activar la función de cambio automático de sensor. El icono del cambio de sensor ( ) 50 se encenderá, y el área del display para el ambiente exterior alternará entre todos los sensores de radio.
4. Presione el botón CH una cuarta vez para cancelar la función de cambio automático de sensor, y pasar

[email protected] SERVICIO DE POSVENTAUSA 1 855 754 8297
Datos meteorológicosUSA
78
al sensor de radio 1. El número del sensor de radio cambiará a “1” y el área del display para el ambiente exterior solo mostrará los datos enviados por el sensor de radio 1.
Consulte el capítulo “Uso de sensores de radio adiciona-les” si quiere asignar números a los sensores de radio.
Valores máximo y mínimoPara mostrar los valores máximo y mínimo de las 24 últimas horas en relación con la temperatura y humedad:
1. Presione el botón MEM 6 una vez para mostrar los valores máximos.
2. Presione el botón MEM una segunda vez para mostrar los valores mínimos.
3. Presione el botón MEM una tercera vez para mostrar los datos meteorológicos actuales.
El valor máximo o mínimo viene indicado con el icono MAX o MIN 43 , respectivamente. Los valores almace-nados se eliminarán cada día a las 12:00 am.
Tendencia de la temperatura y humedadPara los valores de temperatura y humedad medidos por la unidad base y el sensor de radio, la tendencia se muestra en forma de flecha. Una tendencia ascendente se indica con un icono de subida ( ) 51 . Una tendencia descendente se indica con un icono de bajada ( ) 46 .

[email protected] DE POSVENTA USA 1 855 754 8297 79
Presión del aire USA
Se muestra un cambio de tendencia cuando la temperatura cambia 1 °C o más, o cuando la humedad varía un 3 % o más en una hora.
Unidades de temperaturaPara cambiar la unidad de temperatura (°C/°F) en la unidad base, mantenga presionado el botón MEM 6 .
Presión del aireDisplay (presión del aire)Los datos de presión del aire se muestran en el área del display para la presión del aire 30 .
INHG
PRESSUREHISTORY
PRESSURE
HISTORY
30
53 54
55
A
INHG
PRESSUREHISTORY
PRESSURE
HISTORY
30
53 54
55B
A = versión horizontal, B = versión vertical

[email protected] SERVICIO DE POSVENTAUSA 1 855 754 8297
Presión del aireUSA
80
53 Historial54 Presión del aire actual55 Iconos MAX y MIN
Presión del aire actual y tendencia de la presión del aireLa presión del aire actual se muestra en hPa en el área de presión del aire actual 54 . El valor se puede modificar manualmente (véase el capítulo “Configuración manual”).La tendencia de la presión del aire en las 12 últimas horas se muestra en forma de diagrama de barras en el área del historial 53 . La escala va de -1 (hace 1 hora) a -12 (hace 12 horas).
Valores máximo y mínimoPara mostrar los valores máximo y mínimo de las 12 últimas horas en relación con la presión del aire:
1. Presione el botón MEM 6 una vez para mostrar el valor máximo.
2. Presione el botón MEM una segunda vez para mostrar el valor mínimo.
3. Presione el botón MEM una tercera vez para mostrar el valor actual de la presión del aire.
El valor máximo o mínimo viene indicado con el icono MAX o MIN 55 , respectivamente.

[email protected] DE POSVENTA USA 1 855 754 8297 81
Previsión meteorológica USA
Previsión meteorológicaLa estación meteorológica calcula previsiones del tiempo para las 12 horas siguientes, basadas en los datos meteorológicos recopilados. Las predicciones conforman un indicador aproximado del desarrollo meteorológico futuro.
Funcionamiento inicialDurante el funcionamiento inicial, los detalles relativos a la previsión meteorológica no se pueden usar en unas 12 horas, pues la esta-ción meteorológica necesita este tiempo para recopilar y evaluar los datos meteorológicos.
Display (previsión meteorológica)La información sobre la previsión meteorológica se mu-estra en el área del display para la previsión meteoroló-gica 28 .
WEATHER FORECAST
WEATHER FORECAST
28
56 57
A WEATHER FORECAST
WEATHER FORECAST
28
B
56 57
A = versión horizontal, B = versión vertical

[email protected] SERVICIO DE POSVENTAUSA 1 855 754 8297
Previsión meteorológicaUSA
82
56 Iconos de tendencia57 Previsión meteorológica
Símbolos de previsión meteorológicaLos símbolos de previsión meteorológica se muestran en el área para la previsión meteorológica 57 .
Soleado Ligeramente nublado
Nublado Lluvioso
Tormenta eléctrica Nieve*
* Aviso por heladas – Cuando el sensor de radio mide una temperatura entre -3 °C y 1 °C, existe riesgo de helada y parpadeará el símbolo del copo de nieve ( ). Si la temperatura cae por debajo de -3 °C durante un período constante de tiempo, el símbolo del copo de nieve permanecerá visible en el display.

[email protected] DE POSVENTA USA 1 855 754 8297 83
Fases lunares USA
Tendencia de la presión del aireLa presión del aire también viene indicada por los iconos de tendencia ( y ) 56 . El icono ascendente indica una mejora de la situación meteorológica. El icono descendente señala un empeoramiento de la situación meteorológica.
Fases lunaresLas fases lunares se muestran en el área de fase lunar 32 del display, y se actualizan automáticamente.
58
58
60
60
59
61
58 Luna nueva59 Luna creciente60 Luna llena61 Luna menguante

[email protected] SERVICIO DE POSVENTAUSA 1 855 754 8297
Otras funcionesUSA
84
Otras funcionesRetroiluminación del displayFuncionamiento mediante pilasPresione el botón SNOOZE/LIGHT 3 para encender bre-vemente la retroiluminación.
Funcionamiento mediante suministro eléctrico CALa retroiluminación está siempre encendida cuando se usa el adaptador de potencia 24 . Presione el botón SNOOZE/LIGHT una vez para atenuar la retroiluminación. Presione el botón una segunda vez para apagar la re-troiluminación. Presione el botón una tercera vez para encender de nuevo la retroiluminación.
Puerto de carga USBEl puerto de carga USB 9 (salida: 5.0 V, 1000 mA) se puede emplear para cargar dispositivos externos (como celulares y reproductores mp3) a través de un cable USB (no suministrado). Los dispositivos externos no se pueden cargar cuando la unidad base funciona con pilas.
[email protected] DE POSVENTA USA 1 855 754 8297 85
Limpieza USA
Advertencia de pilas bajasReseteo tras el cambio de pilasLa unidad base perderá todos los ajustes tras un cambio de pilas. Quizá tenga que resetear manualmente la unidad base antes de usarla de nuevo (véase el capítulo “Configuración manual”).
Hay un icono de pila baja para la unidad base ( 52 ) y para cada sensor de radio ( 47 , y corresponde al número mostrado de sensor de radio). Cuando aparece el icono de pila baja, sustituya las pilas en el dispositivo pertinente (véanse los capítulos “Inserción y sustitución de las pilas” y “Alimentación de la unidad base”).El icono de pila baja ( ) también se verá en el display 18 del sensor de radio cuando las pilas estén débiles.
Reseteo de la estación meteorológicaSi aparecen valores incorrectos, debería resetear la estación meteorológica retirando y reinsertando las pilas. Si usa el adaptador de potencia, desenchúfelo de la toma de corriente y vuelva a conectarlo.
Limpieza¡AVISO!
¡Riesgo de daños!Si no limpia la estación meteorológica (uni-dad base y sensor de radio) correctamente, podría dañarla.

[email protected] SERVICIO DE POSVENTAUSA 1 855 754 8297
AlmacenamientoUSA
86
− No utilice limpiadores agresivos, ni utensilios de limpieza afilados o metáli-cos como cuchillos, espátulas duras y objetos similares. Podrían dañar las su-perficies de la estación meteorológica.
− Asegúrese de que no entre agua en la carcasa de la estación meteorológica.
1. Desenchufe el adaptador de potencia de la toma de corriente si está usando el suministro eléctrico CA para la unidad base.
2. Pase un paño húmedo por la estación meteorológica.
3. Seque la estación meteorológica con un paño suave y seco.
Almacenamiento ¡ATENCIÓN!
¡Riesgo asociado al líquido derramado de las pilas, y riesgo de daños!Si guarda la estación meteorológica mucho tiempo, y las pilas se quedan dentro, estas se pueden derramar y provocar daños permanentes. El ácido de las pilas (electrolito) es corrosivo.

[email protected] DE POSVENTA USA 1 855 754 8297 87
Almacenamiento USA
− Si no usa la estación meteorológica mucho tiempo, almacene las pilas aparte. Guarde las pilas de forma que queden fuera del alcance de los niños.
− No extraiga las pilas derramadas con las manos desprotegidas. Emplee guantes normales de goma para uso doméstico. No permita que el ácido de las pilas entre en contacto con la piel, los ojos y las mucosas. No obstante, si el líquido de las pilas entra en contacto con la piel, lávese las manos de inmediato y consulte a un médico si fuera necesario.
− Limpie el ácido derramado de las pilas con un paño húmedo y elimínelo en la basura doméstica.
1. Limpie la estación meteorológica (véase el capítulo “Limpieza”).
2. Saque las pilas insertadas del compartimento de pilas y guárdelas bien.
3. Almacene la estación meteorológica en un lugar limpio y seco.
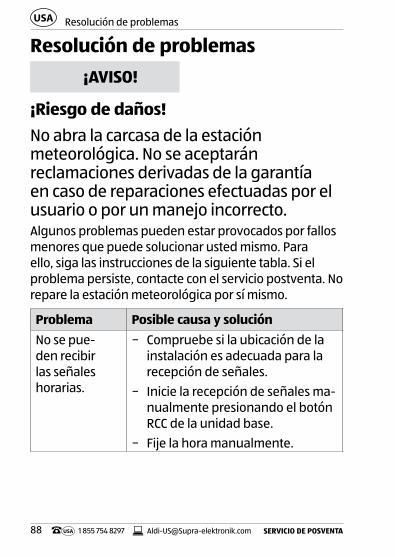
[email protected] SERVICIO DE POSVENTAUSA 1 855 754 8297
Resolución de problemasUSA
88
Resolución de problemas¡AVISO!
¡Riesgo de daños!No abra la carcasa de la estación meteorológica. No se aceptarán reclamaciones derivadas de la garantía en caso de reparaciones efectuadas por el usuario o por un manejo incorrecto.Algunos problemas pueden estar provocados por fallos menores que puede solucionar usted mismo. Para ello, siga las instrucciones de la siguiente tabla. Si el problema persiste, contacte con el servicio postventa. No repare la estación meteorológica por sí mismo.
Problema Posible causa y soluciónNo se pue-den recibir las señales horarias.
− Compruebe si la ubicación de la instalación es adecuada para la recepción de señales.
− Inicie la recepción de señales ma-nualmente presionando el botón RCC de la unidad base.
− Fije la hora manualmente.

[email protected] DE POSVENTA USA 1 855 754 8297 89
Datos técnicos USA
La unidad base no recibe señales del sensor de radio.
− Asegúrese de que no haya equipos eléctricos cerca del sensor de radio ni la unidad base.
− Compruebe si las pilas del sensor de radio están agotadas.
− Inicie la recepción de señales manualmente. Para ello, manten-ga presionado el botón CH de la unidad base.
− Mueva la unidad base más cerca del sensor de radio o viceversa.
Se muestran valores incorrectos.
− Resetee la estación meteorológi-ca (véase el capítulo “Reseteo de la estación meteorológica”).
Aparece “HI” o “LO” en vez de los valores medidos de temperatura o humedad.
− Los valores están por encima o debajo del rango de medición.
Datos técnicosNombre del producto: Estación meteorológica digitalModelo: 92596Unidad baseEntrada: 5.0 V CC Pilas: 2 x AA (1.5 V) Rango de medición de temperatura:
32 °F a 104 °F

[email protected] SERVICIO DE POSVENTAUSA 1 855 754 8297
Datos técnicosUSA
90
Rango de medición de humedad relativa:
20 % a 95 %
Rango de medición de presión del aire:
800 – 1100 hPa
Puerto de carga USB: 5.0 V 1000 mASensor de radioPilas: 2 x AAA (1.5 V)Rango de medición de temperatura:
5 °F a 140 °F
Rango de medición de humedad relativa:
20 % a 95 %
Frecuencia de transmisión:
433 MHz
Rango: máx. 328 pies (espacios abiertos)
Adaptador de potencia (suministrado)Modelo: 6301-US-A o 6301-US-BEntrada: 100 – 240 V CA, 50 / 60 HzSalida: 5.0 V CC 1000 mAEste dispositivo cumple con el apartado 15 de las normas de la FCC. El funcionamiento está sujeto a las dos condiciones siguientes:(1) este dispositivo no puede provocar interferencias perjudiciales, y(2) este dispositivo debe aceptar cualquier interferencia recibida, incluidas las que puedan provocar un funcionamiento no deseado.

[email protected] DE POSVENTA USA 1 855 754 8297 91
Datos técnicos USA
Atención: los cambios o modificaciones no aprobados expresamente por la parte responsable del cumplimiento podrían anular la autoridad del usuario para usar el equipo.AVISO: Este equipo se ha probado y ha demostrado que cumple con los límites para un dispositivo digital de la clase B, conforme al apartado 15 de las normas de la FCC. Estos límites están diseñados para ofrecer una protección razonable frente a interferencias perjudiciales en una instalación residencial.Este equipo genera, utiliza y puede irradiar energía de radiofrecuencia y, si no se instala y se utiliza de acuerdo con las instrucciones, puede ocasionar interferencias perjudiciales para las comunicaciones por radio. No obstante, no se puede garantizar que no se vaya a producir interferencias en una instalación en particular. Si este equipo ocasiona interferencias perjudiciales en la recepción de radio o televisión, lo que puede comprobarse encendiendo y apagando el equipo, se recomienda al usuario que intente corregir la interferencia mediante una o varias de las siguientes medidas:• Reoriente o reubique la antena receptora.• Aumente la separación entre el equipo y el receptor.• Conecte el equipo en una toma de corriente de un
circuito eléctrico diferente del circuito eléctrico del receptor.
• Consulte con su distribuidor o con un técnico especi-alizado en radio y televisión.

[email protected] SERVICIO DE POSVENTAUSA 1 855 754 8297
EliminaciónUSA
92
EliminaciónEliminación del embalaje
Elimine el embalaje por tipos de material. El cartón y el material envolvente han de llevarse a un punto de recogida de papel
usado y un punto de recogida de materiales respectivamente.
Eliminación de equipos en desuso¡Los equipos en desuso no deben ser depositados en la basura doméstica!
− Cuando el equipo no se utiliza más, elimínelo de acuerdo a las disposiciones de su estado o país en materia de desechos.
− Asegúrese de que la información sobre reciclaje cor-responda a la normativa local y las recomendaciones de la EPA (www.epa.gov).
¡Las pilas y los acumuladores no se tiran a la basura de casa! Como consumidor, la ley le exige llevar las pilas y los acumuladores, con independencia de si contienen sustancias nocivas* o no, a un punto de recogida gestionado por la comunidad o el vecindario, o a una tienda, para que se puedan desechar de un modo respetuoso con el entorno.* etiquetado con: Cd = cadmio, Hg = mercurio, Pb = plomo

USA
SNOOZE LIGHT
SNOOZE LIGHT
SNOOZE LIGHT
SNOOZE LIGHT
Description of malfunction / Descripción del defecto:
Return your completed warranty card together with the faulty product to: / Envíe la tarjeta de garantía rellenada junto con el producto defec-tuoso a:
Schenker Inc., Chicago Branch 1347 Mt. Prospect Rd. Des Plaines, IL 60018 USA
Your details / Sus detalles:
Name / Nombre
Address / Dirección
Date of purchase / Fecha de compra* * We recommend you keep the receipt with this warranty card. / Recomendamos guardar el recibo junto con esta tarjeta de garantía.
Location of purchase / Lugar de compra
DIGITAL WEATHER STATIONESTACIÓN METEOROLÓGICA DIGITAL
1 855 754 8297
Model: 92596 10/2015
Warranty cardTARJETA DE GARANTÍA
AFTER SALES SUPPORT • SERVICIO DE POSVENTA
USA
YEARS WARRANTY AÑOS DE GARANTÍA

USA
Warranty conditionsDear Customer,
The ALDI warranty offers you extensive benefits compared to the statutory obligation arising from a warranty:
Warranty period: 3 years from date of purchase.
6 months for wear parts and con-sumables under normal and proper conditions of use (e.g. rechargeable batteries).
Costs: Free repair/exchange or refund. No transport costs.
ADVICE: Please contact our service hotline by phone, e-mail or fax before sending in the device. This allows us to provide support in the event of possible opera-tor errors.
In order to make a claim under the warranty, please send us:
• together with the faulty item, the original receipt and the warranty card properly completed.
• the faulty product with all components in-cluded in the packaging.

USA
The warranty does not cover damage caused by:
• Accident or unanticipated events (e.g. lightning, water, fire).
• Improper use or transport.• Disregard of the safety and maintenance
instructions.• Other improper treatment or modifica-
tion.
After the expiry of the warranty period, you still have the pos-sibility to have your product repaired at your own expense. If the repair or the estimate of costs is not free of charge you will be informed accordingly in advance.This warranty does not limit the statutory obligation of the seller arising from a warranty. The period of warranty can only be extended in accordance with a legal standard. In countries whre a (compulsory) warranty and/or spare part storage and/or a system for compensation are/isrequired by law, the statu-tory minimum conditions apply. In the event that a product is received for repair, neither the service company nor the seller will assume any liability for data or settings possibly stored on the product by the customer.
USA
Condiciones de garantíaEstimado cliente:
La garantía de ALDI le ofrece amplias ventajas en compara-ción a la obligación legal a la que está sujeta una garantía:
Periodo de garantía: 3 años a partir de la fecha de compra.
6 meses para piezas de desgaste y consumibles bajo condiciones nor-males y reglamentarias de uso (p. ej. baterías recargables).
Costes: Reparación/sustitución gratuita a reembolso. Sin costes de transporte.
Aviso: Rogamos póngase en contacto con su servicio de asistencia directa por teléfono, e-mail o fax antes de en-viar al aparato. Esto nos permitirá ofrecerle soporte en caso de posi-bles errores de operador.
A fin de reclamar en el marco de la garantía, rogamos nos envie:
• junto con el producto defectuoso el tiquet de caja original y la tarjeta de garantía completamente rellenada.
• el producto defectuoso con todos los componentes incluidos en el volumen de suministro.

USA
La garantía no cubre daños causados por:
• Accidente o sucesos imprevistos (p. ej. rayos, agua, fuego).
• Uso o transporte inadecuados. • Inobservancia de las instrucciones de seguridad y
mantenimiento.• Otro tipo de manejo o modificación inadecuado.
Una vez expirado el periodo de garantía, usted seguirá teniendo la posibilidad de reparar su aparato a cargo propio. Si la repa-ración o la estimación de costes no es gratuita, se le informará correspondientemente y por adelantado.Esta garantía no limita la obligación legal del vendedor origina-da por una garantía. El periodo de garantía solamente se podrá alargar conforme a las normas legales. En los países en que la ley exija una garantía (obligatoria) y/o el almacenamiento de piezas de recambio y/o un sistema de compensación, serán de aplicación las condiciones legales mínimas. Al recibir un produc-to para su reparación, ni la compañía de servicios ni el vendedor asumirán responsabilidad alguna por los datos o los ajustes que el cliente haya podido almacenar en el producto.

DISTRIBUTED BY • DISTRIBUIDO POR:ALDI INC., BATAVIA, IL 60510www.aldi.us
USA
AFTER SALES SUPPORT • SERVICIO DE POSVENTA
[email protected] 855 754 8297
MODEL: 92596 10/2015
YEARS WARRANTYAÑOS DE GARANTÍA
USA