making connections: electricity and magnetism connections.pdf · scale/ mmsd immersion unit- making...
TRANSCRIPT

Making Connections: Electricity and Magnetism
4th Grade Physical Science
Immersion Unit April 2005
DRAFT
Award No. 0227016

SCALE/ MMSD Immersion Unit- Making Connections: Electricity and Magnetism 2
We would like to thank the following people who reviewed, edited, pilot tested and assisted with the overall development of this Immersion Unit. Their professional and thoughtful contributions are greatly appreciated.
Matt D’Amato Teri Hedges
Susan Johnson Karen Lee-Wahl
Paula Maglio Anne Schoenemann
Lisa Wachtel
.
SCALE/ MMSD Immersion Unit- Making Connections: Electricity and Magnetism 3
Table of Contents
Unit Overview ………………………………………………. 4
Step 1 Overview ………………………………………………. 12
Step 1: Lesson 1 ………………………………………………. 13
Step 1: Lesson 2 ………………………………………………. 19
Step 2 Overview ………………………………………………. 26
Step 2: Lesson 1 ………………………………………………. 27
Step 3 Overview ………………………………………………. 32
Step 3: Lesson 1 ………………………………………………. 32
Step 3: Lesson 2 ………………………………………………. 36
Step 3: Lesson 3 ………………………………………………. 40
Step 3: Lesson 4 ………………………………………………. 44
Step 4 Overview ………………………………………………. 47
Step 4: Lesson 1 ………………………………………………. 48
Step 4: Lesson 2 ………………………………………………. 58
Step 4: Lesson 3 ………………………………………………. 66
Step 5 Overview ………………………………………………. 73
Step 5: Lesson 1 ………………………………………………. 74
Step 5: Lesson 2 ………………………………………………. 76
Step 5: Lesson 3 ………………………………………………. 78
Step 6 Overview ………………………………………………. 81
Step 6: Lesson 1 ………………………………………………. 82
Step 6: Lesson 2 ………………………………………………. 86
Appendix: Worksheet Masters
………………………………………………. 98

Unit Overview
SCALE/ MMSD Immersion Unit- Making Connections: Electricity and Magnetism 4
Unit Overview The foundational understanding of electricity and magnetism is built in most fourth grade classrooms. Students study electricity and then they study magnetism, but do they ever really understand why they are studied side by side? This Immersion Unit uses the resources in the FOSS Magnetism and Electricity Module to help build a student’s understanding of the connections between magnetism and electricity.
This immersion unit asks students to think critically about similarities between the two phenomena. It allows them to delve deeply into a study of the similarities between magnetism and electricity by examining the effects of magnetic and electric forces, known collectively as the electromagnetic force.
Through an examination and subsequent creation of a “mystery box” the students learn to think about the world that they cannot see and use their sharp observational skills and data analysis to formulate explanations.
By engaging students in small inquiries throughout the unit they are prepared to challenge themselves to think through their own mystery box design and plan an inquiry that focuses on one key concept that they learned through this unit. The students will be engaged by a challenging task that fosters their creativity and allows them choice in their work. Through the study of the unit key concept the students will develop the language and content knowledge to discuss the abstract concepts of magnetism and electricity. They will begin to lay the foundational understanding for the phenomenal connections between magnetism and electricity.
Unit Key Concept Electricity and magnetism can influence one another.
Unit Standards This unit supports the Madison Metropolitan School District grade level standards, as outlined in the document in the next section.
Additional references to fourth grade physical science standards, including the Wisconsin State Standards and the National Science Education Standards can be found in the appendix of this unit.
Unit Overview
SCALE/ MMSD Immersion Unit- Making Connections: Electricity and Magnetism 5
Grade 4 – Physical Science
Electricity and Magnetism Connections
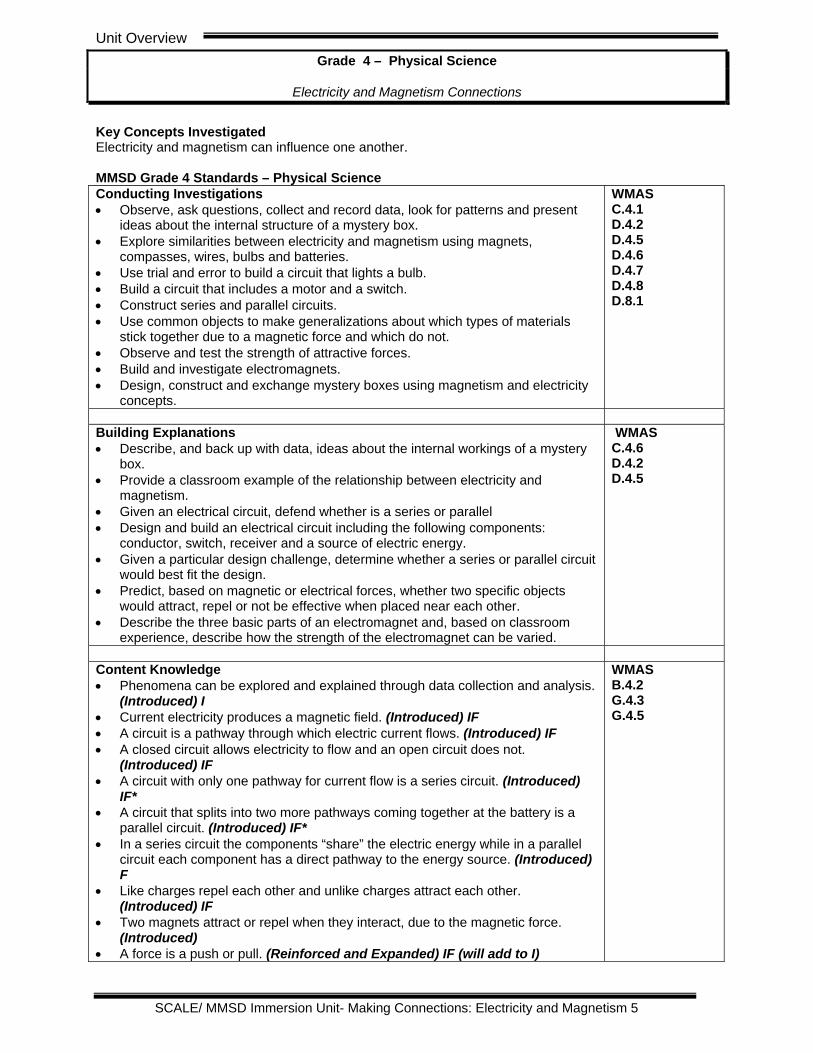
Key Concepts Investigated Electricity and magnetism can influence one another. MMSD Grade 4 Standards – Physical Science Conducting Investigations • Observe, ask questions, collect and record data, look for patterns and present
ideas about the internal structure of a mystery box. • Explore similarities between electricity and magnetism using magnets,
compasses, wires, bulbs and batteries. • Use trial and error to build a circuit that lights a bulb. • Build a circuit that includes a motor and a switch. • Construct series and parallel circuits. • Use common objects to make generalizations about which types of materials
stick together due to a magnetic force and which do not. • Observe and test the strength of attractive forces. • Build and investigate electromagnets. • Design, construct and exchange mystery boxes using magnetism and electricity
concepts.
WMAS C.4.1 D.4.2 D.4.5 D.4.6 D.4.7 D.4.8 D.8.1
Building Explanations • Describe, and back up with data, ideas about the internal workings of a mystery
box. • Provide a classroom example of the relationship between electricity and
magnetism. • Given an electrical circuit, defend whether is a series or parallel • Design and build an electrical circuit including the following components:
conductor, switch, receiver and a source of electric energy. • Given a particular design challenge, determine whether a series or parallel circuit
would best fit the design. • Predict, based on magnetic or electrical forces, whether two specific objects
would attract, repel or not be effective when placed near each other. • Describe the three basic parts of an electromagnet and, based on classroom
experience, describe how the strength of the electromagnet can be varied.
WMAS C.4.6 D.4.2 D.4.5
Content Knowledge • Phenomena can be explored and explained through data collection and analysis.
(Introduced) I • Current electricity produces a magnetic field. (Introduced) IF • A circuit is a pathway through which electric current flows. (Introduced) IF • A closed circuit allows electricity to flow and an open circuit does not.
(Introduced) IF • A circuit with only one pathway for current flow is a series circuit. (Introduced)
IF* • A circuit that splits into two more pathways coming together at the battery is a
parallel circuit. (Introduced) IF* • In a series circuit the components “share” the electric energy while in a parallel
circuit each component has a direct pathway to the energy source. (Introduced) F
• Like charges repel each other and unlike charges attract each other. (Introduced) IF
• Two magnets attract or repel when they interact, due to the magnetic force. (Introduced)
• A force is a push or pull. (Reinforced and Expanded) IF (will add to I)
WMAS B.4.2 G.4.3 G.4.5
Unit Overview
SCALE/ MMSD Immersion Unit- Making Connections: Electricity and Magnetism 6
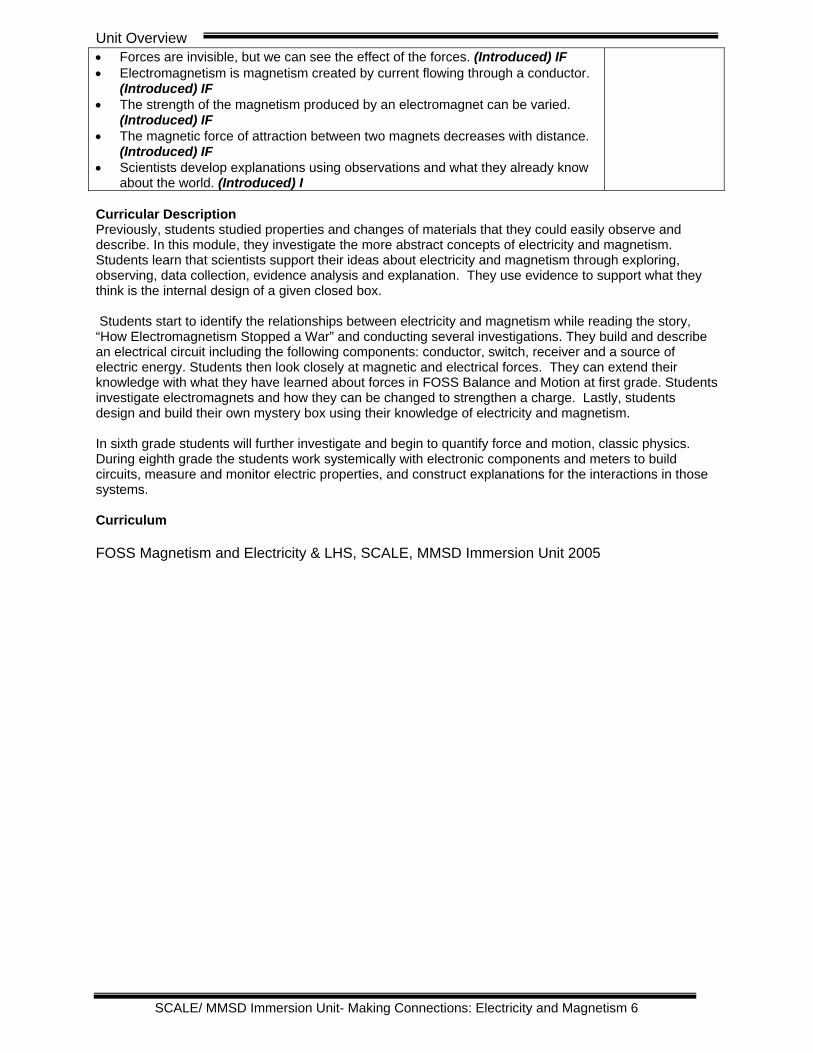
• Forces are invisible, but we can see the effect of the forces. (Introduced) IF • Electromagnetism is magnetism created by current flowing through a conductor.
(Introduced) IF • The strength of the magnetism produced by an electromagnet can be varied.
(Introduced) IF • The magnetic force of attraction between two magnets decreases with distance.
(Introduced) IF • Scientists develop explanations using observations and what they already know
about the world. (Introduced) I Curricular Description Previously, students studied properties and changes of materials that they could easily observe and describe. In this module, they investigate the more abstract concepts of electricity and magnetism. Students learn that scientists support their ideas about electricity and magnetism through exploring, observing, data collection, evidence analysis and explanation. They use evidence to support what they think is the internal design of a given closed box. Students start to identify the relationships between electricity and magnetism while reading the story, “How Electromagnetism Stopped a War” and conducting several investigations. They build and describe an electrical circuit including the following components: conductor, switch, receiver and a source of electric energy. Students then look closely at magnetic and electrical forces. They can extend their knowledge with what they have learned about forces in FOSS Balance and Motion at first grade. Students investigate electromagnets and how they can be changed to strengthen a charge. Lastly, students design and build their own mystery box using their knowledge of electricity and magnetism. In sixth grade students will further investigate and begin to quantify force and motion, classic physics. During eighth grade the students work systemically with electronic components and meters to build circuits, measure and monitor electric properties, and construct explanations for the interactions in those systems. Curriculum FOSS Magnetism and Electricity & LHS, SCALE, MMSD Immersion Unit 2005
Unit Overview
SCALE/ MMSD Immersion Unit- Making Connections: Electricity and Magnetism 7
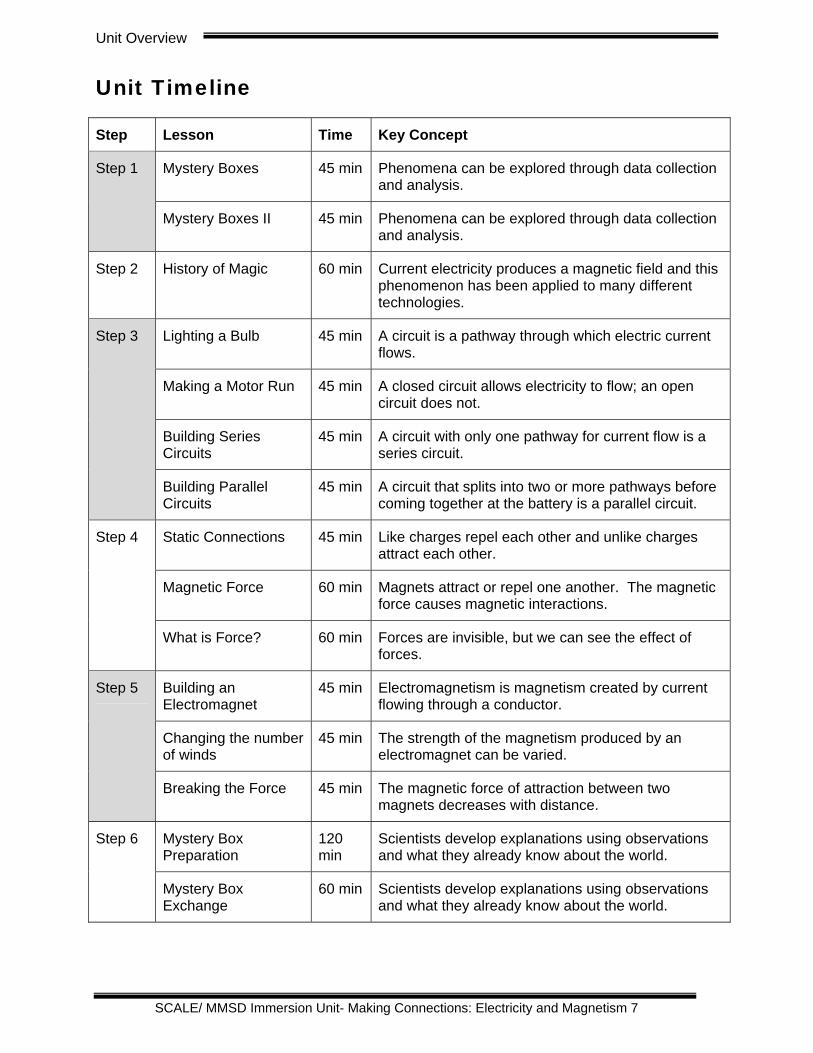
Unit Timeline
Step Lesson Time Key Concept
Mystery Boxes 45 min Phenomena can be explored through data collection and analysis.
Step 1
Mystery Boxes II 45 min Phenomena can be explored through data collection and analysis.
Step 2 History of Magic 60 min Current electricity produces a magnetic field and this phenomenon has been applied to many different technologies.
Lighting a Bulb 45 min A circuit is a pathway through which electric current flows.
Making a Motor Run 45 min A closed circuit allows electricity to flow; an open circuit does not.
Building Series Circuits
45 min A circuit with only one pathway for current flow is a series circuit.
Step 3
Building Parallel Circuits
45 min A circuit that splits into two or more pathways before coming together at the battery is a parallel circuit.
Static Connections 45 min Like charges repel each other and unlike charges attract each other.
Magnetic Force 60 min Magnets attract or repel one another. The magnetic force causes magnetic interactions.
Step 4
What is Force? 60 min Forces are invisible, but we can see the effect of forces.
Building an Electromagnet
45 min Electromagnetism is magnetism created by current flowing through a conductor.
Changing the number of winds
45 min The strength of the magnetism produced by an electromagnet can be varied.
Step 5
Breaking the Force 45 min The magnetic force of attraction between two magnets decreases with distance.
Mystery Box Preparation
120 min
Scientists develop explanations using observations and what they already know about the world.
Step 6
Mystery Box Exchange
60 min Scientists develop explanations using observations and what they already know about the world.

Unit Overview
SCALE/ MMSD Immersion Unit- Making Connections: Electricity and Magnetism 8
Unit Background This Immersion Unit will lay the foundation for an understanding that magnetism and electricity are interrelated. At a fourth grade level students will not understand the intricacies of this connection; however, they can begin to name the effects of each phenomenon and draw links between electricity and magnetism. As the students progress through the unit they will work towards building their own Connections Chart. Class discussions will elicit observations that can be added to the chart in the students’ own words and language. The Connections Chart is an important step in the development of an understanding of the similarities and connections between magnetism and electricity. It is the intention of this unit to serve as an introduction to the connections that students will build upon as they delve more deeply into the concepts of force in the middle school grades. The following is a chart outlining four main connections between electricity and magnetism. The students’ chart will likely contain more entries, and examples of possible entries are included at the end of each step. This chart outlines the four main concepts that all observations and additional concepts will stem from.
CONNECTIONS CHART: ELECTRICITY AND MAGNETISM Magnetism Electricity Magnets display forces of attraction and repulsion
Electric charges display forces of attraction and repulsion
Every magnet has two opposite poles; like poles repel one another and unlike poles attract
There are two kinds of electric charges, positive and negative; like charges repel one another and opposite charges attract.
Magnets produce a magnetic field Electric charge produces an electric field A magnetic field exerts a force on moving charge (current electricity)
Current electricity (moving charge) creates a magnetic field
CONNECTIONS OUTLINED Magnets display forces of attraction and repulsion
Electric charges display forces of attraction and repulsion
If two magnets are brought close together a force can be detected between them. It may be an attractive force or a repulsive force depending on the orientation of the magnets. It is easy to feel magnetic forces between ordinary magnets because they are of great enough magnitude that our muscles have to do some work to keep them apart or push them together. If two electrically charged objects are brought close together they will also display a force of attraction or repulsion. Just like with magnets, forces of attraction and repulsion exist between electric charges, but the magnitude of the force isn’t always as easy to feel as it is with magnets. However, the effect of the force between charges can still be observed. For example, a balloon rubbed against a wool sweater or hair can stick to a wall without falling down for a limited period of time.

Unit Overview
SCALE/ MMSD Immersion Unit- Making Connections: Electricity and Magnetism 9
Both the electric and magnetic forces are invisible, one can only see or feel the effect of the force and cannot see its cause. Therefore, it is useful, to study the magnetic force concurrently with static electricity, so students can make analogies between the forces of attraction and repulsion in both phenomena. Every magnet has two opposite poles; like poles repel one another and unlike poles attract
There are two kinds of electric charges, positive and negative; like charges repel one another and opposite charges attract.
One of the first things people usually notice about magnets is that they have two distinct ends, termed north and south poles. After playing with bar magnets for a while it becomes apparent that like poles repel and opposite poles attract. Similarly, when studying static electricity, one will find that objects can have positive charge (materials containing atoms that are missing some electrons) and negative charge (materials containing extra electrons). Forces of attraction and repulsion occur between oppositely and similarly charged objects, respectively. The fact that all magnets have two kinds of poles and electric charge can be of two types is a comparison that students can make between magnetism and electricity. Magnets produce a magnetic field Electric charge produces an electric field One of the more abstract concepts in physics is the idea of a field. The space around a magnet contains a magnetic field. Similarly, the space around electric charges contains an electric field. A field is the region of space where forces can be felt. For example, when the north poles of two magnets are placed close to one another, a repulsive force is felt between them. Though we cannot actually see anything different about the space around magnets (or electric charges), when another magnet (or charge) is placed in the field, the effect of the field on that magnet (or charge) can be observed. Since fields are an abstract concept, it is enough for a 4th grade student to understand that electric and magnetic fields exist and can interact with each other. A magnetic field can exert a force on moving charge (current electricity)
Current electricity (moving charge) creates a magnetic field
The scientific explanation for what causes magnetism really begins with electricity! That is why this last connection is crucial to understanding the connection between electricity and magnetism. In an Iron magnet, for example, each atom of iron in that magnet has electrons moving around its nucleus. The collective motion of the electrons creates a magnetic field. In other words, current electricity creates a magnetic field. If a charged object is moving in a magnetic field, the magnetic field exerts a force on the moving charge. This connection deals only with current electricity, not with static electricity. It is important to note that only a moving charge can create or interact with a magnetic field. The relationship between current electricity and magnetic fields is used in many different technologies including such diverse applications as the doorbell and the computer.

Unit Overview
SCALE/ MMSD Immersion Unit- Making Connections: Electricity and Magnetism 10
Unit Advance Preparation
GROUPS It is suggested that all activities in this unit are done in cooperative groups of 4-6 students, depending on the number of students in the class. It will be helpful to decide upon the groups ahead of time and keep the students in the same group for the entire unit.
For the last step, Step #6, students may be regrouped, based on interest and other differentiating factors.
MATERIALS Allow a few hours for the construction of mystery boxes to be used for the initial lessons in Step #1. The mystery boxes should be constructed by the teacher or other adults or students, but not by any of the students in the class. Take care to make sure that all boxes are oriented in the same direction when they are labeled and that all labels match the correct holes. The boxes can be saved for use by other classrooms and for years to come, they are only needed for the first two lessons of this unit.
Unit Formative and Summative Assessment FORMATIVE Assessment questions are included in every lesson. They appear in two places, at the bottom of the overview page and at the end of the implementation guide. These questions can be used as class discussion questions, pair-share questions or reflective writing questions.
The worksheets included in the lessons also provide many opportunities for assessment as the students work through the key concepts of the unit. The worksheets should be collected, reviewed and used as benchmarks for student understanding.
In addition to the assessment questions and worksheets two formal reflective assessments are included in the unit. They appear in Steps #3 & #4 and ask students to apply their knowledge of two key concepts. These assessments should be given to the students after the concept is taught. Students should be given the opportunity to discuss their assessment with the teacher and learn from their experiences.
The scoring guides included with the assessments align with the scoring outline contained in the FOSS Assessment folio on page 5.
SUMMATIVE The main summative and performance assessment piece of this unit is detailed in Step #6. The students will work in groups to brainstorm and design a mystery box that demonstrates one of the key concepts that they learned in this unit. Each student will be responsible for a write-up and description of the key concept and how their design demonstrates that concept.
Every student will also think about their box as a small inquiry and leave instructions for another group to help guide them through the process.

Unit Overview
SCALE/ MMSD Immersion Unit- Making Connections: Electricity and Magnetism 11
INQUIRY AND IMMERSION UNITS As the students work through this unit, it is important that they work towards a solid understanding of content. With that said, it is equally important that the students are given an opportunity to use critical thinking and problem solving skills. By allowing students to fully engage in the process of inquiry they are in a position to ask questions and look for answers on their own, with guidance from the teacher when it is needed.
Source adapted from the National Research Council.
2000: Inquiry and the National Science Education Standards.
Washington, D.C.: National Academy Press
Step #1- DRAFT
SCALE/ MMSD Immersion Unit- Making Connections: Electricity and Magnetism 12
Unit Key Concept: Electricity and Magnetism can influence one another.
Step #1 Overview The students will conduct investigations using a pre-constructed mystery box. In teams, the students will make observations, ask questions, collect data and present ideas about the box design. After the first round the teams will trade data sets and the corresponding boxes and the students will repeat the data collection and analysis procedure. The students will learn how to collect data about something that they cannot directly see.
Step #1 Lessons LESSON 1: MYSTERY BOX (45 minutes)
Phenomena can be explored and explained through data collection and analysis.
LESSON 2: MYSTERY BOX II (45 minutes) Phenomena can be explored and explained through data collection and analysis.

Step #1- DRAFT
SCALE/ MMSD Immersion Unit- Making Connections: Electricity and Magnetism 13
Immersion Lesson 1: Overview
• Hand out a mystery box to each group.
• Explain the instructions and rules for exploring mystery boxes.
• Allow 10 minutes for box exploration.
• Hand out the Mystery Box Data Chart worksheet.
• Discuss the worksheet with the students. Ask them to list their predictions.
• Ask the students to perform 7 trials on each hole of the mystery box and record their data on the Mystery Box Data Chart as they work.
• Lead the students in a discussion about their trials with the mystery boxes using the assessment questions.
• Hand out the Evidence & Explanation worksheet and ask the students to complete the worksheet.
MYSTERY BOX
IMMERSION LESSON 1: KEY CONCEPT
Phenomena can be explored and explained through data collection and analysis.
IMMERSION LESSON 1: TIME NEEDED 45 minutes
IMMERSION LESSON 1: MATERIALS
EACH STUDENT
• Mystery Box Data Chart • Evidence & Explanation worksheet • Four different colored pencils or crayons
EACH GROUP
• 1 mystery box • 1 washer
IMMERSION LESSON 1: KEY WORDS Trial Data Chart Phenomenon
ASSESSMENT QUESTIONS • What patterns did you notice in the data that you collected? Explain the patterns. (One
number occurred more than others. For example: When the washer was placed in hole #1 it exited from hole #2 most often.)
• What data did you collect that helped support your explanation about the box design? (The multiple trials.) Explain how this data helped to support your explanation.

Step #1- DRAFT
SCALE/ MMSD Immersion Unit- Making Connections: Electricity and Magnetism 14
Immersion Lesson 1: Background Information Definition of Phenomenon: a fact or event of scientific interest susceptible of scientific description and explanation. (Merriam-Webster Online) There are many different phenomena in science, everything from the rotation of the earth, to gravity and electromagnetism. When we use the word phenomenon in this unit we are referring to magnetism as a phenomenon and electricity as a phenomenon. These phenomena are not things that the students can see; instead the students can work with and manipulate the effects of the phenomena. For example, when a student holds two magnets with opposing poles near each other they can feel the force of repulsion and they can see the magnets move as they repel away from one another, but they cannot see the actual force.
When scientists explain a phenomenon, they often have to explain events that they cannot see. Through careful investigations and data collection scientists collect information about the effects or results of a phenomenon, like watching two magnets repel each other. The physical effects can be used to validate their statements about the existence of a particular phenomenon. Much of the world operates on an atomic or sub-atomic level and for a scientist to make statements about this unseen world they must ask questions, perform tests and collect data to support their ideas. As students investigate electricity and magnetism they will mimic the processes of scientists; they will work to collect information about an invisible phenomenon. To help prepare students for this idea of collecting data about the unseen world they begin this immersion unit with a “Mystery Box” investigation. The mystery box investigation allows them to practice data collection and pattern recognition before delving into the content. They repeat this investigation at the end of the unit, where the focus is on the key concepts studied in this unit.
Phenomenon: singular
Phenomena: plural
Immersion Lesson 1: Teacher Preparation • Make copies of the Mystery Box Data Chart and Evidence & Explanation worksheets
for each student.
• Prepare Mystery Boxes using the instructions on the Mystery Box Construction worksheet.
• Make sure the students are in groups that they will stay with for the duration of this unit.
Lesson 1: Material Tips Use the boxes provided by your district to construct the mystery boxes. Construct as many boxes as needed for your classroom, based on the number of teams desired. For a class of 30 students, with 8 groups of four students, 8 mystery boxes should be made. If additional boxes are needed, small cracker and cereal boxes also work well for the construction.

Step #1- DRAFT
SCALE/ MMSD Immersion Unit- Making Connections: Electricity and Magnetism 15
Mystery Box Construction
MATERIALS (FOR A CLASSROOM SET OF 8 BOXES) 8 empty boxes 6-12 sheets of heavy cardstock 16 washers, 8 for immediate use, 8 spare Scissors or Utility Knife Strong tape
PROCEDURE
1. Unfold the box and tape down the interior flaps on one piece of the box. This will be the bottom of the box.
2. Position the box so the interior flaps are on the left 4 3 and right sides of the box. Write a #1 on the left side of the wall facing you and a #2 on the right side. Write a #3 on across from the #2 and a #4 on the edge across from the #1.
1 2
3. Using a knife or scissors cut a short slit (about 1inch) at each corner. Make sure there is nothing obstructing entry or exit of the washer.
4. Cut 1-2 pieces of cardstock to the dimensions listed below, based on the design that you are constructing. Tape the cardstock inside the bottom part of the box, following the design below. Put tape along the entire length of the cardstock wall.
5. Cut a piece out of the box top at each top and bottom corner, to allow space for the washer to fit into the slit. If the numbers are not visible, rewrite the numbers on the outside of the box top.
6. Put the top piece of the box onto the bottom piece and tape the top to the bottom.
7. Label the top of the box with a number, based on the range given with each design.
SUGGESTED PATTERNS FOR MYSTERY BOXES Box Design A: Cut one piece of cardstock 6.5” x 1.5” Label the box #1 or #2
Box Design B: Cut two pieces of cardstock 6” x 1.5” Label the box #3 or #4
Box Design C: Cut one piece of cardstock 5” x 1.5” Label the box #5 or #6
4 3 4 3 4 3 1 2 1 2 1 2

Step #1- DRAFT
SCALE/ MMSD Immersion Unit- Making Connections: Electricity and Magnetism 16
Immersion Lesson 1: Classroom Implementation Guide
The following guide supports the basic procedures that were described in the Lesson Overview section. This Implementation Guide provides one example of how we recommend teaching this lesson.
Section Guide
TTEEAACCHHEERR NNOOTTEESS
Mystery Box Exploration Begin by asking students to think about how scientists learn about things like gravity. We cannot see the force that pulls an apple down to the ground from a tree, but we know that an apple can fall. Scientists have to study the effects of gravity, like how fast an item falls, instead of studying the gravity itself. Scientists call these things that they cannot see phenomena.
Explain to the students that they are going to use the mystery boxes to practice studying something that they cannot see (a phenomenon) and for that reason they are not going to open the boxes.
Tell the students that you are going to give each team a mystery box. Their challenge will be to figure out what is inside of the box. In other words, ask them to think about a maze drawn on a piece of paper. Now imagine that the maze is three dimensional and the lines extend vertically and are walls. There is essentially a simple maze inside of the mystery box. There are walls inside of the box that dictate what holes the washer can enter and what holes the washer can exit from.
The only rules that apply when the students are exploring the boxes are:
The students are not allowed to
• open the box • peer into the box • put anything inside of the box except for the
washer that they will be given with the box. • push on the top or the sides of the box.
Show the mystery boxes to the students and invite the students to explore them by placing a washer into one of the holes and tipping the box to try to get the washer to come back out. Tell the students that the “mystery” is to figure out what pattern is hidden inside of the box that dictates the path of the washer.
Give the students ten minutes to explore the boxes. As the students work, walk around the classroom and encourage the students to make observations about what they are doing.
• What happens if you put the washer into hole #1? • If you put it in hole #1, does it come out of the
same hole every time? • Does tipping the box have any effect on what hole
the washer exits from?

Step #1- DRAFT
SCALE/ MMSD Immersion Unit- Making Connections: Electricity and Magnetism 17
Section Guide
TTEEAACCHHEERR NNOOTTEESS
Data Collection After the students have had 10 minutes to explore the boxes ask them to put the boxes down and then hand out the Mystery Box Data Chart. Discuss the worksheet with the students. Make sure they fill in the box number that they are working with.
Tell the students that they are going to make predictions for all of the holes and record their predictions on this worksheet. After they have all recorded their own predictions (members of the same team can have different predictions) they will work together as a team to test the predictions. Every person in the team should collect the same data. They will conduct seven trials on each hole. The trial will consist of putting the washer in one hole and slowly tipping the box from side to side and back and forth until the washer exits. The data should be recorded on the Mystery Box Data Chart worksheet.
As the students work on the trials, circulate around the classroom and make sure that each group is recording the correct data. As the students test their predictions, they may be compelled to change their original prediction if the trial is not working out the way that they planned. Ask the students if it is possible for a washer to exit out of more than one hole in the box. Also point out that data that they did not anticipate can still help them to draw conclusions about the box design. Therefore it is ok if the predictions turn out to be incorrect.
Section Guide
TTEEAACCHHEERR NNOOTTEESS
Data Analysis and Discussion When the teams are finished collecting their data ask them to look at each column and circle the number that appears most often. Record this number in the “Analyze Data” section of the worksheet.
Hand out the Evidence & Explanation worksheets to each student. Have a class discussion to discuss and explain the worksheet with the students. Explain to them that they are going to be drawing a diagram of their trial and more specifically that they are going to diagram the most frequent path of the washer.
Using the Teacher Data Sheet, work with the class to draw a diagram on the board. You should post the data or write it on the board ahead of time so the students can follow along with your drawing. Circle the number that appears most often under each column, using a different color for each column and think aloud as you do this to explain your reasoning. Using that same color draw a line in the box to represent the path of the washer that entered that particular hole. There should be four lines on the drawing. From there ask the students to examine the drawing and suggest where the wall or walls might be located inside of this example box. Ask one or two students to come to the board and draw in the lines.
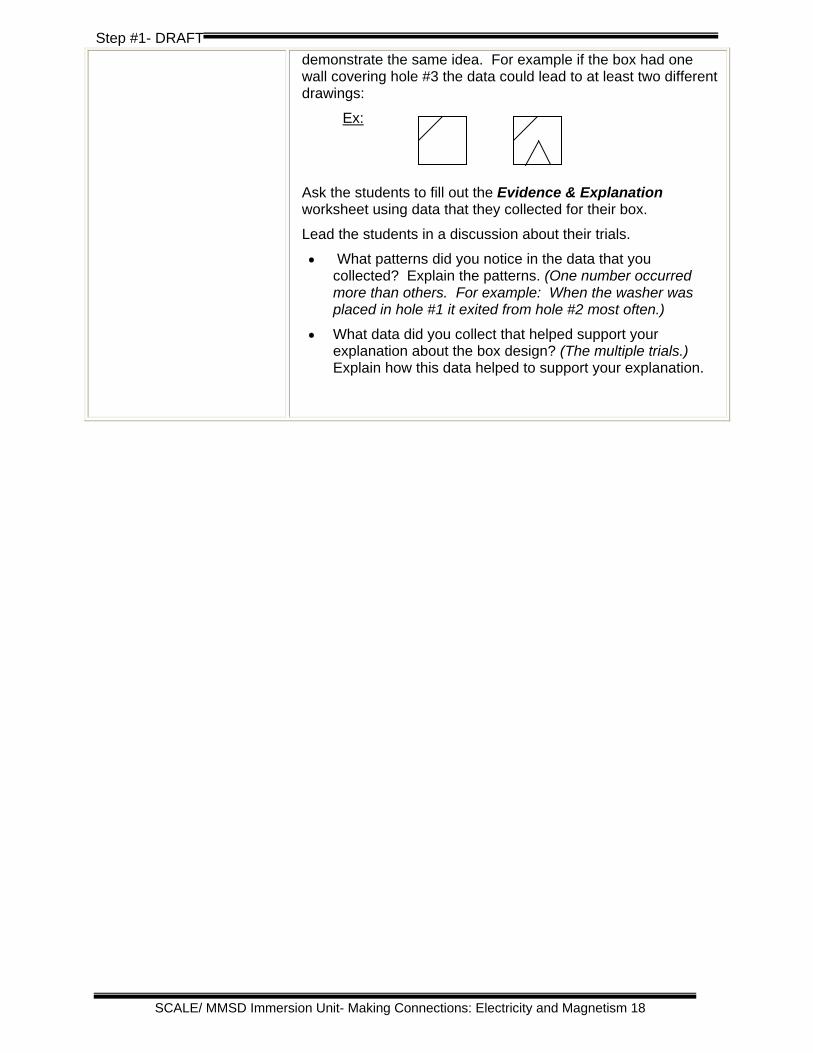
Discuss how it is possible to have two different drawings that represent one set of data, as long as both of the drawings
Step #1- DRAFT
SCALE/ MMSD Immersion Unit- Making Connections: Electricity and Magnetism 18
demonstrate the same idea. For example if the box had one wall covering hole #3 the data could lead to at least two different drawings:
Ex:
Ask the students to fill out the Evidence & Explanation worksheet using data that they collected for their box.
Lead the students in a discussion about their trials.
• What patterns did you notice in the data that you collected? Explain the patterns. (One number occurred more than others. For example: When the washer was placed in hole #1 it exited from hole #2 most often.)
• What data did you collect that helped support your explanation about the box design? (The multiple trials.) Explain how this data helped to support your explanation.

Step #1- DRAFT
SCALE/ MMSD Immersion Unit- Making Connections: Electricity and Magnetism 19
Immersion Lesson 2: Overview
• Give each group a new mystery box. Ask each group to record and test their predictions using the Mystery Box Data Chart worksheet.
• Allow 20 minutes for the trials.
• Hand out the Evidence & Explanation worksheet and ask the students to complete it.
• Give each group the previously collected data for their box.
• Ask the students to discuss similarities and differences between their data and the older data collected by the previous group.
• Lead the students in a share session and have each group report their findings, using the assessment questions as a guide.
MYSTERY BOX II
IMMERSION LESSON 2: KEY CONCEPT
Phenomena can be explored and explained through data collection and analysis.
IMMERSION LESSON 2: TIME NEEDED 45 minutes
IMMERSION LESSON 2: MATERIALS
EACH STUDENT
• Mystery Box Data Chart worksheet • Evidence & Explanation worksheet • Four different colored pencils or markers
EACH GROUP
• 1 mystery box • 1 washer
IMMERSION LESSON 2: KEY WORDS Trial Data Chart Phenomenon
ASSESSMENT QUESTIONS • What did you notice by looking at another set of data? (Most of the data was very similar.)
• Can you think of an example of a “mystery box” in the world around you? (Doorknobs, Jack-in-the-box, telephones)
• Are there things that scientists study, but can’t really see? (Gravity, Electricity, Magnetism, Energy, etc.)

Step #1- DRAFT
SCALE/ MMSD Immersion Unit- Making Connections: Electricity and Magnetism 20
Immersion Lesson 2: Background Information The students are running multiple trials for their data collection to help them understand how scientists gather data. It is important for students to understand that the data they collect may or may not support data collected by another group, on the same box. This new data is just as important to the evolution of the explanation as data that would support the original ideas.
When scientists collect data they run multiple trials to collect many pieces of data. This abundance of data will help a scientist determine if there are any outliers in the data. Outliers are pieces of data that are obviously the result of human or mechanical error. As careful as we can be, mistakes are a part of science too. Collecting a lot of data during an investigation can help scientists decipher which pieces of data do not match up with the average and therefore can be thrown out after careful analysis. In fact, some discoveries are the result of outliers.
Immersion Lesson 2: Teacher Preparation Have the data charts from the previous lesson handy and ready to hand out to the students.
Immersion Lesson 2: Material Tips Make sure each team is given a new box design in this lesson. It will be more fun for them to try to figure out a new box. You can give each team only one set of data from the previous trial if it is too cumbersome to hand out all of them.
Implementation of this lesson has been divided into sections that correspond with the basic procedures that were described in the Lesson Overview section. In the next section you will find a detailed Implementation Guide that provides one example of how we recommend teaching this lesson.
Step #1- DRAFT
SCALE/ MMSD Immersion Unit- Making Connections: Electricity and Magnetism 21
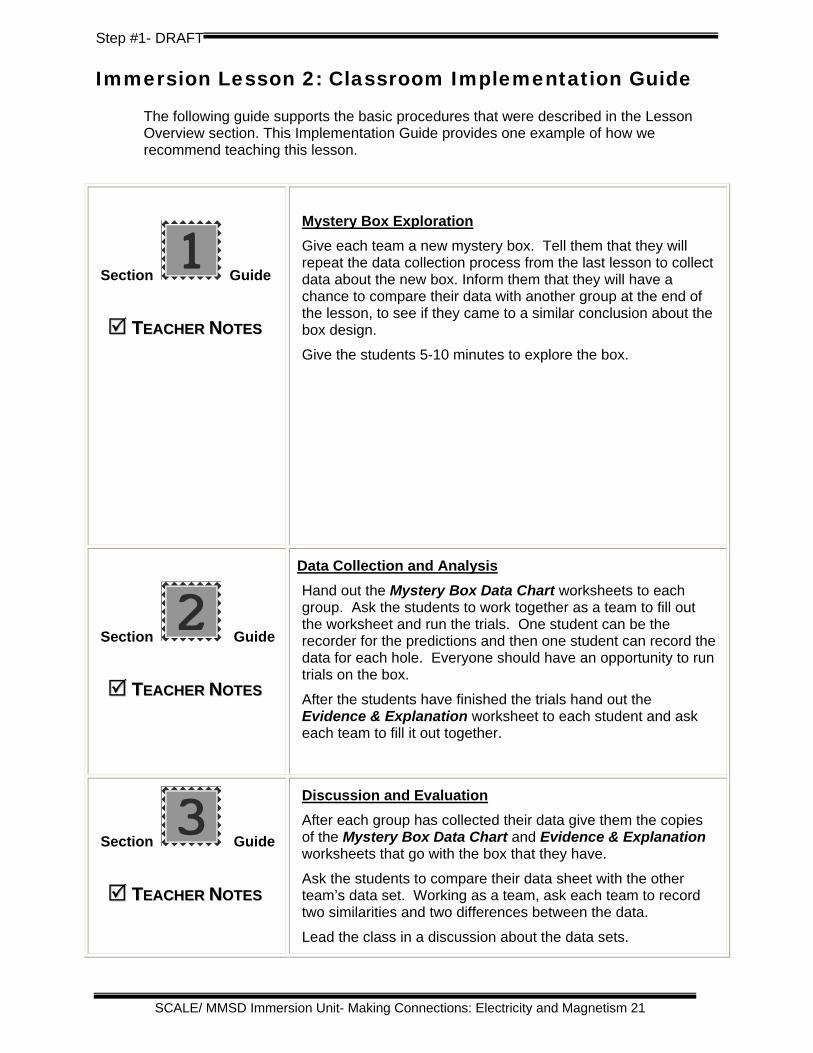
Immersion Lesson 2: Classroom Implementation Guide
The following guide supports the basic procedures that were described in the Lesson Overview section. This Implementation Guide provides one example of how we recommend teaching this lesson.
Section Guide
TTEEAACCHHEERR NNOOTTEESS
Mystery Box Exploration Give each team a new mystery box. Tell them that they will repeat the data collection process from the last lesson to collect data about the new box. Inform them that they will have a chance to compare their data with another group at the end of the lesson, to see if they came to a similar conclusion about the box design.
Give the students 5-10 minutes to explore the box.
Section Guide
TTEEAACCHHEERR NNOOTTEESS
Data Collection and Analysis Hand out the Mystery Box Data Chart worksheets to each group. Ask the students to work together as a team to fill out the worksheet and run the trials. One student can be the recorder for the predictions and then one student can record the data for each hole. Everyone should have an opportunity to run trials on the box.
After the students have finished the trials hand out the Evidence & Explanation worksheet to each student and ask each team to fill it out together.
Section Guide
TTEEAACCHHEERR NNOOTTEESS
Discussion and Evaluation After each group has collected their data give them the copies of the Mystery Box Data Chart and Evidence & Explanation worksheets that go with the box that they have.
Ask the students to compare their data sheet with the other team’s data set. Working as a team, ask each team to record two similarities and two differences between the data.
Lead the class in a discussion about the data sets.

Step #1- DRAFT
SCALE/ MMSD Immersion Unit- Making Connections: Electricity and Magnetism 22
• What did you notice by looking at another set of data? (Most of the data was very similar.)
• Can you think of an example of a “mystery box” in the world around you? (Doorknobs, Jack-in-the-box, telephones)
• Are there things that scientists study, but can’t really see? (Gravity, Electricity, Magnetism, Energy, etc.)

Step #1- DRAFT
SCALE/ MMSD Immersion Unit- Making Connections: Electricity and Magnetism 23
Mystery Box Data Chart
Name:_______________ Box #:_______ Date:______________ Prediction If I put the washer into hole #1 it will exit hole #_________.
If I put the washer into hole #2 it will exit hole #_________.
If I put the washer into hole #3 it will exit hole #_________.
If I put the washer into hole #4 it will exit hole #_________.
Data Collection
Complete seven trials for each hole and record the data. Make sure your whole group collects the same data.
Analyze Data: Review the data with your group. What patterns do you see?
Hole #1 Hole #2 Hole #3 Hole #4
Hole #1 Hole #2 Hole #3 Hole #4
Step #1- DRAFT
SCALE/ MMSD Immersion Unit- Making Connections: Electricity and Magnetism 24
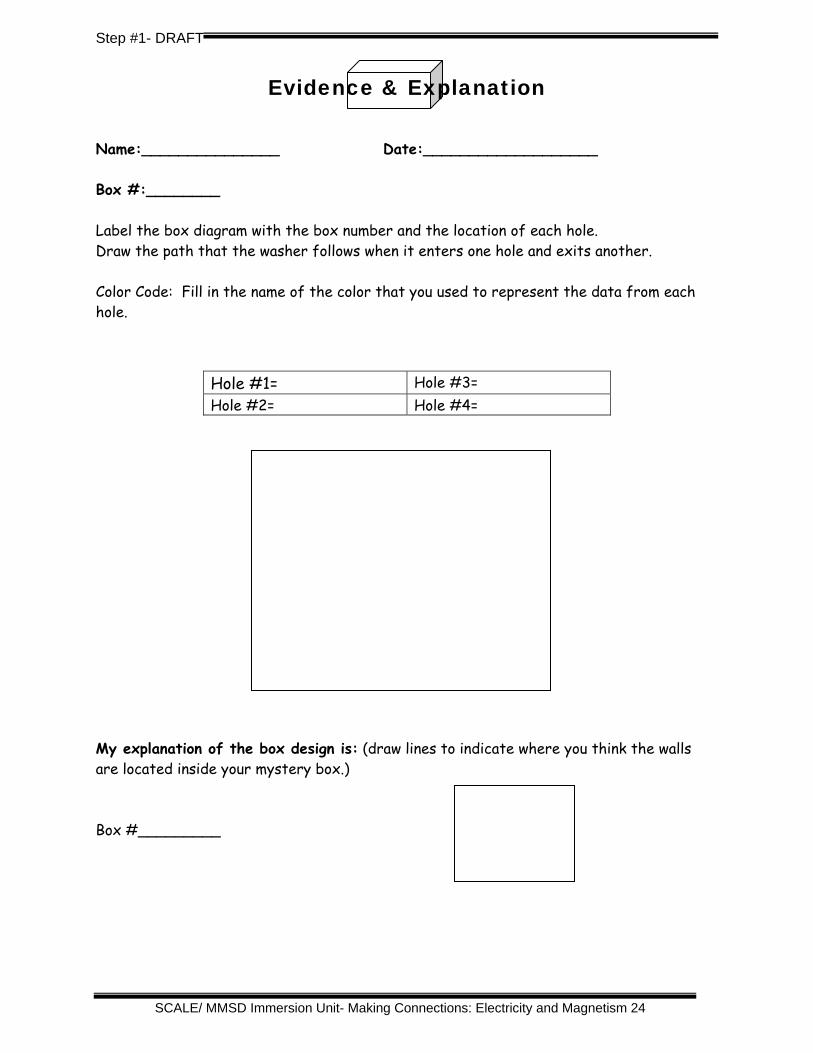
Evidence & Explanation
Name:_______________ Date:___________________ Box #:________ Label the box diagram with the box number and the location of each hole. Draw the path that the washer follows when it enters one hole and exits another.
Color Code: Fill in the name of the color that you used to represent the data from each hole.
My explanation of the box design is: (draw lines to indicate where you think the walls are located inside your mystery box.) Box #_________
Hole #1= Hole #3= Hole #2= Hole #4=
Step #1- DRAFT
SCALE/ MMSD Immersion Unit- Making Connections: Electricity and Magnetism 25
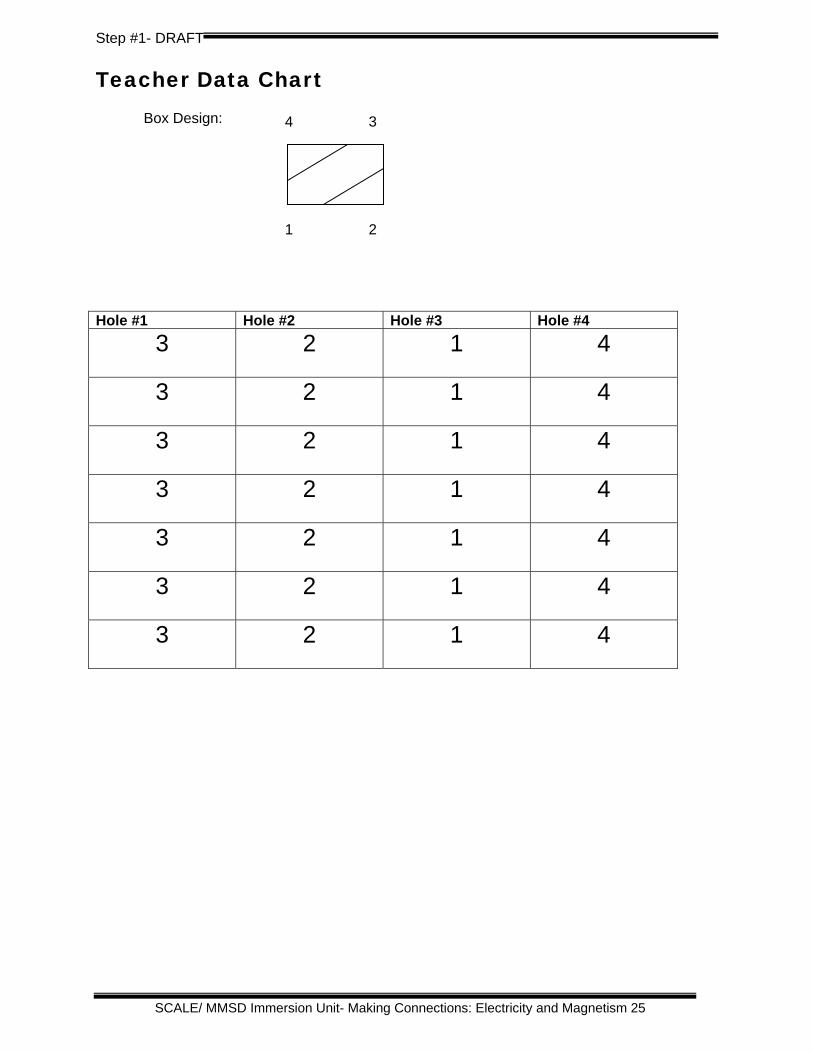
Teacher Data Chart Box Design:
Hole #1 Hole #2 Hole #3 Hole #4
3 2 1 4
3 2 1 4
3 2 1 4
3 2 1 4
3 2 1 4
3 2 1 4
3 2 1 4
4 3
1 2

Step #2- DRAFT
SCALE/ MMSD Immersion Unit- Making Connections: Electricity and Magnetism 26
Unit Key Concept: Electricity and Magnetism can influence one another.
Step #2 Overview Students read a FOSS Science Story titled “How Electromagnetism Stopped a War”. This story will introduce the students to Jean-Eugene Robert Houdin a famous 19th century magician. The students will learn how Houdin used his knowledge about science and magic to create a “mystery box”. This story will help the students think about the relationships between electricity and magnetism and how science content can be applied to the design of a mystery box.
Step #2 Lessons IMMERSION LESSON 1: HISTORY OF MAGIC (60 minutes)
Current electricity produces a magnetic field and this phenomenon has been applied to many different technologies.
Step #2- DRAFT
SCALE/ MMSD Immersion Unit- Making Connections: Electricity and Magnetism 27
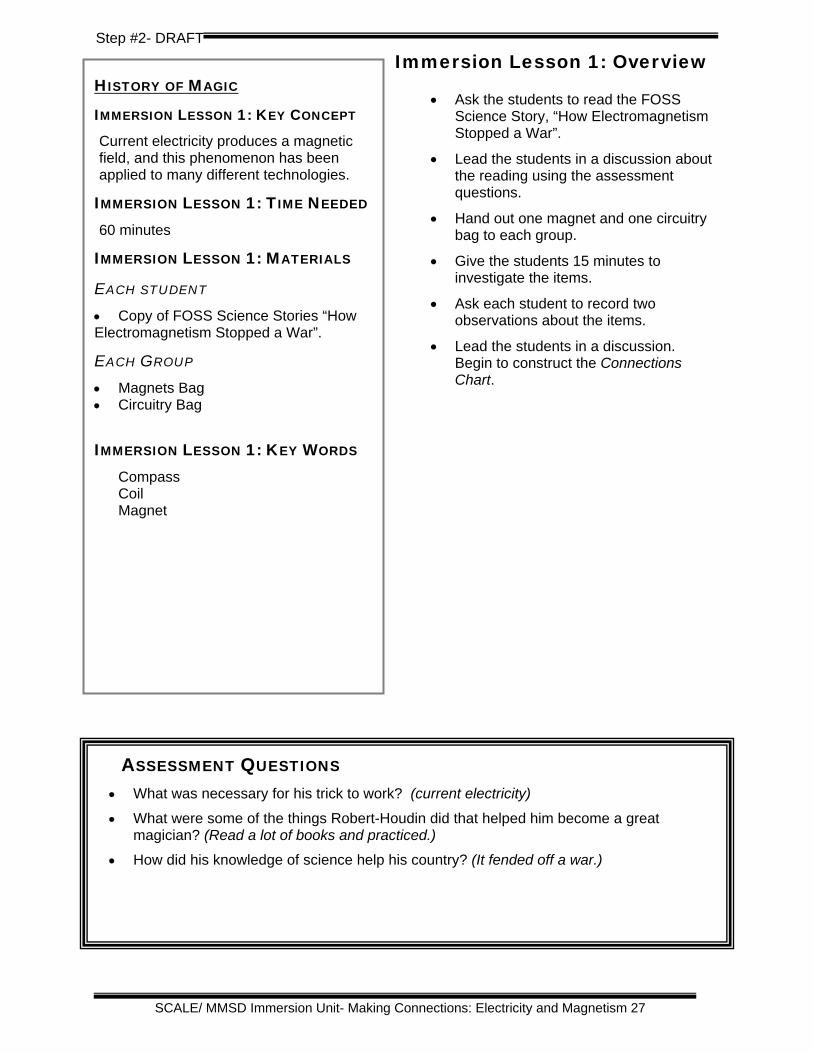
Immersion Lesson 1: Overview
• Ask the students to read the FOSS Science Story, “How Electromagnetism Stopped a War”.
• Lead the students in a discussion about the reading using the assessment questions.
• Hand out one magnet and one circuitry bag to each group.
• Give the students 15 minutes to investigate the items.
• Ask each student to record two observations about the items.
• Lead the students in a discussion. Begin to construct the Connections Chart.
HISTORY OF MAGIC
IMMERSION LESSON 1: KEY CONCEPT
Current electricity produces a magnetic field, and this phenomenon has been applied to many different technologies.
IMMERSION LESSON 1: TIME NEEDED 60 minutes
IMMERSION LESSON 1: MATERIALS
EACH STUDENT
• Copy of FOSS Science Stories “How Electromagnetism Stopped a War”.
EACH GROUP
• Magnets Bag • Circuitry Bag
IMMERSION LESSON 1: KEY WORDS Compass Coil Magnet
ASSESSMENT QUESTIONS • What was necessary for his trick to work? (current electricity)
• What were some of the things Robert-Houdin did that helped him become a great magician? (Read a lot of books and practiced.)
• How did his knowledge of science help his country? (It fended off a war.)
Step #2- DRAFT
SCALE/ MMSD Immersion Unit- Making Connections: Electricity and Magnetism 28
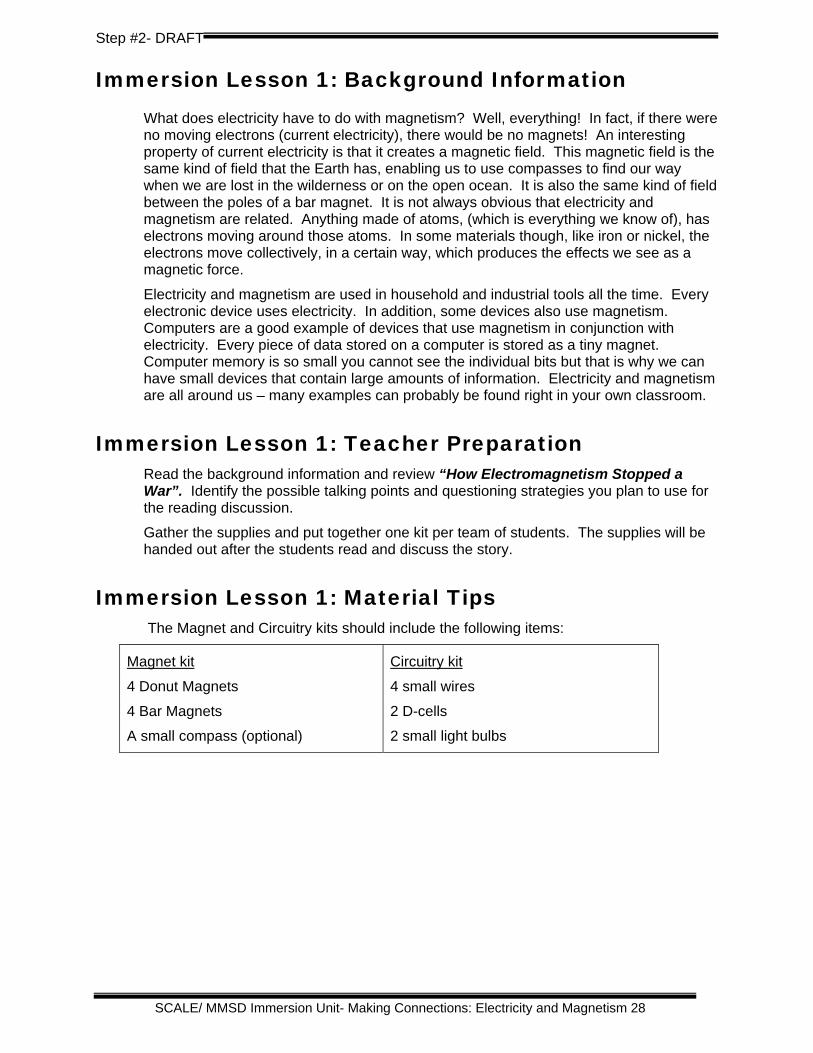
Immersion Lesson 1: Background Information What does electricity have to do with magnetism? Well, everything! In fact, if there were no moving electrons (current electricity), there would be no magnets! An interesting property of current electricity is that it creates a magnetic field. This magnetic field is the same kind of field that the Earth has, enabling us to use compasses to find our way when we are lost in the wilderness or on the open ocean. It is also the same kind of field between the poles of a bar magnet. It is not always obvious that electricity and magnetism are related. Anything made of atoms, (which is everything we know of), has electrons moving around those atoms. In some materials though, like iron or nickel, the electrons move collectively, in a certain way, which produces the effects we see as a magnetic force.
Electricity and magnetism are used in household and industrial tools all the time. Every electronic device uses electricity. In addition, some devices also use magnetism. Computers are a good example of devices that use magnetism in conjunction with electricity. Every piece of data stored on a computer is stored as a tiny magnet. Computer memory is so small you cannot see the individual bits but that is why we can have small devices that contain large amounts of information. Electricity and magnetism are all around us – many examples can probably be found right in your own classroom.
Immersion Lesson 1: Teacher Preparation Read the background information and review “How Electromagnetism Stopped a War”. Identify the possible talking points and questioning strategies you plan to use for the reading discussion.
Gather the supplies and put together one kit per team of students. The supplies will be handed out after the students read and discuss the story.
Immersion Lesson 1: Material Tips The Magnet and Circuitry kits should include the following items:
Magnet kit
4 Donut Magnets
4 Bar Magnets
A small compass (optional)
Circuitry kit
4 small wires
2 D-cells
2 small light bulbs

Step #2- DRAFT
SCALE/ MMSD Immersion Unit- Making Connections: Electricity and Magnetism 29
Immersion Lesson 1: Classroom Implementation Guide
The following guide supports the basic procedures that were described in the Lesson Overview section. This Implementation Guide provides one example of how we recommend teaching this lesson.
Section Guide
TTEEAACCHHEERR NNOOTTEESS
Read Ask the students to think about experiences with the mystery boxes. How did they figure out the box design? Can they imagine creating their own mystery box?
Tell them that they are going to read a story about a man that used what he knew about magnetism and electricity to create his own mystery box.
Hand out copies of the article to each student and ask them to read it or ask them to find the story in their FOSS Science Stories book.
Section Guide
TTEEAACCHHEERR NNOOTTEESS
Discuss Engage the students in a class discussion about the reading.
Ask the students:
• What was necessary for his trick to work? (current electricity)
• What were some of the things Robert-Houdin did that helped him become a great magician? (Read a lot of books and practiced.)
• How did his knowledge of science help his country? (It fended off a war.)
Do not delve into a discussion about the intricacies of an electromagnet or ask the students to answer the questions on Page 23 in their FOSS Science Stories book. They have not had enough experience with Electricity and Magnetism yet to answer the questions. They will be given the opportunity to re-examine this article later on in the unit, after they have built their own electromagnets.
The purpose of having your students read this story is to encourage them to think about electricity and magnetism as
Step #2- DRAFT
SCALE/ MMSD Immersion Unit- Making Connections: Electricity and Magnetism 30
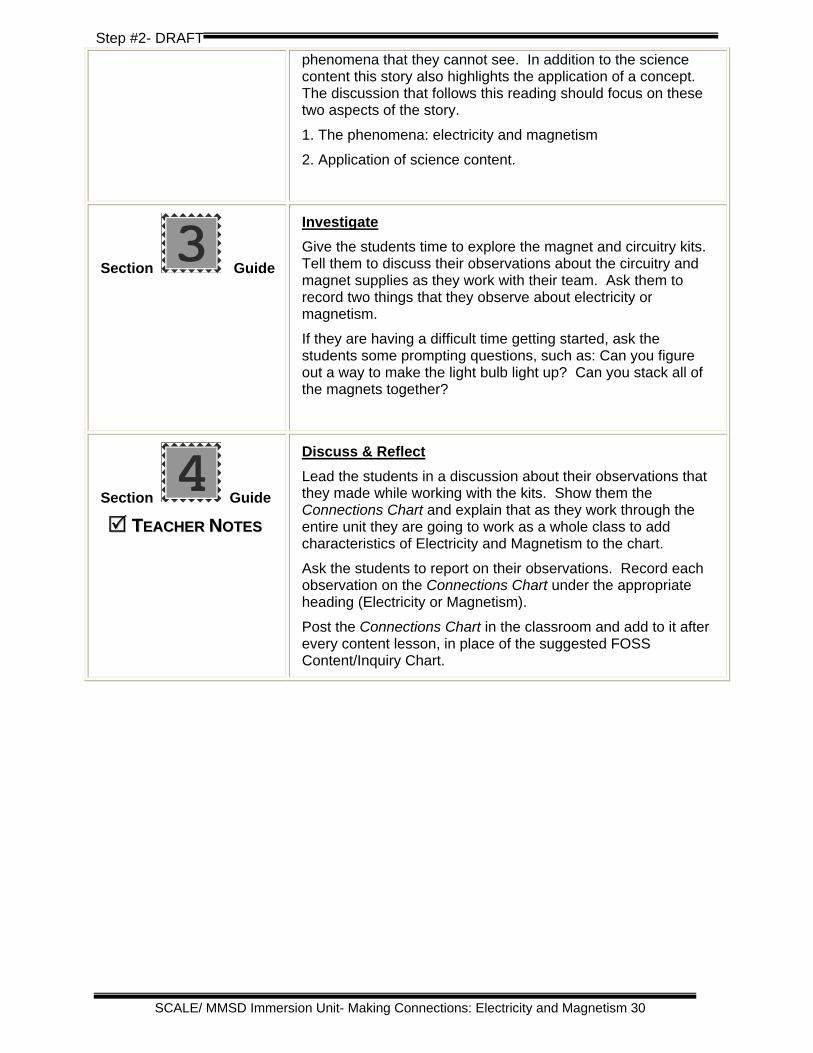
phenomena that they cannot see. In addition to the science content this story also highlights the application of a concept. The discussion that follows this reading should focus on these two aspects of the story.
1. The phenomena: electricity and magnetism
2. Application of science content.
Section Guide
Investigate Give the students time to explore the magnet and circuitry kits. Tell them to discuss their observations about the circuitry and magnet supplies as they work with their team. Ask them to record two things that they observe about electricity or magnetism.
If they are having a difficult time getting started, ask the students some prompting questions, such as: Can you figure out a way to make the light bulb light up? Can you stack all of the magnets together?
Section Guide
TTEEAACCHHEERR NNOOTTEESS
Discuss & Reflect Lead the students in a discussion about their observations that they made while working with the kits. Show them the Connections Chart and explain that as they work through the entire unit they are going to work as a whole class to add characteristics of Electricity and Magnetism to the chart.
Ask the students to report on their observations. Record each observation on the Connections Chart under the appropriate heading (Electricity or Magnetism).
Post the Connections Chart in the classroom and add to it after every content lesson, in place of the suggested FOSS Content/Inquiry Chart.

Step #2- DRAFT
SCALE/ MMSD Immersion Unit- Making Connections: Electricity and Magnetism 31
Sample Connections Chart Asking the students to record their observations after every lesson will help them synthesize their experiences. The Connections Chart should be added to after each lesson to support students in making connections that build understanding.
As the students continue to work through the unit and the individual lesson, they will make observations about both electricity and magnetism that they can add to the chart. Let the students decide under which side they want to list the observations. It will become apparent, after some experience with the chart, that it is often difficult to distinguish between the two phenomena. This will happen with the introduction of electromagnetism later in the unit. At this point let the students decide where they want to include it, even if that means writing it under both categories.
Step/ Lesson
Electricity Step/ Lesson
Magnetism
2/1 “Wires carrying current create a magnetic field.”
2/1 Magnets stick together.
2/1 “When electricity passed through the coil, the iron bar became a magnet.”
2/1 Magnets can attract or repel other magnets.
Step #3- DRAFT
SCALE/ MMSD Immersion Unit- Making Connections: Electricity and Magnetism 32
Unit Key Concept: Electricity and magnetism can influence one another.
Step #3 Overview The students explore basic circuitry and current electricity in this step. Using wires, D-cells and light bulbs the students investigate the flow of electricity in a simple circuit and additional pathways in series and parallel circuits.
Note that Lessons 3 and 4 can be taught using the FOSS instructional module or can be taught using the alternate implementation guide inserted between the overview pages of lesson 3 and lesson 4.
Step #3 Lessons
LESSON 1: FOSS INVESTIGATION 2, PART 1 “LIGHTING A BULB” (45 minutes)
A circuit is a pathway through which electric current flows.
LESSON 2: FOSS INVESTIGATION 2, PART 2 “MAKING A MOTOR
RUN” (45 minutes)
A closed circuit allows electricity to flow; an open circuit does not.
LESSON 3: FOSS INVESTIGATION 3, PART 1 “BUILDING SERIES
CIRCUITS” (45 minutes)
A circuit with only one pathway for current flow is a series circuit.
LESSON 4: FOSS INVESTIGATION 4, PART 2 “BUILDING PARALLEL
CIRCUITS” (45minutes)
A circuit that splits into two or more pathways before coming together at the battery is a parallel circuit.
Step #3- DRAFT
SCALE/ MMSD Immersion Unit- Making Connections: Electricity and Magnetism 33
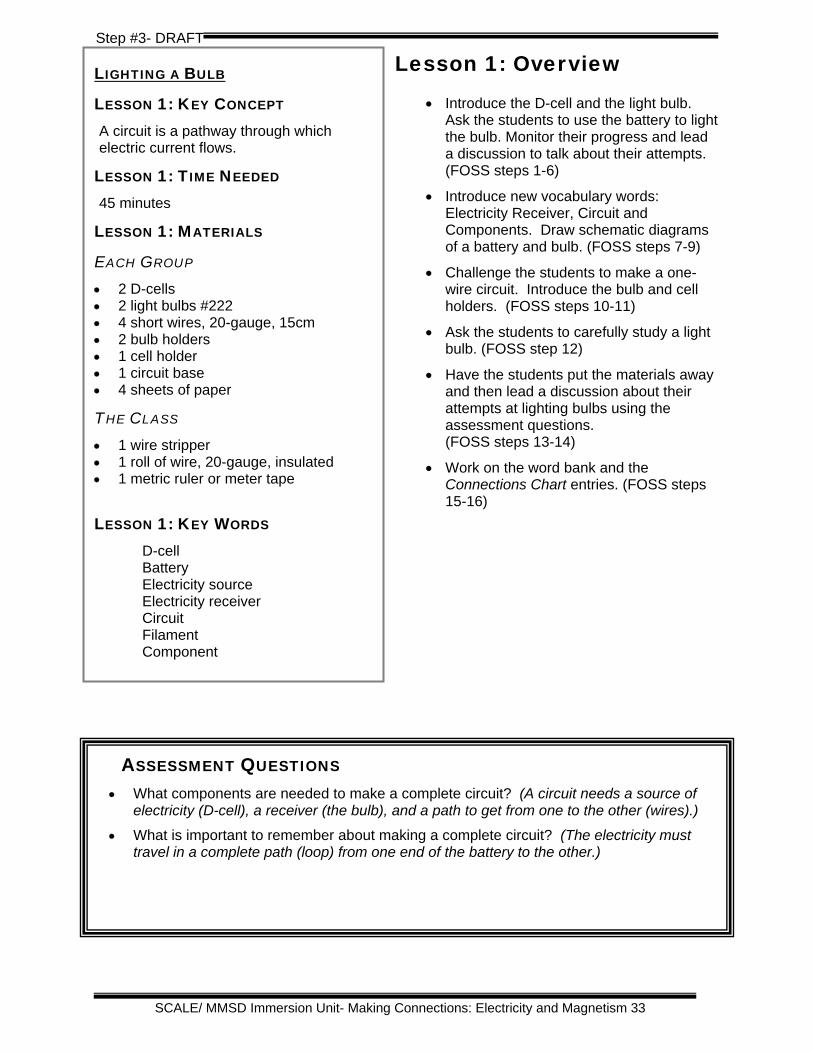
Lesson 1: Overview
• Introduce the D-cell and the light bulb. Ask the students to use the battery to light the bulb. Monitor their progress and lead a discussion to talk about their attempts. (FOSS steps 1-6)
• Introduce new vocabulary words: Electricity Receiver, Circuit and Components. Draw schematic diagrams of a battery and bulb. (FOSS steps 7-9)
• Challenge the students to make a one-wire circuit. Introduce the bulb and cell holders. (FOSS steps 10-11)
• Ask the students to carefully study a light bulb. (FOSS step 12)
• Have the students put the materials away and then lead a discussion about their attempts at lighting bulbs using the assessment questions. (FOSS steps 13-14)
• Work on the word bank and the Connections Chart entries. (FOSS steps 15-16)
LIGHTING A BULB
LESSON 1: KEY CONCEPT A circuit is a pathway through which electric current flows.
LESSON 1: TIME NEEDED 45 minutes
LESSON 1: MATERIALS
EACH GROUP
• 2 D-cells • 2 light bulbs #222 • 4 short wires, 20-gauge, 15cm • 2 bulb holders • 1 cell holder • 1 circuit base • 4 sheets of paper
THE CLASS
• 1 wire stripper • 1 roll of wire, 20-gauge, insulated • 1 metric ruler or meter tape
LESSON 1: KEY WORDS D-cell Battery Electricity source Electricity receiver Circuit Filament Component
ASSESSMENT QUESTIONS • What components are needed to make a complete circuit? (A circuit needs a source of
electricity (D-cell), a receiver (the bulb), and a path to get from one to the other (wires).)
• What is important to remember about making a complete circuit? (The electricity must travel in a complete path (loop) from one end of the battery to the other.)

Step #3- DRAFT
SCALE/ MMSD Immersion Unit- Making Connections: Electricity and Magnetism 34
Lesson 1: Background Information Please reference the background information contained in the FOSS Module, Investigation 2, pages 4-7.
ADDITIONAL BACKGROUND INFORMATION Electric circuits are pathways for electrons to move from a source of energy (one terminal of a battery) to a sink of energy (a light bulb or resistor). This idea is applicable to series or parallel circuits which are both discussed in later lessons.
(Battery) (Wire) (Light Bulb/resistor)
Electrons will not move (there will be no current) if there is no complete conducting pathway or loop from one terminal of a battery to the other. Therefore, wires must connect a source of energy to an energy sink and then loop back to the opposite end of the source (battery).
Light bulb design: An incandescent light bulb is simply a coil of wire, called a filament (usually made of tungsten,) that is mounted inside a glass casing. The bulb is a resistor to the current electricity, so it prevents current from flowing as freely as it would through a perfect conductor. If there is no other way for electricity to flow then the resistance in the bulb turns electrical energy into heat. So much heat is generated that the wire starts to emit light.
To make light bulbs convenient to use, they typically have a threaded bottom which screws into a socket that holds it in place. The threads are embedded in a metal casing which acts as a conducting pathway to one side of the filament. The other side of the filament is connected to the very bottom of the bulb, below the threads. Contact to battery terminals needs to be made to each part of the base (side and bottom) if current is to flow.
Lesson 1: Teacher Preparation Please see the advance preparation contained in the FOSS Module, Investigation 2, pages 8-9.
Energy Source Pathway for Energy Flow Energy Sink

Step #3- DRAFT
SCALE/ MMSD Immersion Unit- Making Connections: Electricity and Magnetism 35
Lesson 1: Material Tips Caution Short Circuits! If the students complain of hot wires, ask them to put the wires down for one minute to let them cool off. In addition, it may be helpful to ask the students to draw a diagram indicating where they touched the wires on the light bulb. During the next trial ask the students to look at their designs and change one thing to try to avoid creating another short circuit. By changing only one thing they can begin to deduce what placement of the wire causes a short circuit on their own. There is not enough energy in a D-cell to be harmful, but please be advised that a short circuit will generate heat quickly and students should let wires cool before trying to reconnect the circuit.
A short circuit exists when there is no energy sink (resistor or light bulb, for example) in the current pathway. If you connect a wire from one terminal of a battery directly to the other, then you will have a nearly infinite (very large) amount of current flowing through that wire. The wire will heat up quickly. If a student does not understand the design of a light bulb they can easily cause a short circuit. For example, when a student connects both wires from a D-cell to a light bulb and touches both of the wires to the bottom of the light bulb, the electric charges move right from one wire to the other without entering the light bulb. This is called a short circuit, which results in a hot wire.

Step #3- DRAFT
SCALE/ MMSD Immersion Unit- Making Connections: Electricity and Magnetism 36
Lesson 2: Overview
• Review the concepts from the previous lesson. Introduce and distribute the motor and D-cells to the students. Ask the students to try to make the motors run. Have the students share their trials. (FOSS steps 1-4)
• Introduce the circuit base and reinforce the concept of a circuit. Demonstrate how a switch works and distribute materials to the students so they can test out the switches. (FOSS steps 5-8)
• Lead a discussion about closed and open circuits. (FOSS step 9)
• Give students bulbs to use with their switches. Ask the students to compare the two different circuits they created. (FOSS steps 10-11)
• Using the Drawings and Schematics worksheet and ask each student to draw the circuit they created with the battery, switch and light bulb. Lead a discussion about these drawings. Encourage the students to make their own drawings. (FOSS steps 12-15)
• Assess the students’ progress by asking them to fill out The Flow of Electricity worksheet and creating the word bank and Connections Chart entries. Lead a discussion using the assessment questions. (FOSS steps 16-18)
MAKING A MOTOR RUN
LESSON 2: KEY CONCEPT A closed circuit allows electricity to flow; an open circuit does not.
LESSON 2: TIME NEEDED 45 minutes
LESSON 2: MATERIALS
EACH GROUP
• 1 electric motor • 1 D-cell • 1 circuit base • 1 switch • 1 short wire, 20-gauge, 15cm • 1 light bulb in holder • 2 additional wires, 30cm or 15cm • 4 student sheets no.8 called Drawings and Schematics (in FOSS module) • 4 student sheets The Flow of Electricity: Reflection
THE CLASS
• 1 wire stripper • 1 roll of wire, 20-gauge, insulated • 1 metric ruler or meter tape • masking tape
LESSON 2: KEY WORDS Circuit base Fahnstock clip Switch Open circuit
ASSESSMENT QUESTIONS • Which part of the circuit was the receiver in this lesson? (The motor was the electricity
receiver that produced motion.)
• Explain how a switch in a circuit works. (A switch is a device that opens and closes the circuit.)
• Why do schematic drawings use special symbols? (They have to agree on a set of symbols, so everyone understands what they mean.)
• What are schematic diagrams used to represent? (Schematic drawings represent circuits.)
Step #3- DRAFT
SCALE/ MMSD Immersion Unit- Making Connections: Electricity and Magnetism 37
Lesson 2: Background Information Please reference the background information contained in the FOSS Module, Investigation 2, pages 4-7.
Lesson 2: Teacher Preparation Please see the advance preparation contained in the FOSS Module, Investigation 2, pages 14-15.

Step #3- DRAFT
SCALE/ MMSD Immersion Unit- Making Connections: Electricity and Magnetism 38
The Flow of Electricity: Reflection Name:_______________________________ Date:_________________________
Connect the D-cell to the bulb above.
Use arrows to show how the electricity flows. Use large and small arrows if you need to show different amounts of electricity. Describe below how electricity flows in your drawing above.
Step #3- DRAFT
SCALE/ MMSD Immersion Unit- Making Connections: Electricity and Magnetism 39
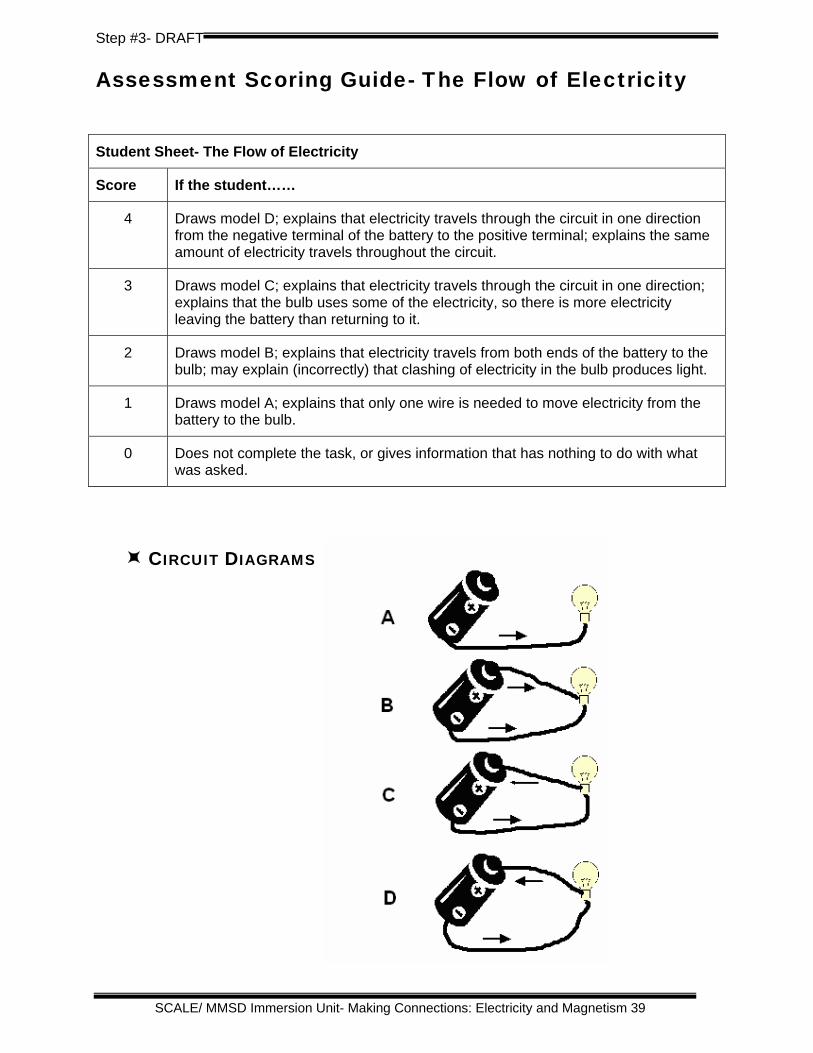
Assessment Scoring Guide- The Flow of Electricity
Student Sheet- The Flow of Electricity
Score If the student……
4 Draws model D; explains that electricity travels through the circuit in one direction from the negative terminal of the battery to the positive terminal; explains the same amount of electricity travels throughout the circuit.
3 Draws model C; explains that electricity travels through the circuit in one direction; explains that the bulb uses some of the electricity, so there is more electricity leaving the battery than returning to it.
2 Draws model B; explains that electricity travels from both ends of the battery to the bulb; may explain (incorrectly) that clashing of electricity in the bulb produces light.
1 Draws model A; explains that only one wire is needed to move electricity from the battery to the bulb.
0 Does not complete the task, or gives information that has nothing to do with what was asked.
CIRCUIT DIAGRAMS

Step #3- DRAFT
SCALE/ MMSD Immersion Unit- Making Connections: Electricity and Magnetism 40
Lesson 3: Overview
• Review the previous lesson, including the schematic diagrams. (FOSS step 1)
• Challenge the students to light a two-bulb circuit. Before they begin, ask them to draw a two-bulb circuit using the Advanced Connections worksheet. Give the materials to the students and allow them time to work on creating the circuit. (FOSS steps 2-4)
• Introduce the vocabulary series circuit. Ask students about their experiences with series circuits and ask them to think about and share reasons for having dim lights. (FOSS steps 5-7)
• Propose solving the dim light problem. Give the students an additional D-cell and wire and ask them to work on solving the problem. Discuss their solutions and the correct orientation of the two D-cell batteries. (FOSS steps 8-10)
• Have the students record their successful trials on the Advanced Connections worksheets and if time permits ask the students to use the materials to create circuits to run both a light bulb and a motor. Lead the students in a discussion using the assessment questions. (FOSS steps 11-12)
• Create word bank and Connections Chart entries. (FOSS step 13)
BUILDING SERIES CIRCUITS
LESSON 3: KEY CONCEPT A circuit with only one pathway for current flow is a series circuit.
LESSON 3: TIME NEEDED 45 minutes
LESSON 3: MATERIALS
EACH GROUP
• 1 circuit base • 2 D-cells • 1 cell holder • 1 switch • 2 light bulbs in holders • 1 electric motor (optional) • 2 long wires, 20-gauge, 30cm • 4 short wires, 20-gauge, 15cm • student sheets no.15 called Advanced Connections
THE CLASS
• 1 wire stripper
LESSON 3: KEY WORDS Series circuit Component
ASSESSMENT QUESTIONS • Explain what makes some circuits series circuits. (A series circuit is a circuit in which all
the components are connected in one big loop so there is only one pathway for electricity to flow.)
• Why do you think the lights are dim, in a circuit, when only one battery is used? (Accept all reasonable ideas. For example, components share the energy in a series circuit so the bulbs are dim.)
Step #3- DRAFT
SCALE/ MMSD Immersion Unit- Making Connections: Electricity and Magnetism 41
Lesson 3: Background Information Please reference the background information contained in the FOSS Module, Investigation 3, pages 4-9.
ADDITIONAL BACKGROUND INFORMATION Electrons in current electricity are on a one-way mission – to get from the negative terminal of a battery or voltage source to the positive terminal of the source. Electrons always follow the path of least resistance. Series circuits are nothing more than one continuous, closed loop which provides a path for electrons to get from one terminal to the other. There may be obstacles along the way (like a light bulb) but as long as there are wires (conductors) connecting these components in a single pathway, then it is a series circuit.
Lesson 3: Teacher Preparation Please see the advance preparation contained in the FOSS Module, Investigation 3, pages 10-11.
This lesson can be implemented as stated in the FOSS module or it can be implemented as suggested in the Alternate Implementation Guide on the following pages. The alternate implementation combines the FOSS lessons “Building Series Circuits” and “Building Parallel Circuits”.
Step #3- DRAFT
SCALE/ MMSD Immersion Unit- Making Connections: Electricity and Magnetism 42
Lesson 3 & 4: Alternate Implementation Guide The following Alternate Implementation Guide was written to combine two FOSS parts into one lesson. It combines “Building Series Circuits” and “Building Parallel Circuits”.
Section Guide
TTEEAACCHHEERR NNOOTTEESS
Review Ask the students to take out their schematic diagrams of circuits.
Ask them to review their diagrams with their team and come to a clear group consensus about what parts of a circuit need to be connected to ensure operability.
Ask one team to volunteer to draw their schematic diagram on the board. Ask the students to think back to the last lesson, which way does the electricity flow? Draw arrows on the schematic diagram to indicate the flow of electricity.
Section Guide
TTEEAACCHHEERR NNOOTTEESS
Investigate Tell the students that you are going to give them 20 minutes to try to light more than one light bulb with only one battery. Give each group 4 short wires, 2 long wires, three light bulbs and one D-cell. Tell the students that these are the materials available to them, but they don’t have to use all the materials in their circuits. Encourage the students to try to come up with as many different ways as possible to light multiple bulbs.
When they figure out one way to light two or more bulbs ask them to record the design by drawing a schematic diagram of the circuits.
After they have designed one successful circuit ask each group to change one thing about the circuit: add one more bulb or one more wire, and create another working circuit. Each group should record their second successful design in the form of another schematic diagram and record an observation about the new circuit. Do the two circuits have a different effect on the light bulbs?

Step #3- DRAFT
SCALE/ MMSD Immersion Unit- Making Connections: Electricity and Magnetism 43
Section Guide
TTEEAACCHHEERR NNOOTTEESS
Discuss Bring the class back together and ask each team to report on one of their solutions and draw their schematic diagram on the board, complete with arrows signifying the direction that they think the electricity is flowing.
As a whole class, discuss the drawings that the students put on the board.
• Are they all the same?
• If not, what differences do you notice? (Most likely there will be examples of both series and parallel circuits on the board.)
If there are not examples of both series and parallel circuits ask the students to return to their work groups and try to create a new circuit that includes either an odd or an even number of wires, whatever is opposite of their original drawing on the board.
When there are examples of both series and parallel circuits on the board ask the students to describe the differences between the circuits. You can guide them by asking them to count the number of wires, bulbs, batteries, etc.
Put the drawings into two categories based on the components and whether or not they are series or parallel circuits. Name and describe the two different types of circuits for the students, using their diagrams to illustrate the differences. Ask the students to return to their work stations and create both a series and parallel circuit and draw a schematic diagram of both types. Walk around the room and use a checklist to make sure each student is able to demonstrate a working knowledge of both types of circuits.
Lead the students in a discussion by asking the following questions:
• Explain what makes some circuits series circuits. (A series circuit is a circuit in which all the components are connected in one big loop so there is only one pathway for electricity to flow.)
• Why do you think the lights are dim, in your circuit, when only one battery is used? (Accept all reasonable ideas. For example, components share the energy in a series circuit so the bulbs are dim.)
• How does electricity flow through a parallel circuit? (A parallel circuit provides a direct path for electricity to serve each component.)
• Which type of circuit can run more components from one D-cell? Why is that so? (Many more components are connected in parallel, because each has a direct pathway to the source.)
Step #3- DRAFT
SCALE/ MMSD Immersion Unit- Making Connections: Electricity and Magnetism 44
Lesson 4: Overview
• Review series circuits and then introduce a new bulb challenge. Ask the students if they can light two bulbs brightly with just one battery. When the students have completed the task ask them to draw a schematic of the circuit and discuss their successes. (FOSS steps 1-4)
• Introduce the phrase “parallel circuit” and work with the students to draw a schematic on part 4 of the Advanced Connections worksheet. (FOSS steps 5-6)
• Lead a discussion to generate a list of class questions or investigation ideas for circuits. Allow each group to choose their own investigation idea from the list and conduct an investigation. (FOSS steps 7-8)
• Review both kinds of circuits and ask the students to fill out The Flow of Electricity: Reflection response sheet. Lead the students in a discussion using the assessment questions. Make word bank and Connections Chart entries. (FOSS steps 9-13)
BUILDING PARALLEL CIRCUITS
LESSON 4: KEY CONCEPT A circuit that splits into two or more pathways before coming together at the battery is a parallel circuit.
LESSON 4: TIME NEEDED 45 minutes
LESSON 4: MATERIALS
EACH GROUP
• 1 circuit base • 2 D-cells • 1 cell holder • 1 switch • 2 light bulbs in holders • 1 electric motor (optional) • 2 long wires, 20-gauge, 30cm • 4 short wires, 20-gauge, 15cm • 4 student sheets no.15 (FOSS) called Advanced Connections
THE CLASS
• 1 wire stripper
LESSON 4: KEY WORDS Parallel circuit
ASSESSMENT QUESTIONS • How does electricity flow through a parallel circuit? (A parallel circuit provides a direct
path for electricity to serve each component.)
• Which type of circuit can run more components from one D-cell? Why is that so? (Many more components are connected in parallel, because each has a direct pathway to the source.)
Step #3- DRAFT
SCALE/ MMSD Immersion Unit- Making Connections: Electricity and Magnetism 45
Lesson 4: Background Information Please reference the background information contained in the FOSS Module, Investigation 3, pages 4-9.
ADDITIONAL BACKGROUND INFORMATION As stated in Lesson 3, electrons in current electricity are on a one-way mission – to get from the negative terminal of a battery or voltage source to the positive terminal. They always do this taking the path of least resistance. The electrons will always return in a closed loop back to the positive terminal of the voltage source, but in a parallel circuit electrons can travel down more than one path.
There still may be obstacles in these loops like light bulbs. In fact, it is the relative resistance of two or more loops that determines which way an electron will travel or in other words, how much current will pass through a given loop. Many light bulbs can be lit with one battery even though less current is flowing through each individual bulb. In a parallel circuit current electricity is split between multiple pathways.
Lesson 4: Teacher Preparation Please see the advance preparation contained in the FOSS Module, Investigation 3, pages 16-17.
This lesson can be implemented as stated in the FOSS module or it can be implemented as suggested in the Alternate Implementation Guide in the preceding lesson. The alternate implementation combines “Building Series Circuits” and “Building Parallel Circuits”.

Step #3- DRAFT
SCALE/ MMSD Immersion Unit- Making Connections: Electricity and Magnetism 46
Step #3 Connections Chart
The following chart gives a few examples of possible observations that students could suggest for the chart after working through the lessons in this step. Work with the class to help them brainstorm their observations after each lesson and ask the students to add connections, in their own words.
Step/ Lesson
Electricity Step/ Lesson
Magnetism
3/1 A circuit needs a d-cell, a bulb and a pathway.
3/1 Electricity needs a complete loop.
3/2 A switch interrupts the flow of current electricity.
3/3 A series circuit only has one pathway.
3/4 A parallel circuit has more than one pathway.
3/4 The light bulbs are brighter in a parallel circuit than in a series circuit.
Step #4- DRAFT
SCALE/ MMSD Immersion Unit- Making Connections: Electricity and Magnetism 47
Unit Key Concept: Electricity and magnetism can influence one another.
Step # 4 Overview In this step the students explore the forces of attraction and repulsion in both static electricity and magnetism. They will deepen their understanding of these forces by learning about electric charges and setting up an investigation to manipulate the strength of repulsion between two electrically charged balloons.
Step # 4 Lessons IMMERSION LESSON 1: STATIC CONNECTIONS (45 MINUTES)
Like charges repel each other and unlike charges attract each other.
IMMERSION LESSON 2: MAGNETIC FORCE (60 MINUTES) Magnets attract or repel one another. The magnetic force causes magnetic interactions.
IMMERSION LESSON 3: WHAT IS FORCE? (60 MINUTES)
Forces are invisible, but we can see the effect of forces.

Step #4- DRAFT
SCALE/ MMSD Immersion Unit- Making Connections: Electricity and Magnetism 48
Immersion Lesson 1: Overview
• Begin with a demonstration of static electricity. Using two hanging balloons, rub one of the balloons on a sweater or a piece of fabric. Rub it approximately 15 times in the same direction. Slowly lower the balloon and let it hang next to the other balloon. Repeat this procedure with the other balloon and discuss student observations.
• Ask the students to observe what happens when the balloons are left hanging next to one another. Place your hand in the space between the two balloons and ask the students to share their observations.
• Give each team the materials to try the demonstration.
• Allow the students 10 minutes to recreate the demonstration and record their observations.
• Ask the students to read the FOSS Science Story “Making Static Electricity”.
• Lead a discussion about static electricity. Using the overheads, explain the transfer of charges that occurs with static electricity.
• Ask the students to relate their own experiences with the phenomena of static electricity.
• Lead a discussion using the assessment questions. Ask the students to write a one paragraph summary of their observations of static electricity.
STATIC CONNECTIONS
IMMERSION LESSON 1: KEY CONCEPT
Like charges repel each other and unlike charges attract each other.
IMMERSION LESSON 1: TIME NEEDED 45 minutes
IMMERSION LESSON 1: MATERIALS
EACH GROUP
• 2 balloons • 2 pieces of string • tape
IMMERSION LESSON 1: KEY WORDS Static electricity Attraction Repulsion Charge
ASSESSMENT QUESTIONS • How did the transfer of negative charges affect the balloons? (They repelled one another.)
• What word can you use to describe two objects that push away from one another? (Repel)
• What do you think will happen to the balloons if you leave them hanging for the entire school day? Overnight? (Accept all predictions. The charges in the balloons will eventually balance out and the balloons will come back together. For example, static cling does not last forever.)

Step #4- DRAFT
SCALE/ MMSD Immersion Unit- Making Connections: Electricity and Magnetism 49
Immersion Lesson 1: Background Information We have many common experiences with static electricity. Static electricity is responsible for creating lightning in thunderstorms and for the shock you get when touching a metal doorknob or file cabinet after walking across a carpet on a dry day. Each of these cases involves the same phenomenon: separation of electric charges.
In thunderstorms, for example, there is a separation of charge within the clouds and between the clouds and the ground. Raindrops and other particles in the air cause electrons (negatively charged parts of an atom) to concentrate at one location, leaving positively charged atoms at another location. Since opposite charges attract, these separated charges are naturally drawn back together. The result is what we observe as a bolt of lightning – a giant spark which neutralizes the two separate regions of charge when the air in between cannot hold them apart.
The same thing happens when walking across a carpet on a dry day. Charge builds up on your body. The build-up of charge is neutralized when your finger gets close to the door knob. When the air between your finger and the knob can no longer keep the charges separated you see (and feel!) a spark.
Static electricity only manifests itself as a spark when the material between the separated charges (the air in the examples above) can no longer hold them apart. We can also see the effects of static electricity in static cling on clothes and when we rub balloons on wool and stick them to the wall. The important lesson that we learn by studying static electricity is that electric charges are of two kinds, positive and negative. Opposite charges are attracted to each other and like charges repel each other.
Here are some ways to think about electrons are and how they relate to electricity.
Atoms contain positively-charged protons and negatively-charged electrons. The simplest way to think of electrons is to consider them as tiny particles that orbit atomic nuclei, much like the Moon orbits the Earth. In most cases, electrons circle around the nucleus and never get any closer or farther away. However, if some energy is supplied, electrons can be pushed or pulled out of orbit.
If some electrons are pulled out of orbit, then you have a separation of positive and negative charge. This is what happens when you walk across a carpet with rubber soled shoes; your shoes take negative charges from the carpet and leave the positive charges behind. The separation of charge is called static electricity.
Electrons can be moved by supplying electrical energy from a battery. This is due to the electrostatic force: since electrons are negatively charged, anything positive (like an atom nucleus) will attract them and anything negative (like a bunch of other electrons) will repel them. A battery attracts and repels electrons in a circuit. The resulting flow of electrons is what we call current electricity.
Magnetism is caused by electrons in motion. In most materials, the electrons in all of the atoms are moving around their orbits in different orientations. However, in some materials like iron or nickel, the electrons move around their respective atoms in the same direction. This collective motion adds up to create a little magnet inside the material. If many of these little magnets (called domains) are aligned in the same direction, then the material as a whole is a magnet. Electrons are also in motion in current electricity. This collection of electrons, all moving in the same direction, creates a magnetic field around the wire, just like the electrons in a magnet. This is why current electricity can induce magnetism in a piece of iron, in the case of an electromagnet. The wire will cease to create an electromagnet the instant the current electricity is turned off and the electrons stop moving.
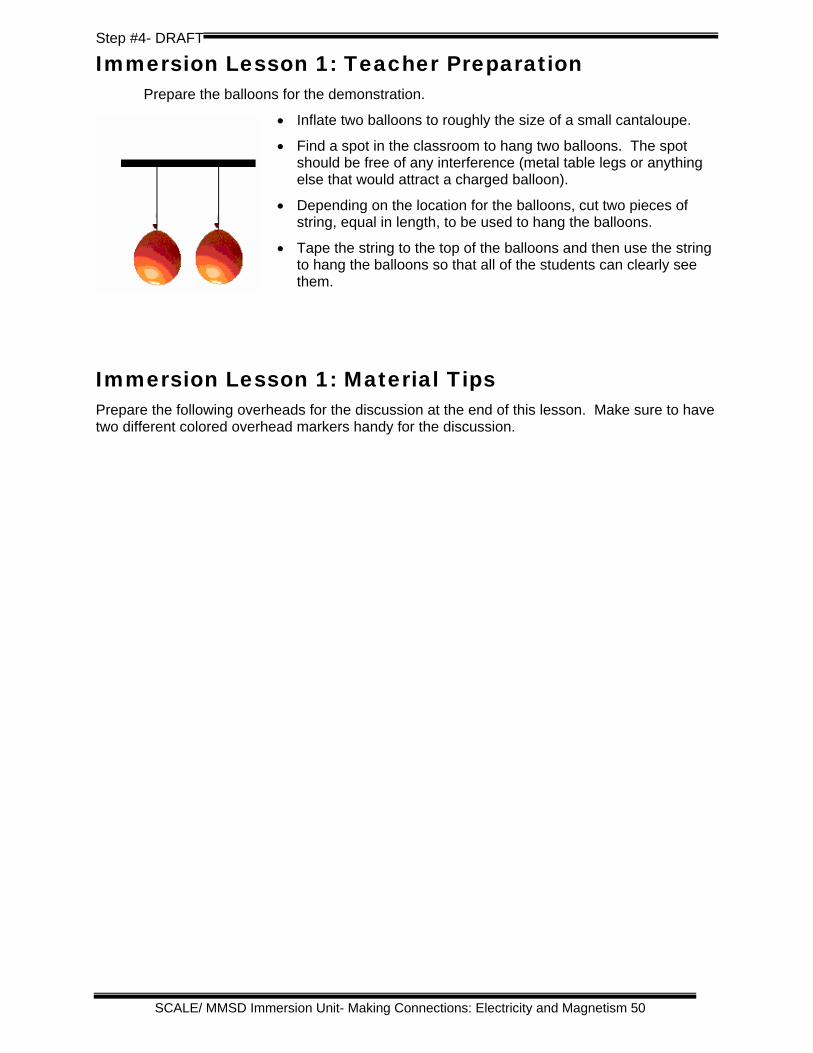
Step #4- DRAFT
SCALE/ MMSD Immersion Unit- Making Connections: Electricity and Magnetism 50
Immersion Lesson 1: Teacher Preparation Prepare the balloons for the demonstration.
• Inflate two balloons to roughly the size of a small cantaloupe.
• Find a spot in the classroom to hang two balloons. The spot should be free of any interference (metal table legs or anything else that would attract a charged balloon).
• Depending on the location for the balloons, cut two pieces of string, equal in length, to be used to hang the balloons.
• Tape the string to the top of the balloons and then use the string to hang the balloons so that all of the students can clearly see them.
Immersion Lesson 1: Material Tips Prepare the following overheads for the discussion at the end of this lesson. Make sure to have two different colored overhead markers handy for the discussion.

Step #4- DRAFT
SCALE/ MMSD Immersion Unit- Making Connections: Electricity and Magnetism 51
Static Electricity

Step #4- DRAFT
SCALE/ MMSD Immersion Unit- Making Connections: Electricity and Magnetism 52
Static Electricity

Step #4- DRAFT
SCALE/ MMSD Immersion Unit- Making Connections: Electricity and Magnetism 53
Static Electricity

Step #4- DRAFT
SCALE/ MMSD Immersion Unit- Making Connections: Electricity and Magnetism 54
Immersion Lesson 1: Classroom Implementation Guide
The following guide supports the basic procedures that were described in the Lesson Overview section. This Implementation Guide provides one example of how we recommend teaching this lesson.
Section Guide
TTEEAACCHHEERR NNOOTTEESS
Demonstrate Hang the two prepared balloons in the demonstration site. (See advanced preparation)
Using a piece of fabric or a sweater, rub one of the balloons about 15 times in the same direction. Slowly lower it back down toward the other balloon. Ask the students to share any observations about the two balloons at this point.
Repeat the procedure with the other balloon. Ask the students if anything happened to the balloons. Did they move?
Place your hand in the space between the two balloons and ask the students to share their observations, as the balloons move towards your hands.
It is quite possible that at this point the students will have no idea that the force that is moving the balloons is static electricity. They do not need to know that it is static electricity, nor should you define it at this point. The students should be encouraged to make guesses based on prior knowledge and experiences.
Once they have had a chance to try out the demonstrations themselves they may connect their own experiences with static electricity to the force that they feel when trying the demonstration.
Section Guide
TTEEAACCHHEERR NNOOTTEESS
Investigate Divide each workgroup into pairs or triplets (based on the number of people in each group). Tell the class that you are going to give each group a few supplies and then give them time to recreate the demonstration that you presented. Ask them to make observations about anything that they can feel or see happening to the balloons.
Hand out the supplies to each group. Tell the students that they will have 10 minutes to work with the materials.
As the students are working circulate among the groups and ask investigative questions to help the students reflect on what they are doing:
• How many times did you rub each balloon to make them move on their own?
• What do you feel when you put your hand between the two balloons?

Step #4- DRAFT
SCALE/ MMSD Immersion Unit- Making Connections: Electricity and Magnetism 55
• How could you measure the force between the two balloons?
Make sure the students have enough time to be successful in their investigation. If they are struggling give them pointers and a few more minutes to complete the investigation. It is most important that they are able to observe the force that exists between the two balloons.
Section Guide
TTEEAACCHHEERR NNOOTTEESS
Read Using a group reading or solo reading method, ask the students to read the FOSS Science Story “Making Static”.
Section Guide
TTEEAACCHHEERR NNOOTTEESS
Discuss Lead the students in a discussion about the FOSS Science Story “Making Static”.
Begin by asking the students to recall their own experiences with static electricity. Can they think of examples, other than those mentioned in the article? (Clothes sticking together after coming out of the dryer, taking off a hat and hair sticking up, giving a friend a shock by accident, etc.)
Ask the students to describe how they know that static electricity is present, even though they cannot see the electricity itself. What is an example of evidence of static electricity?
Allow the discussion to last for 10-15 minutes, to give the students time think about multiple examples of static electricity. This will help the students realize that they are talking about something with which, they are already quite familiar.
Tell the students that they are going to use the information and observations that they gathered, from doing the investigation, to think about static electricity. Ask them to describe their process for charging the balloons. As they describe the process you can put the overheads on the projector and reinforce their discussion with the movement of the overheads.
Tell the students that now you are going to explore the concept of attraction and repulsion even further and begin to discuss what causes the balloons to push away from one another. Using the overhead provided lead the students through an explanation of the transfer of charges that occurs with static electricity.
Begin with the two overheads of the balloons. Lay one out on the overhead machine and explain to the students that all objects have positive and negative charges. Most things have equal amounts of each kind of charge. As you explain this draw

Step #4- DRAFT
SCALE/ MMSD Immersion Unit- Making Connections: Electricity and Magnetism 56
Section Guide
TTEEAACCHHEERR NNOOTTEESS
plus and minus signs on the balloon (each in a different color). Put the other overhead on top of the first one so that the balloons appear side by side. Draw the plus and minus signs on the second balloon.
Tell the students that this is what their balloons looked like when they began their demonstration. They just hung there, side by side.
Take off the balloon overheads and introduce the overhead with the diagram of the piece of cloth on it. Ask the students what kind of charges the cloth has. They should say that the cloth has positive and negative charges. Draw the charges on the cloth overhead.
Reintroduce the balloon overheads one at a time. Place one of the overheads over the cloth and move it back and forth to imitate the process the students used to charge the balloon. As you do this, tell the students that the negative charges will be transferred to the balloon in this process and therefore more negative charges will accumulate on the balloon. Draw more negative signs on the balloon and erase the same amount from the drawing of the cloth.
Place the second balloon overhead over the cloth overhead and move it around. Ask the students what you should draw on the balloon (negative signs). After drawing the negative signs on the second balloon take the cloth overhead away and ask the students what happened in their investigations after they rubbed the balloons on the cloth. They should answer that the balloons repelled one another. Move the overheads apart to show this movement.
Ask the students to look at the diagrams and think about why the balloons repelled one another. What do they notice about the balloons?
If the students do not deduce the answer, tell them to look at the number of charges on each balloon and figure out which charge is most prevalent on each balloon. Ask the students to think about and explain why these charges might affect the movement of the balloons. Encourage this discussion and the explanation from the students, but if they do not come up with an explanation you can explain the attractive and repulsive forces.
Explain to the students that the charges that are alike (negative-negative) push away from one another and the charges that are unalike, or opposite (negative-positive) pull towards one another. Too many negative charges cause a build-up of forces pushing away from one another and therefore cause the balloons to push away and too many positive charges can cause objects to stick together.
Explain to the students that this force is like the push and pull forces that they talked about in first grade when they studied balance and motion. In this unit they will increase their
Step #4- DRAFT
SCALE/ MMSD Immersion Unit- Making Connections: Electricity and Magnetism 57
understanding of the push and pull forces. For this unit they will call it attraction and repulsion. When the forces cause the balloons to come together call it attraction and when forces act to push two things apart, call it repulsion.
The forces of these charges exist in the air between the two balloons, just like the force of gravity exists all around. It is impossible to see the force itself, but there are ways of observing the effect of the force, which can be used as evidence that the force exists. The phenomenon of electricity can be studied by observing the effects of forces.
Section Guide
TTEEAACCHHEERR NNOOTTEESS
Reflect Lead the students in a discussion about this lesson using the following questions:
• How did the transfer of negative charges affect the balloons? (They repelled one another.)
• What word can you use to describe two objects that push away from one another? (Repel)
• What do you think will happen to the balloons if you leave them hanging for the entire school day? Overnight? (Accept all predictions. The charges in the balloons will eventually neutralize and the balloons will come back together. Just like static cling does not last forever.)
Following the discussion ask the students to write a 4-5 sentence paragraph and/or draw pictures to describe their investigations with the balloons. Tell them to think about the following points:
• What did you have to do to make the balloons move?
• What did you feel when you put your hand between the two charged balloons?
• Which charges transfer? (negative)
• Write your own definition for the term “static electricity”.

Step #4- DRAFT
SCALE/ MMSD Immersion Unit- Making Connections: Electricity and Magnetism 58
Immersion Lesson 2: Overview
• Pass out bag #1 of test materials. Ask the students to find things that stick together.
• Ask students to record their answers on the Magnetic Attraction worksheet.
• Ask the students to make predictions about four different items in bag #2 and then test their predictions.
• Lead a discussion about properties of magnetic materials.
• Review the key words: “attraction” and “repulsion”.
• Challenge the students to work with induced magnetism. Can they form a chain of objects?
• Lead a discussion about the key concepts covered in this lesson, using the assessment questions.
• Ask each student to complete the Magnets: Reflection sheet.
MAGNETIC FORCE
IMMERSION LESSON 2: KEY CONCEPT
Magnets attract or repel one another.
The magnetic force causes magnetic interactions.
IMMERSION LESSON 2: TIME NEEDED 60 minutes
IMMERSION LESSON 2: MATERIALS
EACH STUDENT
• Magnetic Attraction worksheet
EACH GROUP
• 4 magnets, donut-shaped • 1 bag of test objects • 4 sheets of scrap paper • 1 box of small paperclips
IMMERSION LESSON 2: KEY WORDS Magnet Magnetism Attraction Repulsion Temporary magnet Induced magnetism
ASSESSMENT QUESTIONS • Can you think of a general rule about what magnets stick to? (Things made mostly of
iron.)
• What happens when two magnets come together? (They either stick together or repel one another, depending on the orientation of the poles.)
• What happens when you touch a piece of iron to a permanent magnet? (Magnetism is induced in the piece of iron, and it becomes a temporary magnet. Magnetism can be induced only in iron or steel, and a few other metals.)
• What materials stop the force of magnetism? (The force of magnetism is stopped by thick objects and sheets of steel.)
• What questions do you still have about magnets? (Ask students to list questions on a piece of paper.)
Step #4- DRAFT
SCALE/ MMSD Immersion Unit- Making Connections: Electricity and Magnetism 59
Immersion Lesson 2: Teacher Preparation This Immersion Lesson is a combination of two lessons contained in the FOSS Module, Investigation 1, Lesson 1 Investigating Magnets and Materials and Investigation 1, Lesson 2 Investigating More Magnetic Properties. Both the FOSS lessons and the Immersion lesson outlined on the following pages cover the key concepts. The Immersion lesson is geared towards classrooms where the students are comfortable with the process of inquiry and classrooms where the students have had some prior experience with magnets.
Immersion Lesson 2: Background Information Please reference the background information contained in the FOSS Module, Investigation 1, pages 4-7.
Immersion Lesson 2: Material Tips Prepare two bags of test objects for each group and label them bag #1 and bag #2.
Fill each bag with the following materials:
Bag #1 Bag #2
2 dull nails
2 soda straws
2 black rocks
2 pieces of screen
2 paper clips
2 screws
2 rubber bands
2 brass rings
2 craft sticks
2 plastic chips
2 shiny nails
2 sponges
2 river pebbles
2 paper fasteners
2 pieces of copper
2 pieces of yarn
2 pieces of cardboard
2 pieces of aluminum foil
2 washers

Step #4- DRAFT
SCALE/ MMSD Immersion Unit- Making Connections: Electricity and Magnetism 60
Immersion Lesson 2: Classroom Implementation Guide
The following guide supports the basic procedures that were described in the Lesson Overview section. This Implementation Guide provides one example of how we recommend teaching this lesson.
Section Guide
TTEEAACCHHEERR NNOOTTEESS
Explore To transition from static electricity to magnetism, tell the students that they are going to investigate more objects that stick together. Using an assortment of objects the students are going to find the objects that display forces of attraction and repulsion. Similar to the balloon that sticks to the wall or sweater, they are going to examine two bags of objects to determine which objects stick together.
Pass out Bag #1 and four magnets to each group. (The magnets should be kept out of the bag, so that they do not stick to anything in the bag). Tell the students that you are going to give them 10 minutes to investigate the objects and figure out which objects stick together. They should record the names of four objects that stick together on the Magnetic Attraction worksheet.
Ask the students to put all of the objects from Bag #1 back into the bag and leave the bag in the center of their workspace. Collect the magnets from each group.
Section Guide
TTEEAACCHHEERR NNOOTTEESS
Predict and Test Explain to the students that now that they have had some experience with objects that stick together you are going to ask them to make predictions about additional objects that might stick together. Hold up bag #2 and tell the students that they are going to make predictions about which objects in bag #2 will stick together. They will record their predictions on the Magnetic Attraction worksheet.
Tell the students that they have to make predictions about four different objects in the bag and give a reason for their predictions. It may be helpful to give them an example by modeling the process and thinking out loud, “If I found out that a pencil from the first bag did not stick to the magnet, then if I found another object in the second bag that had similar properties I might say that because the pencil did not stick and it is made of wood, then another object made of wood would probably not stick.”
If the students are having a hard time coming up with the rationale for their predictions encourage them to look at the objects in Bag #1 to refresh their memories. Allow ten minutes

Step #4- DRAFT
SCALE/ MMSD Immersion Unit- Making Connections: Electricity and Magnetism 61
for recording predictions.
Hand out the magnets and give the students ten minutes to test their predictions. If they finish testing their predictions before the class is finished, encourage them to try all of the objects
Section Guide
TTEEAACCHHEERR NNOOTTEESS
Discuss Engage the students in a discussion about which objects stick together. Record the answers on the board, so that the students follow along with the discussion.
After you have recorded about 4-6 different object pairs on the board, ask the students to think about all of the objects listed and what characteristics these objects have in common.
• Are all of the objects the same color?
• What material is each object made of?
• Do some objects stick together better than others?
Discuss the metals that stick to magnets. Ask the students if all of the items made of metal stick to magnets? They should mention that things like the brass rings and aluminum foil do not stick to the magnets. Tell the students that all metals that stick to magnets are made primarily out of iron. The items can have other metals in them as well, but the primary ingredient is iron.
Review the concept of poles and ask what each pole of the magnet is called. Draw a diagram of a bar magnet and a donut magnet on the board. Ask a few volunteers to come up and label the location of each pole on both magnets. This is an important review discussion to help the students develop the language to talk about the attraction and repulsion of magnets.
Did the students mention that two magnets stick together? If the students mentioned that two magnets stick together, ask them to test out this theory. Lead the whole class in a test and ask each group to try to put two magnets together. A few students will probably experience the repulsion of two magnets in this exercise, but if they do not, ask the students to turn the magnets over and try it again. Explain to the students that when two magnets push away from each other, we say that they “repel” and when two magnets stick together we say that they “attract” each other. Tell the students that in the next lesson they will have an opportunity to explore this concept in greater detail.
Section Guide
Investigate Tell the students that next they are going to see if magnets have a strong enough force to allow more than one thing to stick together. Challenge the students to use one magnet to pick up multiple items, without having the magnet touch more than one

Step #4- DRAFT
SCALE/ MMSD Immersion Unit- Making Connections: Electricity and Magnetism 62
TTEEAACCHHEERR NNOOTTEESS
object. Hand out additional nails and paperclips to each group if they need them for the investigation.
Give the students 10 minutes to explore the objects and work towards inducing magnetism in the objects in their test kits. Give them additional paperclips if they request them.
Ask them to record two different successful trials on their Magnetic Attraction worksheet. What items could become magnetic when stuck to the magnet?
Section Guide
TTEEAACCHHEERR NNOOTTEESS
Reflect Ask the students to record their experiences with induced magnetism on the Magnetic Attraction activity sheet.
Lead a discussion about induced magnetism. Ask the students how they managed to pick up more than one paperclip with only one magnet. Did the nail or the paperclip act like a magnet? Tell the students that this is what scientists call induced magnetism because when you take the nail or paperclip away from the magnet it no longer has magnetic properties.
Lead a review discussion of the lesson by using the following questions:
• Can you think of a general rule about what magnets stick to? (Things made mostly of iron.)
• What happens when two magnets come together? (They either stick together or repel one another, depending on the orientation of the poles.)
• What happens when you touch a piece of iron to a permanent magnet? (Magnetism is induced in the piece of iron, and it becomes a temporary magnet. Magnetism can only be induced in iron or steel, and a few other metals.)
• What materials stop the force of magnetism? (The force of magnetism is stopped by thick objects and sheets of steel.)
• What questions do you still have about magnets? (Ask students to list questions on a piece of paper.)
Ask each student to complete the Magnets: Reflection sheet.
Collect the sheets and save time in another period to review the sheets with the students.

Step #4- DRAFT
SCALE/ MMSD Immersion Unit- Making Connections: Electricity and Magnetism 63
Magnetic Attraction Name:______________________ Date:___________________
Bag #1: Four items that stick together are:
1.
2.
3.
4.
Bag #2: Predictions Did they stick?
1. _________________ will stick to ______________ because
Yes
No
2. ________________ will stick to _______________ because
Yes
No
3. _______________ will stick to ________________ because
Yes
No
4. _______________ will stick to ________________ because
Yes
No
Induced Magnetism List two objects that had magnetic properties when stuck to a magnet:
1.
2.

Step #4- DRAFT
SCALE/ MMSD Immersion Unit- Making Connections: Electricity and Magnetism 64
Magnets: Reflection Name:_______________________ Date:___________________
1.
Students in a fourth-grade class were investigating which objects stick to magnets. One of them drew a picture in his journal like the one you see above, and then wrote,
“I was surprised! I had a nail stuck to a magnet, and when I accidentally touched the nail to a paper clip, the paper clip stuck to the nail. I wonder why this happens.”
Write a note to this student. See if you can help him understand more about what is happening.
2. Which of the figures above shows a situation where two magnets repel each other?
A Figures 1 and 3 C Figures 1 and 4
B Figures 2 and 3 D Figures 1, 2, 3, and 4
S N SN
S
S
S
NN
N
N N
S
S
S
N

Step #4- DRAFT
SCALE/ MMSD Immersion Unit- Making Connections: Electricity and Magnetism 65
Magnets- Reflection: Assessment Scoring Guide
Response Sheet- Magnets
Score In the student……
4 says the paper clip and nail must be iron or steel; explains that the magnetic force has been induced in the nail and paper clip from the permanent magnet, so they have become temporary magnets; offers as evidence the fact that the nail would not stick to the paper clip before it was touching the magnet; answers question #2 correctly.
3 includes content described above, but does not provide convincing evidence to support the statements; answers question #2 correctly.
2 mentions only one idea, either that the objects are made of iron, so they stick, or that the nail has become a temporary magnet; gives no evidence to support conclusions; give one extra point if question #2 is answered correctly.
1 gives some information about magnets, but it does not pertain to the assigned task, or includes a misconception; give one extra point if question #2 is answered correctly.
0 does not complete the task, or gives information that has nothing to do with what was asked; give one extra point if question #2 is answered correctly.

Step #4- DRAFT
SCALE/ MMSD Immersion Unit- Making Connections: Electricity and Magnetism 66
Immersion Lesson 3: Overview
• Ask the students to read the FOSS science story “Magnificent Magnetic Models”.
• Review the terms Attraction and Repulsion and Phenomenon.
• Discuss students own experiences with forces.
• Demonstrate the effects of forces with levitating donut magnets.
• Hand out the Forces worksheet.
• Working together, as a whole class, ask the students to decide how they want to test the strength of the force of static electricity.
• Set up the investigation and ask the students to collect the data.
• Lead the students in a discussion about the results of the investigation and the assessment questions.
WHAT IS FORCE?
IMMERSION LESSON 3: KEY CONCEPT
Forces are invisible, but we can see the effect of forces.
IMMERSION LESSON 3: TIME NEEDED 60 minutes
IMMERSION LESSON 3: MATERIALS
EACH STUDENT
• Forces worksheet
EACH GROUP
• two balloons • four pieces of string • tape • scissors • 2 small paperclips • piece of black construction paper • chalk
LESSON 3: KEY WORDS Attraction Repulsion Force Phenomenon
ASSESSMENT QUESTIONS • Why did rubbing the balloon many times affect the force of repulsion between the two balloons? (The number of times each balloon was rubbed affected the force because more electrons, or negative charges, were transferred each time and the repulsive force increased in strength.) • What evidence did you have that a force was present? (The balloons physically repelled one another.)
Step #4- DRAFT
SCALE/ MMSD Immersion Unit- Making Connections: Electricity and Magnetism 67
Immersion Lesson 3: Background Information The key concept of this lesson is that forces are invisible but we can see the effects of forces. Our everyday experience shows us that gravity keeps our feet on the ground when walking down the street. We can’t see gravity, but we can feel the force of it (our weight) and measure it on a scale. Gravity, just like the electromagnetic force and other forces, acts through a force field.
A field is an abstract concept, but is simply the region of space through which a force acts. We feel our weight whenever we are in the Earth’s gravitational field. Though we cannot see the field, we certainly feel the effects of it on our body. Similarly, negative and positive charges and north and south poles of magnets create a force on other charges and magnetic poles because the electromagnetic force acts through the region of space between them.
Students do not need to completely understand the idea of a force field but should know that just because you cannot see something, does not mean we cannot measure its effects on an object.
Immersion Lesson 3: Material Tips Monitor the students as they work on setting up their investigations. Ideally all balloons should be inflated to the same size. To help facilitate this, it might be helpful to cut a length of string the fits around the sample balloons. The students can use the pre-cut string to measure the circumference of their balloons.

Step #4- DRAFT
SCALE/ MMSD Immersion Unit- Making Connections: Electricity and Magnetism 68
Lesson 3: Classroom Implementation Guide Implementation of this lesson has been divided into sections that correspond with the basic procedures that were described in the Lesson Overview section. Below you will find a detailed Implementation Guide for each section that provides one example of how a section may be taught in the classroom.
Section Guide
TTEEAACCHHEERR NNOOTTEESS
Read and Discuss Begin this lesson by having the students read the FOSS Science Story “Magnificent Magnetic Models”.
After the students have read the article review the terms “Attraction and Repulsion”.
Encourage the students to discuss their experiences with attractive and repulsive forces. Prompt them to think about both magnets and static electricity.
Ask students to define the word force in their own words. They should record their answer in their science journal or on a blank piece of paper.
Ask a few students to share their ideas of the definition of force.
Work together as a class to write a definition for the word force, using the students’ language. The definition can include multiple descriptions and examples. Write the definition on the board (or chart paper) and keep it up for the remainder of this unit. The dictionary definition of force is: strength or energy exerted or brought to bear: cause of motion or change. The students’ own definition will probably be worded much differently, but it should focus on the core concept of strength and cause of change or motion.
They are going to examine the strength of forces in this investigation. Their challenge is to think about how to measure something that you cannot see.
Section Guide
TTEEAACCHHEERR NNOOTTEESS
Brainstorm Place four magnets on a pencil and demonstrate the result of repulsive forces in magnetism. Ask each group to try this demonstration.
Ask each group to brainstorm one way that they might measure the force of repulsion between the magnets on the pencil. Enlist a few groups to share their ideas and discuss the difficulties in measuring force.

Step #4- DRAFT
SCALE/ MMSD Immersion Unit- Making Connections: Electricity and Magnetism 69
Section Guide
TTEEAACCHHEERR NNOOTTEESS
Plan the Investigation Tell the students that as a class they are going to work together to gather data on the strength of repulsion present with static electricity. Ask the students to recall their experiences with static electricity. What did they do to cause the balloons to repel one another? Did the number of times that they rubbed the balloon affect the demonstration? How far apart did the balloons repel?
Tell the students that they are going to set up an investigation to test the strength of the force of repulsion between the two balloons.
Ask the students to think of ways to measure the strength of the force. Ask them to share their ideas and come to a consensus as a class as to how they are going to measure the strength. If they are having a hard time coming up with a method, you can suggest that they measure the space between the two balloons, because they are really trying to measure the invisible force.
If the class has difficulty thinking of a way to measure consistently, introduce the students to the idea that they could suspend a paperclip on a string from the bottom of each balloon and mark where the paperclips hang over a piece of paper. As the balloons repel further and further away from one another they can record the change in distance.
Section Guide
TTEEAACCHHEERR NNOOTTEESS
Investigate Help the class set up the experiment, by following the Force worksheet. Instruct each team to decide on how many times they will rub each balloon on the fabric for each trial. The number of times should increase for each trial, i.e. trial 1, rub 5 times, trial 2- rub 10 times, trial 3- rub 15 times. Each team can run different trials and collect their own data, but each team should run 4 trials.
Section Guide
TTEEAACCHHEERR NNOOTTEESS
Discuss Discuss the results of the investigation.
• Why did rubbing the balloon many times affect the force of repulsion between the two balloons? (The number of times each balloon was rubbed affected the force because more electrons, or negative charges, were transferred each time and the repulsive force increased in strength.)
• What evidence did you have that a force was present? (The balloons physically repelled one another.)

Step #4- DRAFT
SCALE/ MMSD Immersion Unit- Making Connections: Electricity and Magnetism 70
Forces
Name:_____________________ Date:___________________
1. To test the force of static electricity we are going to:
________________________________________________________________
________________________________________________________________
________________________________________________________________
________________________________________________________________
2. We are going to run four trials. Here are the number of times that we are going to rub the balloon on the fabric for each trial:
Trial #: Number of rubs:
Trial #: Number of rubs:
Trial #: Number of rubs:
Trial #: Number of rubs:
3. We are going to measure the force by:
________________________________________________________________
________________________________________________________________
________________________________________________________________
4. I predict that:_________________________________________________________
_______________________________________________________________
5. The results of our investigation are:
________________________________________________________________
________________________________________________________________
________________________________________________________________

Step #4- DRAFT
SCALE/ MMSD Immersion Unit- Making Connections: Electricity and Magnetism 71
Forces Data Chart Name:________________________ Date:___________________
DATA
Trial # Number of rubs Measurement
DRAWINGS
Trial #:
Trial #:
Trial #:
Trial #:

Step #4- DRAFT
SCALE/ MMSD Immersion Unit- Making Connections: Electricity and Magnetism 72
Step #4 Connections Chart
The following chart gives a few examples of possible observations that students could suggest for the chart after working through the lessons in this step. Work with the class to help them brainstorm their observations after each lesson and ask the students to add connections, in their own words.
Step/ Lesson
Electricity Step/ Lesson
Magnetism
4/1 Negative charges can be transferred.
4/2 Magnets can attract or repel other magnets.
4/1 Like electrical charges repel one another.
4/2 The north pole of a magnet attracts the south pole of another magnet.
4/3 A force exists between electric charges.
4/2 Two north poles will repel one another.
4/3 The strength of the force between electric charges can be altered.
4/2 Magnetism can be induced.
4/2 Iron is a magnetic material.
4/3 A force exists between two magnets.

Step #5- DRAFT
SCALE/ MMSD Immersion Unit- Making Connections: Electricity and Magnetism 73
Unit Key Concept: Electricity and magnetism can influence one another.
Step #5 Overview The students will further their study of the relative forces of electricity and magnetism. Through a series of investigations the students will test the strength of these forces.
Step #5 Lessons LESSON 1: FOSS INVESTIGATION 4, PART 1 “BUILDING AN
ELECTROMAGNET” (45 MINUTES)
Electromagnetism is magnetism created by current flowing through a conducting material.
LESSON 2: FOSS INVESTIGATION 4, PART 2 “CHANGING
THE NUMBER OF WINDS” (45 MINUTES)
The strength of the magnetism produced by an electromagnet can be varied.
LESSON 3: FOSS INVESTIGATION 1, PART 3 “BREAKING THE
FORCE” (45 MINUTES)
The magnetic force of attraction between two magnets decreases with distance.
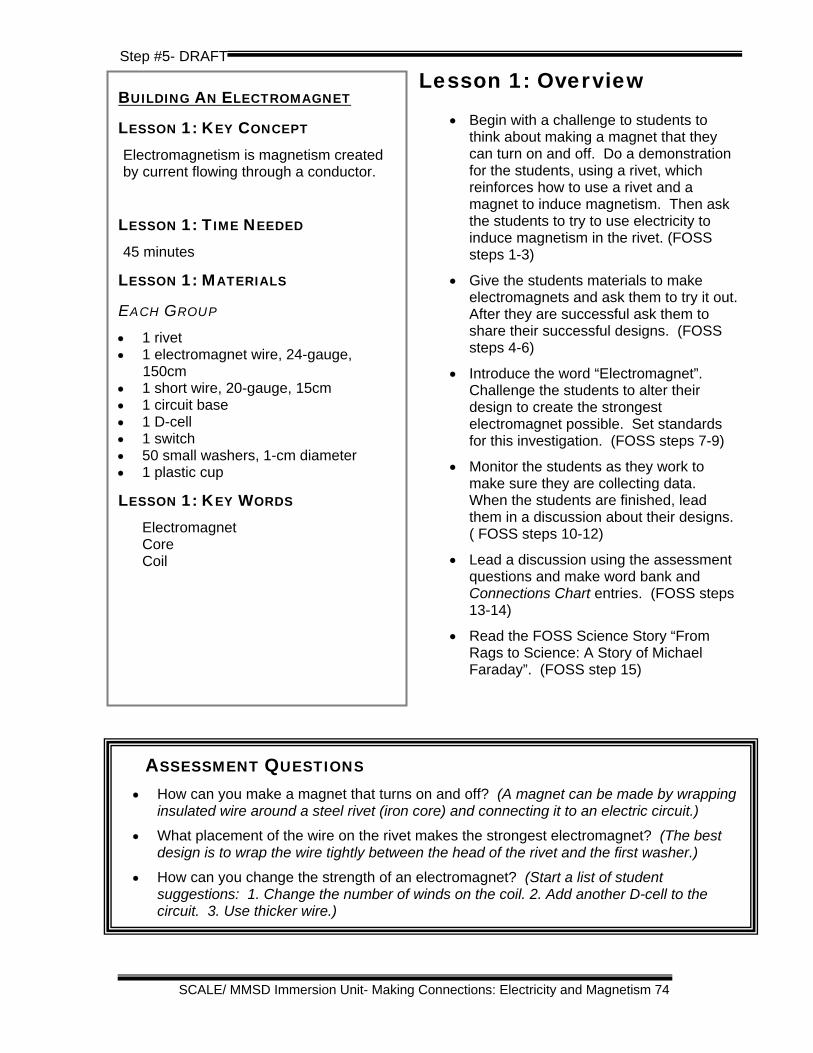
Step #5- DRAFT
SCALE/ MMSD Immersion Unit- Making Connections: Electricity and Magnetism 74
Lesson 1: Overview
• Begin with a challenge to students to think about making a magnet that they can turn on and off. Do a demonstration for the students, using a rivet, which reinforces how to use a rivet and a magnet to induce magnetism. Then ask the students to try to use electricity to induce magnetism in the rivet. (FOSS steps 1-3)
• Give the students materials to make electromagnets and ask them to try it out. After they are successful ask them to share their successful designs. (FOSS steps 4-6)
• Introduce the word “Electromagnet”. Challenge the students to alter their design to create the strongest electromagnet possible. Set standards for this investigation. (FOSS steps 7-9)
• Monitor the students as they work to make sure they are collecting data. When the students are finished, lead them in a discussion about their designs. ( FOSS steps 10-12)
• Lead a discussion using the assessment questions and make word bank and Connections Chart entries. (FOSS steps 13-14)
• Read the FOSS Science Story “From Rags to Science: A Story of Michael Faraday”. (FOSS step 15)
BUILDING AN ELECTROMAGNET
LESSON 1: KEY CONCEPT Electromagnetism is magnetism created by current flowing through a conductor.
LESSON 1: TIME NEEDED 45 minutes
LESSON 1: MATERIALS
EACH GROUP
• 1 rivet • 1 electromagnet wire, 24-gauge, 150cm • 1 short wire, 20-gauge, 15cm • 1 circuit base • 1 D-cell • 1 switch • 50 small washers, 1-cm diameter • 1 plastic cup
LESSON 1: KEY WORDS Electromagnet Core Coil
ASSESSMENT QUESTIONS • How can you make a magnet that turns on and off? (A magnet can be made by wrapping
insulated wire around a steel rivet (iron core) and connecting it to an electric circuit.)
• What placement of the wire on the rivet makes the strongest electromagnet? (The best design is to wrap the wire tightly between the head of the rivet and the first washer.)
• How can you change the strength of an electromagnet? (Start a list of student suggestions: 1. Change the number of winds on the coil. 2. Add another D-cell to the circuit. 3. Use thicker wire.)

Step #5- DRAFT
SCALE/ MMSD Immersion Unit- Making Connections: Electricity and Magnetism 75
Lesson 1: Background Information Please reference the background information contained in the FOSS Module, Investigation 4, pages 4-7.
Lesson 1: Teacher Preparation Please see the advance preparation contained in the FOSS Module, Investigation 4 pages 8-10.

Step #5- DRAFT
SCALE/ MMSD Immersion Unit- Making Connections: Electricity and Magnetism 76
Lesson 2: Overview
• Review the lesson on electromagnets. Discuss ideas for an investigation to test the strength of an electromagnet. (FOSS steps 1-2)
• Begin the investigation. Pass out the worksheet Winding Electromagnets to help guide students. Walk around the room as the students work and provide support. (FOSS steps 3-5)
• Ask each team to share their results of each trial. Using an overhead, graph the results of each trial. (FOSS steps 6-7)
• Using the existing graph ask the students to make predictions. They can predict the results of more winds. If time permits allow them to test the predictions. (FOSS step 8)
• Assess the students’ progress. Ask each student to fill out the Response Sheet- Reverse Switch. (FOSS step 9)
• Lead a discussion using the assessment questions and work on adding to the Connections Chart and word bank. (FOSS steps 10-11)
• Ask the students to re-read the FOSS Science Story “How Electromagnetism Stopped a War”. Give them time to discuss their new understanding of this reading. (FOSS step 12)
CHANGING THE NUMBER OF WINDS
LESSON 2: KEY CONCEPT The strength of the magnetism produced by an electromagnet can be varied.
LESSON 2: TIME NEEDED 45 minutes
LESSON 2: MATERIALS
EACH GROUP
• 1 rivet • 1 electromagnetic wire, 24-gauge, 150cm • 1 short wire, 20-gauge, 15cm • 1 circuit base • 1 D-cell • 1 switch • 50 small washers, 1-cm diameter • 1 plastic cup • 1 student sheet no.18 (FOSS) called Winding Electromagnets • 1 sheet of graph paper, 1/4” grid
LESSON 2: KEY WORDS Prediction Graph
ASSESSMENT QUESTIONS • What was the general pattern you saw in the way the number of winds affects the strength
of an electromagnet? (The more winds on the core, the stronger the magnetism.)
• How were you able to make predictions? (The predictions were based on our experiences and the data we collected.)
• How were electromagnets used in the FOSS Science Story, “How Electromagnetism Stopped a War”?
Step #5- DRAFT
SCALE/ MMSD Immersion Unit- Making Connections: Electricity and Magnetism 77
Lesson 2: Teacher Preparation Please see the advance preparation contained in the FOSS Module, Investigation 4 pages 14-15.
Lesson 2: Background Information Please reference the background information contained in the FOSS Module, Investigation 4 pages 4-7.

Step #5- DRAFT
SCALE/ MMSD Immersion Unit- Making Connections: Electricity and Magnetism 78
Lesson 3: Overview
• Introduce the force investigation by asking the students to recall their experiences with magnets. Pose investigative questions and then hand out the equipment for the investigation. (FOSS steps 1-2)
• Encourage the students to use the equipment to measure the force of the magnets. If they have trouble getting started help guide them through the process through group discussion and by proposing a standard investigation. (FOSS steps 3-5)
• Ask the students to reflect on their process and refine it. Ask each group to share their process. (FOSS steps 6-7)
• Review the experimental process. Introduce the new inquiry question and hand out additional materials. Ask the students to use the materials to retest the strength of magnets. (FOSS steps 10-11)
• Work with the students to create a data chart. Ask each group to test additional spacers, but do not test the effect of using two spacers. Leave this spot blank for a prediction later in the work. (FOSS steps 12-13)
• Ask students to record their data on the chart as they work. After they fill in the data for the chart ask them to make their prediction. (FOSS steps 14-15)
• Discuss the results and assessment question and fill in the Connections Chart and word bank. (FOSS steps 16-19)
BREAKING THE FORCE
LESSON 3: KEY CONCEPT The magnetic force of attraction between two magnets decreases with distance.
LESSON 3: TIME NEEDED 45 minutes
LESSON 3: MATERIALS
EACH GROUP
• 1 FOSS balance • 2 plastic cups • 1 magnet, doughnut-shaped • 1 magnet-on-a-post • 6 spacers (small plastic chips) • 20 large washers • 4 sets of 7 recording dots, adhesive • 4 sheets of lined notebook paper • 4 student sheets no.5 called The Force
LESSON 3: KEY WORDS Graph Prediction Intersection
ASSESSMENT QUESTIONS • What happens to the strength of attraction between two magnets as the distance between
them increases? (The greater the distance between two magnets, the weaker the force of attraction.)

Step #5- DRAFT
SCALE/ MMSD Immersion Unit- Making Connections: Electricity and Magnetism 79
Lesson 3: Background Information Please reference the background information contained in the FOSS Module, Investigation 1, pages 4-7.
Lesson 3: Teacher Preparation Please see the advance preparation contained in the FOSS Module, Investigation 1 pages 23-25.

Step #5- DRAFT
SCALE/ MMSD Immersion Unit- Making Connections: Electricity and Magnetism 80
Step #5 Connections Chart The following chart gives a few examples of possible observations that students could suggest for the chart after working through the lessons in this step. Work with the class to help them brainstorm their observations after each lesson and ask the students to add connections, in their own words.
Step/ Lesson
Electricity Step/ Lesson
Magnetism
5/1 An electromagnet can be turned on and off like a switch.
5/1 Current electricity causes the rivet to become magnetized.
5/2 The strength of an electromagnet can be altered.
5/1 An electromagnet can be turned on and off.
5/1 The strength of an electromagnet can be altered.
5/3 Magnetic force is affected by distance.

Step #6- DRAFT
SCALE/ MMSD Immersion Unit- Making Connections: Electricity and Magnetism 81
Unit Key Concept: Electricity and magnetism can influence one another.
Step #6 Overview In this step the students apply the electricity and magnetism concepts that they have learned in this unit to the creation of their own “mystery box”. Using a worksheet as a guide, the students will plan and construct a mystery box and trade it with another team for evaluation. The students will work in their teams to evaluate another team’s mystery box.
Step #6 Lessons
IMMERSION LESSON 1: MYSTERY BOX PREPARATION (60-90 minutes)
Scientists develop explanations using observations (evidence) and what they already know about the world (scientific knowledge).
IMMERSION LESSON 2: MYSTERY BOX EXCHANGE (60 MINUTES)
Scientists develop explanations using observations (evidence) and what they already know about the world (scientific knowledge).
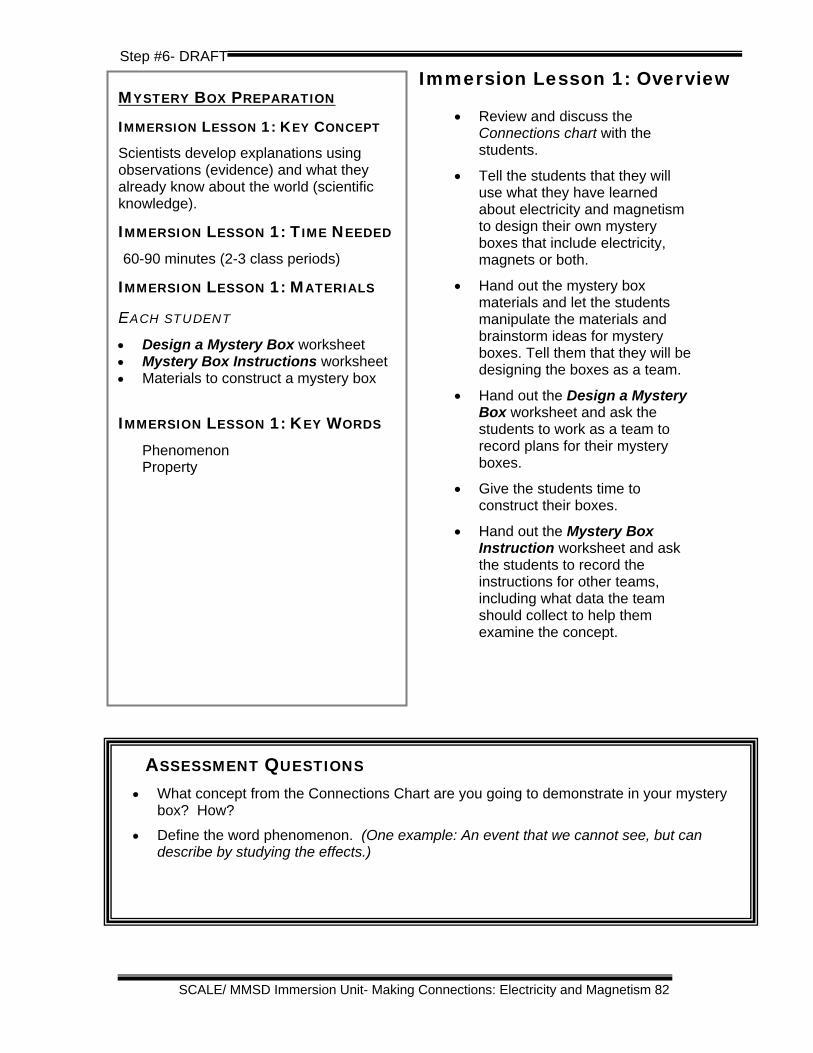
Step #6- DRAFT
SCALE/ MMSD Immersion Unit- Making Connections: Electricity and Magnetism 82
Immersion Lesson 1: Overview
• Review and discuss the Connections chart with the students.
• Tell the students that they will use what they have learned about electricity and magnetism to design their own mystery boxes that include electricity, magnets or both.
• Hand out the mystery box materials and let the students manipulate the materials and brainstorm ideas for mystery boxes. Tell them that they will be designing the boxes as a team.
• Hand out the Design a Mystery Box worksheet and ask the students to work as a team to record plans for their mystery boxes.
• Give the students time to construct their boxes.
• Hand out the Mystery Box Instruction worksheet and ask the students to record the instructions for other teams, including what data the team should collect to help them examine the concept.
MYSTERY BOX PREPARATION
IMMERSION LESSON 1: KEY CONCEPT
Scientists develop explanations using observations (evidence) and what they already know about the world (scientific knowledge).
IMMERSION LESSON 1: TIME NEEDED 60-90 minutes (2-3 class periods)
IMMERSION LESSON 1: MATERIALS
EACH STUDENT
• Design a Mystery Box worksheet • Mystery Box Instructions worksheet • Materials to construct a mystery box
IMMERSION LESSON 1: KEY WORDS Phenomenon Property
ASSESSMENT QUESTIONS • What concept from the Connections Chart are you going to demonstrate in your mystery
box? How?
• Define the word phenomenon. (One example: An event that we cannot see, but can describe by studying the effects.)

Step #6- DRAFT
SCALE/ MMSD Immersion Unit- Making Connections: Electricity and Magnetism 83
Immersion Lesson 1: Background Information See the teacher’s guide following this lesson for examples of mystery box designs that students might invent. The boxes do not need to be overly complicated; the most important thing is that the students can explain the key concept that they are trying to demonstrate and how their box demonstrates that concept.
Before the students begin working let them know what materials are available and tell then that they will not be allowed to take the boxes home at the end of the unit. Encourage students who would like to share the mystery boxes with their families, to build their own boxes at home.
Immersion Lesson 1: Teacher Preparation Collect materials for the student mystery boxes. Suggested materials are:
• Boxes • Small gauge wires • Light bulbs • D-cells • Assorted magnets, different shapes, sizes and strengths • Scissors • Tape (items should be easily removable and therefore taped, not glued) • Markers • Pencils • Blank paper
STUDENT TEAMS The student teams can be re-grouped based on interest. If some students are very interested in magnetism and others in electromagnets or electricity the teams can be shuffled to accommodate different mystery box designs.
Step #6- DRAFT
SCALE/ MMSD Immersion Unit- Making Connections: Electricity and Magnetism 84
Immersion Lesson 1: Classroom Implementation Guide
The following guide supports the basic procedures that were described in the Lesson Overview section. This Implementation Guide provides one example of how we recommend teaching this lesson.
Section Guide
TTEEAACCHHEERR NNOOTTEESS
Discuss Lead the students in a discussion to review concepts covered in this unit. Use the class Connections Chart to begin the discussion. Work together as a class to group the observations and delete any redundant statements. When the list has been pared down (if need be) then work with the class to put the statements into a Connections Chart Diagram, putting overlapping concepts into the center of the diagram.
As the discussion wraps up make sure to emphasize the following concepts:
• Magnets have two poles and like poles repel while unlike poles attract.
• There are two kinds of electrical charges, positive and negative and like charges repel while unlike charges are attracted to one another.
• Electrical circuits require a complete loop through which an electrical current can pass.
• Current electricity creates a magnetic field.
These are the four main concepts that the mystery boxes can demonstrate. Students may come up with alternative concepts, but all will be a variation on these four concepts.
Section Guide
TTEEAACCHHEERR NNOOTTEESS
Mystery Box Brainstorm Tell the students that they are going to have the opportunity to design and build a mystery box, similar to the mystery boxes that they used at the beginning of the unit. Their mystery boxes will use the concepts that they learned in this unit, so every mystery box must include magnets or electricity, or both, in some way. They will construct the boxes in teams, but each person will be responsible for explaining the box in their own words.
You can use one of the mystery boxes from the first lesson to model the process that the students will go through. Explain to the students that they will design and construct a mystery box, similar to the box that was given to them and then they will pass
Step #6- DRAFT
SCALE/ MMSD Immersion Unit- Making Connections: Electricity and Magnetism 85
their box to another team that will work on collecting data about the concept that their box is demonstrating.
Give each group a bag of materials and a box to investigate and try out ideas.
Give the students 15-20 minutes to work on brainstorming ideas.
Section Guide
TTEEAACCHHEERR NNOOTTEESS
Mystery Box Design After the students have had time to brainstorm ideas ask them to work through the details of their box design by filling out the Mystery Box Design worksheet.
Explain that they will work in their teams to design and construct a mystery box. They will give their box to another team and that team will try to figure out which concept their box demonstrates.
In addition to constructing the box, each team will write instructions on how to use the box and collect data about the concept. The team that receives their box in the trade will use the instructions to facilitate the concept discovery.
For example, if a team built one of the mystery boxes used in Step #1 they would have provided instructions for how to use that box. The instructions might have read, “Your task is to figure out where the wall or walls are located inside of this box. Using a washer, place the washer in each hole and observe where it exits. Record the hole number that you placed the washer into and the hole that the washer exited and use this data to explain the concept that the box demonstrates.”
Section Guide
TTEEAACCHHEERR NNOOTTEESS
Mystery Box Construction Give the students time (1-2 additional class periods) to construct their mystery box. It might be helpful to let the students spread out around the classroom, so they feel that they have some privacy while constructing their boxes.
Section Guide
TTEEAACCHHEERR NNOOTTEESS
Idea Synthesis When the students have finished the box construction hand out the Mystery Box Instructions worksheet. The student’s instructions to the next team should be as detailed as possible, without giving the answer away. The students should think about what data can be collected from their box and what data is needed to understand the box concept. Every member of the team will have the same information on the Mystery Box Instructions worksheet, but each team member should still fill out their own copy. Instruct the students to label their box with the title that they recorded on the worksheet.

Step #6- DRAFT
SCALE/ MMSD Immersion Unit- Making Connections: Electricity and Magnetism 86
Immersion Lesson 2: Overview
• Give each team a mystery box and the Mystery Box Instructions worksheet that accompany that box.
• Tell the students to follow the instructions and ask them to complete the task to figure out the concept that the box is demonstrating. They should record their data on the Mystery Box Exploration worksheet.
• Ask each team to share their experience investigating the box.
• Lead the students in a discussion about the concepts featured in each box. Refer to the Connections Chart Diagram. Ask the students if they notice any more connections between the two phenomena.
• Ask each student to complete the My Explanation worksheet, to record their ideas about their mystery box. Collect the worksheets.
LESSON TITLE
IMMERSION LESSON 2: KEY CONCEPT
Scientists develop explanations using observations (evidence) and what they already know about the world (scientific knowledge).
IMMERSION LESSON 2: TIME NEEDED 60 minutes
IMMERSION LESSON 2: MATERIALS
EACH STUDENT
• Completed Mystery Box Instructions worksheet • Mystery Box Exploration worksheet • My Explanation worksheet
IMMERSION LESSON 2: KEY WORDS Phenomenon Property Evidence
ASSESSMENT QUESTIONS • Explain one difference between your explanation and the explanation of the box designer.
• Explain one similarity between your explanation and the explanation of the box designer.
• What questions do you have for the box designer?

Step #6- DRAFT
SCALE/ MMSD Immersion Unit- Making Connections: Electricity and Magnetism 87
Immersion Lesson 2: Classroom Implementation Guide
The following guide supports the basic procedures that were described in the Lesson Overview section. This Implementation Guide provides one example of how we recommend teaching this lesson.
Section Guide
TTEEAACCHHEERR NNOOTTEESS
Investigate Give each team a mystery box that was created by another team.
Remind the students of their investigation process at the beginning of this unit. They worked to complete a task (figuring out the interior box design) and collecting data that they could use to support their explanation about the box design. They are essentially repeating that process in this activity.
Hand out the Mystery Box Instructions and Mystery Box Exploration worksheet that accompanies each box. Review the worksheets with the students. Make sure they understand that they need to collect data and will use that data as evidence in an explanation for the box that they were given.
Section Guide
TTEEAACCHHEERR NNOOTTEESS
Data Collection and Analysis Give each team time to investigate the boxes. Ask each team to fill out the Mystery Box Exploration worksheet as they work.
Section Guide
TTEEAACCHHEERR NNOOTTEESS
Data Comparison
Lead the students in a discussion of their experiences investigating another group’s box. Ask each group to share a few observations of their experience and then ask them to come to the board to record the box title that they investigated and what concept they think that box demonstrated. Ask students to explain what evidence they used to decide on a concept.
Ask each team to look over the responses on the board. The
Step #6- DRAFT
SCALE/ MMSD Immersion Unit- Making Connections: Electricity and Magnetism 88
teams should tell the other team if they guessed correctly. Elicit a discussion of the process:
What evidence helped you figure out the box concept?
How did the data collection process help you figure out the concept?
What additional data would be helpful?
Section Guide
TTEEAACCHHEERR NNOOTTEESS
Discuss and Reflect Lead the students in a discussion about the concepts represented in the boxes and their own thoughts about the connections between electricity and magnetism.
How would you explain the connection between electricity and magnetism?
What work did you do in this unit that helped you understand electricity and electricity?
What do you now know about electricity and magnetism that you did not know before this unit?
What questions do you still have about magnetism and electricity?
Hand out the My Explanation worksheet to each student. Ask them to work independently to explain and record their thoughts about their box and the concept that their box demonstrated. They can use the back of the worksheet if they need extra room to write. Collect the worksheets from all students.

Step #6- DRAFT
SCALE/ MMSD Immersion Unit- Making Connections: Electricity and Magnetism 89
Design a Mystery Box Name:_____________________________ Date:_____________
Your task is to design your own mystery box. Your mystery box must contain one or more of the following:
o Magnets
o A working circuit
o An electromagnet
Here is a drawing of the box that I would like to construct.
(Please use labels on your drawing.)
My mystery box is going to demonstrate the following concept:______________
________________________________________________________________
________________________________________________________________
The supplies that I need for my mystery box are:__________________________
________________________________________________________________
________________________________________________________________

Step #6- DRAFT
SCALE/ MMSD Immersion Unit- Making Connections: Electricity and Magnetism 90
Mystery Box Instructions
Name:_______________________ Date:___________________
1. The title of my box is:_______________________________________________
2. Your goal is to figure out:____________________________________________
________________________________________________________________
________________________________________________________________
3. To begin the task you need to:________________________________________
________________________________________________________________
________________________________________________________________
4. You should collect data by:___________________________________________
________________________________________________________________
________________________________________________________________
5. You should run ___________ trials.
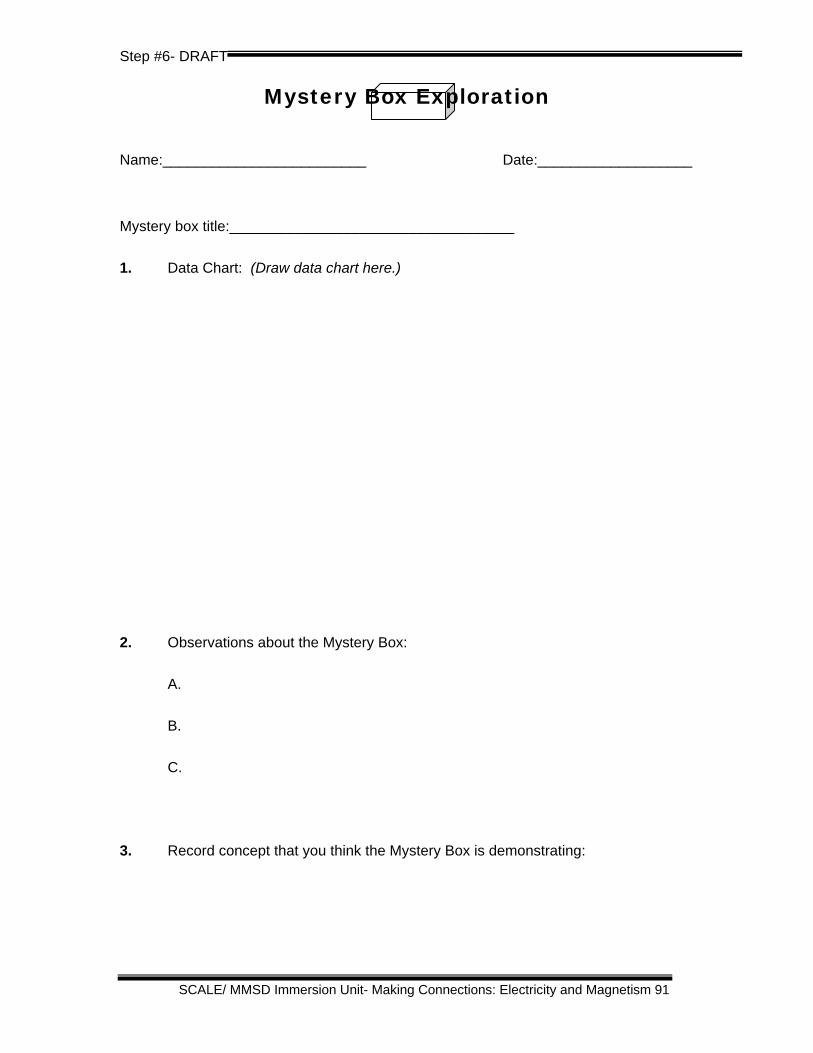
Step #6- DRAFT
SCALE/ MMSD Immersion Unit- Making Connections: Electricity and Magnetism 91
Mystery Box Exploration
Name:_________________________ Date:___________________
Mystery box title:___________________________________
1. Data Chart: (Draw data chart here.)
2. Observations about the Mystery Box:
A.
B.
C.
3. Record concept that you think the Mystery Box is demonstrating:

Step #6- DRAFT
SCALE/ MMSD Immersion Unit- Making Connections: Electricity and Magnetism 92
My Explanation
Name:______________________________ Date:___________________
1. My Mystery Box Title:______________________________________________
2. My Mystery Box Concept:__________________________________________
________________________________________________________________
3. Draw a diagram of your mystery box and label the pieces:

Step #6- DRAFT
SCALE/ MMSD Immersion Unit- Making Connections: Electricity and Magnetism 93
4. Explain how your mystery box demonstrates the concept
(You may refer to your diagram.)
________________________________________________________________
________________________________________________________________
________________________________________________________________
________________________________________________________________
________________________________________________________________
________________________________________________________________
________________________________________________________________
5. Explain one connection between electricity and magnetism:_____________
________________________________________________________________
________________________________________________________________
________________________________________________________________
________________________________________________________________
________________________________________________________________
6. What do you still wonder about electricity and magnetism?

Step #6- DRAFT
SCALE/ MMSD Immersion Unit- Making Connections: Electricity and Magnetism 94
My Explanation: Assessment Scoring Guide
Response Sheet- My Explanation
Score If the student……
4 accurately records box title and concept and draws a diagram complete with labels; explanation accurately explains how the box demonstrates the concept and demonstrates a deep understanding of the concept; lists one connection between electricity and magnetism and thoroughly explains this connection.
3 accurately records box title and concept and draws a diagram complete with labels; explanation accurately explains how the box demonstrates the concept; lists one connection between electricity and magnetism, but cannot explain the connection
2 accurately records box title and concept and draws a diagram complete with labels; explanation mentions the concept but does not accurately explain how the box demonstrates the concept; lists one connection between electricity and magnetism, but cannot explain the connection
1 records the box title, concept and draws a diagram, but does not label the diagram; cannot explain the concept; cannot explain one connection between electricity and magnetism.
0 does not complete the task, or gives information that has nothing to do with what was asked.

Step #6- DRAFT
SCALE/ MMSD Immersion Unit- Making Connections: Electricity and Magnetism 95
Teacher Page: Design a Mystery Box – Sample Ideas
Your task is to design your own mystery box. Your mystery box must contain one or more of the following:
o Magnets
o A working circuit
o An electromagnet
Here is a drawing of the box that I would like to construct.
(Please use labels on your drawing.)
My mystery box is going to demonstrate: How a closed circuit works.
The supplies that I need for my mystery box are: a box, a d-cell, two light bulbs,
three 8-inch wires, one 10-inch wire, tape, scissors, a marker.

Step #6- DRAFT
SCALE/ MMSD Immersion Unit- Making Connections: Electricity and Magnetism 96
Teacher Page: Design a Mystery Box
Your task is to design your own mystery box. Your mystery box must contain one or more of the following:
o Magnets
o A working circuit
o An electromagnet
Here is a drawing of the box that I would like to construct.
(Please use labels on your drawing.)
The magnets will have different poles facing out.
My mystery box is going to demonstrate: That magnets have north and south
poles.
The supplies that I need for my mystery box are: a box, four donut magnets.
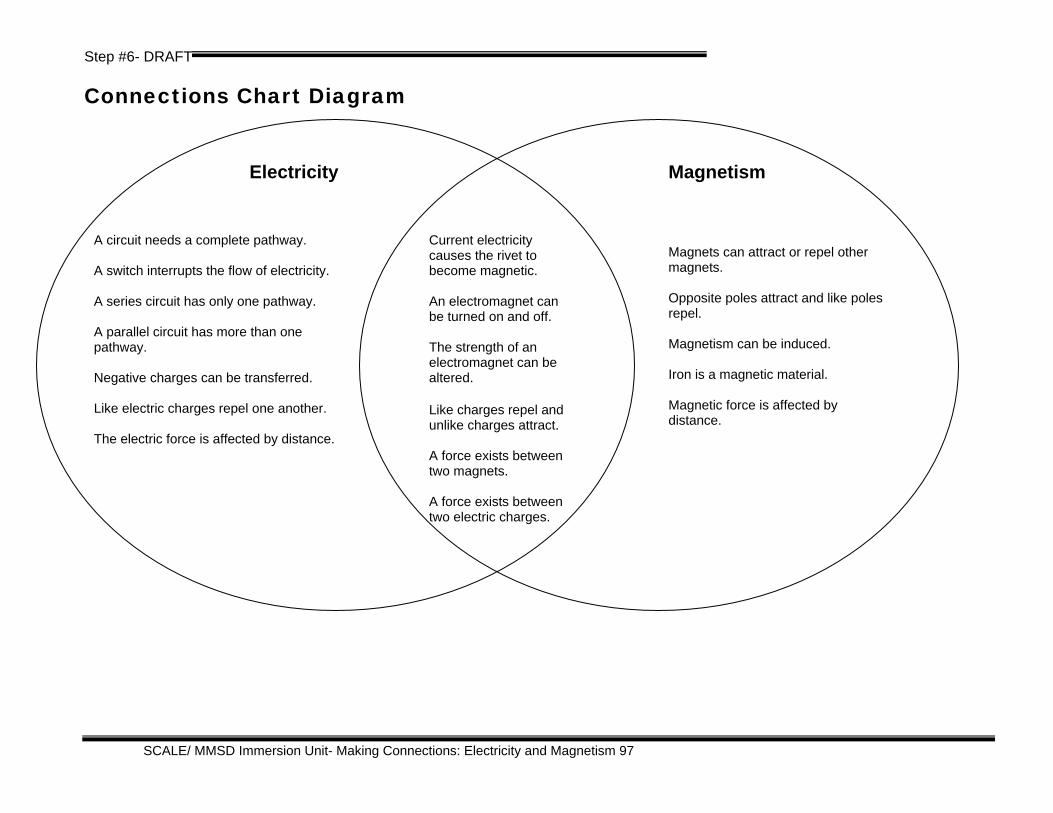
Step #6- DRAFT
SCALE/ MMSD Immersion Unit- Making Connections: Electricity and Magnetism 97
Connections Chart Diagram
A circuit needs a complete pathway. A switch interrupts the flow of electricity. A series circuit has only one pathway. A parallel circuit has more than one pathway. Negative charges can be transferred. Like electric charges repel one another. The electric force is affected by distance.
Electricity Magnetism
Current electricity causes the rivet to become magnetic. An electromagnet can be turned on and off. The strength of an electromagnet can be altered. Like charges repel and unlike charges attract. A force exists between two magnets. A force exists between two electric charges.
Magnets can attract or repel other magnets. Opposite poles attract and like poles repel. Magnetism can be induced. Iron is a magnetic material. Magnetic force is affected by distance.

SCALE/ MMSD Immersion Unit- Making Connections: Electricity and Magnetism 98
Appendix
Making Connections: Electricity and Magnetism

SCALE/ MMSD Immersion Unit- Making Connections: Electricity and Magnetism 99
STANDARDS The following national and Wisconsin state standards are addressed within this Unit.
NATIONAL • Electricity in circuits can produce light, heat, sound and magnetic
effects. Electrical circuits require a complete loop through which an electrical current can pass.
• Magnets attract and repel each other and certain kinds of other materials.
• Ask a question about objects, organisms, and events in the environment.
• Use data to construct a reasonable explanation.
• Scientists develop explanations using observations (evidence) and what they already know about the world (scientific knowledge). Good explanations are based on evidence from investigations.
STATE D.4.8 Ask questions and make observations to discover* the differences between substances that can be touched (matter) and substances that cannot be touched (forms of energy, light, heat, electricity, sound, and magnetism)
C.4.1 Use the vocabulary of the unifying themes* to ask questions about objects, organisms, and events being studied
C.4.2 Use the science content being learned to ask questions, plan investigations*, make observations*, make predictions*, and offer explanations*
C.4.5 Use data they have collected to develop explanations* and answer questions generated by investigations*
C.4.6 Communicate the results of their investigations* in ways their audiences will understand by using charts, graphs, drawings, written descriptions, and various other means, to display their answers
C.4.7 Support their conclusions with logical arguments
A.4.3 When investigating* a science-related problem, decide what data can be collected to determine the most useful explanations*
WORKSHEET MASTERS A master copy of each Immersion worksheet added to this unit is included in the following section. All FOSS worksheets appear in the FOSS Module, Magnetism and Electricity.

SCALE/ MMSD Immersion Unit- Making Connections: Electricity and Magnetism 100
Mystery Box Data Chart
Name:_______________ Box #:_______ Date:______________ Prediction If I put the washer into hole #1 it will exit hole #_________.
If I put the washer into hole #2 it will exit hole #_________.
If I put the washer into hole #3 it will exit hole #_________.
If I put the washer into hole #4 it will exit hole #_________.
Data Collection
Complete seven trials for each hole and record the data. Make sure your whole group collects the same data.
Analyze Data: Review the data with your group. What patterns do you see?
Hole #1 Hole #2 Hole #3 Hole #4
Hole #1 Hole #2 Hole #3 Hole #4

SCALE/ MMSD Immersion Unit- Making Connections: Electricity and Magnetism 101
Evidence & Explanation
Name:_______________ Date:___________________ Box #:________ Label the box diagram with the box number and the location of each hole. Draw the path that the washer follows when it enters one hole and exits another.
Color Code: Fill in the name of the color that you used to represent the data from each hole.
My explanation of the box design is: (draw lines to indicate where you think the walls are located inside your mystery box.) Box #_________
Hole #1= Hole #3= Hole #2= Hole #4=

SCALE/ MMSD Immersion Unit- Making Connections: Electricity and Magnetism 102
Teacher Data Chart Box Design:
Hole #1 Hole #2 Hole #3 Hole #4
3 2 1 4
3 2 1 4
3 2 1 4
3 2 1 4
3 2 1 4
3 2 1 4
3 2 1 4
4 3
1 2

SCALE/ MMSD Immersion Unit- Making Connections: Electricity and Magnetism 103
The Flow of Electricity
Name:_______________________________ Date:___________________
Connect the D-cell to the bulb above.
Use arrows to show how the electricity flows. Use large and small arrows if you need to show different amounts of electricity. Describe below how electricity flows in your drawing above.

SCALE/ MMSD Immersion Unit- Making Connections: Electricity and Magnetism 104
Static Electricity

SCALE/ MMSD Immersion Unit- Making Connections: Electricity and Magnetism 105
Static Electricity
SCALE/ MMSD Immersion Unit- Making Connections: Electricity and Magnetism 106
Static Electricity

SCALE/ MMSD Immersion Unit- Making Connections: Electricity and Magnetism 107
Magnetic Attraction Name:______________________ Date:___________________
Bag #1: Four items that stick together are:
1.
2.
3.
4.
Bag #2: Predictions Did they stick?
1. _________________ will stick to ______________ because
Yes
No
2. ________________ will stick to _______________ because
Yes
No
3. _______________ will stick to ________________ because
Yes
No
4. _______________ will stick to ________________ because
Yes
No
Induced Magnetism List two objects that had magnetic properties when stuck to a magnet:
1.
2.

SCALE/ MMSD Immersion Unit- Making Connections: Electricity and Magnetism 108
Magnets: Reflection Name:_______________________ Date:___________________
1.
Students in a fourth-grade class were investigating which objects stick to magnets. One of them drew a picture in his journal like the one you see above, and then wrote,
“I was surprised! I had a nail stuck to a magnet, and when I accidentally touched the nail to a paper clip, the paper clip stuck to the nail. I wonder why this happens.”
Write a note to this student. See if you can help him understand more about what is happening.
2. Which of the figures above shows a situation where two magnets repel each other? A Figures 1 and 3 C Figures 1 and 4
B Figures 2 and 3 D Figures 1, 2, 3, and 4
S N SN
S
S
S
NN
N
N N
S
S
S
N
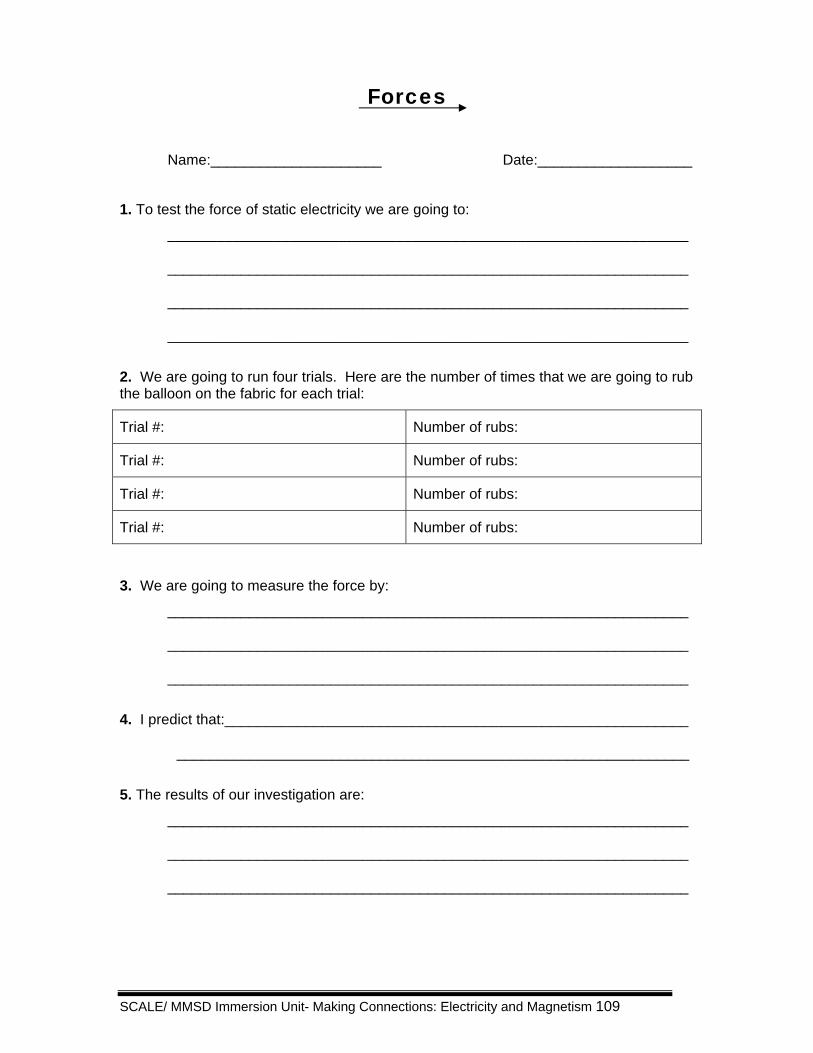
SCALE/ MMSD Immersion Unit- Making Connections: Electricity and Magnetism 109
Forces
Name:_____________________ Date:___________________
1. To test the force of static electricity we are going to:
________________________________________________________________
________________________________________________________________
________________________________________________________________
________________________________________________________________
2. We are going to run four trials. Here are the number of times that we are going to rub the balloon on the fabric for each trial:
Trial #: Number of rubs:
Trial #: Number of rubs:
Trial #: Number of rubs:
Trial #: Number of rubs:
3. We are going to measure the force by:
________________________________________________________________
________________________________________________________________
________________________________________________________________
4. I predict that:_________________________________________________________
_______________________________________________________________
5. The results of our investigation are:
________________________________________________________________
________________________________________________________________
________________________________________________________________

SCALE/ MMSD Immersion Unit- Making Connections: Electricity and Magnetism 110
Forces Data Chart Name:________________________ Date:___________________
DATA
Trial # Number of rubs Measurement
DRAWINGS
Trial #:
Trial #:
Trial #:
Trial #:

SCALE/ MMSD Immersion Unit- Making Connections: Electricity and Magnetism 111
Design a Mystery Box Name:_____________________________ Date:_____________
Your task is to design your own mystery box. Your mystery box must contain one or more of the following:
o Magnets
o A working circuit
o An electromagnet
Here is a drawing of the box that I would like to construct.
(Please use labels on your drawing.)
My mystery box is going to demonstrate the following concept:______________
________________________________________________________________
________________________________________________________________
The supplies that I need for my mystery box are:__________________________
________________________________________________________________
________________________________________________________________
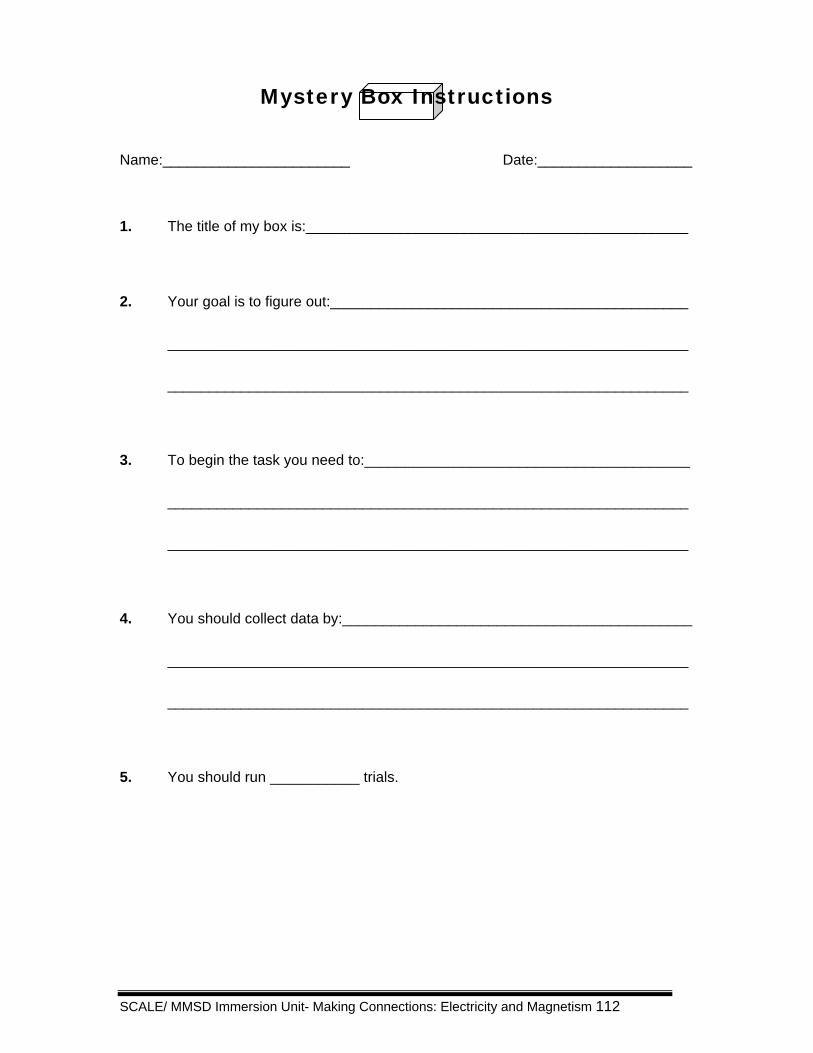
SCALE/ MMSD Immersion Unit- Making Connections: Electricity and Magnetism 112
Mystery Box Instructions
Name:_______________________ Date:___________________
1. The title of my box is:_______________________________________________
2. Your goal is to figure out:____________________________________________
________________________________________________________________
________________________________________________________________
3. To begin the task you need to:________________________________________
________________________________________________________________
________________________________________________________________
4. You should collect data by:___________________________________________
________________________________________________________________
________________________________________________________________
5. You should run ___________ trials.

SCALE/ MMSD Immersion Unit- Making Connections: Electricity and Magnetism 113
Mystery Box Exploration
Name:_________________________ Date:___________________
Mystery box title:___________________________________
1. Data Chart: (Draw data chart here.)
2. Observations about the Mystery Box:
A.
B.
C.
3. Record concept that you think the Mystery Box is demonstrating:
SCALE/ MMSD Immersion Unit- Making Connections: Electricity and Magnetism 114
My Explanation
Name:______________________________ Date:___________________
1. My Mystery Box Title:______________________________________________
2. My Mystery Box Concept:__________________________________________
________________________________________________________________
3. Draw a diagram of your mystery box and label the pieces:
SCALE/ MMSD Immersion Unit- Making Connections: Electricity and Magnetism 115
4. Explain how your mystery box demonstrates the concept
(You may refer to your diagram.)
________________________________________________________________
________________________________________________________________
________________________________________________________________
________________________________________________________________
________________________________________________________________
________________________________________________________________
________________________________________________________________
5. Explain one connection between electricity and magnetism:_____________
________________________________________________________________
________________________________________________________________
________________________________________________________________
________________________________________________________________
________________________________________________________________
6. What do you still wonder about electricity and magnetism?