|m. payne preparing teeth for bonding · armamentarium iv. patient assessment and education the...
TRANSCRIPT

|M. Payne
Preparing Teeth for Bonding
This module will educate you on the concepts of tooth preparation to bond orthodontic
brackets and to restore teeth. You will understand and effectively demonstrate the
sequence of steps, patient management, and the different materials used to effectively
prepare teeth for the bonding of brackets.
Syllabus content
I. Understanding the factors for bonding success
II. General concepts in bonding to enamel surfaces
III. Armamentarium
IV. Patient Assessment and Education the Patient for Bonding
V. Isolation and Moisture Control
VI. Acid etching
VII. Acid etch removal
VIII. Rinsing tooth surfaces
IX. Drying tooth surfaces
X. Application of bonding primers and resins
XI. Preparing dental restorative material surfaces for bonding
Successful bonding technique is an absolute necessity in orthodontics and a very
important skill for every orthodontic assistant. The concepts related to bonding to enamel
of adults and children, as well as the variations in bonding required for gold crowns,
porcelain crowns and resin or plastic materials utilized in dentistry is essential. The goal
of tooth preparation is to create an optimum surface to attach brackets to the teeth
utilizing bonding materials. Well bonded brackets remain in place despite everyday
chewing and functioning. Broken brackets lead to clinical inefficiency, emergencies
which negatively affect the schedule, as well as inconveniences to patients and parents.
With a thorough understanding of bonding, you will avoid pitfalls that lead to bracket
failures.
I. Understanding the factors for bonding success
What are the important factors in effective bonding of orthodontic brackets to teeth?
The Orthodontic professional- Your ability , understanding of the processes, and
attention to detail will assure brackets have adequate bond strength to hold the brackets in
place during normal incising and mastication. Of all the factors resulting in bond failures,
technique is the most critical factor and the one that you can control.

Materials- A great deal of research and development has focused on designing better
bonding materials to effectively bond brackets to tooth surfaces. The critical factor in
achieving a strong bond still remains the knowledge and skill of the operator in properly
utilizing these materials. Consistency and repetition have shown to reduce errors in
execution.
Location- The ease of isolating certain teeth and the adverse effects from the oral
environment varies depending where in the mouth you are preparing a tooth for bonding.
Can you easily apply etching agents? Is the tooth more likely contaminated by saliva or
debris from a cheek or seepage from the gingival crevice of a short tooth? Is the tooth
more highly mineralized with proximity of the salivary ducts which bathe the surface of
the tooth with more minerals?
Clean material surface- In order to create an effective bond, you must start with a clean
surface. You cannot effectively bond to a surface laden with surface debris, calculus,
plaque, blood, or saliva. Understand and be able to identify a pristine tooth surface.
Patient- Is the patient cooperative and is it easy to access all the teeth scheduled for
bonding? Do they have excess saliva or tight lips or cheeks limiting access to the tooth
surfaces? Are they more likely to contaminate a prepared tooth surface with saliva or
contact with an active tongue or cheek?
II. General concepts in bonding to enamel surfaces
The goal of preparing teeth for bonding is to create a material surface which will mate
chemically with bonding materials that are placed on the bracket bases. The common
element in the composite materials used to adhere brackets to teeth is made of a resin
chemical structure. This resin is present in the bracket bonding composite and also in the
unfilled resin known as the bonding agent, primer, or bonding resin. Another goal is to
create a thin surface layer of bonded resin on the tooth that is tightly bound and sealed.
This can be achieved by pressing the bracket gently against the tooth to allow excess
material to be extruded. This layer of material will in turn chemically bond to the
material that is applied to the orthodontic bracket since it is made of the same or a similar
material. No matter whether the tooth surface is composed of gold, porcelain, plastic, or
enamel, the goal is the same, to end with a surface layer of bonding resin that will bond
chemically to the material placed on the back of the bracket.

Figure 1 an unprepared enamel surface.
Figure 2 Enamel surface etched with 37% phosphoric acid
Figure 3 Enamel surface etched with 37% phosphoric acid
Mechanism of Bonding to Enamel
The idea of using phosphoric acid on dental surfaces was first introduced by Buonocore
(1955), who observed that adhesion to metal surfaces by paints improved when acids
were used to etch the metal surface increasing the strength of the bond. An unprepared
enamel surface is a poor surface to bond with mechanically or chemically which leads to
poor adherence of the brackets. (Figure1). Placing an acid on the enamel surface changes
the surface of the enamel by dissolving some of the calcium salts increasing the number
and size of microscopic depressions (Figure 2 and 3). The liquid resin found in
orthodontic bonding agents penetrates into the depressions and over the projections left
from the etching process. Once the bonding agent is cured typically with a light curing
unit, these fingerlike projections of resin are tightly bound to the enamel surface. The
surface of the enamel is now covered with a thin resin which chemically bonds to the
more viscous (thicker) composite bonding materials placed on the back of the brackets.
Since the mechanical lock of the resin into the enamel is critical, proper preparation and
protection of this prepared enamel surface is critical to successful bonding of brackets.
Acid Etchants
No alternative that has yet been tested is as efficient and as effective as phosphoric acid
for etching tooth structure. Phosphoric Acid etchants come in two basic forms, a viscous,
thick gel and in a liquid. The acid etchants are either clear or colored to easily identify on

the tooth surface. There are advantages to gel etchants as these can more easily be
controlled and remain where originally placed on the tooth. The etchants main
component is phosphoric acid in a 10-50% strength with 37% a common strength used in
orthodontics. Compared to a neutral PH of 7 a 37% concentration of phosphoric acid is
over a 1,000,000 times more acidic. The acid dissolves the calcium salts from the tooth
when in contact with the tooth for 20-60 seconds. If 30 seconds is the optimum time to
etch the tooth surface opening the crevices for the resin to fill,; is tripling the etch time
better? In fact, extending the time of the acid etch on a typical enamel surface actually
reduces the bond strength. As the acid remains in contact with the tooth beyond the
optimum time more calcium salts are dissolved which end up filling the crevices with
additional debris thus reducing the places the liquid resin can flow into and shortening the
resin tags which give the bond strength.
Acid Etchant Precautions and patient safety
Phosphoric Acid etchants are a moderate strength acid. Etchant dangers should be
understood by all dental staff members who use these materials as well as the precautions
and means by which to mitigate the effects to the gums and mucosal tissues.
1. All dental staff should wear gloves when handling these materials.
2. Patient precautions should include methods to isolate skin, oral mucosa, and
the eyes from accidental contact with etchant.
3. Avoid contact with the eyes with the use of safety glasses. Avoid passing
items over the patient face.
4. The longer the etchant is in contact with tissue the greater the damage from
the acid.
5. Remain vigilant and watchful of where the acid etchant is placed and practice
good isolation in the oral cavity to limit contact of the acid etchant with oral
mucosa.
6. If the etchant comes in contact with the oral mucosa or the eyes, immediately
rinsing with water.
Review the MSDS for the etchant and bonding materials.

III. Armamentarium- A list of typical materials and instruments is included. Different
offices will vary their procedures and can subtract or add additional materials they find
helpful in successful bonding.
1. Prophy paste- pumice without fluoride
2. Prophy angle and slow speed handpiece
3. High speed drill ( for use by orthodontist when indicated for surface
preparation)
4. High speed evacuation and tip
5. Air water syringe and tip
6. Saliva ejector and tip
7. Mouth Mirror
8. Scaler or explorer
9. Lip retractors
10. Tongue guard and saliva ejector assembly
11. Short and long cotton rolls
12. 2 x 2 gauze
13. Dry angles
14. Individual brushes/ applicators
15. Liquid wells or disposable sheets for dispensing agents
16. Acid etchant in bottle or syringe
17. Bonding agent/primers
18. Additional etchants and primers for bonding to dental restorations
IV. Patient Assessment and Educating the Patient for Bonding
Take the time to examine your patient and plan for the best techniques to isolate the teeth
for bonding. Assessing your patient will give you valuable information before you
decide how best to manage their bonding experience. This step also allows you to discuss
what you are planning before you start and prepare them for how they can best help.
1) Patient assessment
1. Examine the patient to anticipate challenges in the bonding process. Some
patients have small mouths and taunt tissues increasing the methods
necessary to control the oral environment from contamination.
2. The patient assessment should answer a number of questions:
a. Does the patient produce an excessive amount of saliva? The
average person can produce up to 1.5 liters of saliva in 24 hours
produced predominantly from the parotid glands in the cheeks
and the submandibular glands in the floor of the mouth. Many
times it appears the 1.5 liters is flowing all at one time!
b. Does the patient have an active tongue and excess head
movement?
c. Are the lips and cheeks loose or taunt and is access to the labial
surfaces of the teeth difficult?
d. Are the vestibules deep and will these areas accommodate a
cotton roll and maintain the cotton rolls without the muscles
dislodging these isolation aids?
2) Patient assessment
1. Examine the patient to anticipate challenges in the bonding process. Some
patients have small mouths and taunt tissues increasing the methods
necessary to control the oral environment from contamination.
2. The patient assessment should answer a number of questions:
a. Does the patient produce an excessive amount of saliva? The
average person can produce up to 1.5 liters of saliva in 24 hours
produced predominantly from the parotid glands in the cheeks
and the submandibular glands in the floor of the mouth. Many
times it appears the 1.5 liters is flowing all at one time!
b. Does the patient have an active tongue and excess head
movement?
c. Are the lips and cheeks loose or taunt and is access to the labial
surfaces of the teeth difficult?
d. Are the vestibules deep and will these areas accommodate a
cotton roll and maintain the cotton rolls without the muscles
dislodging these isolation aids?
V. Cleaning tooth surfaces
1. The oral cavity is replete with microorganisms, debris, salivary pellicle, and
bathed with serous and mucous fluids. These materials accumulate on the tooth

surface. You cannot reliably etch and bond to a debris laden surface. Recognize
that acquired coatings are present on the tooth surfaces and may affect bond
strength. These materials should be removed prior to preparing the tooth for
bonding.
a. Salivary Pellicle- a clean tooth surface is quickly coated with salivary
proteins and glycoproteins forming a very thin layer. This protein layer
easily reforms when the surface of the tooth is in contact with saliva
b. Dental plaque- the plaque is made up of inorganic compounds, bacteria,
other microorganisms, and salivary constituents
c. Calculus- bacterial plaque can become mineralized forming hardened
deposits which are not easily worn away.
2. Cleaning the tooth surface is designed to provide a bare enamel surface on which
to bond brackets. Prophylaxis of the enamel surfaces removes plaque, food
particles, and some surface minerals.
a. The surface of the tooth can be cleaned with an abrasive applied manually
with a hand instrument and prophy cup or more efficiently with a slow
speed hand piece and prophy angle, micro-etcher.
b. The prophy paste for orthodontics is composed of pumice in a glycerin
liquid for ease of application. Fluoride or other additives are not
components of orthodontic prophy pastes as these can inhibit bonding.
c. Once the surfaces are pumiced and the mouth is thoroughly rinsed, inspect
the tooth surfaces with a scaler or explorer for residual plaque or calculus.
If calculus is found the area will need scaling to expose clean enamel
surface for etching and successful bonding.
Examples of prophy angles, scalers, hand instruments, active picture of prophy
material
VI. Isolation and moisture control – once the surface of the teeth have been rinsed,
dried, and thoroughly inspected for residual plaque and calculus the teeth are ready for
isolation in preparation for etching. The isolation of the teeth serves a number of
functions:
a. Utilizing isolation materials creates a barrier which partitions the oral
mucosa avoiding contact with the teeth.
b. Isolation the soft tissue gives better visualization of the teeth and lessens
the chance of mucosa contacting the etchant materials applied to the teeth.
c. Placement of cotton products and shields helps control saliva and reduces
the challenge of protecting the tooth surface from recontamination with
saliva and salivary pellicle.
d. A properly placed cotton roll or retractor can free an operators hands and
focus back to preparation of the tooth for bonding.
Materials for isolation and moisture control
1. Cotton roll isolation is effective in some patients to retract the cheeks and lips.
a. Select the cotton roll lengths that will best fit and remain in the vestibule.
b. In some patients (many children) the vestibule is not deep enough to
passively hold the cotton roll. When you place it, a short time later you
will see that it has migrated from the mucosa to the tooth level.
c. Longer cotton rolls sometimes work best and an extra mouth mirror may
be used to hold the cotton roll in place.
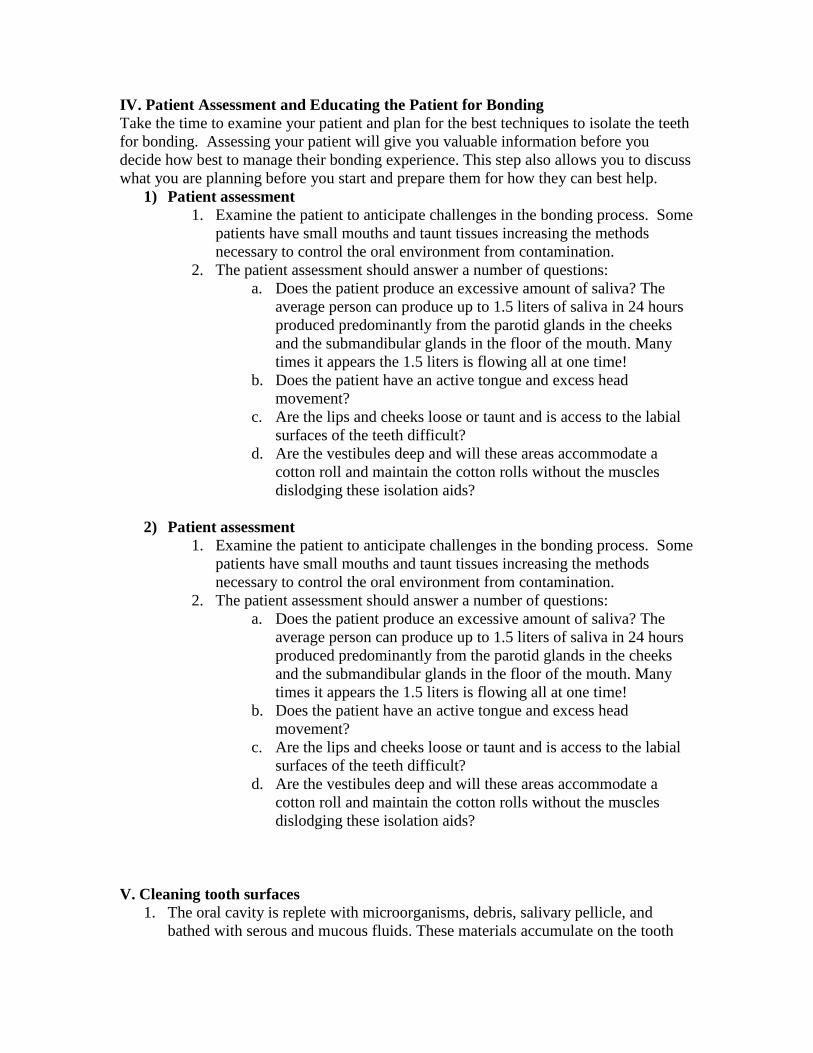
2. Cheek retractors are available from a number of manufactures to retract the lips
and cheeks.
a. Retractors can free the hands from continually holding a mirror to retract
the cheek or lip.
b. Retractors are designed =either as a universal size or scaled for the size of
the patient. Consider a child size retractor for small children as this will
provide a more comfortable experience.
c. Some retractor designs include optional tongue guards as well as saliva
ejection tubing..
3. Dry angles can also assist with moisture control from the parotid salivary ducts
(Stensen’s ducts adjacent to the maxillary first molars).
4. Auxiliary saliva ejectors can prove helpful for patients with excessive saliva
production.
5. High Speed Evacuation - routinely we utilize high speed evacuation to suction the
majority of the saliva from the oral cavity as well as to remove etchant and water
spray. To reduce etchant from dispersing throughout the mouth, first suction
excess etchant and then rinse/suction.
6. Some orthodontists also use anti-sialagogues such as Pro-Banthine to control
saliva flow. These medications given typically in pill form 15 minutes prior to a
bonding appointment shut down saliva flow drying the mouth substantially.
These medications have side effects and there are patients with medical
conditions which prevent there use. Only the orthodontist should prescribe or
provide these medications after thorough evaluation of the patient’s medical
history. Considering the many systems for retracting the lips and suctioning of
saliva, antisialagogues (medications which reduce salivary flow) are not needed in
most patients.

Acid Etchant placement- once the patient teeth have been thoroughly cleaned, inspected
and isolated the operator is ready to etch the tooth enamel surface.
1. If using a syringe delivery for the first time, dispense a small amount of etch from
the application syringe to prevent any etchant gel spurting out into the patient’s
mouth due to air or solids lodged in the application syringe tip.
2. Dry the tooth surface then apply etch to the enamel covering an area larger than
the bracket base and in the area where the bracket will be placed. Cover the area
thoroughly while avoiding excess amounts which may slough or if overly thick
may come in contact with the patients soft tissues.
3. If using liquid etchants, be very careful with placement to avoid excess amounts
which may flow off the tooth and onto vital structures.
4. When using etchants, avoid excess amounts over areas of the tooth where the
bracket will not be bonded, for example the interproximal areas of the teeth.
Coverage of the general area of the tooth where the brackets are to be placed is
permissible as it will not harm the tooth. These etched areas will remineralize
especially if patients utilize fluoride rinses as recommended.
5. With gel etchants the goal is to cover the tooth surface while limiting a buildup of
etchant in thickness. A thick ball of etchant will not increase the effectiveness of
the etching process, wastes material, and will increase the likelihood the etchant
will contact the cheek, lip, or tongue. Excess etchant can transport to areas of the
mouth in quantities that can cause chemical burns to the tissue if left unidentified
for an extended period of time.
Time factors
1. 37% phosphoric acid is the standard etchant material from which the
recommended time for etching teeth is derived. Most manufacturers recommend
15-30 seconds etch time for an average enamel surface.
2. While 15-30 seconds is average, increasing the time to a few minutes does not
improve bond strength, it actually will reduce bond strength as the calcium salts
from the extended etching time clog the enamel surface limiting penetration of the
bond resin into the tooth.
3. Etching time should be increased in specific circumstances:
a. Primary teeth- the enamel structure of the primary teeth is not as
consistent as that of the adult teeth.
b. Some orthodontists recommend removing the top aprismatic enamel
common on primary teeth by removal with a carbide bur or sandblasting
followed by etching for 30-60 seconds with phosphoric acid 37%.
c. Succedaneous (adult) teeth may have aprismatic enamel or hypocalcified
enamel which would also benefit from additional surface preparation and
extended etch time.
Rinsing tooth surfaces
1. At the end of the etching time the etching gel is suctioned off and then rinsed
off with forceful water spray. The goals are to remove the etchant AND
precipitated products of the etching.
2. Focus on rinsing off the etchant while effectively suctioning the liquid to
avoid pooling and recontamination of the etched surfaces.
3. Once the etchant is removed, switch to forceful spray of a oil-free water for 15
seconds to improve surface cleaning removing etchant debris..
4. Remember rinsing not only removes the etchant, it is also critical to continue
rinsing to remove the calcium salts and open up the depressions in the enamel
to accept the bonding agent.
5. At the end of rinsing and high speed suction the etchant will have been
completely eliminated along with excess fluids, while the teeth will remain
wet.
Drying teeth
1. At the end of the rinse cycle, before air drying the teeth, inspect the oral cavity
for residual enchant in contact with the tissue or remaining on the teeth.
Removing the etchant at this time can eliminate prolonged contact of acid
with soft tissue and subsequent chemical irritation of the tissue.
2. Reevaluate the oral cavity and eliminate any pooled saliva or water before
starting to dry the teeth. The goal is to avoid blowing saliva or debris on to the
etched surface reducing bond strength.
3. If cotton rolls are in place and saturated either dry with the high speed suction
or carefully replace the cotton rolls avoiding contact with the tooth surfaces
when removing the cotton rolls.
4. The drying step is critical to the strength of the bond as effective drying
allows for deeper penetration of the resin increasing the length of the resin
tags that mechanically lock the bonding agent to the enamel.
5. Once the teeth are well isolated and no saliva or water is present which might
blow onto the clean tooth surface, it is time to dry the surface.
a. The air water syringe is a common instrument for drying the teeth with
certain provisions.
b. Make sure the air water syringe stops the flow of water when the air is
pressed separately. Observe for the presence of water vapor in the
syringe and rewetting of the tooth surface. There are rubber seals in
the housing of the syringe which can be replaced if moisture continues
to escape from the syringe tip.
c. Air dryers designed for orthodontics also can efficiently dry the teeth.
d. The high speed evacuation will pull moisture from the tooth surface,
but may leave some residual moisture.
e. While drying the enamel, continue suctioning near the air water
syringe tip periodically suctioning the oral cavity to avoid pooled
saliva as before.
f. Properly conditioned enamel should exhibit a dull, matte, chalky,
frosty-white appearance; if not, repeat etching procedure for an
additional 15 to 20 seconds.
g. Take the time to adequately dry the teeth.
h.
Contamination of the tooth surface with saliva or crevicular fluids.
1. Occasionally despite best efforts an etched and dried enamel surface is
contaminated by saliva before the bonding agent is applied.
2. Once contaminated, do not proceed with the bonding process until the
contamination has been corrected.
3. The saliva deposits debris in the irregularities of the enamel surface not allowing
the resin to penetrate the enamel surface and create the strong mechanical bond.
4. You must etch the surface again. The depressions in the enamel with removal of
the calcium salts occurred with the 30 second etching. A 10 second etch will
clean the surface of the debris and once again allow full penetration of the resin.
5. The best way to protect the etched surface is to apply and cure the bonding
agent.
Contamination of the resin bonded surface
1. After the tooth surface is sealed with resin and ready for bonding of orthodontic
brackets we are relying on a chemical bond between the resin on the tooth surface and
the resin within the bonding composite placed on the bracket. If the surface of the
light cured resin placed on the prepared enamel is contaminated with saliva the bond
strength would be reduced by this smear layer of protein and associated debris.
2. The smear layer must be cleaned from the resin surface prior to placing a bracket
loaded with composite.
3. Rinse to remove the smear layer, dry the surface, and reapply bonding agent
thinning with air stream and light cure. At this point the resin is ready to accept the
composite loaded bracket.
Are there different steps and materials for bonding to dental restorative materials?
1. Preparing enamel for bonding has been described as a progression of steps to
create a mechanical connection of the bonding resin to the enamel surface. A general
description of bonding to different restorative materials is provided to give an
understanding of concepts specific to bonding to gold, porcelain, and plastic or
composite fillings. Review the instructions from the manufacturer and discuss the
steps with the orthodontist. In most cases the common material is some form of
primer that will prepare the surface to accept the normal bonding agents.
2. As with enamel the ultimate the goal is to create a strongly bonded surface layer
of bonding resin that will readily bond to the composite bonding paste on the back of
the orthodontic bracket. Some of the following steps and materials may be needed to
bond effectively. Become familiar with the different materials and memorize the
order of these steps and when each is used. Create cards for the steps required for
each material. The table provides general guidelines for each restorative material.
Review instructions from the manufacturers to individualize the steps for the
materials used in your orthodontic office.

Dental
Material
Surface Cleaning or
Roughening
Etching Primers Bonding
Agents
Enamel Pumice Surface 37% phosphoric acid None √
Porcelain Occasional removal of glaze
using micro etch or bur
roughening
10% Hydrofluoric Acid Porcelain primer √
Gold Micro etching or Bur
roughening
None 4 Meta metal
primer
√
Amalgam Micro etching or Bur
roughening
None 4 Meta metal
primer
√
Plastic Roughen surface with bur Only enamel areas Plastic Conditioner √
Composite Roughen surface with bur Only enamel areas Plastic Conditioner √
Bonding Agents
1) Porcelain Bonding Preparation
1. The process to bond to a porcelain crown is dependent on a chemical and/or
mechanical bond between the porcelain surface and the resin bonding agent.
2. Studies have shown that the highest bond strength combines both mechanical
retention and chemical bonding of the porcelain and the bonding resin.
3. Porcelain as a special crystalline material requires a special acid and longer
etching time to dissolve the surface creating irregularities for a mechanical bond.
Hydrofluoric acid is used to alter the porcelain surface. This is a VERY corrosive
material which will damage tissue and must be handled carefully with good
isolation and control of acid placement.
4. To create the chemical bond between the porcelain and the bonding resin a
Silane coupling agent or “porcelain primer”, is used after etching and allowed to
chemically prepare the porcelain surface before air drying.
5. The typical preparation of porcelain involves cleaning of the porcelain surface,
etching with hydrofluoric acid or phosphoric acid (less effective etching),
porcelain primer application, and placement of the bonding resin, and finally
bracket placement with the bonding paste.
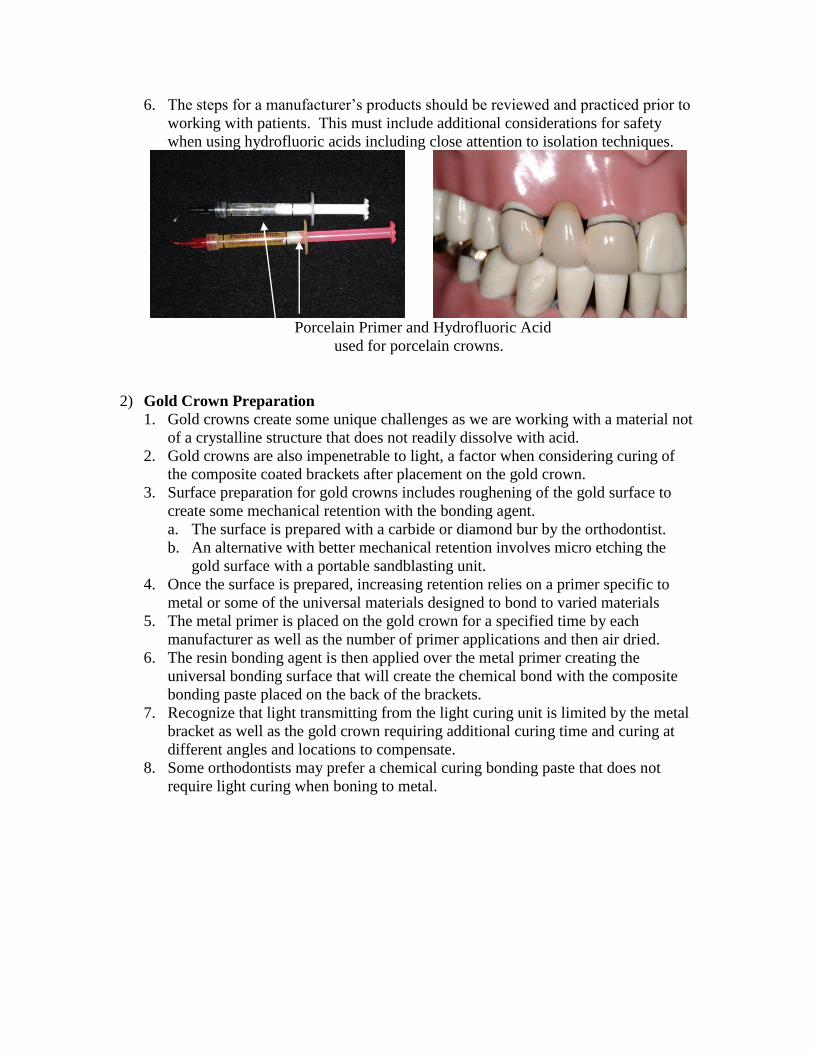
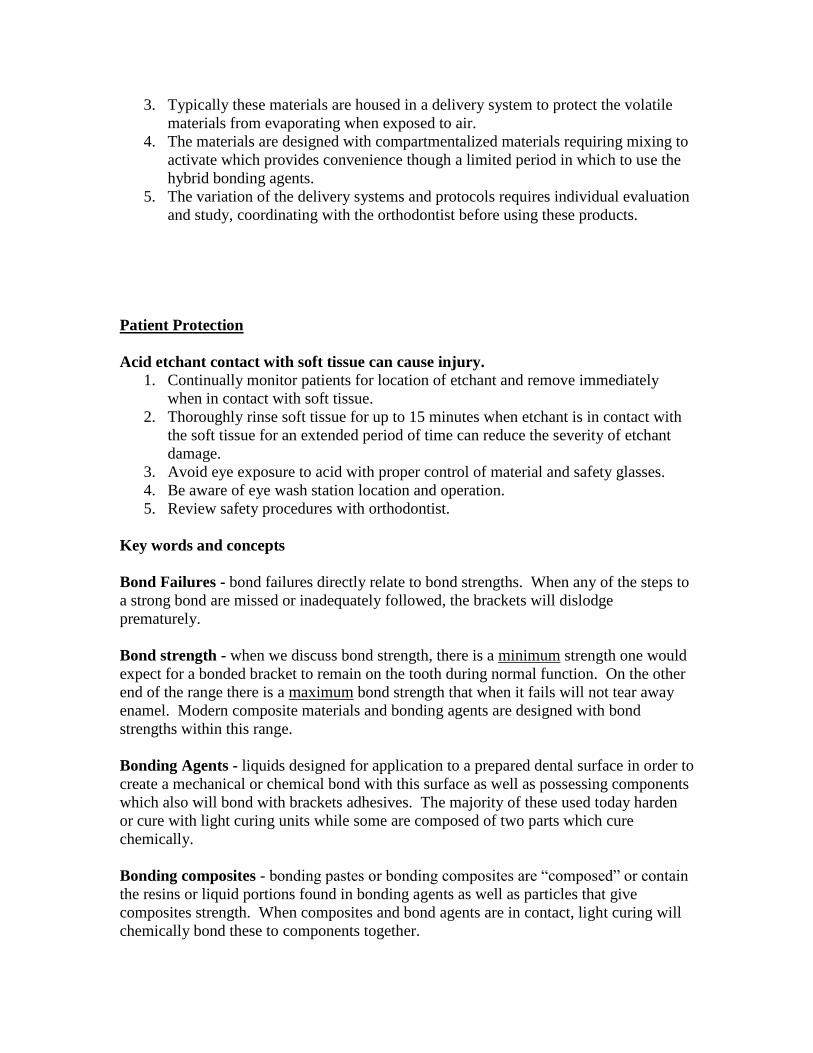
6. The steps for a manufacturer’s products should be reviewed and practiced prior to
working with patients. This must include additional considerations for safety
when using hydrofluoric acids including close attention to isolation techniques.
Porcelain Primer and Hydrofluoric Acid
used for porcelain crowns.
2) Gold Crown Preparation
1. Gold crowns create some unique challenges as we are working with a material not
of a crystalline structure that does not readily dissolve with acid.
2. Gold crowns are also impenetrable to light, a factor when considering curing of
the composite coated brackets after placement on the gold crown.
3. Surface preparation for gold crowns includes roughening of the gold surface to
create some mechanical retention with the bonding agent.
a. The surface is prepared with a carbide or diamond bur by the orthodontist.
b. An alternative with better mechanical retention involves micro etching the
gold surface with a portable sandblasting unit.
4. Once the surface is prepared, increasing retention relies on a primer specific to
metal or some of the universal materials designed to bond to varied materials
5. The metal primer is placed on the gold crown for a specified time by each
manufacturer as well as the number of primer applications and then air dried.
6. The resin bonding agent is then applied over the metal primer creating the
universal bonding surface that will create the chemical bond with the composite
bonding paste placed on the back of the brackets.
7. Recognize that light transmitting from the light curing unit is limited by the metal
bracket as well as the gold crown requiring additional curing time and curing at
different angles and locations to compensate.
8. Some orthodontists may prefer a chemical curing bonding paste that does not
require light curing when boning to metal.

3) Plastic Crown preparations
1. The plastic crowns and composite restorations need cleansing and roughening of
the surface before proceeding.
2. The orthodontist can roughen the surface with a diamond or carbide bur.
3. Temporary plastic crowns and composites require a special primer formulated for
plastics.
4. Just as with the other primer, solutions for porcelain and gold, the primer remains
on the surface and is air dried.
5. The bonding resin chemically bonds to the primed plastic surface. Once light
cured, the surface will again bond chemically with the composite paste on the
back of the brackets.
4) Hyper-mineralized teeth
1. Teeth near the salivary ducts may have an excessive layer of minerals on the
surface of the enamel. The typical etching time with phosphoric acid will not
dissolve these surface minerals quickly and penetrate the enamel sufficiently to
create the long resin tags necessary for good mechanical retention. When
encountered, it is necessary to increase the etching time to at least 60 seconds to
dissolve the additional minerals on the surface as well as the calcium salts of the
enamel.
5) Primary teeth enamel bonding
1. The primary enamel structure is not as organized as with adult teeth. It is
recommended that the surface layer of aprismatic enamel be removed prior to
etching with a carbide bur by the orthodontist.
2. The primary enamel may require additional etching time to provide adequate
bond strength.
6) Self Etching primers
1. Self etching primers continue the progression of simplifying the bonding process
by combining the etching and bonding materials in a single solution.
2. Self etching primers were designed to streamline the bonding step and reduce
some of the technique sensitive steps prone to contamination and a reduction in
bond strength.
3. Typically these materials are housed in a delivery system to protect the volatile
materials from evaporating when exposed to air.
4. The materials are designed with compartmentalized materials requiring mixing to
activate which provides convenience though a limited period in which to use the
hybrid bonding agents.
5. The variation of the delivery systems and protocols requires individual evaluation
and study, coordinating with the orthodontist before using these products.
Patient Protection
Acid etchant contact with soft tissue can cause injury.
1. Continually monitor patients for location of etchant and remove immediately
when in contact with soft tissue.
2. Thoroughly rinse soft tissue for up to 15 minutes when etchant is in contact with
the soft tissue for an extended period of time can reduce the severity of etchant
damage.
3. Avoid eye exposure to acid with proper control of material and safety glasses.
4. Be aware of eye wash station location and operation.
5. Review safety procedures with orthodontist.
Key words and concepts
Bond Failures - bond failures directly relate to bond strengths. When any of the steps to
a strong bond are missed or inadequately followed, the brackets will dislodge
prematurely.
Bond strength - when we discuss bond strength, there is a minimum strength one would
expect for a bonded bracket to remain on the tooth during normal function. On the other
end of the range there is a maximum bond strength that when it fails will not tear away
enamel. Modern composite materials and bonding agents are designed with bond
strengths within this range.
Bonding Agents - liquids designed for application to a prepared dental surface in order to
create a mechanical or chemical bond with this surface as well as possessing components
which also will bond with brackets adhesives. The majority of these used today harden
or cure with light curing units while some are composed of two parts which cure
chemically.
Bonding composites - bonding pastes or bonding composites are “composed” or contain
the resins or liquid portions found in bonding agents as well as particles that give
composites strength. When composites and bond agents are in contact, light curing will
chemically bond these to components together.

Bonding Primers - Consider the word primer as it is related to painting. Prior to
painting a wall it is recommended to place a “primer paint” to improve the bond of the
paint to the wall. Bonding primers improve the bond of the composite bonding agents
and materials to the tooth in the same way.
Etchant - an acid designed to clean and etch the tooth surface. Etchants are different
formulations of acid depending on the type of surface you are preparing.
Filled resins - the same as bonding composites filled resins are made of the liquid resins
found in bonding agents as well as the “filler” which is the hard particles that give the
bonding composites strength and a thicker more viscous composition. This allows the
filled resins to effectively stick to the tooth surface when applying a bracket to the tooth.
Pellicle - a mixture of protein and plaque that coats the surface of teeth. The pellicle will
instantly coat the tooth when the surface is contaminated by saliva, when contacted by
the tongue or when in contact with the lip or cheek. The pellicle will inhibit a good bond
to enamel if it contacts the freshly etched enamel surface of a tooth.
Students will complete study material for modules 4 preparing teeth for bonding and
Module 5 bracket placement prior to proceeding with the laboratory section which will
include instruction in the continuum of both procedures.
Laboratory Session 1 Hour
During this session, students will practice the preparation of teeth for bonding with the
application of materials on typodont teeth using appropriate etchants, primers according
to type of enamel or restorative material being bonded.
Typodont experience
1. Practice protocol for bonding to enamel
2. Practice protocol for bonding to porcelain
3. Practice protocol for bonding to plastic
4. Practice protocol for bonding to gold/metal
5. Practice protocol for bonding to atypical enamel
6. Practice protocol for contaminated tooth
Students will work with a partner during the process of these procedures. The assisting
student will observe each stage of the process for evaluation. The following is an
approximate step-by-step description of the procedures that should be followed during
the laboratory session.
1. Each student will set up his/her armamentaria for etchant and bonding
placement.
2. Student will be provided with a typodont, a bench mount and four anterior and
four posterior typodont teeth. In addition, the student will be provided with
individualized packets that will include:
a. Description of packet
b. Etchant material in disposable syringe or bottle
c. Brushes/applicators for etchant application
d. Liquid wells or disposable sheets for dispensing materials
e. Bonding agent/primer in bottle or disposable syringe
3. Instructor will review procedures and present information on how to use
worksheet for etchant and bonding placement.
4. Instructor will present criteria for ideal etchant, bonding resin placement.
Instructor will provide ideal examples that will be passed around for viewing.
5. Student will place etchant on typodont tooth, partner observes, evaluates and
records on worksheet. Student will also evaluate him/herself on the procedure.
Instructor evaluates the etching process. The entire process will continue to be
evaluated on the worksheet by the student, partner/assistant and instructor.
6. Partners switch places, the operator becomes the assistant and the assistant
becomes the operator, both student partners have completed at this point three
typodont teeth at this point.
7. Instructor will now present product evaluation form and how it is used to evaluate
final etchant and bonding application.
8. Using the product evaluation form, the student operator and the student assistant
and instructor grade the final etchant, bonding process for each other.
9. Discussion on product evaluation is conducted in small groups
Laboratory Session 5 Hours Laboratory practice on typodont teeth continues but now for specialized products used for
bonding atypical enamel, porcelain, plastic, gold etc. and practice protocol for
contaminated teeth.
Preclinical: Assistants working on each other in simulation
During this session, student partners work on each other in simulation as described and
demonstrated by instructor on day one. The following general procedures will occur:
Working with a partner, each student functions as an operator and applies etchant (faux)
and bonding materials. Student will then function as an assistant, observe and evaluate
placement with partner.
The following general procedures will occur for each patient:
1. Operatory will be set up following the infection control guidelines.
2. Medical history will be completed by student/patient prior to seating.
3. Equipment and supplies will be checked by student.
4. Student/patient will be seated and prepared for treatment.
5. Student operator will review medical history and perform a patient assessment
instructor will follow-up with same procedures.
6. Patient is given instructions/explanation of procedures

7. Student operator will perform the following according to the stated criteria
a. Perform coronal polish.
b. Isolate one quadrant and dry
c. Perform etchant (faux/simulated product) application procedures
d. Suction of “etchant” from tooth
e. Rinse and dry etched tooth/teeth.
f. Apply primer/bonding material(s)
g. Cure material (2 seconds only during simulation for easy removal)
h. Apply composite resin material
i. Cure composite resin material
j. Evaluate product using ideal criteria
k. Patient post-op instructions are given
l. Dismiss patient
m. Perform operatory clean-up according to infection control guidelines.
During the procedure the following will take place:
1. The student/operator will evaluate his/her own work according to stated criteria
using the worksheet and product evaluation forms.
2. The student/assistant will assist, observe and evaluate operator’s performance
according to criteria using the worksheet and product evaluation forms.
3. The instructor will evaluate both student’s work/performance using stated criteria
using the worksheet and product evaluation forms. Discussion on results will be
conducted.
4. The instructor will demonstrate and explain clinical examination protocol. When
student performs last procedure on student partner it will be termed “mock exam”
in preparation for the final exam on a clinical patient.
Written Final Examination: 1 hour Modules 4 and 5
Clinical Instruction 4 hours
During this session, the instructor will demonstrate the sequence of tooth preparation for
bonding on active patients.
The following procedures will be demonstrated:
a. Perform coronal polish.
b. Isolate one quadrant and dry
c. Perform etchant application procedures
d. Suction of etchant from tooth
e. Rinse and dry etched tooth/teeth.
f. Apply primer/bonding material(s)
g. Cure material
h. Apply composite resin material
i. Cure composite resin material
Student experience on active patients will include preparation for subsequent bracket
bonding on four anterior and four posterior teeth a minimum of four times each, with one
of each of the four times used for a practical exam.
The following general procedures will occur for each patient:
1. Operatory will be set up following the infection control guidelines.
2. Medical history will be completed by the patient prior to seating.
3. Equipment and supplies will be checked by student/operator.
4. The patient will be seated and prepared for treatment.
5. Student operator will review medical history and perform a patient assessment,
instructor will follow-up with same procedures.
6. Patient is given instructions/explanation of procedures
7. Student operator will perform the following according to the stated criteria
a. Perform coronal polish.
b. Isolate one quadrant and dry.
c. Perform etchant application procedures.
d. Suction of etchant from tooth.
e. Rinse and dry etched tooth/teeth.
f. Apply primer/bonding material.(s)
g. Cure material.
h. Apply composite resin material.
i. Cure composite resin material.
j. Evaluate product using ideal criteria
k. Patient post-op instructions are given.
l. Dismiss patient.
m. Perform operatory clean-up according to infection control guidelines.
After the student operator completes the sequence of procedures, the student operator, the
assistant and the instructor will evaluate the performance of the student operator using the
worksheet and product evaluation
During this time period the following procedures will occur:
1. The student/operator will evaluate his/her own work according to stated criteria
using the worksheet and product evaluation forms.
2. The student/assistant will assist, observe and evaluate operator’s performance
according to criteria using the worksheet and product evaluation forms.
3. The instructor will evaluate both students’ work/performance using stated criteria
using the worksheet and product evaluation forms. Discussion on results will be
conducted.