lt series • ld series • rd series - refco · 1.0 unpacking remove the pump from its packing...
TRANSCRIPT

LT Series • LD Series • RD Series
Operating Instructions
®
Vector_Instruction_Manual.indd 1 28/1/09 2:25:19 PM
SAFETY PRECAUTIONS
THIS EQUIPMENT MUST ALWAYS BE OPERATED BY A QUALIFIED TECHNICIAN
READ THIS MANUAL and become familiar with the specifications and operation of this machine prior to use
WEAR APPROPRIATE SAFETY PROTECTION APPAREL such as gloves, eye protection and foot protection when working on refrigeration systems
DISCONNECT POWER before moving or servicing the JAVAC vacuum pump. Improper use or connections may cause ELECTRICAL SHOCK hazards. Be sure that all associated devices are properly grounded before energizing circuits
CARE MUST BE EXERCISED IF TOUCHING THE PUMP, AS CERTAIN COMPONENTS MAY BE HOT
The exhaust gas from the vacuum pump is composed of oil and gases entering the pump. THE EXHAUST GAS SHOULD BE WELL VENTILATED
NEVER OPERATE THE PUMP WITH BLOCKED OR RESTRICTED OUTLET (exhaust), the resulting back pressure may blow out the sight glass or otherwise damage the pump
THE PUMP HAS BEEN DESIGNED TO OPERATE MOST EFFICIENTLY ON JAVAC NO. 16 OILS.Other vacuum pump oils may work, however, performance results may not be as stated. Consult JAVAC for use with other oils
THE RD AND LD VACUUM PUMP IS NOT DESIGNED FOR PUMPING CORROSIVE, AGGRESSIVE OR EXPLOSIVE GASES, OR FOR USE IN A FLAMMABLE OR EXPLOSIVE ENVIRONMENT
Pumps may weigh in excess of 25kg. Please handle in accordance with your local OH&S guidelines/laws.

Vector Direct Drive Vacuum Pumps
Thank you for choosing a JAVAC high vacuum pump. We take pride in every JAVAC model and ensure you of our long-term interest in our product’s reliability. Careful reading of the enclosed instructions and adherence to our suggestions will serve to prolong the life of your chosen pump. Please remember your high vacuum pump is a high quality precision instrument and with appropriate care will provide many years of satisfactory service.
SAFETY FIRST!
This international symbol is intended to alert the user to the presence of important operating, safety and maintenance (servicing) instructions in this Manual. As used in the Manual, it is intended to draw your attention to critical items.
It is important to read this entire Manual and be familiar with its contents before using the machine!
RESPONSIBILITY:
Any high vacuum pump must only be operated by a Qualified Technician who has been properly trained in the care and use of such equipment. Use of this equipment by unqualified personnel is potentially dangerous and should not be attempted.
Table of Contents: Page No.
1.0 Unpacking..........................................................................................2 1.1 Setting Up .............................................................................� 1.� Starting Up ............................................................................� 1.� Shutting Down.......................................................................� 1.� Storage .................................................................................�
2.0 Performance ........................................................................................ �.1 Oil Suck Back........................................................................� �.� Changing Oil .........................................................................� �.� Air Ballast (Gas Ballast) ........................................................�
3.0 Replacing VacPak vacuum cartridge………………………………….54.0 Routine maintenance kits.................................................................6 5.0 Spare Parts/Service...........................................................................6
�.1 Schematics ...........................................................................� 6.0 Trouble Shooting...............................................................................6
�.1 Poor Vacuum ........................................................................� �.� Pump will not start.................................................................� �.� Pump hesitates to start .........................................................� �.� Noisy .....................................................................................� �.� Runs too hot..........................................................................�
7.0 Safety .................................................................................................7 �.1 Electrical ...............................................................................� �.� Vacuum Pump ......................................................................� �.� Exhaust Gas .........................................................................� �.� Returning pump for service ...................................................� �.� User Responsibility ...............................................................� �.� Pumping Media .....................................................................� �.� Freeze Dryers, Concentrators & Gel Dryers .........................�
8.0 Accessories .......................................................................................8 �.1 Suggested Accessories Applications ....................................� �.� Pump Oils .............................................................................�
9.0 Terms of Warranty...........................................................................10 10.0 Declaration of Contamination .......................................................11 11.0 Specifications.................................................................................12 12.0 Diagrams and Parts Lists ..............................................................14

� �
1.0 Unpacking Remove the pump from its packing case and retain all tags and documentation for future reference. Check that the contents are as quoted on the packing note with the package and it is as requested on the original order.
If the pump or accessories have sustained any damage from the shipment, file a claim with your carrier or insurer at once and keep all the packing etc. for future inspection by the carrier.
If the contents are not as requested, inform JAVAC immediately for clarification.
Please complete the warranty card and return via post to JAVAC. This will ensure you receive prompt service at all times. NB: Any claim for damage etc. must be made within �� hours of receipt of goods.
1.1 Setting Up Confirm that the pump is appropriate for the work to be done (capacity, type of gas to be pumped, electricity supply etc.). When setting up the pump, it should be in a clean, dry, level location and at ambient temperature. As the normal working temperature of the pump is in the range of �0-�0oC, it must have free air circulation around it and away from any materials which may be affected by the local heat given off.
Consideration must also be given to the location of the pump if the built-in stop/start button is to be utilised.Consideration should be given to the output exhaust gases and if necessary, have them piped to a safe area for further treatment as required.
Where liquid or particulate can enter the vacuum pump inlet a liquid knock out pot or inline vacuum filter must be installed. Failure to prevent either from entering the pump will void the warranty.
SOME GASES MAY BE DANGEROUS
If the pump is to be permanently sited and run for lengthy periods, it is advisable to pipe the exhaust to a point outside the building. In which case the piping should be arranged to prevent condensate from running back into the pump. Alternatively, an oil mist filter can be fitted in an appropriate position.
When connecting any suction and exhaust piping to the pump, it is recommended that the correct JAVAC fitting be used to prevent atmospheric ingress or pollution (contact JAVAC for advice).
Any piping connected to the pump must be flexible between the pump and the piping so that no strain is put on the pump or connections. The piping must be at least equal to, but preferably larger than the pump suction port and must be of a suitable material compatible with the gas being pumped and free from any internal obstructions.
When removing the plastic protection plugs from the pump, it is suggested that they be stored in a convenient location for future use.
When making the electrical connection, confirm that the supply is as required for the pump and the pump internal connections are set to the correct voltage. The electrical cabling and connections must be in accordance with the relevant Electrical Construction Standards.
1.2 Starting Up Fill the pump with JAVAC approved high vacuum oil (if supplied empty). The oil level will rise when the pump warms up and is operating under vacuum conditions. The level should be checked later and adjusted as required.
Most high vacuum pumps are supplied without a charge of high vacuum oil. Running without oil will damage the pump and is not covered by warranty.
IT IS NOT ADVISABLE TO MIX OILS

��
After filling and before starting up the pump, wipe away any surplus oils and spillage and dispose of the soiled rags/cloths safely. After handling any oils, wash hands on completion of the task.
If the pump has been stored, or is not to be used for a lengthy period, it may be necessary to manually rotate the pump before starting. In order to do this, carry out the following steps:
SINGLE PHASE PUMPS 1. Isolate the electric supply and inlet and exhaust as appropriate �. Remove the fan cover and turn the pump by hand to ensure it is free �. After checking that there is no obstruction to the fan, replace the fan cover
THREE PHASE PUMPS 1. Isolate the electric supply and inlet and exhaust as appropriate �. Remove the fan cover and turn the pump by hand to ensure it is free �. Switch the electric supply on and off, observe the pump running in the right direction; and
correct if required �. Replace fan cover
Connect to a suitable electrical supply – DO NOT use coiled extension leads. JAVAC recommends circuit breakers are installed in the power supply.
Peak performance is achieved after the pump has reached an operating temperature of �0-�0°C.
CARE MUST BE EXERCISED IF TOUCHING THE PUMP AS IT CAN BE HOT
Recommended operating temperature can be reached quickly by utilising the ballast value initially when starting up. It is necessary for the pump to be at its operating temperature BEFORE pumping condensable vapours. (Refer �.� and �.�)
1.3 Shutting Down Isolate the gauge. Switch off the electric supply. Close the inlet and exhaust lines as applicable. Open the pump to atmosphere taking care that no foreign bodies are sucked into the inlet. Whenever the pump is disconnected from the system, it is advisable to cover the inlet and exhaust openings to stop foreign bodies entering the pump.
If the pump is not to be used or stored for an extended period it is advisable to drain it and refill with new oil. If the pump is fitted with an air admittance valve or isolation value, venting will be automatic and it is not necessary to disconnect the pump from the system.
Some models are supplied with a standard air admittance isolation valve. Check specification if in doubt.
If the pump has switched off due to the motor overheating (initiated by the built-in thermal cut out) the system must be isolated by switching off the electric supply and isolating the inlet and exhaust lines as appropriate, and the fault rectified before starting the pump again.
1.4 Storage Pumps should be stored in a clean, dry environment, preferably at room temperature. When handling the pump, care should be taken that it is not damaged and the handles or lifting eyes should be used. If the pump is to be put into storage after use, it should be drained, purged and refilled with an approved oil (see Section �.� – Changing Oil). The input and exhaust openings should be sealed and the gas ballast valve tightly closed. If the pump is not to be used for a considerable time it should be wrapped in an airtight container with a suitable desiccant enclosed. Before putting the pump back into service after being stored for a considerable time, it should be serviced again. (See Section 1.� – Starting Up)

� �
2.0 Performance JAVAC high vacuum pumps are rigorously tested during all facets of manufacture. All products are quality assured to AS/NZS ISO�001:�000. A high vacuum pump is tested at its inlet port. All JAVAC high vacuum pumps must achieve the specified vacuum before approval for dispatch. Rough handling, dropped foreign material entering the suction fitting, dirty oil or environment effects the ultimate performance of the high vacuum pump. Thus, the condition of the system to which the high vacuum pump is connected will have a significant bearing on the ultimate vacuum attained by the pump.
Specifications:Ultimate partial pressure obtained using an untrapped McLeod gauge; Laboratory Pumps: � x 10-� mbar = � x 10-� torr = 0.� micron Refrigeration Pumps: 1.� x 10-� mbar = 1 x 10-� torr = �-1 micron
Please note that these results are obtained under ideal test conditions and may not be readily obtained in the field.
2.1 Oil Suck Back RD, LD and LT model pumps:As the pump is shut down a special check valve on top of the vac cartridge allows air to enter the pressurised oil circuit. This prevents the vacuum pump oil from entering the ‘process’ in the event of premature power failure. For this reason the pump must not be over filled with oil.
LD and LT pumps: Theses pumps are fitted with an anti air admittance valve as standard. Neither oil nor air will be sucked back to the ‘process’ in the event of power failure.
2.2 Changing Oil
THE OIL MUST BE CHANGED WHEN CONTAMINATED
Oil contamination is usually indicated by poor vacuum reading, or a grey or milky appearance. Should liquids be accidentally allowed into the pump CHANGE OIL IMMEDIATELY. Your JAVAC high vacuum pump is a precision unit and oil is less expensive than pump service and repairs.
To Change Oil and Purge Pump: 1. Isolate the electric supply and the inlet and exhaust as applicable �. Remove the drain plug and drain oil into a suitable receptacle - consider the reason why the
oil has been contaminated and take the necessary precautions when handling and disposal �. Replace the drain plug after cleaning the aperture and refitting a new washer or ‘O’ring �. Refill with the approved oil (JAVAC no.1� is standard) - checking that the oil is suitable for the
gas being pumped �. Clean away any surplus spillage �. Switch the pump on and check for any oil leakage �. When the pump is running check that oil rises to sight glass level when operating under
vacuum conditions. If not, top up as required �. After handling any oils, on completion of the task wash hands.
DO NOT MIX OILS USE ONLY JAVAC HIGH VACUUM OILS

��
Suggested Oil Changes: Dirty/intermittent use every �0-100 hours or sooner. Clean continuous use every �00 hours. Changing oil more frequently will enhance the life of a high vacuum pump. If the vacuum pump is pumping condensable vapours i.e. freeze drying, it may be necessary to change the oil after each process so the pump does not stand idle with contaminated oil. The warranty of the pump will be void due to damage from contaminated oil.
2.3 Air Ballast (Gas Ballast) The air ballast valve is situated at the top of the vacuum pump next to the suction fitting. It is opened by turning anticlockwise. The valve must only be shut down finger tight otherwise the precision valve seat may get damaged. The function of the gas ballast valve is to enable condensable vapours to be discharged through the pump with minimum oil contamination, depending on the nature and quantity of the vapour(s) involved. As vapour will condense back into its liquid form upon compression at (or greater than) its Saturation Vapour Pressure (SVP) this can present a problem with high vacuum pumps which have a suction and a compression cycle. It is necessary during the compression cycle of the pump to compress the system gas from the suction port at or greater than atmospheric pressure, in order to lift the exhaust valve allowing them to be discharged. In a vacuum system containing a quantity of water for example, the air is quickly removed by the vacuum pump and the partial pressure of the water in the system will increase. When the partial pressure of the water vapour of the system gas reaches it’s SVP during the compression cycle of the pump, it will condense back into a liquid and mix with the oil.
At this stage the vacuum pump CANNOT achieve a vacuum better than the SVP of the water. This is because the water evaporates from the oil on the suction cycle and then re-condenses back into the oil during the compression cycle. The water in the oil therefore becomes a source of vapour that the pump must contend with. If however we reduce the partial pressure of the water vapour during the pump’s compression cycle with a measured and controlled amount of non-condensable gas the water vapour WILL NOT reach its SVP during compression and will therefore be discharged from the pump.The gas ballast valve in JAVAC pumps ‘meter in’ a controlled amount of atmospheric gas into the compression cycle of the pump, thus ‘diluting’ the amount of vapour that is being compressed. All high vacuum pumps have a maximum amount of water vapour tolerance i.e. the quantity of water that the pump can successfully pump without contamination. (Please contact JAVAC if you are unsure with the amount of water or any other vapour that your pump will handle.)
IT IS VITALLY IMPORTANT THAT THE PUMP HAS REACHED ITS NORMAL OPERATIONAL TEMPERATURE (�0-�0oC) BEFORE ANY CONDENSABLE VAPOURS ARE PUMPED. FAILURE TO DO THIS MAY CONTAMINATE THE OIL AND DAMAGE THE PUMP. SUCH DAMAGE WILL VOID THE WARRANTY.
Normal operating condition is approximately two to two and half turns, at which a slight “popping” noise occurs. Open valve several turns before closing down to required control position. If valve is removed ensure spring and ball are replaced in the correct order – spring first.
Allowing the pump to run for a few hours with the ballast valve open and the inlet port closed will purge oil and slightly contaminated condensed vapours i.e. water. The gas ballast, if used during start up of the pump will aid in bringing the pump up to its operational temperature sooner.
Care must be taken when operating the ballast valve that the body of the pump is not touched, as the normal heat generated by the pump in normal operation is in the range of �0-�0oC.
3.0 Replacing VacPak vacuum cartridge
The JAVAC VacPak vacuum cartridge is a rugged and efficient unit engineered to withstand arduous working conditions. In the event of misuse or accidental damage it is readily replaced as follows:
1. Isolate pump �. Remove oil �. Remove motor by removing � x cap head screws �. Remove oil box by removing � x cap head screws �. Remove drive coupling from pump shaft �. Remove cartridge from master mount by removing � x cap head screws �. Install new cartridge using new ‘O’rings on master mount

� �
�. Install drive coupling on pump shaft. Note the height may need to adjusted so that there is no thrusting once the motor is reinstalled
�. Install oil box with new ‘O’ring 10. Install motor. This will require alignment of coupling halves. 11. Check that the coupling is not in compression - adjust coupling half on pump rotor if needed 1�. Fill pump with oil 1�. Test pump for quite operation as well as oil leaks
4.0 Routine maintenance kits JAVAC supply standard seal kits and vane sets for every JAVAC high vacuum pump. To order please identify pump and serial number.
USE ONLY JAVAC GENUINE SPARE PARTS
5.0 Spare Parts/Service It is very important that spare parts are of correct materials otherwise unsatisfactory performance and even pump damage may result.
Items such as flapper valves, ‘O’ rings, ball valves, springs, seals etc. MUST be of correct materials. Whilst substitutes may be readily obtained from various sources, such replacements are likely to lead to future problems.
Many JAVAC spares are highly specialised versions of standard industrial components and real differences are not visually apparent.
When ordering spare parts, please quote model and serial numbers (on front label)
JAVAC has designed and manufactured your high vacuum pump and as such are the only people qualified to service it.
5.1 Schematics Supplied with this instruction booklet is an exploded diagram which indicates each part, its positions and appropriate part number.
This diagram is indicative to the appropriate model pump and should be used as a guide for assembly or ordering parts. Always quote model and serial number when ordering spare parts.
6.0 Trouble Shooting If there is a problem with performance, first check with a vacuum gauge and if possible compare the performance with another high vacuum pump.
If the problem is still apparent contact JAVAC (refer to back page of this manual for contact details).Please note all costs involved in transporting the pump to JAVAC must be paid for by the owner. JAVAC does not accept responsibility for transport or shipping.
6.1 Poor Vacuum Ultimate vacuum will not be instantaneous. It is relative to pump capacity and system size. If it appears the rotary pump is not achieving high vacuum, check as follows:
1. Oil level is correct when pumping �. All fitting hoses are tight and valves shut

��
If no improvement is achieved, check with a known good McLeod gauge or electronic gauge as follows:
1. Remove pump from system �. Connect gauge to suction fitting positively sealed �. Run pump. A McLeod gauge should indicate a vacuum of between �0 and 1 micron. An
electronic gauge will show approximately ��0 to �0 micron after five minutes, depending on type of pump (see �.0)
6.2 Pump will not start 1. Check electrical plug/switch and power is available �. Check motor overload �. Has something fallen into the suction fitting? �. Has pump been left unused for some time? (See 1.�)
6.3 Pump hesitates to start 1. Check ambient (pump) temperature is be above �oC. In cold climates start up can be
improved by using lighter grade oil. BEFORE attempting this consult the factory or supplier. �. Check oil contamination �. Turn pump by hand (power off) to free any locking of rotor �. Check voltage supply
6.4 Noisy Under normal circumstances pumps run relatively quiet, slight gurgling or ticking may indicate low oil level but slight noises due to high compression ratios will always be apparent.
Some JAVAC high vacuum pumps incorporate a silencing jet. This minute air lead serves to eliminate vacuum knock by cushioning the valves, if the jet is blocked noise may occur (check with manufacturer for specifications).
Pumps which are not fitted with a silencer can be quietened by slightly opening the gas ballast valve which serves a similar purpose.
6.5 Runs too hot In order to achieve high water vapour pumping ratios, high vacuum pumps run at elevated temperatures of �0oC+. Temperatures as high as ��oC will not effect the pump. If in doubt, contact JAVAC.
DO NOT TOUCH HOT PUMP SURFACE WITH BARE HANDS
7.0 Safety
7.1 Electrical In most instances, JAVAC high vacuum pumps are supplied with ��0 volt single phase electrical motors.Under no circumstances attempt to alter or re-wire the direction of the motor. Motors should only be serviced or repaired by JAVAC or an authorised service agent. If power lead to motor is damaged or cut it should be replaced. Do not put any article into the fan or motor to obstruct rotation. The motor is equipped with a circuit breaker. If the breaker is activated, check the pump for obstruction. Ensure motor is well ventilated. If overload happens, return to manufacturer for investigation.
7.2 Vacuum Pump The vacuum pump in itself has no exposed parts. The drive coupling is concealed and presents no danger provided the unit is used correctly.

� �
7.3 Exhaust Gas The exhaust gas from the vacuum pump is composed of oil and gas entering the pump. Exhaust gas should be well ventilated or plumbed externally. Where this is impractical, an oil mist filter should be fitted. Please contact JAVAC for more information about oil mist filters. If hazardous gases are to be pumped, appropriate safety measure must be taken.
7.4 Returning pump for service When the vacuum pump is returned for service it is your obligation to inform JAVAC of the pump’s duties. If it has been involved in pumping carcinogenic material or any substance liable to endanger health or property, the owner of the vacuum pump will be totally liable to inform JAVAC and thoroughly clean the product prior to delivery. FAILURE TO OBSERVE THIS REGULATION CAN AND WILL CONSTITUTE LEGAL PROCEEDINGS WITH ALL DAMAGES TO PERSON OR PROPERTY BEING LIABLE TO THE OWNER OR OPERATOR OF SAID VACUUM PUMP.
7.5 User Responsibility JAVAC high vacuum pumps and refrigeration service units will perform in accordance with their specifications providing equipment is installed, operated and maintained in compliance with the instructions given in this manual. The equipment must be checked periodically. Parts that are contaminated, broken, worn or missing should be immediately replaced. Only genuine JAVAC spares should be used. The equipment, or any of its parts should not be altered without prior written approval of JAVAC Pty. Ltd. The owner of this equipment shall have the sole responsibility for any malfunction which results from improper repair or alteration by any party other than JAVAC Pty Ltd, JAVAC (UK) Ltd, JAVAC (NZ) Ltd or their authorised service agents.
7.6 Pumping Media In some cases where exotic gases may need to be pumped, obvious reactions with Aluminum, Neoprene, Viton and Cast Iron need to be considered. Damage caused by pumping reactive gases will void warranty and potentially damage the vacuum pump.
Oxygen should only be pumped when the pump is filled with an inert oil. In this situation the pump should be returned to JAVAC for a total strip and clean prior to adding an inert oil. Do not mix oils.
Acetic acid and common laboratory reagents can be in most cases eliminated by using a cold trap in line. Failure to observe these and common laboratory practices will render the vacuum pump unserviceable very quickly and result in costly repairs.
7.7 Freeze Dryers, Concentrators & Gel Dryers Common solvents and acids like Acetonitrile, Butanol, Hydrochloric acids etc. have freezing points below that of most refrigerated cold traps. These vapours will pass directly to the vacuum pump where they may remain and render the pump unserviceable.
In this instance, JAVAC recommends the use of secondary chemical traps with appropriate filtering media in line with the vacuum pump. Traps are available for acids and solvents. Most are colour indicating giving an obvious sign of efficiency ratio. (Refer to 1.�, �.� and �.�)
8.0 Accessories Acravac Vacuum Gauge High Vacuum Gauges Oil Mist Filters Air Admittance Valves Air Admittance/Isolation Valves Foreline Traps-Filters ISO KF High Vacuum Fittings High Vacuum Hoses/Stainless Steel Flexible Line Vacuum Valves, Switches Needle Valves High Vacuum Oils Standard Seal Kits & Vane Sets VacPak Cartridges Special Motors/Air/Electrical Degassing Units – Trolleys UHV – Systems and Accessories Automatic Filling Stations Leak Detectors etc. For full details on JAVAC’s range of high vacuum equipment contact our Head Office.
��
8.1 Suggested Accessories Applications A high vacuum pump should be seen as only one element of a high vacuum system. This element will however only work to its optimum if certain criteria are met. We suggest that in order to protect the pump the following accessories be considered.
1. In-line filter is an essential accessory �. Spare oil as oils should be regularly changed �. A mist filter to trap vapour may be appropriate if the pump must operate in a confined space �. A vacuum gauge is also a very useful accessory as the performance of the pump can be
monitored to ensure it is operating correctly. We liken a vacuum gauge to a speedometer in a motorcar - an essential service tool
�. Pumping lines, hoses, valves, etc. have dramatic effect on the performance of your high vacuum pump, cheap hoses do leak out gas, small pipes and valves throttle do not do justice to a high vacuum environment, specialised accessories do exist to optimise the pump’s performance, in many cases the optimised pump will out perform a significantly bigger pump with poor plumbing accessories
Other Issues Cleanliness: If even a remote chance of contamination in the form of an abrasive can enter the pump it is strongly recommended that an in-line filter be installed. Failure to protect the pump from foreign matter will void warranty and degrade the pump’s ultimate performance. Oil – vapour properties: Many oils behave differently in different applications, for example in an Electron Microscope backing application it is desirable to use super clean oil with very low back streaming, in addition the installation of a molecular foreline trap will also absorb hydrocarbon traces. In a low temperature operating environment lower viscosity oil may be more appropriate, the converse is also true in hot environments where oil properties break down. Special inert oils also exist for explosive media pumping applications. Moisture: Water will cause a pump to rust and break down the lubrication properties of the oil. Moisture in small amounts can be tolerated however, if the moisture load exceeds the capacity of the pump traps should be installed. These traps may be simply gravity, absorption or refrigerated. Preventative Maintenance: JAVAC designed and manufactured your high vacuum pump and as such are the best people to service and recommend accessories for it. Taking short cuts on installation, using cheap oils, not servicing the pump or using inferior parts in the pump will in the long or even short term prove to be more expensive and time wasting ventures. The JAVAC high vacuum pump is an investment in quality engineering – care for it accordingly and it will serve you admirably. In accordance with its policy to continually improve the quality and performance of JAVAC vacuum pumps, JAVAC Pty Ltd reserves the right to make detailed changes without notice.
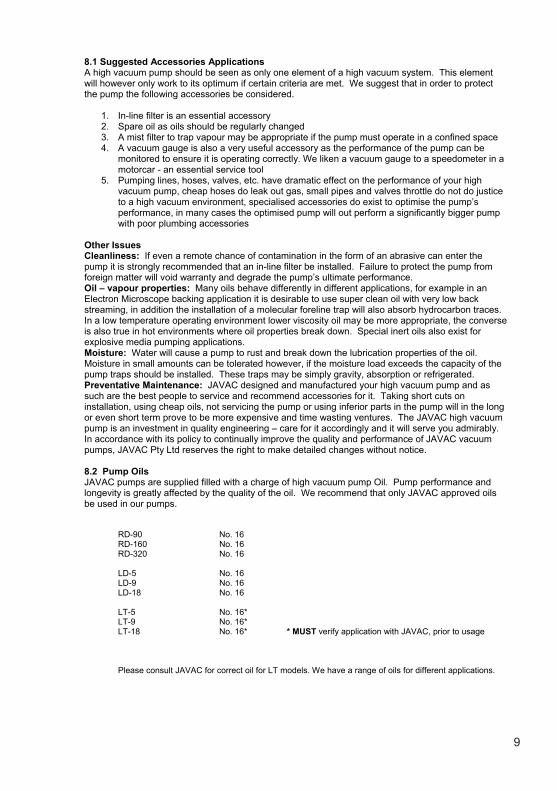
8.2 Pump Oils JAVAC pumps are supplied filled with a charge of high vacuum pump Oil. Pump performance and longevity is greatly affected by the quality of the oil. We recommend that only JAVAC approved oils be used in our pumps.
RD-�0 No. 1� RD-1�0 No. 1� RD-��0 No. 1�
LD-� No. 1� LD-� No. 1� LD-1� No. 1�
LT-� No. 1�* LT-� No. 1�* LT-1� No. 1�* * MUST verify application with JAVAC, prior to usage
Please consult JAVAC for correct oil for LT models. We have a range of oils for different applications.

10 10
S�1�0� 1 litre JAVAC #1� general laboratory grade oil S�1�0� � litre JAVAC #1� general laboratory grade oil S�0��� �0 litre JAVAC #1� general laboratory grade oil
IL�00�001L* 1 litre JAVAC Oil #1� – for corrosive applications IL�00�001G* �.� litre JAVAC Oil #1� – for corrosive applications IL�00�00�G* 1� litre JAVAC Oil #1� – for corrosive applications
* MUST VERIFY APPLICATION WITH JAVAC PRIOR TO USAGE
We do not recommend PAG oil for use in HVP’s. PAG oils are very hygroscopic and can cause severe corrosion. Ester oils can be detrimental to the performance of HVP. If ester oil must be used always ensure the pump gets hot and blank off with a plug the inlet and discharge when not in use. Heavy duty aggressive applications require specialist oils. Please refer to the range of specialist oils shown in the accessories section of this manual. If in doubt please contact JAVAC for advice.
9.0 Terms of Warranty
JAVAC Vector high vacuum pumps are warrantied for a period of 1� months against faulty workmanship and or materials according to statutory rights.
JAVAC offer an additional �� months (in total �� months) conditional warranty on Vector vacuum pumps provided the following conditions are met:
1. Pumps are used in accordance with manufacturer’s instructions �. Pumps use only JAVAC High Vacuum oil with regular oil changes �. Pumps receive an inspection service, (subject to normal service charges), not more than 1�
months into the �� month period in order to re-validate the warranty �. The appropriate certificate for revalidation of warranty is retained for future records
This warranty does not extend to performance where oil or contamination have entered the pump, likewise, failure to service, abuse, neglect or physical damage to the pump caused by freight or miss handling will also void this warranty.
High vacuum pumps are built to high tolerances and disassembly of vacuum pumps will automatically void this warranty, unless completed by JAVAC or an authorised JAVAC service representative.
Return of goods under warranty is at the customers cost. JAVAC will at its discretion will repair or replace vacuum pumps under warranty. JAVAC reserves the right to charge the customer for work completed including freight if a unit is considered not a fault of warranty.
Proof of purchase of vacuum pump must be presented at the time of a warranty claim. Please retain receipt for your records.
Please note, this warranty is not extended to rental vacuum pumps or units that JAVAC determines are not used or handled in an appropriate manner. Pumps installed in continuous operations will be limited to a maximum 1� month warranty.
Prior to returning goods for service or warranty refer to Section �.0.
Warranty on service is � months, unless otherwise agreed.
No responsibility is accepted for unclaimed goods after a period of �0 days has elapsed.
For many years JAVAC Pty Ltd has taken great pride in applying the skill of its designers and craftsmen to the development of precision engineering products.
We thank you for selecting one of our vacuum pumps for your purposes and assure you of our continuing interest in its operation. To assist us, would you please complete and return the attached warranty card within 1� days of purchase for our records.
Please retain original purchase receipt for verification.

1111
10.0 Declaration of Contamination In view of the nature of some of the gases and vapours handled by the equipment we sell, a statement will be required from our customers advising us of any contact the instrument has had with hazardous substances. Any equipment arriving at JAVAC that has suspicious signs of contamination and no duly filled and signed “Declaration of Contamination” statement, will be double bagged and returned immediately by appropriate carrier – this will incur a minimum 1 hour charge, plus the cost of carriage.
You will understand, of course, that these requirements are not only in the interest of the continuing good health of our employees but also yours and your carrier. It is also needed in order to comply with the Health and Safety at Work Acts, and others.
NOTE: Please photocopy this page, complete relevant sections and return with Vacuum Pump.
1. Description of equipment Model: ____________________________________________________________________ Serial No. _________________________________________________________________
�. Reason for return: ___________________________________________________________________________________________________________________________________________________________________________________________________________________________
�. Condition of equipment type of oil/fluid used: �. Was equipment used with any of the __________________________________ following processes? (Tick Box) __________________________________
Explosives Toxic Is equipment free from harmful substance? Corrosive Radioactive (Tick Box) Biological Other
Yes (Go to �) No (Go to �)
NB: Equipment contaminated by radioactive or biological substances will not be accepted without written evidence of decontamination.
�. List of substances with which equipment had been used.
Substance Symbols (e.g. N�) Safety Measures in case of contact
(A) _______________________________________________________________________ (B) _______________________________________________________________________ (C)_______________________________________________________________________
�. Declaration to be signed by suitable authorized staff. Name of Company: __________________________________________________________ Name: __________________________ Signature:______________________________ Position within Company: _____________________________________________________ Phone No.: ______________________ Date: _________________________________
IMPORTANT: When returning any Vacuum Pump to JAVAC, ALWAYS DRAIN OIL, PLUG INLET AND EXHAUST PORT AND PACK SUITABLY FOR TRANSPORT.

1� 1�
11.0 Specifications
Double Stage Model Unit/Measure RD-90 RD-160 RD320
Number of Stages - � � �
Speed @ �0Hz (�0Hz) / Swept Volume
ltr/minm�/hrCFM
100 (1�0) �.0 (�.�) �.� (�.�)
1�0 (1�0) �.0 (10.�) �.� (�.�)
�00 (��0) 1�.0 (�1.�) 10.� (1�.�)
Ultimate Vacuum (PP) mbar 0.001 0.001 0.001
Gas Ballast Ultimate (PP) mbar 0.01 0.01 0.01
Pump Time �0 litre to 0.01 mbar minutes �.0 1.� 0.�
Water Vapour Pumping gram/hr �0 �0 100
Rotational Speed rpm 1�00 1�00 1�00
Motor Power �0Hz Watt ��0 ��0 ��0
Oil Capacity (nominal) ml 1�00 1�00 1�00
Weight kg �1.0 �1.0 ��.�
Cat No - VRD-�0 VRD-1�0 VRD-��0
Dimensions L/W/H mm ��0/1��/��0 ��0/1��/��0 ��0/1��/��0
Operating Temperature °C �0±10 �0±10 �0±10
*Inlet fitting Standard - 1/�SAE,
�/1�SAE, �/� SAE 1/�SAE,
�/1�SAE, �/� SAE 1/�SAE,
�/1�SAE, �/� SAE
*Ammonia series are fitted with �/�” SAE *Consult JAVAC for optional or custom fittings

1�1�
11.0 Specifications (cont)
Double Stage Model Unit/Measure LD-5/LT-5 LD-9/LT-9 LD-18/LT-18
Number of Stages - � � �
Speed @ �0Hz (�0Hz) / Swept Volume
ltr/minm�/hrCFM
100 (1�0) �.0 (�.�) �.� (�.�)
1�0 (1�0) �.0 (10.�) �.� (�.�)
�00 (��0) 1�.0 (�1.�) 10.� (1�.�)
Ultimate Vacuum (PP) mbar 0.000� 0.000� 0.000�
Gas Ballast Ultimate (PP) mbar 0.01 0.01 0.01
Pump Time �0 litre to 0.01 mbar minutes �.0 1.� 0.�
Water Vapour Pumping gram/hr �0 �0 100
Rotational Speed rpm 1�00 1�00 1�00
Motor Power �0Hz Watt ��0 ��0 ��0
Oil Capacity (nominal) ml 1�00 1�00 1�00
Weight kg �1.0 �1.0 ��.�
Cat No - VLD-� VLD-� VLD-1�
Dimensions L/W/H mm ��0/1��/��0 ��0/1��/��0 ��0/1��/��0
Operating Temperature °C �0±10 �0±10 �0±10
*Inlet and exhaust fitting
Standard ISO KF�� KF�� KF��
*Consult JAVAC for optional or custom fittings

1�
1�
1�

1�
RD
SER
IES
PAR
TS L
IST
1C1
1���
Labe
l Gen
eric
Seria
l No.
11
1��
D�0�
0�Bl
ade
��m
m S
econ
d St
age
��
�C1
1�1�
Labe
l Mod
el N
o. R
D-�
01
��D�
0�0�
Blad
e �0
mm
Sec
ond
Stag
e�
�C1
1�1�
Labe
l Mod
el N
o. R
D-1
�01
��D�
0�0�
Blad
e �0
mm
Firs
t Sta
ge�
��
C11�
1�La
bel M
odel
No.
RD
-��0
1��
D�0�
0�Bl
ade
�0m
m F
irst S
tage
��
D�0�
01Sc
rew
Sock
et M
� x
10 N
ickel
Pla
te�
��
��D�
0�1�
Sprin
g (B
lade
)�
��
�D�
0�01
Sigh
t Gla
ss1
11
��C1
1���
Oil P
ump
Sprin
g1
11
�D�
0�0�
Sigh
t Gla
ss G
aske
t Vito
n Br
own
11
1�0
D�0�
0�Ba
ll S/S
teel
��
��
C11�
1�O
il Box
11
1�1
XD�0
�0�
O'R
ing
BS00
� Vi
ton
11
1�
D�0�
��O
'Rin
g BS
11�
NBR
11
1��
XD�0
�10
O'R
ing
BS0�
1 Vi
ton
11
1�
D�0�
��Ex
haus
t Fitt
ing
Al �
0mm
11
1��
XD�0
�11
O'R
ing
BS01
� Vi
ton
11
1�
D�0�
��O
il Fille
r Plu
g1
11
��D�
0�0�
Scre
w So
cket
M�
x �0
mm
��
�10
D�0�
��Fi
ller P
lug
Gas
ket
11
1��
D�01
0�Be
arin
g Ho
usin
g 1
11
11D�
0�1�
Scre
w M
� x
100m
m S
ocke
t Hea
d�
��
��XD
�0�1
1O
'Rin
g BS
01�
Vito
n1
11
1�C1
1���
Baffl
e Pl
ate
11
1��
XD�0
�11
O'R
ing
BS01
� Vi
ton
11
11�
C11�
�0O
'Rin
g BS
���
NBR
11
1��
C11�
�0In
let O
il Stra
iner
11
11�
D�0�
1�Sc
rew
M�
x 1�
mm
Soc
ket H
ead
��
���
XD�0
���
Oil S
eal V
iton
11
11�
C11�
��D
rain
Plu
g G
aske
t1
11
�0C1
1�1�
Mas
ter M
ount
Vec
tor
11
11�
C11�
�0Su
mp
Plug
M1�
x 1
.�m
m S
ocke
t Hea
d 1
11
�1D�
0�0�
Balla
st S
prin
g1
11
1�D�
0���
Scre
w So
cket
Hea
d M
� x
10�
��
��C1
1�11
Rubb
er B
all 1
/�" V
T�0
11
11�
D�01
01En
d Pl
ate
11
1��
D�0�
0�Ba
llast
Val
ve S
tem
11
11�
D�0�
0�Sc
rew
Sock
et M
� x
�0m
m
��
���
C11�
��O
'Rin
g BS
11�
Vito
n�0
XD�0
�1�
O'R
ing
BS0�
0 Vi
ton
��
���
C11�
��In
let F
ittin
g KF
���1
D�01
0�C
ylind
er �
�mm
Sec
ond
Stag
e1
1��
C11�
��In
let F
ittin
g �/
�",1
/�" &
�/1
�"1
11
�1D�
010�
Cyli
nder
�0m
m S
econ
d St
age
1��
VD�0
��Fe
lt Na
tura
l 1�.
�x��
x1�x
��m
m1
11
��D�
0�11
Scre
w So
cket
M�
x �0
mm
�
���
C11�
0�Ru
bber
Fee
t �
��
��D�
0�1�
Scre
w So
cket
M�
x 10
0mm
���
R�0�
��Sc
rew
M�
x 10
mm
Com
bi Z
P�
��
��D�
0�0�
Flap
per V
iton
��m
m1
1�0
D�1�
0�So
leno
id V
alve
��0
v
��D�
0�0�
Flap
per V
iton
�0m
m1
�1C1
0�0�
On/
Off
Switc
h1
11
��D�
0�0�
Flap
per S
pace
r �
��
��Q
C�00
0�Po
wer I
n So
cket
11
1��
D�0�
0�Ke
eper
Pla
te �
�mm
11
��C1
1��0
Circ
uit B
reak
er1
11
��D�
0�0�
Kepp
er P
late
�0m
m1
��C1
1���
Mot
or �
�0w
11
1��
D�0�
0�Ke
eper
Pla
te �
�mm
11
��C1
0�0�
Coup
ling
Hal
f L0�
��
��
��D�
0�0�
Keep
er P
late
�0m
m1
��C1
0�0�
Spid
er L
0��
11
1��
D�0�
0�Sc
rew
M�
x �m
m
��
���
D�0�
1�Sc
rew
M�
x 1�
mm
Soc
ket H
ead
��
���
C11�
��C
Che
ck V
alve
11
1��
C11�
�1M
otor
Mou
nt P
late
11
1��
D�01
0�C
Inte
rsta
ge B
earin
g1
11
��D�
0�1�
Scre
w M
� x
1�m
m S
ocke
t Hea
d�
��
�0XD
�0�1
�O
'Rin
g BS
���
Vito
n1
11
�0D�
1001
Blac
k Ha
ndle
11
1�1
XD�0
�0�
Oil S
eal V
iton
11
1�1
C11�
��Si
ght G
lass
Gas
ket F
EP��
D�0�
0�Fl
appe
r Vito
n �0
mm
11
���
C11�
��O
'Rin
g Be
arin
g Pl
ate
OR�
�x�
11
1��
D�0�
0�Ke
eper
Pla
te �
0mm
11
���
XD�0
�1�
Oil S
eal V
iton
11
1��
D�0�
0�Ke
eper
Pla
te �
0mm
11
���
C11�
��O
'Rin
g �x
1mm
Vito
n O
ER�x
11
11
��D�
010�
Cyli
nder
�0m
m F
irst S
tage
11
��XD
�0�1
�O
'Rin
g BS
011
Vito
n1
11
��D�
010�
Cyli
nder
�0m
m F
irst S
tage
1
Desc
riptio
n Q
TY R
D�0
QTY
RD1
�0Q
TY R
D��0
QTY
RD1
�0Q
TY R
D��0
Item
no.
Part
No.
Item
no.
Part
No.
Desc
riptio
n Q
TY R
D�0

1�
1�

1�
LD
/LT
SER
IES
PAR
TS L
IST
Con
sult
JAVA
C w
hen
orde
ring
LT p
arts
1C1
1���
Labe
l Gen
eric
Seria
l No.
11
1��
D�0�
0�Bl
ade
��m
m S
econ
d St
age
��
�C1
1���
Labe
l Mod
el N
o. L
D-�
1��
D�0�
0�Bl
ade
�0m
m S
econ
d St
age
��
C11�
��La
bel M
odel
No.
LD-
�1
��D�
0�0�
Blad
e �0
mm
Firs
t Sta
ge�
��
C11�
��La
bel M
odel
No.
LD-
1�1
��D�
0�0�
Blad
e �0
mm
Firs
t Sta
ge�
�D�
0�01
Scre
w So
cket
M�
x 10
Nick
el P
late
��
���
D�0�
1�Sp
ring
(Bla
de)
��
��
D�0�
01Si
ght G
lass
11
1��
C11�
��O
il Pum
p Sp
ring
11
1�
D�0�
0�Si
ght G
lass
Gas
ket V
iton
Brow
n1
11
�0D�
0�0�
Ball S
/Ste
el�
��
�C1
1�1�
Oil B
ox1
11
�1XD
�0�0
�O
'Rin
g BS
00�
Vito
n1
11
�D�
0���
O'R
ing
BS11
� NB
R1
11
��XD
�0�1
0O
'Rin
g BS
0�1
Vito
n1
11
� D
�0��
�
Fitti
ng K
F��
Shor
t1
11
��XD
�0�1
1O
'Rin
g BS
01�
Vito
n1
11
�D�
0���
Oil F
iller P
lug
11
1��
D�0�
0�Sc
rew
Sock
et M
� x
�0m
m�
��
10D�
0���
Fille
r Plu
g G
aske
t1
11
��D�
010�
Bear
ing
Hous
ing
11
111
D�0�
1�Sc
rew
M�
x 10
0mm
Soc
ket H
ead
��
���
XD�0
�11
O'R
ing
BS01
� Vi
ton
11
11�
C11�
��Ba
ffle
Plat
e1
11
��XD
�0�1
1O
'Rin
g BS
01�
Vito
n1
11
1�C1
1��0
O'R
ing
BS��
� NB
R1
11
��C1
1��0
Inle
t Oil S
train
er1
11
1�D�
0�1�
Scre
w M
� x
1�m
m S
ocke
t Hea
d�
��
��XD
�0��
�O
il Sea
l Vito
n 1
11
1�C1
1���
Drai
n Pl
ug G
aske
t1
11
�0C1
1�1�
Mas
ter M
ount
Vec
tor
11
11�
C11�
�0Su
mp
Plug
M1�
x 1
.�m
m S
ocke
t Hea
d 1
11
�1D�
0�0�
Balla
st S
prin
g1
11
1�D�
0���
Scre
w So
cket
Hea
d M
� x
10�
��
��C1
1�11
Rubb
er B
all 1
/�" V
T�0
11
11�
D�01
01En
d Pl
ate
11
1��
D�0�
0�Ba
llast
Val
ve S
tem
11
11�
D�0�
0�Sc
rew
Sock
et M
� x
�0m
m
��
���
C11�
��O
'Rin
g BS
11�
Vito
n1
11
�0XD
�0�1
�O
'Rin
g BS
0�0
Vito
n�
��
��C1
1���
Inle
t Fitt
ing
KF��
11
1�1
D�01
0�Cy
linde
r ��m
m S
econ
d St
age
11
��C1
1���
Inle
t Fitt
ing
�/�"
,1/�
" & �
/1�"
�1D�
010�
Cylin
der �
0mm
Sec
ond
Stag
e1
��VD
�0��
Felt
Natu
ral 1
�.�x
��x1
�x��
mm
11
1��
D�0�
11Sc
rew
Sock
et M
� x
�0m
m
��
��C1
1�0�
Rubb
er F
eet
��
���
D�0�
1�Sc
rew
Sock
et M
� x
100m
m�
��R�
0���
Scre
w M
� x
10m
m C
ombi
ZP
��
���
D�0�
0�Fl
appe
r Vito
n ��
mm
11
�0D�
1�0�
Sole
noid
Val
ve �
�0v
11
1��
D�0�
0�Fl
appe
r Vito
n �0
mm
1�1
C10�
0�O
n/O
ff Sw
itch
11
1��
D�0�
0�Fl
appe
r Spa
cer
��
���
QC�
000�
Powe
r In
Sock
et1
11
��D�
0�0�
Keep
er P
late
��m
m1
1��
C11�
�0Ci
rcui
t Bre
aker
11
1��
D�0�
0�Ke
pper
Pla
te �
0mm
1��
C11�
��M
otor
��0
w1
11
��D�
0�0�
Keep
er P
late
��m
m1
1��
C10�
0�Co
uplin
g Ha
lf L0
���
��
��D�
0�0�
Keep
er P
late
�0m
m1
��C1
0�0�
Spid
er L
0��
11
1��
D�0�
0�Sc
rew
M�
x �m
m
��
���
D�0�
1�Sc
rew
M�
x 1�
mm
Soc
ket H
ead
��
���
C11�
��C
Chec
k Va
lve1
11
��C1
1��1
Mot
or M
ount
Pla
te1
11
��D�
010�
CIn
ters
tage
Bea
ring
11
1��
D�0�
1�Sc
rew
M�
x 1�
mm
Soc
ket H
ead
��
��0
XD�0
�1�
O'R
ing
BS��
� Vi
ton
11
1�0
D�10
01Bl
ack
Hand
le1
11
�1XD
�0�0
�O
il Sea
l Vito
n1
11
�1C1
1���
Sigh
t Gla
ss G
aske
t FEP
��D�
0�0�
Flap
per V
iton
�0m
m1
1�
��C1
1���
O'R
ing
Bear
ing
Plat
e O
R��x
�1
11
��D�
0�0�
Keep
er P
late
�0m
m1
1�
��XD
�0�1
�O
il Sea
l Vito
n1
11
��D�
0�0�
Keep
er P
late
�0m
m1
1�
��C1
1���
O'R
ing
�x1m
m V
iton
OER
�x1
11
1��
D�01
0�Cy
linde
r �0m
m F
irst S
tage
11
��XD
�0�1
�O
'Rin
g BS
011
Vito
n1
11
��D�
010�
Cylin
der �
0mm
Firs
t Sta
ge1
C11
���
Valve
Pop
pet P
lung
er1
11
Desc
riptio
n Q
TY L
D �
QTY
LD
�Q
TY L
D 1�
QTY
LD
�Q
TY L
D 1�
Item
no.
Part
No.
Item
no.
Part
No.
Desc
riptio
n Q
TY L
D �

1� 1�
For your records:
Model No.: Purchased From:
Serial No.: Date Purchased:

1�
For technical support, service, warranty and further information, contact JAVAC on
1300 786 771 (Aus)or
www.javac.com.auOnly JAVAC know how to service your Vector®.
Vacuum and Refrigeration Process Technology
Head Office54 Rushdale StreetKnoxfield VIC 3180
P: +61 (3) 9763 7633F: +61 (3) 9763 2756
New South Wales19/159 Arthur Street
Homebush West NSW 2140P: +61 (2) 9746 3536F: +61 (3) 9763 2756
JAVAC UKUnit 6, Drake Court
Britannia ParkMiddlesbrough, TS2 1RS
United KingdomP: +44 1642 232880F: +44 1642 232870E: [email protected]
JAVAC New ZealandUnit D, 7 Tait StreetAlbany, Auckland
New ZealandP: +64 9 579 0450F: +64 9 270 3130
A U S T R A L I A
I N T E R N A T I O N A L
P/N: C11551
Vector_Instruction_Manual.indd 2 28/1/09 2:25:21 PM