lpi camera program - meade.com lpi program uses the first 10 images it takes as a baseline to...
TRANSCRIPT

Meade® LPI Camera Program The Basics

When first opening the packing box, note carefully the following parts:
• LPI camera• Parfocal ring• USB cable • DB-9 to RJ-11 adapter• LX200 serial cable• Autostar #497 serial cable• CD ROM, including the Operating Instruction in .pdf format
Recommended Minimum System:
PC running Windows 98SE with 64 MB and 100 MB free disk space.
To get the best view and resolution for the images in this manual, zoom in to 200% using the viewing controlsin the Acrobat Reader control bar.
Parts Listing
2

The following procedure is also found on the printed Quick Start Guide supplied with this product.
Before you can operate the LPI camera, you must install the Autostar Suite software.
1. Do not plug the USB cable into your PC at this time. You will be asked to do so later in this installation.2. Turn on your PC. Allow Windows to load.3. Place the CD ROM into your PC's CD drive. 4. The Main Menu screen displays. Click "Install Autostar Suite."5. You are prompted to choose a directory in which to install the driver. You may accept the default directory or
create your own directory path. Click “Next” when done.6. The “Select Components” window displays. This window allows you to choose whether or not to install the
Guide Star Catalog. Note: This is an optional catalog that may be used by the Planetarium program and contains all of the locations of the Hubble Space Telescope (HST) Guide stars. This file is very large and takes up a largeamount of memory. Only download if you have enough memory or wish to use this amount of memory ofyour hard drive. Memory totals for the file and your hard drive are displayed in this window.If you wish to install the catalog, check the GSC check box.If you do not wish to install the catalog, uncheck the GSC check box.Then click “Next.”
7. The “Start Installation” window displays. The program is now ready to install the Autostar Suite. Click "Next”to begin installation.
8. The “Microsoft Text to Speech Engine” window displays. Click "Yes” to agree to the terms and to continuewith the installation.
9. The “Microsoft .Net Framework installation” window displays. You must click “Yes” for the LPI to operate.10. Once .Net Framework installs, the .Net Framework agreement displays. Click “OK” to continue.11. A window displays that allows you to install Adobe Acrobat Reader if you do not already have it installed on
your PC. Click “Yes” or “No.”12. The “InstallShield Wizard for the Meade LPI” displays. Click "Next.”13. A window displays prompting you to do a complete or custom install of InstallShield Wizard. Click on the
“Complete” button and then click “Install” to begin installation.
14. (XP versions only) “Windows Logo Test” window displays. Clicking “Continue Anyway” will install a driverthat should operate with most PC configurations.
15. InstallShield Wizard completes installation. Click “Finish.”16. A window displays that tells you that Autostar Suite has been installed. Click “Finish.”
Install the Autostar Suite Software
3

To connect the LPI Camera to your PC, you need to install the LPI device driver and connect the USB cable:
1. Connect one end of the USB Cable to the LPI camera.2. Connect the other end of the USB Cable to your PC or to a USB hub.3. “Found camera” displays at the bottom right of your PC screen. 4. The “Hardware Wizard” window displays. The “Install Software” selection is checked as the default choice.
Click “Next.” The Wizard searches for the driver.5. (XP versions only) “Windows Logo Test” window displays. Clicking “Continue Anyway” will install a driver
that should operate with most PC configurations.6. The driver is installed. Click “Finish.”
The camera driver is now installed and your PC will now be able to recognize the LPI whenever you connect itto the PC.
Connect The LPI Camera to Your PC
4

If the Autostar Suite icon doesn’t appear on your desktop, you can start the Autostar Suite program by going toStart/Program/Meade/Autostar Suite. The Planetarium program will display. You can open other programs of the Suite by going to the Image menu and selecting the desired program.
You can open the Operating Instruction manuals or the Meade General Catalog by selecting them from the MainMenu screen of the CD ROM.
Click the word “Meade” in the Main Menu or in the General catalog to go www.meade.com.
Start the Suite Software
5

6
To connect the LPI camera to an ETX Telescope:• Orient the LPI camera into the eyepiece holder so that the USB
cable points at the front end of the telescope’s optical tube (seephoto at right).
• If you are using the ETX in a “straight-through” configuration, orientthe LPI camera in the holder so that the USB cable points downward.
To connect the LPI camera to an LX-200 or LX-90 Telescope:• Orient the LPI camera into the eyepiece holder so that the USB
cable points downward.
To connect the LPI camera to other telescopes:• Move the LPI camera around in the eyepiece holder until the image on the LPI display screen (17) is
upright.
To connect the LPI camera when using an autoguider:• Go to the Object box and choose “Autoguide” from the list ( see pages 25 and 26 for more information).
Enter comm port number and other information.• Attach the correct serial cable from the telescope’s control panel RS-232 port to the comm port of your PC
(see the Autoguider instruction sheet for more information). Also see “Autoguider,” page 25, for more information.
Connect the LPI Camera to Your Telescope
Cable points at front of tube

To open the LPI Imaging program, go to the Image menu of the Planetarium program and select LPI Imaging.
The LPI program will display.
Open the LPI Program
7

8
LPI Controls
bc d
e
fg h
i
j
1)
1!
1@
1#1$
1%
1^ 1&
1*
1(
2) 2!
2@
2#
2$
2%
2^
2&
2*
3)
3!
2(
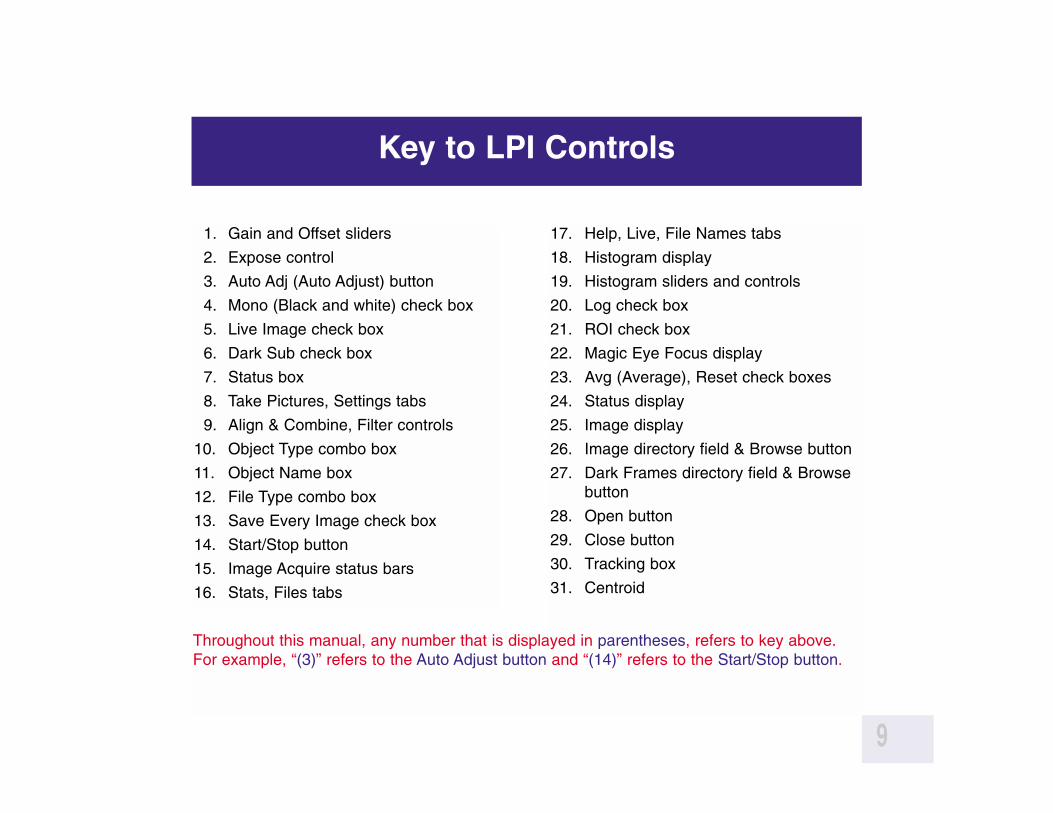
1. Gain and Offset sliders
2. Expose control
3. Auto Adj (Auto Adjust) button
4. Mono (Black and white) check box
5. Live Image check box
6. Dark Sub check box
7. Status box
8. Take Pictures, Settings tabs
9. Align & Combine, Filter controls
10. Object Type combo box
11. Object Name box
12. File Type combo box
13. Save Every Image check box
14. Start/Stop button
15. Image Acquire status bars
16. Stats, Files tabs
Key to LPI Controls
9
17. Help, Live, File Names tabs
18. Histogram display
19. Histogram sliders and controls
20. Log check box
21. ROI check box
22. Magic Eye Focus display
23. Avg (Average), Reset check boxes
24. Status display
25. Image display
26. Image directory field & Browse button
27. Dark Frames directory field & Browsebutton
28. Open button
29. Close button
30. Tracking box
31. Centroid
Throughout this manual, any number that is displayed in parentheses, refers to key above.For example, “(3)” refers to the Auto Adjust button and “(14)” refers to the Start/Stop button.

Once you have connected your camera to the computer and opened the LPI program, you’ll want to start takingpictures. Follow the steps below to start taking simple pictures with your LPI camera. We recommend that thefirst time you take pictures, you do so during daylight hours. Point your telescope at a stationary landmark, suchas a building, telephone pole or so forth—trees and other objects that move slightly are not the best objects touse during your first image tests.
1. Click on the “Auto Adj” button (3). See “Auto Adjust Button,” page 16, for more infor-mation.
2. Click on the combo box controls in the “Object” field (10) to display a list of object types. Scroll down the list and select “Terrestrial.” See “Object,”page 17, for more information.
3. Type a name for the object in the “Object Name” box (11). This will be used as the image file name. See “Object Name,” page 18, for moreinformation.
4. Click on the combo box controls in the File Type field (12) and select “JPEG.” See “File Type,”page 18, for more information.
5. Click on the “Live” tab (17). See “Live ImageCheck Box,” page 16, for more information.
more...
Start Taking Pictures1
10

6. An image should be already displayed on the screen (25). Use the focuser on your telescope to focus theobject. Notice that in the Magic Eye Focus field (22), that two triangles are displayed and change their size.The Magic Eye Focus will help you focus your image; see “Magic Eye Focus,” page 21, for more information. If you are having a lot of problems focusing your image, see “The Parfocal Ring,” pages 14-15.
7. Click “Start (14).”
The camera begins taking pictures and will continue to do so until you click on “Stop.” Watch the Status box (24) in the bottom left-hand corner. When “Images” reaches 50, click the “Stop” button (14).
Go to the next page to find out what the program is doing once you press “Start.”
Start Taking Pictures2
11
• The live image is displayed on the program’s display screen if the Live box is checked and the Live tab isselected (these are the default settings).
• When you press Start, the LPI camera begins taking images and continues to take images until you pressstop. The LPI program uses the first 10 images it takes as a baseline to compare with the images it takessubsequently. In other words, the program is always comparing images. Note: The user can change theamount of images that the program uses as a baseline. See “Evaluation Count,” page 17, for more information.
• The program takes images with the best contrast and quality and assembles the best of these images intoone image; this image is referred to as the composite image in this manual.
• After you press the Start button, the composite image is displayed as a new tab above the display screen.When you press Stop and select this tab, the final version of the composite image is displayed.
• After about 10 images are taken, the LPI program applies a sharpening filter to the composite image. Youcan choose which sharpening filter you wish to use from the most to the least sharp, or none. You canchange the filter setting while the camera is taking pictures. See “Kernel Filter,” page 17, for more information.
• Further image enhancement or filtering may be performed in other image editing software, such as the supplied Image Processing software or Adobe Photoshop. Make sure you select an image type that can beopened (such as JPEG or BMP) by the Image Editing software.
more...
What Happens When You Press Start1
12

• The LPI program is continually resaving the composite image. If the Save Every Image box is checked, theprogram will save every image that added to the composite image (see pages 17-19 for more information).If your PC crashes or loses power, the images that have been taken up to the time of the crash or powerloss will automatically be saved—the user does not need to save them manually.
• The LPI program continues to composite the image until you press the Stop button. Typically, about 50images are needed to get a high quality composite image. After 50 images, the quality of the image increases only in small amounts; about 90% of the quality level will have been accumulated with about 50images.
• When you press Start again, the LPI program begins to accumulate a new composite image and renamesthe image in a new tab. For example, if you named the first image “Building,” the next images will be named“Building 2,” then “Building 3” and so forth, so that it doesn’t overwrite the previously saved images.
• If a name/number was previously saved as a file name, the program will choose the next available number.For example, if “Building 7” was previously saved, the next file will be named “Building 8.”
• Note that controls that are not currently available are grayed out.
What Happens When You Press Start2
13

The Parfocal Ring1
14
It is extremely useful to have the LPI camera and a telescope eyepiece be parfocal—it will save you time whenyou need to refocus.
Parfocal means setting two or more eyepieces to the same focus. (In this case, one eyepiece is a camera.) Inother words, if you focus one eyepiece in your telescope, then you remove it and replace it with a parfocal eyepiece, the parfocal eyepiece will require little, if any, refocusing.
The following procedure will show you how to make your LPI camera parfocal with a low-power wide-field 25mmor 26mm eyepiece (do not perform this procedure with a high-power eyepiece). Use the supplied parfocal ringand perform the procedure during the daytime.
more...

1. Open the LPI program. 2. Insert the LPI camera into the telescope eyepiece holder. Do not tighten the eyepiece holder thumbscrew.
Make sure the LPI camera slides down as far as it will go into the eyepiece holder.3. Point the telescope at a terrestrial object that has a lot of contrast with the surrounding area and if possible,
has a distinctive edge (like a building, for example).4. If you have previously moved the histogram sliders, move the top slider to the 0 position (move all the way
to the left) and move the bottom slider to the 256 position (move all the way to the right).5. Click on the Auto Adj. (3) button.6. An image which may be or may not be focused appears on the display screen.7. Use the telescope’s focuser to get a rough focus of the object. Be patient.
You may have to rotate the focuser back and forth until you can achievefocus of the image.
8. When the image is roughly in focus, remove the camera from the eyepiece.
9. Place the supplied parfocal ring over the bottom chrome tubing of the eyepiece. Do not tighten the ring.
10. Place the eyepiece and tubing into the eyepiece holder. Do not tighten anyof the thumbscrews yet. See photo at right.
11. Do not use the telescope focuser in this step. Lift the eyepiece (but not theparfocal ring) until the object is focused.
12. When the object is focused, tighten the parfocal ring. The eyepiece is nowparfocal with the LPI camera. Do not remove or change the position of the parfocal ring or you will need torepeat the procedure.
Now, instead of focusing the camera with the telescope focuser (which is somewhat difficult and time consuming), insert in the eye piece/parfocal assembly and focus the eyepiece as you normally would. Thenremove the eyepiece and replace the camera. You’ll find that the camera is focused and may need only minorfocuser adjustment.
The Parfocal Ring2
15
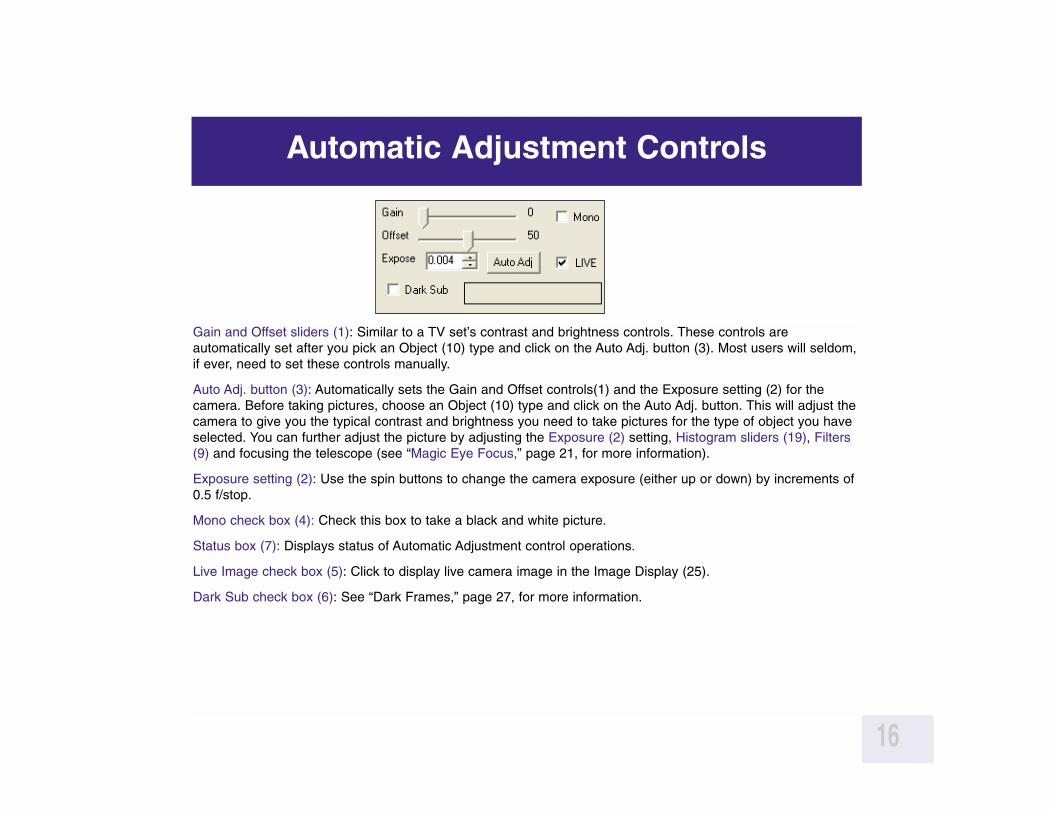
Gain and Offset sliders (1): Similar to a TV set’s contrast and brightness controls. These controls are automatically set after you pick an Object (10) type and click on the Auto Adj. button (3). Most users will seldom,if ever, need to set these controls manually.
Auto Adj. button (3): Automatically sets the Gain and Offset controls(1) and the Exposure setting (2) for the camera. Before taking pictures, choose an Object (10) type and click on the Auto Adj. button. This will adjust thecamera to give you the typical contrast and brightness you need to take pictures for the type of object you haveselected. You can further adjust the picture by adjusting the Exposure (2) setting, Histogram sliders (19), Filters(9) and focusing the telescope (see “Magic Eye Focus,” page 21, for more information).
Exposure setting (2): Use the spin buttons to change the camera exposure (either up or down) by increments of0.5 f/stop.
Mono check box (4): Check this box to take a black and white picture.
Status box (7): Displays status of Automatic Adjustment control operations.
Live Image check box (5): Click to display live camera image in the Image Display (25).
Dark Sub check box (6): See “Dark Frames,” page 27, for more information.
Automatic Adjustment Controls
16

Take Picture Tab (8): Click on the Take Picture Tab to display the Take Picturecontrols.
Setting Tab (8): Click on the Setting Tab to display the Setting controls.
Align and Combine (9): Selects a minimum quality level that is acceptable whenimages are added together to produce the composite image. Typically 50% isselected. You may wish to set it lower (e.g., 30%) if you have an image that hasa lot of turbulence or other noise, but should try adjusting other controls first,such as the Exposure (2) setting, Histogram sliders (19) and Filters (9). Also tryrefocusing the telescope.
Object (10): Displays a list of objects to view, such as Mars, the Moon, terrestrial, etc. Adjusts some of theimage processing settings to preset levels that will assist you in better quality images for the select object. Also“Take Dark” is on this list; see “Dark Frames,” page 27, for more information.
Click on the Min Quality % spin box to change the minimum quality level.
Evaluation Count allows you change number of images accumulated and evaluated to determine a quality baseline when the Start button is pressed. Normally, 10 images are evaluated (this is the default number). Clickin the spin box to change the number of images used.
Track check box: Check this box if you wish to have the ROI track the centroid. See “Tracking Boxes andCentroids,” page 23, and “ROI,” page 24, for further information.
Combine check box: Normally, you will leave this box checked. If you wish to take raw images that are not combined into a composite image (you may wish to process the images yourself), uncheck this box and checkthe Save Every Image box. The LPI camera will take images and save them in the Image directory.
Kernel Filter: The chosen sharpening filter is applied to the composite image as it is savedand is displayed in the live Display Image after about 10 images are accumulated. 3 levelsof sharp filters, 1 edge only filter and “None” (no filter) are available.
Image Processing Controls1
17
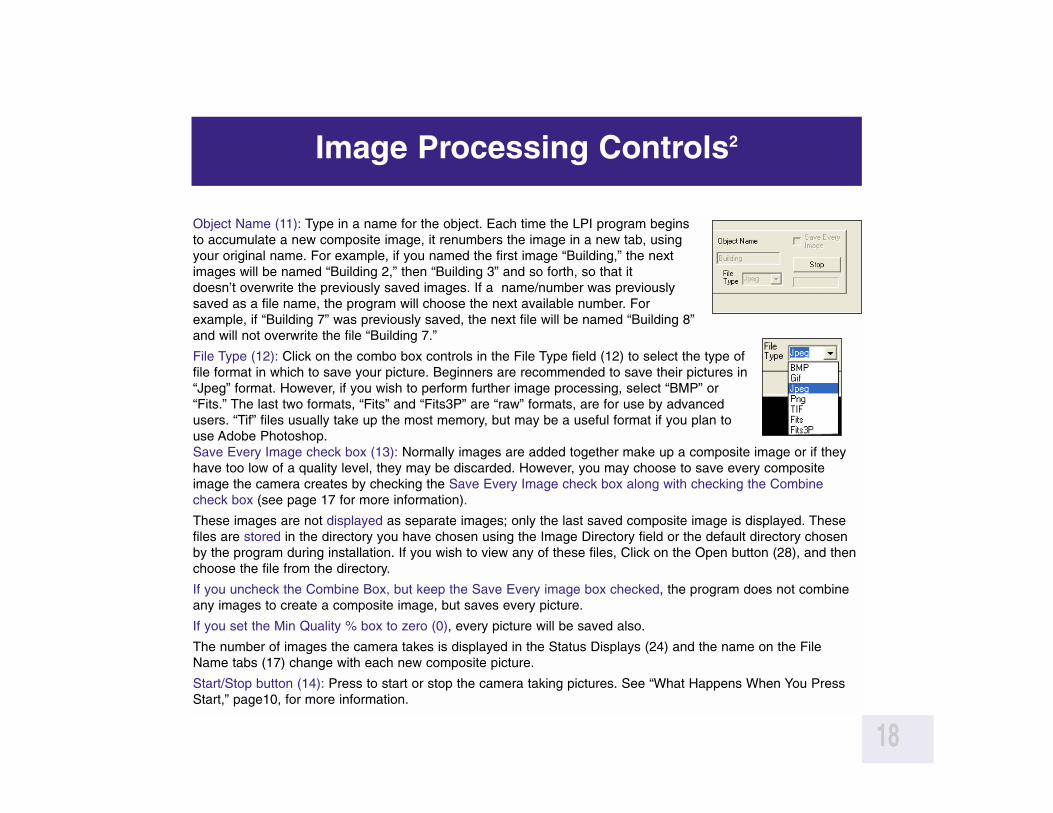
Object Name (11): Type in a name for the object. Each time the LPI program beginsto accumulate a new composite image, it renumbers the image in a new tab, usingyour original name. For example, if you named the first image “Building,” the nextimages will be named “Building 2,” then “Building 3” and so forth, so that it doesn’t overwrite the previously saved images. If a name/number was previouslysaved as a file name, the program will choose the next available number. For example, if “Building 7” was previously saved, the next file will be named “Building 8”and will not overwrite the file “Building 7.”
File Type (12): Click on the combo box controls in the File Type field (12) to select the type offile format in which to save your picture. Beginners are recommended to save their pictures in“Jpeg” format. However, if you wish to perform further image processing, select “BMP” or“Fits.” The last two formats, “Fits” and “Fits3P” are “raw” formats, are for use by advancedusers. “Tif” files usually take up the most memory, but may be a useful format if you plan touse Adobe Photoshop.Save Every Image check box (13): Normally images are added together make up a composite image or if theyhave too low of a quality level, they may be discarded. However, you may choose to save every compositeimage the camera creates by checking the Save Every Image check box along with checking the Combinecheck box (see page 17 for more information).
These images are not displayed as separate images; only the last saved composite image is displayed. Thesefiles are stored in the directory you have chosen using the Image Directory field or the default directory chosenby the program during installation. If you wish to view any of these files, Click on the Open button (28), and thenchoose the file from the directory.
If you uncheck the Combine Box, but keep the Save Every image box checked, the program does not combineany images to create a composite image, but saves every picture.
If you set the Min Quality % box to zero (0), every picture will be saved also.
The number of images the camera takes is displayed in the Status Displays (24) and the name on the FileName tabs (17) change with each new composite picture.
Start/Stop button (14): Press to start or stop the camera taking pictures. See “What Happens When You PressStart,” page10, for more information.
Image Processing Controls2
18
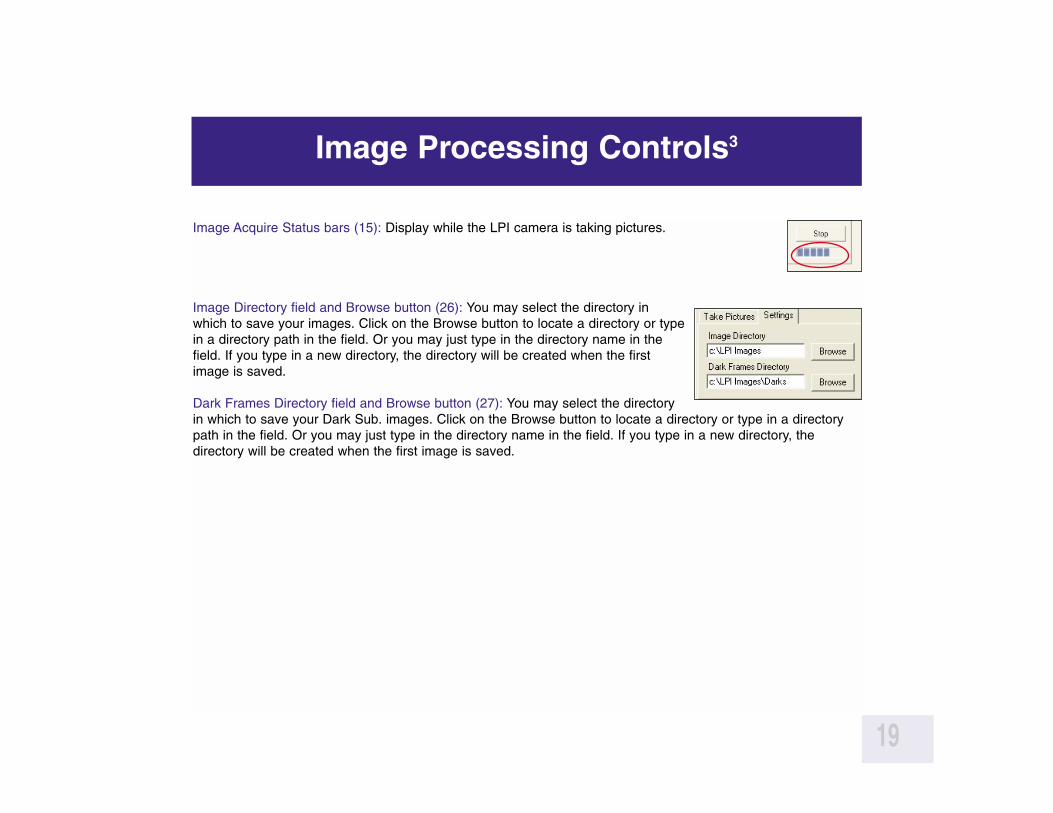
Image Acquire Status bars (15): Display while the LPI camera is taking pictures.
Image Directory field and Browse button (26): You may select the directory inwhich to save your images. Click on the Browse button to locate a directory or typein a directory path in the field. Or you may just type in the directory name in thefield. If you type in a new directory, the directory will be created when the firstimage is saved.
Dark Frames Directory field and Browse button (27): You may select the directoryin which to save your Dark Sub. images. Click on the Browse button to locate a directory or type in a directorypath in the field. Or you may just type in the directory name in the field. If you type in a new directory, the directory will be created when the first image is saved.
Image Processing Controls3
19

Open button (28): Allows you to open a file you have previously created. Click on this button and your directorylist displays. Choose the desired file and it opens as a tab above the Image Display window. See diagram below.
Notice that there are scroll arrows (see diagram above) at the end of the tab row. Click on these arrows to dis-play more composite image file tabs.
Close (29): Allows you to close a composite image file tab. First click on the tab you wish to close, then click onthe Close button to close the file.
File Settings Tab
20
Scroll Arrows
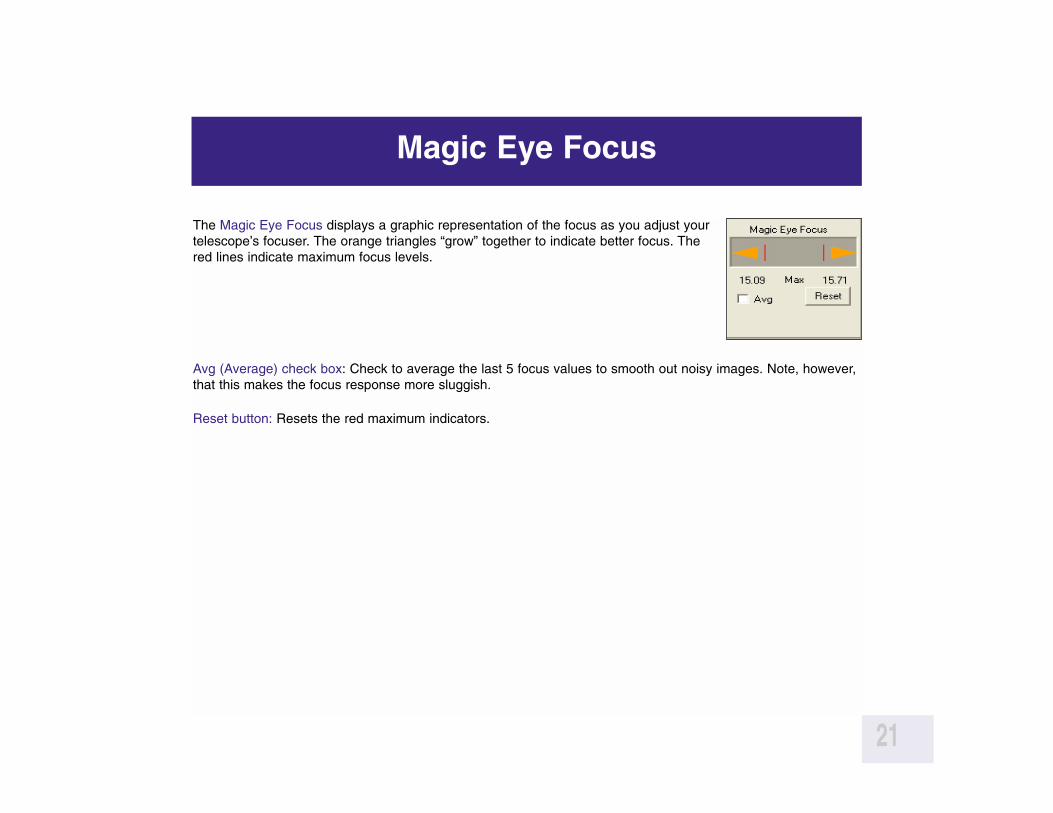
The Magic Eye Focus displays a graphic representation of the focus as you adjust yourtelescope’s focuser. The orange triangles “grow” together to indicate better focus. Thered lines indicate maximum focus levels.
Avg (Average) check box: Check to average the last 5 focus values to smooth out noisy images. Note, however,that this makes the focus response more sluggish.
Reset button: Resets the red maximum indicators.
Magic Eye Focus
21

22
LPI Camera Program Advanced Concepts
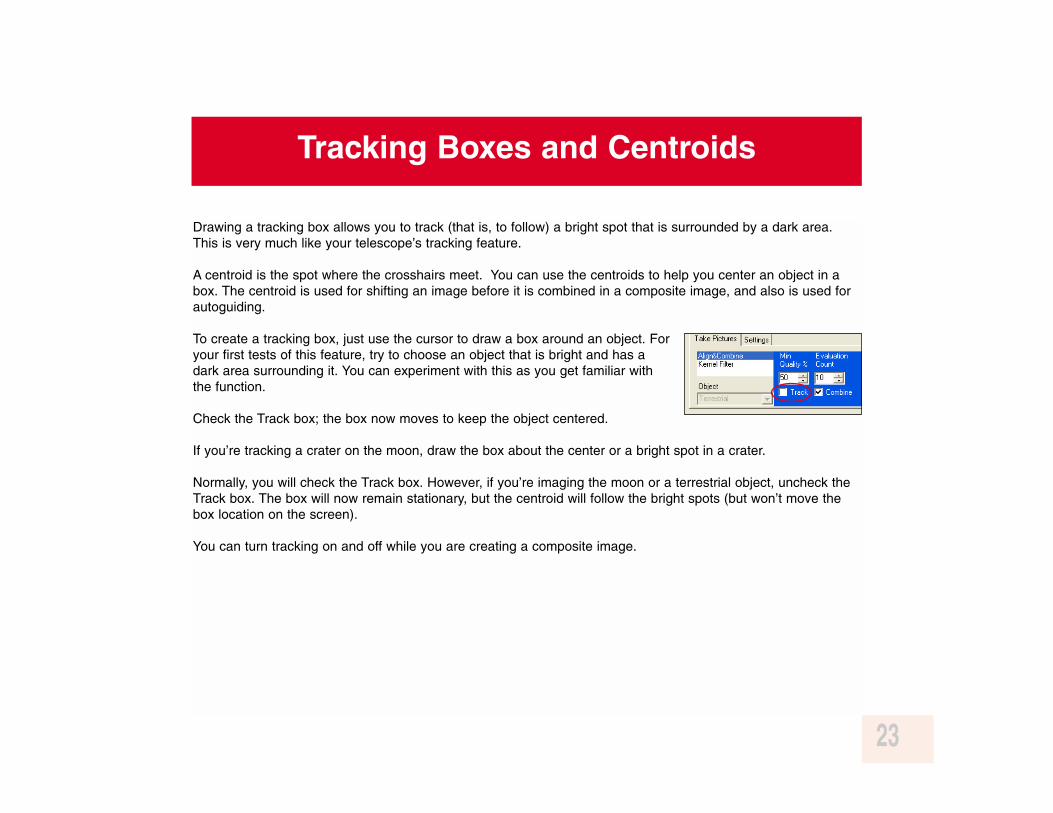
Drawing a tracking box allows you to track (that is, to follow) a bright spot that is surrounded by a dark area.This is very much like your telescope’s tracking feature.
A centroid is the spot where the crosshairs meet. You can use the centroids to help you center an object in abox. The centroid is used for shifting an image before it is combined in a composite image, and also is used forautoguiding.
To create a tracking box, just use the cursor to draw a box around an object. Foryour first tests of this feature, try to choose an object that is bright and has adark area surrounding it. You can experiment with this as you get familiar withthe function.
Check the Track box; the box now moves to keep the object centered.
If you’re tracking a crater on the moon, draw the box about the center or a bright spot in a crater.
Normally, you will check the Track box. However, if you’re imaging the moon or a terrestrial object, uncheck theTrack box. The box will now remain stationary, but the centroid will follow the bright spots (but won’t move thebox location on the screen).
You can turn tracking on and off while you are creating a composite image.
Tracking Boxes and Centroids
23

The Histogram controls allow you more control of the brightness, contrast and mid-rangetones of your LPI camera.
Experiment with these controls. Select an easily focused terrestrial image and adjust theHistogram sliders. You will notice the Live image growing brighter or darker, and even noticemid-tones becoming more visible. You will have to adjust these sliders differently for eachobject and can adjust the sliders “on the fly” as you are creating a composite image.
Note: The effect of the sliders is saved in all file types, except fits and fits3P.
LOG check box: Makes the Histogram response logarithmic.
ROI: Creates a histogram for just the part of an image that is inside a tracking box.
Histogram Display and Controls
24
Autoguider1
25
For users familiar with the product, the LPI camera functions in a manner similar to the Meade Pictor 201XTCCD Autoguider.
An autoguider helps keep an object centered so that a 35mm camera can take long exposures of an image.Note that you do not have to set the LPI camera for a long exposure using Exposure controls (2). Autoguiding isused typically with telescope mounted in the equatorial mode, although it can also be used with LX200GPSTelescope mounted in the alt/az mode.
To use the LPI camera as an autoguider, perform the following procedure. You will need an off-axis guider (seethe Meade General Catalog for more information) and the supplied serial cable that is appropriate for yourmodel telescope. You will also need to know the focal length of your telescope.
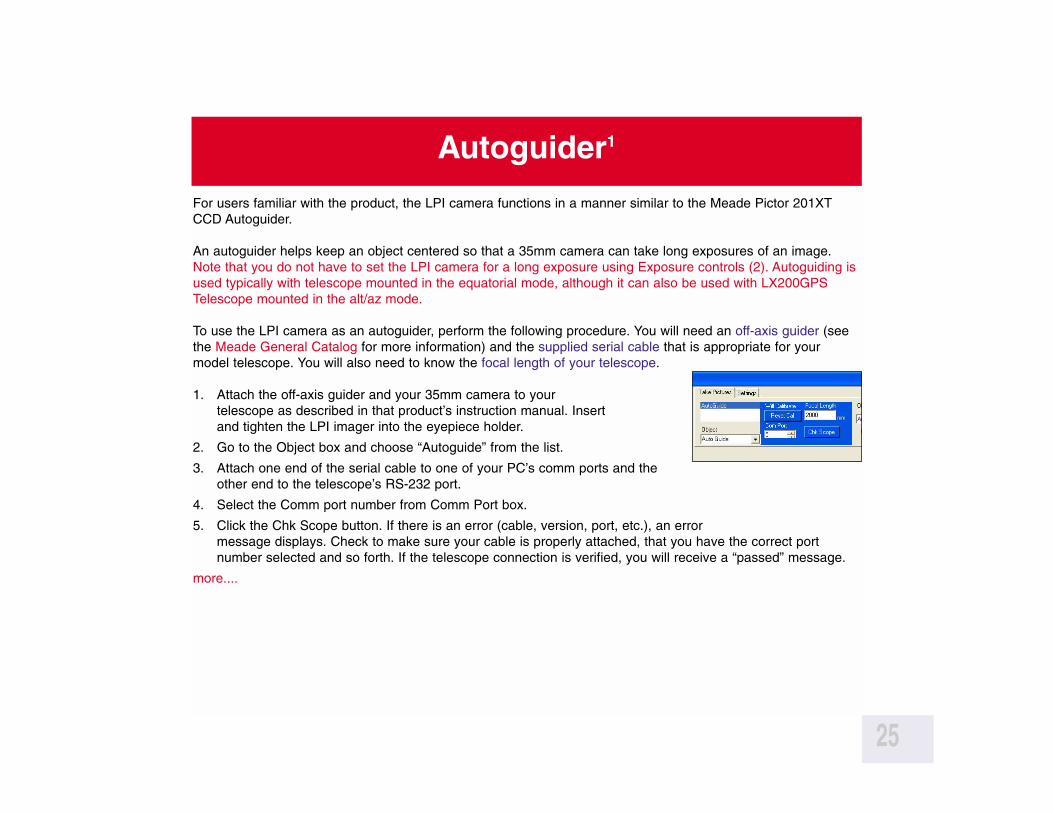
1. Attach the off-axis guider and your 35mm camera to your telescope as described in that product’s instruction manual. Insert and tighten the LPI imager into the eyepiece holder.
2. Go to the Object box and choose “Autoguide” from the list.
3. Attach one end of the serial cable to one of your PC’s comm ports and theother end to the telescope’s RS-232 port.
4. Select the Comm port number from Comm Port box.
5. Click the Chk Scope button. If there is an error (cable, version, port, etc.), an error message displays. Check to make sure your cable is properly attached, that you have the correct port number selected and so forth. If the telescope connection is verified, you will receive a “passed” message.
more....

Autoguider2
26
6. In the Focal Length field, type in the focal length of your telescope.
7. Locate a star using your telescope’s alignment and Go To procedures. Focus and prepare the imager asdescribed earlier in this manual.
8. Draw a tracking box around the star.
9. Click the Start button.
10. When you click on the Start button, the program begins to calibrate. It then begins to autoguide your telescope and displays X and Y error coordinates in the Status Display box (24).
11. Click the Abort button (the Start button renamed) when you are finished.
If you don’t move your telescope or rotate the guider assembly, you do not need to recalibrate. However, if youwish to recalibrate, click on the Reset Cal button.
Note that you do not need to check the Track button to use this feature.

Dark Frames is a useful feature for if you’re taking exposures longer than 1 second.
Longer exposures and temperature can create noise in your LPI camera called dark current artifacts. The Dark Frames feature allows you to subtract out some of this noise from your pictures.
Perform the Dark Frames features at night. If the temperature changes significantly during your observing session, you should repeat this procedure.
To perform the dark Frames procedure:
1. Select “Take Dark” in the Object type combo box (10). The Dark FrameExposure controls display.
2. Select a range of exposure time. For example, if the length of your exposureswill be between 2 and 5 seconds, set the First Exp (Exposure) box for 2 seconds and the Last Exp box for 5 seconds. The LPI program will then take aseries of dark frames image files between 2 seconds and 5 seconds in length at approximately 0.5 f/stopintervals (about 1.4 seconds apart). Later, when you set your camera exposure time (see Step 6 below), theLPI program will automatically select the Dark Frame file with the closest exposure length, scale it to theactual exposure time and apply it to the image you are taking. In effect, it subtracts out the dark current artifacts.
more....
Dark Frames1
27

3. Select a value for the Avg Exp box. This is the number of exposures that areaveraged together to create each composite Dark Frame exposure. Typically,set this value to 10.
4. Click on the Setting tab (9). The Dark Frames directory field displays. The DarkFrames will be saved to this directory. You may change the directory if you wish.
5. Click the Start button (14). A message displays that tells you to cover up your telescope or LPI camera.Replacing the lens cap on your telescope is sufficient.
The program erases all the old Dark Frames files in the directory, and takes and saves the new DarkFrames series. When all the Frames are taken, “Done” displays in the Status Display (24). Notice theHistogram display; it will reflect the Dark Frames that are being imaged.
6. Select an exposure in the Exposure Controls (2). The Dark Frames feature isused with Longer exposures, so your exposure time should typically be longerthan 1 second.
7. Check the Dark Sub check box (6). The Dark Frames feature is automated, soDark Frames will automatically be applied to any pictures you now take.
8. Remove the lens cap from your telescope or uncover your LPI camera. Begin taking pictures as previouslydescribed in “Start Taking Pictures.” (See page 10 for more information.) The Dark Frames feature is automated, so Dark Frames will automatically be applied to any pictures you now take.
Note that if you are taking longer exposures, better results will be achieved with black and white (mono) images:Check the Mono check box (4).
Dark Frames2
28

This document and the Meade Autostar IP Software described herein, are copyrighted and are protected from reproduction, proliferation, and disclosure underthe Copyright laws of the United States of America. The Software contained herein is licensed to you under the terms of a License Agreement incorporated inthe Software. PLEASE READ IT BEFORE USING. By using the Software, you are accepting and agreeing to such terms. If you do not accept the terms,return the Software unused to the place of purchase for a full refund.
Information in this document is subject to change without notice and does not represent a commitment on the part of Meade Instruments Corp. The softwareand/or databases described in this document are furnished under a license agreement. The software and/or databases may be used or copied only in accor-dance with the terms of the agreement. It is against the law to copy the software on any medium except as specifically allowed in the license agreement. Thepurchaser may make one copy of the software for backup purposes. No part of this manual and/or databases may be reproduced or transmitted in any form orby any means; electronic or mechanical, including photocopying, recording, or information storage and retrieval systems, for any purpose other that the purchas-er's personal use, without the express written permission of Meade Instruments Corp.
Copyright © 2003 by Meade Instruments Corp. All rights reserved. Printed in the United States of America.
Microsoft is a registered trademark and Windows is a trademark of Microsoft Corporation.
Acrobat Reader and Photoshop are trademarks of the Adobe Corporation.
LIMITED WARRANTY
LIMITED WARRANTY. Meade Instruments warrants that (a) the SOFTWARE will perform substantially in accordance with the accompanying written materialsfor a period of ninety (90) days from the date of receipt, and (b) any hardware accompanying the SOFTWARE will be free from defects in materials and work-manship under normal use and service for a period of one (1) year from the date of receipt. Any implied warranties on the SOFTWARE and hardware are limit-ed to ninety (90) days and one (1) year respectively. Some states/countries do not allow limitations on duration of an implied warranty, so the above limitationmay not apply to you.
CUSTOMER REMEDIES. Meade Instruments entire liability and your exclusive remedy shall be, at Meade 's option, either (a) repair or (b) replacement of theSOFTWARE or hardware that does not meet Meade 's Limited Warranty. You must return the defective item to Meade Instruments, at your expense, with a copyof your receipt. This Limited Warranty is void if failure of the SOFTWARE or hardware has resulted from accident, abuse, or misapplication. Any replacementSOFTWARE or hardware will be warranted for the remainder of the original warranty period or thirty (30) days, whichever is longer. Outside of the UnitedStates, these remedies are not available without proof of purchase from an authorized non-U.S. source.
NO OTHER WARRANTIES. Meade Instruments and its suppliers disclaim all other warranties, either expressed or implied, including, but not limited to, impliedwarranties of merchantability and fitness for a particular purpose, with regard to the SOFTWARE, the accompanying written materials, and any accompanyinghardware. This limited warranty gives you specific legal rights. You may have other rights which vary from state/country to state/country.
NO LIABILITY FOR CONSEQUENTIAL DAMAGES. In no event shall Meade Instruments, or its suppliers, be liable for any damages whatsoever (including with-out limitation, damages for loss of business profits, business interruption, loss of business information, or any other pecuniary loss) arising out of the use of, orinability to use, the Meade product, even if Meade Instruments has been advised of the possibility of such damages. Because some states/countries do notallow the exclusion or limitation of liability for consequential or incidental damages, the above limitation may not apply to you.
U.S. GOVERNMENT RESTRICTED RIGHTS
The SOFTWARE and documentation are provided with RESTRICTED RIGHTS. Use, duplication, or disclosure by the Government is subject to restriction as setforth in subparagraph (c)(1)(ii) of The Rights in Technical Data and Computer Software clause at DFARS 252.227-7013 or subparagraphs (c)(1) and (2) of theCommercial Computer Software--Restricted Rights at 48 CFR 52.227-19, as applicable. Manufacturer is Meade Instruments Corporation, 6001 Oak Canyon,Irvine, California 92618.
29

9/03
A D V A N C E D P R O D U C T S D I V I S I O N
Meade Instruments CorporationWorld’s Leading Manufacturer of Astronomical Telescopes for the Serious Amateur6001 Oak Canyon, Irvine, California 92618 � (949) 451-1450FAX: (949) 451-1460 � www.meade.com © 2003