lnstruction manual mode d’emploi manual de instrucciones
TRANSCRIPT

lnstruction Manual Bedienungsanleitung Mode d’emploi Manual de instrucciones Manuale di istruzioni Handleiding
ZM1501
Slow Juicer
Langsamer Entsafter
Presse-agrumes lent
Exprimidor lento
Juicer lento

2
ENGLISH Content
Section 1. Safety precautions before use.......................................................................... 5
Section 2. Parts and functions .......................................................................................... 7
Section 3. Operating instructions ...................................................................................... 8
Section 4. How to assemble ............................................................................................ 9
Section 5. Guidance for ingredients selection ................................................................ 12
Section 6. Maintenance .................................................................................................. 14
Section 7. Technical data ................................................................................................. 15
Section 8. Trouble Shooting ............................................................................................ 16
Section 9. Warranty ......................................................................................................... 17
DEUTSCH lnhalt
Kapitel 1. Sicherheitshinweise ........................................................................................ 18
Kapitel 2. Komponenten und Funktion ............................................................................. 20
Kapitel 3. Bedienungshinweise ........................................................................................ 21
Kapitel 4. Zusammenbau ................................................................................................. 22
Kapitel 5. Hinweise zu den Zutaten ................................................................................ 25
Kapitel 6. Wartung ............................................................................................................ 27
Kapitel 7. Technische Daten ............................................................................................ 28
Kapitel 8. Storungsbehebung ........................................................................................... 29
Kapitel 9. Garantie ............................................................................................................ 30

3
FRANCAIS Table des matières
Section 1. Conseils de sécurité ......................................................................................... 31
Section 2. Pièces et fonctions ........................................................................................... 33
Section 3. Mode d’emploi de l’appareil ................................................................................ 34
Section 4. Assemblage de l’appareil ................................................................................. 35
Section 5. Conseils pour sélection d’ingrédients .............................................................. 38
Section 6. Entretien ........................................................................................................... 40
Section 7. Information technique ....................................................................................... 41
Section 8. Dépannage ....................................................................................................... 42
Section 9. Garantie .......................................................................................................... 43
ESPANOL Contenido
Seccion 1. Precauciones para el uso seguro ........................................................................ 44
Seccion 2. Piezas y funciones ............................................................................................... 46
Seccion 3. Metodo de operacion ........................................................................................... 47
Seccion 4. Como armarlo .................................................................................................. 48
Seccion 5. Consejos para la seleccion de ingredientes ......................................................... 51
Seccion 6. Mantenimiento ........................................................................................................ 53
Seccion 7. Indice de seguridad ................................................................................................ 54
Seccion 8. Resolucion de problemas ....................................................................................... 55
Seccion 9. Garantia .......................................................................................................... 5. 6

4
ITALIANA Contenuto
Sezione 1. Precauzioni per l'uso in sicurezza ....................................................................... 57
Sezione 2. Parti e Funzioni .................................................................................................... 59
Sezione 3 . Metodo di operazione ................................................................................................. 60
Sezione 4. Come assemblare ................................................................................................ 61
Sezione 5. Suggerimenti per la selezione degIi ingredienti .................................................. 63
Sezione 6. Manutenzione ...................................................................................................... 66
Sezione 7. lndice di sicurezza ............................................................................................... 67
Sezione 8. Risoluzione dei Problemi ..................................................................................... 68
Sezione 9. Garanzia ............................................................................................................... 69
Nederlands Inhoud
Deel 1. Veiligheidsvoorschriften ............................................................................................ 57
Deel 2. Onderdelen ............................................................................................................... 59
Deel 3. Gebruiksaanwijzing ........................................................................................................ 60
Deel 4. Montagegids .............................................................................................................. 61
Deel 5. Advies voor selectie van ingrediënten ...................................................................... 63
Deel 6. Onderhoud ................................................................................................................. 66
Deel 7. Veiligheidsaanwijzingen ............................................................................................. 67
Deel 8. Pechverhelping ........................................................................................................... 68
Deel 9. Garantie ..................................................................................................................... 69

5
Parts and Functions Komponenten und Funktion Composants et fonctions
Piezas y funciones Parti e funzioni
Componenten en functies
2
1
5 6 /

6
Section I. Precautions for Safety Use
When using electrical appliances, basic safety precautions should always be followed, including the following:
1. Power of 220-240V~50Hz shall be supplied to this product. Please
confirm your power supply before use.
2. Be sure to disconnect the power supply before dis-assembly/re-
assembly or adjustment to this product.
3. In case of any damage to the flexible wire, to avoid any hazard,
contact our customer service or send it to our authorized service
center for replacement, and do not try to disassemble it without our
authorization.
4. Prior to use, please check the power cable, plug, juice filter,
Auger, chopper body, meat grinder and other parts, and in case of any
damage, stop using this product and contact our customer service
immediately without unauthorized dis-assembly or repair to avoid any
potential hazard.
5. For need of any repair during use,return appliance to our authorized
service facility for examination, repair or electrical adjustment.
6. Before connecting with power supply, make sure that any such
removable parts as extractor body, auger, juice filter and extractor
cover have been mounted inplace.
7. DO NOT put your fingers or other objects into the juicer opening
while it is in operation. If food becomes lodged in the opening, use
the plunger or another piece of fruit to push it down. When this
method is not possible, turn the motor off and disassemble juicer
to remove the remaining food.

7
s. The food material needs to be cut into proper pieces so as to pass
through the inlet to extractor/chopper/grind. Any fruit/vegetable shall
have any hard core, seed, skin or shell removed before processing.
9. Proper amount of force shall be used to push the food material in, not
excessive but sufficient to have it cut off exactly.
10. The juice filter, extractor cover, or auger may be dyed by the juice
during operation, which is a normal phenomenon and has no effect on
edibility and does no harm to health.
11. This product is equipped with intelligent protection chips, making it stop
automatically for every 20 minutes' operation. And in such case, rest it for
20-30 minutes before restarting it, so as to cool the motor down and
prolong product servicelife.
12. This product is designed to limit the flow rate. During processing of
any hard material, the motor will be locked and the current will rise up.
When the current goes higher than 1.3A, the equipment will beep
and the motor will stop operation for over-current protection and
extension of life span.
13. In case that current limit protection is triggered or the motor is locked
and stops automatically, disconnect the power supply and keep the
switch in position "0", and press Rotate Backwards button on the power
switch, and then discharge the food material and then press Rotate
Forwards to restart the machine. If the problem continues, it is
recommended to remove any food material inside auger before restart
so as to protect the motor.
14. After the completion of operation, remove any removable part
only after the motor/auger/shredder/slicer/grinder screw has
stopped rotating and the power has been disconnected.
15. Any part in contact with food material is clean, safe and reliable in
compliance with related food hygiene codes.
16. To protect against risk of electrical shock, do not put the motor base in
water or other liquid.

8
17. Do not use any steel wool, abrasive cleaning agent or corrosive
liquid such as gasoline or acetone to clean this product.
18. This product should be stored in a place that children can't reach. Not
allow persons with unsound extremities and sensation or mental
disorders and persons who are short of related experience and
knowledge( including children ) to use or play with this product.
19. This product is used for individual or family only.
20. This product is of Class-I protection grade, and the socket used for it
must be grounded properly.
Section II. Parts and Functions
No.
[!JPower Cable I For connection to power supply.
Housing The main unit containing motor and other
components, providing power output.
On-Off
Switch
For control of product operation, such as forward/backward rotation andclose-down.
Locking
Button
For locking of extractor to prevent unexpected release
out of the tn.srg. To unload the extractor off the
housing, press down and hold this button.
Component
Name
Function Description

9
®
@
(j)
9
(@
@
@
@
Juice
Container
To hold and collect the juice extracted by the
extractor.
Pulp
Container
To hold and collect any Pulps separated by the
extractor.
Plunger To squeeze and make theload food material contact completely with the auger so as to maximize extracting efficiency.
Tray For interim storage of food material to process.
Feed chute Feeding food and load down to Drum
Drum
One of the main components to extract juice, where the food material is loaded from theFeed chute at the top, while the juice and Pulps are discharged from the outlet.
Auger One of the main components to extract juice, where
the food material istransferred and ground against
juice filter or extruder.
Juicing
screen
Work with Auger to grind food material and filter the
juice. (applicabletofruits, vegetables and beams)
End cap
Coupled with extractor to provide protection.

10
Button Operation
Description: "ON"
Appliance is ON state
"O" : Appliance is OFF state
"R" : Appliance will REVERSE auger.(use when
food is blocking or stuck)
Tips: In case of Pulp blockage or motor locking.
Press and hold"R" button for approximately 3
seconds to rotate the auger reversely and then
release it.. Press"ON"button to resume normal
operation.
Section Ill. Method of Operation
Prior to first use.Please thoroughly clean any parts in contact with food
material. (See Section IV. Maintenance for more details)

11
Section IV. How to assemble
Connect Drum@with Housing@:
Connect the Drum@with the Housing@ by
aligning the" " on Feed chute® with " " on
the Housing@, push the Drum hard and rotate
the Drum anticlockwise until aligning" " on
Feed chute® with " " on the Housing@. (You
will hear "Tick" sound to confirm fasten it
tightly and correctly).
Place the auger@into the drum@.
2
Insert the juicing screen@ int o the drum@.
3
12
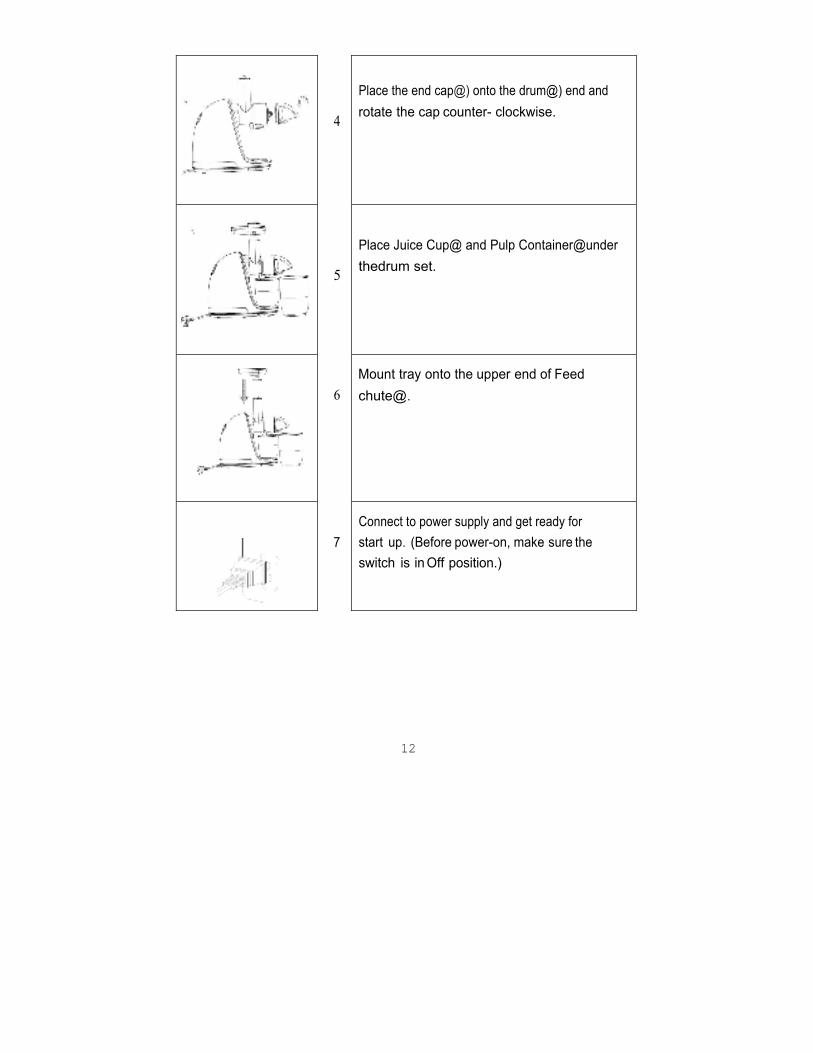
4
5
6
7
Place the end cap@) onto the drum@) end and
rotate the cap counter- clockwise.
Place Juice Cup@ and Pulp Container@under
thedrum set.
Mount tray onto the upper end of Feed
chute@.
Connect to power supply and get ready for
start up. (Before power-on, make sure the
switch is in Off position.)

13
8
9
10
ON
R
Clean the material and cut it into pieces
small sufficiently 'M'Ill can pass through the
Feed chute, and place them onto the tray.
Note: Any hard core, seed, skin or shell
from fruits and vegetables shall be removed
in advance.
Press down"ON" button on the switch to start
Note: Keep the machine operating for less
than 10 minutes. Long time work will destroy
the motor.
Note: Do not touch the power switch with wet
hand to avoid electric shock, leakage or fire.
Place the few pieces of cut fruit or
vegetables into the Feed chute, push them
downthedrumgenflywith plunger.
� Proper amount of force shall be used to push
the food material in,not excessive but
sufficientto have it cut off exactly.
(Donotputyour fingeror anyotherobjectinto
the Feed chute! If the Pulp/Juice Cup is full,
disconnect the power supply and clear it up before
restart.)
Upon completion, shut down the switch when no
juice flows out of the outlet and disconnect the
power supply. Do not remove the Juice Cup
off the outlet until the spiral propeller and
juice filter have stopped rotating completely.

14
11
The extracted juice should be drunk as soon as
possible as it will have degraded taste and
nutrient content if exposed in the
air for a time.)
� The Pulps shall not be stored fora long
time.
Do not touch the power switch with wet
hand to avoid electric shock, leakage or
fire.

15
Section V. Tips for Ingredients Selection
� FRUIT JUICE EXTACTOR
Efficiently juices hard and soft fruits: even citrus fruits, usually one of the
hardest fruits to juice.
Jam can not be achieved, some fruit can not squeeze juice (such as bananas,
mangoes, dried fruit, sugar cane, etc.).
� VEGETABLE JUICE
Cut vegetables to strips(less than 10 cm).
Juices all kinds of vegetables including carrots, beets, celery, peppers,
and radishes without destroying the natural flavor and nutrition benefits.
Fresh taste and full nutrition are guaranteed with this unique extraction
process.
� WHEATGRASS AND LEAFY GREENS
Cut it to strips(less than 10 cm).
Wheat grass, kale, cabbage, spinach and pine tree needles are just some of
the natural products that can be juiced with the Amzchef juicer. Enjoy the
best that nature offers in raw foods of all kinds and juice them for full
nutritional benefits.
Instructions on Selection of Fruits
1. Select fresh fruits and vegetables, which contain more juice. The proper
fruits include: pineapple, beet root, celery stalk, apple, cucumber, spinach,
melons, tomato, orange and grape.
16
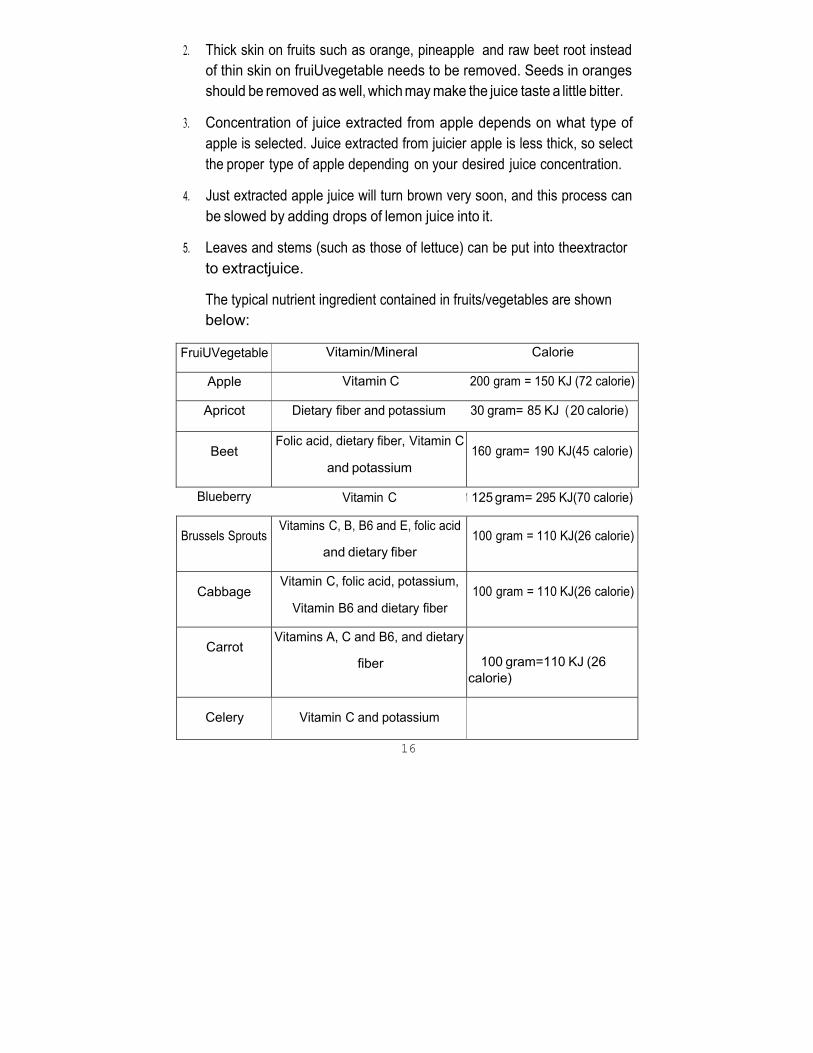
2. Thick skin on fruits such as orange, pineapple and raw beet root instead
of thin skin on fruiUvegetable needs to be removed. Seeds in oranges
should be removed as well, which may make the juice taste a little bitter.
3. Concentration of juice extracted from apple depends on what type of
apple is selected. Juice extracted from juicier apple is less thick, so select
the proper type of apple depending on your desired juice concentration.
4. Just extracted apple juice will turn brown very soon, and this process can
be slowed by adding drops of lemon juice into it.
5. Leaves and stems (such as those of lettuce) can be put into theextractor
to extractjuice.
The typical nutrient ingredient contained in fruits/vegetables are shown
below:
Blueberry Vitamin C 1 125 gram= 295 KJ(70 calorie)I
Brussels Sprouts Vitamins C, B, B6 and E, folic acid
and dietary fiber
100 gram = 110 KJ(26 calorie)
Cabbage Vitamin C, folic acid, potassium,
Vitamin B6 and dietary fiber
100 gram = 110 KJ(26 calorie)
Carrot Vitamins A, C and B6, and dietary
fiber
100 gram=110 KJ (26
calorie)
Celery Vitamin C and potassium
FruiUVegetable Vitamin/Mineral Calorie
Apple Vitamin C 200 gram = 150 KJ (72 calorie)
Apricot Dietary fiber and potassium 30 gram= 85 KJ ( 20 calorie)
Beet Folic acid, dietary fiber, Vitamin C
and potassium
160 gram= 190 KJ(45 calorie)

17
80 gram = 55 KJ(7 calorie)
Cucumber Vitamin C 280 gram= 120 KJ(29 calorie)
Fennel Vitamin C and dietary fiber 300 gram= 145 KJ(35 calorie)
Grape Vitamins C and 86, and potassium 125 gram= 355 KJ(85 calorie)
Yangtao Vitamin C and potassium 100 gram= 100 KJ(40 calorie)
Muskmelon Vitamins C and A, folic acid and
dietary fiber
200 gram= 210 KJ(50 calorie)
Nectarine Vitamins C and 83, potassium and
dietary fiber
180 gram = 355 KJ(85 calorie)
Peach Vitamins C and 83, potassium and
dietary fiber
150 gram= 205 KJ(49 calorie)
Pear Dietary fiber 150 gram = 250 KJ(60 calorie)
Pineapple Vitamin C 150 gram = 245 KJ(59 calorie)
Raspberry Vitamin C, iron, potassium and
magnesium
125gram= 130KJ(31 calorie)
Tomato Vitamins C, E and A, dietary fiber
and folic acid
100 gram= 90 KJ(31ca lo r ei )
Section VI. Maintenance
1. Before cleaning this product, be sure to shut down the switch to
disconnect the power supply.
2. Clean this product after using it.
3. The Housing cannot be washed under water, and must be cleaned
with twisted wet clothinstead.
4. Before storing it, make sure this product is clean and dry.

18
5. Disassemble this product to wash the components by the following
steps:
2
3
WARNING
First remove the plunger and tray.
Press down and hold the locking
button@,and rotate the drum
clockwise to remove it.
After removing extractor, detach the
end cap,juice &l'W1 and auger in turn,
all removable components can be
washed with water.

19
Do not immerse the motor base in water or any other liquid. Do not
use water jet to clean the motor base.
Section VII. Safety Index
Product Name Slow Juicer
Model ZM1501
Rated Voltage 220V-240V ~
Rated Power 150W
Rated Frequency 50Hz
Continuous Operating Time 10 minutes
Interval Time 10 minutes

20
Section VIII. Trouble Shooting
Fault Phenomenon
Analysis of cause Fault resolution
After connecting
power supply
and turning on
the switch, the
product fails to
work
1. After turn on the
machine, wait for 1s,
it will work. It is
normal.
2. After 1s, it still no
work, maybe poor
contact between plug
and socket
Re-plug it properly
1. Replace thesocket and try
again, or contact after
Sales Support Email:
info@iamzchef .com
During the early
uses, the motor
generates
unpleasant smell
It is a normal
phenomenon
If this phenomena occurs
frequently, send it to our
authorized service center
nearest to you for inspection.
1. Too lowvoltage
1. Check whether the voltage
is too low
2. Disconnect the power
supply and remove
excessive food material
3. It is a normal phenomenon
and themotorwill resume
2. Excessiveamountof
This machine
stop during
operation
food material has been
loaded
3. The machine has
operated continuously
for long time.

21
after a break time.
Noise is
generated
during
operation.
1. The machine operates
in an unbalanced state
due to failure to
mount auger orjuice
filter inplace.
1. Mount auger or juice
filter in place or
Contact after Sales
Support Email:
info@iamzchef .com
2. The starting motor in
the frame has been
damaged.
Section IX. Warranty
Thank you for purchasing our product, which has been made to meet
high quality standards. The manufacturer's warranty covers the
product for a period of 12 months from the date of purchase against
manufacturing faults.
All Amzchef warranties are automatically kept track of in our system,
so there is no need to register your product.
For 6month extra free of charge warranty, please register at website
www.iamzchef .com or fill in and take picture of bellow Warranty Card
sending to [email protected].
22
Due to continuous product improvement, we reserve the right to change
the product specification without prior notice.
Kapitel I. Sicherheitshinweise
Bei der Verwendung von elektrischen Geraten sind stets diese grundlegenden
Sicherheitshinweise zu beachten:
21. Dieses Produkt muss mit einer Spannung von 220-240V~50Hz versorgt
werden. Bitte bestatigen Sie lhre Stromversorgung vor Gebrauch.
22. Ziehen Sie den Netzstecker, bevor Sie das Gerat demontieren, neu
montieren oder einstellen.

23
23. Im Fall einer Beschadigung des Kabels wenden Sie sich bitte an
unseren Kundendienst oder senden Sie das Gerat zum Austausch an
unser autorisiertes Kundendienstzentrum. Versuchen Sie nicht, das
Gerat ohne unsere Genehmigung zu demontieren.
24. Bitte uberprufen Sie vor Gebrauch Netzkabel, Stecker, Saftfilter,
Schnecke, Gehause, Fleischwolf und andere Teile und setzen Sie sich
im Fall einer Beschadigung sofort mit unserem Kundendienst in
Verbindung. Verwenden Sie das Gerat nicht weiter und wenden Sie
sich an unseren Kundendienst oder senden Sie das Gerat an unser
autorisiertes Kundendienstzentrum, um Gefahren zu vermeiden.
25. Fur eine eventuelle Reparatur wahrend des Betriebs senden Sie das Gerat
zur 0berprufung, Reparatur oder elektrischen Einstellung an unseren
Kundendienst.
26. Vergewissern Sie sich vor dem Anschluss, dass alle Anbauteile korrekt
montiert sind.
27. Stecken Sie NIGHT lhre Finger oder Gegenstande in die
Entsafteroffnung, wahrend das Gerat in Betrieb ist. Wenn sich etwas in
der Offnung befindet, verwenden Sie den Kolben oder ein anderes
Stuck Obst/Gemuse, um es nach unten zu drucken. Wenn dies nicht
moglich ist, schalten Sie den Motor aus und demontieren Sie den Slow
Juicer, um die restlichen Stucke zu entfernen.
28. Das Obst/Gemuse muss in Stucke geschnitten werden, damit es durch
den Einlass zum Mahlwerk gelangt. Alles Obst/Gemuse muss vor der
Verarbeitung von harten Kernen, Samen und Schalen befreit werden.
29. Das Obst/Gemuse muss mit der erforderlichen Kraft eingedruckt
werden, nicht ubermaf!iig, aber ausreichend, um es korrekt zu
verarbeiten.
30. Saftfilter, Abdeckung und Schnecke konnen wahrend des Betriebs
durch den Saft verfarbt werden, was normal ist und keinen Einfluss auf
die Genief!ibarkeit und die Gesundheit hat.
31. Dieses Produkt ist mit intelligenten Schutzchips ausgestattet, sodass es alle
20 Minuten automatisch stoppt. In diesem Fall muss der Motor vor dem

24
Wiederanfahren 20 bis 30 Minuten ruhen, um ihn abzukuhlen und die
Lebensdauer des Produkts zu verlangern.
32. Dieses Produkt wurde entwickelt, um den Durchsatz zu begrenzen.
Wahrend der Verarbeitung von hartem Material wird der Motor blockiert.
Wenn die Stromaufnahme hoher als 1,3 A ist, ertont ein Signalton und
der Motor unterbricht den Betrieb zum Schutz vor Oberstrom und zur
Gewahrleistung der Lebensdauer.
33. Falls der Strombegrenzungsschutz ausgelost wird oder der Motor
blockiert ist und automatisch stoppt, ziehen Sie den Netzstecker und
halten Sie den Schalter in Position ,,O" gedruckt. Drucken Sie die
Ruckwartslauf-Taste am Netzschalter, und entladen Sie das
Obst/Gemuse . Dann drucken Sie wieder die Vorwartslauftaste , um
das Gerat neu zu starten. Wenn das Problem weiterhin besteht, muss
vor dem Wiederanfahren alles Obst/Gemuse aus der Schnecke
entfernt werden, um den Motor zu schutzen.
34. Nach Beendigung des Betriebs entfernen Sie alle abnehmbaren Teile
erst dann, wenn der Motor und alle beweglichen Teile zum
vollstandigen Stillstand gekommen sind und der Netzstecker gezogen
wurde.
35. Alie Teile, die mit Lebensmitteln in Beruhrung kommen, sind sauber,
sicher und zuverlassig und erfullen die entsprechenden
Lebensmittelhygienevorschriften.
36. Zurn Schutz vor Stromschlag dart das Motorgehause nicht in Wasser
oder andere Flussigkeiten getaucht werden.
37. Verwenden Sie keine Stahlwolle, Scheuermittel oder korrosive
Flussigkeiten wie Benzin oder Aceton, um dieses Produkt zu reinigen.
38. Das Produkt muss fur Kinder unerreichbar gelagert werden. Lassen Sie
Personen mit korperlichen oder geistigen Einschrankungen oder mit
wenig oder keiner Erfahrung und Wissen im Umgang mit diesem Gerat
(einschlie lich Kinder) nicht mit dem Produkt spielen oder es benutzen.
39. Dieses Produkt ist nur fur den Gebrauch im privaten Haushalt bestimmt.
40. Dies ist ein Produkt der Schutzklasse I und die dafur verwendete
Steckdose muss ordnungsgema geerdet sein.

25
Kapitel II. Komponenten und Funktion
fl [!
®
®
(J)
®
®
Komponente Funktion
]Netzkabel Anschluss an der Stromversorgung.
Gehause Die Haupteinheit, die den Motor und andere
Komponenten enthalt und die Leistung liefert.
Ein-
/Ausschalter
Steuerung des Betriebs, wie Vorwarts-/Ruckwartslauf
und Abschaltung .
Entriegelung
s-taste
Verriegeln des Anbaugerats, um ein unerwartetes
Herausfallen aus dem Gehause zu verhindern. Um
das Anbaugerat vom Gehause zu entfernen, halten
Sie diese Taste gedruckt.
Saftbehalter Halten und Sammeln des durch das Anbaugerat
gewonnenen Saftes.
Fruchtfleisch-
behalter Halten und Sammeln des Fruchfleisches, das durch
das Anbaugerat getrennt wurde.
Presskolben
Andrucken des zu entsaftenden Materials fur gro te Saftausbeute.
Ablage Vorubergehende Ablage des zu entsaftenden
Materials.
Einfullschac
ht Einfullen und Beladung bis zur Trammel
Trammel
Eine der Hauptkomponenten zur Saftgewinnung, bei
der das ObsUGemuse oben im Einfullschacht geladen
wird, wahrend der Saft und das Fruchtfleisch aus dem
Auslauf ausgetragen werden.
Schnecke Eine der Hauptkomponenten zur Saftgewinnung,
bei der das Obst/Gemuse transportiert und gegen

26
den Saftfilter gemahlen wird.
Saftfilter
Arbeitet mit der Schnecke, um Lebensmittel zu
mahlen und den Saft zu filtern (Obst und Gemuse).
Abschlusska
ppe Verschluss des Anbaugerats und Schutzkappe.
Kapitel Ill. Bedienungshinweise
Bitte reinigen Sie vor dem ersten Gebrauch alle Teile, die mit
Lebensmitteln in Beruhrung kommen, grundlich (Siehe Kapitel IV.
Wartung fur weitere Details).
@
@

27
Kapitel IV. Zusammenbau
Trammel @)am Gehause@ montieren:
Montieren Sie die Trammel @)am Gehause @,
indem Sie die Markierung auf dem Einfullschacht
®mit dem Symbol auf dem Gehause @,
ausrichten. Drucken Sie die Trammel an und
drehen Sie sie entgegen dem Uhrzeigersinn, bis
auf dem Einfullschacht®mit auf dem Gehause
Tasten
,,ON": Gerat einschalten
,,O": Gerat ausschalten
,,R": Ruckwartslauf der Schnecke (bei
Blockierung)
Hinweis: Bei Blockierung des Motors halten Sie
,,R" fur 3 Sekunden gedruckt, um die Schnecke
ruckwarts laufen zu lassen. Dann drucken Sie
wieder ,,ON", um den Normalbetrieb fortzusetzen.
Hinweis: Nachdem Sie ,,ON" gedruckt haben,
setzt das Gerat fur 1 Sekunde aus, bevor es

28
2
Setzen Sie den Saftfilter @in die Tremmel @)
ein.
3
Setzen Sie die Schnecke @n die Tremmel @)
ein.
@ ausgerichtet ist(die Trommel rastet horbar ein).

29
4
5
6
7
Setzen Sie die Abschlusskappe @auf der Tremmel
@) an und drehen Sie sie entgegen dem
Uhrzeigersinn.
Stellen Sie den Saftbehalter @ und den
Fruchtfleischbehalter@ unter die Tremmel.
Setzen Sie die Ablage oben auf dem
Einfullschacht ® auf.
Stecken Sie den Netzstecker in eine
geeignete Steckdose (versichern Sie sich
vor dem Anschluss, dass das Gerat
ausgeschaltet ist).

30
8
9
10
Reinigen Sie 1hr Obst/Gemuse und
schneiden Sie es in Stucke, die durch den
Einfullschacht passen, dann legen Sie sie
auf die Ablage.
Hinweis: Alie harten Kerne, Samen und
Schalen mussen vorab von Obst und
Gemuse entfernt werden.
Drucken Sie ,,ON", um zu starten.
Hinweis: Halten Sie das Gerat fur weniger
als 10 Minuten in Betrieb.
Hinweis: Beruhren Sie den Netzschalter
nicht mit nassen Handen, um Stromschlage
und Feuer zu vermeiden.
Geben Sie einige Obst- oder Gemusestucke
in den Einfullschacht und drucken Sie sie
mit dem Presskolben vorsichtig in die
Trammel.
� Wenden Sie keine ubermaige Kraft auf.
Fuhren Sie keine Finger oder Gegenstande
in den Einfullschacht ein. Wenn der
Fruchtfleisch- oder Saftbehalter voll ist,
ziehen Sie den Netzstecker und entleeren
diese vor dem Neustart.)

31
11
Nach Beendigung schalten Sie das Gerat aus,
wenn kein Saft mehr flie t und ziehen Sie den
Netzstecker. Entfernen Sie den Saftbehalter erst
dann vom Auslauf , wenn die Schnecke zum
vollstandigen Stillstand gekommen ist. Der Saft
sollte so schnell wie moglich getrunken werden,
da er bei langerem Verbleiben an der Luft
Geschmack und Nahrstoffgehalt verliert. )
� Fruchtfleisch und Saft nicht fur langere
Zeit lagern.
� Netzschalter nicht mit nassen Handen
beruhren, um Stromschlag und Feuer zu
vermeiden.

32
Kapitel V. Hinweise zu den Zutaten
� SLOW JUICER
Entsaftet effizient harte und weiche Fruchte, auch Zitrusfruchte, meist die
schwierigsten Fruchte zum Entsaften.
Marmelade kann nicht zubereitet werden, einige Fruchte konnen nicht
entsaftet werden (z.B. Bananen, Mangos, Trockenfruchte, Zuckerrohr usw.).
� GEMOSESAFT
Gemuse in Streifen schneiden (weniger als 10 cm).
Safte aller Art von Gemuse, einschlief11ich Karotten, Ruben, Sellerie, Paprika
und Radieschen, ohne den naturlichen Geschmack und die Nahrstoffe zu
zerstoren.
Frischer Geschmack und gesunde Ernahrung sind mit diesem einzigartigen
Prozess garantiert.
� WEIZENGRAS UND BLATTGEMOSE
In Streifen schneiden (weniger als 10 cm).
Weizengras, Grunkohl, Kohl, Spinat und Kiefernnadeln sind nur einige der
naturlichen Produkte, die mit dem Amzchef Entsafter entsaftet werden
konnen. Genief1en Sie das Beste, was die Natur an Rohkost aller Art zu
bieten hat und entsaften Sie sie fur die vollwertigen Nahrstoffe.
Hinweise zur Auswahl der Fruchte
6. Wahlen Sie frisches Obst und Gemuse, das mehr Saft enthalt. Die richtigen
Fruchte sind: Ananas, Rote Beete, Staudensellerie, Apfel, Gurken, Spinat,
Melonen, Tomaten, Orangen und Trauben.

33
7. Dicke Schale an Fruchten wie Orangen, Ananas und roher Rote Beete
muss entfernt werden. Samen in Orangen sollten ebenfalls entfernt werden,
wodurch der Saft anderenfalls etwas bitter schmecken kann.
8. Die Konzentration des aus dem Apfeln gewonnenen Safts hangt davon
ab, welche Apfelsorte ausgewahlt wird. Saft aus saftigeren Apfeln ist
weniger dick, also wahlen Sie die Apfelsorte je nach gewunschter
Saftkonzentration .
9. Frisch entsafteter Apfelsaft wird sehr schnell braun, das kann durch Zugabe
von Zitronensaft verlangsamt werden.
10. Blatter und Stangel (z.B. von Salat) konnen in den Slow Juicer gegeben
werden, um Saft zu gewinnen.
Der typische Nahrstoffgehalt van ObsUGemuse ist nachfolgend
dargestellt:
Obst/Gemuse Vitamine/Mineralstoffe Kalorien
Apfel Vitamin C 200 g = 150 KJ (72 Kalorien)
Aprikosen Ballaststoffe und Kalium 30 g = 85 KJ (20 Kalorien)
Rote Beete Folsaure, Ballaststoffe, Vitamin C
und Kalium 160 g = 190 KJ (45 Kalorien)
Blaubeeren Vitamin C 125 g = 295 KJ (70 Kalorien)
Rosenkohl Vitamin C, B, B6 und E, Folsaure
und Ballaststoffe
100 g = 110 KJ (26 Kalorien)
Kohl Vitamin C, Folsaure, Kalium,
Vitamin B6 und Ballaststoffe 100 g = 110 KJ (26 Kalorien)
Karotten Vitamin A, C und B6, und
Ballaststoffe
100 g = 110 KJ (26 Kalorien)
Sellerie Vitamin C und Kalium

34
80 g = 55 KJ (7 Kalorien)
Gurken Vitamin C 280 g = 120 KJ (29 Kalorien)
Fenchel Vitamin C und Ballaststoffe 300 g = 145 KJ (35 Kalorien)
Trauben Vitamin C und B6 und Kalium 125 g = 355 KJ (85 Kalorien)
Kiwi Vitamin C und Kalium 100 g = 100 KJ (40 Kalorien)
Zuckermelone Vitamin C und A, Folsaure und
Ballaststoffe
200 g = 210 KJ (50 Kalorien)
Nektarinen Vitamin C und B3, Kalium und
Ballaststoffe
180 g = 355 KJ (85 Kalorien)
Pfirsiche Vitamin C und B3, Kalium und
Ballaststoffe
150 g = 205 KJ (49 Kalorien)
Birnen Ballaststoffe 150 g = 250 KJ (60 Kalorien)
Ananas Vitamin C 150 g = 245 KJ (59 Kalorien)
Himbeeren Vitamin C, Eisen, Kalium und
Magnesium
125g=130KJ (31 Kalorien)
Tomaten Vitamin C, E und A, Ballaststoffe
und Folsaure
100 g = 90 KJ (31 Kalorien)
Kapitel VI. Wartung
6. Bevor Sie dieses Produkt reinigen, schalten Sie es aus und
ziehen Sie den Netzstecker.
7. Reinigen Sie das Produkt nach jedem Einsatz.
8. Das Gehause darf nicht unter flier.,endem Wasser abgewaschen
werden und muss stattdessen mit einem feuchten Tuch gereinigt
werden.

35
9. Vergewissern Sie sich vor dem Wegstellen, dass das Produkt
sauber und trocken ist.
10. Zerlegen Sie das Produkt, um die Komponenten mit folgenden
Schritten abzuwaschen:
2
3
WARNUNG
Entfernen Sie zunachst Presskolben
und Ablage.
Halten Sie die Entriegelungstaste @
gedruckt und drehen Sie die
Trammel im Uhrzeigersinn, um sie
zu entfernen.
Nach dem Entfernen des Anbauteils
entfernen Sie die Abschlusskappe,
Saftsieb und Schnecke. Alie
abnehmbaren Teile konnen mit
Wasser abgewaschen werden.

36
Tauchen Sie das Motorgehause nicht in Wasser oder andere
Flussigkeiten. Waschen Sie das Motorgehause nicht unter flie endem
Wasser ab.
Kapitel VII. Technische Oaten
Product Name Slow Juicer
Model ZM1501
Rated Voltage 220V-240V
Rated Power 150W
Rated Frequency 50Hz
Continuous Operating
Time
:S10 minutes
Interval Time 10 minutes

37
Kapitel VIII. Storungsbehebung
I Problem Mogliche Ursachen Losungsvorschlag
Nach dem Anschlier..en der Stromversorgung und dem Einschalten arbeitet das Gerat nicht.
3. Nach dem Einschalten
des Gerats warten Sie fur
1 Sekunde, es startet
dann. Das ist vollig
normal.
4. Nach 1 Sekunde
Gerat korrekt anschlier..en
1. Schlier..en Sie das Gerat
neu an und versuchen Sie
es erneut, oder wenden
Sie sich an den
funktioniert es immer noch Kundendienst unter E-
nicht, moglicherweise Mail:[email protected] schlechter Kontakt
zwischen Stecker und
Steckdose.
Bei den ersten Einsatzen erzeugt der Motor unangenehme Geruche.
Das ist vollig normal.
Wenn dies haufiger auftritt,
senden Sie das Gerat zur
Oberprufung an unseren
autorisierten Kundendienst in
lhrer Nahe.
Das Gerat stoppt wahrend des Betriebs.
4. Zu niedrige Spannung.
5. Obermar..ig viel
Obst/Gemuse
geladen.
6. Das Gerat lauft zu
lange im
Dauerbetrieb.
4. Oberprufen Sie, ob die
Spannung zu niedrig ist.
5. Ziehen Sie den
Netzstecker und
entfernen Sie
uberschussiges
Obst/Gemuse.
3. Das ist vollig normal undder l\tbtorlauft nach einer Pause
wieder.

38
Wahrend
des Betriebs
entstehen
laute
Gerausche.
3. Das Geriit arbeitet
nicht ausgeglichen,
weil Schnecke oder
Saftfilter nicht montiert
wurden.
2. Montieren Sie Schnecke
oder Saftfilter korrekt
oder wenden Sie sich an
den Kundendienst. E-
Mail:info@iamzchef .com
Der Anlaufmotor im
Rahmen ist beschadigt.
Kapitel IX. Garantie
Vielen Dank fur den Kaut unseres Produkts, das nach hohen
Qualitatsstandards hergestellt wurde. Die Herstellergarantie umfasst das
Produkt fur einen Zeitraum von 12 Monaten ab Kaufdatum gegen
Herstellungsfehle.r
Alie Amzchef-Garantien werden automatisch in unserem System
gespeichert, so dass Sie 1hr Produkt nicht registrieren mussen.
Fur eine 6-monatige zusatzliche kostenlose Garantie registrieren Sie sich
bitte auf der Website www.iamzchef.com oder fullen Sie das
untenstehende Foto aus und machen Sie ein Foto von der Garantiekarte

39
Aufgrund der standigen Produktverbesserung behalten wir uns das Recht
var, die Produktspezifikation ohne vorherige Ankundigung zu andern.
Section I. Precautions d'utilisation en toute securite3
Quand vous utilisez un appareil electrique, respectez systematiquement un
certain nombre de precautions de securite elementaires, parmi lesquelles :
41. Une puissance de 220-240V~50Hz doit etre fournie a ce produit.
Confirmez votre alimentation avant utilisation.

40
42. Veillez a deconnecter l'alimentation avant de proceder au
desassemblage/reassemblage ou au reglage de ce produit.
43. En cas d'endommagement du fil flexible, pour eviter tout risque,
contactez notre service clientele ou envoyez-le a notre centre de
service agree pour le remplacemen,t et n'essayez pas de le demonter
sans notre autorisation.
44. Avant de l'utiliser, veuillez verifier le cable d'alimentation, la fiche, le
filtre a jus, la spirale, l'arbre porte-lames, le hachoir a viande et les
autres pieces. En cas de dommage, cessez immediatement d'utiliser ce
produit et contactez immediatement notre service apres-vente afin
d'eviter tout danger potentiel.
45. Pour tout besoin de reparation pendant !'utilisation, retournez l'appareil
a notre centre de service agree pour examen, reparation ou reglage
electrique.
46. Avant de brancher l'alimentation, assurez-vous que toutes les pieces
amovibles telles que le corps de l'extracteur, la spirale, le filtre a jus et
le couvercle de l'extracteur ont ete montes en place.
47. NE PAS mettre les doigts ou d'autres objets dans l'ouverture de la
centrifugeuse pendant son fonctionnement. Si des aliments se logent
dans l'ouverture, utilisez le poussoir ou un autre fruit pour le pousser.
Lorsque cette methode n'est pas possible, eteignez le moteur et
demontez la centrifugeuse pour retirer les aliments restants.
48. Le produit alimentaire doit etre coupe en morceaux appropries de
maniere a passer a travers l'entree de l'extracteur/hachoir. Tout
fruit/legume doit etre debarrasse de tout noyau dur, graine, peau ou
coquille avant traitement.
49. Utilisez une force appropriee pour pousser le produit alimentaire a l'i nterieur, pas de maniere excessive mais suffisante pour qu'il soit
coupe exactement.
50. Le filtre a jus, le couvercle de l'extracteur ou la spirale peuvent etre
teints par le jus pendant le fonctionnement, ce qui est un phenomene
normal et n'a aucun effet sur la comestibilite et ne nuit pas a la sante.

41
51. Ce produit est equipe de puces de protection intelligentes, le faisant
s'arreter automatiquement toutes les 20 minutes. Dans ce cas, reposez-
le pendant 20 a 30 minutes avant de le redemarrer afin de refroidir le
moteur et prolonger la duree de vie du produit.
52. Ce produit est congu pour limiter le debit. Pendant le traitement de tout
materiau dur, le moteur sera verrouille et le courant augmentera.
Lorsque le courant depasse 1,3 A, l'equipement emet un bip et le
moteur s'arrete de fonctionner pour la protection contre les surintensites
et le prolongement de la duree de vie.
53. Si la protection de limite de courant est declenchee ou que le moteur
est bloque et s'arrete automatiquement, debranchez l'alimentation et
maintenez l'interrupteur en position « 0 » et appuyez sur le bouton
Tourner vers l'arriere de l'interrupteur, puis dechargez les aliments et
appuyez sur Tourner vers l'avant pour redemarrer la machine. Si le
probleme persiste, ii est recommande d'enlever tout produit alimentaire
dans la spirale avant de redemarrer afin de proteger le moteur.
54. Une fois !'operation terminee, retirer toute piece amovible seulement
apres que la vis du moteur I spirale / broyeur / trancheuse a cesse de
tourner et que l'alimentation a ete coupee.
55. Toute partie en contact avec les aliments est propre, s0re et fiable
conformement aux codes d'hygiene alimentaire .
56. Pour eviter tout risque d'electrocution, ne placez pas la base du moteur
dans l'eau ou un autre liquide.
57. N'utilisez pas de laine d'acier, de nettoyant abrasif ou de liquide corrosif
comme de !'essence ou de !'acetone pour nettoyer ce produit.
58. Ce produit doit etre stocke dans un endroit inaccessible aux enfants. Ne
pas permettre aux personnes presentant des extremites malsaines et
des troubles sensoriels ou mentaux et aux personnes qui n'ont pas
!'experience et les connaissances necessaires (y compris les enfants)
d'utiliser ou de jouer avec ce produit.
59. Ce produit est utilise pour l'individu ou la famille seulement.
60. Ce produit est de classe de protection I, et la prise utilisee doit etre
correctement mise a la terre.

42
Section II. Pieces et fonctions
CD
®
®
(J)
I ® I Plateau I Pour le stockage provisoire du produit alimentaire a I
Norn du
composant Description de la fonction
Cable
d'alimentation Pour le raccordement a l'alimentation electrique.
L'unite principale contenant le moteur et d'autres
composants, fournissant la puissance de sortie.
Commutateur
marche/arret
Pour le controle du fonctionnement du produit,
comme la rotation avant/arriere et la fermeture.
Bouton de
verrouillage
Pour le verrouillage de l'extracteur afin d'empecher
une liberation inattendue du boitier. Pour decharger
l'extracteur du boitier, appuyez sur ce bouton et
maintenez-le enfonce.
Jus
Recipient
Permet de conserver et recueillir le jus extrait par
l'extracteur.
Marc
Recipient
Permet de conserver et recueillir tout le mare separe
par I' extracteur.
Poussoir
Permet de comprimer et faire en sorte que le produit
alimentaire en charge soit completement en contact
avec la spirale afin de maximiser l'efficacite de
!'extraction.

43
□
I traiter.
®
®
@
®
@
Section Ill. Mode operatoire
Avant la premiere utilisation, nettoyez soigneusement toutes les
parties en contact avec le produit alimentaire. (Pour plus de details,
voir la section IV. Entretien)
Goulotte lntroduisez les aliments et chargez jusqu'au
tambour.
Tambour
L'un des principaux composants pour extraire le jus,
ou le produit alimentaire est charge a partir de la
goulotte d'alimentation en haut, tandis que le jus et le
mare sont decharges de la sortie.
Spirale
Un des composants principaux pour extraire le jus,
ou le produit alimentaire est transfere et moulu
contre le filtre a jus ou l'extrudeuse.
Filtre a jus
Travaille avec la spirale pour brayer le produit
alimentaire et filtrer le jus (applicable aux fruits,
legumes et haricots)
Capuchon
d'extremite Couple avec l'extracteur pour protection.

44
Section IV. Assemblage
Utilisation des boutons
Description : « ON » :
L'appareil est en marche
« 0 » : L'appareil est eteint
« R » : L'appareil INVERSERA la spirale (a utiliser
lorsque les aliments sont bloques ou coinces)
Conseils : En cas de blocage du mare ou du
blocage du moteur. Appuyez sur le bouton « R » et
maintenez-le enfonce pendant environ 3 secondes
pour faire pivoter la spirale a l'envers, puis relachez-
le. Appuyez sur le bouton « ON » pour reprendre le
fonctionnement normal.

45
Connectez le tambour @)au boftier@ :
Connectez le tambour @)au boftier@ en
alignant le « » de la goulotte ® sur
1 « »du boftier @, poussez le tambour et
faites-le tourner dans le sens antihoraire
jusqu'a l'alignement de « » de la goulotte
® sur « » du boftier @. (Vous entendrez le
son « tic-tac » pour confirmer que vous
l'avez serre correctement).
Placez la spirale (llilans le tambour @)
2
lnserez le filtre a jus @dans le tambour@)
3

46
4
5
6
7
8
Placez le capuchon @sur l'extremite du tambour
@) et tournez le capuchon dans le sens
antihoraire.
Placez la tasse a jus ® et le recipient a mare @
sous le tambour.
Montez le plateau sur l'extremite superieure
de la goulotte ®ꞏ
Connectez a l'alimentation et preparez-vous
pour le demarrage. (Avant la mise sous
tension, assurez-vous que l'interrupteur est
en position Arret.)
Nettoyez les aliments et coupez-les en
morceaux suffisamment petits pour pouvoir
passer dans la goulotte, puis placez-les sur
le plateau.
Remarque : Tout noyau dur, graine, peau ou
coquille de fruits et legumes doit etre retire a

47
□ l'avance.
Appuyez sur le bouton « ON » de l'interrupteur
pour demarrer
Remarque : Laissez la machine fonctionner
pendant moins de 10 minutes. Une duree plus
longue de fonctionnement continu detruira le
moteur.
Remarque : Ne touchez pas l'interrupteur
d'alimentation avec les mains mouillees
9 pour eviter les decharges electriques, les fuites
ou le feu.
Placez les quelques morceaux de fruits ou de
legumes coupes dans la goulotte et poussez-
les delicatement dans le tambour a l'aide du
poussoir.
� Utilisez une force appropriee pour pousser le
1O produit alimentaire a l'interieur, pas de
maniere excessive mais suffisante pour qu'il
soit coupe exactement.
(Ne mettez pas votre doigt ou tout autre objet
dans la goulotte ! Si la tasse de jus/marc est
pleine, debranchez l'alimentation et videz-la
avant de redemarrer.)
ON
R
Press
48
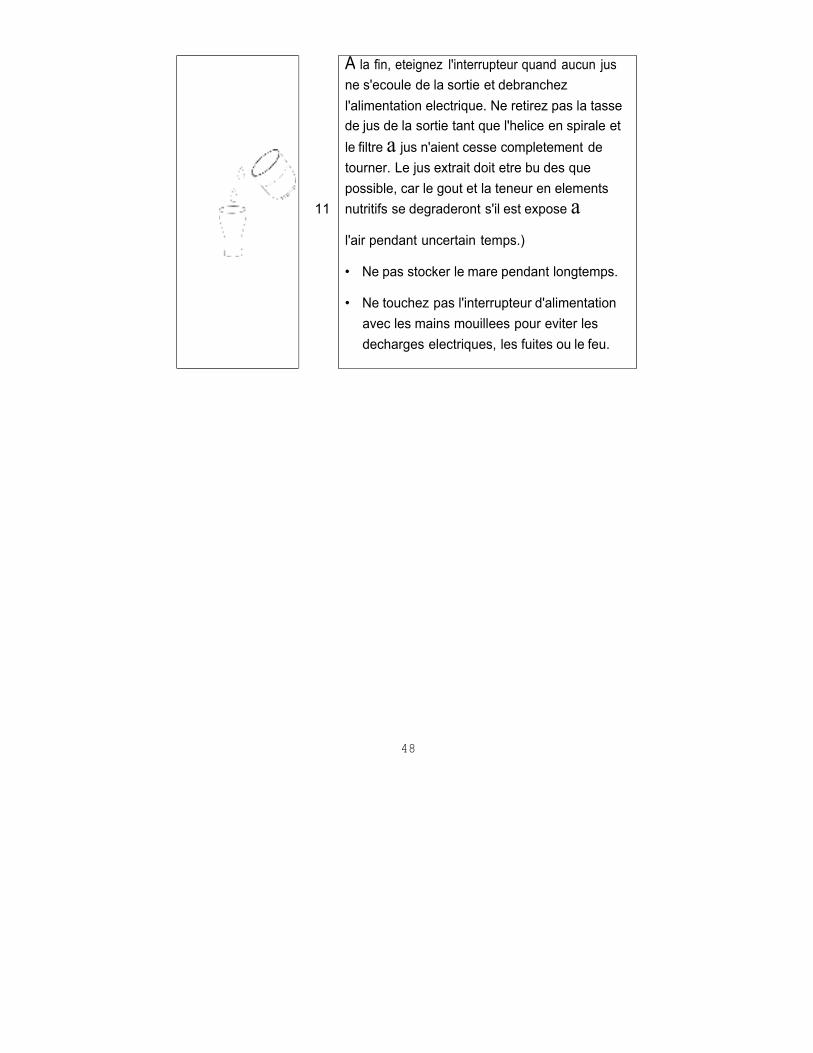
11
A la fin, eteignez l'interrupteur quand aucun jus
ne s'ecoule de la sortie et debranchez
l'alimentation electrique. Ne retirez pas la tasse
de jus de la sortie tant que l'helice en spirale et
le filtre a jus n'aient cesse completement de
tourner. Le jus extrait doit etre bu des que
possible, car le gout et la teneur en elements
nutritifs se degraderont s'il est expose a
l'air pendant uncertain temps.)
� Ne pas stocker le mare pendant longtemps.
� Ne touchez pas l'interrupteur d'alimentation
avec les mains mouillees pour eviter les
decharges electriques, les fuites ou le feu.

49
Section V. Conseils pour la selection des ingredients
� EXTRATEUR DE JUS DE FRUITS
Presse efficacement les fruits durs et doux : meme les agrumes , generalement l'un
des
fruits les plus durs a presser.
On ne peut pas obtenir de la confiture, certains fruits ne peuvent pas donner du jus
(comme les bananes, les mangues, les fruits secs, la canne a sucre, etc.).
� JUS DE LEGUMES
Coupez les legumesen bandes (moins de 10 cm).
Presse toutes sortes de legumes, y compris les carottes, les betteraves, le celeri, les
poivrons et les radis sans detruireles saveurs naturelles et les avantages nutritionnels.
Ce processus d'extraction unique garantit un gout frais et une nutrition
complete.
� HERBE DE BLE ET LEGUMES-FEUILLES
Coupez-le en bandes (moins de 10 cm).
L'herbe de ble, le chou kale, le chou, les epinardset les aiguilles de pin ne sont que
quelques-uns des produits naturels que l'on peut extraire avec la centrifugeuse
Amzchef . Profitez du meilleur que la nature offre dans les aliments crus de toutes
sortes et pressez-les pour des avantages nutritionnels complets.
Instructions sur la selection des fruits
11. Selectionnez des fruits et des legumes frais, qui contiennent plus de jus. Les
fruits appropries comprennent : ananas, racine de betterave, tige de celeri,
pomme, concombre, epinards, melons, tomate, orange et raisin.
50
12. Retirez la peau epaisse des fruits tels que !'orange, l'ananas et la racine de
betterave crue. Les semences des oranges doivent egalement etre eliminees,
car elles peuvent rendre le gout du jus amer.
13. La concentration du jus extrait de la pomme depend du type de pomme
selectionne. Le jus extrait d'une pomme plus juteuse est moins epais,
choisissez done le bon type de pomme en fonction de la concentration de jus
desiree.
14. Le jus de pomme extrait va brunir tres bient6t, et ce processus peut etre ralenti
en y ajoutant quelques gouttes de jus de citron.
15. Les feuilles et les tiges (comme celles de la laitue) peuvent etre mises dans
l'extracteur pour extraire le jus.

51
Les ingredients nutritifs typiques contenu dans les fruits/legumes sont indiques ci-
dessous :
I Fruit/Legumes I Vitamine/Mineral Calories
Pomme
Vitamine C
200 grammes = 150 KJ (72
calories)
Abricot Fibres alimentaires et potassium 30 grammes = 85 KJ (20
calories)
Betterave
Acide folique, fibres alimentaires,
vitamine C et potassium
160 grammes= 190 KJ (45
calories)
Myrtille
Vitamine C
125 grammes = 295 KJ (70
calories)
Choux de
Bruxelles
Vitamines C, B, 86 et E, acide
folique et fibres alimentaires
100 grammes = 110 KJ (26
calories)
Chou
Vitamine C, acide folique,
potassium, Vitamine 86 et fibres
alimentaires
100 grammes = 110 KJ (26
calories)
Garotte
Vitamines A, C et 86 et fibres
alimentaires
100 grammes = 110 KJ (26
calories)
Celeri Vitamine C et potassium 1 80 grammes= 55 KJ (7 calories!)
Concombre
Vitamine C 280 grammes = 120 KJ (29
calories)
Fenouil
Vitamine C et fibres alimentaires
300 grammes= 145 KJ (35
calories)
Raisin
Vitamines C et 86 et potassium
125 grammes = 355 KJ (85
calories)
Yangtao
Vitamine C et potassium
100 grammes= 100 KJ (40
calories)
Cantaloup
Vitamines C et A, acide folique et
fibres alimentaires
200 grammes = 210 KJ (50
calories)
Nectarine I Vitamines C et 83, potassium et I 180 grammes = 355 KJ (85

52
fibres alimentaires calories)
Peche
Vitamines C et 83, potassium et
fibres alimentaires 150 grammes= 205 KJ (49
calories)
Poire Fibre alimentaire
150 grammes = 250 KJ (60 calories)
Ananas Vitamine C
150 grammes = 245 KJ (59 calories)
Framboise
La vitamine C, fer, potassium et
magnesium 125 grammes = 130 KJ (31
calories)
Tomate Vitamines C, E et A, fibres
alimentaires et acide folique 100 grammes = 90 KJ (31
calories)
Section VI. Entretien
11. Avant de nettoyer ce produit, assurez-vous d'eteindre
l'interrupteur pour deconnecter l'alimentation electrique.
12. Nettoyez ce produit apres l'avoir utilise.
13. Le boitier ne peut pas etre lave sous l'eau et doit etre nettoye
avec un chiffon humide.
14. Avant de le ranger, assurez-vous que ce produit est propre et sec.
15. Demontez ce produit pour laver les composants en suivant les
etapes ci-dessous :
1
Enlevez d'abord le poussoir et le
plateau.

53
2
3
AVERTISSEMENT
Ne pas immerger base du moteur dans l'eau ou tout autre liquide. Ne pas
utiliser de jet d'eau pour nettoyer la base du moteur.
Apres avoir retire l'extracteur,
detachez le capuchon d'extremite,
le filtre a jus et la spirale. Taus les
composants amovibles peuvent etre
laves avec de l'eau.
Appuyez sur le bouton de
verrouillage ® et maintenez-le
enfonce, puis faites tourner le
tambour dans le sens horaire pour
retirer.

54
Section VII. lndice de securite
Product Name Slow Juicer
Model ZM1501
Rated Voltage 220V-240V
Rated Power 150W
Rated Frequency 50Hz
Continuous Operating
Time
:510
minutes
Interval Time 10
minutes
Section VIII. Depannage
.
Phenomene
de defaillance Analyse de cause Resolution du probleme
Apres avoir
connecte
l'alimentation et
allume
5. Apres avoir allume la
machine, attendez 1 s,
elle fonctionnera. C'est
normal.
Rebranchez correctement.
1. Remplacez la prise et
l'interrupteur, le
produit ne
fonctionne
6. Apres 1 s, elle ne
fonctionne toujours pas,
peut-etre un mauvais
reessayez, ou contactez
notre service apres-vente a info@iamzchef .com
pas contact entre la prise et
la douille
Au cours des
premieres
utilisations, le
C'est
normal
un phenomene Si ce phenomene se produit
frequemment, envoyez-le a notre centre de service
moteur genere autorise le plus pres de chez.

55
une odeur
desagreable
vous pour inspection.
7. Tension trap faible
8. Une quantite
excessive de praduit
alimentaire a ete chargee
-9 La machine a
fonctionne
continuellement pendant
longtemps.
6. Verifiez si la tension est trap basse
7. Debranchez
Cette machine l'alimentation et retirez
s'arrete en l'exces de praduit alimentaire
cours de fonctionnement 8. C'est un phenomene
normal et le moteur
reprendra
apres une pause.
4. La machine 3. Montez la spirale ou le
filtre a jus en place ou
contactez le service apres-
vente a info@iamzchef .com
fonctionne dans un etat
Un bruit est
genere
pendant le
fonctionnement
desequilibre en raison de
l'impossibilite de monter
la spirale ou le filtre a jus
en place.
5. Le moteur de demarrage dans le cadre
a ete endommage.
Section IX. Garantie
Merci d'avoir achete notre produit, qui a ete conc;u pour repondre a des normes de qualite elevees. La garantie du fabricant couvre le produit
pour une periode de 12 mois a compter de la date d'achat contre les
defauts de fabrication.
Toutes les garanties d'Amzchef sont automatiquement enregistrees dans
notre systeme, ii n'est done pas necessaire d'enregistrer votre produit.
Pour une garantie supplementaire gratuite de 6 mois, veuillez vous
inscrire sur le site Web www.iamzchef.com ou remplir et prendre en
photo l'envoi de la carte de garantie a [email protected].

56
En raison de !'amelioration continue des produits, nous nous reservons le
droit de modifier les specifications du produit sans preavis.
Secci6n I. Precauciones para el uso seguro
Cuando use un aparato electrico, siempre se deben seguir las precauciones de
seguridad basicas, incluidas las siguientes:
57
61. Se debe suministrar una alimentaci6n de 220-240V~50Hz a este
producto. Confirme el suministro de alimentaci6n antes de usar.
62. Asegurese de desconectar el suministro de alimentaci6n antes de
desarmar/reensamblar o al realizar ajustes a este producto.
63. En caso de que existan danos el cable flexible, para evitar cualquier
peligro, p6ngase en contacto con nuestro servicio de atenci6n al cliente
o envfelo a un centro de servicio autorizado para la sustituci6n y no
intente desmontarlo sin nuestra autorizaci6n.
64. Antes del uso, compruebe el cable de alimentaci6n, la clavija, el filtro
de jugo, el tornillo sin fin, el cuerpo triturador, el moledor de came y
otras piezas y, en caso de algun dano, deje de usar este producto y
p6ngase en contacto con nuestro servicio de atenci6n al cliente de
inmediato sin el desmontaje no autorizado o realice la reparaci6n para
evitar cualquier peligro potencial.
65. Si requiere una reparaci6n durante el uso, devuelva el aparato a
nuestro servicio autorizado para examinarlo, repararlo o realizar ajustes
electricos.
66. Antes de conectar el suministro de alimentaci6n, asegurese de que las
piezas extrafbles como el cuerpo extractor, el tornillo sin fin, el filtro de
jugo y la cubierta del extractor se hayan montado en su sitio.
67. NO coloque los dedos ni otros objetos en la abertura del extractor de
jugos cuando esta en funcionamiento. Si el alimento se queda atorado
en la abertura, use el embolo u otra pieza de fruta para empujarlo hacia
abajo. Cuando no es posible usar este metodo, apague el motor y
desmonte el extractor de jugos para eliminar los restos de alimentos.
68. El material de alimentos tiene que cortarse en piezas del tamano
adecuado de manera que pase a traves de la entrada del
extractor/triturador/moledor. Cualquier fruta o verdura que tenga un
centro, semilla, piel o cascara muy duros, retfrelos antes de procesarlos.
69. Se debe usar la cantidad correcta de fuerza para empujar el alimento
hacia el interior, sin ser excesiva pero la suficiente para procesar de
forma efectiva.

58
70. El filtro de jugo, la tapa del extractor o el tornillo sinffn pueden adquirir
un cierto tinte por el jugo durante la operaci6n, sin embargo, esto es un
fen6meno normal y no tiene efectos en la salud.
71. Este producto esta equipado con chips de protecci6n inteligentes , que
detienen el aparato automaticamente cada 20 minutos de operaci6n. Y
en tal caso, dejelo descansar de 20 a 30 minutos antes de volver a
usarlo, de tal modo que se enfrfe el motor y se prolongue la vida util de
servicio del producto.
72. Este producto esta disefiado para limitar la tasa de flujo. Durante el
proceso de cualquier material duro, el motor sera bloqueado y
aumentara la corriente. Cuando la corriente aumenta a mas de 1,3 A, el
equipo sonara y el motor dejara de funcionar para la protecci6n de
sobrecorriente y ampliaci6n de la vida util.
73. En caso de que se active la protecci6n de Ifmite de corriente o si se
bloquea el motor y se detiene automaticamente, desconecte el
suministro de alimentaci6n y mantenga el interruptor en la posici6n "0",
presione el bot6n de Girar hacia atras y enseguida descargue el
alimento y presione Girar hacia adelante para reiniciar la maquina. Si
el problema persiste, se recomienda que retire el alimento en el interior
del tornillo sinffn antes de reiniciar para proteger el motor.
74. Despues de completar la operaci6n, retire cualquier pieza extrafble
solamente despues de que el motor/tornillo
sinffn/trituradora/rebanadora/moledora dejen de girar y se haya
desconectado la alimentaci6n.
75. Cualquier pieza en contacto con alimentos es limpia, segura y confiable
en cumplimiento con los c6digos de higiene de alimentos relacionados.
76. Para protegerse contra descargas electricas, no coloque la base del
motor en agua ni en otro Ifquido.
77. No use lana de acero, agente de limpieza abrasivo ni lfquidos
corrosivos, como gasolina o acetona, para limpiar este producto.
78. Este producto debe almacenarse en un lugar alejado de los nifios. No
permita que personas con alguna discapacidad ffsica o que no tienen la

59
experiencia ni el conocimiento (incluidos ninos) use o jueguen este
producto.
79. Este producto es de uso individual o domestico solamente.
BO. Este producto es de protecci6n Clase I y la toma de corriente usada
para el mismo debe conectarse a tierra correctamente.
Secci6n II. Piezas y funciones
[ Bandeja
N.o Nombre de componente
Descripci6n de funci6n
CD Cable de alimentaci6n
Para conectar el suministro de alimentaci6n.
@ Alojamiento La unidad principal que contiene el motor y otros componentes, que proporciona alimentaci6n.
®
lnterruptor de encendido/apa gado
Para controlar la operaci6n del producto, como la rotaci6n hacia adelante/atras y apagar.
@) Bot6n de bloqueo
Para bloquear el extractor y evitar la salida inesperada del alojamiento. Para descargar el extractor del alojamiento, mantenga presionado este bot6n.
® Contenedor
dejugo Para retener y recoger el jugo extrafdo por el extractor.
@ Contenedor
de bagazo
Para retener y recoger el bagazo separador por
el extractor.
Q) !] Embolo
Para exprimir y hacer que el alimento entre en contacto completamente con el tornillo sinffn para maximizar la eficiencia de extracci6n.
Para el almacenamiento interno de alimentos que va a procesar.

60
[
Secci6n Ill. Metodo de operaci6n
Antes del primer uso, limpie minuciosamente las piezas en contacto
con las alimentos. (Consulte la Secci6n IV. Mantenimiento para
obtener mas informaci6n)
LW.:.J
Conducto de
alimentaci6n
Alimentaci6n de alimentos y enviarlos hacia el tambor
@)
Tambor
Uno de los principales componentes para extraer jugo, donde el alimento es cargado desde el conducto de alimentaci6n en la parte superior, mientras se descarga el jugo y el bagazo de la salida.
®
®l
Tornillo sinffn
Uno de los principales componentes para extraer jugo, donde el
alimento es transferido y molido contra el filtro de jugo o extrusor.
i Malla de jugo !] Funciona con el tornillo sinfin para moler el alimento y
filtrar el jugo. (Aplica a frutas, verduras y tallos)
Tapafinal Se acopla con el extractor para proporcionar protecci6n.
61
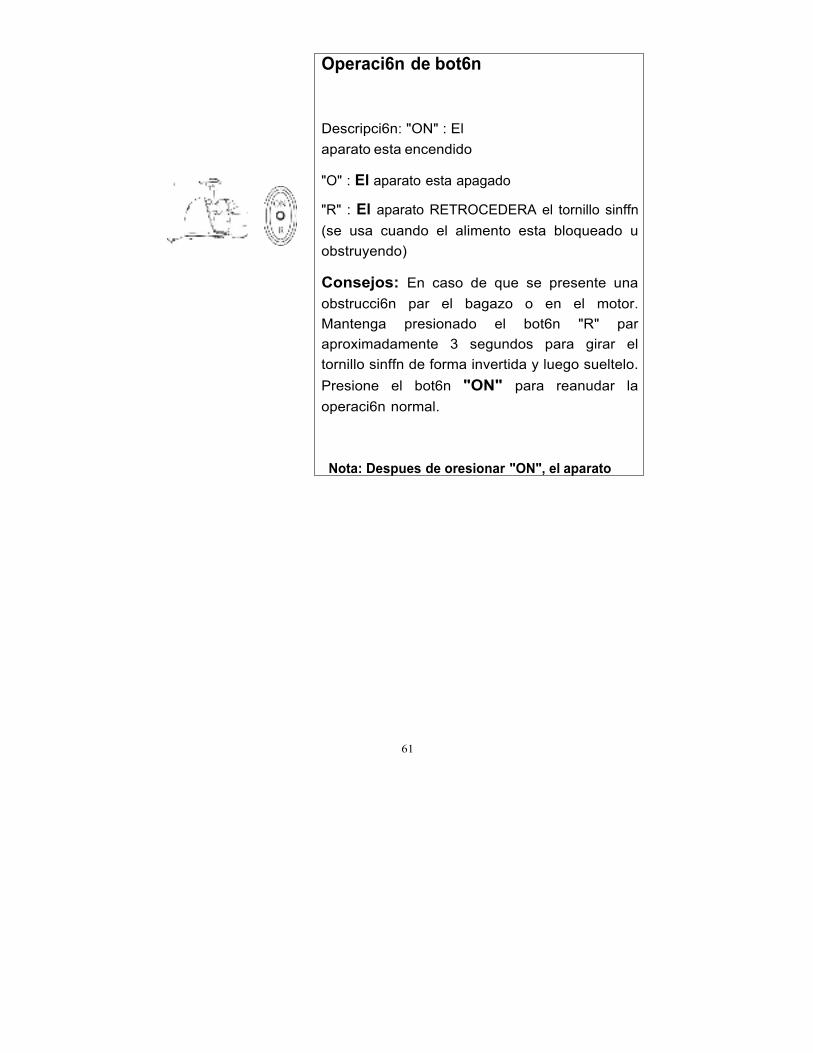
Operaci6n de bot6n
Descripci6n: "ON" : El
aparato esta encendido
"O" : El aparato esta apagado
"R" : El aparato RETROCEDERA el tornillo sinffn
(se usa cuando el alimento esta bloqueado u
obstruyendo)
Consejos: En caso de que se presente una
obstrucci6n par el bagazo o en el motor.
Mantenga presionado el bot6n "R" par
aproximadamente 3 segundos para girar el
tornillo sinffn de forma invertida y luego sueltelo.
Presione el bot6n "ON" para reanudar la
operaci6n normal.
Nota: Despues de oresionar "ON", el aparato

62
Secci6n IV. Como armarlo
Conecte el tambor @) al alojamiento @:
1
Conecte el tambor@) al alojamiento @
alineando " " con el conducto de alimentaci6n
® con " " en el alojamiento @, presione el
tambor con fuerza y gfrelo en el sentido
antihorario hasta que se alinee con " " en el
conducto de alimentaci6n ® con " " en el
alojamiento @. (Escuchara un "tic" que le
confirmara que se ha apretado
correctamente).
Coloque el tornillo sinffn ®en el tambor @).
2
lnserte la malla de jugo ©en el tambor @).
3

63
4
5
6
7
8
□ Presione el bot6n "ON" del interruptor para
Coloque la tapa @ en el extrema del tambor@
y gire la tapa en el sentido antihorario.
Coloque el contenedor de jugo ® y el
contenedor de bagazo @ debajo del tambor.
Monte la bandeja en el extrema superior del
conducto de alimentaci6n ®ꞏ
Conecte el suministro de alimentaci6n y
preparese para iniciar. (Antes de
encender, asegurese de que el interruptor
este en la posici6n Off).
Limpie el material y c6rtelo en trozos
pequenos de tal modo que puedan pasar a
traves del conducto de alimentaci6n y
col6quelos en la bandeja.
Nota: Cualquier centro duro, semilla, cascara
y corteza de las frutas y verduras deben
eliminarse con anticipaci6n.

64
9
9
10
11
ON
- - R
Press
iniciar
Nota: Mantenga la maquina en operaci6n por
menos de 10 minutes. El tiempo
prolongado danara el motor.
Nota: No toque el interrupter de alimentaci6n con
las manos humedas
para evitar descargas electricas, fugas o
incendio.
Coloque unas piezas de fruta cortada o
verduras en el conducto de alimentaci6n,
presi6nelas hacia el tambor suavemente con
el embolo.
� Se debe usar la cantidad correcta de fuerza
para empujar el alimento hacia el interior,
sin ser excesiva pero la suficiente para
procesar de forma efectiva.
(No coloque su dedo ni otros objetos en el
conducto de alimentaci6n. Si el contenedor
de bagazo/jugo esta lleno, desconecte el
suministro de alimentaci6n y lfmpielo antes
de iniciar).
Una vez finalizado, apague el interrupter
cuando no fluya jugo fuera de la salida y
desconecte el suministro de alimentaci6n. No
retire el contenedor de jugo hasta que el
propulsor de espiral y el filtro de jugo hayan
dejado de girar por complete. El jugo extrafdo
debe beberse lo mas pronto posible ya que el
sabor y el contenido de nutrientes se vera
afectado si se expone al aire

65
par un tiempo determinado).
� El bagazo no debe almacenarse par un
tiempo prolongado.
� No toque el interruptor de alimentaci6n con
las manos humedas para evitar descargas
electricas, fugas o un incendio.
66
Secci6n V. Consejos para la selecci6n de ingredientes
� EXTRACTOR DE JUGO DE FRUTA
Extraiga el jugo de forma eficiente de frutas suaves y duras: incluso cftricos,
usualmente uno de los
frutos mas duros para extraer el jugo.
Nose puede realizar mermelada, algunas frutas nose pueden exprimir (coma
los platanos, los mangos, frutos secos, cana de azucar, etc.).
� JUGO DE VERDURAS
Corte las verduras en rebanadas (inferiores a 10 cm).
Jugos de todo tipo de verduras incluidas zanahorias, remolacha, apio,
pimientos
y rabanos sin destruir el sabor natural ni los nutrientes.
Se garantiza un sabor fresco y el total de nutrientes con este exclusivo
proceso de extracci6n.
� SALVADO DE TRIGO Y HOJAS VERDES
Corte en tiras (inferiores a 10 cm).
Pasto de trigo, col, repollo, espinacas y agujas de pino son solo algunos
productos naturales que puede usar para extraer el jugo con el extractor de
jugos Amzchef. Disfrute lo mejor que la naturaleza le ofrece en alimentos
crudos de todo tipo y extraiga el jugo y todos sus nutrientes.
lnstrucciones para seleccionar los frutos
16. Seleccione frutos y verduras frescos, que contienen mas jugo. Los
frutos apropiados incluyen: pina, remolacha, apio, manzana, pepino,
espinacas, melones, tomates, naranja y uvas.

67
17. La piel gruesa en los frutos coma la naranja, la pina y la remolacha
tiene que desecharse. Las semillas de las naranjas deben eliminarse
tambien, ya que harfan que el jugo tenga un sabor mas amargo.
18. La concentraci6n del jugo extrafdo de la manzana depende del tipo de
manzana seleccionada. El jugo extrafdo de una manzana fresca es
menos espeso, por lo tanto seleccione el tipo correcto de manzana en
funci6n de la concentraci6n de jugo deseada.
19. Solamente el jugo de manzana extrafdo adquirira un color turbio muy
pronto y este proceso puede alentarse si agrega unas gotas de lim6n.
Las hojas y los tallos (coma la lechuga) pueden ingresarse al extractor
para extraer el jugo.

68
El nutriente comun contenido en las frutos y en las verduras se muestran
a continuaci6n:
FrutasNer
duras Vitaminas/Minerales Calorfas
Manzana Vitamina C 200 gramos = 150 KJ (72
calorfas)
Albaricoqu
e Fibra dietetica y potasio
30 gramos = 85 KJ (20
calorfas)
Remolacha Acido f6Iico, fibra dietetica,
vitamina C y potasio
160 gramos = 190 KJ (45
calorfas)
Arandano Vitamina C 125 gramos = 295 KJ (70
calorfas)
Coles de
Bruselas
Vitaminas C, B, B6 y E, acido
f6Iico y fibra dietetica
100 gramos = 110 KJ (26
calorfas)
Repollo Vitamina C, acido f6Iico, potasio
Vitamina B6 y fibra dietetica
100 gramos = 110 KJ (26
calorfas)
Zanahoria Vitaminas A, C y B6, fibra
dietetica
100 gramos = 110 KJ (26
calorfas)
Apia Vitamina C y potasio 80 gramos = 55 KJ (7
calorfas)
Pepino Vitamina C 280 gramos = 120 KJ (29
calorfas)
Hinojo Vitamina C y fibra dietetica 300 gramos = 145 KJ (35
calorfas)
Uvas Vitaminas C y B6, y potasio 125 gramos = 355 KJ (85
calorfas)
Kiwi Vitamina C y potasio 100 gramos = 100 KJ (40
calorfas)
Melon Vitaminas C y A, acido f6Iico
y fibra dietetica
200 gramos = 210 KJ (50
calorfas)

69
Nectarina Vitaminas C y B3, potasio
y fibra dietetica
180 gramos = 355 KJ (85
calorfas)
Durazno Vitaminas C y B3, potasio
y fibra dietetica
150 gramos = 205 KJ (49
calorfas)
Pera Fibra dietetica 150 gramos = 250 KJ (60
calorfas)
Pina Vitamina C 150 gramos = 245 KJ (59
calorfas)
Frambuesa Vitamina C, hierro, potasio y
magnesia
125 gramos = 130 KJ (31
calorfas)
Tomate Vitaminas C, E y A, fibra dietetica y
acido f6Iico 100 gramos = 90 KJ (31
calorfas)
Secci6n VI. Mantenimiento
16. Antes de limpiar este producto, asegurese de apagar el
interruptor para desconectar el suministro de alimentaci6n.
17. Limpie este producto despues de usarlo.
18. El alojamiento no puede lavarse sumergiendose en agua y debe
limpiarse con un pano humedo exprimido.
19. Antes de guardarlo, asegurese de que este producto este limpio y
seco.
20. Desmonte este producto para lavar los componentes siguiendo
los pasos a continuaci6n:

70
1
2
3
ADVERTENCIA
No sumerja la base del motor en
agua ni en otro Ifquido. No use un chorro de agua
Primera quite el embolo y la bandeja.
Mantenga presionado el bot6n de
bloqueo @ y gire el tambor en
sentido horario para quitarlo.
Despues de quitar el extractor, quite
la tapa final, la malla de jugo y el
tornillo sinffn en uso, todos las
componentes extrafbles deben
lavarse con agua.

71
para limpiar la base del motor.
Secci6n VII. indice de
seguridad
Product Name Slow Juicer
Model ZM1501
Rated Voltage 220V-240V
Rated Power 150W
Rated Frequency 50Hz
Continuous Operating
Time
::;10
minutes
Interval Time 10
minutes
Secci6n VIII. Soluci6n de problemas
I Sintomas
I Analisis de causa I Soluci6n de problema
.
Despues de
conectar el
7. Despues de encender la maquina,
Vuelva a conectar
correctamente.
1. Cambie la toma de
corriente e intente
nuevamente o p6ngase en
contacto con el equipo de
suministro de espere 1 seg.,
alimentaci6n y funcionara. Es normal.
encender el
interruptor, 8. Despues de 1 seg., y
si no funciona, existe
el producto deja un contacto deficiente

72
de funcionar. entre la clavija y la
toma de corriente. soporte de posventa al
correo electr6nico:
info@iamzchef .com
Al iniciar el USO, el
motor genera un
olor desagradable
Es un fen6meno normal
Si este fen6meno ocurre con
frecuencia, envfelo a nuestro
centro de servicio autorizado
mas cercano a usted para su
inspecci6n.
10. Voltaje demasiado bajo
9. Verifique si el voltaje es
demasiado bajo.
Esta maquina
deja de
funcionar
durante la
operaci6n.
11. Se ha cargado una
cantidad excesiva de
alimentos
12. La maquina ha
operado
continuamente por un
tiempo prolongado.
10. Desconecte el
suministro de
alimentaci6n y elimine
la cantidad excesiva de
alimentos .
11. Es un fen6meno normal y el
motor reanudara su
funcionamiento despues de
un tiempo de inactividad.
Se genera
ruido durante
el
funcionamient
0 .
6. La maquina opera en
un estado inestable
debido a que el tornillo
sinffn o el filtro de jugo
no esta colocado
correctamente.
4. Monte el tornillo sinffn o
el filtro de jugo en su sitio
o p6ngase en contacto
con el equipo de soporte
de posventa al correo
electr6nico:
info@iamzchef .com 7. El motor de arranque
en el bastidor
ha sido averiado.
Secci6n IX. Garantia

73
Gracias por comprar nuestro producto, que se ha fabricado para cumplir
con los estandares de alta calidad. La garantfa del fabricante cubre el
producto por un per[odo de 12 meses a partir de la fecha de compra
contra fallas de fabricaci6n.
Todas las garantfas de Amzchef se mantienen automaticamente en
nuestro sistema, por lo que no es necesario registrar su producto.
Por 6 meses de garantfa adicional sin cargo, regfstrese en el sitio web
www.iamzchef.com o complete y tome una foto de la siguiente tarjeta de
garantfa enviando a [email protected].

74
Debido a la mejora continua del producto, nos reservamos el derecho de
cambiar las especificaciones del producto sin previo aviso.
Sezione I. Precauzioni per l'uso in sicurezza
Quando si utilizza l'apparecchi elettrici, e necessario sempre seguire le
precauzioni di sicurezza di base, incluse le seguenti:
1. A questo prodotto viene fornita una potenza di 220-240 V ~ 50 Hz. Si
prega di confermare l'alimentazione prima dell'uso.
2. Assicurarsi di scollegare l'alimentazione prima di smontare /
riassemblare o regolare questo prodotto.
3. In caso di danni al cavo flessibile, per evitare qualsiasi rischio, contatta
ii nostro servizio per i clienti o inviarlo al nostro centro di assistenza
autorizzato per la sostituzione, e non cercare di smontarlo senza la
nostra autorizzazione.
4. Prima di utilizzarlo, controlla ii cavo di alimentazione, la spina, ii filtro
succo, la coclea, ii corpo trituratore, ii tritacarne e altre parti e, in caso di
danni, interrompere l'uso di questo prodotto e contattare immediatamente
ii servizio per i clienti senza disassemblaggio non autorizzato o riparare
per evitare potenziali pericoli.
5. Per eventuali riparazioni durante l'uso, restituire l'apparecchio al nostro
centro di assistenza autorizzato per l'ispezione, la riparazione o la
regolazione elettrica.
6. Prima di collegare l'alimentatore, assicurarsi che tutte le parti rimovibili
come ii corpo dell'estrattore, la coclea, ii filtro del succo e ii coperchio
dell'estrattore siano stati montati in posizione.
7. NON mettere le dita o altri oggetti nell'apertura dello spremiagrumi
mentre e in funzione. Se ii cibo si deposita nell'apertura, utilizzare lo
stantuffo o un altro pezzo di frutta per spingerlo verso ii basso. Quando

75
questo metodo non e possibile, spegnere ii motore e smontare lo
spremiagrumi per rimuovere ii cibo rimanente.
8. II materiale alimentare deve essere tagliato in pezzi adeguati in modo
da passare attraverso l'ingresso per estrattore /chopper/ macinare.
Qualsiasi frutto / verdura deve essere rimosso dal nucleo duro, dal seme,
dalla pelle o dal guscio prima della lavorazione .
9. E necessario utilizzare una quantita di forza adeguata per spingere ii
materiale alimentare, non in modo eccessivo ma sufficiente per farlo tagliare esattamente.
10. II filtro del succo, ii coperchio dell'estrattore o la coclea possono
essere tinti dal succo durante ii funzionamento, che e un fenomeno
normale e non ha alcun effetto sulla commestibilita e non nuoce alla
salute.
11. Questa prodotto e dotato di chip di protezione intelligenti, che si
arrestano automaticamente ogni 20 minuti di funzionamento. In tal caso, lasciarlo riposare per 20-30 minuti prima di riavviarlo, in modo da raffreddare ii motore e prolungare la durata del prodotto.
12. Questa prodotto e progettato per limitare la portata. Durante la
lavorazione di qualsiasi materiale duro, ii motore verra bloccato e la corrente salira. Quando la corrente supera 1,3A, l'apparecchiatura emette un segnale acustico e ii motore interrompe ii funzionamento per la protezione da sovracorrente e l'estensione della durata.
13. Nel caso in cui venga attivata la protezione del limite di corrente o ii
motore sia bloccato e si fermi automaticamente, scollegare
l'alimentazione e mantenere l'interruttore in posizione "0", quindi premere
ii pulsante Ruota all'indietro sull'interruttore di alimentazione, quindi
scaricare ii materiale alimentare e quindi premere Ruota avanti per
riavviare la macchina. Se ii problema persiste, si consiglia di rimuovere
qualsiasi materiale alimentare all'interno della coclea prima di riavviare in
modo da proteggere ii motore.
14. Dopo ii completamento dell'operazione, rimuovere qualsiasi parte
rimovibile solo dopo che ii motore / coclea I trituratore / affettatrice / vite
della smerigliatrice ha smesso di ruotare e l'alimentazione e stata
scollegata.

76
15. Qualsiasi parte a contatto con ii materiale alimentare e pulita, sicura e
affidabile nel rispetto dei relativi codici di igiene alimentare.
16. Per evitare rischi di shock elettrico, non mettere la base del motore in
acqua o altri liquidi.
17. Non usare lana d'acciaio, detergenti abrasivi o liquidi corrosivi come
benzina o acetone per pulire questo prodotto.
18. Questa prodotto deve essere conservato in un luogo che i bambini
non possono raggiungere. Non consentire alle persone con estremita non
sane e alle sensazioni o disturbi mentali e alle persone che sono a corto
di esperienza e conoscenze correlate (compresi i bambini) di utilizzare o
giocare con questo prodotto.
19. Questa prodotto e utilizzato solo per uso individuale o familiare.
20. Questa prodotto e di classe I grado di protezione e la presa utilizzata
deve essere correttamente collegata a terra.
Sezione II. Parti e Funzioni
No.
Q)
Nome del
componente
Descrizione della funzione
Cava di
alimentazione
Per ii collegamento all'alimentazion.e
Alloggiamento
L'unita principale contenente motore e altri componenti, fornisce
potenza in uscita.
lnterruttore on-off
Per ii controllo del funzionamento
del prodotto, come la rotazione
avanti / indietro e ii close-down.

77
®
@
®
(J)
@
®
@)
®
@
@
Pulsante di
blocco
Per bloccare l'estrattore per impedire ii rilascio
inaspettato fuori dall'alloggiamento. Per
scaricare l'estrattore dall'alloggiamento, premere
e tenere premuto questo pulsante.
Succo
Contenitore
Per contenere e raccogliere ii succo estratto
dall'estrattore.
Polpa
Contenitore
Per tenere e raccogliere qualsiasi pasta
separata dal estrattore.
Tuffatore Spremere e rendere ii materiale alimentare carico completamente a contatto con la coclea in modo da massimizzare l'efficienza di estrazione.
Vassoio Per lo stoccaggio temporaneo di materiale
alimentare da elaborare.
scivolo di alimentazione
Nutrire ii cibo e caricarlo sul tamburo
Tamburo
Uno dei componenti principali per estrarre ii succo, in cui ii materiale alimentare viene caricato dallo scivolo di alimentazione nella parte superiore, mentre ii succo e le polpe vengono scaricati dalla presa.
Trivella Uno dei componenti principali per estrarre ii succo, dove
ii materiale alimentare viene trasferito e macinato contra ii filtro del succo o l'estrusore.
schermo di spremitura
Lavora con Auger per macinare ii cibo e filtrare ii succo. (applicabile a frutta, verdura e travi)
Tappa di chiusura
Accoppiato con estrattore per fornire
protezione.
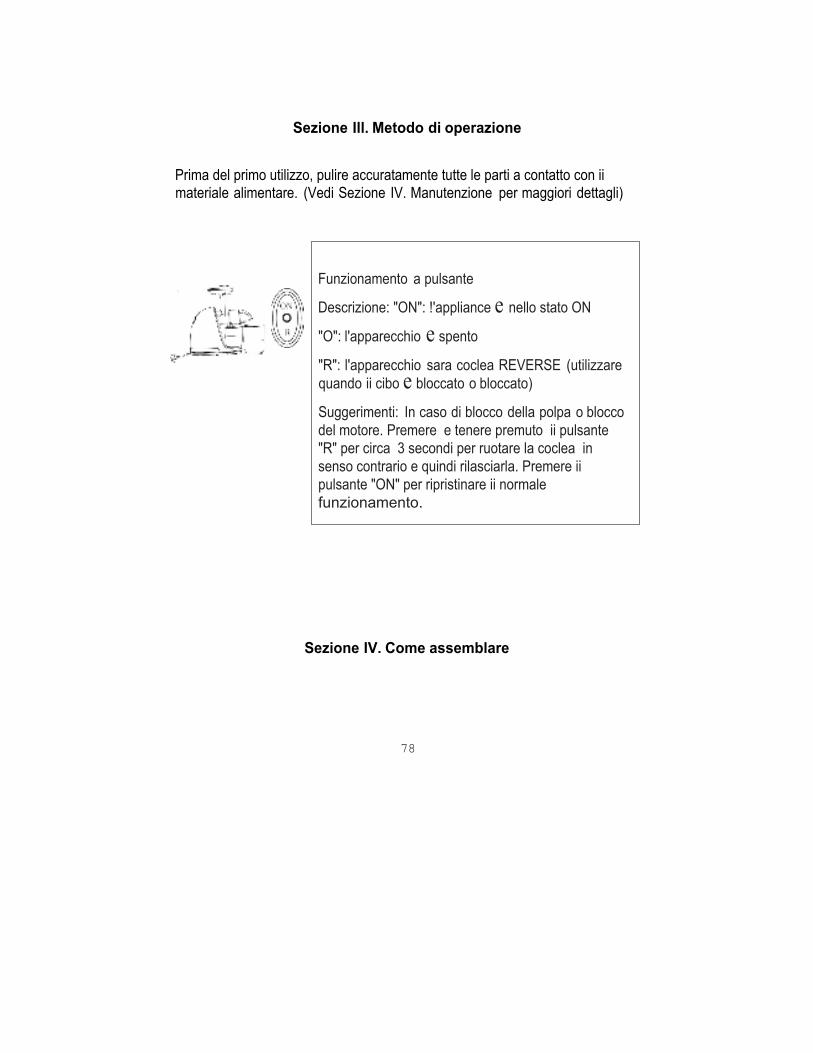
78
Funzionamento a pulsante
Descrizione: "ON": !'appliance e nello stato ON
"O": l'apparecchio e spento
quando ii cibo e bloccato o bloccato)
Suggerimenti: In caso di blocco della polpa o blocco
del motore. Premere e tenere premuto ii pulsante
"R" per circa 3 secondi per ruotare la coclea in
senso contrario e quindi rilasciarla. Premere ii
pulsante "ON" per ripristinare ii normale
funzionamento.
"R": l'apparecchio sara coclea REVERSE (utilizzare
Sezione Ill. Metodo di operazione
Prima del primo utilizzo, pulire accuratamente tutte le parti a contatto con ii materiale alimentare. (Vedi Sezione IV. Manutenzione per maggiori dettagli)
Sezione IV. Come assemblare

79
Collega ii Drum @) con l'alloggiamento@:
Collega ii tamburo @) all'alloggiamento @
allineando ii " " sull'albero di alimentazione ®
con " " sull'alloggiamento@, spinge ii tamburo
con forza e ruota ii tamburo in senso antiorario
fino ad allineare " " sullo scivolo di
alimentazione® con " " sull'alloggiamento@.
(Sentirai ii suono "Tick" per confermare di fissarlo
saldamente e correttamente).
Posiziona la coclea @nel tamburo@).
2
3
lnseri lo schermo di spremitura @nel tamburo@).

80
4
5
6
7
8
Posiziona ii cappuccio terminale @ sul tamburo@)
terminare e ruotare ii tappo in senso antiorario.
Colloca ii contenitore per ii succo e ii contenitore
della polpa @ sotto ii set di batteria.
Monta ii vassoio sull'estremita superiore del
canale di alimentazione® .
Connettiti all'alimentazione e preparati per
l'avvio . (Prima dell'accensione, assicurarsi
che l'interruttore sia in posizione Off.)
Pulisce ii materiale e tagliarlo in pezzi
sufficientemente piccoli da peter passare
attraverso lo scivolo di alimentazione e
posizionarli sul vassoio.
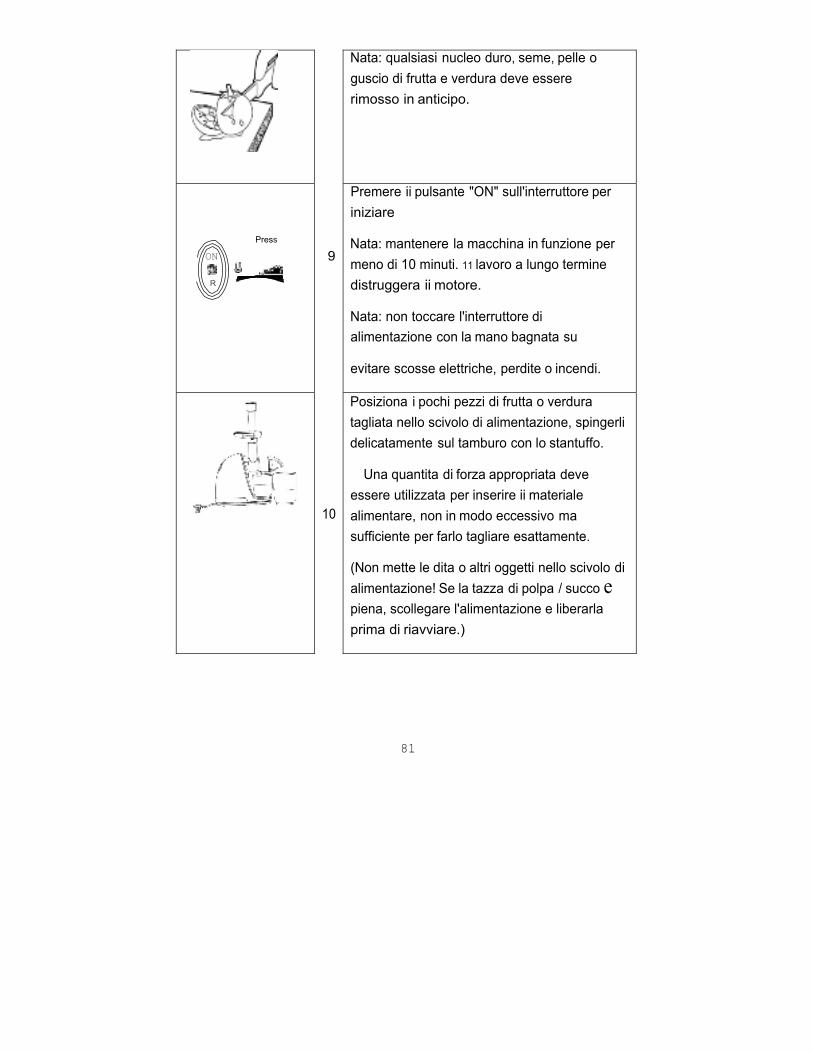
81
9
10
Press
ON
R
Nata: qualsiasi nucleo duro, seme, pelle o
guscio di frutta e verdura deve essere
rimosso in anticipo.
Premere ii pulsante "ON" sull'interruttore per
iniziare
Nata: mantenere la macchina in funzione per
meno di 10 minuti. 11 lavoro a lungo termine
distruggera ii motore.
Nata: non toccare l'interruttore di
alimentazione con la mano bagnata su
evitare scosse elettriche, perdite o incendi.
Posiziona i pochi pezzi di frutta o verdura
tagliata nello scivolo di alimentazione, spingerli
delicatamente sul tamburo con lo stantuffo.
Una quantita di forza appropriata deve
essere utilizzata per inserire ii materiale
alimentare, non in modo eccessivo ma
sufficiente per farlo tagliare esattamente.
(Non mette le dita o altri oggetti nello scivolo di
alimentazione! Se la tazza di polpa / succo e piena, scollegare l'alimentazione e liberarla
prima di riavviare.)

82
11
Sezione V. Suggerimenti per la selezione degli ingredienti
� ESTRATTORE DI SUCCHI DI FRUTTA
Succhi in modo efficiente i frutti duri e morbidi: anche gli agrumi, di solito uno dei
frutta piu difficile da spremere.
La marmellata non puo essere raggiunta, alcuni frutti non possono spremere ii
succo (come banane, mango, frutta secca, zucchero di canna, ecc.).
� SUCCO DI VERDURA
Tagliare le verdure a strisce (meno di 10 cm).
Succhi di tutti i tipi di verdure tra cui carote, barbabietole, sedano, peperoni,
e ravanelli senza distruggere ii sapore naturale e i benefici nutrizionali.
Gusto fresco e piena nutrizione sono garantiti con questa estrazione unica
processi.
Al termine, spegne l'interruttore quando nessun
succo esce dalla presa e scollegare
l'alimentazione. Non rimuovere la Juice Cup
dalla presa finche l'elica a spirale e ii filtro del
succo non hanno completamente ruotato. II
succo estratto deve essere bevuto ii piu presto
possibile in quanta avra un gusto e un
contenuto di sostanze nutritive degradati se
esposto nel aria per volta.)
Le polpe non devono essere conservate per
un lungo periodo.
Non toccare l'interruttore di alimentazione con
la mano bagnata per evitare scosse elettriche,
perdite o incendi.

83
� GRASSI DI GRANO E FOGLIE
Tagliarlo a strisce (meno di 10 cm).
Gli aghi di erba di grano, cavoli, cavoli, spinaci e pini sono solo alcuni dei
prodotti naturali che possono essere spremuti con lo spremiagrumi Amzchef.
Goditi ii meglio che la natura offre in cibi crudi di tutti i tipi e spremili per ottenere
tutti i benefici nutrizionali.
lstruzioni sulla selezione dei frutti
1. Seleziona frutta e verdura fresca, che contengono piu succo. I frutti adatti
includono: ananas, radice di barbabietola, gambo di sedano, mela, cetriolo,
spinaci, meloni, pomodoro, arancia e uva.
2. Rimuovere la pelle di frutta come l'arancia, l'ananas e la radice di
barbabietola cruda anziche quella sottile di frutta / verdura. Anche i semi nelle
arance dovrebbero essere rimossi, ii che potrebbe rendere un po 'amaro ii
succo.
3. La concentrazione del succo estratto dalla mela dipende dal tipo di mela
selezionata. II succo estratto dalla mela piu succosa e meno denso, quindi
seleziona ii tipo di mela adatto in base alla concentrazione di succo desiderata.
4. Appena ii succo di mela estratto diventera marrone molto presto, questo
processo puo essere rallentato aggiungendo gocce di succo di limone.
5. Foglie e steli (come quelli di lattuga) possono essere messi nell'estrattore per
estrarre ii succo.
II tipico ingrediente nutriente contenuto in frutta / verdura e mostrato di seguito:

84
Frutta / verdura Vitamine / minerali Caloria
Mela Vitamina C 200 g = 150 KJ (72 calorie)
Albicocca Fibra alimentare e potassio 30 g = 85 KJ C 20 calorie)
Barbabietola Acido folico, fibra alimentare,
vitamina C e potassio 160 g = 190 KJ(45 calorie)
Mirtillo Vitamina C 125 g = 295 KJ(70 calorie)
Cavoletti di
Bruxelles
Vitamine C, B, B6 ed E, acido folico
e fibra alimentare
100 g = 110 KJ(26 calorie)
Cavolo Vitamina C, acido folico, potassio,
Vitamina B6 e fibra alimentare
100 g = 110 KJ(26 calorie)
Carota Vitamine A, C e B6 e dietetici
fibra
100 g=110 KJ (26 calorie)
Sedano Vitamina C e potassio
80 g = 55 KJ(7 calorie)
Cetriolo Vitamina C 280 g = 120 KJ(29 calorie)
Finocchio Vitamina C e fibra alimentare 300 g= 145 KJ(35 calorie)
Uva Vitamine C e B6 e potassio 125 g = 355 KJ(85 calorie)
carambole Vitamina C e potassio 100 g = 100 KJ(40 calorie)
Melone Vitamine C e A, acido folico e
fibra alimentare
200 g= 210 KJ(50 calorie)
Nettarina Vitamine C e B3, potassio e
fibra alimentare
180 g = 355 KJ(85 calorie)
Pesca Vitamine C e B3, potassio e
150 g = 205 KJ(49 calorie)

85
fibra alimentare
Pera Fibra alimentare 150 g = 250 KJ(60 calorie)
ananas Vitamina C 150 g= 245 KJ(59 calorie)
Lampone Vitamina C, ferro, potassio e
magnesia
125 g=130 KJ(31 calorie)
Pomodoro Vitamine C, E e A, fibre alimentari
e acido folico
1oo g = 90 KJ(31 calorie)
Sezione VI. Manutenzione
1. Prima di pulire questo prodotto, assicurarsi di spegnere l'interruttore per
scollegare l'alimentazione.
2. Pulire questo prodotto dopo averlo usato.
3. La custodia non pu6 essere lavata sott'acqua e deve essere pulita con un
panno bagnato e contorto.
4. Prima di conservarlo, assicurarsi che questo prodotto sia pulito e asciutto.
5. Smontare questo prodotto per lavare i componenti procedendo come segue:
1
Prima rimuovi lo stantuffo e ii vassoio.

86
2
3
AWERTIMENTO
Non immergere la base del motore in acqua o altri liquidi. Non usare un getto
d'acqua per pulire la base del motore.
Sezione VII. lndice di sicurezza
Product Name Slow Juicer
Model ZM1501
Rated Voltage 220V-240V
Rated Power 150W
Rated Frequency 50Hz
Continuous Operating :510
Dopo aver rimosso l'estrattore,
staccare ii cappuccio terminale, ii filtro
del succo e la coclea a turno, tutti i
componenti rimovibili possono essere
lavati con acqua.
Premere verso ii basso e tenere
premuto ii pulsante di blocco@, quindi
ruotare ii tamburo in senso orario per
rimuoverlo.

87
Time minutes
Interval Time 10
minutes
Sezione VIII. Risoluzione dei Problemi
Fenomeno di
guasto
Analisi della causa Risoluzione del guasto
Dopo aver 1. Dopo accendere la
macchina, aspetta 1s,
funzionera. E normale.
2. Dopo 1s, non
funziona ancora, forse
un cattivo contatto tra
spina e presa
Ricollegarlo correttamente
1. Sostituisci ii socket e
riprova oppure contatta l'e-
mail di supporto alla
vendita:[email protected]
collegato
l'alimentazione
e acceso
l'interruttore, ii
prodotto non
funziona
Durante i primi Se questo fenomeno si
utilizzi, ii
motore genera
adore
E un fenomeno
normale
verifica frequentemente,
inviarlo al nostro centro di
assistenza autorizzato piu
sgradevole vicino a te per l'ispezione.
Tensione troppo 1. Controlla se la tensione e troppo bassa.
2. Scollega l'alimentazione e
rimuove ii materiale
alimentare in eccesso.
3. E un fenomeno normale e
ii motore riprendera
dopo una pausa.
bassa.
Questa
macchina si
ferma durante
E stata caricata una
quantita eccessiva di
materiale alimentare.
ii La macchina ha
funzionamento funzionato
continuamente per
lungo tempo.

88
1. La macchina Montare la coclea o ii filtro
II rumore e generato
durante ii
funzionamento
funziona in uno stato
sbilanciato a causa del
mancato montaggio
della coclea o del filtro
del succo in posizione.
del succo SUI posto 0
Contattare dopo l'assistenza
commerciale. Email:
info@iamzchef .com
2. II motore di
avviamento nel telaio
e stato danneggiato.
Section IX.Garanzia
Grazie per aver acquistato ii nostro prodotto, che e stato fatto per
soddisfare gli standard di alta qualita. La garanzia del produttore copre ii prodotto per un periodo di 12 mesi dalla data di acquisto contra i difetti di fabbricazione.
Tutte le garanzie Amzchef sono automaticamente tenute sotto controllo
nel nostro sistema, quindi non e necessario registrare ii prodotto.
Per ulteriori 6 mesi di garanzia gratuita, si prega di registrarsi sul sito
www.iamzchef.com o di compilare e scattare una foto della Scheda di
garanzia muggente inviando a [email protected].

89
G amzchef Certificato di garanzia
Articolo:
Modell o:
II nome del prop ietario:
Indirizzo ------------------------- -
Tel :
Data di acquisto: _
Nome e tmi bro de l r i vendi t ore: _
Indirizzo: ----------------------------------------------- -
Tel:
Si pn,'glidi WIili lare qucsta tabella invia r:lo via t;!IHil. c nt ro IQ g ioi:rr i dal la dat a di acquis t.o.
A causa del continua miglioramento del prodotto, ci riserviamo ii diritto di
modificare le specifiche del prodotto senza preavviso.

90
Deel 1. Veiligheidsaanwijzingen
Houd de volgende richtlijnen in acht bij gebruik van elektrische toestellen:
1. Spanning 220-240V ~50Hz.
2. Verwijder het netsnoer van het stopcontact alvorens monteren of
uit elkaar halen.
3. In geval van schade aan het netsnoer, contacteer de
klantendienst van AMZchef voor vervanging of herstelling door
onze erkende diensten. Herstelling door niet erkende
personen vernietigt de garantie. In geval van beschadigde
onderdelen, neem eveneens contact met onze klantendienst.
4. Zorg dat alle onderdelen correct gemonteerd alvorens het
netsnoer in het stopcontact te steken.
5. Steek nooit vingers, lichaamsdelen of vreemde voorwerpen in
de trechter wanneer het toestel ingeschakeld is. Gebruik enkel
het duwstuk om vruchten en fruit door de trechter te duwen.
Indien dit niet mogelijk is, schakel het toestel uit, verwijder het
netsnoer uit het stopcontact en haal de componenten uit elkaar
om vastgelopen voedingstukjes los te halen.
6. Snijd het eten opdat deze door de trechter passen. Verwijder harde
stenen en schillen.
7. De filter, duwstuk en perskegel kunnen met de sap verkleuren
tijdens gebruik. Dit is volkomen normal en heft geen nadelige
invloed op smaak en gezondheid.
8. Deze slowjuicer is voorzien van een oververhittingsbeveiliging en schakelt
automatisch uit na 20 minuten in gebruik. Laat 20 à 30 minuten rusten
alvorens hem weer te gebruiken, dit om de levensduur te verlengen. Bij
overbelasting van de motor hoort u een biep en schakelt de
motor uit om af te koelen. Schakel het toestel uit en verwijder
het netsnoer uit het stopcontact en verwijder etensresten.

91
9. Schakel het toestel uit na gebruik, verwijder netsnoer uit het
stopcontact, en haal de onderdelen uit elkaar voor
schoonmaak.
10. Apparaat nooit onderdompelen in water of andere vloeistoffen.

92
21. Do not use any steel wool, abrasive cleaning agent or corrosive
liquid such as gasoline or acetone to clean this product.
22. This product should be stored in a place that children can't reach. Not
allow persons with unsound extremities and sensation or mental
disorders and persons who are short of related experience and
knowledge( including children ) to use or play with this product.
23. This product is used for individual or family only.
24. This product is of Class-I protection grade, and the socket used for it
must be grounded properly.
Section II. Parts and Functions
No.
[!JPower Cable I For connection to power supply.
Housing The main unit containing motor and other
components, providing power output.
On-Off
Switch
For control of product operation, such as forward/backward rotation andclose-down.
Locking
Button
For locking of extractor to prevent unexpected release
out of the tn.srg. To unload the extractor off the
housing, press down and hold this button.
Component
Name
Function Description

93
®
@
(j)
9
(@
@
@
@
Juice
Container
To hold and collect the juice extracted by the
extractor.
Pulp
Container
To hold and collect any Pulps separated by the
extractor.
Plunger To squeeze and make theload food material contact completely with the auger so as to maximize extracting efficiency.
Tray For interim storage of food material to process.
Feed chute Feeding food and load down to Drum
Drum
One of the main components to extract juice, where the food material is loaded from theFeed chute at the top, while the juice and Pulps are discharged from the outlet.
Auger One of the main components to extract juice, where
the food material istransferred and ground against
juice filter or extruder.
Juicing
screen
Work with Auger to grind food material and filter the
juice. (applicabletofruits, vegetables and beams)
End cap
Coupled with extractor to provide protection.

94
Button Operation
Description: "ON"
Appliance is ON state
"O" : Appliance is OFF state
"R" : Appliance will REVERSE auger.(use when
food is blocking or stuck)
Tips: In case of Pulp blockage or motor locking.
Press and hold"R" button for approximately 3
seconds to rotate the auger reversely and then
release it.. Press"ON"button to resume normal
operation.
Section Ill. Method of Operation
Prior to first use.Please thoroughly clean any parts in contact with food
material. (See Section IV. Maintenance for more details)

95
Section IV. How to assemble
Connect Drum@with Housing@:
Connect the Drum@with the Housing@ by
aligning the" " on Feed chute® with " " on
the Housing@, push the Drum hard and rotate
the Drum anticlockwise until aligning" " on
Feed chute® with " " on the Housing@. (You
will hear "Tick" sound to confirm fasten it
tightly and correctly).
Place the auger@into the drum@.
2
Insert the juicing screen@ int o the drum@.
3

96
4
5
6
7
Place the end cap@) onto the drum@) end and
rotate the cap counter- clockwise.
Place Juice Cup@ and Pulp Container@under
thedrum set.
Mount tray onto the upper end of Feed
chute@.
Connect to power supply and get ready for
start up. (Before power-on, make sure the
switch is in Off position.)

97
8
9
10
ON
R
Clean the material and cut it into pieces
small sufficiently 'M'Ill can pass through the
Feed chute, and place them onto the tray.
Note: Any hard core, seed, skin or shell
from fruits and vegetables shall be removed
in advance.
Press down"ON" button on the switch to start
Note: Keep the machine operating for less
than 10 minutes. Long time work will destroy
the motor.
Note: Do not touch the power switch with wet
hand to avoid electric shock, leakage or fire.
Place the few pieces of cut fruit or
vegetables into the Feed chute, push them
downthedrumgenflywith plunger.
� Proper amount of force shall be used to push
the food material in,not excessive but
sufficientto have it cut off exactly.
(Donotputyour fingeror anyotherobjectinto
the Feed chute! If the Pulp/Juice Cup is full,
disconnect the power supply and clear it up before
restart.)
Upon completion, shut down the switch when no
juice flows out of the outlet and disconnect the
power supply. Do not remove the Juice Cup
off the outlet until the spiral propeller and
juice filter have stopped rotating completely.

98
11
The extracted juice should be drunk as soon as
possible as it will have degraded taste and
nutrient content if exposed in the
air for a time.)
� The Pulps shall not be stored fora long
time.
Do not touch the power switch with wet
hand to avoid electric shock, leakage or
fire.
99
Section V. Tips for Ingredients Selection
� FRUIT JUICE EXTACTOR
Efficiently juices hard and soft fruits: even citrus fruits, usually one of the
hardest fruits to juice.
Jam can not be achieved, some fruit can not squeeze juice (such as bananas,
mangoes, dried fruit, sugar cane, etc.).
� VEGETABLE JUICE
Cut vegetables to strips(less than 10 cm).
Juices all kinds of vegetables including carrots, beets, celery, peppers,
and radishes without destroying the natural flavor and nutrition benefits.
Fresh taste and full nutrition are guaranteed with this unique extraction
process.
� WHEATGRASS AND LEAFY GREENS
Cut it to strips(less than 10 cm).
Wheat grass, kale, cabbage, spinach and pine tree needles are just some of
the natural products that can be juiced with the Amzchef juicer. Enjoy the
best that nature offers in raw foods of all kinds and juice them for full
nutritional benefits.
Instructions on Selection of Fruits
6. Select fresh fruits and vegetables, which contain more juice. The proper
fruits include: pineapple, beet root, celery stalk, apple, cucumber, spinach,
melons, tomato, orange and grape.

100
7. Thick skin on fruits such as orange, pineapple and raw beet root instead
of thin skin on fruiUvegetable needs to be removed. Seeds in oranges
should be removed as well, which may make the juice taste a little bitter.
8. Concentration of juice extracted from apple depends on what type of
apple is selected. Juice extracted from juicier apple is less thick, so select
the proper type of apple depending on your desired juice concentration.
9. Just extracted apple juice will turn brown very soon, and this process can
be slowed by adding drops of lemon juice into it.
10. Leaves and stems (such as those of lettuce) can be put into theextractor
to extractjuice.
The typical nutrient ingredient contained in fruits/vegetables are shown
below:
Blueberry Vitamin C 1 125 gram= 295 KJ(70 calorie)I
Brussels Sprouts Vitamins C, B, B6 and E, folic acid
and dietary fiber
100 gram = 110 KJ(26 calorie)
Cabbage Vitamin C, folic acid, potassium,
Vitamin B6 and dietary fiber
100 gram = 110 KJ(26 calorie)
Carrot Vitamins A, C and B6, and dietary
fiber
100 gram=110 KJ (26
calorie)
Celery Vitamin C and potassium
FruiUVegetable Vitamin/Mineral Calorie
Apple Vitamin C 200 gram = 150 KJ (72 calorie)
Apricot Dietary fiber and potassium 30 gram= 85 KJ ( 20 calorie)
Beet Folic acid, dietary fiber, Vitamin C
and potassium
160 gram= 190 KJ(45 calorie)

101
80 gram = 55 KJ(7 calorie)
Cucumber Vitamin C 280 gram= 120 KJ(29 calorie)
Fennel Vitamin C and dietary fiber 300 gram= 145 KJ(35 calorie)
Grape Vitamins C and 86, and potassium 125 gram= 355 KJ(85 calorie)
Yangtao Vitamin C and potassium 100 gram= 100 KJ(40 calorie)
Muskmelon Vitamins C and A, folic acid and
dietary fiber
200 gram= 210 KJ(50 calorie)
Nectarine Vitamins C and 83, potassium and
dietary fiber
180 gram = 355 KJ(85 calorie)
Peach Vitamins C and 83, potassium and
dietary fiber
150 gram= 205 KJ(49 calorie)
Pear Dietary fiber 150 gram = 250 KJ(60 calorie)
Pineapple Vitamin C 150 gram = 245 KJ(59 calorie)
Raspberry Vitamin C, iron, potassium and
magnesium
125gram= 130KJ(31 calorie)
Tomato Vitamins C, E and A, dietary fiber
and folic acid
100 gram= 90 KJ(31ca lo r ei )
Section VI. Maintenance
6. Before cleaning this product, be sure to shut down the switch to
disconnect the power supply.
7. Clean this product after using it.
8. The Housing cannot be washed under water, and must be cleaned
with twisted wet clothinstead.
9. Before storing it, make sure this product is clean and dry.

102
10. Disassemble this product to wash the components by the following
steps:
2
3
WARNING
First remove the plunger and tray.
Press down and hold the locking
button@,and rotate the drum
clockwise to remove it.
After removing extractor, detach the
end cap,juice &l'W1 and auger in turn,
all removable components can be
washed with water.

103
Do not immerse the motor base in water or any other liquid. Do not
use water jet to clean the motor base.
Section VII. Safety Index
Product Name Slow Juicer
Model ZM1501
Rated Voltage 220V-240V ~
Rated Power 150W
Rated Frequency 50Hz
Continuous Operating Time 10 minutes
Interval Time 10 minutes

104
Section VIII. Trouble Shooting
Fault Phenomenon
Analysis of cause Fault resolution
After connecting
power supply
and turning on
the switch, the
product fails to
work
3. After turn on the
machine, wait for 1s,
it will work. It is
normal.
4. After 1s, it still no
work, maybe poor
contact between plug
and socket
Re-plug it properly
1. Replace thesocket and try
again, or contact after
Sales Support Email:
info@iamzchef .com
During the early
uses, the motor
generates
unpleasant smell
It is a normal
phenomenon
If this phenomena occurs
frequently, send it to our
authorized service center
nearest to you for inspection.
1. Too lowvoltage
4. Check whether the voltage
is too low
5. Disconnect the power
supply and remove
excessive food material
6. It is a normal phenomenon
and themotorwill resume
2. Excessiveamountof
This machine
stop during
operation
food material has been
loaded
3. The machine has
operated continuously
for long time.

105
after a break time.
Noise is
generated
during
operation.
1. The machine operates
in an unbalanced state
due to failure to
mount auger orjuice
filter inplace.
1. Mount auger or juice
filter in place or
Contact after Sales
Support Email:
info@iamzchef .com
2. The starting motor in
the frame has been
damaged.
Section IX. Warranty
Thank you for purchasing our product, which has been made to meet
high quality standards. The manufacturer's warranty covers the
product for a period of 12 months from the date of purchase against
manufacturing faults.
All Amzchef warranties are automatically kept track of in our system,
so there is no need to register your product.
For 6month extra free of charge warranty, please register at website
www.iamzchef .com or fill in and take picture of bellow Warranty Card
sending to [email protected].

Due to continuous product improvement, we reserve the
right to change the product specification without prior
notice.

