living life like a writer - socorro independent school ... · routines of the writing workshop and...
TRANSCRIPT

Living Life Like A Writer 3rd Grade
The El Paso Collaborative for Academic Excellence Copyright © 2002
2
Study One Living Life Like a Writer
Third Grade Background Information:
This unit has been designed with a focus on teaching students the rituals and routines of the Writing Workshop and how to live life like a real writer. This study requires students to follow certain procedures (rituals and routines) that will eventually lead to student independence. This independence allows the teacher time for individual and small group conferring, which is the heart of the writing workshop. This study also encourages writing stamina in students by expecting them to write daily in a notebook, to try different types of notebook entries and to finally publish a piece of writing that they live with for several days. Teaching Objectives:
To have students develop: the habits of writers, ways of working independently, productively and resourcefully in a workshop environment (rituals and routines) an eye and ear for writing craft, methods for collecting different types of notebook entries that will eventually lead to one finished product.
Reasons for the focus on living life like a writer:
Rituals and routines allow students to work independently so that the teacher can confer without interruption. Studying the lives of mentor authors allows students to practice different writing habits so that they may develop their own writing routines. Studying mentor texts introduces students to examples of writing craft that they can study and mimic.
Suggested authors/texts for this study: Mentor Authors: Sandra Cisneros, Patricia Polacco, Cynthia Rylant, Judith Viorst, Jane Yolen Information about some of these authors can be found in the Meet the Author Series as well as some of the following online resources: http://www.nhptv.org/kn/vs/kidbookaut.htm http://www.marisamontes.com/links.htm Mentor Texts: I’m in Charge of Celebrations, Byrd Baylor Eleven, Sandra Cisneros Family Pictures, Carmen Lomas Garza Fireflies, Julie Brinckloe House on Mango Street, Sandra Cisneros Ordinary Things, Ralph Fletcher
The El Paso Collaborative for Academic Excellence Copyright © 2002

3
Notes to Teacher: Study Format:
The unit is divided into six sections with four to five lessons in each section. While most lessons are intended to be take one day, it is encouraged that the teacher adjust as needed. Mini-Lessons:
Mini- lessons are meant to focus on one procedure, skill or craft at a time and are expected to last approximately 7-10 minutes. However, when first establishing the Writing Workshop, it is sometimes important to focus on more than one thing, therefore extending the length of the mini- lesson. For example, Lesson 1 of this study suggests both an introduction to the Writing Workshop format, as well as the creation of a chart where the students generate ideas for writing. Closings:
Every Writing Workshop period is expected to end with a closing time (7-10 minutes). The purpose of a closing is two- fold: it is to provide a daily ritual for the class to end the Workshop and it is to provide a second opportunity for whole class instruction for the teacher. While validating the students’ work is very important, it is not the only purpose of the closing.
There are several different kinds of closings and teachers should feel comfortable choosing the kind that best suits their students’ needs. The closings mentioned in this study include:
Process Share: During the closing, students will verbally reflect on the writing process they tried that day.
Author’s Chair: Students (2-3 only) share a piece of their writing that is directly linked to that day’s mini- lesson. The work that is shared should in some way reflect the teaching point that was made in the mini-lesson or a conference. Sometimes a student who has reached a personal writing goal may want to share with the class and that should be encouraged as well.
Popcorn Share: Students spend about 1 minute reading their writing from the work time and choose 1-2 lines that they would like to share with the group. While the sharing is random and spontaneous (not structured by the teacher), rituals and routines will need to be established ahead of time. Charts: The charts that are suggested in this study are meant to be used as guidelines for your classroom charts, and are not to be copied exactly. Your classroom charts should be generated by you and your students and should grow in depth and content as your students develop as writers.
The El Paso Collaborative for Academic Excellence Copyright © 2002
4
Homework: Students will be assigned writing homework. Usually they will be asked to produce a free-choice notebook entry or an assigned “try- it” from a mini- lesson. While types of writing might be assigned, writing topics are always student choice. Touchstone Books and Mentor Texts:
Touchstone Books are selected by the individual teacher to be used throughout the year across the Writing Workshop. These books should be chosen because the teacher loves them, kids love them, and the teacher knows there are several grade- level appropriate writing strategies she can teach by referring to these books all year.
In this study, specific Mentor Texts were selected based on their relevance to the study of living life like a writer. During genre studies throughout the year, teachers should use Mentor Texts that are more specifically structured to match that particular genre. Materials Need for a 3rd Grade Writing Workshop Teacher selected Touchstone Books Notebooks for students Work-in-Progress folders for students Teacher’s record-keeping system Chart paper Chart stand Chart pens/markers Cover-up tape (for charting) Writing supplies accessible to students:
Sharpened pencils Crayons Pens Tape Scissors Pens Highlighters Post-it notes A variety of paper types and sizes
Recommended Professional Texts Mini-Lessons: Establishing the Writing Workshop, America’s Choice Mini-Lesson Series Craft Lessons, Ralph Fletcher The Writing Workshop: Working Through the Hard Parts (and they’re all hard parts), Katie Wood Ray The Art of Teaching Writing, 2nd Edition, Lucy Calkins The Writer’s Notebook: Unlocking the Writer Within You, Ralph Fletcher How Writers Work, Ralph Fletcher New Standards Primary Writing Standards, available through NCEE
The El Paso Collaborative for Academic Excellence Copyright © 2002 The Structure of Writer’s Workshop
5
Mini-Lesson – This is direct teaching to the whole class on a specific topic that usually lasts from ten to fifteen minutes. Connection - Connecting to previous lessons, touchstone texts, and/or prior knowledge. Active Involvement- At the end of the mini-lesson students are given the opportunity to try-out the lesson either through partner sharing, writing in their notebook or whole group discussion. Link – Before you send students off to write, encourage them to use the concepts learned in the mini-lesson during their independent writing time. Writing time – Students write independently while the teacher is meeting or conferring with students. This writing time should be a minimum of 40 minutes. Conferring – The teacher has the option of meeting with students individually or with small groups depending on the needs of the class. Keep in mind that when conferring with students you are coaching the writer and not the writing. The purpose of a conference is to develop students as writers. It is not to develop a perfect piece of writing every time. A guiding question could be, “What can I teach this child (one or two strategies) that he or she will be able to use in other pieces of writing as well as the one he or she is currently working on?” Response Groups – Students can be working with three of four students or with a partner. The purpose of response groups is for students to help each other develop a well-written piece. Response groups are taking place during the independent writing time. Closure – At the end of the writing time, students meet at the gathering spot to share their writing or some of the strategies that they used. Before students share, reinforce the concept presented during the mini-lesson. This can take the form of: Popcorn Share- One at a time all students share a sentence or section of their piece of writing. Author’s Chair – The author sits in a chair designated for sharing and reads his or her writing or a section of it. The author may select two to four students who wish to respond to the writing. Partner Share- Students share with the person sitting next to them. Again students can share entire piece of a section of the writing.
The El Paso Collaborative for Academic Excellence Copyright © 2002 Lesson Sequence: Each week will have key ideas as well as a series of mini-lessons and some homework. Week One: Setting up the Writing Workshop
6
Lesson One - How to begin the Writing Workshop Lesson Two – Gathering Spot Rules Lesson Three – Good Writing Habits Lesson Four – Introducing and Maintaining a Writer’s Notebook Lesson Five – Notebook Entries: Types vs. Topics
Week Two: Writing Different Types of Notebook Entries
Referring to Touchstone Books and Mentor Authors Lesson One – What to do When You Think You’re Done Lesson Two – Notebook Entry: Observations Lesson Three – Writing About Small Ordinary Things Lesson Four – Writing Off a Picture Lesson Five – Draw a Detailed Picture or Zoom In
Week Three: Habits of Writers
Lesson One – Characteristics of Good Writing Lesson Two – Creating a Rubric of Good Writing Habits Lesson Three - Rereading your Notebook to generate more writing Lesson Four - Studying the lives and habits of authors Lesson Five - The Writing Process and Writing Folders
Week Four: Choosing a Seed Idea and Learning to Gather Around that Seed
Lesson One - Introducing the Seed Idea Lesson Two – Gathering Around a Seed Idea Lesson Three - Gathering around the Seed Idea Lesson Four - Flagging Notebook entries Lesson Five - Catch-up day
Week Five: Characteristics of Good Writing Rubric
Lessons One and Two - Characteristics of Good Writing Rubric Lesson Three - Drafting Lesson Four – Status of the Class and Partner Response Groups Lesson Five - Revision with a partner
Week Six: Publishing/Celebrating
Lesson One - Editing Lessons Two and Three – Final Draft Lesson Four – Celebration and Author’s Chair
The El Paso Collaborative for Academic Excellence Copyright © 2002
Week One Lesson 1
How to Begin the Writing Workshop

7
Mini-Lesson Goal:
o Teaching students the structure of a Writing Workshop hour and thinking of ideas to write about
TEKS – 3.14 ABCD, 3.18 AB, 3.20 B Materials Needed:
o Chart Paper and markers Mini-Lesson Connection:
o If students have had Writers’ Workshop in the past remind students that they are continuing the rituals and routines of the year before.
Teach:
o Explain to students the structure of the 60 Minute Writing Workshop Mini-Lesson for the whole class: 5-10 minutes Writing/Work block of time: 35-45 minutes (students work at planning, drafting, revising, rereading, editing, conferencing with teacher or peers)
Closing or whole class sharing: 5-10 minutes Active Involvement
o Generate a list of writing topics, model by thinking aloud how to think about possible topics for writing such as tapping into your personal experiences, thoughts or feelings o List might include the following: things I know about, things that are important to me, things that happened to me or my family, things I know how to do, friends, something fun I did, something that made me sad/happy o Chart responses
Link:
o Explain to students that during the workshop you will be coming around to talk to them about their writing. o Give students paper to write on and ask them to put their name on the paper and date their entry before beginning.
The El Paso Collaborative for Academic Excellence Copyright © 2002 Writing Time / Conferring Time
o Teacher will mainly be roving for the first day and touching base with many
8
students during the writing time. o Engage in short, quiet conversations about writing or topic selection for today. o Teacher needs to get on the level of the student by kneeling down by student desks, or pulling a chair along side them.
Closing
o Gather the group back together and sit together on the floor. o Explain to students that this will be the time that they share something from the workshop—sometimes a student will read their writing aloud, sometimes partners or small groups will work together. o Invite students to share what topic they selected to write about during the writing time and how they thought of the topic.
Homework
o Add on to today’s entry for homework, or generate a new topic. o Bring writing back tomorrow—work on it at home for ten to twenty minutes. o (At this point students could draw a line where they left off during class so that teacher will be able to assess that students added more at home.)
The El Paso Collaborative for Academic Excellence Copyright © 2002
9
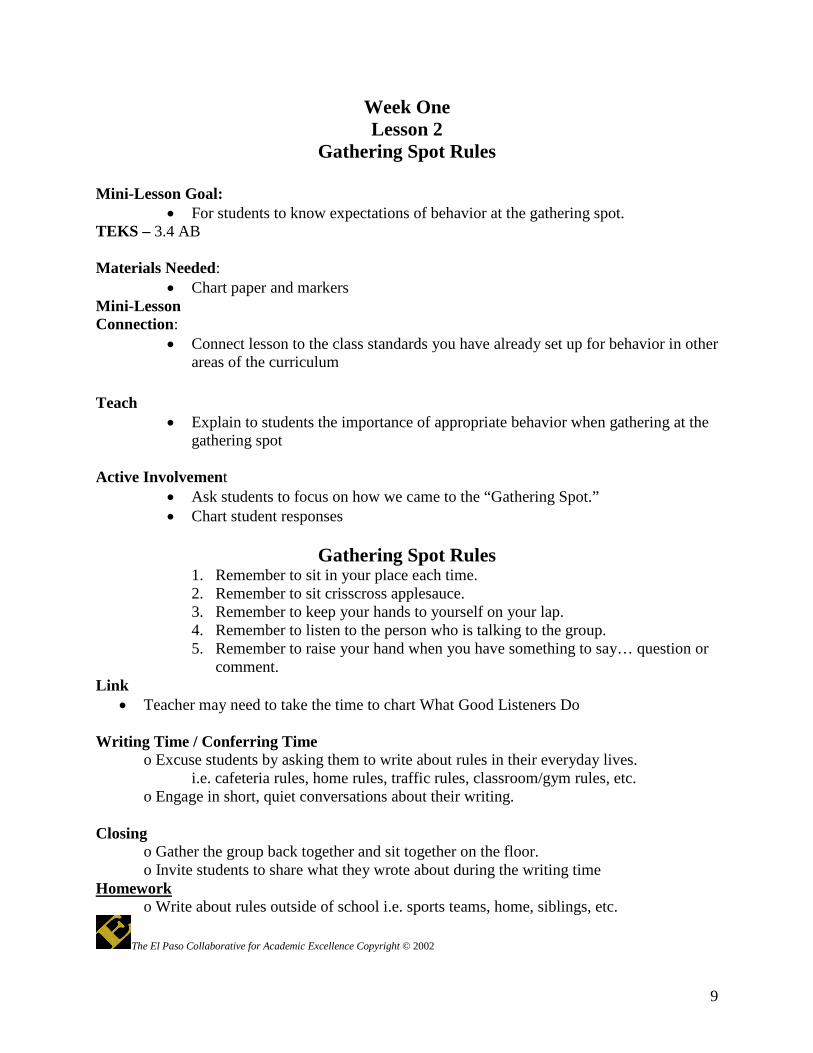
Week One Lesson 2
Gathering Spot Rules
Mini-Lesson Goal: • For students to know expectations of behavior at the gathering spot.
TEKS – 3.4 AB Materials Needed:
• Chart paper and markers Mini-Lesson Connection:
• Connect lesson to the class standards you have already set up for behavior in other areas of the curriculum
Teach
• Explain to students the importance of appropriate behavior when gathering at the gathering spot
Active Involvement
• Ask students to focus on how we came to the “Gathering Spot.” • Chart student responses
Gathering Spot Rules 1. Remember to sit in your place each time. 2. Remember to sit crisscross applesauce. 3. Remember to keep your hands to yourself on your lap. 4. Remember to listen to the person who is talking to the group. 5. Remember to raise your hand when you have something to say… question or
comment. Link
• Teacher may need to take the time to chart What Good Listeners Do Writing Time / Conferring Time
o Excuse students by asking them to write about rules in their everyday lives. i.e. cafeteria rules, home rules, traffic rules, classroom/gym rules, etc. o Engage in short, quiet conversations about their writing.
Closing
o Gather the group back together and sit together on the floor. o Invite students to share what they wrote about during the writing time
Homework o Write about rules outside of school i.e. sports teams, home, siblings, etc.
The El Paso Collaborative for Academic Excellence Copyright © 2002
10
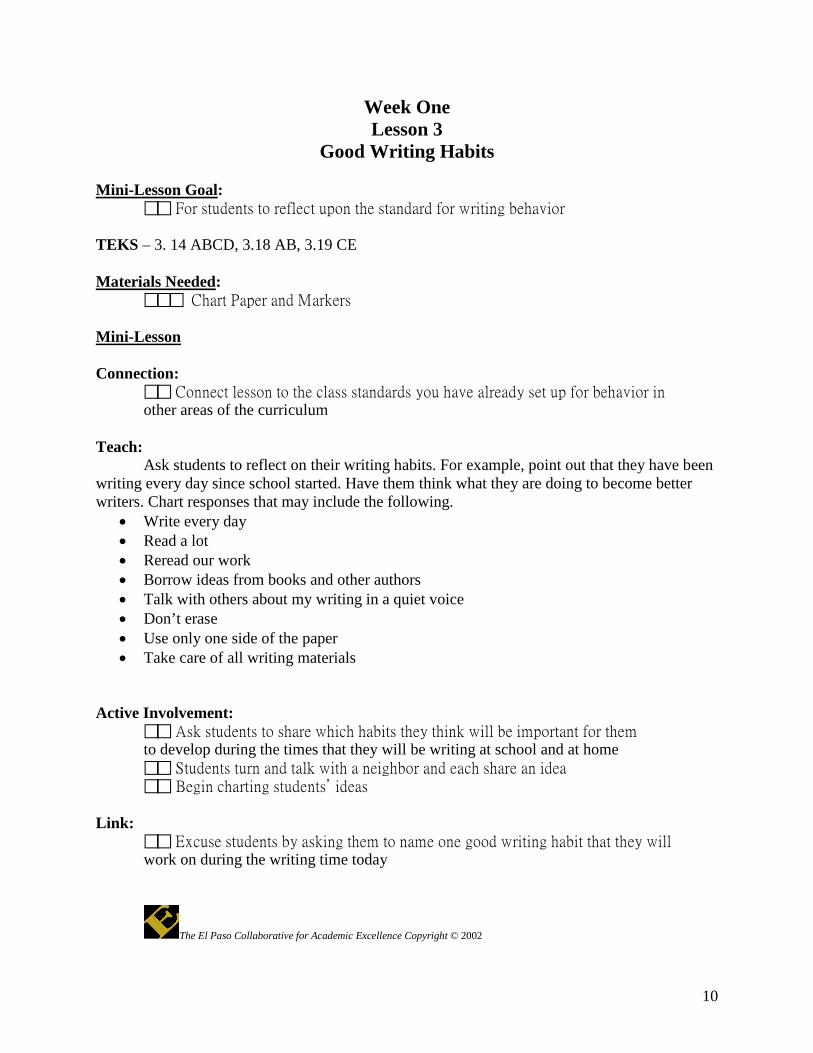
Week One Lesson 3
Good Writing Habits Mini-Lesson Goal:
For students to reflect upon the standard for writing behavior TEKS – 3. 14 ABCD, 3.18 AB, 3.19 CE Materials Needed:
Chart Paper and Markers Mini-Lesson Connection:
Connect lesson to the class standards you have already set up for behavior in other areas of the curriculum
Teach: Ask students to reflect on their writing habits. For example, point out that they have been writing every day since school started. Have them think what they are doing to become better writers. Chart responses that may include the following.
• Write every day • Read a lot • Reread our work • Borrow ideas from books and other authors • Talk with others about my writing in a quiet voice • Don’t erase • Use only one side of the paper • Take care of all writing materials
Active Involvement:
Ask students to share which habits they think will be important for them to develop during the times that they will be writing at school and at home Students turn and talk with a neighbor and each share an idea Begin charting students’ ideas
Link:
Excuse students by asking them to name one good writing habit that they will work on during the writing time today
The El Paso Collaborative for Academic Excellence Copyright © 2002
11
Writing Time / Conferring Time
o Encourage students to write on a self-selected topic or to choose one from the chart of generated topics o Engage in short, quiet conversations about writing or topic selection for today.
Closing
o Gather the group back together and sit together on the floor. o Invite students to share which good writing habit they practiced today
The El Paso Collaborative for Academic Excellence Copyright © 2002
12
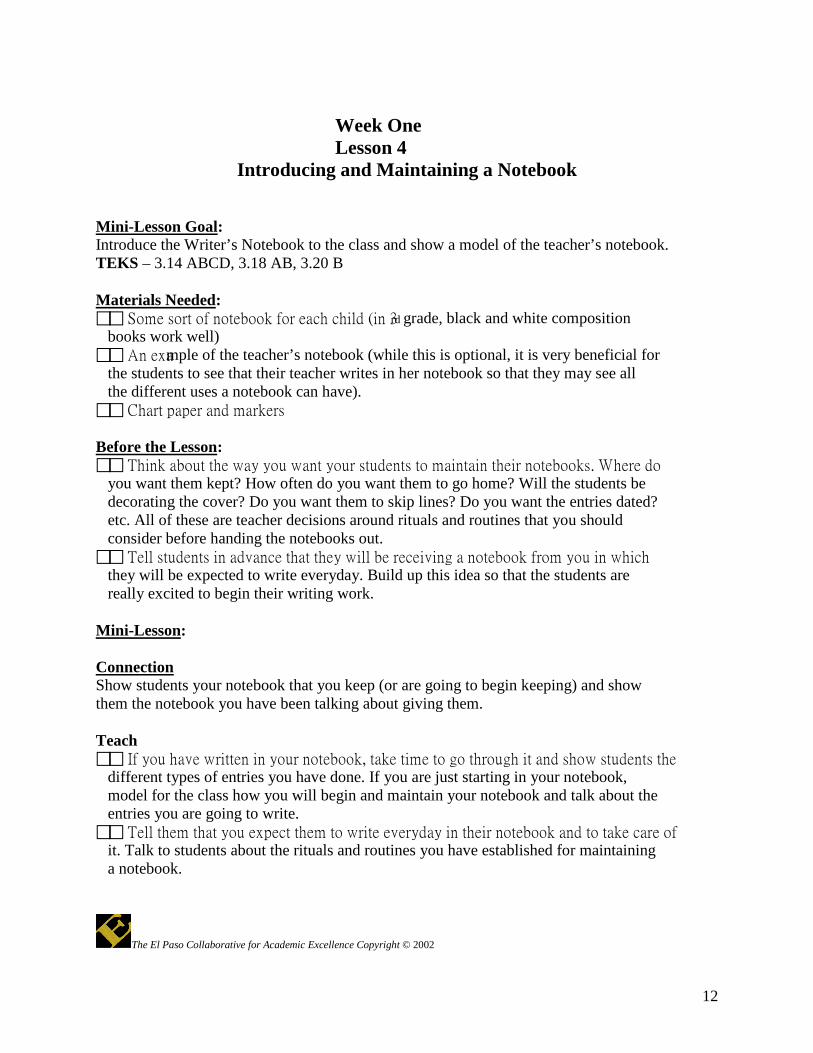
Week One Lesson 4
Introducing and Maintaining a Notebook Mini-Lesson Goal: Introduce the Writer’s Notebook to the class and show a model of the teacher’s notebook. TEKS – 3.14 ABCD, 3.18 AB, 3.20 B Materials Needed: Some sort of notebook for each child (in 3rd grade, black and white composition books work well) An example of the teacher’s notebook (while this is optional, it is very beneficial for the students to see that their teacher writes in her notebook so that they may see all the different uses a notebook can have). Chart paper and markers Before the Lesson: Think about the way you want your students to maintain their notebooks. Where do you want them kept? How often do you want them to go home? Will the students be decorating the cover? Do you want them to skip lines? Do you want the entries dated? etc. All of these are teacher decisions around rituals and routines that you should consider before handing the notebooks out. Tell students in advance that they will be receiving a notebook from you in which they will be expected to write everyday. Build up this idea so that the students are really excited to begin their writing work. Mini-Lesson: Connection Show students your notebook that you keep (or are going to begin keeping) and show them the notebook you have been talking about giving them. Teach If you have written in your notebook, take time to go through it and show students the different types of entries you have done. If you are just starting in your notebook, model for the class how you will begin and maintain your notebook and talk about the entries you are going to write. Tell them that you expect them to write everyday in their notebook and to take care of it. Talk to students about the rituals and routines you have established for maintaining a notebook.
The El Paso Collaborative for Academic Excellence Copyright © 2002
13
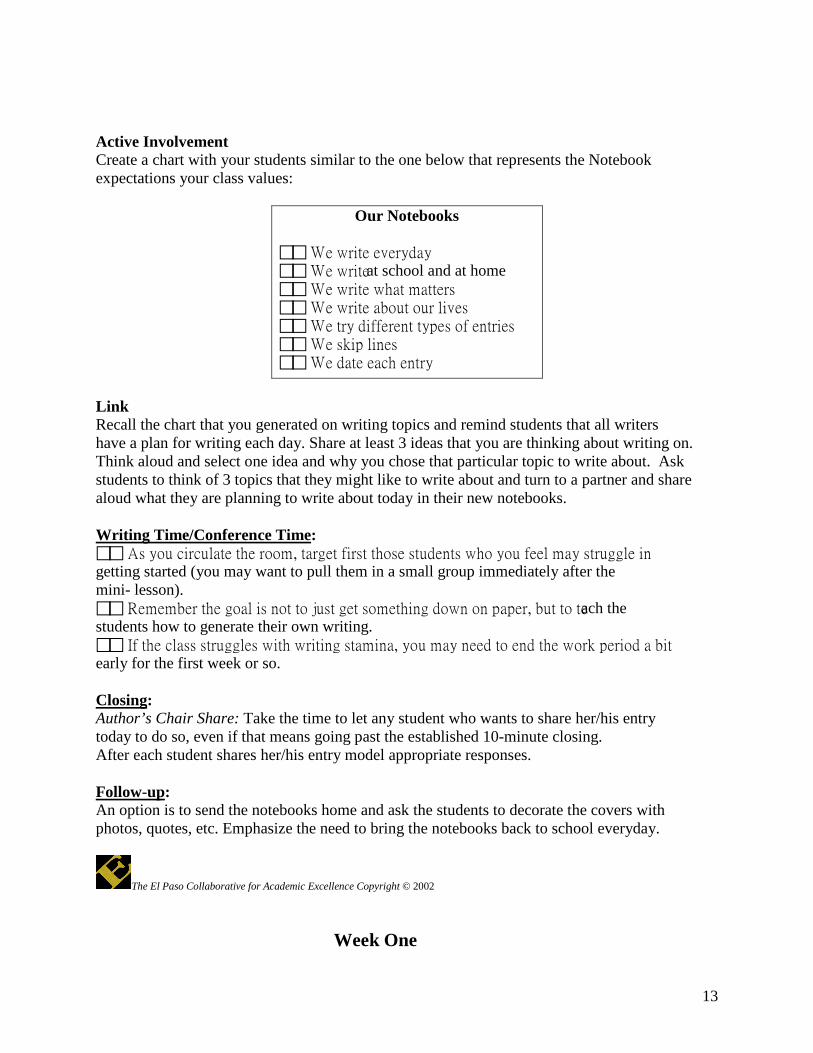
Active Involvement Create a chart with your students similar to the one below that represents the Notebook expectations your class values:
Our Notebooks
We write everyday We write at school and at home We write what matters We write about our lives We try different types of entries We skip lines We date each entry
Link Recall the chart that you generated on writing topics and remind students that all writers have a plan for writing each day. Share at least 3 ideas that you are thinking about writing on. Think aloud and select one idea and why you chose that particular topic to write about. Ask students to think of 3 topics that they might like to write about and turn to a partner and share aloud what they are planning to write about today in their new notebooks. Writing Time/Conference Time: As you circulate the room, target first those students who you feel may struggle in getting started (you may want to pull them in a small group immediately after the mini- lesson). Remember the goal is not to just get something down on paper, but to teach the students how to generate their own writing. If the class struggles with writing stamina, you may need to end the work period a bit early for the first week or so. Closing: Author’s Chair Share: Take the time to let any student who wants to share her/his entry today to do so, even if that means going past the established 10-minute closing. After each student shares her/his entry model appropriate responses. Follow-up: An option is to send the notebooks home and ask the students to decorate the covers with photos, quotes, etc. Emphasize the need to bring the notebooks back to school everyday.
The El Paso Collaborative for Academic Excellence Copyright © 2002
Week One

14
Lesson 5 Notebook entries-types vs. topics
Mini-Lesson: For students to understand the difference between topics and types of Notebook entries TEKS – 3.14 ABCD Connection Recall the Writing Ideas chart and add any new ideas that the students have to the chart. Note: Today you will be revising a chart and creating a new one. Teach Point out to the students that there is a difference between ideas like “My trip to Disneyland” (a writing topic) and “All about my dog” (a description, which is a type of entry). Good writers write different types of entries in their notebooks. Explain that one can write several different types of entries on the same topic (For example, a description of my dog, a memory about my dog, a poem about my dog, etc. These are all about one topic, my dog, but are different types of entries).
• Note: This chart may be revisited and added to throughout the Writerly Life Unit
Active Involvement Have students separate the ideas on the chart into topics and types of entries, and discuss the difference. Your new chart should be a list of types of entries, rather than a list of topics. Link Before going to their writing, ask students to think about choosing a different type of entry to write today. Tell them that their challenge is to fill their notebooks with different types of entries. Writing/Conferring Time
• Circulate around the room conducting brief conferences with the students • Some students will need extra assistance as they try to understand topic vs. type of
writing in their Notebooks Closing Ask 2-5 students who tried to write a different type of entry to share. After each student shares her/his entry model appropriate responses. For example, “I’d like to know more about . . . or I like the way you used such descriptive words . . .” This helps lay the foundation for students to consider thoughtful peer response in order for them to become better writers.
The El Paso Collaborative for Academic Excellence Copyright © 2002 Week Two
15
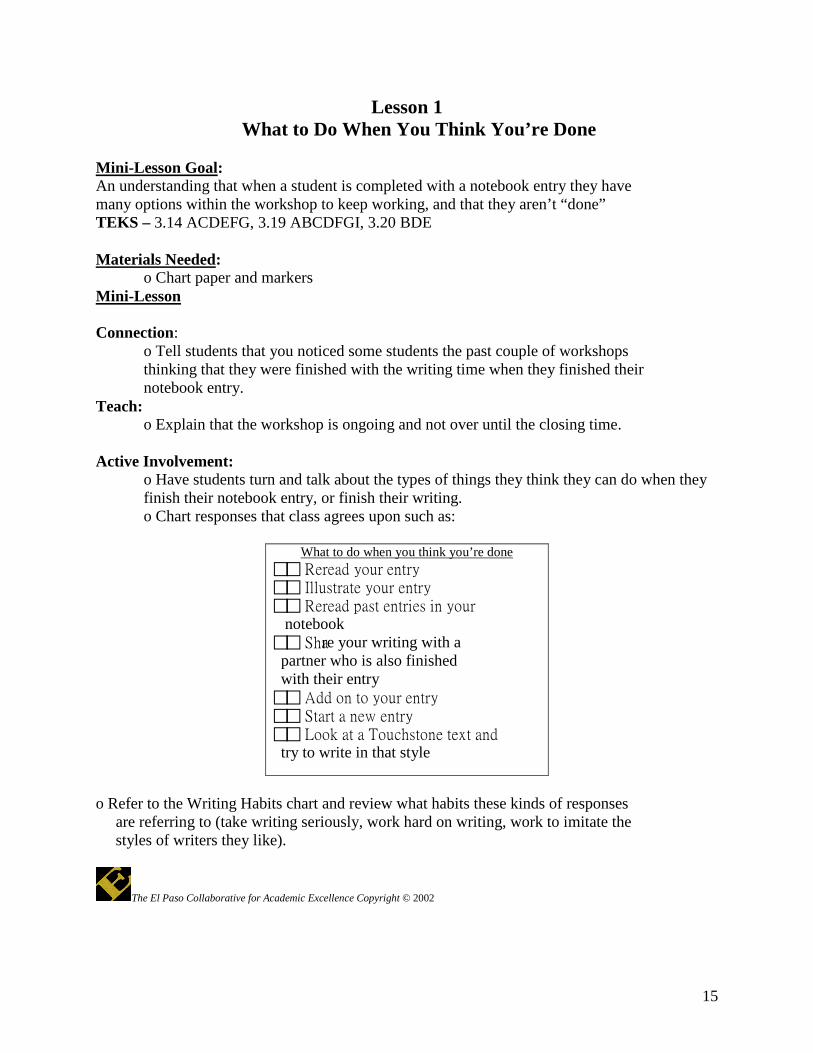
Lesson 1 What to Do When You Think You’re Done
Mini-Lesson Goal: An understanding that when a student is completed with a notebook entry they have many options within the workshop to keep working, and that they aren’t “done” TEKS – 3.14 ACDEFG, 3.19 ABCDFGI, 3.20 BDE Materials Needed:
o Chart paper and markers Mini-Lesson Connection:
o Tell students that you noticed some students the past couple of workshops thinking that they were finished with the writing time when they finished their notebook entry.
Teach: o Explain that the workshop is ongoing and not over until the closing time.
Active Involvement:
o Have students turn and talk about the types of things they think they can do when they finish their notebook entry, or finish their writing. o Chart responses that class agrees upon such as:
What to do when you think you’re done Reread your entry Illustrate your entry Reread past entries in your notebook Share your writing with a partner who is also finished with their entry Add on to your entry Start a new entry Look at a Touchstone text and try to write in that style
o Refer to the Writing Habits chart and review what habits these kinds of responses are referring to (take writing seriously, work hard on writing, work to imitate the styles of writers they like).
The El Paso Collaborative for Academic Excellence Copyright © 2002
16
Link:
o Send students off to write by telling them that you will be looking for students using their whole writing time wisely
Writing/Conferring Time Circulate and conference with students about their writing. Use the following questions.
1. Tell me about your writing/story. 2. What else can you tell me about . . . 3. How’s your writing going? 4. Have you ______ (refer to chart listings for things to do when finished)?
Closing:
o Invite two to five students to share with the group what they did when they finished their entry. (Look for students doing this during the writing time) After each student shares her/his entry, model appropriate responses.
The El Paso Collaborative for Academic Excellence Copyright © 2002
Week Two
17
Lesson 2 Notebook Entry--Observations
Mini-Lesson Goal: Model a type of entry for all students to try in their notebooks.
The series of mini-lessons over the next 4 days will be quite directive; you will be asking all students to try the type of entry you will be teaching them. Be sure to tell the students, though, that they are expected to write in the notebooks the entire Writing Workshop period, so that when they finish their assigned entry, they are to resume their individual notebook writing. You may need to revisit the “What to do when I’m done” chart.
TEKS – 3.14 ABCD, 3.18 AB, 3.20 AB Materials Needed: I’m in Charge of Celebrations, by Byrd Baylor, or another read aloud that is about an observation of something i.e. Night in the Country, by Cynthia Rylant …A Quiet Place, by Audrey Wood Student notebooks Access to a large area that is outside of the classroom (preferably outdoors) Clipboards, if necessary Pencils for each student Before the Lesson: Read I’m in Charge of Celebrations, or the other book you have chosen. Be sure to have added “observations” to the chart as one of the types of entries students can write in their notebooks. Mini-Lesson: Connection Recall the “Types of Notebook Entries” chart, calling attention to ‘observations’. Recall I’m in Charge of Celebrations, or the other book you chose, and discuss how the character in this story used her notebook. She went outside and described her observations. In this particular story, she really used her imagination to give life to everyday noticings. Tell students that all this week you will be teaching them different types of notebook entries and asking them to try them out. Tell them that you will also be trying the same entries in your notebook.
The El Paso Collaborative for Academic Excellence Copyright © 2002
18
Teach Tell students that today they will be going outside (or to the area you choose) to write some observations in their notebooks. They will be expected to find a place to sit and just observe quietly what is around them. They will depend on all their different senses in order to help give life to their observation, like the girl in the story. Their goal for today is to find a simple thing (like a cloud or leaf or pencil), observe it and give it life. Active Involvement Ask them to think about the place you are taking them and to imagine what kinds of things they may want to observe and write about. Lead a brief discussion about these places so that students can start thinking about their writing before they go. Link Tell students that you will be circulating around the area helping them with their observations. Writing Time/Conference Time: Walk around and assist students who may be struggling to focus on a particular observation. Take note of any student who has written an observation particularly well and ask them to share during the closing. Closing: Author’s Chair Share: Ask the 3-4 students who have a well- written observation in their notebook to share their entry. Explain to the class why you chose these entries to share and encourage everyone to try observations as a notebook entry in the future. Follow-up: Ask students to bring in a favorite photo from home for tomorrow’s Writing Workshop lesson that they may keep in their notebook. In your own notebook, prepare for Lesson 4 by following the mini- lesson procedures listed.
The El Paso Collaborative for Academic Excellence Copyright © 2002
19
Week Two Lesson 3
Writing About Small Ordinary Things Mini-Lesson Goal: Writers write about small, ordinary things that they know about--in beautiful and unique ways TEKS – 3.14 ABCD, 3.18 AB, 3.20 AB Materials Needed: Samples of writing about everyday kinds of things: Examples: Ordinary Things by Ralph Fletcher
House on Mango Street by Sandra Cisneros Fireflies! by Julie Brinckloe
Mini-Lesson Connection:
o Explain to students that yesterday they were learning how to write observations and that today you will try thinking about another kind of notebook entry.
Teach:
o Explain to students that writers often times write about the very small and ordinary things in life. o Share the table of contents of a book like Ordinary Things or House on Mango Street, just reading the titles of entries o Then read aloud some of the lines from these books that describe ordinary things in beautiful ways
Active Involvement:
o Ask students to think about some of the small, ordinary things they could write about in beautiful ways. o Have students share aloud a few of their ideas
Link:
o Excuse students to write by having them say what small ordinary topic they will try in their notebook.
The El Paso Collaborative for Academic Excellence Copyright © 2002

20
Writing Time/Conference Time: Walk around and assist students who may be struggling to focus on a small ordinary thing. Take note of any student who has a particularly well-written piece and ask them to share during the closing. Closing
o Ask students to popcorn share a beautiful line they wrote today about an ordinary, everyday thing After each student shares her/his entry model appropriate responses.
The El Paso Collaborative for Academic Excellence Copyright © 2002
21
Week Two Lesson 4
Notebook Entry—Writing off a Picture Mini-Lesson: For students to begin to learn how to “write off a picture” TEKS – 3.14 ABCD, 3.18 AB, 3.20 AB Materials
• Teacher’s writer’s notebook with photo entry. Connection Recall yesterday’s mini- lesson on ordinary and small things and tell students that today they will be trying a different type of entry. Recall Family Pictures, by Carmen Lomas Garza, or another book you have already read aloud that has examples of photos or realistic pictures. Discuss how the author wrote “off” the picture in the book. Recall the Writing Ideas chart and add to it, if it is not already on there, “writing off a picture”. Teach Explain that many writers use visuals to help generate writing. Show them the photo that you put in your notebook and read to them the entry that you made in response to the photo. Explain how you wrote a detailed description of what was happening in the picture, just like in the mentor text you read for today’s lesson. Active Involvement Ask students to get out their photo and think about what they are going to write in their notebook. Link Tell students that today you want them to tape their photo in their notebook and to write off it, like the author did, and like you did. Writing Time/Conference Time: Walk around and assist students who may be struggling with how to write about or off the picture they brought. You may need to refer again to one of the Mentor or Touchstone Texts or your own Notebook entry as models. Closing Popcorn share, allow students a chance to read 1-2 favorite lines from their entry. After one or two students share their entry, model appropriate responses.
The El Paso Collaborative for Academic Excellence Copyright © 2002
22
Week Two
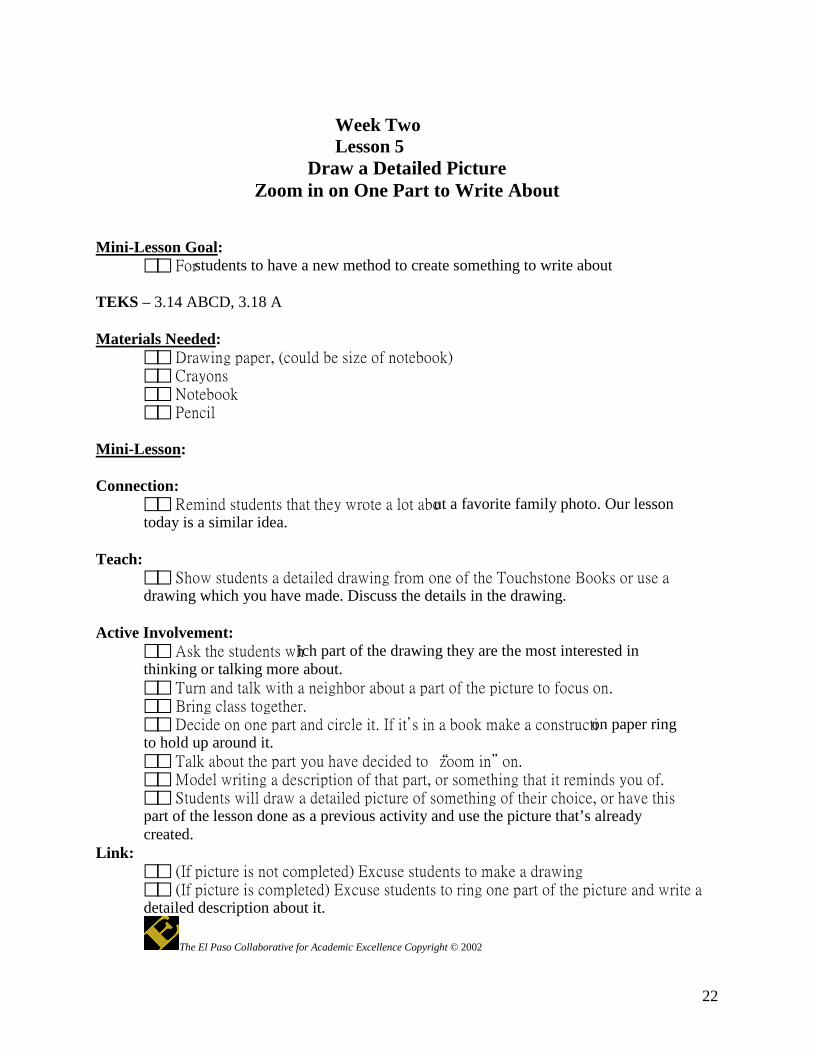
Lesson 5 Draw a Detailed Picture
Zoom in on One Part to Write About Mini-Lesson Goal:
For students to have a new method to create something to write about TEKS – 3.14 ABCD, 3.18 A
Materials Needed:
Drawing paper, (could be size of notebook) Crayons Notebook Pencil
Mini-Lesson: Connection:
Remind students that they wrote a lot about a favorite family photo. Our lesson today is a similar idea.
Teach:
Show students a detailed drawing from one of the Touchstone Books or use a drawing which you have made. Discuss the details in the drawing.
Active Involvement:
Ask the students which part of the drawing they are the most interested in thinking or talking more about. Turn and talk with a neighbor about a part of the picture to focus on. Bring class together. Decide on one part and circle it. If it’s in a book make a construction paper ring to hold up around it. Talk about the part you have decided to “zoom in” on. Model writing a description of that part, or something that it reminds you of. Students will draw a detailed picture of something of their choice, or have this part of the lesson done as a previous activity and use the picture that’s already created.
Link: (If picture is not completed) Excuse students to make a drawing (If picture is completed) Excuse students to ring one part of the picture and write a detailed description about it.
The El Paso Collaborative for Academic Excellence Copyright © 2002

23
Writing Time/Conference Time: Walk around and assist students who may be struggling to write about only the “zoom in” portion of the picture. Use the following questions to help guide the student toward more specific writing.
1. Look just at that part of the picture which is circled. What are three things you see there? 2. How can you describe in detail what you see? Remember to use all your senses when
describing. 3. What else could you say about . . .
Take note of any student who has a particularly well-written piece and ask them to share during the closing. Closing
• Invite 2-3 students who focused on zooming in on their picture to share with the others. • After each student shares her/his entry model appropriate responses.
The El Paso Collaborative for Academic Excellence Copyright © 2002
24
Week Three
Lesson 1 Characteristics of Good Writing
Mini-Lesson Goal:
For students to notice some of the qualities of good writing
TEKS – 3.19 ABCDE Materials Needed:
Touchstone Books (previously read aloud and used so far) Chart paper and markers
Mini-Lesson: Connection:
Tell students that the authors of these books can teach all of us about good writing Teach:
Reread a portion of each book, or read one book and pause to think about and discuss what makes it good
Active Involvement:
Title the chart: Characteristics of Good Writing (teacher must be familiar with these characteristics in order to lead the discussion) .Record appropriate student responses. Site and discuss examples of each
characteristic evident in more than one book. Present each characteristic one at a time. All characteristics must be fully addressed before you create your rubric. Once your rubric is created, you can keep this chart and use for reference. For example, in discussing the beginnings, refer to previously read Touchstone books. Show what authors do to engage the reader with their beginnings. Create a Good Beginnings chart by listing the beginnings discussed from the texts.
The El Paso Collaborative for Academic Excellence Copyright © 2002
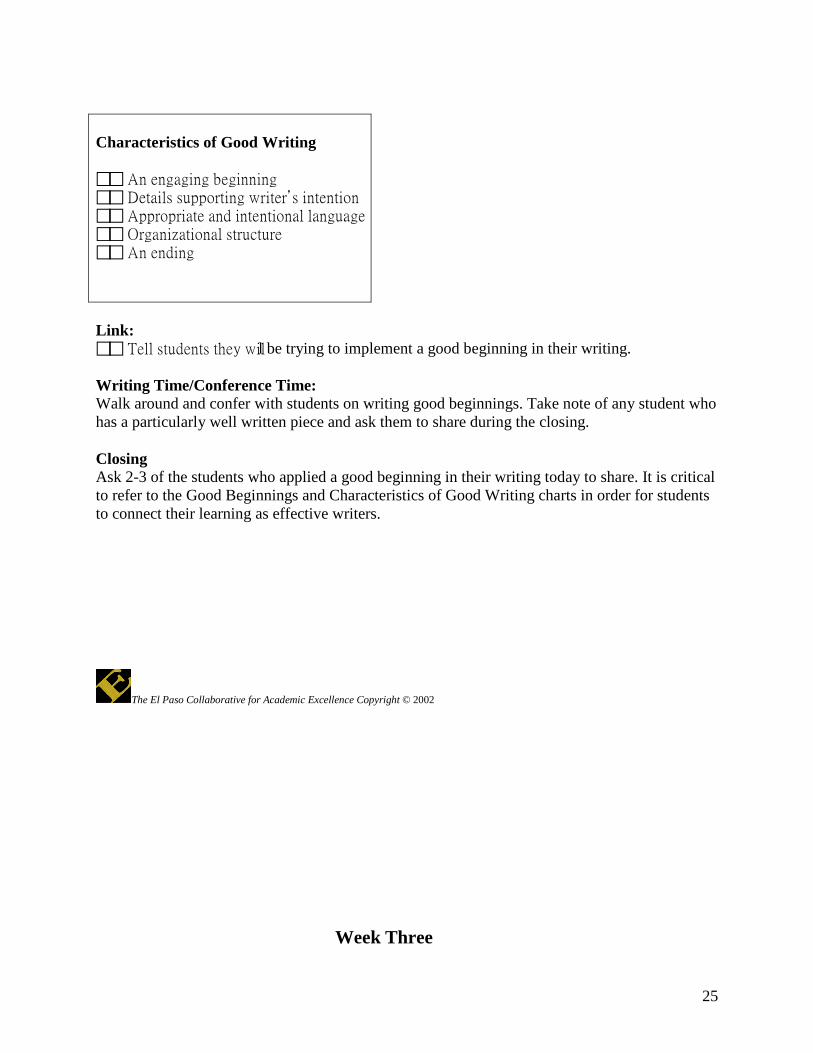
Chart should contain but is not limited to:
25
Characteristics of Good Writing An engaging beginning Details supporting writer’s intention Appropriate and intentional language Organizational structure An ending
Link: Tell students they will be trying to implement a good beginning in their writing. Writing Time/Conference Time: Walk around and confer with students on writing good beginnings. Take note of any student who has a particularly well written piece and ask them to share during the closing. Closing Ask 2-3 of the students who applied a good beginning in their writing today to share. It is critical to refer to the Good Beginnings and Characteristics of Good Writing charts in order for students to connect their learning as effective writers.
The El Paso Collaborative for Academic Excellence Copyright © 2002
Week Three
26
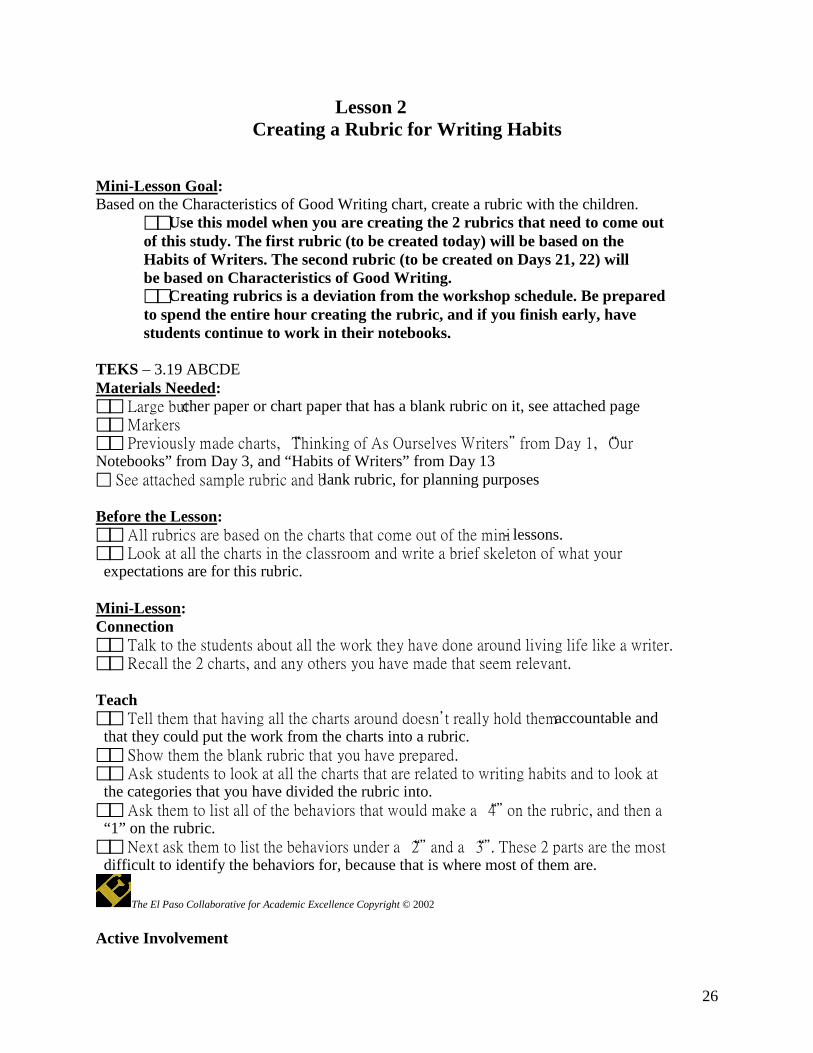
Lesson 2 Creating a Rubric for Writing Habits
Mini-Lesson Goal: Based on the Characteristics of Good Writing chart, create a rubric with the children.
Use this model when you are creating the 2 rubrics that need to come out of this study. The first rubric (to be created today) will be based on the Habits of Writers. The second rubric (to be created on Days 21, 22) will be based on Characteristics of Good Writing. Creating rubrics is a deviation from the workshop schedule. Be prepared to spend the entire hour creating the rubric, and if you finish early, have students continue to work in their notebooks.
TEKS – 3.19 ABCDE Materials Needed: Large butcher paper or chart paper that has a blank rubric on it, see attached page Markers Previously made charts, “Thinking of As Ourselves Writers” from Day 1, “Our Notebooks” from Day 3, and “Habits of Writers” from Day 13 See attached sample rubric and blank rubric, for planning purposes Before the Lesson: All rubrics are based on the charts that come out of the mini- lessons. Look at all the charts in the classroom and write a brief skeleton of what your expectations are for this rubric. Mini-Lesson: Connection Talk to the students about all the work they have done around living life like a writer. Recall the 2 charts, and any others you have made that seem relevant. Teach Tell them that having all the charts around doesn’t really hold them accountable and that they could put the work from the charts into a rubric. Show them the blank rubric that you have prepared. Ask students to look at all the charts that are related to writing habits and to look at the categories that you have divided the rubric into. Ask them to list all of the behaviors that would make a “4” on the rubric, and then a “1” on the rubric. Next ask them to list the behaviors under a “2” and a “3”. These 2 parts are the most difficult to identify the behaviors for, because that is where most of them are.
The El Paso Collaborative for Academic Excellence Copyright © 2002 Active Involvement

27
The students should all be actively involved in the creation of the rubric. Closing: After you finish making the rubric, post it somewhere accessible to the students and be sure they are aware that you will be holding them accountable for their behaviors. You may now take down any of the charts that were used to make this rubric.
Blank Rubric to use for teacher planning Prepare rubric skeleton before lesson, but allow student language to fill in the content of the rubric. Create the descriptors under each number with your class, keeping in mind that you want to instill a positive tone within the rubric. Students should believe they can grow as a writer by using this rubric; it shouldn’t be seen as strictly evaluative.
Rubric for Writing Workshop Habits 4 3 2 1
The El Paso Collaborative for Academic Excellence Copyright © 2002
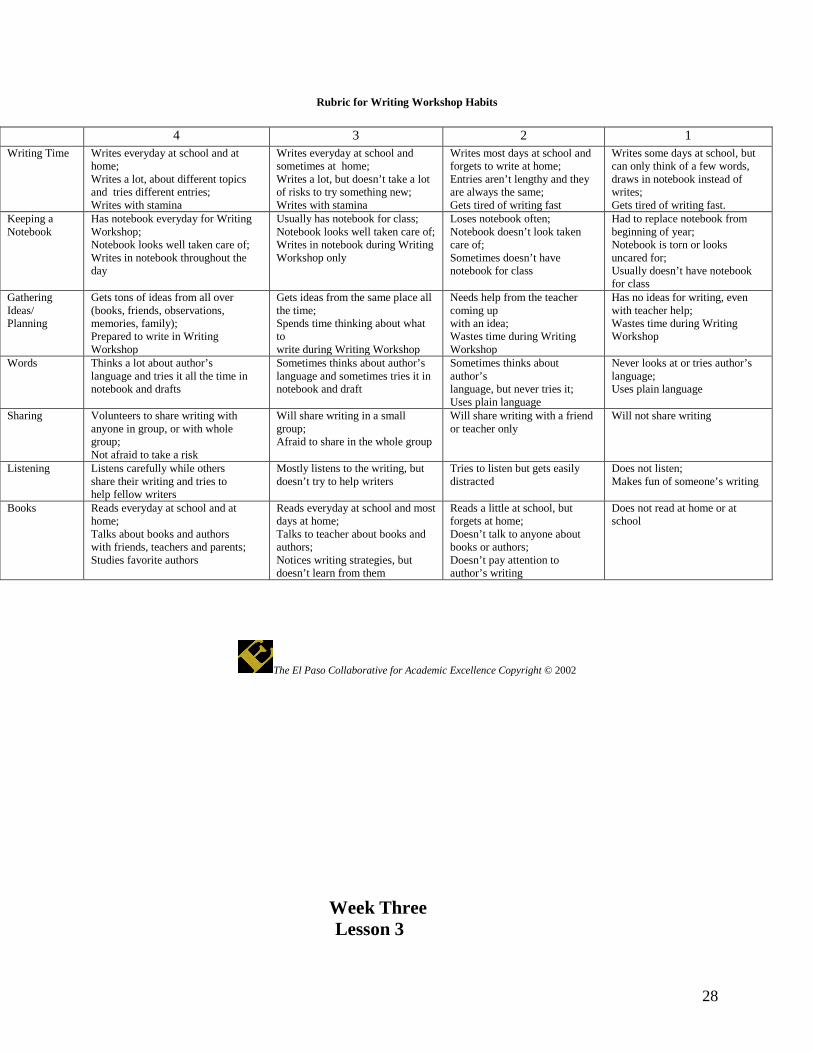
28
Rubric for Writing Workshop Habits
4 3 2 1 Writing Time Writes everyday at school and at
home; Writes a lot, about different topics and tries different entries; Writes with stamina
Writes everyday at school and sometimes at home; Writes a lot, but doesn’t take a lot of risks to try something new; Writes with stamina
Writes most days at school and forgets to write at home; Entries aren’t lengthy and they are always the same; Gets tired of writing fast
Writes some days at school, but can only think of a few words, draws in notebook instead of writes; Gets tired of writing fast.
Keeping a Notebook
Has notebook everyday for Writing Workshop; Notebook looks well taken care of; Writes in notebook throughout the day
Usually has notebook for class; Notebook looks well taken care of; Writes in notebook during Writing Workshop only
Loses notebook often; Notebook doesn’t look taken care of; Sometimes doesn’t have notebook for class
Had to replace notebook from beginning of year; Notebook is torn or looks uncared for; Usually doesn’t have notebook for class
Gathering Ideas/ Planning
Gets tons of ideas from all over (books, friends, observations, memories, family); Prepared to write in Writing Workshop
Gets ideas from the same place all the time; Spends time thinking about what to write during Writing Workshop
Needs help from the teacher coming up with an idea; Wastes time during Writing Workshop
Has no ideas for writing, even with teacher help; Wastes time during Writing Workshop
Words Thinks a lot about author’s language and tries it all the time in notebook and drafts
Sometimes thinks about author’s language and sometimes tries it in notebook and draft
Sometimes thinks about author’s language, but never tries it; Uses plain language
Never looks at or tries author’s language; Uses plain language
Sharing Volunteers to share writing with anyone in group, or with whole group; Not afraid to take a risk
Will share writing in a small group; Afraid to share in the whole group
Will share writing with a friend or teacher only
Will not share writing
Listening Listens carefully while others share their writing and tries to help fellow writers
Mostly listens to the writing, but doesn’t try to help writers
Tries to listen but gets easily distracted
Does not listen; Makes fun of someone’s writing
Books Reads everyday at school and at home; Talks about books and authors with friends, teachers and parents; Studies favorite authors
Reads everyday at school and most days at home; Talks to teacher about books and authors; Notices writing strategies, but doesn’t learn from them
Reads a little at school, but forgets at home; Doesn’t talk to anyone about books or authors; Doesn’t pay attention to author’s writing
Does not read at home or at school
The El Paso Collaborative for Academic Excellence Copyright © 2002
Week Three Lesson 3
29
Rereading your Notebook to generate writing
Mini-Lesson For students to learn the writer’s craft of rereading Notebook entries as a technique to generate writing TEKS – 3.18 ABC, 3.6 E Connection Tell students that all writers struggle with finding something to write about at different times and that some of the things you are teaching them are strategies for generating writing. Teach Model for your students as you go through your notebook, skimming the different entries you have made. Stop and pause at an entry and read it aloud. Model a think-aloud for them, explaining how this entry makes you think of something else, something you haven’t written about before. Turn to the next clean page in your notebook, or using a chart tablet or overhead so that all students can see write a few words at the top of the page that are from the old entry, and begin writing about this new idea. Active Involvement Ask the students to explain the process you just went through and to wonder why you are doing it. Lead a discussion around “lifting a line” from an entry in order to write off it and explain that this is a strategy real writers use when they can’t think of something to write about. Link As students get started on their writing today, ask them to begin the work period by rereading their notebooks and attempt to lift a line from an old entry in order to generate new writing. Tell them that you will be looking for people who try this new strategy to share their thoughts about it in the closing.
The El Paso Collaborative for Academic Excellence Copyright © 2002 Writing Time/Conference Time: Walk around and assist students who are trying out the strategy of “lifting a line.” Take note of any student who has been able to achieve this strategy with some effectiveness and ask them to
30
share during the closing. Closing
• Ask 2-3 students who “lifted a line” from an entry and wrote off of it to share their writing.
• Ask the students to talk aloud or talk through the process of how they lifted the line and wrote on from there
• After each student shares her/his entry model appropriate responses..
The El Paso Collaborative for Academic Excellence Copyright © 2002
Week Three Lesson 4
31
Studying the Writing Life and Habits of an Author
Mini-Lesson Goal: To learn about the life of one author
TEKS – 3.19 ABCDE Materials Needed:
Chart Paper Charting Pens Choose any book on writing by an author that is about how they live their life (for example, A Letter From a Phoenix Farm, by Jane Yolen; this is the book that is referenced in our lesson today) Books by that author
Note to teacher: This lesson should be repeated with a second author, on another day. The Internet is another good source for finding out information about authors. Mini-Lesson: Connection
o Remind the class that they have been working on the routines that real writers use. Today they are going to hear some ideas that one writer (Jane Yolen) uses. They will hear some things that she does to get ideas for writing. These are called “writing habits.” (You may hold up some of the books that Jane Yolen has written.)
Teach
o Read pages 13 – 29 out loud. Have students raise their hand when they hear something Jane Yolen does that they could also do. Chart these noticings on a chart titled.
The El Paso Collaborative for Academic Excellence Copyright © 2002
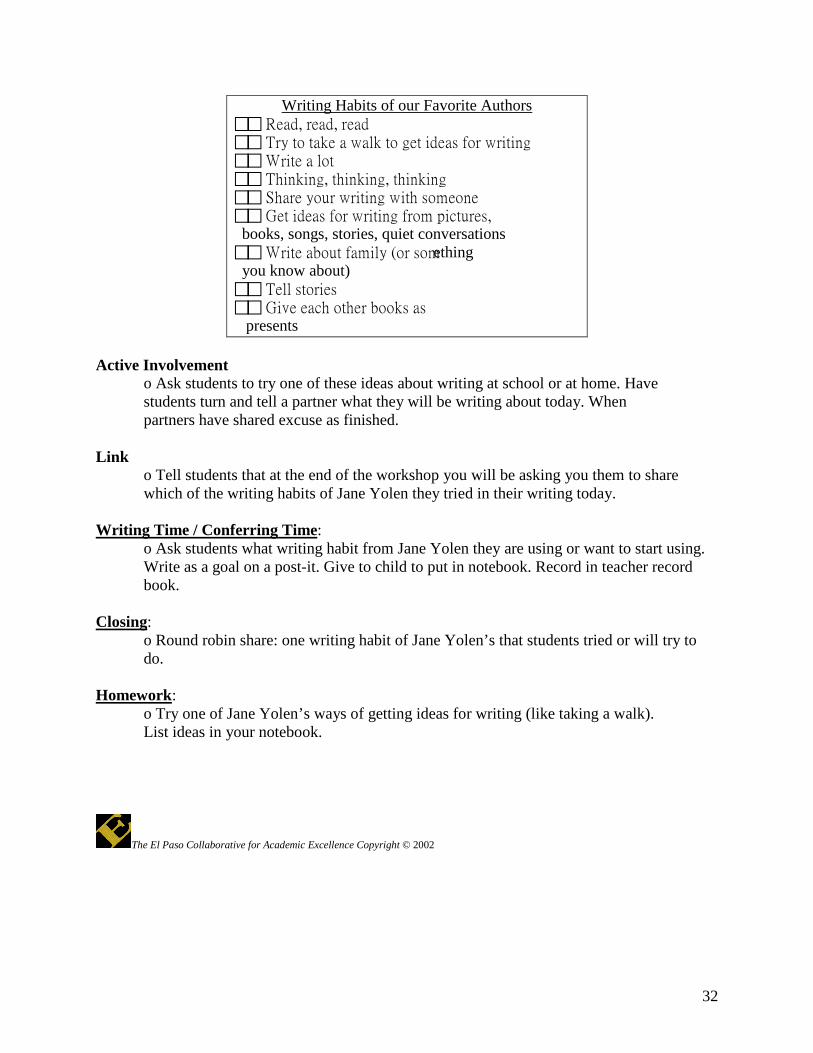
32
Writing Habits of our Favorite Authors Read, read, read Try to take a walk to get ideas for writing Write a lot Thinking, thinking, thinking Share your writing with someone Get ideas for writing from pictures, books, songs, stories, quiet conversations Write about family (or something you know about) Tell stories Give each other books as presents
Active Involvement
o Ask students to try one of these ideas about writing at school or at home. Have students turn and tell a partner what they will be writing about today. When partners have shared excuse as finished.
Link
o Tell students that at the end of the workshop you will be asking you them to share which of the writing habits of Jane Yolen they tried in their writing today.
Writing Time / Conferring Time:
o Ask students what writing habit from Jane Yolen they are using or want to start using. Write as a goal on a post-it. Give to child to put in notebook. Record in teacher record book.
Closing:
o Round robin share: one writing habit of Jane Yolen’s that students tried or will try to do.
Homework:
o Try one of Jane Yolen’s ways of getting ideas for writing (like taking a walk). List ideas in your notebook.
The El Paso Collaborative for Academic Excellence Copyright © 2002
33
Week Three Lesson 5
The Writing Process (Introduction of Work In Progress Folder)
Mini-Lesson: For students to begin to conceptualize the steps in the writing process. TEKS – 3.18 ABCDEF Connection:
o Explain to students that they have been studying the life of a writer and that writers take their notebook ideas and bring them through a “writing process”.
Teach:
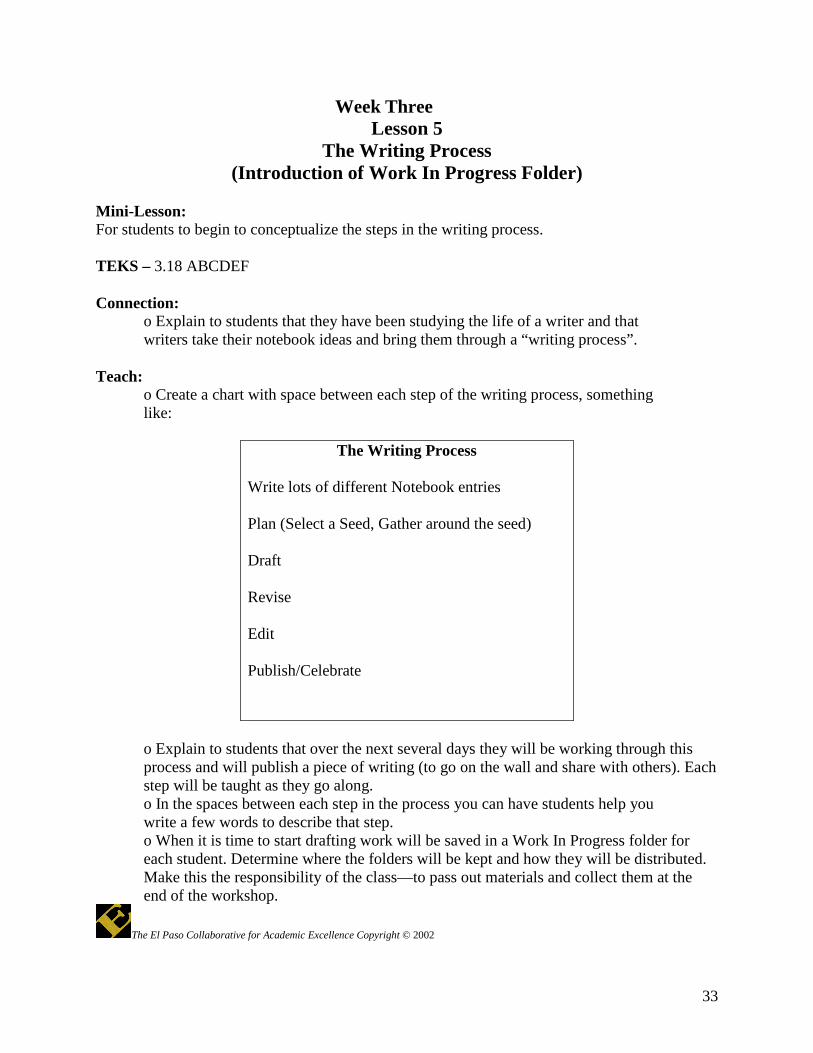
o Create a chart with space between each step of the writing process, something like:
The Writing Process Write lots of different Notebook entries Plan (Select a Seed, Gather around the seed) Draft Revise Edit Publish/Celebrate
o Explain to students that over the next several days they will be working through this process and will publish a piece of writing (to go on the wall and share with others). Each step will be taught as they go along. o In the spaces between each step in the process you can have students help you write a few words to describe that step. o When it is time to start drafting work will be saved in a Work In Progress folder for each student. Determine where the folders will be kept and how they will be distributed. Make this the responsibility of the class—to pass out materials and collect them at the end of the workshop.
The El Paso Collaborative for Academic Excellence Copyright © 2002
34
Active Involvement:
o Allow students to select their folder (you could have several different colors available. Many teachers use simple two pocket folders).
Link: Excuse to write a new notebook entry, or reread and add on to an old entry. Writing Time/Conference Time: Walk around and confer with students about their writing. Closing Gather students together and ask for volunteers to recall the procedures for using the Work in Progress Folders.
The El Paso Collaborative for Academic Excellence Copyright © 2002
35
Week Four Lesson 1
Introducing the Seed Idea Mini-Lesson Goal: Introducing the notion of what a seed idea is and how it develops into a published piece.
In Living Between the Lines, Lucy Calkins writes, “If children reread their notebooks and star their favorite entries, underline key words, draw arrows between related entries, write marginal notes alongside entries, and share all of this with each other and with their teacher, in time this process of reflecting becomes a natural part of their writing process.”
Over the next 4 days, your students will be reflecting on their notebook entries
and choosing one seed idea, one idea, not necessarily one particular entry, that they want to develop further. Think of it as if the idea is the seed and the finished project is the tree; you will need to gather around, or nurture, the seed (write a lot of about it, think a lot about it) in order for it to grow into a tree.
An example may be that a student’s seed is a trip to Mexico. The student will be gathering around that seed in her notebook for a few days. That means she may: recall a favorite memory of Mexico, write a funny family story about her Mexican grandmother, write a reflection on the differences between her U.S. home and her Mexican home, write an observation she made of her family’s house in Mexico, etc. When it is time to draft, she will use bits and pieces of these entries—not recopy one of them. The mini- lessons over the next few days will help walk your students through this process.
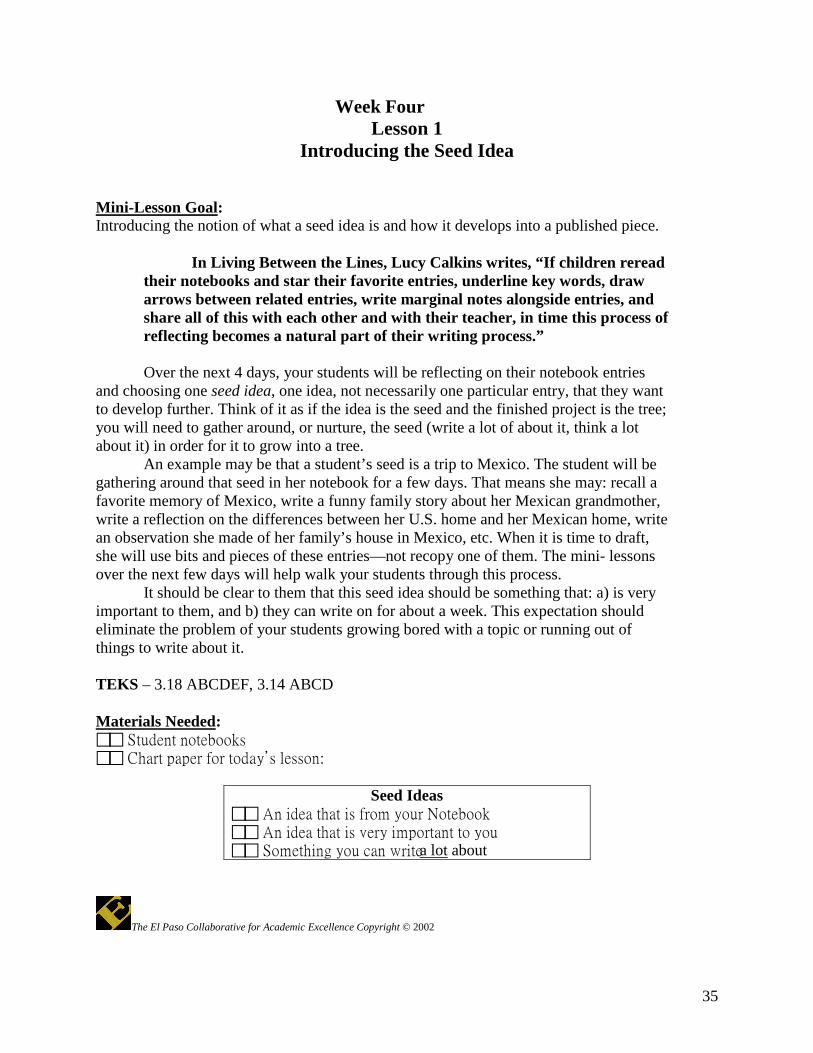
It should be clear to them that this seed idea should be something that: a) is very important to them, and b) they can write on for about a week. This expectation should eliminate the problem of your students growing bored with a topic or running out of things to write about it. TEKS – 3.18 ABCDEF, 3.14 ABCD Materials Needed: Student notebooks Chart paper for today’s lesson:
Seed Ideas An idea that is from your Notebook An idea that is very important to you Something you can write a lot about
The El Paso Collaborative for Academic Excellence Copyright © 2002
36
Before the Lesson: The students have written several entries in their notebooks. As their writing teacher, you should have reread your own notebook and chosen a seed idea that you want to develop in order to model this process for your students. Mini-Lesson: Connection Recall that yesterday you talked about the steps you will take in order to publish your first piece and one of those steps is “choosing a seed idea”. Teach Look at the Seed Idea chart and explain what a seed idea is. Model for your students a couple of seeds that you are considering for a possible draft from your notebook and explain your reasoning for considering each one. The teacher should model by reflecting on the different seeds to demonstrate to the students how she may have more information and/or interest in one idea over the others. Active Involvement Ask the students to reread their notebook entries and choose 2-3 seed ideas on their own. These ideas will be shared with a partner. Students will then work in pairs to discuss their 2-3 seed ideas. Encourage them to ask questions that will further support the extension and selection of a seed idea . This will help the children determine if they know enough about their idea to extend upon one. Link For the following 2-3 days allow the students to extend and develop further their selected seed idea. Writing Time/Conference Time: During conferences, ask students to talk about their choice of seed idea and how they plan to develop it further. Ask the students, “How did your partner help you?” (This will continue to build an awareness in students of how author’s learn from each
other) Closing: Process Share: Ask 2 students (partners) to share their process of rereading, discussing and the feedback they provided each other.
The El Paso Collaborative for Academic Excellence Copyright © 2002
37
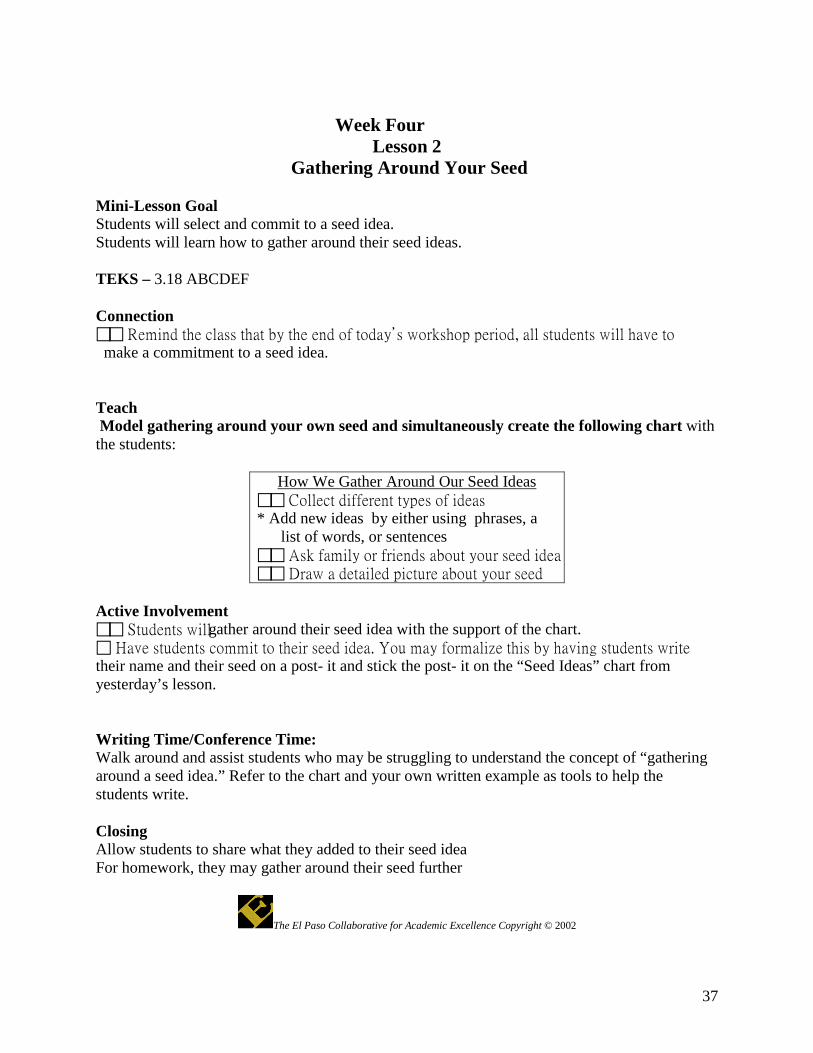
Week Four
Lesson 2 Gathering Around Your Seed
Mini-Lesson Goal Students will select and commit to a seed idea. Students will learn how to gather around their seed ideas. TEKS – 3.18 ABCDEF Connection Remind the class that by the end of today’s workshop period, all students will have to make a commitment to a seed idea. Teach Model gathering around your own seed and simultaneously create the following chart with the students:
How We Gather Around Our Seed Ideas Collect different types of ideas * Add new ideas by either using phrases, a list of words, or sentences Ask family or friends about your seed idea Draw a detailed picture about your seed
Active Involvement Students will gather around their seed idea with the support of the chart. Have students commit to their seed idea. You may formalize this by having students write their name and their seed on a post- it and stick the post- it on the “Seed Ideas” chart from yesterday’s lesson. Writing Time/Conference Time: Walk around and assist students who may be struggling to understand the concept of “gathering around a seed idea.” Refer to the chart and your own written example as tools to help the students write. Closing Allow students to share what they added to their seed idea For homework, they may gather around their seed further
The El Paso Collaborative for Academic Excellence Copyright © 2002
38
Week Four
Lesson 3 Gathering Around Seed Ideas
Mini-Lesson: For students continue to learn about extending and developing their writing seed ideas by gathering around. TEKS – 3.18 ABC, 3.20 B, 3.14 ABCD Connection Revisit yesterday’s chart on gathering seeds. Teach Add any different types of entries to the chart that may seem necessary. Tell the class that they will have a long period of time to work today, as the mini lesson and closing will be short. Active Involvement Ask anyone who did some gathering last night to share their process, not the entry. Link Make students aware that all their gathering should be completed today. Students should have at least 4-5 entries (old and new) to work from by tomorrow. Writing Time/Conference Time: Walk around and assist students who may be struggling to understand the concept of “gathering around a seed idea.” Refer to the chart and your own written example as tools to help the students write. Closing Process Share: Ask for volunteers to share their process, not what they wrote, of gathering around the seed idea.
The El Paso Collaborative for Academic Excellence Copyright © 2002
39
Week Four Lesson 4
Flagging your Notebook Entries *Notes: Today’s lesson will not follow Writing Workshop format. You may want some sort of marker (like peel arrows or mini post-its) for today’s lesson, as students are asked to indicate several different entries. Simply ‘dog-earing’ the pages will work also. You may feel the need to give students some time in the beginning of the workshop to finish their gathering around the seed idea they’ve selected. TEKS – 3.19 AC Mini-Lesson: Connection Indicate to the class that by now, everyone has chosen a seed idea and gathered around that seed. Teach Today they will be rereading their notebooks and looking for parts of different entries that will help them write their drafts. Walk the class through your notebook, showing each entry you “flagged” and explain why. Perhaps you liked a particular line from one entry, perhaps a paragraph from another. The flagged sections do not need to be from entries they wrote when gathering, but it will most likely happen that way. Reiterate to the class that they are not supposed to copy an entry for their draft, but develop a draft based on several entries. Active Involvement Choose whatever level of structure you want to be provide for your students for this lesson. You may want them working as a whole group, walking them through each step, working in small groups, with partners, or on their own. Spend the workshop flagging entries. Do not have students begin their draft today. You want to be sure that everyone starts together, so you can model the process of moving from notebooks to projects. If students finish flagging early, have them work in their notebooks on anything they’d like.
The El Paso Collaborative for Academic Excellence Copyright © 2002

40
Catch Up Day
This is a day to finish up any loose ends (before students start creating a rubric, then drafting towards publication). Negotiate the Publishing Date and commit to a date in about ten days. Post the date in your classroom. Plan your lesson here: Mini-Lesson Goal: Materials Needed: Mini-Lesson:
Connection: Teach:
Active Involvement:
Link: Writing Time/Conferring: Closing: Homework:
The El Paso Collaborative for Academic Excellence Copyright © 2002
41
Week Five Lessons 1 and 2
Creating a Rubric for Characteristics of Good Writing Mini-Lesson Goal: Based on the Characteristics of Good Writing attribute chart, create a rubric.
Creating rubrics is a deviation from the workshop schedule. Be prepared to spend 2 workshop periods creating this rubric. Divide up the time in the most effective way for your class’ needs.
TEKS – 3.19 ABCDE Materials Needed: Large butcher paper or chart paper that has a blank rubric on it, see attached page Markers Previously made chart, “Characteristics of Good Writing” Attached sample rubric and blank rubric, for planning purposes Your Touchstone and Mentor Books for this unit Before the Lesson: All rubrics are based on the charts that come out of the mini- lessons. Refer to all the charts developed from the Characteristics of Good Writing chart. These should guide the development of this rubric. Mini-Lesson: Connection Recall the rubric you and the class made on Writing Workshop Habits. Talk about how it is beneficial to judge yourself according to a rubric and explain that today you’ll be making one for the content of their writing. Teach Tell them that having all the charts around doesn’t really hold them accountable and that they could put the work from the charts into a rubric. Show them the large blank rubric that you have prepared. Ask students to look at all the charts that are related to characteristics of good writing and to look at the categories that you have divided the rubric into. Ask them to list all of the characteristics that would make a “4” on the rubric, and then a “1” on the rubric.
When listing the “4” characteristics, it is effective to talk to the students about the mentor books you have studied and list them appropriately. For example, if your class really identified with the beginning of Owl Moon, by Jane Yolen, then you should write Owl Moon next to the “4” in the “beginnings” section of the rubric.
Next ask them to list the characteristics under a “2” and a “3”.
The El Paso Collaborative for Academic Excellence Copyright © 2002
42
Active Involvement The students should all be actively involved in the creation of the rubric. Closing: After you finish making the rubric, post it somewhere accessible to the students and be sure they are aware that the rubric is a support to guide their writing. Talk to them about the draft they will be starting soon and how they will use this rubric to write their draft well. You may now take down any of the charts that were used to make this rubric. Follow-up: You may want to type up the rubric you just created so the students can have access to it right at their seats as they draft, revise and edit.
The El Paso Collaborative for Academic Excellence Copyright © 2002
43
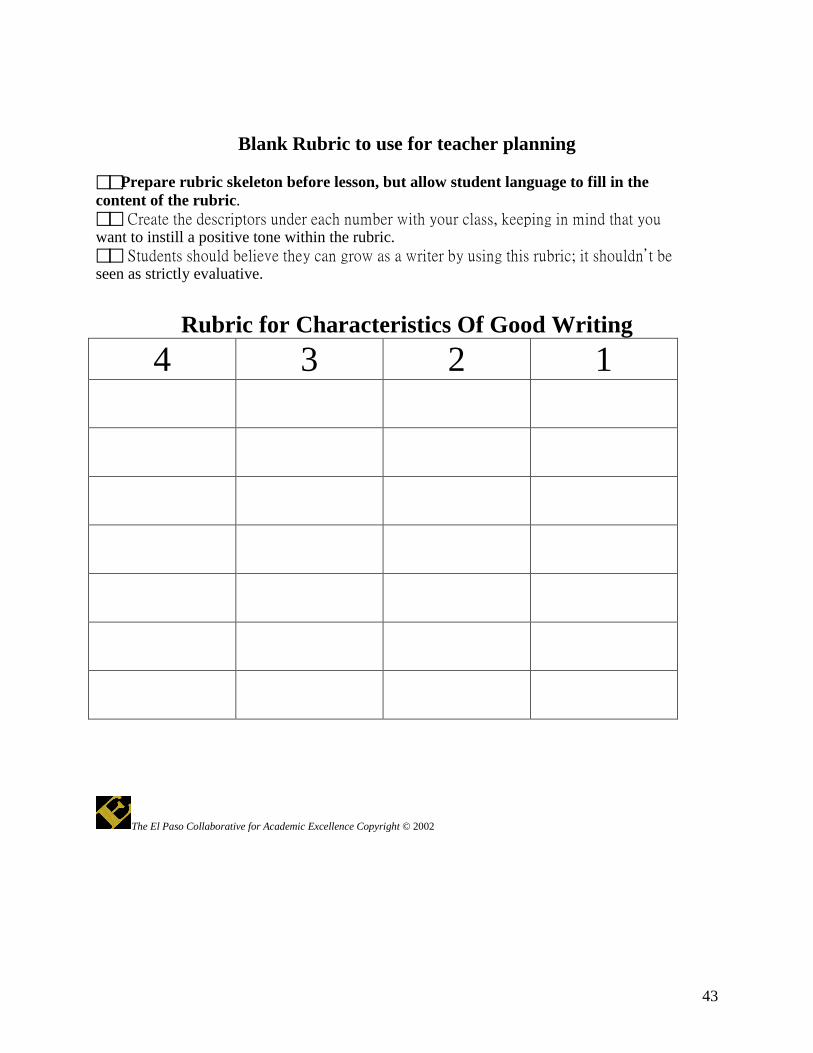
Blank Rubric to use for teacher planning Prepare rubric skeleton before lesson, but allow student language to fill in the content of the rubric. Create the descriptors under each number with your class, keeping in mind that you want to instill a positive tone within the rubric. Students should believe they can grow as a writer by using this rubric; it shouldn’t be seen as strictly evaluative.
Rubric for Characteristics Of Good Writing 4 3 2 1
The El Paso Collaborative for Academic Excellence Copyright © 2002
44
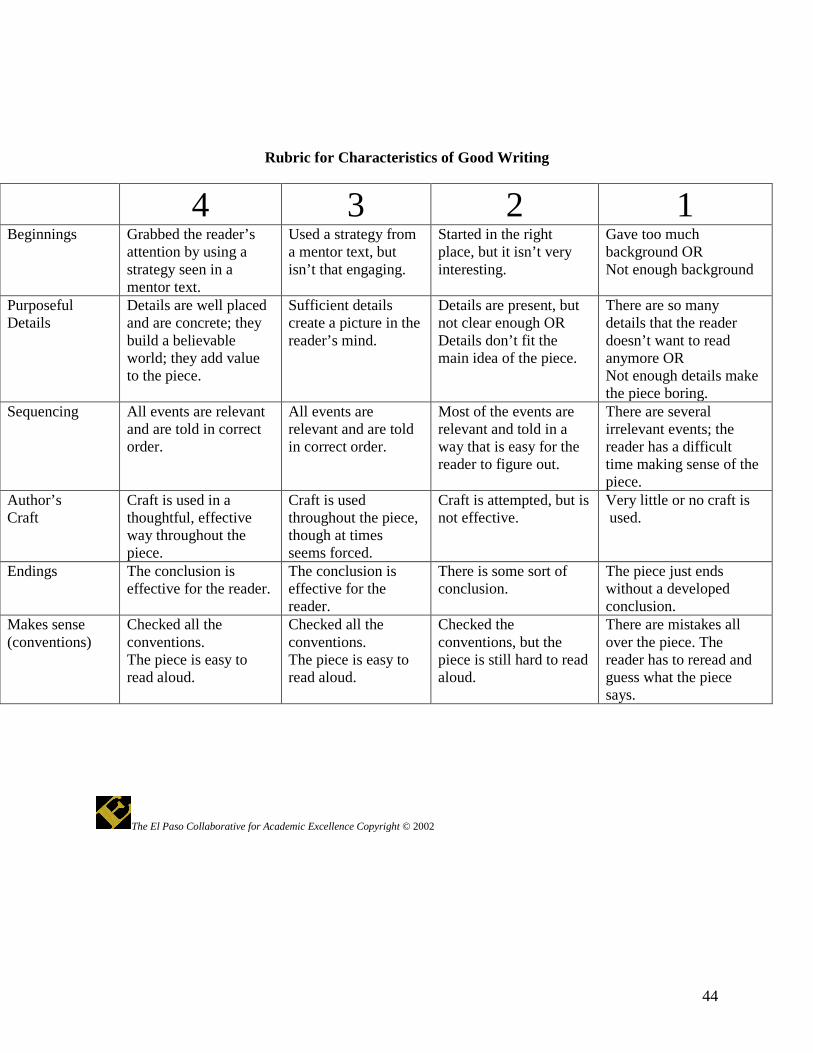
Rubric for Characteristics of Good Writing
4 3 2 1 Beginnings Grabbed the reader’s
attention by using a strategy seen in a mentor text.
Used a strategy from a mentor text, but isn’t that engaging.
Started in the right place, but it isn’t very interesting.
Gave too much background OR Not enough background
Purposeful Details
Details are well placed and are concrete; they build a believable world; they add value to the piece.
Sufficient details create a picture in the reader’s mind.
Details are present, but not clear enough OR Details don’t fit the main idea of the piece.
There are so many details that the reader doesn’t want to read anymore OR Not enough details make the piece boring.
Sequencing All events are relevant and are told in correct order.
All events are relevant and are told in correct order.
Most of the events are relevant and told in a way that is easy for the reader to figure out.
There are several irrelevant events; the reader has a difficult time making sense of the piece.
Author’s Craft
Craft is used in a thoughtful, effective way throughout the piece.
Craft is used throughout the piece, though at times seems forced.
Craft is attempted, but is not effective.
Very little or no craft is used.
Endings The conclusion is effective for the reader.
The conclusion is effective for the reader.
There is some sort of conclusion.
The piece just ends without a developed conclusion.
Makes sense (conventions)
Checked all the conventions. The piece is easy to read aloud.
Checked all the conventions. The piece is easy to read aloud.
Checked the conventions, but the piece is still hard to read aloud.
There are mistakes all over the piece. The reader has to reread and guess what the piece says.
The El Paso Collaborative for Academic Excellence Copyright © 2002
45
Week Five Lesson 3
Writing a Draft
Mini-Lesson Goal:
o Students will understand the process and expectations for creating a written draft. TEKS – 3.14 ABCD, 3.18 A Materials Needed:
o Drafting paper for students o Chart paper and pens o Overhead for modeling drafting o Touchstone Books o Characteristics of Good Writing Rubric
Mini-Lesson: Connection:
o Explain to students that they are now aware of what we need to try to do to write well—point to Characteristics of Good Writing Rubric. Review the highest level briefly. Remind the students too that they have been working on selecting a seed idea, gathering around that seed idea to expand their ideas and thinking and so, now they are ready to begin writing a draft piece for publication.
Teach:
o Model for students how to write a draft using your own draft. It can be done on an overhead, a chart or on your own drafting pad. Show students how you collected ideas and seeds from your Notebook entries. o (One idea: Purposely leave something out that you could add in a revision, or have a better craft strategy ready to use in a revision, or put in information that should be left out—so that when you look at the rubric with your writing you can model how it gives you ideas for making the writing better.)
Active Involvement: o Students could help you with good word choices and give you ideas as you go along. o As you go along model skipping lines as you write and only writing on one side of the paper. Explain that to students—that skipping lines will give you room to go back and make changes or cut and reorganize your paper later. o After modeling your draft, discuss with students what drafting entails (getting ideas down, don’t stop to worry about spelling, reread your draft as you go along—and just keep going trying to do the best writing job you can). o Create a Drafting Chart with student input
The El Paso Collaborative for Academic Excellence Copyright © 2002
46
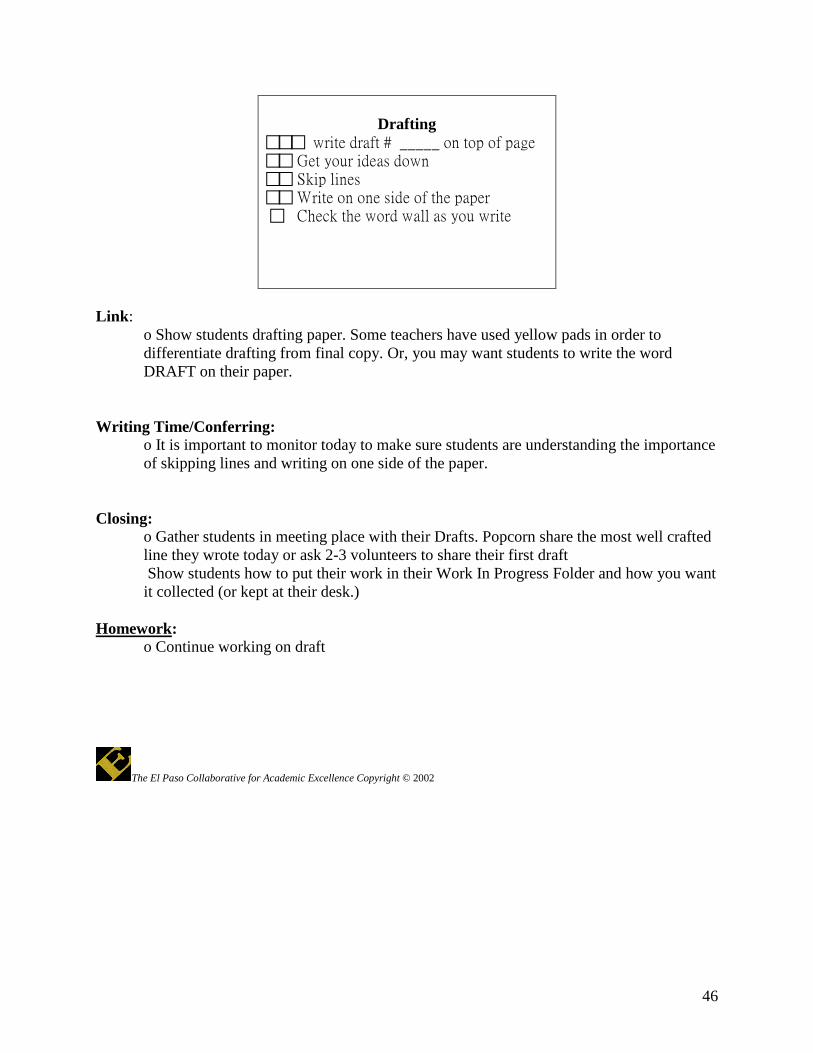
Drafting
write draft # _____ on top of page Get your ideas down Skip lines Write on one side of the paper Check the word wall as you write
Link:
o Show students drafting paper. Some teachers have used yellow pads in order to differentiate drafting from final copy. Or, you may want students to write the word DRAFT on their paper.
Writing Time/Conferring:
o It is important to monitor today to make sure students are understanding the importance of skipping lines and writing on one side of the paper.
Closing:
o Gather students in meeting place with their Drafts. Popcorn share the most well crafted line they wrote today or ask 2-3 volunteers to share their first draft Show students how to put their work in their Work In Progress Folder and how you want it collected (or kept at their desk.)
Homework:
o Continue working on draft
The El Paso Collaborative for Academic Excellence Copyright © 2002
47
Week Five Lesson 4
Status of the Class And
Partner Response Groups
Mini-Lesson Goal: Introduce the Writing Process Chart as a means of checking the status of the class, or what each student is writing on a particular day.
• Define procedures for students to participate in small groups for partner responses and revision to their writing; to do so independently of the teacher.
TEKS – 3.19 B Materials Needed: o Writing Process Steps written out on a chart, pocket chart or chalkboard chart o Students’ names printed on clothespins, labels or magnets
• Chart Tablet for recording Partner Response Group Procedures Mini Lesson: Connection: o Review the writing process steps with the class from Week 3, Lesson 5. Connect what has been covered in previous lessons that are related to the writing process steps.
• Explain to students that they have looked at their writing on their own and thought about some changes. Now it is time to work with a partner to help improve their writing.
Teach/ Active Involvement:
o Ask the students where they are in terms of the writing process. Each student will place his/her name in the respective step on the chart.
• Remind students that authors share their work with friends or other writers to get feedback and get ideas just as we do. Share with students a quote from a book such as Jane Yolen’s A Letter from Phoenix Farm (pp. 22-23) where it says, “After I write a story or a poem or a picture book or a novel or a song I give it to my husband to read because he is my very best first reader.”
The El Paso Collaborative for Academic Excellence Copyright © 2002
48
• Explain that after students have looked at their drafts with the Characteristics of Good Writing rubric in mind, it is time for them to share their writing with a partner (or small group of no more that four) to get feedback about what was good and for any questions the partner may have.
• Begin to record the procedures for partner response groups on the chart tablet. Some suggested procedures might include those on the sample chart below.
• Have students pick a partner to read their drafts with. Assign places in the room where they can work, using quiet/whisper voices.
Partner Response Group Procedures Go to the designated area in the classroom Sit crisscross, applesauce on the floor Decide who goes first and read story quietly to partner/group Put pencil/paper down and actively listen to the reader Give a compliment on the writing Ask questions or make comments such as: I would like to know more about I’m wondering . . .? Is there more you could say about . . .? What do you want to do next with your writing?
Link:
o Explain to students that status of the class is a way to keep track of your progress as a writer
Note: Be vigilant of the progression by the student. A student may get stuck in a specific step, which may indicate that a conference is needed.
Closing: Bring students back together on the carpet and talk about the partner response groups. Review the chart procedures. Ask students how it felt to read their writing and get feedback from their peers. Ask the students how they listened to each other and how they think the feedback will help them become better writers.
The El Paso Collaborative for Academic Excellence Copyright © 2002
Week Five Lessons 5
49
Revision With a Partner Mini-Lesson: For students to respond appropriately and respectfully to other student writers so that revision is meaningful TEKS – 3.18 C, 3.19 CE Connection:
Explain to students that there are two final steps in the Writing Process, revision and editing. Explain the difference between the two. Revision is reviewing the writing to make the meaning or message better. Editing is checking things like spelling, correct sentences and grammar.
Teach/Active Involvement:
Remind students that when they reread their own writing or when they get feedback from a partner in a partner response group, the purpose is to make any changes to the writing that will make it more clear, more precise or more descriptive. Create a chart entitled, “What We Do When We Revise” with student input Record responses on the chart such as: We reread our writing We think about what we want to say in the writing We try to make the writing more clear We add or take out information We move sentences around We use more descriptive language
Remind students that they can use this chart as a tool to help themselves become better writers. Link:
• Explain to students that you will be sitting in with Partner Response Groups during conferring today. When they are finished with their work together they are to return to their drafts for revision.
• Remind students to update the stage of the Writing Process they are working in on the Status of the Class Chart.
Note: Students could revise using blue pencils (or colored pencils) to have evidence that they have made changes to their writing. Writing/Conferring Time: Students should be working individually on their drafts. Some students may be meeting in Partner Response Groups for feedback. Closing: Bring students back together. Invite volunteer students to share one way in which they revised their writing today to make it better.
The El Paso Collaborative for Academic Excellence Copyright © 2002 Week Six
Lesson 1 Editing
50
Mini Lesson Goal: For students to become familiar with what it means to edit their draft piece of writing. TEKS – 3.18 D, 3.19 D Materials Needed:
Dictionaries, personal word books, writing handbooks, grammar handbooks Word Wall Red pencils (or other color) Editor’s Marks chart
Mini-Lesson: Connect Remind students that all published work needs to be edited. By third grade, the conventions in published pieces should be close to perfect. This lesson will probably carry over to a second day. Teach Create the Self Editing Checklist with the class and emphasize that during the editing steps you are now focusing on the conventions of writing. Review what some of those conventions of writing are at third grade. (See TEKS as a reference) Model the editing process with a student and his/her draft on the overhead, emphasizing that conventions impact the meaning of the text. Explain that today they will be editing their own draft, using skills they have learned and the self editing checklist. When they think they have all of the editing corrections made, they may ask for an editing conference with you. Active Involvement Students will edit their writing using the Self Editing Checklist and the Editors Marks Below is an example of a possible chart:
Self- Editing Checklist Correct Spelling Ending punctuation Capitals Quotation marks Paragraphs
Note: Students may use a different color pencil to differentiate between revision and editing.
The El Paso Collaborative for Academic Excellence Copyright © 2002 Writing Time/Conferring:
It is important to monitor today to make sure students understand what editing is and how to use the self-editing checklist. You’ll want to refer students to various other resources for editing such as dictionaries, writing handbooks with grammar rules, classroom charts with conventions usage rules, a Word Wall, etc.
51
Closing:
o Gather students in meeting place with their Drafts. Process share the various editing changes students made and how they made them.
The El Paso Collaborative for Academic Excellence Copyright © 2002
Week Six Lessons 2 and 3
Final Draft

52
Mini-Lesson Goal: For students to make a final copy of their work TEKS – 3.18 BCDEF, 3.19 ACDE Connection:
o Explain to students that it’s time to make a clean, final copy of their work. Teach:
o Have students give their thoughts on what a final copy should look like. Chart ideas such as: o Include Final Draft on a sticky note at the top of the page
o Neat penmanship o Margins o Words are spelled correctly, like a dictionary spelling o Do not skip lines o Do not write on the back of the page
Active Involvement: o Students select paper and begin to write/copy their final draft. Some students may still
be completing the editing step on their draft writing. Link:
o Remind students that this work will be available for others to read and that they will have a feeling of accomplishment while sharing their final product.
*Note: It may take two-three days for all students to complete the writing of their final draft that meets the Good Writing Characteristics rubric standards.
The El Paso Collaborative for Academic Excellence Copyright © 2002
Week Six Lesson 4
Celebration And Author’s Chair
53
Note: Having a celebration date posted in advance will increase the interest and
motivation of the writing workshop!
TEKS – 3.19 BCDE Note to teacher: At this point in time, students will be celebrating a final draft or published piece. The celebration can be as simple as students sharing their work with each other in Author’s Chair or as complex as inviting the parents to an Author’s Night. The following is just one example of a simple celebration. Connection:
Explain to students that today they will be sharing their writing with students in the class to celebrate the completion of their writing piece. This is a time to introduce Author’s Chair and the procedures for it.
Materials: • Designated Author’s Chair • Chart Tablet and Markers
Teach:
Talk to students about being good listeners and offering a specific compliment about what they liked upon the completion of the reading. Ask students for their ideas on the procedures for having an Author’s Chair. Record their responses on a chart paper. Some suggestions might be: Use Good Listening Habits Read my written piece in a loud, confident voice Give a positive comment or compliment to the reader Give a positive class response such as applause, high five, thumbs up
Active Involvement: Students take turns reading their writing, and offering a compliment to the author seated in the Author’s Chair Close with a Process Share on the use of writing craft techniques that the student authors used (beginnings, endings, powerful lines or words, etc.)
The El Paso Collaborative for Academic Excellence Copyright © 2002