lesson assignment lesson 1 text assignment lesson … · identify the purpose and the procedures...
TRANSCRIPT
LESSON ASSIGNMENT LESSON 1 Hygiene and Care of the Patient. TEXT ASSIGNMENT Paragraph 1-1 through 1-18. LESSON OBJECTIVES When you have completed this lesson, you should be
able to: 1-1. Identify the composition and importance of hygiene and care. 1-2. Given a patient's condition, identify the procedure for administering the appropriate therapeutic bath. 1-3. Identify the procedures for administering a bed bath/partial bath. 1-4. Identify the procedures for administering a towel bath. 1-5. Identify the procedures for assisting a patient to take a tub bath. 1-6. Identify the procedures for administering a tepid sponge bath. 1-7. Identify the purpose and the procedures used to care for the hands and feet. 1-8. Identify the purpose and the procedure used to care for the patient's eyes, ears, and nose. 1-9. Identify the procedures for performing catheter care with a patient with an indwelling catheter. 1-10. Identify the procedures for administering a backrub to a patient. 1-11. Identify the purposes and the procedures for administering oral hygiene.
MD0556 1-1

1-12. Identify the purpose and the procedure for administering routine mouth care. 1-13. Identify the procedures for denture care. 1-14. Identify the procedures for administering special mouth care. 1-15. Identify the procedures for a patient with hair and the necessary equipment, provide care of
the patient's hair. 1-16. Identify the proper procedures for administering urinal and bed pan assistance. SUGGESTION Work the lesson exercises at the end of this lesson before beginning the next lesson. These exercises will help you accomplish the lesson objectives.
MD0556 1-2

LESSON 1
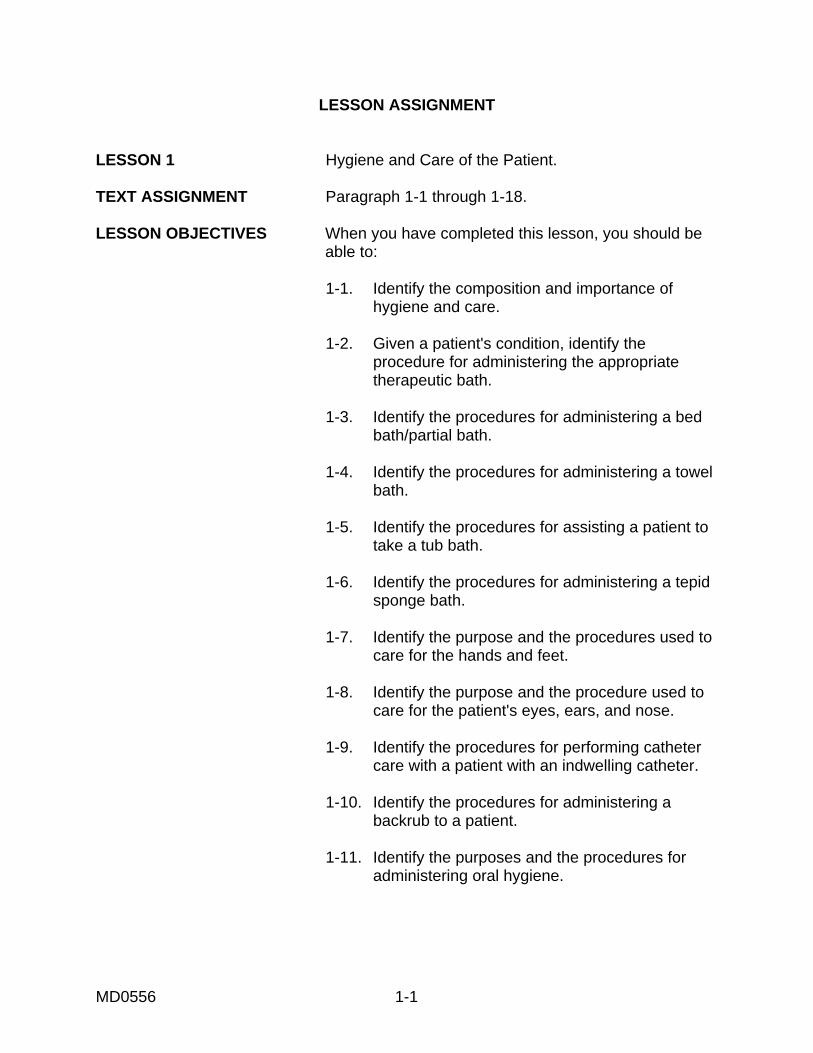
HYGIENE AND CARE OF THE PATIENT 1-1. OVERVIEW a. Administering Hygiene. Hygiene includes care of the skin, along with the hair, hands, feet, eyes, ears, nose, mouth, back, and perineum. This includes the bath, components of the bath, bed making, and assisting the patient in the use of the bed pan, urinal, and bedside commode. b. Importance of Hygiene and Care. The bath stimulates circulation in the skin and underlying tissues; it cleans and refreshes, promoting health and comfort; it provides some exercise for the patient; and similar to the opportunities available in making the occupied patient's bed, it provides excellent opportunities for observation of the patient's physical and emotional condition and for patient-centered conversation to promote good interpersonal relationships. 1-2. ADMINISTERING A SPECIAL (THERAPEUTIC) BATH a. Sitz Bath. The sitz bath cleanses and aids in reducing inflammation of the perineal and anal areas. It is for patients who have undergone rectal or vaginal surgery or childbirth. The sitz bath also relieves discomfort from hemorrhoids or fissures. Two kinds of sitz baths are shown in figures 1-1 and figure 1-2. Water temperature should be maintained at 110ºF (about 43ºC). The sitz bath should last from 20 to 30 minutes.
Figure 1-1. Built-in sitz bath.
MD0556 1-3
Figure 1-2. Disposable sitz bath b. Cool Water Tub Bath. The cool water bath is given to relieve tension or lower the body temperature. Care must be taken to prevent the patient from chilling. The water temperature is tepid, not cold (98.6ºF (37ºC]). c. Warm Water Tub Bath. The warm water bath is primarily to reduce muscle tension. Recommended water temperature is 109.4ºF (43ºC). d. Hot Water Tub Bath. The hot water tub bath is given to assist in relieving muscle soreness and muscle spasm. The procedure is not recommended for children. For adults, the water temperature should be 113º to 115ºF (45º to 46ºC). 1-3. ADMINISTERING A BED BATH/PARTIAL BATH a. General. When a patient is either confined to bed, must conserve energy, or is helpless, the medical specialist may give the entire bath; however, the patient should do as much for himself as his conditions permit. All necessary equipment is provided and the areas the patient cannot reach are bathed for him. Each bed patient should have his back bathed and rubbed for him. b. Important Points. (1) Sometimes a complete bath is too exhausting for a patient. Therefore, a partial bath may be given to include the face, hands, axilla (region under the arms), genitalia, back, and buttocks. (2) The patient's position during the bath is determined by his physical conditions and his movement abilities. Unless contraindicated (undesirable or prohibited), the bed is level and movement and position change is encouraged. The specialist is encouraged to use good body mechanics and to request assistance when necessary when moving and positioning a patient.
MD0556 1-4

(3) While washing individual areas, the skin should be checked thoroughly for breakdown. During washing, range of motion should be done. (4) When supporting binders and leg bandages are used, the specialist finds out in advance if they can be removed for skin cleansing, and if they are to be reapplied. The patient receiving a bed bath will often have tubing attachments that must be handled so that they continue to function as he is moved and turned. All tubing must be carefully checked before and immediately after position changes. (5) Avoid chilling and unnecessarily exposing the patient. Provide for privacy with the compartment curtain or screen. (6) Change bath water when it becomes cold, dirty, or excessively soapy. (7) Do not place soap in bath water. Too much suds will prevent adequate rinsing. (8) Patients with diabetes mellitus will require special foot care. (9) Expose only those body parts being bathed (figure 1-3). (10) Don gloves if danger of contact with body fluids exist. (11) Maintain a neat, clean work area.
Figure 1-3. Bed bath/partial bath.
MD0556 1-5

c. Procedure. (1) Check the physician's orders. (2) Visit the patient; introduce yourself and inform him of the procedure. Offer him a bedpan, urinal, or use of bathroom. (3) Check for the required personal toilet articles and clean linen available in the unit. Clear the top of his bedside cabinet and place the cabinet and chair for optimum workspace. Adjust the room temperature and provide privacy. (4) Prepare supplies and equipment. The following materials should be assembled: (a) Washbasin and water (110-115ºF). (b) Hygiene articles, such as lotion, powder, and deodorant. (c) Pajamas or gown. (d) Linen as necessary. (e) Portable screen as necessary. (f) Laundry bag or hamper. (g) Soap and soap dish. (h) Bath towels (2). (i) Washcloths (2). (j) Nail file and comb. (k) Disposable gloves. (5) Wash your hands. (6) Place bath equipment on the cabinet. Place clean linen on the chair in order of use. (7) Loosen top covers at the foot of the bed. Fold and remove spread and blanket. Leave top sheet for cover.
MD0556 1-6
(8) Lower side rail, position patient on near side of bed, and raise bed to working level. (9) Loosen top linens from the foot of the bed; place bath blankets over the top linens. Ask patient to hold bath blankets while you remove top linens. If patient is unable, you will have to hold bath blanket in place while removing linens. (10) Remove the pillow and raise the head of the bed to semi-Fowler's position if patient can tolerate it. Place it at the back of the chair (hang the pillow case to receive soiled linen, if laundry hamper is not readily available). Do not permit soiled laundry to touch your uniform. (11) Assist the patient with oral hygiene. If the patient is unable, you should perform procedures in paragraphs 1-11 through 1-14. (12) Remove the patient's gown/pajamas, all undergarments, and jewelry. (a) If the patient has an injured arm or shoulder, start removing the coat from the uninjured side. When only limited movement is permitted, the pajama coat is worn back to front, and left unfastened. (b) To remove the coat, unbutton and tuck the excess material under the back toward the far shoulder. Raise the far shoulder, remove the sleeve, and tuck the coat under the near shoulder. Raise the near shoulder and pull the coat through, removing it from the near arm. (c) To remove the pants, loosen the waist tie, unbutton, and pull the pants below the hips while keeping the patient covered with the sheet. Grasping the waist portion, ease the pants off over the feet. (13) Wash the patient's eyes and face. (a) Place the bath towel under the patient's head and the hand towel over his chest. Form a mitt with the bath cloth around hand; ends of bath cloth should not dangle (fig. 1-4). Dip mitt and hand into bath water. Squeeze out excess water. (b) Bathe the eyelids, using a different portion of the cloth for each eye. Cleanse from inner to outer canthus (corner of eye), as in figure 1-5. Dry thoroughly. (c) Apply soap to the cloth, unless soap is not to be used on the patient's face. Do not leave soap in water. Rinse bath cloth. Using firm, gentle strokes, wash the face to the hairline. Wash the ears and neck. Use cotton-tipped applicators to cleanse pinna of ear.
MD0556 1-7
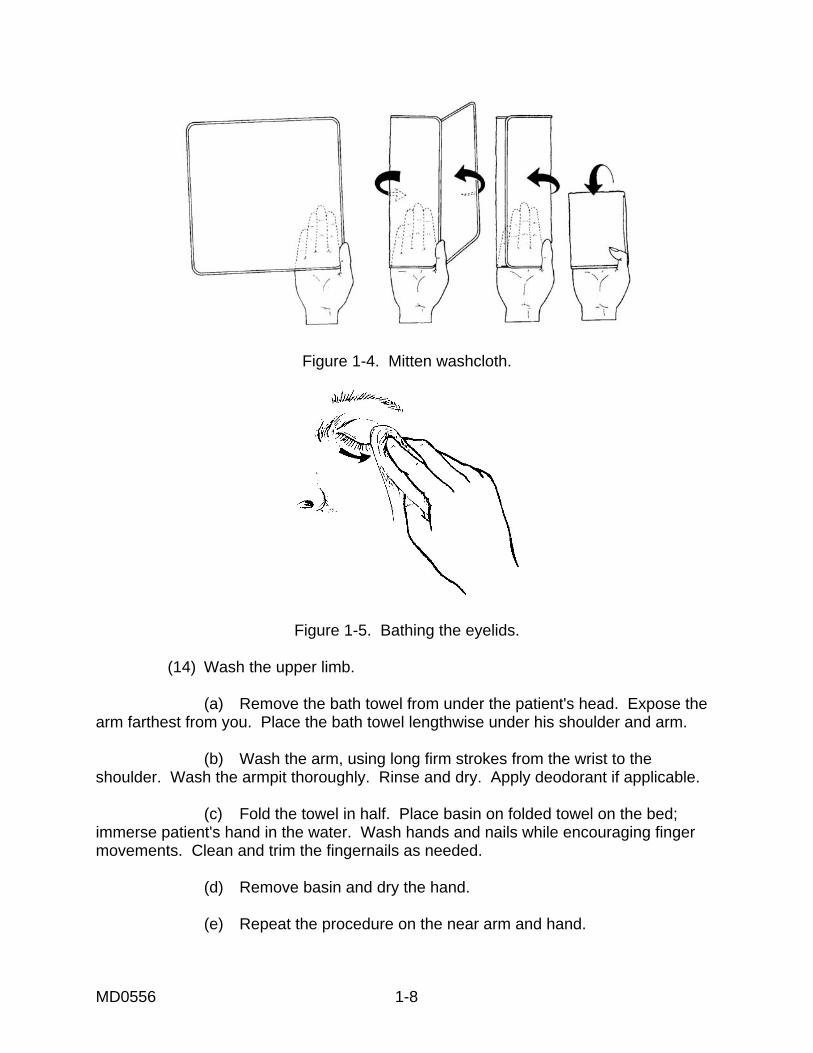
Figure 1-4. Mitten washcloth.
Figure 1-5. Bathing the eyelids.
(14) Wash the upper limb. (a) Remove the bath towel from under the patient's head. Expose the arm farthest from you. Place the bath towel lengthwise under his shoulder and arm. (b) Wash the arm, using long firm strokes from the wrist to the shoulder. Wash the armpit thoroughly. Rinse and dry. Apply deodorant if applicable. (c) Fold the towel in half. Place basin on folded towel on the bed; immerse patient's hand in the water. Wash hands and nails while encouraging finger movements. Clean and trim the fingernails as needed. (d) Remove basin and dry the hand. (e) Repeat the procedure on the near arm and hand.
MD0556 1-8
(15) Wash the chest and abdomen. (a) Cover the patient's chest with bath towel; fold bath blanket down to waist; and wash the chest with a circular motion. Be sure to cleanse and dry under breast and skin folds very well. (b) Fold bath blanket down to pubic area, keeping chest covered with dry towel. Wash abdomen including umbilicus (using cotton-tipped applicators) and skin folds. Dry thoroughly. (c) Raise side rail; empty basin into hopper or stool. Rinse basin and wash cloth. Refill basin 2/3 full with water at 110º to 115ºF (43º to 46ºC). (16) Wash the lower limb. (a) Expose the far leg, draping the sheet securely into the groin and under the thigh. Check to see that genitalia are not exposed when the leg is flexed. (b) Wash, rinse, and dry the thigh and leg. (c) Place the basin on a towel on the bed so that the patient's foot can be immersed in the basin with no pressure on the calf of the leg. Wash the foot, paying particular attention to the skin between the toes, at the heels, and at the ankles. Encourage toe and ankle movement. Trim and clean toenails if necessary. (d) Support the leg at the knee and heel when moving his foot from the basin. Place the basin on the table. Dry the foot thoroughly, rubbing any calloused area with a towel to remove dead skin. Apply lotion to the foot and ankle, massaging the heel in circular motion with the palm of your hand. (e) Repeat the procedure on the near thigh, leg, and foot. (f) Change the bath water and rinse the washcloth thoroughly. (17) Wash the back and buttocks. (a) Turn the patient to wash his back and buttocks. His position may be prone (on the abdomen) or lateral recumbent (on the side), but the entire back and buttocks should be exposed. (b) Place the towel close to the back and lengthwise on the bed. (c) Bathe, rinse, and dry the back from the neck to the sacrum (region in back of pelvis). Pay particular attention to the folds of the buttocks and anal areas.
MD0556 1-9

(d) Rub the back with lotion. Use firm, gentle, circular movements, starting at the base of the spine and rubbing with the heel of both hands, up and out, and over the shoulders. Finish with circular movements at the upper spine and nape of the neck. (18) Wash the genitalia area. (a) Turn the patient on his back, to the near side of the bed, and place the towel under his hips. (b) Hand the patient the prepared washcloth and assist in washing the pubic area and genitalia as necessary. There should be minimal exposure but thorough washing, rinsing, and drying. NOTE: If the patient has an indwelling catheter, the entire procedure should be done for him. (19) Put pajamas on the patient. (a) Replace the coat. If the patient has an injured arm or shoulder, start replacing the coat from the injured side. Slip your hand through the sleeve cuff to his shoulder and grasp the patient's hand. Draw his hand and arm through the sleeve. Now tuck the material under to his other shoulder on the injured side and guide his hand and arm through the sleeve. (b) To replace the pants, slip your hand through the pant leg from the cuff to the waist and grasp the patient's feet to guide each leg through its pant leg. Raise the patient's buttocks and pull the pants over his hips to the waist. Fasten the buttons and tie at the waist. (20) Comb the patient's hair. (21) Remove the bath equipment to the utility room; clean and store it. (22) Remake the bed. If possible, assist the patient to a chair or stretcher and make the bed as in Lesson 3, paragraph 3-4. If the patient must remain in bed, make it as discussed in Lesson 3, paragraph 3-5. 1-4. ADMINISTERING A TOWEL BATH a. General. When a patient, confined to bed, has casts and/or special dressing, the medical specialist may be required to give a towel bath. The towel bath prevents contamination of special dressing or cast. It also will comfort and encourage relaxation.
MD0556 1-10
b. Important Points. Bathing the patient following the proper procedure will promote an effective towel bath, provide warmth, keep the bed dry, and avoid causing the patient to chill. c. Procedure. (1) Check the physician's orders. Confer with the nurse in charge to determine need for towel bath. (2) Explain the procedure to the patient. (3) Adjust the room temperature, and provide privacy. (4) The following supplies and equipment should be assembled: (a) Concentrate and/or solution Septi-Soft®. (b) Measuring device, such as liter-calibrated device or plastic medication cup. (c) Towel (3 ft x 7 1/2 ft). (d) Large plastic bag. (e) Bath towel. (f) Washcloths (2). (g) Bath blankets (2 or 3). (h) Disposable gloves. (i) Linens for bedmaking. (j) Articles for personal hygiene (comb, toothbrush, lotion, toothpaste, mouthwash). (5) Prepare the patient for a towel bath. (a) Remove patient's clothing and excess bedding (top linens, bed spread). Place the patient on the bath blanket and cover the patient with the blanket. (b) Cover the areas that should not be wet (surgical dressings, casts) with plastic.
MD0556 1-11

(c) Fan fold the clean bath blanket at foot of the bed. (d) Arrange the patient to the supine position. (6) Prepare the towel for bathing the patient (figure 1-6).
Figure 1-6. Prepare a towel. (a) Fold towel in half, top to bottom; fold in half again, top to bottom; now half again, side to side. Then roll towel with bath towel and washcloth inside, beginning with folded edge. (b) Place rolled up towel (with bath towel and washcloths inside) in plastic bag with salvage edges toward open end of bag. (c) Draw 2000 ml of water at 115º to 120ºF into plastic pitcher. Measure 30 ml of concentrate or 90 ml of solution. (If using dispenser with a pump, a single stroke measures 30 ml.) Mix 2000 ml of water and Septi-Soft®. (d) Pour mixture over towel inside plastic bag. (e) Knead the solution quickly into towel, position plastic bag with open end in sink, and squeeze out excess water, giving added wringing twists to salvage edges of towel. (7) Bathe patient (figure 1-7).
Figure 1-7. Bathe the patient.
MD0556 1-12
(a) Fold bath blanket down to waist. Remove warm, moist towel from plastic bag and place on patient's right or left chest with open edges up and outward. Unroll towel across chest. (b) Open towel to cover entire body while removing top bath blanket. Tuck towel in and around body (leave bath towel and washcloths in plastic bag to keep warm). (c) Begin bathing at feet, using gentle, massaging motion. Employ clean section of towel for each part of body as you move toward patient's head. (d) Fold lower part of towel upward away from feet as bathing continues. (e) Put clean bath blanket up over patient as you move upward. Leave 3 inches of exposed skin between towel and bath blanket. Skin will dry in 2 or 3 seconds. (f) Wash face, neck, and ears with one of prepared washcloths. (g) Turn patient onto side. (h) Use bath towel for back care. (i) Use second washcloth for perineal care (don disposable gloves). (j) When bath is completed, remove towel and place with soiled linens in plastic laundry bag. (k) If top bath blanket is not soiled, fold and use later. 1-5. ASSISTING A PATIENT TO TAKE A TUB BATH a. General. A patient who is not confined to bed and is not helpless will, in some cases, be recommended to have a tub bath. All necessary supplies and equipment is provided by the medical specialist. Any assistance in getting in and out of bed, getting in and out of the tub, and/or reaching areas of the body while bathing will be rendered by the specialist. b. Important Points. (1) Provide safety measures to prevent slipping, tripping, or falling. (2) Maintain privacy. (3) Encourage performance.
MD0556 1-13
c. Procedure. (1) Determine if activity is allowed. Consult with registered nurse (RN) in charge and check physician's orders. (2) Make certain tub or shower appliance is clean. Check local standard operating procedure (SOP). Place nonskid mat on tub or shower floor and disposable mat outside of tub or shower. (3) Gather all items necessary for bathing: (a) Towel. (b) Washcloth. (c) Soap. (d) Deodorant. (e) Lotion. (f) Clean gown. (4) Assist patient to tub or shower. Be certain patient wears robe and slippers. (5) Instruct patient on how to use call signal and place "in use" sign on tub or shower door if private bath is not being used. (6) If tub is used, fill with warm water (109ºF (43ºC). Have patient test water; adjust temperature if needed. Instruct patient on use of faucets--which is hot and which is cold. If shower is used, turn water on and adjust temperature. (7) Caution patient to use safety bars. Discourage the use of bath oil in water. Check on patient every 5 minutes. Do not allow the patient to remain in tub more than 20 minutes. (8) Return to room when patient signals. Knock before entering. (9) Assist patient out of tub and with drying. If patient complains of weakness, vertigo, or syncope, drain tub before patient gets out and place towel over patient's shoulder. (10) Assist patient into clean gown, robe, and slippers. Accompany to room and position for comfort in either chair or bed.
MD0556 1-14

(11) Make unoccupied bed if patient can tolerate sitting in chair. Perform back, hair, nail, and skin care. (12) Return to shower or tub. Clean according to SOP. Place all soiled linens in laundry bag and return all articles to patient's bedside. (13) Wash hands. 1-6. ADMINISTERING A TEPID SPONGE BATH FOR TEMPERATURE REDUCTION a. General. A patient whose temperature reaches 102.2ºF will usually develop flush color, very warm and moist skin, and an accompanying headache. A tepid sponge bath may be recommended to reduce body temperature. Desired temperature reached is 99.6ºF. b. Important Points. (1) Remind the patient to call for assistance when getting up. The combination of the elevated temperatures and sponge bath could weaken the patient. (2) Check the patient's temperature, blood pressure, and heart rate every 15 minutes. (3) Maintain a level of privacy. c. Procedure. (1) Observe patient for elevated temperature. Review physician's orders. (2) Explain the procedure to patient. (3) Prepare the equipment: (a) Bath basin. (b) Tepid water (37ºC; 98.6ºF) (c) Washcloth (4). (d) Bath thermometer. (e) Bath blanket. (f) Patient thermometer.
MD0556 1-15
(4) Provide privacy; wash hands. (5) Cover patient with blanket, remove gown, and close windows and doors. (6) Test the water temperature. Place washcloths in water and then apply wet cloths to each axilla and groin. (7) Gently sponge an extremity for about 5 minutes. If the patient is in tub, gently sponge water over his upper torso, chest, and back. (8) Continue sponge bath to other extremities, back, and buttocks for 3 to 5 minutes each. Determine temperature every 15 minutes. (9) Change water; reapply freshly moistened washcloths to axilla and groin as necessary. (10) Continue with sponge bath until body temperature falls slightly above normal. Discontinue procedure according to SOP. (11) Dry patient thoroughly, and cover with light blanket or sheet. (12) Return equipment to storage, clean area, and change bed linens as necessary. Wash hands. (13) Record time procedure was started, when ended, vital signs, and patient's response. 1-7. CARE OF THE HANDS AND FEET a. General. Special attention is often required to prevent infection, odor, and injury of the patient's hands and feet. Problems often arise from abuse or poor care of hands and feet, such as biting the nails and wearing ill-fitted shoes. Assessment of the feet involves a thorough examination of all skin surfaces. Areas between toes should be carefully checked. Patients with diabetes mellitus or peripheral vascular disease should be observed for adequate circulation of the feet. Because of poor vision and decreased mobility, the elderly are at risk for foot disorders. Care of hands and feet can be administered during the morning bath or at another convenient time. b. Important Points. (1) Notice general physical conditions that may place the patient at risk for infections. (2) Prevent interruptions during the procedure.
MD0556 1-16

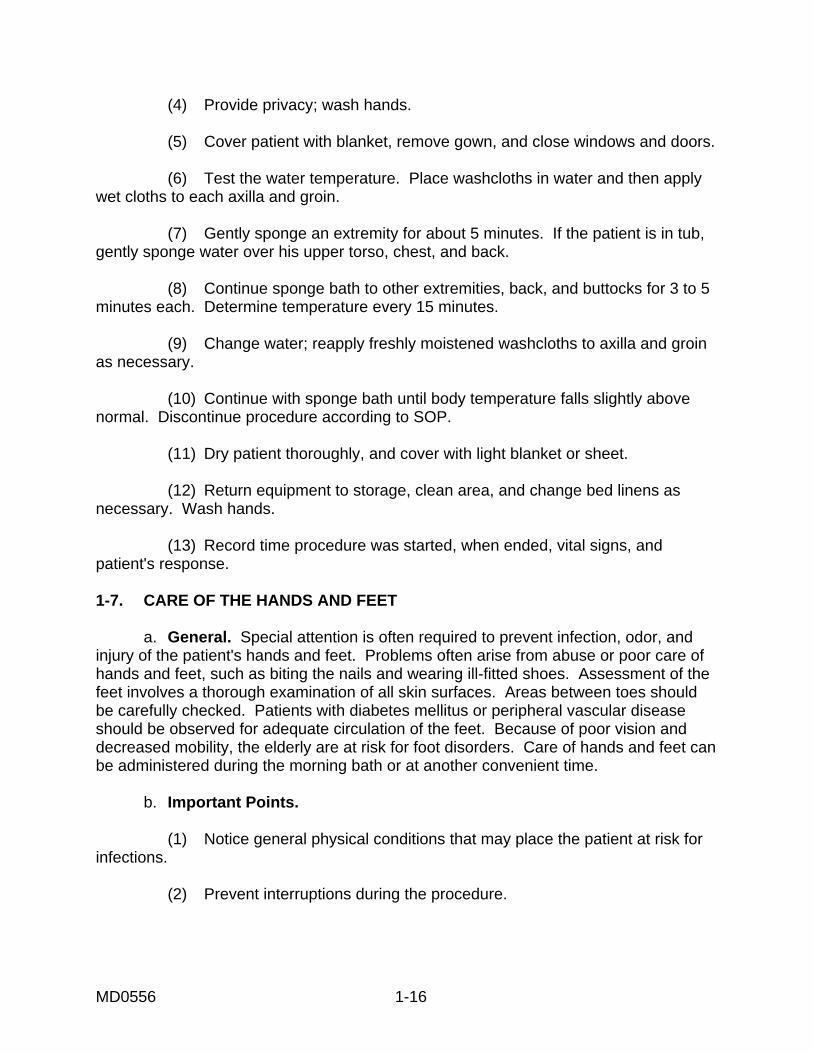
(3) Soak in warm water to soften nails and loosen foreign particles. (4) Prevent spread of microorganisms. c. Procedure. (1) Obtain physician's order if necessary. (2) Explain procedure. (3) Prepare equipment: (a) Washbasin. (b) Emesis basin. (c) Washcloth. (d) Hand towel. (e) Nail clippers, emery board, and orangewood stick. (f) Lotion. (g) Disposable bath mat. (h) Disposable gloves (optional). (4) Wash hands, and arrange supplies within easy reach. (5) Position patient in chair, place disposable mat under patient's feet if possible, and provide patient with privacy. (6) Fill the basin with water at 100º to 110ºF (38º to 44ºC). Place the basin on a disposable mat and help patient place feet into basin. Soak feet for 15 to 20 minutes, rewarming water as necessary (figure 1-8). (7) Place overbed table in low position in front of the patient. Fill emesis basin with water at 100º to 110ºF (38º to 44ºC). Place the basin on the table and place patient's fingers into basin. Soak fingernails 10 to 20 minutes; rewarm water as necessary (figure 1-9).
MD0556 1-17
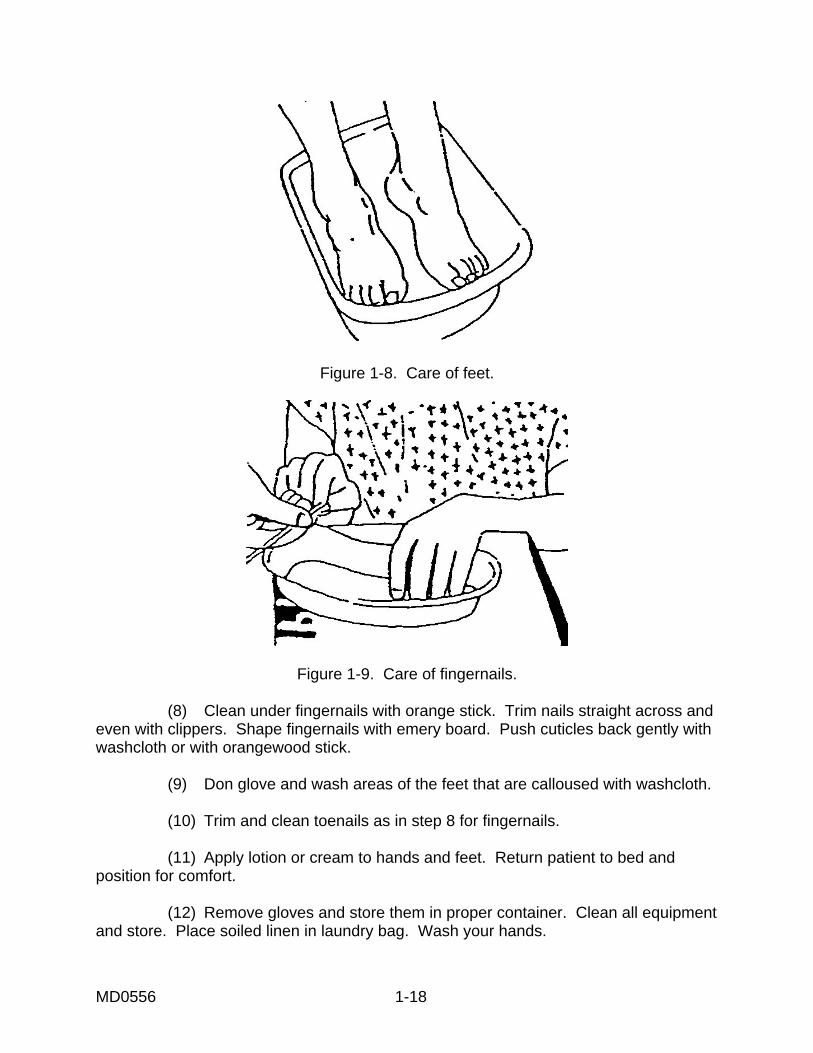
Figure 1-8. Care of feet.
Figure 1-9. Care of fingernails. (8) Clean under fingernails with orange stick. Trim nails straight across and even with clippers. Shape fingernails with emery board. Push cuticles back gently with washcloth or with orangewood stick. (9) Don glove and wash areas of the feet that are calloused with washcloth. (10) Trim and clean toenails as in step 8 for fingernails. (11) Apply lotion or cream to hands and feet. Return patient to bed and position for comfort. (12) Remove gloves and store them in proper container. Clean all equipment and store. Place soiled linen in laundry bag. Wash your hands.
MD0556 1-18
1-8. CARING FOR THE EYES, EARS, AND NOSE a. General. The eyes, ears, and nose require special attention for cleansing during the patient's bath. The specialist has the responsibility of assisting patients in the care of eyeglasses, contact lenses, artificial eyes, or hearing aids. Assessments must be made of the patient's knowledge and methods used to care for the aids, as well as any problems he might be having with the aids. Patients with limited mobility cannot grasp small objects. Patients that have reduced vision or are seriously fatigued will also require assistance from the specialist. b. Important Points. The eyes, ears, and nose are sensitive and therefore extra care should be taken to avoid injury to these tissues. Never use bobby pins, toothpicks, or cotton-tipped applicators to clean the external auditory canal. Such objects may damage the tympanic membrane (eardrum) or cause wax (cerumen) to impact within the canal. c. Procedure. (1) Care of the eyes. (a) Cleansing of the circumorbital (circular area around the eye) area of the eye is usually performed during the bath, and involves washing with a clean washcloth moistened with clear water. Do not use soap because of the possibility of burning and irritation. The eye is cleansed from the inner to outer canthus. A separate section of the washcloth is used each time. This is to prevent spread of infection. Place a damp cotton ball on lid margins to loosen secretions. Never apply direct pressure over the eyeball. Exudate from the eye should be removed carefully, and as often as necessary to keep the eye clean. (b) The eyelashes, tearing, and split-second blink reflex usually keeps the eyes well protected. An unconscious patient may need frequent special eye care. Secretions may collect along the margins of the lid and inner canthus when the blink reflex is absent or when the eyes do not completely close. The physician may order lubricating eye drops. In some cases, the eyes may be medicated and covered to prevent irritation and corneal drying. (c) Many patients wear eyeglasses. The specialist will use care when cleaning glasses, and protect them from breaking. Eyeglasses should be stored in the case and placed in the drawer of the bedside stand. Glasses are made of hardened glass or plastic that is impact resistant to prevent shattering, but they can easily be scratched. Plastic glasses require special cleaning solutions and drying tissues. Warm water and a soft dry cloth may be used for cleansing glass lens.
MD0556 1-19
(d) Most patients prefer to care for their own contact lens. A contact lens is a small, round, sometimes colored disk that fits over the cornea. If the patient is unable to remove the lens, the specialist should seek assistance from someone who is familiar with the procedure. The lens should not be reinserted until the patient is capable of caring for the lens himself. It is very important that you care for the patients who are unable to properly take care of their lens. Prolonged wearing of contact lens may cause serious damage to the cornea. (2) Care of the ears. (a) The ears are cleaned during the bed bath. A clean corner of a moistened washcloth rotated gently into the ear is used for cleaning. Also, a cotton-tipped applicator is useful for cleansing the pinna. (b) The care of the hearing aid involves routine cleaning, battery care, and proper insertion techniques. The specialist must assess the patient's knowledge and routines for cleaning and caring for his hearing aid. The specialist will also determine whether the patient can hear clearly with the use of the aid by talking slowly and clearly in a normal tone of voice. Have the patient suggest any additional tips for care of the hearing aid. When not in use, the hearing aid should be stored where it will not become damaged. The hearing aid should be turned off when not in use. The outside of the hearing aid should be cleaned with a clean, dry cloth. Hearing loss is a common health problem with the elderly, and the aid assists in the ability to communicate and react appropriately in the environment. (3) Care of the nose. (a) Secretions can usually be removed from the nose by having the patient blow into a soft tissue. The specialist must teach the patient that harsh blowing causes pressure capable of injuring the eardrum, nasal mucosa, and even sensitive eye structures. If the patient is not able to clean his nose, the specialist will assist using a saline moistened washcloth or cotton tipped applicator. Do not insert the applicator beyond the cotton tip. (b) Suctioning may be necessary if the secretions are excessive. When patients receive oxygen per nasal cannula, or have a nasogastric tube, you should cleanse the nares every 8 hours. Use a cotton-tipped applicator moistened with saline. Secretions are likely to collect and dry around the tube; therefore, you will need to cleanse the tube with soap and water.
MD0556 1-20
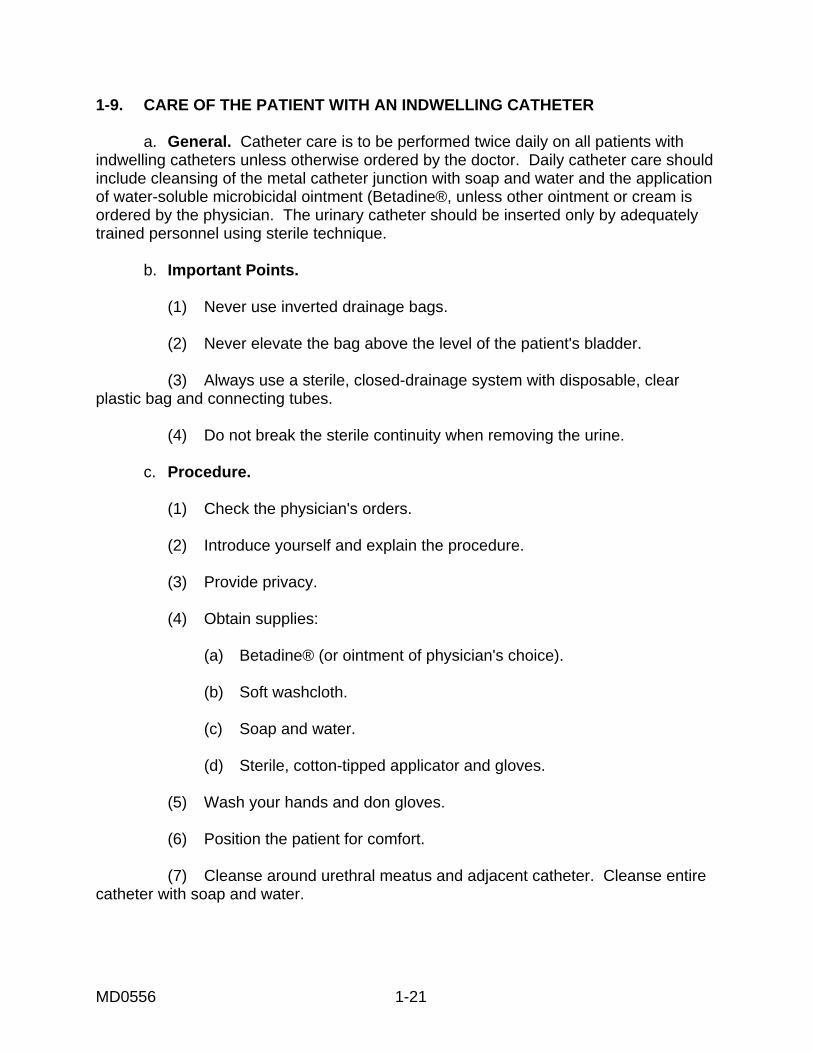
1-9. CARE OF THE PATIENT WITH AN INDWELLING CATHETER a. General. Catheter care is to be performed twice daily on all patients with indwelling catheters unless otherwise ordered by the doctor. Daily catheter care should include cleansing of the metal catheter junction with soap and water and the application of water-soluble microbicidal ointment (Betadine®, unless other ointment or cream is ordered by the physician. The urinary catheter should be inserted only by adequately trained personnel using sterile technique. b. Important Points. (1) Never use inverted drainage bags. (2) Never elevate the bag above the level of the patient's bladder. (3) Always use a sterile, closed-drainage system with disposable, clear plastic bag and connecting tubes. (4) Do not break the sterile continuity when removing the urine. c. Procedure. (1) Check the physician's orders. (2) Introduce yourself and explain the procedure. (3) Provide privacy. (4) Obtain supplies: (a) Betadine® (or ointment of physician's choice). (b) Soft washcloth. (c) Soap and water. (d) Sterile, cotton-tipped applicator and gloves. (5) Wash your hands and don gloves. (6) Position the patient for comfort. (7) Cleanse around urethral meatus and adjacent catheter. Cleanse entire catheter with soap and water.
MD0556 1-21
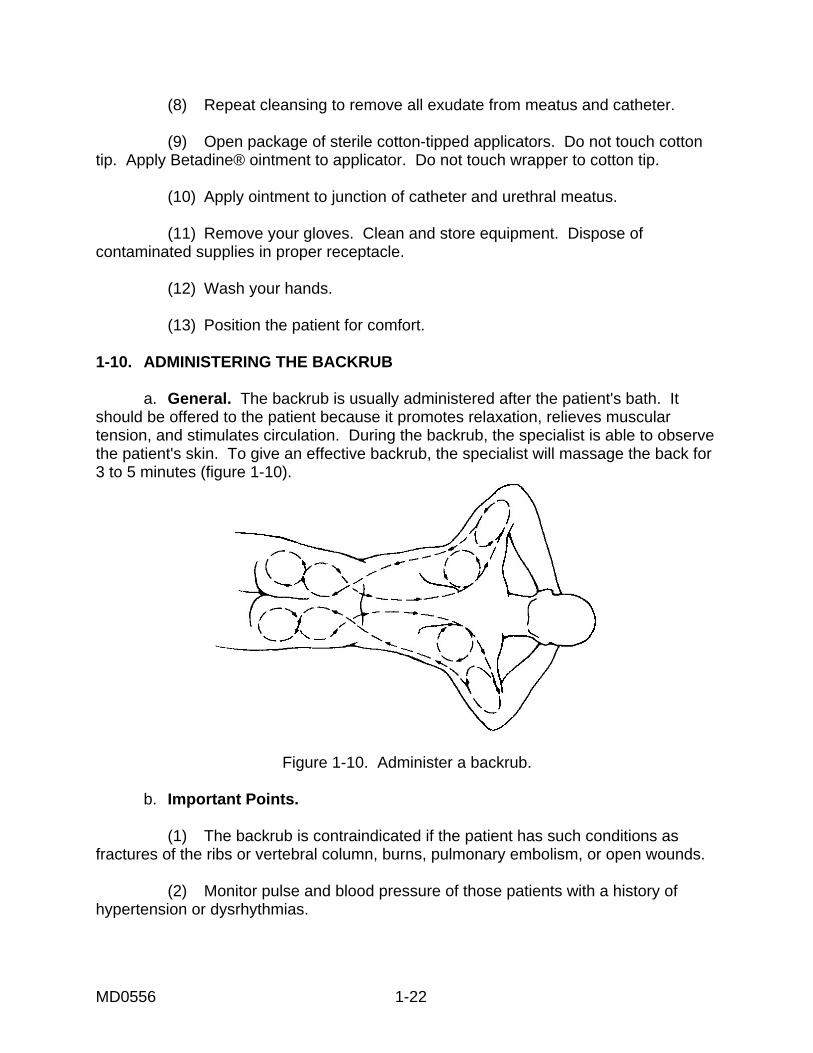
(8) Repeat cleansing to remove all exudate from meatus and catheter. (9) Open package of sterile cotton-tipped applicators. Do not touch cotton tip. Apply Betadine® ointment to applicator. Do not touch wrapper to cotton tip. (10) Apply ointment to junction of catheter and urethral meatus. (11) Remove your gloves. Clean and store equipment. Dispose of contaminated supplies in proper receptacle. (12) Wash your hands. (13) Position the patient for comfort. 1-10. ADMINISTERING THE BACKRUB a. General. The backrub is usually administered after the patient's bath. It should be offered to the patient because it promotes relaxation, relieves muscular tension, and stimulates circulation. During the backrub, the specialist is able to observe the patient's skin. To give an effective backrub, the specialist will massage the back for 3 to 5 minutes (figure 1-10).
Figure 1-10. Administer a backrub. b. Important Points. (1) The backrub is contraindicated if the patient has such conditions as fractures of the ribs or vertebral column, burns, pulmonary embolism, or open wounds. (2) Monitor pulse and blood pressure of those patients with a history of hypertension or dysrhythmias.
MD0556 1-22
c. Procedure. (1) Explain to the patient what you are going to do. (2) Prepare equipment: (a) Bath blanket (optional). (b) Bath towel. (c) Skin lotion, alcohol, or powder. (3) Adjust bed height to working level. (4) Provide privacy and quiet environment. (5) Lower side rail. Position patient with back toward self. Cover patient so that only parts to massage are exposed. (6) Wash hands, and warm if necessary. Warm lotion by holding some in hands. Explain that lotion may feel cool. (7) Begin massage by starting in sacral area using circular motions. Stroke upwards to shoulders. Use firm, smooth strokes to massage over scapulae. Continue to upper arms with one smooth stroke and down along side of back to iliac crests. Do not break contact with patient's skin. Complete massage in 3 to 5 minutes. (8) Gently but firmly knead skin by grasping area between thumb and fingers. Work across each shoulder and around nape of neck. Continue downward along each side to sacrum. (9) With long, smooth strokes, end massage. Remove excess lubricant from patient's back with towel, and retie gown. Position for comfort. Lower bed, and raise side rail as needed. (10) Place soiled laundry in proper receptacle. Wash hands.
MD0556 1-23

1-11. ORAL HYGIENE Oral hygiene (mouth care for cleanliness) is essential to the care of all patients, as the mouth normally harbors many bacteria. The patient's resistance may become so lowered during illness that severe infections of the mouth tissue may result. Mouth breathing, restricted oral fluids, elevated temperature, and other conditions that may accompany illness cause drying and cracking of mouth tissues. Such conditions aid the development of infection. When a patient is too ill to care for his mouth and teeth, the medical specialist must help him or must perform the procedure for him. Ambulatory patients may need reminding to carry out self-care measures. Problem in oral hygiene should be referred to the Dental Service. 1-12. ROUTINE MOUTH CARE a. General. Mouth care should be given at least every morning and evening to all patients, and preferably after every meal. Routine mouth care is essentially assisting a patient to brush his teeth (figure 1-11) and to rinse his mouth thoroughly, as often as needed. The purposes are to keep the mouth clean, to prevent sores and mouth odors, to retard or prevent deterioration of teeth, and to refresh the patient.
Figure 1-11. Cleaning the teeth. b. Equipment. The following equipment is appropriate for routine mouth care. (1) Glass of water. (2) Drinking tube if necessary. (3) Hand towel. (4) Toothbrush and dentifrice. (5) Mouthwash, if desired.
MD0556 1-24

c. Procedure for Patient Able to Help Himself. Following is the procedure for routine mouth care for a bed patient able to help himself. (1) Place the patient in a comfortable position. (2) Arrange the equipment within his reach on the bedside cabinet or on an over bed table. (3) Remove and clean the equipment promptly when he is finished. NOTE: Rinse the toothbrush thoroughly under running water and allow it to air dry-- not place the damp brush in the cabinet. d. Procedure for a Patient Requiring Assistance. Following is the procedure for routine mouth care for a bed patient requiring some assistance. (1) Turn the patient on his side or if on his back, turn his head to the side. (2) Place a towel under his chin and over the bedding. (3) Pour the water over the brush; place dentifrice on it. (4) Give the patient his brush and hold the basin under his chin while he brushes his teeth (figure 1-12).
Figure 1-12. Assisting patient with mouth care.
MD0556 1-25
(5) Encourage the patient to rinse his mouth frequently, using the drinking tube, if necessary to draw water in his mouth. The basin receives the used rinse water. (6) Remove the basin; wipe his face and lips with the hand towel. (7) Remove and clean the equipment. (8) Wash your hands. e. Procedure for a Patient Unable to Brush His Teeth. Following is the procedure for providing mouth care for a patient unable to brush his teeth. (1) Proceed as in paragraph 1-12c above except that all steps are done for the patient. (2) Finish the mouth cleansing with a gentle brushing of the tongue from back to front, and with a thorough final rinsing. (3) The patient's teeth should be flossed at least weekly. 1-13. CARE OF DENTURES a. General. Dentures should be given the same careful cleansing as the natural teeth. The conscious patient normally wears his teeth. Moreover, since some patients are embarrassed by having artificial teeth, medical personnel should be considerate. The patient normally cleans his mouth and natural teeth while dentures are out of his mouth. Clean dentures under running water, if possible. b. Equipment. The equipment necessary to clean dentures follows: (1) Tissues. (2) Washbasin. (3) Toothbrush or denture brush, dentifrice. (4) Denture container. c. Procedure. The following procedure is appropriate for cleaning dentures for a bed patient as in figure 1-13. (1) Ask the patient to remove dentures and place them in the container, which may be a glass of water if no other container is available. (2) While the patient is cleaning his mouth, take his dentures to the sink. Give him tissues to wipe his mouth.
MD0556 1-26

Figure 1-13. Care of dentures. (3) Place the basin in the sink and brush the dentures over the basin under running water. In event the denture is dropped, it will be cushioned by the water in the basin. After thorough brushing, rinse the dentures and place them in a basin of water while cleaning the denture container. (4) Return the dentures in the container to the patient. (5) When a denture is not in use, place it in a marked clean container filled with clean water. Patients should neither wrap a denture in tissue or other material nor store it in a pajama pocket, under the pillow, or in a drawer. 1-14. SPECIAL MOUTH CARE Special mouth care is required for oral hygiene that cannot be accomplished by routine tooth brushing and mouth rinsing measures. Patients with mouth injuries, oral surgery, or inflamed mouth tissue are given mouth care in consonance with special instructions by the medical or dental officer. In addition, standing operating procedures are often available locally to provide guidance in these situations. 1-15. CARE OF PATIENT'S HAIR a. General. A patient's hair should be combed daily. In addition, other care is necessary to enhance morale, stimulate circulation of the scalp, and prevent tangled, matted hair. b. Daily Care. Encourage the patient to rub his scalp with fingertips to stimulate circulation. Comb hair in a becoming style. To assist a patient to comb matted and tangled hair, first comb the ends and progress toward the scalp. Hold the lock of hair being combed between the scalp and the comb to avoid pulling. Brush the hair as necessary (figure 1-14).
MD0556 1-27
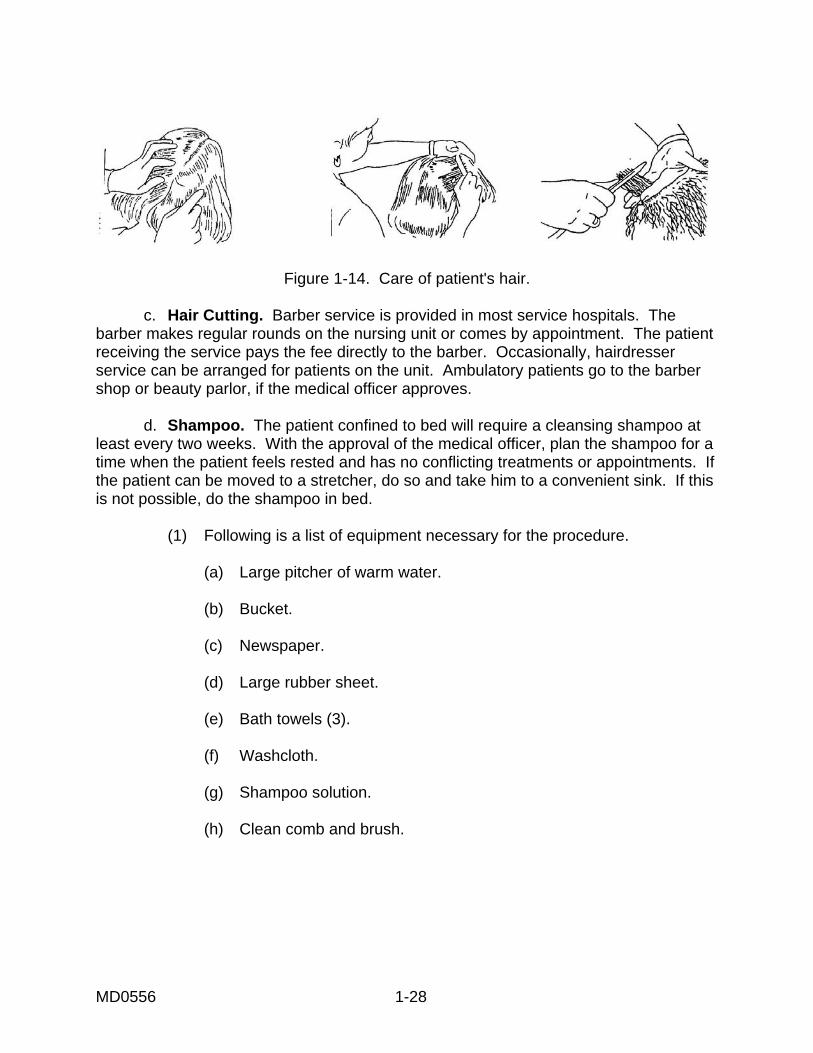
Figure 1-14. Care of patient's hair. c. Hair Cutting. Barber service is provided in most service hospitals. The barber makes regular rounds on the nursing unit or comes by appointment. The patient receiving the service pays the fee directly to the barber. Occasionally, hairdresser service can be arranged for patients on the unit. Ambulatory patients go to the barber shop or beauty parlor, if the medical officer approves. d. Shampoo. The patient confined to bed will require a cleansing shampoo at least every two weeks. With the approval of the medical officer, plan the shampoo for a time when the patient feels rested and has no conflicting treatments or appointments. If the patient can be moved to a stretcher, do so and take him to a convenient sink. If this is not possible, do the shampoo in bed. (1) Following is a list of equipment necessary for the procedure. (a) Large pitcher of warm water. (b) Bucket. (c) Newspaper. (d) Large rubber sheet. (e) Bath towels (3). (f) Washcloth. (g) Shampoo solution. (h) Clean comb and brush.
MD0556 1-28
(2) Following is the procedure for administering a shampoo to a patient in bed. (a) Place a newspaper on the chair and the bucket on the newspaper. Place the pitcher of water, shampoo, comb, brush, and one of the two bath towels on the bedside cabinet. (b) Move the patient to the near side of the bed. Lower the bed to a level position. (c) Pull the pillow down under the patient's shoulders to assisting extending the neck. Fold one bath towel around the neck. (d) Place the narrow side of the rubber sheet under his head and over the edge of the pillow. Roll the sides of the sheet to improvise a trough, and place the free end in the bucket. (e) Give the patient a washcloth for his eyes and face. (f) Check provisions for water drainage before pouring any water. (g) Wet his hair and apply shampoo. Lather and rinse it. (h) Reapply shampoo and rinse the hair again repeatedly until his hair is "squeaky clean." (A woman will require more rinse water than a man, but otherwise the procedure is unchanged.) (i) Slip a dry towel under the patient's bed. Then roll and remove the rubber sheet. Pull the pillow up into its normal place. (j) Dry the hair by gently rubbing it with a clean towel. (k) Remove the equipment and wipe up any water spilled on the floor. (l) Assist the patient to comb and brush his hair with a clean comb and brush. 1-16. URINAL AND BEDPAN ASSISTANCE a. General. Although bed patients realize the necessity of eliminating body wastes, they sometimes feel embarrassed when the need arises to ask for and use a urinal or bedpan. Medical personnel should reduce the unpleasant aspects as much as possible and assist the patient to maintain proper elimination with the least exertion. The urinal or bedpan is provided promptly anytime one is requested. In addition, bed patients are usually offered one before meals and before visiting hours. After each use, the patient and medical personnel must wash their hands.
MD0556 1-29
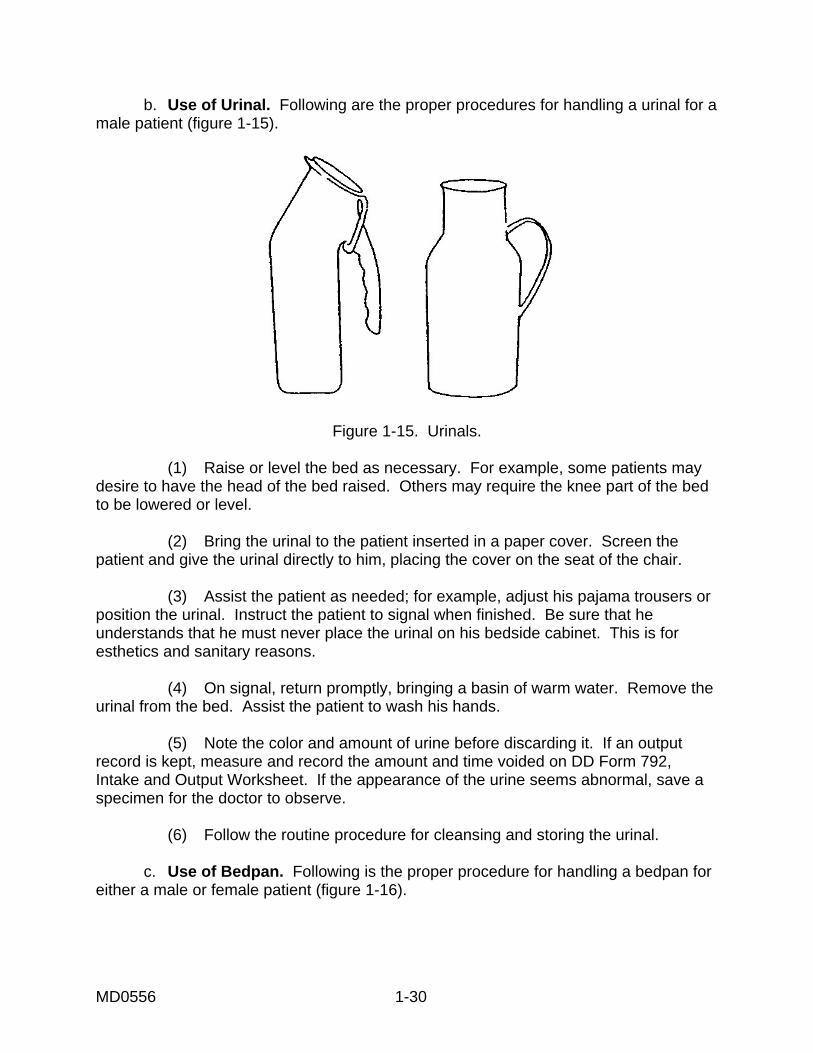
b. Use of Urinal. Following are the proper procedures for handling a urinal for a male patient (figure 1-15).
Figure 1-15. Urinals. (1) Raise or level the bed as necessary. For example, some patients may desire to have the head of the bed raised. Others may require the knee part of the bed to be lowered or level. (2) Bring the urinal to the patient inserted in a paper cover. Screen the patient and give the urinal directly to him, placing the cover on the seat of the chair. (3) Assist the patient as needed; for example, adjust his pajama trousers or position the urinal. Instruct the patient to signal when finished. Be sure that he understands that he must never place the urinal on his bedside cabinet. This is for esthetics and sanitary reasons. (4) On signal, return promptly, bringing a basin of warm water. Remove the urinal from the bed. Assist the patient to wash his hands. (5) Note the color and amount of urine before discarding it. If an output record is kept, measure and record the amount and time voided on DD Form 792, Intake and Output Worksheet. If the appearance of the urine seems abnormal, save a specimen for the doctor to observe. (6) Follow the routine procedure for cleansing and storing the urinal. c. Use of Bedpan. Following is the proper procedure for handling a bedpan for either a male or female patient (figure 1-16).
MD0556 1-30

Figure 1-16. Bedpan. (1) Bring the patient a warmed bedpan inserted in paper cover, rinsed in hot water, and dried. (2) Provide privacy. (3) Place the covered pan on the chair seat and prepare to assist the patient as necessary. Lift the bed cover; remove any supporting pillows; and lower the knee rail. Pull the pajama jacket above the waist, and the pants to below the knees. Tell the patient to bend his knees, press his heels against the bed, and raise hips. Slip one hand under his back, and place the pan under the buttocks. Ask for assistance if the patient is heavy and unable to assist in lifting. If the patient cannot raise his buttocks, roll him to the near side of the bed, place the pan under his buttocks, and then roll him back on the pan. Check his position on the pan. (4) Elevate the head of the bed. Place toilet paper and signal cord within patient's reach, and leave patient alone unless there is a requirement for constant attention. (5) When the patient is through, answer his signal promptly, bring a basin of warm water. When removing the pan, support the patient in the same way as when the pan was being placed. If the patient is unable to cleanse himself, turn him on his side off the pan and cleanse him with paper. If necessary, wash the anal area with soap and warm water; dry thoroughly. (6) Place covered pan on chair. Readjust pajamas, bedding, and patient's position. Remove the screen. Air the area by opening a window, if possible.
MD0556 1-31
1-17. APPLY HEAT a. The reasons for applying heat are to relieve pain, promote purulent (containing pus) drainage, increase circulation to an area, raise the body temperature, and relax muscles. The effects of heat are to increase lymph flow, local metabolism, blood flow and blood vessel dilation, and exchange of substances through capillary walls. b. Apply heat only according to directions of a physician or supervisor to be sure that no injury comes to the patient. Nerves in the skin are easily numbed after repeated heat application, and the patient may not feel the pain of burn. Ninety-five to 100 degrees Fahrenheit is considered warm, while 100 to 110 degrees Fahrenheit is considered hot. If you are unsure of the correct temperature, check with the physician or supervisor. Then check with the patient to be sure the application is not too hot. Always make sure a patient can remove the heating device or move away from it if it is causing excessive discomfort. Remember that eyelids, neck, and the inside surface of arms are especially sensitive to heat. c. Cases that require special protection from excessive heat are infants, the elderly, persons with fair skin, and patients with other disease processes present. In such cases as these, you must remain with the patient for the entire procedure and constantly monitor how well the patient is tolerating the treatment. Certain patients should be observed closely and should not be left alone while receiving therapy because they cannot tell when heat is intense. These are patients in altered levels of consciousness, paralyzed, anesthetized, with impaired circulation, and with some metabolic diseases. d. Methods of applying heat to patients are many and varied. The old hot water bottle, now known as the warm water bag, placed in a protective cover to protect the patient from burns, is often the perfect answer to the need. The chemical hot pack is capable of excessive heat, and care must be taken to avoid serious burns. The physician's order will dictate whether to use warm or hot moist compresses. Other methods of applying heat include soaks, sitz baths, Aqua K pack, the heat cradle, and electric heating pads. NOTE: Do not use these methods for patients with malignant cancer, edema, or abdominal injuries unless ordered by a physician. e. If at any time the patient complains of pain, or if you see burns, swelling, paleness, maceration (water-logged skin caused by moist heat), or redness that does not diminish with pressure, you must remove the heat treatment.
MD0556 1-32
1-18. APPLY COLD a. The reasons for applying cold are to prevent edema, relieve pain, decrease circulation, decrease metabolism, and to slow or stop bleeding. The effects of cold are to decrease blood flow, oxygen, tissue temperature, local metabolism, lymph flow, to enhance blood clotting, and to slow nerve impulses. b. As when applying heat, apply cold only according to directions of a physician or supervisor. Nerves in the skin are easily numbed, and the patient may not feel any pain. Therefore, it is up to you to discontinue any cold application if the patient complains of numbness, if the skin looks white or spotty, or if the patient develops a rapid pulse, bluish lips, bluish nail beds, or chills. Keep the temperatures between 40 to 80 degrees Fahrenheit, and check with the physician if you are unsure. Then check with the patient to be sure the application is not causing pain. c. Methods of applying cold include chemical cold packs, ice bag for head, collar, cold soaks, cold compresses, and a cold or tepid alcohol sponge bath. Always place a hand towel over the treatment site before applying any wrapped cold pack. d. Cases or conditions when cold is not used are 24 hours after a burn or sprain injury, elderly patients with decreased metabolic rate, arthritic patients, and very young children. The possible complications resulting from the use of cold are chills, pain, maceration, ischemia, blister, and hypothermia.
Continue with Exercises
MD0556 1-33
EXERCISES, LESSON 1 INSTRUCTIONS: Answer the following exercises by marking the lettered response that best answers the question or best completes the statement. After you have completed all of the exercises, turn to "Solutions to Exercises" at the end of the lesson and check your answers. 1. The sitz bath is given to: a. Relieve tension or lower the body temperature. b. Cleanse and aid in reducing inflammation of the perineal and anal areas. c. Reduce muscle tension. d. Assist in relieving muscle soreness and muscle spasm. 2. The cool water tub bath is given to: a. Assist in relieving muscle spasm and muscle soreness. b. Reduce muscle tension. c. Relieve tension and lower the body temperature. d. Reduce inflammation of the perineal and anal areas. 3. The warm water tub bath is given to: a. Reduce muscle tension. b. Assist in relieving muscle tension and muscle spasm. c. Cleanse and aid in reducing inflammation. d. Relieve tension and lower the body temperature.
MD0556 1-34
4. The bed bath/partial bath is administered when the patient is either: a. Confined to bed, must conserve energy, or is helpless. b. Tired, must conserve energy, or is confined to bed. c. Confined to bed, must get plenty of sleep, or is nervous. 5. You should change bath water when it becomes: a. Cold, dirty, or excessively soapy. b. Warm, excessively soapy, or dirty. c. Extremely soapy, dirty, or too clear. d. Dirty, old, or too cold. 6. During the procedure for giving a bed bath or partial bath, the first step of the process is to: a. Introduce yourself and inform the patient of the procedure. b. Prepare supplies and equipment. c. Check the physician's orders. d. Check the required personal toilet articles, and for clean linen available in the unit. 7. When cleaning the inner eye, it is important to remember to move the mittcloth in the direction: a. From outer to inner canthus. b. From top to bottom of eye. c. From inner to outer canthus. d. From bottom to top of eye.
MD0556 1-35

8. When preparing to administer the bed bath/partial bath, the temperature of the water should be how many degrees Fahrenheit? a. 100 to 105. b. 110 to 115. c. 115 to 120. d. 120 to 125. 9. When soap can be used on the patient's face, it should be applied: a. To the cloth, and then to the patient's face. b. Directly to the patient's face, and wiped off with cloth. c. In the water for a while, and then to the cloth. d. Only to the ears and face, but not on neck. 10. When you administer the bed bath/partial bath, the first part of the body to be exposed is: a. The upper limb. b. The upper leg. c. The abdomen. d. The feet. 11. Which area of the body should not be exposed when washing the upper and lower limbs? a. Genitalia. b. Feet. c. Thigh. d. Stomach area.
MD0556 1-36
12. A partial bath to the genitalia area is given by turning the patient: a. On his back to the near side of the bed, and placing the towel under his hips. b. On his side and far side of the bed, and placing the towel under his hips. c. On his back to the far side of the bed, and placing the towel under his hips. d. On his stomach to the far side of the bed, and placing the towel under his stomach. 13. To replace the pajama coat of a patient with an injured arm or shoulder, start replacing: a. From the uninjured side. b. From the far side. c. From the near side. d. From the injured side. 14. The towel bath is administered by the specialist when a patient is sick or confined to: a. The hospital room. b. Bed. c. Ward. d. The general hospital area.
MD0556 1-37
15. When preparing the towel bath, the specialist should draw ___________milliliters of water into the plastic container. a. 1000. b. 2000. c. 3000. d. 4000. 16. When the towel bath is completed, remove towel and: a. Fold it for use later. b. Dispose of it. c. Place with soiled linens in laundry bag. d. Send it directly to laundry. 17. Do not allow the patient to remain in the bath tub more than __________minutes. a. 5. b. 10. c. 15. d. 20. 18. The purpose of administering the tepid sponge bath is to: a. Lower the patient's body temperature. b. Raise the patient's body temperature. c. Maintain the patient's body temperature. d. Lower the patient's blood pressure.
MD0556 1-38

19. When administering a tepid sponge bath, the step after checking the physician's orders is to: a. Cover the patient with a blanket. b. Provide privacy. c. Explain and outline steps of procedures to the patient. d. Prepare the equipment. 20. Caring for the hands and feet require filling the basin full of water at: a. 90 to 100ºF. b. 100 to 110ºF. c. 110 to 120ºF. d. 120 to 130ºF. 21. When you have finished caring for the hands and feet, you should: a. Wash your hands. b. Place soiled linens in laundry bag. c. Clean all equipment and store. d. Remove gloves and store them in proper container. 22. Eyeglasses made with glass lens may be cleaned by using: a. Warm water and a soft dry cloth. b. Special cleaning solutions and drying tissues. c. Warm water and drying tissues. d. Hot water and hot dry cloth.
MD0556 1-39

23. The specialist should learn the routines for cleaning and caring for the patient's hearing aid, and determine if the patient can hear clearly with the aid by talking in a _________ tone of voice. a. Loud. b. Moderate. c. Normal. d. Slow. 24. The patient receiving oxygen through the nasal cannula, or has a nasogastric tube should have the nares cleaned every _________hours. a. 6. b. 8 c. 10. d. 12. 25. The meatal-catheter junction should be cleansed daily with soap and water, and the application of: a. A hypochlorite solution. b. A mild solution of hydroxide. c. Water-soluble microbicidal ointment. d. Alcohol swabs.
MD0556 1-40
26. When caring for a patient with an indwelling catheter, the specialist should: a. Use inverted drainage bags. b. Elevate the bag above the level of the patient's bladder. c. Use a sterile, closed-drainage system with disposable, clear plastic bag and connecting tubes. d. Break the sterile continuity when removing the urine. 27. The backrub is usually administered: a. Before the patient's bath. b. After the patient's bath. c. During the patient's bath. d. When the patient is going to sleep. 28. The specialist will massage the patient's back for: a. 1 minute. b. 2 to 3 minutes. c. 2 to 4 minutes. d. 3 to 5 minutes. 29. The backrub is contraindicated (not given) if the patient has such conditions as: a. Fractured ribs, burns, or high blood pressure. b. Pulmonary embolism, heart condition, or open wounds. c. Fractured ribs, burns, or open wounds. d. Hypertension, dysrhythmias, or fractured ribs.
MD0556 1-41
30. To administer a backrub, the specialist should first: a. Explain to the patient what you are going to do. b. Prepare the equipment. c. Adjust bed height to working level. d. Provide privacy and quiet environment. 31. Prior to moving to another task following the backrub, you should: a. Lower the bed rail, and raise the side rail as needed. b. Wash your hands. c. Remove excess lubricant from patient's back. d. Position the patient and make him comfortable. 32. The patient who can help himself during routine mouth care should: a. Rinse the toothbrush thoroughly under running water and allow it to air dry. b. Disinfect the toothbrush and place it in the cabinet. c. Place the toothbrush in the cabinet and allow it to thoroughly dry before the next use. d. Place the toothbrush in a glass of clean water when it is not in use. 33. The urinal or bedpan is provided anytime one is requested by the patient; in addition, it is usually offered: a. Before meals and before visiting hours. b. Before meals and after visiting hours. c. After meals and after visiting hours. d. After meals and before visiting hours.
Check Your Answers on Next Page
MD0556 1-42

SOLUTIONS TO EXERCISES, LESSON 1 1. b (para 1-2a) 2. c (para 1-2b) 3. a (para 1-2c) 4. a (para 1-3a) 5. a (para 1-3b(6)) 6. c (para 1-3c(1)) 7. c (para 1-3c(13)(b)) 8. b (para 1-3c(1)(a)) 9. a (para 1-3c(13)(c)) 10. a (para 1-3c(14)) 11. a (para 1-3c(16)(a)) 12. a (para 1-3c(18)(a)) 13. d (para 1-3c(20)(a)) 14. b (para 1-3a) 15. b (para 1-4c(6)(c)) 16. c (para 1-4c(7)(j)) 17. d (para 1-5c(7) 18. a (para 1-6a) 19. c (para 1-6c(2)) 20. b (paras 1-7c(6,7)) 21. d (para 1-7c(12)) 22. a (para 1-8c(1)(c))
MD0556 1-43

23. c (para 1-8c(2)(b)) 24. b (para 1-8c(3)(b)) 25. c (para 1-9a) 26. c (para 1-9b(3)) 27. b (para 1-10a) 28. d (para 1-10a) 29. c (para 1-10b(1)) 30. a (para 1-10c(1)) 31. b (para 1-10c(10)) 32. a (para 1-12c(3)) 33. a (para 1-16a)
End of Lesson 1
MD0556 1-44