lesson 2-2 blood collection: capillary puncture student
TRANSCRIPT

LESSON 2-2 Blood Collection: Capillary Puncture Student Performance Guide
LESSON 2-3 Blood Collection: Venipuncture—Syringe Method Student Performance Guide
LESSON 2-3 Blood Collection: Venipuncture—Vacuum-Tube Method Student Performance Guide
LESSON 2-4 Hematocrit Student Performance Guide
LESSON 2-5 The Hemacytometer Student Performance Guide
LESSON 2-5 The Hemacytometer: Red Blood Cell Count Student Performance Guide
LESSON 2-5 The Hemacytometer: Red Cell Count Worksheet
LESSON 2-5 The Hemacytometer: White Blood Cell Count Student Performance Guide
LESSON 2-6 Platelet Count Student Performance Guide
LESSON 2-7 Hemoglobin Determination: Hemoglobin Analyzer Student Performance Guide
LESSON 2-8 Preparing and Staining a Blood Smear Student Performance Guide
LESSON 2-9 Blood Cell Morphology and Differential Count Student Performance Guide
LESSON 2-9 Differential Count Worksheet
LESSON 2-9 Hematology CBC Report Form Report Form
LESSON 2-10 Morphology of Abnormal Blood Cells in Peripheral Blood Student Performance Guide
LESSON 2-11 Reticulocyte Count Student Performance Guide
LESSON 2-11 Reticulocyte Count Worksheet
LESSON 2-12 Erythrocyte Sedimentation Rate Student Performance Guide

PROCEDURERecord in the comment section any problems encountered whilepracticing the procedure (or have a fellow student or the instruc- S = Satisfactorytor evaluate your performance). U = Unsatisfactory
You must: S U Comments
1. Wash hands and put on gloves and protective facewear (usesafety shield if facewear is not available)
2. Assemble equipment and materials
3. Explain the procedure to the patient
4. Select and warm the puncture site
5. Cleanse the puncture site with alcohol-soaked gauze or cotton
6. Allow the site to air-dry or wipe with dry sterile gauze or cotton
7. Position the puncture site, holding the skin taut with one handand holding the lancet in the other hand
8. Perform the capillary puncture, using a quick, firm stab
9. Wipe the first drop of blood away with sterile gauze or cotton
Estridge, B., Reynolds, A., and Walters, N. Basic Medical Laboratory Techniques. © 2000 Delmar, a division of Thomson Learning
Student Performance GuideLESSON 2-2 Blood Collection: Capillary Puncture
Name _________________________________________________________________ Date ______________________
INSTRUCTIONS1. Practice the procedure for performing a capillary
puncture following the step-by-step procedure.
2. Demonstrate your understanding of this lesson by:
a. Completing a written examination successfully,and
b. Performing the procedure for capillary puncturesatisfactorily for the instructor. All steps must becompleted as listed on the instructor’s Per-formance Check Sheet.
Note: Follow manufacturer’s instructions for the typeof capillary tubes used.
MATERIALS AND EQUIPMENT� acrylic safety shield or protective face shield
� gloves
� hand disinfectant
� lancets (sterile, disposable)
� sterile cotton balls or gauze squares
� 70 % alcohol or alcohol swabs
� Mylar-coated capillary tubes (heparinized andplain, self-sealing)
� precalibrated capillary tubes (optional)
� surface disinfectant or 10% chlorine bleach solution
� biohazard container
� puncture-proof biohazard container for sharps

Estridge, B., Reynolds, A., and Walters, N. Basic Medical Laboratory Techniques. © 2000 Delmar, a division of Thomson Learning
You must: S U Comments
10. Massage the finger gently to produce the second drop of blood
11. Collect the blood specimen:
a. For hematocrit test:
1. Fill a capillary tube two-thirds to three-quarters full using the second and subsequent drops of blood (fill to the line if using pre-calibrated tubes). Follow manufacturer’s directions for the type of tube used
2. Fill a second tube and seal the tubes
b. For other POCT:
1. Apply a free-flowing drop of blood to test strip, slide, or cartridge
2. Follow directions with instrument to complete the analysis
12. Apply pressure to the puncture site by pressing with dry sterilegauze or cotton. Instruct patient to continue applying pressure
13. Place used lancet into a puncture-proof biohazard container forsharp objects
14. Discard used gauze or cotton into biohazard container
15. Clean and return equipment to proper storage
16. Clean work area with surface disinfectant
17. Remove and discard gloves into biohazard container. Washhands with hand disinfectant
Evaluator Comments:
Evaluator ___________________________________________________________________ Date _________________________

Estridge, B., Reynolds, A., and Walters, N. Basic Medical Laboratory Techniques. © 2000 Delmar, a division of Thomson Learning
Student Performance GuideLESSON 2-3 Blood Collection: Venipuncture—Syringe Method
Name _________________________________________________________________ Date ______________________
INSTRUCTIONS1. Practice performing a venipuncture using a syringe
and following the step-by-step procedure.
2. Demonstrate your understanding of this lesson by:
a. Completing a written examination successfully,and
b. Performing a venipuncture using a syringe satis-factorily for the instructor. All steps must becompleted as listed on the instructor’sPerformance Check Sheet.
MATERIALS AND EQUIPMENT� acrylic safety shield� gloves� hand disinfectant� tourniquet� sterile gauze or cotton� 70% alcohol or alcohol swabs� sterile disposable 20 to 22 gauge safety needle � sterile syringe� collection tubes� test tube rack� needle-disposal container (sharps container)� surface disinfectant (10% chlorine bleach solution)� biohazard container
PROCEDURERecord in the comment section any problems encountered whilepracticing the procedure (or have a fellow student or the instruc- S = Satisfactorytor evaluate your performance). U = Unsatisfactory
You must: S U Comments
1. Wash hands and put on gloves
2. Assemble equipment and materials
3. Place venipuncture equipment and clean gauze within easyreach
4. Identify patient
5. Explain venipuncture procedure to, and position, patient
6. Attach the capped needle to the syringe, maintaining sterility
7. Slide the plunger up and down in the barrel of the syringe to besure it moves freely
8. Push the plunger to the bottom of the barrel so no air remainsin the syringe
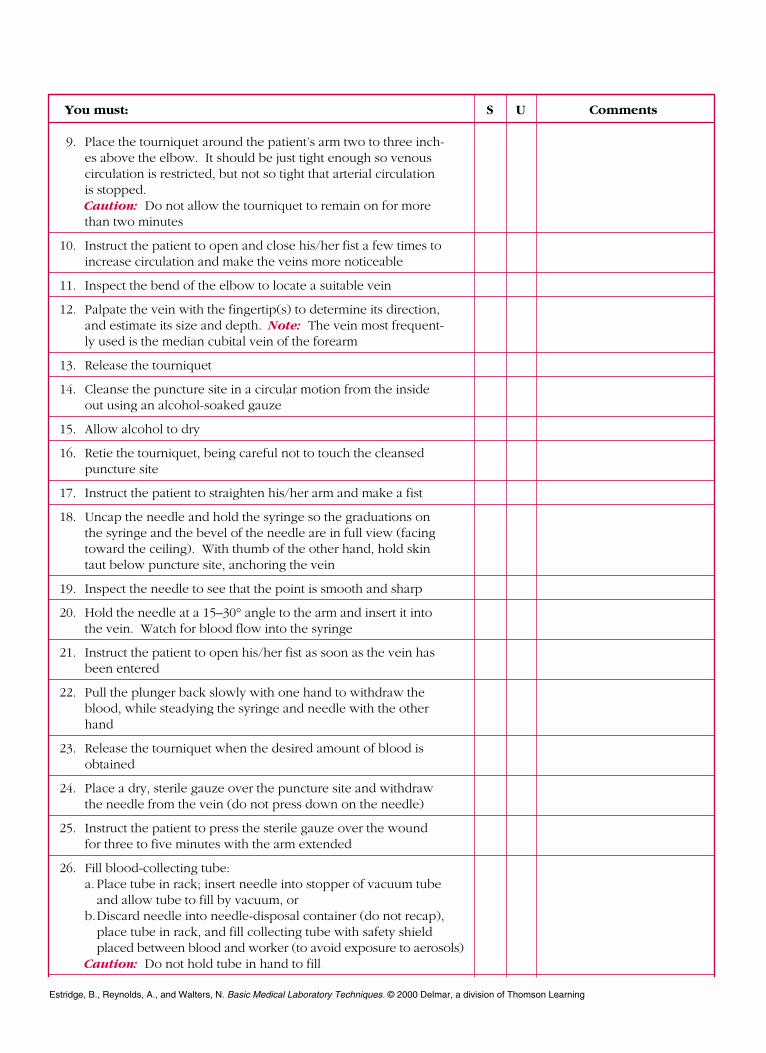
You must: S U Comments
9. Place the tourniquet around the patient’s arm two to three inch-es above the elbow. It should be just tight enough so venouscirculation is restricted, but not so tight that arterial circulationis stopped.Caution: Do not allow the tourniquet to remain on for morethan two minutes
10. Instruct the patient to open and close his/her fist a few times toincrease circulation and make the veins more noticeable
11. Inspect the bend of the elbow to locate a suitable vein
12. Palpate the vein with the fingertip(s) to determine its direction,and estimate its size and depth. Note: The vein most frequent-ly used is the median cubital vein of the forearm
13. Release the tourniquet
14. Cleanse the puncture site in a circular motion from the insideout using an alcohol-soaked gauze
15. Allow alcohol to dry
16. Retie the tourniquet, being careful not to touch the cleansedpuncture site
17. Instruct the patient to straighten his/her arm and make a fist
18. Uncap the needle and hold the syringe so the graduations onthe syringe and the bevel of the needle are in full view (facingtoward the ceiling). With thumb of the other hand, hold skintaut below puncture site, anchoring the vein
19. Inspect the needle to see that the point is smooth and sharp
20. Hold the needle at a 15–30° angle to the arm and insert it intothe vein. Watch for blood flow into the syringe
21. Instruct the patient to open his/her fist as soon as the vein hasbeen entered
22. Pull the plunger back slowly with one hand to withdraw theblood, while steadying the syringe and needle with the otherhand
23. Release the tourniquet when the desired amount of blood isobtained
24. Place a dry, sterile gauze over the puncture site and withdrawthe needle from the vein (do not press down on the needle)
25. Instruct the patient to press the sterile gauze over the woundfor three to five minutes with the arm extended
26. Fill blood-collecting tube:a. Place tube in rack; insert needle into stopper of vacuum tube
and allow tube to fill by vacuum, orb.Discard needle into needle-disposal container (do not recap),
place tube in rack, and fill collecting tube with safety shield placed between blood and worker (to avoid exposure to aerosols)
Caution: Do not hold tube in hand to fill
Estridge, B., Reynolds, A., and Walters, N. Basic Medical Laboratory Techniques. © 2000 Delmar, a division of Thomson Learning

You must: S U Comments
27. Label the tube properly
28. Discard used syringe into biohazard sharps container
29. Check patient to be sure bleeding has stopped; apply bandage,if necessary
30. Clean and return equipment to storage
31. Clean work area with surface disinfectant
32. Remove and discard gloves in biohazard container
33. Wash hands with hand disinfectant
Evaluator Comments:
Evaluator ___________________________________________________________________ Date _________________________
Estridge, B., Reynolds, A., and Walters, N. Basic Medical Laboratory Techniques. © 2000 Delmar, a division of Thomson Learning

Student Performance GuideLESSON 2-3 Blood Collection: Venipuncture—Vacuum-Tube Method
Name _________________________________________________________________ Date ______________________
INSTRUCTIONS1. Practice performing a venipuncture using a vacu-
um-tube system and following the step-by-step pro-cedure.
2. Demonstrate your understanding of this lesson by:
a. Completing a written examination successfully,
and
b. Performing a venipuncture using a vacuum-tube system satisfactorily for the instructor. All steps must be completed as listed on the instructor’s Performance Check Sheet.
MATERIALS AND EQUIPMENT� acrylic safety shield� gloves� hand disinfectant� tourniquet� sterile gauze or cotton� 70% alcohol or alcohol swabs� vacuum-tube safety needle and holder� evacuated blood-collection tubes� needle-disposal container� 10% chlorine bleach solution� biohazard container
PROCEDURERecord in the comment section any problems encountered whilepracticing the procedure (or have a fellow student or the instruc- S = Satisfactorytor evaluate your performance). U = Unsatisfactory
You must: S U Comments
1. Wash hands and put on gloves
2. Assemble equipment and materials
3. Place venipuncture equipment and clean gauze within easyreach
4. Identify patient
5. Explain venipuncture procedure to, and position, the patient
6. Attach the sterile capped needle to the needle holder
7. Insert vacuum-collection tube into needle holder, but do notpierce stopper with needle
Estridge, B., Reynolds, A., and Walters, N. Basic Medical Laboratory Techniques. © 2000 Delmar, a division of Thomson Learning

You must: S U Comments
8. Place the tourniquet around the patient’s arm two to three inch-es above the elbow. It should be just tight enough so venouscirculation is restricted, but not so tight that arterial circulation isstopped. Caution: Do not allow the tourniquet to remain on for morethan two minutes
9. Instruct the patient to open and close his/her fist a few times toincrease circulation and make the veins more noticeable
10. Inspect the bend of the elbow to locate a suitable vein
11. Palpate the vein with the fingertips to determine its direction,and estimate its size and depth. Note: The vein most frequent-ly used is the median cubital vein of the forearm
12. Release the tourniquet
13. Cleanse the puncture site in a circular motion from the insideout using an alcohol-soaked gauze
14. Allow alcohol to dry
15. Retie the tourniquet, being careful not to touch the sterilepuncture site
16. Instruct the patient to straighten his/her arm and make a fist
17. Uncap the needle and hold the needle holder and tube assem-bly so the bevel of the needle is facing upward (toward ceiling).With the thumb of your other hand, hold the skin below punc-ture site taut
18. Inspect the needle to see that the point is smooth and sharp
19. Hold the needle at a 15–30° angle to the arm and insert it intothe vein.
20. Push the vacuum tube gently onto the inner needle in the hold-er while steadying the needle holder with the other hand.Watch for blood flow into the tube
21. Instruct the patient to open his/her fist as soon as the vein hasbeen entered
22. Release the tourniquet when the desired amount of blood isobtained
23. Remove the vacuum tube from the needle holder
24. Place a dry, sterile gauze over the puncture site and withdrawthe needle from the vein (do not press down on the needle)
25. Instruct the patient to press the sterile gauze over the wound forthree to five minutes with his/her arm extended
Estridge, B., Reynolds, A., and Walters, N. Basic Medical Laboratory Techniques. © 2000 Delmar, a division of Thomson Learning

Estridge, B., Reynolds, A., and Walters, N. Basic Medical Laboratory Techniques. © 2000 Delmar, a division of Thomson Learning
You must: S U Comments
26. Discard the needle into the needle-disposal container. DO NOTRECAP
27. Label the collecting tube properly
28. Discard used materials as indicated by the instructor
29. Check patient to be sure bleeding has stopped; apply bandage,if necessary
30. Clean and return equipment to storage
31. Clean work area with surface disinfectant
32. Remove and discard gloves in biohazard container
33. Wash hands with hand disinfectant
Evaluator Comments:
Evaluator ___________________________________________________________________ Date _________________________

PROCEDURERecord in the comment section any problems encountered whilepracticing the procedure (or have a fellow student or the instruc- S = Satisfactorytor evaluate your performance). U = Unsatisfactory
You must: S U Comments
1. Wash hands and put on gloves
2. Assemble equipment and materials for capillary puncture andhematocrit; place acrylic safety shield into position
3. Fill two capillary tubes from a capillary puncture:
a. Perform a capillary puncture
b. Wipe away the first drop of blood
c. Touch one end of a heparinized capillary tube to the second drop of blood
d. Allow the tube to fill three-quarters full by capillary action. A slight downward angle of the tube may be necessary. If using precalibrated tubes, fill to the line
Student Performance GuideLESSON 2-4 Hematocrit
Name _________________________________________________________________ Date ______________________
INSTRUCTIONS1. Practice the hematocrit procedure following the
step-by-step instructions.
2. Demonstrate your understanding of this lesson by:
a. Completing a written examination successfully,and
b. Performing the procedure for the hematocrit sat-isfactorily for the instructor. All steps must becompleted as listed on the instructor’sPerformance Check Sheet.
Note: Consult the instruction manual for the centrifugebeing used. Refer to the specific procedure being per-formed.
MATERIALS AND EQUIPMENT� gloves� acrylic safety shield� hand disinfectant� self-sealing capillary tubes, Mylar-coated,
heparinized, and plain � precalibrated capillary tubes (optional)� microhematocrit centrifuge and reader� tube of anticoagulated venous blood (or
commercially available simulated blood)� paper towels or soft laboratory tissue� 70% alcohol or alcohol swabs� gauze or cotton balls, sterile� blood lancets, sterile, disposable� surface disinfectant or 10% chlorine bleach
solution� biohazard container� puncture-proof biohazard container for sharps
Estridge, B., Reynolds, A., and Walters, N. Basic Medical Laboratory Techniques. © 2000 Delmar, a division of Thomson Learning

You must: S U Comments
e. Fill a second tube in the same manner
f. Wipe the outside of the filled capillary tube with soft tissue, if necessary, to remove excess blood
g. Seal the capillary tube. Check to see that the plug has expanded
4. Fill two capillary tubes using a tube of EDTA anticoagulatedblood (If not available, proceed to step 5):
a. Mix the tube of blood thoroughly by gently rocking tube from end to end a minimum of two minutes by mechanical mixer or fifty to sixty times by hand
b. Remove cap from tube (with an acrylic safety shield placed between worker and tube)
c. Tilt the tube so the blood is very near the top edge of the tube
d. Insert the tip of a plain capillary tube into the blood and fill three-quarters full by capillary action. If using precalibrated tubes, fill to the line Note: Wipe the outside of the filled capillary tube with tissue, if necessary, to remove excess blood
e. Seal the tube. Check to see that plug expanded
f. Fill a second tube in the same manner
5. Place tubes into the hematocrit centrifuge with sealed endssecurely against the gasket. Balance the load by placing thetubes directly opposite each other
6. Fasten both lids securely
7. Set the timer and adjust the speed if necessary
8. Centrifuge for the prescribed time
9. Allow centrifuge to come to a complete stop and unlock lid(s)
10. Determine the hematocrit values using one of the followingmethods:
A. A centrifuge that requires calibrated tubes and has a built-in scale:
(1) Position the tubes as directed by the manufacturer’s instructions
(2) Read the hematocrit value
B. A centrifuge without a built-in reader:
(1) Remove capillary tubes from centrifuge carefully
(2) Place tubes on the hematocrit reader provided
(3) Follow instructions on the reader to obtain the hematocrit value
Estridge, B., Reynolds, A., and Walters, N. Basic Medical Laboratory Techniques. © 2000 Delmar, a division of Thomson Learning

Estridge, B., Reynolds, A., and Walters, N. Basic Medical Laboratory Techniques. © 2000 Delmar, a division of Thomson Learning
You must: S U Comments
11. Average the values from the two tubes and record the hemat-ocrit. (The values must agree within ±1%)
12. Discard capillary tubes and used lancets in a puncture-proofbiohazard container for sharps
13. Clean and return equipment to proper storage
14. Clean the work area with surface disinfectant
15. Remove gloves, discard in biohazard container, and washhands with hand disinfectant
Evaluator Comments:
Evaluator ___________________________________________________________________ Date _________________________

PROCEDURERecord in the comment section any problems encountered whilepracticing the procedure (or have a fellow student or the instruc- S = Satisfactorytor evaluate your performance). U = Unsatisfactory
You must: S U Comments
1. Assemble equipment and materials
2. Use lens paper and alcohol to carefully clean hemacytometerand coverglass
3. Place the coverglass carefully over the ruled areas (chamber) of the hemacytometer
4. Wash hands and put on gloves
5. Draw distilled water into the micropipet (approximately 10 µLwill be needed for each side of the chamber)
6. Wipe excess fluid from the tip of the pipet using soft tissue
Student Performance GuideLESSON 2-5 The Hemacytometer
Name _________________________________________________________________ Date ______________________
INSTRUCTIONS1. Practice using the hemacytometer following the
step-by-step procedure.
2. Demonstrate your understanding of this lesson by:
a. Completing a written examination successfully,and
b. Demonstrating the procedure for using thehemacytometer satisfactorily for the instructor.All steps must be completed as listed on theinstructor’s Performance Check Sheet.
MATERIALS AND EQUIPMENT� gloves� hand disinfectant� hemacytometer� 10% chlorine bleach solution� hemacytometer coverglass� lens paper� 70% ethyl or isopropyl alcohol� micropipet (10–20 �L capacity)� pipet tips for micropipet� microscope� paper towels or gauze� laboratory detergent� distilled water� soft tissue� biohazard container� puncture-proof sharps container
Estridge, B., Reynolds, A., and Walters, N. Basic Medical Laboratory Techniques. © 2000 Delmar, a division of Thomson Learning

You must: S U Comments
7. Hold the pipet at a 45° angle and touch the tip to the pointwhere the coverglass and the hemacytometer meet (do notmove coverglass)
8. Allow fluid to flow into one side of the chamber by capillaryaction (the chamber should fill in one smooth flow withoutflooding over into the depressions)
9. Fill the other side of the chamber in the same manner
10. Position the low-power (10X) objective in place
11. Place the hemacytometer on the microscope stage securely withone ruled area over the light source
12. Look directly at the hemacytometer (not through microscopeeyepiece) and turn the coarse-adjustment knob to bring themicroscope objective and the hemacytometer close together,continuing until the objective is almost touching the coverglass.Note: Use coarse-adjustment knob with care
13. Look into the eyepiece and slowly turn the coarse-adjustmentknob in the opposite direction until the etched lines come intoview
14. Rotate the fine-adjustment knob until the lines are in clear focus
15. Find all nine squares used for the WBC count on one side of thechamber by moving the stage or the hemacytometer
16. Scan squares using left-to-right, right-to-left counting patternand note boundary lines
17. Locate the center square used for the RBC count
18. Rotate the high-power (40X) objective carefully into positionand adjust focus using the fine-adjustment knob until the etchedlines appear distinct
19. Locate the four small corner squares and the center square(within the large center square) used for the RBC count
20. Scan counting area using left-to-right, right-to-left pattern andnote boundary lines
21. View the second ruled area, repeating steps 15–20
22. Rotate the low-power objective into position
23. Remove the hemacytometer carefully from the microscopestage (Place hemacytometer and coverglass into chlorine bleachsolution to disinfect, if blood was used)
24. Clean the hemacytometer and the coverglass carefully usingalcohol and lens paper
25. Dry the hemacytometer and coverglass with lens paper
Estridge, B., Reynolds, A., and Walters, N. Basic Medical Laboratory Techniques. © 2000 Delmar, a division of Thomson Learning

Estridge, B., Reynolds, A., and Walters, N. Basic Medical Laboratory Techniques. © 2000 Delmar, a division of Thomson Learning
You must: S U Comments
26. Clean and return all equipment to proper storage
27. Clean work area with surface disinfectant
28. Remove and discard gloves in biohazard container
29. Wash hands with hand disinfectant
Evaluator Comments:
Evaluator ___________________________________________________________________ Date _________________________

Student Performance GuideLESSON 2-5 The Hemacytometer: Red Blood Cell Count
Name _________________________________________________________________ Date ______________________
INSTRUCTIONS1. Practice performing and calculating an RBC count
using the RBC UNOPETTE® system and followingthe step-by-step procedure.
2. Demonstrate your understanding of this lesson by:
a. Completing a written examination successfully,and
b. Performing the RBC count procedure satisfactori-ly for the instructor. All steps must be completedas listed on the instructor’s Performance CheckSheet.
Note: The following is a general procedure for using aUNOPETTE® system. Consult the package insert forspecific instructions.
MATERIALS AND EQUIPMENT� gloves� hand disinfectant� materials for capillary puncture, or blood sample,
anticoagulated with EDTA� gauze or paper towel� hemacytometer with coverglass� test tube rack or beaker to hold blood sample� UNOPETTE® RBC system (reservoir and pipet
assembly)� microscope� lens paper� alcohol (70% ethanol)� hand tally counter� surface disinfectant or 10% chlorine bleach solution� biohazard container� biohazard container for sharps� acrylic safety shield
PROCEDURERecord in the comment section any problems encountered whilepracticing the procedure (or have a fellow student or the instruc- S = Satisfactorytor evaluate your performance). U = Unsatisfactory
You must: S U Comments
1. Assemble equipment and materials. Set up acrylic safety shield
2. Place a clean hemacytometer coverglass over a cleanhemacytometer
3. Wash hands and put on gloves
4. Puncture the diaphragm of the UNOPETTE® reservoir. Hold thereservoir firmly on a flat surface with one hand and use the tipof the pipet shield to puncture the diaphragm.Note: The opening must be made large enough to easilyaccommodate the pipet
Estridge, B., Reynolds, A., and Walters, N. Basic Medical Laboratory Techniques. © 2000 Delmar, a division of Thomson Learning

Estridge, B., Reynolds, A., and Walters, N. Basic Medical Laboratory Techniques. © 2000 Delmar, a division of Thomson Learning
You must: S U Comments
5. Remove the shield from the pipet assembly
6. Fill the capillary pipet from a capillary puncture or from a tubeof well-mixed EDTA anticoagulated blood. The pipet will fillby capillary action and will stop filling automatically.Note: Keep pipet horizontal or at a slight (5°) upward angle toavoid overfilling
7. Wipe excess blood from the outside of the capillary pipet withsoft laboratory tissue.Note: Do not allow tissue to touch pipet tip
8. Squeeze the reservoir slightly, being careful not to expel any ofthe liquid
9. Maintain the pressure on the reservoir and insert the capillarypipet into the reservoir, seating the pipet firmly in the neck ofthe reservoir. Do not expel any of the liquid
10. Release the pressure on the reservoir, drawing the blood out ofthe capillary pipet into the diluent
11. Squeeze the reservoir gently three to four times to rinse theremaining blood from the capillary pipet.Note: Do not allow the blood-diluent mixture to flow out thetop
12. Mix the contents of the reservoir thoroughly by gently swirling the reservoir or turning it side to side
13. Withdraw the capillary pipet from the reservoir and insert it inthe neck of the reservoir in reverse position (the pipet tipshould now project upward from the reservoir)
14. Mix the contents of the reservoir thoroughly. Invert the reser-voir and gently squeeze to discard four to five drops onto gauzeor paper towel
15. Fill both sides of the hemacytometer
16. Place the hemacytometer on the microscope stage carefully andsecurely
17. Use the low-power (10X) objective to bring the ruled area intofocus
18. Locate the large central square
19. Rotate the high-power (40X) objective into position carefullyand focus with the fine-adjustment knob until lines are clear
20. Adjust the light or condenser so RBCs are visible
21. Count the cells in the four corner squares and one center squarewithin the larger center square of the counting area, using theleft-to-right, right-to-left counting pattern

Estridge, B., Reynolds, A., and Walters, N. Basic Medical Laboratory Techniques. © 2000 Delmar, a division of Thomson Learning
You must: S U Comments
22. Record the results for each of the five squares (four corners andone center)
23. Repeat the count using the other side of the hemacytometer
24. Use the worksheet to calculate the RBC count
25. Record the result
26. Disinfect the hemacytometer and coverglass using 10% chlorinebleach solution
27. Discard the specimen and disposable materials appropriately
28. Return the equipment to proper storage
29. Clean work area with surface disinfectant
30. Remove and discard gloves in biohazard container and washhands with hand disinfectant
Evaluator Comments:
Evaluator ___________________________________________________________________ Date _________________________

Estridge, B., Reynolds, A., and Walters, N. Basic Medical Laboratory Techniques. © 2000 Delmar, a division of Thomson Learning
SIDE 1 NUMBER OF CELLS COUNTED
Square a _________________________________
Square b _________________________________
Square c _________________________________
Square d _________________________________
Square e _________________________________
Total cells counted side 1 = _________________________________
SIDE 2 NUMBER OF CELLS COUNTED
Square a _________________________________
Square b _________________________________
Square c _________________________________
Square d _________________________________
Square e _________________________________
Total cells counted side 2 = _________________________________
Total of sides 1 and 2 = _________________________________
Average of two sides (total divided by two) = _________________________________
Multiply average number of cells by 10,000 _________________________________ = RBC/µL
Convert to SI units (RBC/L) by multiplyingabove number by 106 _________________________________ = RBC/L
WorksheetLESSON 2-5 The Hemacytometer: Red Cell Count
Name _________________________________________________________________ Date ______________________

Student Performance GuideLESSON 2-5 The Hemacytometer: White Blood Cell Count
Name _________________________________________________________________ Date ______________________
INSTRUCTIONS1. Practice performing and calculating a WBC count
following the step-by-step procedure.
2. Demonstrate your understanding of this lesson by:
a. Completing a written examination successfully,and
b. Performing the WBC count procedure satisfacto-rily for the instructor. All steps must be complet-ed as listed on the instructor’s PerformanceCheck Sheet.
Note: The following is a general procedure for usingthe UNOPETTE® system. Consult the package insert forspecific instructions.
MATERIALS AND EQUIPMENT� gloves� surface disinfectant (10% chlorine bleach solution)� gauze or paper towel� tube of EDTA blood or supplies for a capillary
puncture� hand disinfectant� UNOPETTE® WBC or WBC/Platelet system� hemacytometer with coverglass� hand tally counter� 70% alcohol� microscope� lens paper� acrylic safety shield� biohazard container� biohazard container for sharps
PROCEDURERecord in the comment section any problems encountered whilepracticing the procedure (or have a fellow student or the instruc- S = Satisfactorytor evaluate your performance). U = Unsatisfactory
You must: S U Comments
1. Assemble equipment and materials; obtain a UNOPETTE® sys-tem for WBC or WBC/platelet count
2. Place a clean hemacytometer coverglass on a clean hemacy-tometer
3. Pierce the diaphragm of the UNOPETTE® reservoir with thepipet shield
4. Set up acrylic safety shield
5. Wash hands and put on gloves
Estridge, B., Reynolds, A., and Walters, N. Basic Medical Laboratory Techniques. © 2000 Delmar, a division of Thomson Learning

You must: S U Comments
6. Remove the shield from the pipet assembly (Perform steps 7–14with acrylic safety shield between you and the blood or bloodsolution)
7. Fill the UNOPETTE® capillary pipet from a capillary puncture orfrom a tube of well-mixed EDTA blood
8. Allow the blood to flow into the capillary until it automaticallystops
9. Wipe any excess blood from the outside of the pipet, beingcareful not to touch the tip with the tissue
10. Squeeze the reservoir lightly, being careful not to expel any ofthe liquid
11. Maintain pressure on the reservoir and insert the capillary pipetinto the reservoir, seating the pipet firmly in the neck of thereservoir. Do not expel any of the liquid
12. Release the pressure on the reservoir, drawing the blood out ofthe capillary into the diluent
13. Squeeze the reservoir gently three to four times to rinse theremaining blood from the capillary pipet.Note: Do not allow the blood-diluent mixture to flow out the top
14. Mix contents of the reservoir by gently swirling the reservoir ortilting it from side to side
15. Let the reservoir sit for ten minutes (but no longer than an hour)to destroy the red blood cells
16. Remove the pipet from the reservoir and insert it in the neck ofthe reservoir so the pipet tip extends upward from the reservoir
17. Mix the contents of the reservoir thoroughly. Invert the reser-voir and gently squeeze to discard four or five drops onto papertowel or gauze
18. Touch the tip of the pipet to the edge of the coverglass andhemacytometer. Fill both sides of the hemacytometer
19. Place the hemacytometer on the microscope stage carefully andsecure it
20. Use the low-power (10X) objective to bring the ruled area intofocus. Identify the nine white blood cell squares
21. Count the WBCs lying within all nine squares, using the bound-ary rule
22. Record the results
23. Repeat the count, using the other side of the hemacytometer,and record the results
Estridge, B., Reynolds, A., and Walters, N. Basic Medical Laboratory Techniques. © 2000 Delmar, a division of Thomson Learning

Estridge, B., Reynolds, A., and Walters, N. Basic Medical Laboratory Techniques. © 2000 Delmar, a division of Thomson Learning
You must: S U Comments
24. Obtain the average count by adding the results from the twosides together and dividing by two
25. Calculate 10% of the average and add that to the average. Thenmultiply that total by 100 to get the number of white blood cellsper µL
26. Place hemacytometer and coverglass into bleach solution forten minutes, then rinse with water. Dry carefully with lenspaper
27. Discard any sharps into a puncture-proof biohazard container
28. Return tube of blood to storage area or discard into biohazardwaste. Discard UNOPETTE® assembly in biohazard sharps con-tainer
29. Return equipment to proper storage
30. Clean work area with surface disinfectant
31. Remove and discard gloves in biohazard container
32. Wash hands with hand disinfectant
Evaluator Comments:
Evaluator ___________________________________________________________________ Date _________________________

Student Performance GuideLESSON 2-6 Platelet Count
Name _________________________________________________________________ Date ______________________
INSTRUCTIONS1. Practice performing a platelet count following the
step-by-step procedure.
2. Demonstrate your understanding of this lesson by:
a. Completing a written examination successfully,and
b. Performing a platelet count satisfactorily for theinstructor. All steps must be completed as listedon the instructor’s Performance Check Sheet.
Note: The following is a general procedure for theuse of the UNOPETTE® system. Consult the packageinsert for specific instructions.
MATERIALS AND EQUIPMENT� gloves� hand disinfectant� blood sample, anticoagulated with EDTA� acrylic safety shield or face shield� hemacytometer with coverglass� test-tube rack or beaker to hold blood sample� UNOPETTE® for platelet count (reservoir and pipet
assembly)� microscope� Petri dish� cotton ball (moistened slightly with water)� lens paper� alcohol (70% ethanol)� hand tally counter� surface disinfectant (10% chlorine bleach solution)� biohazard container� puncture-proof container for sharps
PROCEDURERecord in the comment section any problems encountered whilepracticing the procedure (or have a fellow student or the instruc- S = Satisfactorytor evaluate your performance). U = Unsatisfactory
You must: S U Comments
1. Wash hands and put on gloves
2. Assemble equipment and materials
3. Place a clean hemacytometer coverglass over a clean hemacy-tometer
4. Puncture the diaphragm of the UNOPETTE® reservoir. Hold thereservoir firmly on a flat surface with one hand and use the tipof the pipet shield to puncture the diaphragm. Remove theshield from the pipet assemblyNote: The opening must be made large enough to easilyaccommodate the pipet
Estridge, B., Reynolds, A., and Walters, N. Basic Medical Laboratory Techniques. © 2000 Delmar, a division of Thomson Learning

You must: S U Comments
5. Work behind safety shield or wear face shield
6. Fill the capillary pipet from a capillary puncture or from a tubeof well-mixed EDTA anticoagulated blood. The pipet will fill bycapillary action and will stop filling automaticallyNote: Keep pipet horizontal or at a slight (5°) upward angle toavoid overfilling
7. Wipe excess blood from the outside of the capillary pipet withsoft laboratory tissue.Note: Do not allow tissue to touch pipet tip
8. Squeeze the reservoir lightly, being careful not to expel any ofthe liquid
9. Maintain the pressure on the reservoir and insert the capillarypipet into the reservoir, seating the pipet firmly in the neck ofthe reservoir. Do not expel any of the liquid
10. Release the pressure on the reservoir, drawing the blood out ofthe capillary pipet into the diluent
11. Squeeze the reservoir gently three to four times to rinse theremaining blood from the capillary pipet.Note: Do not allow the blood-diluent mixture to flow out thetop
12. Mix the contents of the reservoir thoroughly by gently swirlingthe reservoir or tilting it from side to side
13. Let reservoir stand at least 10 minutesNote: Do not allow to stand longer than three hours
14. Prepare a moist chamber: Place a slightly moist cotton ball intoa Petri dish, leaving enough space for the hemacytometer
15. Withdraw the capillary pipet from the reservoir and place it inthe neck of the reservoir in reverse position (the pipet tipshould now project upward from the reservoir)
16. Mix the contents of the reservoir thoroughly. Invert the reser-voir and gently squeeze to discard four to five drops onto gauzeor paper towel
17. Fill both sides of the hemacytometer using the capillary pipet
18. Place the hemacytometer in the Petri dish. Do not allow thecotton ball to touch the hemacytometer
19. Place the cover on the Petri dish and allow the preparation tostand 10 minutes (this permits the platelets to settle in the cham-ber). Do not wait longer than 30 minutes to complete theplatelet count
20. Place the hemacytometer on the microscope stage carefully andsecurely
Estridge, B., Reynolds, A., and Walters, N. Basic Medical Laboratory Techniques. © 2000 Delmar, a division of Thomson Learning

Estridge, B., Reynolds, A., and Walters, N. Basic Medical Laboratory Techniques. © 2000 Delmar, a division of Thomson Learning
You must: S U Comments
21. Use the low-power (10X) objective to bring the ruled area intofocus
22. Locate the large central square
23. Rotate the high-power (40X) objective into position carefullyand focus with the fine-adjustment knob until the ruled lines areclear
24. Lower the condenser and reduce the light by partially closingthe diaphragm for best contrast. Platelets should appear asround or oval particles that are refractile and smaller than RBCs
25. Count the platelets in the entire center square of the ruled area(all 25 small squares) using the left-to-right, right-to-left count-ing pattern and record results
26. Repeat the count on the other side of the hemacytometer
27. Average the results from the two sides
28. Calculate the platelet count:
platelets/µL = Avg x D (mm) x DFA (mm2)
or
platelets/µL = average # platelets x 1000
29. Record the results
30. Disinfect hemacytometer and coverglass with 10% chlorinebleach solution and then wash them
31. Discard specimen and UNOPETTE® assembly into sharps container
32. Return equipment to proper storage
33. Clean work area with surface disinfectant
34. Remove and discard gloves in biohazard container
35. Wash hands with hand disinfectant
Evaluator Comments:
Evaluator ___________________________________________________________________ Date _________________________

Student Performance GuideLESSON 2-7 Hemoglobin Determination: Hemoglobin Analyzer
Name _________________________________________________________________ Date ______________________
INSTRUCTIONS1. Practice the procedure for determining blood
hemoglobin concentration using a hemoglobin ana-lyzer and following the step-by-step procedure.
2. Demonstrate your understanding of this lesson by:
a. Completing a written examination successfully,and
b. Performing a hemoglobin determination using ahemoglobin analyzer satisfactorily for theinstructor. All steps must be completed as listedon the instructor’s Performance Check Sheet.
Note: Consult manufacturer’s instructions for specificprocedure.
MATERIALS AND EQUIPMENT� acrylic safety shield or protective facewear� gloves� hand disinfectant� 10% chlorine bleach solution� capillary puncture equipment or blood samples col-
lected in EDTA� HemoCue® System, or other hemoglobin analyzer
with supplies appropriate for the analyzer� biohazard container� puncture-proof biohazard container for sharps� hemoglobin control solution
PROCEDURERecord in the comment section any problems encountered whilepracticing the procedure (or have a fellow student or the instruc- S = Satisfactorytor evaluate your performance). U = Unsatisfactory
You must: S U Comments
1. Wash hands and put on gloves
2. Assemble equipment and materials for HemoCue® B-Hemoglobin analyzer or go to step 14 for other analyzer
3. Turn on instrument to warm up. The display screen should read “Hb”
4. Pull out the slide arm that holds the cuvette to the first stop.Within 2–6 seconds, the screen should read “Ready”, with threeflashing dashes
5. Place the control cuvette into the holder and push the holdercompletely in. The screen should read “Measuring”
Estridge, B., Reynolds, A., and Walters, N. Basic Medical Laboratory Techniques. © 2000 Delmar, a division of Thomson Learning

You must: S U Comments
6. Record the value of the reading that appears after 10–15 sec-onds; the value should be within ±0.3 g/dL of the assignedvalue. If the value is not within the acceptable range, contactthe manufacturer
7. Remove a cuvette from the vial. Immediately replace the captightly to prevent humidity damage to cuvettes
8. Perform a capillary puncture observing Standard Precautions.Wipe away the first drop or two of blood with a tissue or sterilecotton ball
9. Touch the pointed tip of the cuvette to a well-rounded drop ofblood and allow the cuvette to fill in one continuous motion. Apartially filled cuvette must be discarded and the collectionrepeated using a new cuvette
10. Wipe excess blood from the outside of the cuvette, being care-ful not to touch the open end of the curved edge
11. Insert the filled cuvette into the holder of the HemoCue®
photometer within 10 minutes of filling the cuvette
12. Push the holder into the analyzer to the “measuring” position
13. Read the hemoglobin value from the display and record
14. If using another hemoglobin analyzer, follow the manufactur-er’s instructions for performing a hemoglobin determination
15. Discard all contaminated materials in biohazard containers
16. Turn off the instrument, wipe up any spills, and return allequipment to proper storage
17. Wipe counters with surface disinfectant
18. Remove and discard gloves in appropriate biohazard container
19. Wash hands with hand disinfectant
Evaluator Comments:
Evaluator ___________________________________________________________________ Date _________________________
Estridge, B., Reynolds, A., and Walters, N. Basic Medical Laboratory Techniques. © 2000 Delmar, a division of Thomson Learning
PROCEDURERecord in the comment section any problems encountered whilepracticing the procedure (or have a fellow student or the instruc- S = Satisfactorytor evaluate your performance). U = Unsatisfactory
You must: S U Comments
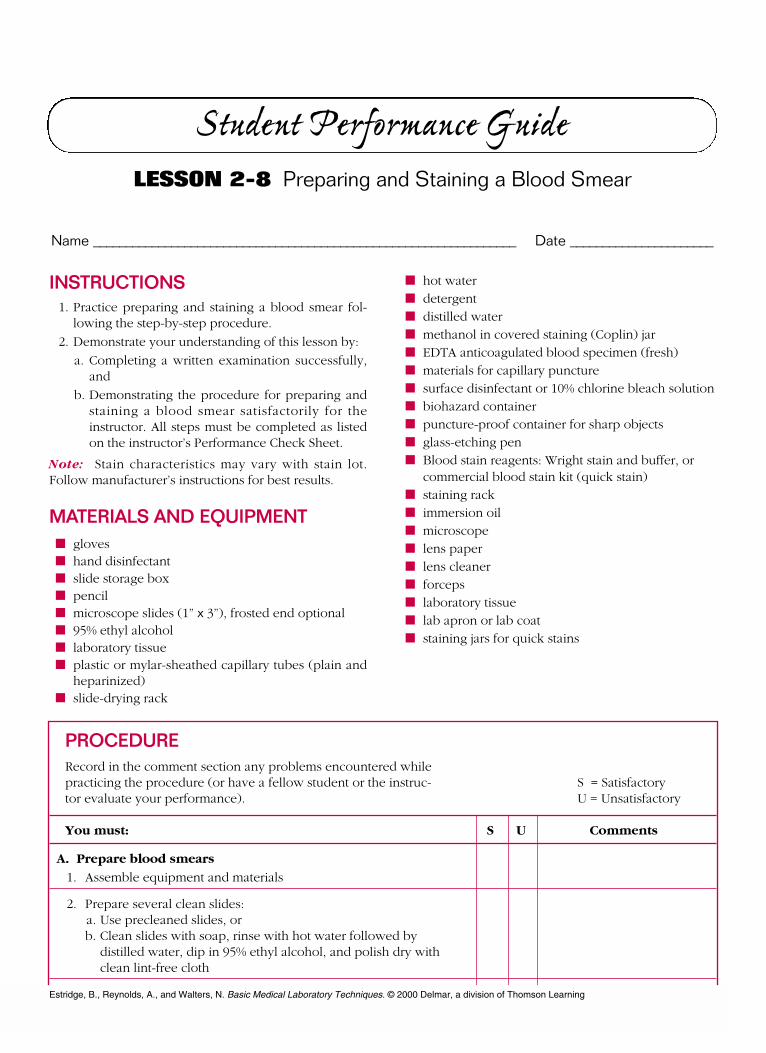
A. Prepare blood smears
1. Assemble equipment and materials
2. Prepare several clean slides:a. Use precleaned slides, orb. Clean slides with soap, rinse with hot water followed by
distilled water, dip in 95% ethyl alcohol, and polish dry with clean lint-free cloth
Student Performance GuideLESSON 2-8 Preparing and Staining a Blood Smear
Name _________________________________________________________________ Date ______________________
INSTRUCTIONS1. Practice preparing and staining a blood smear fol-
lowing the step-by-step procedure.
2. Demonstrate your understanding of this lesson by:
a. Completing a written examination successfully,and
b. Demonstrating the procedure for preparing andstaining a blood smear satisfactorily for theinstructor. All steps must be completed as listedon the instructor’s Performance Check Sheet.
Note: Stain characteristics may vary with stain lot.Follow manufacturer’s instructions for best results.
MATERIALS AND EQUIPMENT� gloves� hand disinfectant� slide storage box� pencil� microscope slides (1” x 3”), frosted end optional� 95% ethyl alcohol� laboratory tissue� plastic or mylar-sheathed capillary tubes (plain and
heparinized)� slide-drying rack
� hot water� detergent� distilled water� methanol in covered staining (Coplin) jar� EDTA anticoagulated blood specimen (fresh)� materials for capillary puncture� surface disinfectant or 10% chlorine bleach solution� biohazard container� puncture-proof container for sharp objects� glass-etching pen� Blood stain reagents: Wright stain and buffer, or
commercial blood stain kit (quick stain)� staining rack� immersion oil� microscope� lens paper� lens cleaner� forceps� laboratory tissue� lab apron or lab coat� staining jars for quick stains
Estridge, B., Reynolds, A., and Walters, N. Basic Medical Laboratory Techniques. © 2000 Delmar, a division of Thomson Learning

You must: S U Comments
3. Place a clean slide on a flat surface (be sure to touch only the edgesof the slide with fingers). Write patient identification on the frostedarea with a pencil or etch I.D. on slide using etching pen
4. Wash hands and put on gloves
5. Obtain an anticoagulated blood sample (provided by the instructor)
6. Mix blood well and fill a plain capillary tube with blood
7. Dispense a small drop of blood from the capillary tube onto theslide about one-half to three-quarters of an inch from the right end(if left-handed, reverse instructions)
8. Place the end of a clean, polished unchipped spreader slide in frontof the drop of blood at a 30–35° angle. Spreader should be lightlybalanced with fingertips
9. Pull the spreader slide back into the drop of blood by sliding it gen-tly along the slide until the blood spreads along three-fourths of thewidth of the spreader
10. Push the spreader slide forward with a quick steady motion (useother hand to keep slide from moving while spreader is pushed)
11. Examine the smear to see if it is satisfactory
12. Repeat the procedure until two satisfactory smears are obtained
13. Allow the smear(s) to air-dry quickly (stand slide on end in slide-drying rack) and label the slide
14. Place the dried smears in absolute methanol for 30–60 seconds topreserve the smear
15. Remove the slides from the methanol and allow to air-dry
16. Store slides for staining
17. Perform a capillary puncture, wipe away the first drop of blood,and fill one or two capillary tubes
18. Prepare two blood smears from capillary blood, repeating steps7–16
19. Discard blood specimens appropriately or store for later use. Placecontaminated materials in biohazard or sharps container
B. Stain blood smears:
1. Stain a blood smear by one of the following methods:a. Two-step method
(1) Place the dried smear on the staining rack, blood side up(2) Flood the smear with Wright stain, but do not let stain
overflow the sides of the slide(3) Leave stain on slide one to three minutes (get exact time
from instructor)(4) Add buffer drop by drop to the stain until buffer volume
is about equal to that of the stain(5) A green metallic sheen should appear on the surface
Estridge, B., Reynolds, A., and Walters, N. Basic Medical Laboratory Techniques. © 2000 Delmar, a division of Thomson Learning

Estridge, B., Reynolds, A., and Walters, N. Basic Medical Laboratory Techniques. © 2000 Delmar, a division of Thomson Learning
You must: S U Comments
(6) Allow buffer to remain on slide for two to four minutes (do not allow mixture to run off slide); get exact time from instructor
(7) Rinse thoroughly and continuously with a gentle stream of tap or distilled water
(8) Drain water from slide(9) Wipe the back of the slide with a wet gauze to remove
excess stain(10) Stand smear on end to dry
or
b. Quick stain(1) Dip dry smear into solutions as directed by manufactur-
er’s instructions (do not allow slide to dry between solutions)
(2) Rinse slide (if instructed to do so)(3) Remove excess stain from the back of the slide with wet
gauze(4) Allow slide to air-dry by standing on end
2. Place thoroughly dried slide on microscope stage, stain side up
3. Focus with low-power (10X) objective
4. Scan slide to find area where cells are barely touching each other (in feathered edge of smear)
5. Place a drop of immersion oil on the slide
6. Rotate oil-immersion lens carefully into position
7. Focus with fine-adjustment knob only
8. Observe erythrocytes; color should be pink-tan
9. Observe leukocytes; nuclei should be purple; neutrophil granulesshould be pink-lavender
10. Observe platelets; they should appear purple and granular
11. Rotate the low-power (10X) objective into position
12. Remove slide from microscope stage
13. Clean oil objective thoroughly with lens paper
14. Wipe oil from slide gently with soft tissue
15. Clean equipment and return to proper storage
16. Discard slides as instructed or store in slide box for use in Lesson 2-9
17. Clean work area with surface disinfectant
18. Remove and discard gloves in biohazard container and washhands with hand disinfectant
Evaluator Comments:
Evaluator ___________________________________________________________________ Date _________________________

Estridge, B., Reynolds, A., and Walters, N. Basic Medical Laboratory Techniques. © 2000 Delmar, a division of Thomson Learning
Student Performance GuideLESSON 2-9 Blood Cell Morphology and Differential Count
Name _________________________________________________________________ Date ______________________
INSTRUCTIONS1. Practice identification of erythrocytes, leukocytes,
and platelets from a stained smear.
2. Practice the procedure for performing the differen-tial count following the step-by-step procedure.
3. Demonstrate your understanding of this lesson by:
a. Completing a written examination successfully,and
b. Performing the differential count satisfactorily forthe instructor. Identify erythrocytes, five types ofleukocytes, and platelets satisfactorily for theinstructor. All steps must be completed as listedon the instructor’s Performance Check Sheet.
MATERIALS AND EQUIPMENT� gloves� hand disinfectant� stained normal blood smears� microscope with oil-immersion objective� immersion oil� lens paper and lens cleaner� soft tissue or soft paper towels� blood cell atlas; drawings or photographs
and descriptions of stained blood cells� tally counter or differential counter� worksheet� puncture-proof container for contaminated sharps� surface disinfectant or 10% chlorine bleach solution
PROCEDURERecord in the comment section any problems encountered whilepracticing the procedure (or have a fellow student or the instruc- S = Satisfactorytor evaluate your performance). U = Unsatisfactory
You must: S U Comments
1. Wash hands and put on gloves
2. Assemble materials and equipment
3. Place stained blood smear on microscope stage and secure withclips
4. Use the low-power (10X) objective to locate the feathered edgeof the smear
5. Bring the cells into focus using the 10X objective and coarseadjustment
6. Scan the smear to find an area where the RBCs are barelytouching
7. Place one drop of immersion oil on the smear
8. Rotate the oil-immersion objective (97X or 100X) carefully intoposition

Estridge, B., Reynolds, A., and Walters, N. Basic Medical Laboratory Techniques. © 2000 Delmar, a division of Thomson Learning
You must: S U Comments
9. Focus, using the fine adjustment, until cells can clearly be seen
10. Raise the condenser and open the iris diaphragm to allow maxi-mum light into the objective
11. Scan the slide to observe the leukocytes
12. Study the smear; try to find and identify all five types of WBCs
13. Scan the smear to find platelets
14. Scan the smear to observe RBCs
15. Repeat steps 3–14 until cells can readily be identified
16. Repeat steps 1–10 using the same smear or a different one
17. Count 100 consecutive WBCs, moving the slide so that consecu-tive microscopic fields are viewed; use the counting patternillustrated in Figure 2-54
18. Record on the worksheet how many WBCs of each type are seen
19. Observe the RBCs in at least 10 fields. Note the hemoglobincontent; record as normochromic or hypochromic
20. Observe the RBC size. Record as normocytic, microcytic, ormacrocytic. If present, estimate number of microcytic or macro-cytic RBCs by using a grading system of 1+ to 4+, or small,medium, large numbers present
21. Observe platelets in at least 10 fields:a. Note morphologyb. Estimate the number of platelets per oil-immersion field:
record as adequate, decreased, or increased, using the guide on the worksheet
22. Rotate the low-power (10X) objective into place
23. Remove the slide from the stage
24. Clean the oil-immersion objective thoroughly, using lens paper
25. Check the microscope stage and condenser for oil and cleanwith soft tissue if necessary
26. Place the slide on its edge in plastic slide box or discard slidesas instructed
27. Clean remaining equipment and return it to proper storage
28. Wipe work counter with surface disinfectant
29. Remove and discard gloves in biohazard container and washhands with hand disinfectant
Evaluator Comments:
Evaluator ___________________________________________________________________ Date _________________________

Estridge, B., Reynolds, A., and Walters, N. Basic Medical Laboratory Techniques. © 2000 Delmar, a division of Thomson Learning
WorksheetLESSON 2-9 Differential Count
Name _________________________________________________________________ Date ______________________
Specimen I.D. ______________________________________________________________________________________
REFERENCE VALUES (ADULT)
Segmented Neutrophils __________________ % 50–65%
Lymphocytes __________________ % 25–40%
Monocytes __________________ % 3–9%
Eosinophils __________________ % 1–3%
Basophils __________________ % 0–1%
Bands __________________ % 0–7%
Other ____________________
Platelet Estimate: ❒ appear adequate 7–20/oil-immersion field
❒ appear decreased (<7/oil-immersion field)
❒ appear increased (>20/oil-immersion field)
RBC Morphology:
Cell size: ❒ normocytic
❒ microcytic normocytic (6–8 µm)
❒ macrocytic
Cell color: ❒ normochromic normochromic
❒ hypochromic
Comments: _________________________________________________________________________________________________
_________________________________________________________________________________________________
_________________________________________________________________________________________________
_________________________________________________________________________________________________
_________________________________________________________________________________________________

REFERENCE VALUES (ADULT)
WBC/L __________________ 4.5–11.0 x 10⁹/LRBC/L __________________ 4.5–6.0 x 10¹²/L male
4.0–5.5 x 10¹²/L femaleHgb (g/dL) __________________ 13–17 g/dL male
12–16 g/dL femaleHct % __________________ 42–52% male
36–48% femaleMCV (fL) __________________ 80–100 fLMCH (pg) __________________ 27–32 pgMCHC (%) __________________ 32–37%
Differential Count:
________ % segmented neutrophils 50–65%
________ % lymphocytes 25–40%
________ % monocytes 3–9%
________ % eosinophils 1–3%
________ % basophils 0–1%
________ % bands 0–7%
________ % other
RBC Morphology:
Cell size: ❒ normocytic
❒ microcytic normocytic
❒ macrocytic
Cell color: ❒ normochromic normochromic
❒ hypochromic
Platelet ❒ appear adequate 7–20/oil-immersion field
Estimate: ❒ appear decreased <7/oil-immersion field
❒ appear increased >20/oil-immersion field
Comments: _________________________________________________________________________________________________
_________________________________________________________________________________________________
Estridge, B., Reynolds, A., and Walters, N. Basic Medical Laboratory Techniques. © 2000 Delmar, a division of Thomson Learning
Report FormLESSON 2-9 Hematology CBC Report Form
Name _________________________________________________________________ Date ______________________
Specimen I.D. ______________________________________________________________________________________
Estridge, B., Reynolds, A., and Walters, N. Basic Medical Laboratory Techniques. © 2000 Delmar, a division of Thomson Learning
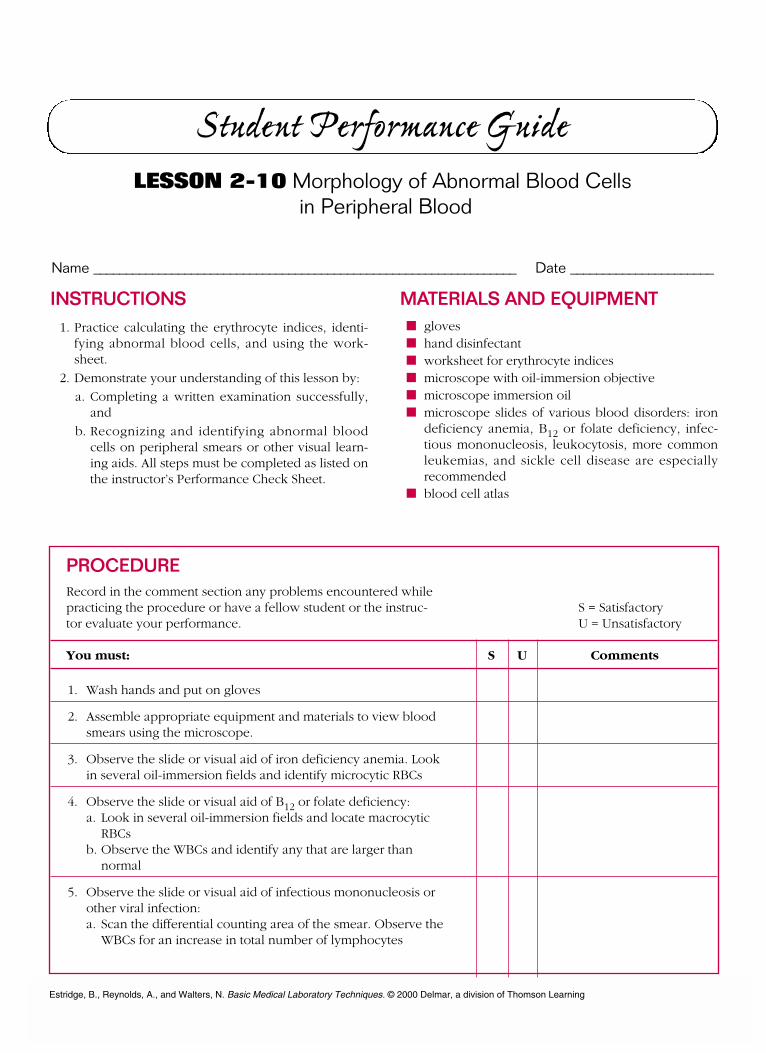
Student Performance GuideLESSON 2-10 Morphology of Abnormal Blood Cells
in Peripheral Blood
Name _________________________________________________________________ Date ______________________
INSTRUCTIONS1. Practice calculating the erythrocyte indices, identi-
fying abnormal blood cells, and using the work-sheet.
2. Demonstrate your understanding of this lesson by:
a. Completing a written examination successfully,and
b. Recognizing and identifying abnormal bloodcells on peripheral smears or other visual learn-ing aids. All steps must be completed as listed onthe instructor’s Performance Check Sheet.
MATERIALS AND EQUIPMENT� gloves� hand disinfectant� worksheet for erythrocyte indices� microscope with oil-immersion objective� microscope immersion oil� microscope slides of various blood disorders: iron
deficiency anemia, B12 or folate deficiency, infec-tious mononucleosis, leukocytosis, more commonleukemias, and sickle cell disease are especiallyrecommended
� blood cell atlas
PROCEDURERecord in the comment section any problems encountered whilepracticing the procedure or have a fellow student or the instruc- S = Satisfactorytor evaluate your performance. U = Unsatisfactory
You must: S U Comments
1. Wash hands and put on gloves
2. Assemble appropriate equipment and materials to view bloodsmears using the microscope.
3. Observe the slide or visual aid of iron deficiency anemia. Lookin several oil-immersion fields and identify microcytic RBCs
4. Observe the slide or visual aid of B12 or folate deficiency:a. Look in several oil-immersion fields and locate macrocytic
RBCsb. Observe the WBCs and identify any that are larger than
normal
5. Observe the slide or visual aid of infectious mononucleosis orother viral infection:a. Scan the differential counting area of the smear. Observe the
WBCs for an increase in total number of lymphocytes

Estridge, B., Reynolds, A., and Walters, N. Basic Medical Laboratory Techniques. © 2000 Delmar, a division of Thomson Learning
You must: S U Comments
b. Locate several reactive lymphocytes and note the characteristics of the cytoplasm and the nucleus
6. Observe the slide or visual aid of sickle cell disease:a. Identify any sickled RBCs presentb. Identify microcytic RBCsc. Look in several fields; identify codocytes
7. Observe the leukemia slide:a. Locate and identify the predominant WBC type presentb. Observe the RBC morphologyc. Observe the platelets for an increase or decrease in number
8. Wipe the immersion oil from the slides and replace them intheir storage containers or return visual aids to storage
9. Clean the microscope objectives and return the microscope toproper storage
10. Remove and dispose of gloves in biohazard container
11. Wash hands with hand disinfectant
Evaluator Comments:
Evaluator ___________________________________________________________________ Date _________________________

Student Performance GuideLESSON 2-11 Reticulocyte Count
Name _________________________________________________________________ Date ______________________
INSTRUCTIONS1. Practice the procedure for performing a reticulocyte
count following the step-by-step procedure.
2. Demonstrate your understanding of this lesson by:
a. Completing a written examination successfully,and
b. Performing the procedure for the reticulocytecount satisfactorily for the instructor. All stepsmust be completed as listed on the instructor’sPerformance Check Sheet.
MATERIALS AND EQUIPMENT� gloves� hand disinfectant� microscope� microscope slides� lens paper� acrylic safety shield
� immersion oil� Pasteur pipet with bulb� New Methylene Blue stain, freshly filtered (or com-
mercial kit such as Retic-Set® by Fisher Scientific)� 70% alcohol or alcohol swabs� sterile cotton or gauze� sterile lancet� capillary tubes, heparinized and plain� test tube 10 x 75 mm� tally counter� surface disinfectant (10% chlorine bleach solution)� biohazard container� puncture-proof container for sharp objects� commercially available stained reticulocyte slides
(optional)� reticulocyte count worksheet
Optional:� freshly collected EDTA blood specimen� materials for RBC count and microhematocrit� reticulocyte controls
PROCEDURERecord in the comment section any problems encountered whilepracticing the procedure (or have a fellow student or the instruc- S = Satisfactorytor evaluate your performance). U = Unsatisfactory
You must: S U Comments
1. Wash hands and put on gloves
2. Assemble equipment and materials. Set up acrylic safety shield
3. Perform a capillary puncture and wipe away the first drop ofblood with dry sterile cotton or gauze (or use freshly collected,well-mixed venous anticoagulated blood to perform the test)
4. Fill one or two heparinized capillary tubes with blood (useplain capillary tubes if using anticoagulated blood)
Estridge, B., Reynolds, A., and Walters, N. Basic Medical Laboratory Techniques. © 2000 Delmar, a division of Thomson Learning

You must: S U Comments
5. Dispense two to three drops of blood into the bottom of a smalltest tube
6. a. Add an equal amount of New Methylene Blue stain to thetest tube and mix
b. Allow mixture to stand for 15 minutes at room temperaturec. Remix contents of test tube and fill a plain capillary tube with
the blood-stain mixtured. Follow manufacturer’s guidelines if using a kit such as
Retic-Set®
7. Prepare two blood smears from the blood-stain mixture andallow to air-dry
8. Place one slide on the microscope stage and secure it
9. Use the low-power (10X) objective to find a good area of thesmear
10. Place one drop of immersion-oil on the slide and carefully rotateoil-immersion objective into position
11. Count all erythrocytes in one oil-immersion field and record thenumber of reticulocytes in the field. Note: A reticulocyte is alsocounted as a red blood cell
12. Move the slide to an adjacent microscopic field
13. Count all erythrocytes in the (adjacent) field and record thenumber of reticulocytes in the field
14. Continue steps 12–13 until 500 erythrocytes have been counted.Record count on worksheet
15. Repeat steps 8–14 using the second slide
16. Calculate the reticulocyte percentage using the worksheet:# of retics counted
x 100 = % reticulocytes1000 RBCs
17. Record the results on the worksheet
18. Clean oil-immersion objective carefully and thoroughly withlens paper
19. Clean any oil from microscope stage with laboratory tissue
20. Optional: If specimen for reticulocyte count is from a tube ofanticoagulated blood, perform an RBC count and microhemat-ocrit from the same specimen. Record results on worksheet (ifanticoagulated specimen is not available, go to step 21)a. Calculate the absolute reticulocyte count using the work-
sheet
Estridge, B., Reynolds, A., and Walters, N. Basic Medical Laboratory Techniques. © 2000 Delmar, a division of Thomson Learning
Estridge, B., Reynolds, A., and Walters, N. Basic Medical Laboratory Techniques. © 2000 Delmar, a division of Thomson Learning
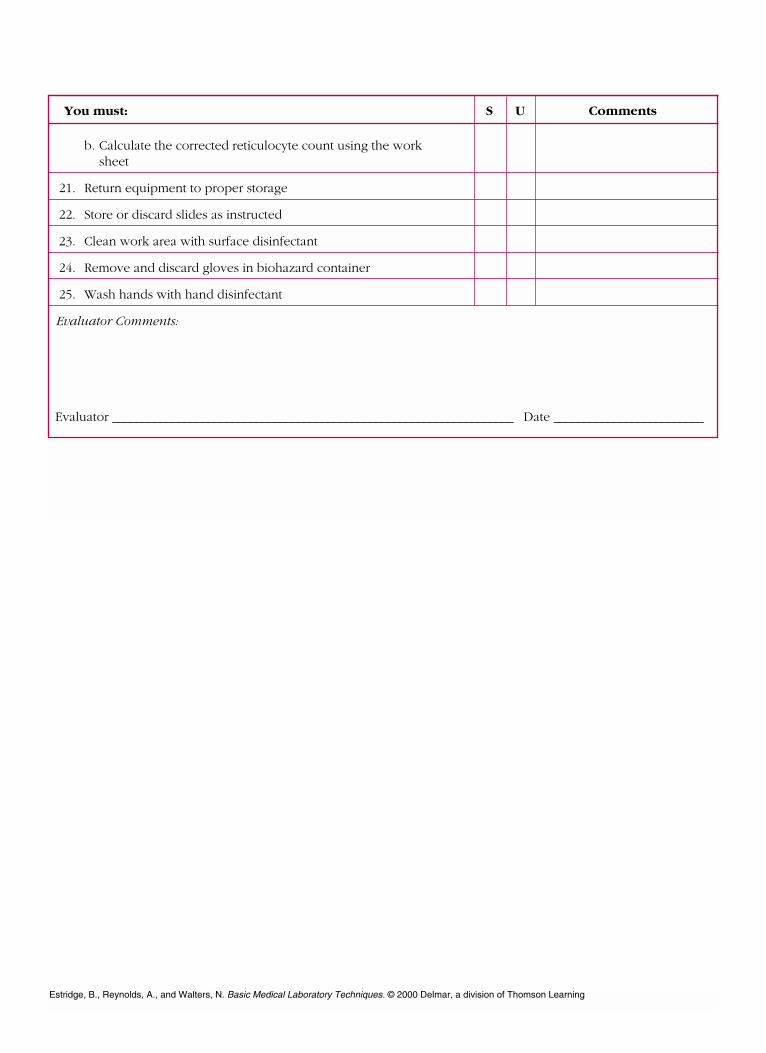
You must: S U Comments
b. Calculate the corrected reticulocyte count using the worksheet
21. Return equipment to proper storage
22. Store or discard slides as instructed
23. Clean work area with surface disinfectant
24. Remove and discard gloves in biohazard container
25. Wash hands with hand disinfectant
Evaluator Comments:
Evaluator ___________________________________________________________________ Date _________________________
Estridge, B., Reynolds, A., and Walters, N. Basic Medical Laboratory Techniques. © 2000 Delmar, a division of Thomson Learning
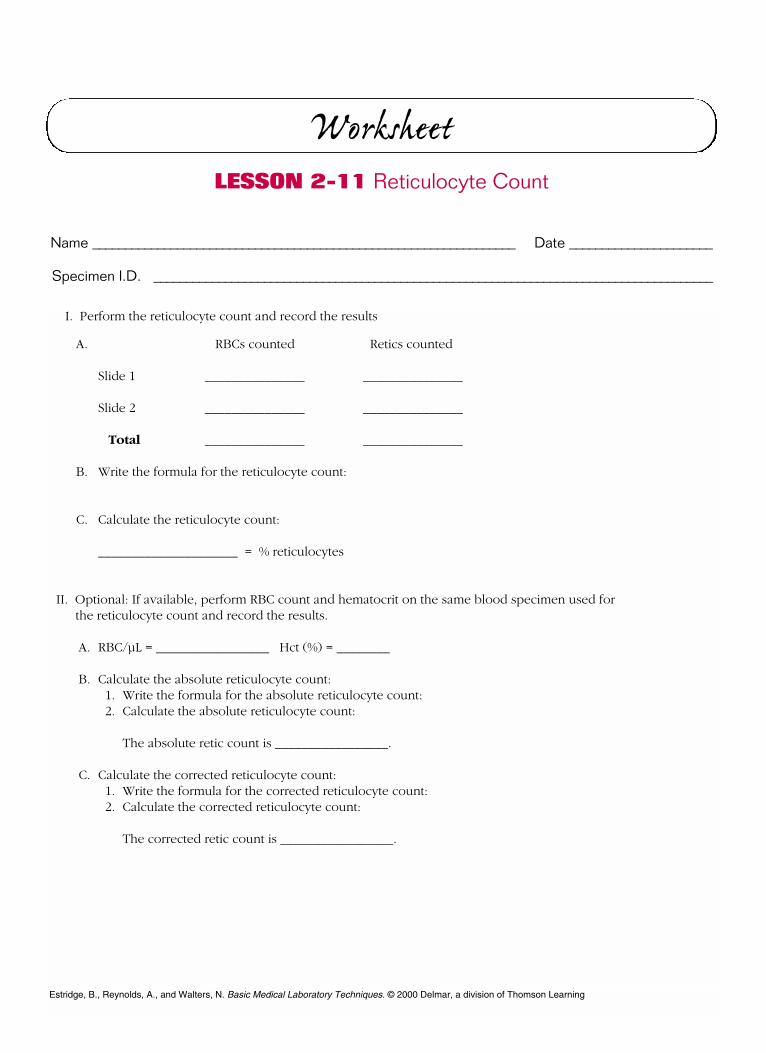
WorksheetLESSON 2-11 Reticulocyte Count
Name _________________________________________________________________ Date ______________________
Specimen I.D. ______________________________________________________________________________________
I. Perform the reticulocyte count and record the results
A. RBCs counted Retics counted
Slide 1 _______________ _______________
Slide 2 _______________ _______________
Total _______________ _______________
B. Write the formula for the reticulocyte count:
C. Calculate the reticulocyte count:
_____________________ = % reticulocytes
II. Optional: If available, perform RBC count and hematocrit on the same blood specimen used for the reticulocyte count and record the results.
A. RBC/µL = _________________ Hct (%) = ________
B. Calculate the absolute reticulocyte count:1. Write the formula for the absolute reticulocyte count:2. Calculate the absolute reticulocyte count:
The absolute retic count is _________________.
C. Calculate the corrected reticulocyte count:1. Write the formula for the corrected reticulocyte count:2. Calculate the corrected reticulocyte count:
The corrected retic count is _________________.

Estridge, B., Reynolds, A., and Walters, N. Basic Medical Laboratory Techniques. © 2000 Delmar, a division of Thomson Learning
Student Performance GuideLESSON 2-12 Erythrocyte Sedimentation Rate
Name _________________________________________________________________ Date ______________________
INSTRUCTIONS1. Practice performing the ESR test following the step-
by-step procedure.
2. Demonstrate your understanding of this lesson by:
a. Completing a written examination successfully,and
b. Performing the ESR procedure satisfactorily forthe instructor. All steps must be completed aslisted on the instructor’s Performance CheckSheet.
Note: Consult the manufacturer’s package insert forspecific instructions for the ESR kit being used.
MATERIALS AND EQUIPMENT� gloves� hand disinfectant� sample of venous blood collected in EDTA� Sediplast® Kit (or other ESR kit):
sedivial and sedirackSediplast® autozeroing pipetPipet capable of delivering up to 1.0 mL
� Wintrobe method:Wintrobe sedimentation tubeWintrobe sedimentation racklong-stem Pasteur-type pipet with rubber bulb
� timer� 10% chlorine bleach solution� biohazard disposal container� acrylic safety shield or protective facewear� puncture-proof biohazard container for sharps
PROCEDURERecord in the comment section any problems encountered whilepracticing the procedure (or have a fellow student or the instruc- S = Satisfactorytor evaluate your performance). U = Unsatisfactory
You must: S U Comments
1. Wash hands and put on gloves
2. Assemble equipment and materials
3 Mix blood sample gently for two minutes
4. Perform either Sediplast® ESR (method a) or Wintrobe (method b):a. Sediplast® ESR (Modified Westergren)
(1) Remove stopper on sedivial and fill to the indicated mark with 0.8 mL blood. Replace stopper and invert vial several times to mix (or mix using pipet)
(2) Place sedivial in Sediplast® rack on a level surface

Estridge, B., Reynolds, A., and Walters, N. Basic Medical Laboratory Techniques. © 2000 Delmar, a division of Thomson Learning
You must: S U Comments
(3) Insert the disposable Sediplast® pipet gently through the piercable stopper with a twisting motion and push down until the pipet rests on the bottom of the vial. The pipet will autozero the blood and any excess will flow into the sealed reservoir compartment
(4) Set timer for one hour(5) Return blood sample to proper storage. (If no laboratory
work will be performed during the incubation, remove gloves, discard appropriately, and wash hands. Reglove before handling test materials)
(6) Let the pipet stand undisturbed for exactly one hour and then read the results of the ESR: Use the scale on the tube to measure the distance from the top of the plasma to the top of the RBCs
(7) Record the sedimentation rate:ESR (Mod. Westergren, 1 hr) = _____ mm
(8) Dispose of tube and vial in appropriate biohazard container
b. Wintrobe method:(1) Place tube in Wintrobe sedimentation rack(2) Check the leveling bubble to ensure the Wintrobe rack is
level(3) Fill Wintrobe tube to the “0” mark with well-mixed blood
using the Pasteur pipet, being careful not to overfill. Note: Insert pipet tip to bottom of tube and fill from the bottom up to avoid air bubbles
(4) Set timer for one hour. Be certain the tube is vertical(5) Return blood sample to proper storage. (If no other
laboratory work is scheduled, remove gloves, discard appropriately, and wash hands. Reglove before handling test materials)
(6) Measure the distance the erythrocytes have fallen (in mm): after exactly one hour, use the scale on the tube to measure the distance from the top of the plasma to the top of the RBCs
(7) Record the sedimentation rate:ESR (Wintrobe, 1 hr) = _____ mm
(8) Disinfect and clean equipment and return to storageNote: Discard disposable equipment in bio-hazard container
5. Clean work area with surface disinfectant
6. Remove gloves and discard in biohazard container
7. Wash hands with hand disinfectant
Evaluator Comments:
Evaluator ___________________________________________________________________ Date _________________________