learning life cycle management (lcm): command line security...
TRANSCRIPT

Learning Life Cycle Management (LCM): Command Line
Security Synchronization
Printer Friendly
This purpose of this article is to introduce the command line Life Cycle Management(LCM)
utility in Oracle EPM. The LCM tool can be used to export and import objects that can be found
within the Oracle EPM Environment. This includes Security, Essbase, Hyperion Planning,
Financial Management … etc. As once gets more familiar with LCM, one comes to realize how
powerful the tool is and how empty life without LCM was. Without LCM some of the more
detailed artifacts within an application were difficult to move between environments. LCM
provides a centralized mechanism for exporting and importing nearly all of the objects within an
Oracle EPM application or module. The table below is listed to get an idea of all the facets of
LCM.
Application Artifacts by Module
Module Artifacts
Shared Services User and Group Provisioning
Projects/Application Metadata
Essbase
Files (.csc, .rpt, .otl, .rul)
Data
Filters
Partitions
Index and Page files (drive letters)
Application and Database properties
Security
EAS/Business Rules
Rules
Locations
Sequences
Projects
Security
Hyperion Planning
Forms
Dimensions
Application Properties
Security
Hyperion Financial Management
Metadata
Data
Journals
Forms/Grids
Rules

Lists
Security
Financial Data Quality Management
Maps
Security
Data
Metadata
Scripts
Security
Reporting and Analysis (Workspace)
Reports
Files
Database Connections
Security
The LCM tool is integrated into the Shared Services Web Interface. If can be found under the
Application Groups tab. Within the application groups there are three main areas of interest:
1. Foundation – includes Shared Services security such as Users/Groups and Provisioning.
2. File System - This is where the exported files will go by default. The default location is to
be stored server side, on the Shared Services server in the location:
E:\Hyperion\common\import_export
Under this main folder, the contents are broken out by the user account that performed
the export. Within the export folder, there is an “info” folder and a “resource” folder. The
info folder provides an xml listing of the artifacts contained within the export. The
resource folder contains the actual objects that were exported.
The LCM Command line tool provides more flexibility because it can be installed on any
machine and the results can be directed to output to any local folder. Sometimes this is
very useful if the Shared Services node is a Unix machine, and the LCM users are
unfamiliar with Unix. Simply install the LCM Command Line Utility on the Windows
machine and redirect its output to a local Windows folder using the –local command line
option.
3. Products and Applications – Each registered product will be listed and provide a
mechanism to export and import the respective objects for the associated applications,
Essbase, Planning…etc.
Going Command Line
The Shared Services LCM GUI is a great way to become familiar with the LCM tool. However,
when it is time to start automating LCM tasks and debugging issues, the Command Line LCM
utility is very helpful. To get started, the LCM Command Line tool requires a single command
line argument, an xml file that contains the migration definition. The quickest way to obtain the

xml file is to use the Shared Services LCM Web interface to select the objects you wish, select
Define Migration to pull up the LCM Migration Wizard, and follow the prompts until the last
step. Two options are presented, “Execute Migration” or “Save Migration Definition”. Choose
“Save Migration Definition” to save the migration definition to a local file.
That is pretty much all there is to it… move the xml migration definition file to the location you
have installed LCM. For instance, \Hyperion\common\utilities\LCM\9.5.0.0\bin, open a
command line and run Utility.bat as indicated:
E:\Hyperion\common\utilities\LCM\9.5.0.0\bin>Utility.bat SampleExport.xml
Attempting to load Log Config File:../conf/log.xml
2011-03-20 11:50:49,015 INFO - Executing package file -
E:\Hyperion\common\util
ities\LCM\9.5.0.0\bin\SampleExport.xml
>>> Enter username - admin
>>> Enter Password----------
--2011-03-20 11:50:57,968 INFO - Audit Client has been created for the
server h
ttp://hyp13:58080/interop/Audit
2011-03-20 11:50:58,421 WARN - Going to buffer response body of large or
unknow
n size. Using getResponseBodyAsStream instead is recommended.

2011-03-20 11:51:03,421 INFO - Audit Client has been created for the server
htt
p://hyp13:58080/interop/Audit
2011-03-20 11:51:03,437 INFO - MIGRATING ARTIFACTS FROM "Foundation/Shared
Serv
ices" TO "/SampleExport"
2011-03-20 11:51:32,281 INFO - Message after RemoteMigration execution -
Succes
s. HSS log file is in -
E:\Hyperion\common\utilities\LCM\9.5.0.0\logs\LCM_2011_0
3_20_11_50_48_0.log
2011-03-20 11:51:32,687 INFO - Migration Status - Success
E:\Hyperion\common\utilities\LCM\9.5.0.0\bin>
LCM Example: Synchronizing Shared Services Security between Environments
LCM often requires moving objects and security between environments, such as from a
development environment to a production environment. While LCM makes it easy, it is not as
straightforward as simply running an export from one environment and importing into another
environment. The reason is that LCM imports work in a “create/update” mode. In other words,
the operations performed in LCM are typically additive in nature. While the typical LCM
method would capture new users and new application provisioning, it will not handle removing
user provisioning, removing or changing groups, or essentially removing users from the system.
This can be an easy oversight, but it will ensure that the security becomes out of sync over time
and can cause issues as well as security implications. At a high level, the steps to sync
provisioning using LCM would be:
1. Export Users/Groups/Provisioning from Source Environment
2. Export Users/Groups from Target Environment
3. Delete Using Step 2 Results the Users/Groups in Target Environment
4. Import Users/Groups/Provisioning into Target Environment
Essentially, Step 1 and 4 are the typical import/export operations – where security is exported
from one environment and imported into another environment. However, two additional steps are
necessary. In Step 3, the users and groups in the target environment are deleted, removing
provisioning too. This leaves an empty, clean environment to then import security, ensuring no
residual artifacts remain in the environment. To use the LCM delete operation, a list of items to
be deleted must be supplied. This is where Step 2 comes in, a simple export of the Users and
Groups in the Target environment will provide the necessary information to provide to Step 3 –
deleting the respective users and groups.
Below are some sample XML migration definitions for each step:

Step 1 – Export Users/Groups/Provisioning from Source Environment
Note: By default the results will be sent to the source Shared Services server in the
“import_export” directory. You can use LCM to redirect the output to keep the results all in the
same environment (the target system) by using the command line option [-local/-l] (run
utility.bat without any command line options to see help for your version of LCM). Simply
redirect the results into the local folder, \Hyperion\common\import_export, in the Target system.
<?xml version=”1.0” encoding="UTF-8"?>
<Package name="web-migration" description="Migrating Shared Services to File
System ">
<LOCALE>en_US</LOCALE>
<Connections>
<ConnectionInfo name="MyHSS-Connection1" type="HSS"
description="Hyperion Shared Service connection"
url="http://sourceSvr:58080/interop" user="" password=""/>
<ConnectionInfo name="FileSystem-Connection1" type="FileSystem"
description="File system connection" HSSConnection="MyHSS-Connection1"
filePath="/Step1ExportFromSource"/>
<ConnectionInfo name="AppConnection2" type="Application"
product="HUB" project="Foundation" application="Shared Services"
HSSConnection="MyHSS-Connection1" description="Source Application"/>
</Connections>
<Tasks>
<Task seqID="1">
<Source connection="AppConnection2">
<Options>
<optionInfo name="userFilter" value="*"/>
<optionInfo name="groupFilter" value="*"/>
<optionInfo name="roleFilter" value="*"/>
</Options>
<Artifact recursive="false" parentPath="/Native Directory"
pattern="Users"/>
<Artifact recursive="true" parentPath="/Native
Directory/Assigned Roles" pattern="*"/>
<Artifact recursive="false" parentPath="/Native Directory"
pattern="Groups"/>
</Source>
<Target connection="FileSystem-Connection1">
<Options/>
</Target>
</Task>
</Tasks>
</Package>
Step 2 - Export Users / Groups from Target Environment
<?xml version="1.0" encoding="UTF-8"?>
<Package name="web-migration" description="Migrating Shared Services to File
System ">
<LOCALE>en_US</LOCALE>
<Connections>
<ConnectionInfo name="MyHSS-Connection1" type="HSS"
description="Hyperion Shared Service connection"

url="http://targetSvr:58080/interop" user="" password=""/>
<ConnectionInfo name="FileSystem-Connection1" type="FileSystem"
description="File system connection" HSSConnection="MyHSS-Connection1"
filePath="/Step2UsersGroupsTarget"/>
<ConnectionInfo name="AppConnection2" type="Application"
product="HUB" project="Foundation" application="Shared Services"
HSSConnection="MyHSS-Connection1" description="Source Application"/>
</Connections>
<Tasks>
<Task seqID="1">
<Source connection="AppConnection2">
<Options>
<optionInfo name="userFilter" value="*"/>
<optionInfo name="groupFilter" value="*"/>
</Options>
<Artifact recursive="false" parentPath="/Native Directory"
pattern="Users"/>
<Artifact recursive="false" parentPath="/Native Directory"
pattern="Groups"/>
</Source>
<Target connection="FileSystem-Connection1">
<Options/>
</Target>
</Task>
</Tasks>
</Package>
Step 3 – Delete Users/Groups in Target Environment
<?xml version="1.0" encoding="UTF-8"?>
<Package name="web-migration" description="Migrating File System to Shared
Services">
<LOCALE>en_US</LOCALE>
<Connections>
<ConnectionInfo name="MyHSS-Connection1" type="HSS"
description="Hyperion Shared Service connection"
url="http://targetSvr:58080/interop" user="" password=""/>
<ConnectionInfo name="AppConnection1" type="Application"
product="HUB" description="Destination Application" HSSConnection="MyHSS-
Connection1" project="Foundation" application="Shared Services"/>
<ConnectionInfo name="FileSystem-Connection2" type="FileSystem"
HSSConnection="MyHSS-Connection1" filePath="/Step2UsersGroupsTarget"
description="Source Application"/>
</Connections>
<Tasks>
<Task seqID="1">
<Source connection="FileSystem-Connection2">
<Options/>
<Artifact recursive="false" parentPath="/Native Directory"
pattern="Users"/>
<Artifact recursive="false" parentPath="/Native Directory"
pattern="Groups"/>
</Source>
<Target connection="AppConnection1">
<Options>
<optionInfo name="operation" value="delete"/>

<optionInfo name="maxerrors" value="100"/>
</Options>
</Target>
</Task>
</Tasks>
</Package>
Step 4 – Import Users and Groups into Clean Target Environment
This step assumes that Step 1 was redirected onto the target environment within the
import_export directory. The respective folder, Step1UsersGroupsSource, can also be manually
copied from the source to the target environment without using the redirection to a local folder
technique.
<?xml version="1.0" encoding="UTF-8"?>
<Package name="web-migration" description="Migrating File System to Shared
Services">
<LOCALE>en_US</LOCALE>
<Connections>
<ConnectionInfo name="MyHSS-Connection1" type="HSS"
description="Hyperion Shared Service connection"
url="http://targetSvr:58080/interop" user="" password=""/>
<ConnectionInfo name="AppConnection1" type="Application"
product="HUB" description="Destination Application" HSSConnection="MyHSS-
Connection1" project="Foundation" application="Shared Services"/>
<ConnectionInfo name="FileSystem-Connection2" type="FileSystem"
HSSConnection="MyHSS-Connection1" filePath="/Step1UsersGroupsSource"
description="Source Application"/>
</Connections>
<Tasks>
<Task seqID="1">
<Source connection="FileSystem-Connection2">
<Options/>
<Artifact recursive="true" parentPath="/Native Directory"
pattern="*"/>
</Source>
<Target connection="AppConnection1">
<Options>
<optionInfo name="operation" value="create/update"/>
<optionInfo name="maxerrors" value="100"/>
</Options>
</Target>
</Task>
</Tasks>
</Package>
Troubleshooting with Command Line LCM
LCM can be a great tool when it works flawlessly. However, it can quickly become part of
mission critical activities like promoting artifacts from development to production.
Consequently, it is necessary to learn some troubleshooting skills to maintain business continuity
using LCM.
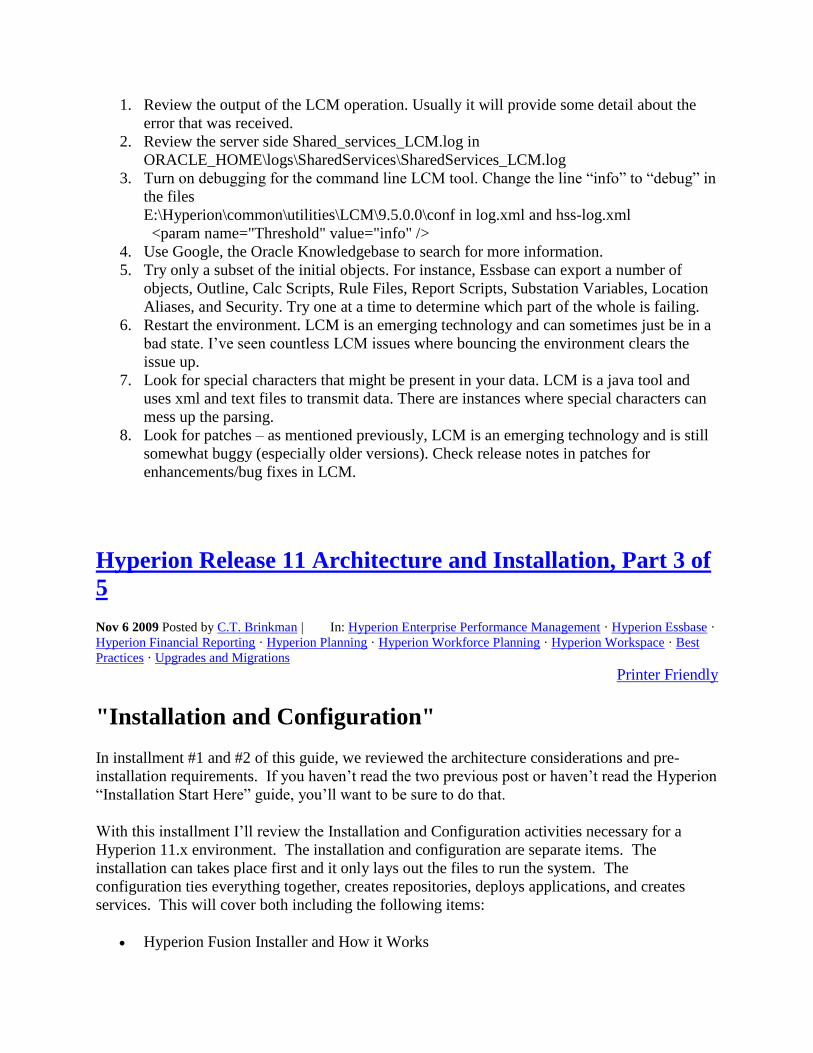
1. Review the output of the LCM operation. Usually it will provide some detail about the
error that was received.
2. Review the server side Shared_services_LCM.log in
ORACLE_HOME\logs\SharedServices\SharedServices_LCM.log
3. Turn on debugging for the command line LCM tool. Change the line “info” to “debug” in
the files
E:\Hyperion\common\utilities\LCM\9.5.0.0\conf in log.xml and hss-log.xml
<param name="Threshold" value="info" />
4. Use Google, the Oracle Knowledgebase to search for more information.
5. Try only a subset of the initial objects. For instance, Essbase can export a number of
objects, Outline, Calc Scripts, Rule Files, Report Scripts, Substation Variables, Location
Aliases, and Security. Try one at a time to determine which part of the whole is failing.
6. Restart the environment. LCM is an emerging technology and can sometimes just be in a
bad state. I‟ve seen countless LCM issues where bouncing the environment clears the
issue up.
7. Look for special characters that might be present in your data. LCM is a java tool and
uses xml and text files to transmit data. There are instances where special characters can
mess up the parsing.
8. Look for patches – as mentioned previously, LCM is an emerging technology and is still
somewhat buggy (especially older versions). Check release notes in patches for
enhancements/bug fixes in LCM.
Hyperion Release 11 Architecture and Installation, Part 3 of
5
Nov 6 2009 Posted by C.T. Brinkman | In: Hyperion Enterprise Performance Management · Hyperion Essbase ·
Hyperion Financial Reporting · Hyperion Planning · Hyperion Workforce Planning · Hyperion Workspace · Best
Practices · Upgrades and Migrations Printer Friendly
"Installation and Configuration"
In installment #1 and #2 of this guide, we reviewed the architecture considerations and pre-
installation requirements. If you haven‟t read the two previous post or haven‟t read the Hyperion
“Installation Start Here” guide, you‟ll want to be sure to do that.
With this installment I‟ll review the Installation and Configuration activities necessary for a
Hyperion 11.x environment. The installation and configuration are separate items. The
installation can takes place first and it only lays out the files to run the system. The
configuration ties everything together, creates repositories, deploys applications, and creates
services. This will cover both including the following items:
Hyperion Fusion Installer and How it Works

Preparing the Fusion Installer
Using the Fusion Installer
Hyperion Configuration Utility
The companion Hyperion Documentation for this post is either of the following documents
found in the Oracle Documentation Library:
Oracle Hyperion Enterprise Performance Management System Installation and Configuration
Guide Release 11.1.1.x
Oracle Hyperion Enterprise Performance Management System Manual Deployment Guide
Release 11.1.1.x
You probably are not going to read them in their entirety since they are rather lengthy but they
are very useful in fully understanding what is going on and priceless for complex environment or
when things don‟t go well.
Hyperion Fusion Installer and How it works.
So let‟s get started on this installation already. One of the great features of Release 11.x Fusion
Edition is the Fusion Installer. It is a nice application for guiding you through the
installation. The first thing to do is download the Fusion Installer and copy it to each server in
your architecture. The Fusion Installer is only the shell for the rest of the installation. Under the
Fusion Installer create a folder called “assemblies”.
Preparing the Fusion Installer
You‟ll next need to download the remaining Foundation Services as well as any other
applications you are using. For our example we are going to assume the client is using
Foundation, Planning, and HFM. You are probably looking at something in the neighborhood of
4GB to download. Each download, when unzipped contains a group of folders looking
something like this:

Each server will need the appropriate assemblies copied to its own \<FusionInstaller>\assmblies
directory. This way, whenthe Fusion Installer starts, it knows what is available to install. Some
of the common components are needed on each server. If you are missing something, the Fusion
Installer will let you know in the status window at the bottom application. For details on which
assemblies are required for each application, refer to the Installation and Configuration Guide.
Using the Fusion Installer
As you start the Fusion Installer you will see something like this:

I like to choose “Choose Components Individually” since it feels like I have a little more
granularity. At this point I‟ll select all of the components I want to install on each server. Once
again, this is run on every server in the architecture. The Fusion Installer only lays out the
application files; it doesn‟t need any information so the sequence of installation can occur in any
order. It seems to work pretty well when all the components on a server are chosen together.
The last thing to do is to review all the install logs for any errors. It is much easier to catch them
now than after the configuration is started before anything is written specific is written to
registries and relational databases. Once the configuration starts, you are committed.
Configuration
The first thing to do is to configure Shared Services. After the installation is complete, each
server will have a Configuration Application. It can be launched on a Windows Server from
Start >Oracle EPM Applications > Foundation Services > EPM System Configurator. This
application will guide you through the configuration with such things as creating and distributing
Java applications, creating relational repositories, and building the Windows Services. The EPM
System Configurator displays the installed components and then you can select which
components to configure. It looks something like this

The first thing to do is configure Shared Services. This needs to be done by itself and before any
other components are configured. As soon as this is complete, launch Shared Services and verify
that it is working appropriately. If it isn‟t, it‟s will be a long day. If you are able to log in to
Shared Services, it is also probably best to go ahead and configure any external authentication
provider at this time.
When Shared Services is complete and verified, you can move from server to server configuring
all the components. The documentation says that you can configure all the components at once
but this will attempt to configure all the selected products in the same relation schema/table. The
documentation also says that some of the repositories need to be separate. I prefer to do it one at
a time to be certain I can keep all the relational repositories separate and I can validate each
component as it is competed. I usually start with all the Foundation Services and then make sure
Workspace functions before moving on to the EPM application like Planning and Financial
Management. The last thing to do is to redeploy Workspace so it is configured to proxy all the
remaining Web Applications.
You will want to be careful with each screen to make certain every component is configured as
you planned. It is easy to keep hitting „NEXT‟ only to find out you mixed your Calculation
Manager Repository in with your Shared Services repository.
As with the installation, I like to review all the configuration logs on each server very
carefully. Better to catch an error now than later. When I‟m comfortable with the configuration,
I shut everything down and bring it back up. The start order is quite finicky. The Oracle

Installation and Configuration Guide has specifics regarding the start order but I usually do
something like this:
1. Shared Services OpenLDAP
2. Shared Services Application Server
3. Hyperion Annotation Service
4. EPM Workspace Agent (CMC Agent)
5. EPM Workspace UI (CMC UI)
6. EPM Workspace Web Server
7. EPM Workspace Application Server
8. Hyperion RMI Registry
9. Performance Management Architect Services
Process Manager automatically starts the following services:
Hyperion EPM Architect - Engine Manager
Hyperion EPM Architect - Event Manager
Hyperion EPM Architect - Job Manager
Hyperion EPM Architect - .NET JNI Bridge
10. Performance Management Architect Web Services
11. Essbase Server
12. Administration Services Application Server
13. Smart Search Application Server
14. Essbase Studio Server
15. Provider Services Application Server
16. Hyperion Financial Reporting - Java RMI Registry
17. Hyperion Financial Reporting - Print Server
18. Hyperion Financial Reporting - Report Server
19. Hyperion Financial Reporting - Scheduler Server
20. Web Analysis Application Server
21. Performance Management Architect Application Server
22. Performance Management Architect Data Synchronizer Application Server
23. Financial Reporting - Web Application
24. Calculation Manager
25. Planning Application Server
26. Financial Management
27. Hyperion Financial Management DME Listener
28. Hyperion Financial Management Web Service Manager
29. Hyperion Financial Data Quality Management - Task Manager
Assuming everything starts, we‟ll discuss validation in the next part.

Upgrade to Essbase 11 and enjoy a host of new features
There are a host of new features in version 11. As with most product releases, there are the
typical improvements related to memory, scripting, and stability. But, there are some other, very
notable, functional additions that might peak your interest.
Lifecycle Management
Shared Services now provides a consistent way to manage environments. This console gives
administrators the ability to compare applications, search for artifacts, and perform artifact
migrations. It comes with a command line tool to automate tasks, as well as a full API for those
who want to customize the process even further.
Typed Measures
Essbase now stores text! Well, somewhat. Text measures give administrators a way of storing a
value other than a number in a data intersection. Technically, it still stores numbers, but it
represents a string. A member in the measures dimension can have a text attribute. This
member is associated with an enumerated list. Each member in that list has an index number,
which is what is in the database. When reporting is done, that number is converted to the
associated text value in the enumerated list. Members can also be tagged as Date, which changes
the formatting to; you guessed it, a date.
Varying Attributes
Attributes have been around for a while now in Essbase. Some people hate them and some love
them. They definitely have their place in the design of a database. One limitation has been the
inability to walk forward attributes over time. For example, assume we have an attribute that
identifies our customers into tiers based on their credit score. If a customer‟s score changes such
that they move to a higher or lower tier, the history is lost because their attribute is the same for
all time periods. Not anymore. Varying attributes adds the capability of Essbase to store, and
calculate measures for attributes that vary over multiple dimensions.
Backup and Recovery
I have seen many methods to making sure Essbase applications are secured. In version 11, there
are some new options for BSO databases. First, an option in EAS exists to backup the entire
database, including its data and all of its objects, to one file. When changing things rapidly
through the day, this is a nice feature to ensure you don‟t lose valuable work. The entire
database can easily be restored. This is much quicker than manually archiving all the objects
(calc scripts, load rules, outlines, and reports) and keeping data exports.
Secondly, Essbase now includes the option to log transactions and replay them. With this option
turned on, Essbase applications can be restored with the option to replay all transactions that
occurred after the backup occurred. Now, a database can be restored to a specific point in time.

ASO Data Management
ASO now includes Maxl scripting to enable administrators to clear data from regions of a
database in two ways. The first and most obvious is to remove the values from the
database. The second is the ability to copy the data into another member as the inverse, resulting
in a total of zero.
The use of Environment Variables
If your process management uses variables to decrease maintenance tasks from, this might be
something that will intrigue you. Version 11 has access to not only Essbase variables, but
operating system environment variables as well.
Monitoring Environment Reponses
Many environments take advantage of partitioning. Now, there is a way to evaluate the cost of
using partitions. Using the ENABLE_DIAG_TRANSPARENT_PARTITION configuration
setting in the essbase.cfg file, administrators can log transaction response times.
Common Log Locations
Version 11 organizes all log files in one location. This is a very nice improvement. Rather than
searching through each products‟ directory tree for the area logs are stored, they are now located
in one common folder, with a folder for each of the Hyperion products.
Override Implied Shares
Essbase now includes an option in the outline management section to ignore the default setting
for implied shares. This can be very helpful when using partitions, as well as a host of other
situations.
Notable Calculations Additions
Now that members can carry a text or date value, there are a host of functions that open up a
whole new realm of possibilities. DATEROLL will increase a value based on a specific time
interval. DATEDIFF will take the difference between two dates at the interval
designated. DATEPART will pull the time period (week, month, day, etc) from any date. These
operations were difficult at best, in previous releases of Essbase.

Hyperion Release 11 Architecture and Installation, Part 2 of
5
“Pre-Installation Requirements”
In installment #1 of this guide, we reviewed the architecture considerations and defined a
simplistic architecture to use as a reference moving forward. I recommend you read the previous
post before you pick up this one. I also recommend reading
“Oracle Hyperion Enterprise Performance Management System Installation Start Here Release
11.1.1.2.pdf (128 pages)” from the Oracle Documentation Library.
To reiterate our general approach, the Hyperion architecture establishment and installation
activities in our organization cover the following five areas.
1. Defining an Architecture – Work with the client to define the hardware, software, and the
distribution of Hyperion components
2. Provide Pre-Installation Requirements – Provide the client with a detailed list of activities
prior to the installation
3. Installation – Running the installation and configuration utilities
4. Validation – Perform all functional activities necessary to validate the environment
readiness
5. Documentation – Provide the client with all the details of the environment as it is
configured.
In this post, I will go through step 2 that the Hyperion architect, should deliver. Steps 3-5 will be
available in the coming weeks. For the sake of simplicity I will be using the example of a
common installation, primarily Hyperion Planning, Hyperion Financial Management (HFM), and
the core BI applications.
As part of any installation, some items need to take place before the Fusion Installer is started. I
like to create a checklist of things that need to be done. Often times these things are out of my
control and I will rely on Database Administrator, Network Administrators, and other System
Administrators. This checklist contains the following elements.
Web Application Server Specifications
Relational Repository Information
General System Administration
Network Information
Additional Components
DCOM Configuration
IIS and .NET Configuration
I‟ll start with the Web Application Server Specification. Once the web application server
platform is chosen from the table below, the installation and configuration often falls on System

Administrators. Items such as clustering, system account management, and JVM setting are
managed outside of the Hyperion installation. Other times, I‟ll get admin access and manage it
myself. The first item to do is to validate the application server is certified. This is directly from
Oracle Enterprise Performance Management System - Supported Platforms Matrices “Oracle
Enterprise Performance Management System, Fusion Edition Release 11.1.1.2)” in the Oracle
document library. I recommend reviewing this document. It can change from release to release.
Server Notes
Oracle Application Server 10g
(10.1.3.3.x) a
If Oracle Application Server is used as the Web
application server, Oracle HTTP Server is also
required. Profitability and Cost Management
supports only Oracle Application Server 10.1.3.x.
Oracle WebLogic Server 9.2 (MP1
minimum) / 9.2.xb
Shared Services requires WebLogic Server patch
CR283953” for all platforms. You can obtain this
patch at the BEA web site.
IBM WebSphere 6.1.0.17 / 6.1.x C
Embedded Java container d
a Supports these editions: Java, Standard One, Standard & Enterprise. Includes support for
Oracle Application Server Single Sign-On.
b WebLogic Express is supported for each supported version of WebLogic Server; non-
base versions are supported only via manual deployment.
c WebSphere Express, ND, and XD Editions are supported for each supported version of
WebSphere; ND and XD are supported only via manual deployment.
d For this release, Apache Tomcat 5.5.17 is the embedded Java container that is installed
automatically on all platforms. Apache Tomcat is supported only in this capacity. If future
EPM System releases embed different Java application servers, Apache Tomcat will no
longer be supported. For deployments that require high availability or failover, Oracle
recommends using a commercially supported Web application server that supports high
availability and failover.
I request the URL and authentication information since this will be needed during the
deployment. If I am doing a manual deployment, I will request contact information from the
web application server administrator and work in collaboration on the deployment.

The next item on my checklist is to get the Relational Repositories Information set up. This is
mostly straightforward. In general, I like to create a tablespace/database for each component
((Hyperion Foundation, Essbase Admin Services / Business Rules, EPMA, Planning, Financial
Management, etc). A distinct tablespace/database for each component makes it easier to manage
in my opinion. Although it may not be strictly necessary, the documentation does not seem to be
clear on the matter. I say „better safe than sorry‟. For the installation and deployment, I‟ll need
credentials for each table. Based upon some Q&A, I‟ll make initial size recommendations.
The target installation servers have a General System Administration checklist containing the
information that I‟ll need to execute the installation. This is made of the following items.
Operating Systems version/build
Account on each server to run the Hyperion services and account requirements
External Authentication information (MSAD, LDAP, or OID if applicable)
Drive/Volume information identified for installation of the Hyperion software.
DCOM and .NET account information if HFM or FDM are to be installed
Next, I identify the Network Information necessities for appropriate communication between
servers. This includes IP addresses, DNS information, validation of name resolution, trace
between servers, subnet configuration, etc. This is vital so the components can communicate via
Fully Qualified Domain Name, Short Name, and IP address. Some components use different
variations of name resolution probably because the components were developed separately and
have not been fully standardized.
In addition to the Hyperion Software, Web Application Servers, and Relational Repositories
there are a few Additional Components that need to be installed. A PDF writer is needed for
Reports Server to render .pdf reports in Workspace. This can be GhostScript or Acrobat
distiller. I suggest referring to the “Start Here” documentation to see what is currently supported
but we often go with GhostScript due to its cost.
For the Windows Administration, we provide the DCOM Configuration information needed to
support FDM, EPMA, and FDM. This includes the DCOM account information, permissions,
and authentication information. Although this is spelled out in detail in the “Start Here” manual,
I like to provide step-by-step information with screen shots since DCOM is often
confusing…well it is to me at least.
The last thing we review is the IIS and .NET Configuration. IIS is often not installed as part of
a standard OS build. We make sure this requirement is specified, ensuring .NET is installed, and
validate it is the appropriate version.
As with any installation, I recommend the Installation Architect read, and re-read, the Hyperion
Manuals on there own rather than relying on this information or intuition. It can always change
and your installation may have some caveats that I have not covered. For our purposes, with all
the above activities completed and validated, we should be ready to start laying out the binaries
and start the Hyperion Installation. We will review the Fusion Installer and Hyperion
Configuration Utility in our next installment.

Migrating/Upgrading Essbase to a New Server
There are many considerations that must be carefully planned when addressing an upgrade to
version 9 or 11, or creating a backup strategy. Manually moving all the components involved
can take days and is extremely error prone. There is more to it than moving Essbase
databases. Essbase calc scripts, reports, and load rules have to be considered. Server variables
need to be moved. All the Maxl and EssCmd scripts need to be copied and changed to reflect the
new server and security model. Security filters need to be copied and altered slightly if moving
to a new version of Essbase. All the security users and groups need to be created. As with any
endeavor of this capacity, it can be time consuming. The benefits of the improved stability and
features far outweigh the efforts.
Completing this for one server is tough enough. Imagine if corporate policy dictates that
everything has to be done in a QA and/or test environment before it is moved to the new
production area. Now factor in the number of Essbase servers and the fact that the security
model might have to be consolidated to one (this occurs when upgrading from anything before 9,
to version 9 or 11). Don‟t forget that there is only a very small window for the current
production servers to be down. If 4 Essbase servers exist, this effort might have to occur 12
times!
Doing the same work 3 times for every server is obviously redundant. I developed a small .NET
application that significantly reduces the work involved. It virtually eliminates the need for any
manual or redundant effort. .NET was selected because it was the quickest for me to develop the
application, but JAVA, Perl, or any other similar development language could be used. The
.NET application accepted the results of the following Maxl display commands.
display application all;
display database all;
display filter row all;
display variable all;
display privilege group all;
alter system load application all;
display partition all advanced;
Maxl scripts were created from the process to
1. create all the applications and databases
2. assign all relevant application and database settings
3. rebuild and update security filters
4. replicate all server variables
This Maxl can be executed on the destination server to setup the new environment. Examples of
the scripts generated from the .NET application below.
/* Create Application: BUDGET */

create or replace application 'BUDGET' type nonunicode_mode;
alter application 'BUDGET' set lock_timeout after 300;
alter application 'BUDGET' set max_lro_file_size unlimited;
alter application 'BUDGET' set minimum permission no_access;
alter application 'BUDGET' enable startup;
alter application 'BUDGET' disable autostartup;
alter application 'BUDGET' enable commands;
alter application 'BUDGET' enable updates;
alter application 'BUDGET' enable connects;
alter application 'BUDGET' enable security;
/* Create Database: BUDGET */
create database 'BUDGET'.'Budget';
alter database 'BUDGET'.'Budget' set data_file_cache_size 1024000000;
alter database 'BUDGET'.'Budget' set index_cache_size 76800000;
alter database 'BUDGET'.'Budget' enable startup;
alter database 'BUDGET'.'Budget' enable autostartup;
alter database 'BUDGET'.'Budget' set minimum permission no_access;
alter database 'BUDGET'.'Budget' set retrieve_buffer_size 102400;
alter database 'BUDGET'.'Budget' enable two_pass_calc;
alter database 'BUDGET'.'Budget' enable aggregate_missing;
alter database 'BUDGET'.'Budget' enable compression;
alter database 'BUDGET'.'Budget' disable create_blocks;
alter database 'BUDGET'.'Budget' disable committed_mode;
alter database 'BUDGET'.'Budget' set implicit_commit after 10000 blocks;
alter database 'BUDGET'.'Budget' disable cache_pinning;
alter database 'BUDGET'.'Budget' set retrieve_buffer_size 102400;
alter database 'BUDGET'.'Budget' set compression bitmap;
alter database 'BUDGET'.'Budget' set retrieve_buffer_size 102400;
alter database 'BUDGET'.'Budget' set retrieve_sort_buffer_size 102400;
alter database 'BUDGET'.'Budget' set data_cache_size 512000000;
alter database 'BUDGET'.'Budget' set io_access_mode buffered;
alter database 'BUDGET'.'Budget' set note '';
alter system unload application 'BUDGET';
/* Create Filter: MRP100206310000 */
create or replace filter 'BUDGET'.'Budget'.'Audit' write on
'@DESCENDANTS("Time"),@DESCENDANTS("Year"),"Input","Working
Budget",@DESCENDANTS("Product"),@DESCENDANTS("Total
Audit"),@DESCENDANTS("Expenses")';
DOS and UNIX scripts were generated to copy all of the database objects, data files, and Maxl
and EssCmd scripts from the source server to the destination server. The program also created
all the files to import into Version 9 and System 11 to add users, groups, and replicate the
security model.

All the Maxl and EssCmd scripts (username, password, server names, file paths, etc.) were
updated so they could be executed on the new servers.
This process makes it extremely simple to migrate, or move, any Essbase application from one
server to another. The entire process could be completed in hours, rather than days, and
eliminates the possibility of human error. What would be budgeted to take weeks with several
resources can take less than a day.