learner workbook i ms excel advanced - online academy excel advanced... · workbook | microsoft...
TRANSCRIPT

WO
RKBO
OK
Empower and invest in yourself
MIC
ROSO
FT E
XCEL
ADV
ANCE
D

2 Workbook | Microsoft Excel Advanced | onlineacademy.co.za
MODULE 01
FORMULAS/DATA ANALYSIS PART 1
Defining formula fundamentals
1. To enter references to cells A9 and A10 in a formula in cell B10, do the following:
• Select cell B10, and type an equal sign.
• Click cell A9, and type a plus sign.
• Click cell A10, and press Enter.
2. When you click each cell, a marquee surrounds the cell, and Excel inserts a reference to the cell in cell B10.
Workbook | Microsoft Excel Advanced | onlineacademy.co.za 3
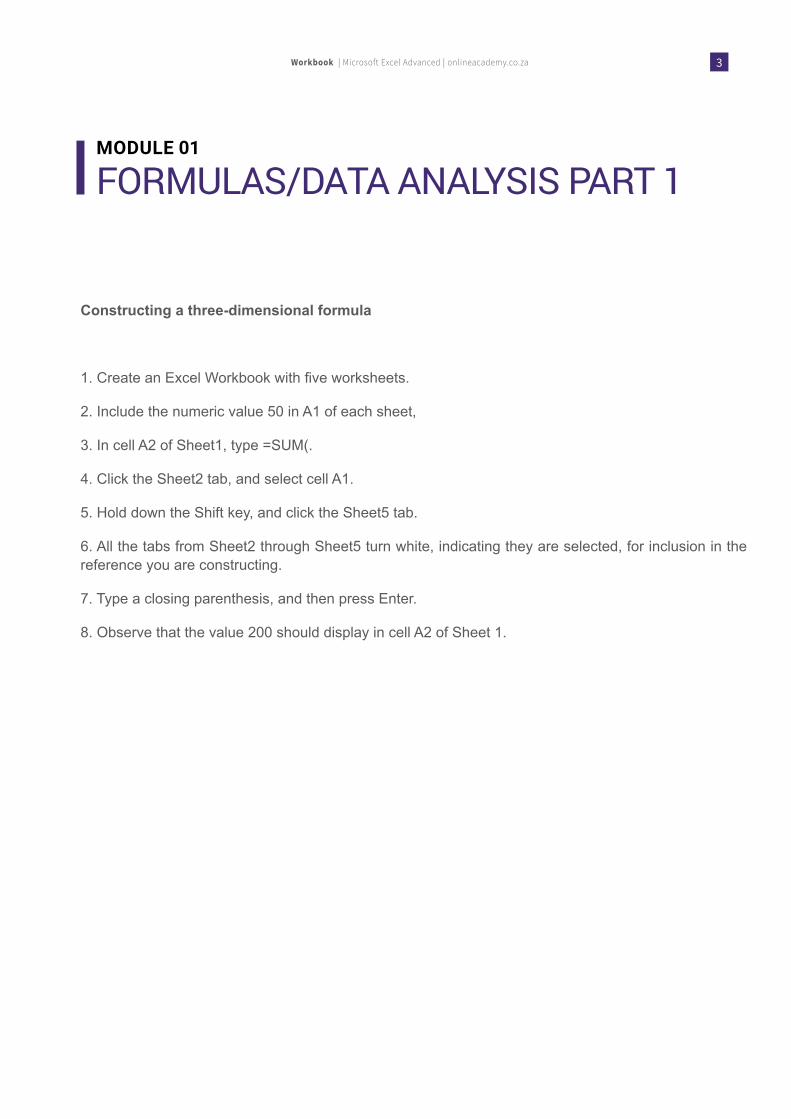
Constructing a three-dimensional formula
1. Create an Excel Workbook with five worksheets.
2. Include the numeric value 50 in A1 of each sheet,
3. In cell A2 of Sheet1, type =SUM(.
4. Click the Sheet2 tab, and select cell A1.
5. Hold down the Shift key, and click the Sheet5 tab.
6. All the tabs from Sheet2 through Sheet5 turn white, indicating they are selected, for inclusion in the reference you are constructing.
7. Type a closing parenthesis, and then press Enter.
8. Observe that the value 200 should display in cell A2 of Sheet 1.
MODULE 01
FORMULAS/DATA ANALYSIS PART 1
4 Workbook | Microsoft Excel Advanced | onlineacademy.co.za
MODULE 01
REFLECT 01
1. Discuss the importance of the order of parenthesis.
2. Discuss a typical formula that can contain an Absolute Cell Reference.
Workbook | Microsoft Excel Advanced | onlineacademy.co.za 5
MODULE 01
REFLECT 02
1. Would you be able to identify common error values in your daily Excel workflow?
2. In what situation would you need to use three-dimensional formulas?
6 Workbook | Microsoft Excel Advanced | onlineacademy.co.za
MODULE 02
FORMULAS/DATA ANALYSIS PART 2
Working with array formulas
1. Follow these guidelines when entering and working with array formulas:
• Press Ctrl+Shift+Enter to lock in an array formula. Excel then places a set of curly braces around the formula in the formula bar to indicate that it’s an array formula.
• To edit an array, select the entire array, click the formula bar, and edit the formula. Then press Ctrl+Shift+Enter to lock in the formula.
• To clear an array, select the entire array, and press Delete.
• To select an entire array, click any cell in the array, and press Ctrl+/.
• To move an array range, you must select the entire array and either cut and paste the selection or drag the selection to a new location.
Workbook | Microsoft Excel Advanced | onlineacademy.co.za 7
Inserting a logical function
• Select the cell into which the function will be placed.
• Enter the logical function.
• If necessary, recommended, in the Function Arguments dialog box, enter the arguments required and then click OK.
MODULE 02
FORMULAS/DATA ANALYSIS PART 2

8 Workbook | Microsoft Excel Advanced | onlineacademy.co.za
MODULE 02
REFLECT 01
1. In which situation in your current position would you use manual recalculation?
2. What kind of spreadsheets can contain a wide spread of arrays?

Workbook | Microsoft Excel Advanced | onlineacademy.co.za 9
MODULE 02
REFLECT 02
1. What types of advanced calculations have you encountered either on the job or personally?
2. What factors will influence the choice of conditional test?

10 Workbook | Microsoft Excel Advanced | onlineacademy.co.za
MODULE 03
MATHEMATICS, TEXT AND LOGIC
Applying mathematical functions
1. Multiply values in the range using the PRODUCT function
• In cell A1, type 50.
• In cell A2, type 3.
• In cell B1, insert the formula: =PRODUCT(A1:A2).
• Press Enter.
• Observe the value 150 is returned.
2. Use the ROUND function to convert an entire range of decimal values to the
nearest integer. The following values display in range A1:A3.
125.365
188.985
121.569
• In cell B1, insert the formula =ROUND(A1, 0).
• Observe the value 125 is returned.
• Copy the formula down to B3.

Workbook | Microsoft Excel Advanced | onlineacademy.co.za 11
MODULE 03
MATHEMATICS, TEXT AND LOGIC
Applying text functions
The following values display in range A1:A3
• Karlien
• Tobie
• Ben
The following values display in range B1:B3
• Theart
• van der Merwe
• van der Westhuyzen
1. Combine the Names and Surnames to become one text string.
• In cell C1, enter the formula, =CONCATENATE(A1, “ “, B1).
• Press Enter.
• Observe the value returned will display Karlien Theart.
• Copy the formula from C1:C3.
MODULE 03
MATHEMATICS, TEXT AND LOGIC

12 Workbook | Microsoft Excel Advanced | onlineacademy.co.za
MODULE 03
REFLECT 01
1. Which mathematical function will be helpful to you in your user experience?
2. In which workplace instance would you need to make use of the ROUND function?
Workbook | Microsoft Excel Advanced | onlineacademy.co.za 13
MODULE 03
REFLECT 02
1. Which text function will be helpful to you in your user experience?
2. In which workplace instance would you need to make use of the CONCATENATE function?
14 Workbook | Microsoft Excel Advanced | onlineacademy.co.za
MODULE 04
WORKING WITH DATE AND TIME
Formatting dates and times
1. Display todays’ date using the TODAY formula.
• Select cell A1.
• Type the formula =TODAY().
• Press Enter.
• Observe the date displayed in the cell.
2. Create a custom date format to display only weekdays.
• In cell A1, insert the date 17 June 2016.
• Make sure cell A1 is selected before the custom date is applied.
• Select the Number Format dialog box from the Number group in the Home tab.
• Select Custom from the displayed format list.
• Highlight the entry in the text box at the top of the Type list, and type the following custom format code: dddd.
• Select OK.
• Observe the weekday – Friday is displayed.
Workbook | Microsoft Excel Advanced | onlineacademy.co.za 15
MODULE 04
REFLECT 01
1. How can the use of date and time formats increase workflow?
2. Which date function would you consider applying to increase your workflow?
16 Workbook | Microsoft Excel Advanced | onlineacademy.co.za
MODULE 05
FUNCTIONS FOR ANALYSING STATISTICS
Using functions for analysing statistics
1. Determine the ranking level of the value 72 using the RANK function.
• Assume the range Exam Scores, contain the following values in range A2:A7.
Exam Scores:
78, 98, 65, 80, 72, 69
• Select cell B2.
• Insert the formula =RANK.EQ(A6,A2:A7).
• Observe the value 72, ranks 4th.
2. Create a data analysis summary using the same range.
• Select cell C2.
• Navigate to the Data tab and select the Data Analysis Tool.
• Select Descriptive Statistics.
• Select the input range (A1:A7).
• Observe Grouped by Columns should be selected.
• Observe that Labels in first row should be selected.
• Select the Output Range (C:2).
• Observe that Summary is selected.
• Select OK.
• Observe the summary generated.
Workbook | Microsoft Excel Advanced | onlineacademy.co.za 17
MODULE 05
FUNCTIONS FOR ANALYSING STATISTICSMODULE 05
REFLECT 01
1. How can you benefit from built-in statistical functions?
2. What type of work situation would require the need for data analysis?
18 Workbook | Microsoft Excel Advanced | onlineacademy.co.za
MODULE 06
ANALYSING DATA WITH PIVOTTABLES
Analyzing data with PivotTables
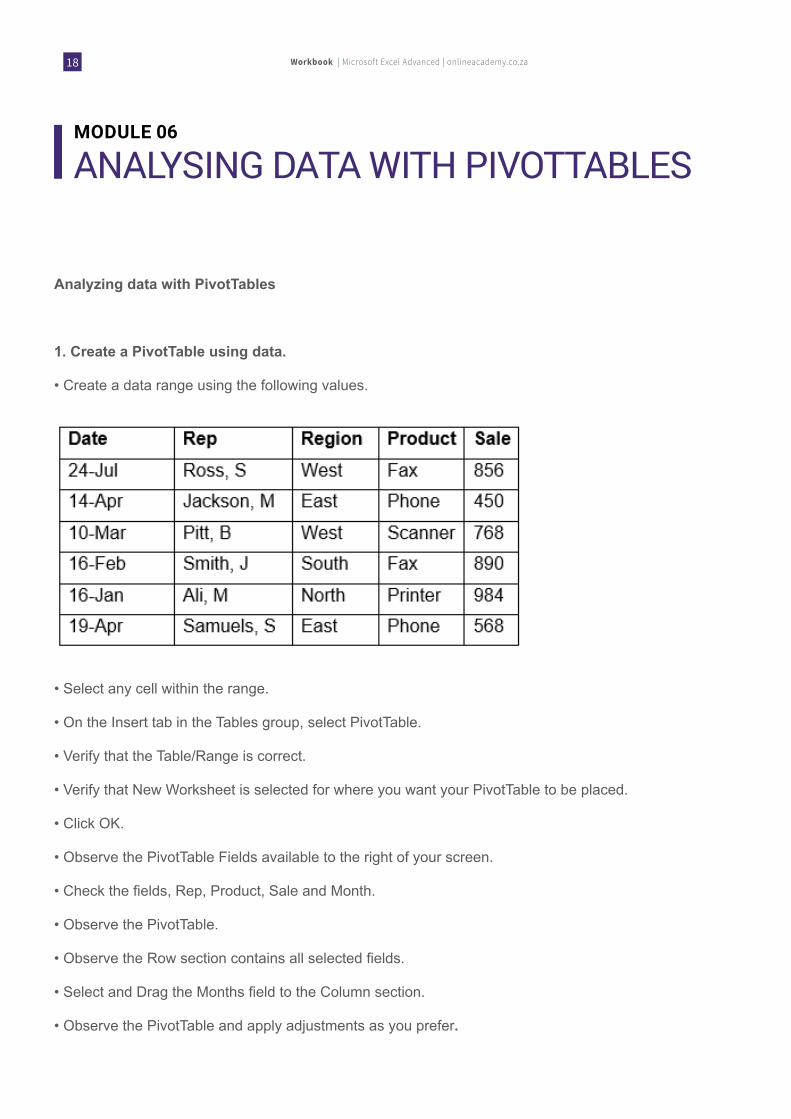
1. Create a PivotTable using data.
• Create a data range using the following values.
• Select any cell within the range.
• On the Insert tab in the Tables group, select PivotTable.
• Verify that the Table/Range is correct.
• Verify that New Worksheet is selected for where you want your PivotTable to be placed.
• Click OK.
• Observe the PivotTable Fields available to the right of your screen.
• Check the fields, Rep, Product, Sale and Month.
• Observe the PivotTable.
• Observe the Row section contains all selected fields.
• Select and Drag the Months field to the Column section.
• Observe the PivotTable and apply adjustments as you prefer.
Workbook | Microsoft Excel Advanced | onlineacademy.co.za 19
MODULE 06
ANALYSING DATA WITH PIVOTTABLESMODULE 06
REFLECT 01
1. How will your use of PivotTables improve the way you analyze and display data?
2. What do you think are the advantages using PivotTables?
20 Workbook | Microsoft Excel Advanced | onlineacademy.co.za
MODULE 07
PERFORMING WHAT-IF ANALYSIS
Performing a What-if Analysis
1. Suppose you have two budget scenarios: a worst case and a best case. Which What-if analysis tool would be used to evaluate both situations in a formula?
Answer: The Scenario Manager
2. If you know the result that you want from a formula, but you are not sure what input value the formula requires to get that result, which feature would you use?
Answer: Goal Seeker
Workbook | Microsoft Excel Advanced | onlineacademy.co.za 21
MODULE 07
PERFORMING WHAT-IF ANALYSISMODULE 07
REFLECT 01
1. In your opinion, what are the advantages of using a Goal Seeker?
2. What types of data analysis do you need to apply in your work environment?
22 Workbook | Microsoft Excel Advanced | onlineacademy.co.za
MODULE 08
AUTOMATING EXCEL WITH MACROS
Creating a macro recording
1. Create a Macro recording for inserting a column layout for Student No, Name, Surname, Class
• In the View Tab, in the Macros group, select the Macro menu drop down list.
• Select Record Macro.
• Observe the Record Macro dialog box.
• Insert the Macro Name, ClassList.
• Use the shortcut key Ctrl + C.
• Observe the shortcut result should display Ctrl+Shift+c.
• Verify that the macro will be stored in the workbook.
• Include a description of your choosing.
• Select OK.
• In the View tab, in the Macros group, verify that Use Relative Reference toggle is active.
• From cell A1:D1 insert the required column headings.
• Once all column headings are included, press STOP recording in the status bar.
• Clear your worksheet.
• Select cell A3 and use your Ctrl+Shift+C shortcut key.
• Observe the Macro recording.
• Save your workbook to enable Macros.
Workbook | Microsoft Excel Advanced | onlineacademy.co.za 23
MODULE 08
AUTOMATING EXCEL WITH MACROSMODULE 08
REFLECT 01
1. How will your use of Macro Recordings improve the way you analyze and display data?
2. What do you think are the advantages using Macros?

2 De Beers AvenueMomentum Golf VillageSomerset West7130
© 2018 ALL RIGHTS RESERVED.