large scissor skill patterns for developing fine...
TRANSCRIPT

Reproducible Patternsfor Early Learners!
Large Scissor Skill Patterns forDeveloping Fine Motor Skills!
Written and Illustrated by:Karen Sevaly
Contributing Editor:Libby Perez
Graphic Designer:Cory Jackson
Look for All of OurLittle Kids... Books
at your local educational retailer!Little Kids...Cut! © Teaching Resources, a Scholastic Company

2
Table of ContentsIntroduction.........................................4Certificates ..........................................6Scissor Skills Check List .......................7One and Two Snip Strips......................8Three Snips Strips ...............................9Straight Lines ....................................10Zigzags..............................................11Fringe ...............................................12Squares and Triangles ........................13Curved Lines .....................................14Scallops/Waves .................................16Circles...............................................17Spirals ..............................................18Tangram............................................19Start, Stop and Fold...........................20Bus ...................................................21Apple................................................22Spider ...............................................23Pumpkin............................................24Turkey...............................................25Gingerbread Man ...............................26Candy Cane.......................................27
Stocking............................................28Christmas Tree ..................................29Snowman ..........................................30Valentine...........................................31Shamrock..........................................32Bunny Ears and Easter Egg.................33Spring Flower ....................................34Cloud and Raindrops .........................35Butterfly ............................................36Tree Stump........................................37Star ..................................................38Sun...................................................39Sailboat.............................................40Fish...................................................41Mouse ...............................................42Snake ...............................................43Cat ...................................................44House ...............................................45Lion ..................................................46Barn ................................................47Farm Animals ....................................48
Copyright © 2000Teacher’s Friend, a Scholastic Company.
All rights reserved.Printed in China.
ISBN 0-439-50298-5
Reproduction of these materials for commercial resale or distribution to an entireschool or school district is strictly prohibited. Pages may be duplicated for oneindividual classroom set only. Material may not be reproduced for other purpos-es without the prior written permission of the publisher.
Safety Warning! The activities and patterns in this book are appropriate for children ages3 to 6 years old. It is important that children only use materials and products labeled child-safeand non-toxic. Remember that young children should always be supervised by a competent adultand youngsters must never be allowed to put small objects or art materials in their mouths.Please consult the manufacturer’s safety warnings on all materials and equipment used withyoung children.
Little Kids...Cut! © Teaching Resources, a Scholastic Company

3
With these Little Kids...Books!, teachers canprovide easy patterns and projects that willhelp young children obtain the necessary skills needed for their development.The simple activities of cutting, tracing, coloring and pasting provide a varietyof cognitive learning skills that will help prepare preschoolers for reading andwriting. These important developmental skills consist of:
Fine Motor Skillsfinger-wrist dexterity, arm-hand movement, eye-hand coordination
Perceptual Motor Skills identification, color and shape recognition, matching and location,spatial relationships
Expressive and Receptive Language Skillslistening, speaking, questioning, relating words and pictures, imitation, utilization, recognition and discrimination, visual perception and discrimination
Social and Emotional Skillscreativity and imagination, pride in accomplishments, self-reliance,
self-control, self-confidence
The early years of schooling helps determine how a child will learn for a life-time. During this period, children develop a sense of self and decide whetherschool is a burden or a joy. We hope these books assist you in your goal toprovide each child with a fulfilling and fun learning experience!
Little Kids...Books!
Welcome to the wonderful world ofpreschoolers where play is learning
and learning is fun!
Little Kids...Cut! © Teaching Resources, a Scholastic Company

4
Introduction
Little Kids...Cut!Most three and four year olds can begin to learn the skill of cutting. Very young children may need topractice paper tearing and pasting or gluing first. Here are some helpful ideas that will assist you inthe progressive steps in helping students develop the fine motor skills of cutting.
TEARING AND PASTING/GLUING PAPER - Very young children may need to first practice thesesimple skills:
Reciprocal Tearing - Hands pull the paper away from the middle to tear.Bilateral Tearing - One hand pulls the paper away from the body while the second hand
pulls toward the body.Pasting/Gluing - Children take torn or cut pieces of paper and paste or glue them to a
larger piece of paper.
CHOOSING THE SCISSORS - Do not use scissors of poor quality or with sharp points withpreschoolers. Five-inch, blunt nose scissors are best for beginners. Test the blades for tightness andease of use. Make sure you provide both right-handed and left-handed versions.
SCISSOR SAFETY - Teach children how to safely walk with a pair of scissors and how to handthem to someone else. (The hand should make a fist around the closed blades of the scissors, handlesup.) Instruct children to never point, wave or misuse the scissors.
FINGER PLACEMENT - Show students how the thumbgoes in one handle hole and the middle finger goes in theother. The index finger rests under the second handle toprovide balance and strength. One hand provides theopen/close movement of the scissors while the other handholds the paper. Some children may want to turn theirhand awkwardly making it difficult to cut. Tell the childrenthat the thumb is up or, “Thumbs up!” when it comes tousing scissors.
FIRST TIME CUTTING - Cut several 6” X 1” strips andhave children make several cuts anyway they choose. Ifnecessary, correct each child’s finger placement and motion.Give plenty of praise and encouragement.
PATTERNS FOUND IN THIS BOOK:Many of the patterns found in this book have been designed so that the bold, black cutting linesextend to the edges of the page. This has been done so that children will know where to begin cut-ting. When making copies of these patterns, you may want to enlarge each page 105% so that thelines will still extend to the the edge of the paper.
Begin teaching children to cut using the snip strips first, then continue with the other exercise patternsas outlined on the next page. Children will soon be able to cut the simple craft patterns that can thenbe used to create fun projects. As you introduce each scissor skill or craft pattern, make severalcopies of the patterns and place them in your classroom’s arts and crafts center. More complex pat-terns are located toward the back of the book
The craft patterns can be copied onto white paper and the children can color the patterns before cut-ting them out. The patterns can also be used to make templates from tag board or posterboard. Thechildren can then trace the patterns onto colored paper before cutting them out. It is best to useheavy, solid colored, construction paper and/or index paper.
Little Kids...Cut! © Teaching Resources, a Scholastic Company

5
How to Use This Book!Copy the patterns onto heavy, colorful paper. The teacher may need to cutsome of the pattern pages apart before children attempt to cut. Patterns canbe used by both right and left handed children. Instruct students to look forthe ✄ to know where to begin cutting. Have the children place their cutpieces in resealable plastic bags to take home. As the children accomplishthe more advanced cutting techniques, have them paste the cut out shapes toa large sheet of construction paper. These pages can be displayed on theboard as a colorful, creative testament to the children’s cutting ability.
ONE SNIP STRIPS - Start by giving each child a one snip strip. Instruct him or her to cut (or snip)across the strip in one motion following the solid black lines. Encourage the child to cut along eachof the cutting lines on the strip. As children master this cutting method have them proceed to cut twoand three snip strips.
TWO AND THREE SNIPS STRIPS - The two and three snip strips are wide enough to requiresmall hands to make two or three motions when cutting across the strip. Have them master thestraight cutting strip first before introducing the curve and angle snip strips. Cutting along curvesrequires the child to use his/her other hand to move the paper in relationship to the cutting move-ment. Cutting angles require children to stop cutting and change direction. Both of these movementsare more advanced and will require more patience and persistence.
Remember to tell students that they need to turn the paper not the scissors when cutting any-thing other than a straight line.
STRAIGHT LINES - These practice pages require multiple motions to cut across the page. Havestudents practice cutting both solid and dotted lines.
ZIGZAG LINES - Show children how to cut along these angled lines by stopping and changing direc-tion.
FRINGE STRIPS - Cut out the fringe strips and instruct the children to cut along the solid blacklines. Make sure you instruct them to stop cutting where each line ends. Show the children how thefringe can be folded or bent and used in different craft projects.
SQUARES AND TRIANGLES - Using the same start/change direction method, instruct children tofollow the ✄ symbol and cut out the squares and triangles
CURVED LINES - Have each child practice turning the paper with one hand while he or she cutswith the other hand using multiple cutting motions.
SCALLOP LINES - Cutting scallops or waves requires children to turn the paper while they cut, stopat a given point and change direction.
CIRCLES AND SPIRALS - Show children how they can cut out a circle or a spiral by simply rotat-ing the paper as they cut. Stretch the spiral out to show children how it bounces.
START, STOP AND FOLD - Instruct each child how to cut, change direction and stop using thispattern page. Show them how the cut patterns can be folded back to create a flap. (This method canbe used to create doors and windows in craft projects.
CRAFT PATTERNS - These simple cutting patterns give children practice using their newly acquiredcutting techniques. It will also give them the opportunity to create their own cute crafts to take home.In most cases, have the children glue their cut-out crafts to larger colored paper. The children canthen decorate it anyway you choose. In some cases, you may have them use crayons, paints, tissuepaper, dried beans, macaroni, glitter, etc. Most of the craft patterns have seasonal or holiday themes,however many of the patterns can be used anytime through the year.
Little Kids...Cut! © Teaching Resources, a Scholastic Company

6
Teacher Date
Teacher Date
Name
Name
Ican
I knowScissorSafety!
Little Kids...Cut! © Teaching Resources, a Scholastic Company

7
Scissor SkillsCheck List!
Group
Nam
es
Pasting & Gluing
Start, Stop & Fold
Circles & Spirals
Scallop Lines
Curved Lines
Squares & Triangles
Zigzag Lines
Straight Lines
Fringe Strips
Three Snip Strips
Two Snip Strips
One Snip Strips
Finger Placement
Scissor Safety
Tear Paper(Bilateral Tearing)
Tear Paper(Reciprocal
Tearing)
Little Kids...Cut! © Teaching Resources, a Scholastic Company

8
One SnipStrips
Two SnipStrips
• Copy these snip stripsonto brightly coloredpaper and cut themapart before givingthem to the children.
• Introduce the onesnip strips (one motion)first.
• Show each child howto hold the scissors inone hand and the snipstrip in the other.
• Instruct each childhow to cut along eachsolid black line in onemotion.
• Have each child col-lect the small piecesand paste them onto alarge sheet of coloredpaper. Or, place thepieces in a reclosableplastic bag for the childto take home.
• When one snip stripsare mastered, instructeach child to cut thetwo snips strips usingtwo motions with thescissors.
Little Kids...Cut! © Teaching Resources, a Scholastic Company

9
ThreeSnip
Strips
• Cut these snip strips from brightly colored paper.• Introduce the straight line snip strip first before proceeding with the
curves and angles.• Show students how to turn the paper, not the scissors, when cutting
anything other than a straight line.• Instruct each child how to cut along each solid black line in three or
more motions.
Straight Lines Curved Lines Angled Lines
Little Kids...Cut! © Teaching Resources, a Scholastic Company

10
Straight Lines(Multiple Motions)
• Instruct each child how to cut these straight lines using multiple cutting motions.
• Have the children practice cutting both solid and dotted lines.
Little Kids...Cut! © Teaching Resources, a Scholastic Company

11
Zigzags • Show the children how to cut along these angled lines by stopping thecut and changing direction. Encourage them to turn the paper with one hand while they cut with the other.
Little Kids...Cut! © Teaching Resources, a Scholastic Company

12
Fringe Strips• Cut the fringe strips apart before giving them to the children. • Instruct the children how to cut along the black lines and stop where each line ends.
Tell them to, “Stop at the dot.”• Show the children how to bend, fold, or curl the fringe for a craft project.
Little Kids...Cut! © Teaching Resources, a Scholastic Company

13
Squares &Triangles • Cut the shapes out starting at the ✄ symbol.
Little Kids...Cut! © Teaching Resources, a Scholastic Company

14
Curved Lines(Multiple Motions)
• Instruct the children how to cut these curved lines using multiple cutting motions. Show them how to turn the paper with one hand while cutting with the other.
• Have the children practice cutting both solid and dotted curved lines.
Little Kids...Cut! © Teaching Resources, a Scholastic Company

15
Curved Lines • Cut along these curved lines. Rotate the paper as you cut.
Little Kids...Cut! © Teaching Resources, a Scholastic Company

16
Scallops/Waves
• Show children how to cut along these scalloped lines by stoppingthe cut and changing direction. Encourage them to turn the paper with one hand while they cut with the other.
Little Kids...Cut! © Teaching Resources, a Scholastic Company

17
Circles • Show children how to cut out the circles by rotating the paper as they cut.
• Left-handed children may find it easier to cut an object from the left side rather than from the right. Have them try cutting both ways.
Little Kids...Cut! © Teaching Resources, a Scholastic Company

18
Spirals • Have the children cut out circle patterns before attempting to cut spirals.
• Show children how to carefully stretch the spirals out and make them bounce.
Little Kids...Cut! © Teaching Resources, a Scholastic Company

19
Tangram
A tangram is an ancient Chinese puzzle cut from one square piece ofpaper. It consists of five triangles, a parallelogram and a smallsquare. These seven shapes can be used to make many differentdesigns.
Have students cut out the tangram and arrange the pieces in aninteresting design on a contrasting sheet of colored paper. Instructthem to paste the pieces in place.
Little Kids...Cut! © Teaching Resources, a Scholastic Company

20
Start, Stopand Fold(Advanced
Scissor Skill)
• Instruct each child how to cut on the solid black line, changedirection, and then stop cutting. Make sure they stop atthe dot.
• Make sure that they understand that the dotted lines are to be folded and not cut.
• Show them how to fold back the flaps along the dotted lines.
Little Kids...Cut! © Teaching Resources, a Scholastic Company

21
School BusSkills: Circles and Curves
• Color the bus yellow and the wheels black.
• Cut out the pattern pieces.• Attach the wheels using brass
fasteners or glue the piecesto a larger sheet of coloredconstruction paper.
Write the child’s name on thebus along with his or her busnumber. Display the buses onthe class board.
Little Kids...Cut! © Teaching Resources, a Scholastic Company

22
• Color the apple red and leaf green.
• Cut out the pattern pieces.• Paste the apple to a larger
sheet of colored construction paper.
Let the childreneat apple sec-tions and askthem to collect theseeds. Let the chil-dren glue the appleseeds to their applepattern.
AppleSkills: Curvesand Zigzags
Little Kids...Cut! © Teaching Resources, a Scholastic Company

23
SpiderSkills: Curves and
Straight Lines
• Color this spider black and cut his legs from black construction paper.
• Paste the eight legs to the spider. • Tape or staple a length of string to
the spider’s body and hang him fromthe ceiling.
Show the children how the spider legscan be folded to make him stand on atable. (Legs can also be rolled arounda pencil for “curly” legs.)
Little Kids...Cut! © Teaching Resources, a Scholastic Company

24
PumpkinSkills: Curves
• Color this pumpkin orange and the stem green.
• Cut out the pattern pieces.• Paste the pumpkin and its lid
to a sheet of black con-struction paper.
Instruct the children to cut geo-metric shapes from black con-struction paper and paste themto the pumpkin to make a jack-o’-lantern face.
Little Kids...Cut! © Teaching Resources, a Scholastic Company

25
TurkeySkills: Circles and Straight Lines
• Color this turkey autumn colors.• Cut out the turkey and cut several feathers
from brown, yellow, orange and red construction paper.
• Paste the turkey to the back of a fluted paper plate and stapleor glue the feathersaround the plate to makethe turkey’s tail.
Little Kids...Cut! © Teaching Resources, a Scholastic Company
26
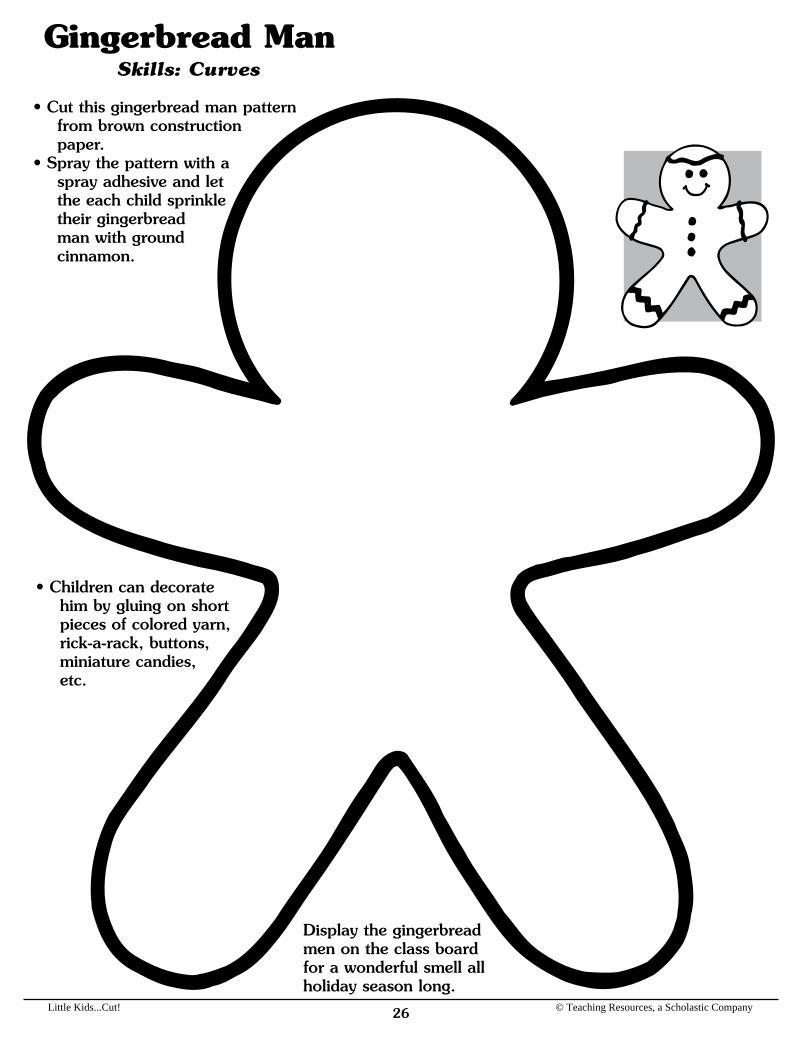
Gingerbread ManSkills: Curves
• Cut this gingerbread man pattern from brown construction paper.
• Spray the pattern with a spray adhesive and let the each child sprinkle their gingerbread man with ground cinnamon.
Display the gingerbreadmen on the class boardfor a wonderful smell allholiday season long.
• Children can decorate him by gluing on short pieces of colored yarn, rick-a-rack, buttons, miniature candies, etc.
Little Kids...Cut! © Teaching Resources, a Scholastic Company

27
Candy CaneSkills: Curves
• Color red and white stripes on this candy cane and color the bow holiday green.
• Cut out the pattern pieces.• Paste the bow to the candy cane.
These candy canes can be hung ona tree branch as a holiday decora-tion.
Little Kids...Cut! © Teaching Resources, a Scholastic Company

28
StockingSkills:
Curves andStraight
Lines
• Color this stocking pattern any way you choose.
• Cut out two stocking patterns.
• Glue the two stockings together by carefully apply the glue to the edges of one of the stockings. (Do not glue the top or stocking opening.)
When dry, write each child’s name onhis or her stocking and display themon the class board. Place a candycane in each stocking (pattern onpage 27).
Little Kids...Cut! © Teaching Resources, a Scholastic Company

29
Christmas TreeSkills: Zigzags
• Color the Christmas tree green and cut it out.
• Let the children decorate each tree in a variety of ways:
• Use brightly colored, self-adhesive dots.• Punch holes in the tree with
a hole punch and paste bitsof colored tissue paper to the back of the tree.• Draw decorative designs
on the tree with white glue using a toothpick
and sprinkle with colorful glitter.
Little Kids...Cut! © Teaching Resources, a Scholastic Company
30
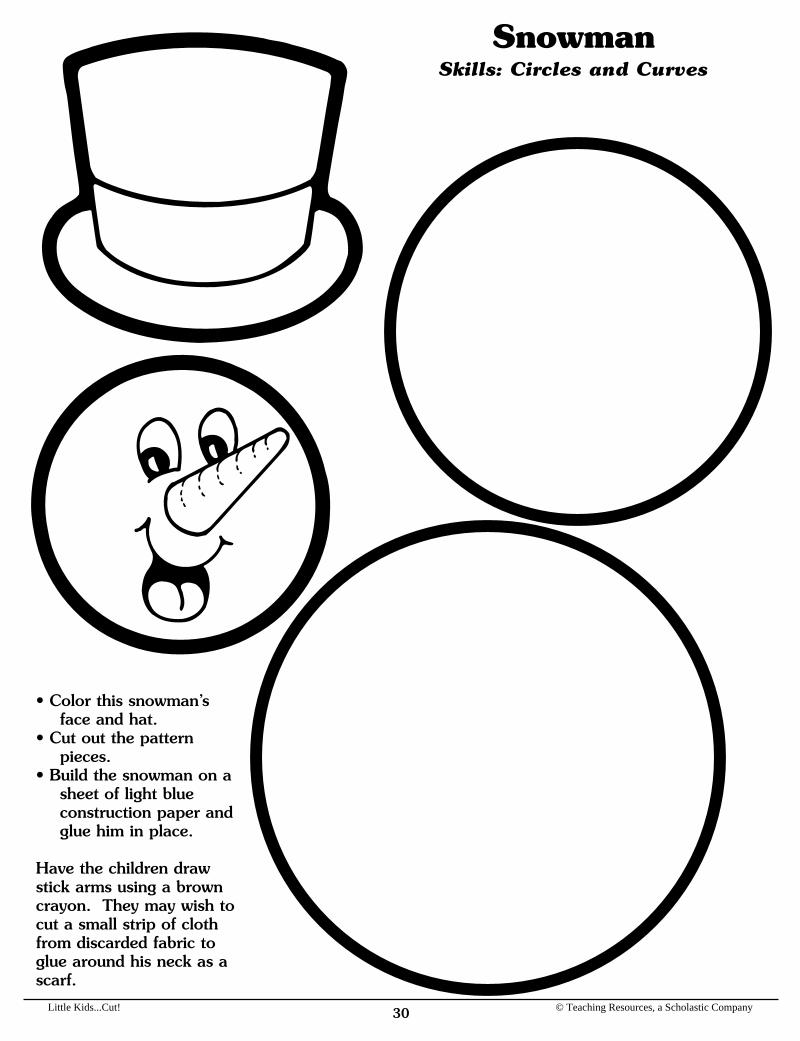
SnowmanSkills: Circles and Curves
• Color this snowman’s face and hat.
• Cut out the pattern pieces.
• Build the snowman on a sheet of light blue construction paper and glue him in place.
Have the children drawstick arms using a browncrayon. They may wish tocut a small strip of clothfrom discarded fabric toglue around his neck as ascarf.
Little Kids...Cut! © Teaching Resources, a Scholastic Company

31
ValentineSkills: Scallops
• Cut the valentine heart from pink or red construction paper.
• Help the children write their own valentine messages on the heart to take home to a parent.
Little Kids...Cut! © Teaching Resources, a Scholastic Company

32
ShamrockSkills: Curves
• Cut this shamrock pattern from green construction paper.
• Cut green and white strips of paper and staple or paste the strips together to make a three foot chain.
• Staple the shamrock to the end of the chain and hang from the ceiling for a fun St. Patrick’s Day decoration.
Little Kids...Cut! © Teaching Resources, a Scholastic Company

33
Bunny Ears and Easter EggSkills: Curves
• Cut two bunny ears from white construction paper and color the inside of ears pink.
• Staple the ears to a white paper headband for a fun Easter costume.
• Color or paint several egg patterns with festive designs.
• Cut them out and display them as a border around an Easter bulletin board.
Little Kids...Cut! © Teaching Resources, a Scholastic Company

34
Spring FlowerSkills: Scallops, Fringe,
Zigzags, Lines and Curves
• Cut flower patterns from construction paper.
• Cut between the flower petals. Make sure you stopat the dots!
• Paste the center to the middleof the flower.
• Assemble the flower patterns onto a larger sheet of con-struction paper and bend thepetals forward. Glue the flower in place and display them on the class board.
This simple craft project canmake a cute Mother’s Day card.
Little Kids...Cut! © Teaching Resources, a Scholastic Company

35
Cloud and RaindropSkills: Scallops and Curves
• Cut this cloud pattern fromblue paper and the raindrop(s) from blue.
• Arrange the cloud and raindrops onto a larger sheet of dark blue construction paper and glue in place.
Let the children glue piecesof holiday tinsel from thecloud to simulate rain orlightning. Cotton balls canalso be glued to the cloud. You may want to glue twocloud patterns together andlet the “tinsel” rain hangfrom the cloud.
Little Kids...Cut! © Teaching Resources, a Scholastic Company

36
ButterflySkills: Curves
• Color and decorate this butterfly pattern anyway you wish.• Cut out the pattern pieces.• Paste the wing patterns to a larger sheet of
construction paper. Paste the body pattern on top of the wings.
• Add two pipe cleaner antennae to the butterfly and display him on a springtime classroom board.
Little Kids...Cut! © Teaching Resources, a Scholastic Company

37
TreeTrunk
Skills: Curvesand Zigzags
• Cut this tree trunk from brown construction paper.• Paste the trunk to a larger sheet of light blue construction paper.• Sponge paint or use bits of green tissue paper to create a leafy tree top.
Children can draw in grass, flowers, birds, clouds, etc. to complete thescene.
Little Kids...Cut! © Teaching Resources, a Scholastic Company

38
StarSkills: Zigzags
• Cut this star from yellow construction paper.• Write the child’s name to the center of the star.• Advanced students can trace the letters with white glue and sprinkle
with glitter.
Hang the stars in the classroom or display them on the board toannounce your “starring” students. Crepe paper streamers can behung from the stars!
Little Kids...Cut! © Teaching Resources, a Scholastic Company

39
Sun Skills: Circles and Straight Lines
• Cut these sun patterns from yellow or orange construction paper.
• Paste the center of the sun to the center of a larger sheet of construction paper.
• Paste the sun’s rays around the center.
Children can add gold glitter or add their own crayon decora-tions before displaying the suns on the classroom board.
Little Kids...Cut! © Teaching Resources, a Scholastic Company

40
SailboatSkills: Squares and Triangles
• Color the boat, sail and flag.• Cut out the pattern pieces.• Assemble and paste the sailboat
to a larger sheet of con-struction paper.
• Cut blue paper waves using the scallop patterns on page 16.
• Paste the waves to the sailboat picture.
Little Kids...Cut! © Teaching Resources, a Scholastic Company

41
FishSkills: Curves,Scallops and Straight Lines
• Cut this fish pattern from colored construction paper.• Sponge paint colorful scales on the fish.• Child’s name can be written on the tail.
Cover your class board with blue paper and create an underwa-ter scene with the colorful fish. Use colored chalk to draw inrocks, plants, shells, etc.
This fish pattern willalso make a cuteFather’s Day card.
Little Kids...Cut! © Teaching Resources, a Scholastic Company

42
MouseSkills: Curves
• Cut these mouse patterns from grey or white paper.• Color his nose and the inside of his ears pink.• Paste the ears to the mouse.• Attach a string or pipe cleaner for the mouse’s tail.• Children’s names can be written on the mice and displayed on the
class board.
These mice can help make a clever motivational display by posting ayellow paper hunk of cheese at one end of the board and the mice atthe other. As children accomplish tasks, move their mice closer to thecheese.
Little Kids...Cut! © Teaching Resources, a Scholastic Company

43
SnakeSkills: Spirals
• Look at real pictures of various snakes andthen color this snake pattern using your own creative designs.
• Cut out the snake pattern. (Let the snake’stail spiral down.)
• Hang the snakes on the class board or from the ceiling.
Little Kids...Cut! © Teaching Resources, a Scholastic Company

44
CatSkills: Curves and Spiral
• Cut these cat patterns from colored construction paper.
• Use crayons to draw stripes or spots on the cat and his tail.
• Paste or staple the tail to cat and hang him in the classroom.
• Paste on toothpicks for the cat’s whiskers.
Little Kids...Cut! © Teaching Resources, a Scholastic Company

Jerry14 Main St.
45
HouseSkills: Straight
Lines andStart, Stop and
Fold
• Color this house any way you choose.• Cut out the house pattern.• Cut out the door, stopping at the dot. Fold the door open.• Paste the house to a larger sheet of construction paper. Be careful
not to paste down the door.• Draw a picture of yourself inside the door. You may wish to color in
bushes, flowers, sun, clouds, etc.
Help the child memorize his/her address by writing the child’s name andaddress on the house pattern.
Little Kids...Cut! © Teaching Resources, a Scholastic Company

46
LionSkills: Curves and Fringe
• Cut these lion patterns from yellow or brown con-struction paper.
• Cut “fringe” around the lion’s mane. Bend the fringe forward.
• Paste the lion body pattern to a larger sheet of con-struction paper. Paste the lion’s head and his tail in place. (Be careful not to paste the lion’s mane.)
Little Kids...Cut! © Teaching Resources, a Scholastic Company

47
BarnSkills: Straight Lines and
Start, Stop and Fold
• Color this barn red and white or anyway you choose.
• Cut out the pattern pieces.• Cut open the barn door, stopping at the
dots. Fold open the doors.• Paste the barn to a large sheet of
construction paper.
Add the farm animals from the next page by
pasting them in place.
Little Kids...Cut! © Teaching Resources, a Scholastic Company

48
Farm AnimalsSkills: Curves
• Color these farm animal patterns any way you choose.
• Cut out the patterns.
Little Kids...Cut! © Teaching Resources, a Scholastic Company

